Welcome
Early digital beta of XPENG's official owner's manual · Europe-Non-cold: EV_4WD_Pro_7seater · Version V1.4 · 2026-09-30
The current user manual corresponds to vehicle system version V6.3.2. Tap the center display. “  →Settings→General”You can view the current system version. If the system version is not the latest, please update it promptly.
Marked in this manual with The descriptions apply only to vehicles with certain configurations; your vehicle may not be equipped with these functions.
The vehicle supports remote upgrade (OTA) capability, and vehicle functions are often optimized/updated. The content of this manual will be updated from time to time.
This manual provides information on all configurations of the vehicle model. Due to differences in vehicle configuration, software version, etc., it may differ from the vehicle at the time of purchase. In such cases, please refer to the actual vehicle.
Please carefully read the warnings and precautions in the manual:
 Warning information: Be sure to comply, otherwise it may result in personal injury or death, or traffic accidents!
 For note information, be sure to observe it; otherwise, vehicle damage or malfunction may occur!
 Informational messages can help you use the vehicle better.
The illustrations in this manual are for functional operation description only, and the content is for reference only.
Illustrations in this manual are labeled:
 Indicates the object being described.
 Indicates the direction of the translation operation.
 Indicates the direction of the rotation operation.
 Indicates the direction of the flipping operation.
Unless otherwise specified, all descriptions in this manual regarding vehicle orientation (front, rear, left, and right) are based on the vehicle's forward direction of travel.
Without authorization from XPENG Vehicle, no person may reproduce or modify all or part of the contents of this manual. XPENG Vehicle always reserves the right to change, supplement, or terminate the contents and technical specifications of this manual.
During vehicle operation, the driver shall comply with traffic regulations, control vehicle speed, and avoid speeding or overloading.
While the vehicle is in motion, all occupants must wear seat belts at all times.
Before driving the vehicle, be sure to confirm that the four doors and the two lids are all in the closed state, and confirm that the vehicle performance is good and that all functions can be used normally and safely.
Please remain alert while driving. Do not drive the vehicle after drinking alcohol or when fatigued, otherwise your control of the vehicle may be affected, which may cause an accident resulting in personal injury or death.
Please be sure to drive cautiously, determine whether the weather and road conditions are suitable for travel, and pay attention at all times to the movements of other vehicles or pedestrians on the road so that you can make timely judgments and prevent accidents.
Do not use handheld devices to make or answer calls, view messages, etc. while driving, as this will distract your attention and affect your control of the vehicle.
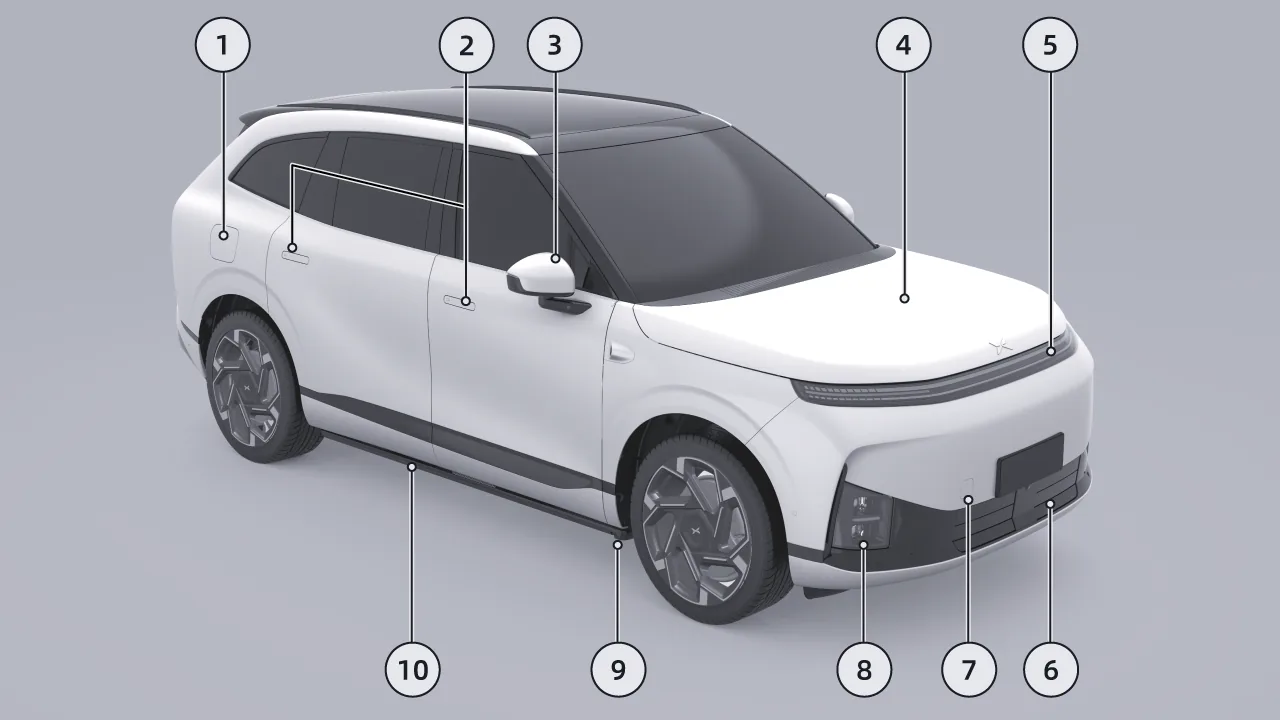
Charging Port Cover See Charging Port Lid Switch
Exterior Door Handle
Non-electric Door See Open using the exterior door handle
Electric Door* Using the Exterior Door Handle to Open and Close
Side Mirrors NFC Card-Swiping Area Unlock or lock the vehicle
Front Hood Open the Frunk
Front Through Light (including position light, turn signal) See Position lamp
Active Air Intake Grille
Tow Hook Cover Plate See Using the Tow Hook
Headlamps (including low beam, high beam, and AI digital projection headlamps*) See Position lamp
Power Running Board Welcome Light* Light Welcome
Power Running Board* See Set the automatic deployment mode for the power running board
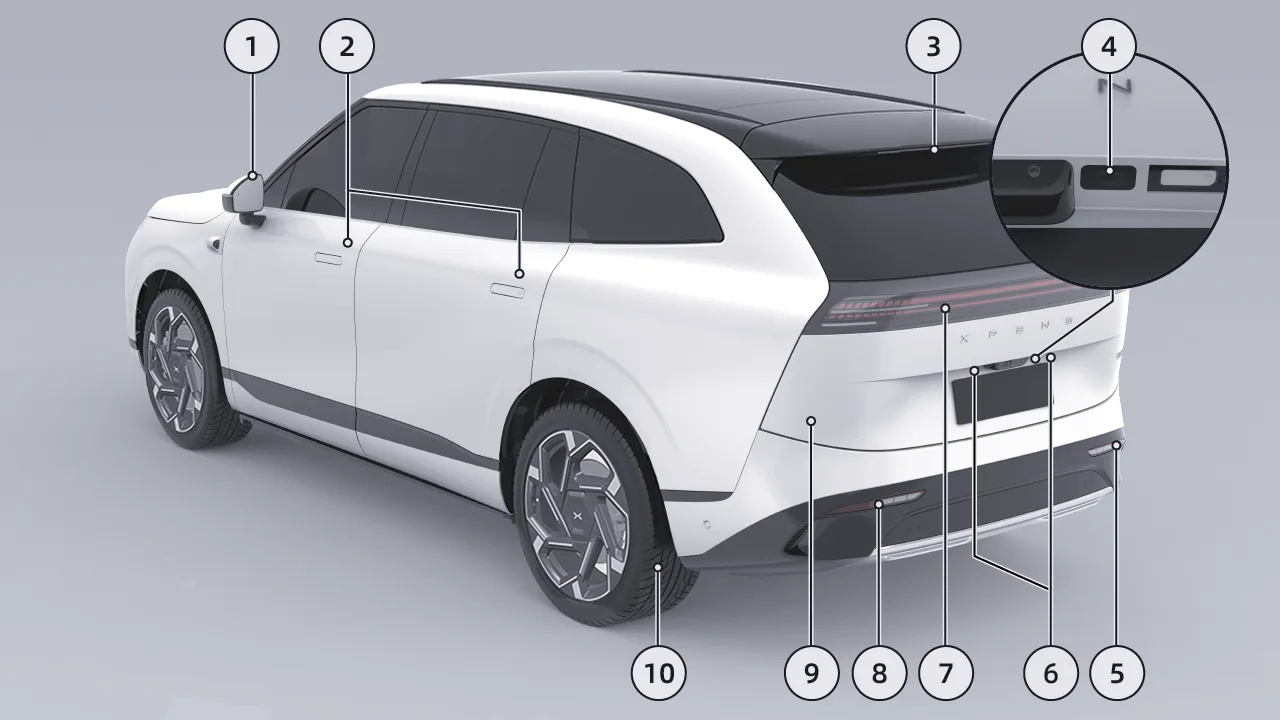
Side Mirrors See Adjust the Side Mirrors Angle
Door
Non-electric Door See Open using the exterior door handle
Electric Door* Using the Exterior Door Handle to Open and Close
High-mounted Brake Light
Exterior Tailgate Switch See External Trunk Switch
Reflector, reversing light, rear fog light, position light, and turn signal lamp See Position lamp
License Plate Lamp
Rear Through Lamp (including brake lamp, turn signal lamp, position lamp) See Position lamp
Reflector, reversing light, rear fog light, position light, and turn signal See Position lamp
Tailgate See Trunk Overview (5 Seats)
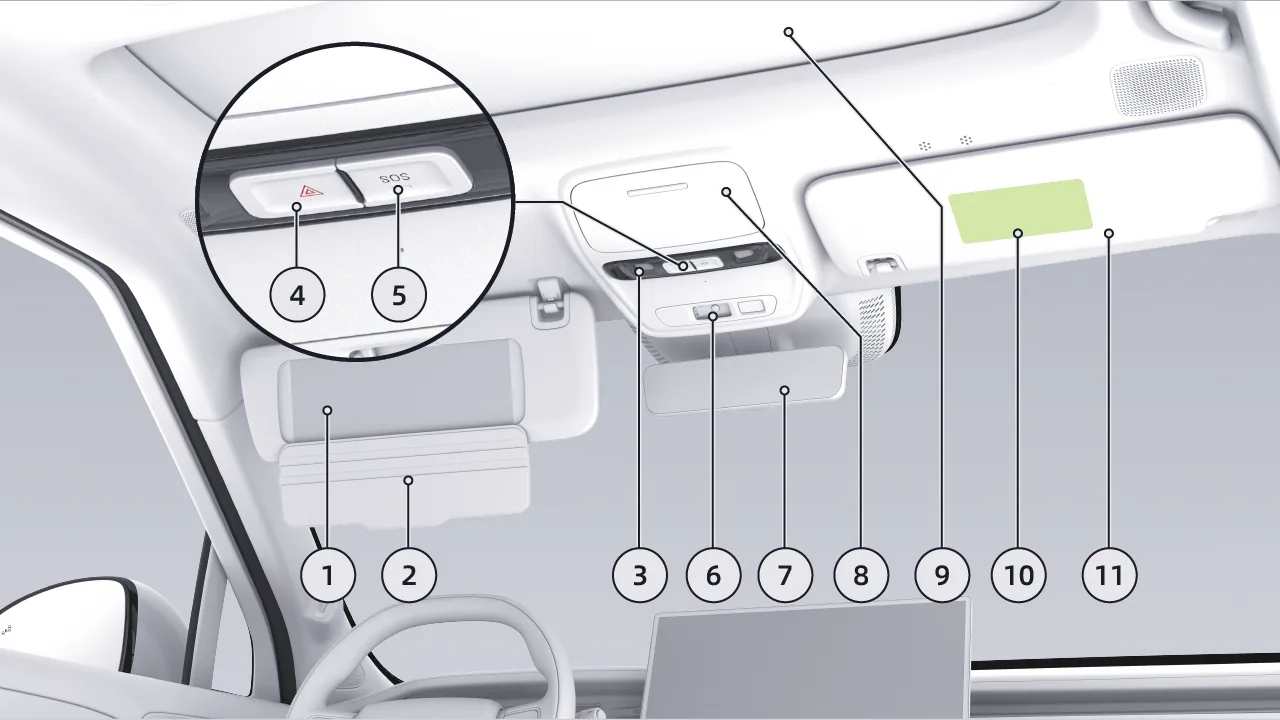
Vanity Mirror Vanity mirror
Vanity Mirror Cover Plate Vanity mirror
front row reading lamp See reading light
Hazard Warning Light Button See Hazard Warning Light
SOS Button See SOS Overview
OMS Cabin Camera* See Function Overview
Streaming Media Rearview Mirror See Function Overview
Glasses Case Storage Space
front row sunshade curtain See Power Sunshade for Panoramic Roof
front row airbag warning label
Sun Visor Sun Visor
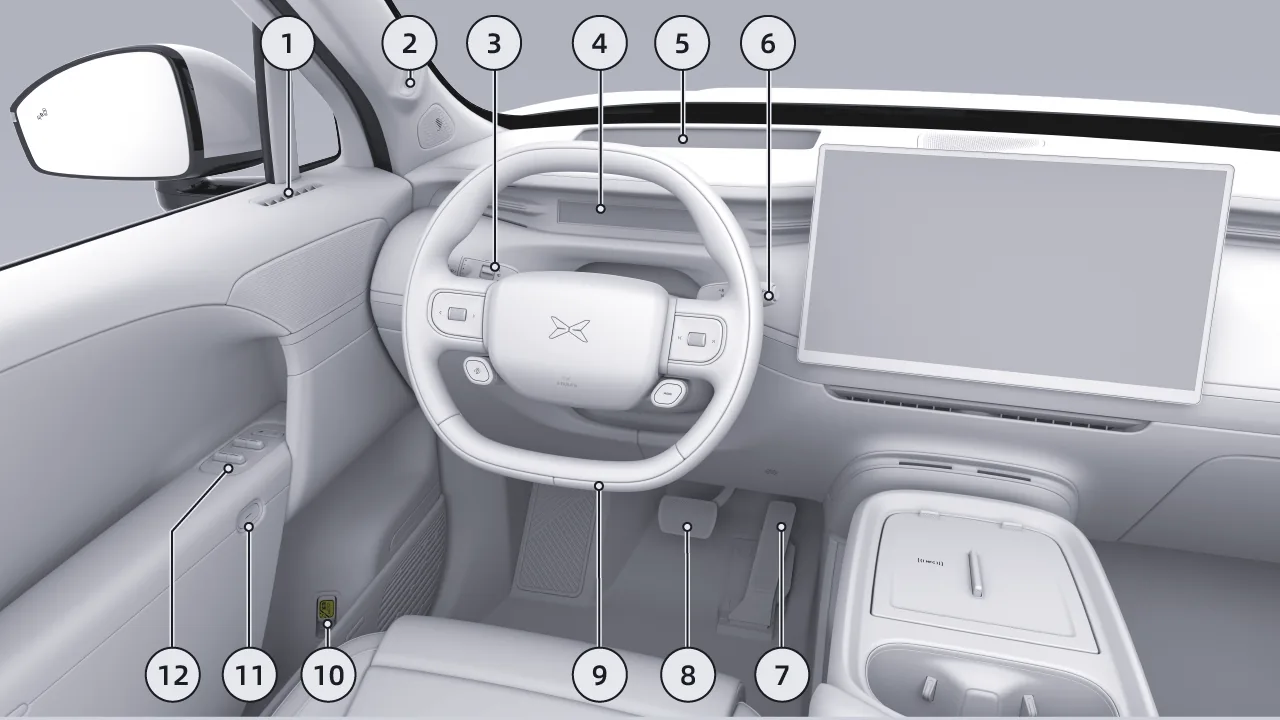
Door Side Defrost Air Outlet
DMS Camera Feature Overview
Lighting & Wiper Stalk Manual Wiper
Instrument screen See Page display
HUD AR-HUD See Function Overview
Gear Selector Lever Shift gears
Accelerator Pedal
Brake Pedal
steering wheel See Steering wheel buttons
Emergency Door Opening Handle
Non-electric Door Emergency Door Opening During Power Failure
Electric Door* Emergency Door Opening After Power Loss
Interior Door Open Button
Non-electric Door Open Using the In-Vehicle Button
Electric Door* Use the in-vehicle button to open and close
Door Switch Assembly driver window switch
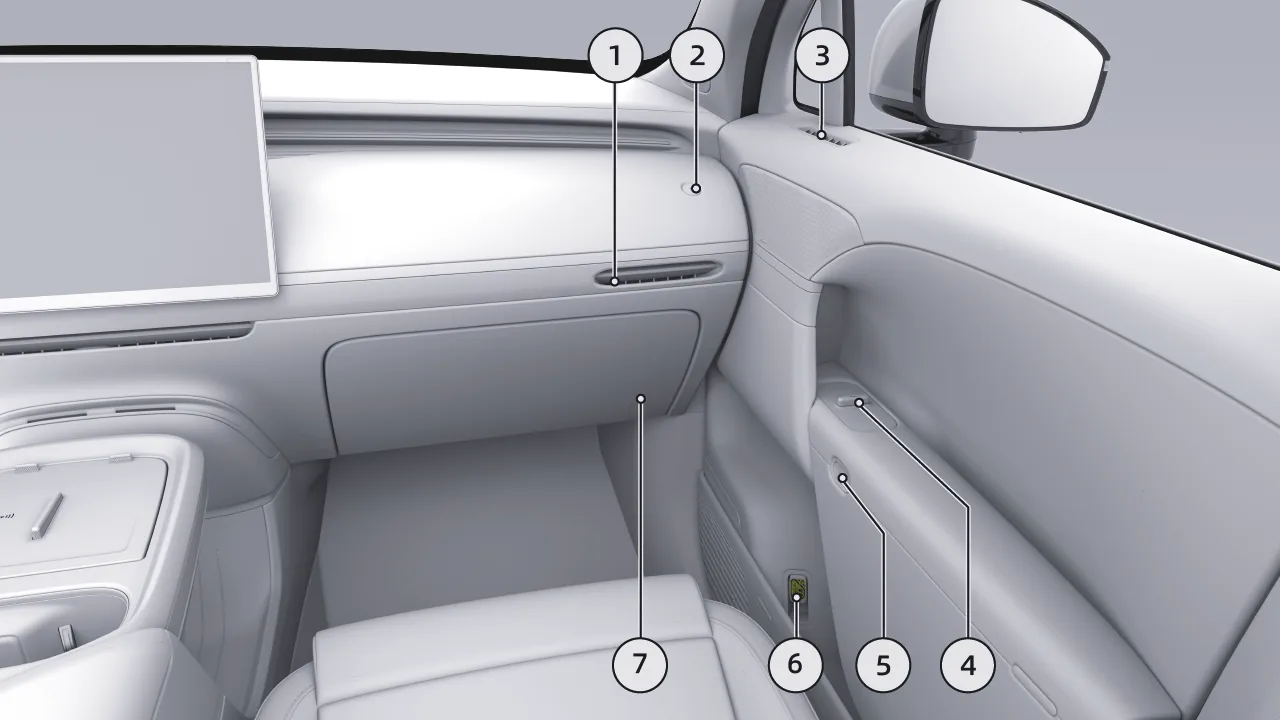
Air Conditioner Air Outlet Adjust Air Conditioner Airflow Mode
1/4 Threaded Interface (passenger side) Expansion Magnetic Interface
Door Side Defrost Air Outlet
Door Switch Assembly Passenger side window button
Non-electric Door Open Using the In-Vehicle Button
Electric Door* Use the in-vehicle button to open and close
Non-electric Door Emergency Door Opening During Power Failure
Electric Door* Emergency Door Opening After Power Loss
Electric Glove Box Open Close the Glove Box
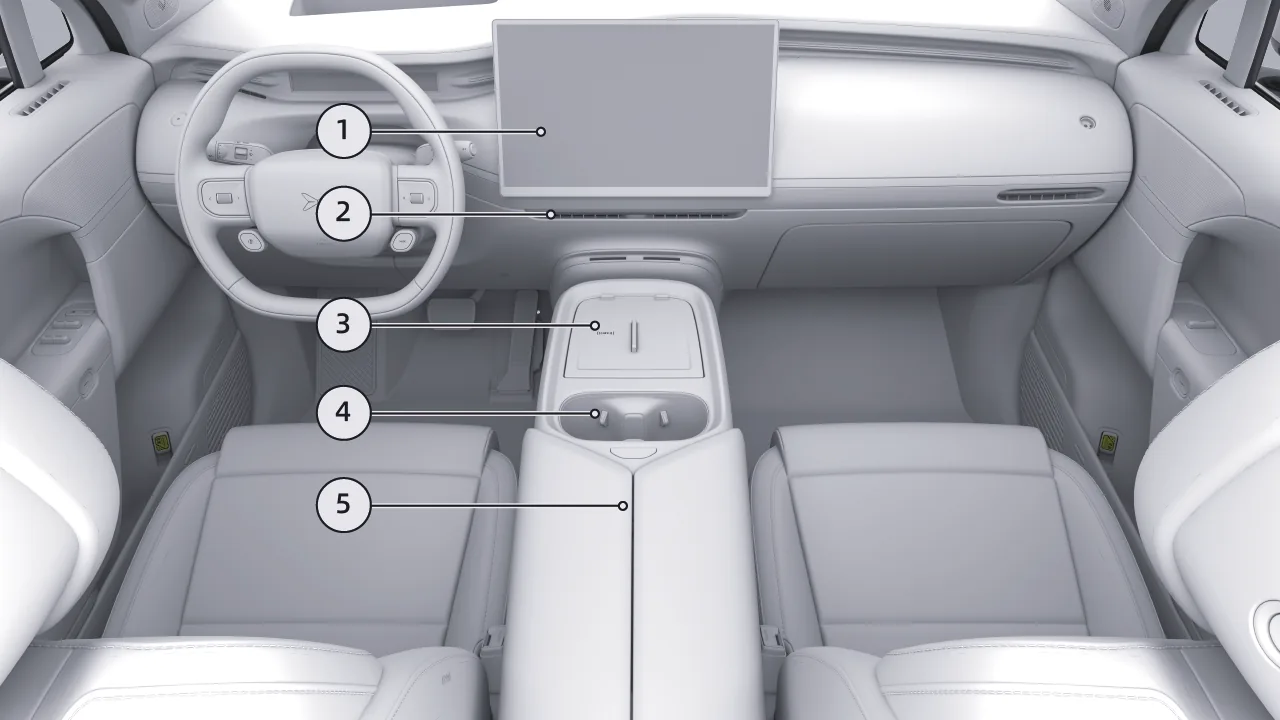
Center Control Screen Page Display
Air Outlet Adjust Air Conditioner Airflow Mode
wireless charging front row wireless charging
Cup Holder Cup Holder
Center Armrest Box Storage Space
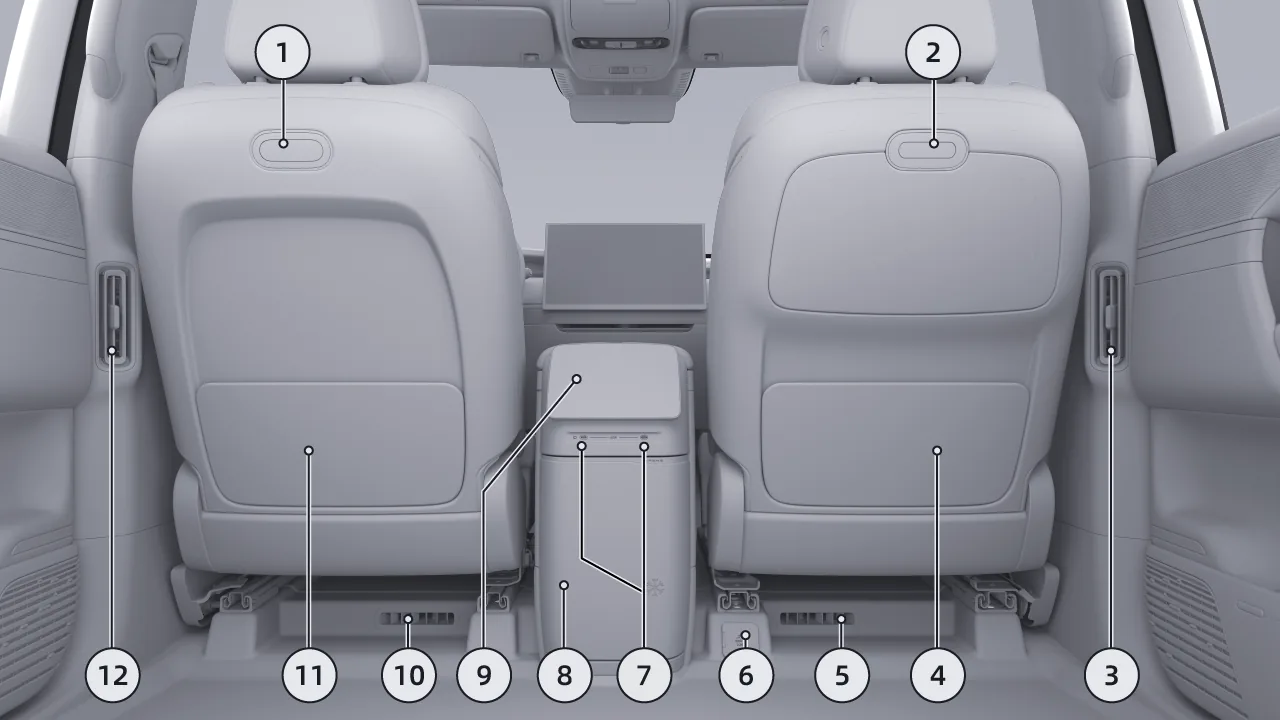
Left Front Seat seatback Electromagnetic Suction Multifunctional Interface Expansion Magnetic Interface
Right Front Seat seatback Electromagnetic Suction Multifunctional Interface Expansion Magnetic Interface
Right Rear Air Outlet Adjust Air Conditioner Airflow Mode
Right Front Seatback Pocket Storage Space
Right-side second-row foot air outlet
In-Vehicle AC Power Outlet* See In-Vehicle AC Power Outlet*
USB Type-C Port See Front Interface of the Center Armrest Box
Sterile Air-Cooled Double-Door Dual-Temperature-Zone Vehicle Refrigerator* See Function Overview
Rear Control Screen See Display Page
Left-side second-row foot air outlet
Left Front Seatback Pocket Storage Space
Left Rear Air Outlet
Rear Quarter Window Sunshade* Rear quarter window manual sunshade*
Rear Roof Sunshade See Power Sunshade for Panoramic Roof
Rear Roof Grab Handle*
Interior Door Open Button* Use the in-vehicle button to open and close
window sunshade* Rear window power sunshade*
Second-row reading light See reading light
Rear entertainment screen See Page Display
Door Switch Assembly driver window switch
Interior Door Open Button
Non-electric Door Open Using the In-Vehicle Button
Electric Door* Use the in-vehicle button to open and close
Second-Row Seats Adjust the rear seatback angle
Second-Row Seat Armrest
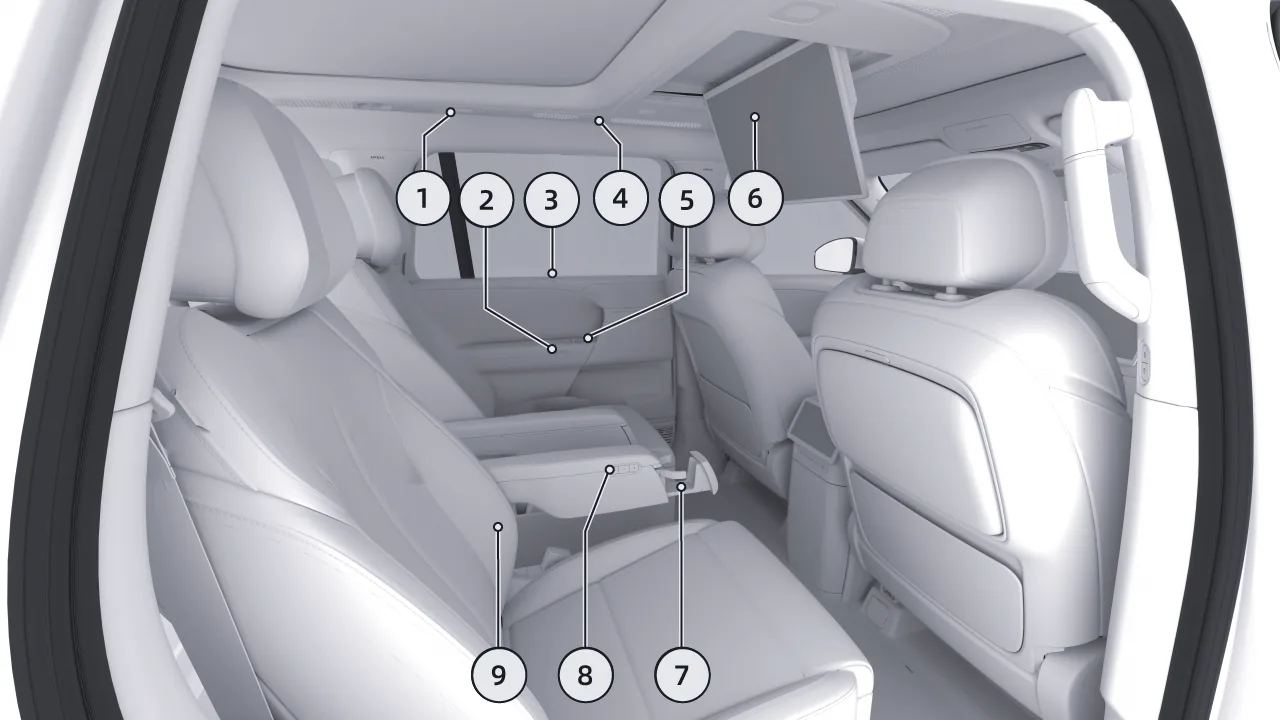
Interior Door Open Button* Use the in-vehicle button to open and close
Interior Door Open Button
Non-electric Door Open Using the In-Vehicle Button
Electric Door* Use the in-vehicle button to open and close
window sunshade*
Rear window power sunshade*second row reading light See reading light
Door Switch Assembly driver window switch
Rear entertainment screen See Page Display
Cup Holder Cup Holder
Second-Row Seat Armrest Switch Group See Seat heating function
Second-Row Seats Adjust the rear seatback angle
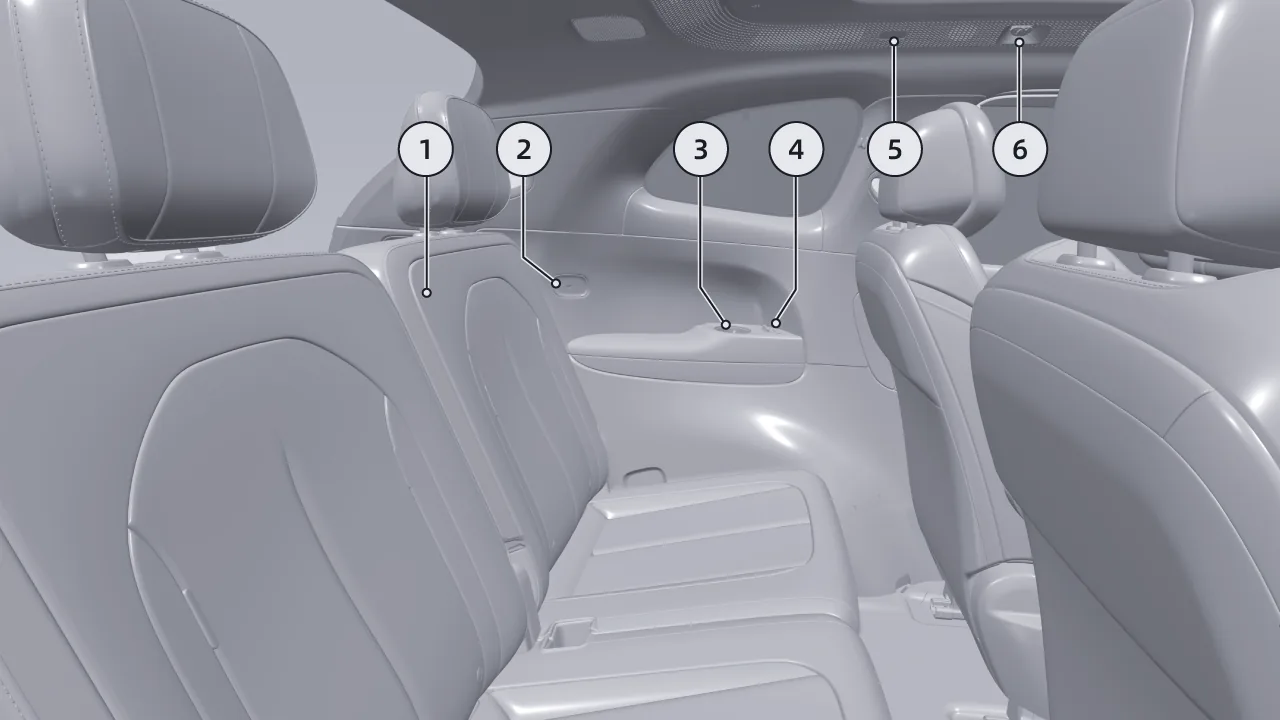
Third-Row Seats Adjust the third-row seatback
USB Type-C Port See Front Interface of the Center Armrest Box
Third-Row Cup Holder Cup Holder
Third-Row Seat Interior Trim Panel Switch Assembly Adjust the third-row seatback
Third-Row Reading Light
Aviation Reading Light See reading light
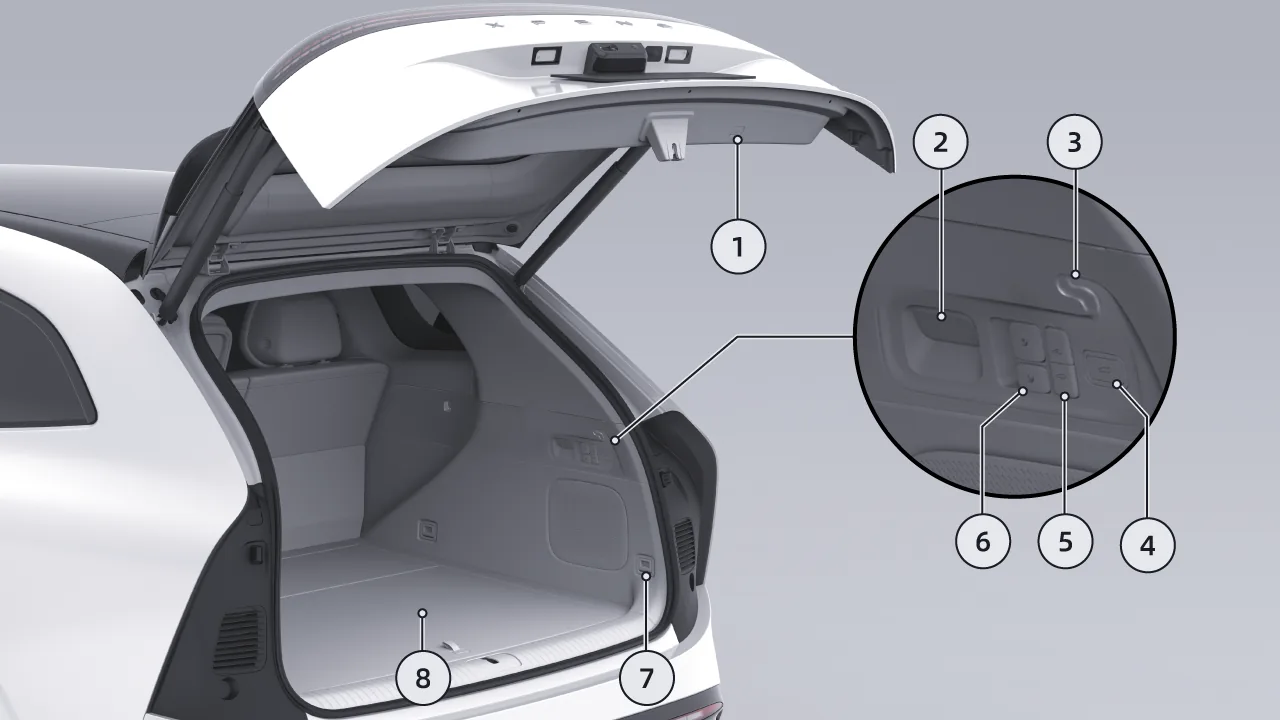
Interior Trunk Switch See Trunk Interior Switch
Trunk Light See Trunk lamp
Cargo Cover Slot See Luggage Compartment Cover*
Trunk Interior Switch See Trunk Interior Switch
Easy Cargo Loading Switch See Trunk Storage (5 Seats)
Seat seatback folding switch See Trunk Storage (5 Seats)
Trunk Floor Latch See Trunk Storage (5 Seats)
Rear Trunk Storage Space See Trunk Storage (5 Seats)
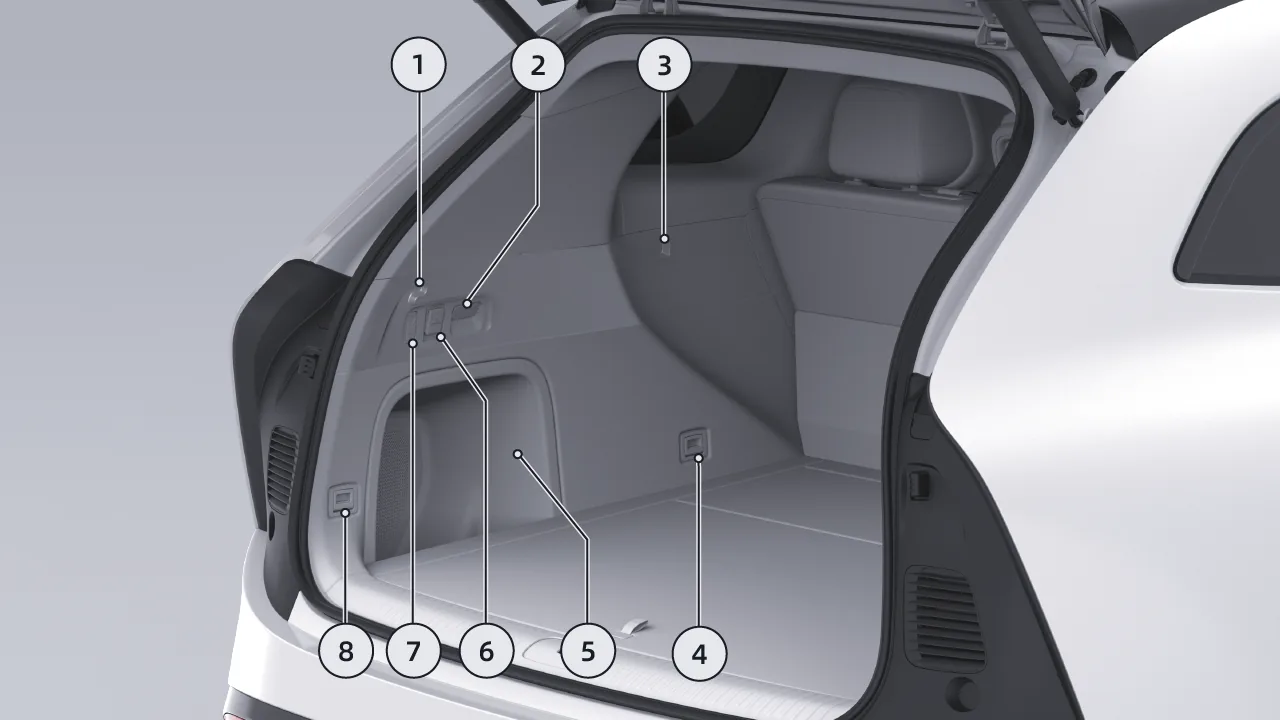
Cargo Cover Slot See Luggage Compartment Cover*
Trunk Light See Trunk lamp
Cargo Cover Slot See Trunk Storage (5 Seats)
Trunk Floor Latch See Trunk Storage (5 Seats)
Left-side recessed storage compartment in the trunk
12V Power Outlet See Trunk 12V Low-Voltage Power Outlet
Trunk Hook See Trunk Storage (5 Seats)
Trunk Floor Latch See Trunk Storage (5 Seats)
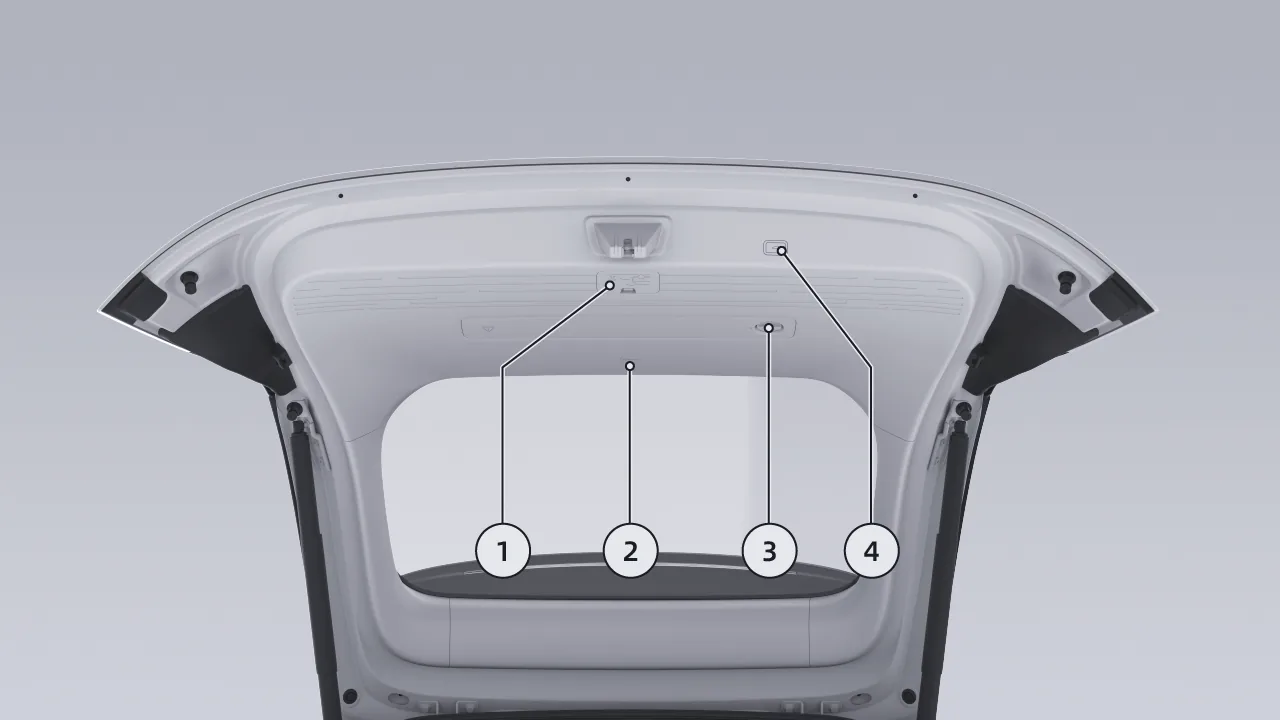
Emergency Trunk Release Switch See Emergency Opening Switch
Trunk Expansion Magnetic Interface Expansion Magnetic Interface
Warning Triangle Switch
Interior Trunk Switch See Trunk Interior Switch
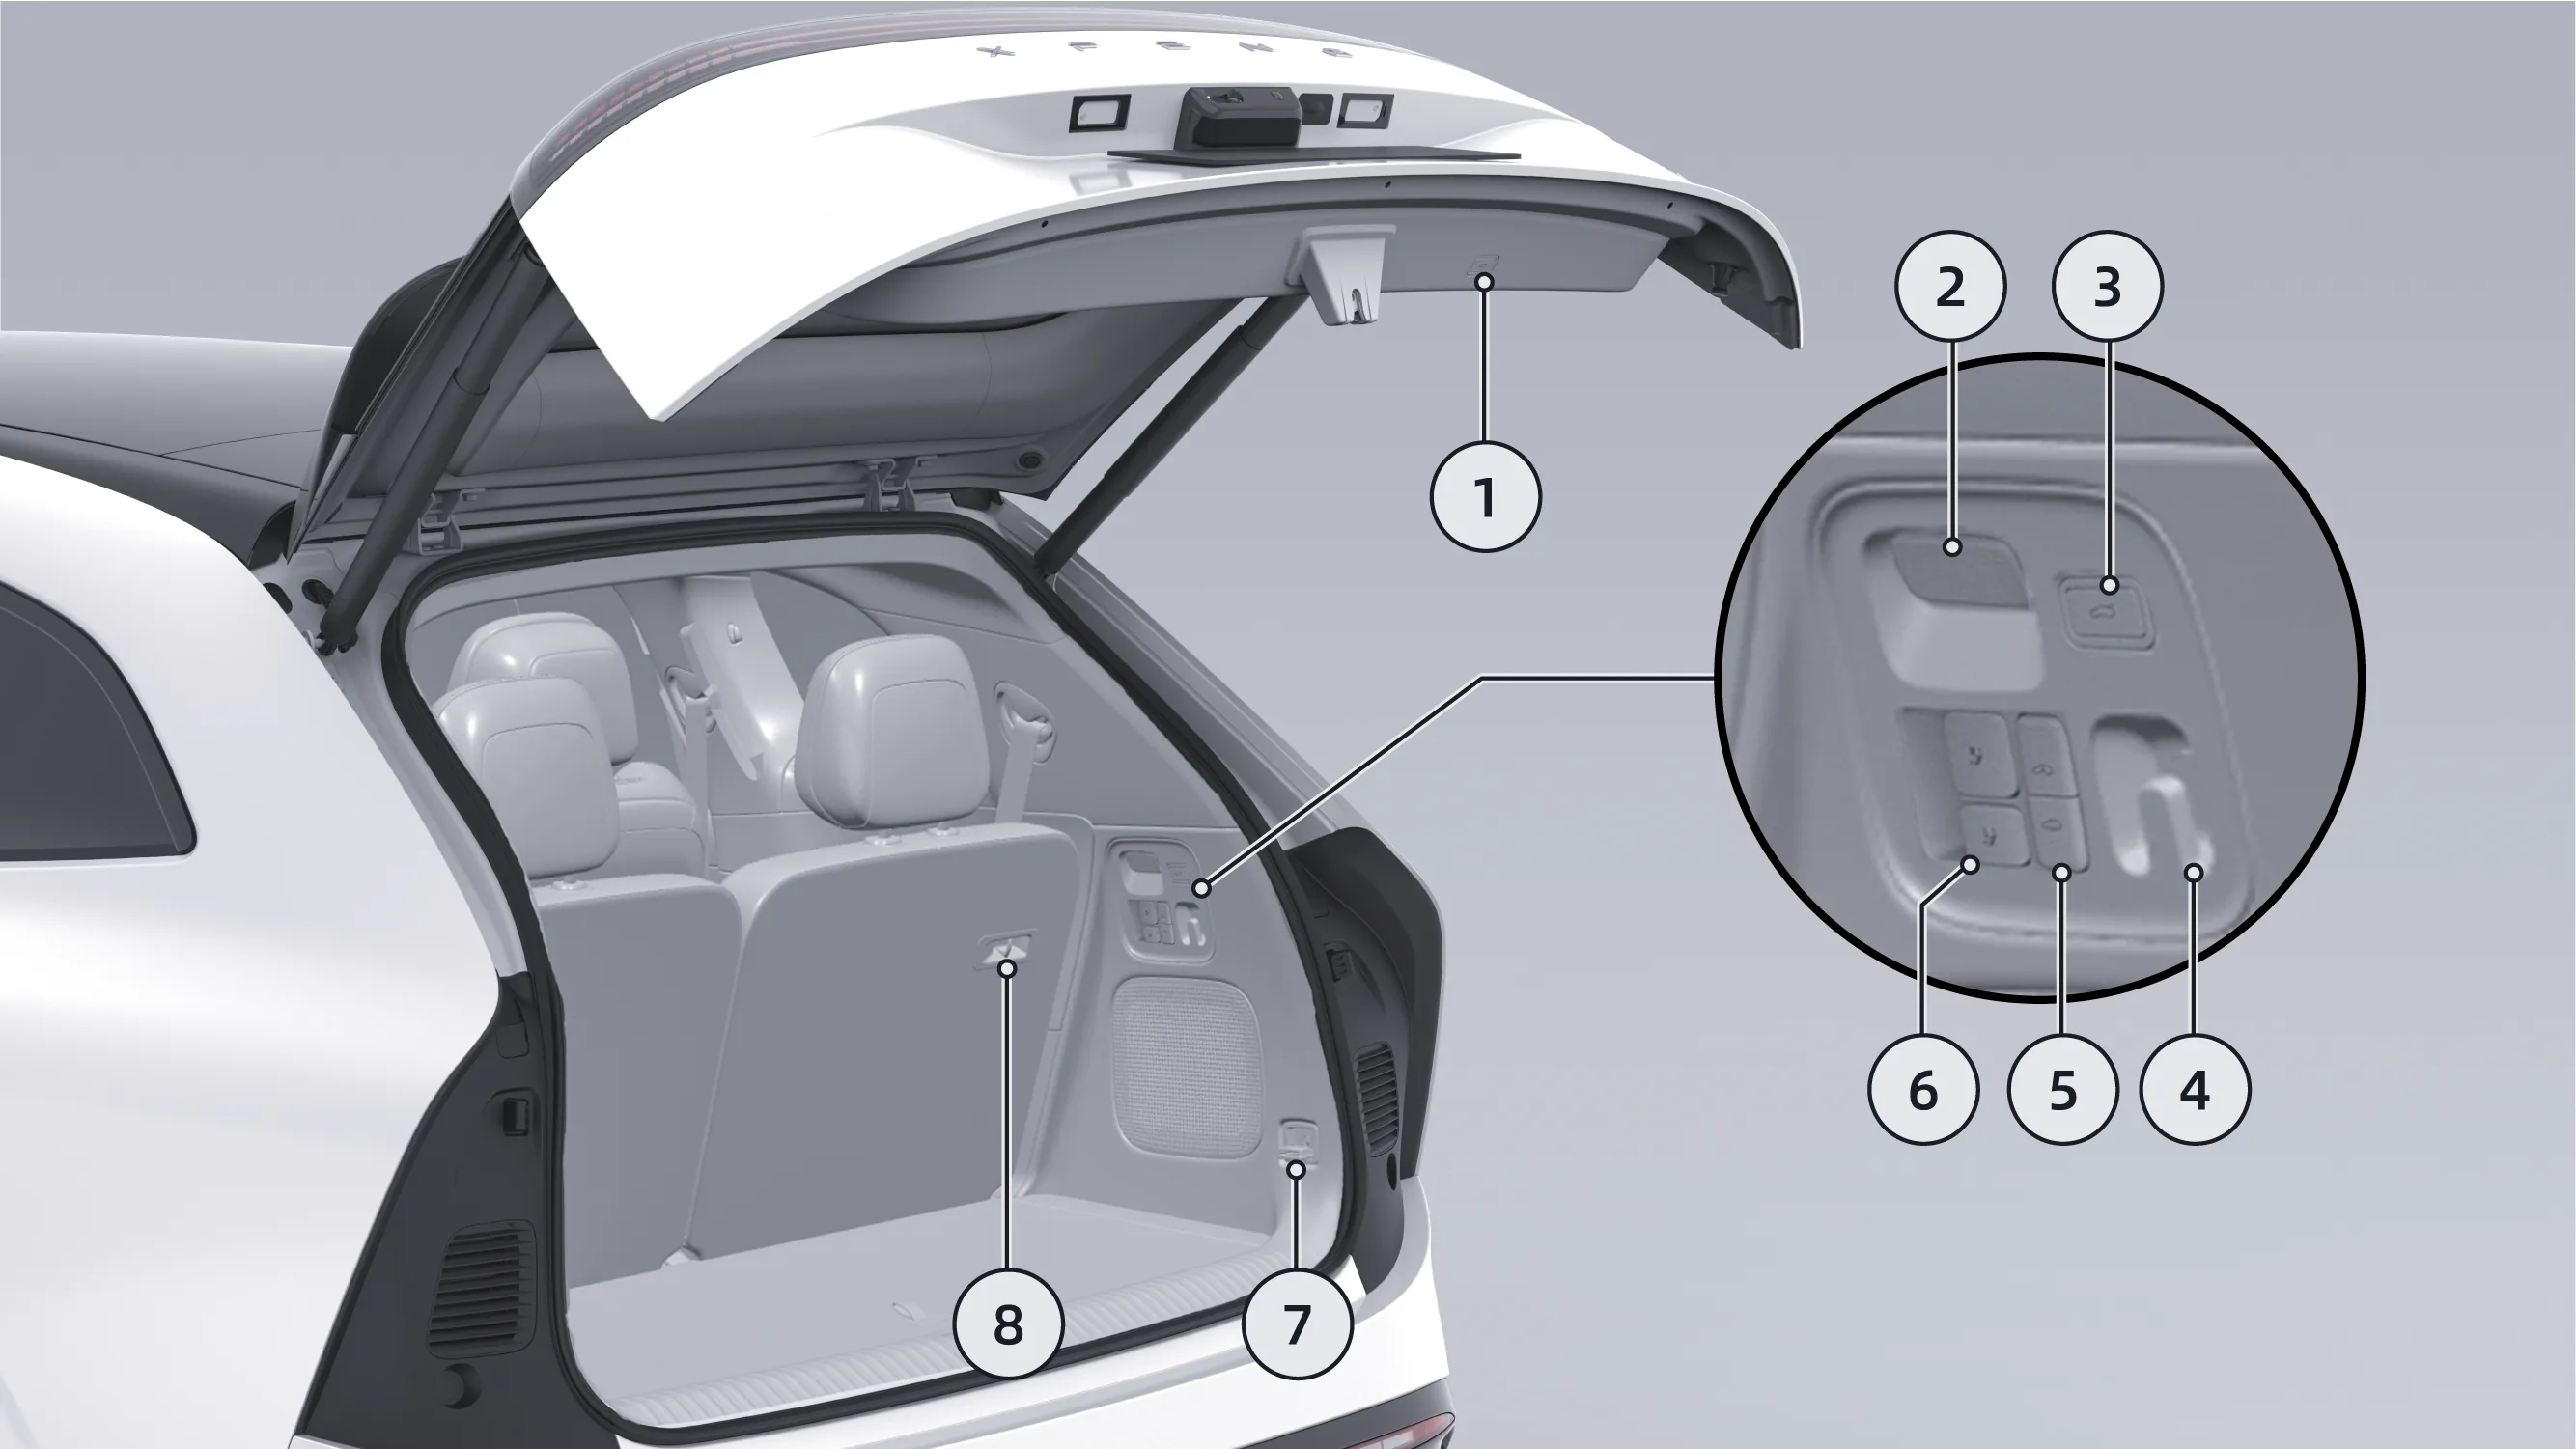
Interior Trunk Switch See Trunk Interior Switch
Trunk Light See Trunk lamp
Interior Trunk Switch See Trunk Interior Switch
Trunk Hook See Trunk Storage (6- and 7-Seat Models)
Easy Load Switch See Trunk Storage (6- and 7-Seat Models)
Third-row seat seatback folding See Trunk Storage (6- and 7-Seat Models)
Trunk Floor Latch See Trunk Storage (6- and 7-Seat Models)
Third-row seat seatback retaining buckle See Trunk Storage (6- and 7-Seat Models)
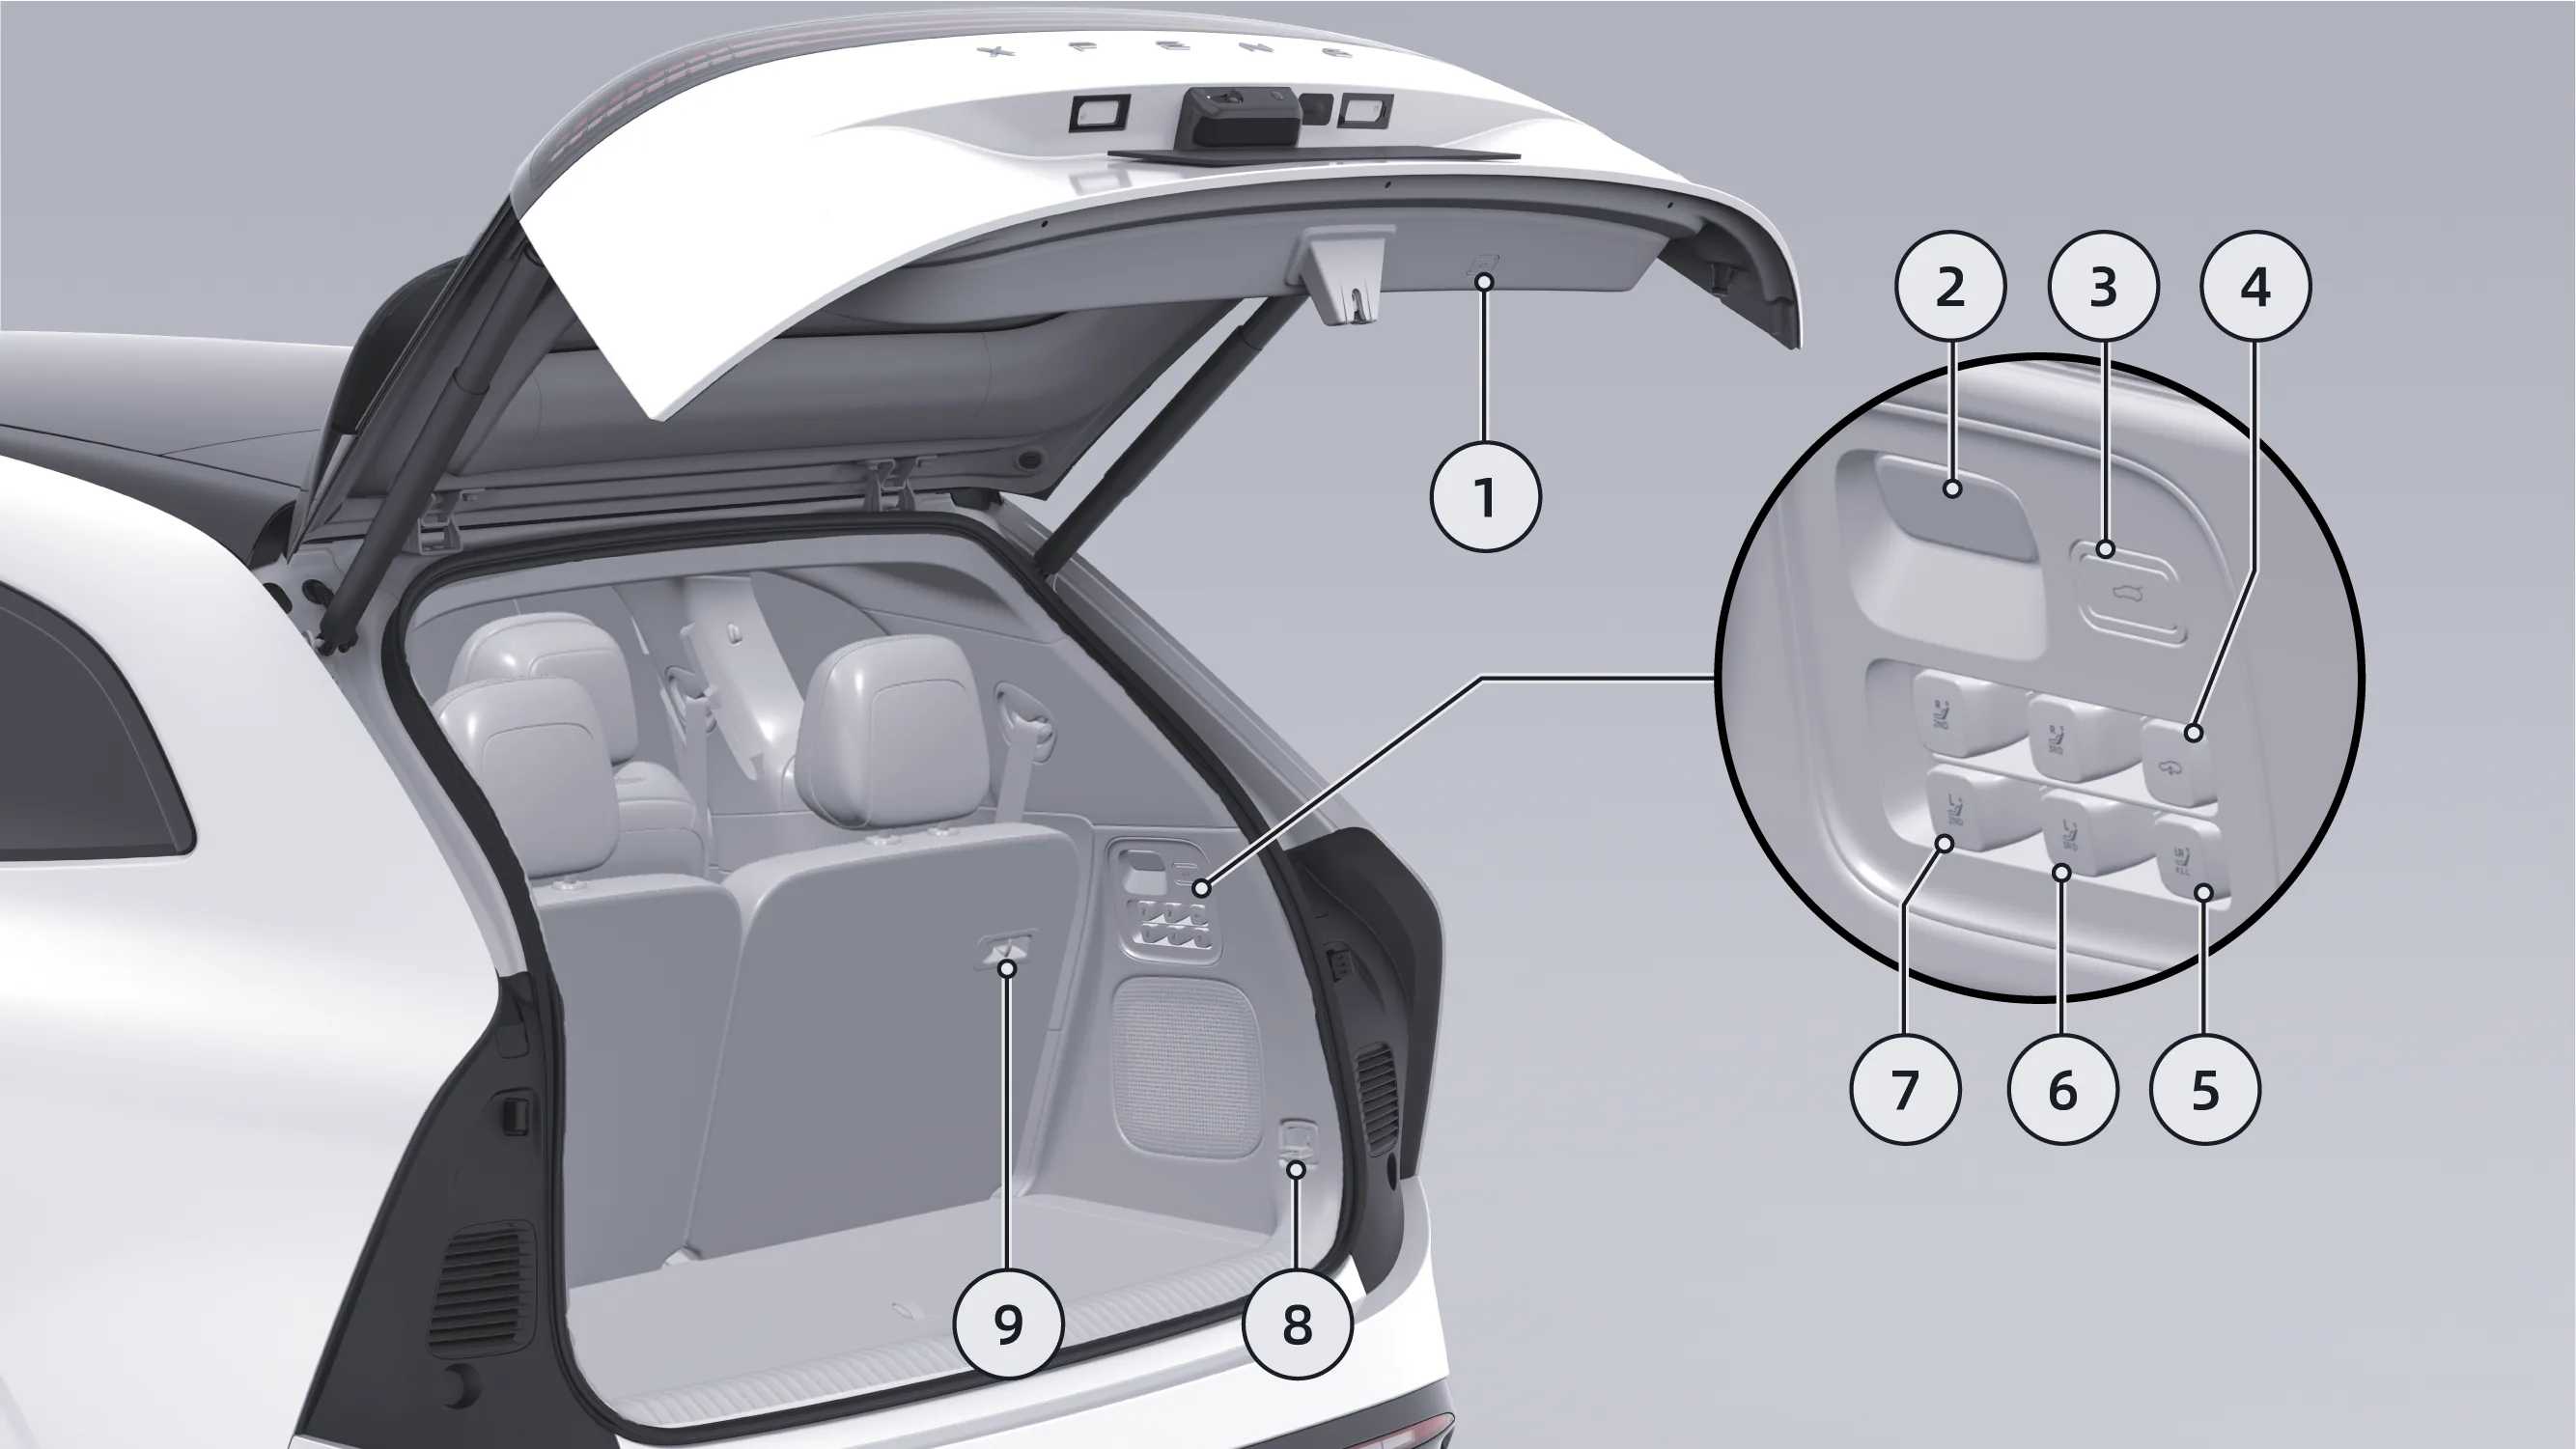
Trunk Internal Switch See Trunk Interior Switch
Trunk Light See Trunk lamp
Trunk Internal Switch See Trunk Interior Switch
Easy Cargo Loading Switch See Trunk Storage (6- and 7-Seat Models)
One-Touch Folding of Second- and Third-Row Seatbacks See Trunk Storage (6- and 7-Seat Models)
Third-Row Seat seatback Folding See Trunk Storage (6- and 7-Seat Models)
Second-Row Seat seatback Folding See Trunk Storage (6- and 7-Seat Models)
Trunk Floor Latch See Trunk Storage (6- and 7-Seat Models)
Third-row seat seatback retaining buckle See Trunk Storage (6- and 7-Seat Models)
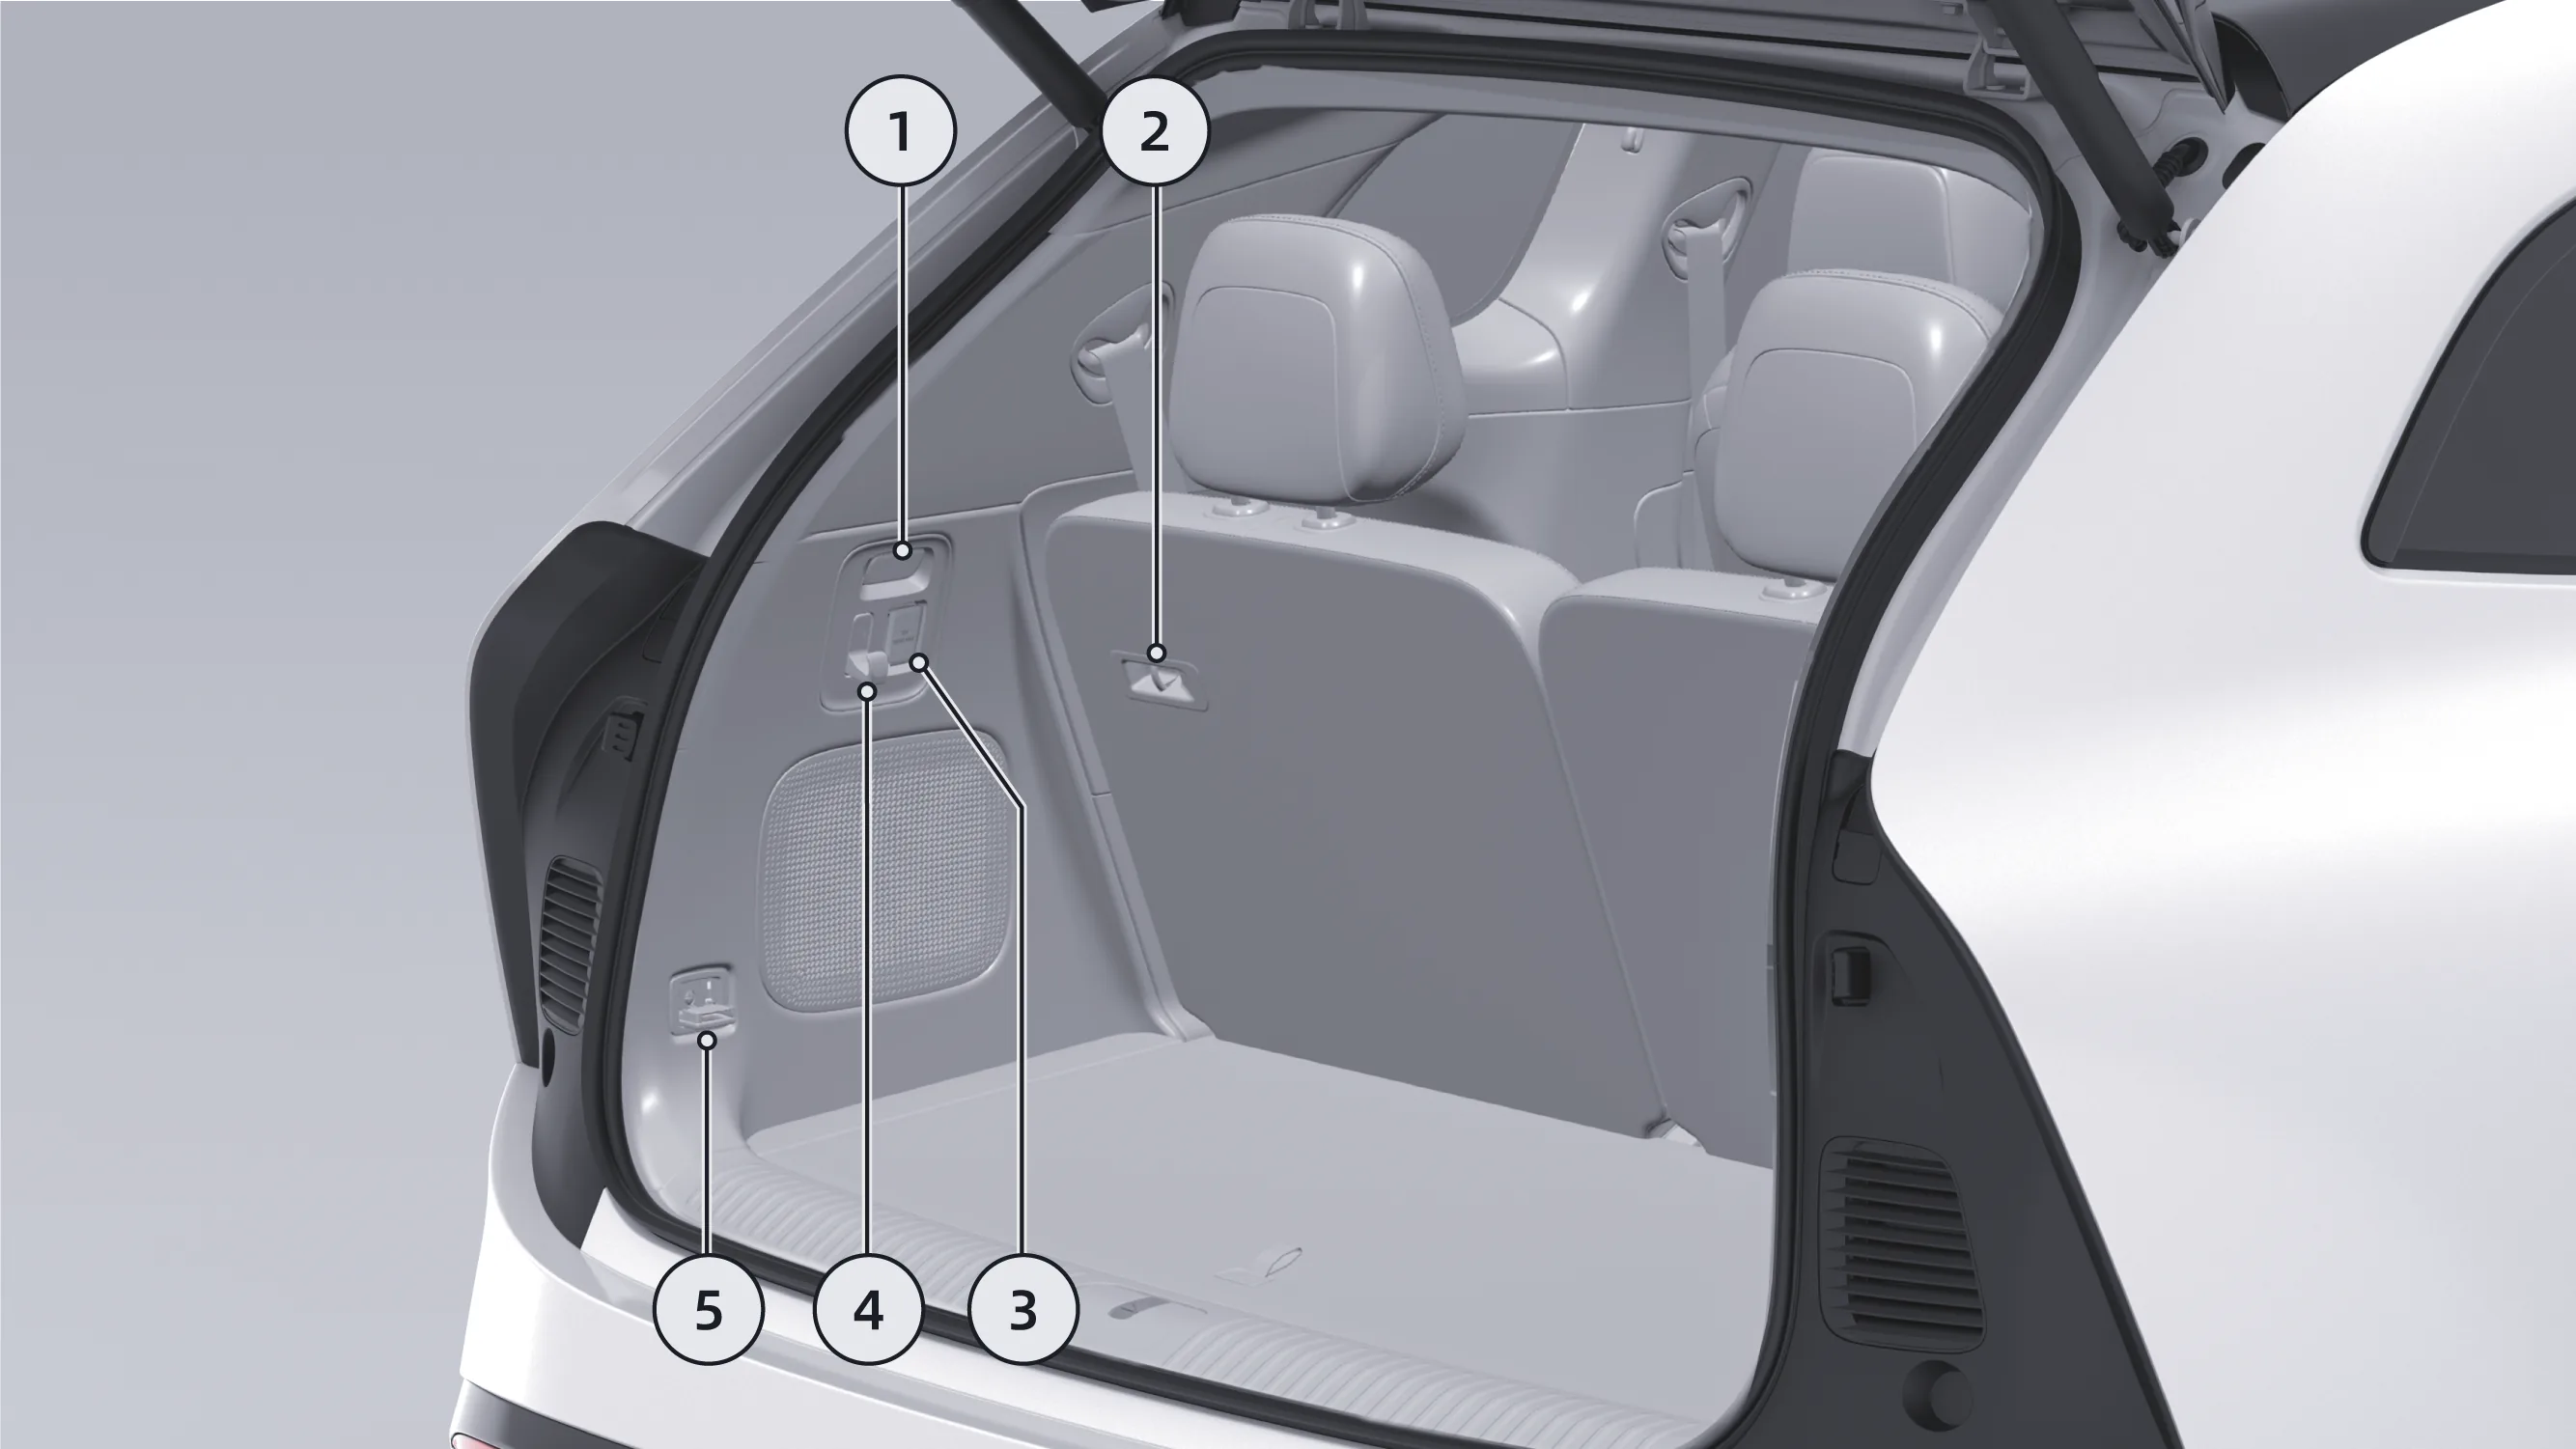
Trunk Light See Trunk lamp
Third-row seat seatback retaining buckle See Trunk Storage (6- and 7-Seat Models)
12V Power Outlet See Trunk 12V Low-Voltage Power Outlet
Trunk Hook See Trunk Storage (6- and 7-Seat Models)
Trunk Floor Latch See Trunk Storage (6- and 7-Seat Models)
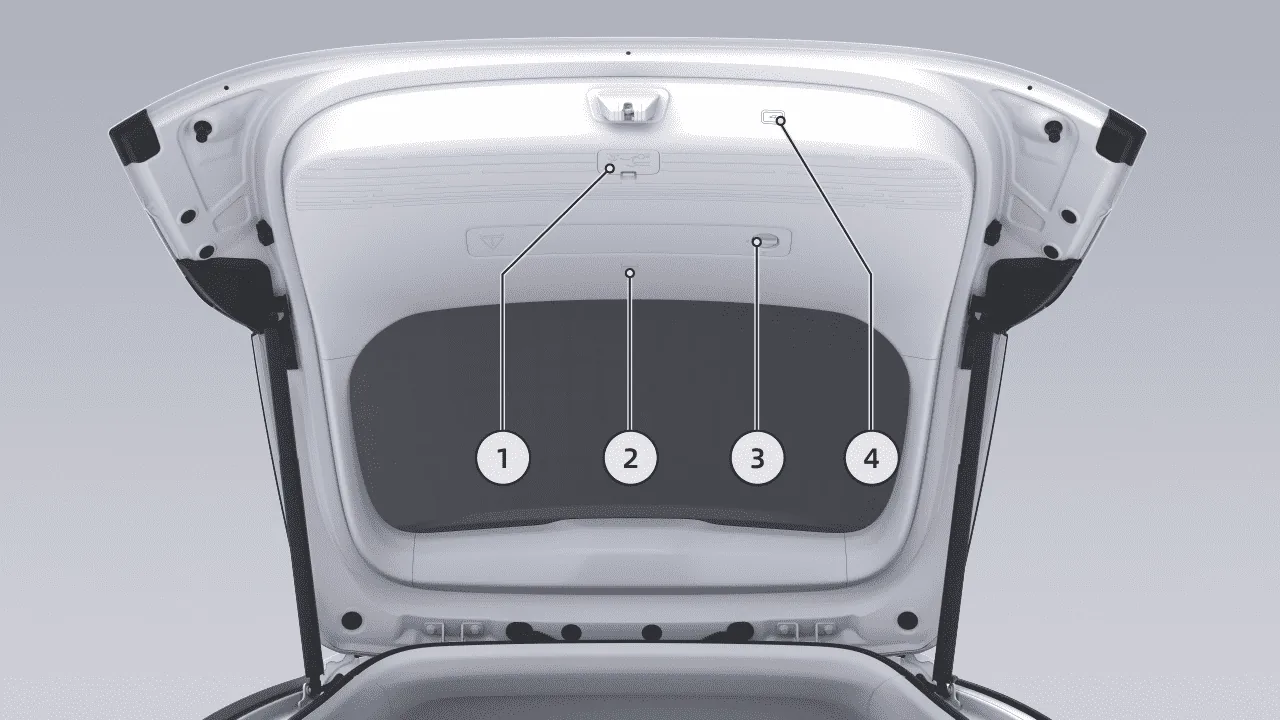
Emergency Trunk Release Switch See Emergency Opening Switch
Trunk Expansion Magnetic Interface Expansion Magnetic Interface
Warning Triangle Switch
Trunk Interior Switch See Trunk Interior Switch
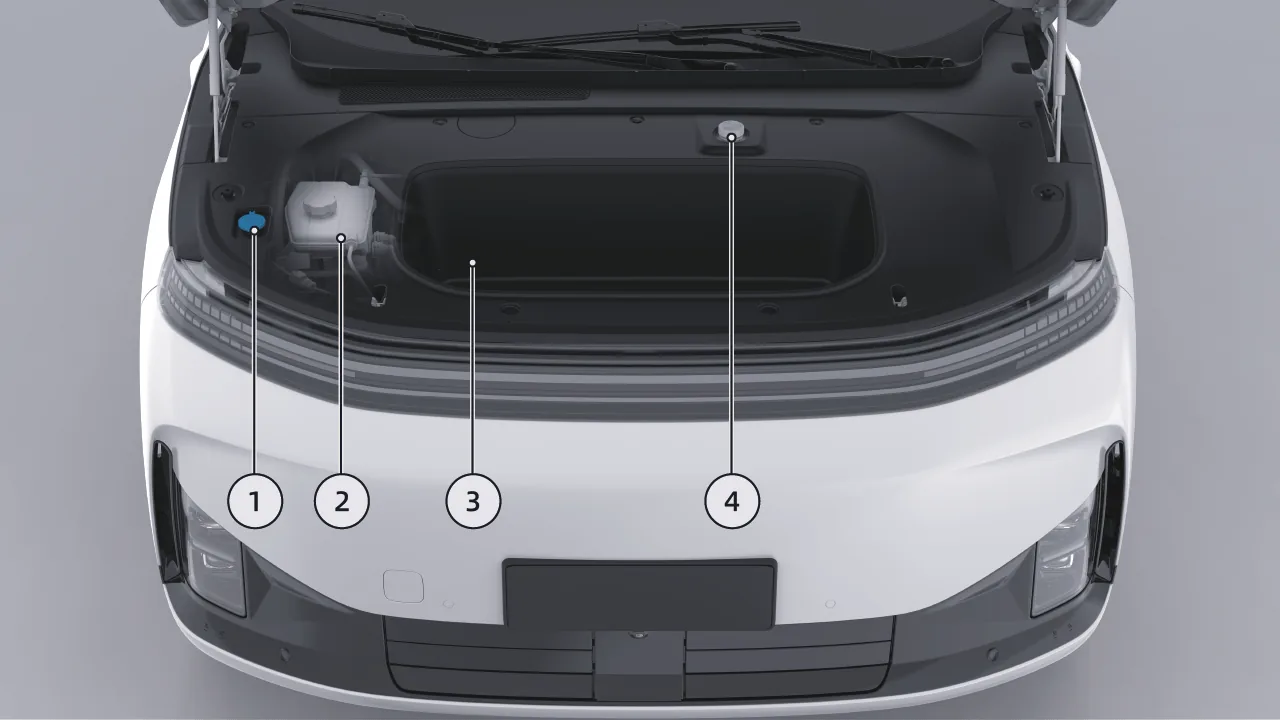
Windshield washer fluid reservoir Add windshield washer fluid
Coolant Reservoir Tank Coolant Inspection
Frunk Open the Frunk
Brake Fluid Reservoir Brake Fluid Inspection
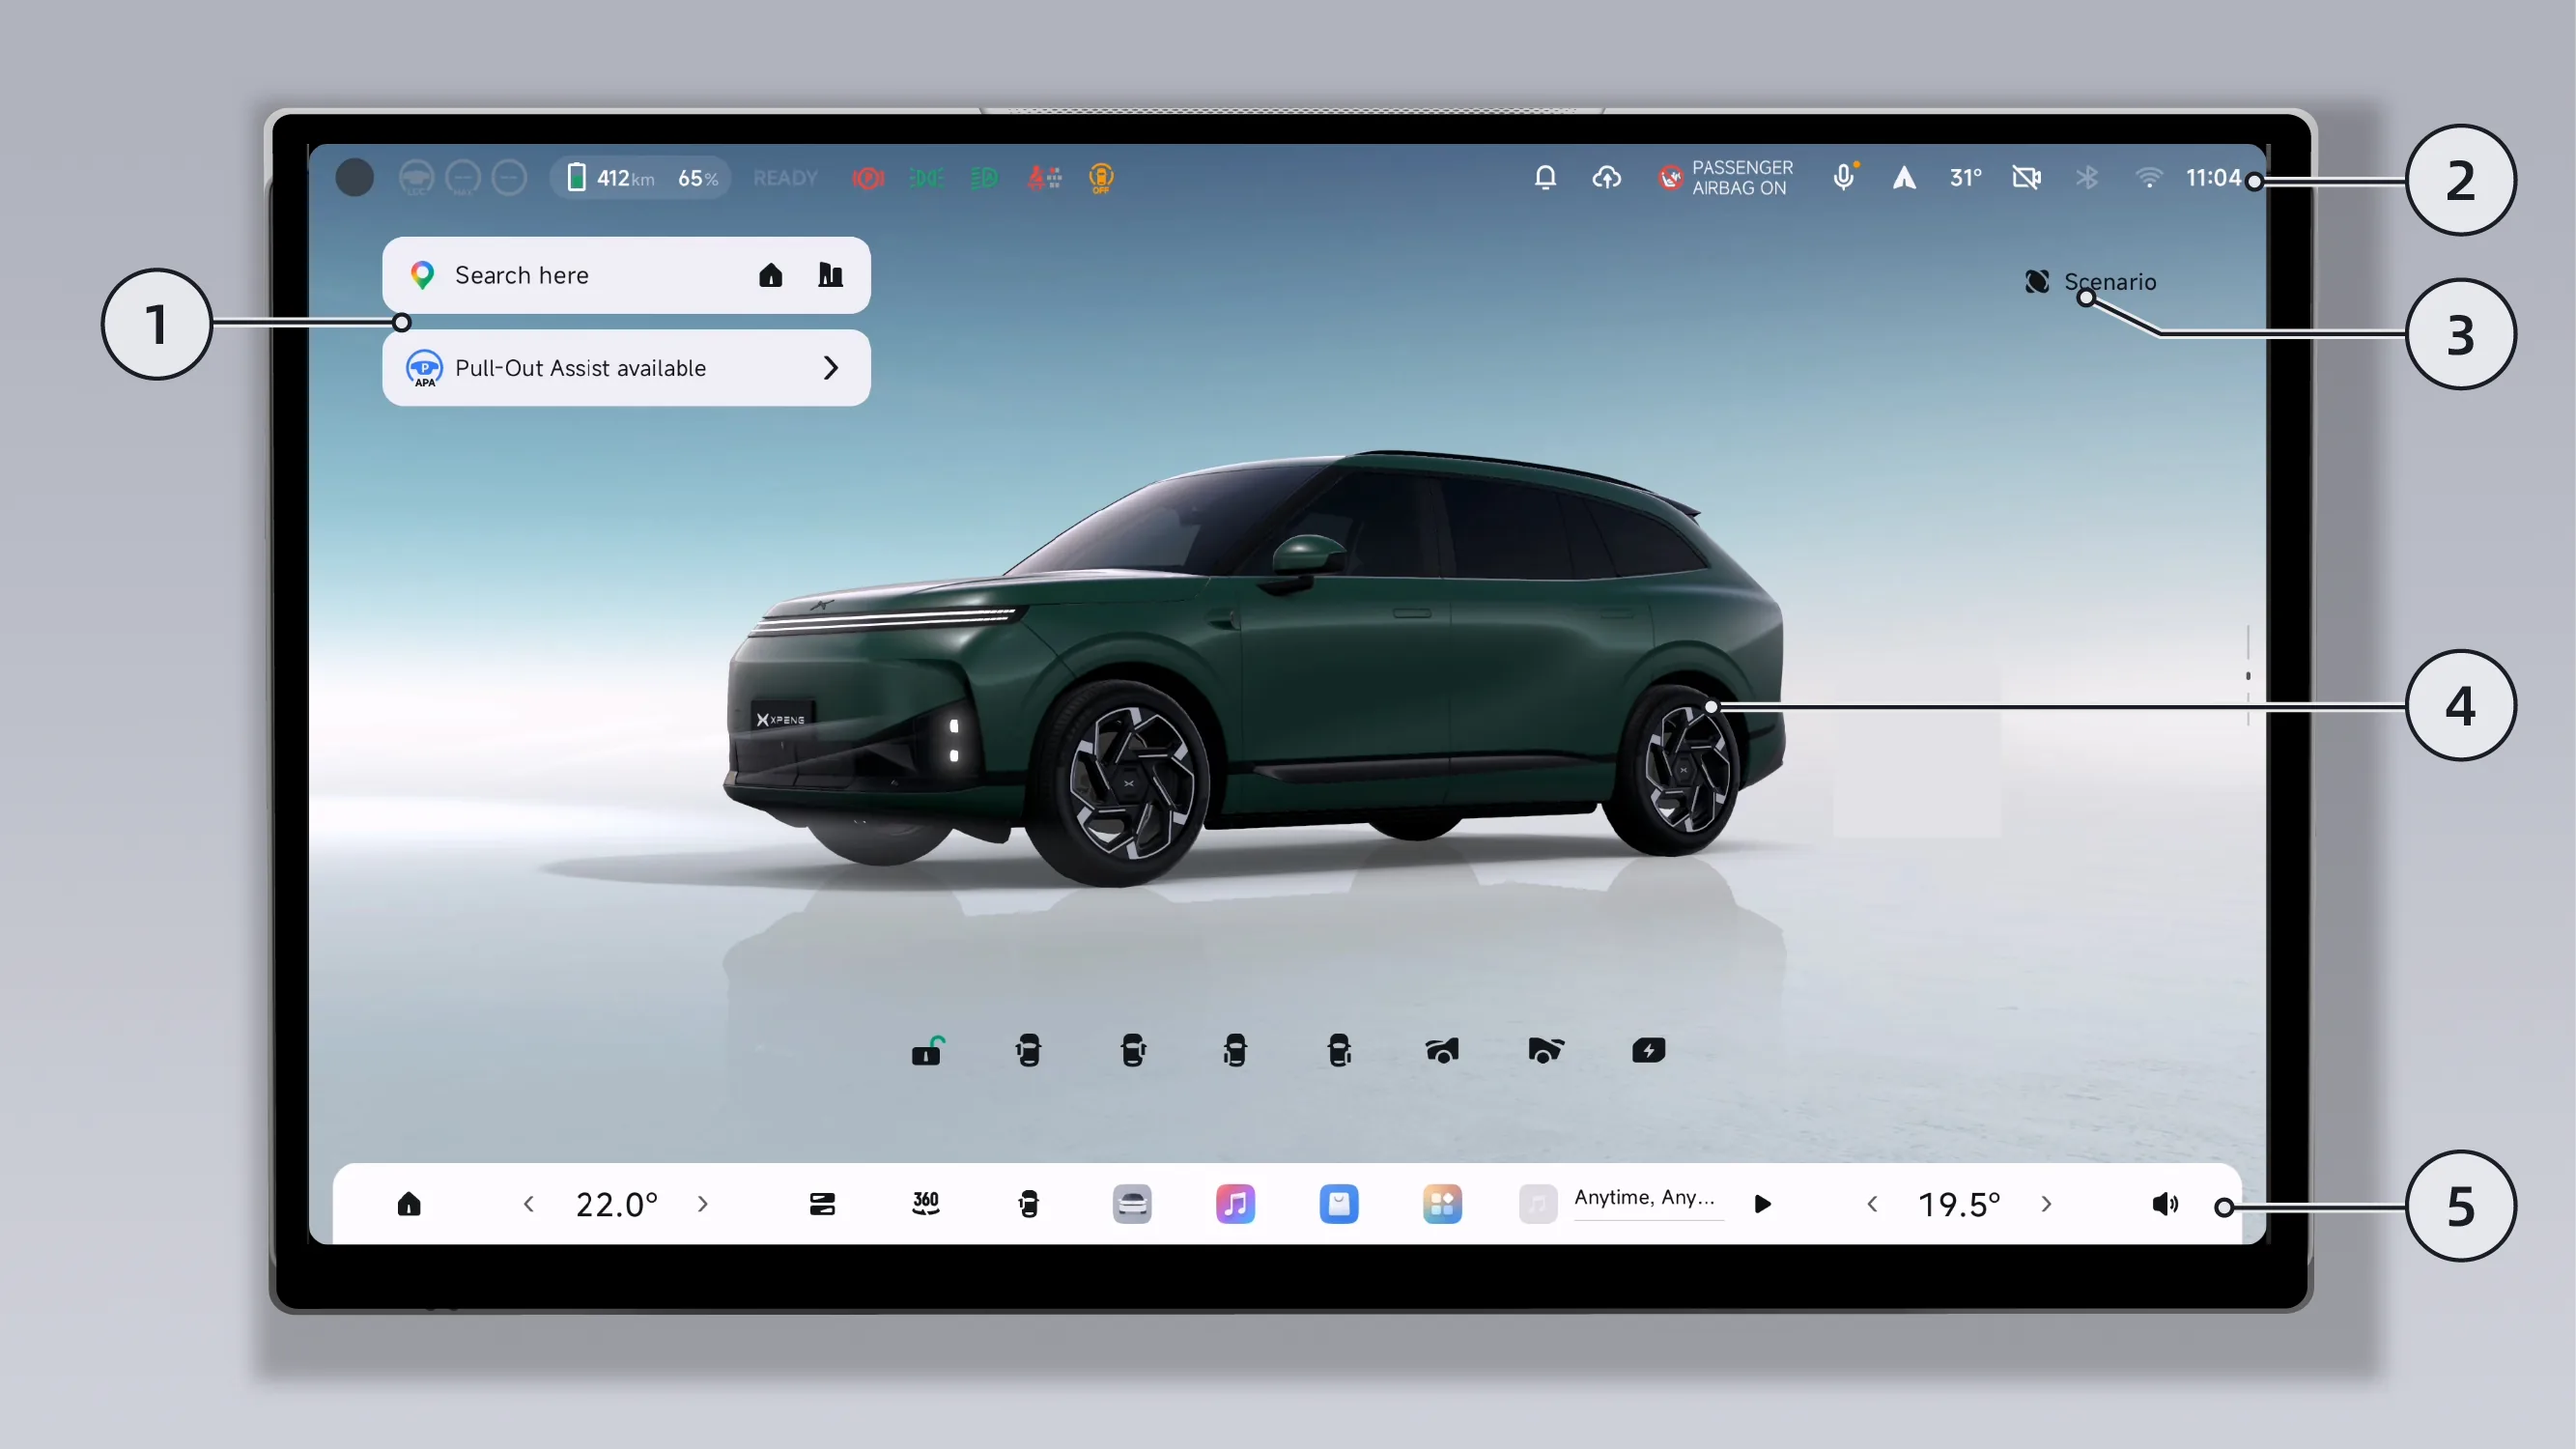
Navigation Shortcut Bar and Assisted Driving Function Cards
Status Bar
Scene Mode Entry
SR Interface
Bottom Taskbar
 Tips
Tips When the assisted parking function is not enabled, the assisted driving function card will not be displayed.
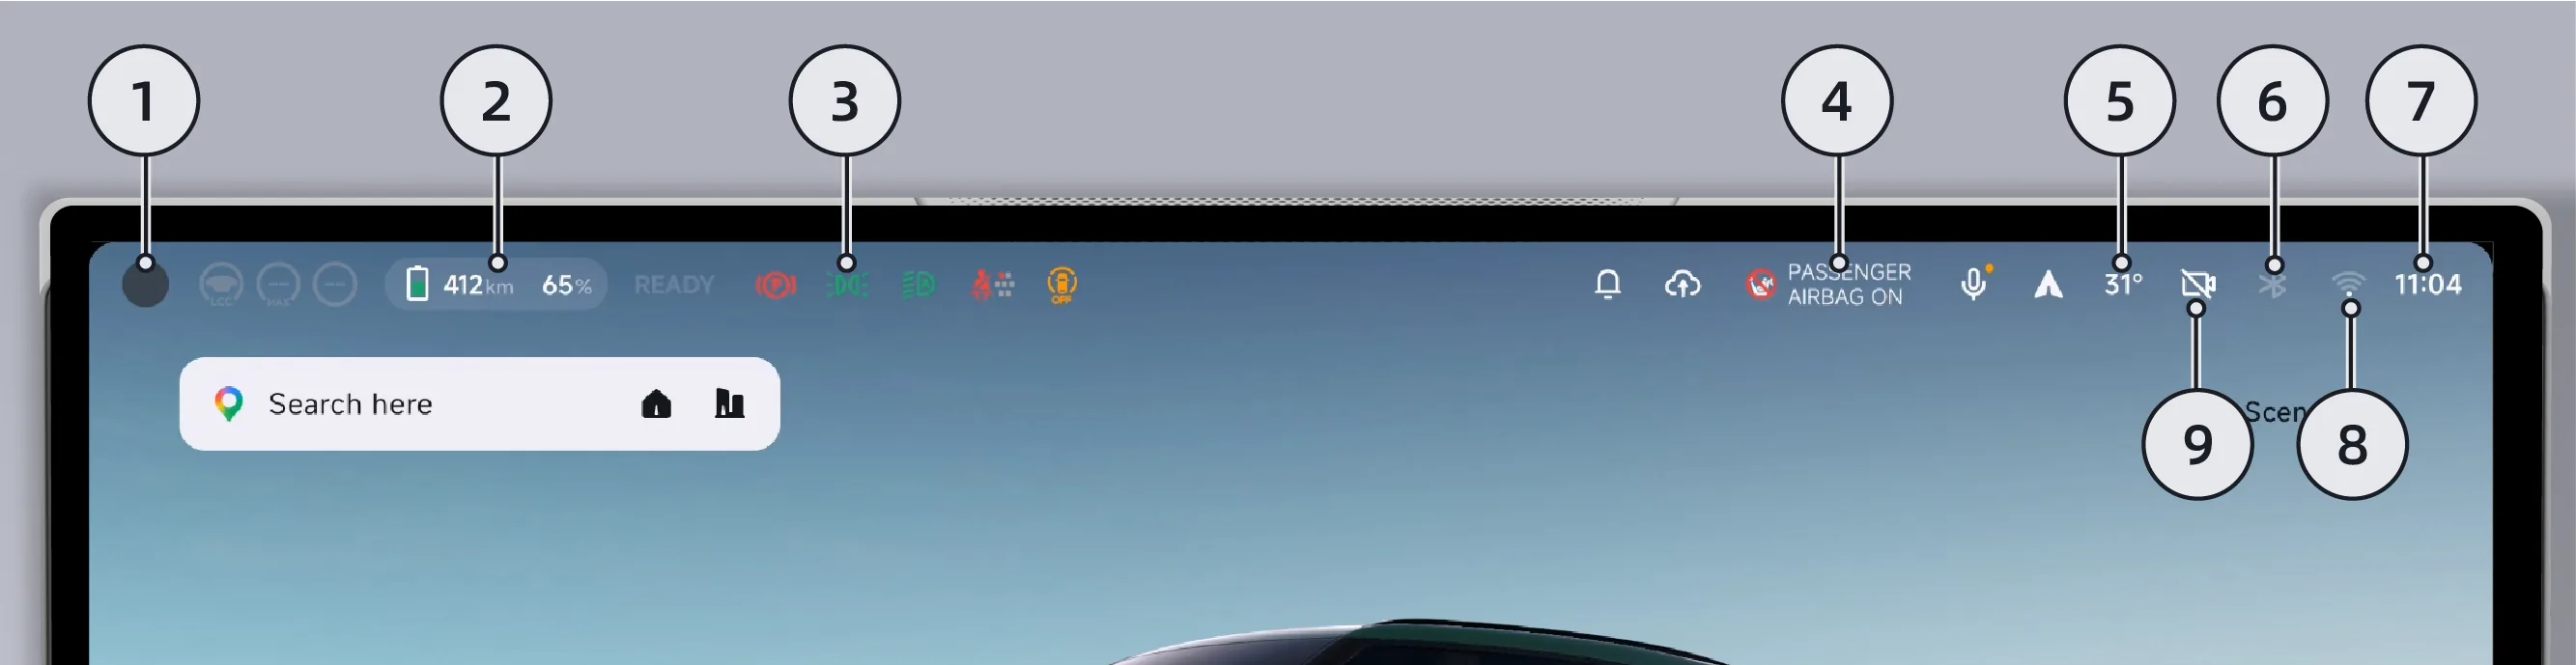
Account & Habits
Displays the remaining driving range and remaining battery level
Indicator Light
front row occupant airbag status*
Outside Ambient Temperature
Bluetooth
Time
Network
Driving Recorder Status
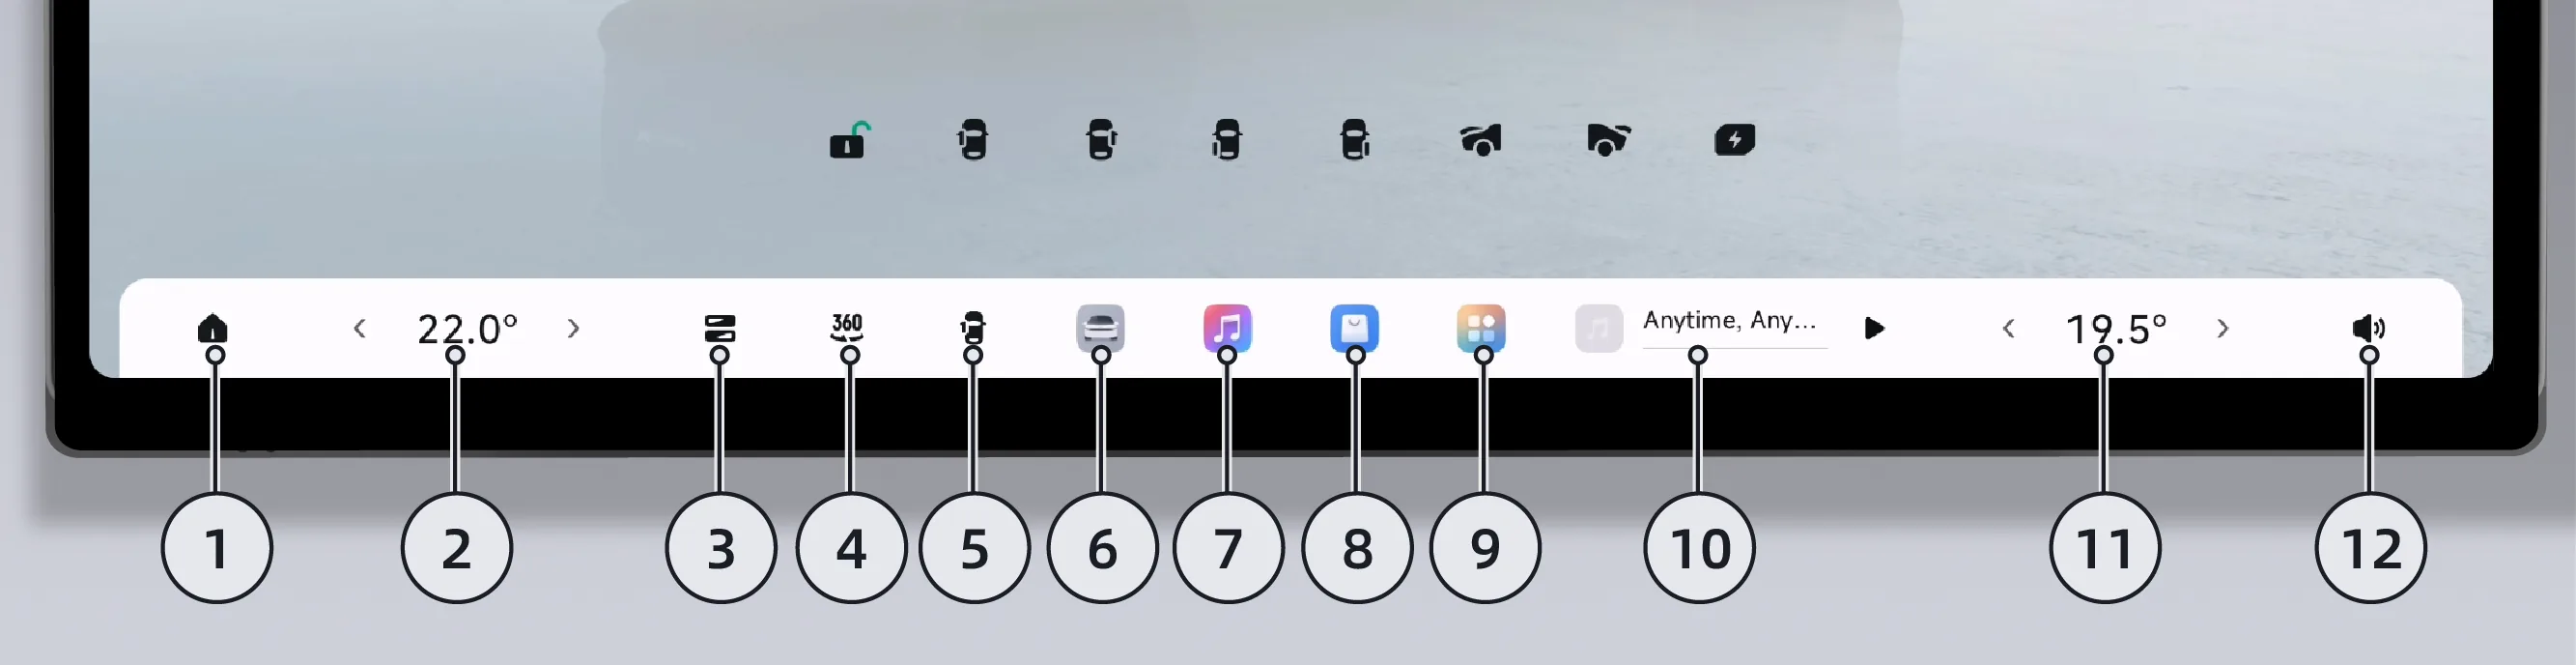
Home
Driver Air Conditioner Assembly
Control Center
360 Camera
Electric Door Switch*
Settings
Music
App Store
App Center
Music Component
passenger Air Conditioner assembly
Volume Adjustment
The desktop supports the following three display modes:
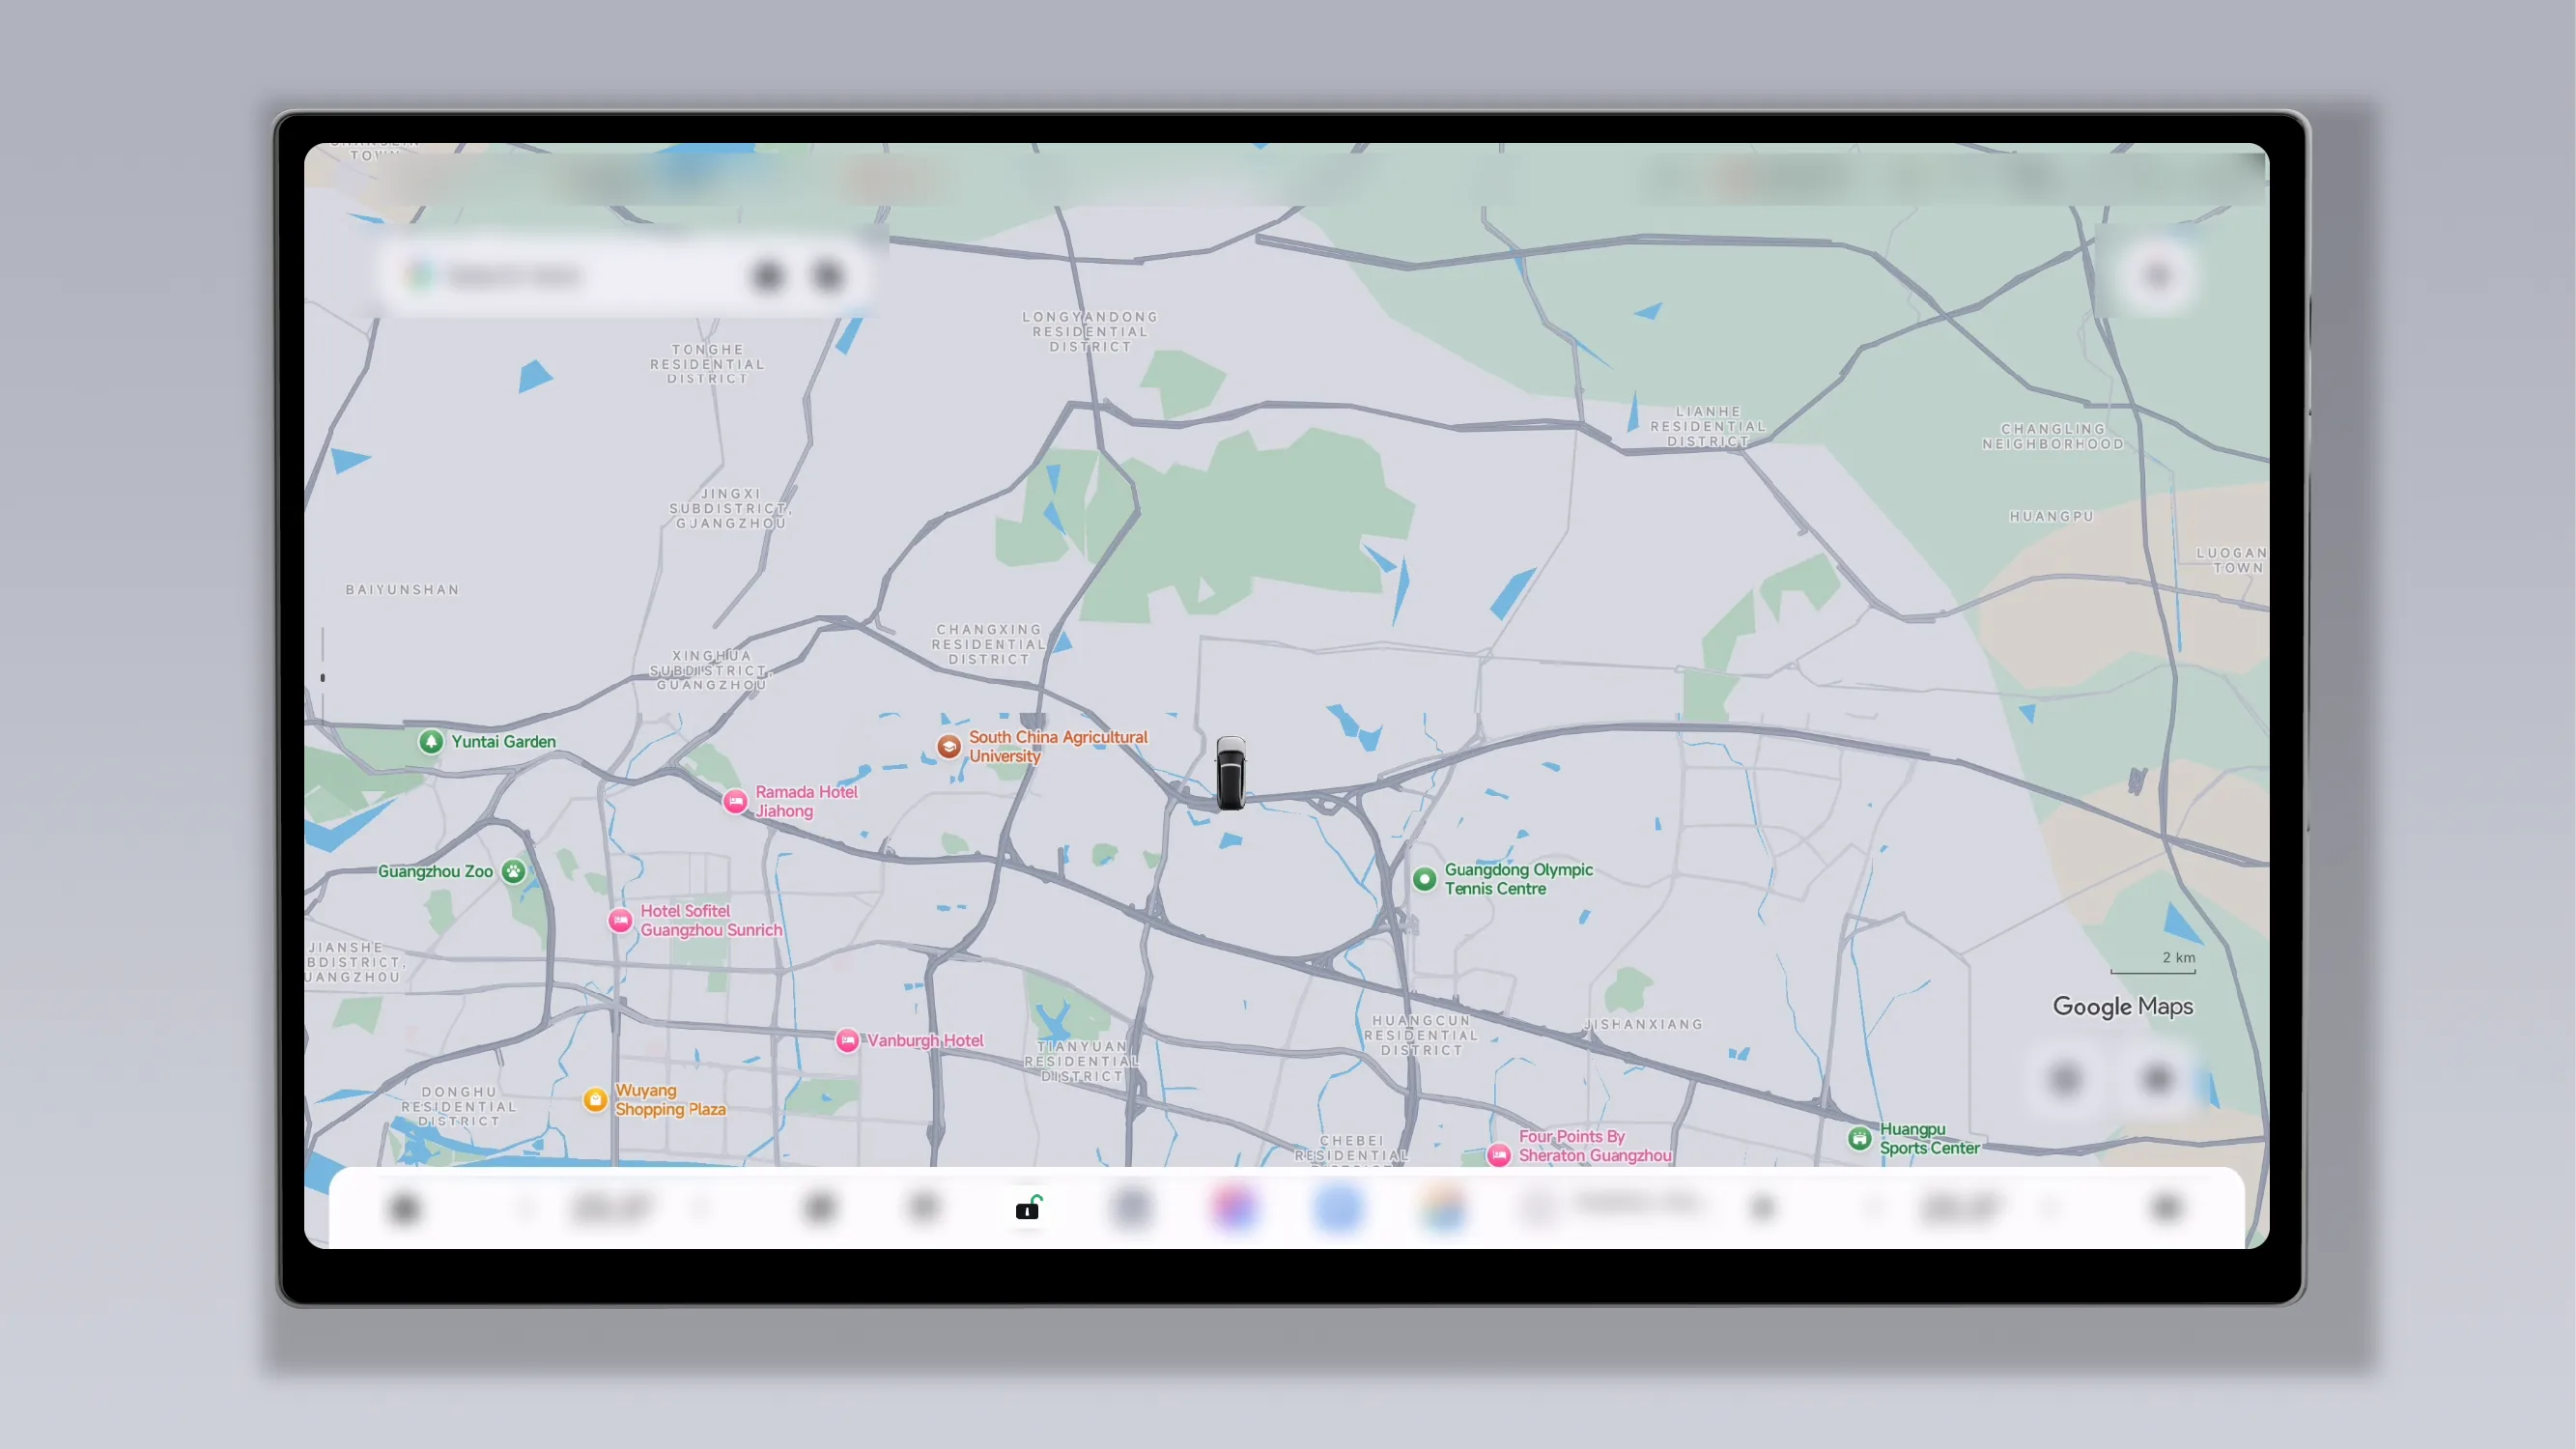
Full-screen map mode.
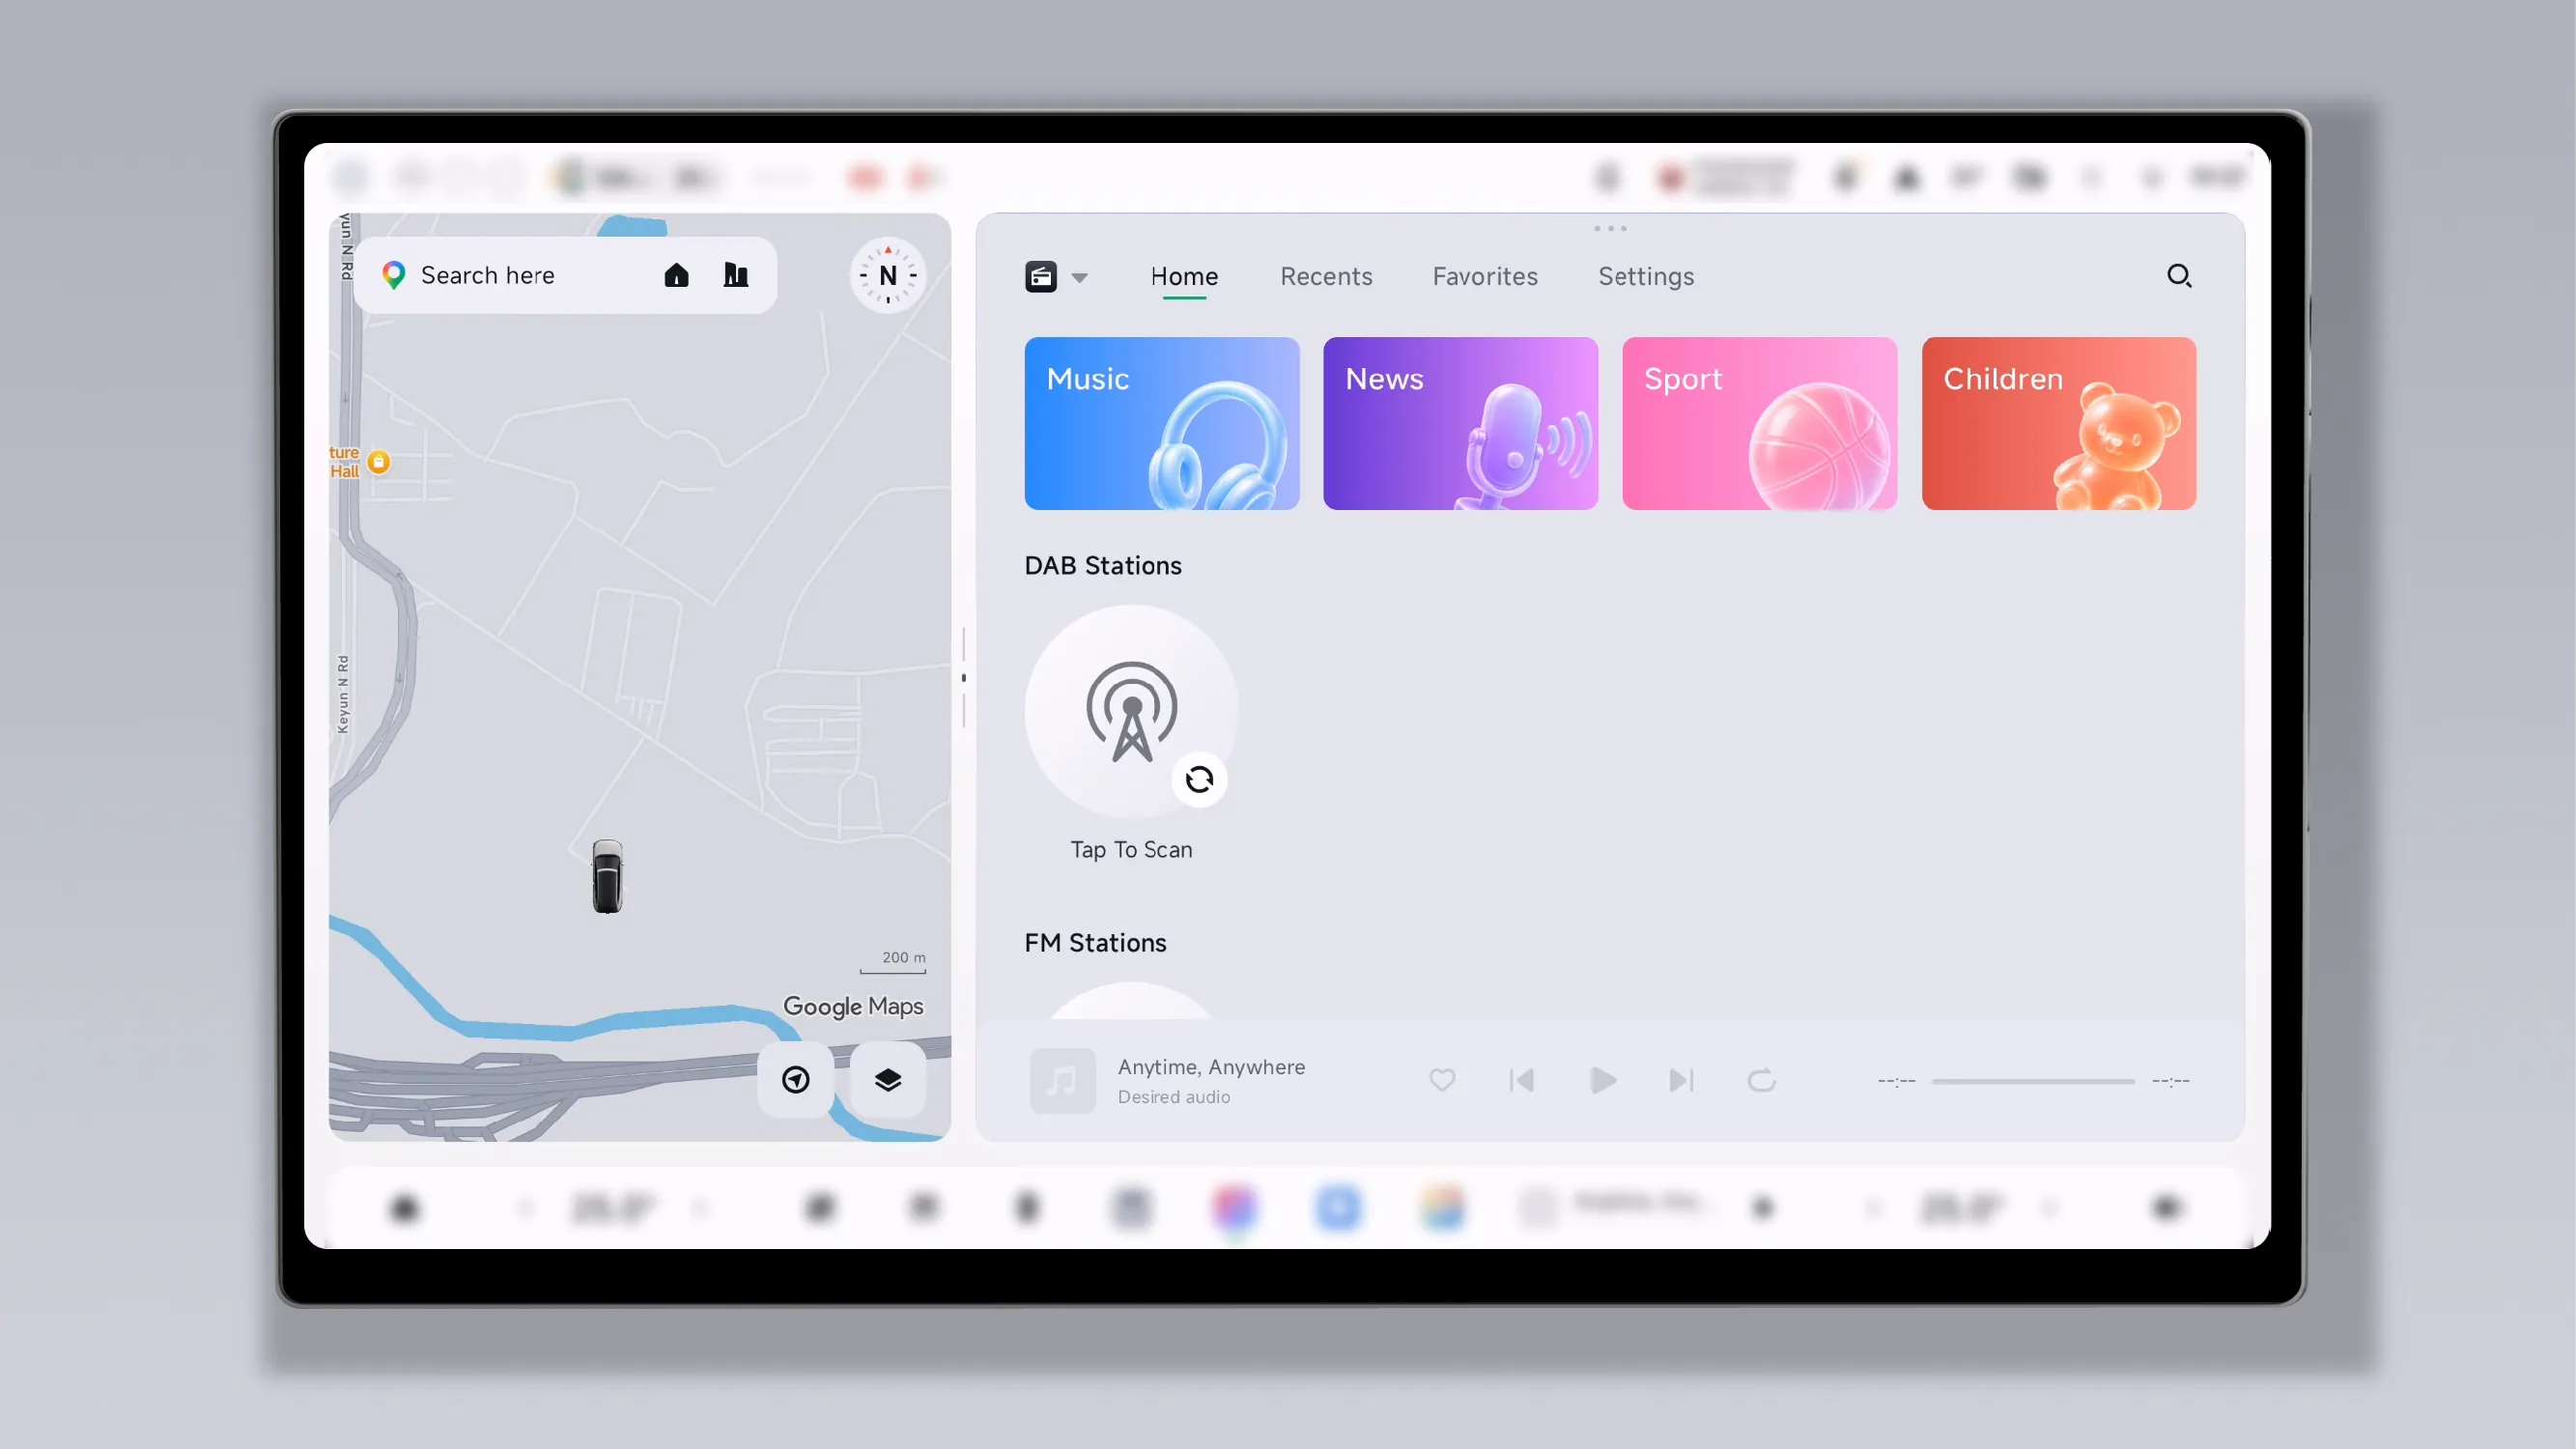
Split-screen desktop mode.
Full-screen SR mode.
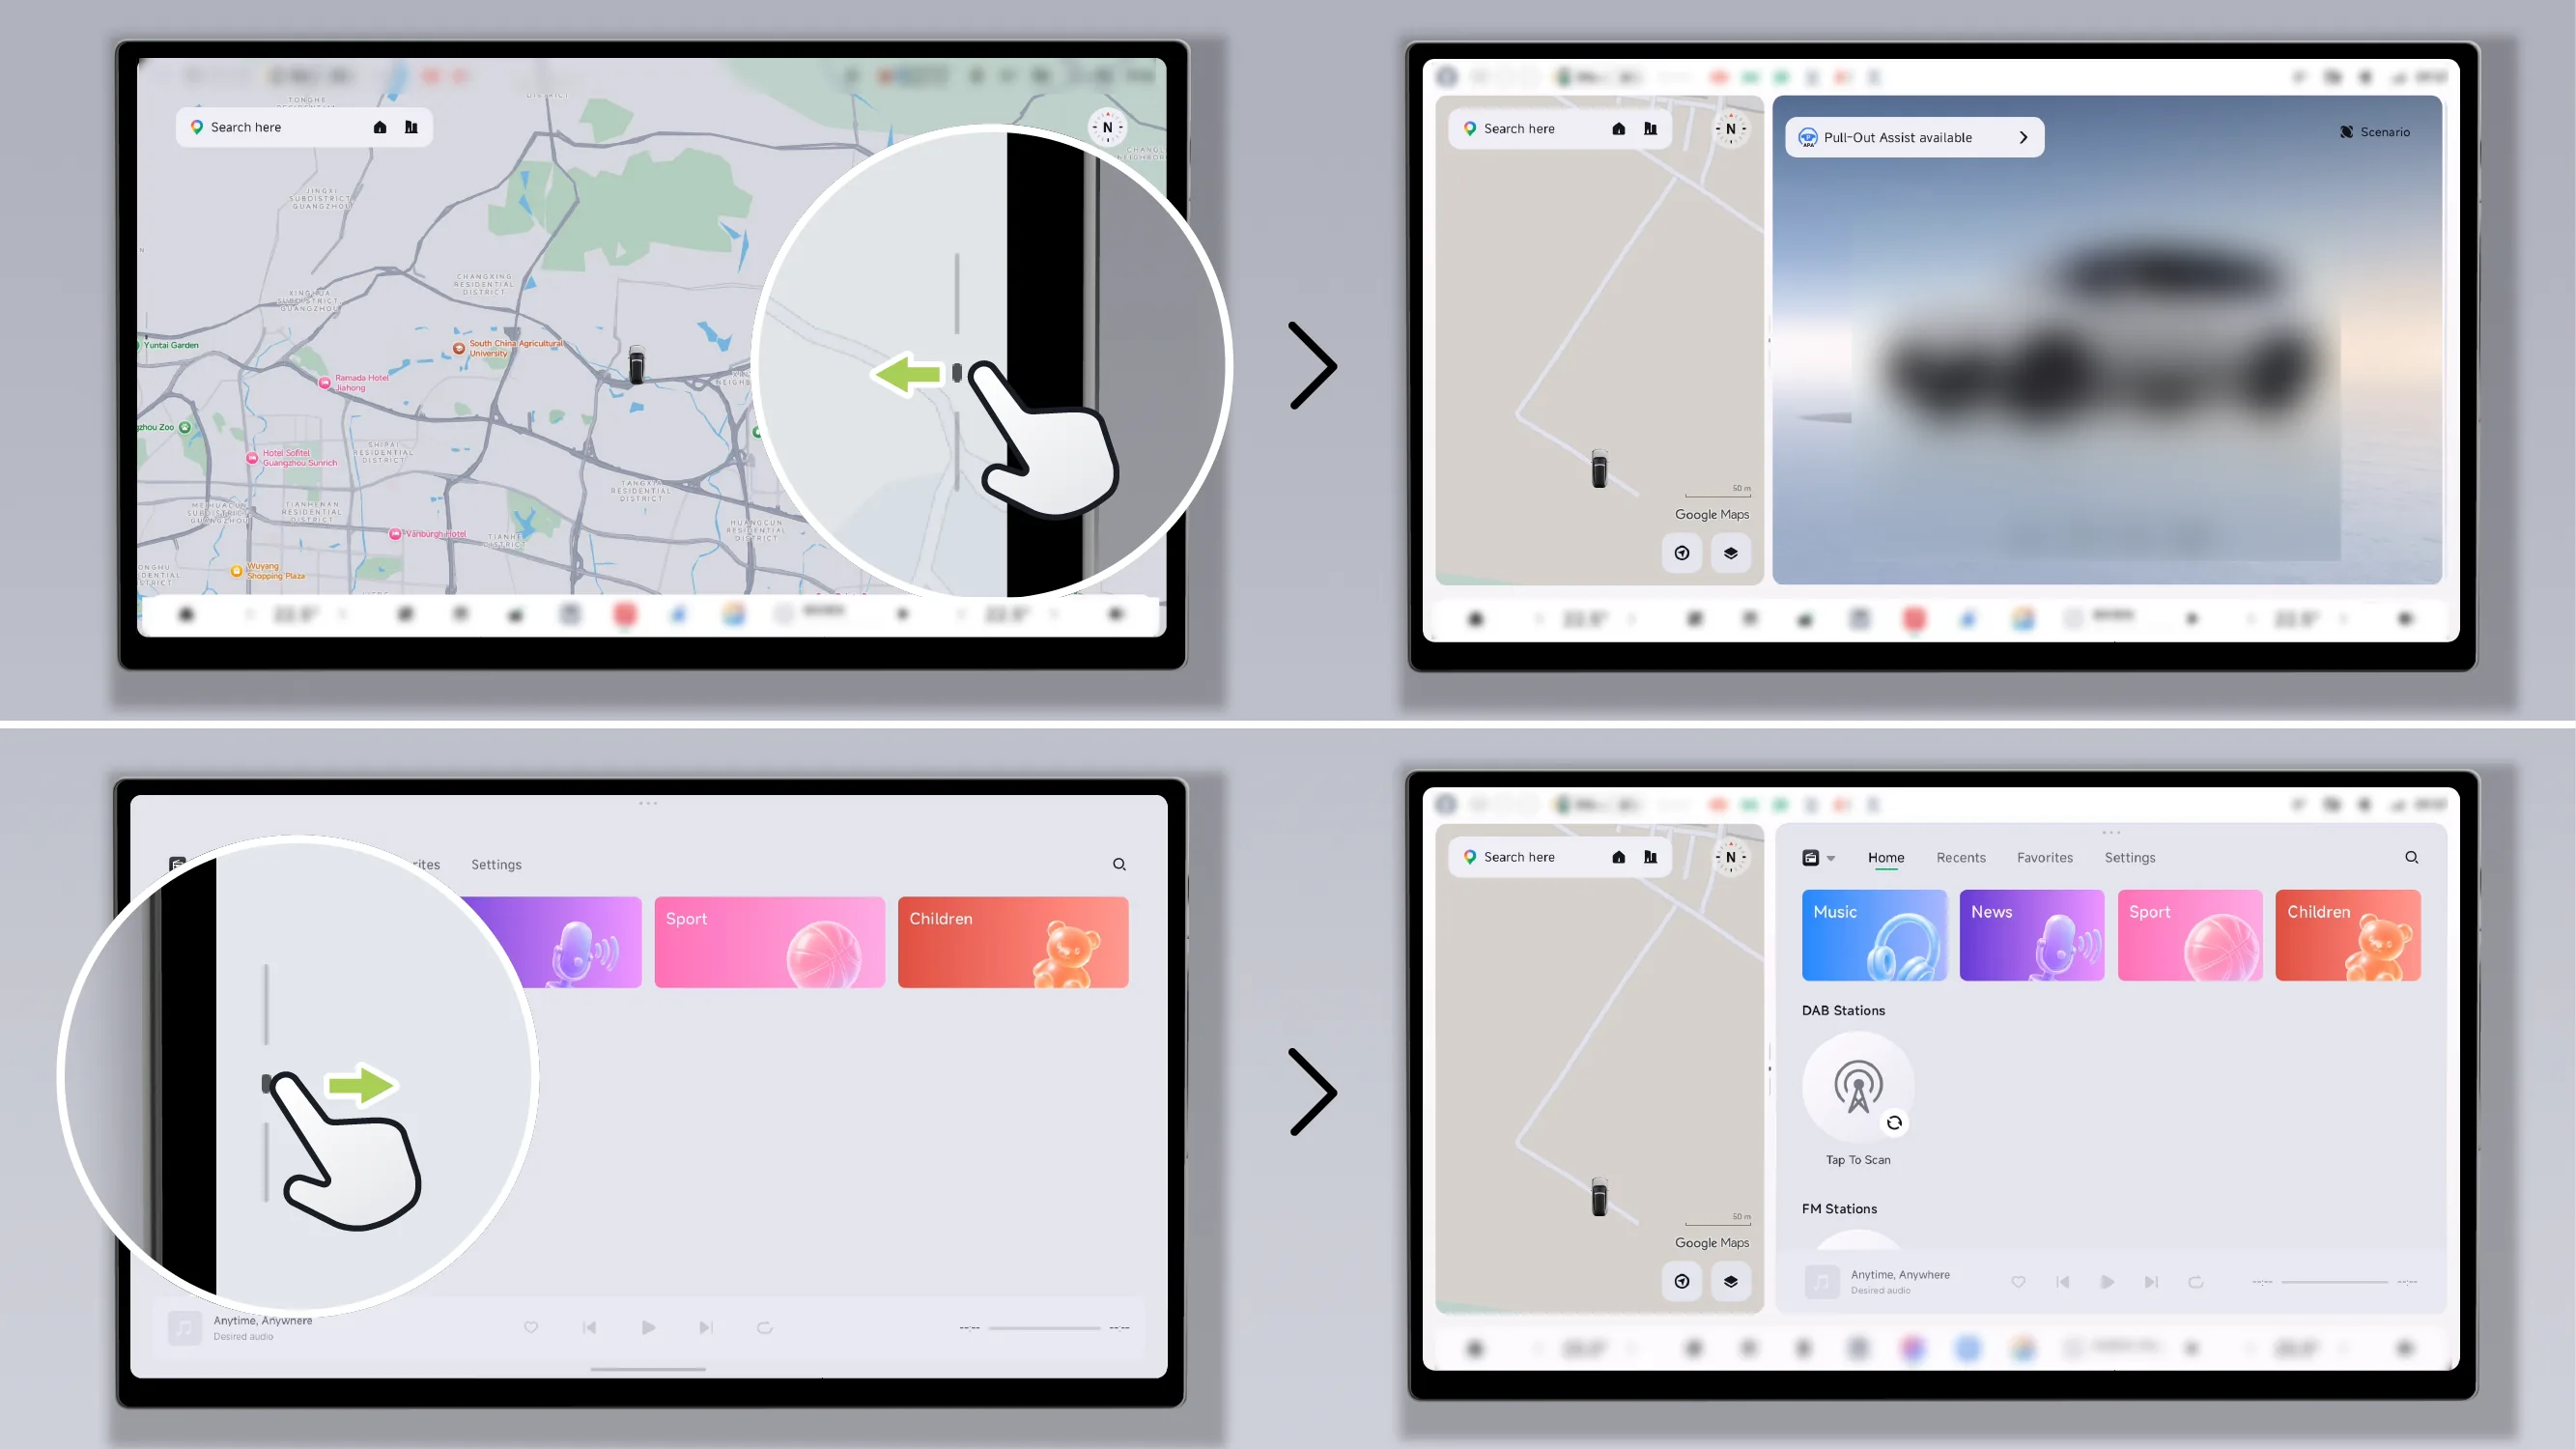
In full-screen mode, drag the split-screen slider to adjust the application window to split-screen mode.
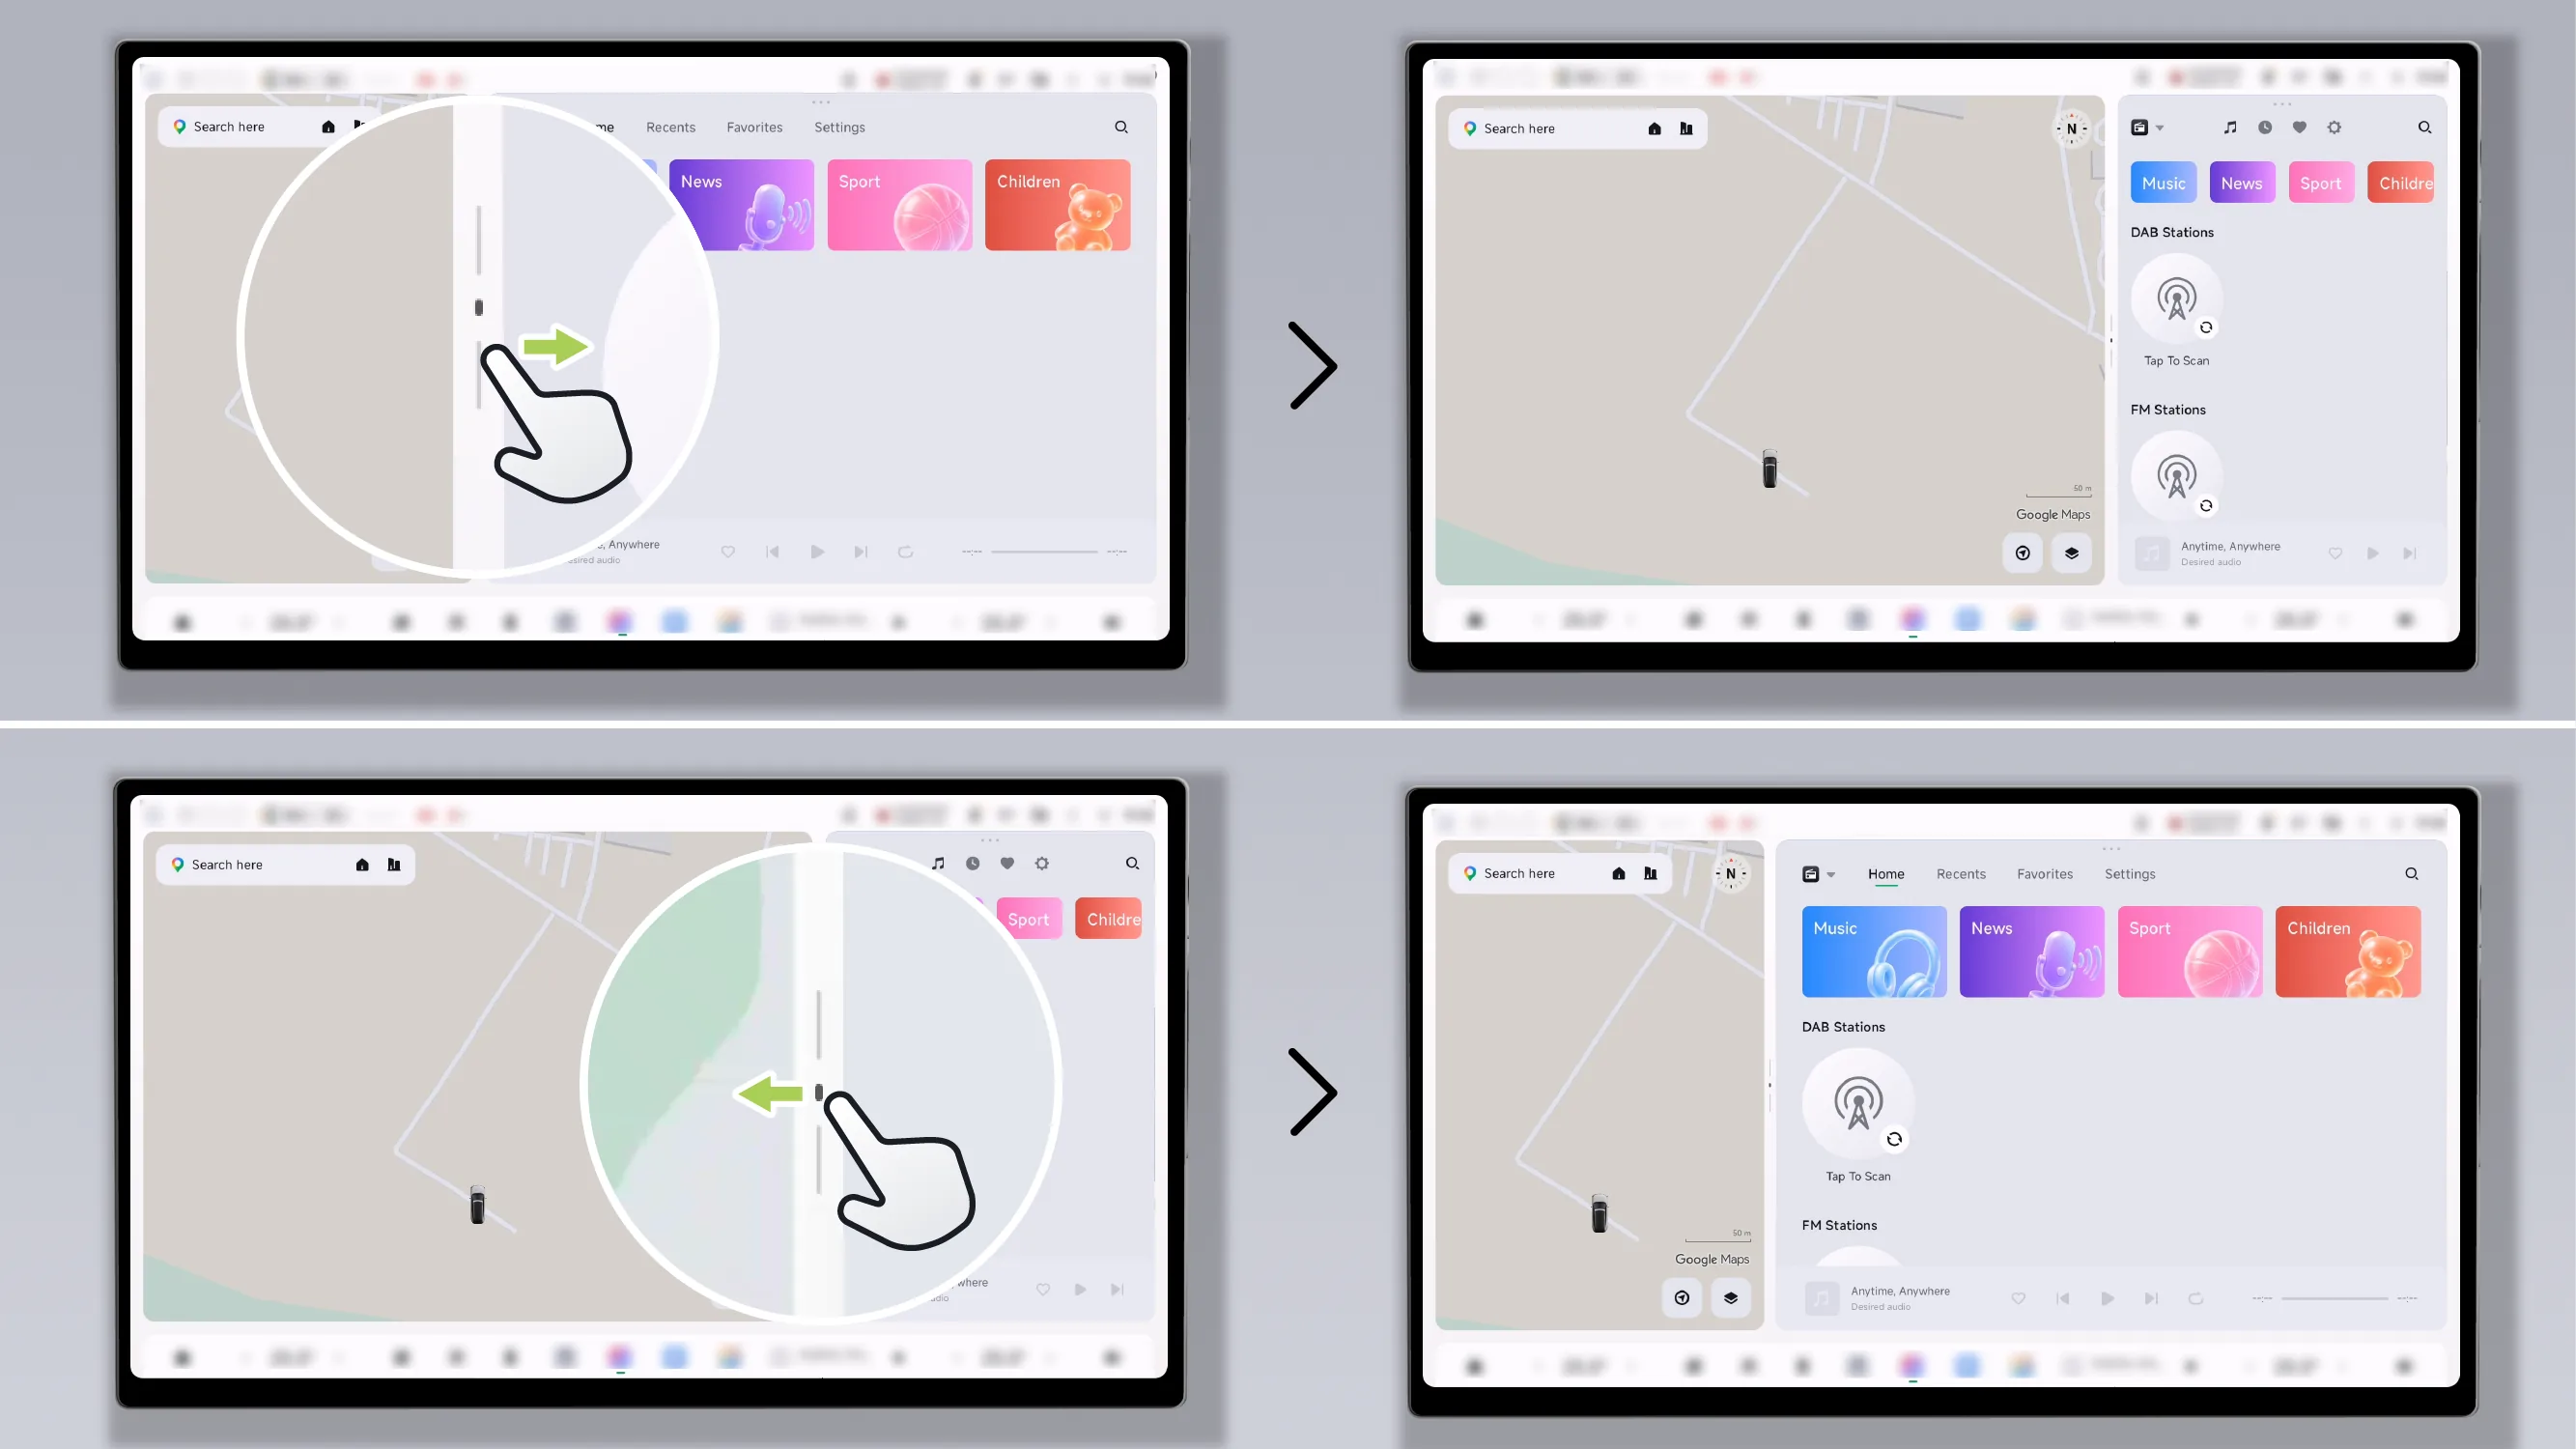
In split-screen mode, drag the split-screen slider to change the display size of the app window.
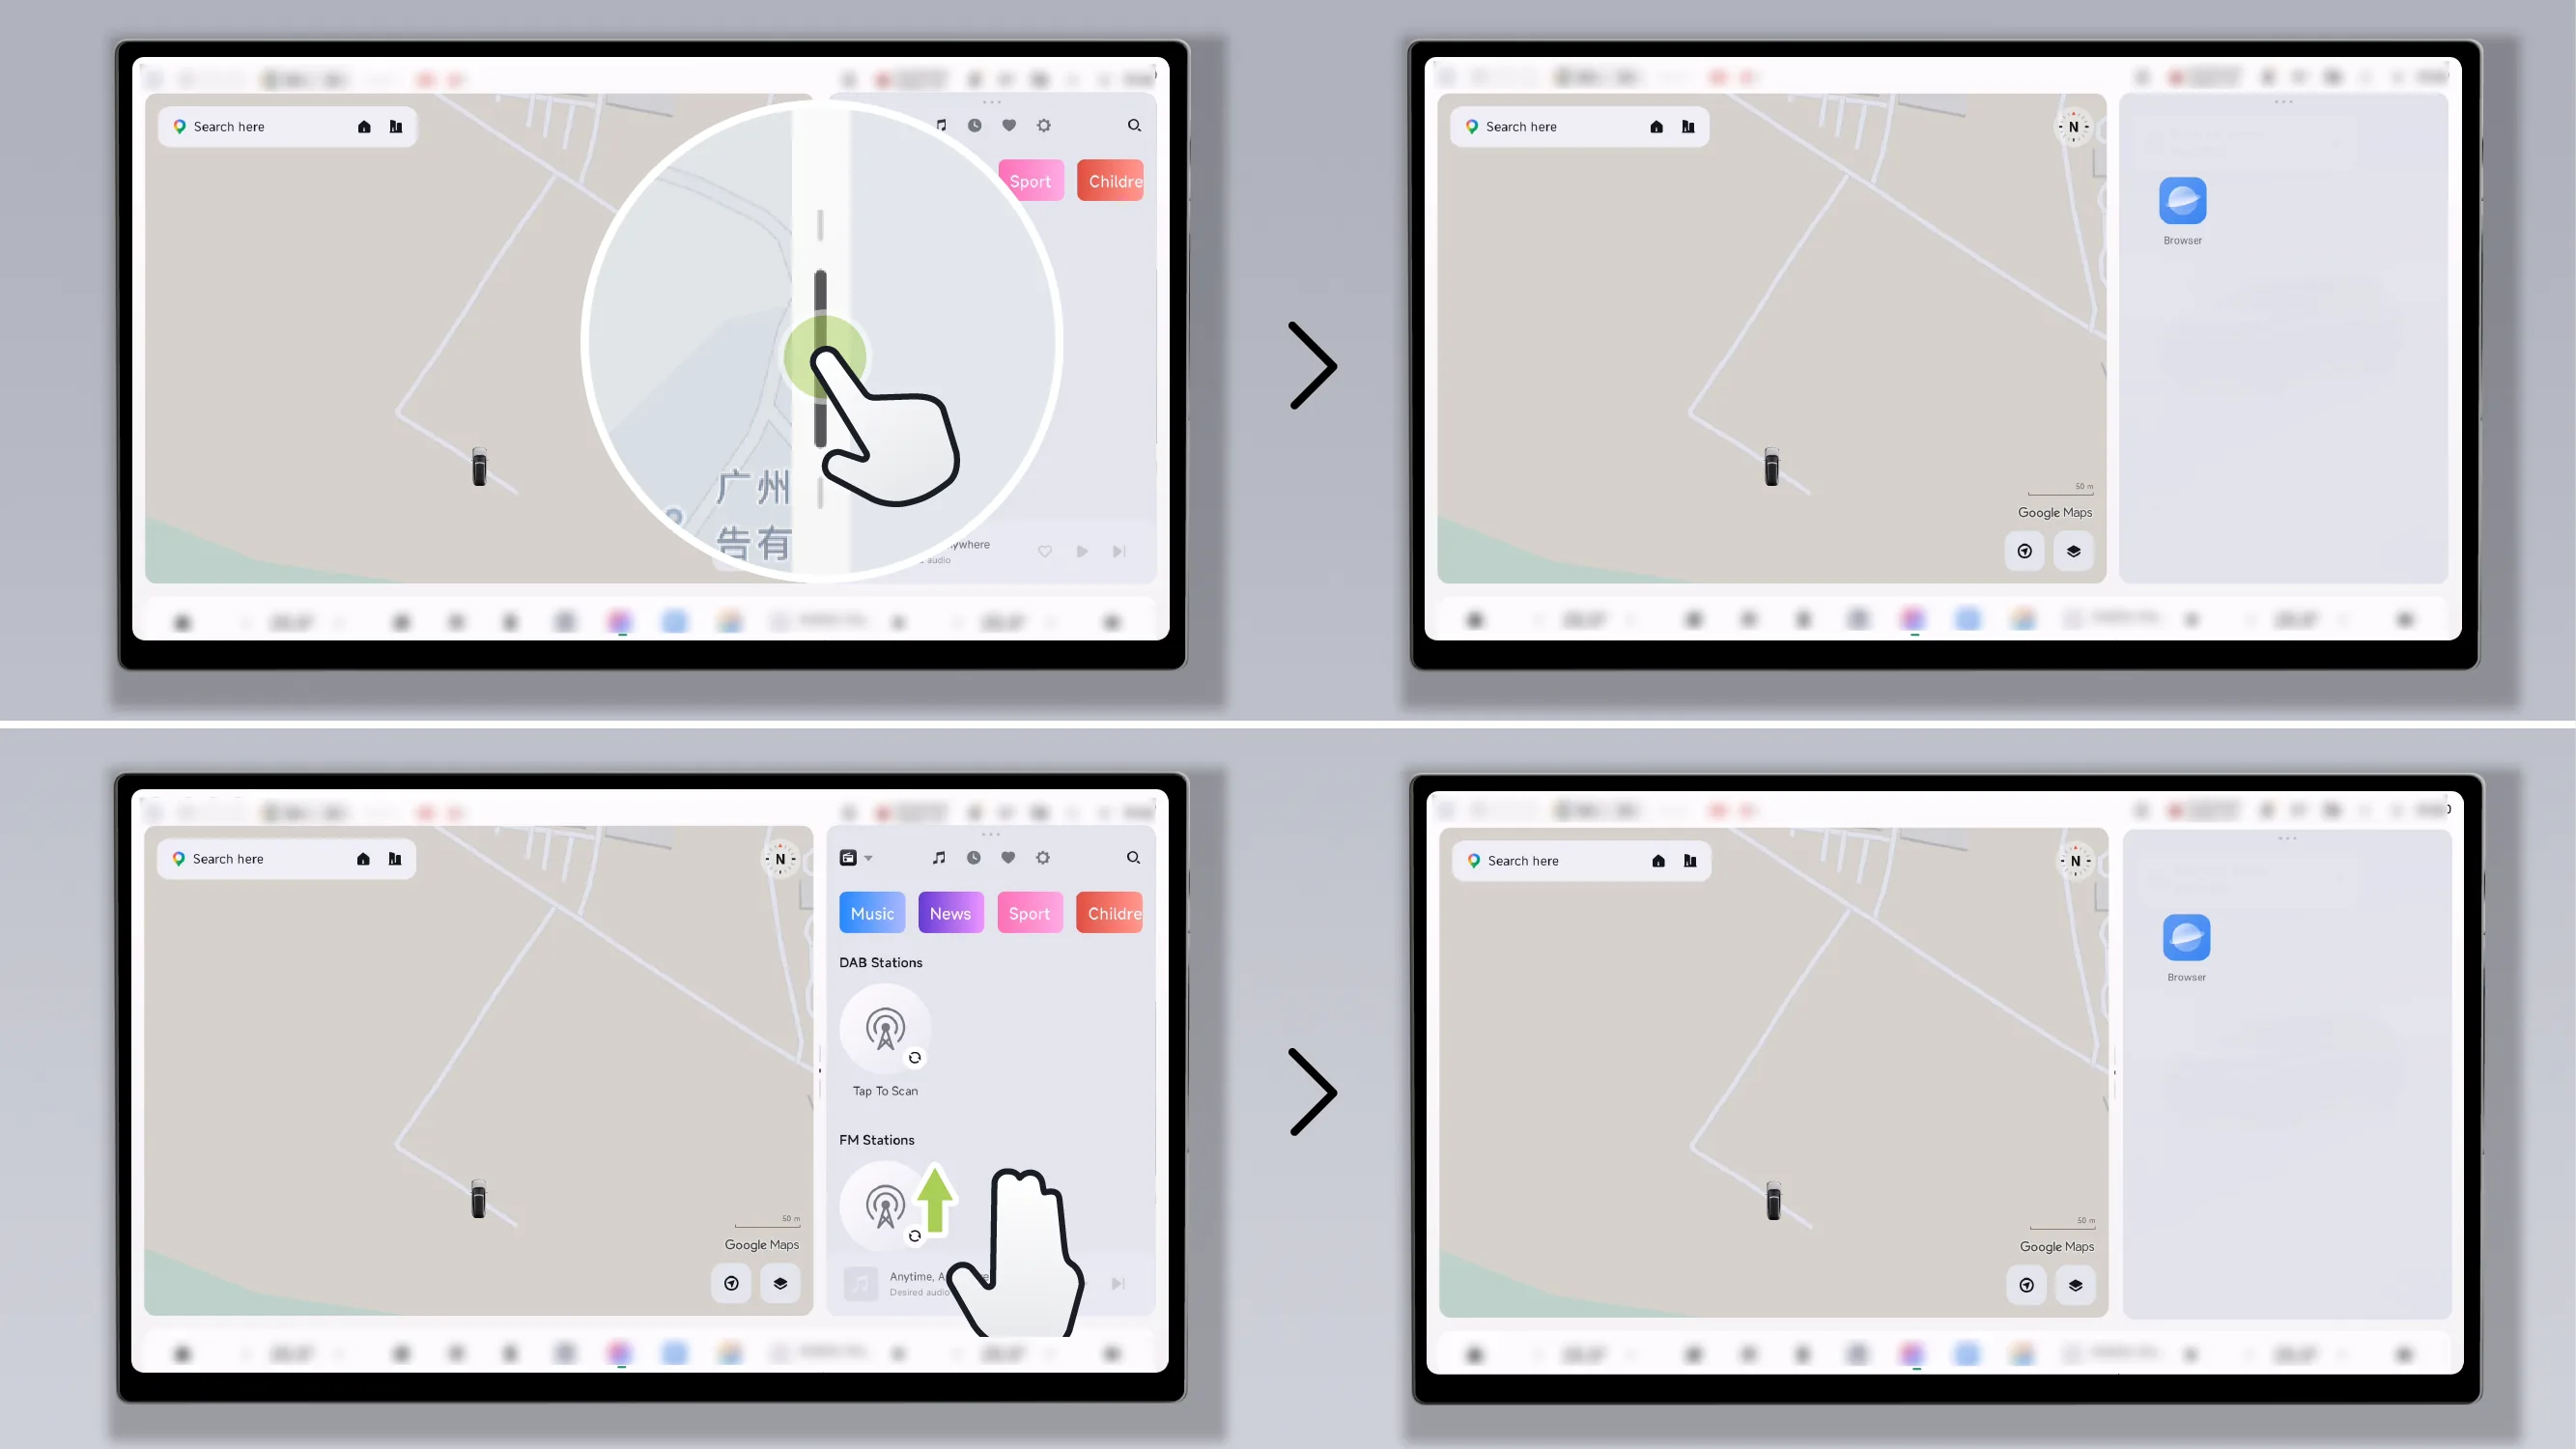
Tap the split-screen divider line or use a three-finger upward swipe gesture to open a floating window app, which supports displaying the browser.
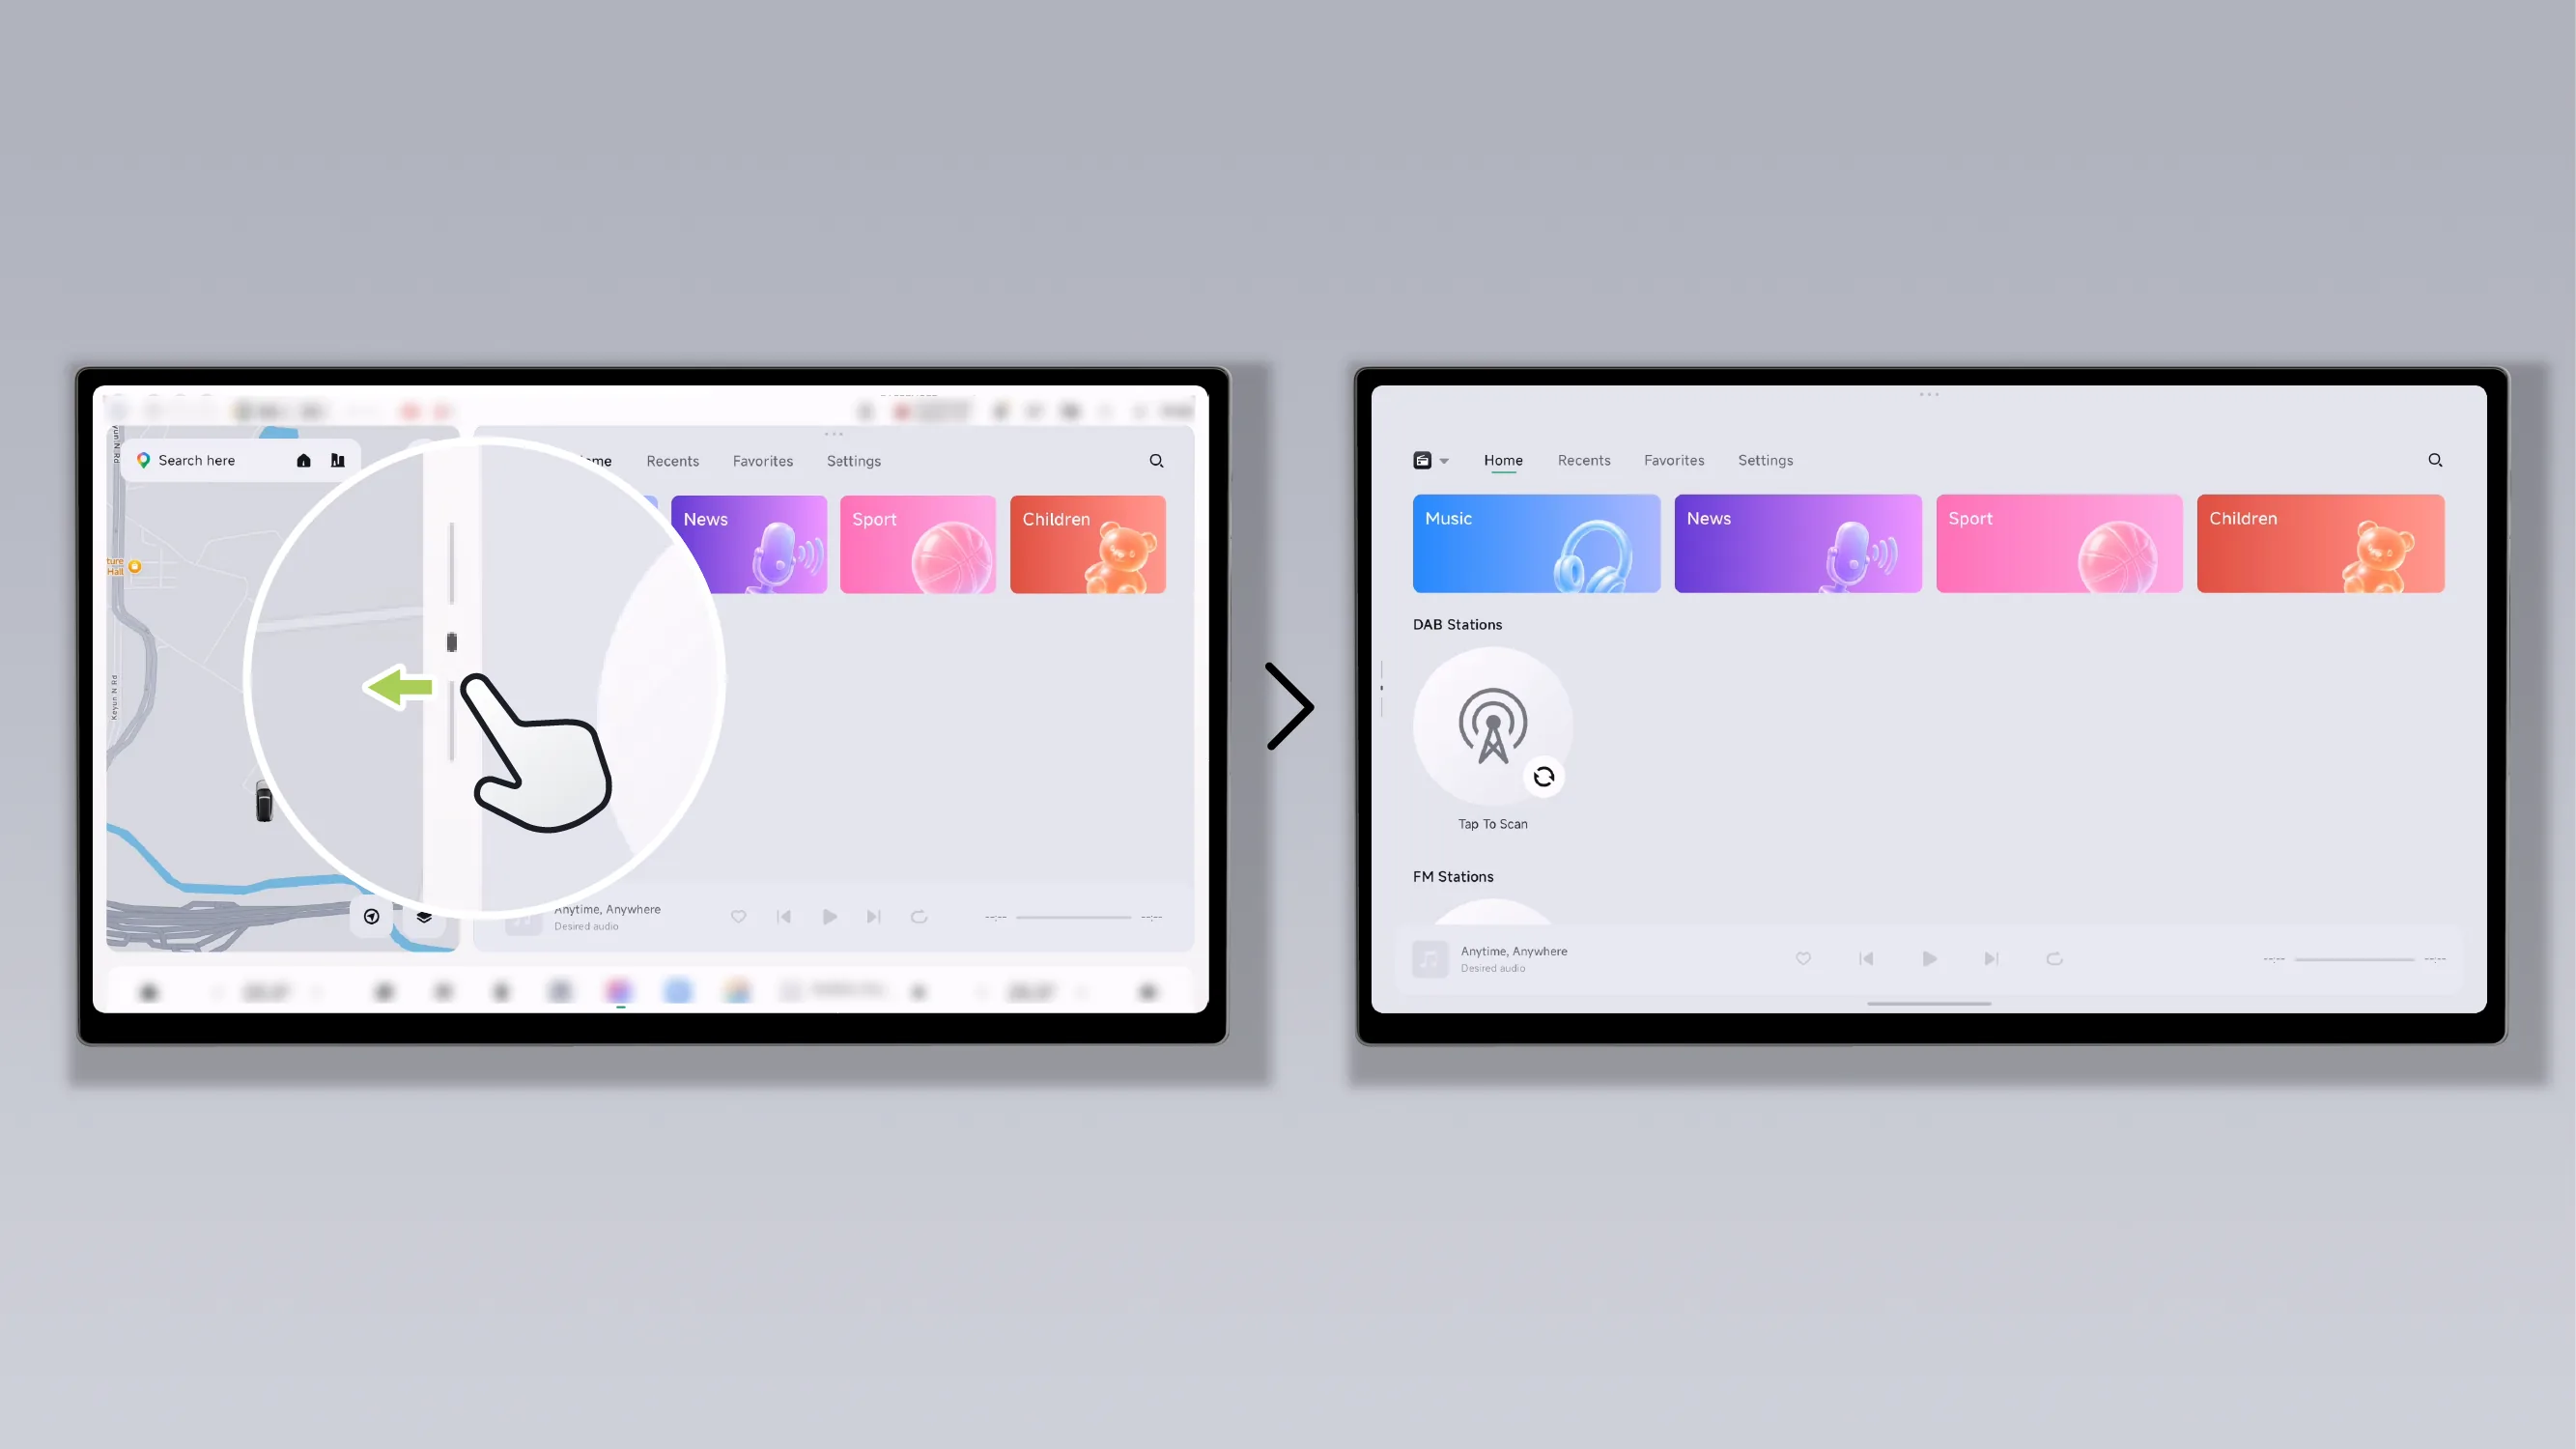
In split-screen mode, drag the split-screen slider to adjust the app window to full-screen display. When split-screen is switched to full-screen, the last opened split-screen app is remembered.
When you select and tap any app icon on the central control screen home page or in the app list, the system will open and display the corresponding app window on the screen.
The window toolbar is displayed in the centered area at the top of the application window.
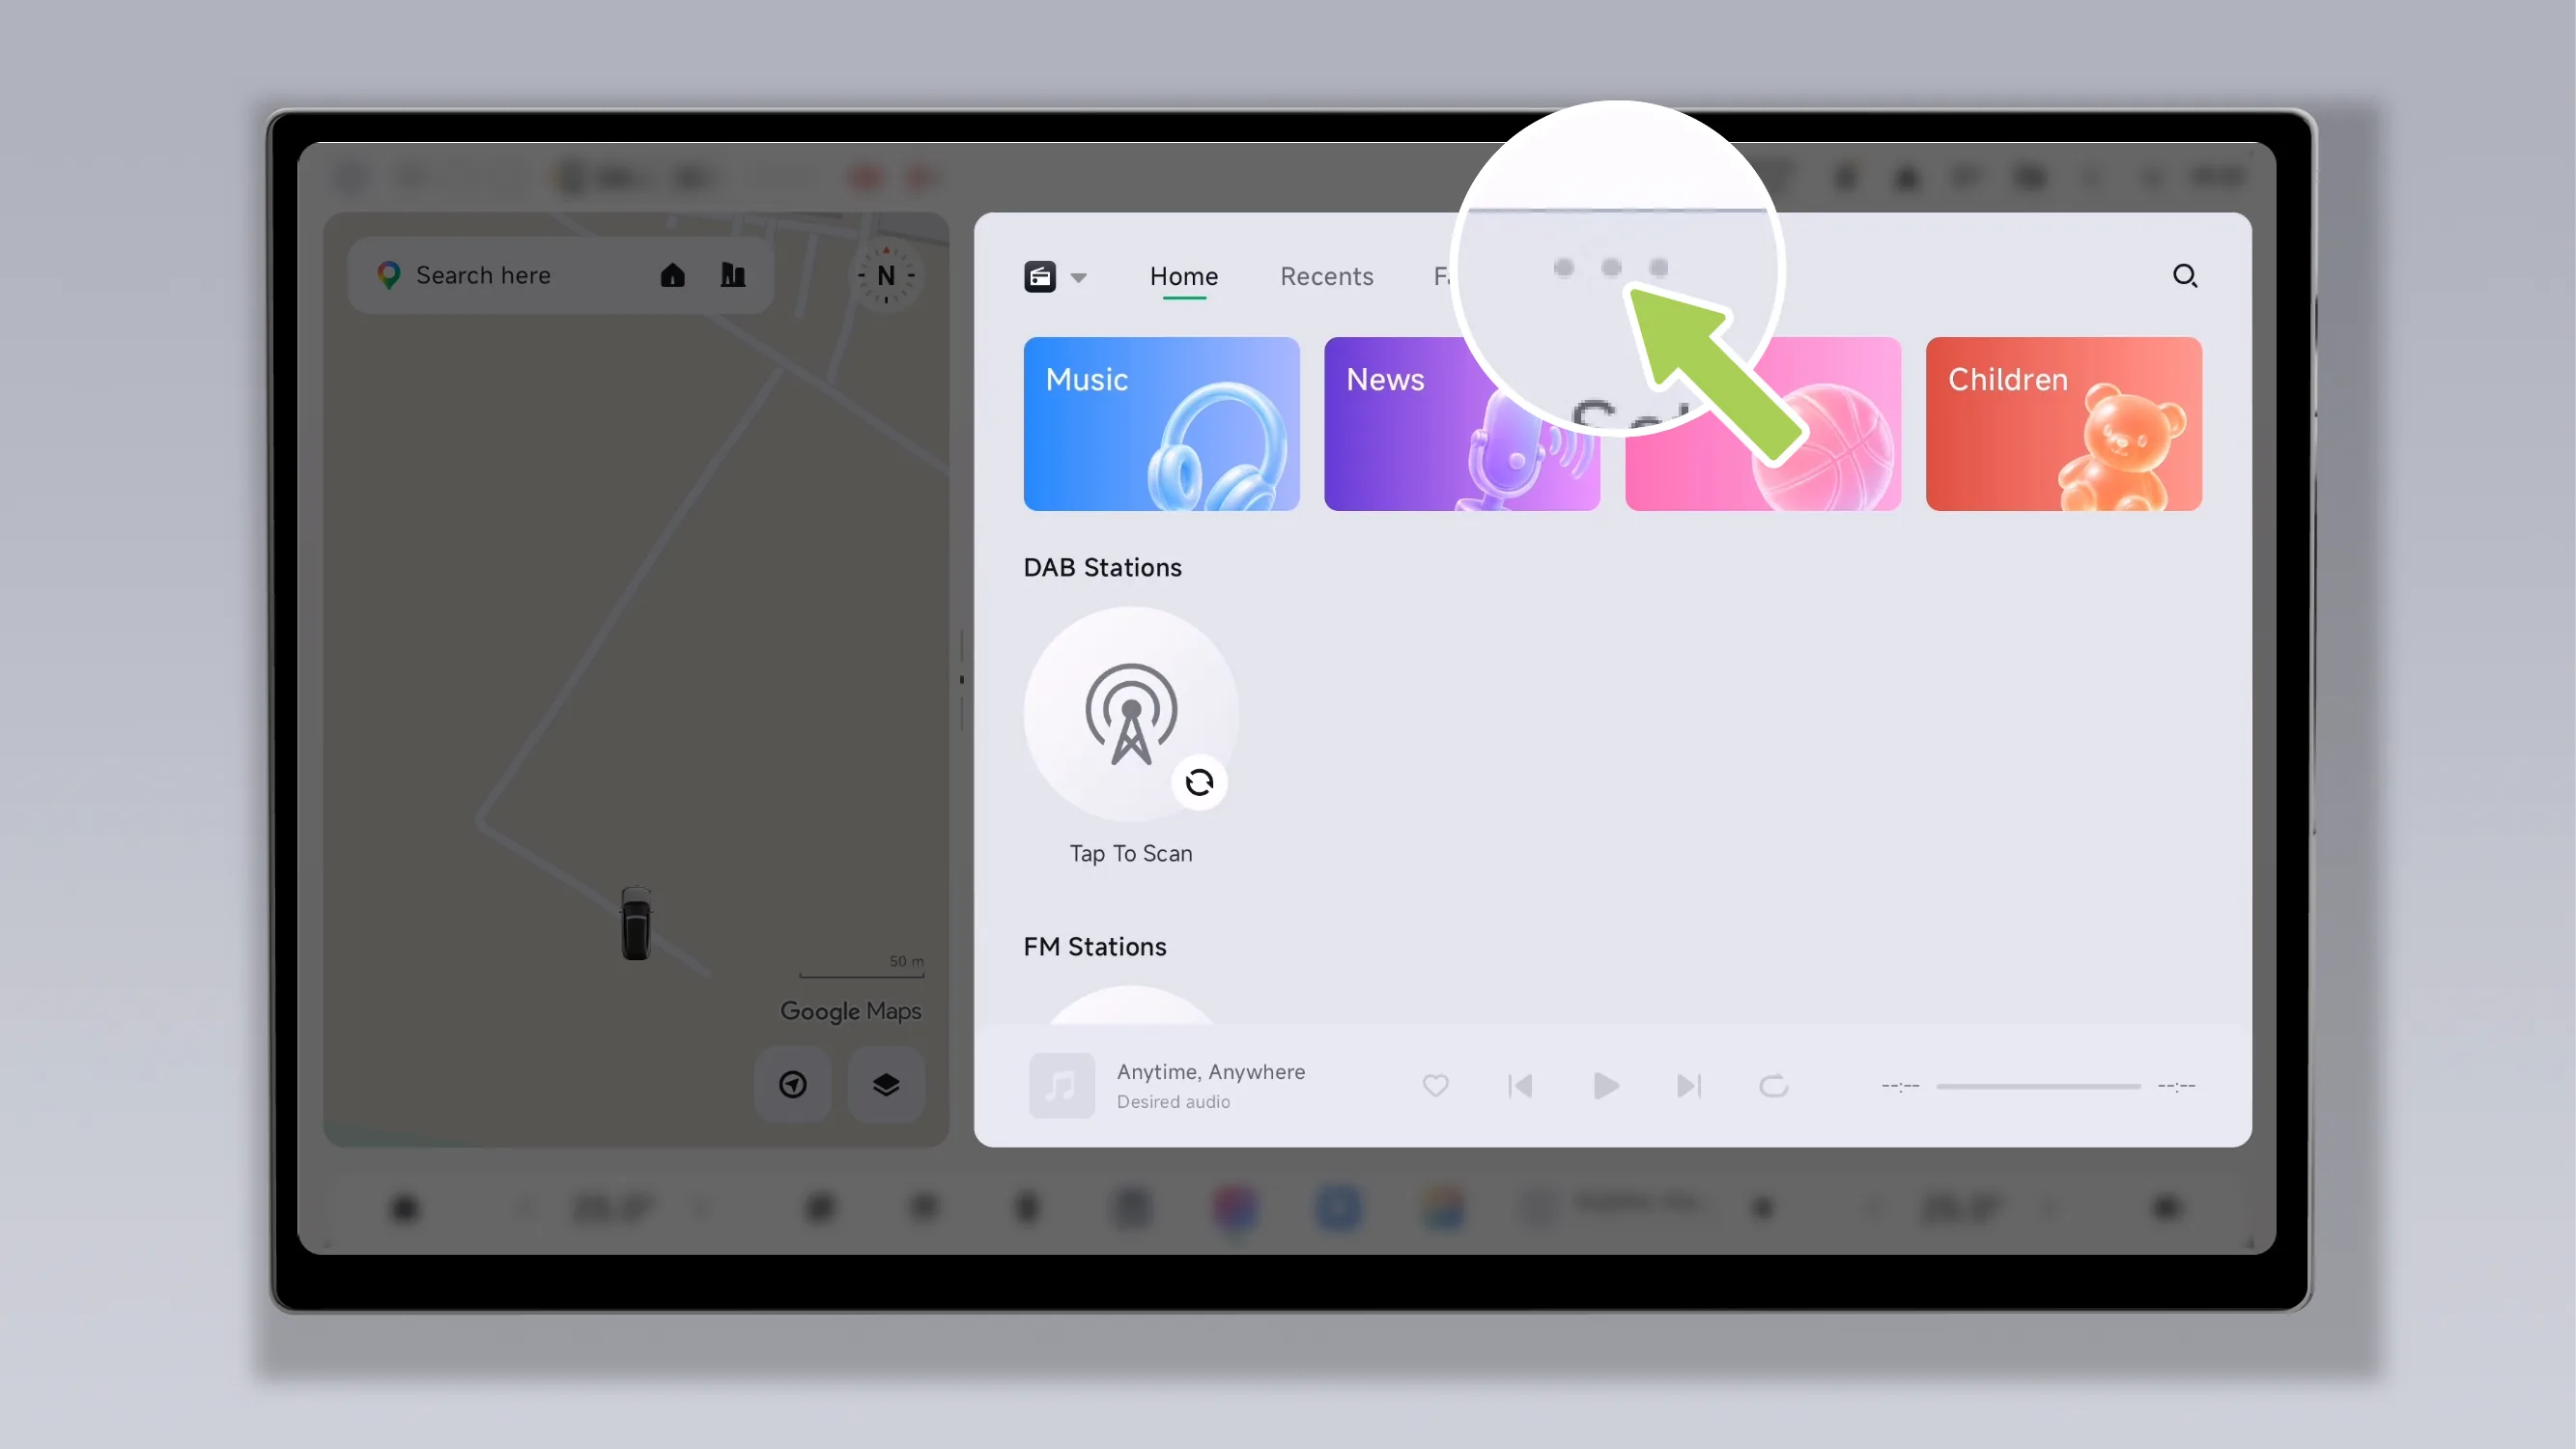
Default state:Usually displayed as Icon.
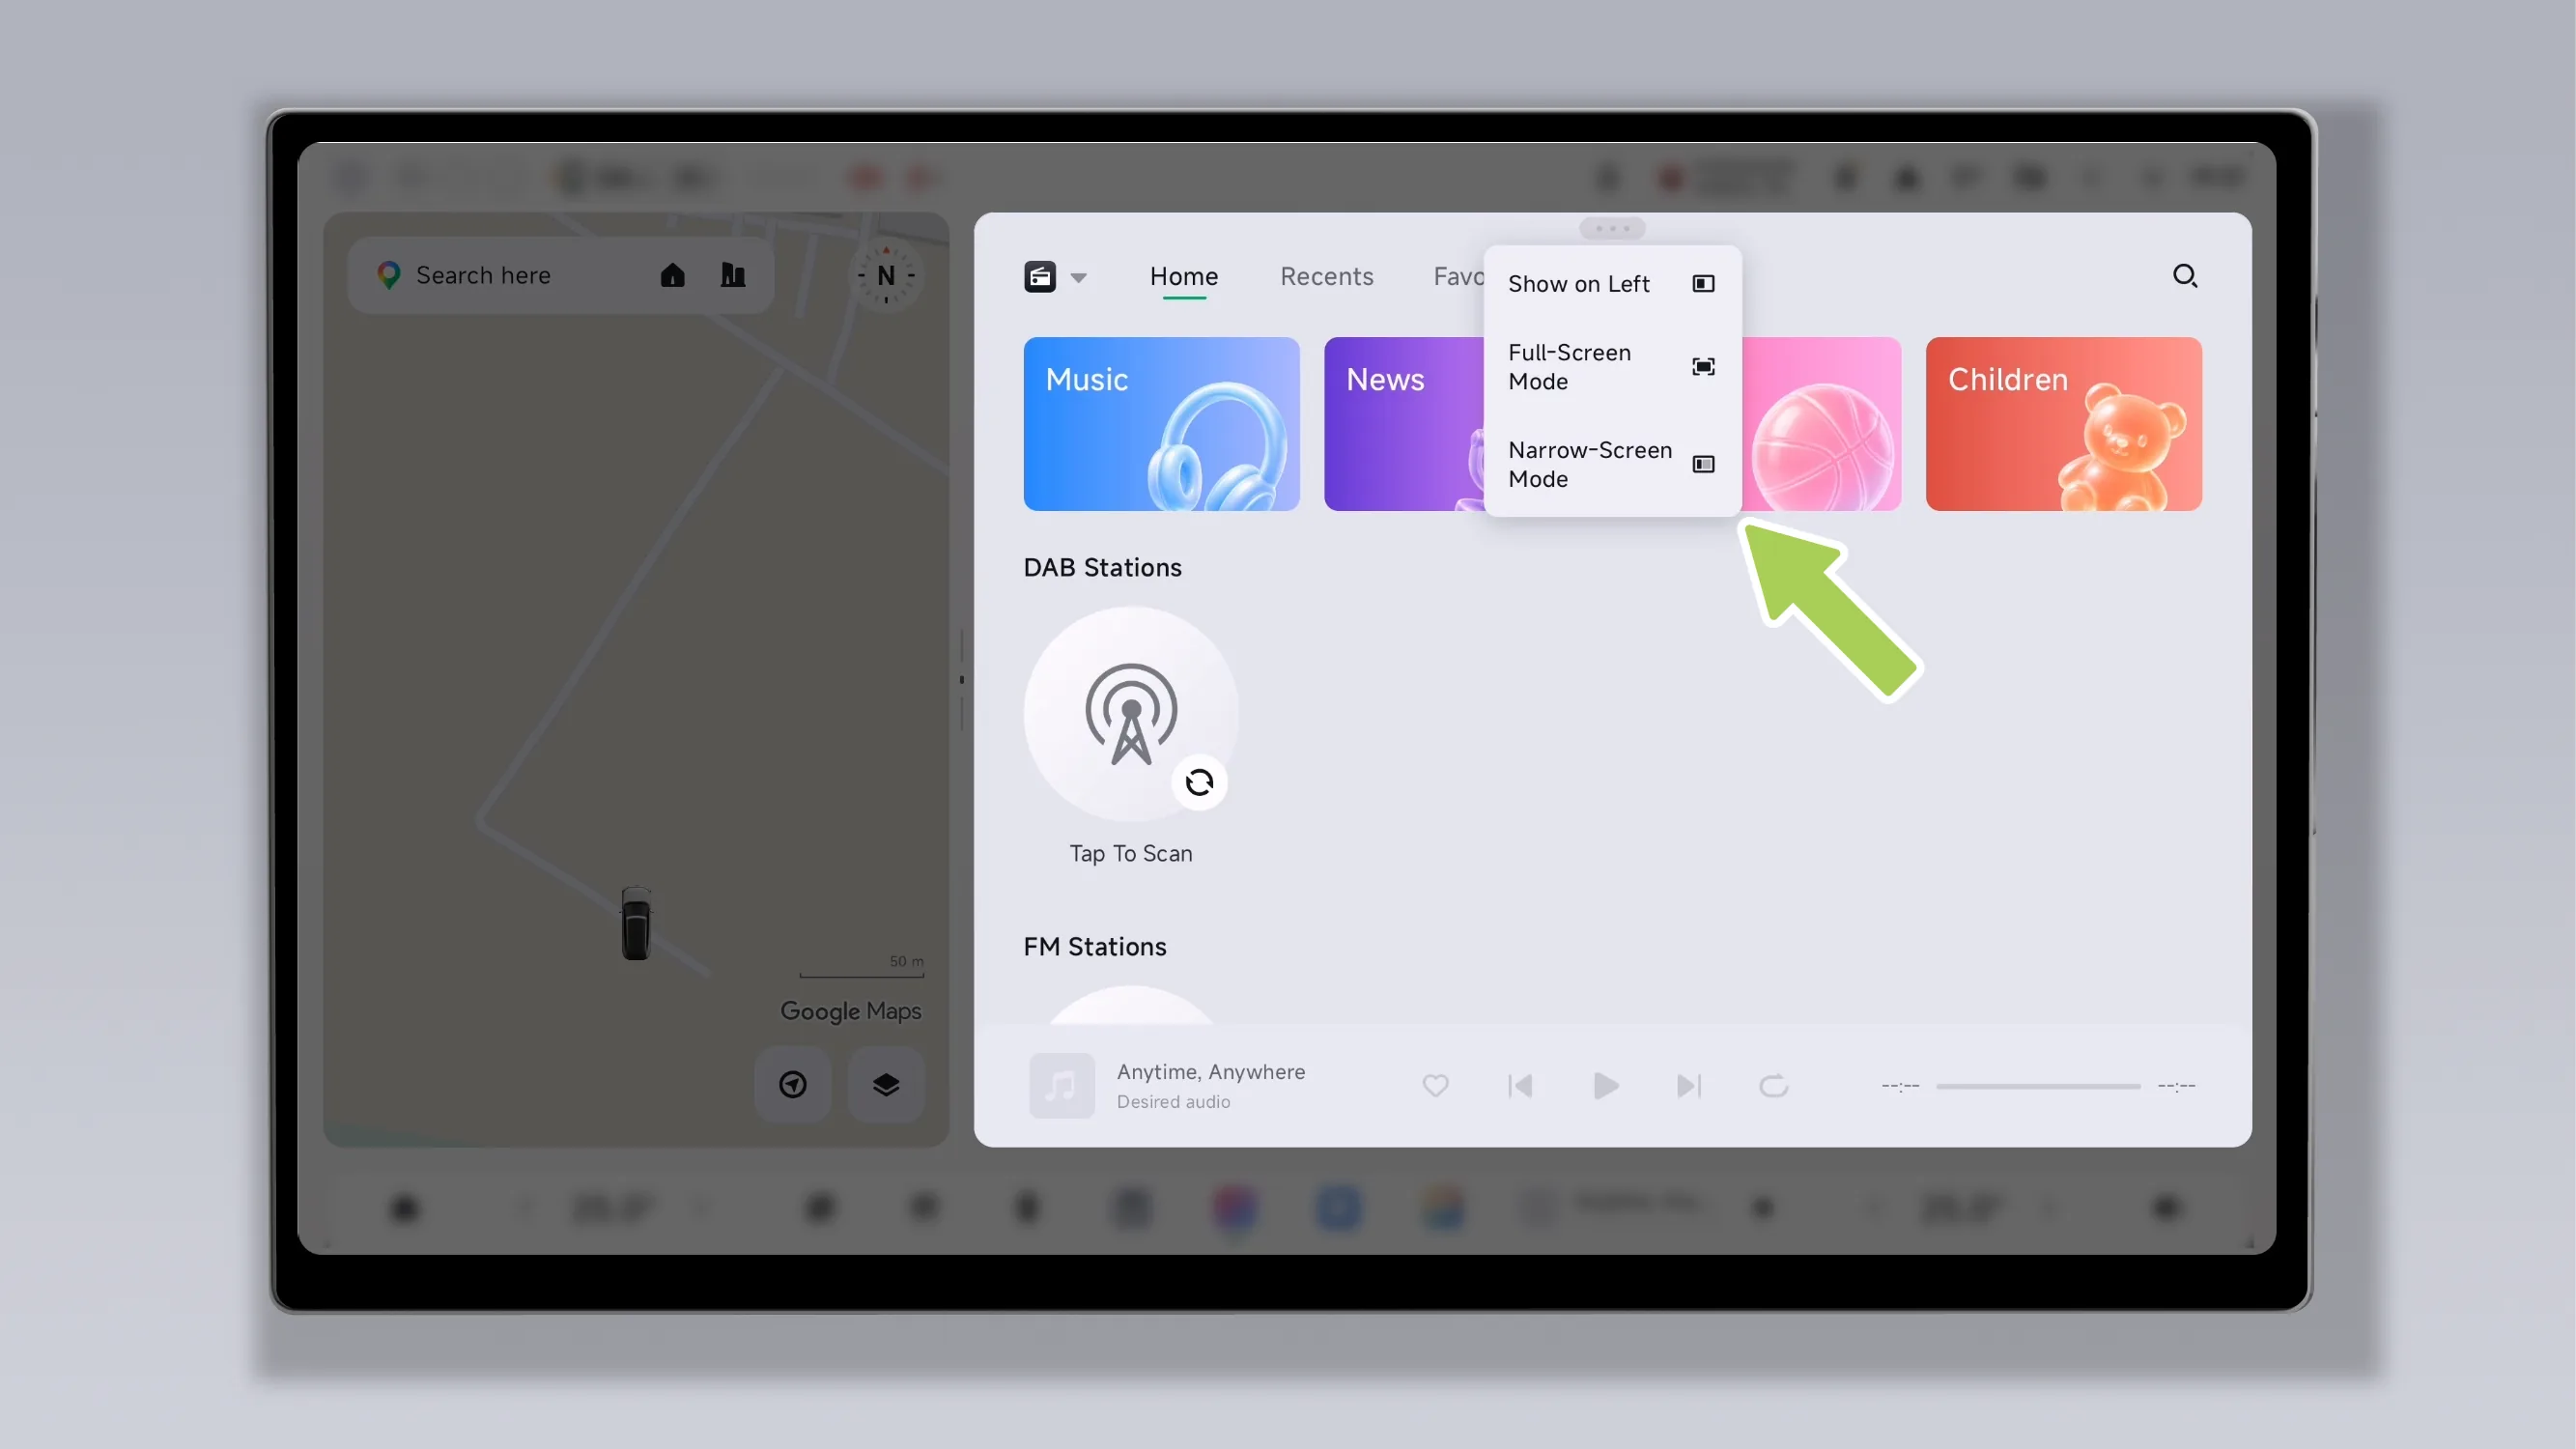
Expanded state:Tap Tap the icon to expand the toolbar.
Tips The specific functions of the toolbar may vary depending on the application. Please refer to what is actually displayed.
The application window supports display in the following three sizes:
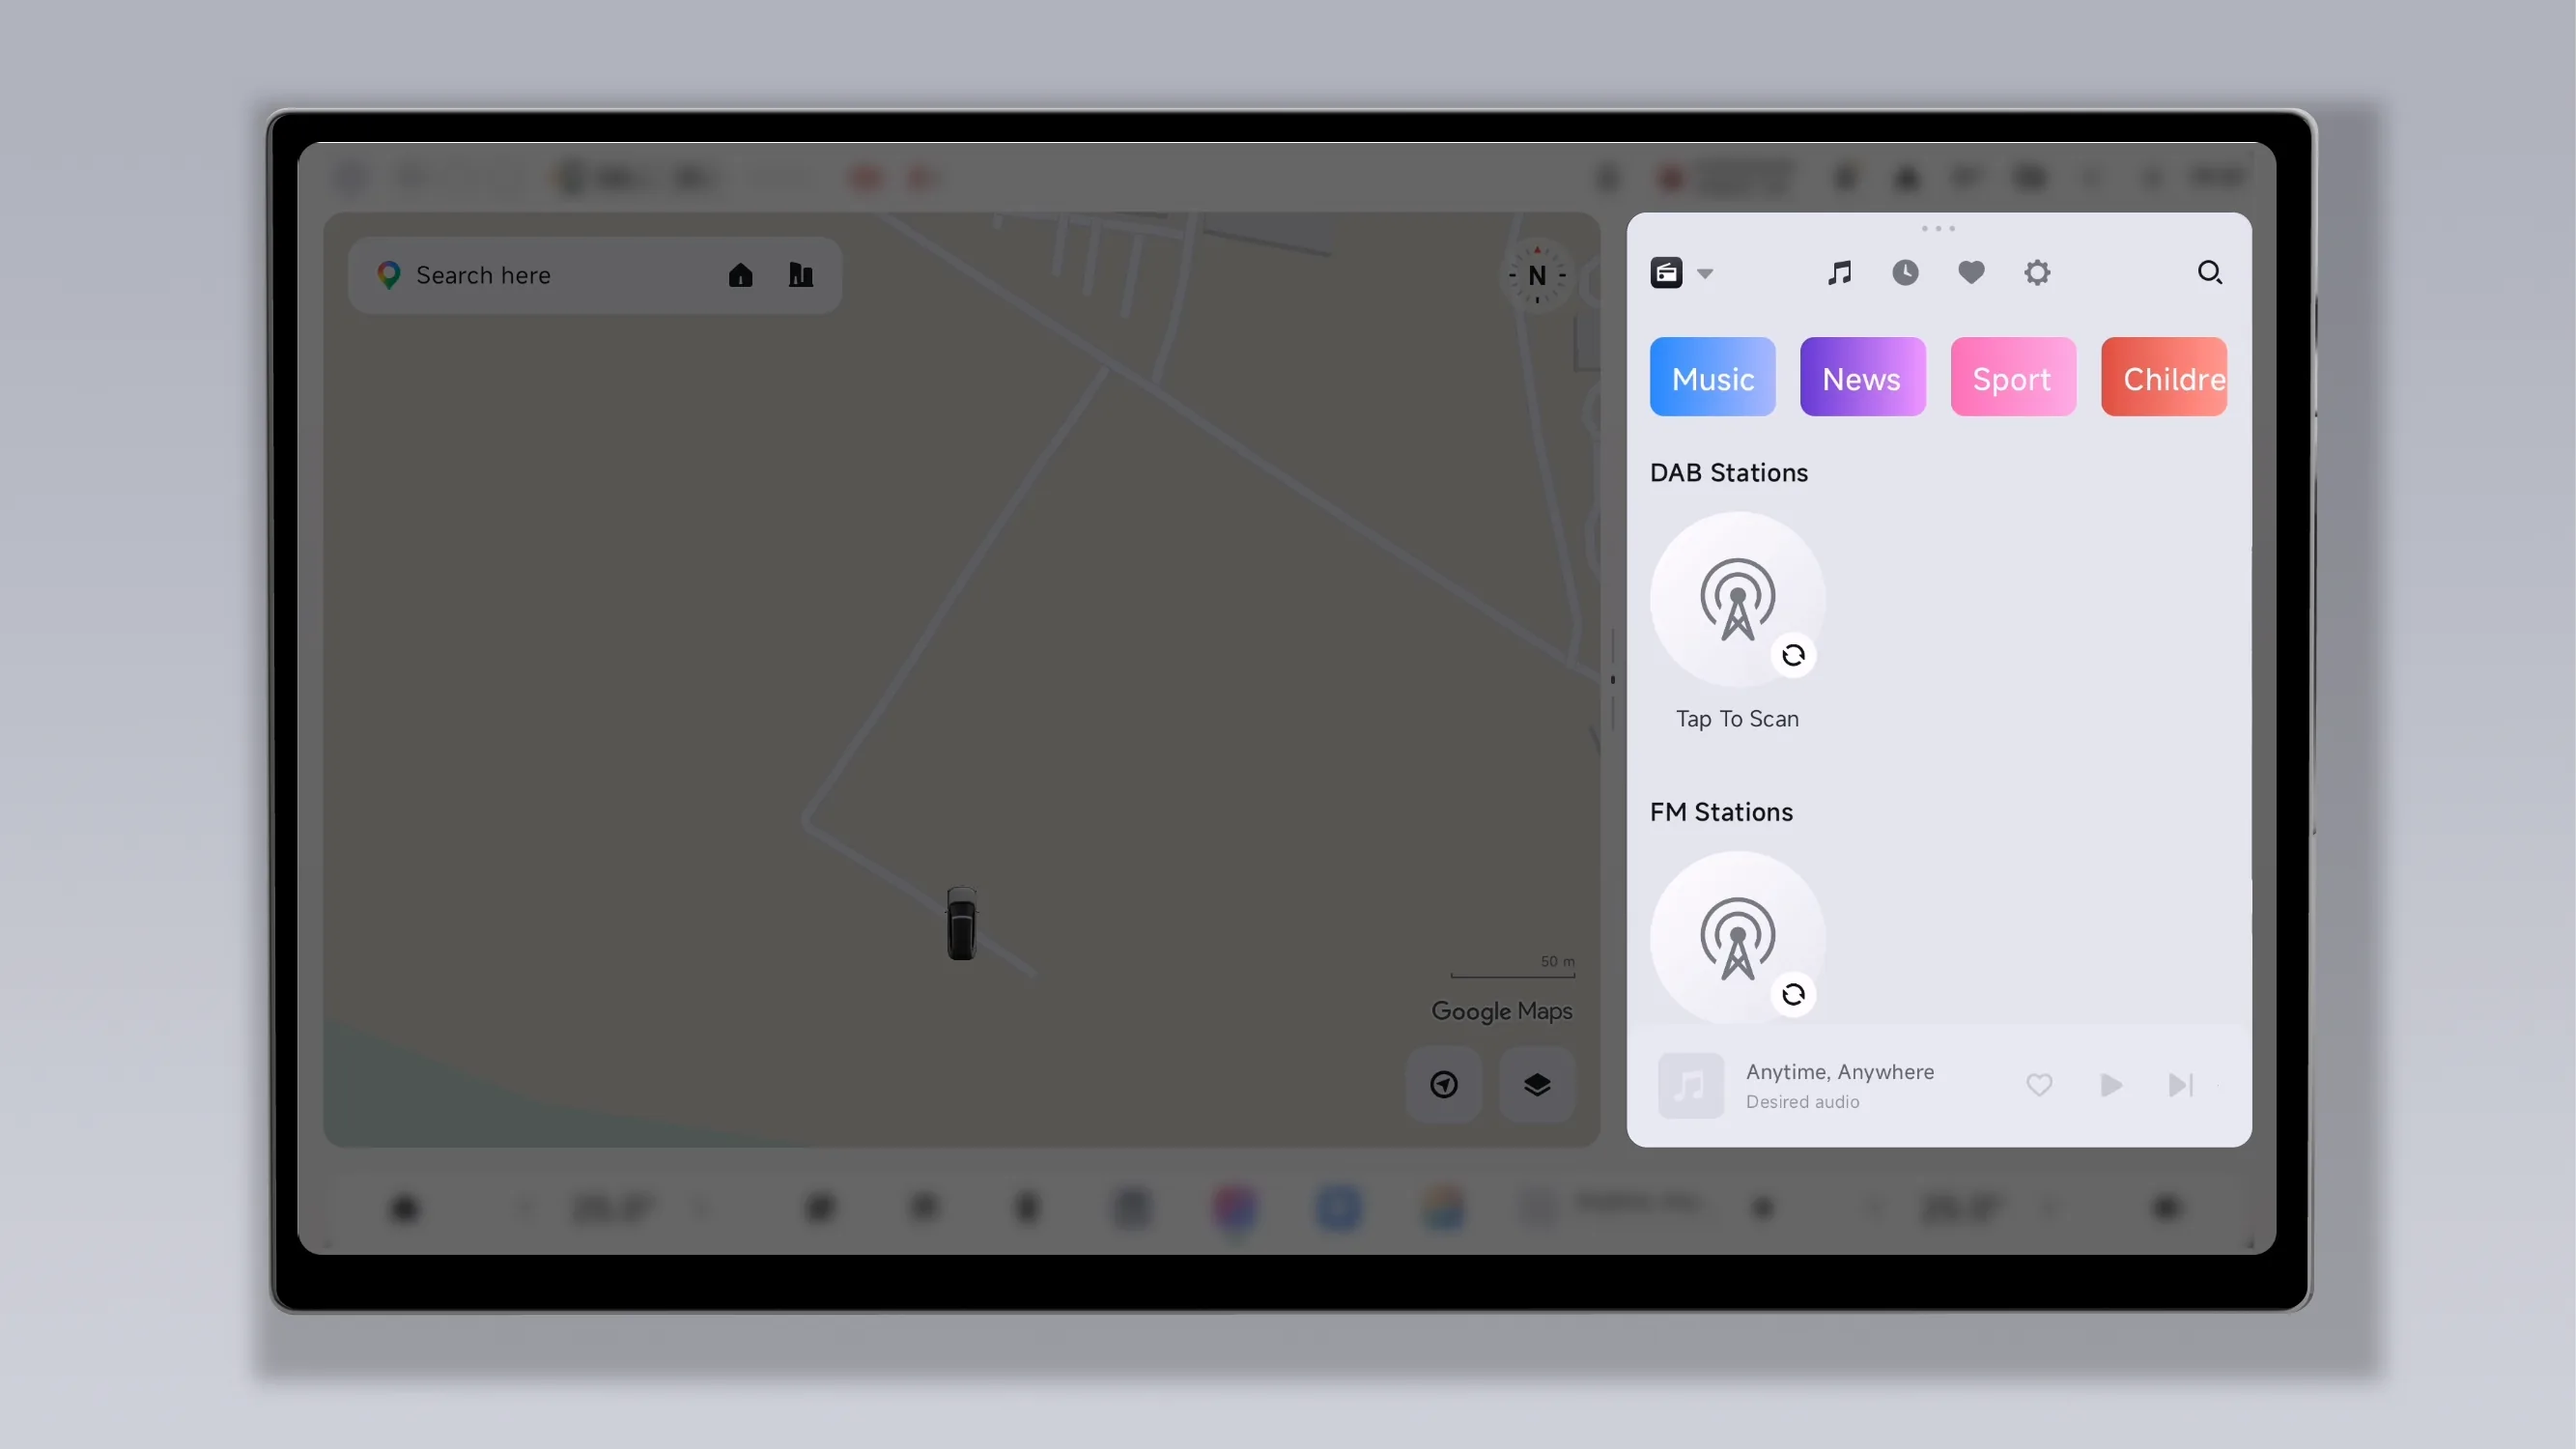
Narrow screen display mode.
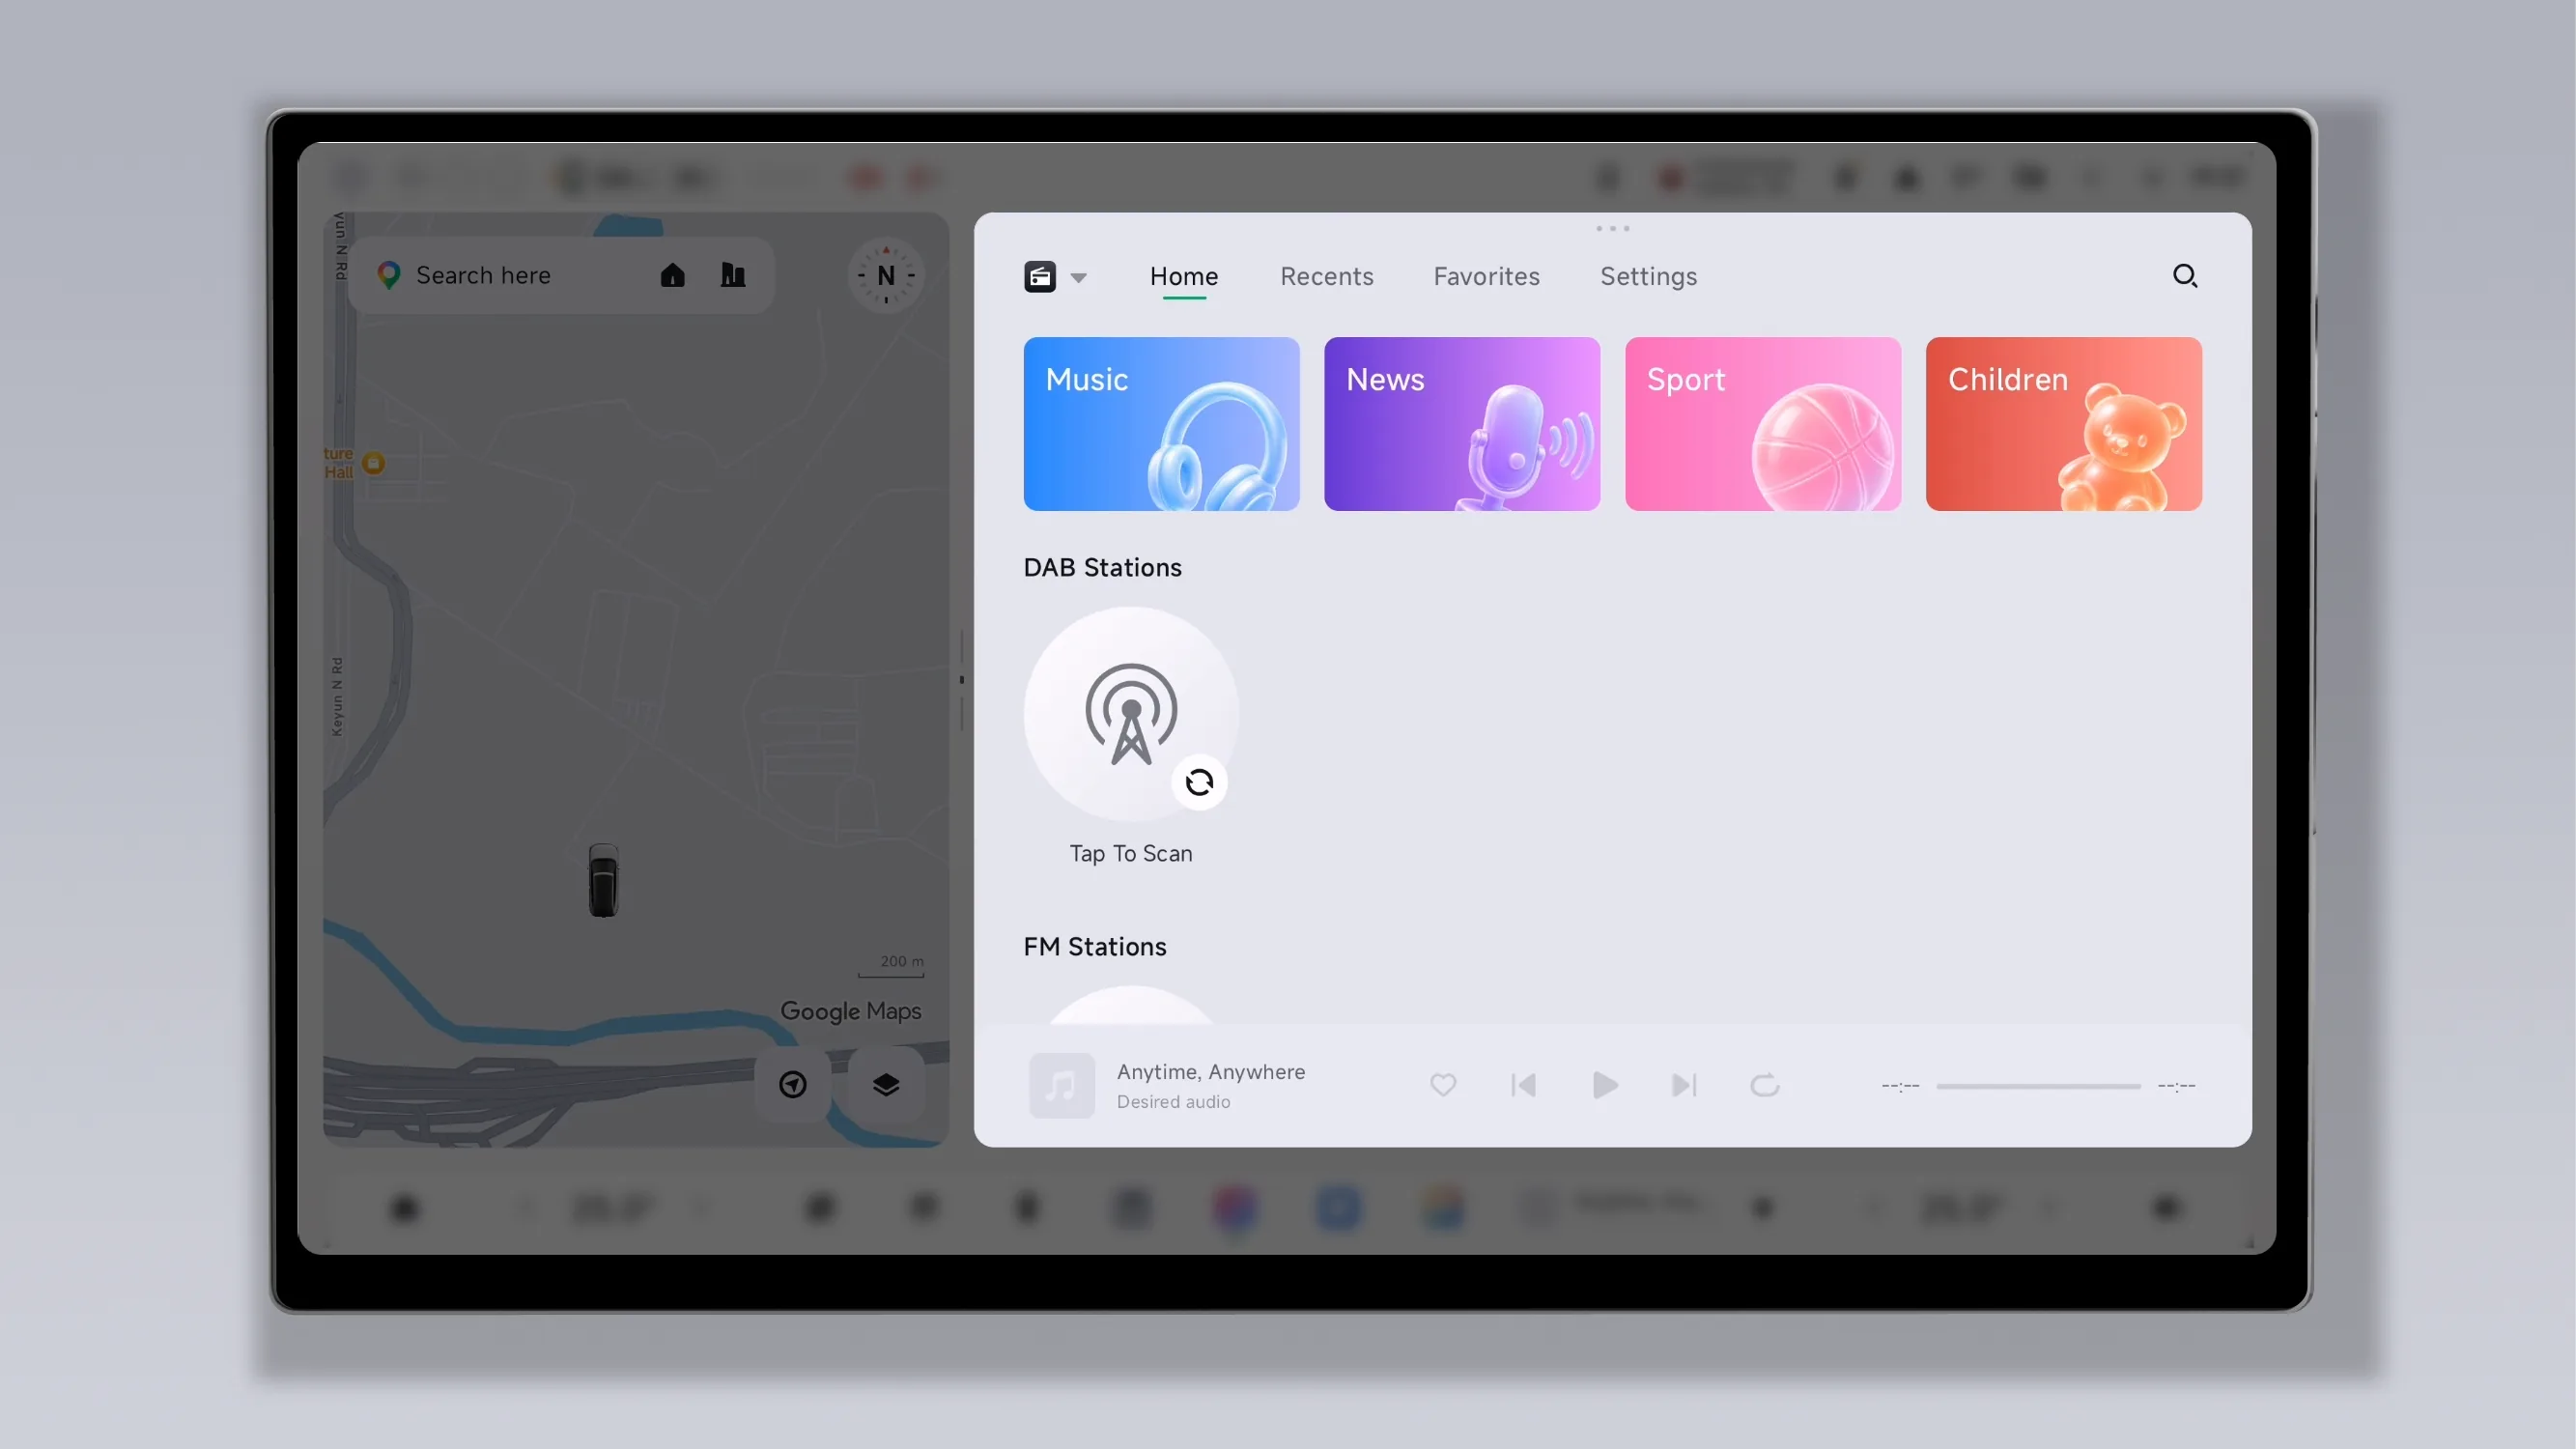
Split-screen display mode.
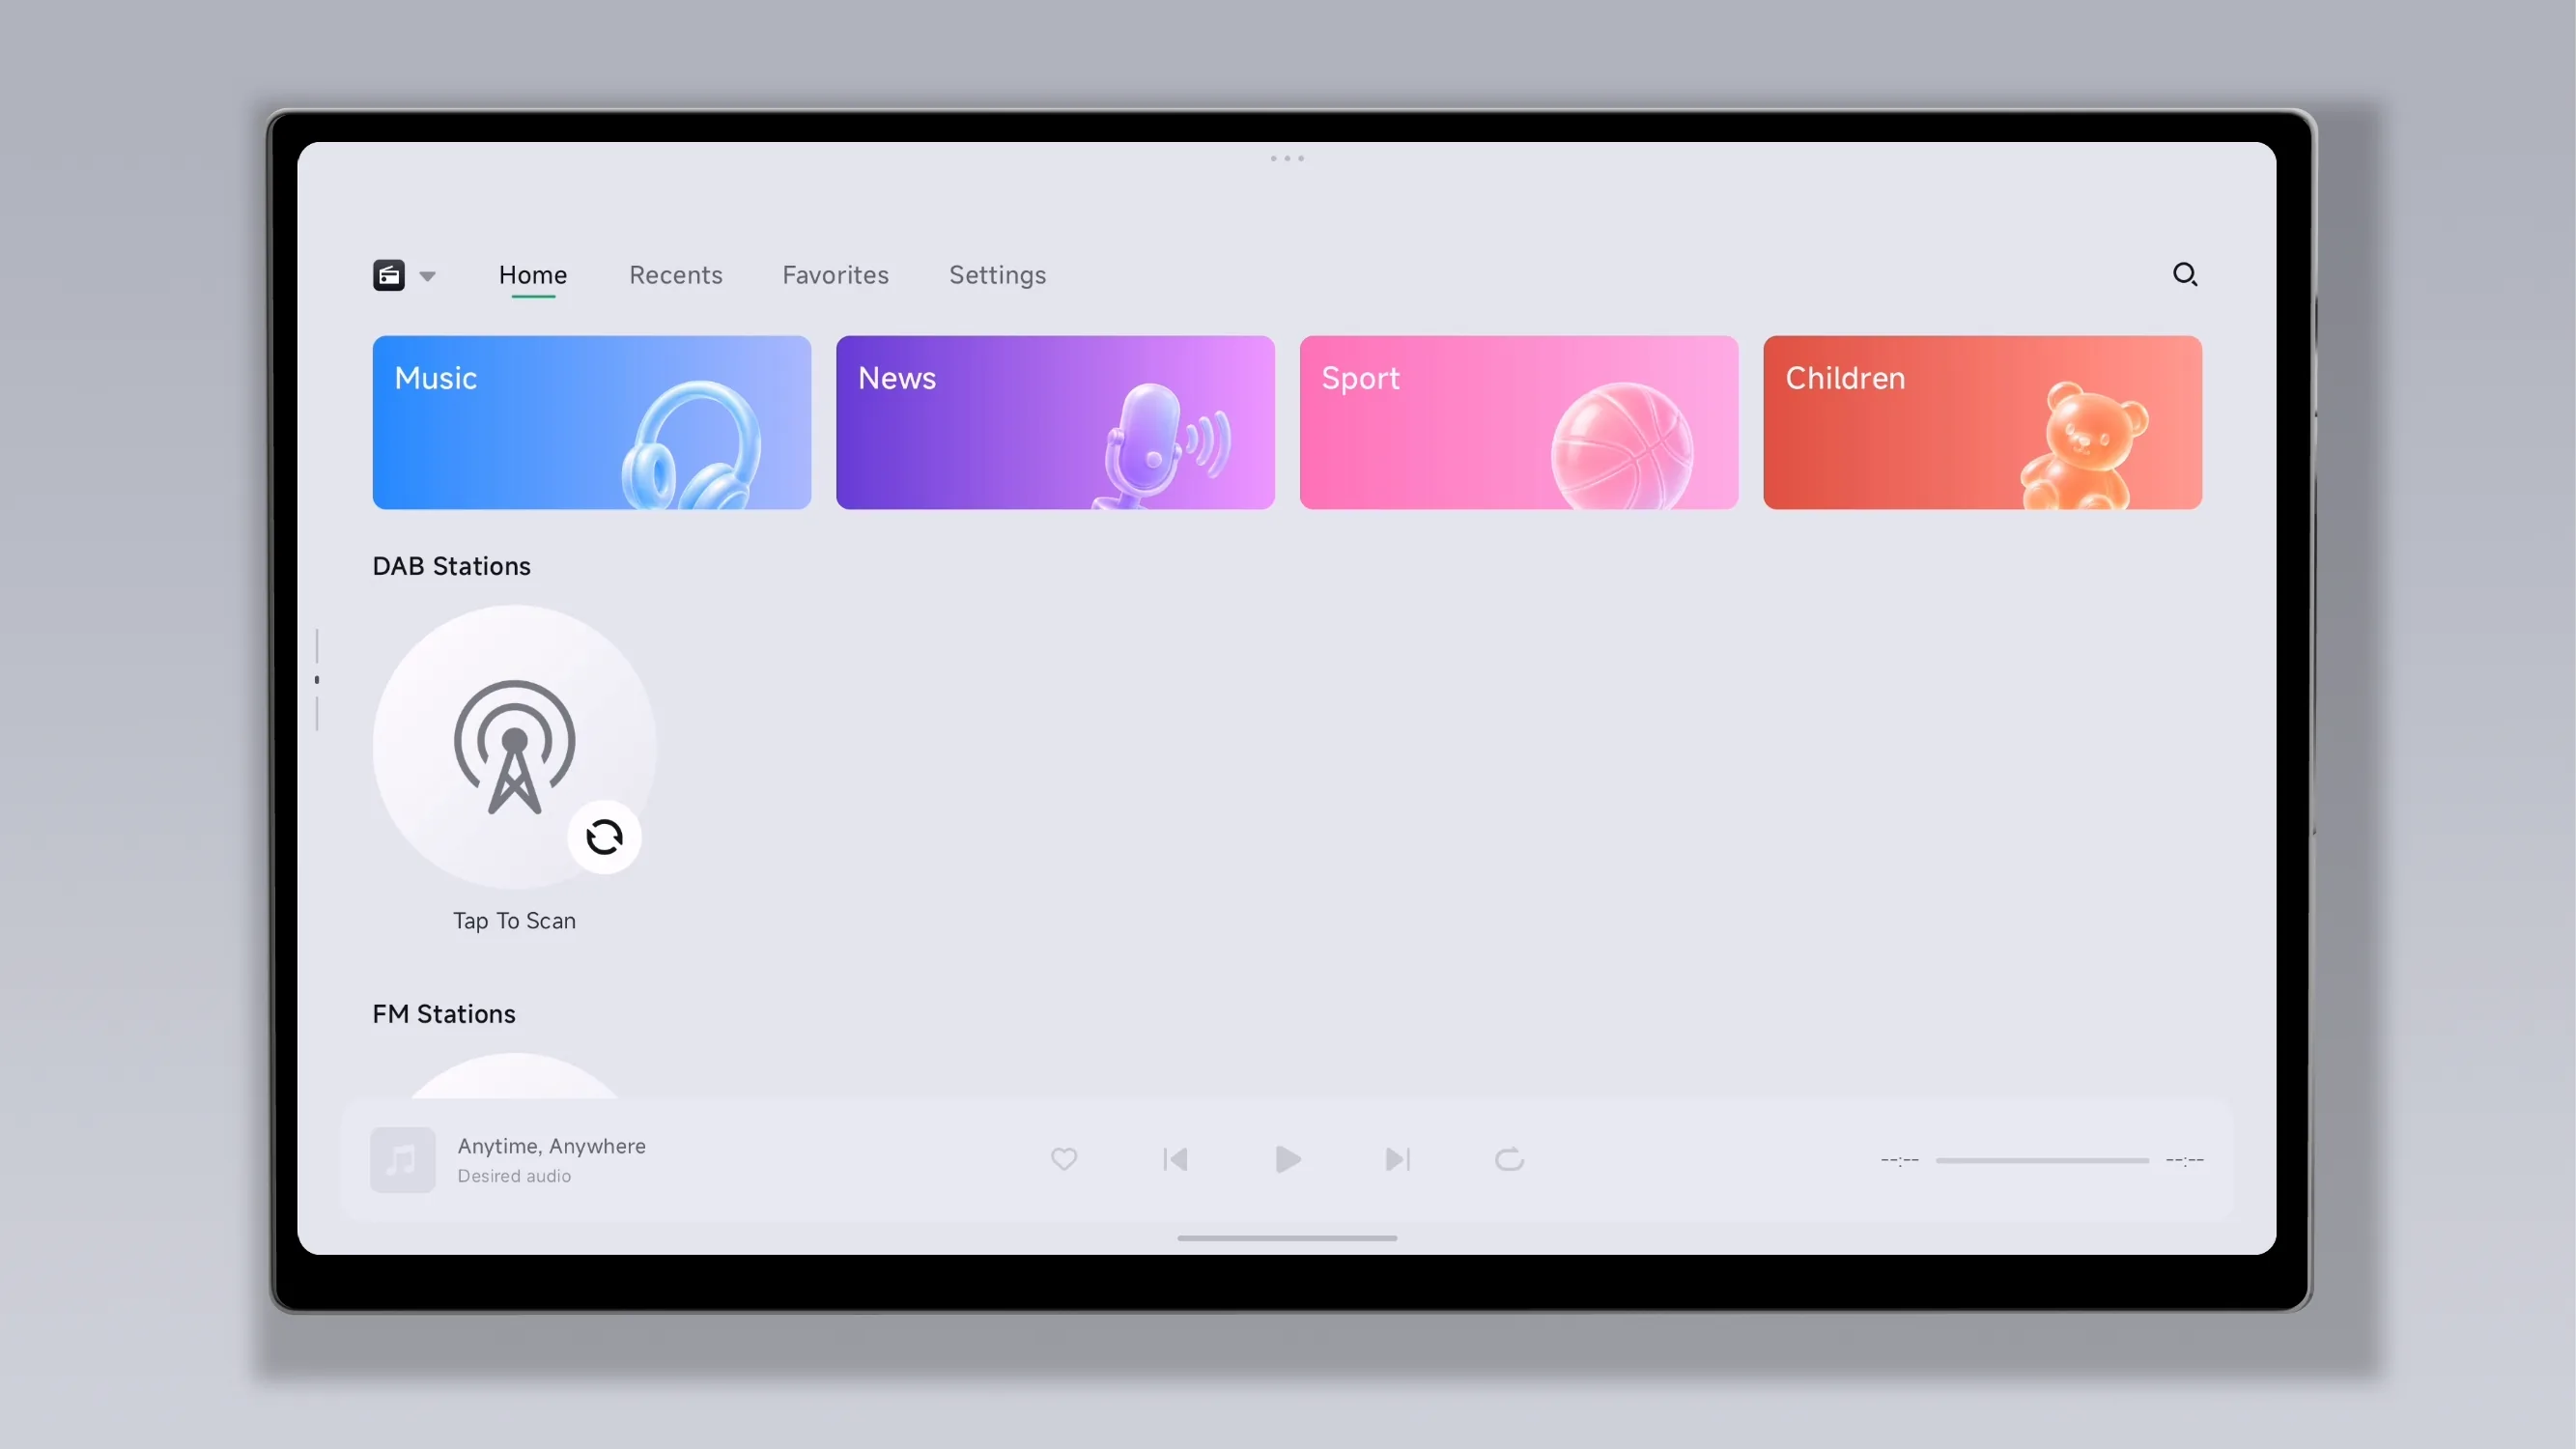
Full-screen display mode.
Tips Supported window sizes may vary between different applications. Some applications do not support window size adjustments. Please refer to the actual application window.
Adjust via the window toolbar:
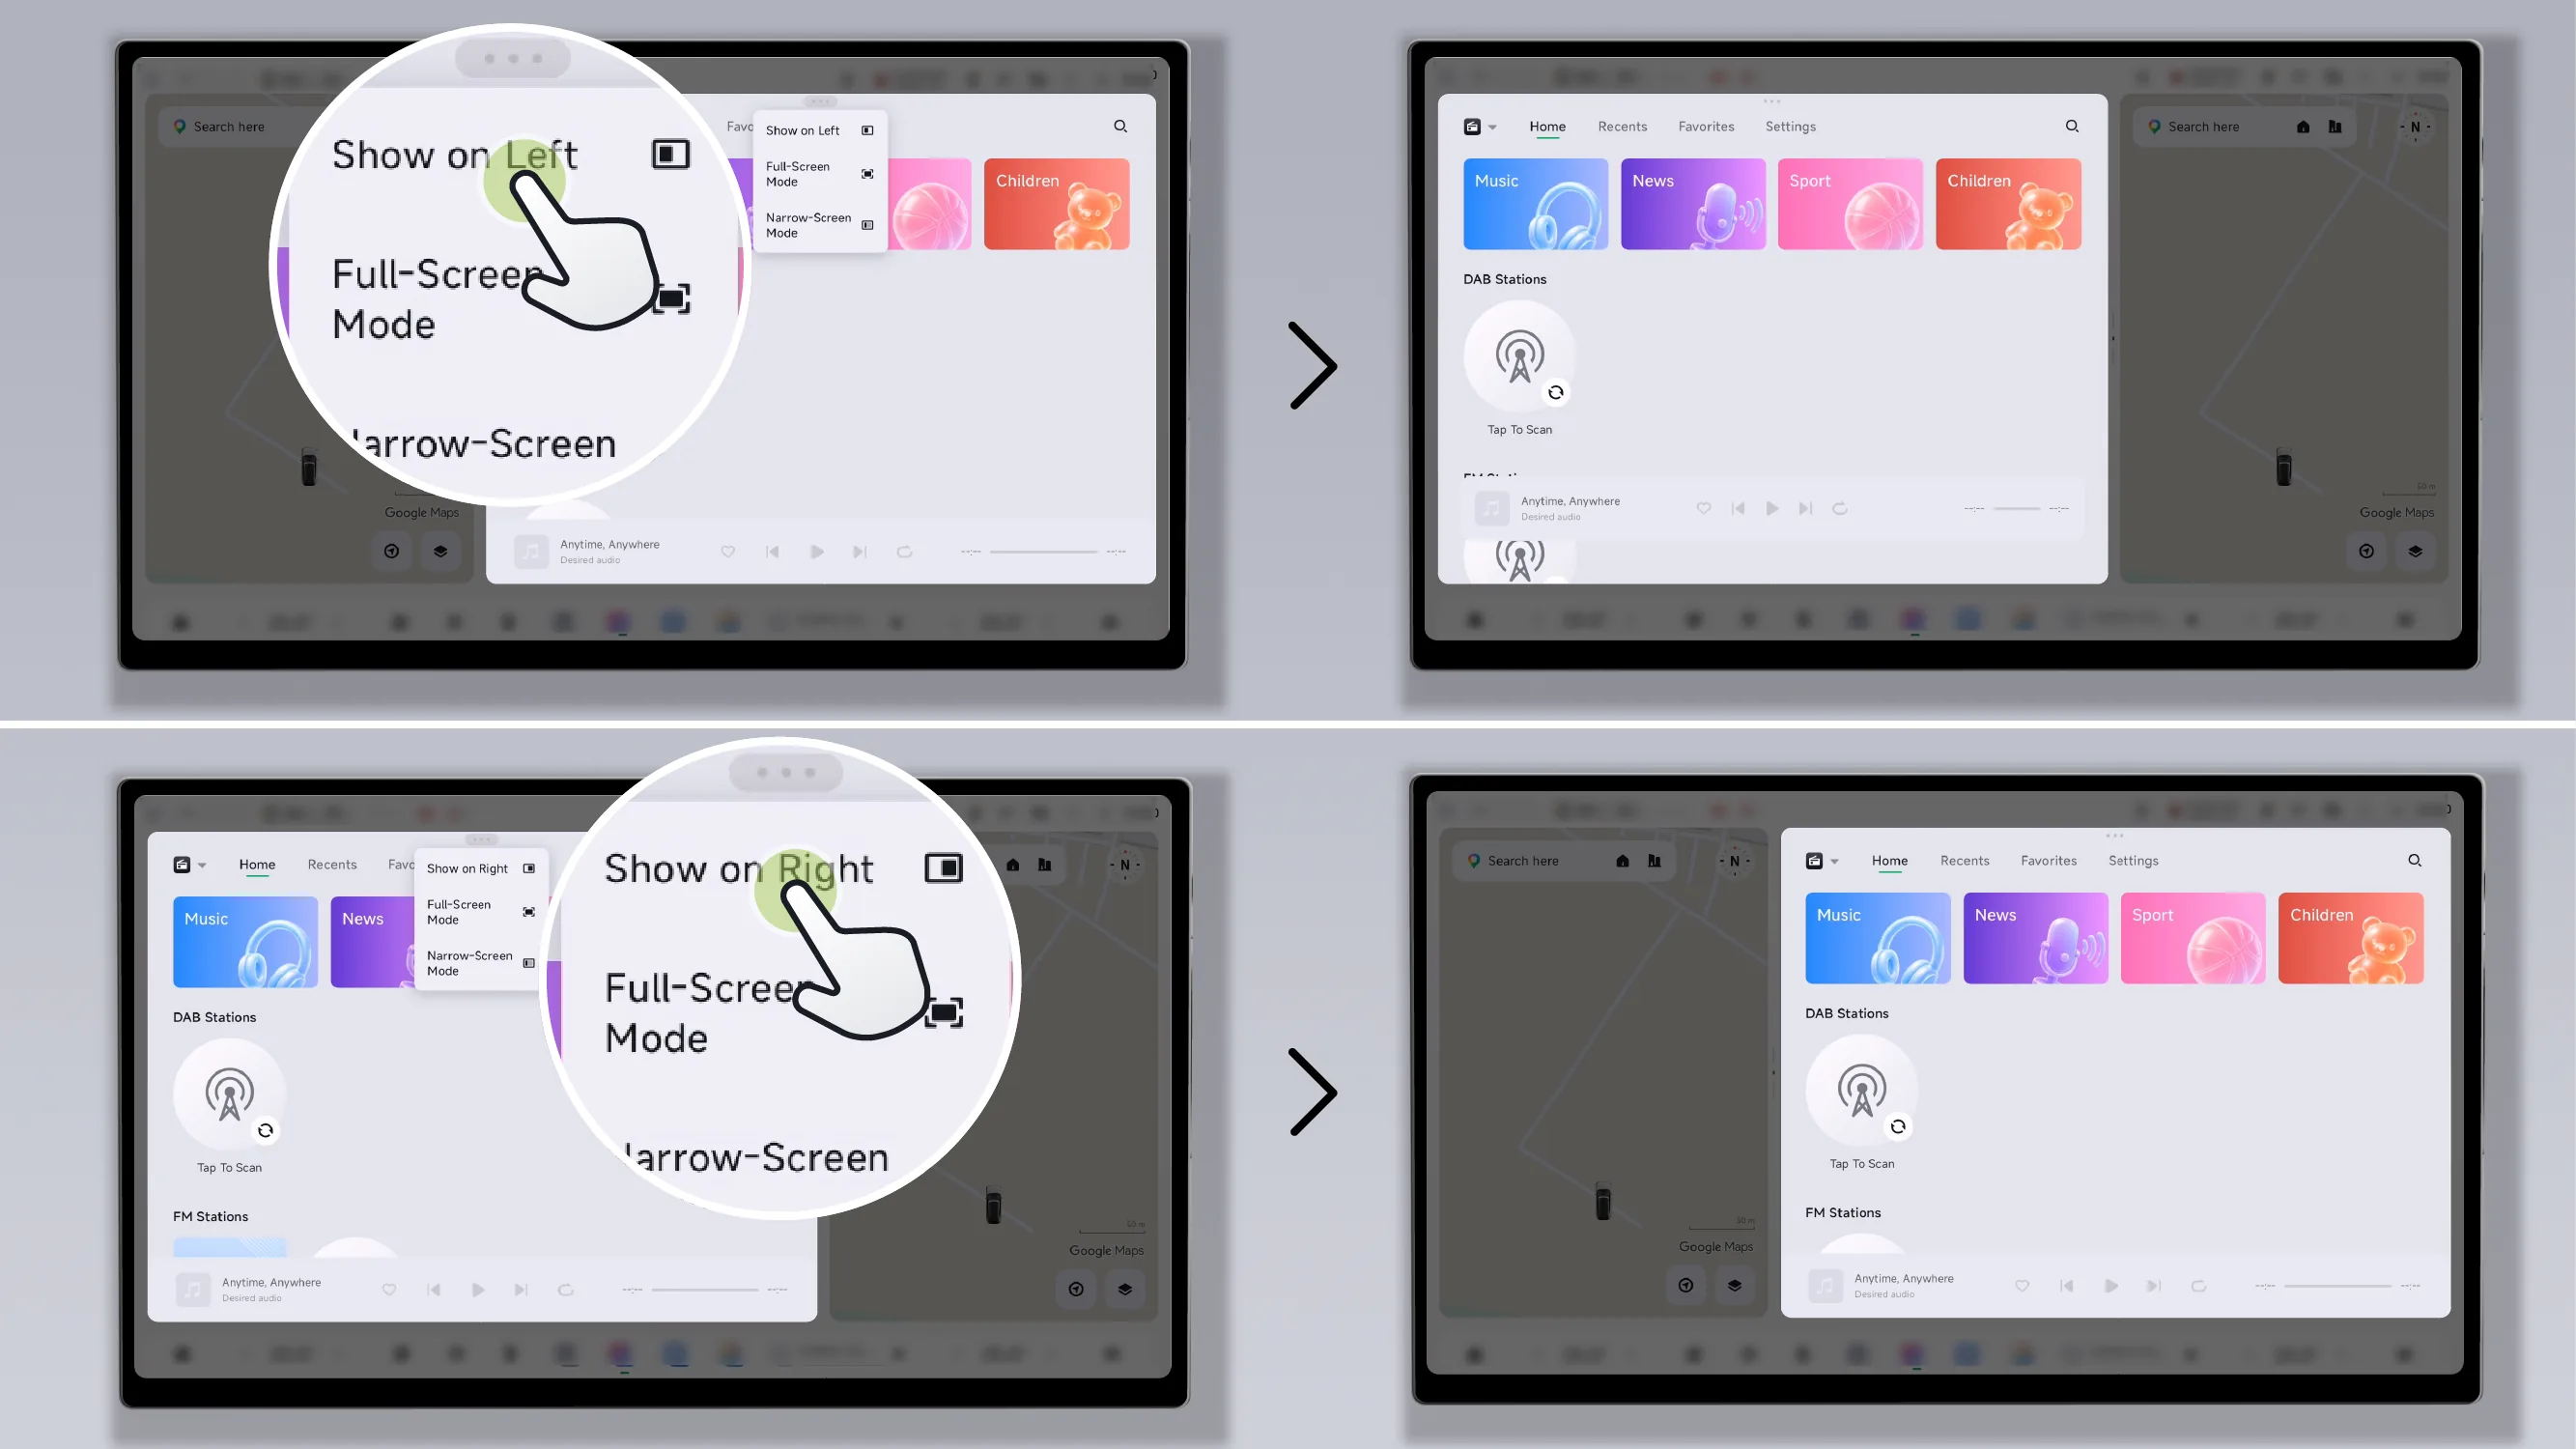
In narrow-screen/split-screen mode, tap on the toolbar. or Adjust the window to display on the left side or the right side.
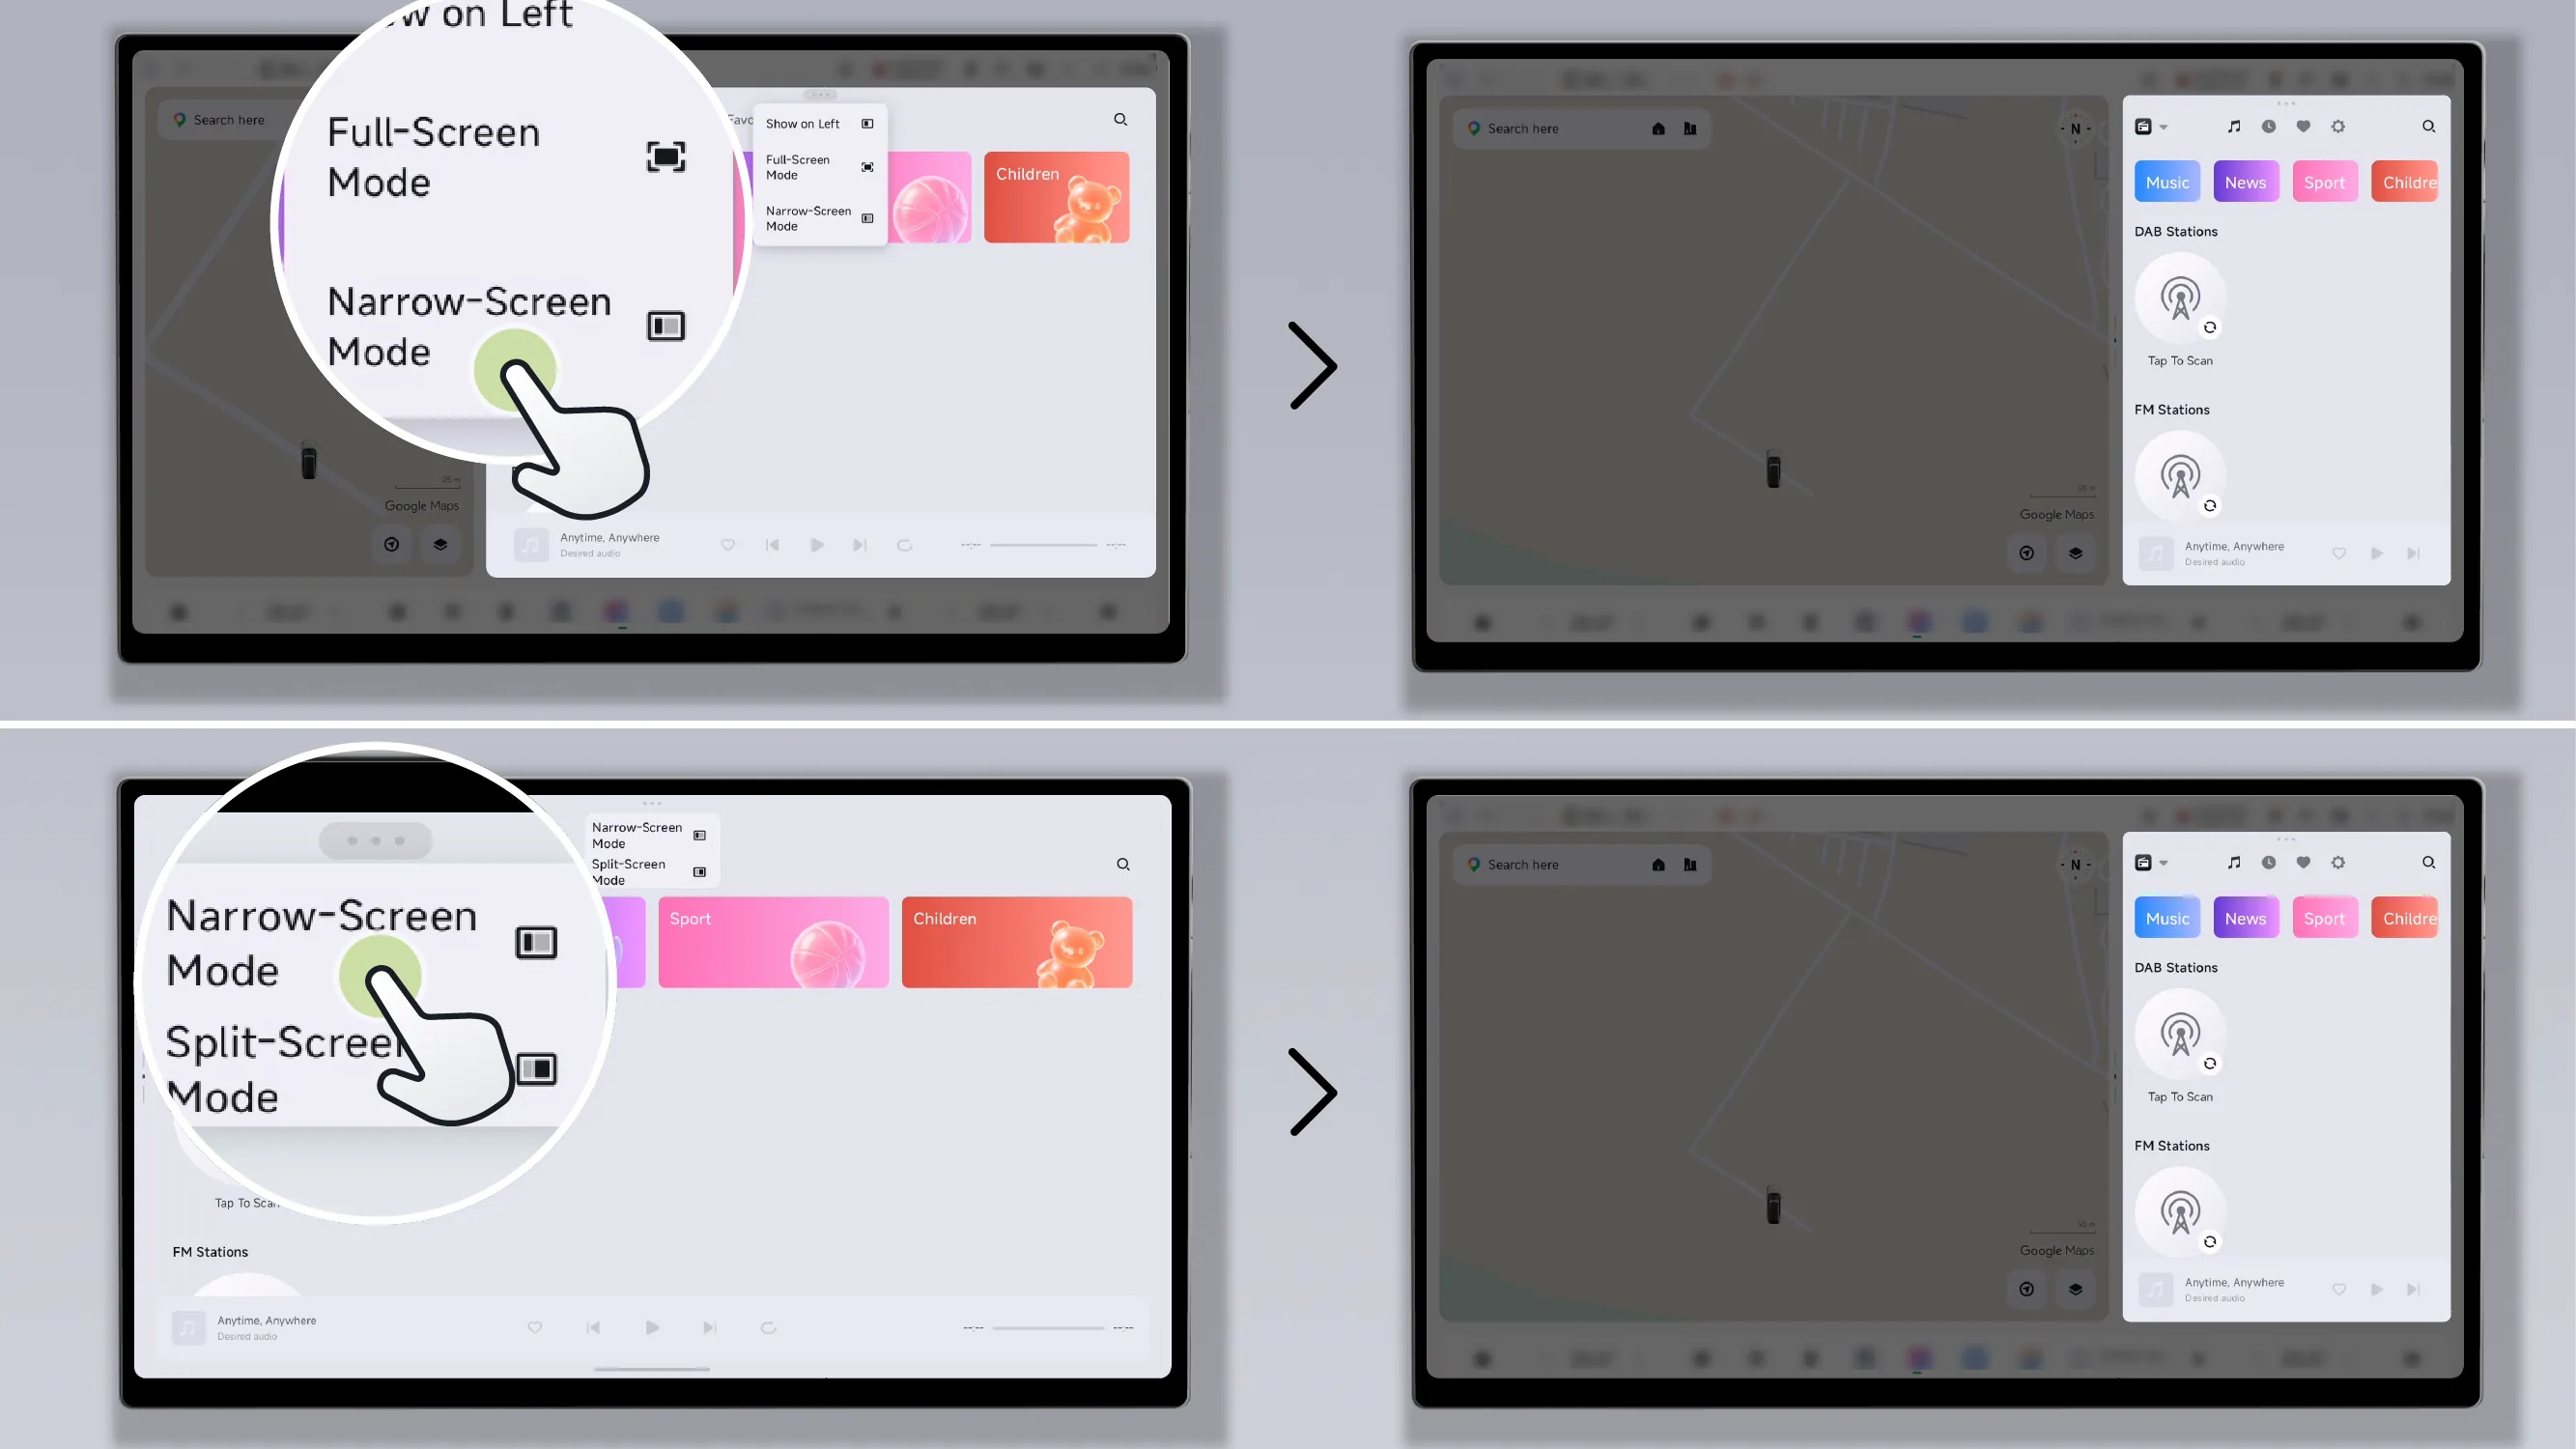
In full-screen/split-screen mode, tap on the toolbar. , adjust the window to narrow-screen display.
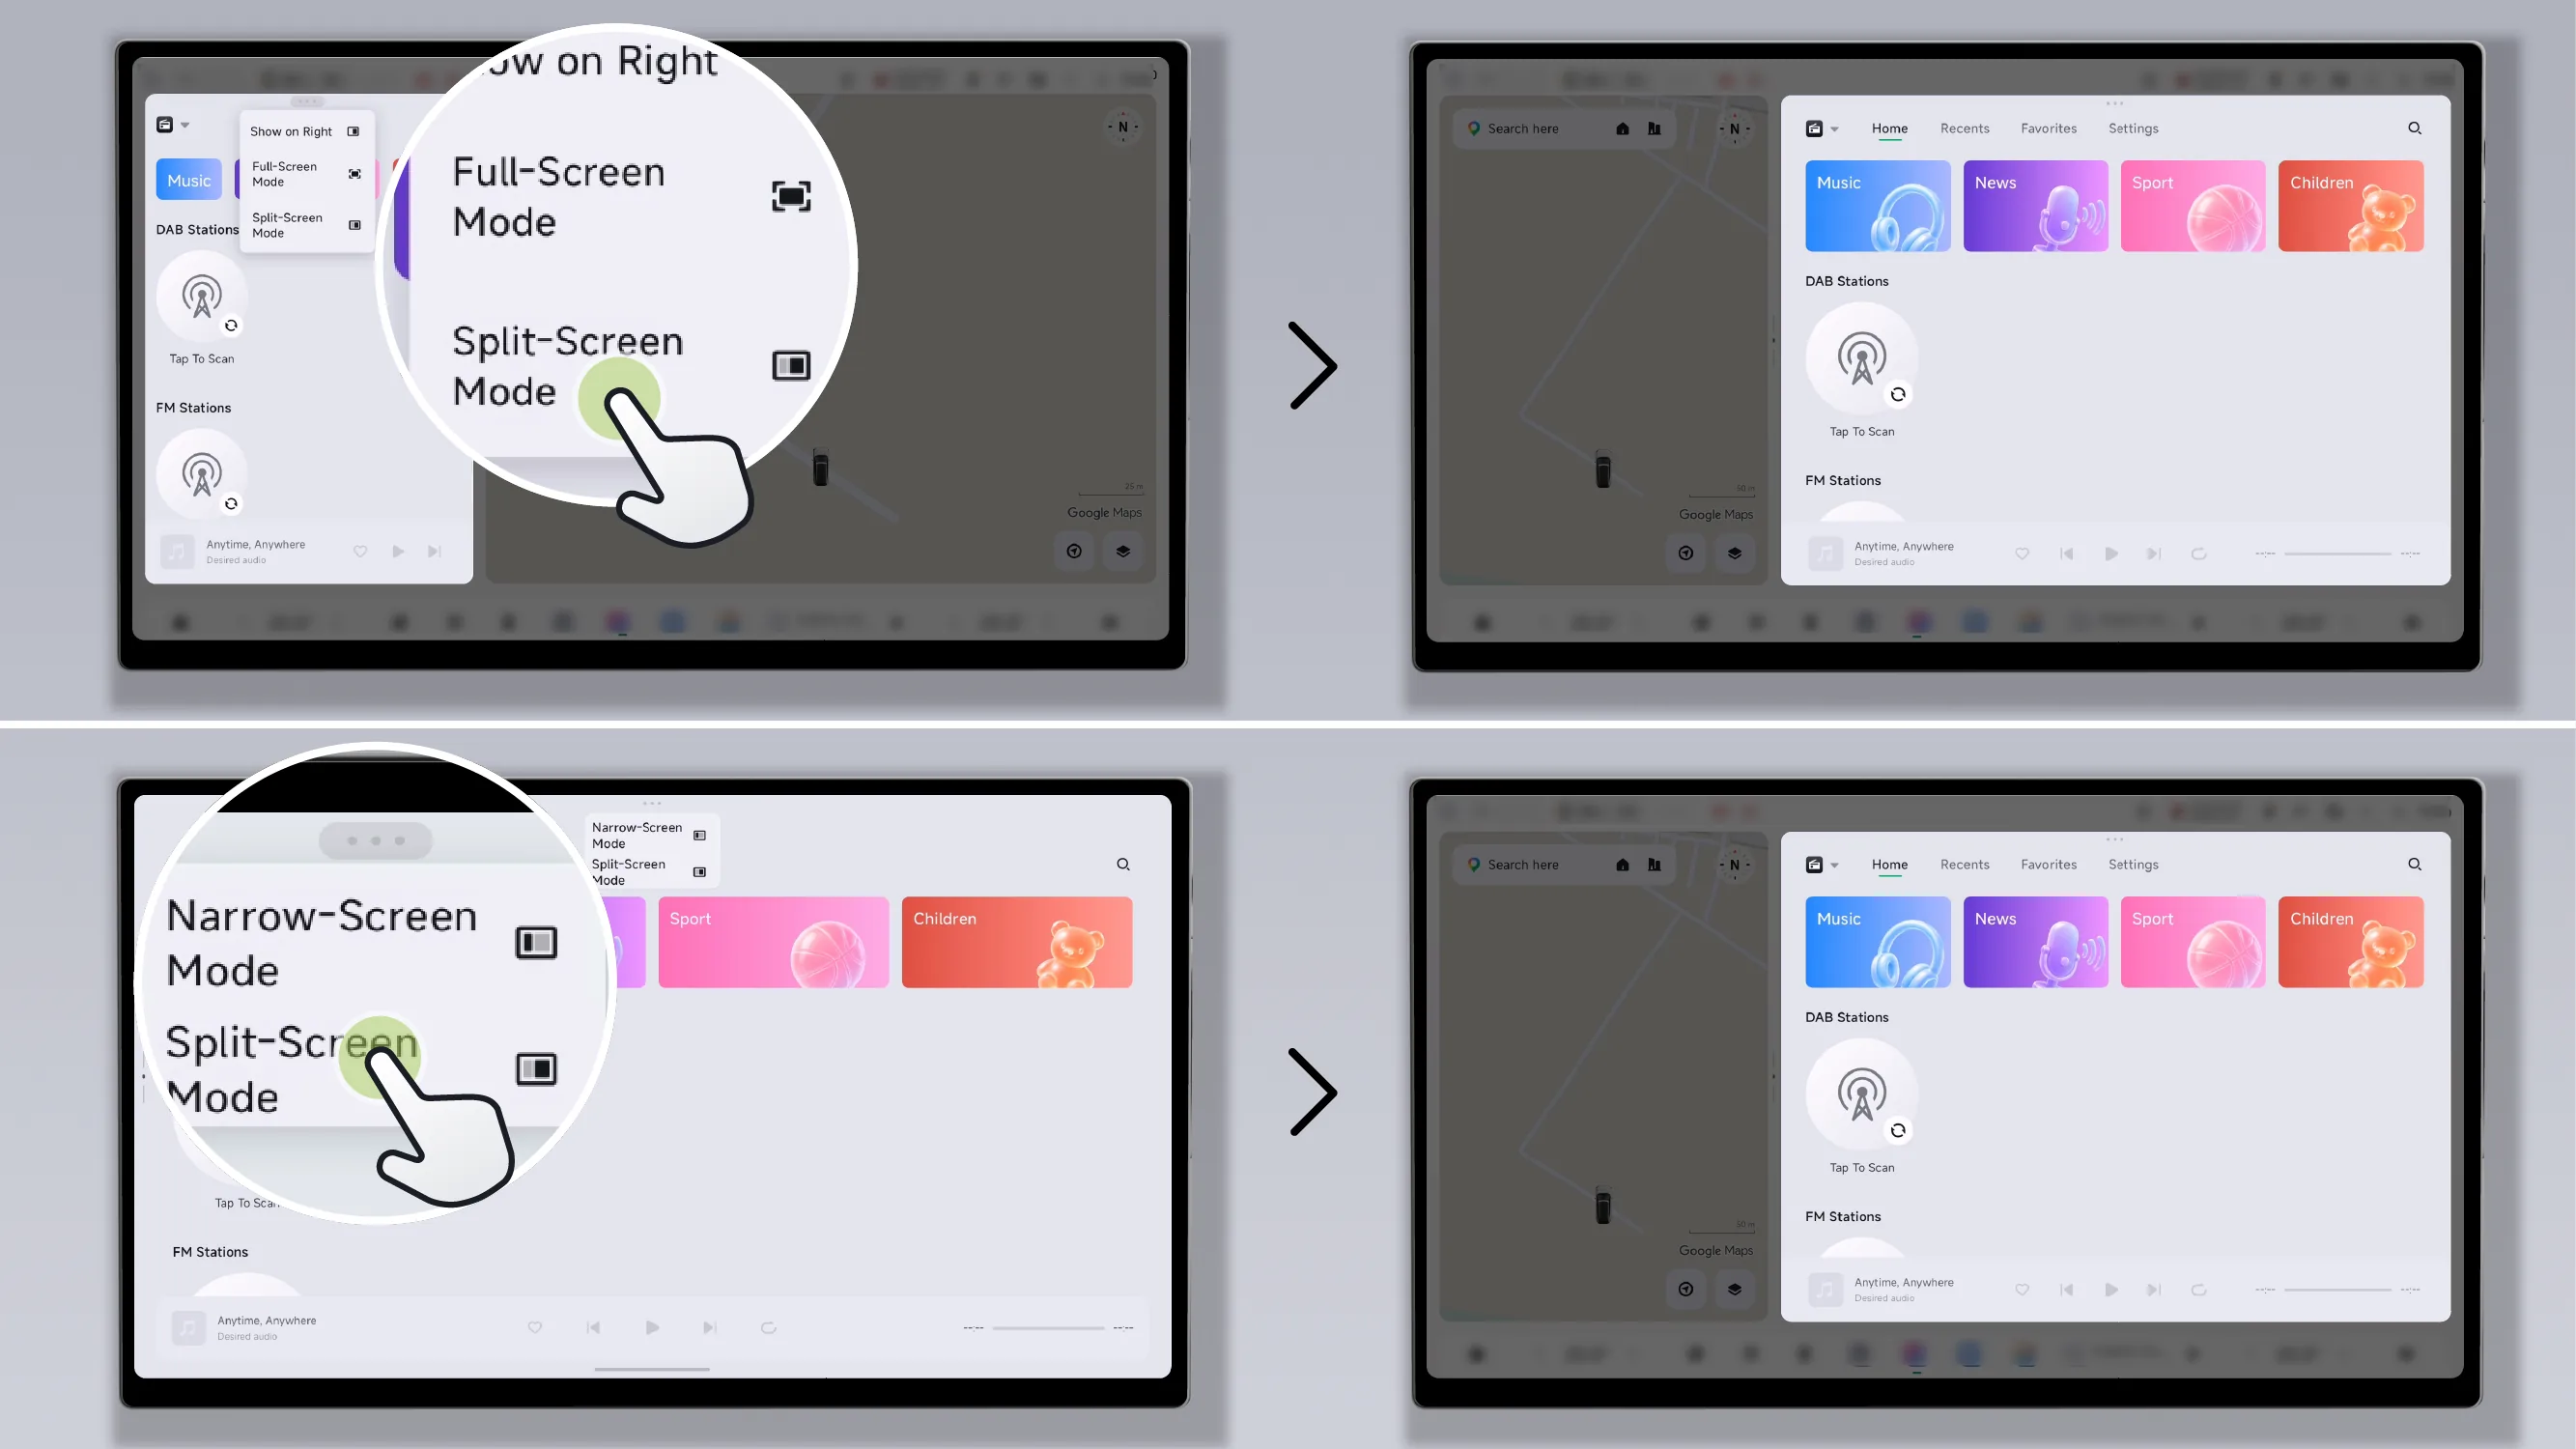
In narrow-screen/full-screen mode, tap on the toolbar. , adjust the window to split-screen display.
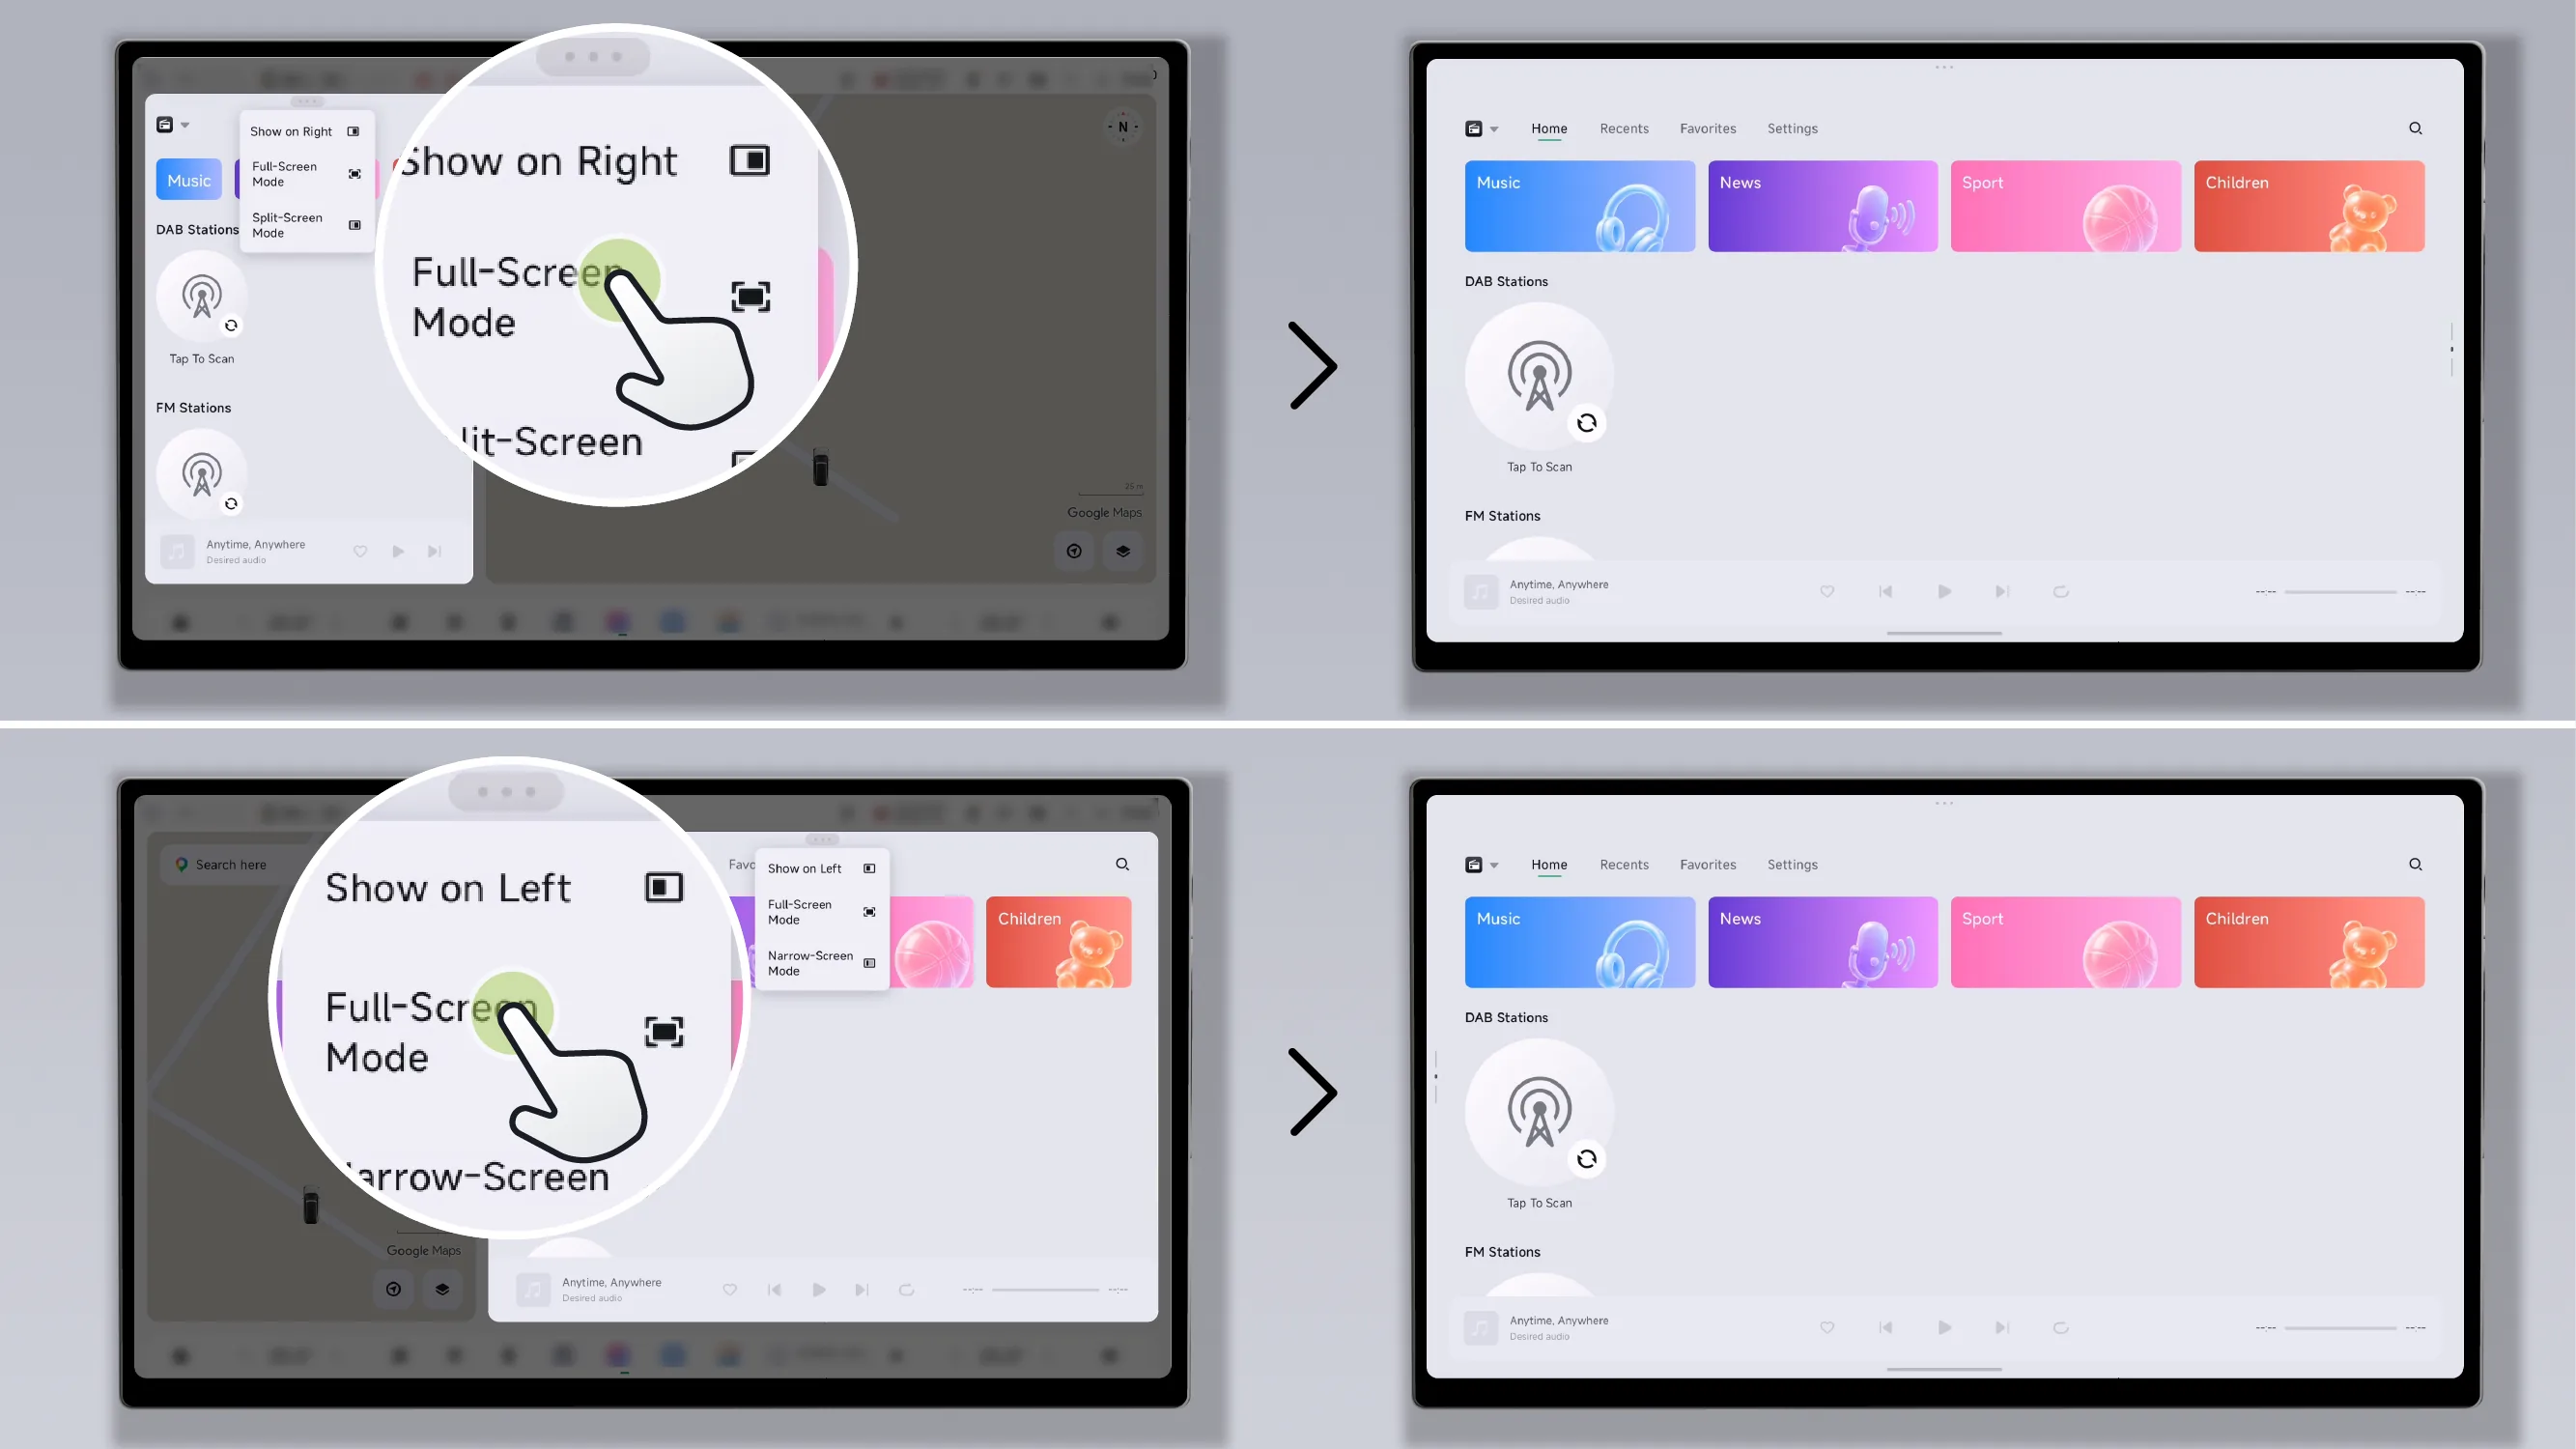
In narrow-screen/split-screen mode, tap on the toolbar. , adjust the window to full-screen display.
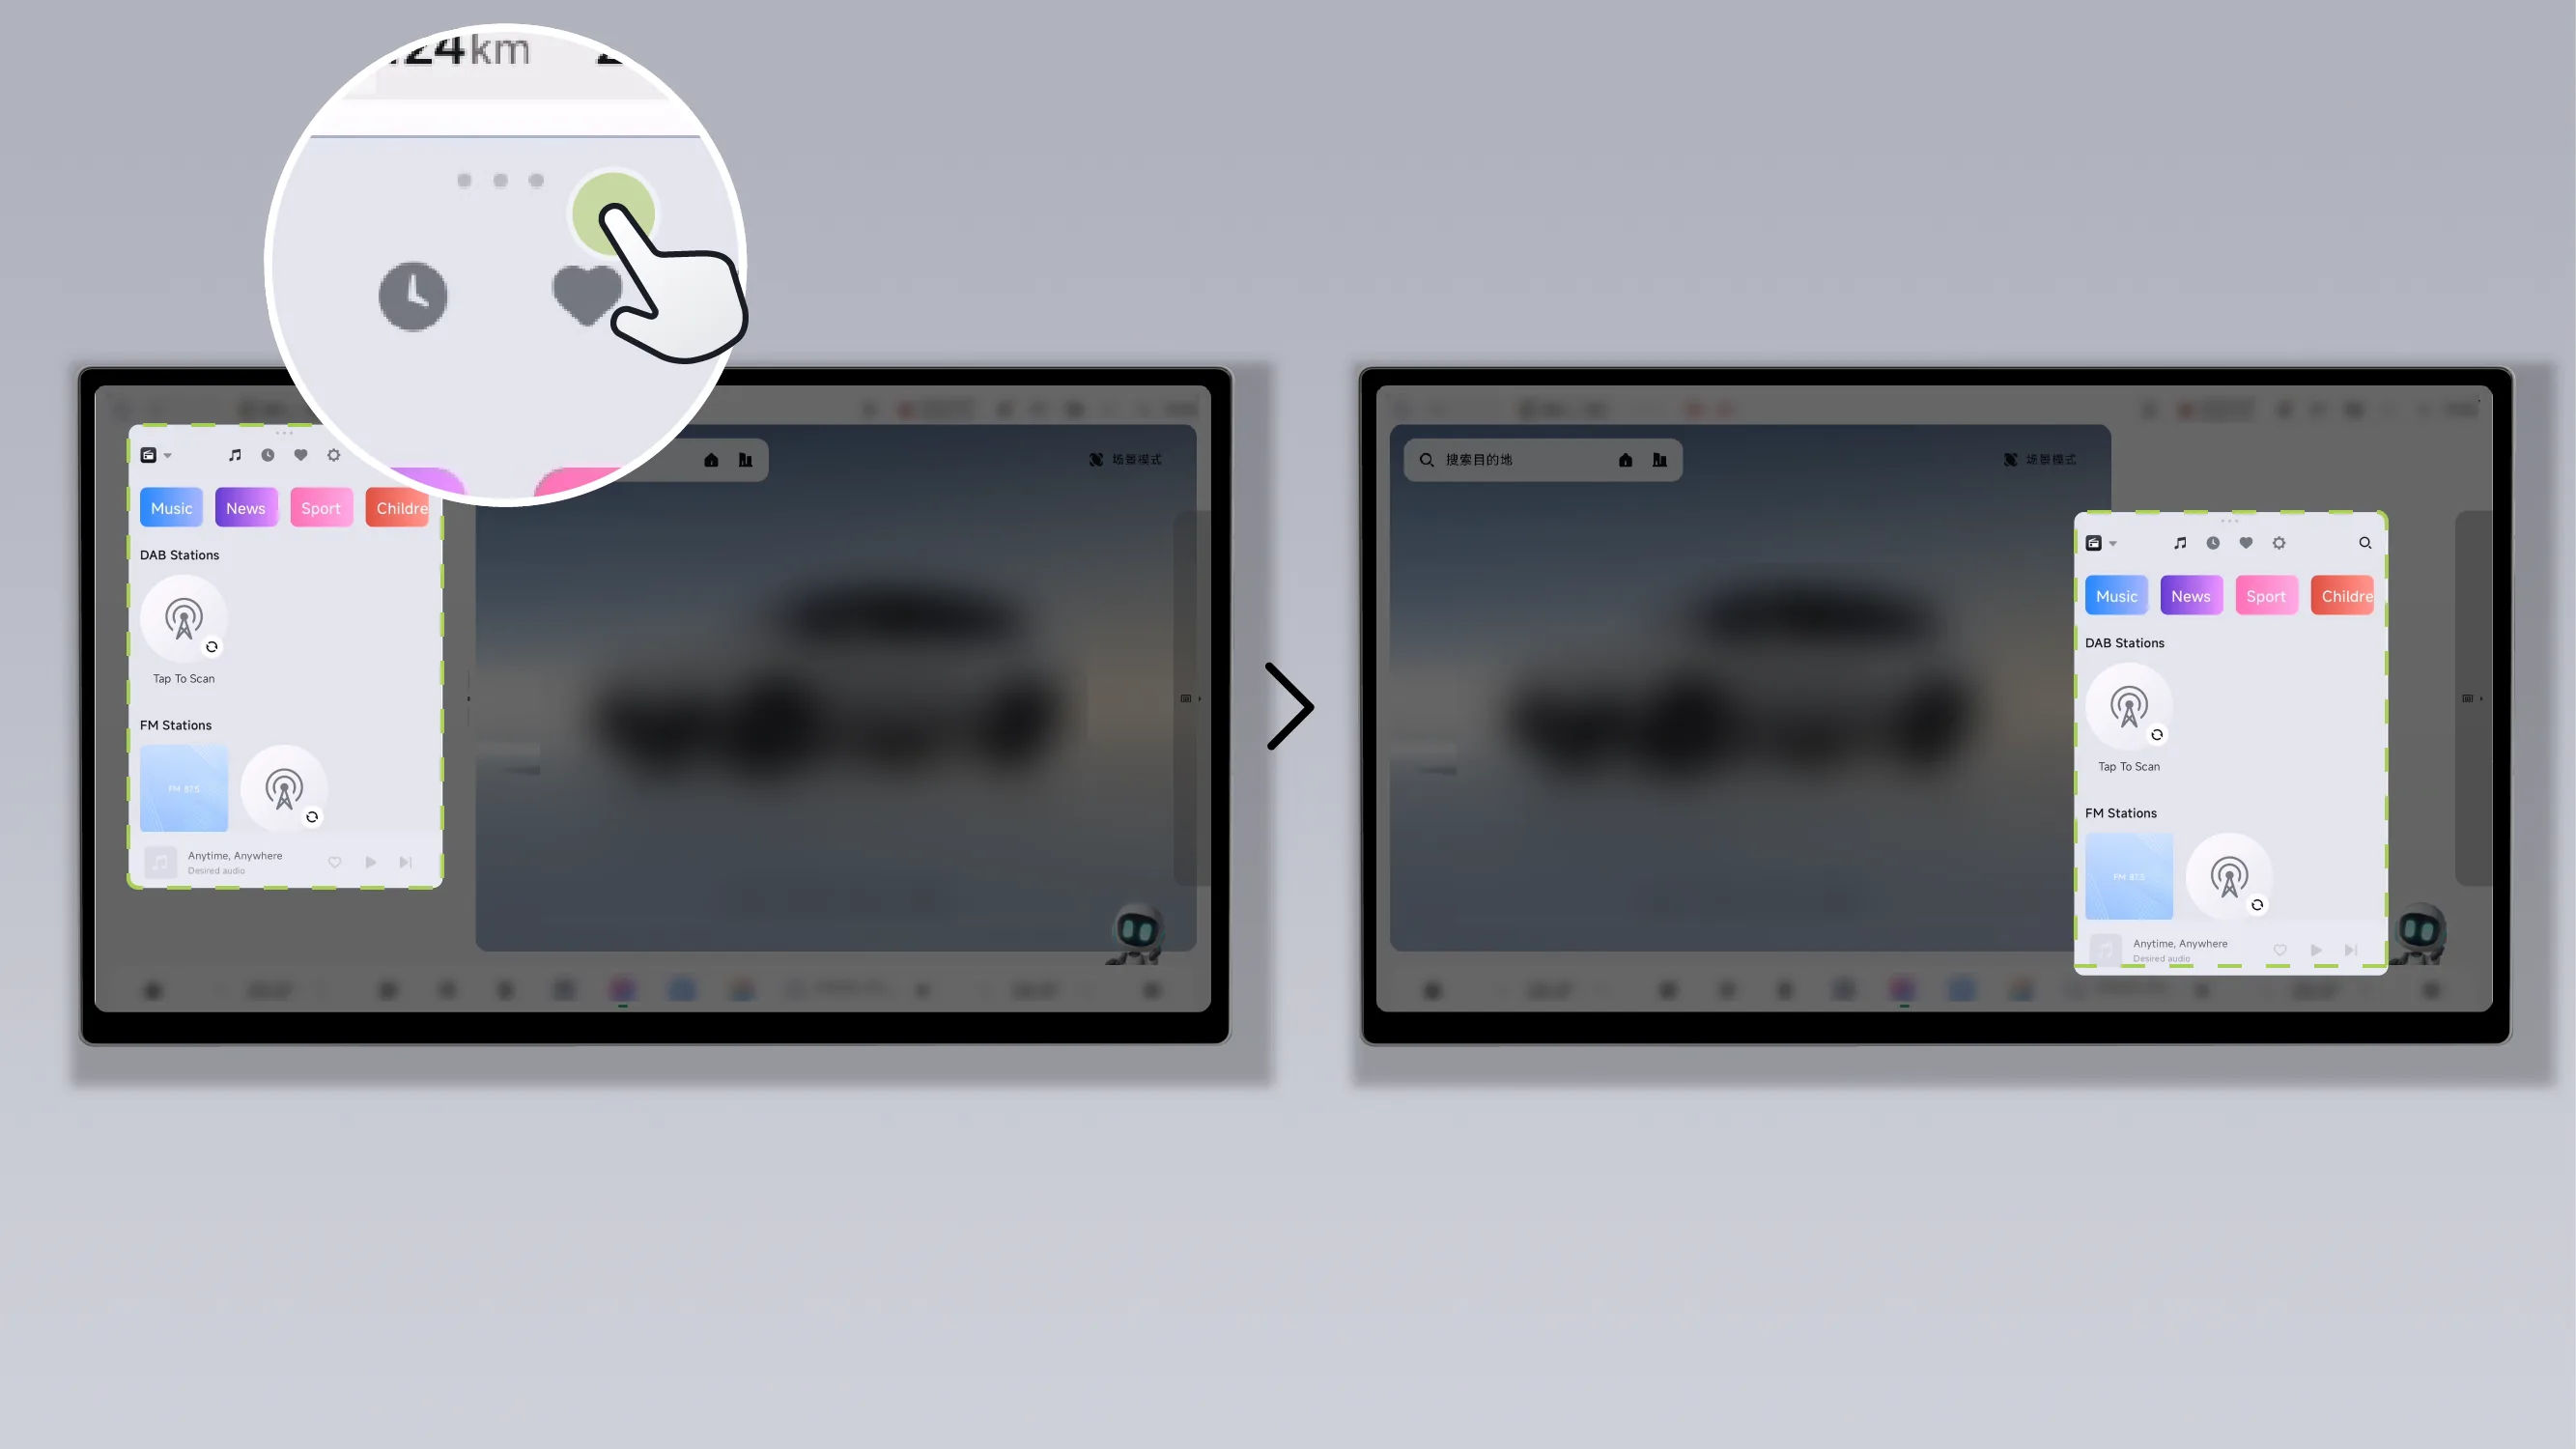
Press and hold the top of the window. Toolbar AreaDrag it to the other side of the screen and release it to switch the window between the left and right sides.
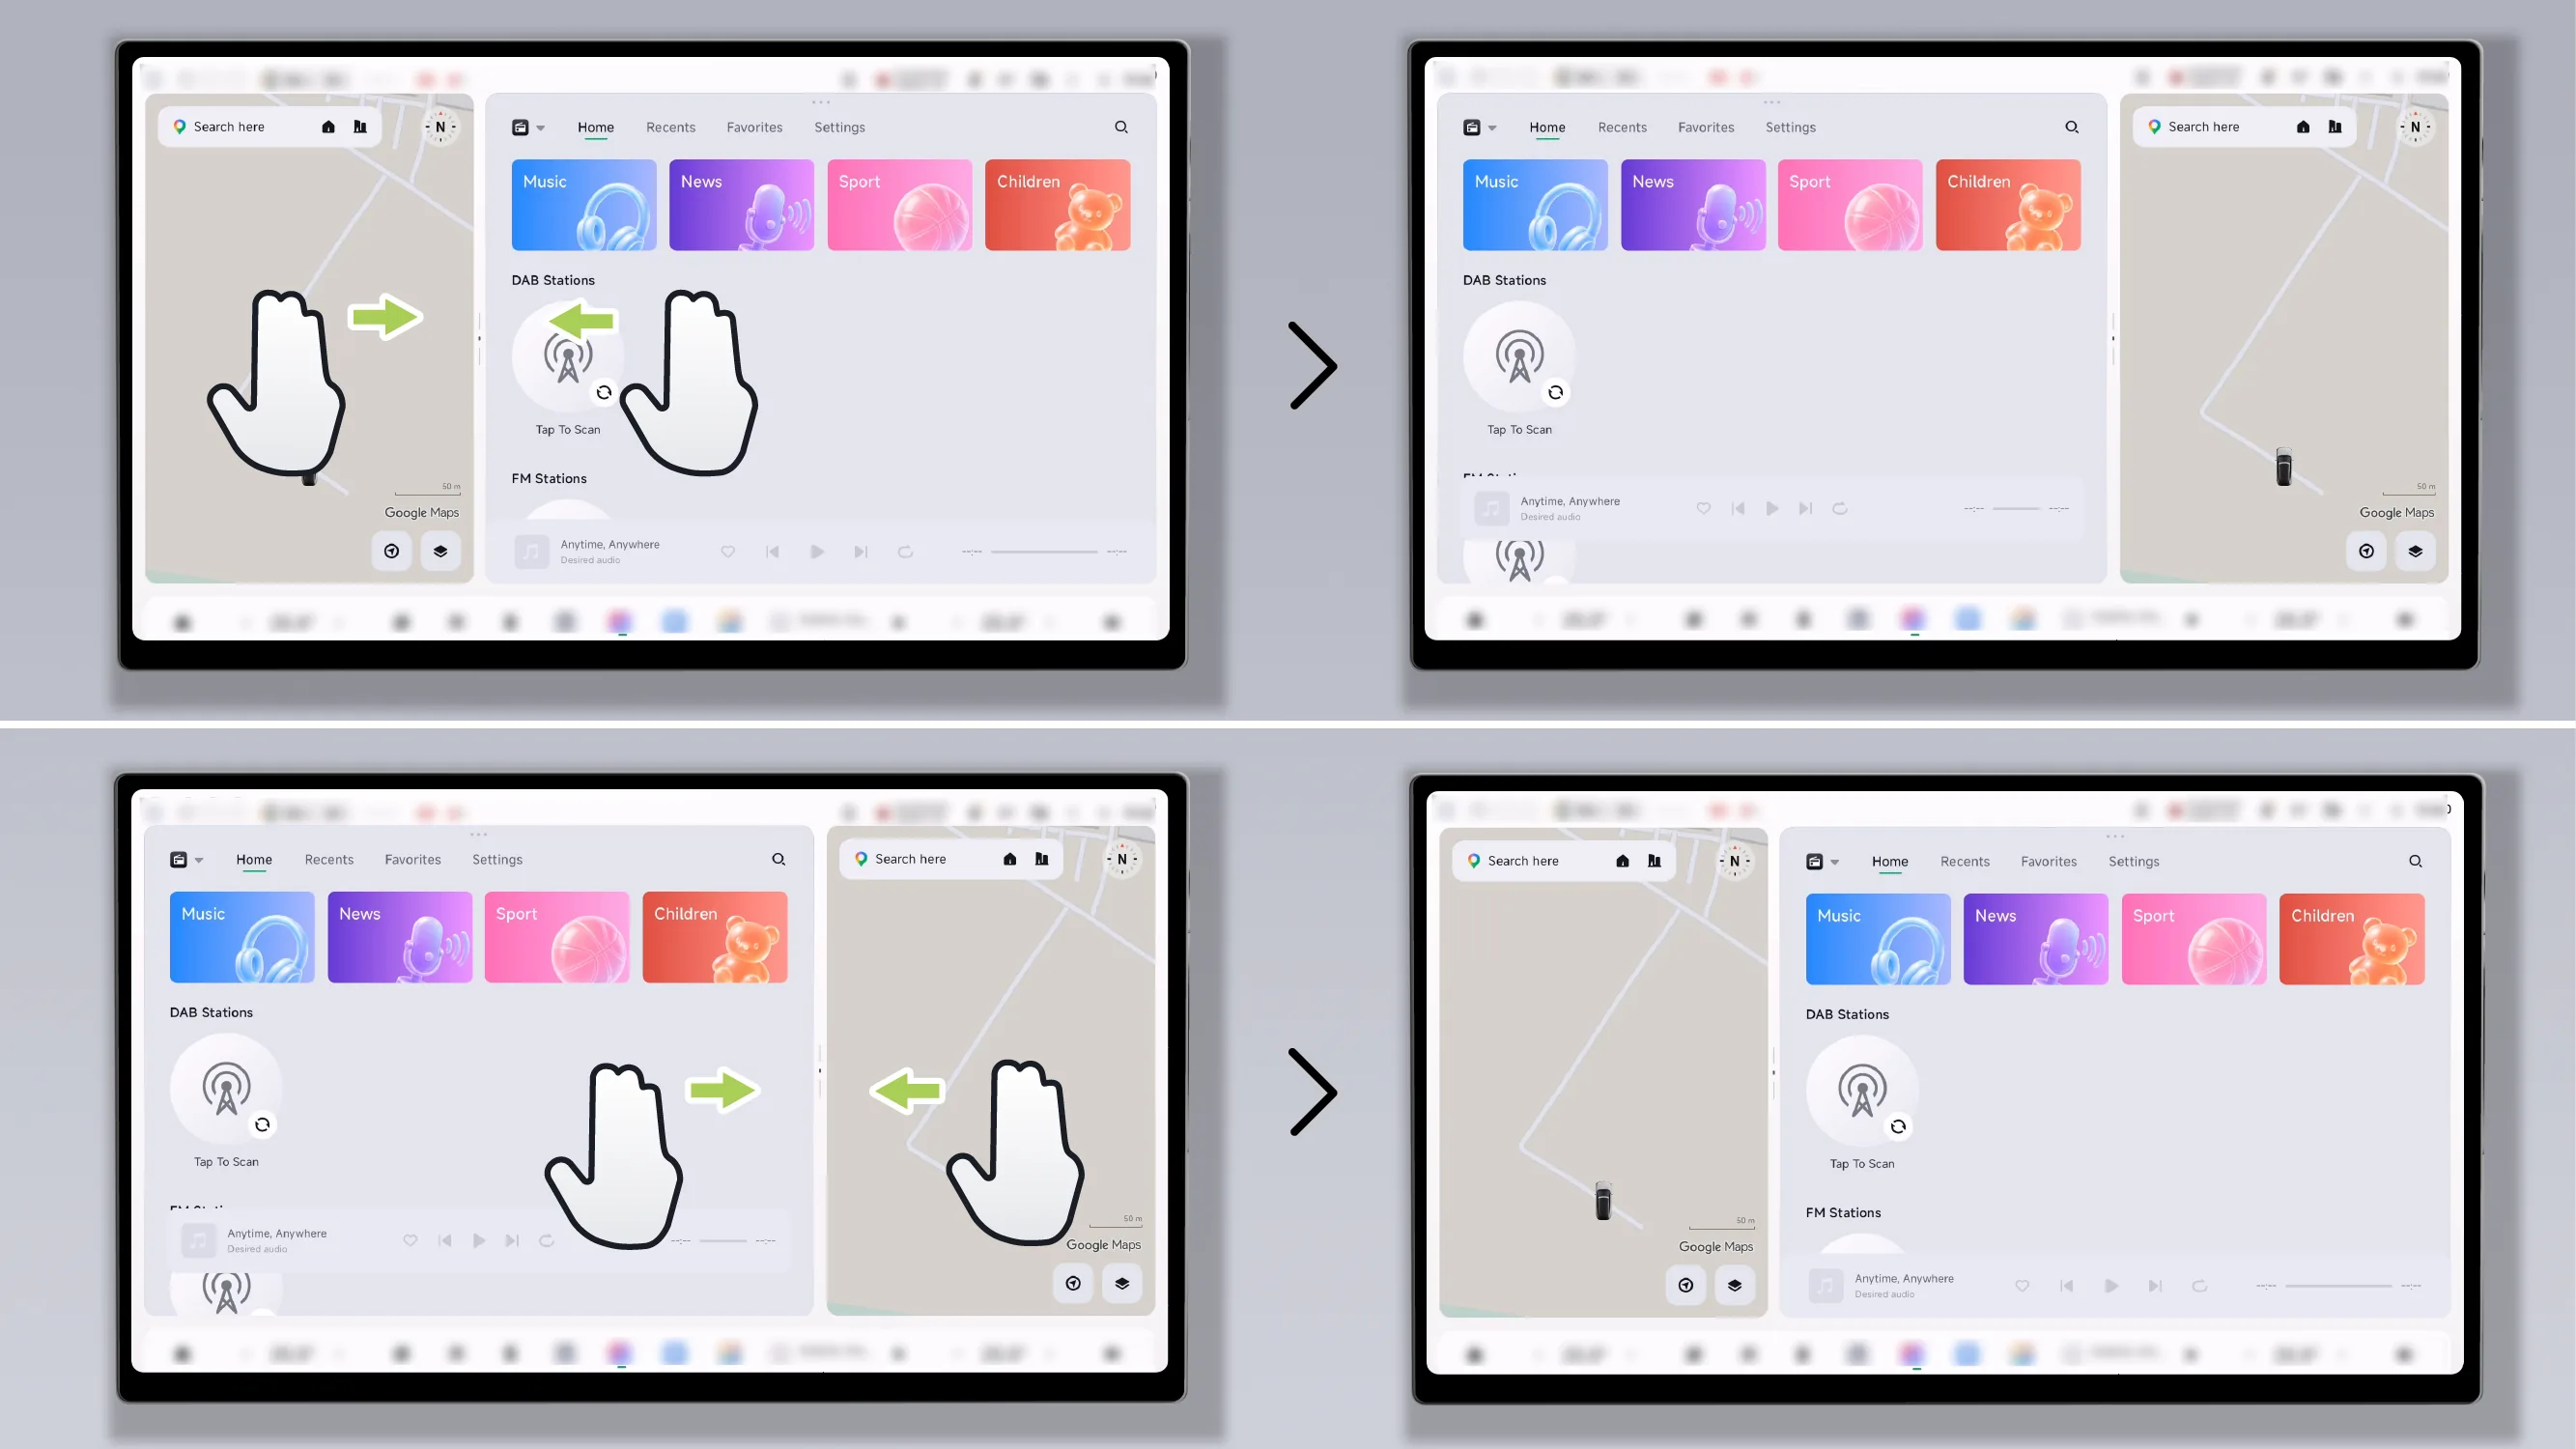
When the application window is on the right side, use three fingers to swipe left to move it to the left side for display. Conversely, when the window is on the left side, use three fingers to swipe right to move it to the right side for display.
Tips Apps in full-screen mode do not support gesture operations for switching the window display position.
The bottom taskbar area does not support gesture operations. During the swap process, the status bar and bottom taskbar are not hidden.
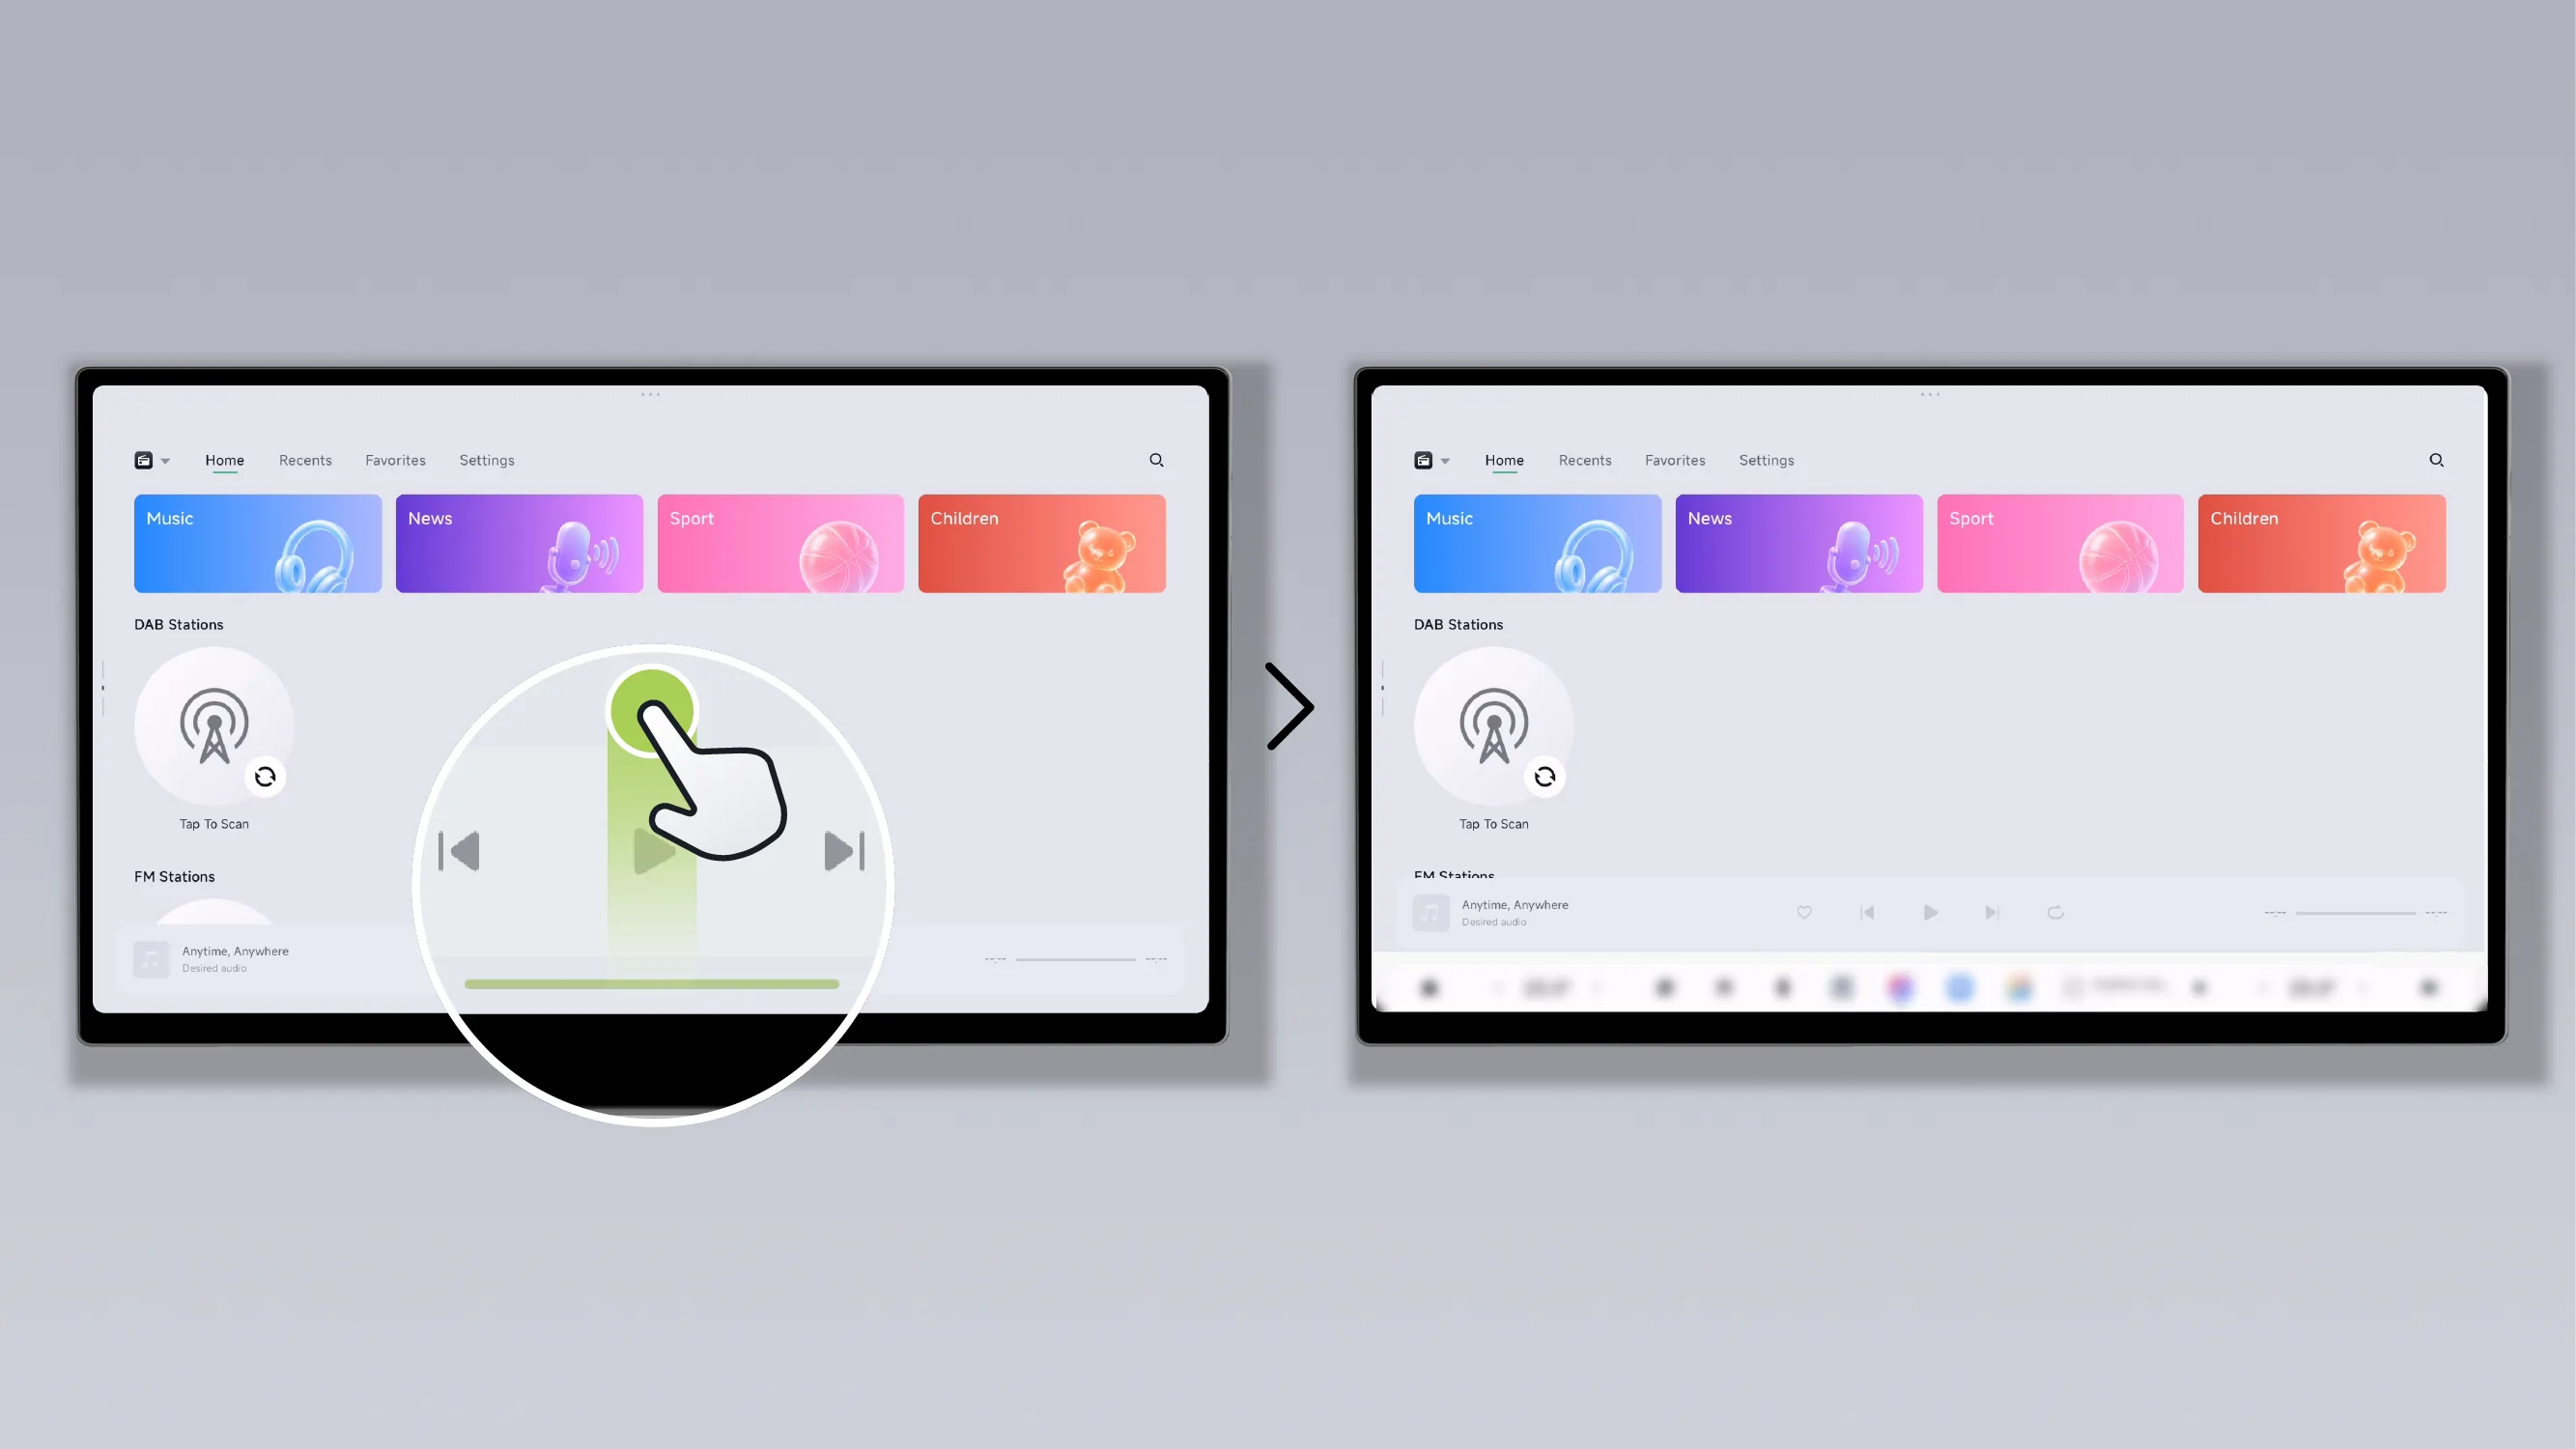
In full-screen mode, both the bottom taskbar and the status bar are hidden. Swipe upward with one finger from the bottom edge of the screen to bring up the bottom taskbar and the status bar.
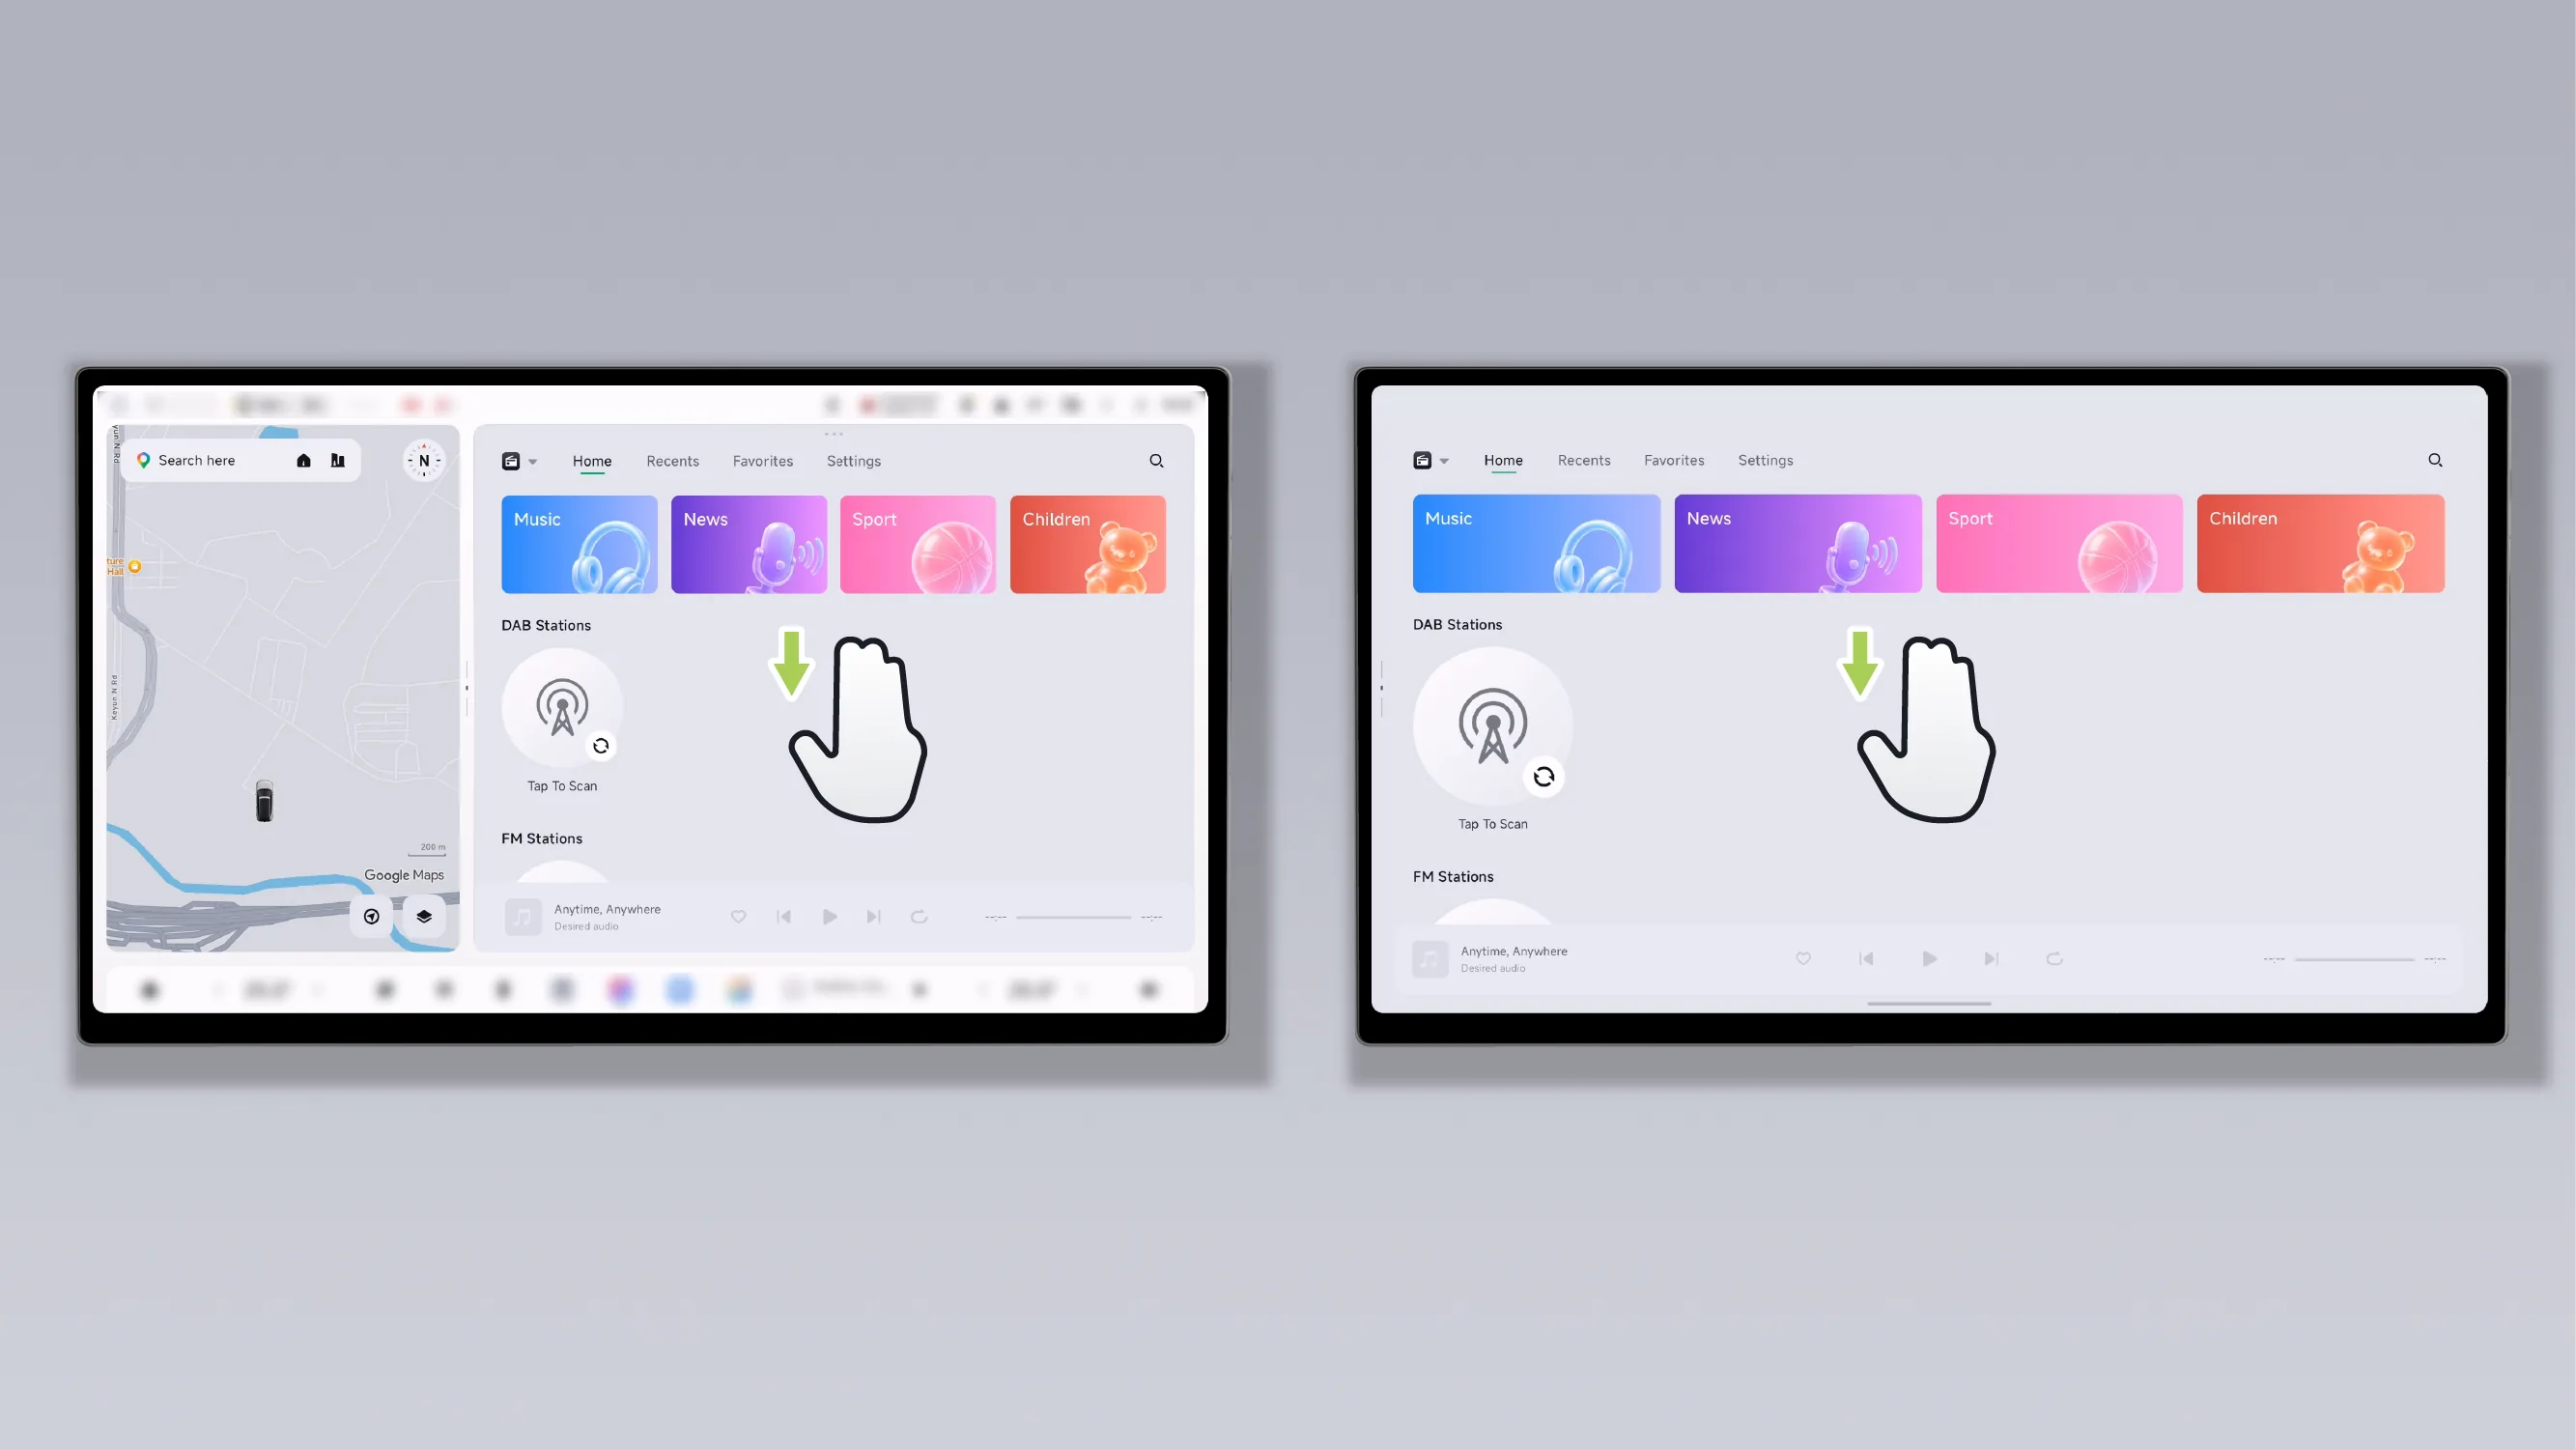
A three-finger swipe-down gesture can close the app.
The Control Center is an interactive panel for convenient operation of the vehicle's core functions, and can be opened in the following ways:
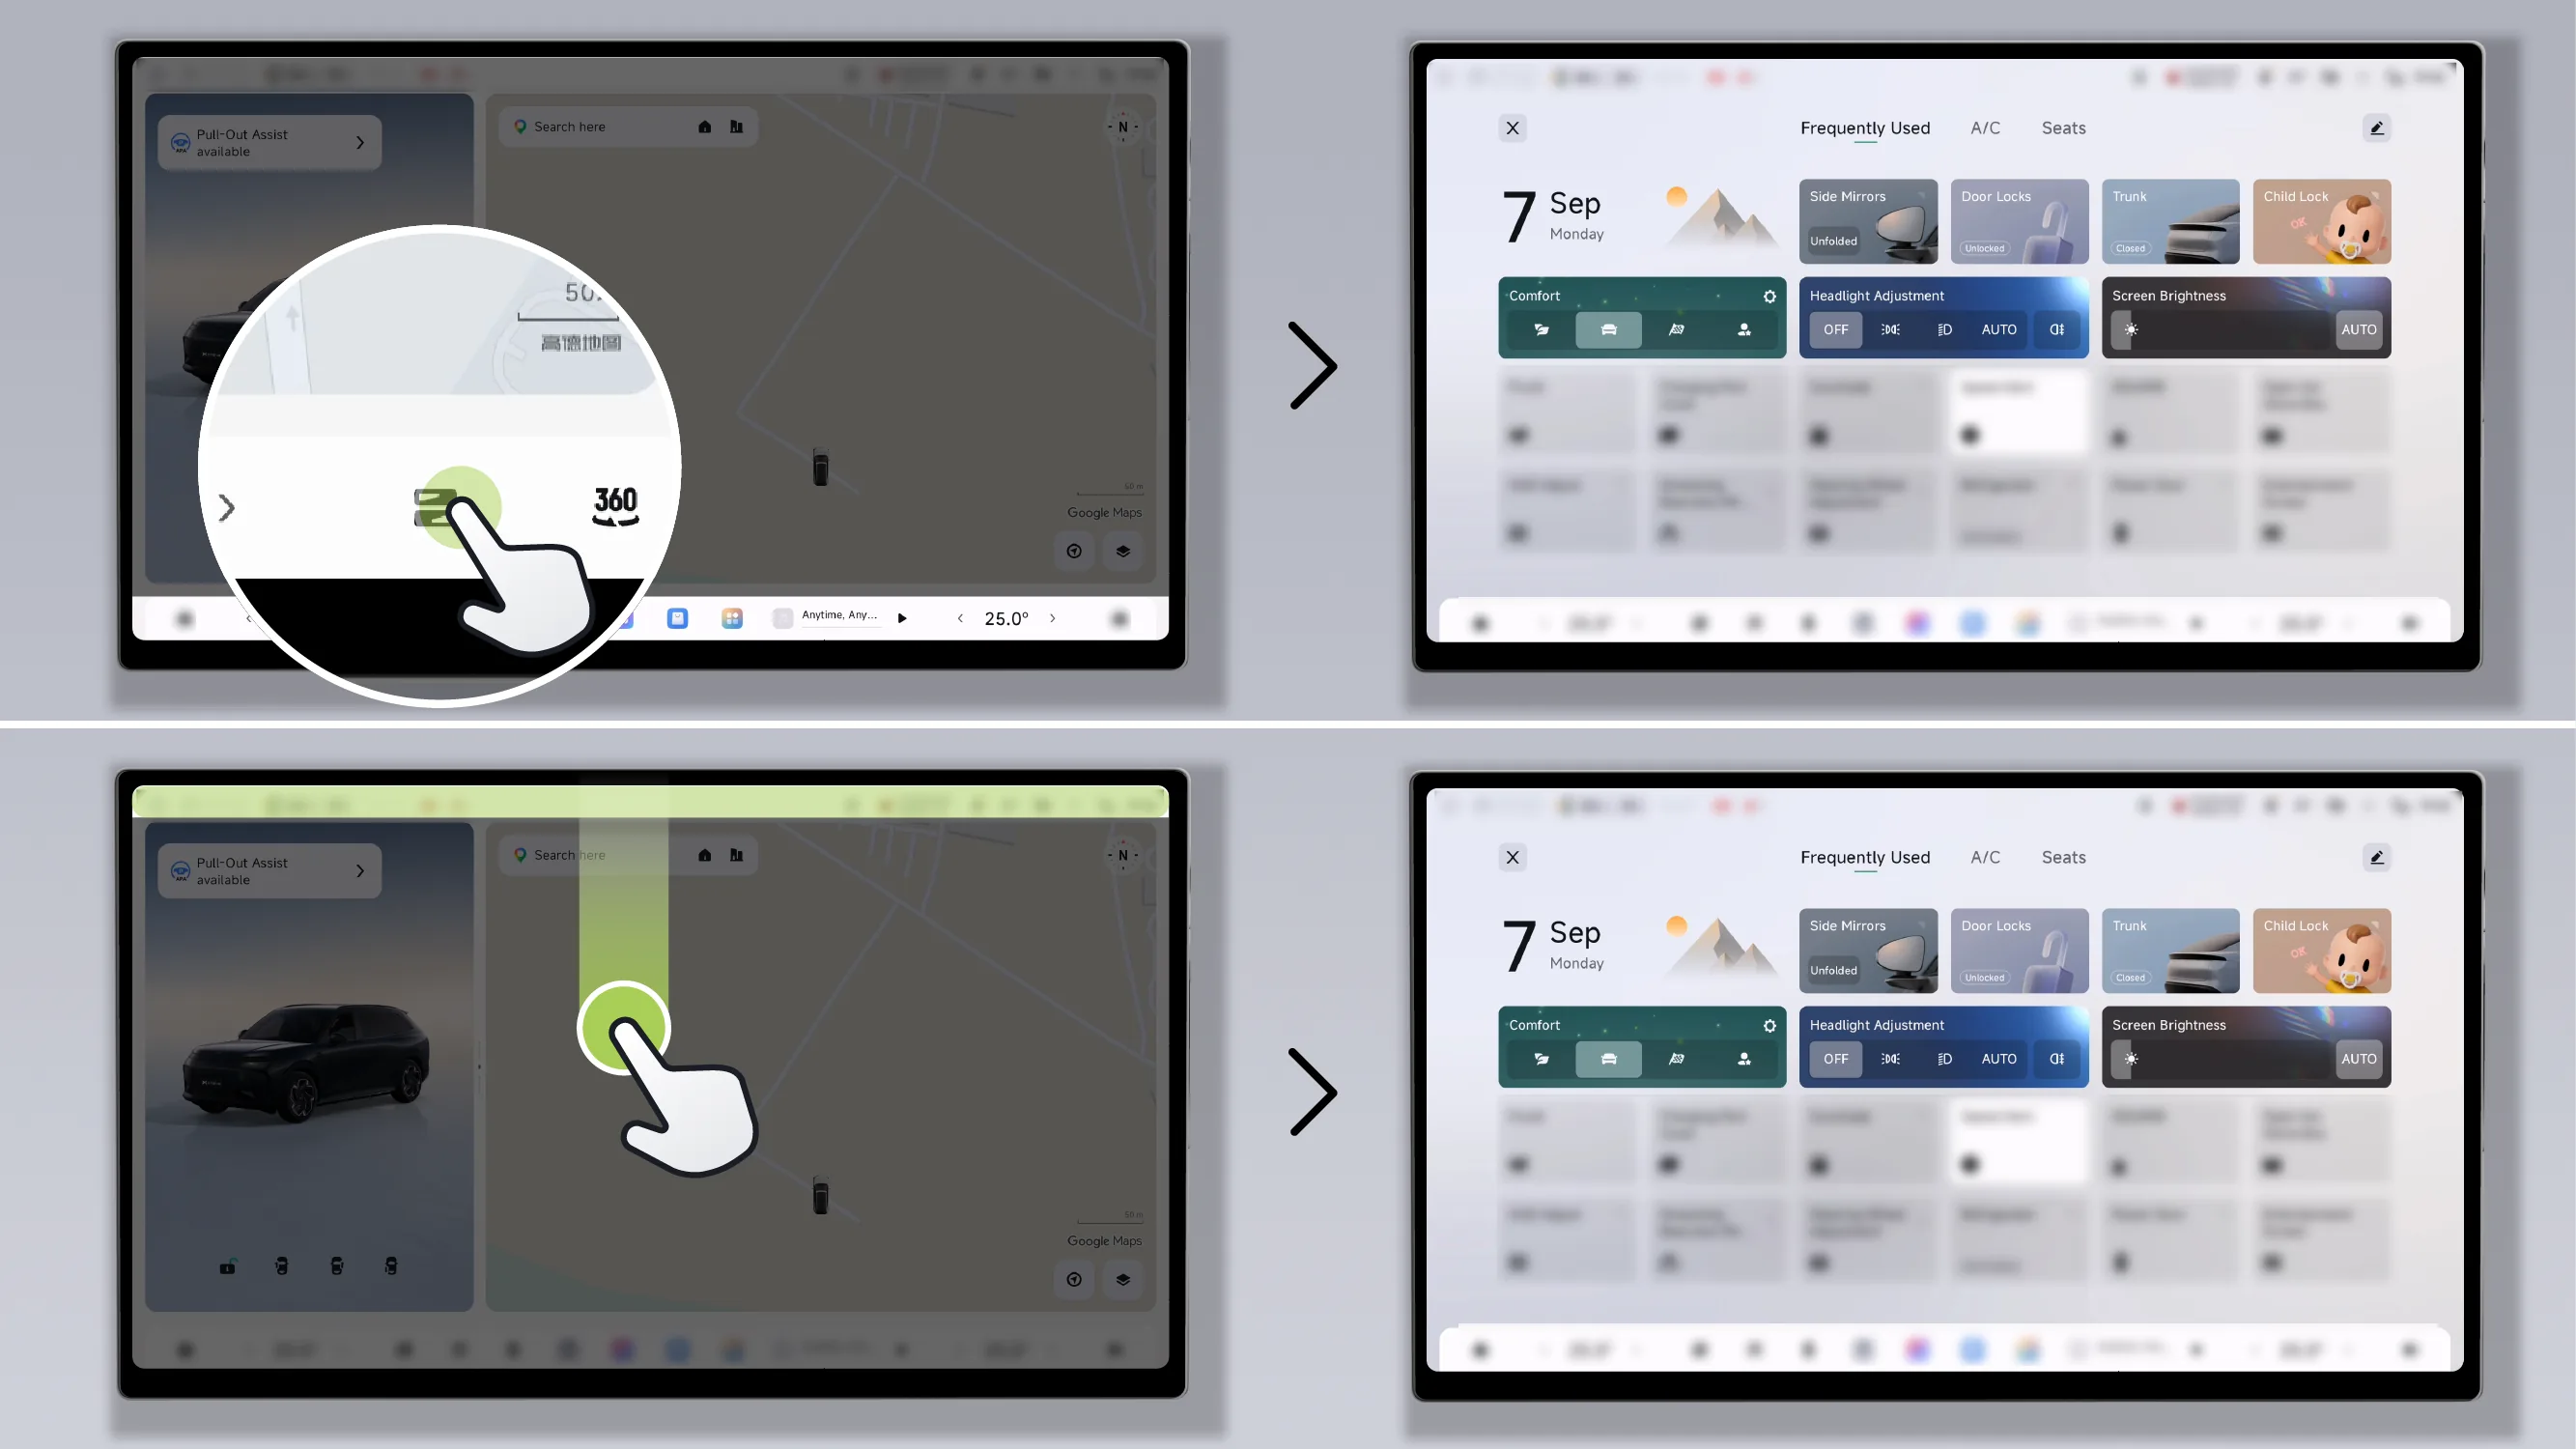
Tap the bottom taskbar “  ”Control center icon.
Open with gesture operation: swipe one finger downward from the upper edge of the screen.
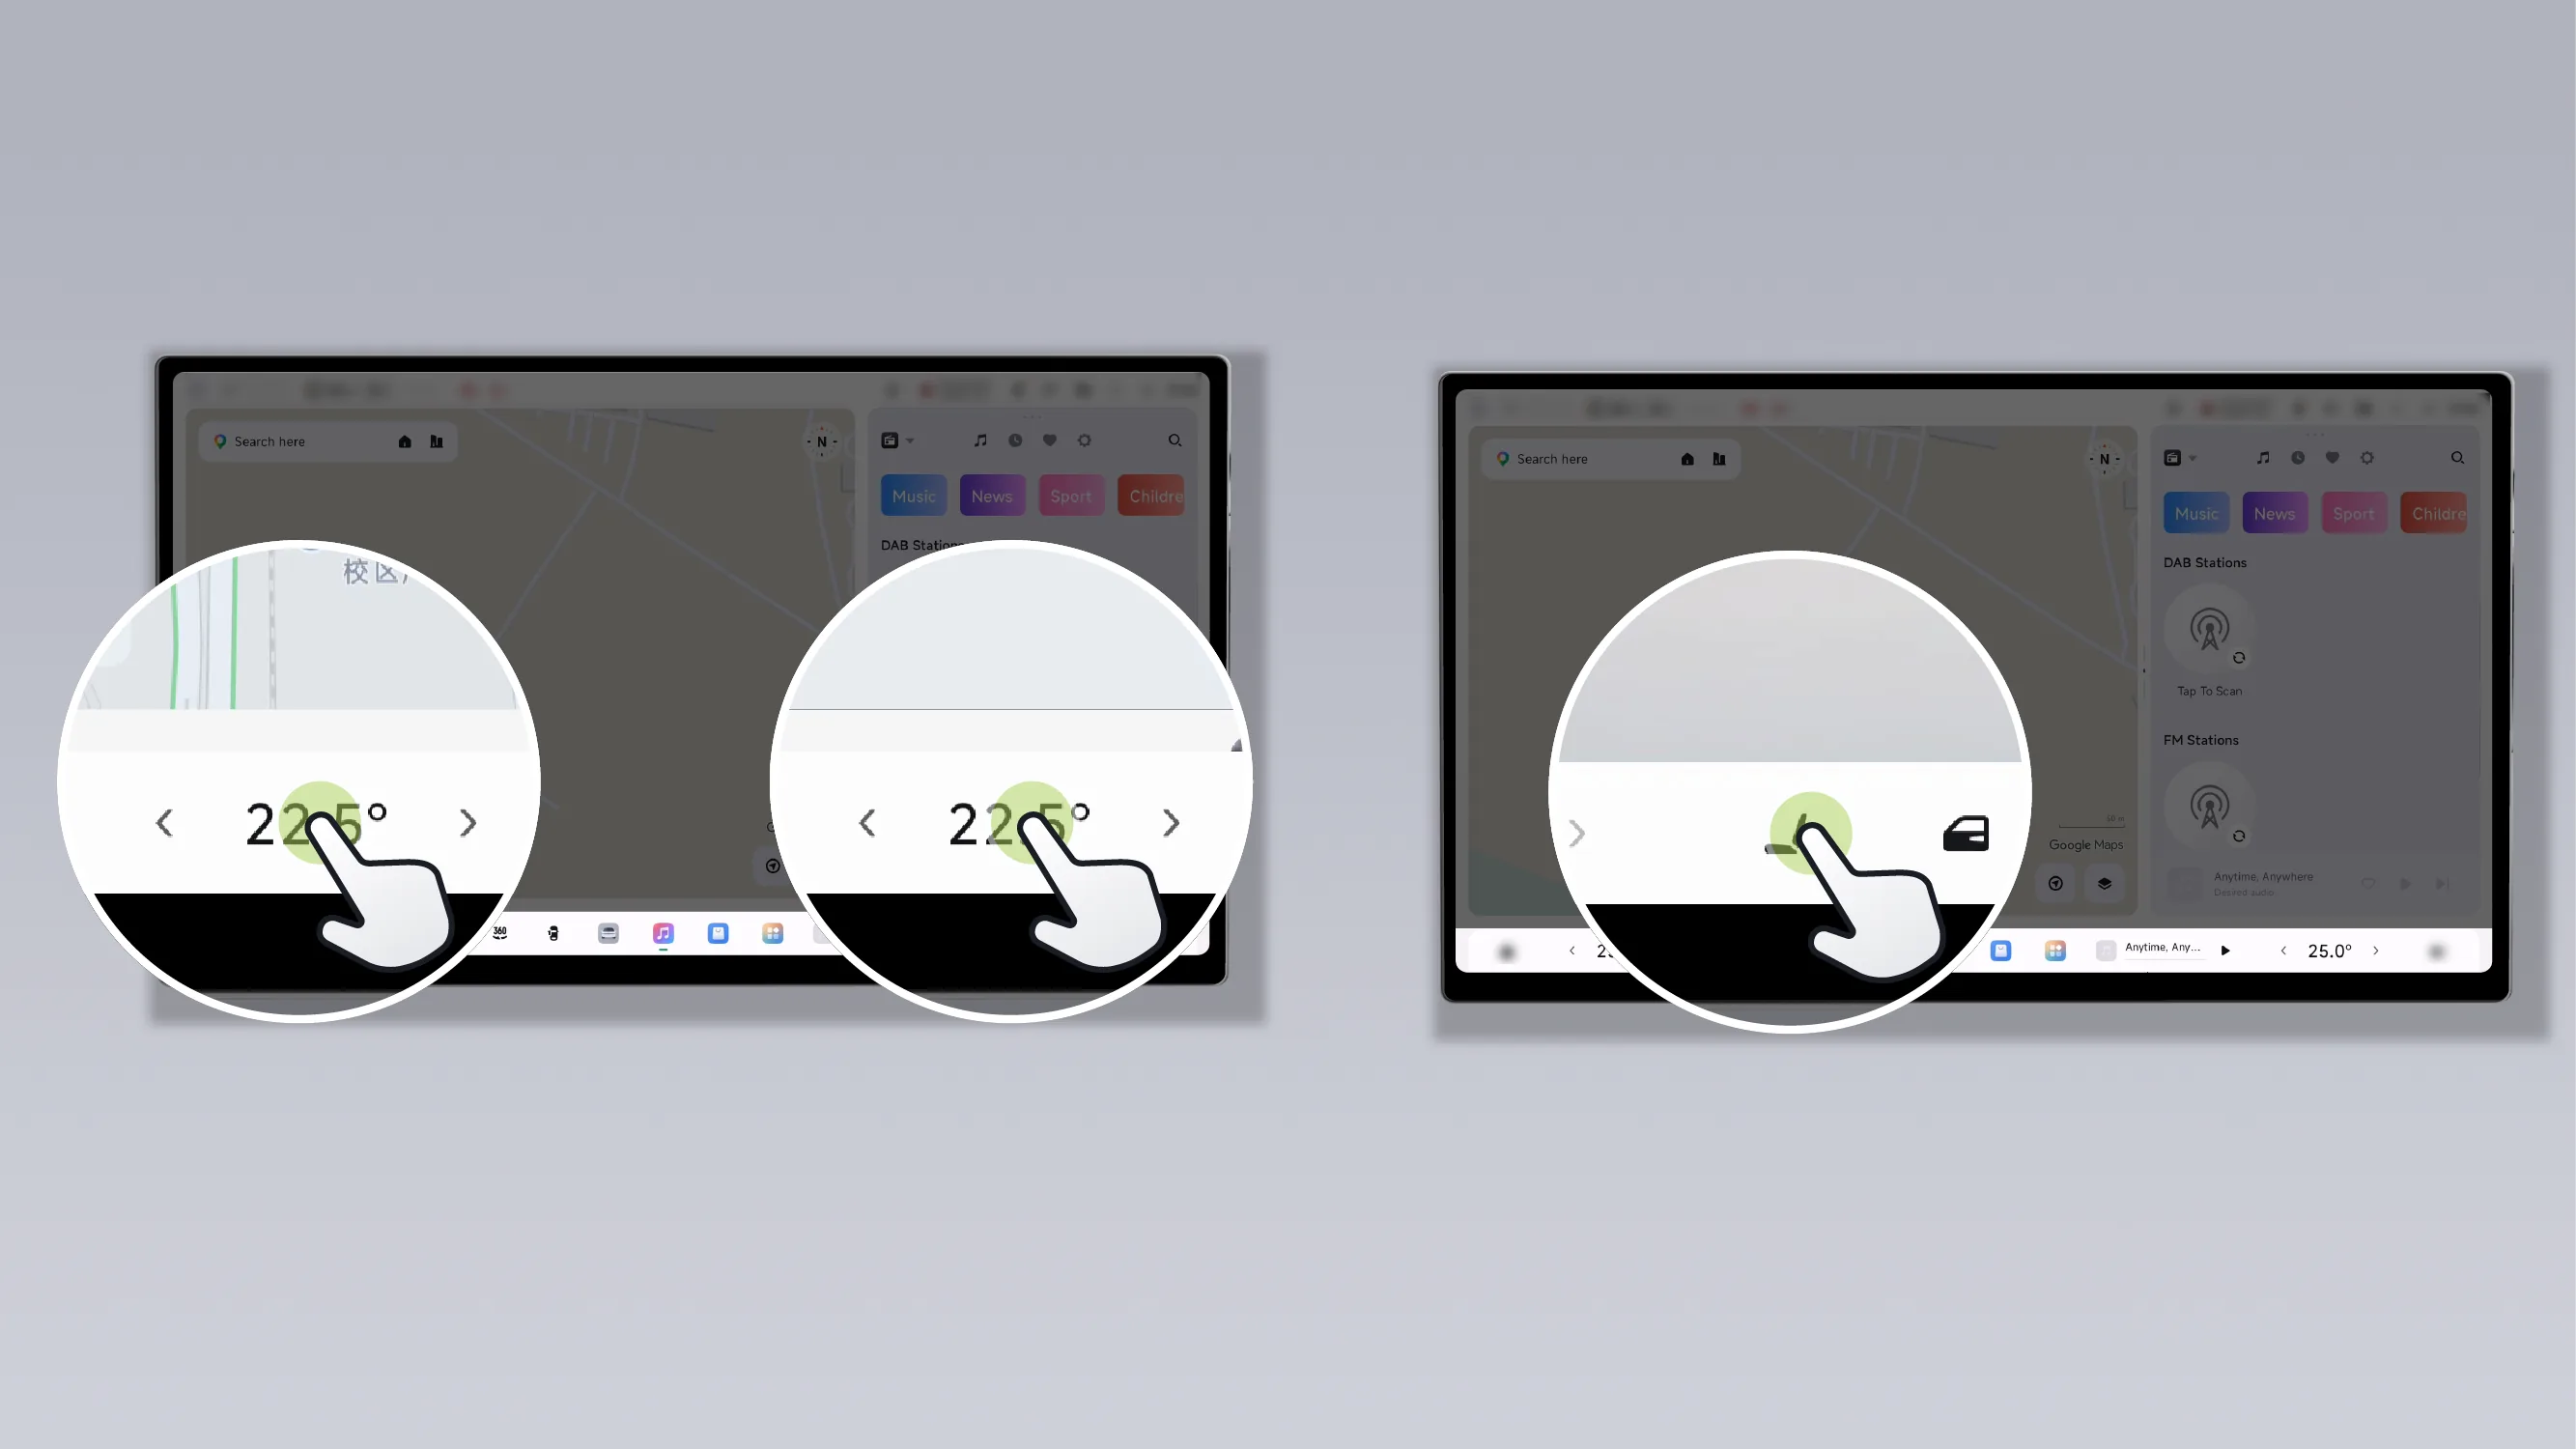
Tap the Air Conditioner widget on the bottom taskbar.
Tap the bottom taskbar “  ”Seat icon.
Tips For information about the custom bottom taskbar, please refer to the custom bottom taskbar section.
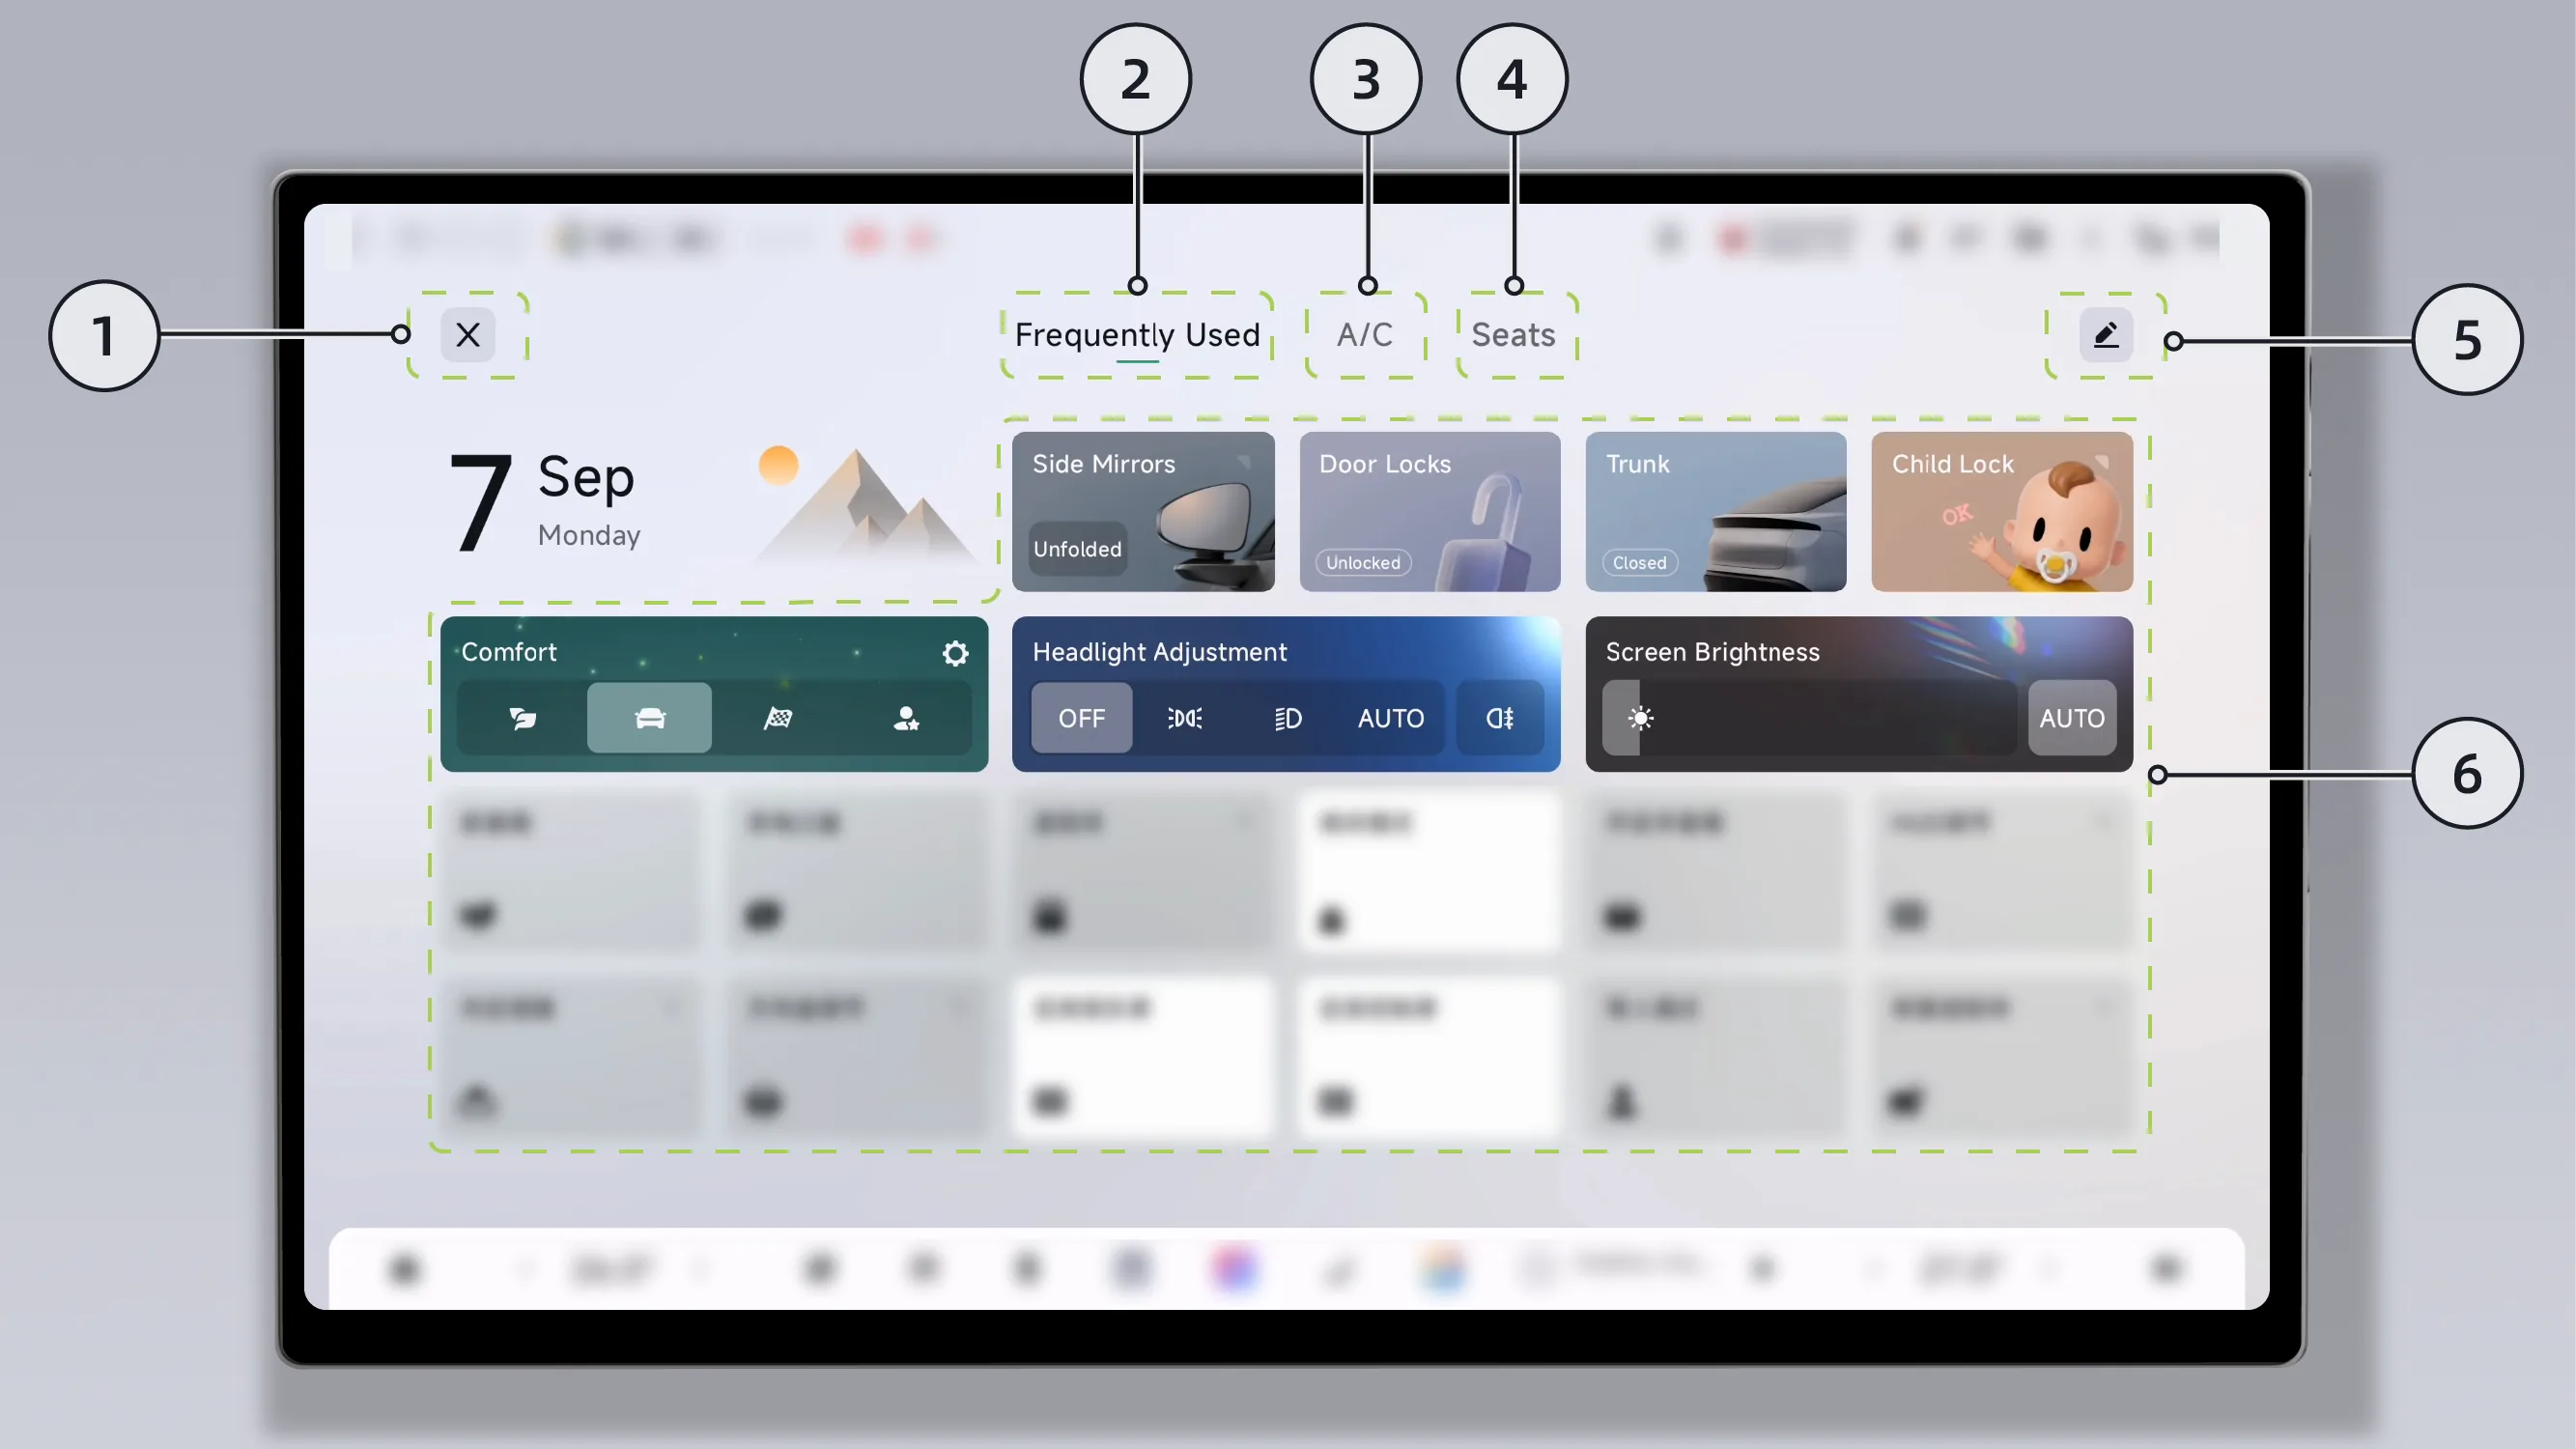
Close
Common Interface
Air Conditioner Interface
Seat Interface
Edit Customization
Vehicle Quick Functions
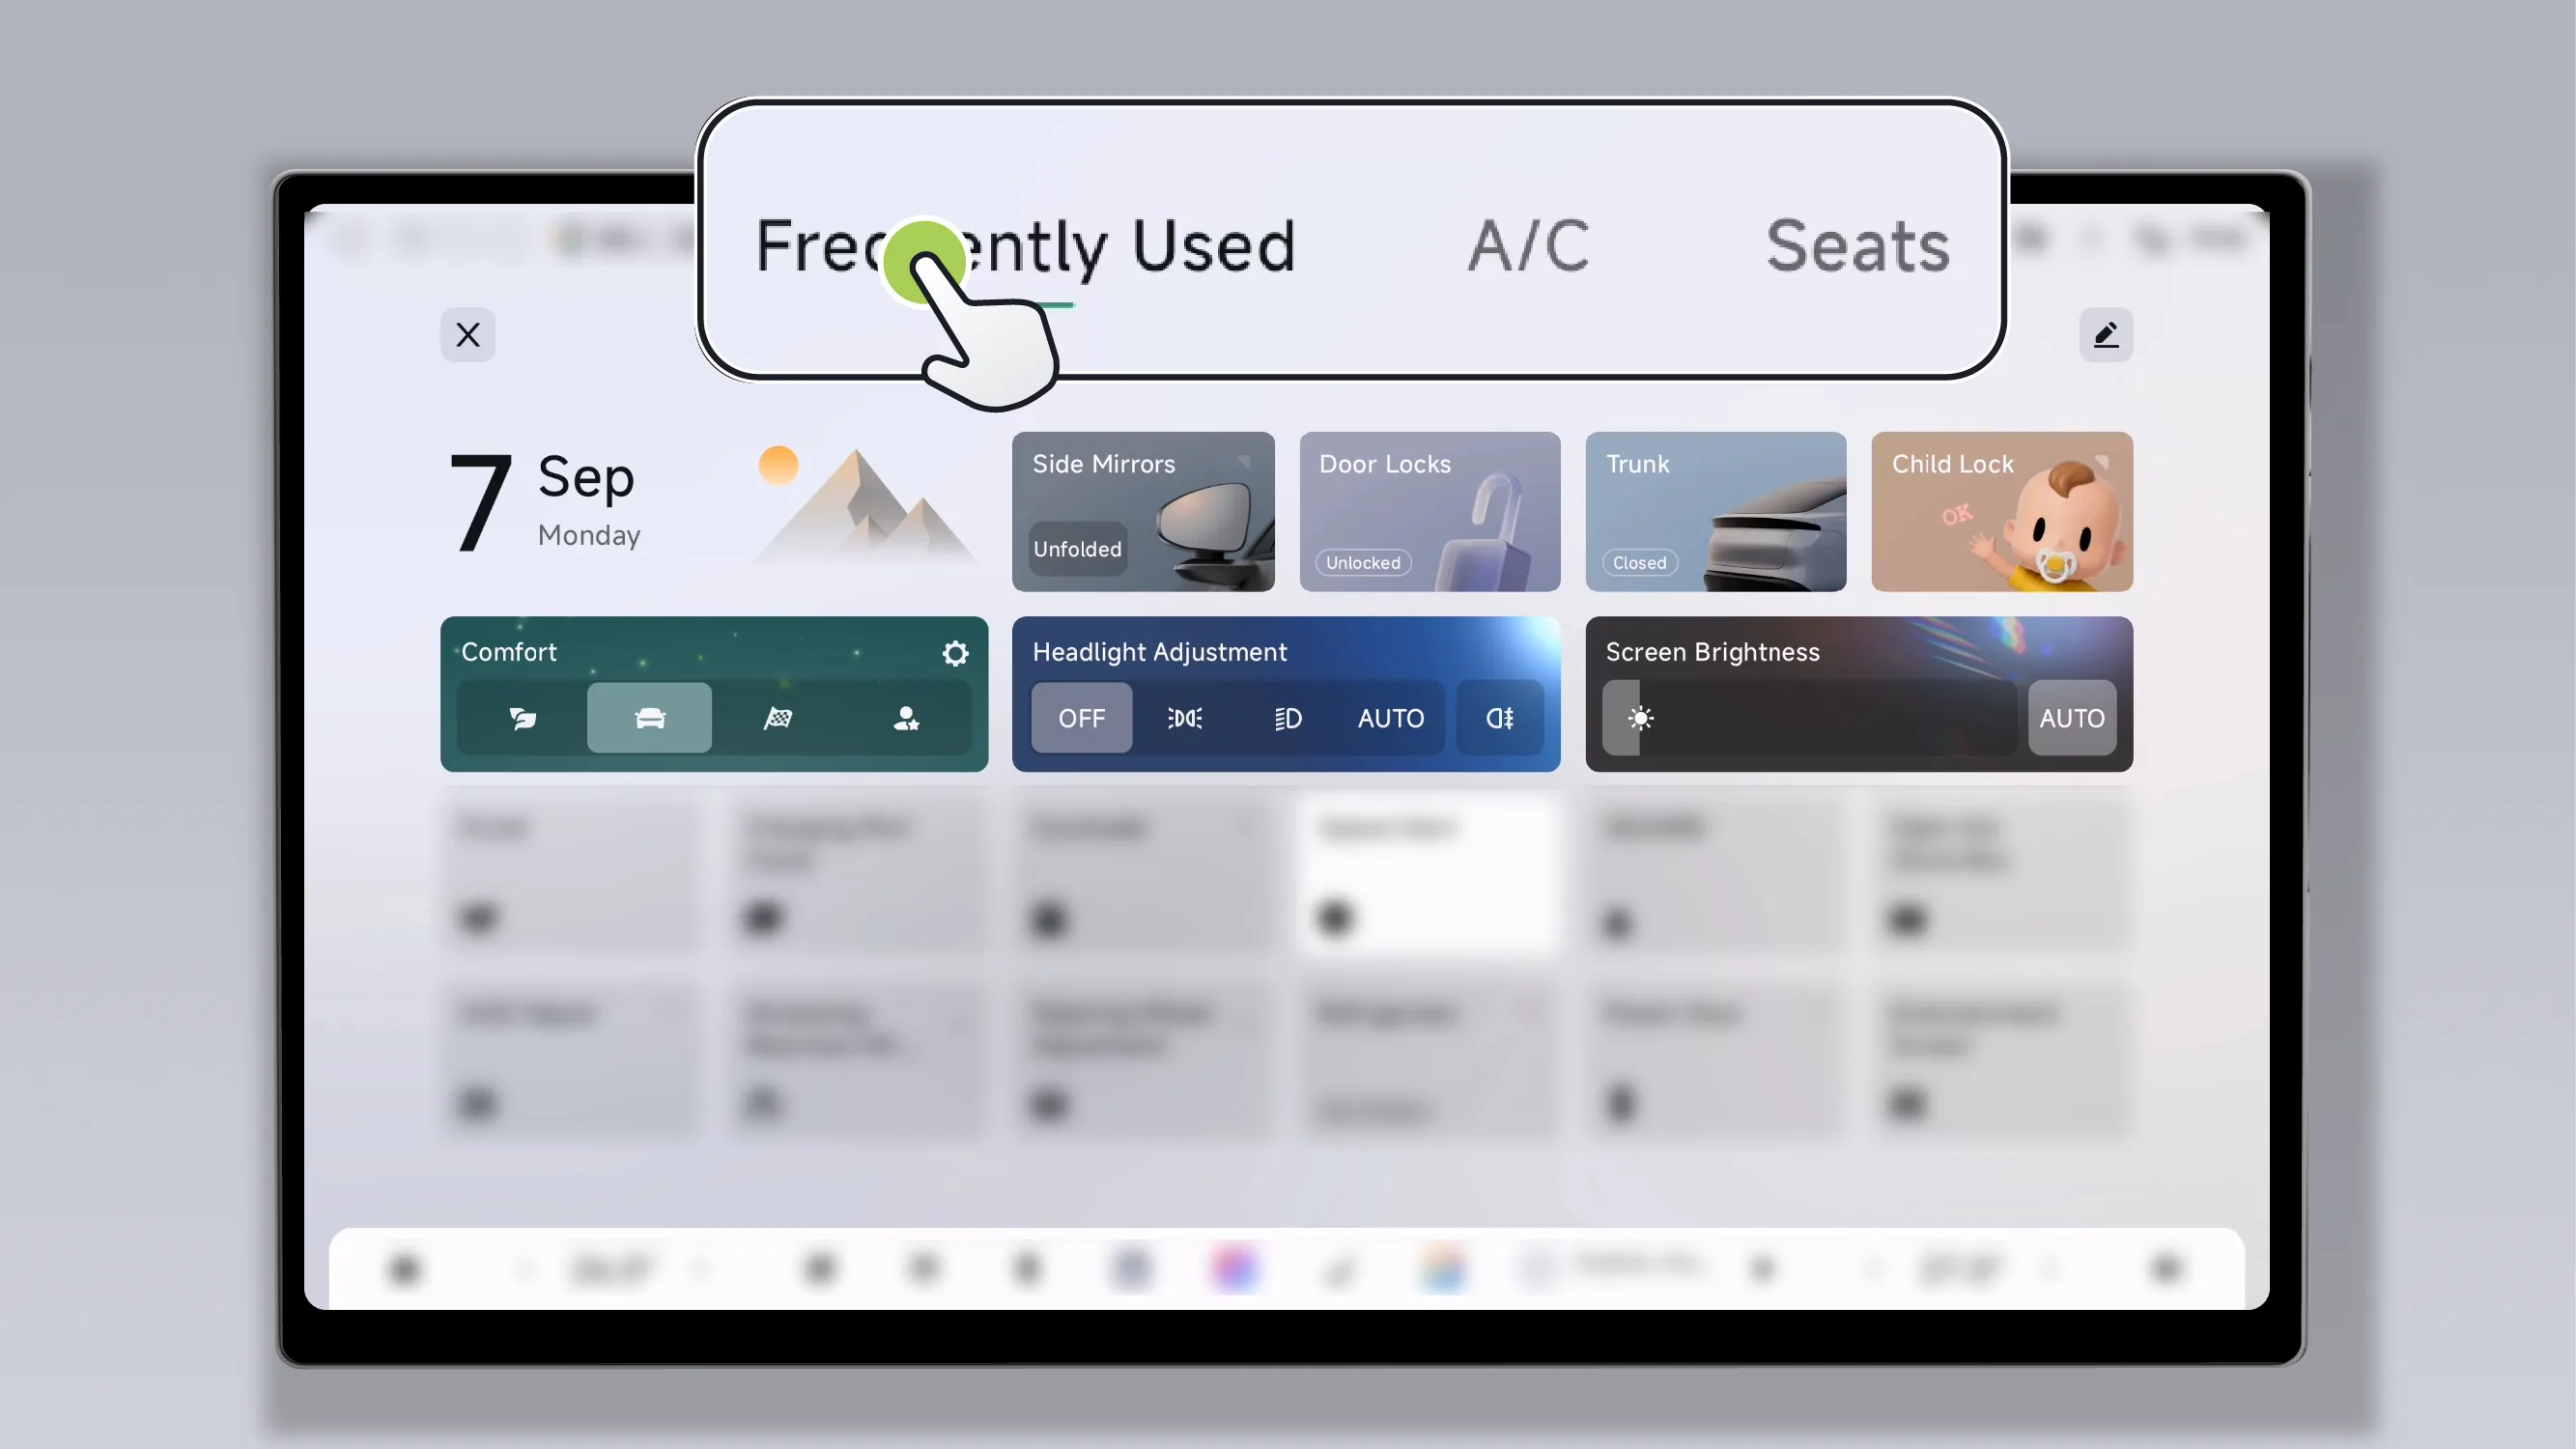
The Control Center contains three interfaces: Common, Air Conditioner, and seat. Tap the Common, Air Conditioner, or seat icon at the top of the Control Center to switch to the corresponding interface.
Use the following steps to add or delete function cards on the Favorites screen:
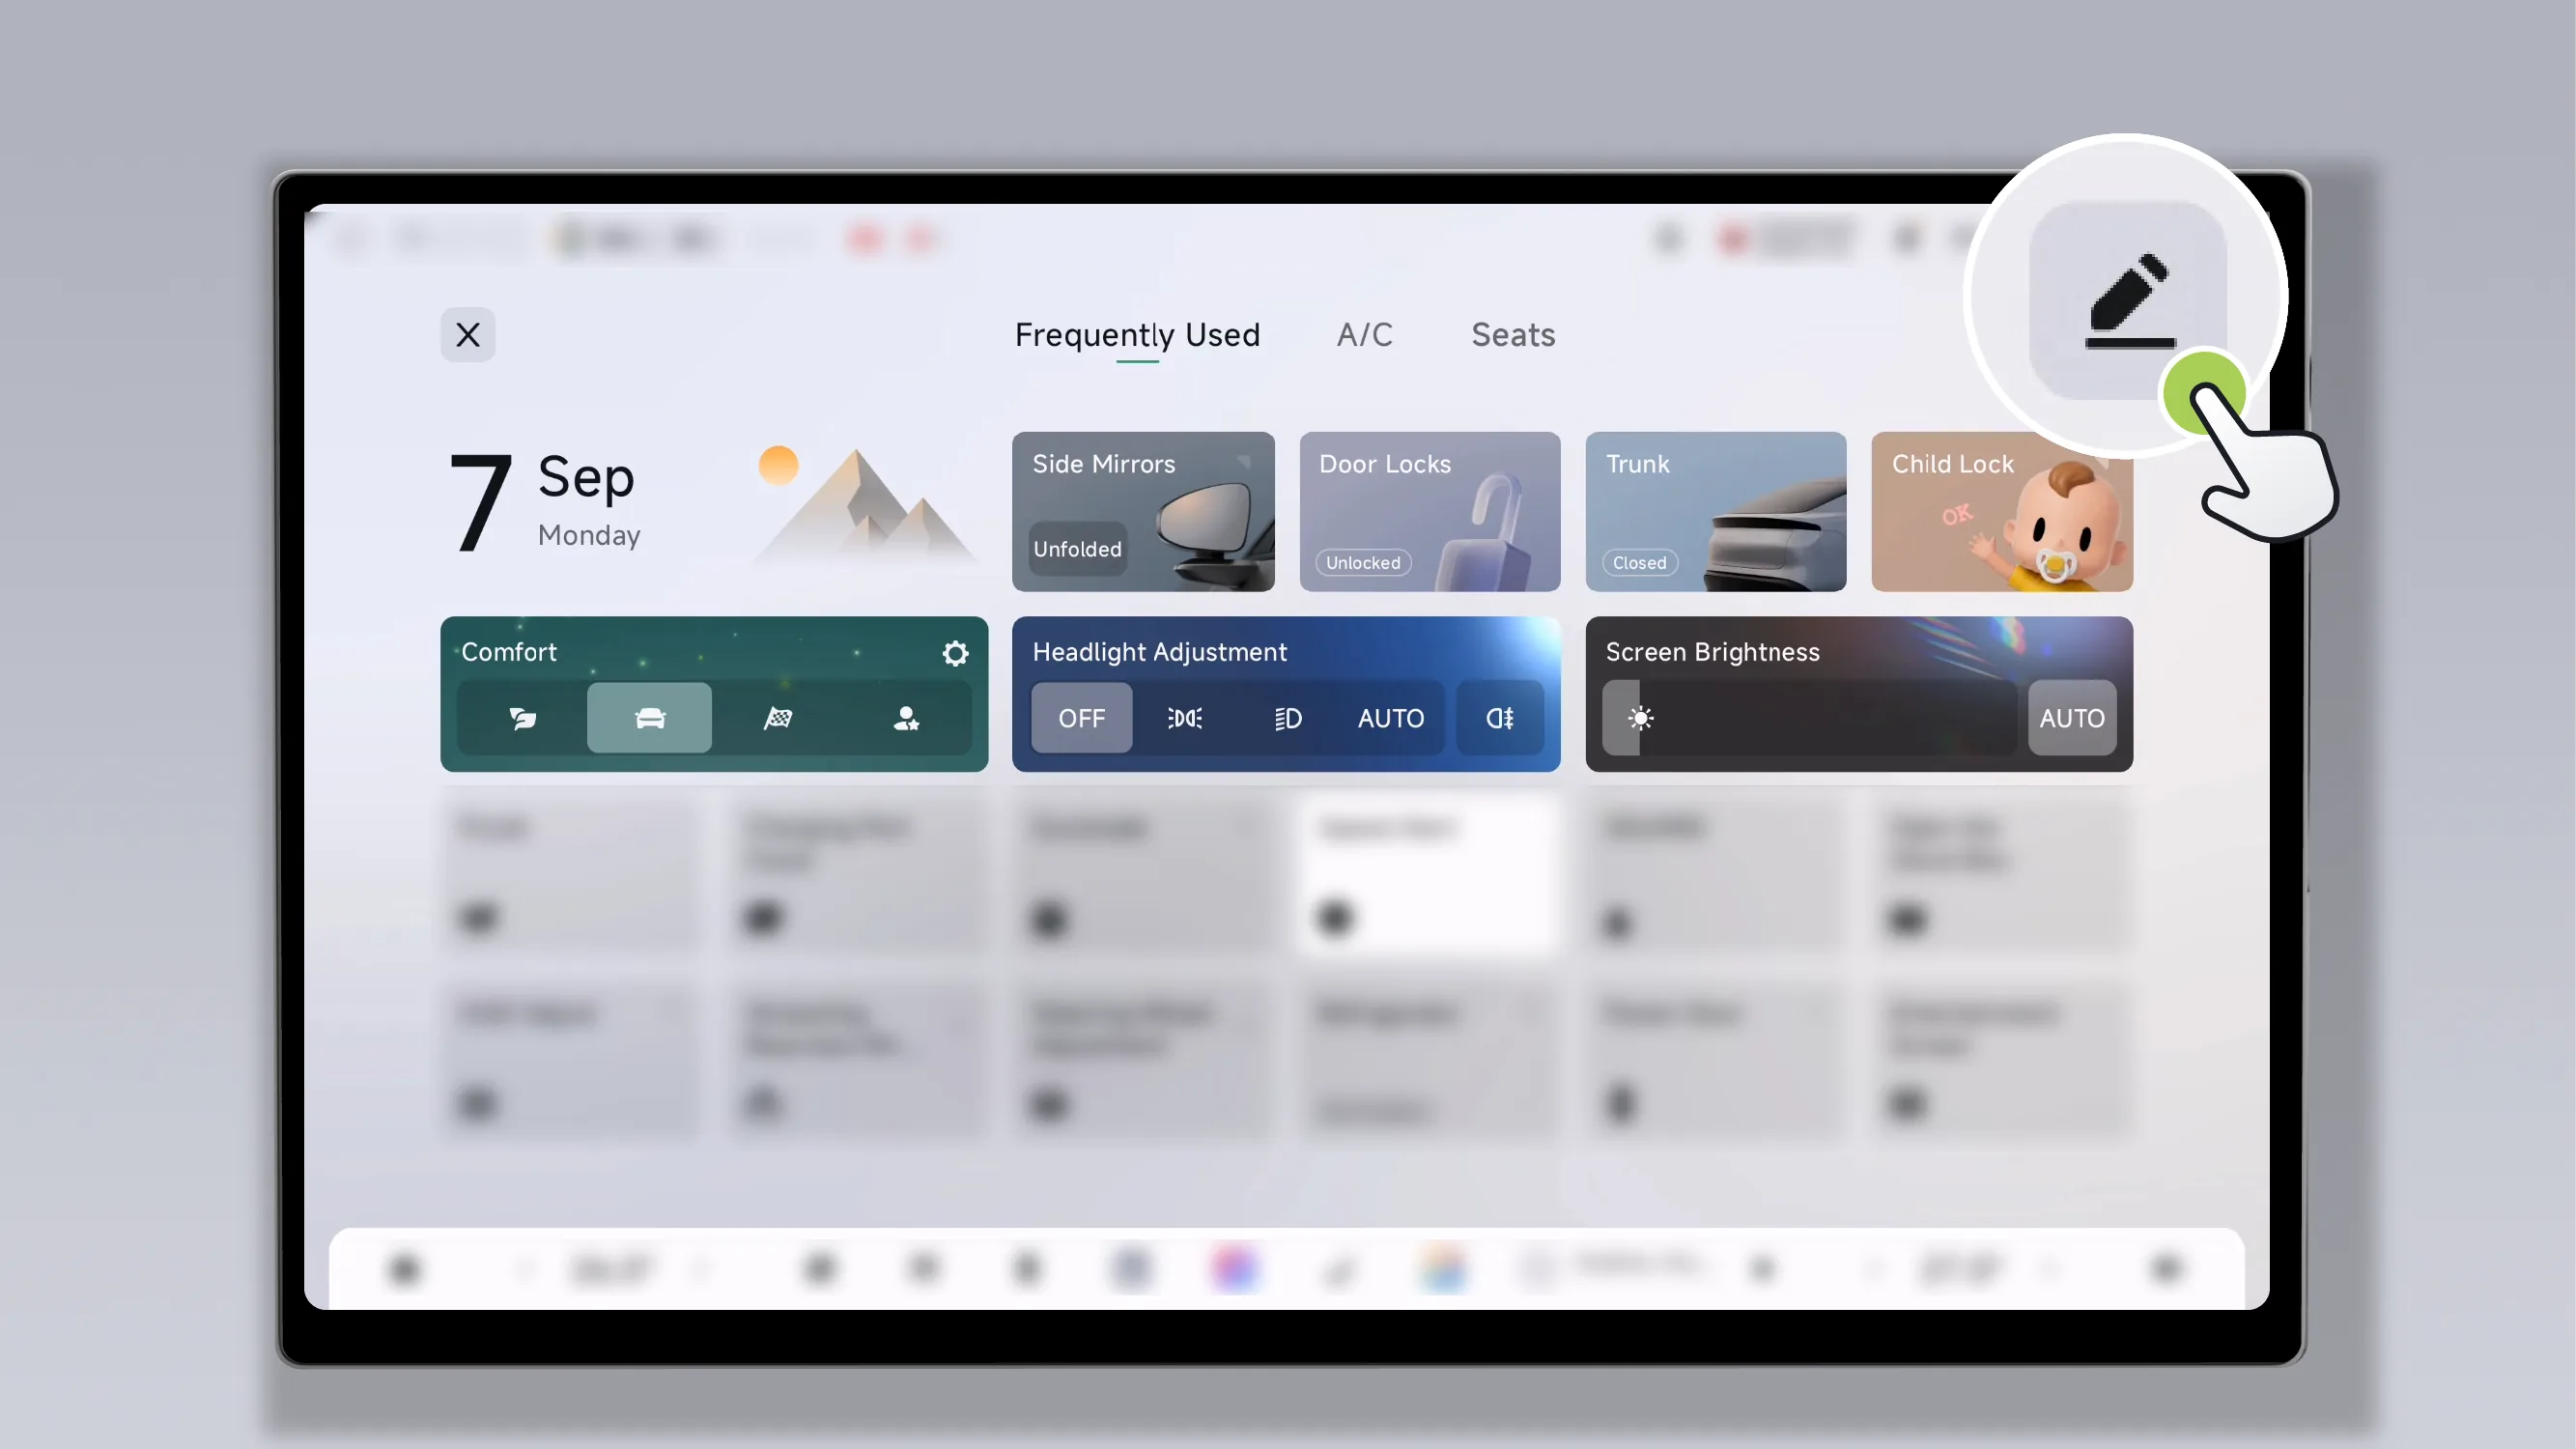
Tap the upper right of the frequently used interface. “  ”Button to enter the custom card state.
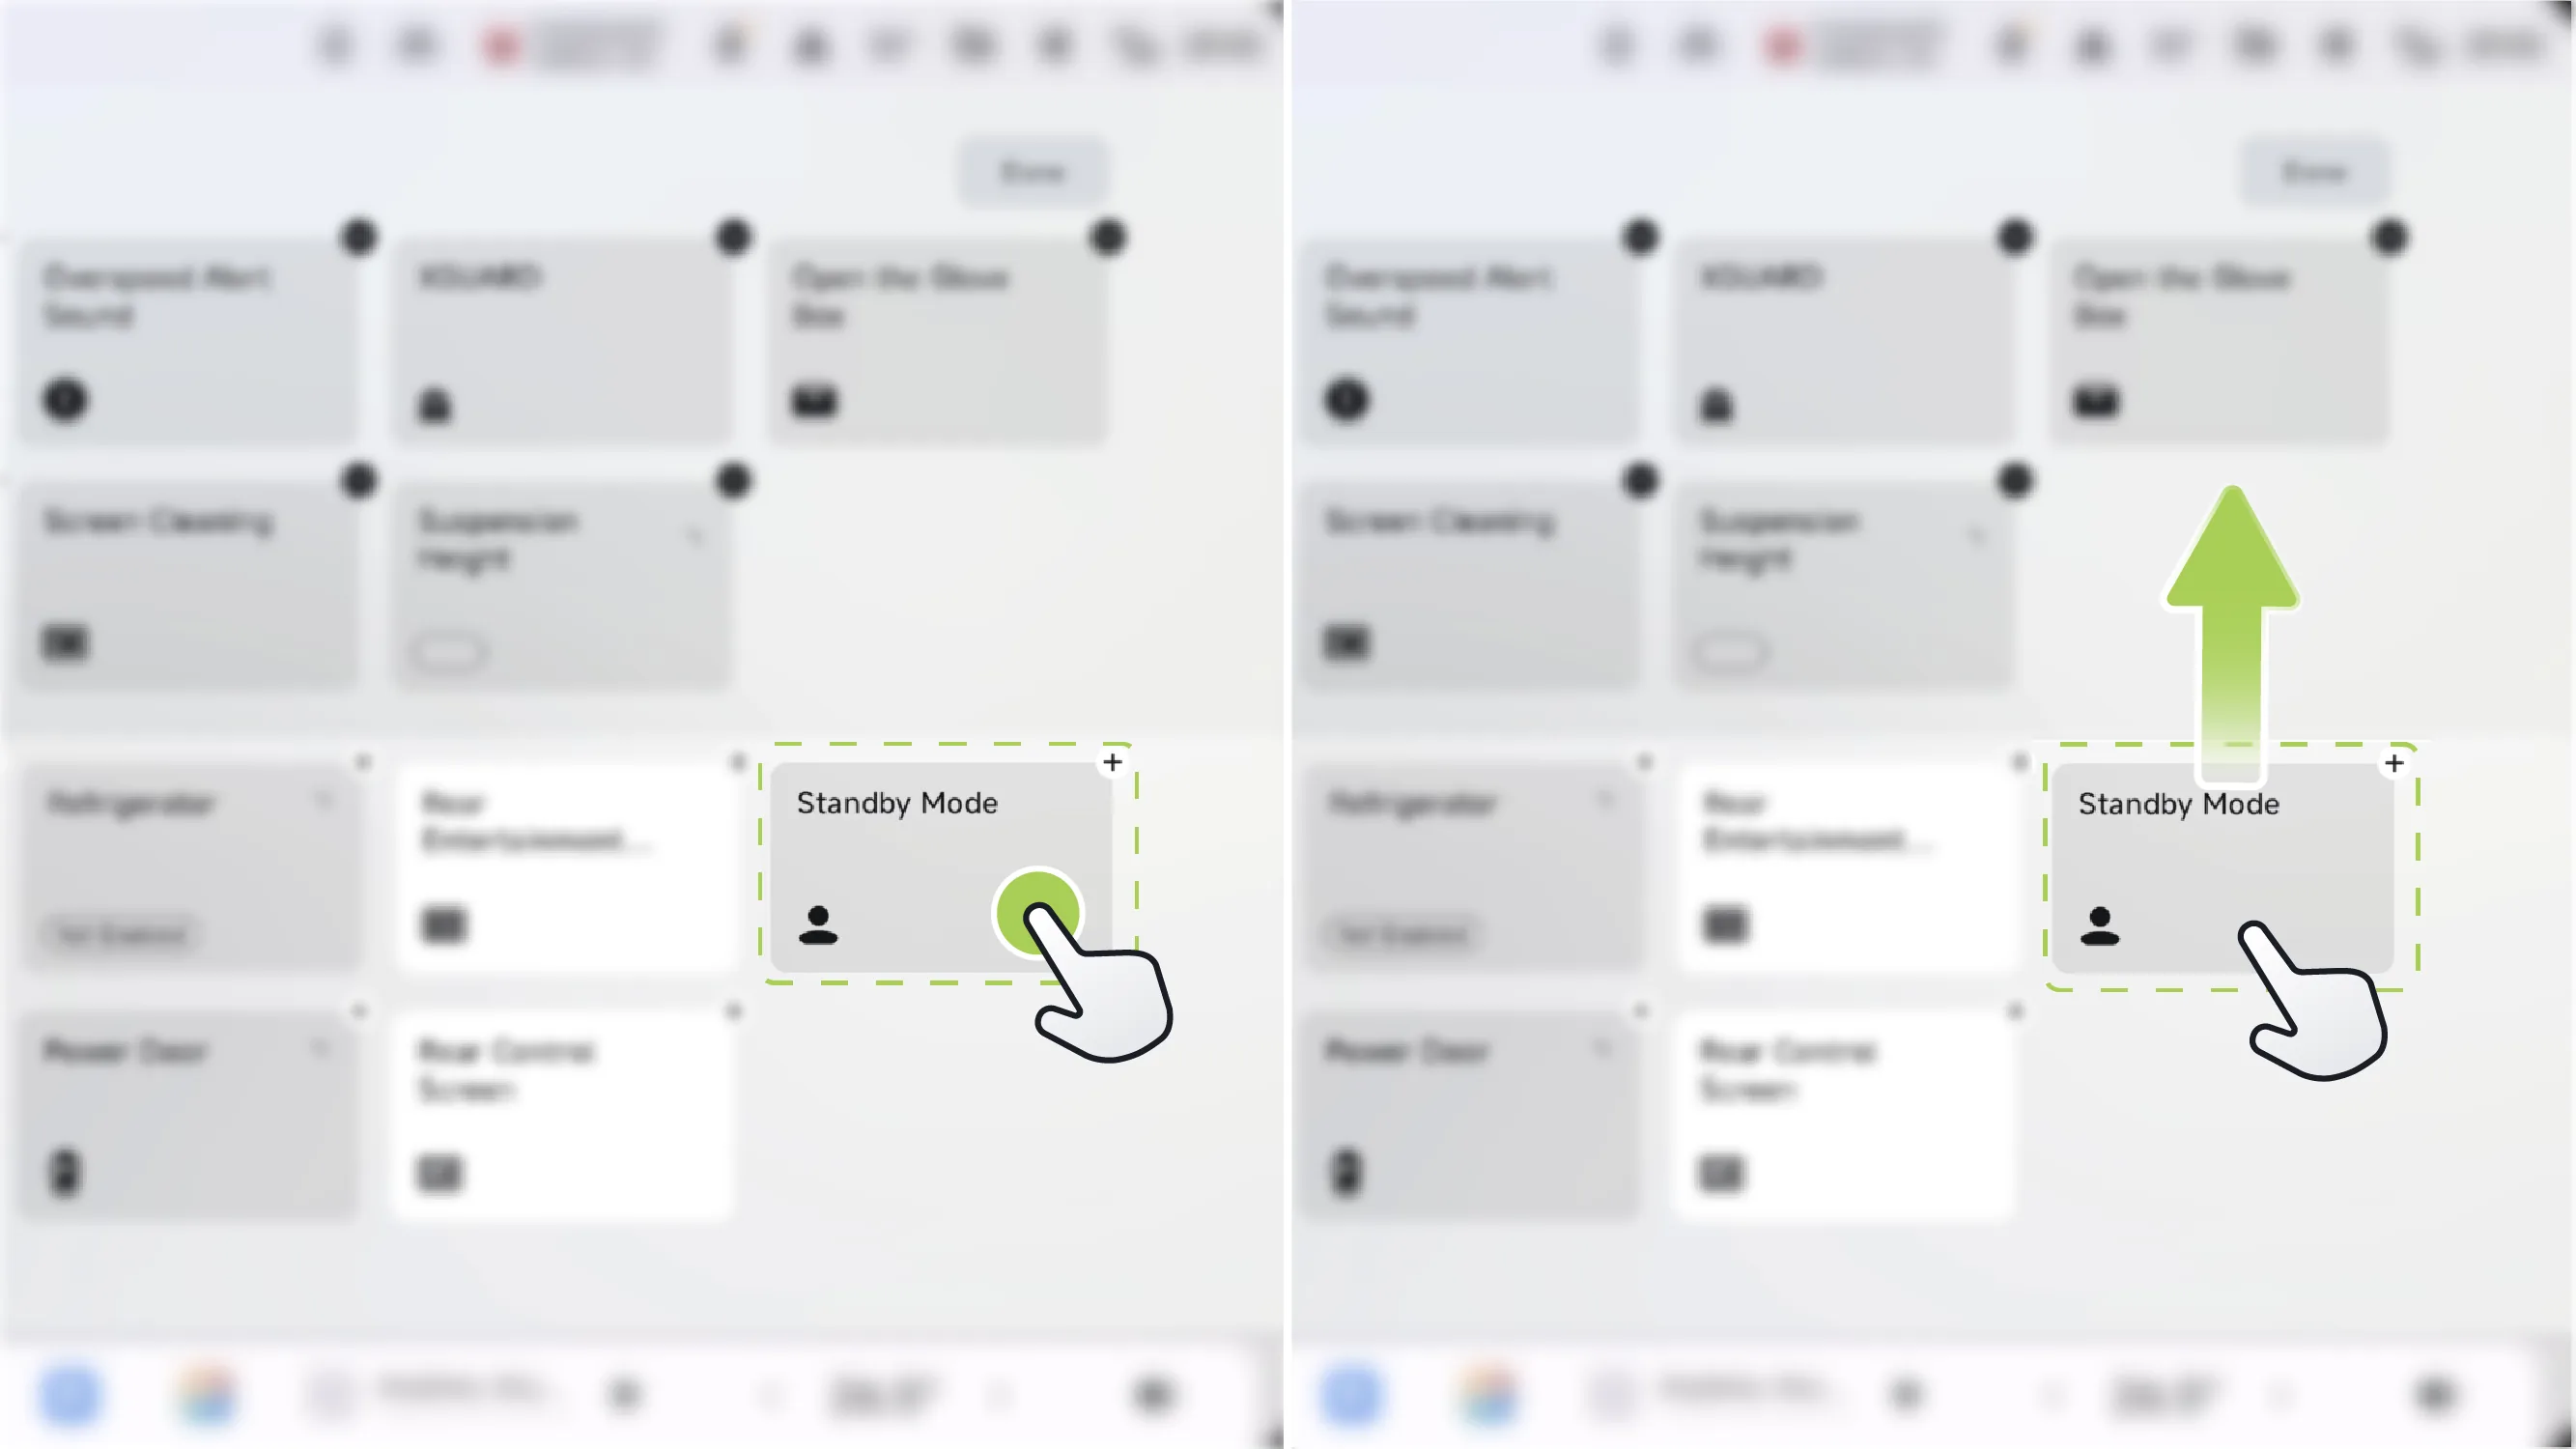
To add a card: tap the card in the available function area, or press and hold the card and drag it to the selected function area.
Tips When the selected function area is full, first delete a card from the selected function area, and then add a new function card.
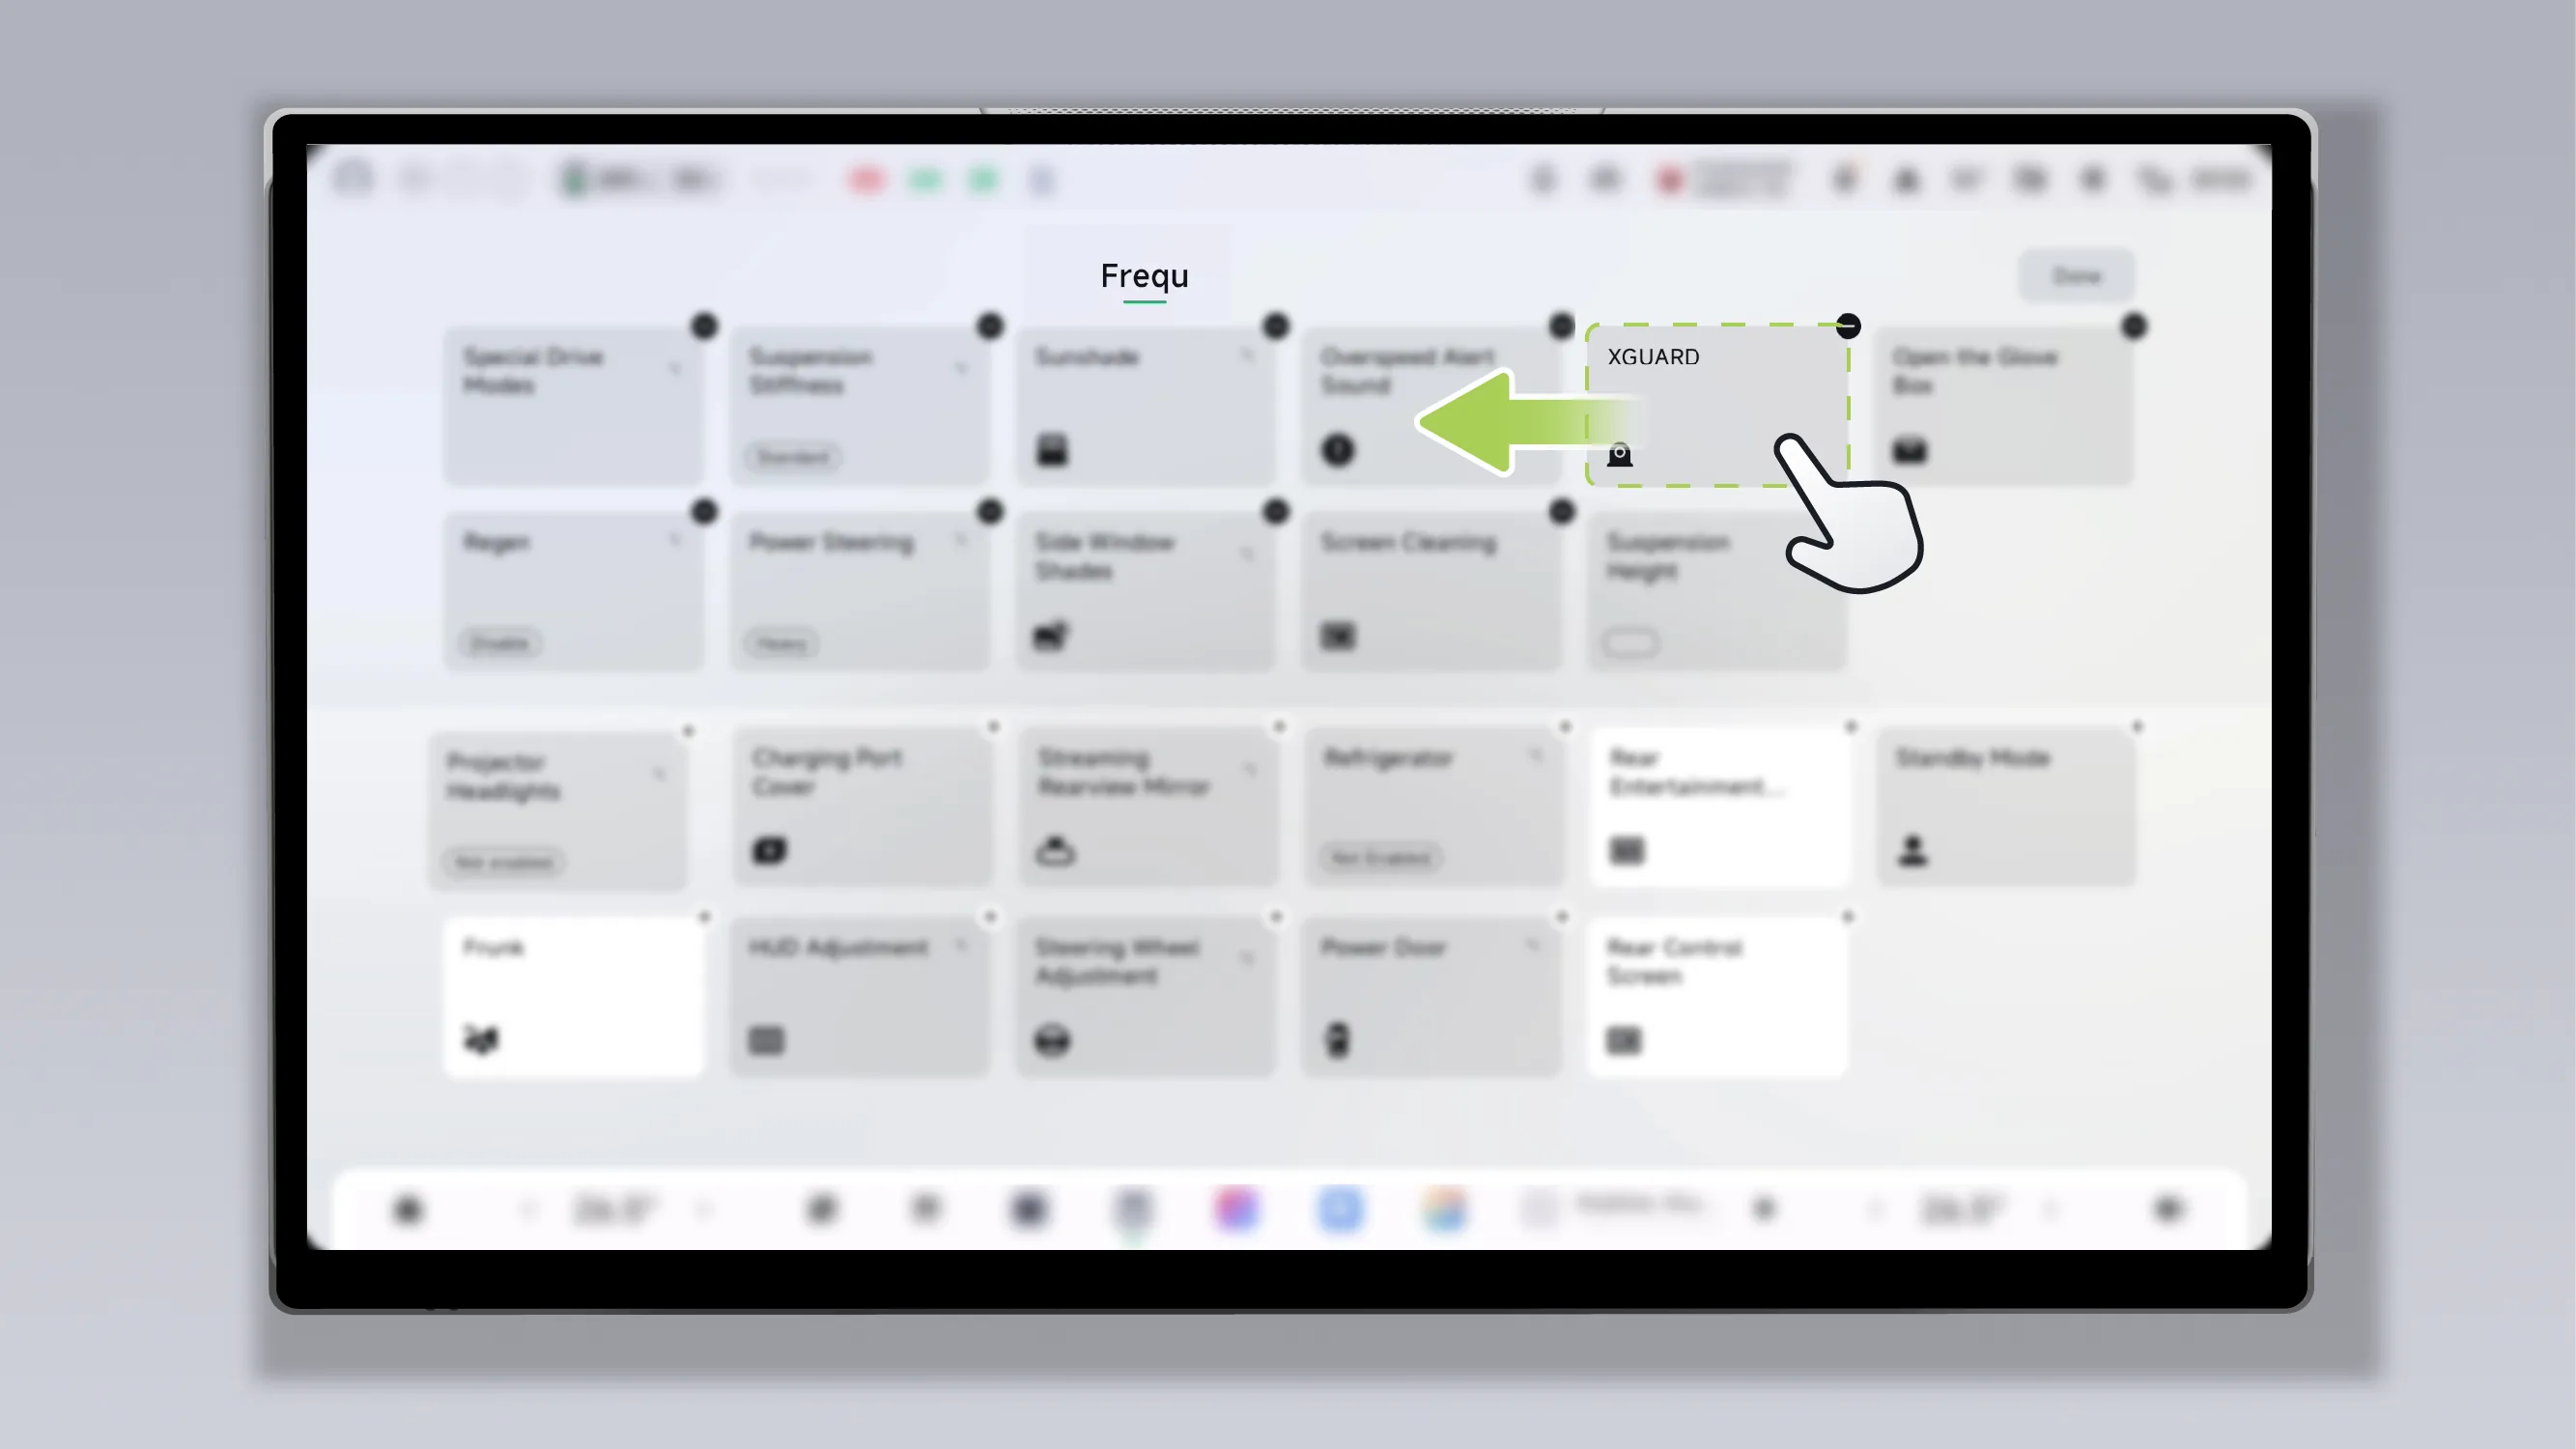
Press and hold and drag the card to adjust its position.
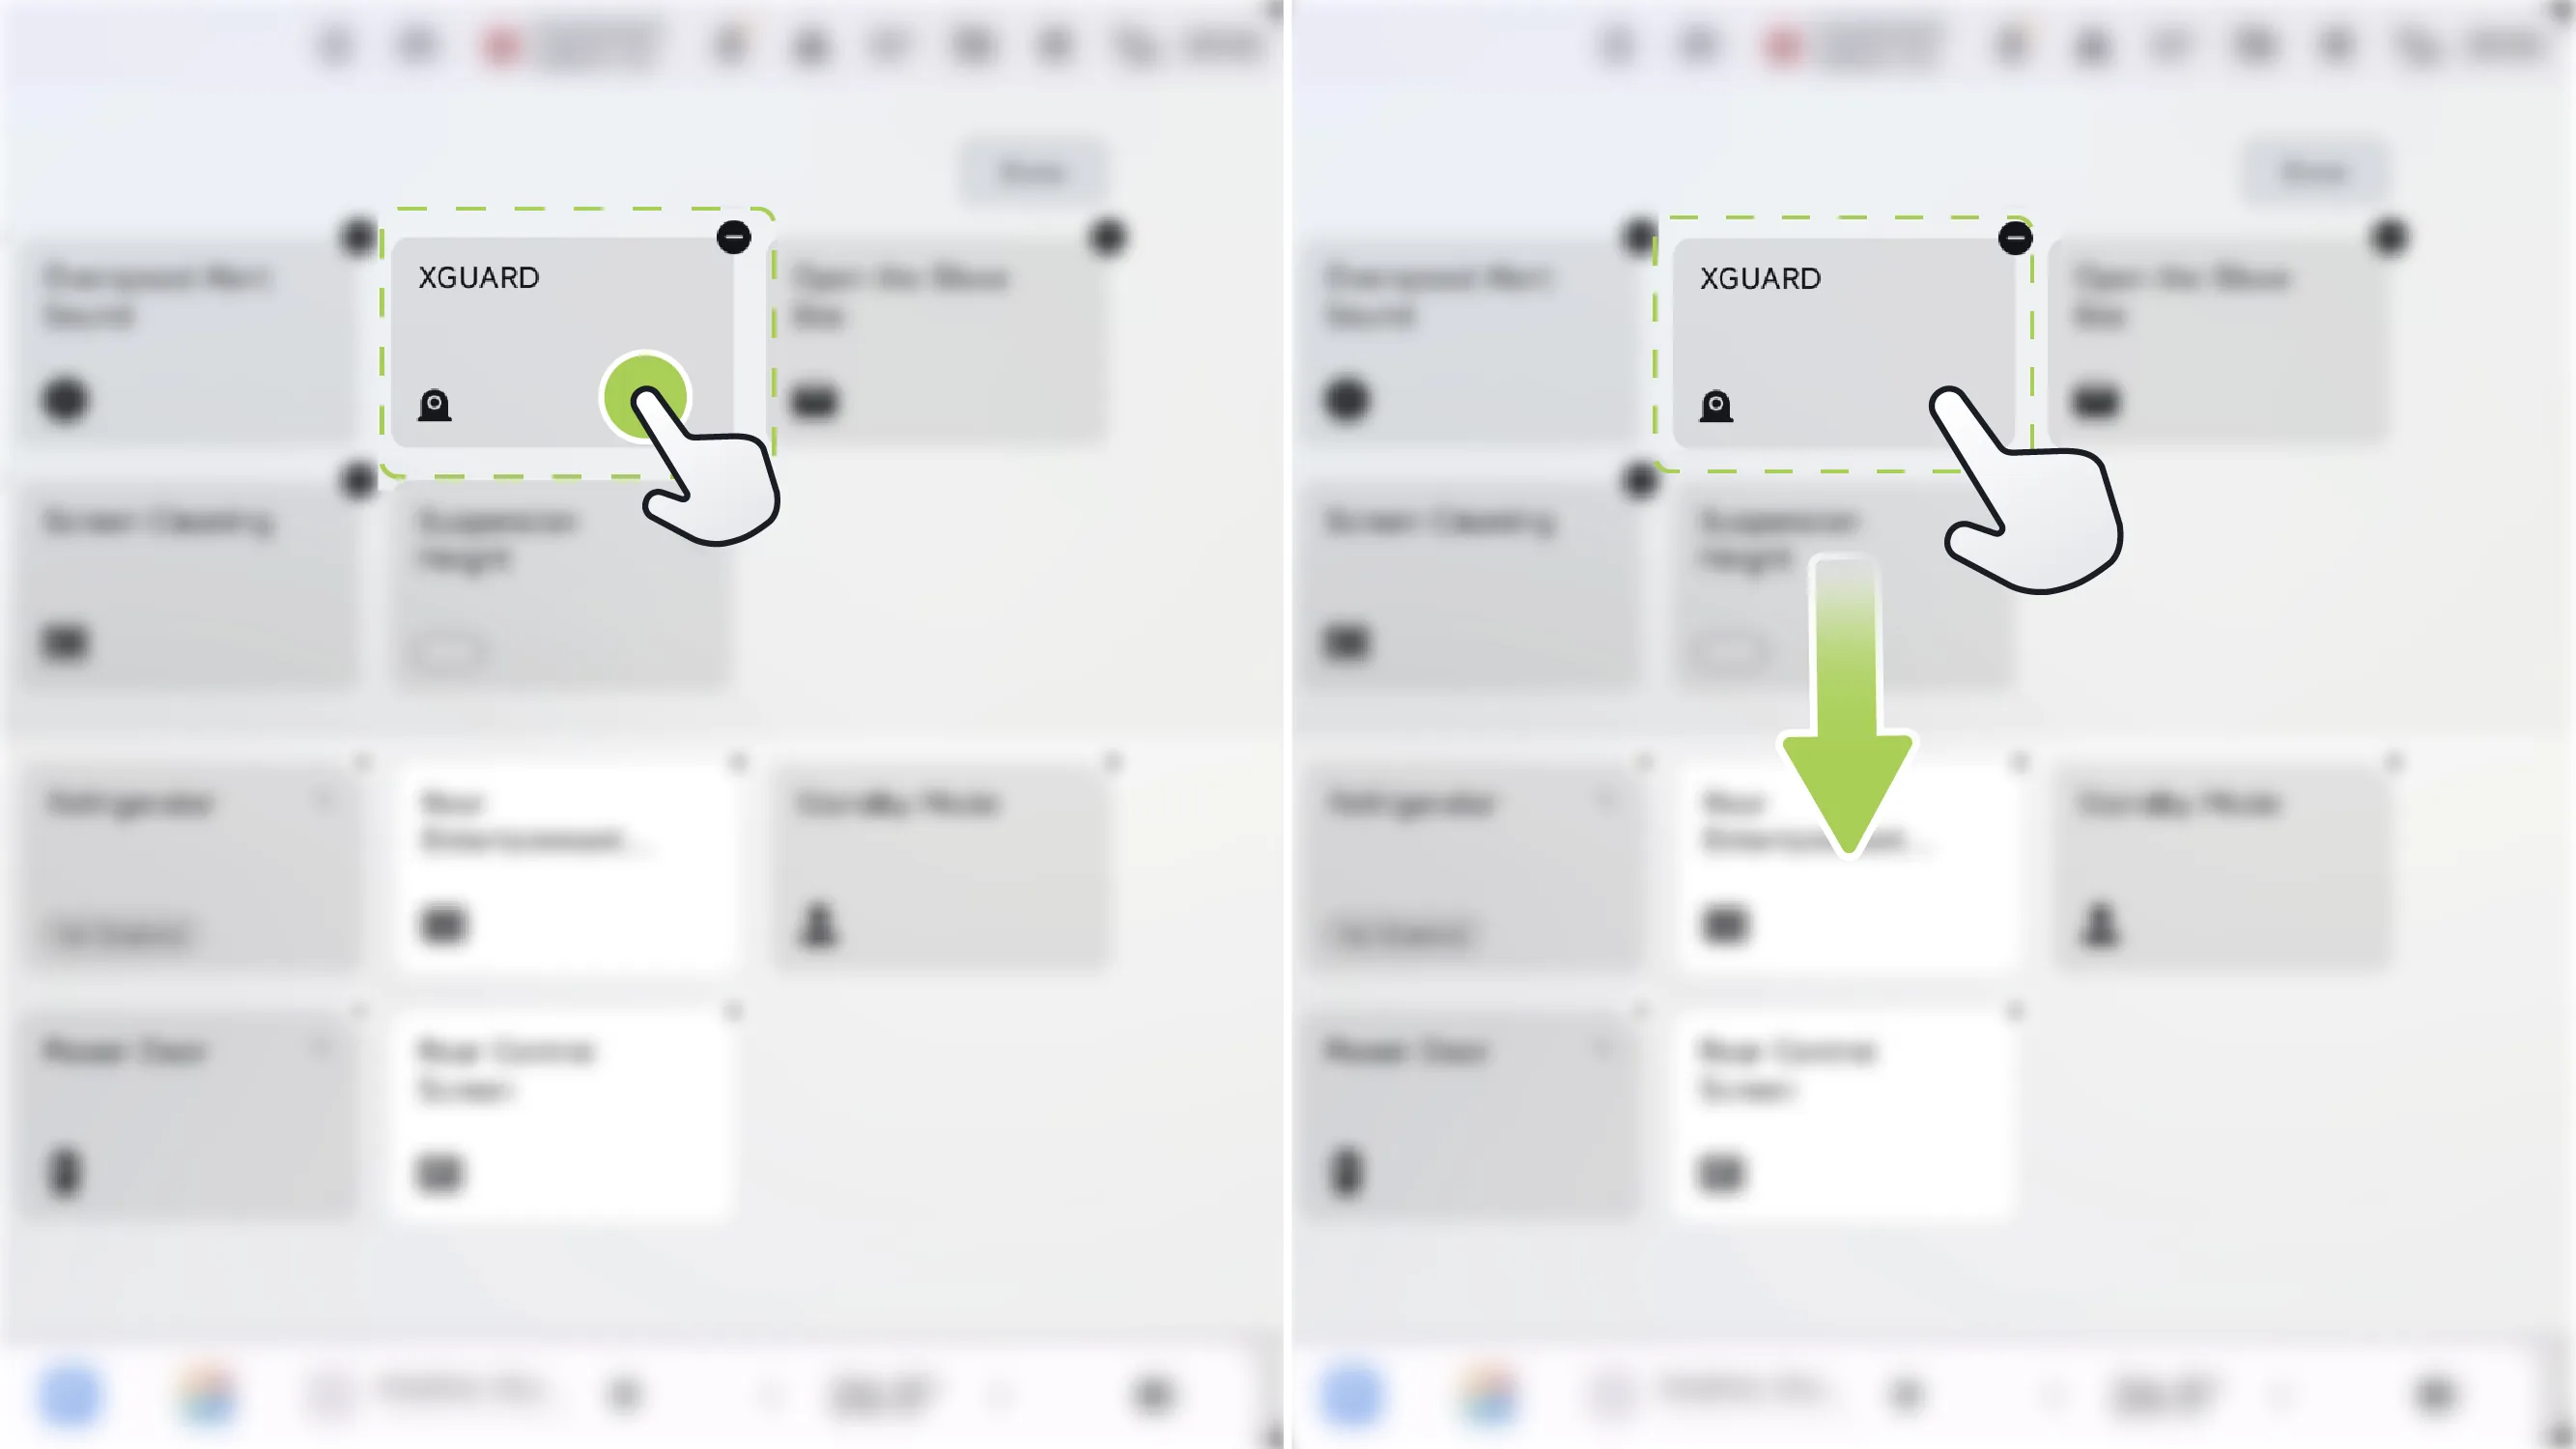
To delete a card: tap the card in the selected function area, or press and hold the card and drag it to the function area to be selected.
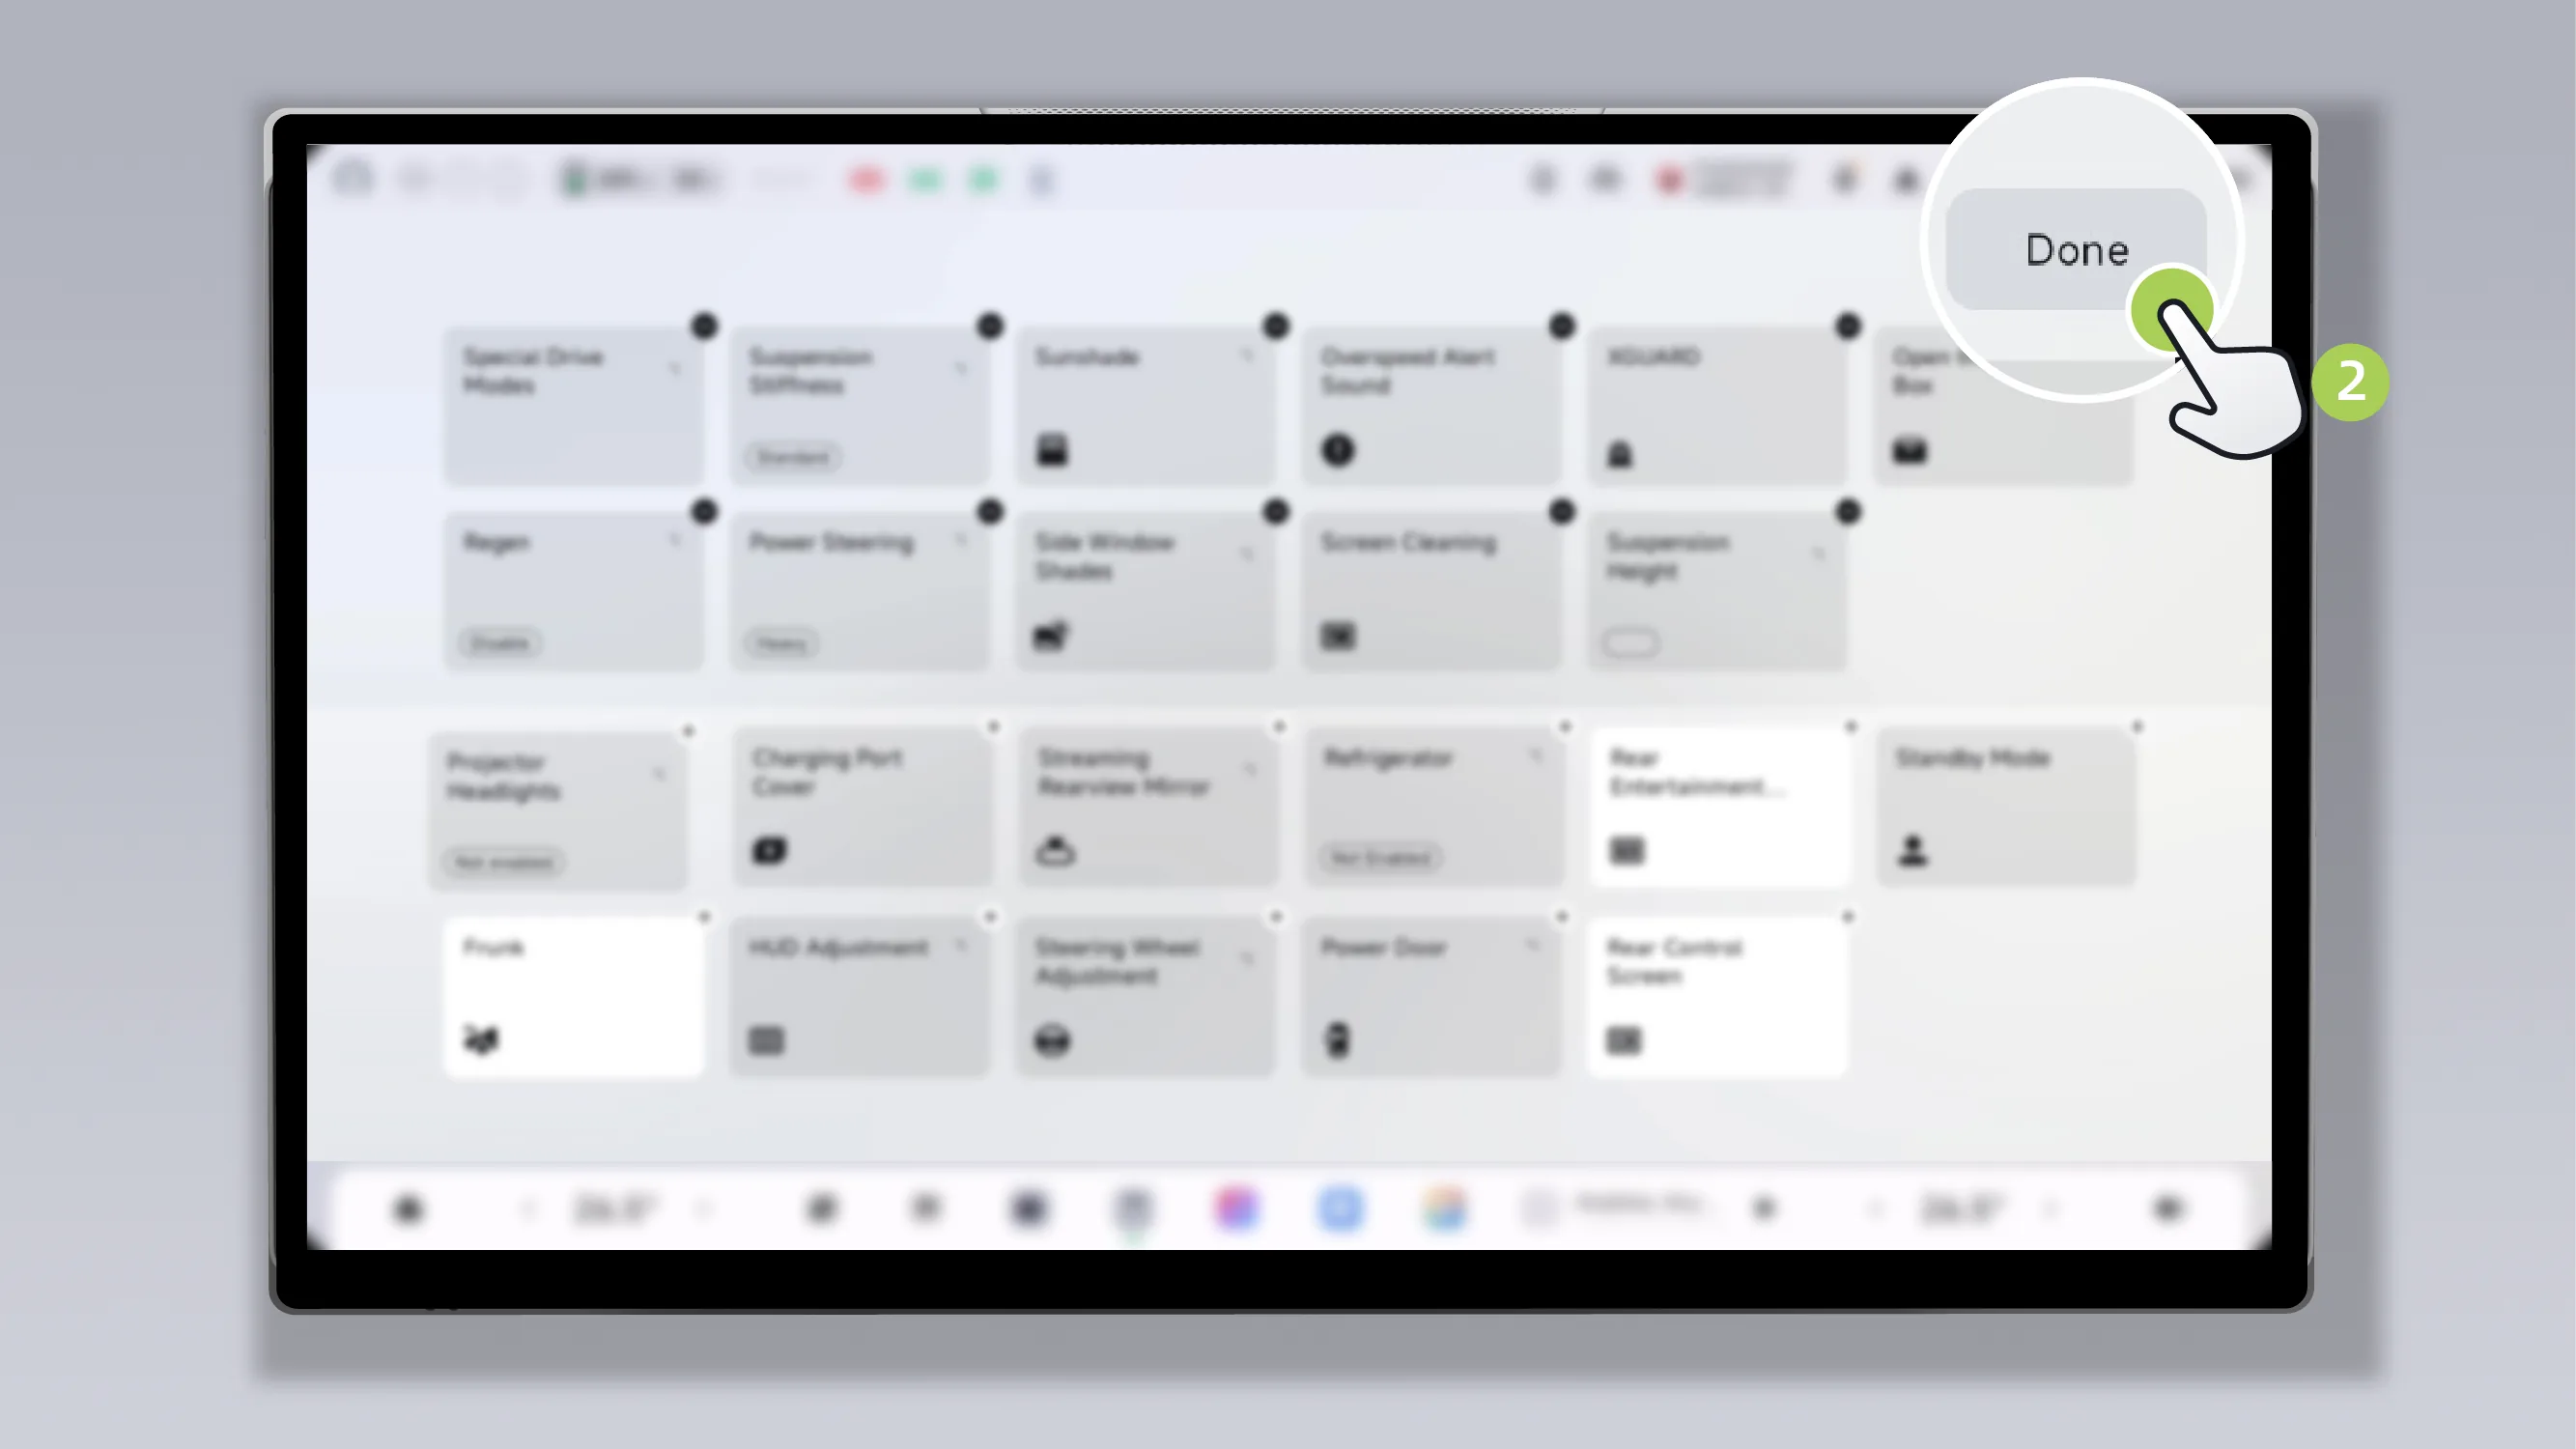
Tap Tap **or a blank area** to exit the customization state.
In any of the following situations, the control center will collapse and close:
Tap the close button on the Control Center panel.
Tap a blank area of the control center (the left and right sides and the bottom).
Open other apps.
No operation for more than 30 seconds.
Tap the bottom taskbar “ ”App Center icon.
Tap the bottom taskbar “  ”Home page icon.
You can conveniently adjust the air conditioning temperature, volume, and more in the bottom taskbar of the center display.
You can customize the frequently used apps in the bottom taskbar in the following ways:
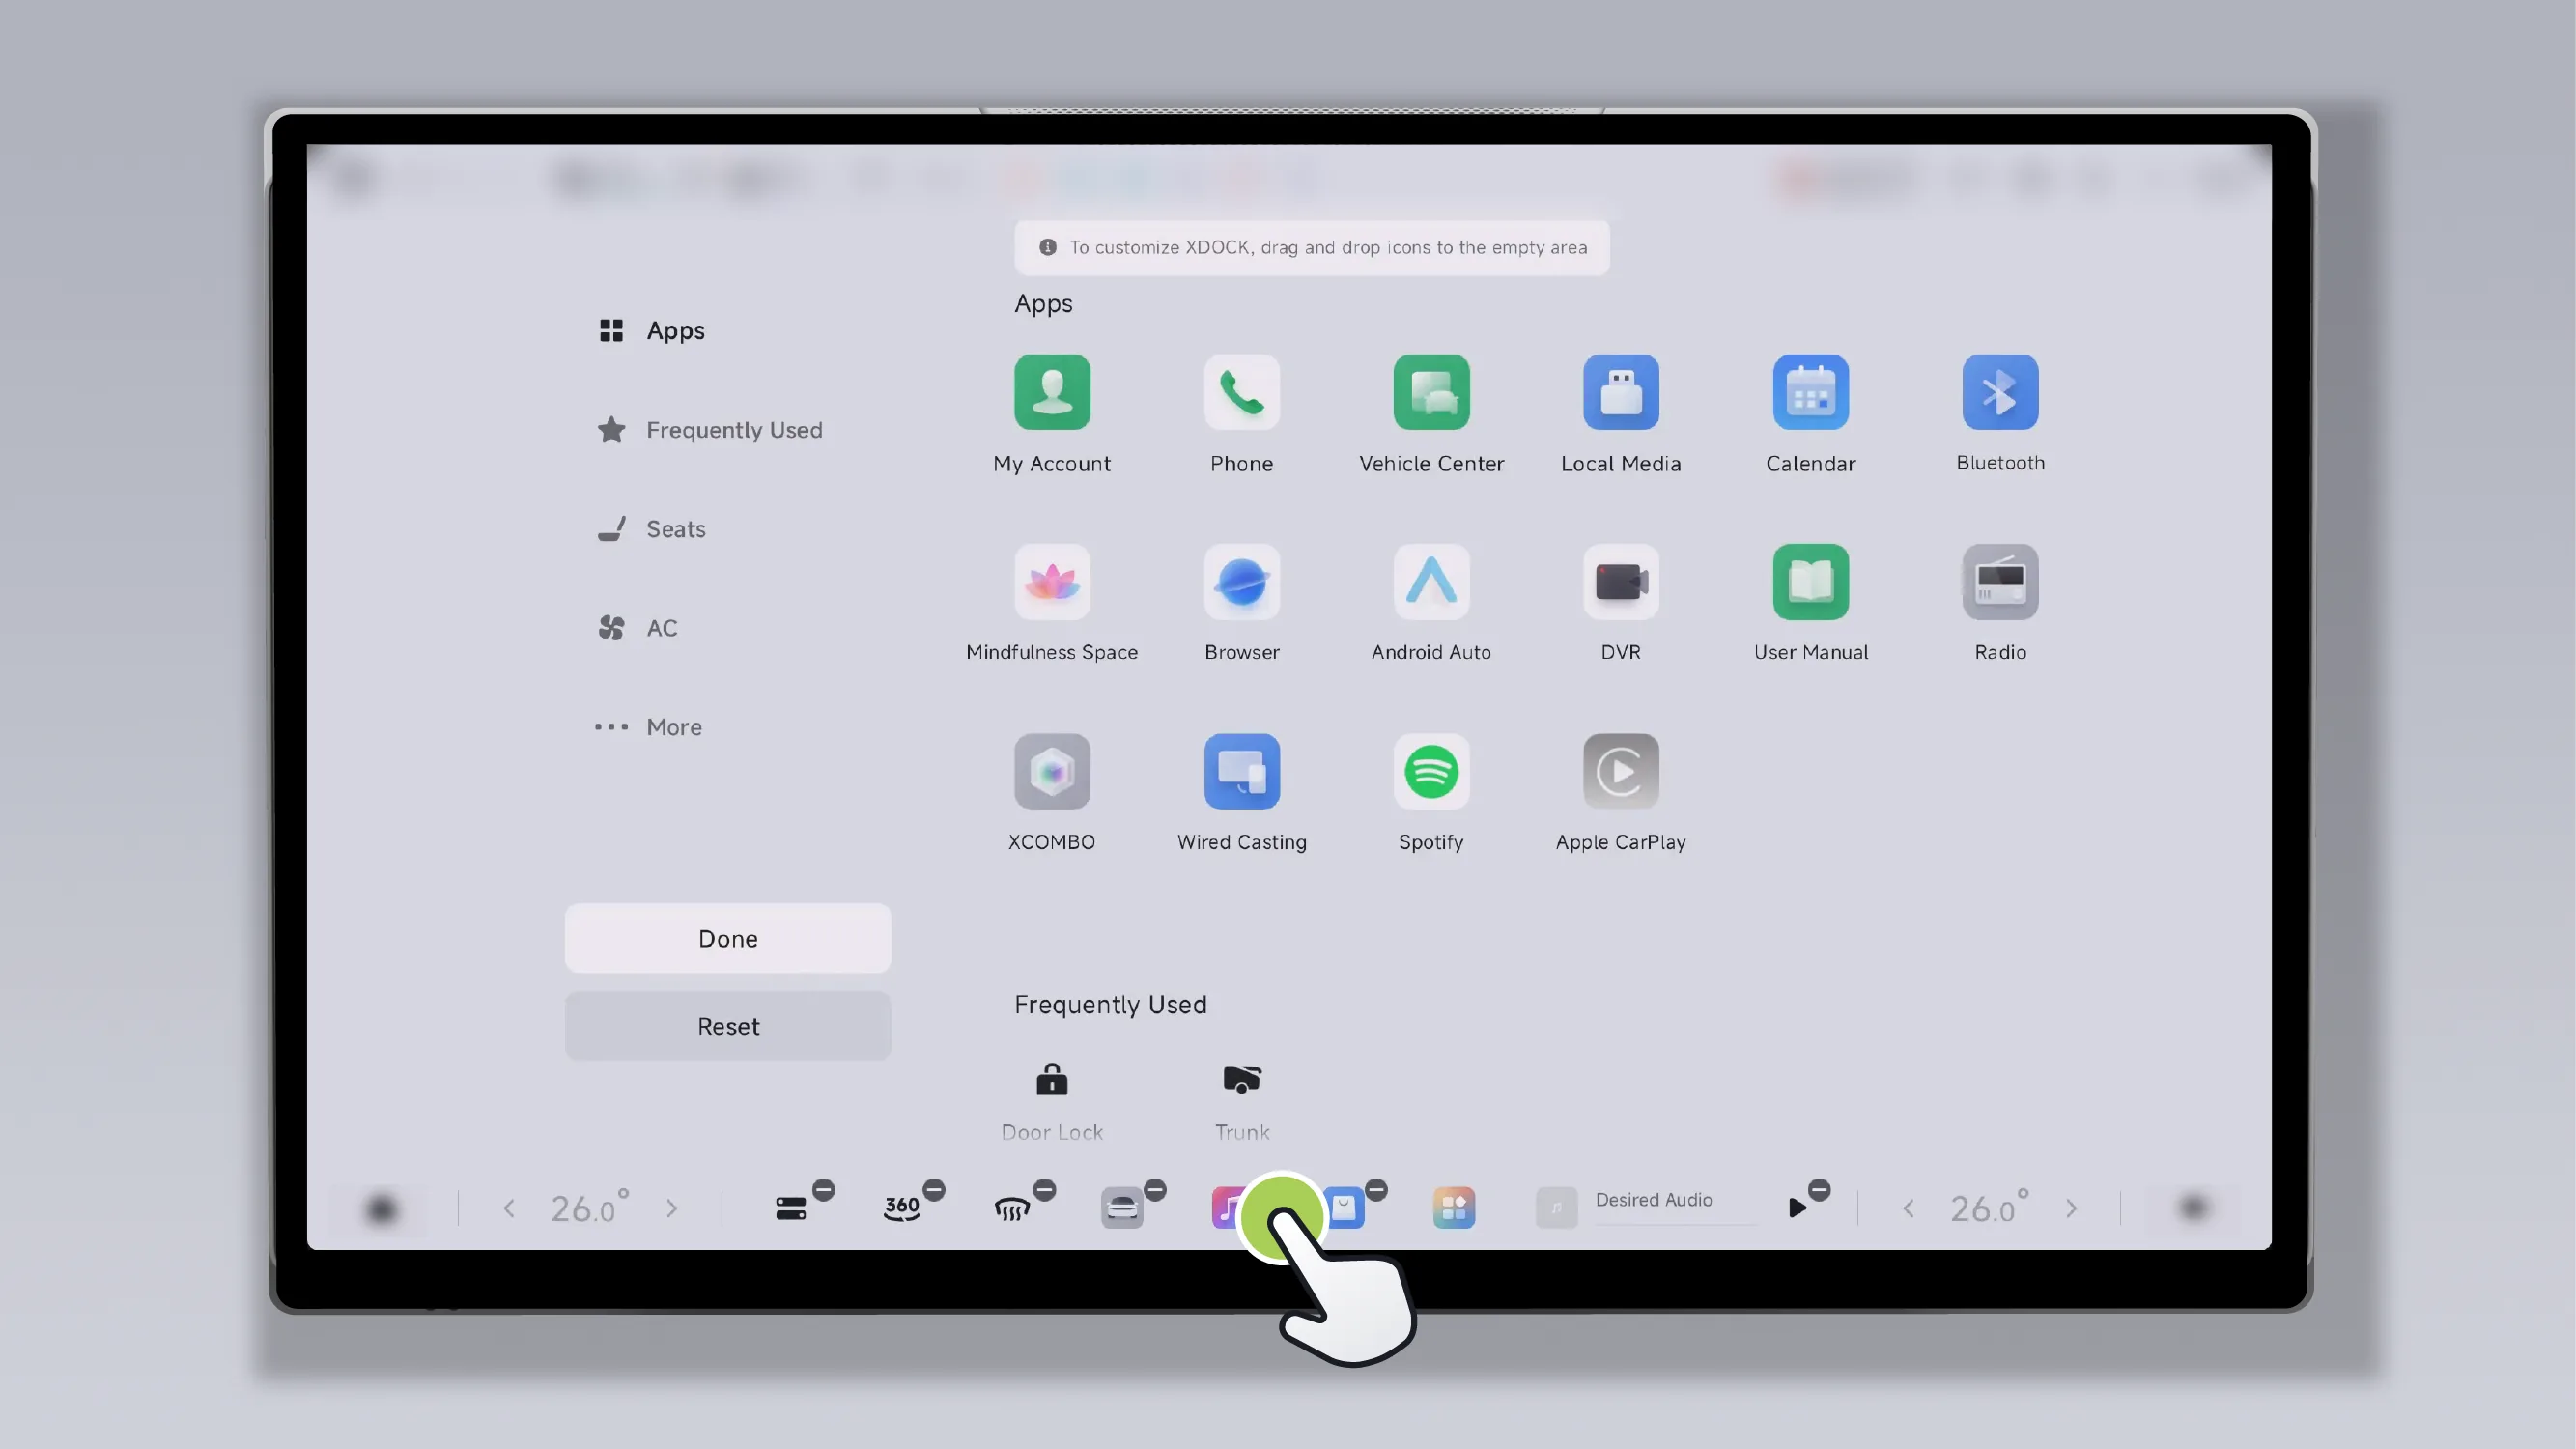
Press and hold any area of the bottom taskbar icon to customize the bottom taskbar.
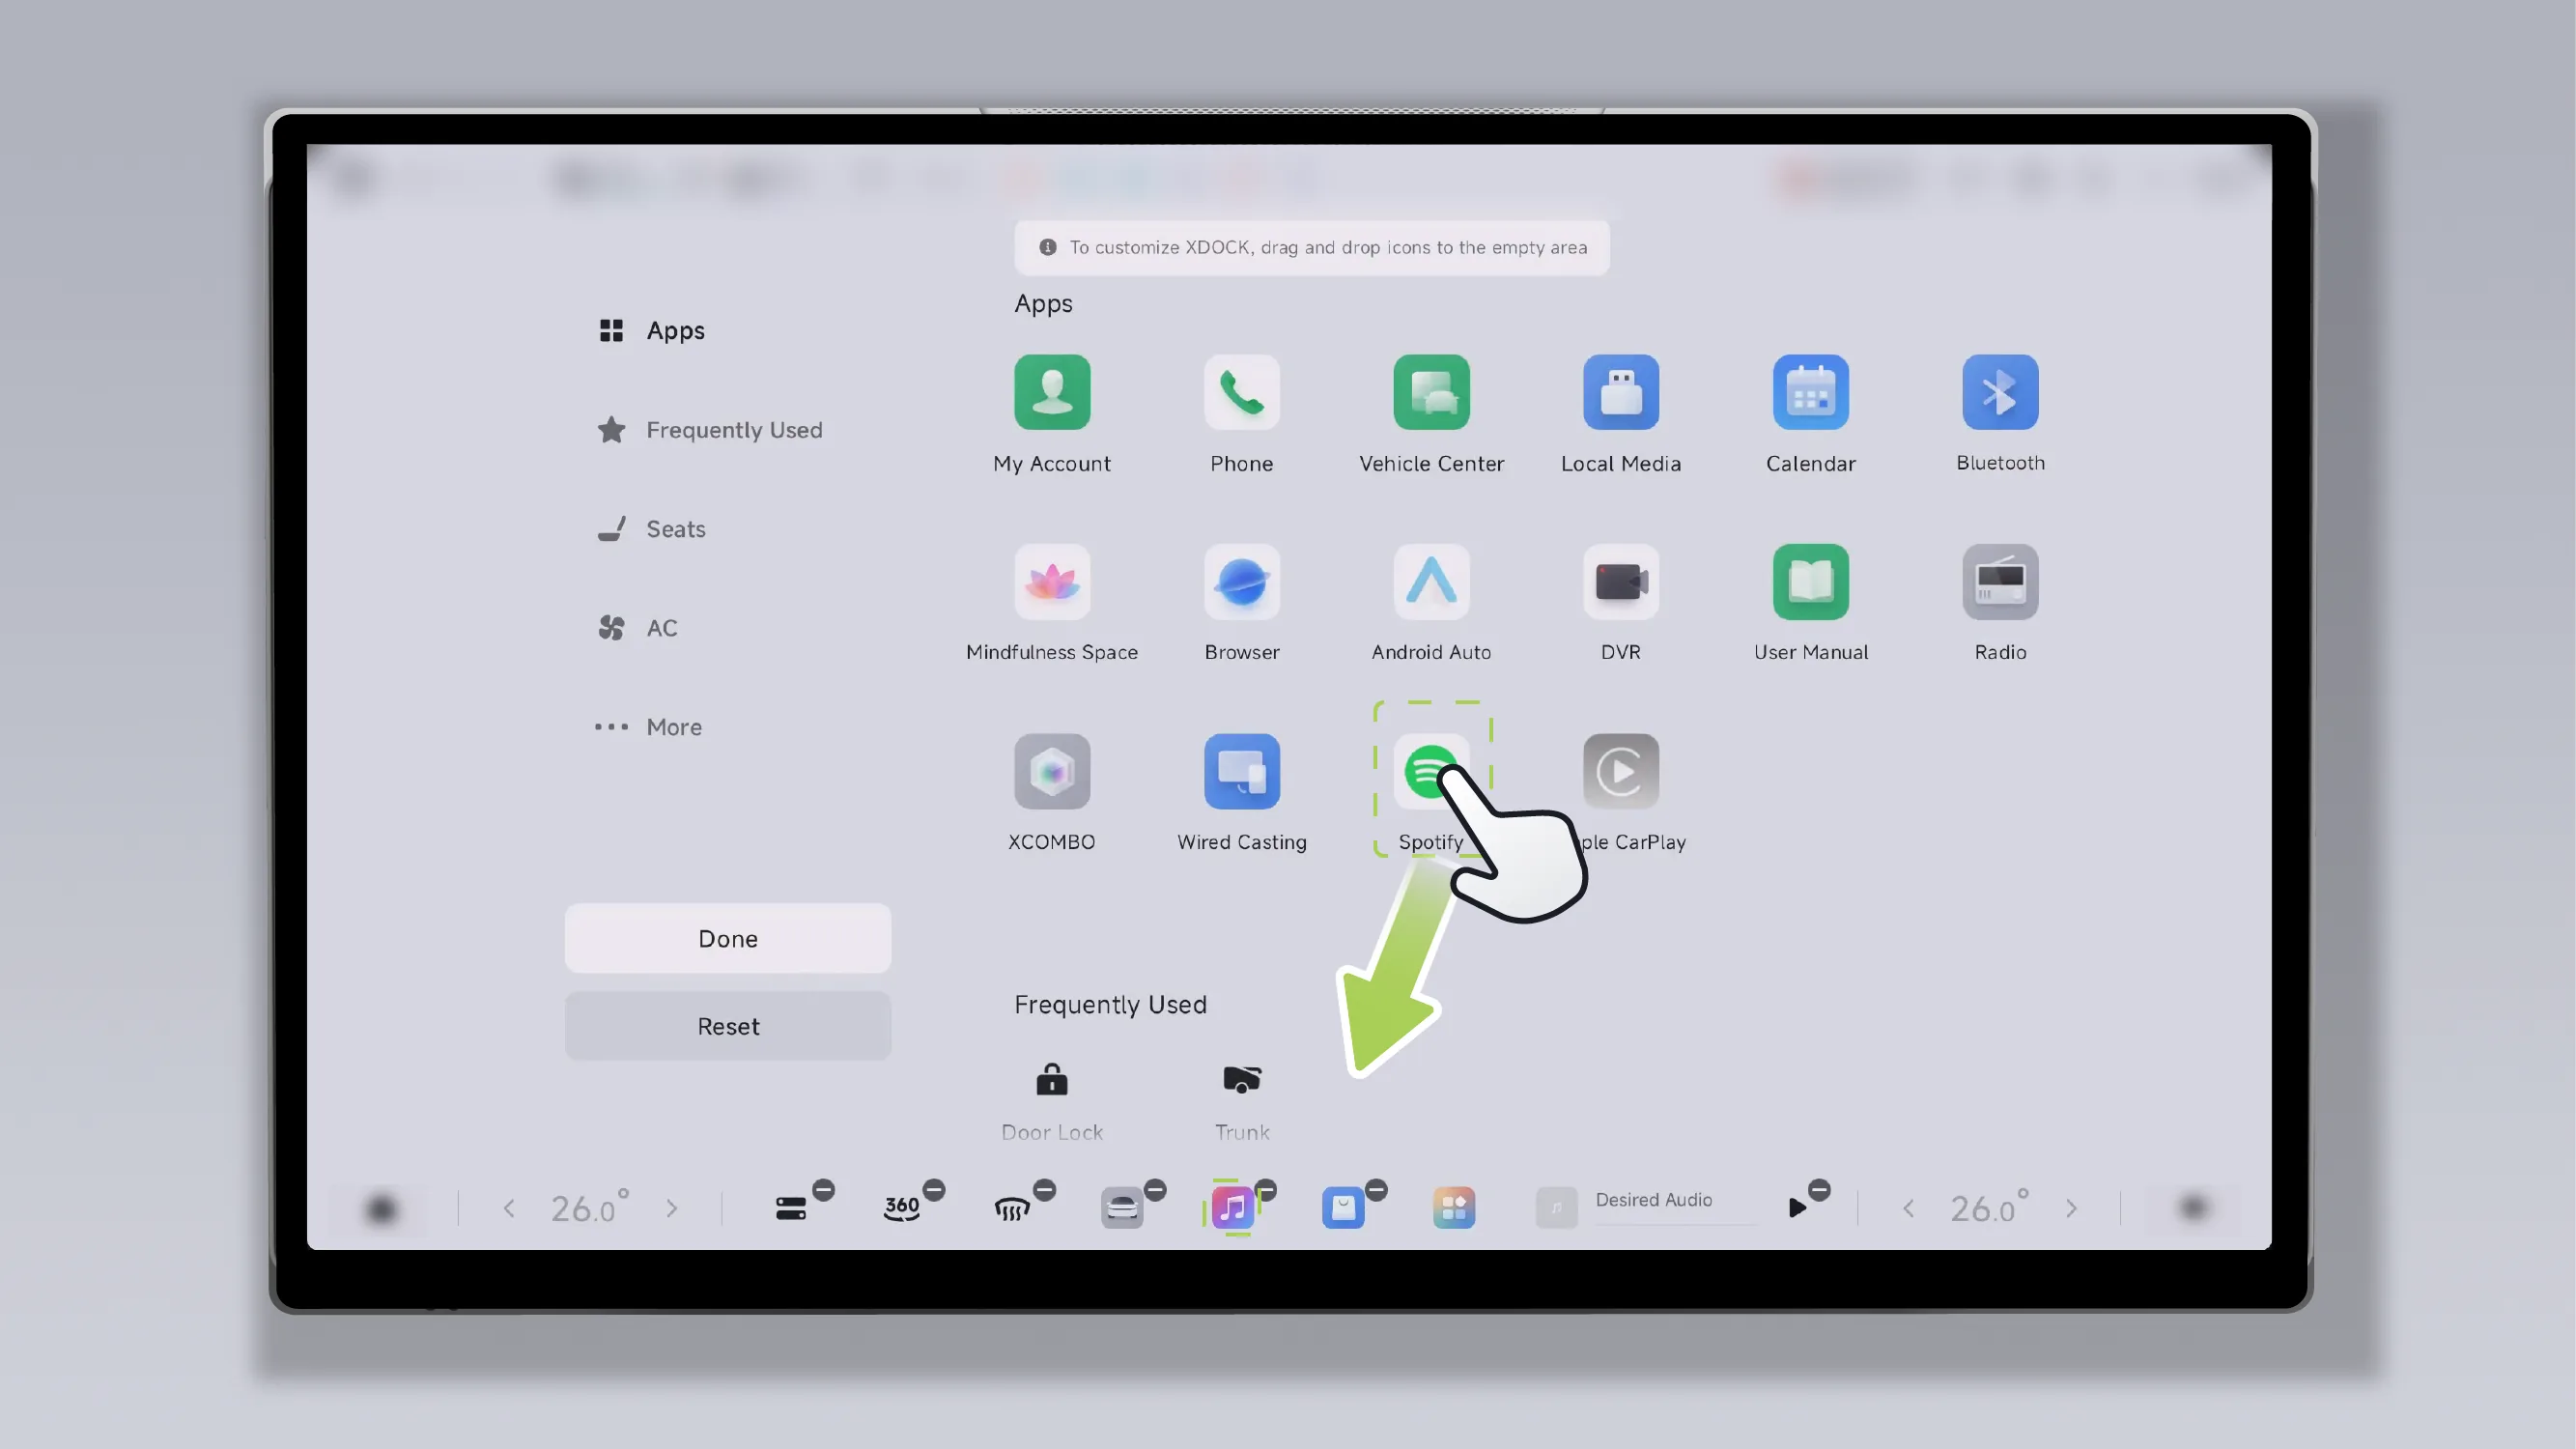
You can drag apps and the function control and shortcut widget icons in doors and windows, seats, and Air Conditioner to the empty spaces in the bottom taskbar.
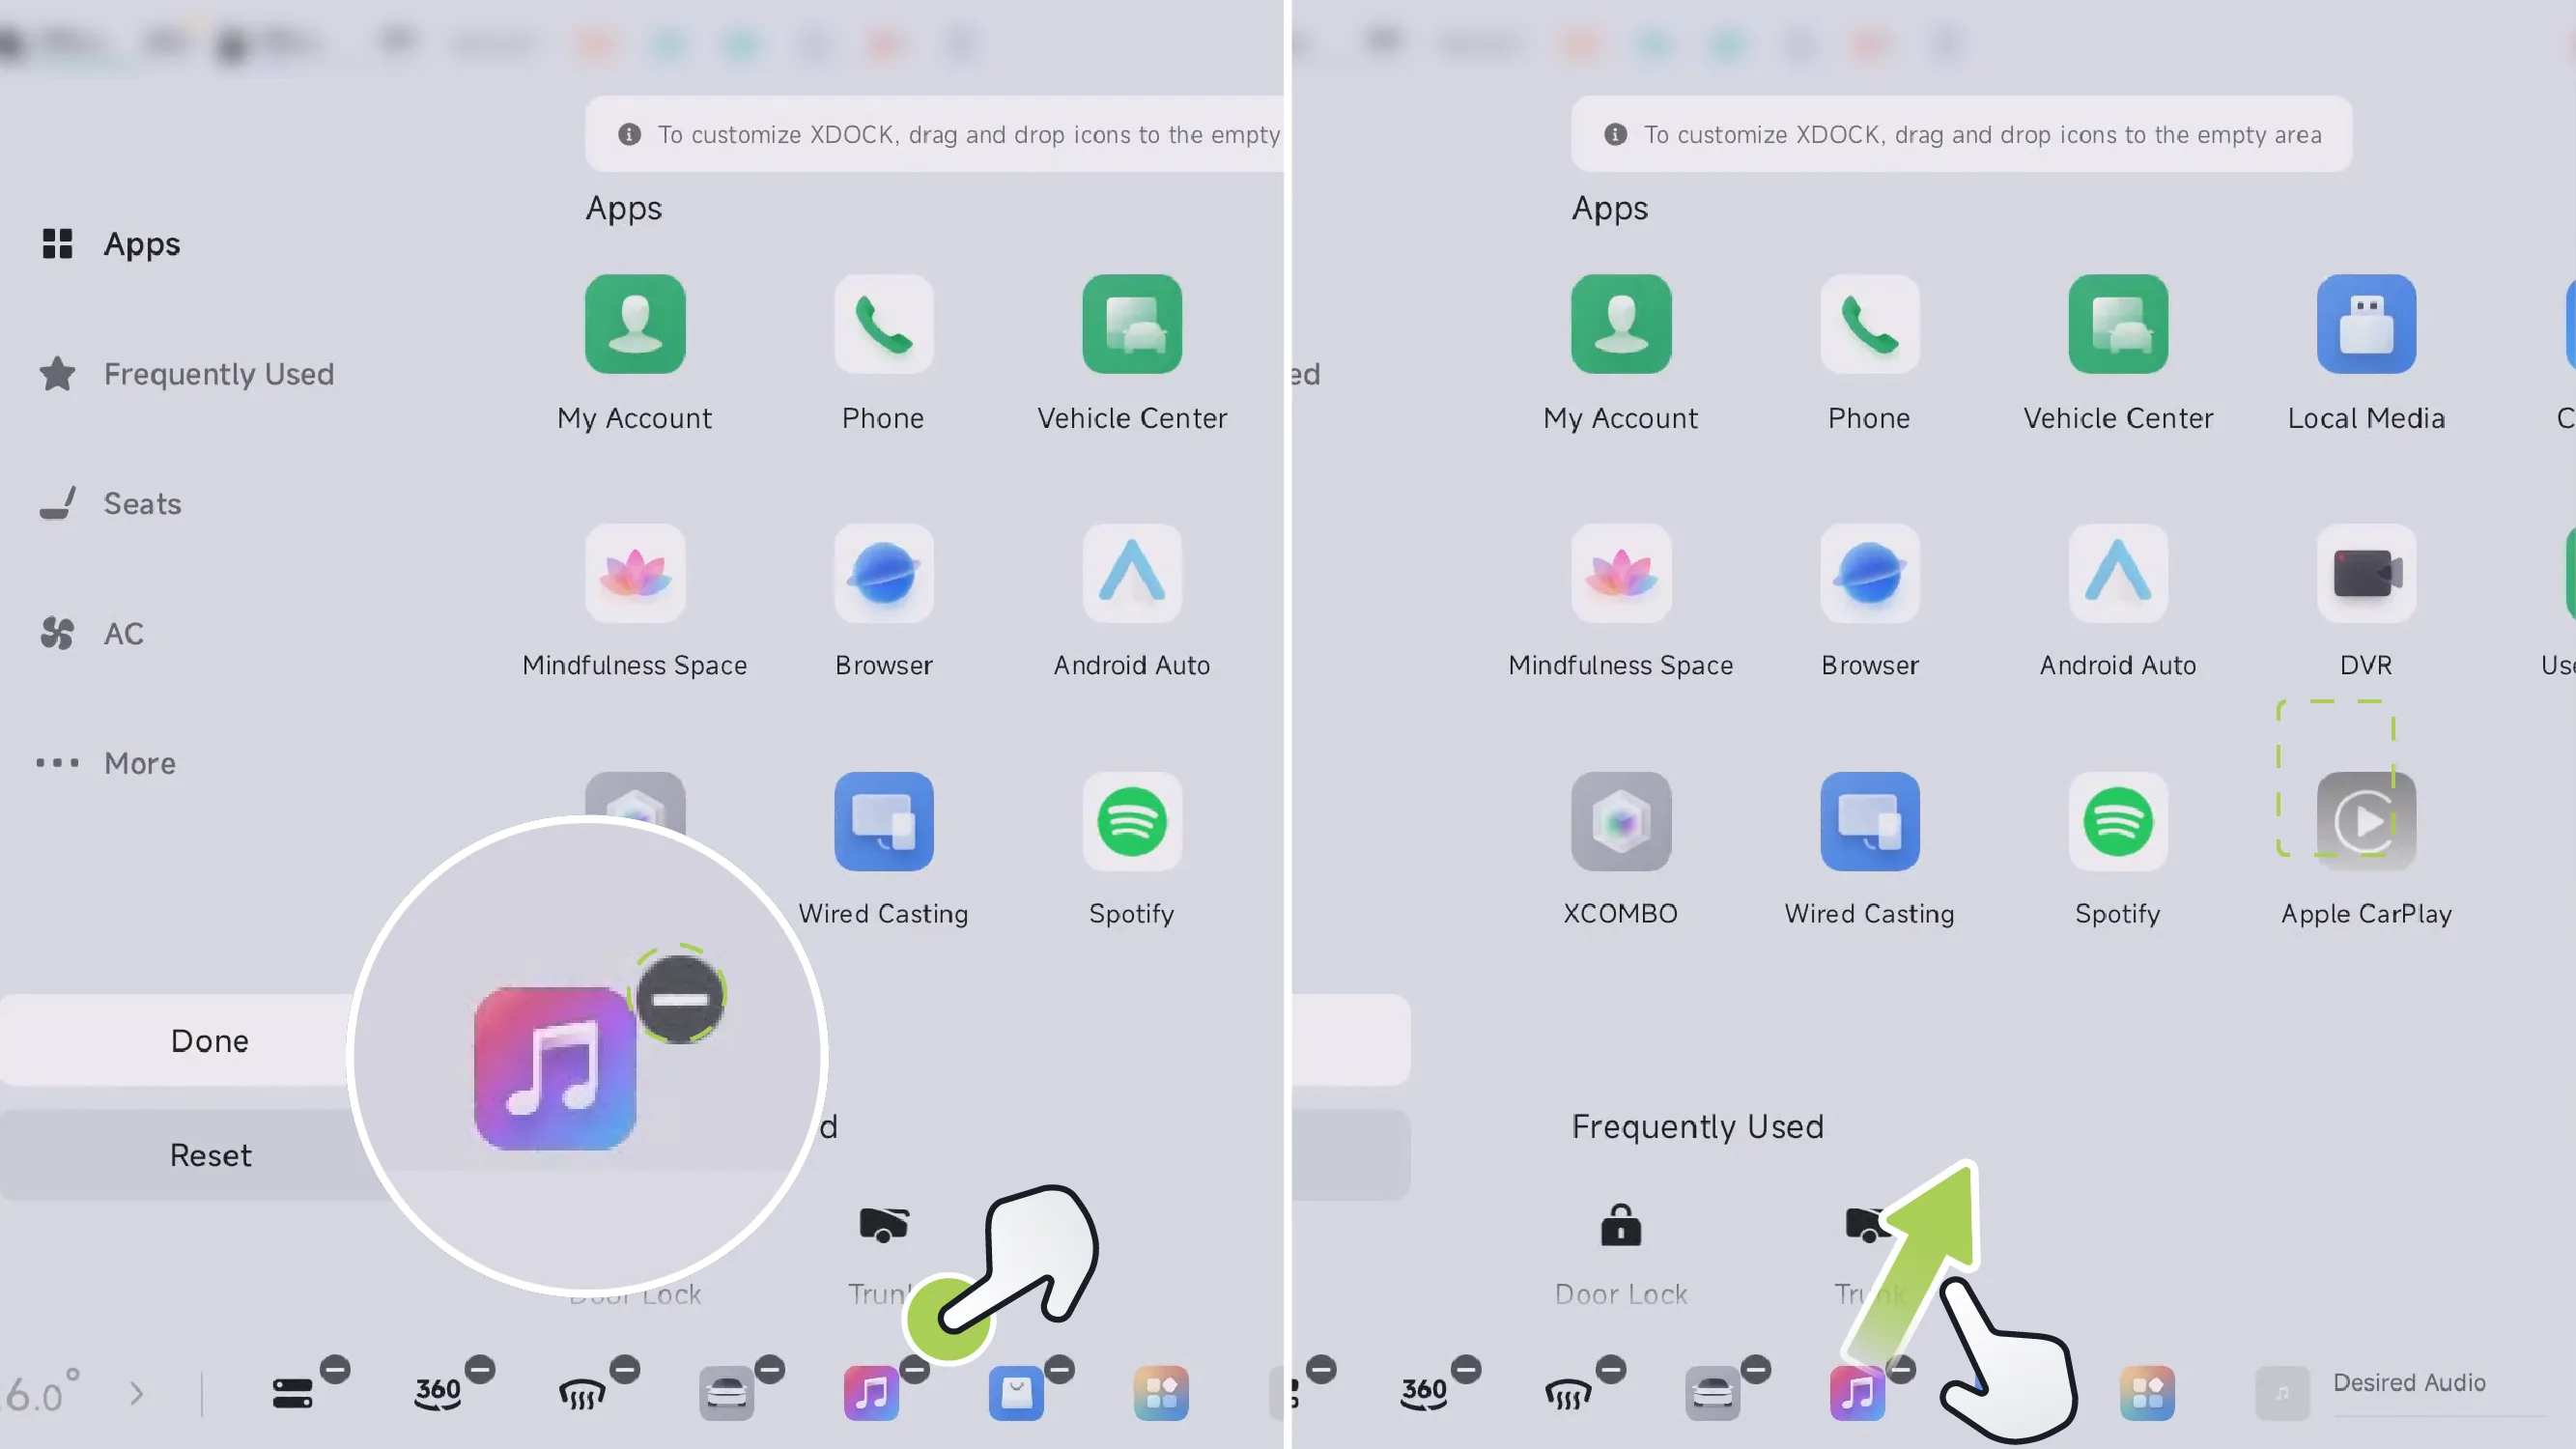
Tap the upper-right corner of the icon in custom mode. “  ”, or drag the icon into an app and release it to remove this icon from the bottom taskbar.
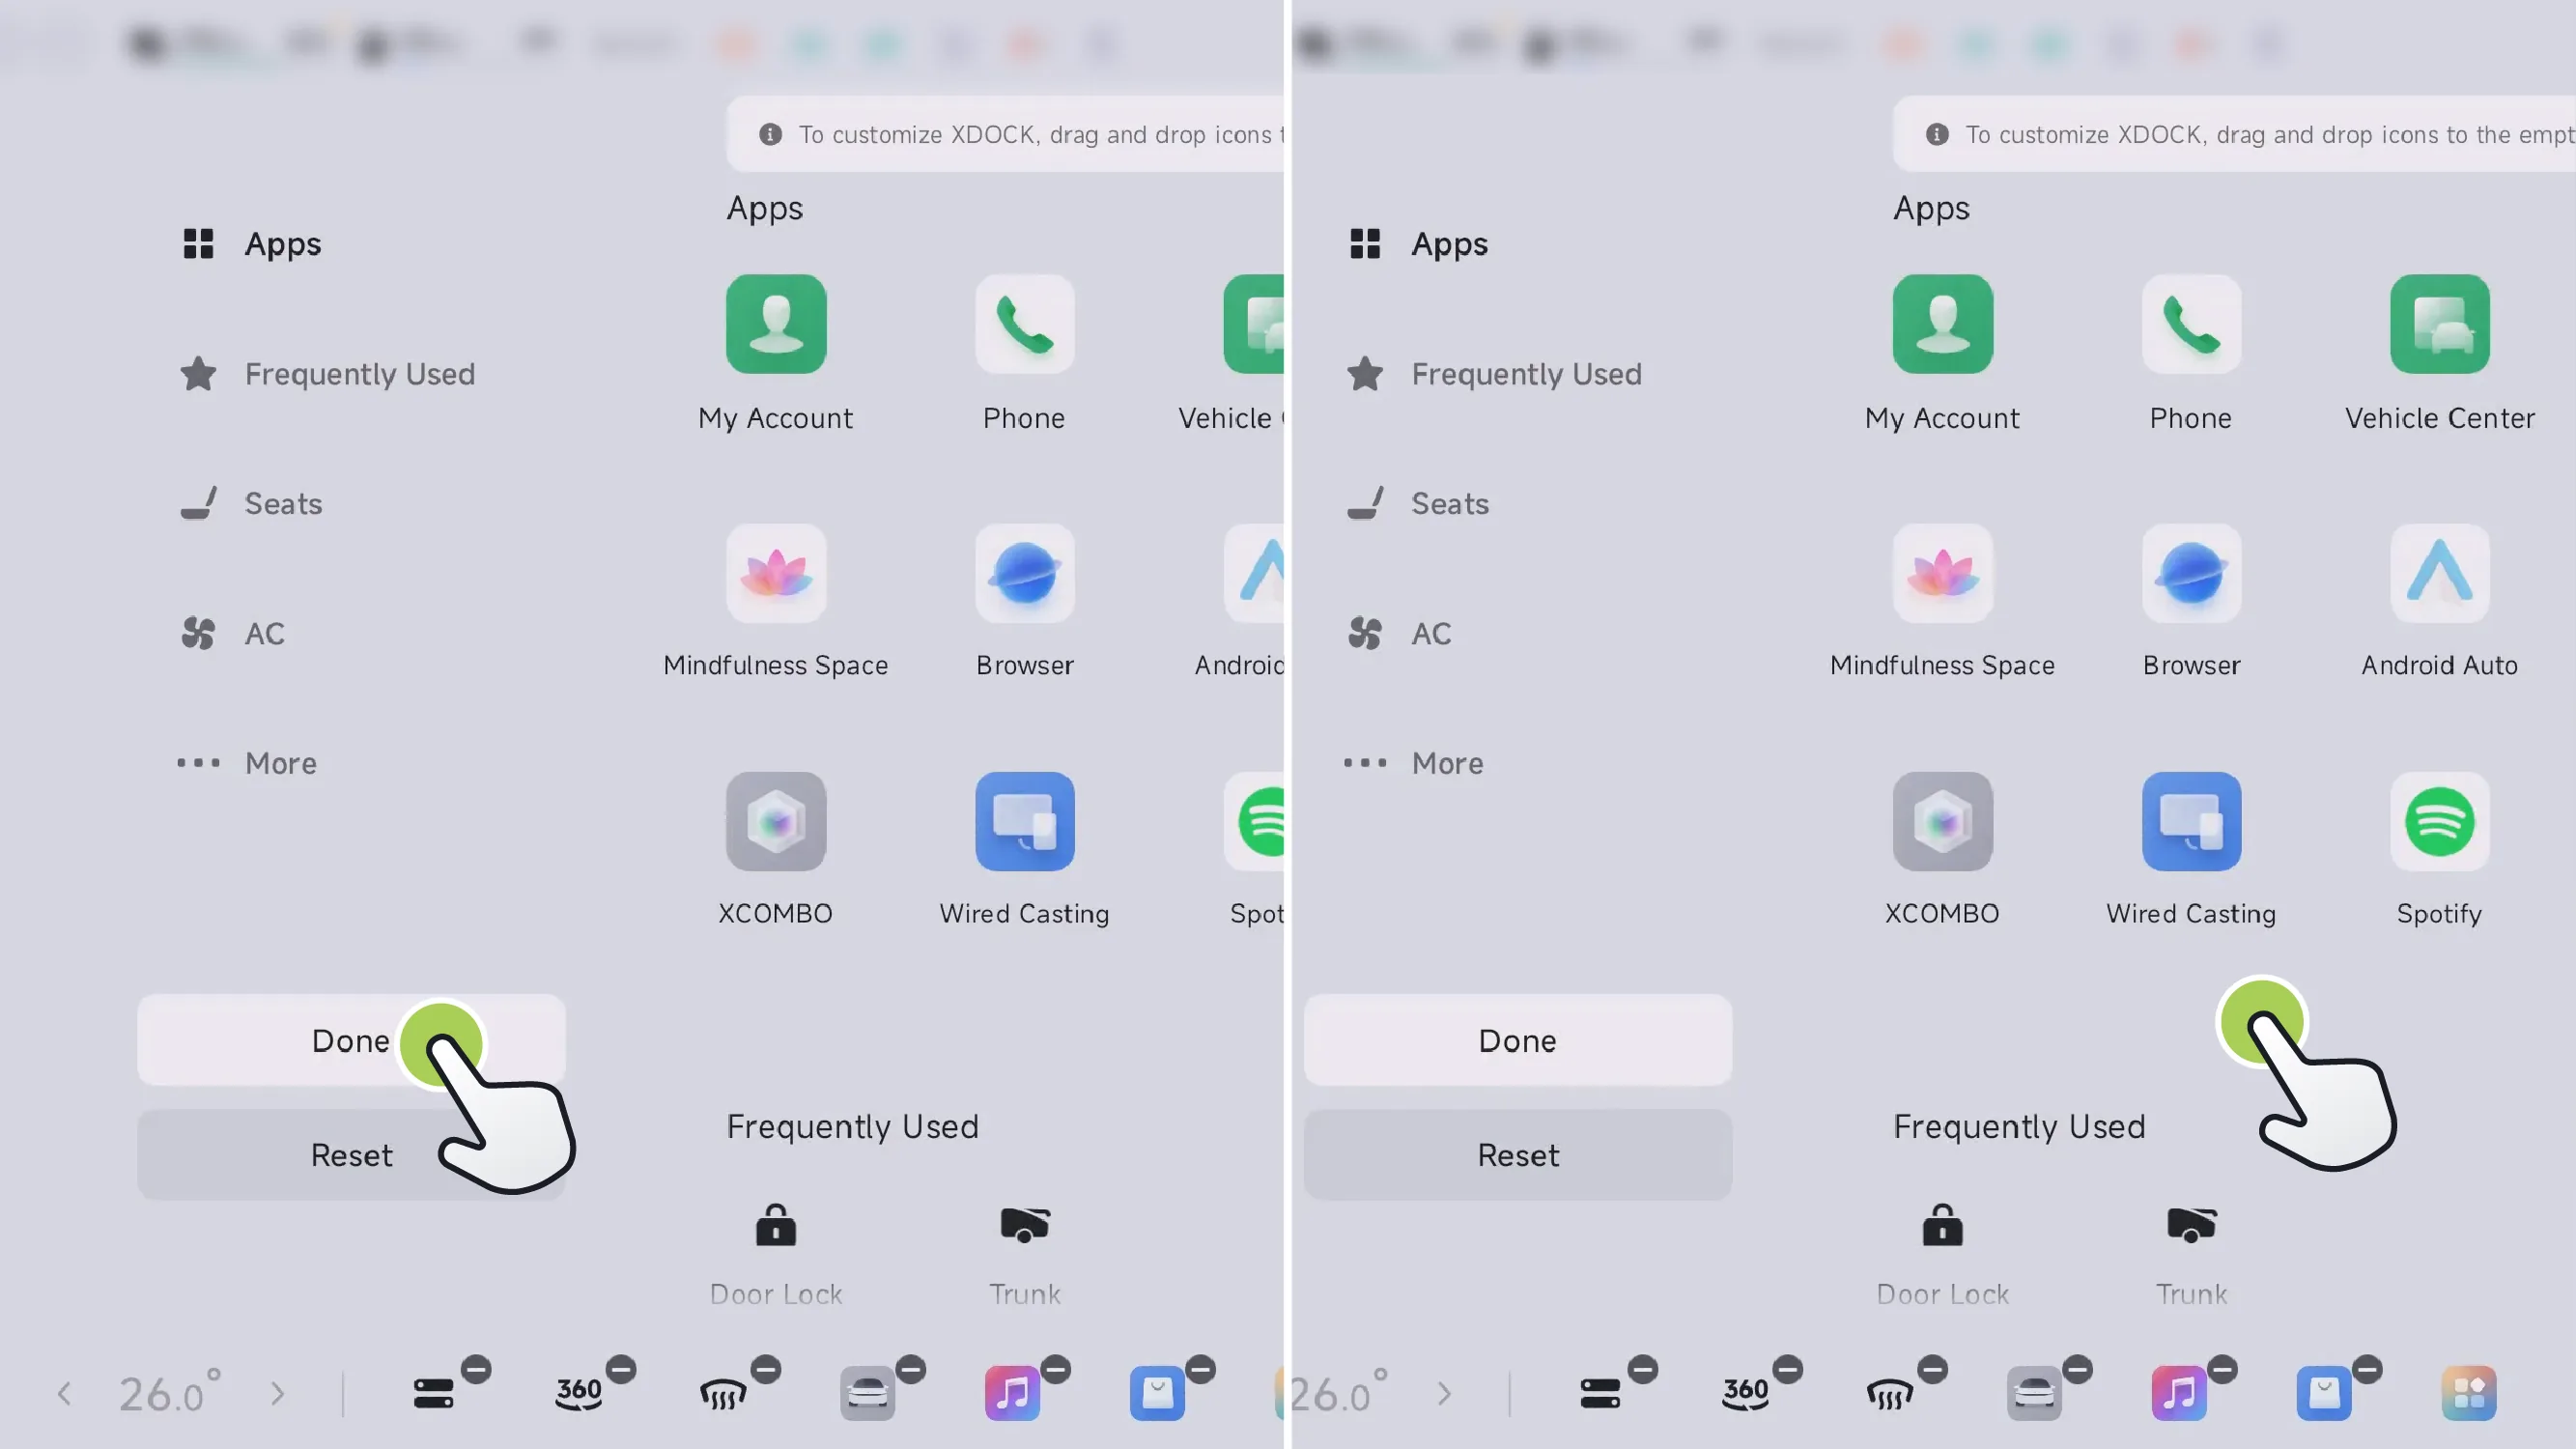
Tap Tap elsewhere or a blank area to exit the customization state.
You can reset the overall layout of the bottom taskbar in the following ways:
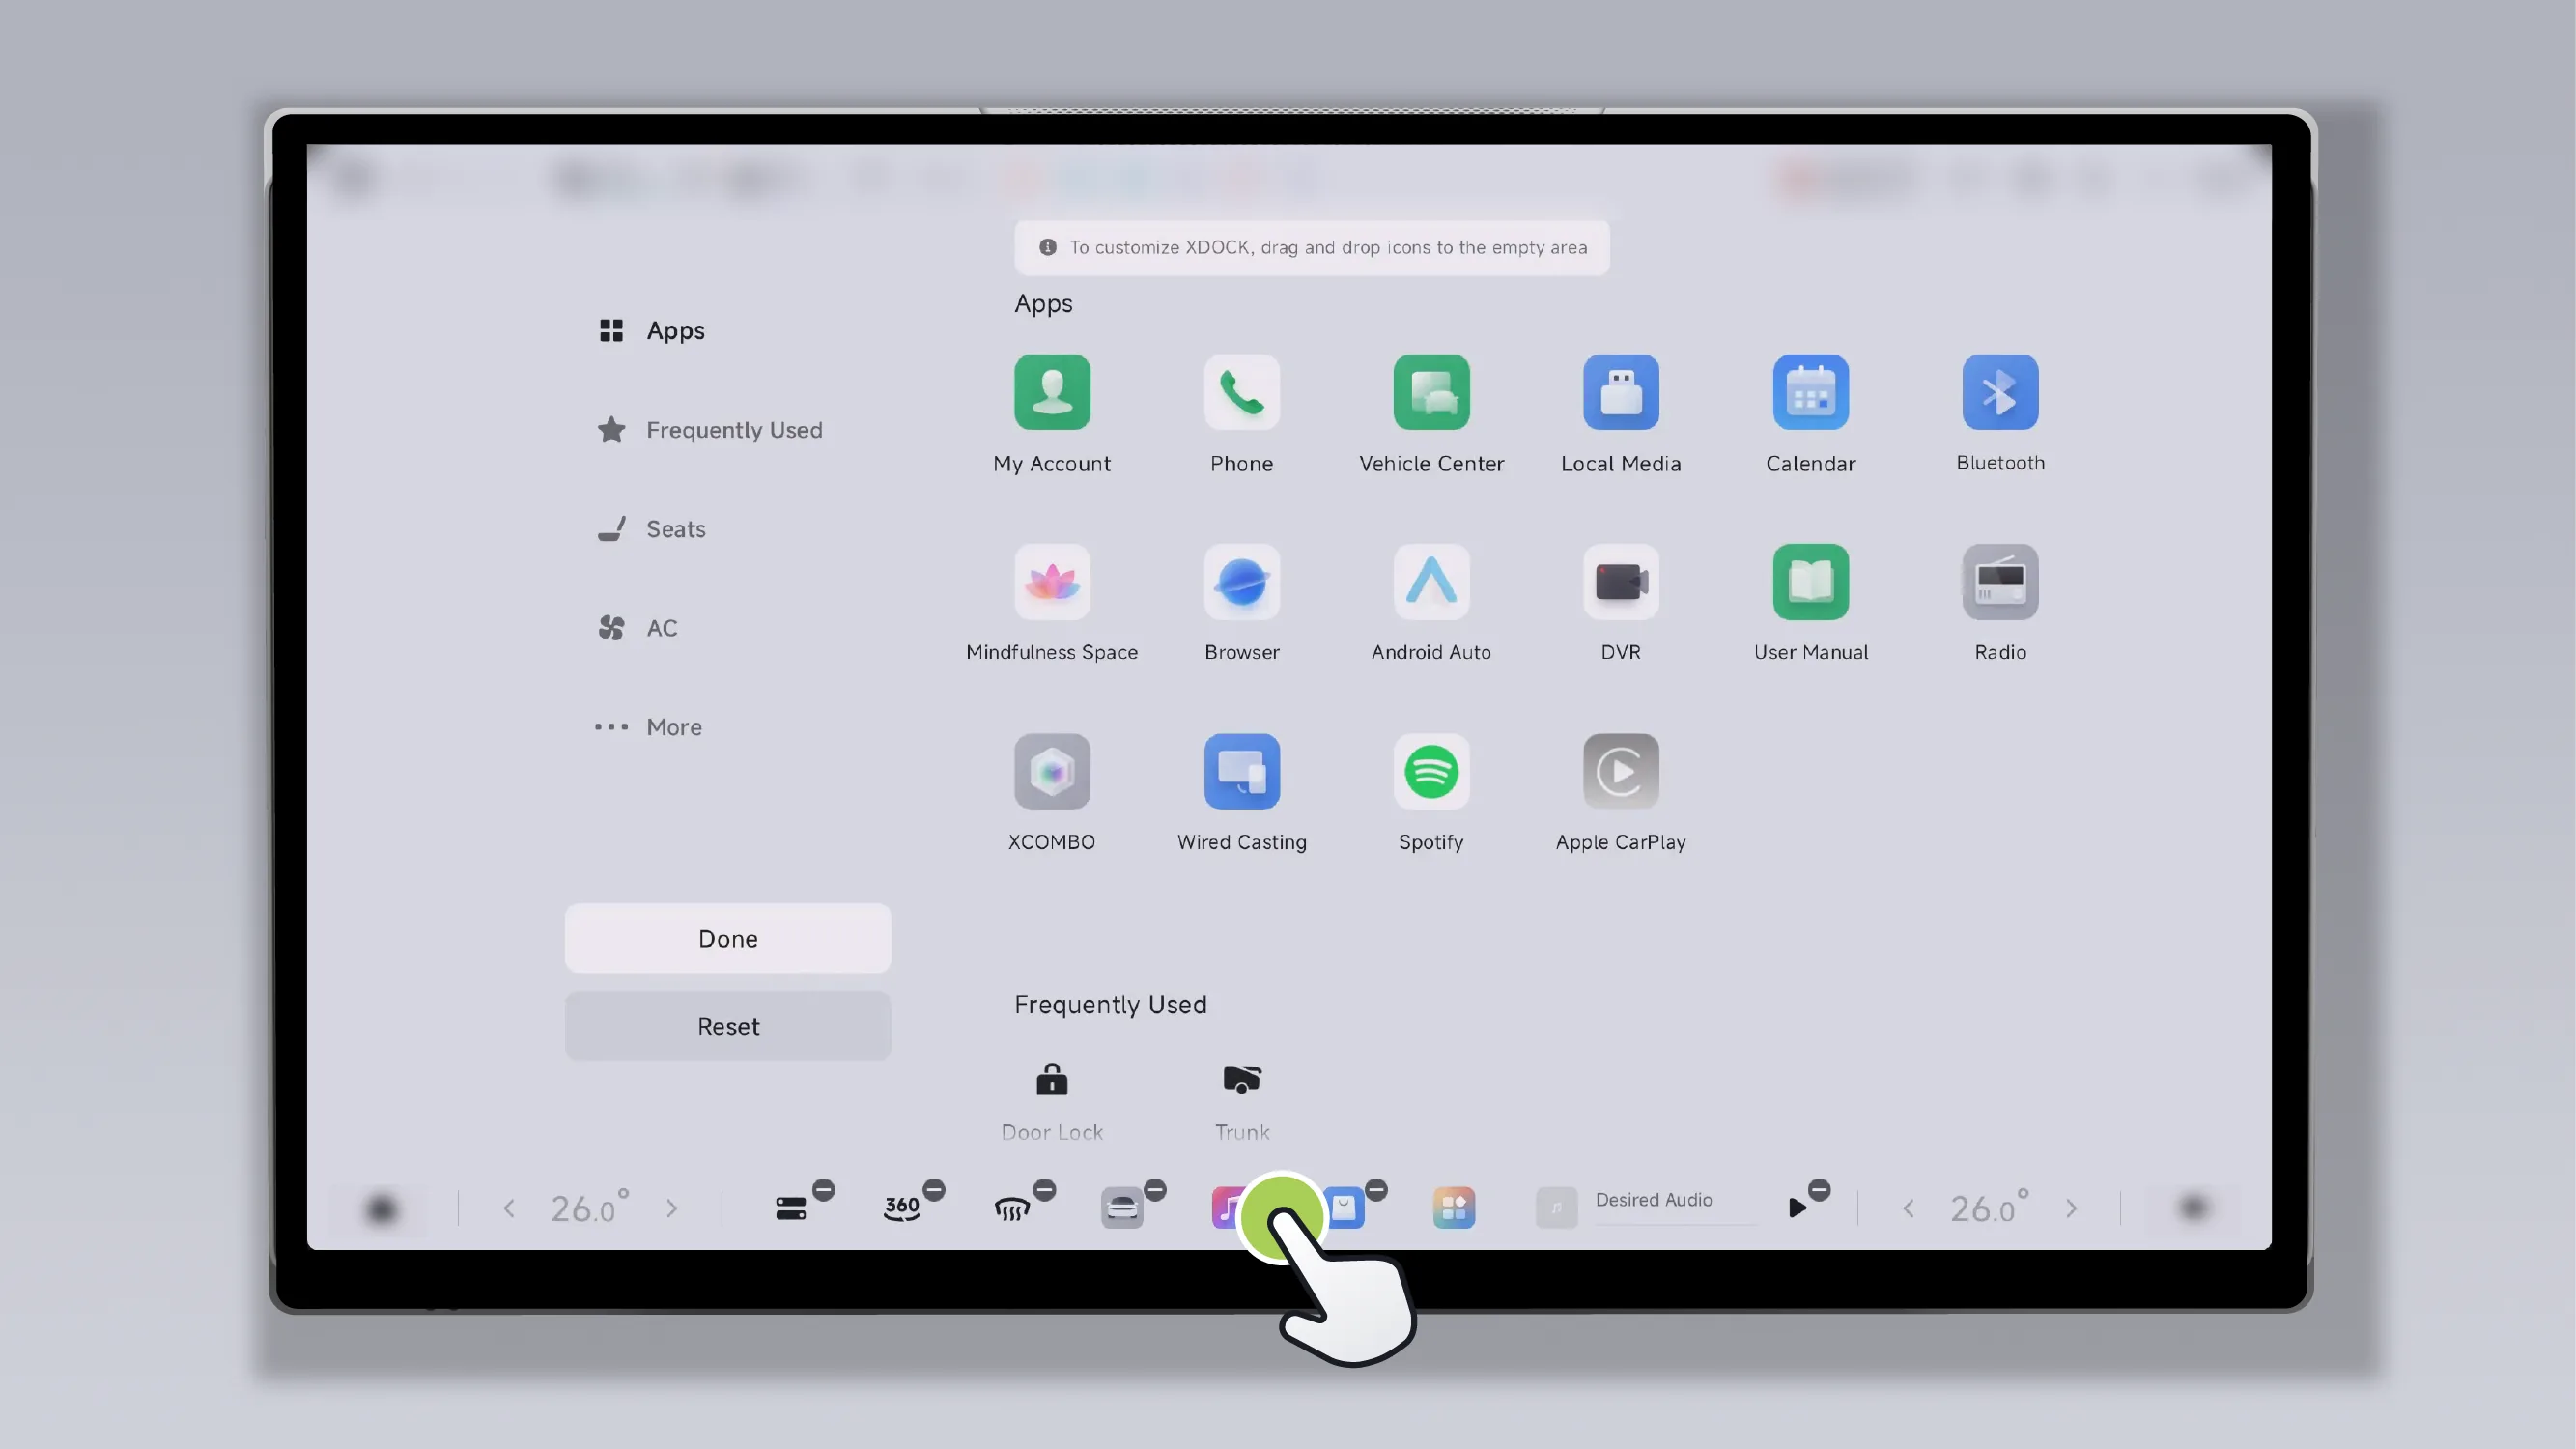
Press and hold any area of the bottom taskbar icon to customize the bottom taskbar.

Tap Can reset the overall layout of the bottom taskbar.
You can adjust the screen brightness in the following ways:
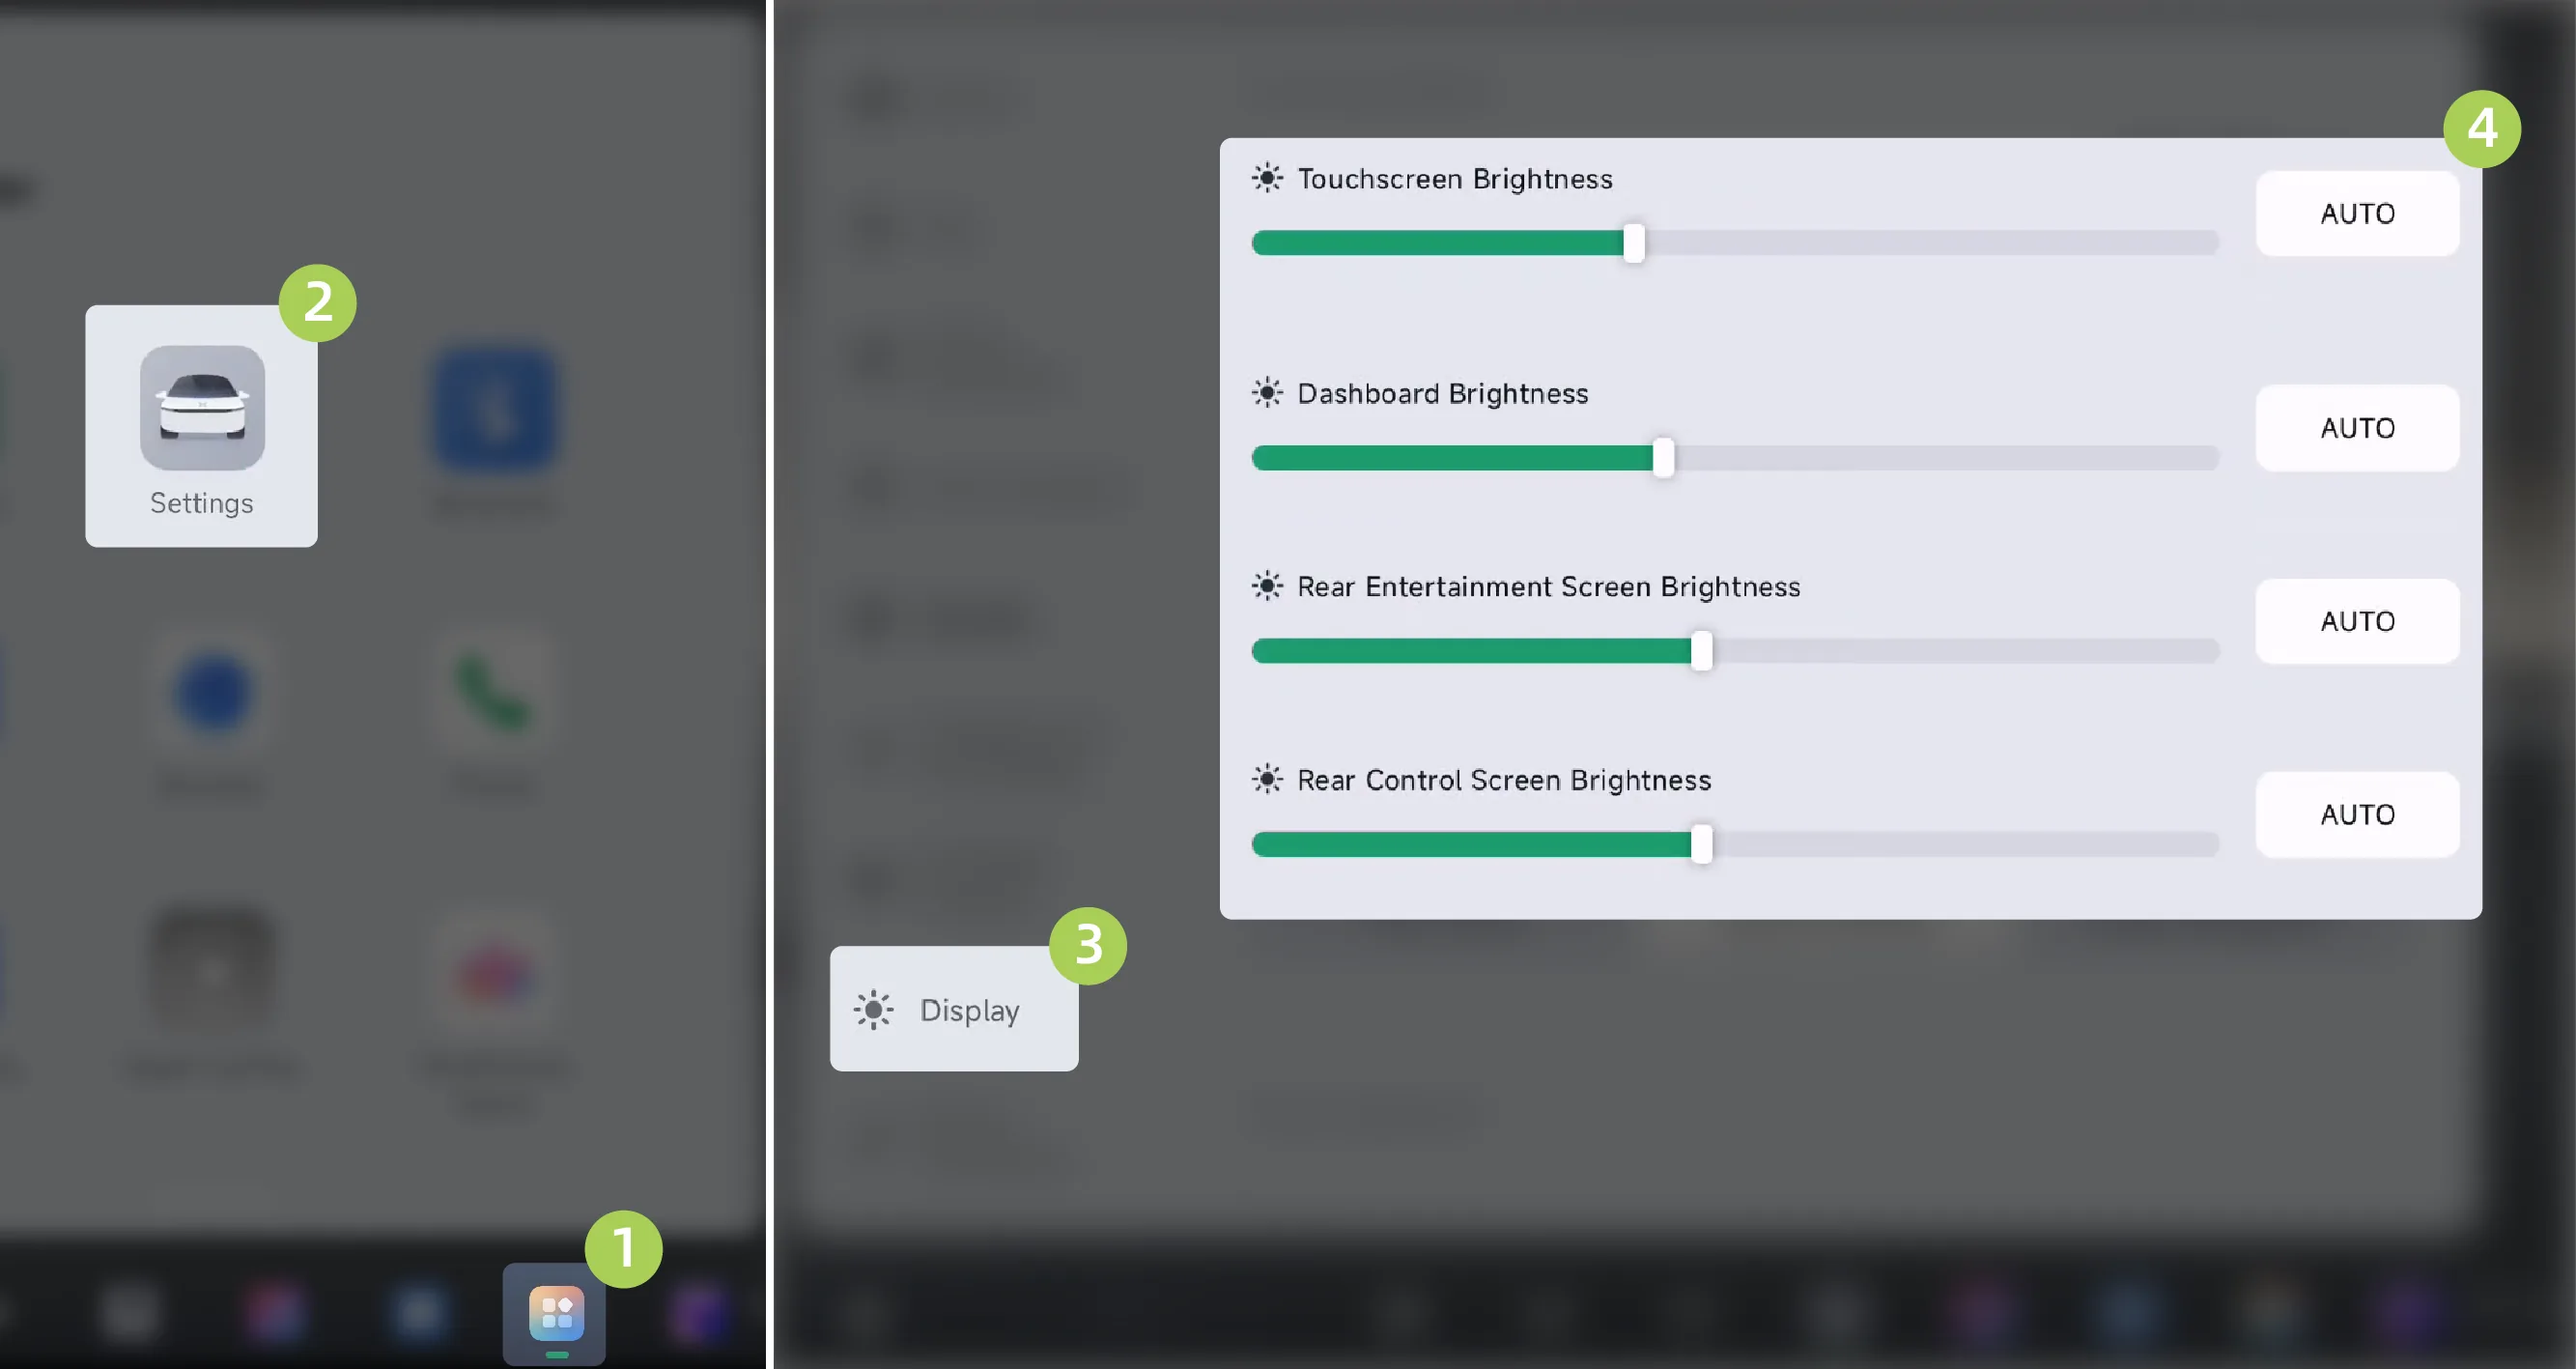
On the central control screen “ →Settings→Display”On the interface, you can drag the sliders to adjust the brightness of the Touchscreen, Dashboard, Rear Enertainment Screen, and Rear Control Screen respectively. After automatic brightness is enabled, the system will automatically adjust the screen brightness.
After waking up XPENG, say your command, for example: “Brighten the screen a little.”
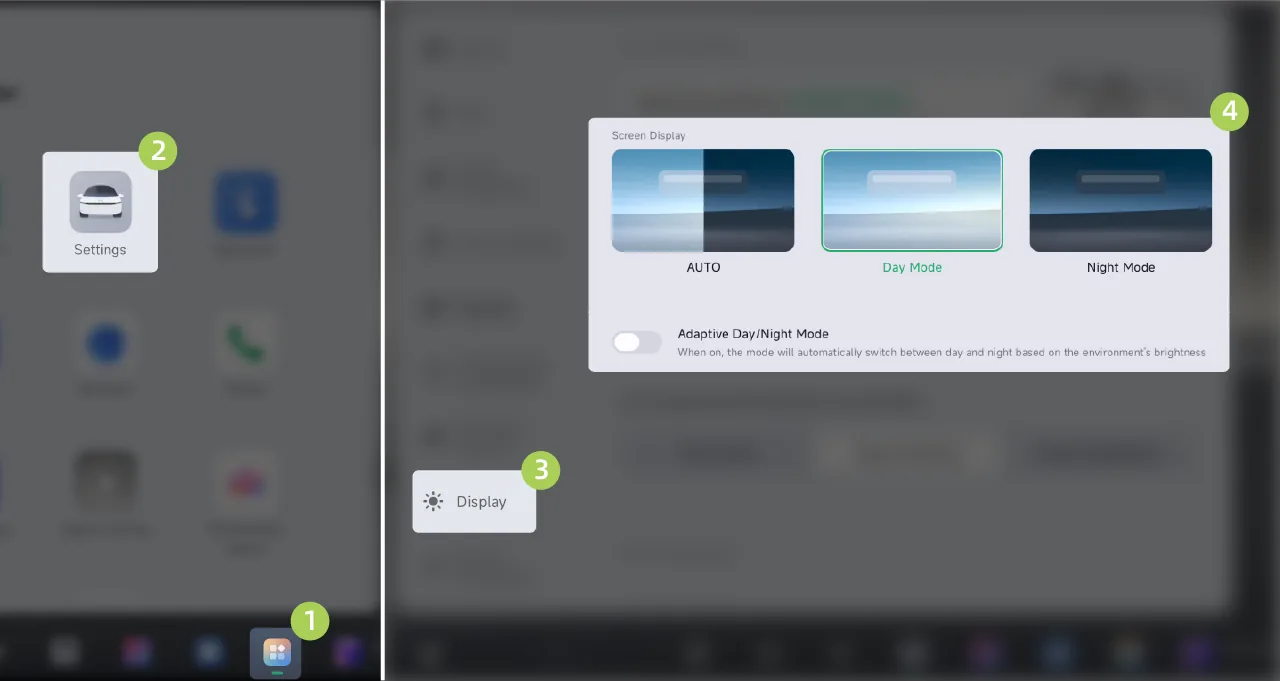 →Settings→Display”Interface,
 You can select Auto, Day Mode, or Night Mode.
Open/Close Function. After it is enabled, the system will automatically switch to Day Mode/Night Mode according to the ambient light.
After the vehicle is powered on, some indicator lights will illuminate. After the system completes the self-check, if the system is normal, the indicator lights will turn off. Some indicator lights illuminate to display the current status of vehicle system functions and do not indicate a system fault. If anything is unclear during daily vehicle use, consult a XIAOPENG Motors Service Center.
 | The high-voltage system is ready, and the vehicle is in a drivable state. |  | Door Opening Indicator Light |
 | Position lights are on |  | Low beam headlights are on |
 | auto headlights enabled |  | rear fog light is on |
 | High beam is on |  | intelligent high beam is on |
 | intelligent high beam has been turned on and illuminated |  | intelligent high beam malfunction |
 | Left turn signal is on |  | The right turn signal is on |
 | Charging cable connected |  | Scheduled charging enabled |
 | Battery fault exists |  | Power system fault detected |
 | Motor and Controller Overheating |  | Motor and controller fault exists |
 | Power Battery Temperature Too Low |  | Drive Battery Temperature Too High |
 | Traction Battery Charge Too Low |  | Power battery fault exists |
 | Power Battery Disconnected |  | Drive Power Limitation |
 | Steering system fault |  | Severe Steering System Fault |
 | Steady on: Parking function is activated Flashing: Incorrect caliper status |  | Steady on: Parking brake malfunction Flashing: The parking system is in maintenance mode |
 | Auto Hold Activated |  | Auto Hold Malfunction |
 | Flashing: Electronic Stability Program has been activated Steady on: Electronic Stability Program malfunction |  | Electronic Stability Program is turned off |
 | Anti-lock Braking System malfunction |  | Brake system malfunction |
 | Reduced Braking Performance |  | Hill Descent Control function ready |
 | Hill Descent Control function activated |  | Hill Descent Control Fault |
 | Abnormal tire pressure or tire pressure monitoring system malfunction |  | Suspension Stiffness Control Unavailable |
 | Rear-Wheel Steering Fault |  | Rear-Wheel Steering Hardware Fault |
 | Partial Air Suspension Function Failure |  | Air Suspension Severe Fault |
 | Airbag Malfunction |  | front row occupant airbag has been deactivated* |
 | Left Front Seat Belt Unfastened (Five-Seat Model) |  | Right Front Seat Belt Unfastened (Five-Seat Model) |
 | Rear Left Seat Belt Unfastened (Five-Seat Model) |  | Rear Center Seat Belt Unfastened (Five-Seat Model) |
 | Rear Right Seat Belt Unfastened (Five-Seat Model) |  | Left Front Seat Belt Unfastened (Six-Seat Model) |
 | Right Front Seat Belt Unfastened (Six-Seat Model) |  | Second-Row Left Seat Belt Unfastened (Six-Seat Model) |
| | Second-Row Right Seat Belt Unfastened (Six-Seat Model) |  | Third-row left seat belt unfastened (six-seat model) |
 | Third-row right seat belt unfastened (six-seat model) |  | Left Front Seat Belt Unfastened (Seven-Seat Model) |
 | Right Front Seat Belt Unfastened (Seven-Seat Model) |  | Second-Row Left Seat Belt Unfastened (Seven-Seat Model) |
 | Second-Row Center Seat Belt Unfastened (Seven-Seat Model) |  | Second-Row Right Seat Belt Unfastened (Seven-Seat Model) |
 | Third-row left seat belt unfastened (seven-seat model) |  | Third row right seat belt unfastened (seven-seat model) |
 | Forward Collision Warning is off |  | Forward Collision Warning Initialization |
 | Lane Departure Assist has been deactivated |  | Assisted Driving Fault |
 | Forward Collision Warning malfunction |  | SAS Fault |
 | Lane Centering Control unavailable |  | Lane Centering Control is activated |
 | Speed Assistance Activation |  | Maximum speed limit value of ACC/LCC, and any function has been activated |
 | Maximum speed limit value of ACC/LCC, and both are not activated | | Adaptive Cruise Control ACC has been activated |
| | Adaptive Cruise Control ACC is activated |  | No Speed Limit Sign Limit |
 | Speed limit sign speed limit |  | Speed Limit Camera |
 | Exceeding the speed limit indicated by the speed limit sign |  | Parking Assist Unavailable |
 | Parking Assist Ready |  | Parking Assist Activated |
 | Low washer fluid level indicator* |  | Tow Mode Temporarily Unavailable* |
 | Trailer Mode Fault* |  | Tow Mode Ready* |
 | Stop Mode Enabled* |  | Map not in cruise state |
 | Fatigue and Distraction Detection System Malfunction |  | Driver Seat Belt Incorrectly Fastened or Worn |
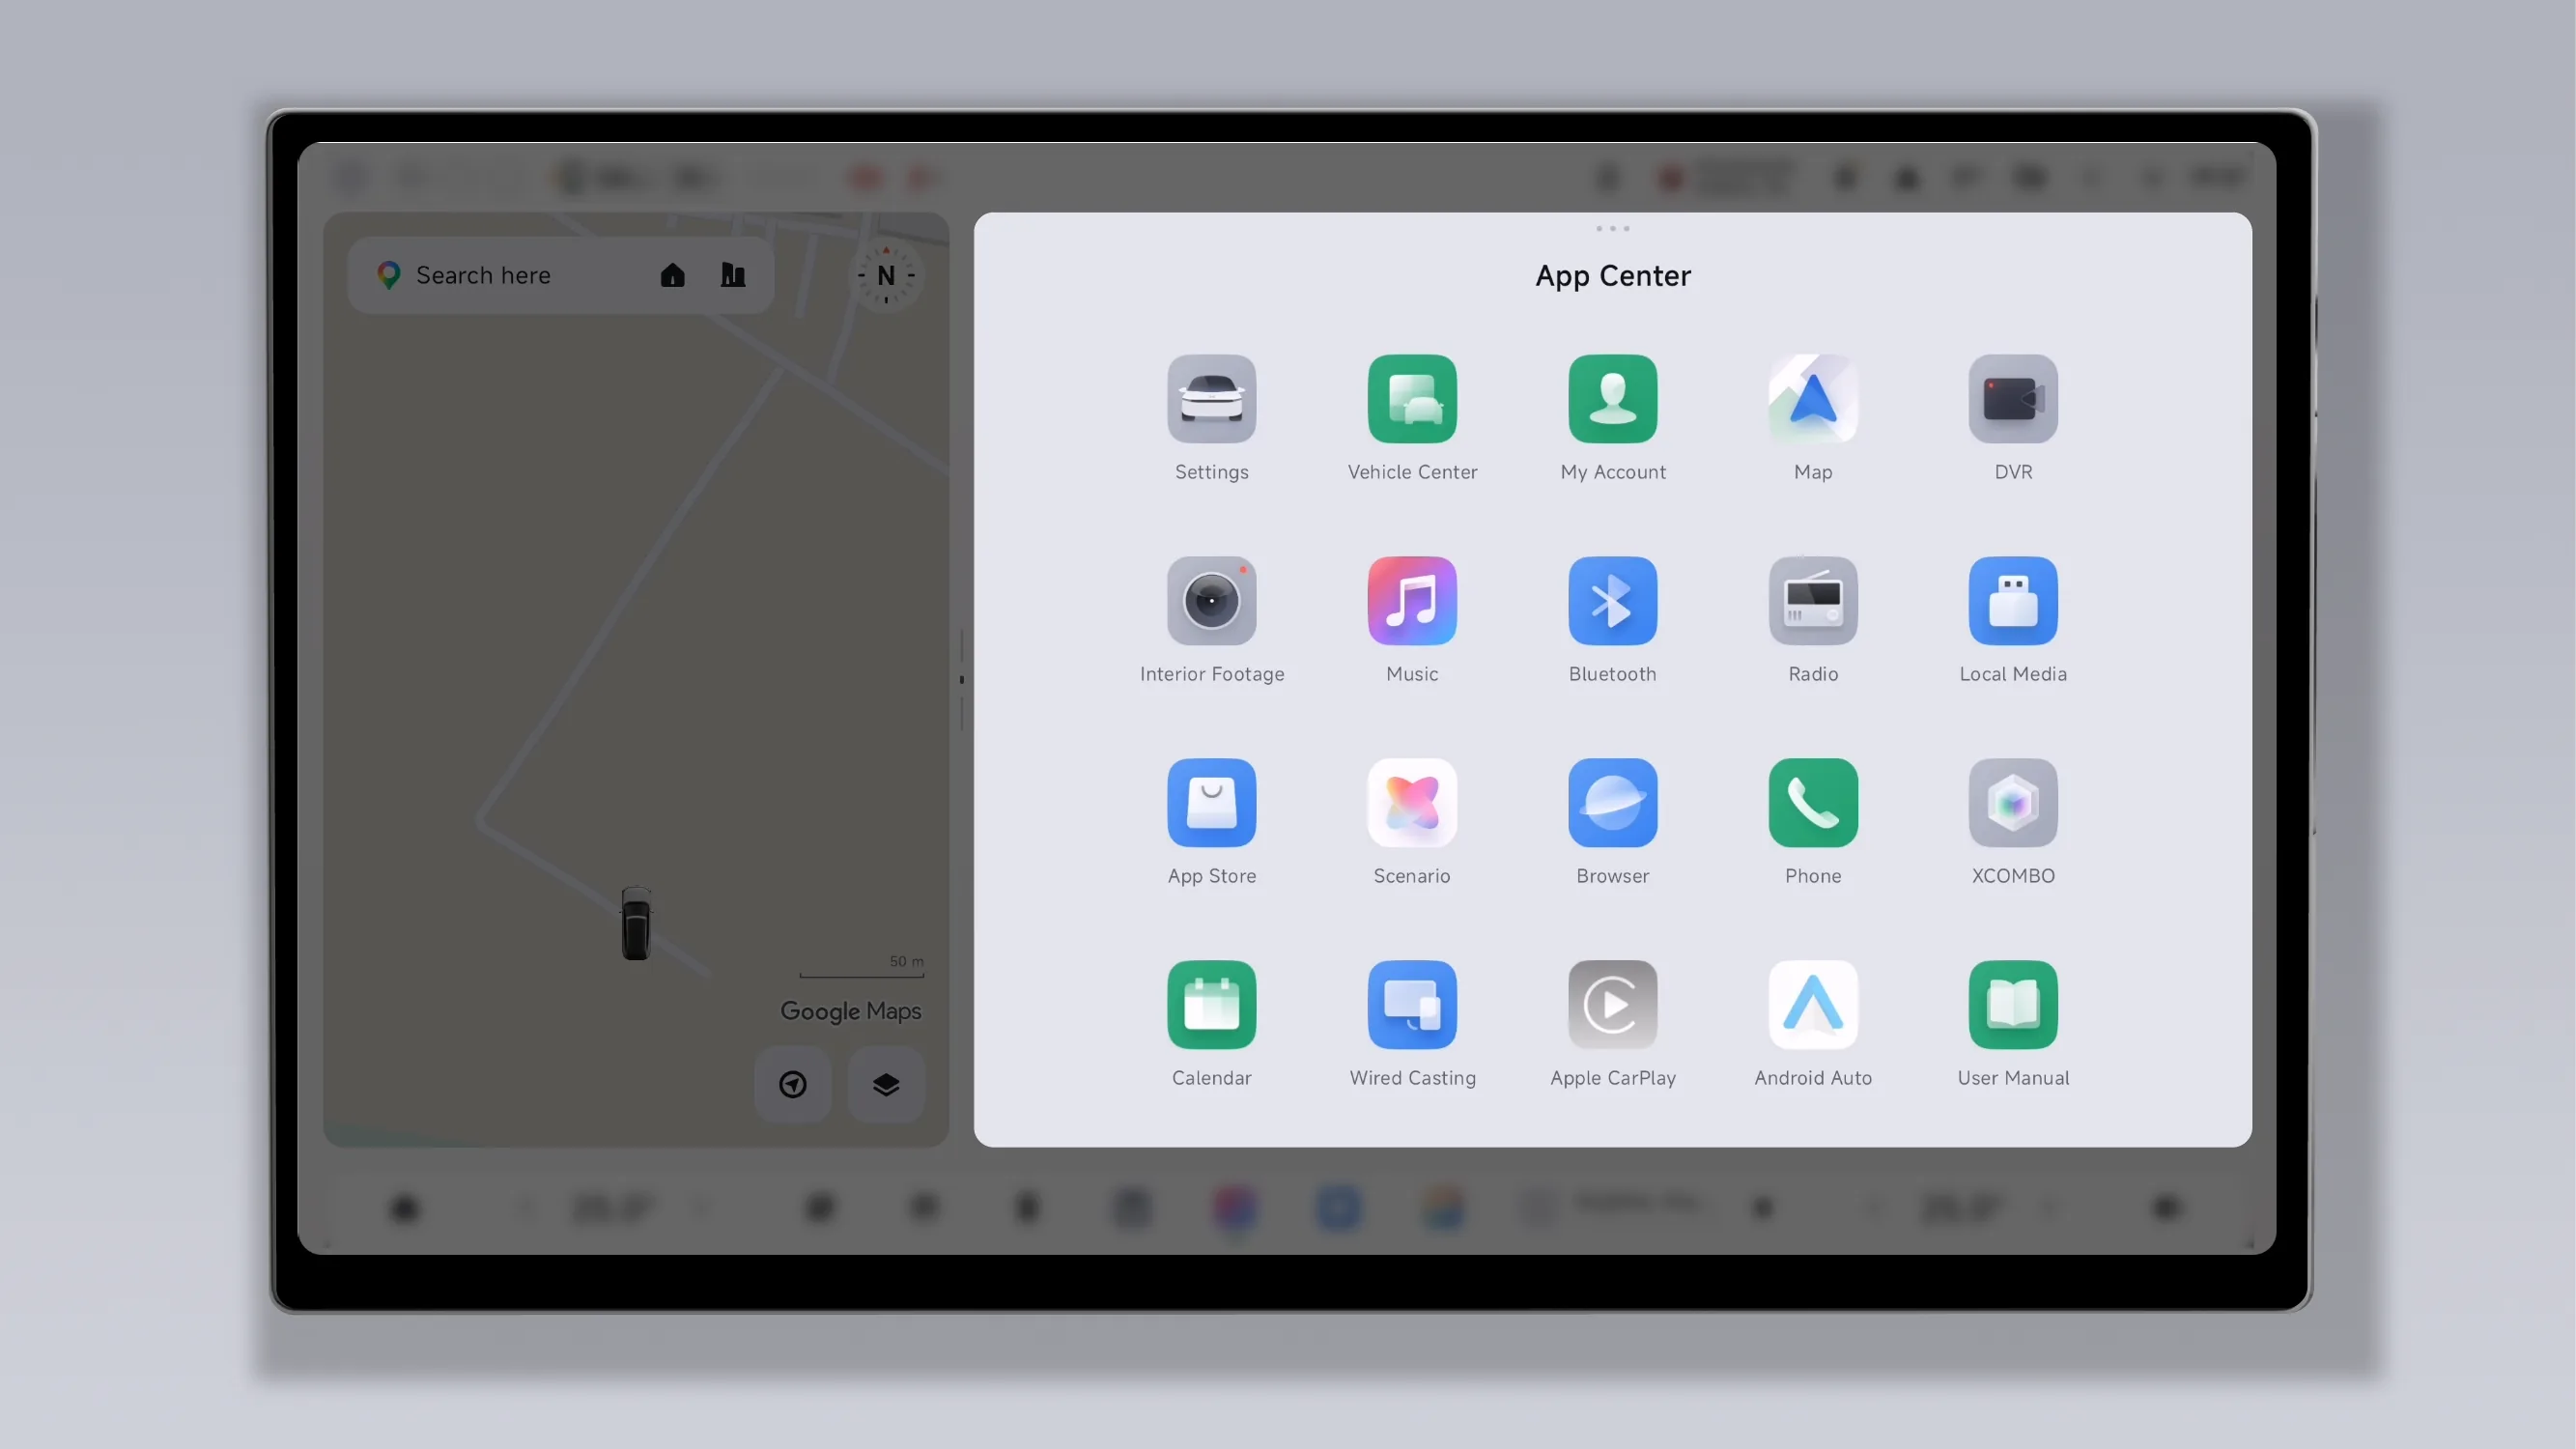
Tap the bottom taskbar , you can open the App Center.
Tap an app icon to open the app. Apps that are being downloaded and installed also have corresponding status displays.
Press and hold an app icon or a blank area to enter the custom app center mode. In this mode, you can drag icons to reorder them in the app list.
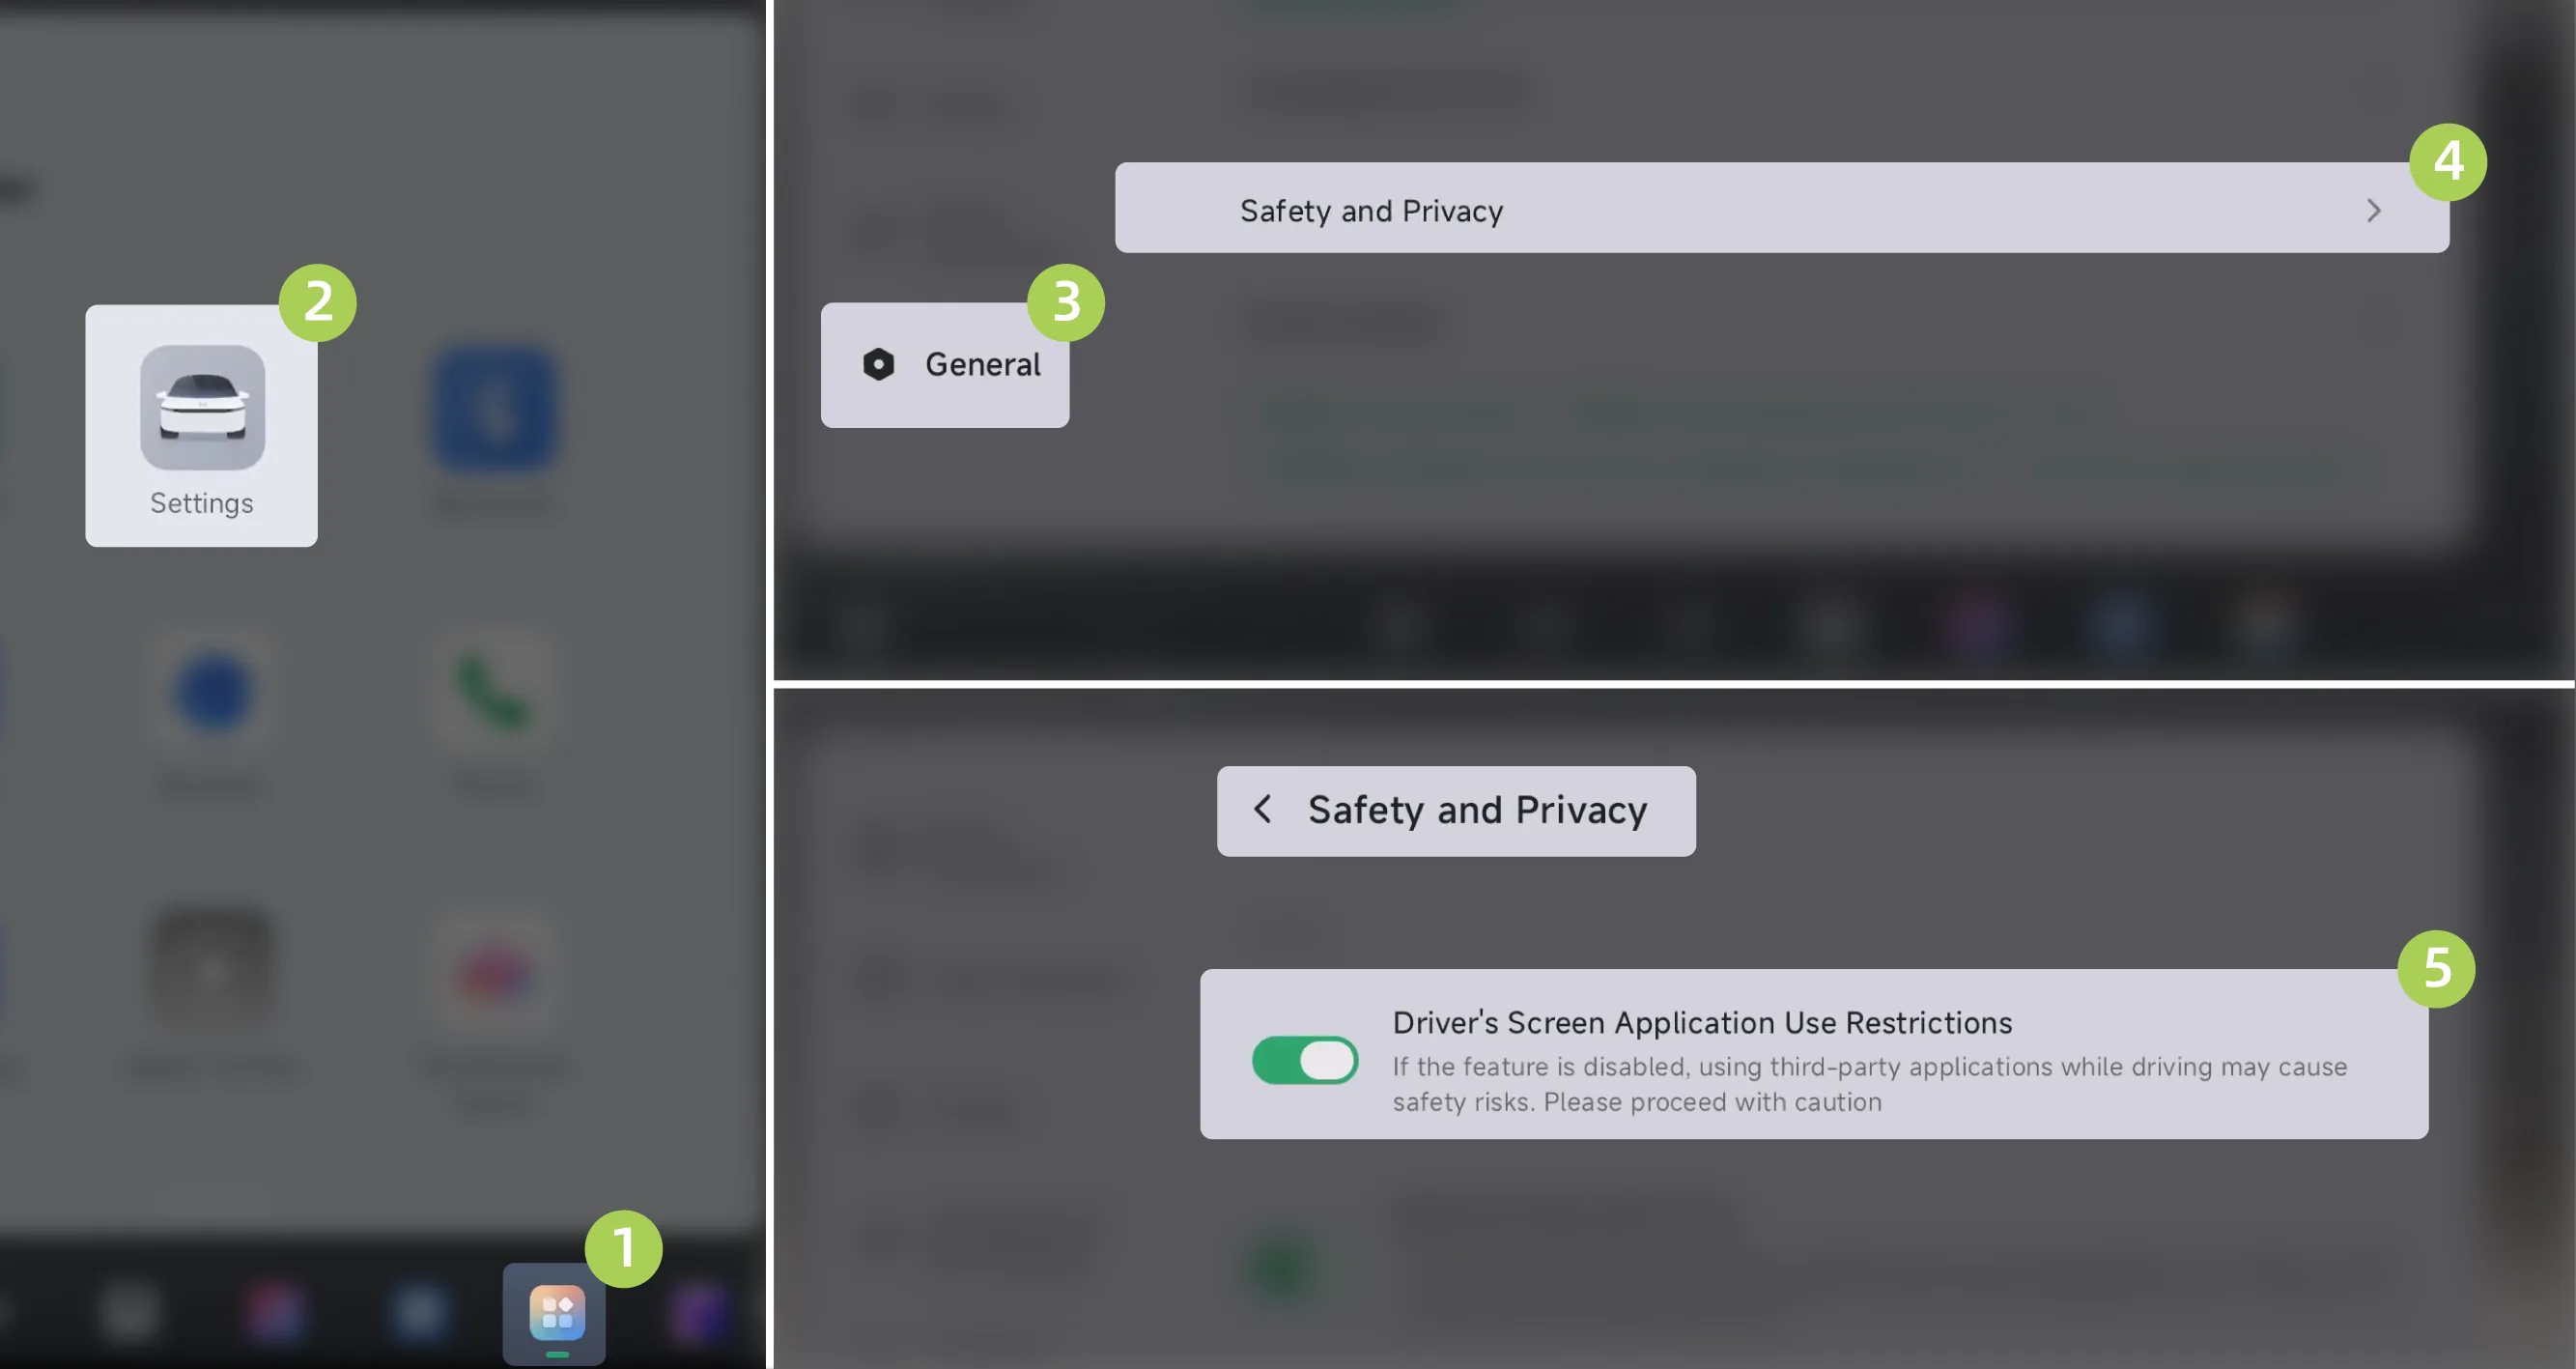
To ensure driving safety, while the vehicle is in motion, the system is by default set to restrict the activation or use of some in-vehicle entertainment functions, unless you manually remove the system restriction. After you have acknowledged and agreed to this statement and manually removed the system restriction, passengers in the vehicle can continue to experience some in-vehicle entertainment content during driving.
On the center control screen “ →Settings→General→Safety and Privacy”Interface, where you can enable/disable usage restrictions for Driver Display Brightness applications.
 Warning
 When the vehicle is in motion, in-car entertainment is only available to the vehicle occupants and should not be used by the driver.
When the vehicle is in motion, if the driver believes that the use of some of the in-car entertainment content by the occupants of the vehicle may affect the safety of the vehicle, ask the driver to immediately request the occupants to stop using the entertainment feature and turn the entertainment feature off or to re-switch the system restrictions on.
When the system limits are manually removed, the driver shall ensure that safe driving practices are followed, such as violations of laws and regulations or safe driving practices by the driver for his own reasons (e.g. the use of in-car entertainment functions by the driver), resulting in his or her own or any third party being physically present. Any property or other loss shall be solely liable for all legal liabilities arising therefrom.
In applications that support the application sharing function, you can transfer video content among the HUD, rear entertainment screen, rear control screen, and center display.
Open the video app on the center display to play your preferred audio and video content, and tap the app toolbar.  , select Share or Watch Together.
In the toolbar, select Share, then select HUD (supported only when in P gear) or the rear control screen or the rear entertainment screen to transfer the audio and video content currently playing on the center control screen to the HUD or the rear control screen or the rear entertainment screen for playback.
In the toolbar, select Watch Together, then select HUD (supported only when in P gear), or the rear control screen, or the rear entertainment screen, to synchronize and play the audio and video content currently being played on the center control screen on the HUD, rear control screen, or rear entertainment screen.
After receiving shared Music/video app content on the central control screen, tap the app toolbar Select Back or Close to exit.
In applications that support the application sharing function, you can share the application interface across screens between the rear control screen or rear entertainment screen* and the central control screen.
When the Music/video app on the center control screen is in narrow-screen/split-screen mode, press and hold the top toolbar area with one finger and drag it to the right edge area of the screen to transfer the Music/video app on the center control screen to the rear entertainment screen.
If the HUD, instrument screen, center control screen, rear control screen, and rear entertainment screen display abnormally or suddenly freeze, you may try restarting them. If the fault is still not corrected after restarting, promptly contact a XPENG service center for inspection and repair.
Restart Method:
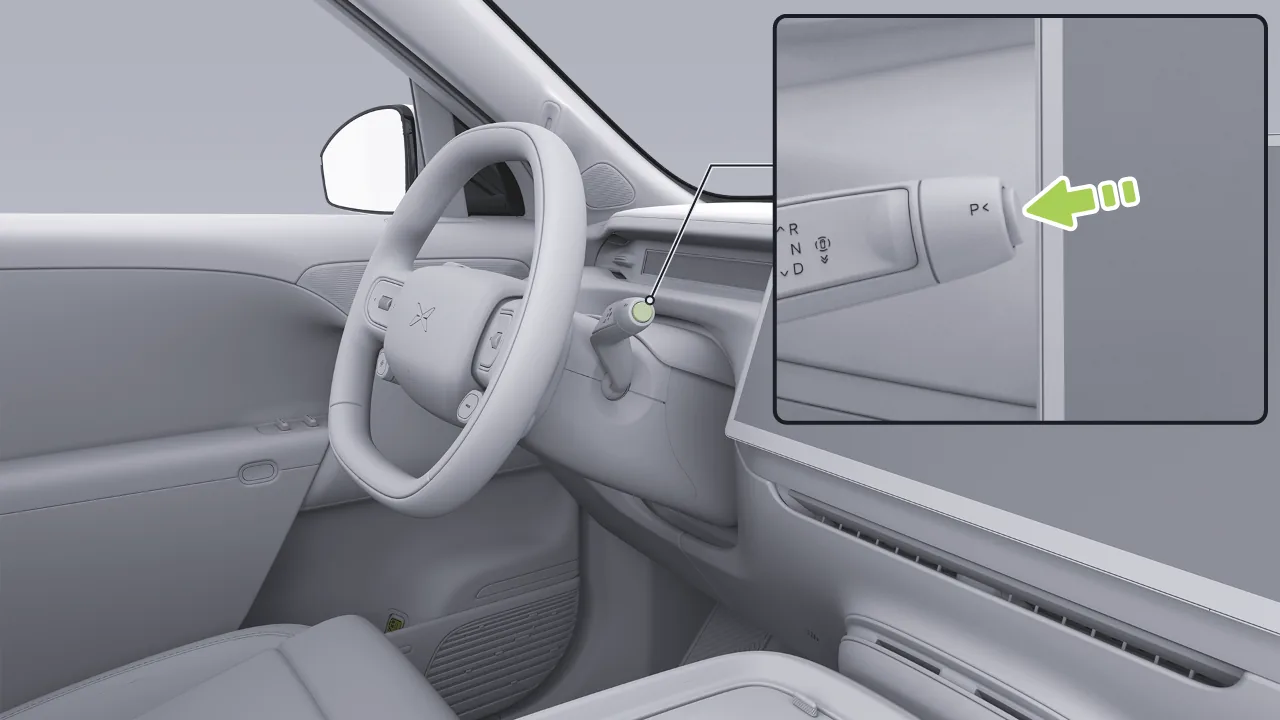
Park the vehicle in a safe location and shift the gear to P.
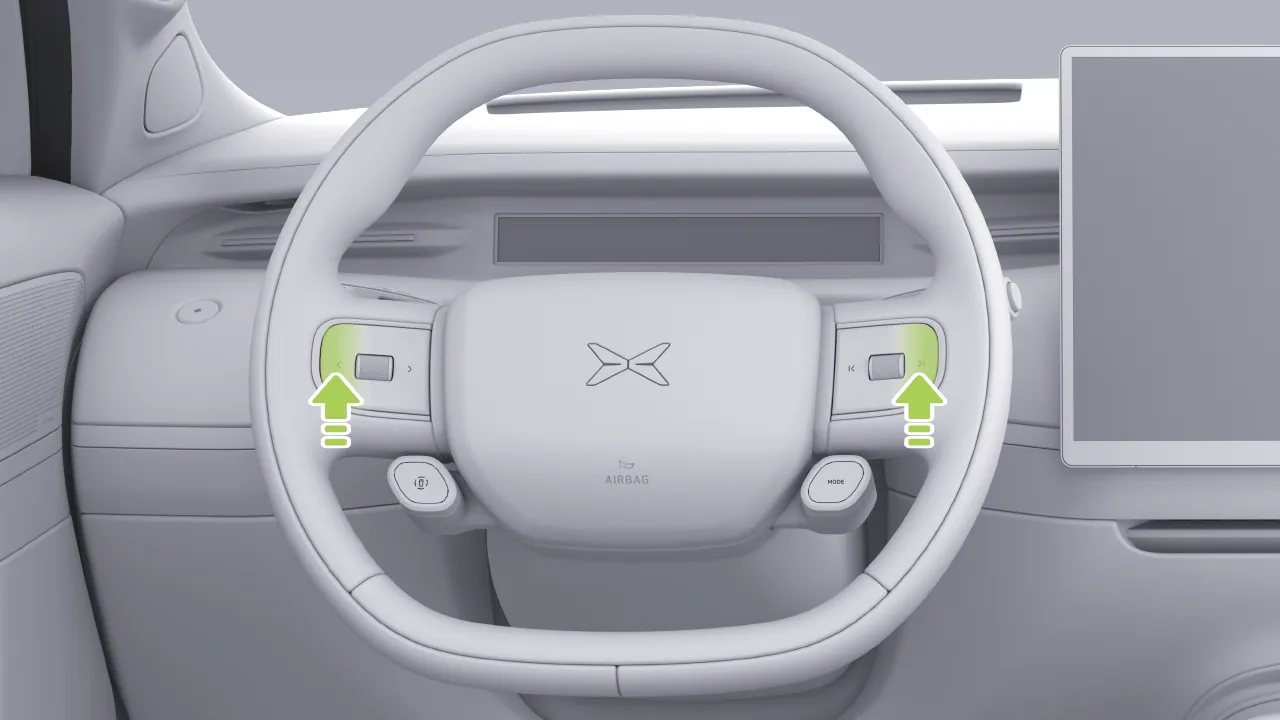
Press and hold the left button on the left side of the steering wheel and the right button on the right side of the steering wheel at the same time. Release them after the screen turns black to restart the HUD, instrument screen, center control screen, rear control screen, and rear entertainment screen.
Warning Do not restart the vehicle while it is in motion, otherwise a traffic accident may occur.

Left display area: displays the assisted driving status indicator light and the speed limit indicator light.
driving mode: Displays the current vehicle driving mode.
Vehicle speed/P gear display/AUTO HOLD activation indicator.
Gear position: Displays the current gear position.
Right display area: The steering wheel scroll wheel can be used to switch the display to the range card, mileage card, vehicle status card, or energy consumption card (for information on how to switch the information cards of the instrument cluster theme, please refer to Section).

Left display area: displays multimedia information.
driving mode: Displays the vehicle's current driving mode.
Vehicle speed/P gear display/AUTO HOLD activation indicator.
Gear position: Displays the current gear position.
Right display area: When music is playing, the lyrics are displayed.

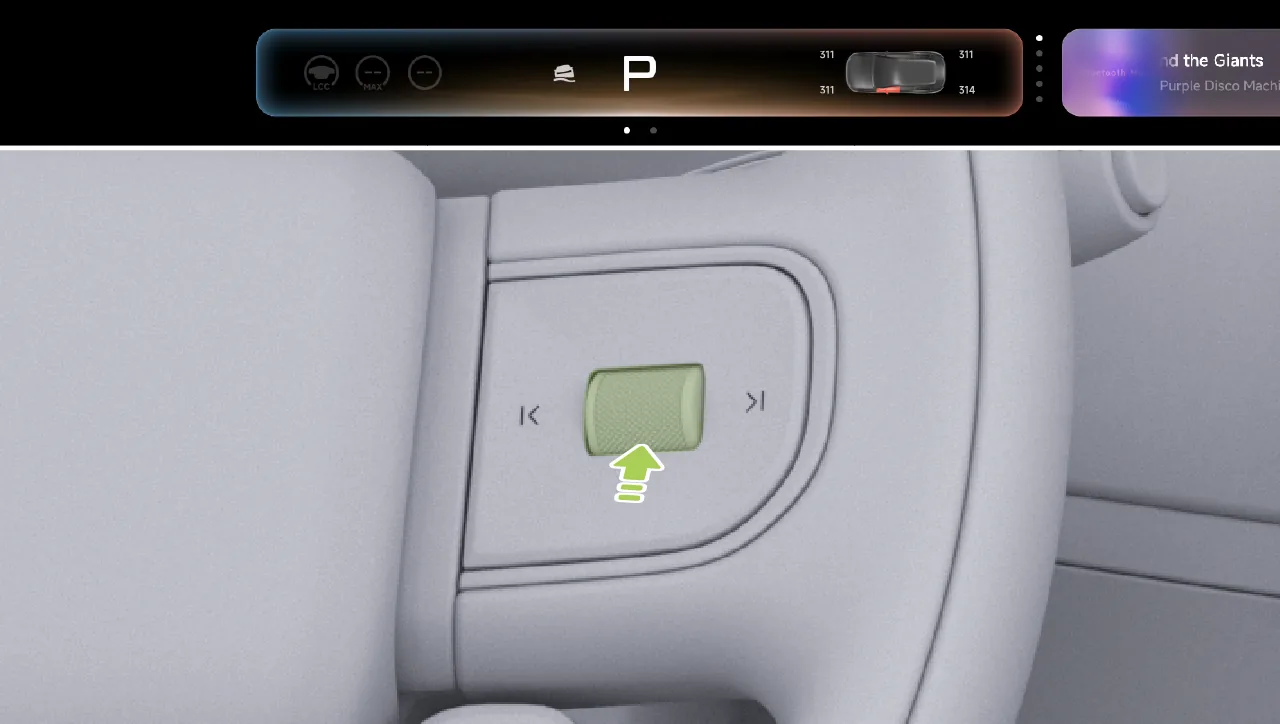
Press and hold the roller on the right side of the steering wheel to enter the instrument cluster screen theme switching interface.
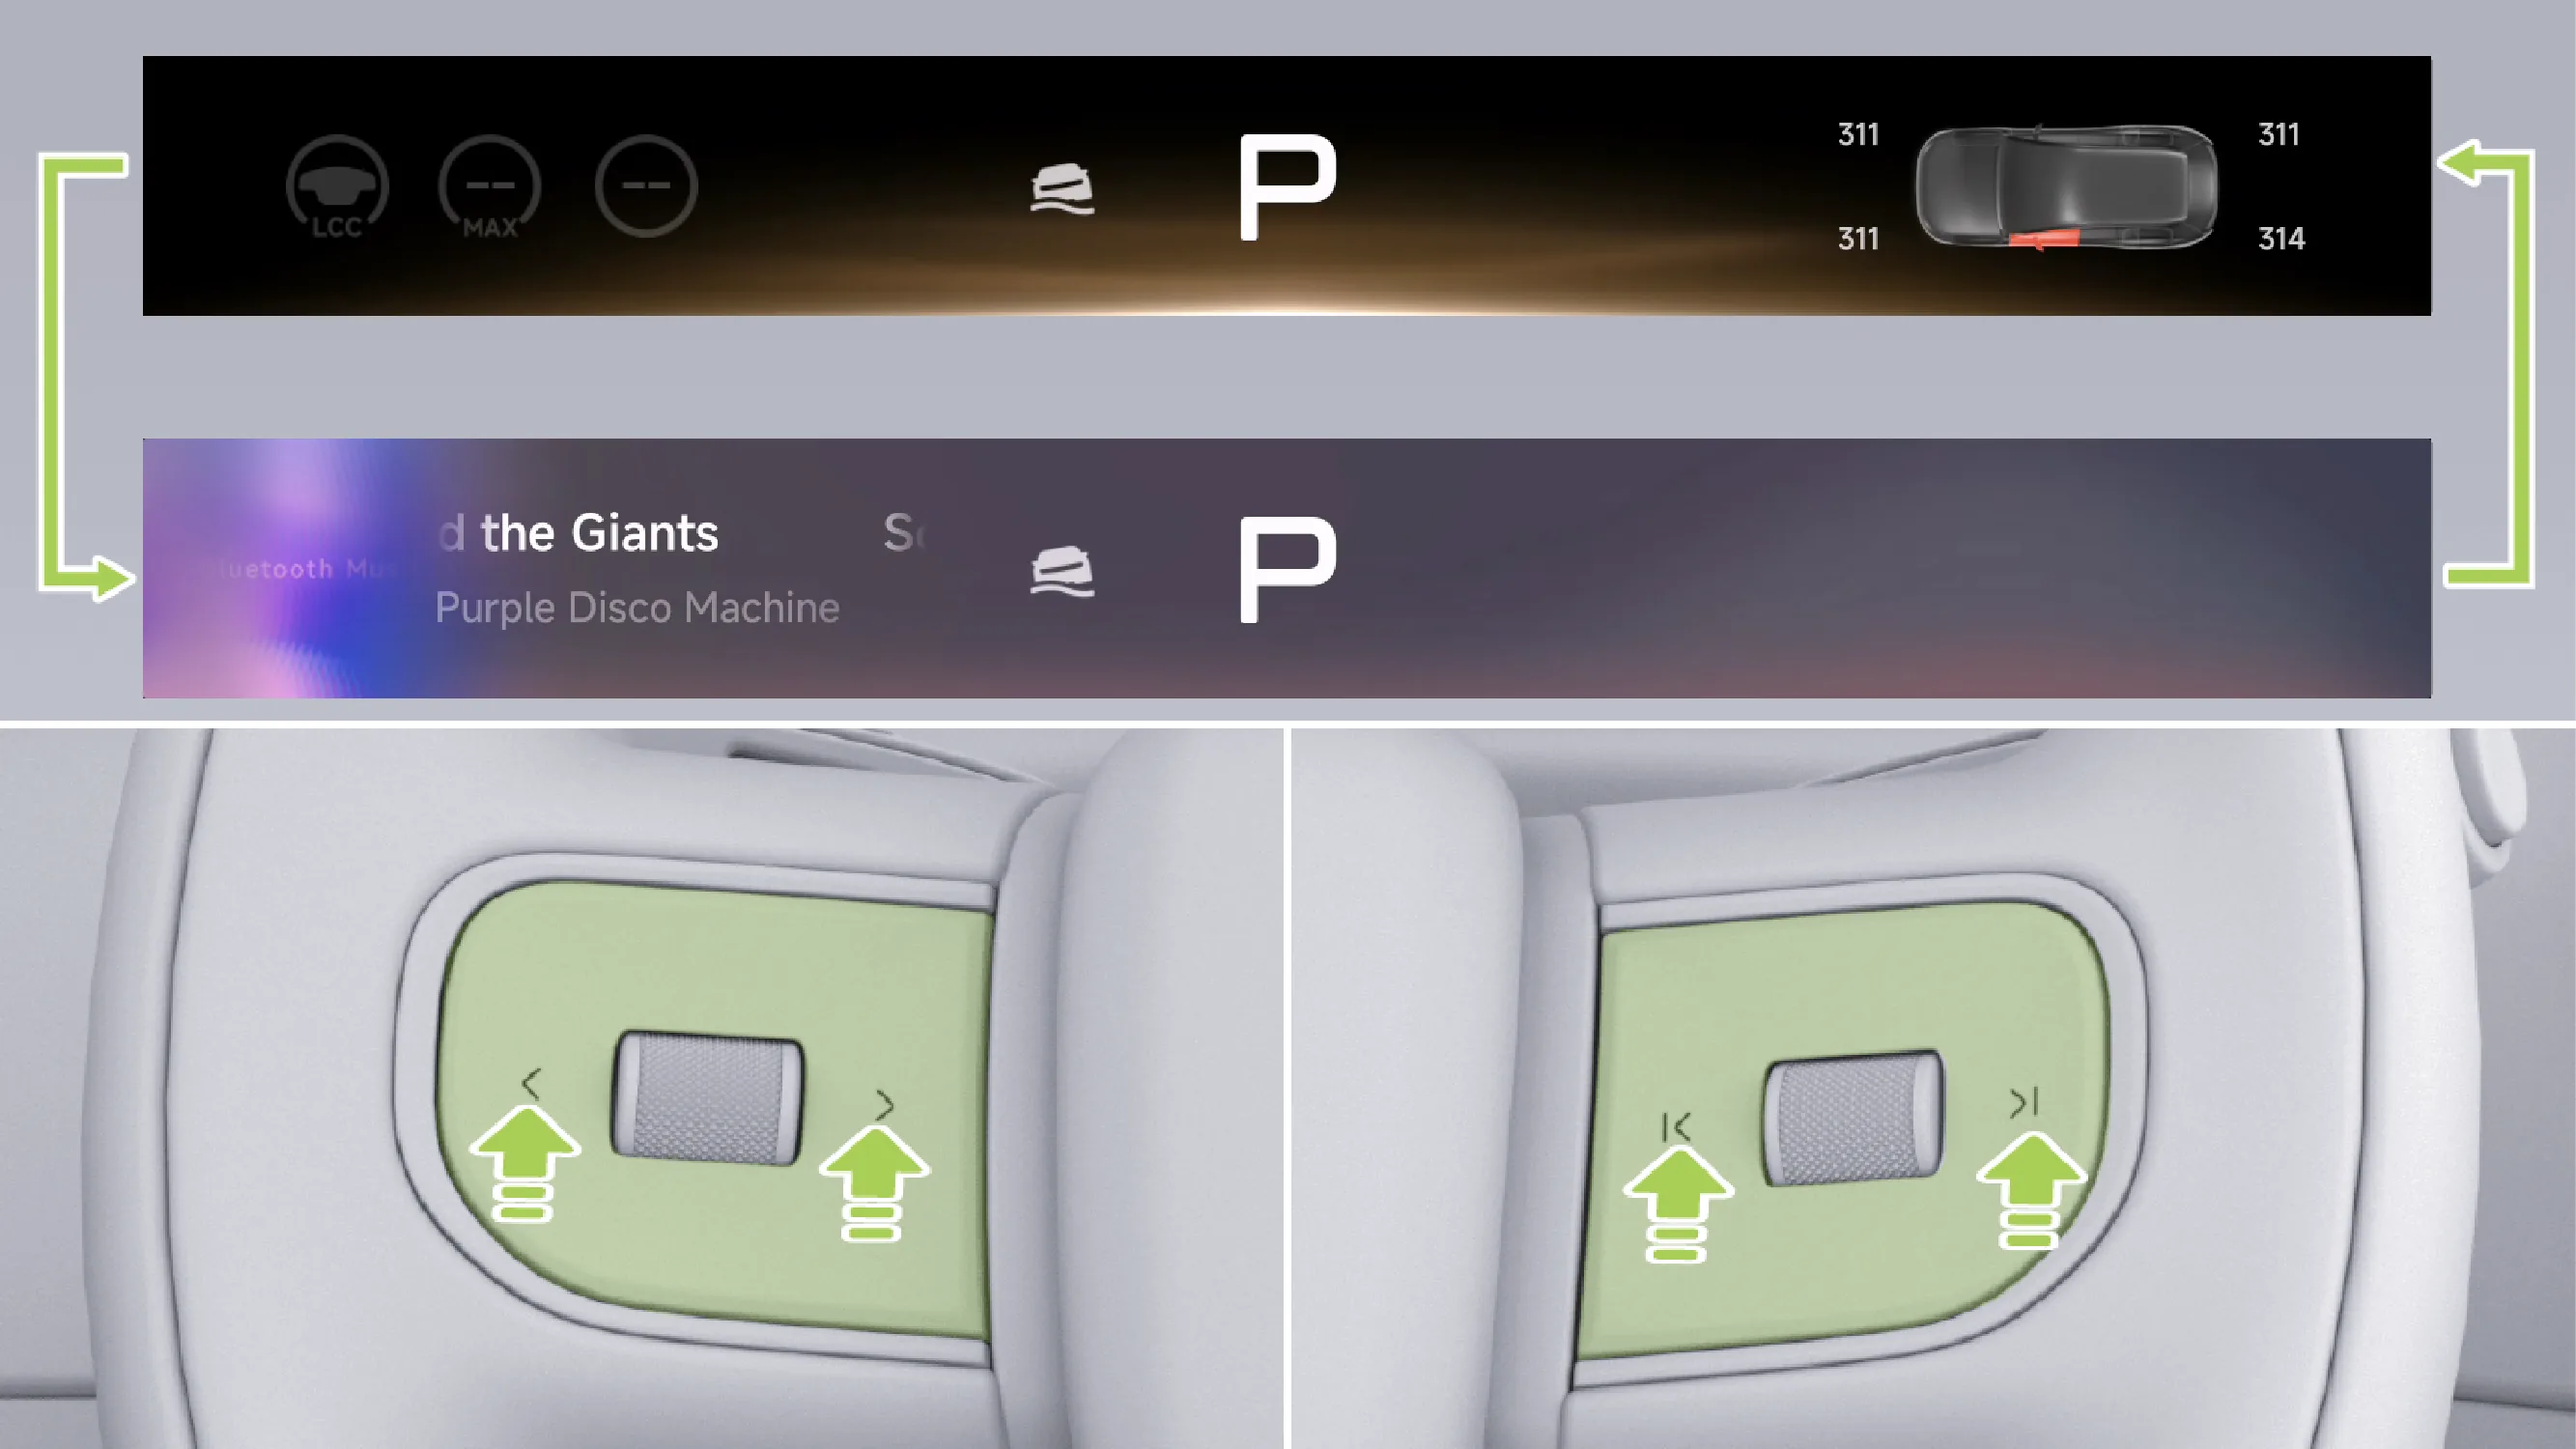
Press the left or right button on either side of the steering wheel briefly to switch the instrument cluster screen theme to the instrument cluster theme or the multimedia theme.
After selecting the desired instrument cluster screen theme, briefly press the scroll wheel to apply the theme.
Tips If you do not switch the dashboard theme for a period of time, the system automatically exits the theme switching interface and applies the currently displayed theme.
When HUD is off and gear is not in P, the instrument theme cannot be switched.
Under the instrument cluster theme, press and hold the scroll wheel on either side of the steering wheel to enter the instrument cluster screen information card switching interface.
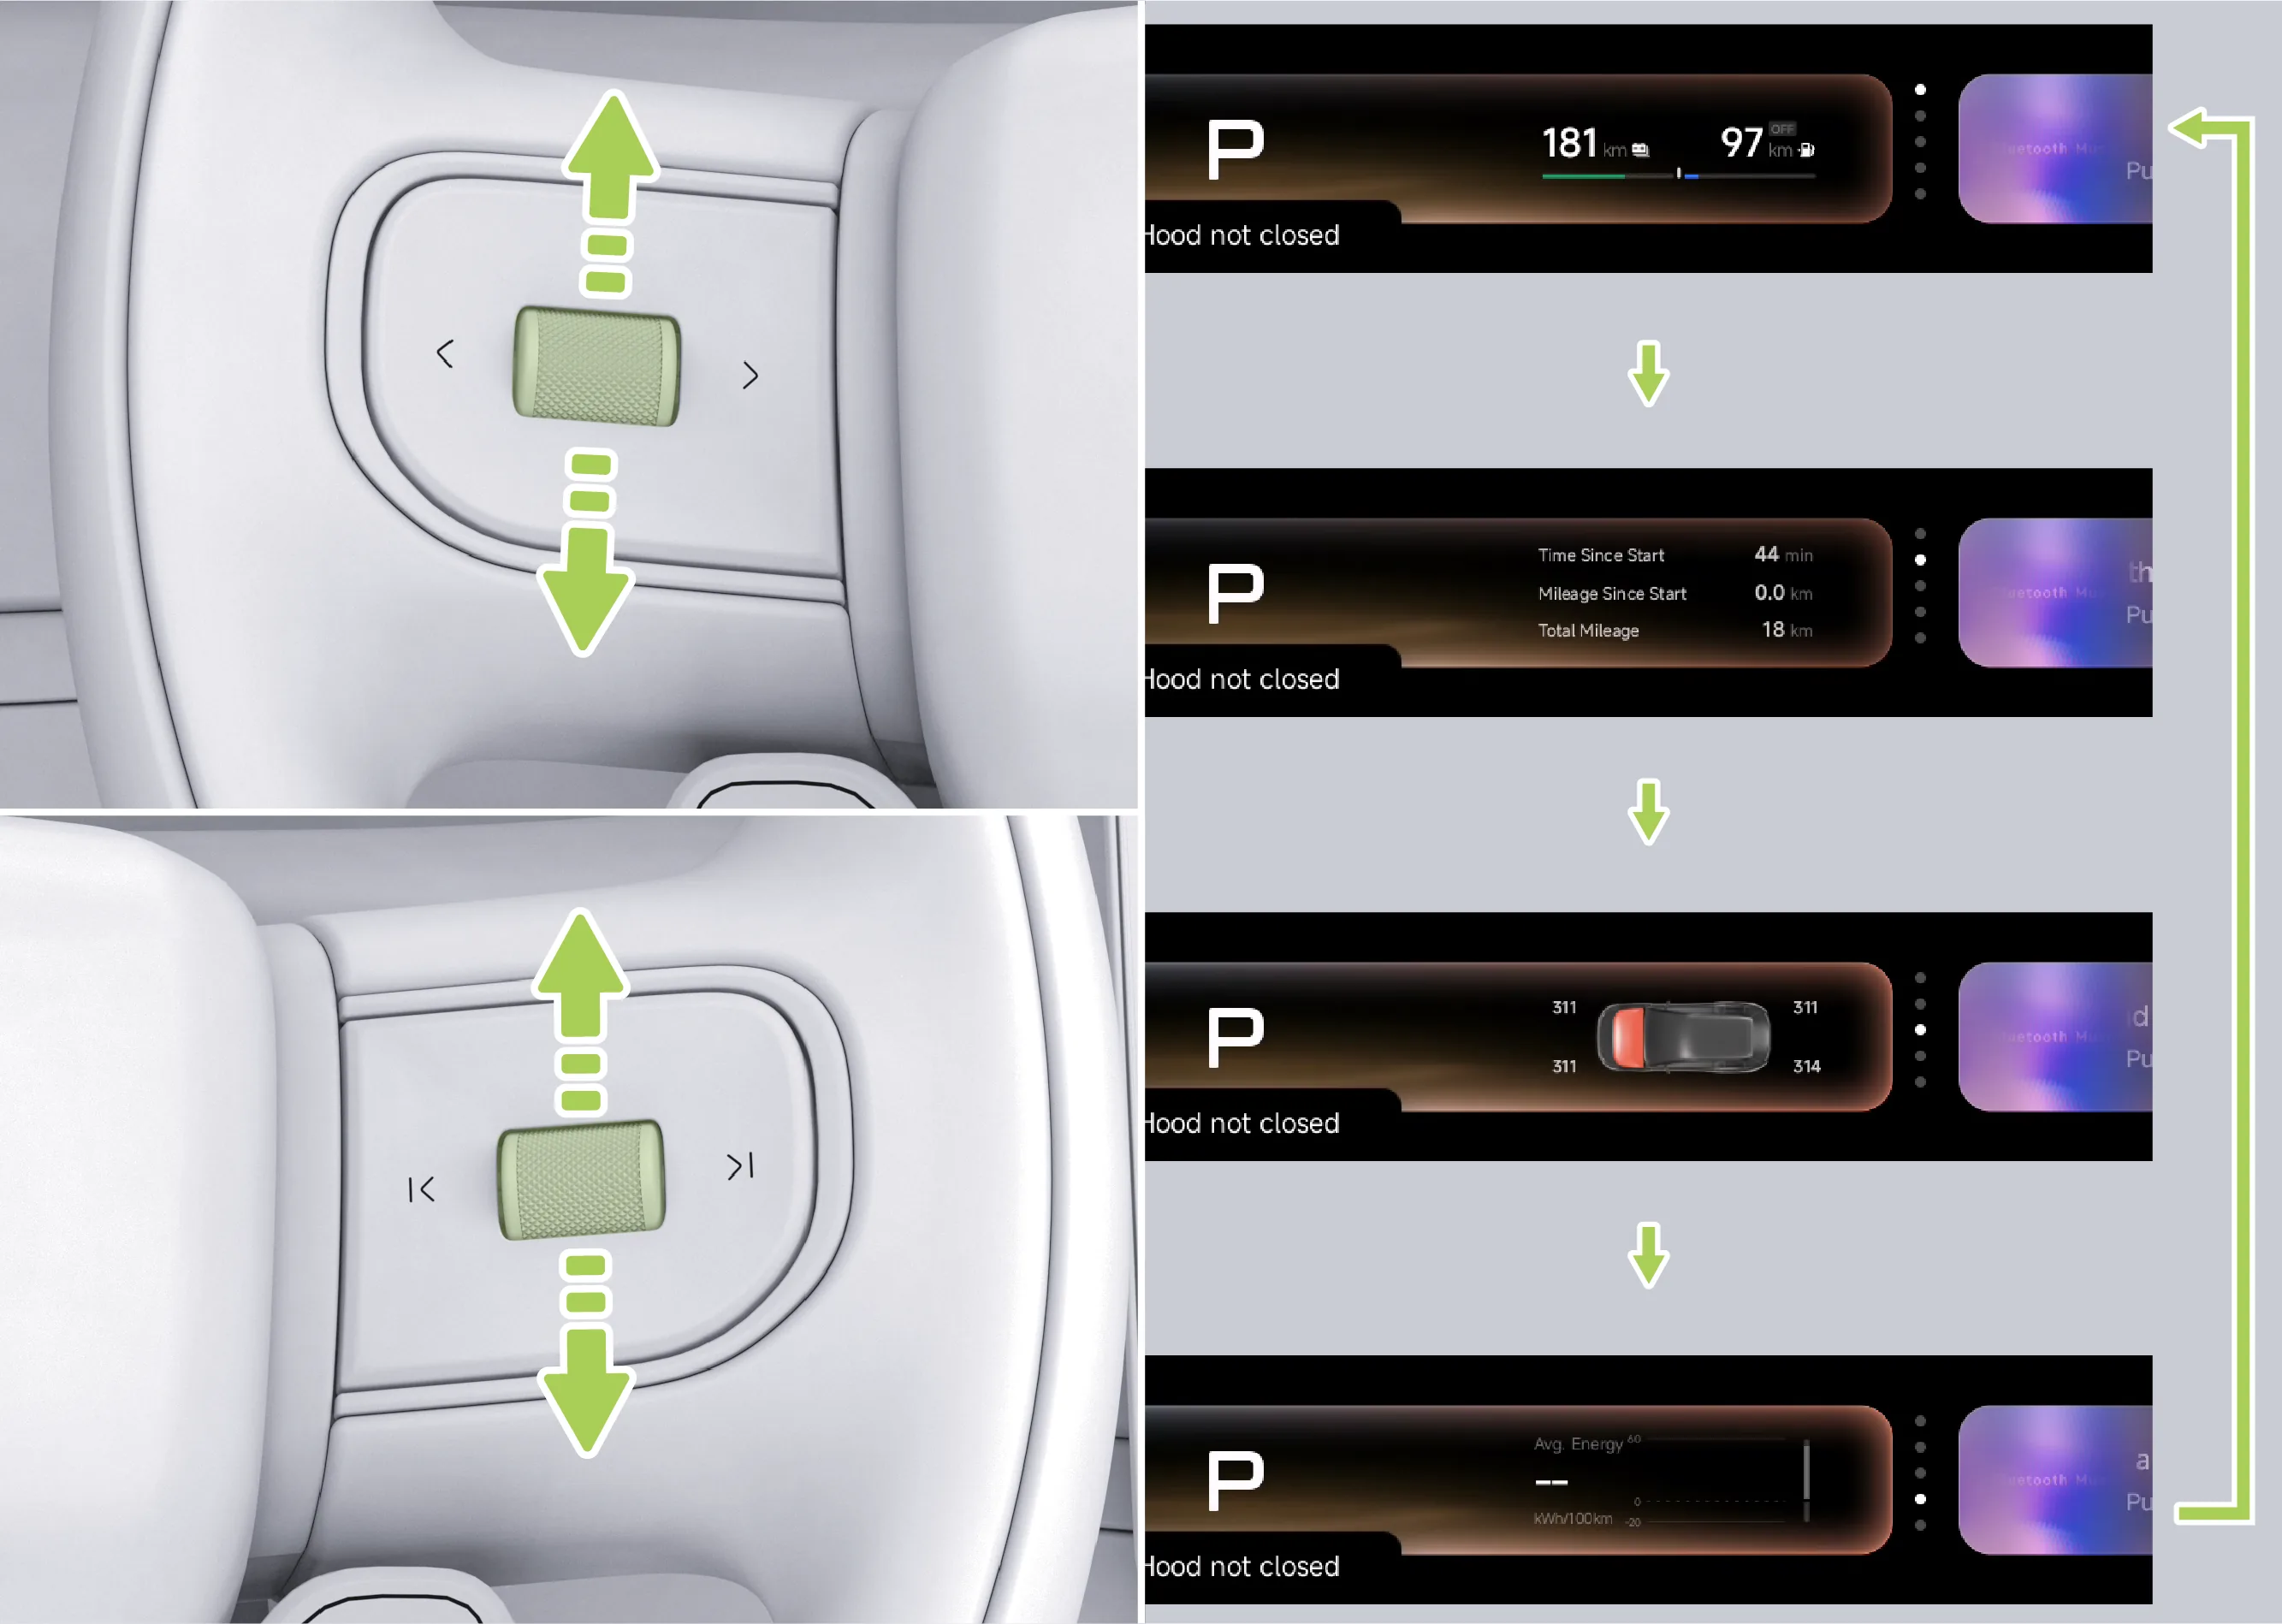
Scroll either roller on the steering wheel up or down to switch among the range card, mileage card, vehicle status card, and energy consumption card.
After selecting the desired information card, briefly press the scroll wheel to apply the information card.
Tips If no information card is switched within a period of time, the system will automatically exit the information card switching screen and apply the currently displayed information card.
The rear control screen can be used to operate the rear Air Conditioner, seats, and basic entertainment applications.
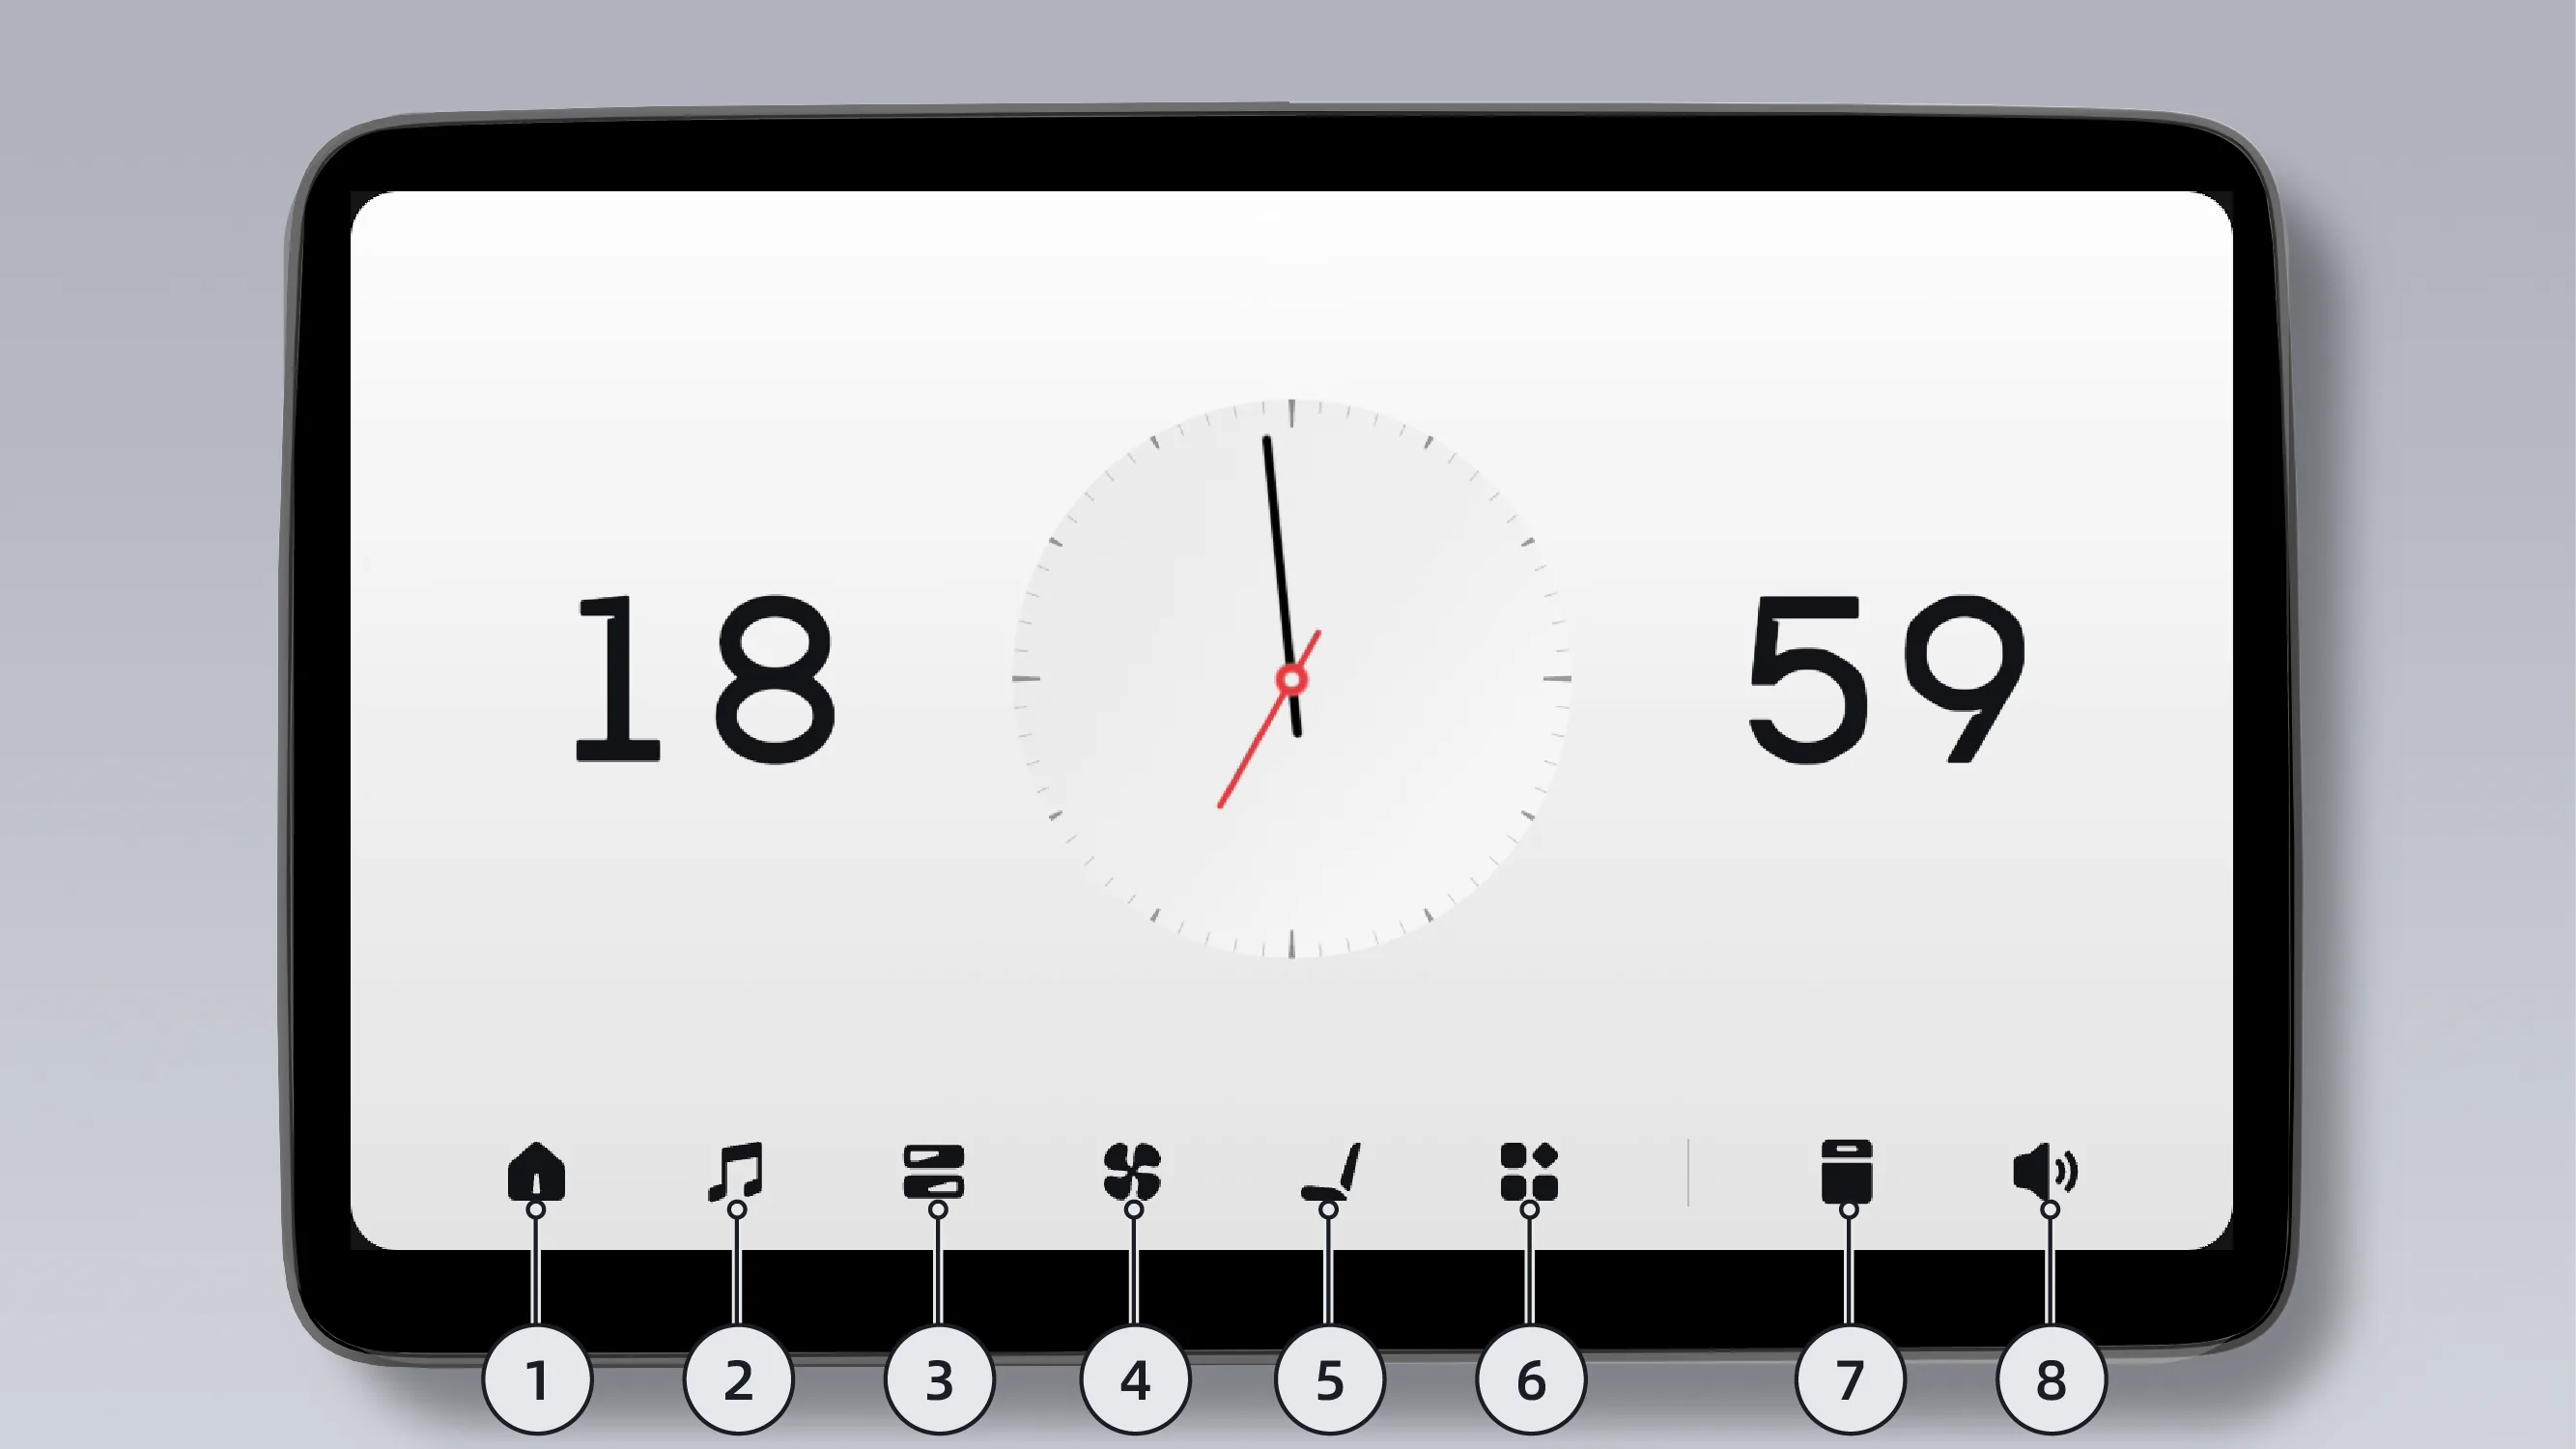
Tap to return to the home page.
Tap to control music playback (for more detailed information about the music app, please refer to Section).
Tap to enter the Control Center screen.
Tap to set the rear Air Conditioner (For more detailed information about the Air Conditioner functions, please refer to Section).
Tap to set passenger seat, second-row and third-row seats* heating/ventilation/massage, and adjust the seat positions of the passenger seat, second-row and third-row seats* (for more detailed information about seat functions, please refer to Section).
Tap to enter the App Center screen.
Tap to open/close the in-vehicle refrigerator door.
Tap to adjust the media volume (for more detailed information on sound settings, please refer to Section).
Tips The rear control screen, rear entertainment screen, and center control screen share one set of third-party applications.
Applications must be downloaded through the app store. If an application is deleted on the center control screen or the rear control screen, it will also be deleted synchronously on the rear entertainment screen.
The rear control screen can be turned on/off in the following ways:
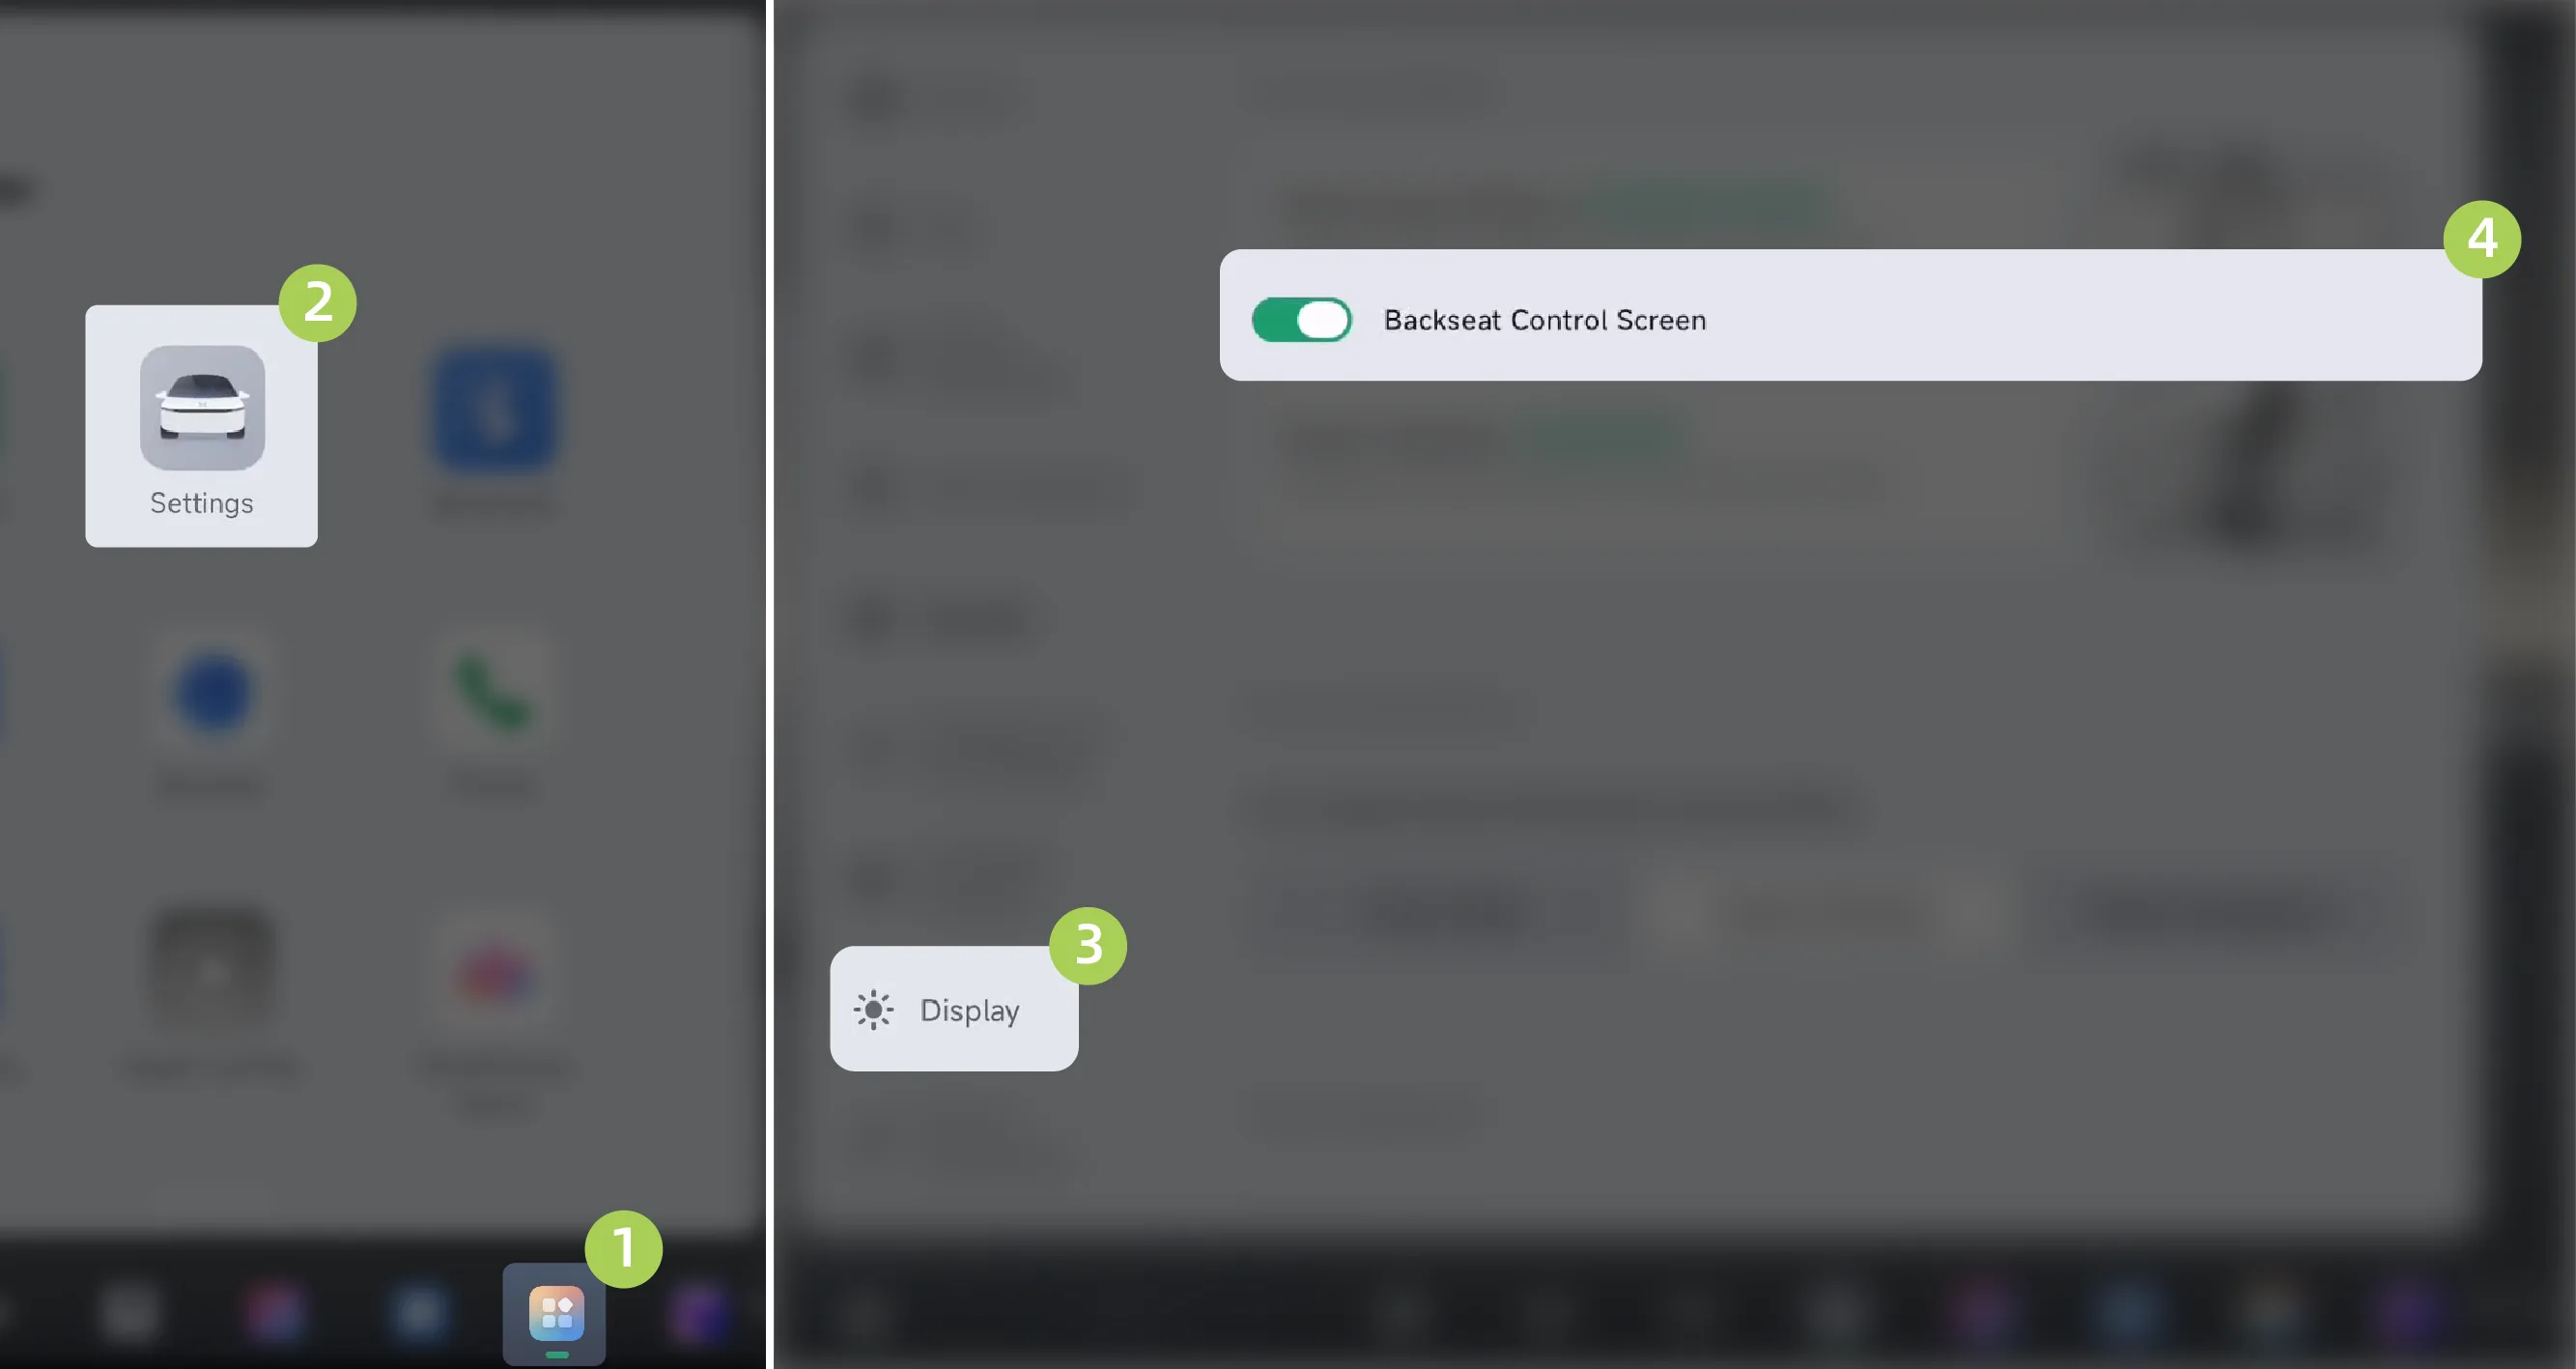
On the center display “ →Settings→Display”Interface, turn the rear control screen on/off.
Tap the center display screen “ ”Enter the Control Center screen and tap Rear Control ScreenTap to turn the rear control screen on/off.
After waking XPENG, say your command, for example: “Turn on the rear control screen”, “Turn off the rear control screen”.
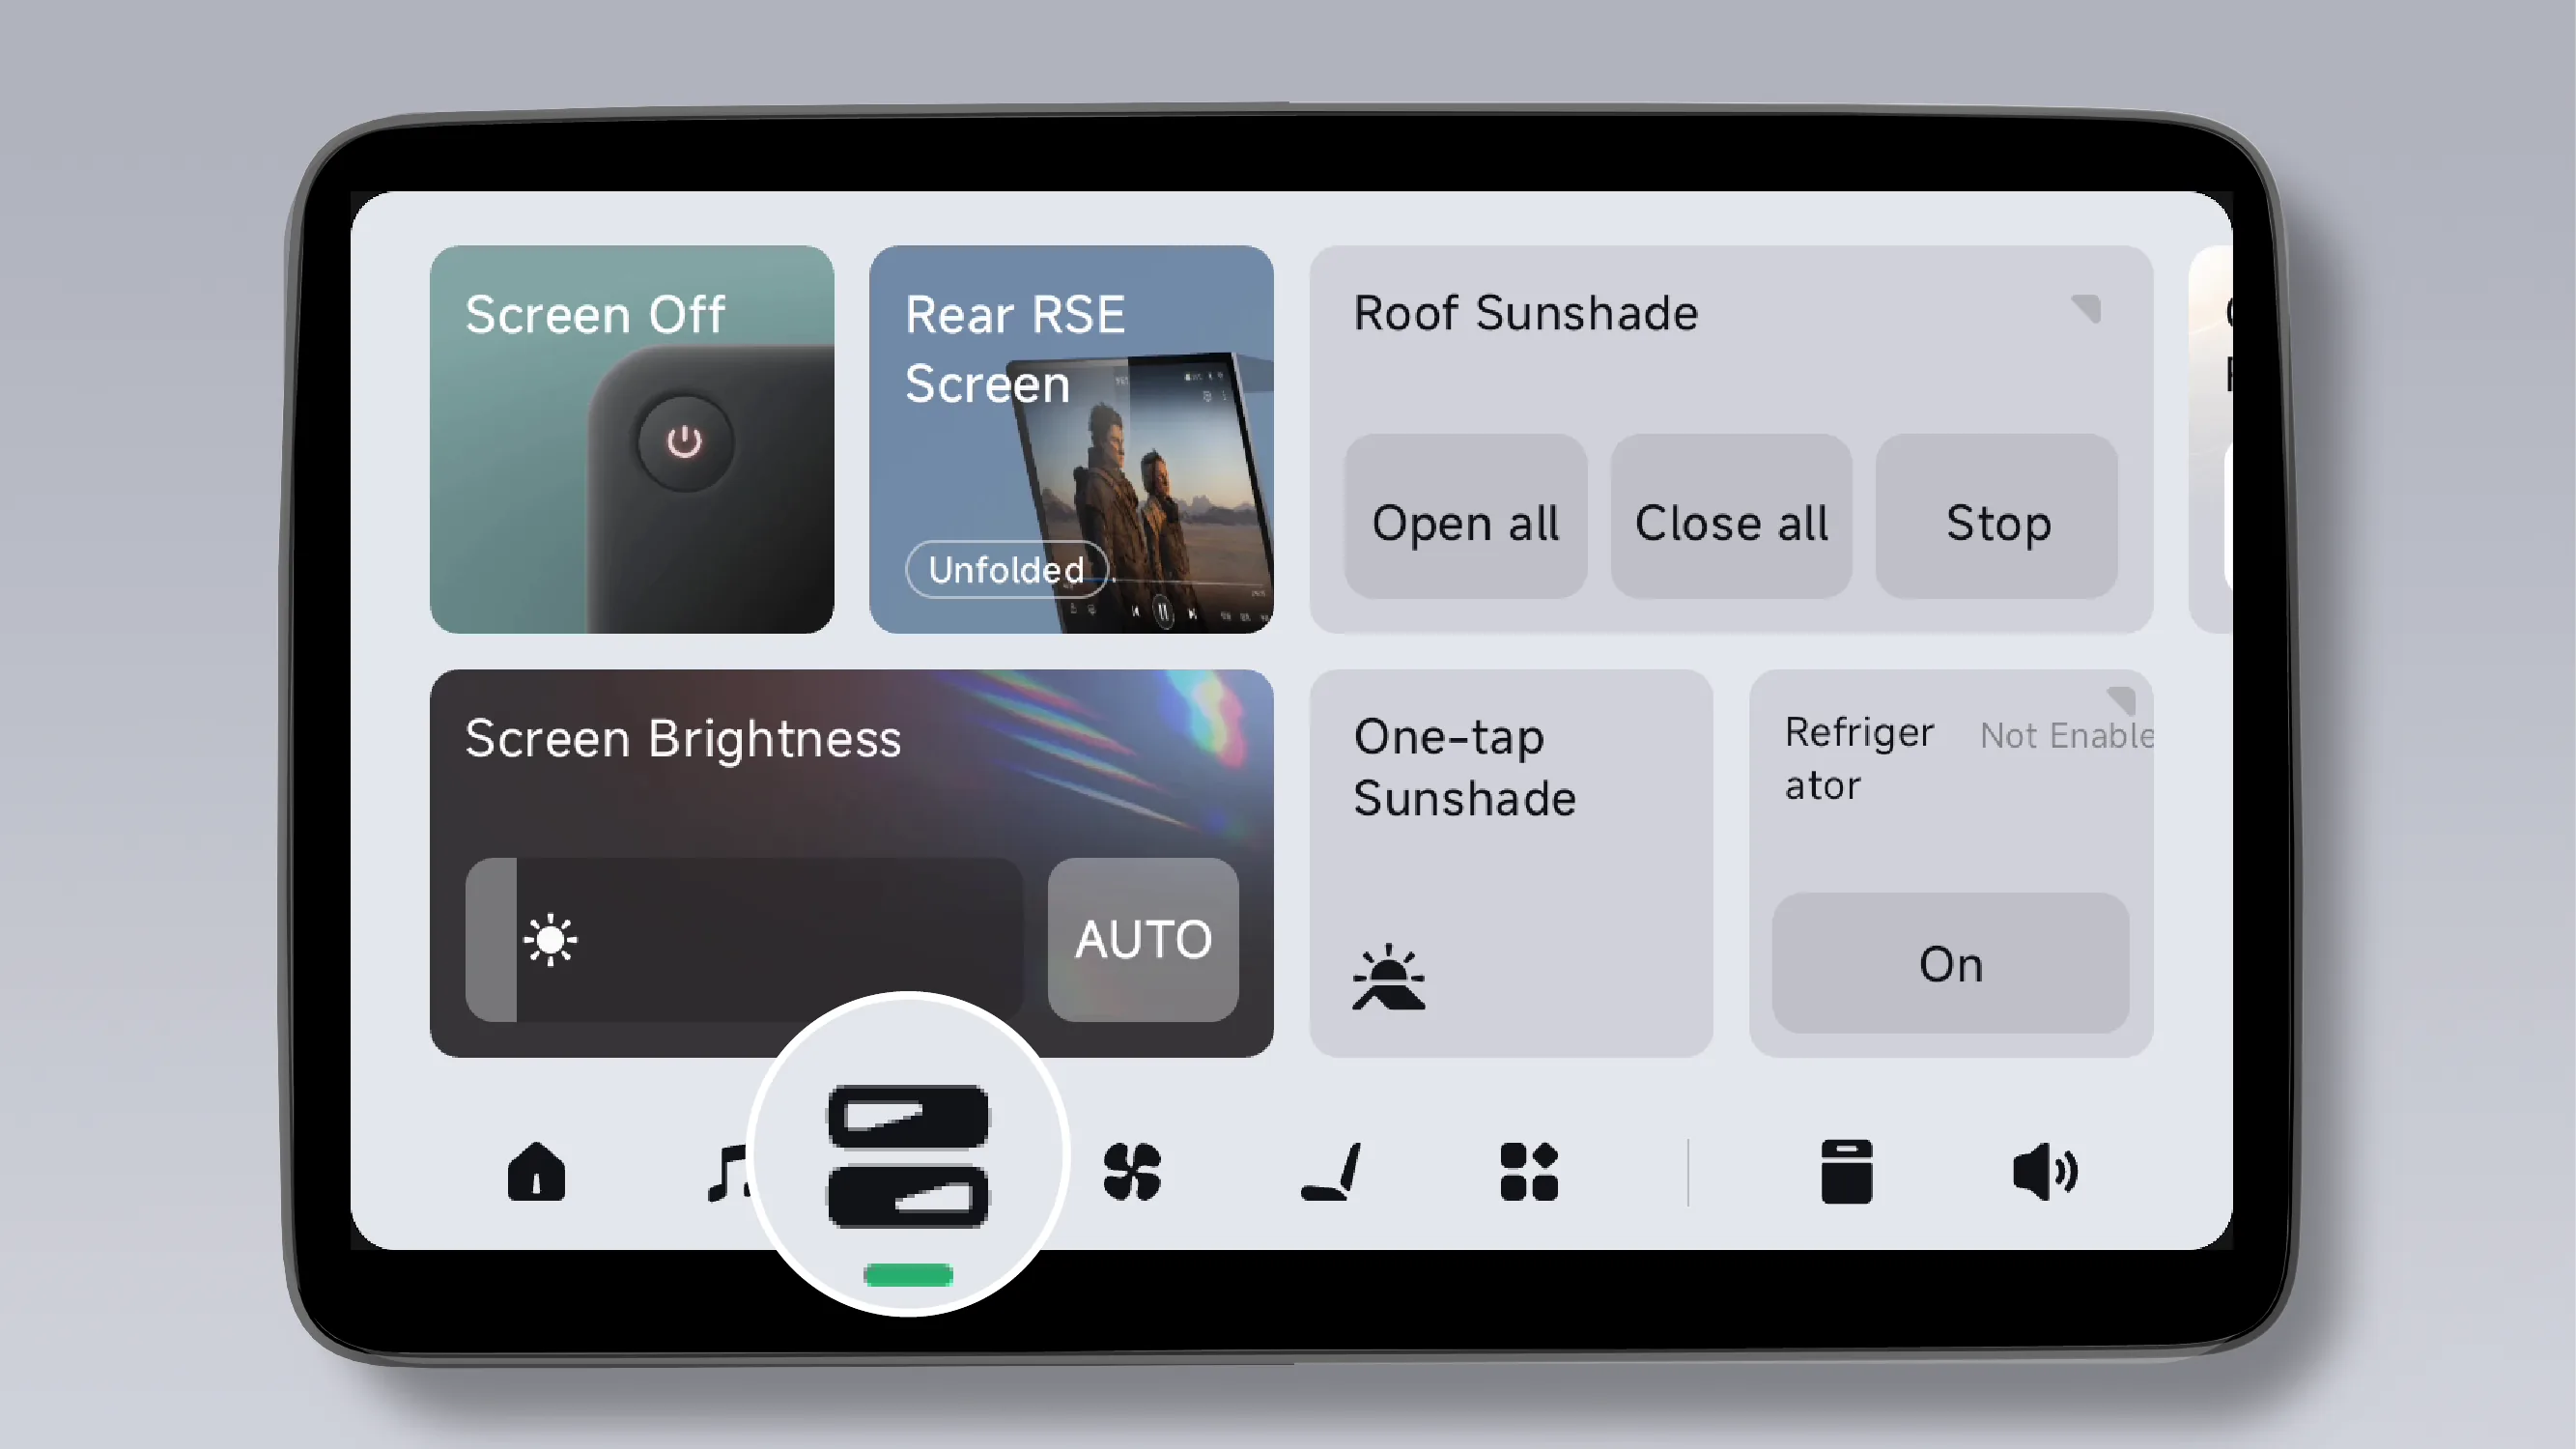
Tap the bottom taskbar on the rear screen. Tap the icon to open the rear screen control center.
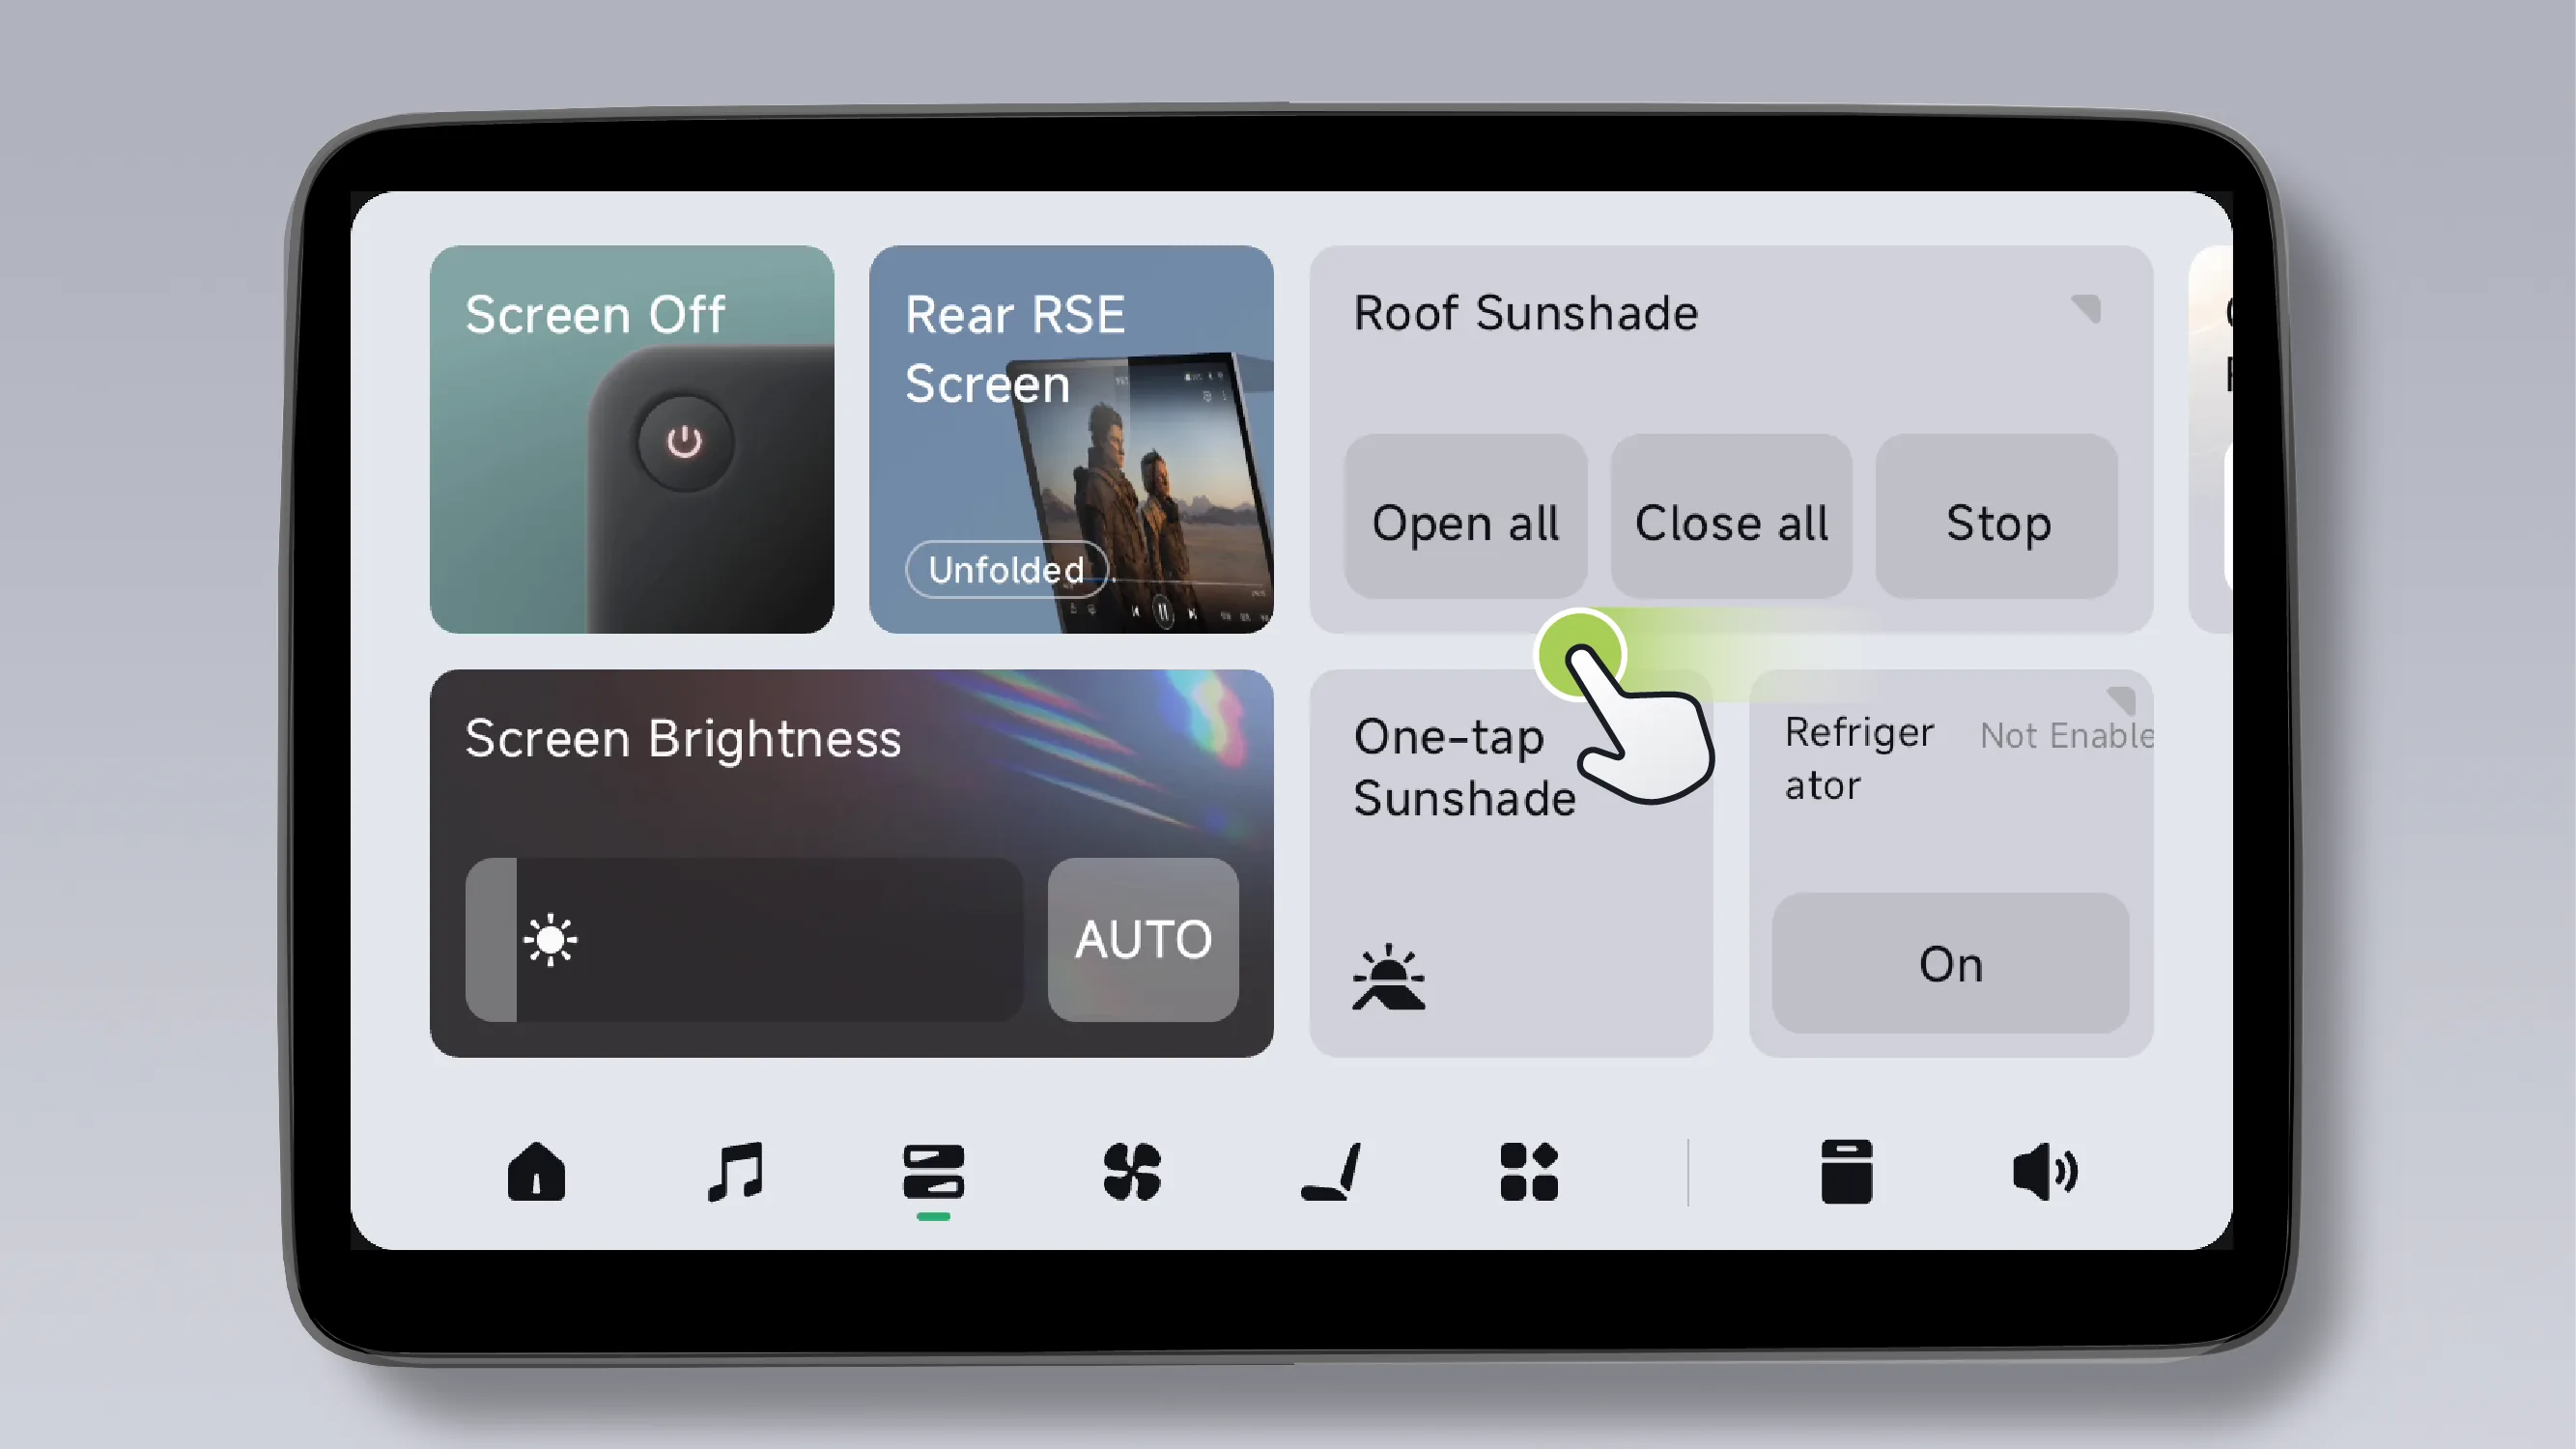
Swipe left from the right side of the screen with one finger to view more functions in the Control Center.
Screen Off:Tap to turn off the rear control screen. Tap the screen again to turn the rear control screen back on.
Rear RSE Screen:The rear entertainment screen can be folded or unfolded.
Screen Brightness:You can drag the slider to adjust the brightness of the rear control screen. After automatic brightness is enabled, the system will automatically adjust the brightness of the rear control screen.
You can view the current status of the vehicle refrigerator (for example: off, heating 30°, freezing -1°, cooling 30°, and other statuses).
Quickly open or close the vehicle refrigerator door.
Access the refrigerator settings screen.
Quickly turn on or off the left Overhead Reading Lights and the right Overhead Reading Lights.
Access the Overhead Reading Lights settings screen.
Quickly Operate Roof Sunshade 、 、 。
Enter the sunshade settings screen.
One-tap Sunshade*:Tap to close the Roof Sunshade and Side Window Shades.
With Control Center open, tap the bottom taskbar on the rear screen again. Icon.
Open other apps.
Tap any blank area in the control center.
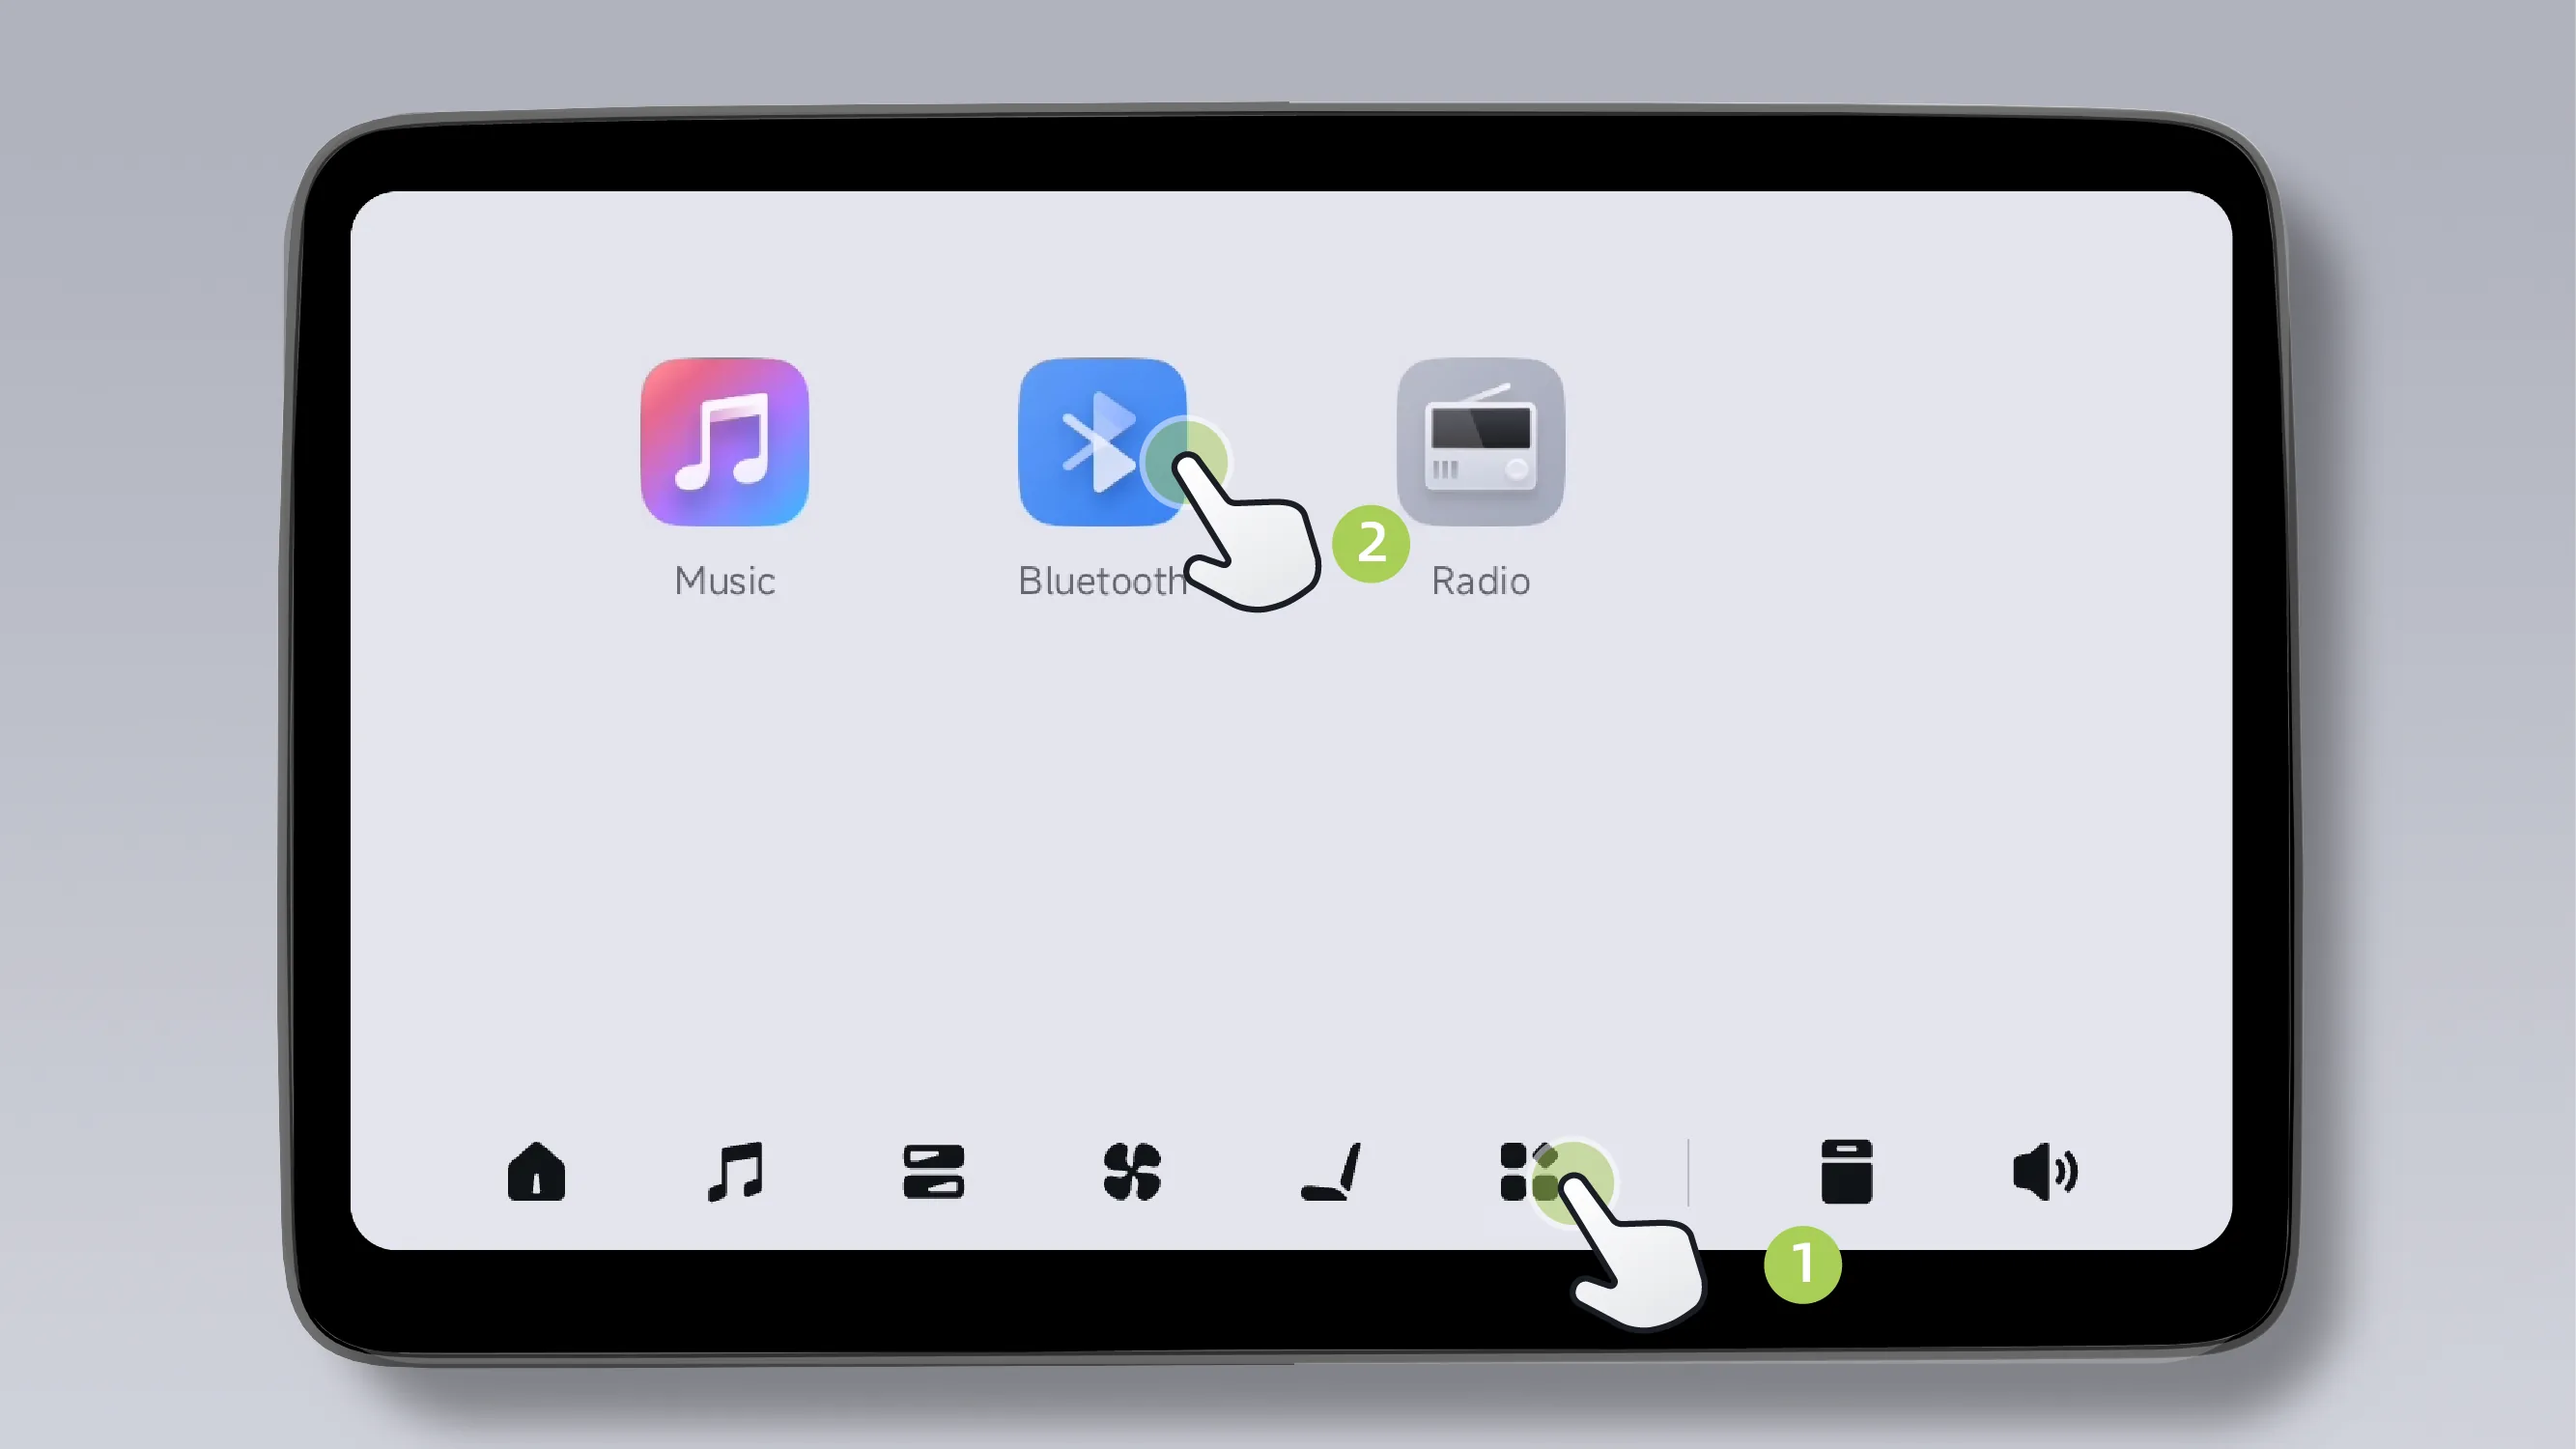
Tap **App Center** on the bottom taskbar.  Tap the icon to open the App Center.
Tap the app icon to open the app.
Tap **App Center** on the bottom taskbar. Tap the icon to open the App Center.
Press and hold an app icon or a blank area to enter the customization mode.
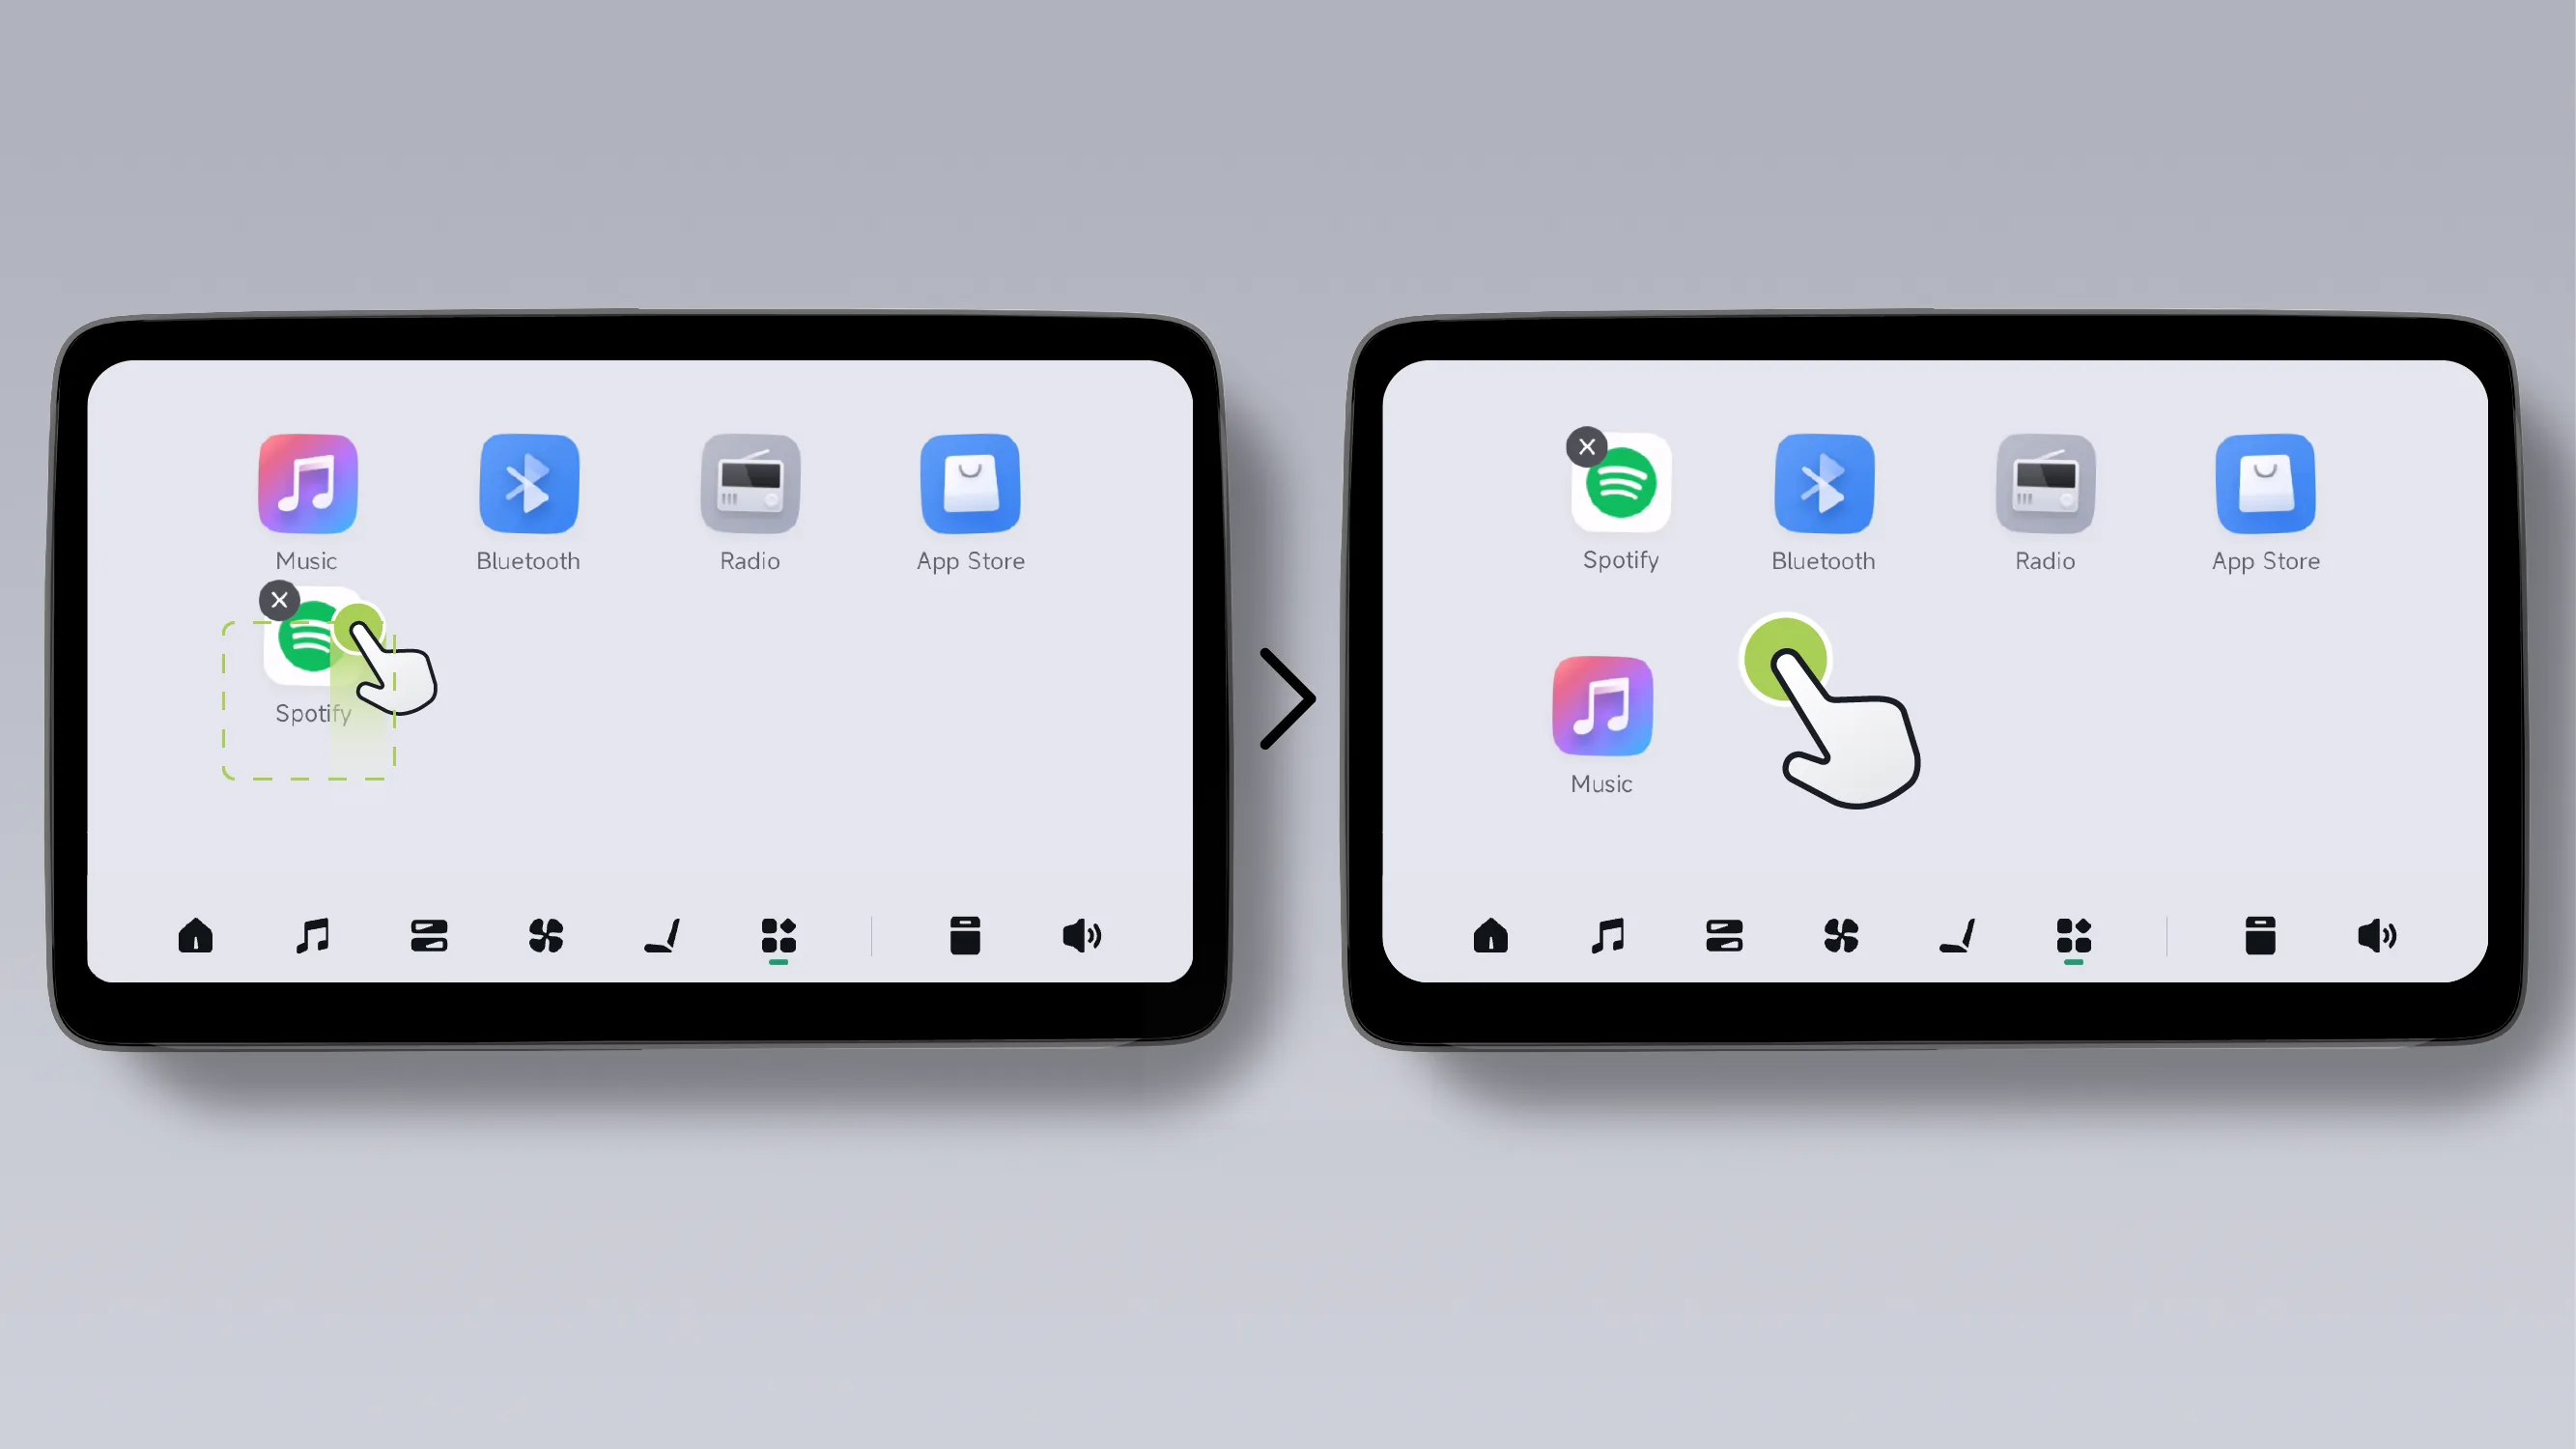
In custom mode, drag app icons to reorder them within the app list.
Tap any blank area in the App Center to exit customization mode.
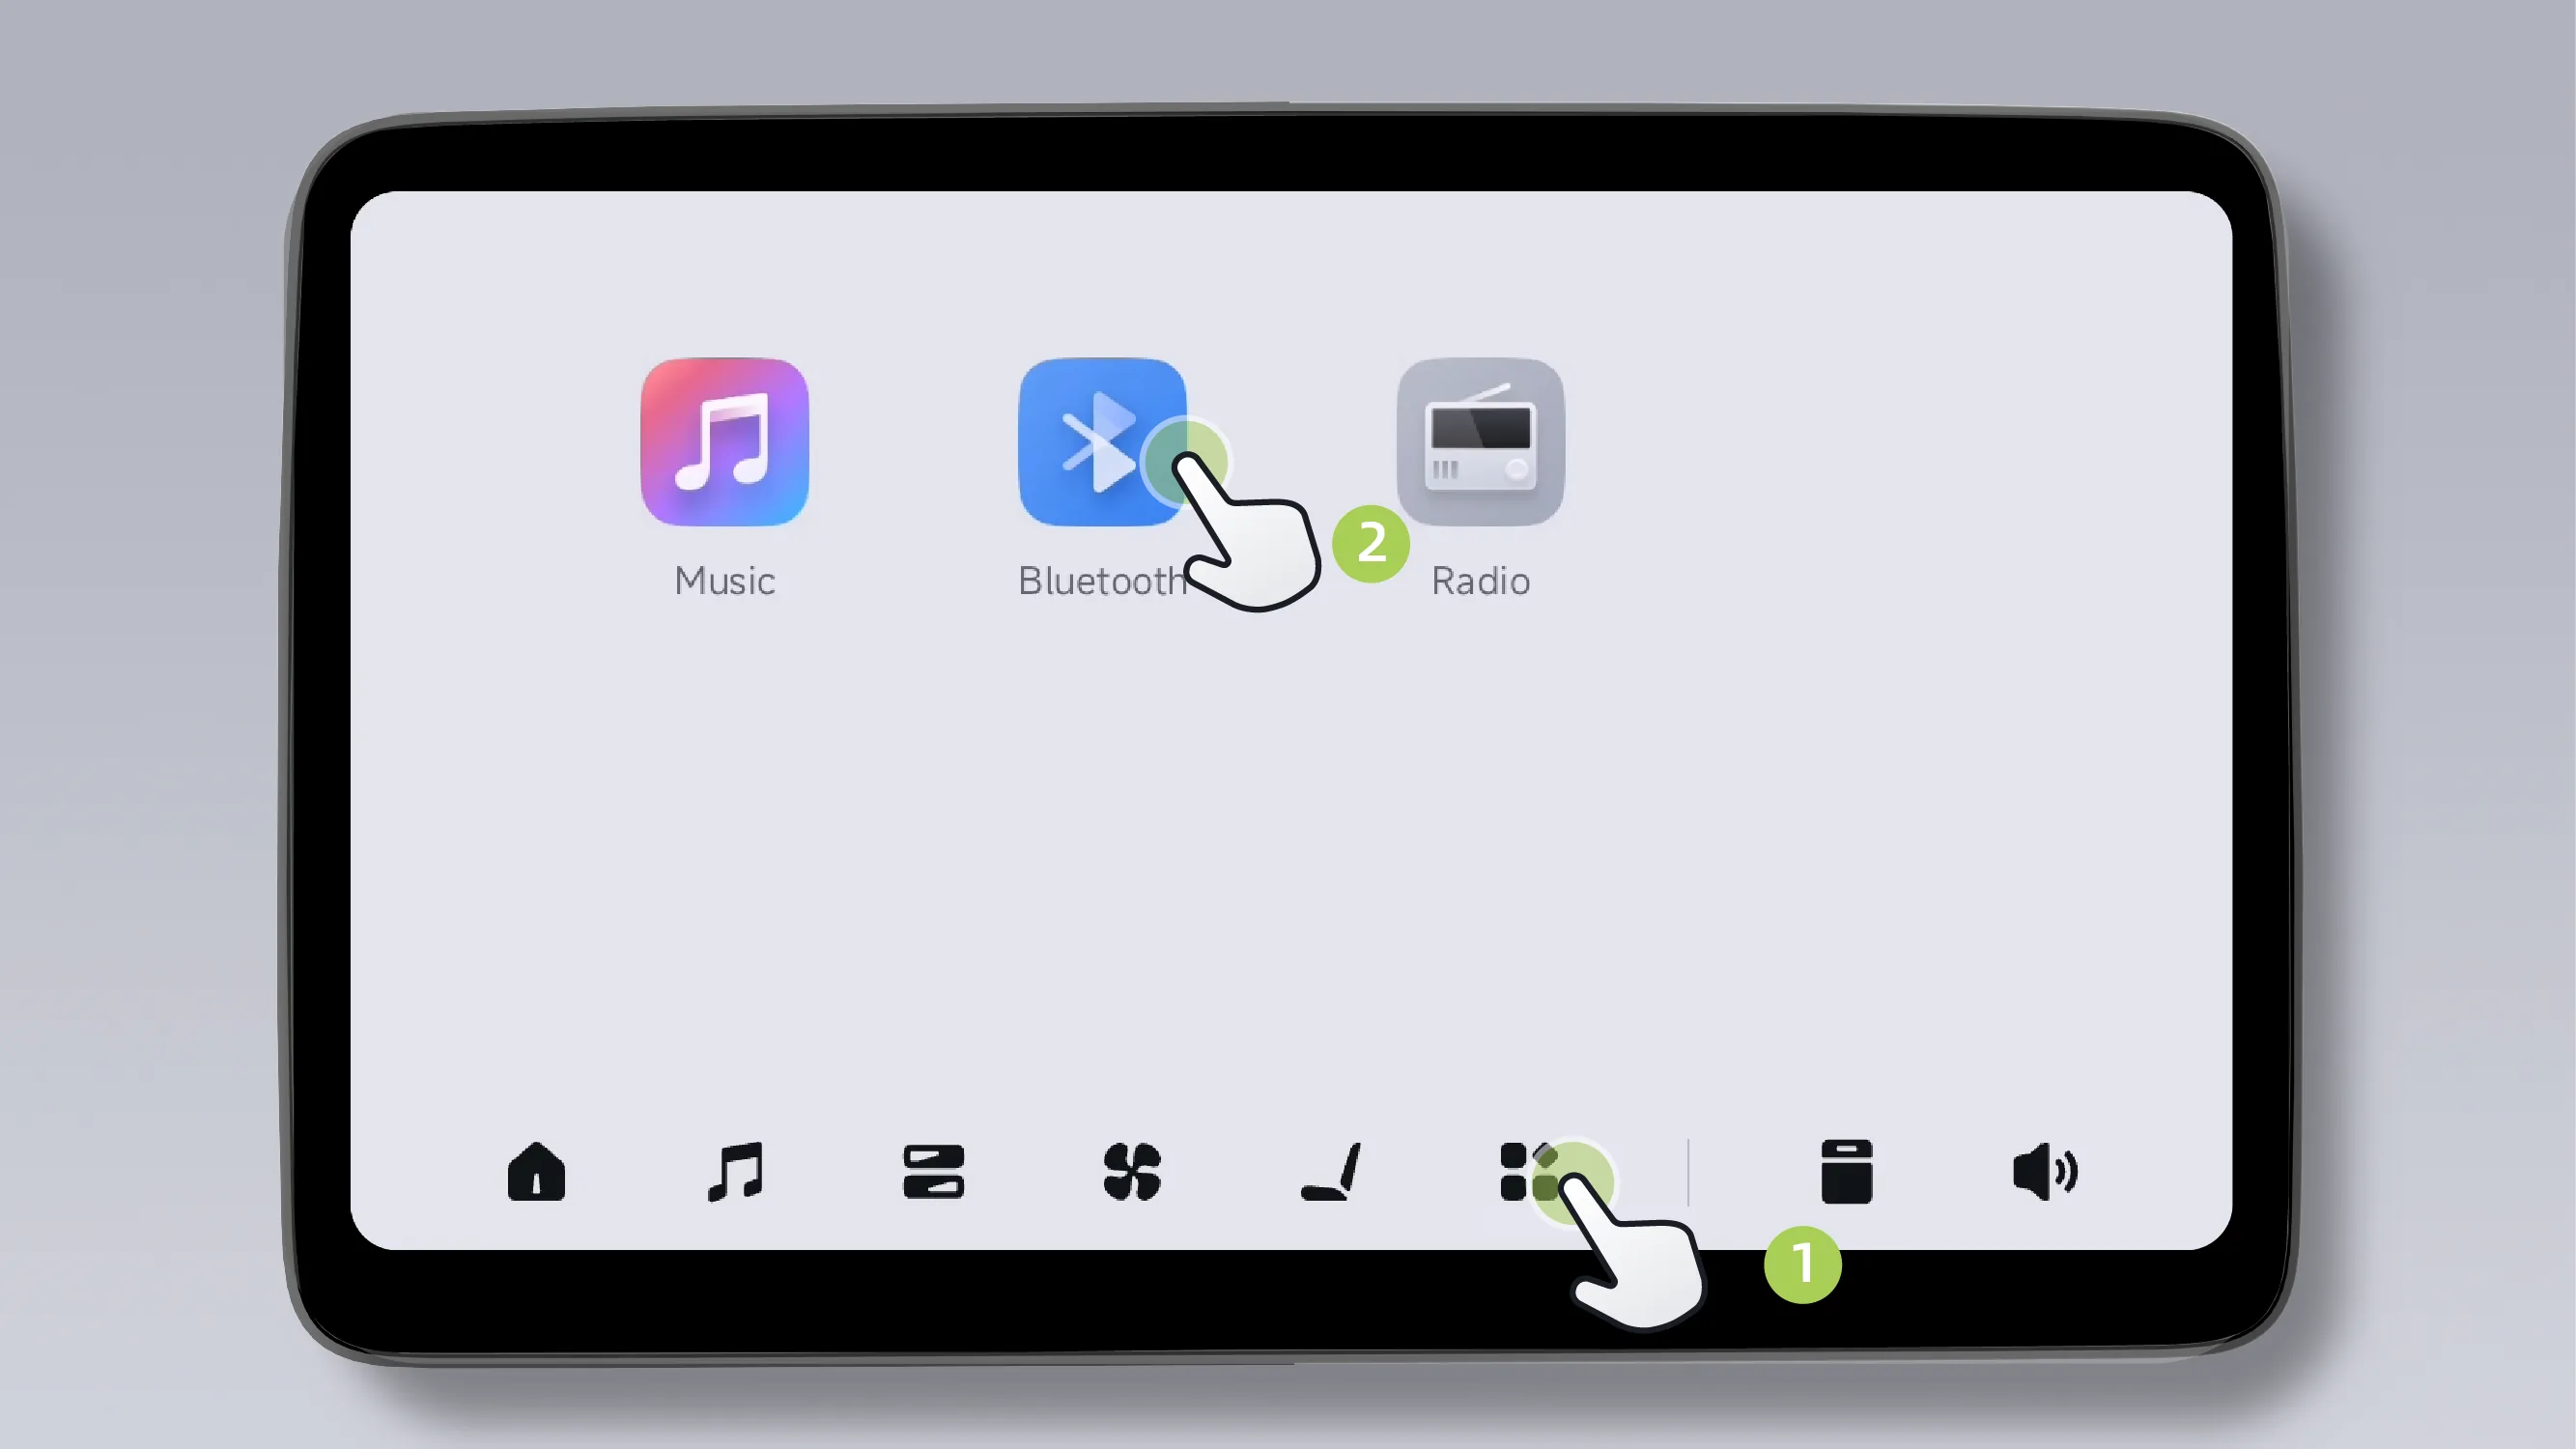
Tap **App Center** on the bottom taskbar Tap the icon to open the App Center.
Press and hold an app icon or a blank area to enter the customization mode.
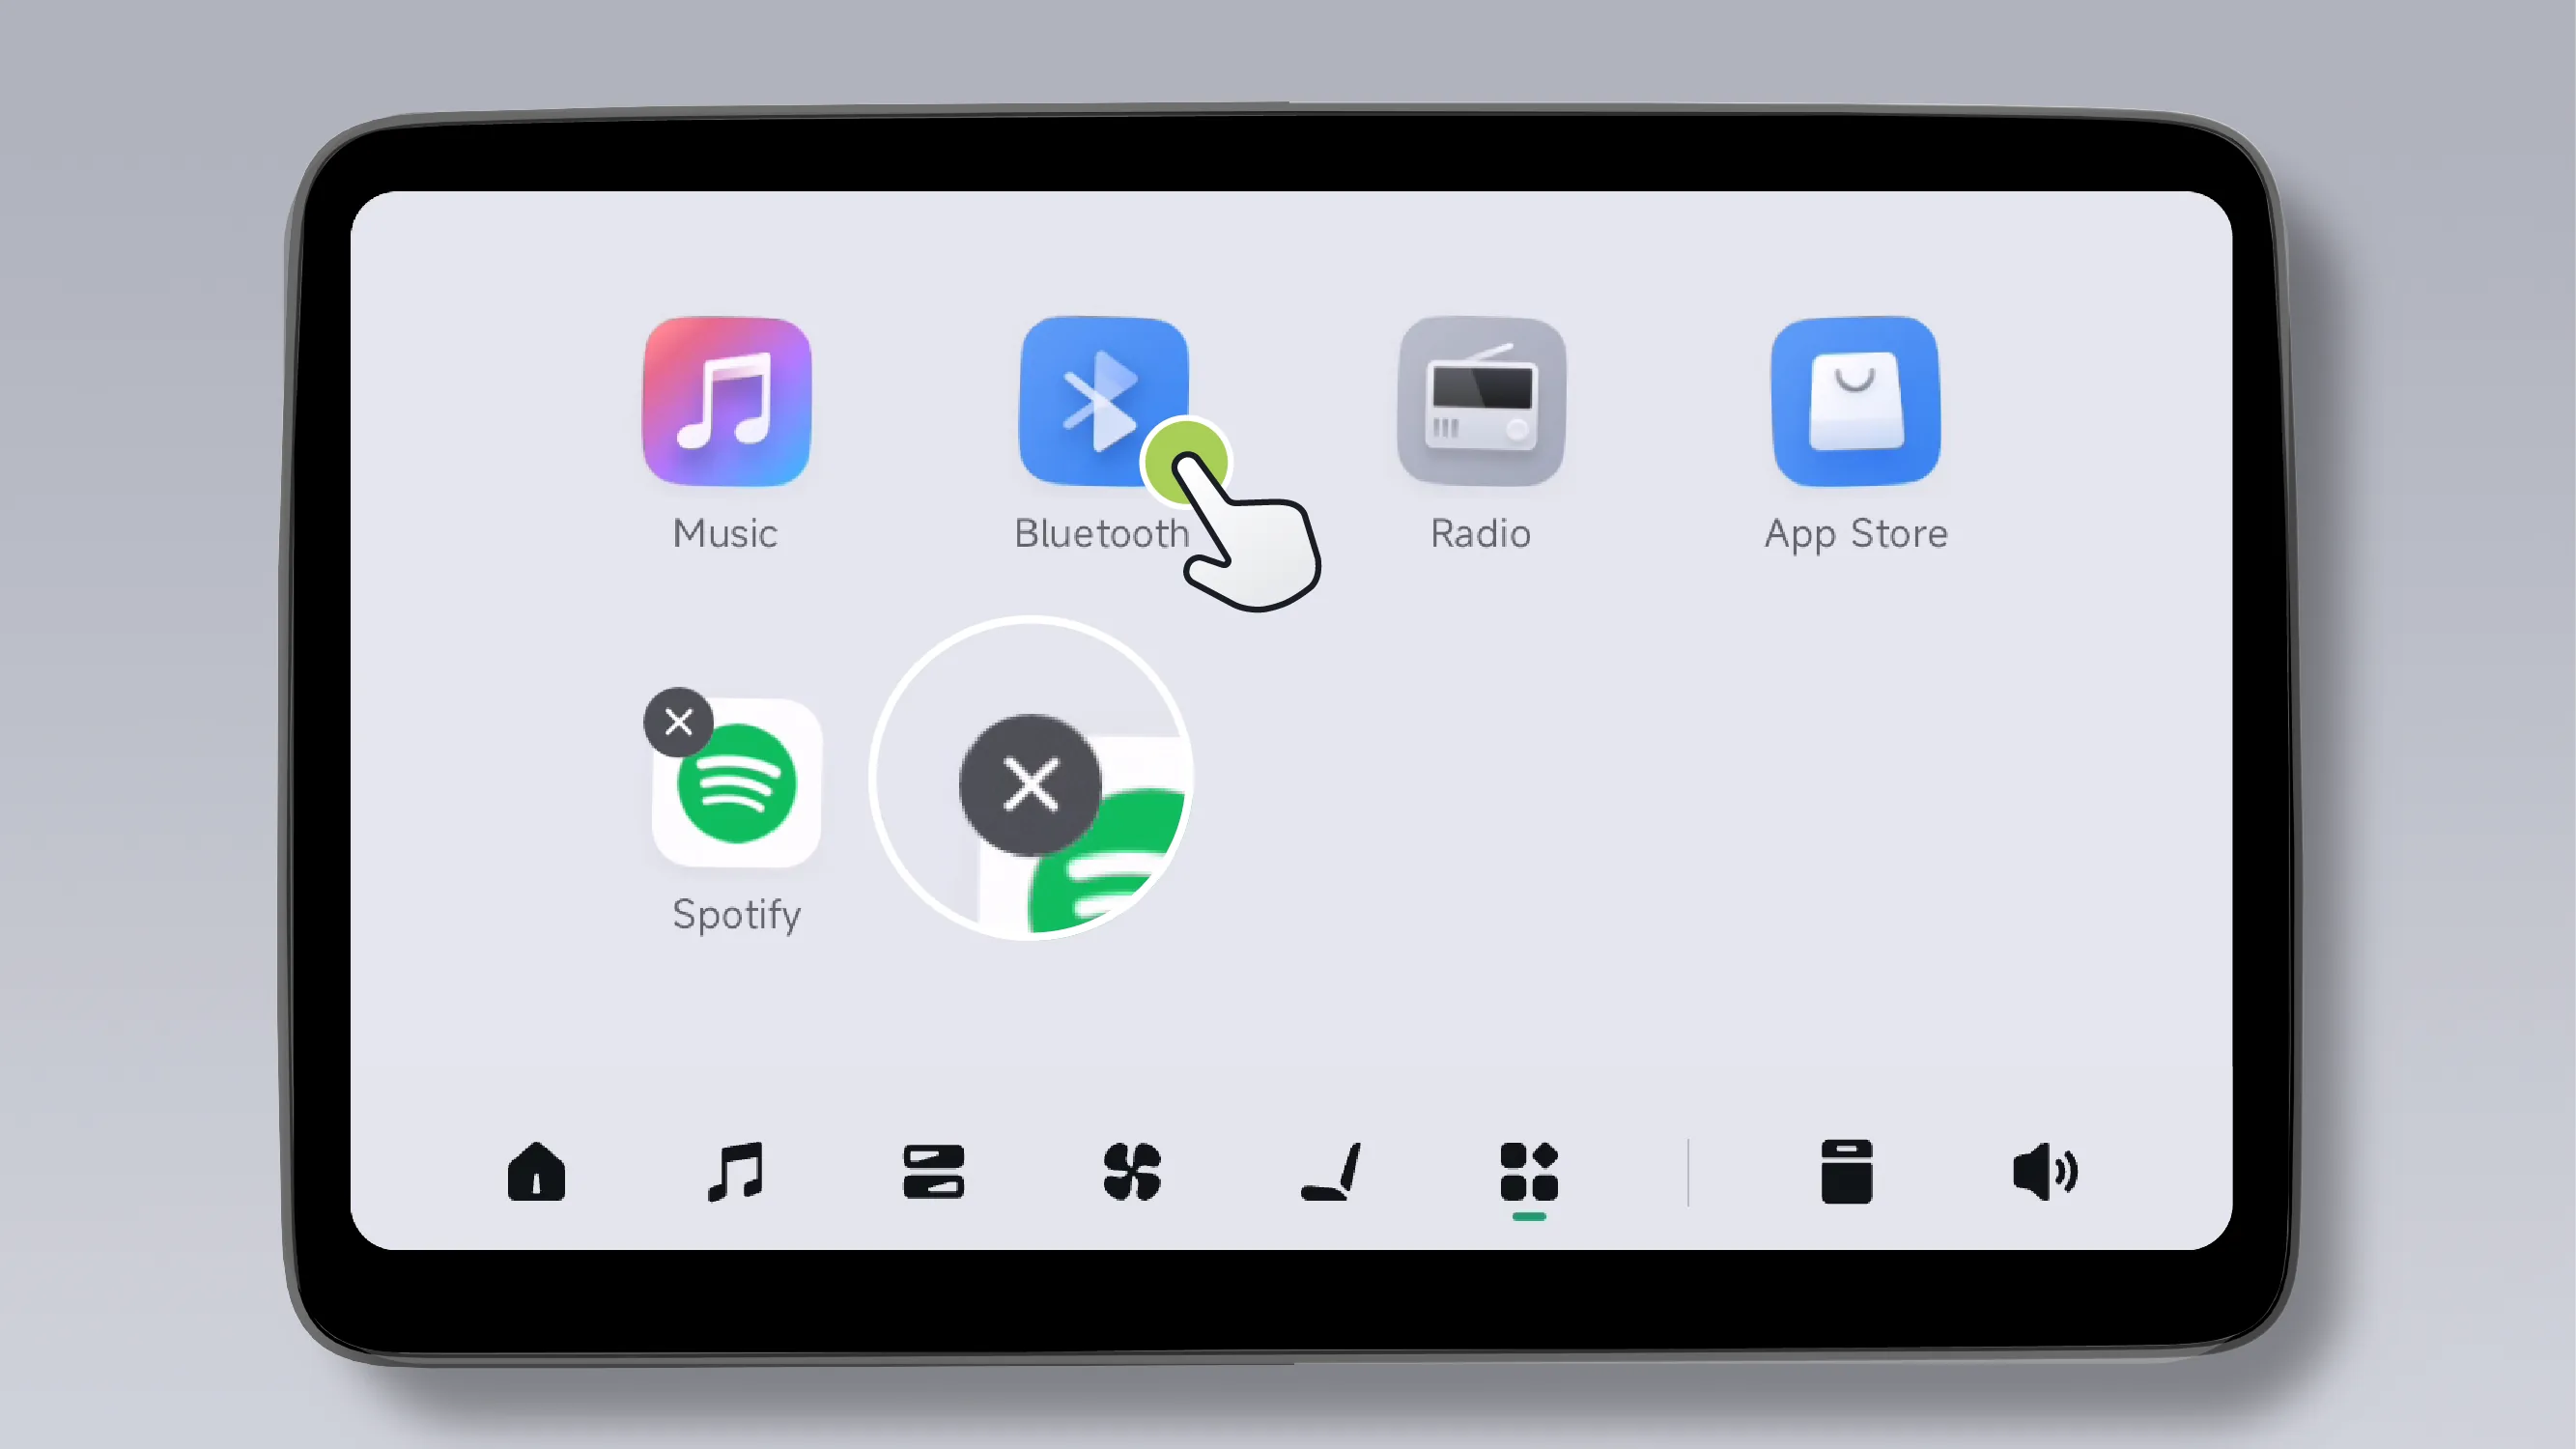
In custom mode, tap the upper-left corner of the app icon Icon.
After reading the prompt in the pop-up window, tap , this app will be removed from . To use this app again, please download it from the App Store.
Tap any blank area in the App Center to exit the custom mode.
Tips The rear control screen, rear entertainment screen, and center control screen share one set of third-party applications.
Applications must be downloaded through the app store. If an application is deleted on the center control screen or the rear control screen, it will also be deleted synchronously on the rear entertainment screen.
You can exit the App Center in the following ways:
Tap any blank area in the App Center.
Tap **App Center** on the bottom taskbar Area outside the icon.
Open other apps.
The entertainment screen mainly displays imaging content. Tap the video to directly enter the imaging interface.
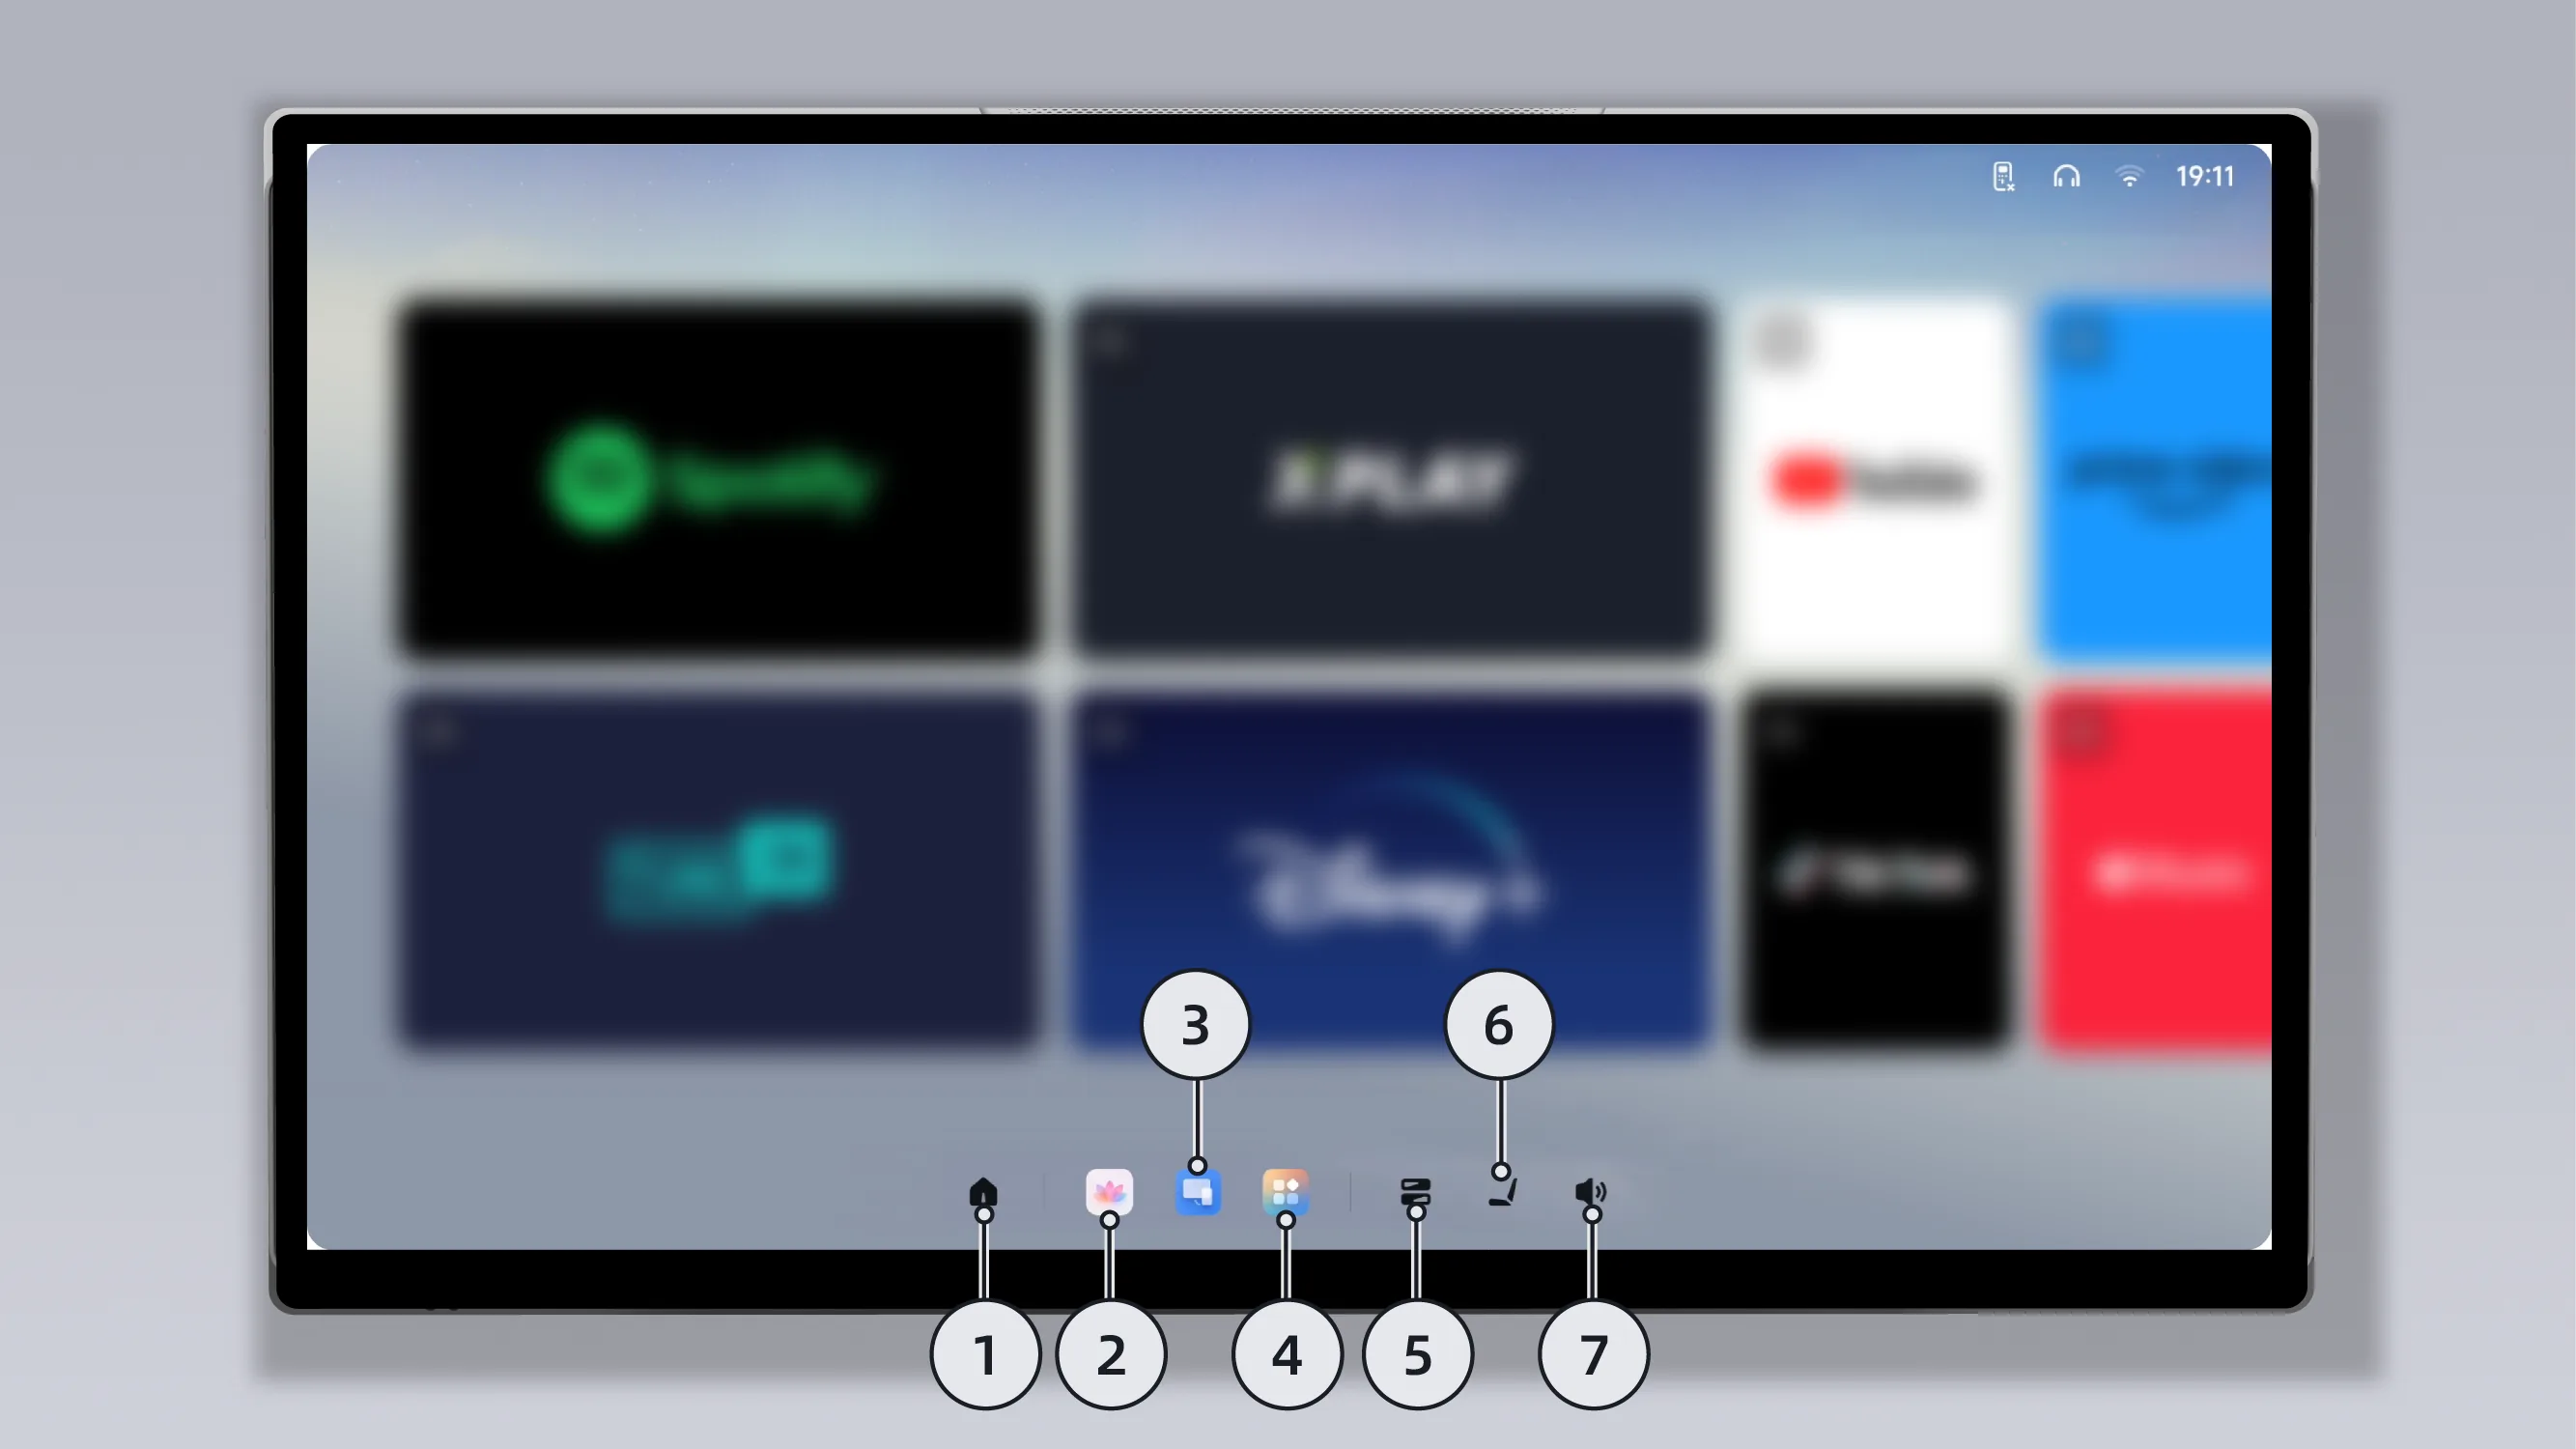
Tap to return to the home page.
Tap to enter the Mindfulness screen.
Tap to enter the Screen Projection Assistant interface (for more detailed information about Screen Projection Assistant, please refer to Section).
Tap to enter the App Center screen.
Tap to enter the entertainment screen control center interface.
Tap the seat control panel to set second-row and third-row* seat heating/ventilation/massage, and adjust the passenger seat, second-row and third-row* seat positions (for more detailed information about seat functions, please refer to Section).
Tap to adjust the media volume (for more detailed information about sound settings, please refer to Section).
The entertainment screen can be expanded or collapsed on the center display in the following ways:
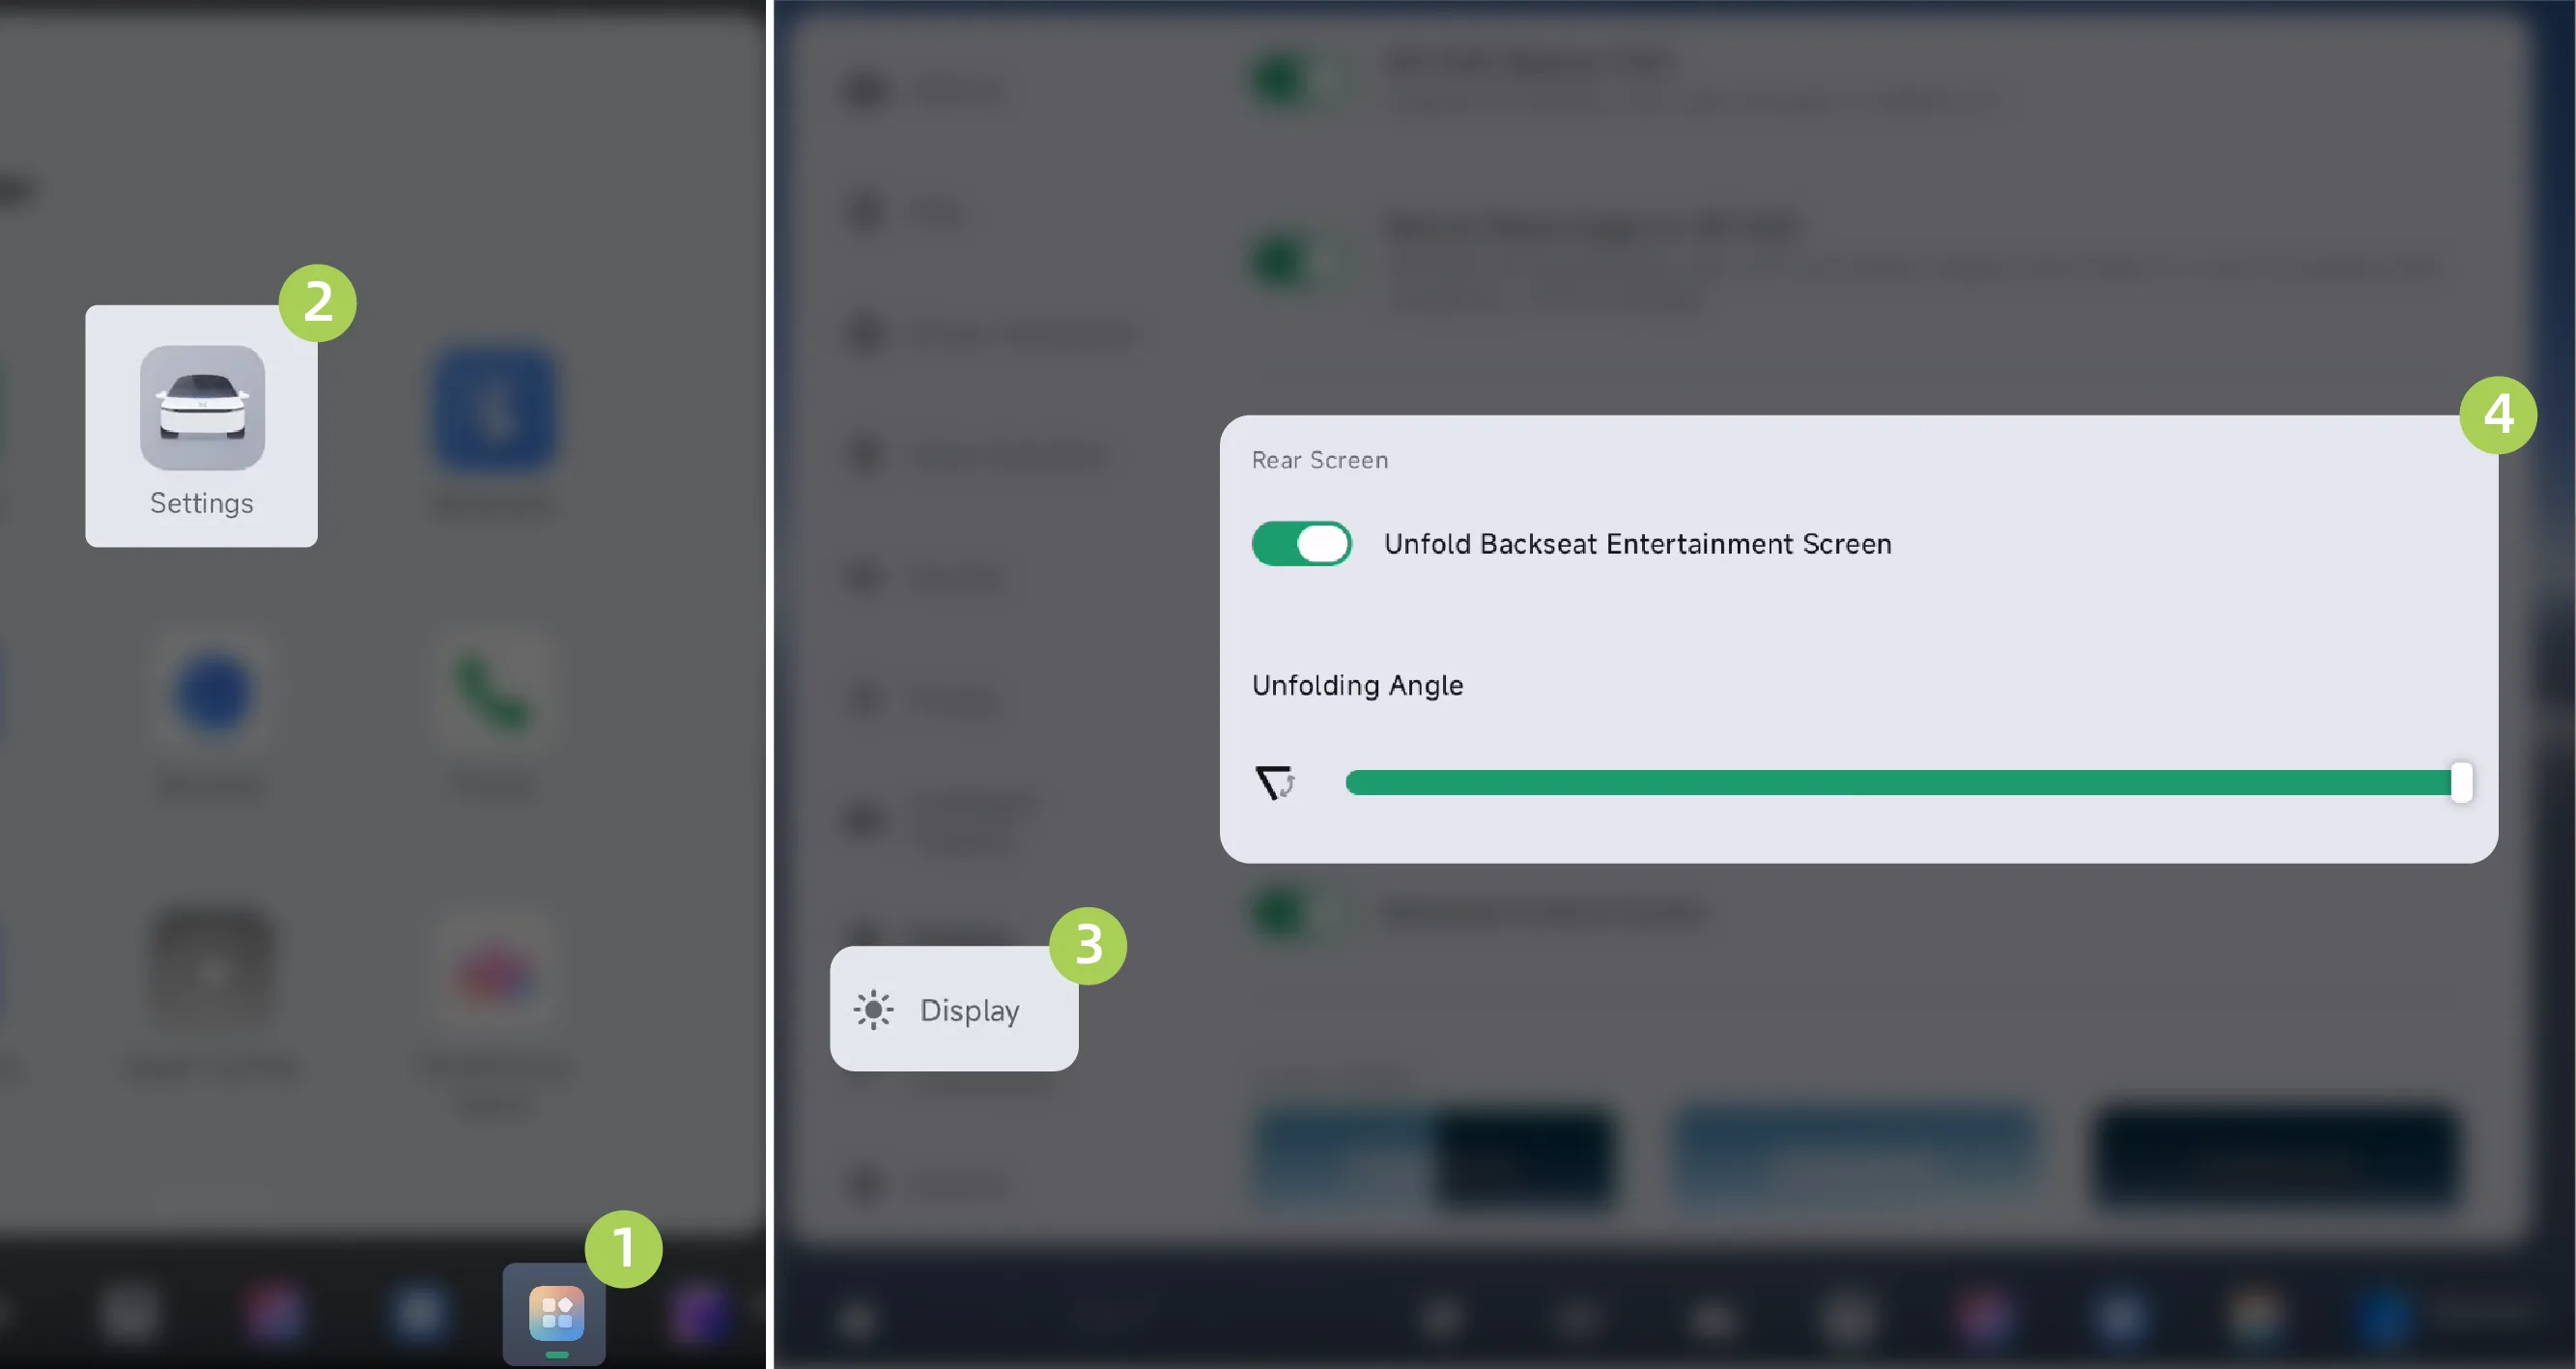
On the center display screen “ →Settings→Display”Interface, foldable rear entertainment screen.
Tap the central control screen “ ”Enter the Control Center screen and tap , the rear entertainment screen can be expanded/collapsed. (To learn about the custom Control Center, please refer to the Custom Control Center section).
Customize the bottom taskbar through the central control screen, “  entertainment screen ”Add to the bottom taskbar, tap in the bottom taskbar “ entertainment screen ”Icon to expand/collapse the rear entertainment screen.
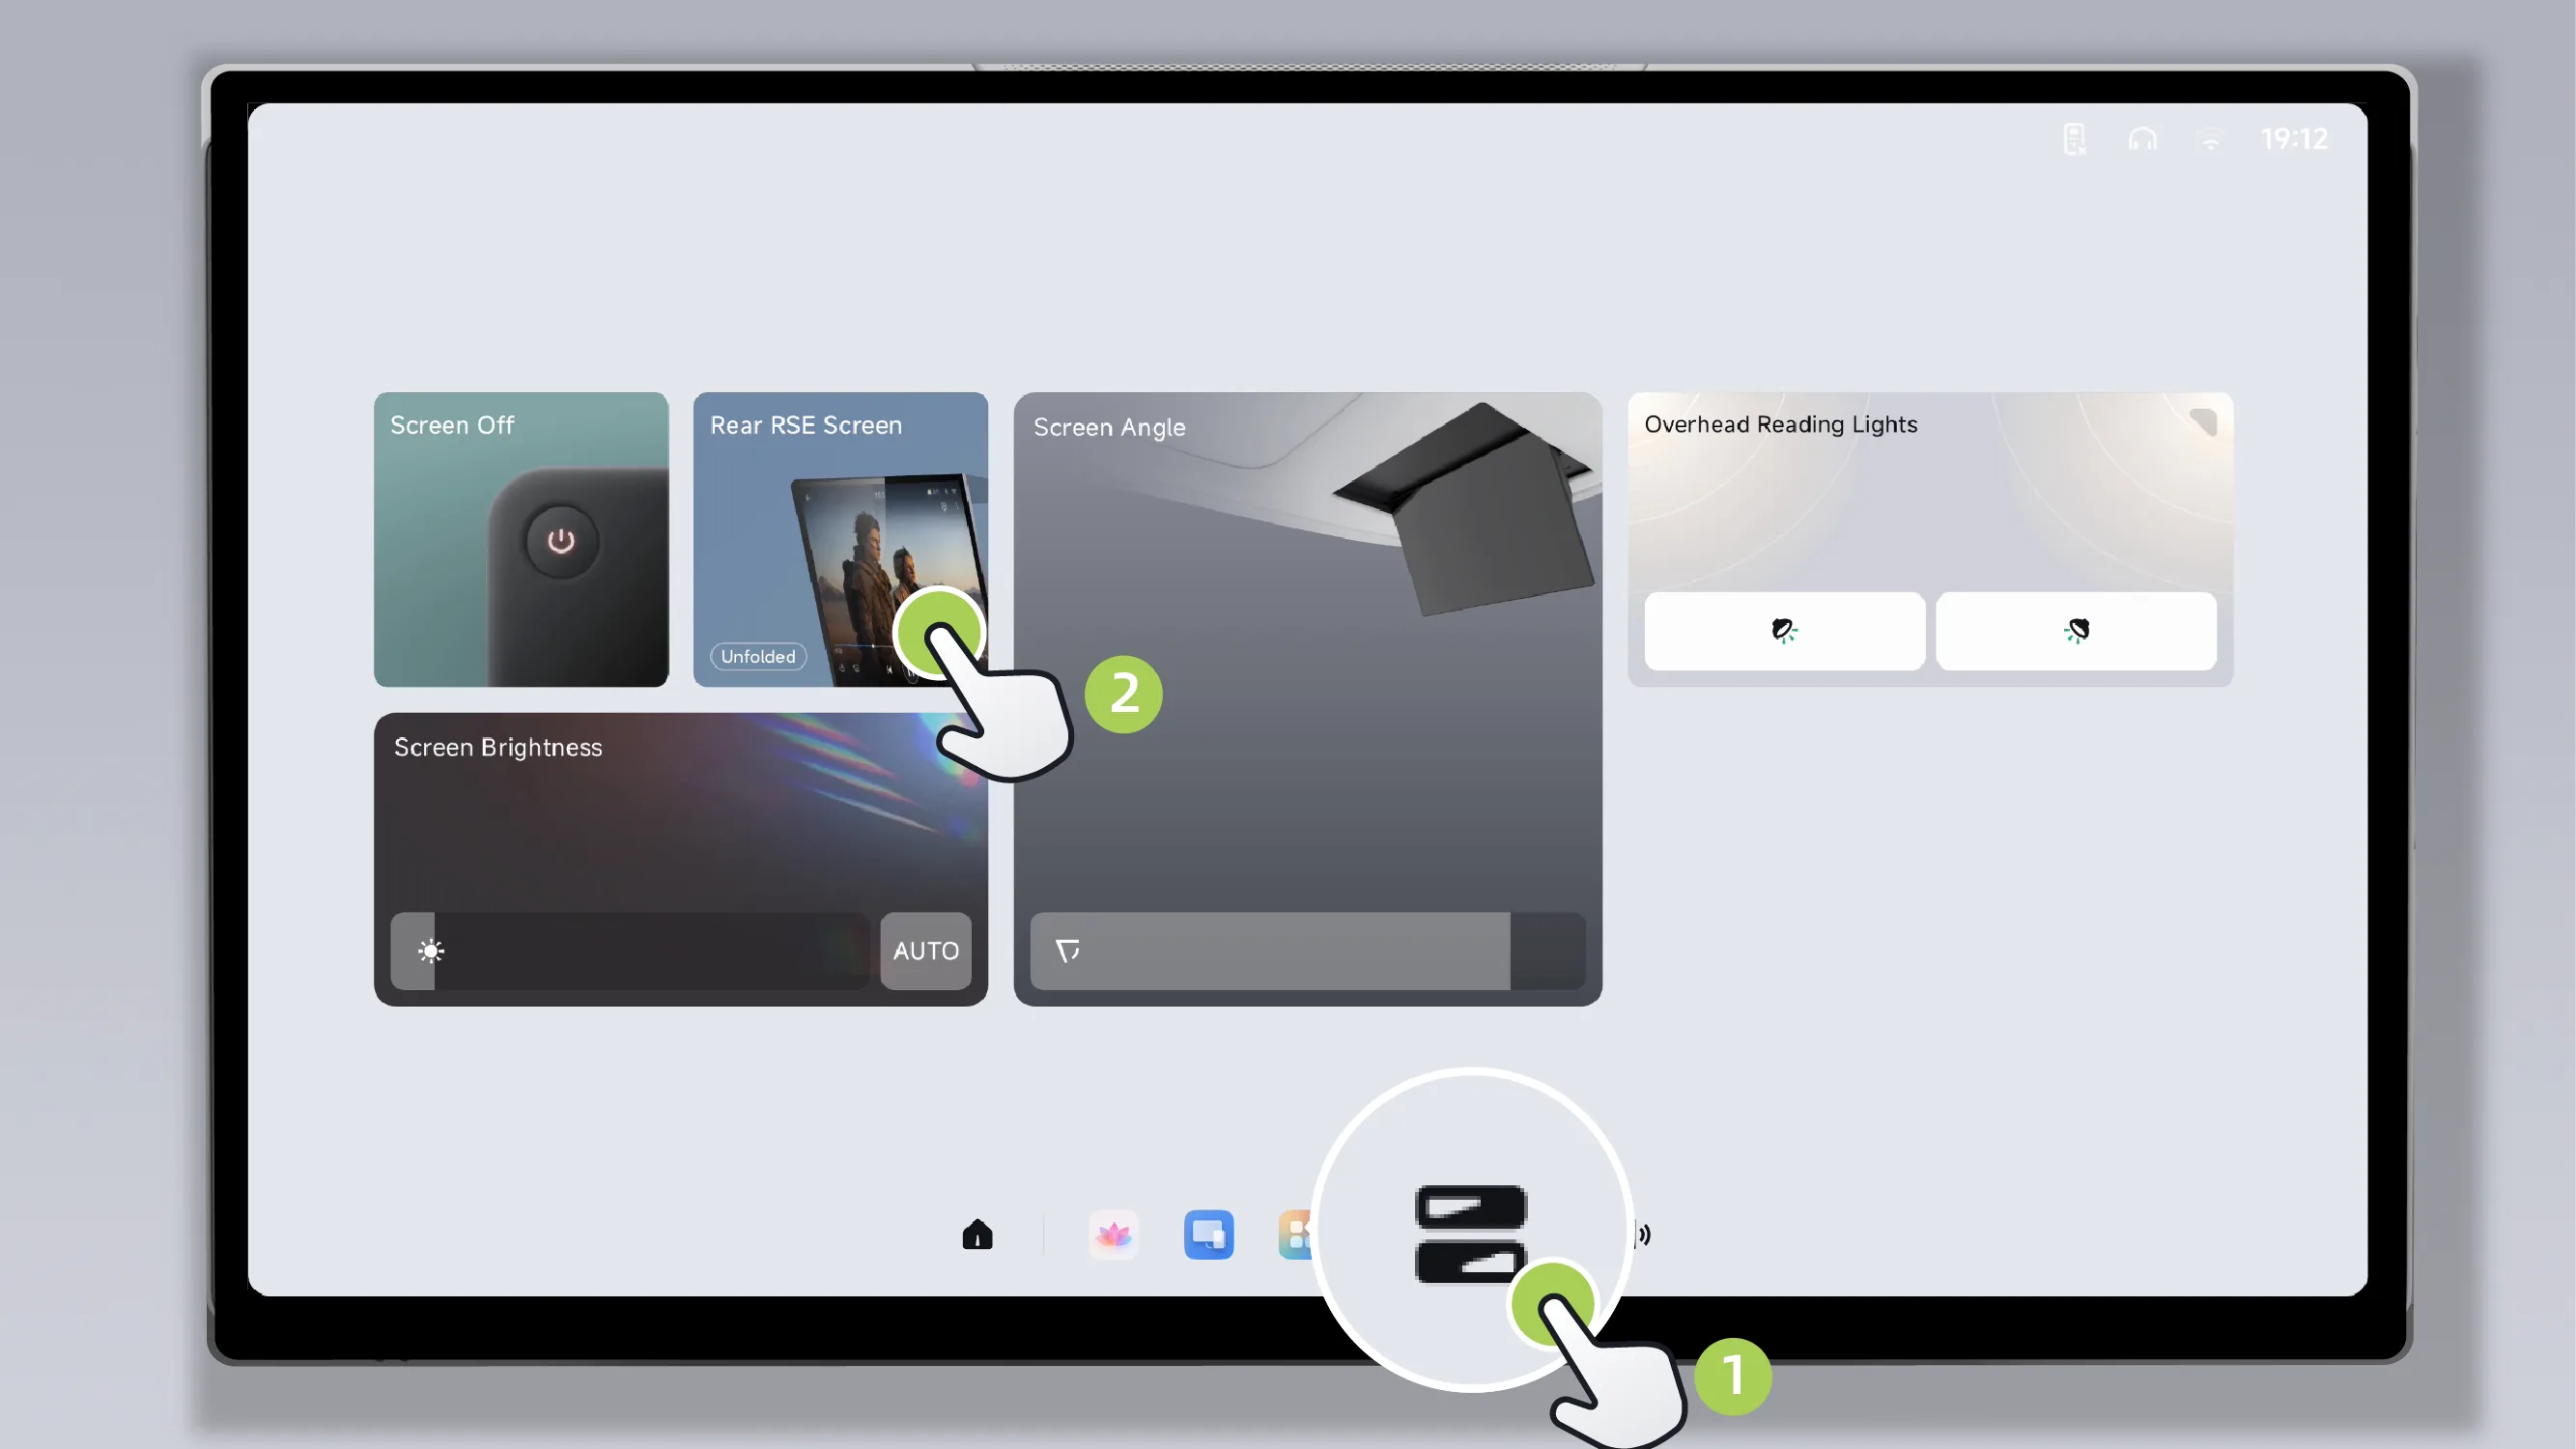
Tap **in the bottom taskbar of the rear entertainment screen** “ ”Tap the icon to expand the control center, then tap , foldable rear entertainment screen.
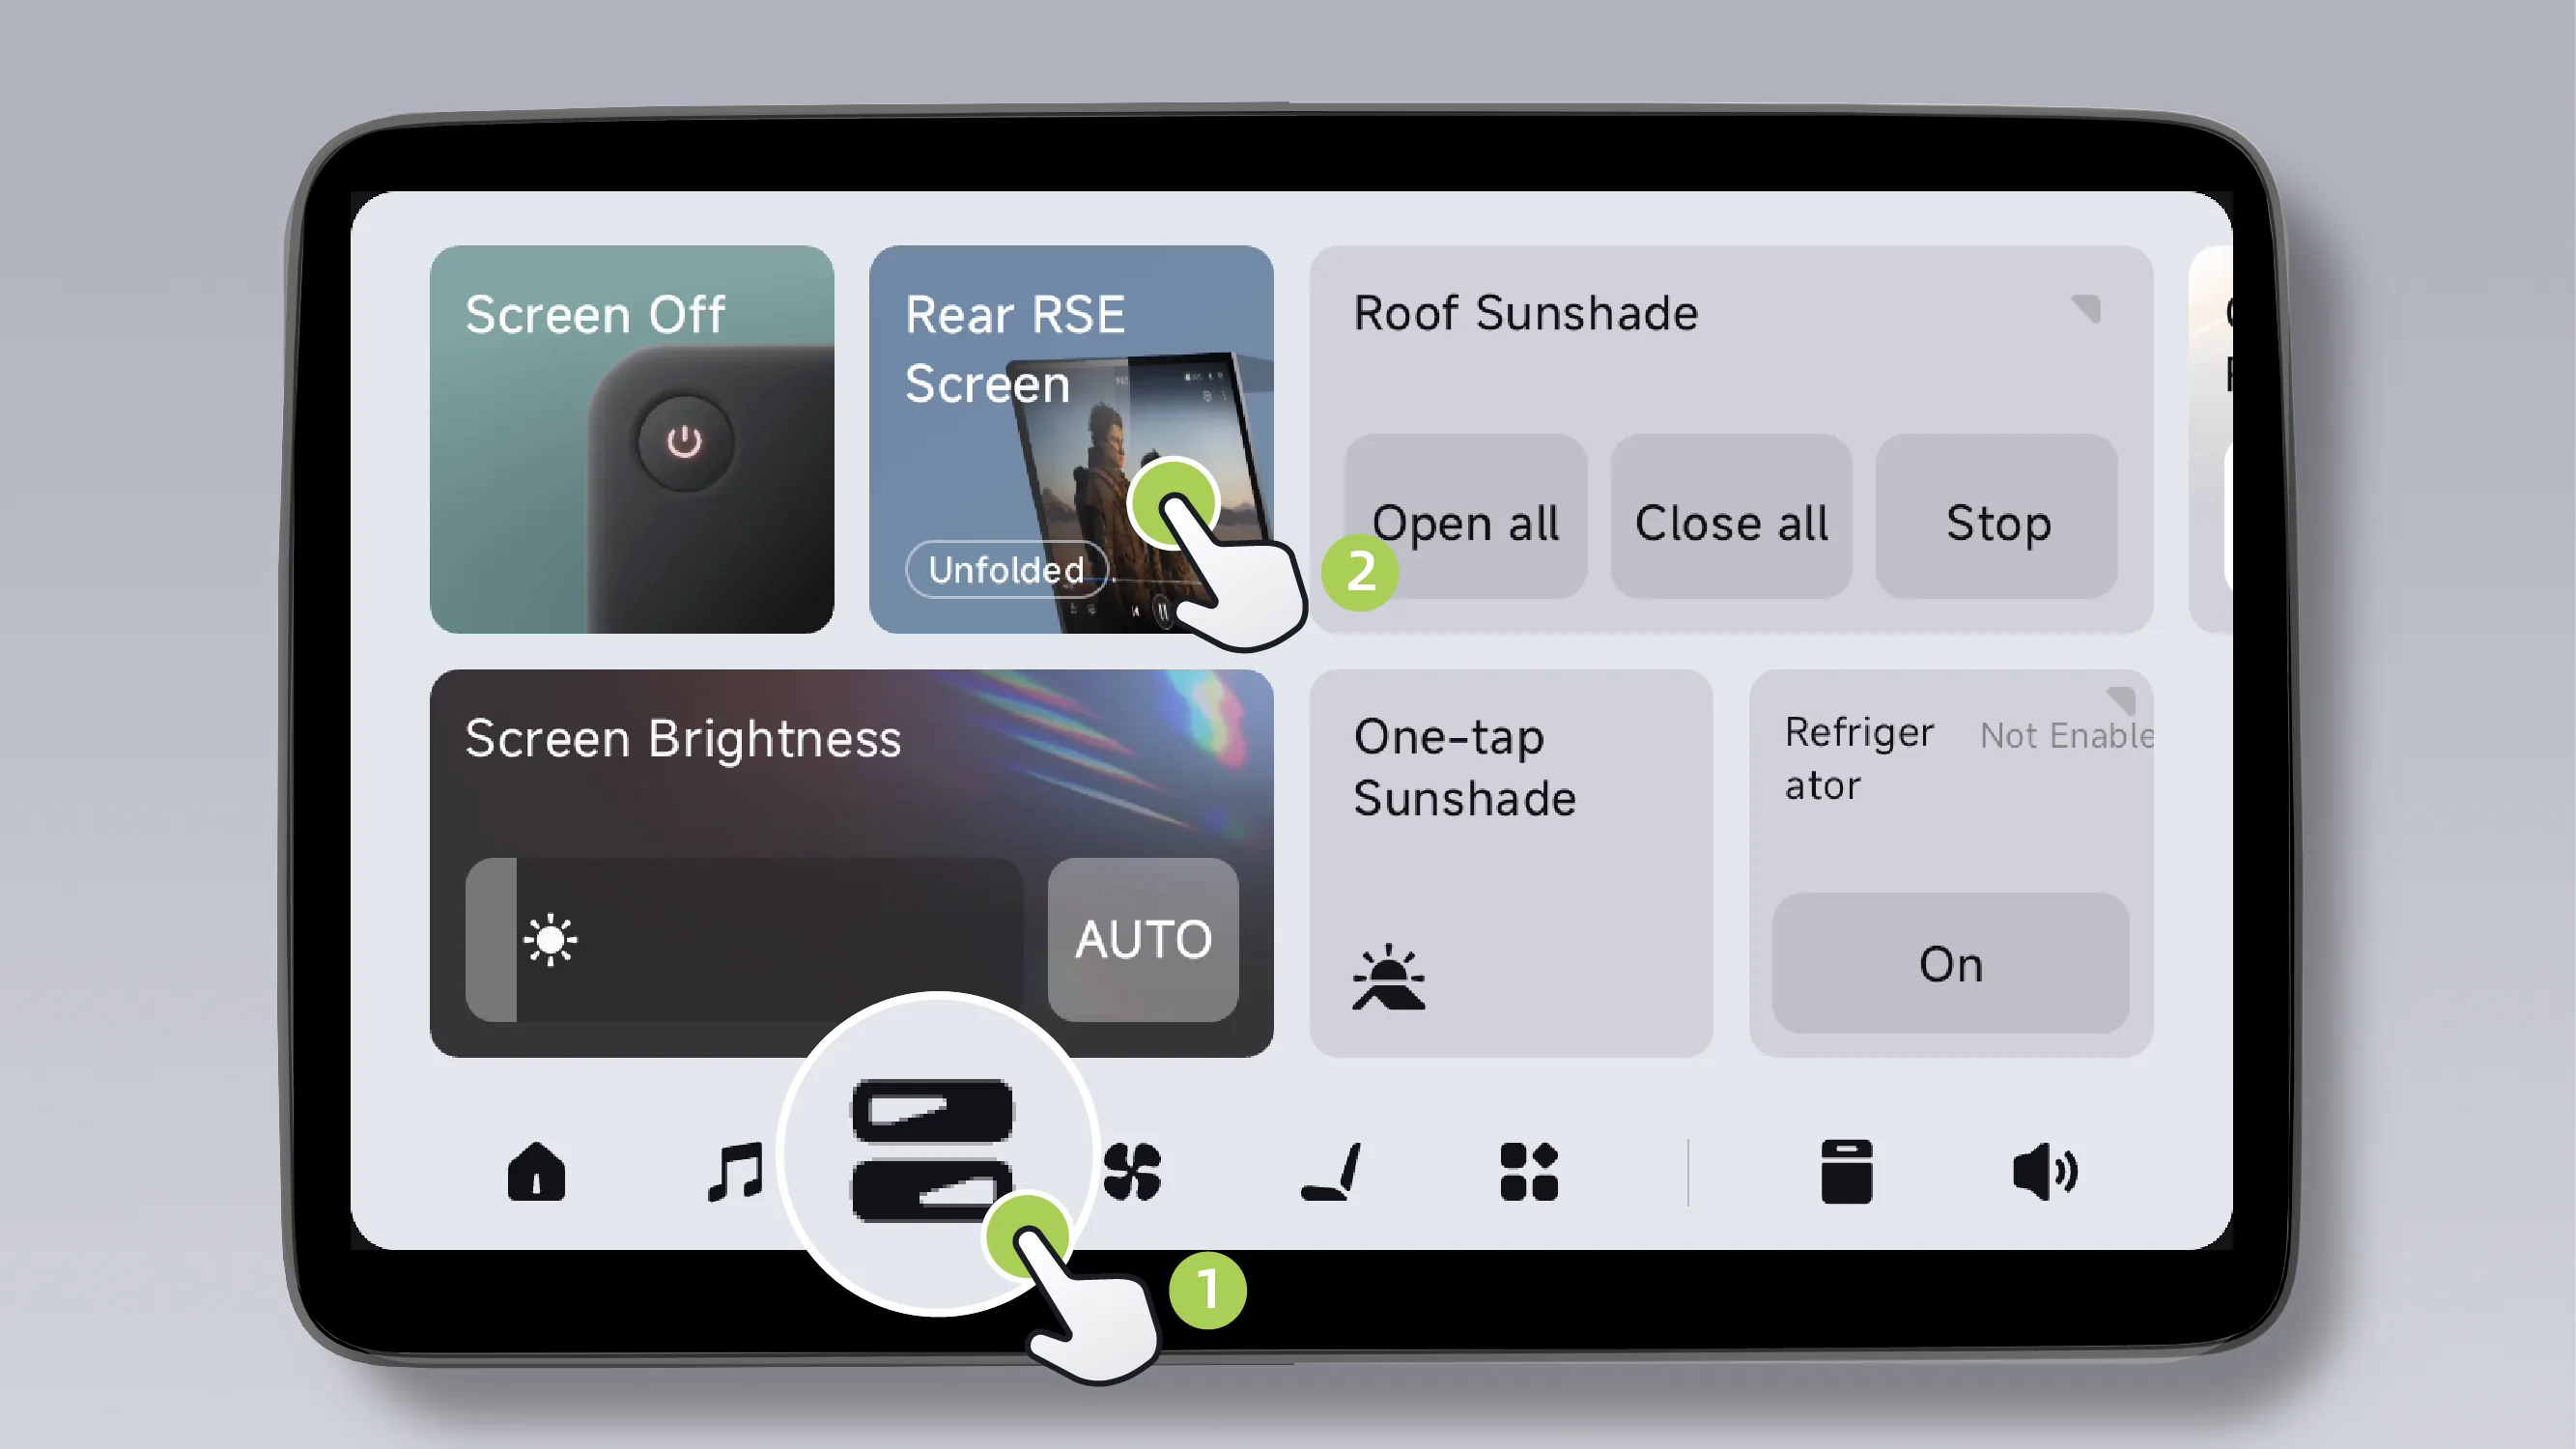
Tap **in the bottom taskbar of the rear control screen** “ ”Tap the icon to expand the Control Center. , can expand/fold the rear entertainment screen. When the switch is illuminated, it indicates that the rear entertainment screen is expanded; when the switch is not illuminated, it indicates that the rear entertainment screen is folded.
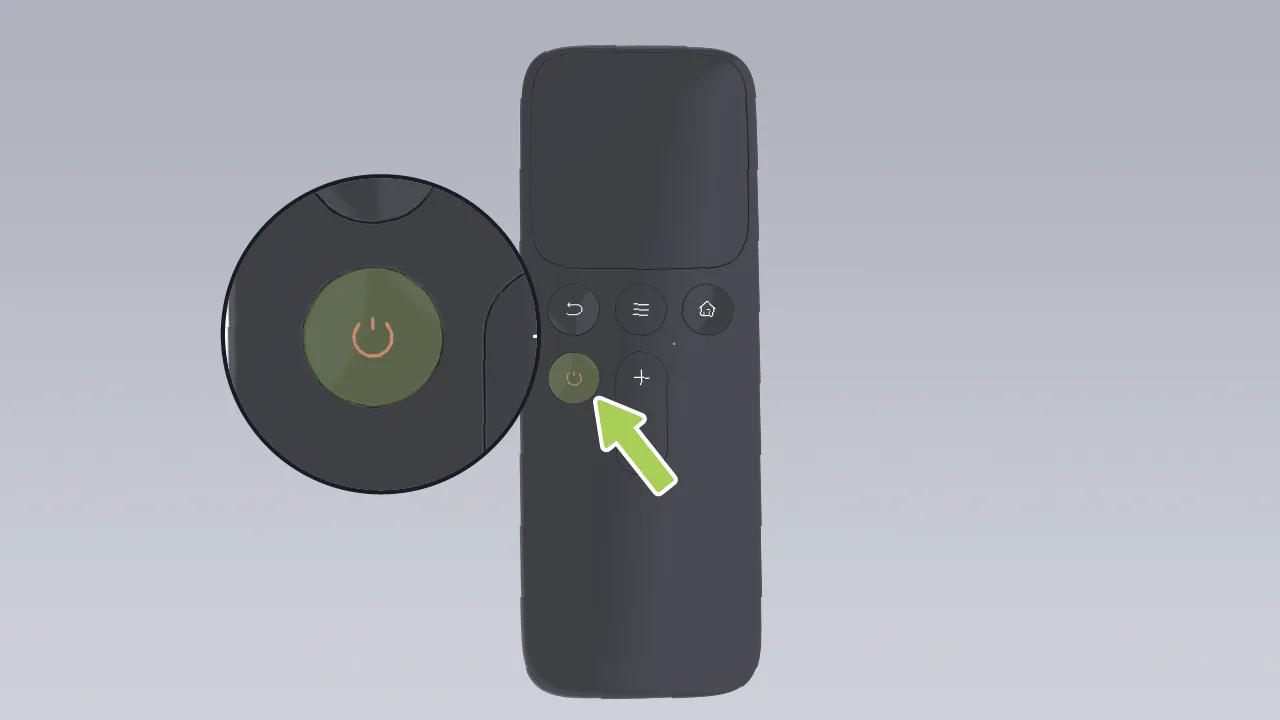
After the vehicle-mounted entertainment screen remote control is successfully connected to the vehicle, press the screen switch button on the remote control to unfold/fold the rear entertainment screen.
After waking XPENG, say your command, for example: “Turn on the rear entertainment screen”, “Turn off the rear entertainment screen”.
During the unfolding or folding process of the entertainment screen, the entertainment screen will remain off until the screen is fully unfolded or folded. When the entertainment screen is fully unfolded, the screen will light up immediately.
During the unfolding or folding process of the entertainment screen, touch the screen, and the entertainment screen will stop moving until you perform the unfold/fold or angle adjustment operation on the entertainment screen again.
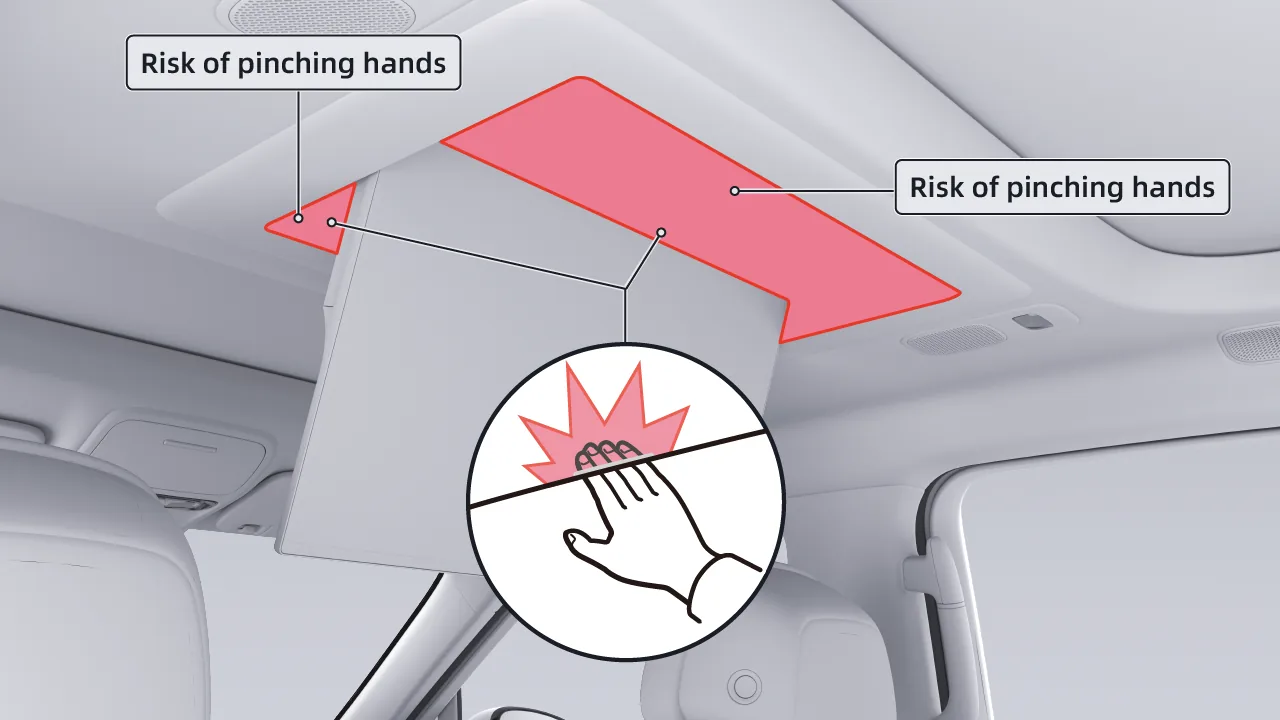 Warning
 When unfolding or folding the entertainment screen, keep objects and all parts of the body away from the movement range of the entertainment screen to avoid personal injury or property damage.
When using the entertainment screen, do not use external force to adjust the angle of the entertainment screen, so as to avoid screen damage.
The rear entertainment screen deployment angle can be set in the following ways:
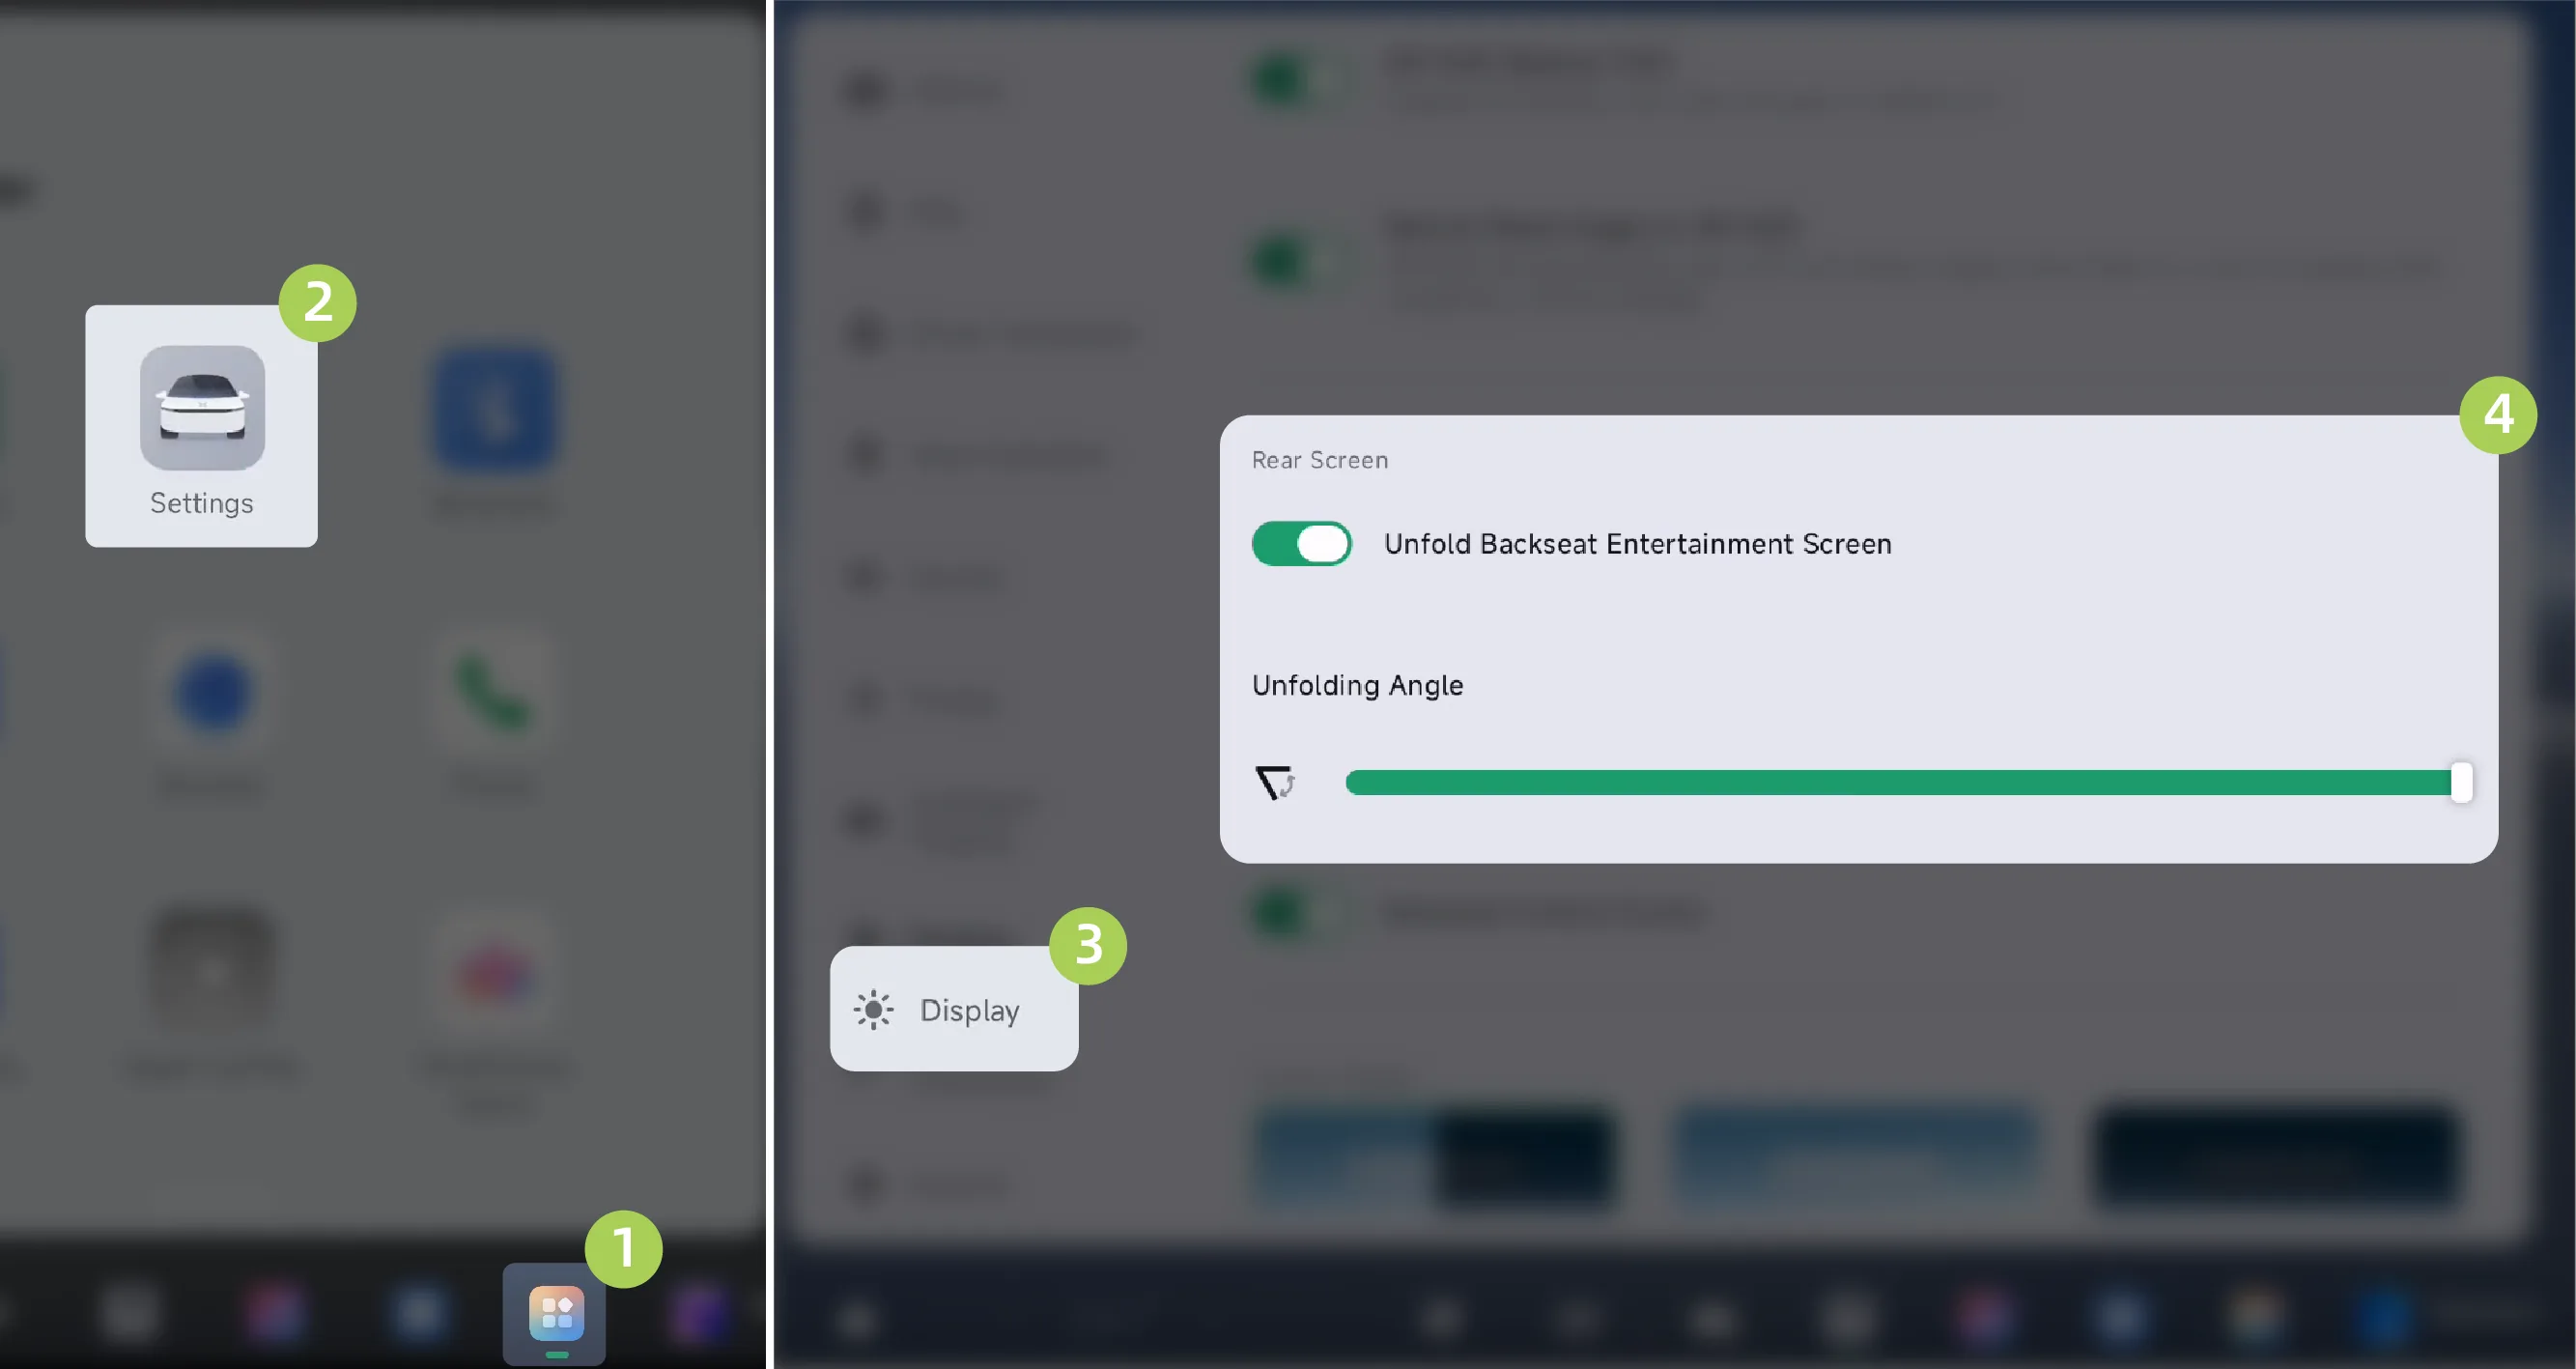
On the central control screen “ →Settings→Display”Interface for setting the deployment angle of the rear entertainment screen.
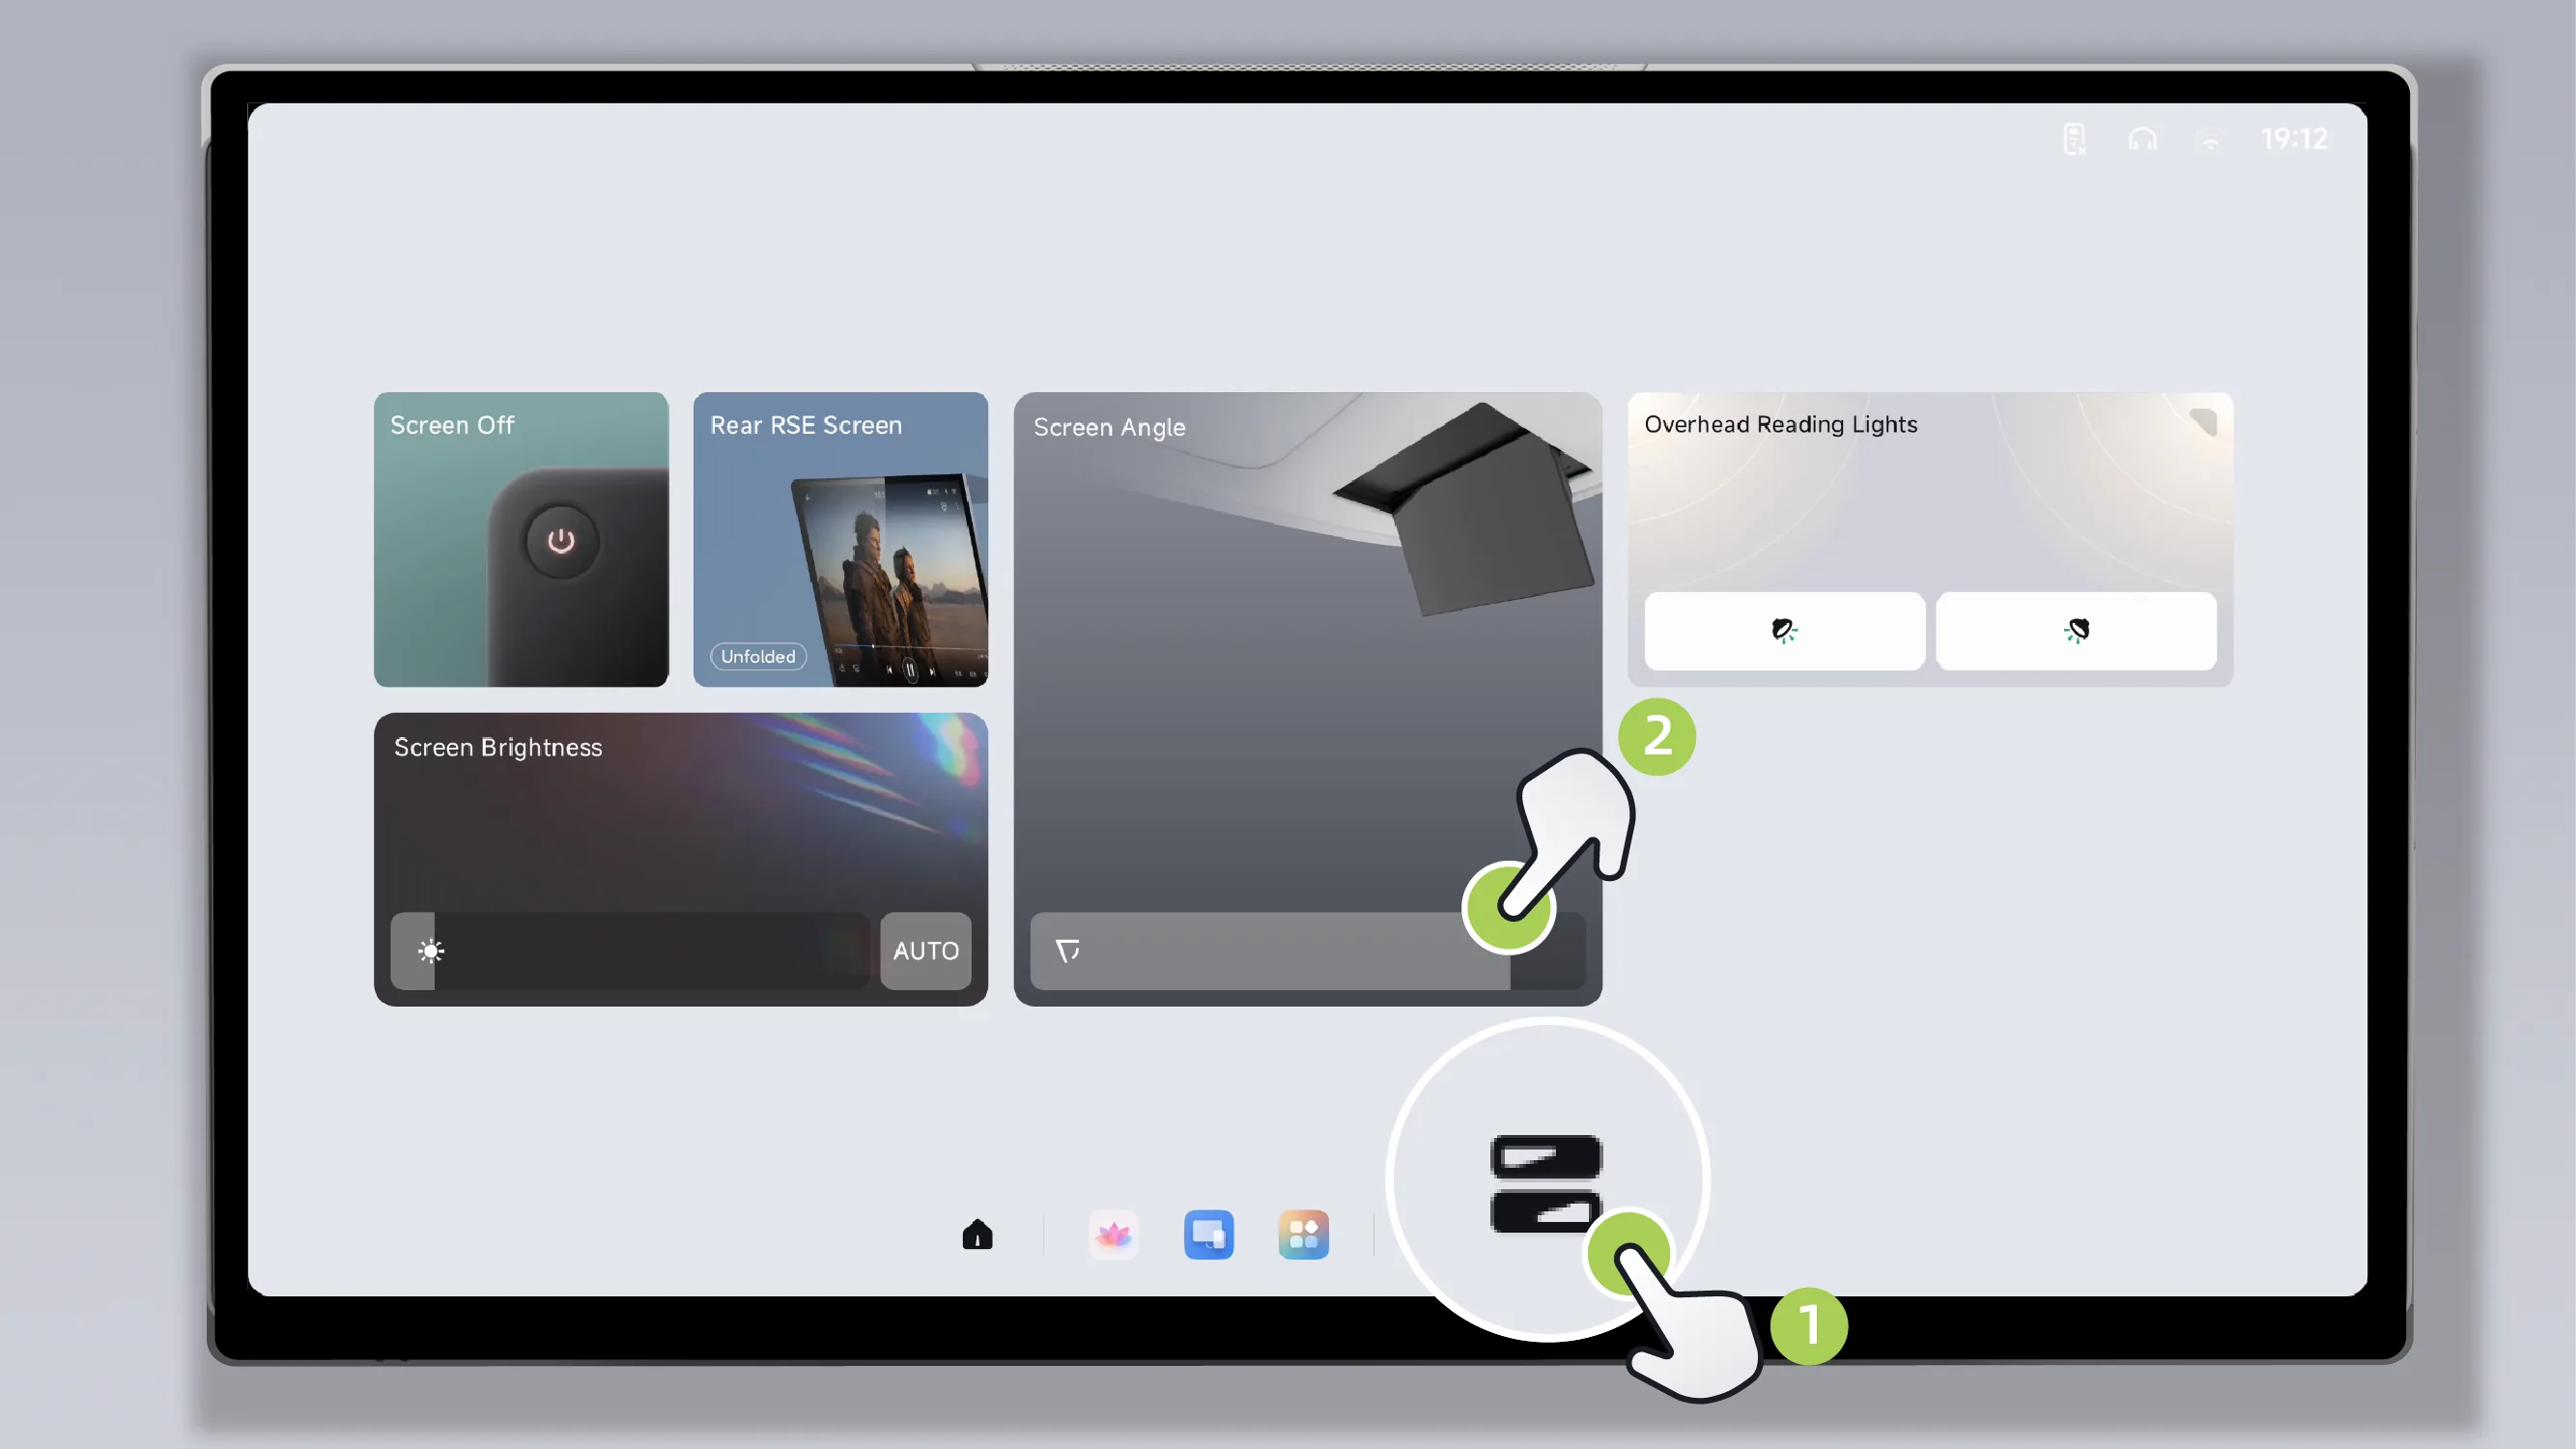
Tap the rear entertainment screen “ ”Expand Control Center and swipe , the deployment angle of the rear entertainment screen can be set.
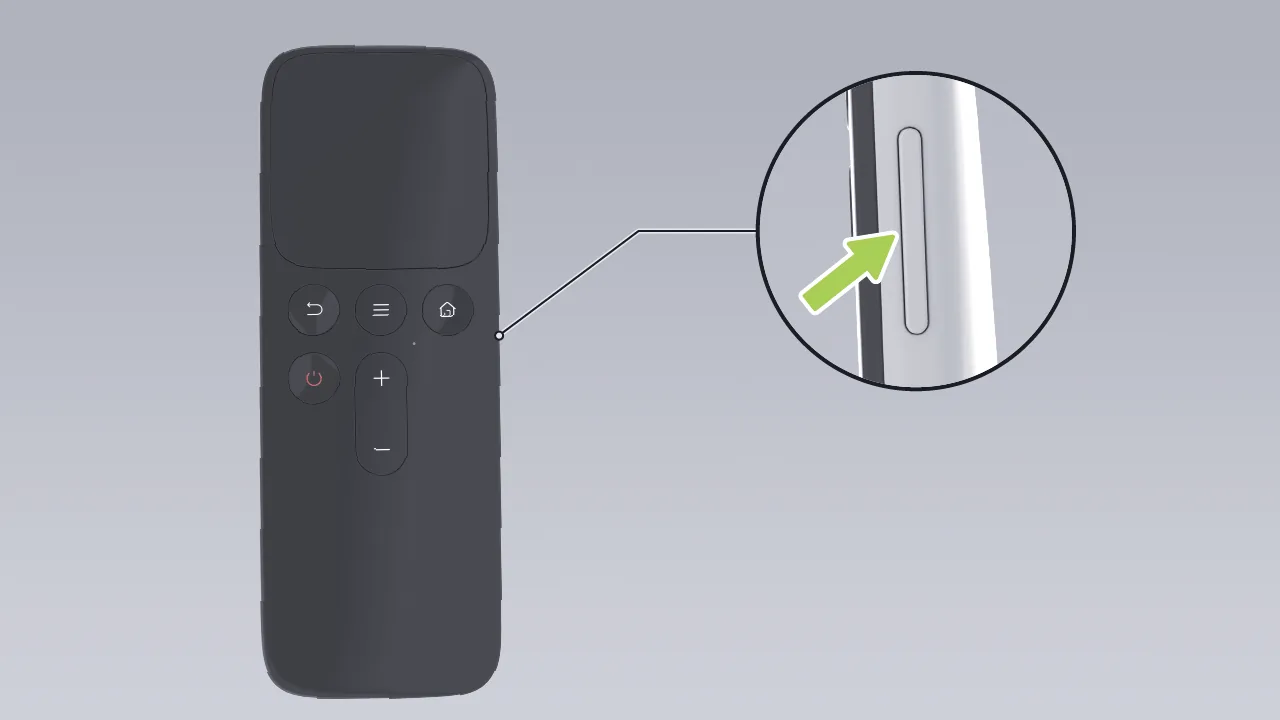
After the vehicle-mounted entertainment screen remote control is successfully connected to the vehicle, press the screen angle adjustment button on the side of the remote control, and press it up or down to adjust the deployment angle of the entertainment screen.
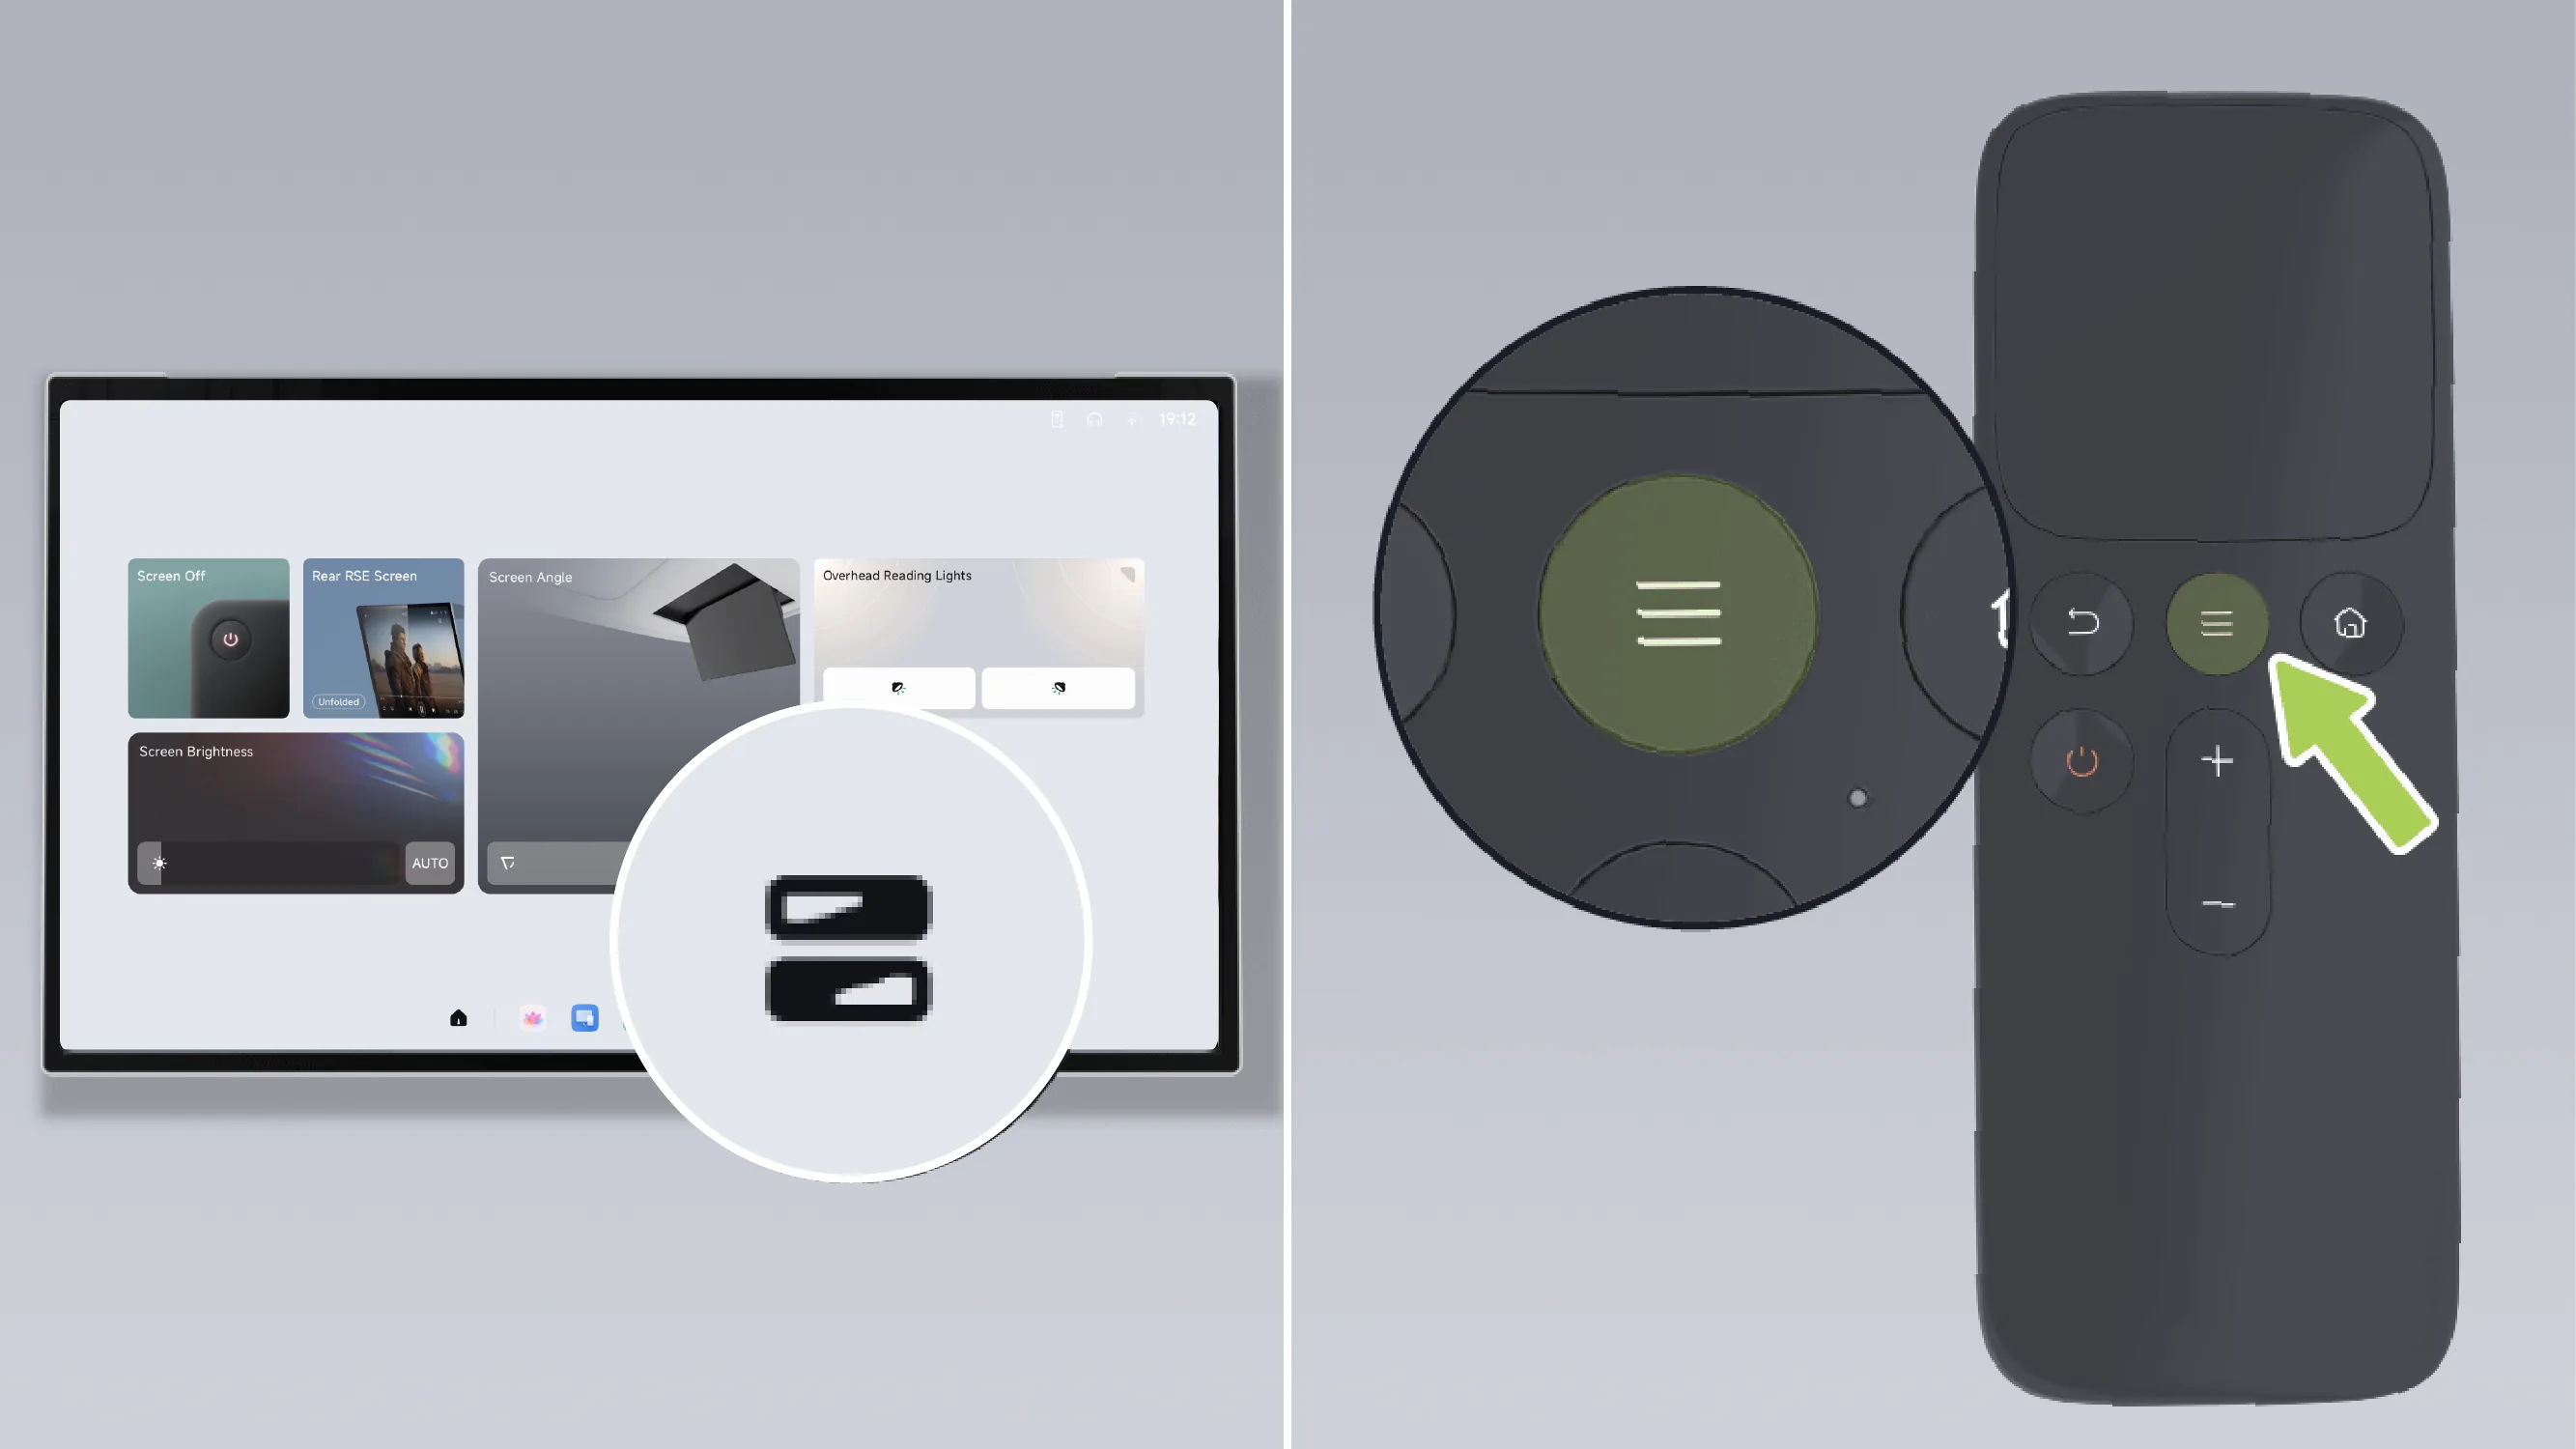
Tap on the bottom taskbar of the entertainment screen. Icon.
Tap on the in-vehicle entertainment remote control.  Button.
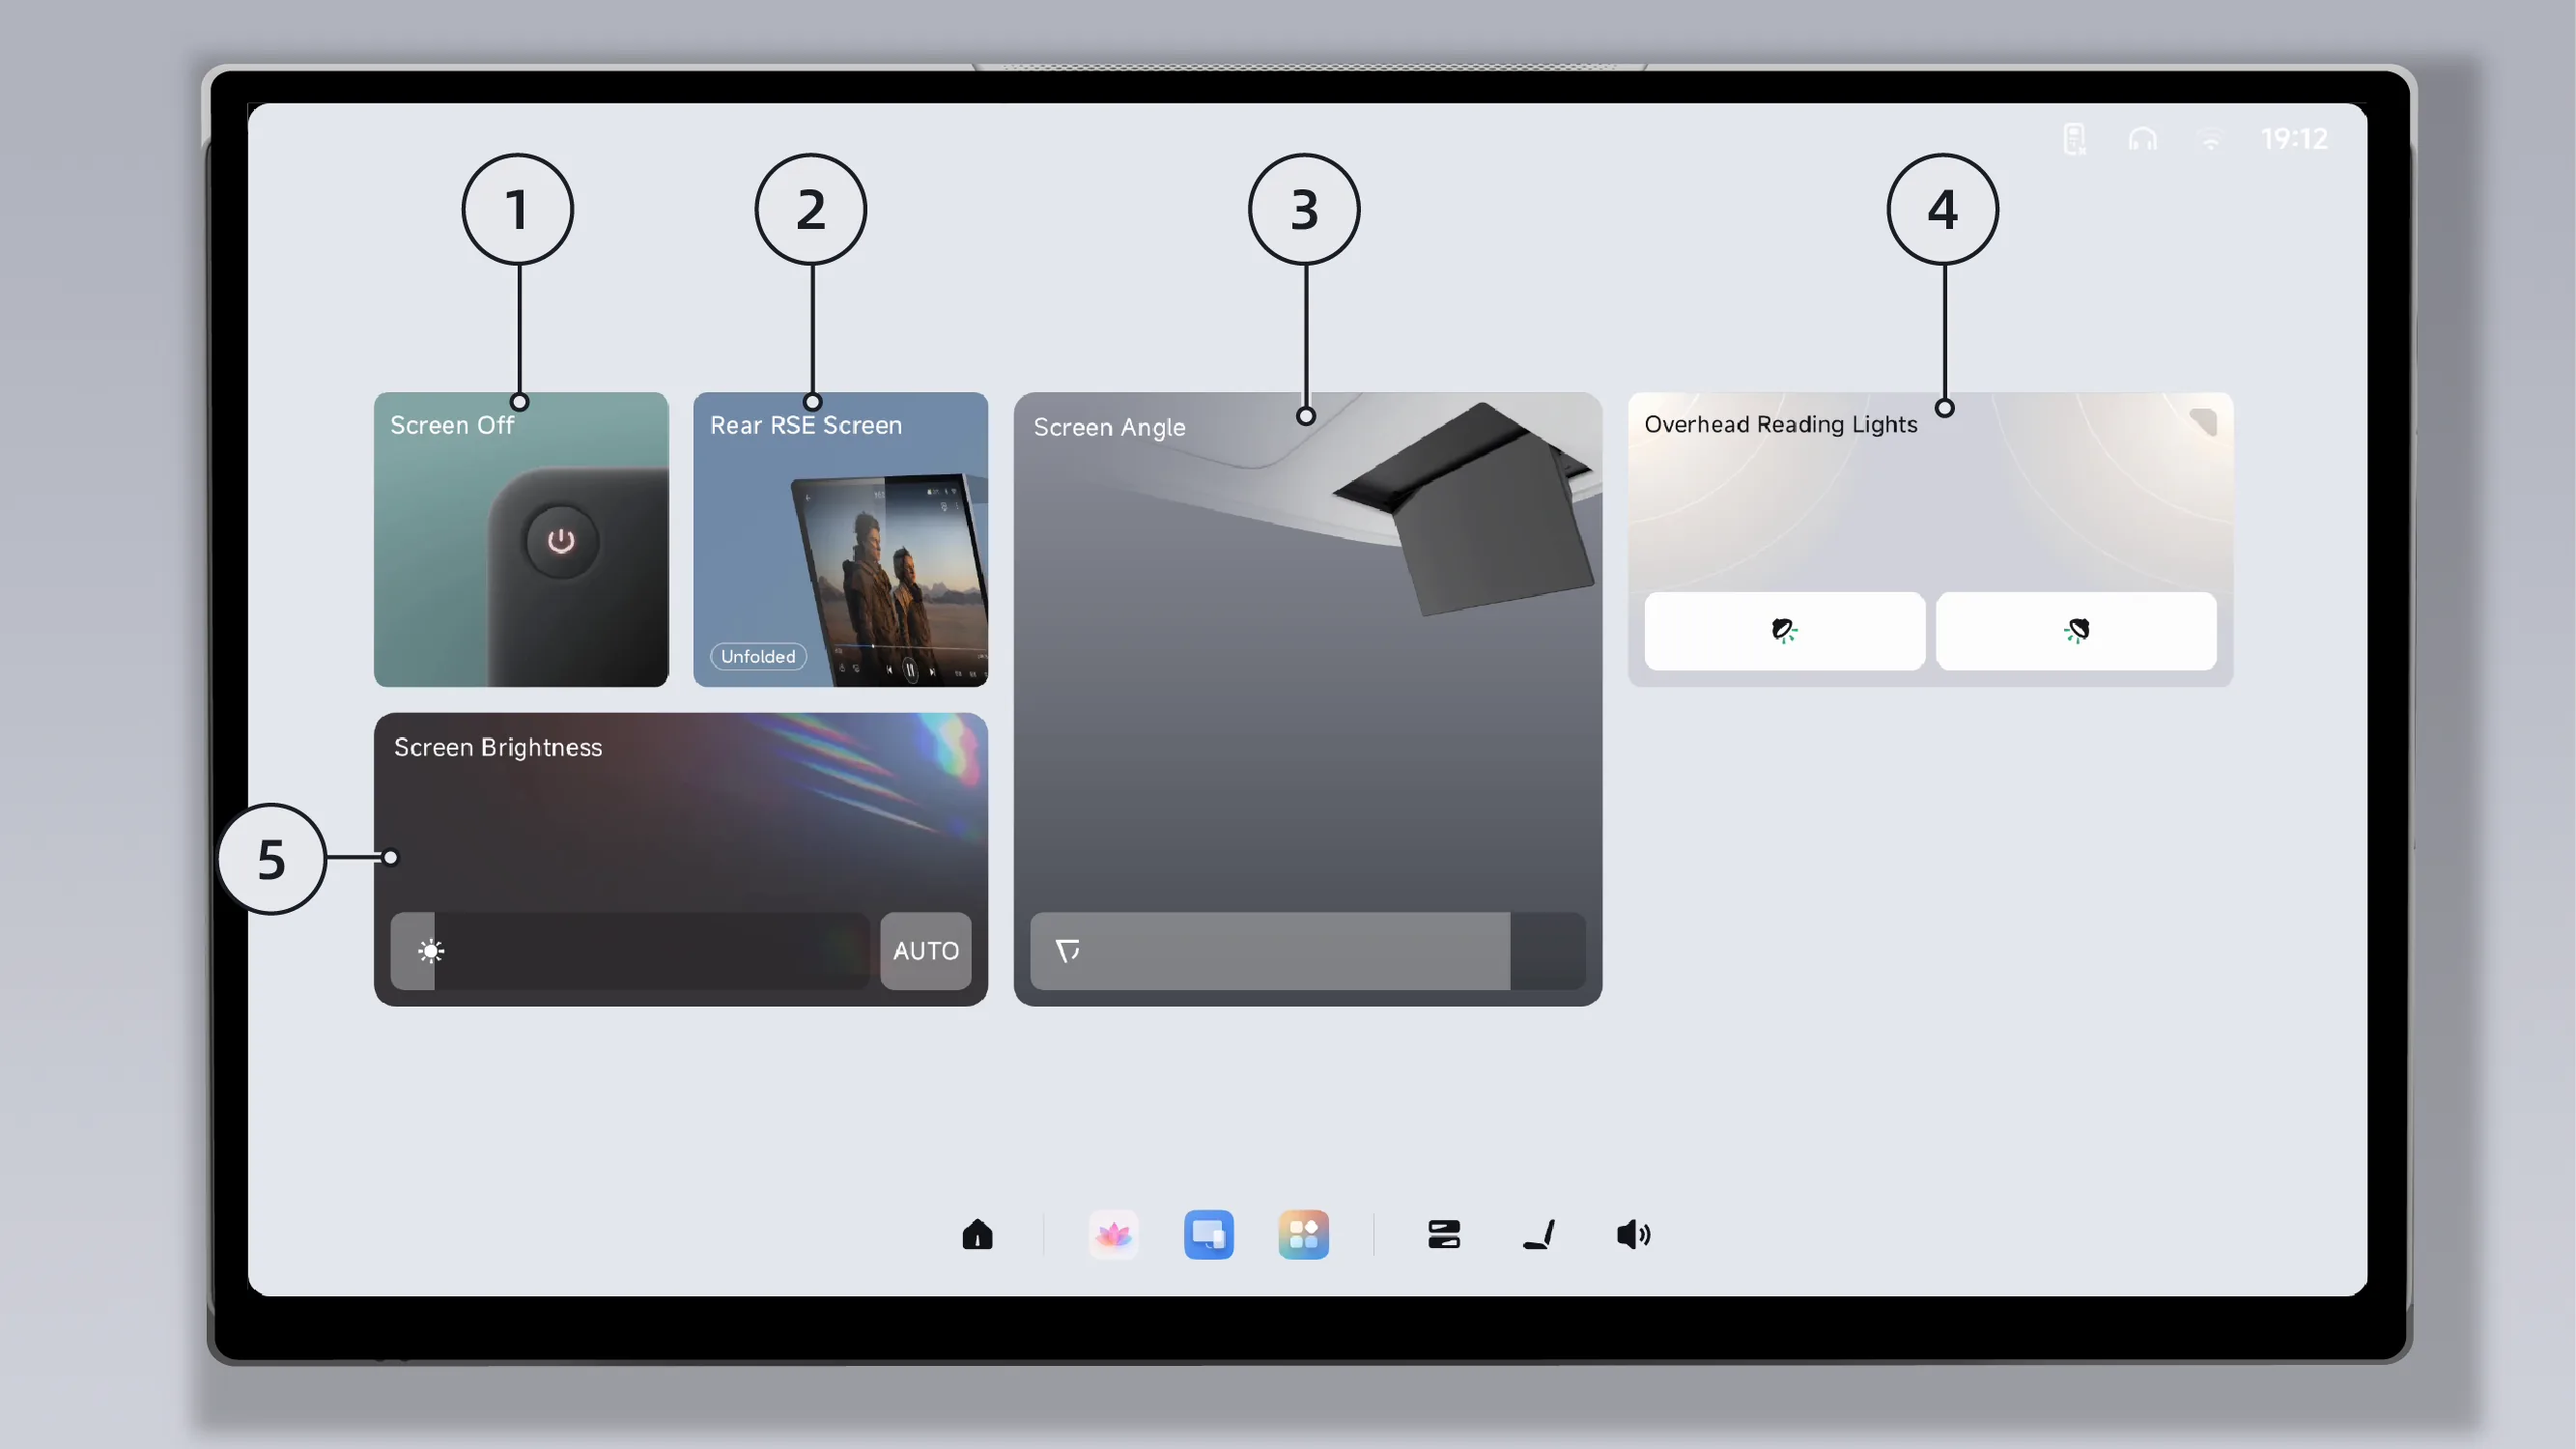
In the rear screen control center, the following functions can be operated:
Screen Off:Tap to turn off the rear entertainment screen. Tap the screen again or operate the in-vehicle entertainment remote control to turn the rear entertainment screen back on.
Rear RSE Screen:Foldable rear entertainment screen.
Screen Angle:You can drag the slider to adjust the deployment angle of the rear entertainment screen.
Quickly turn on or off the left Over Reading Lights and the right Over Reading Lights.
You can enter the Over Reading Lights settings screen.
Screen Brightness:You can drag the slider to adjust the brightness of the rear entertainment screen. After Auto Brightness is enabled, the system will automatically adjust the brightness of the rear entertainment screen.
With the Control Center open, tap again on the bottom taskbar of the rear entertainment screen. Icon.
With the Control Center open, tap again on the in-vehicle infotainment remote control. Button.
Open other apps.
Tap any blank area in the Control Center.
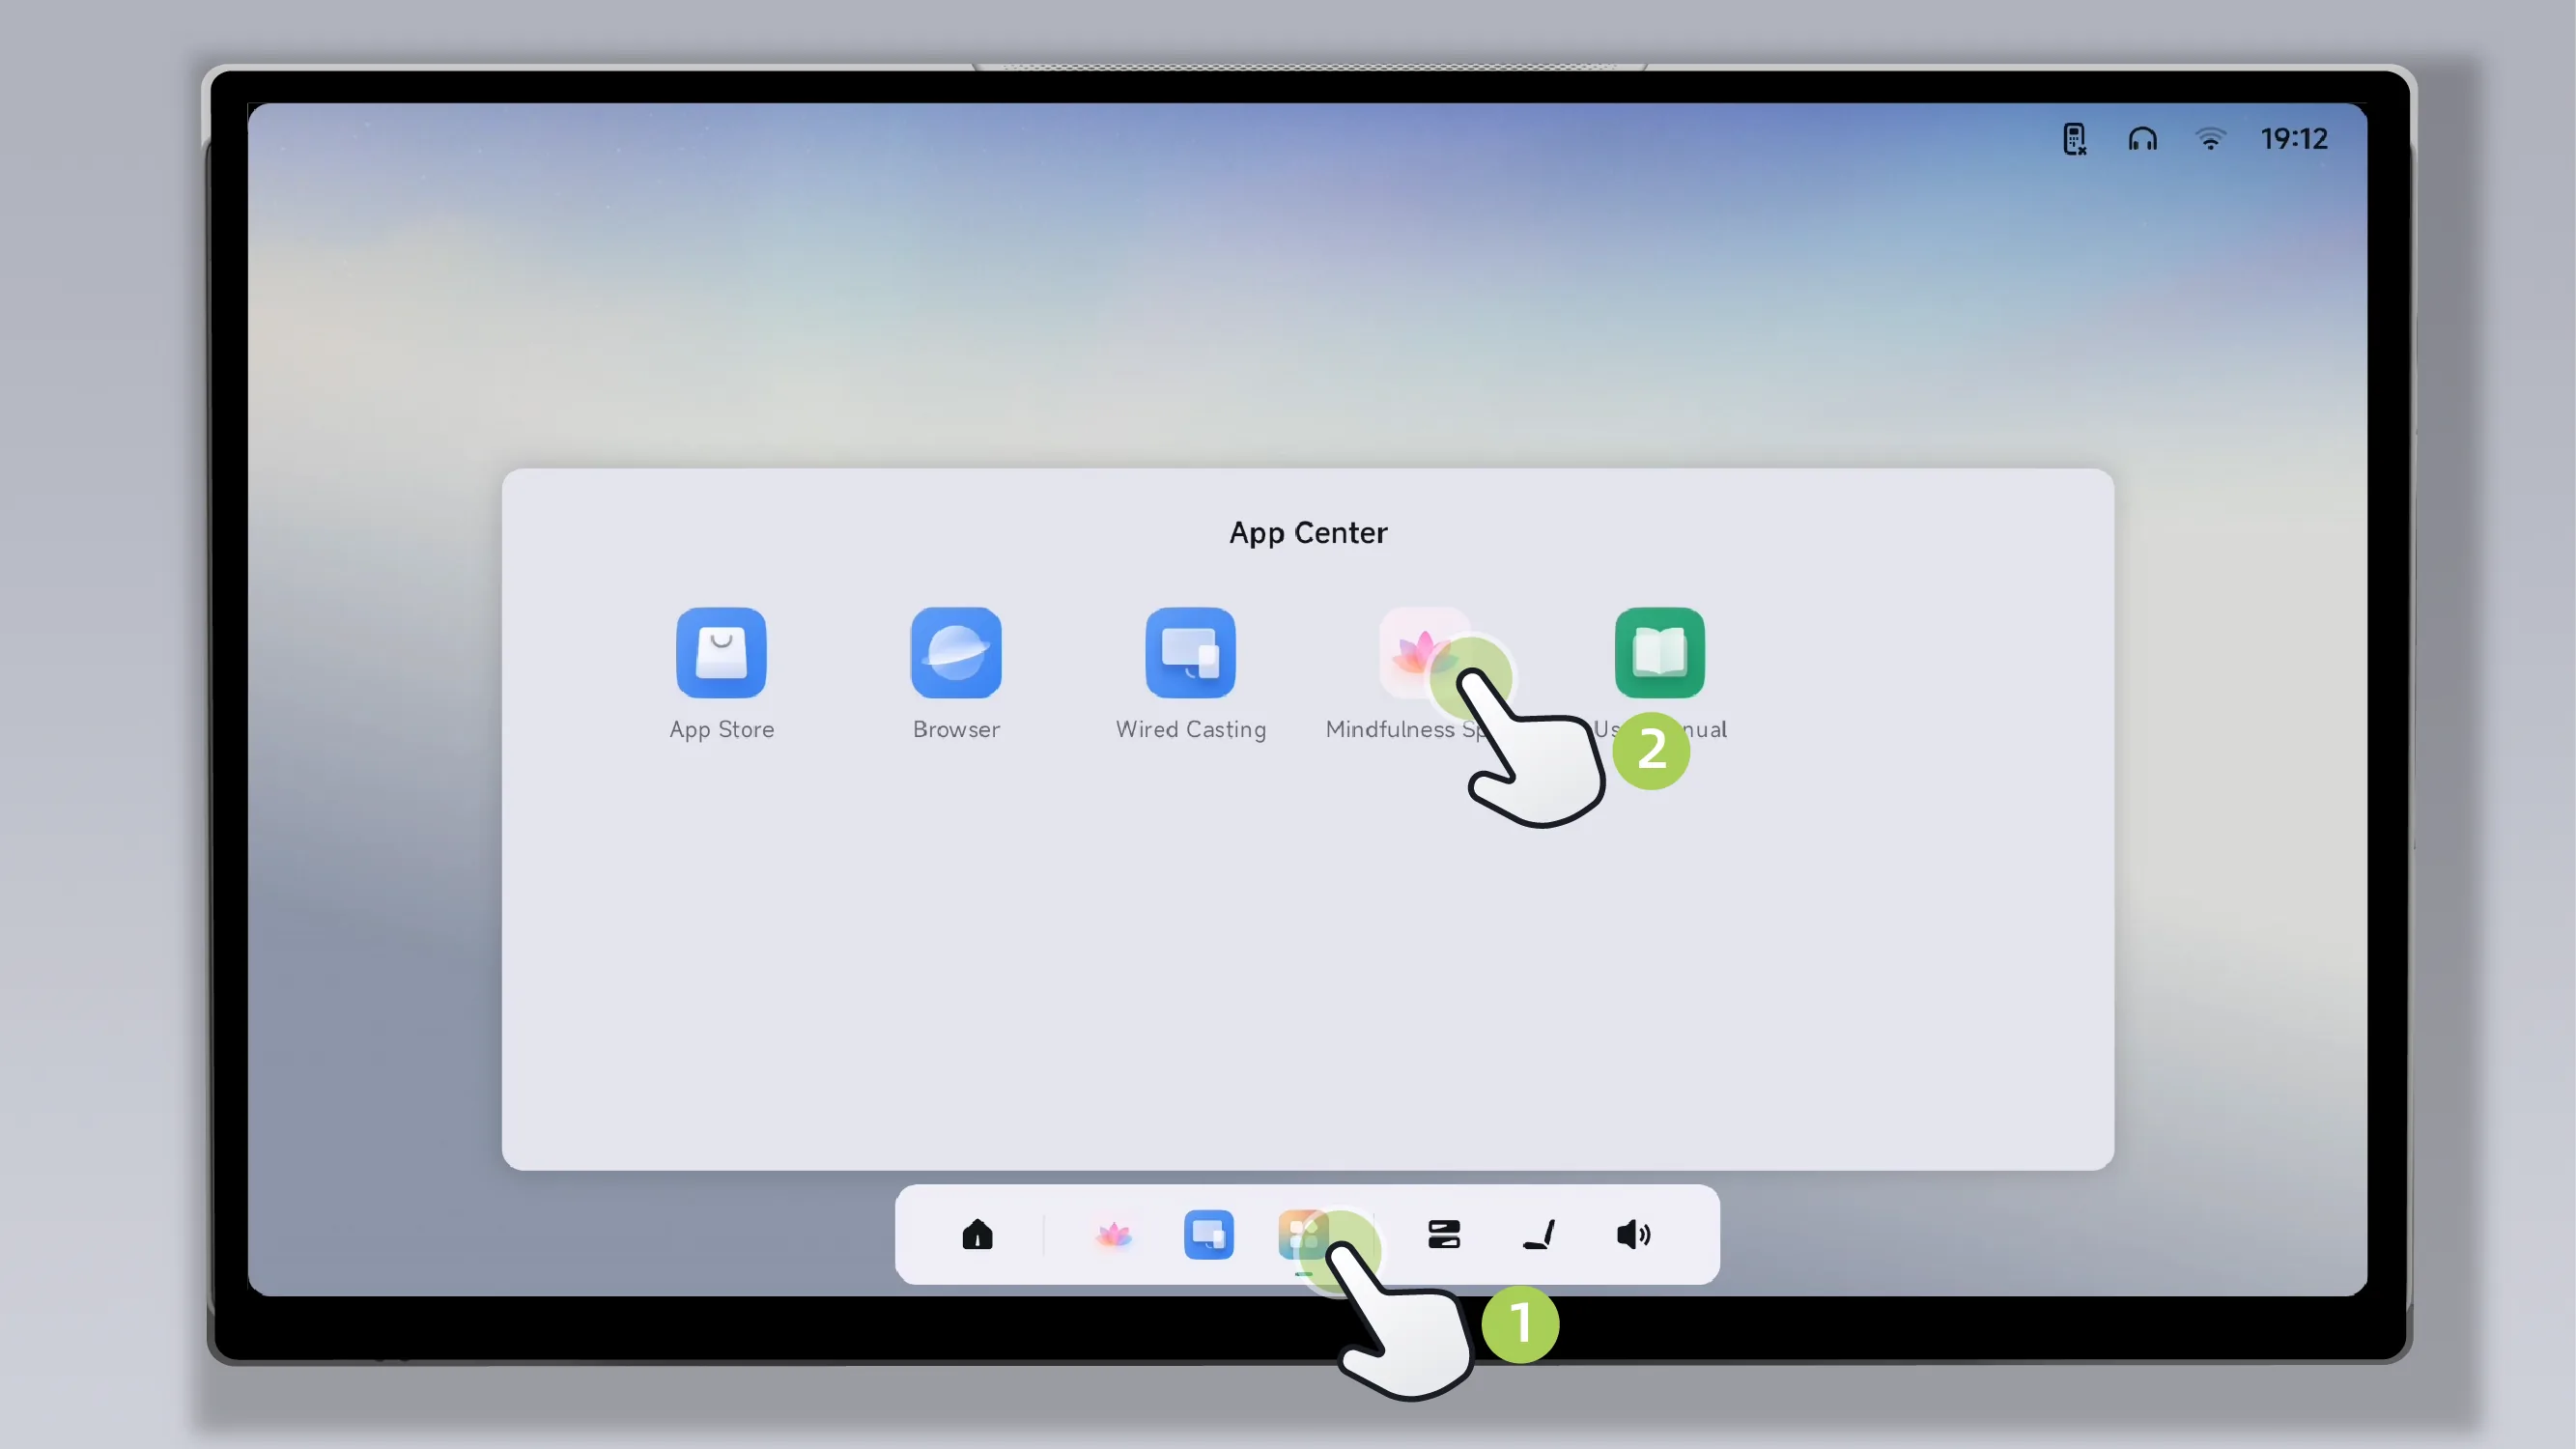
Tap , open the App Center
Tap the app icon to open the app.
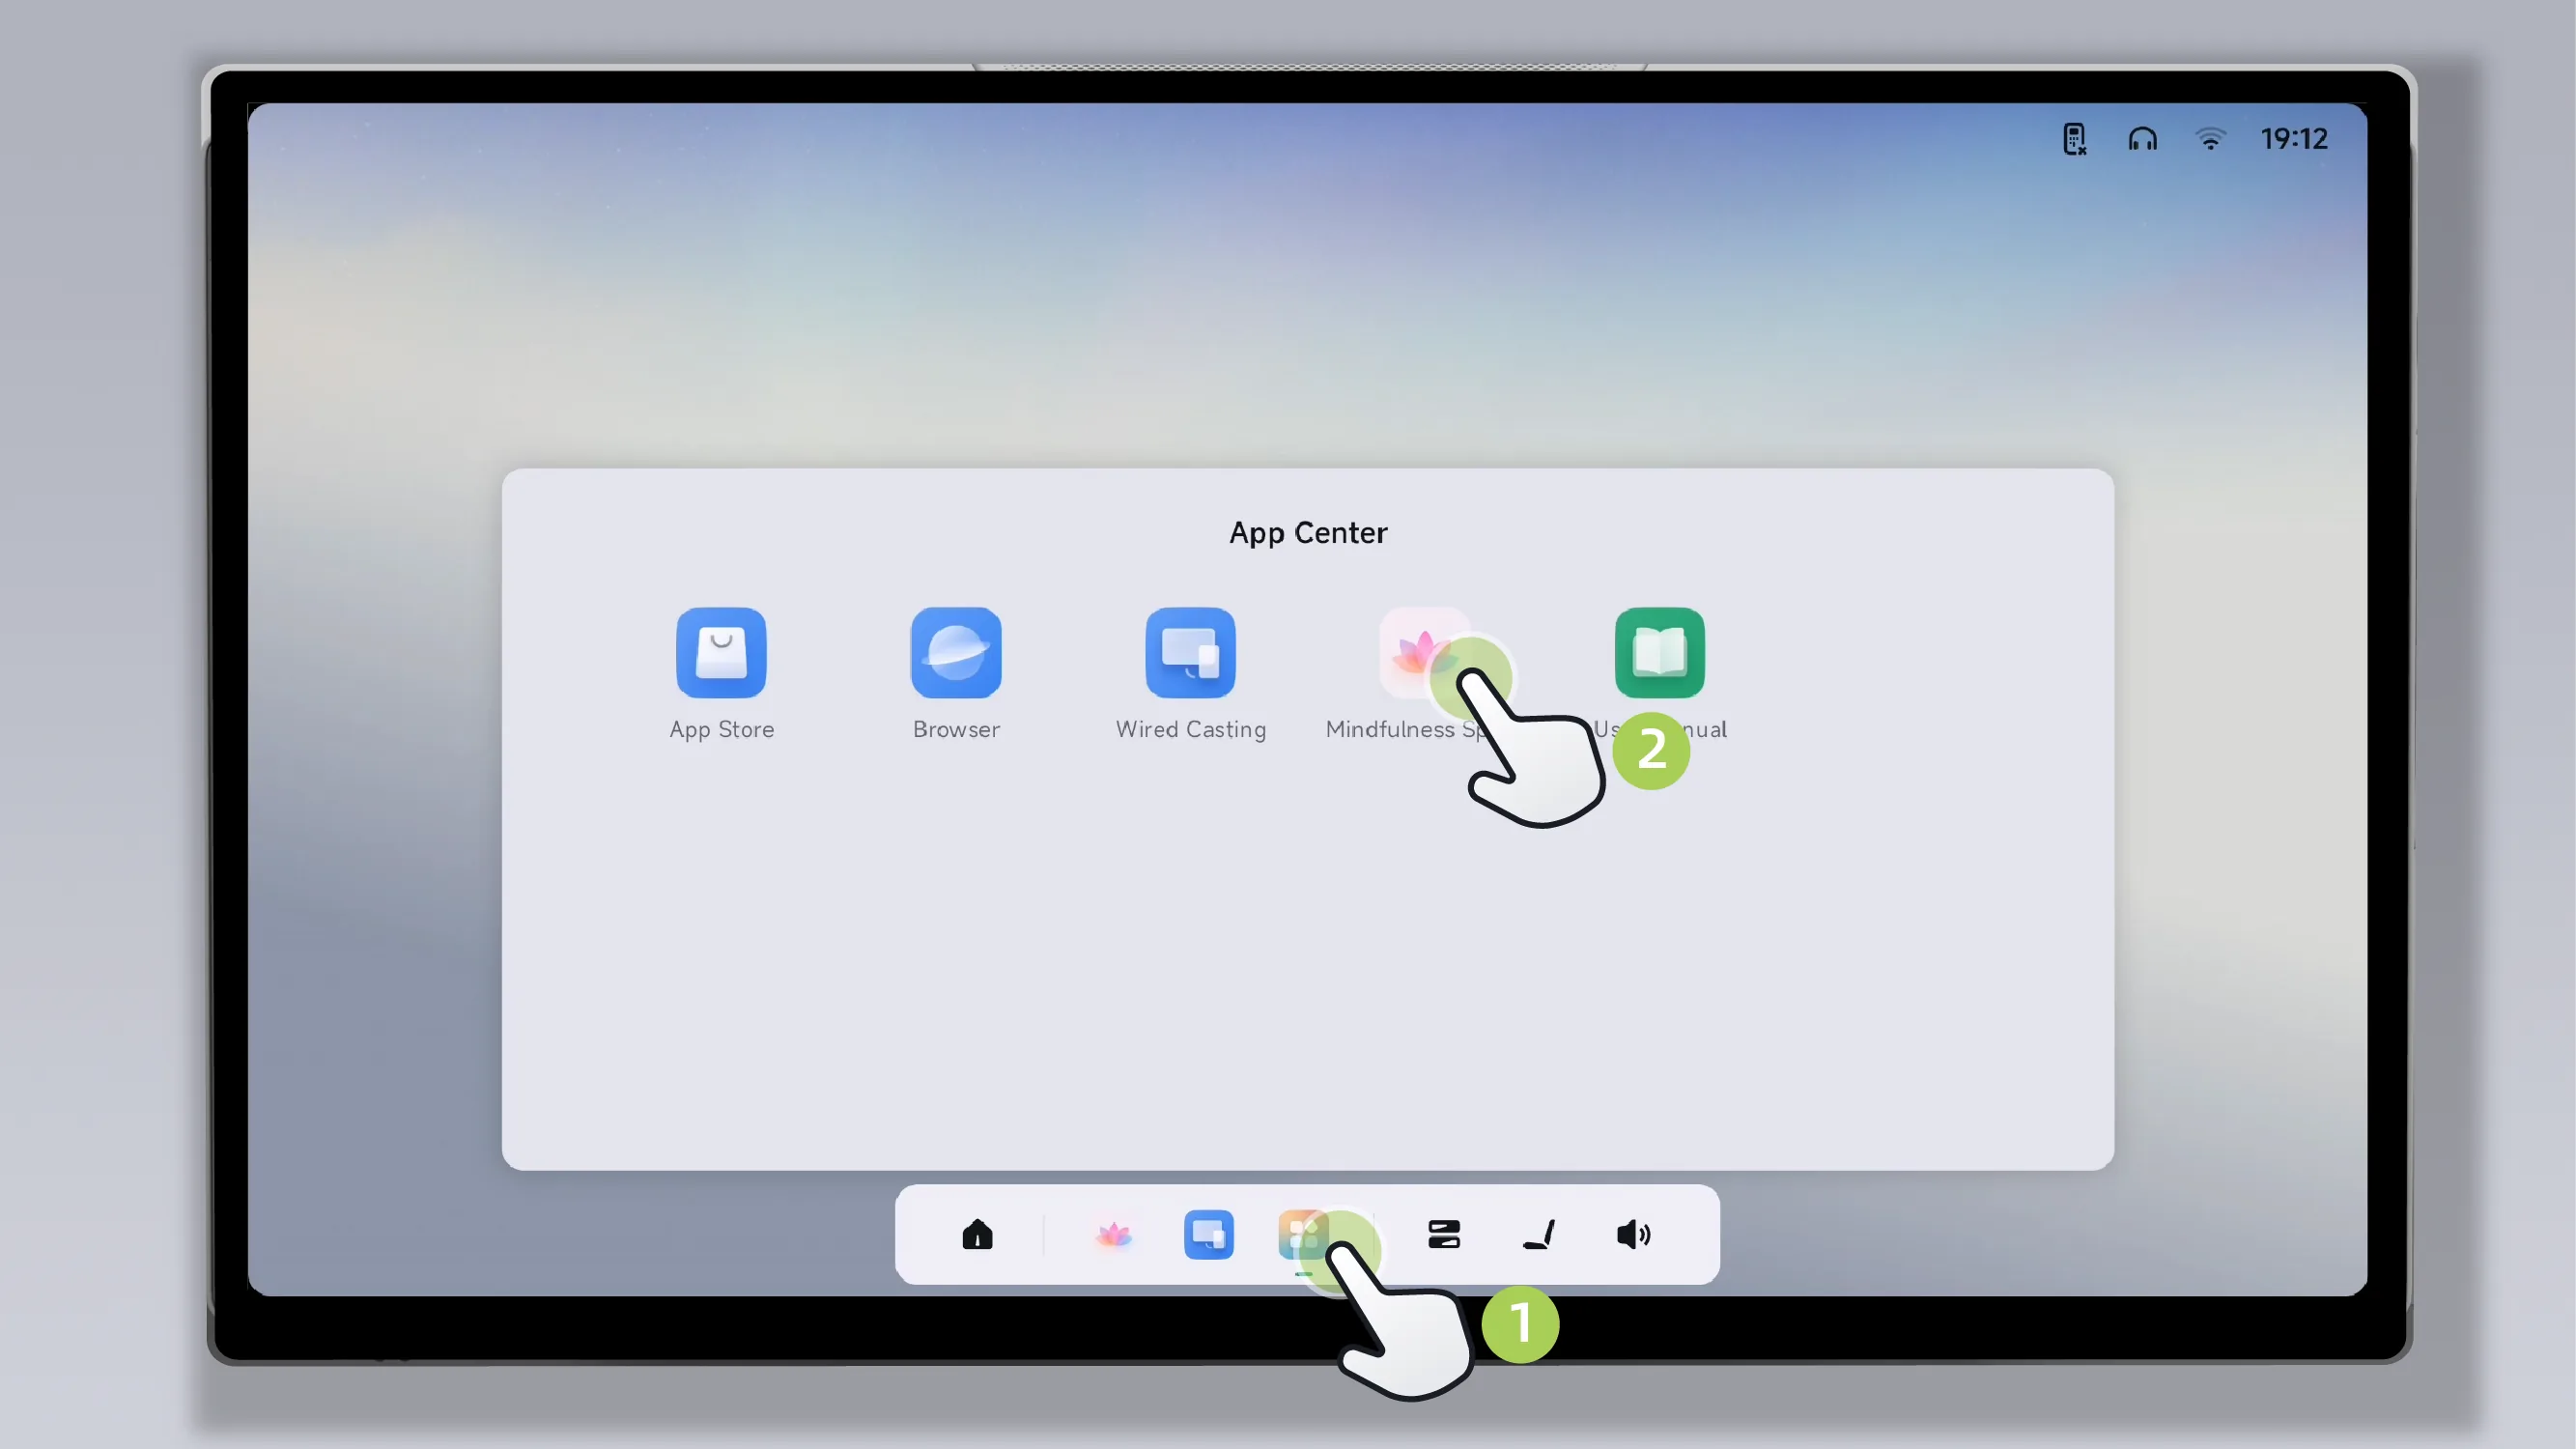
Tap , you can open the App Center.
Press and hold the app icon to enter the customization mode.
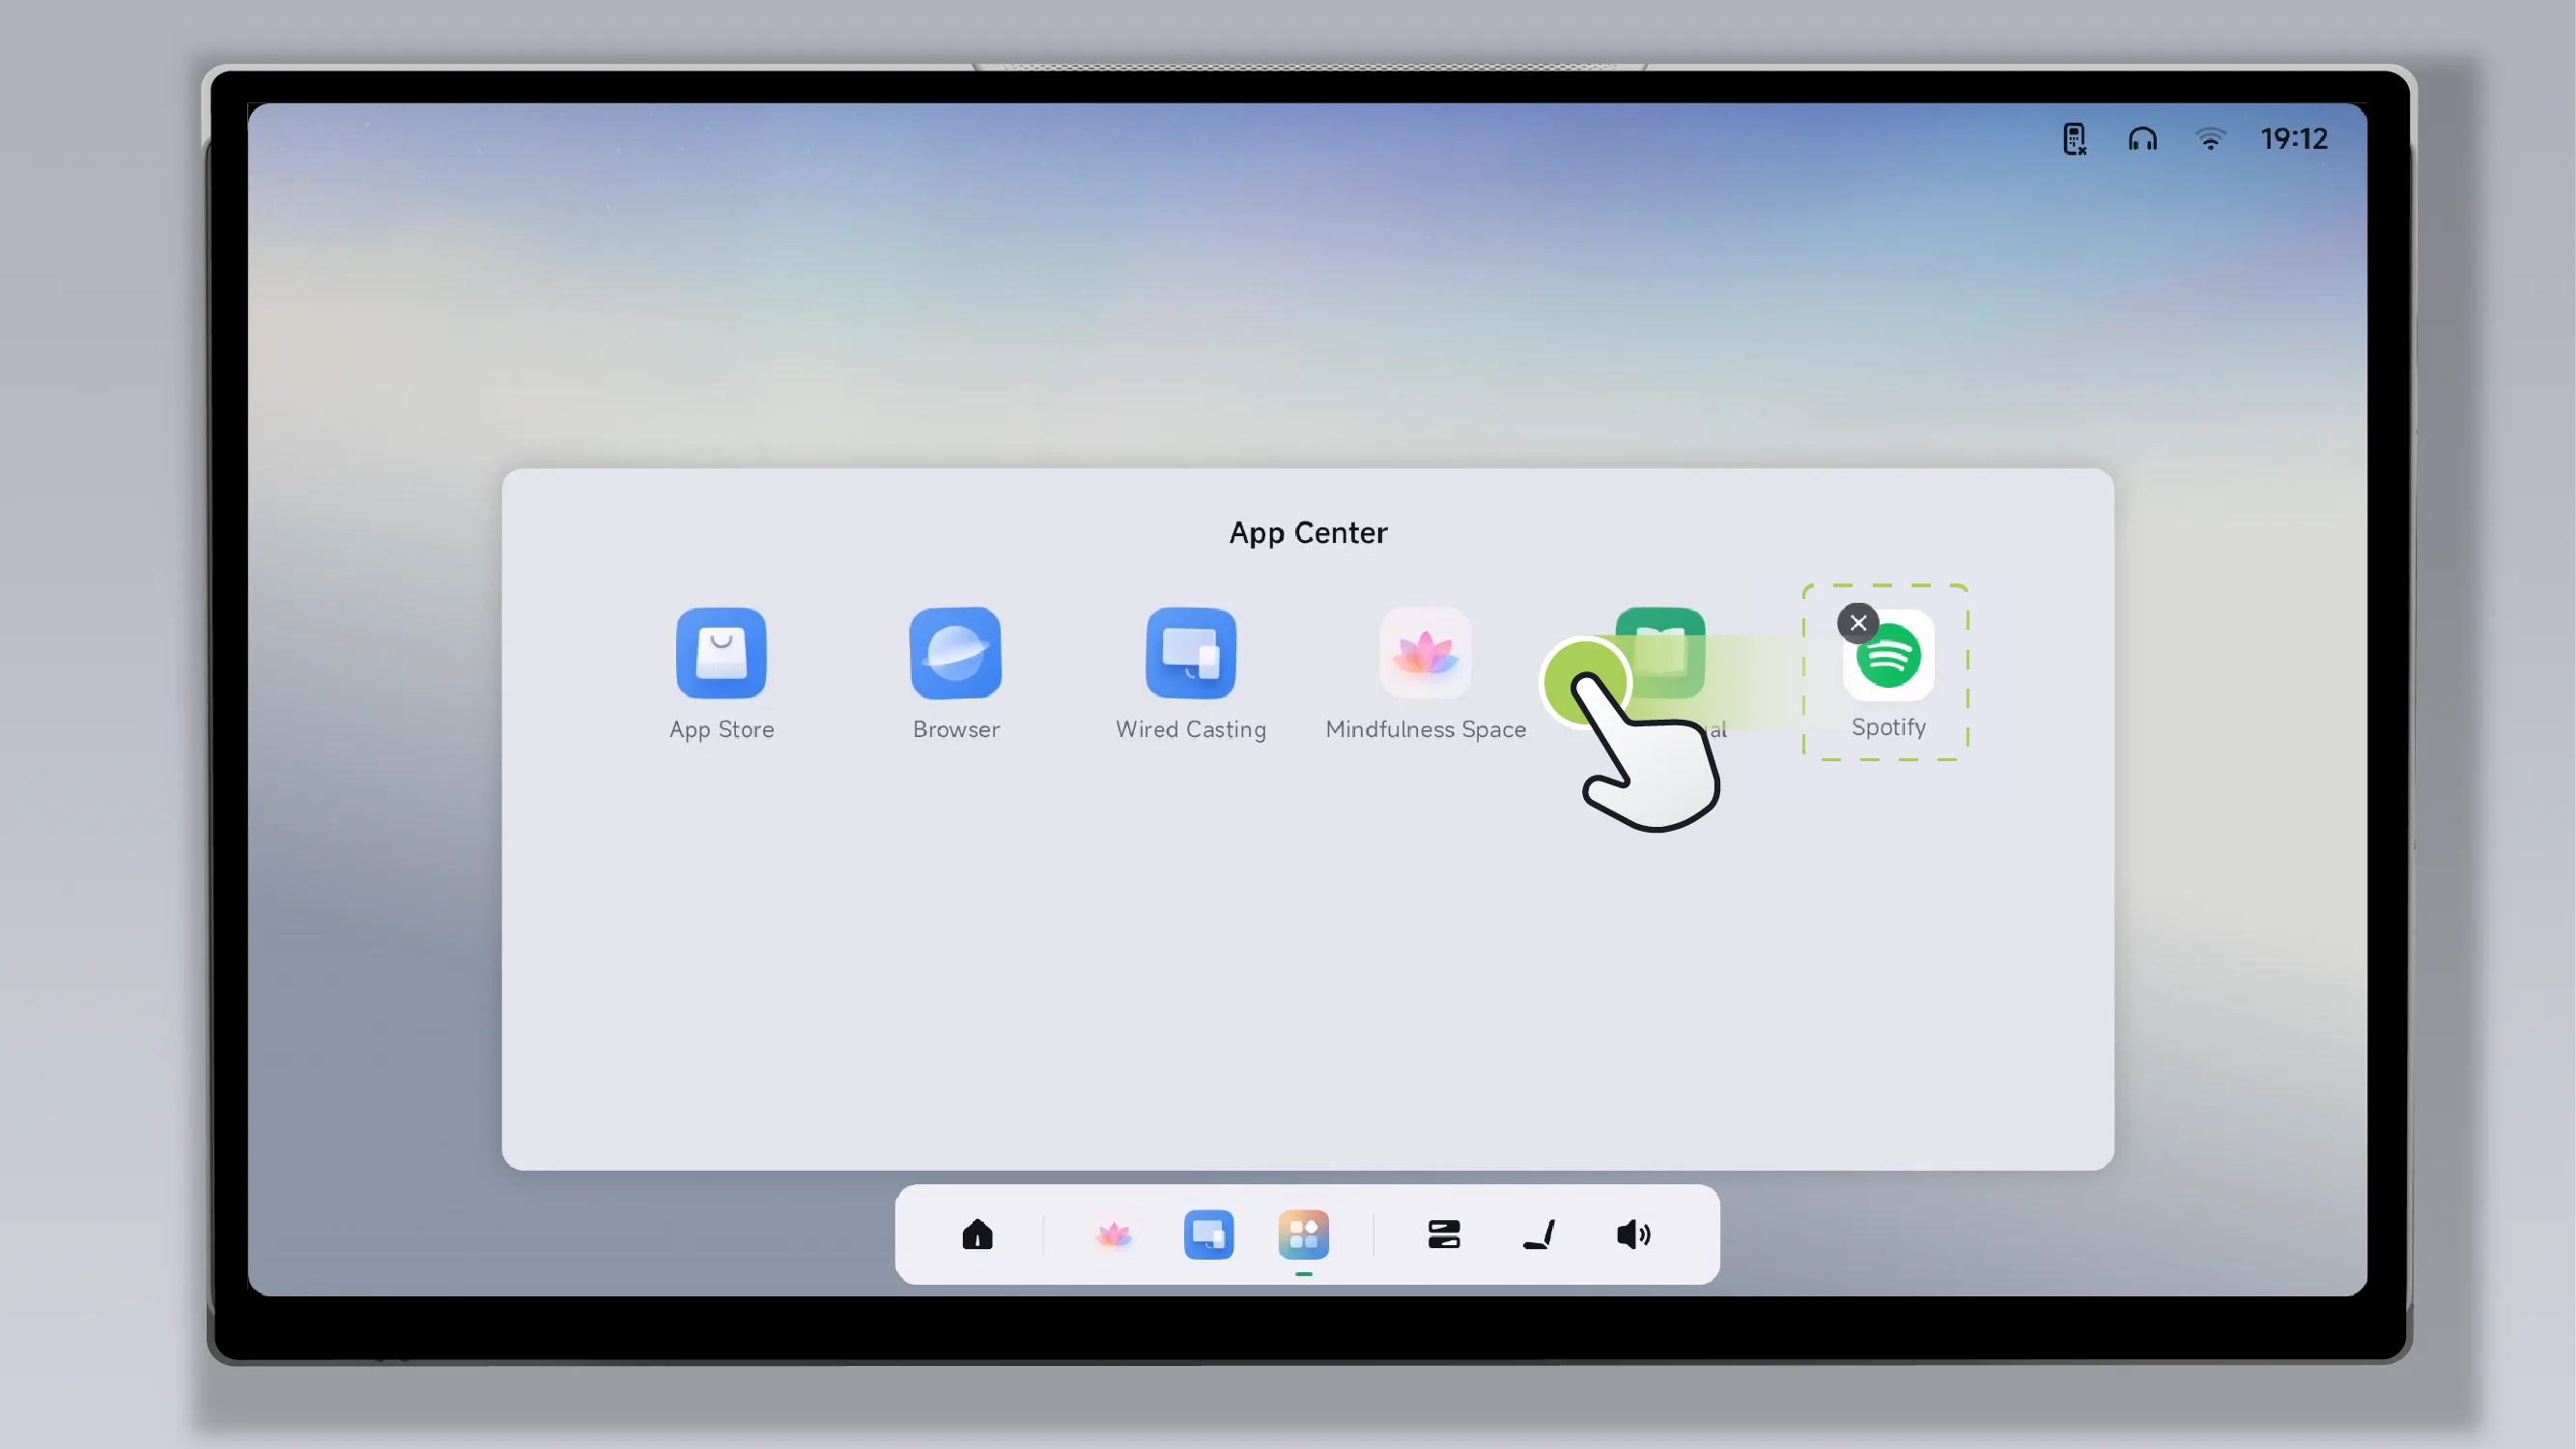
In custom mode, drag app icons to reorder them within the app list.
Tap any blank area in the App Center to exit the custom mode.
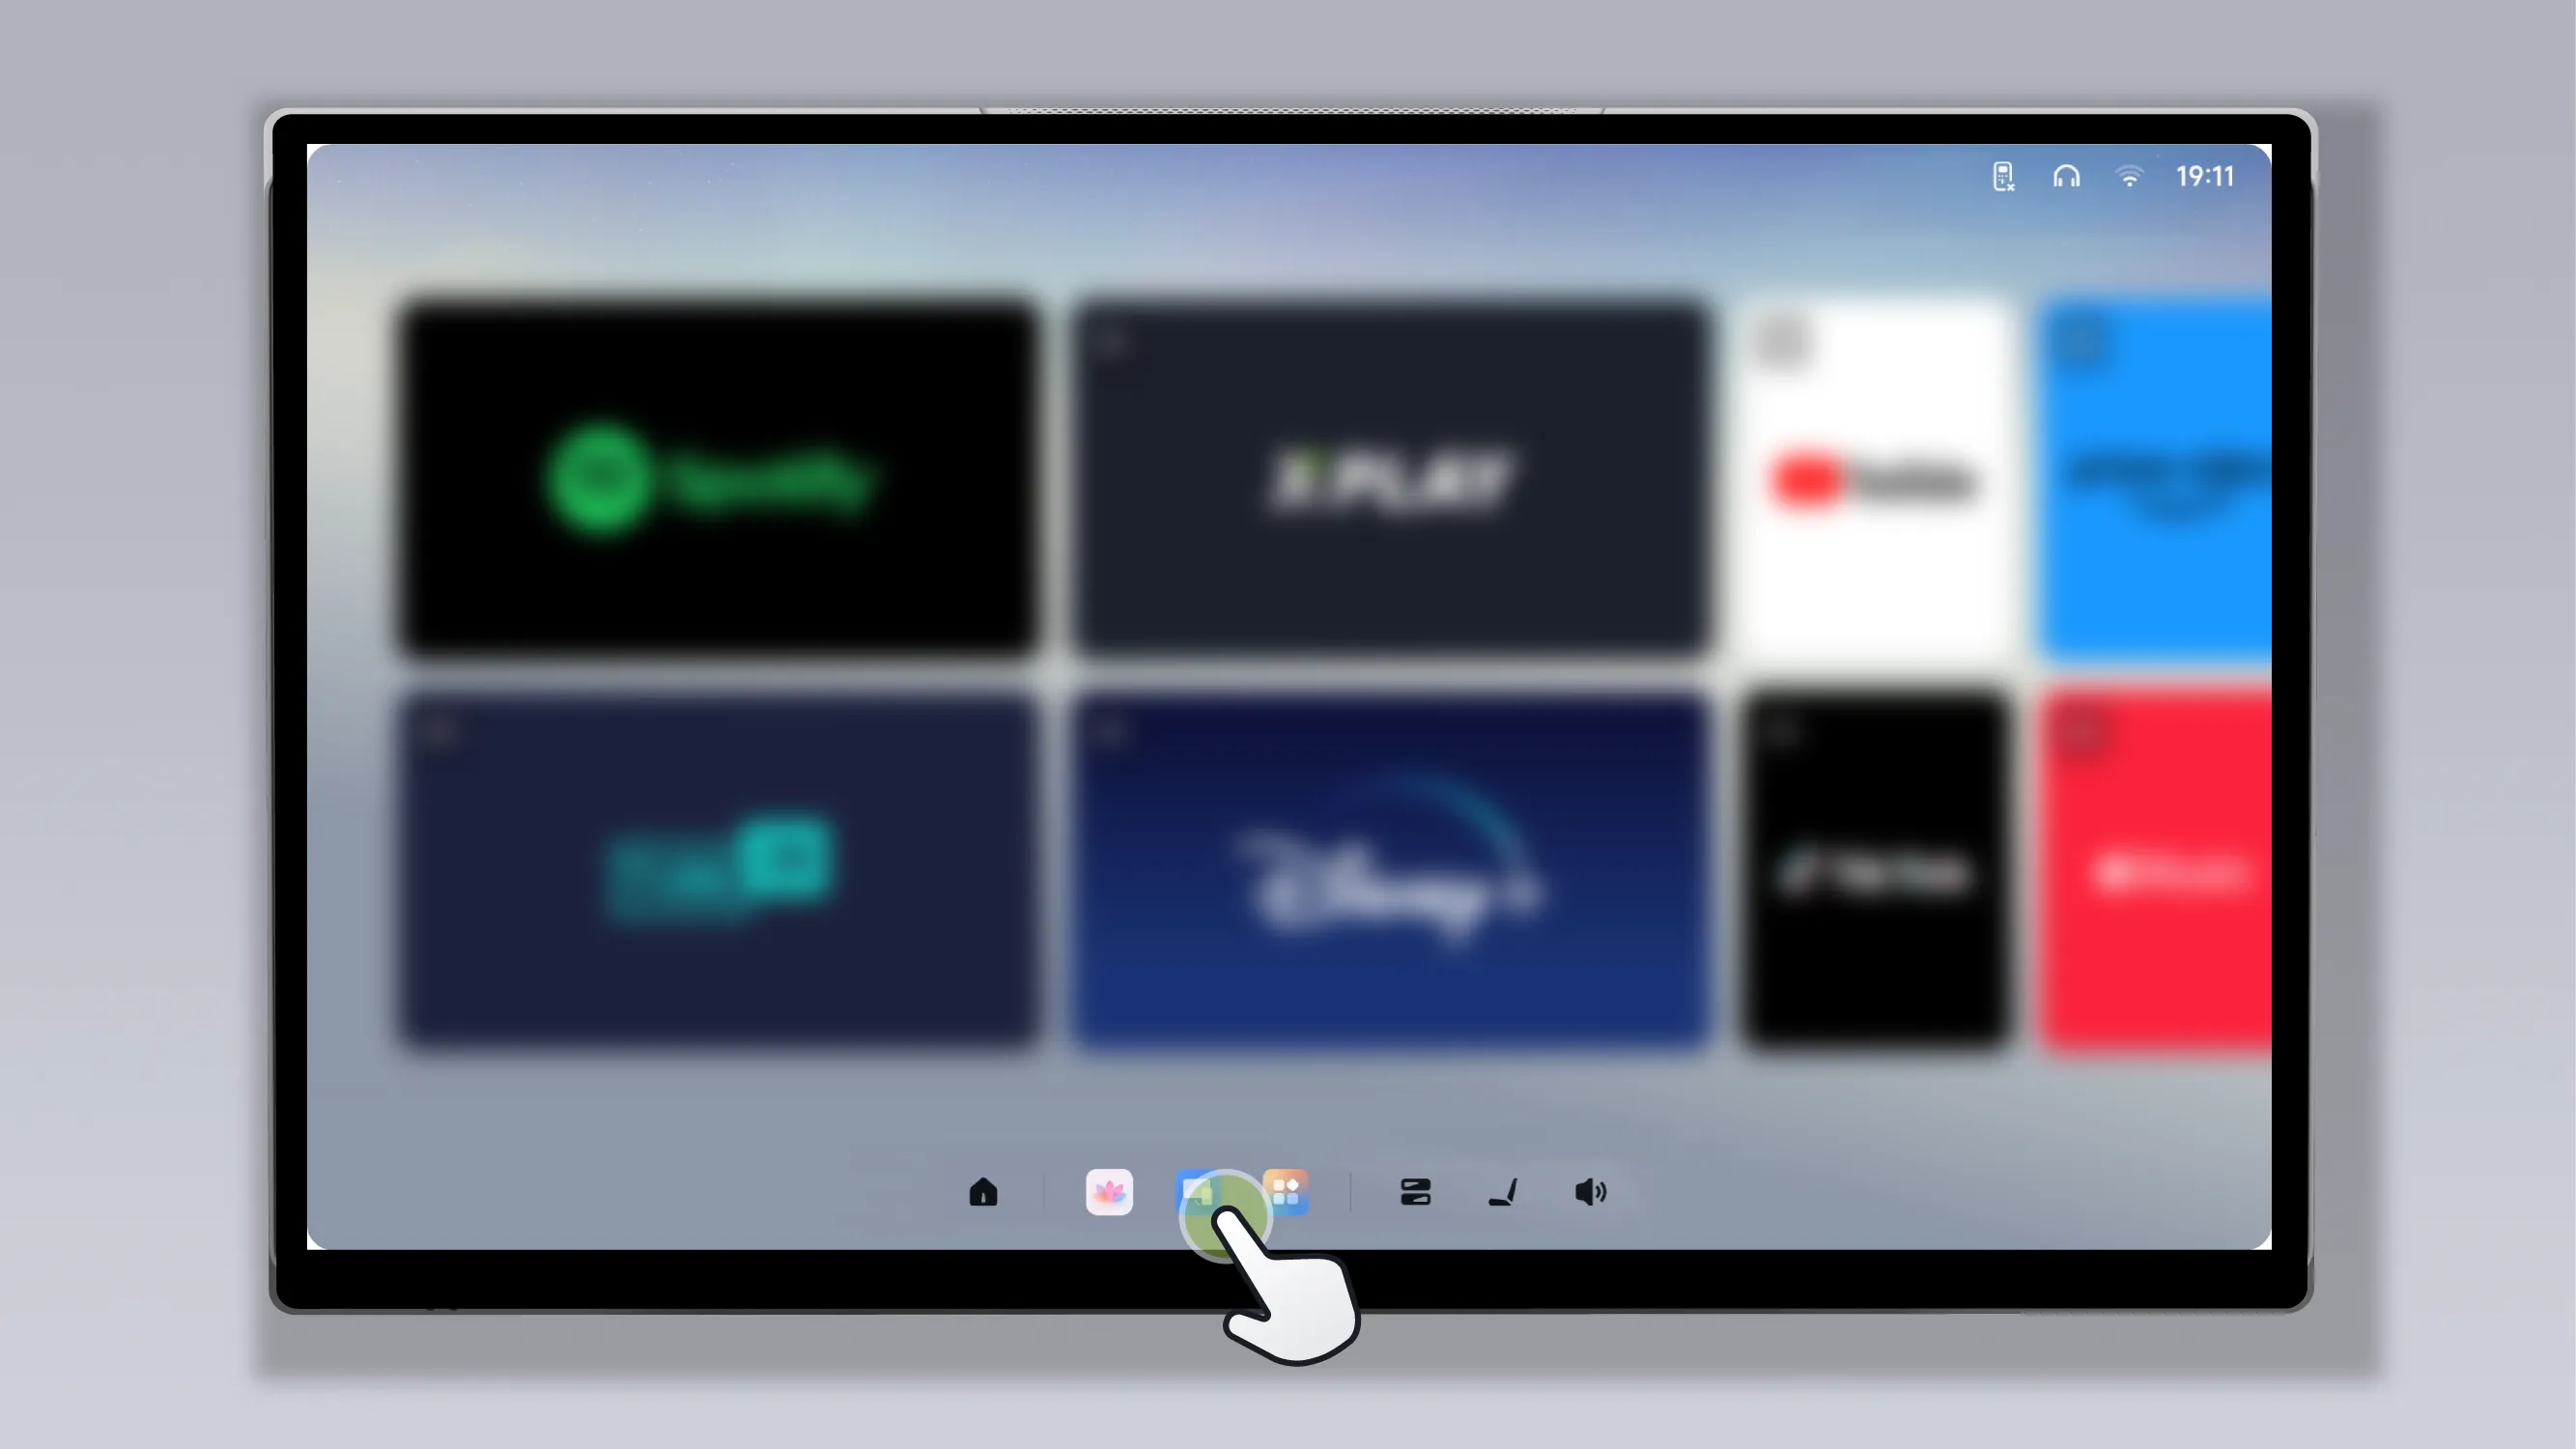
Press and hold an APP icon on the bottom taskbar to customize the bottom taskbar.
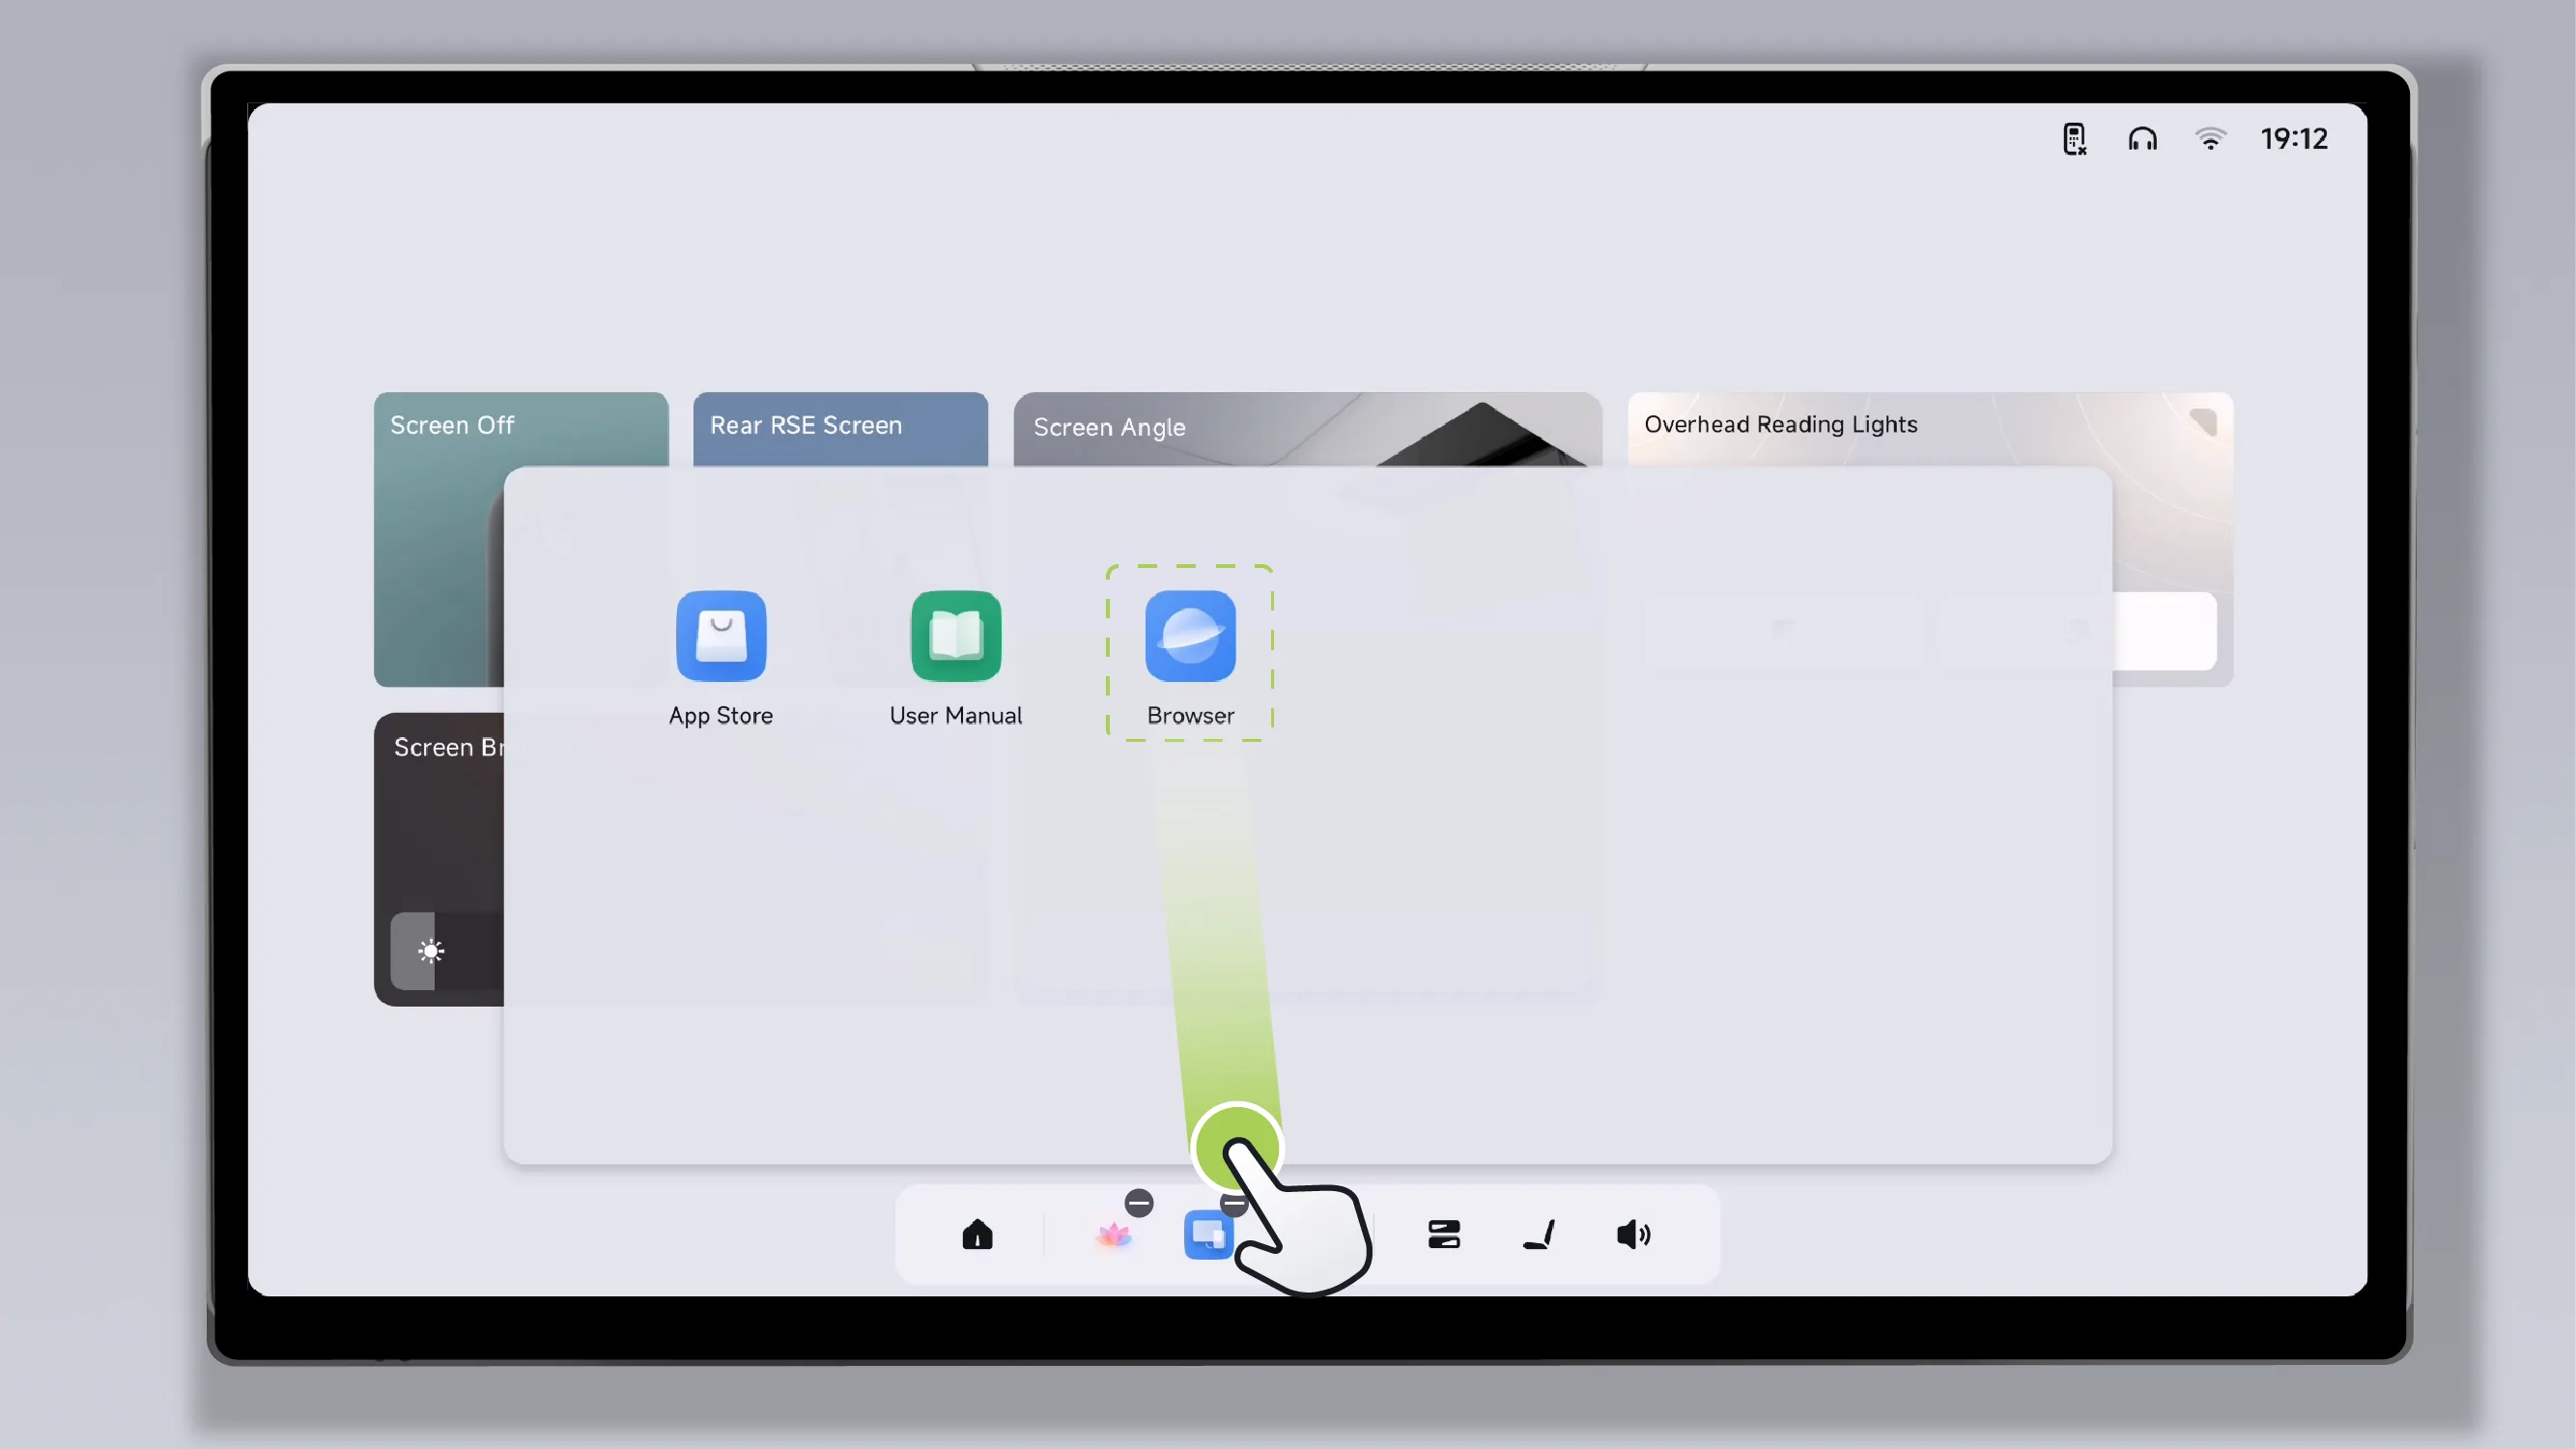
You can drag the app to the bottom taskbar.
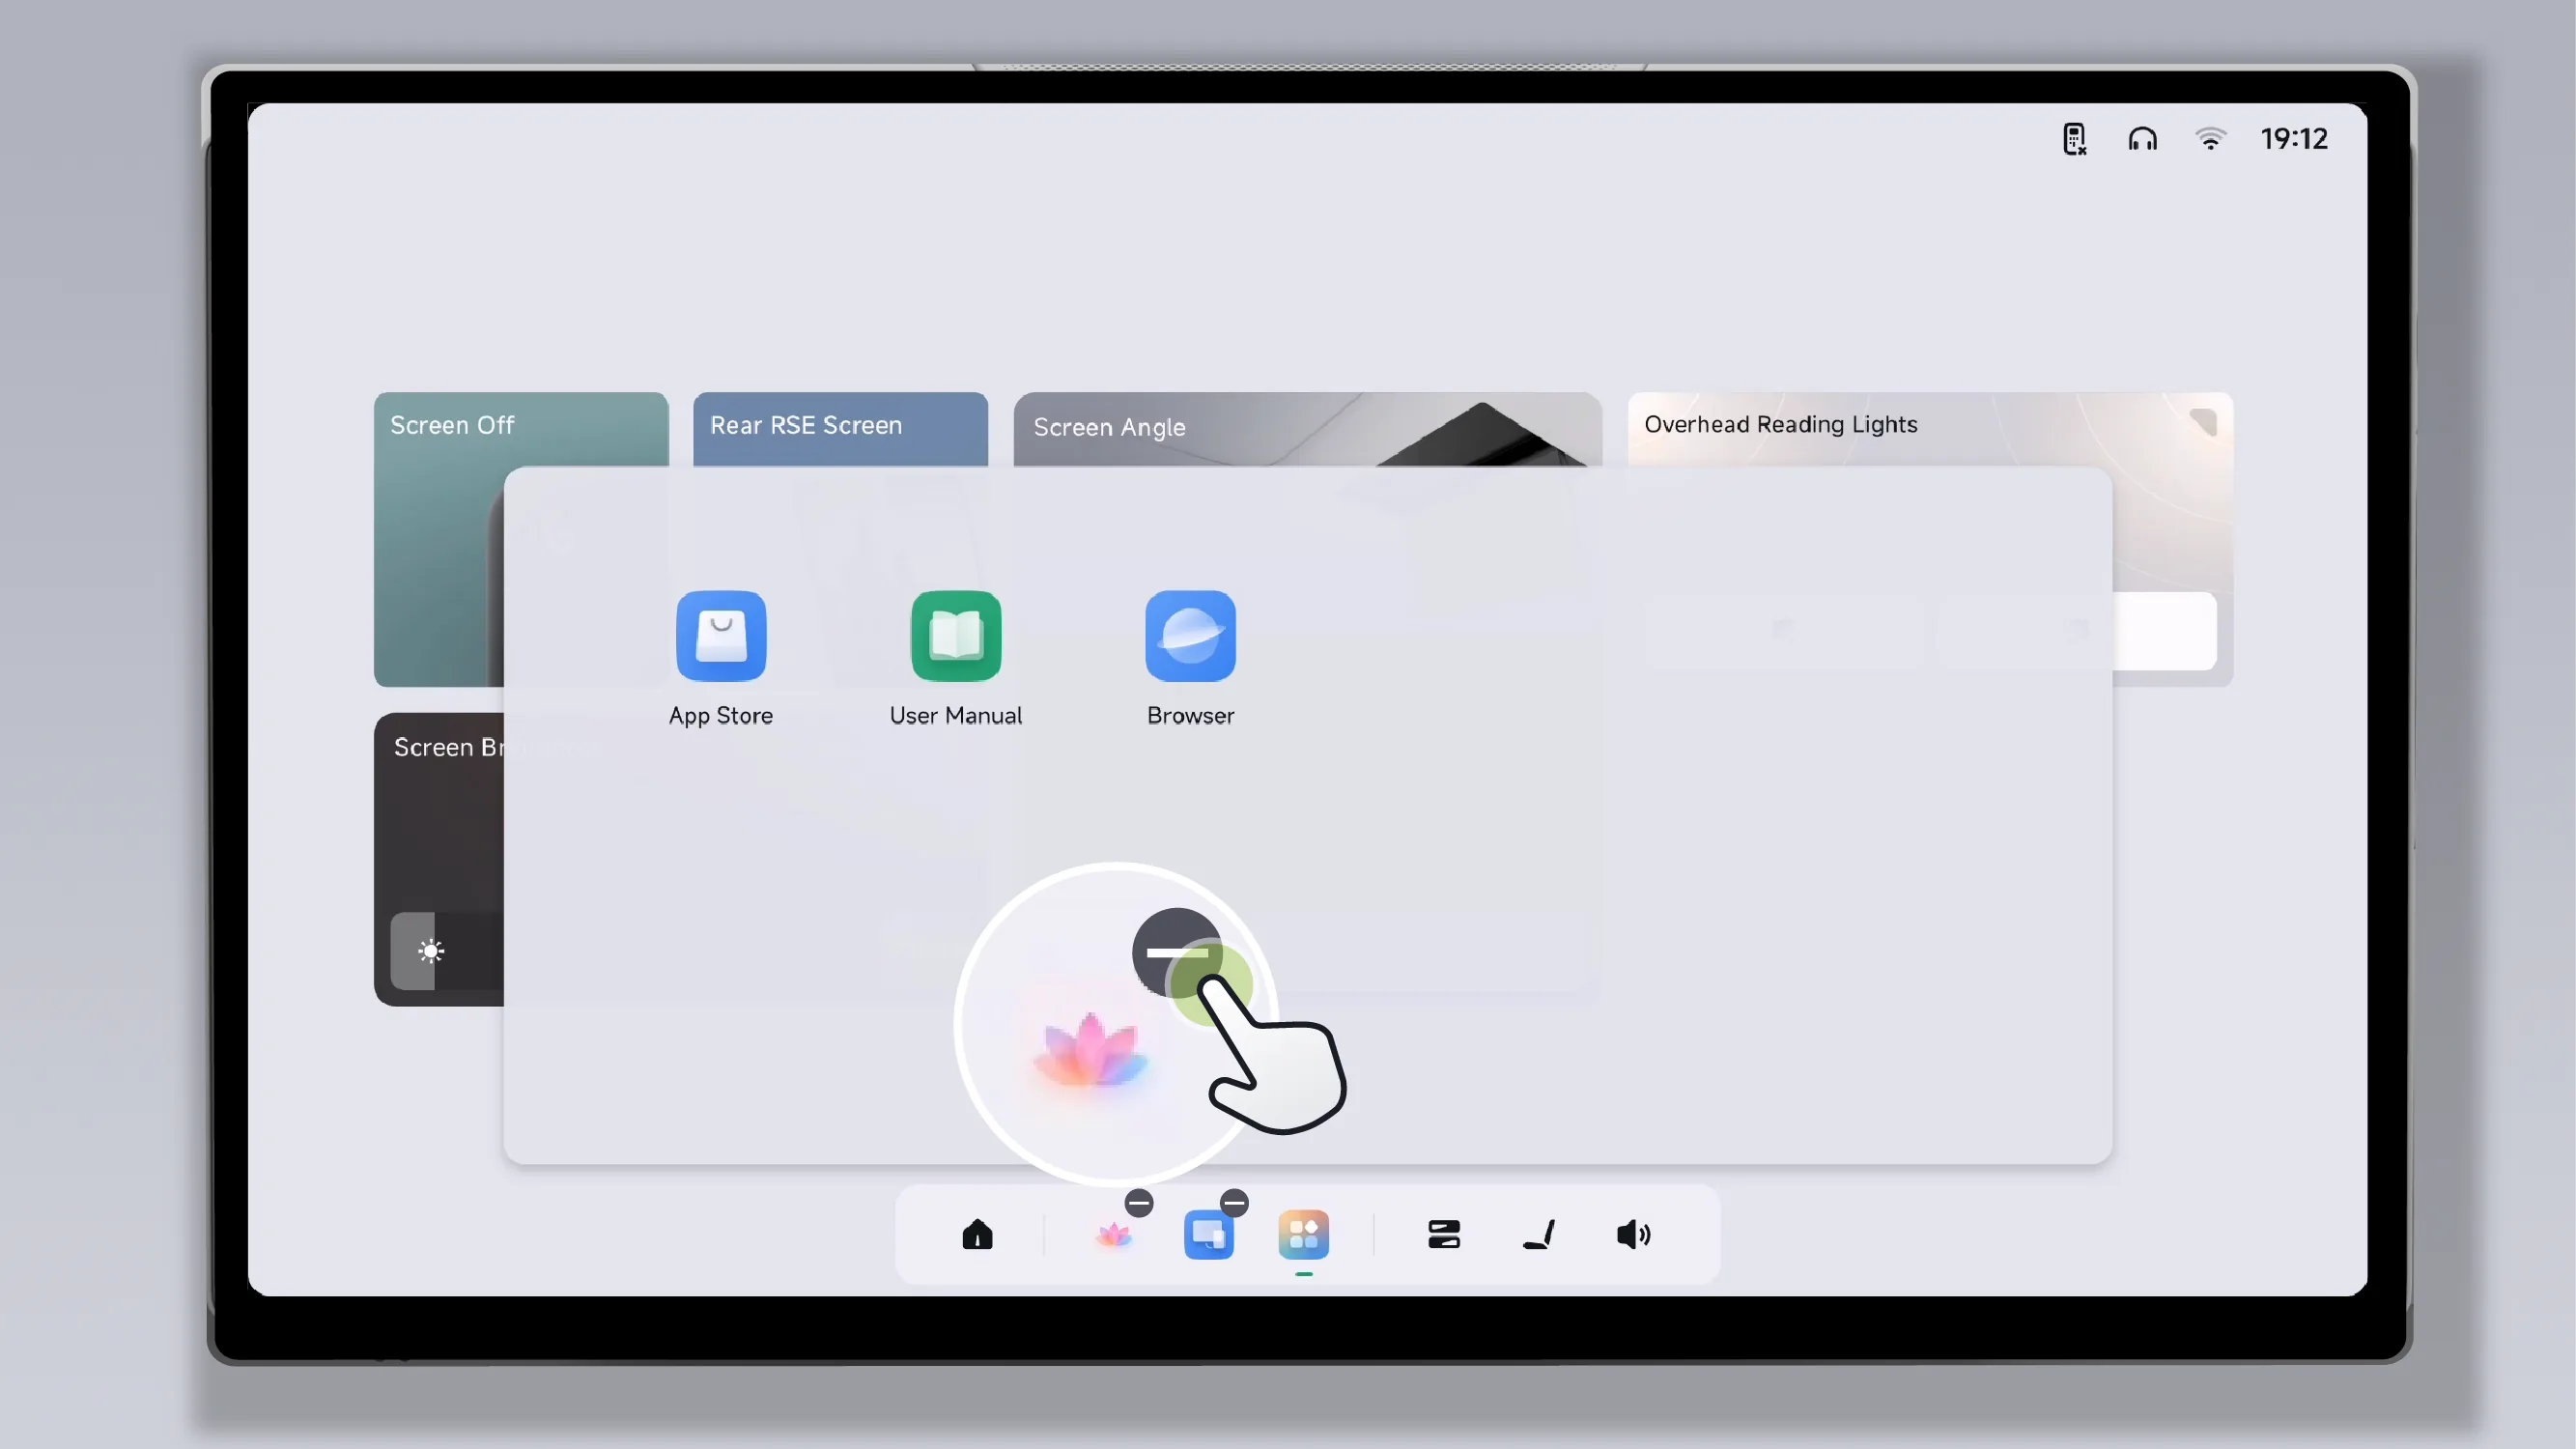
In custom mode, tap on the icon's , or drag the icon to the app center and release it to remove this icon from the bottom taskbar. To use this app again, please download it through the app store.
Tap any blank area in the app center or any screen position outside the app center area to exit the custom state.
Tips The rear control screen, rear entertainment screen, and center control screen share one set of third-party applications.
Applications must be downloaded through the app store. If an application is deleted on the center control screen or the rear control screen, it will also be deleted synchronously on the rear entertainment screen.
You can exit the App Center in the following ways:
Tap any blank area in the App Center.
Tap any area of the screen outside the app center area (except the top status bar).
Open other apps.
After the vehicle-mounted entertainment screen remote control is successfully connected to the vehicle, operate the touchpad on the remote control or press the Back button, Home button, or other buttons on the remote control to exit the App Center.
In apps that support the app sharing feature, you can transfer video content between the center display, HUD, rear control screen, and rear entertainment screen.
Open the video app on the rear entertainment screen to play your favorite audio and video content, then tap the app toolbar. , select Share or Watch Together.
In the toolbar, select Share, then select the center control screen, HUD (supported only when in P gear), or rear control screen to transfer the audio and video content currently playing on the rear entertainment screen to the driver's screen, HUD, or rear control screen for playback.
In the toolbar, select Watch Together, then select the center display or HUD (supported only when in P gear) or the rear control screen to synchronize the audio and video content currently playing on the rear entertainment screen with the center display or HUD or rear control screen.
Tap the app toolbar , select Back or Close.
After the vehicle-mounted entertainment screen remote control is successfully connected to the vehicle, you can exit by operating the touchpad on the remote control or pressing buttons such as the Back button or Home button on the remote control.
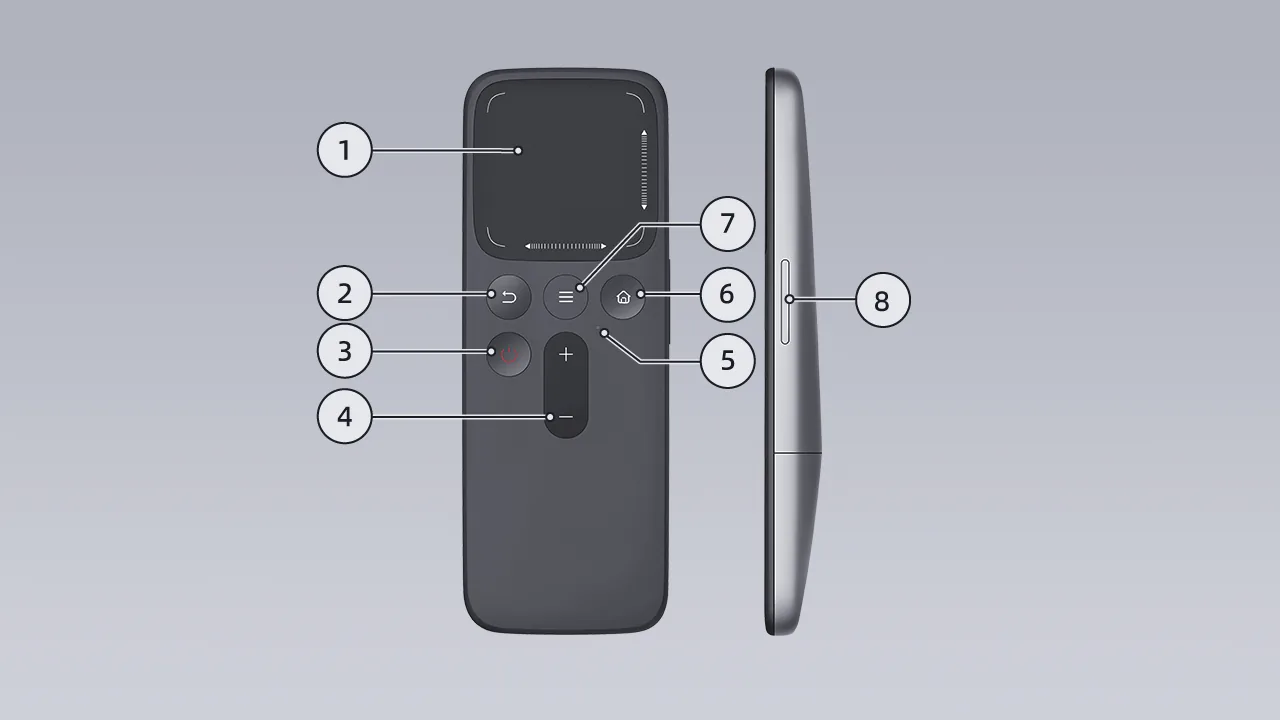
Touchpad
Tap: Press the touchpad to confirm the screen operation.
Swipe: Slide on the touchpad to control the cursor on the screen.
Edge swipe: swipe up and down along the right edge of the touchpad to scroll the page up and down; swipe left and right along the bottom edge to scroll the page horizontally.
Tips For better sliding and scrolling performance, lightly sweep your finger across the touchpad while keeping it in contact.
Back button: Press to return to the previous screen.
Screen power button: Turn the entertainment screen on/off.
Volume Up/Down Button: Press Increase volume, press Decrease the volume.
Indicator light: Press any button. A blue light indicates sufficient battery power; a red light indicates low battery power. Please replace the battery promptly.
Home key: Press to return to the home page.
Control Center key: Press to enter the Control Center screen.
Adjust the screen angle: press up or down to adjust the deployment angle of the entertainment screen.
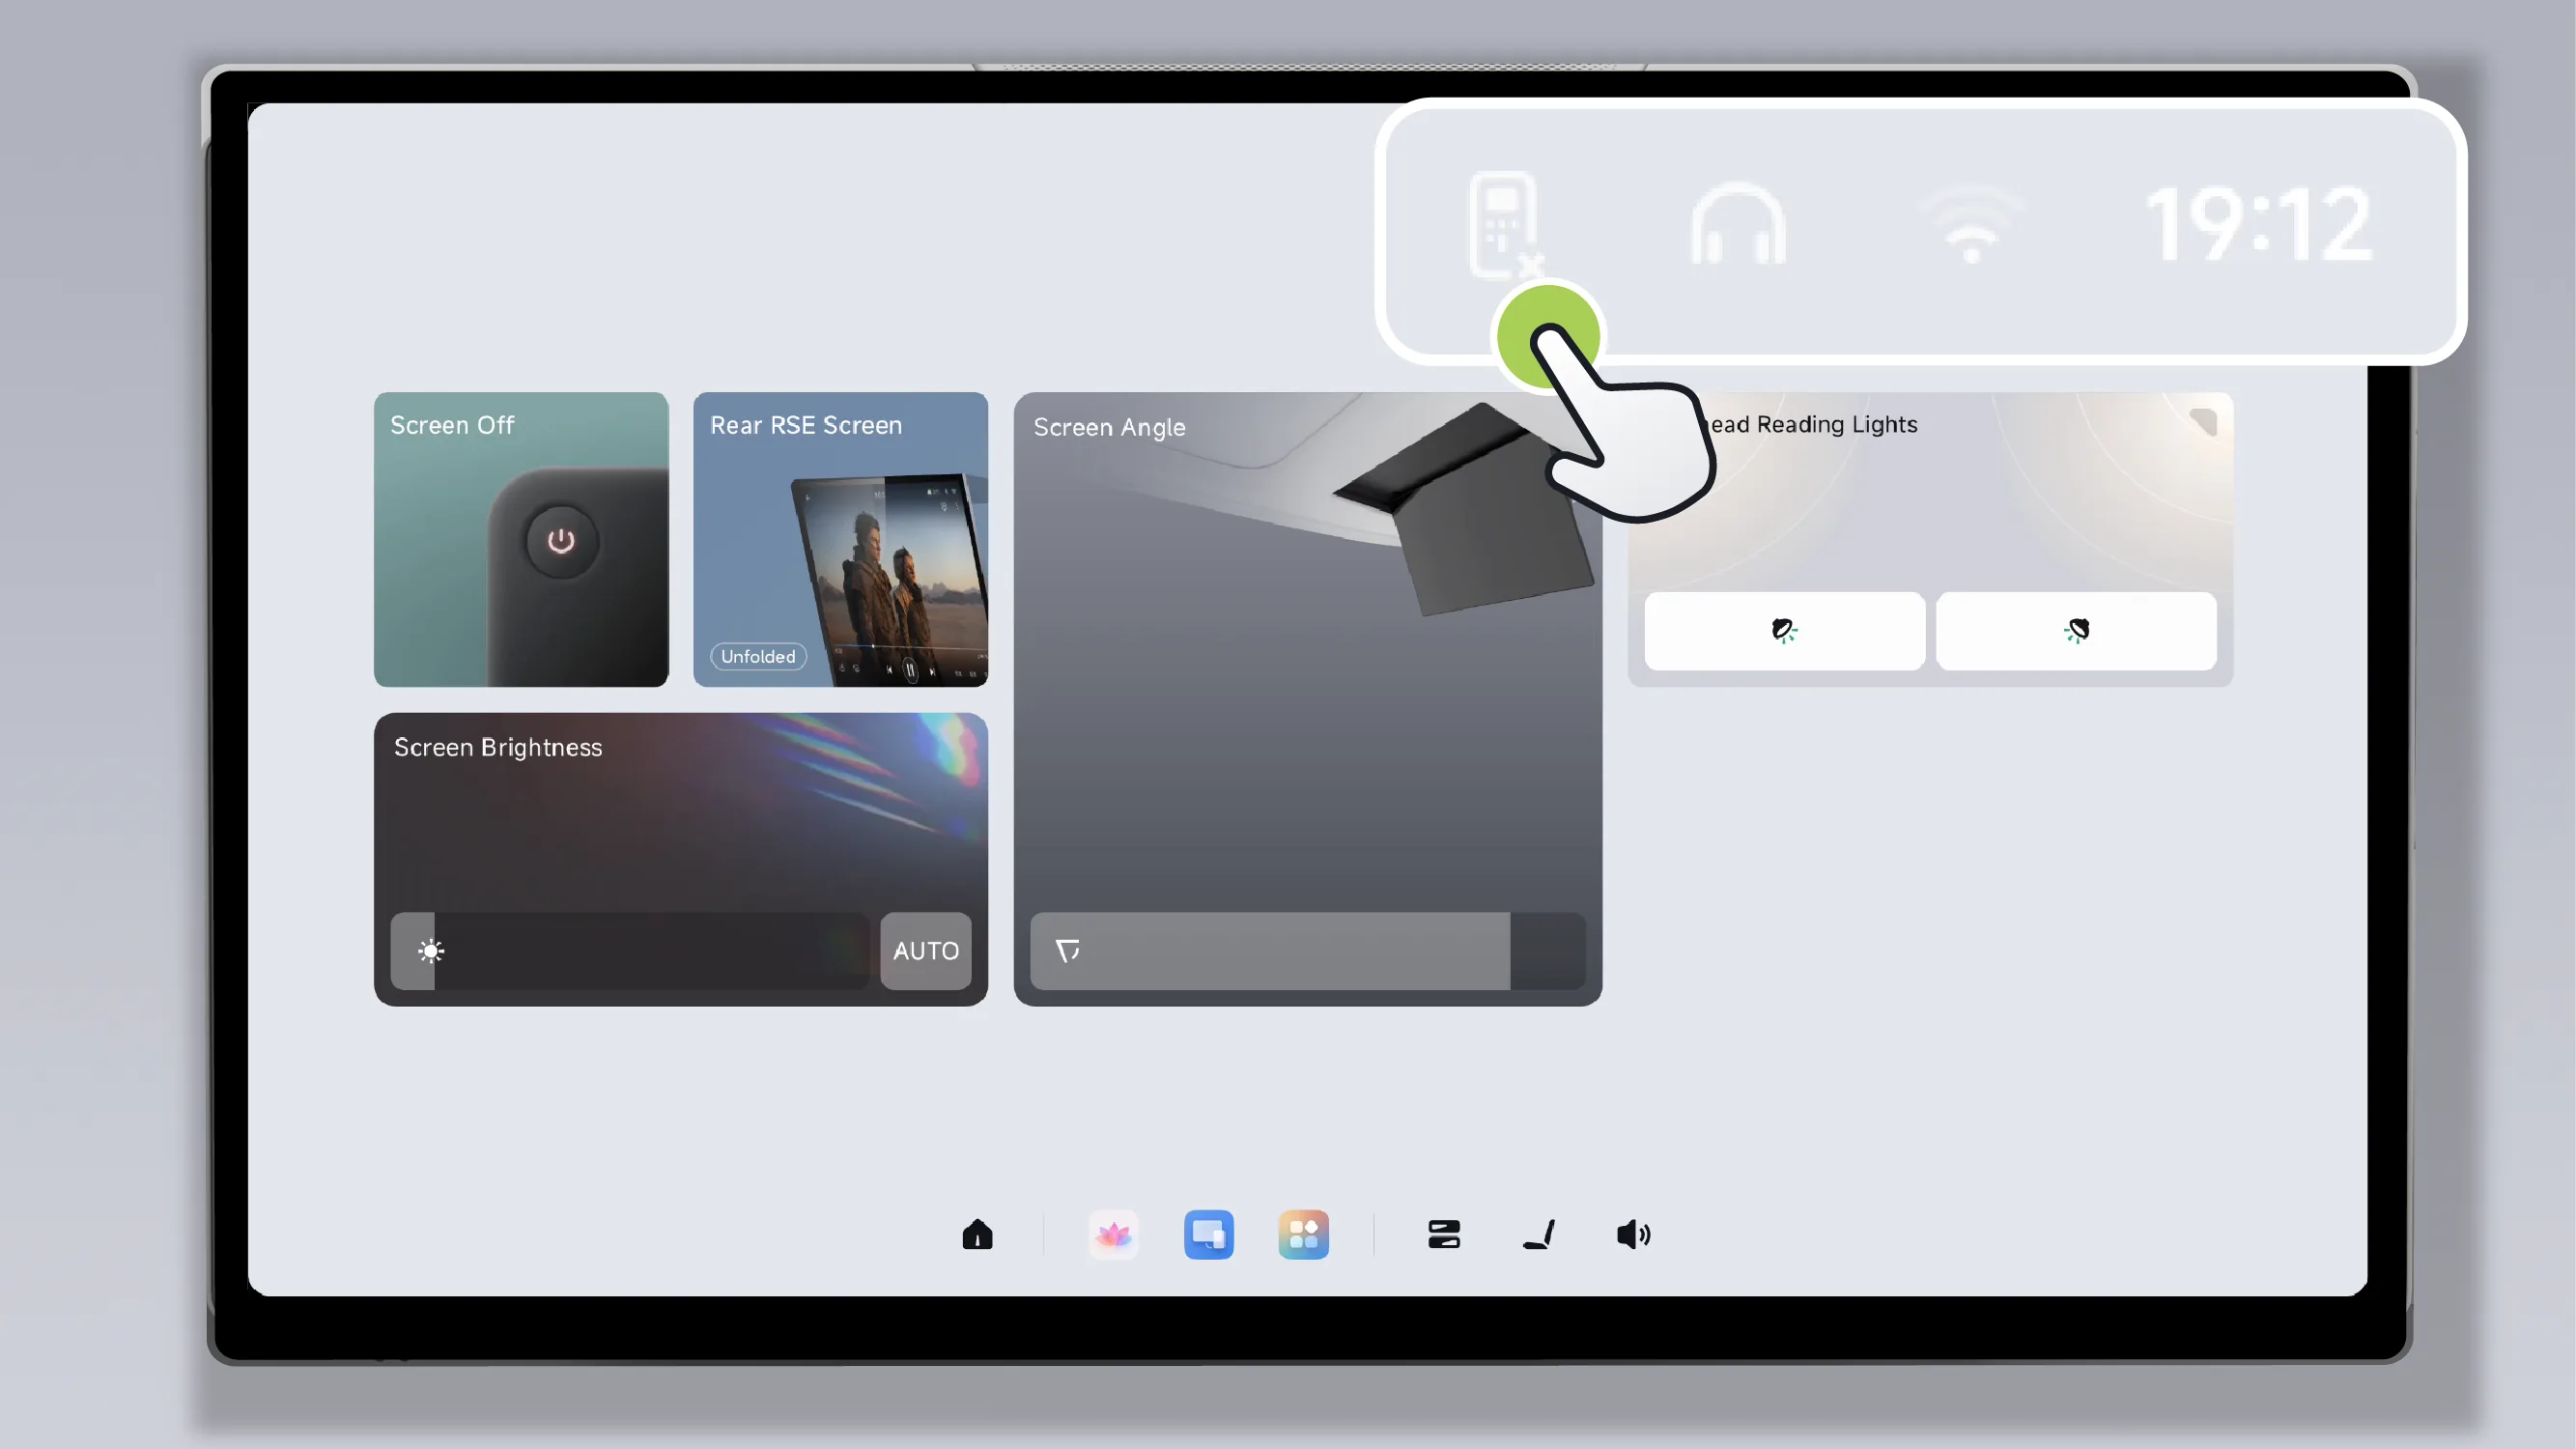
When the remote control is not connected, you can tap on the top status bar of the entertainment screen. 。
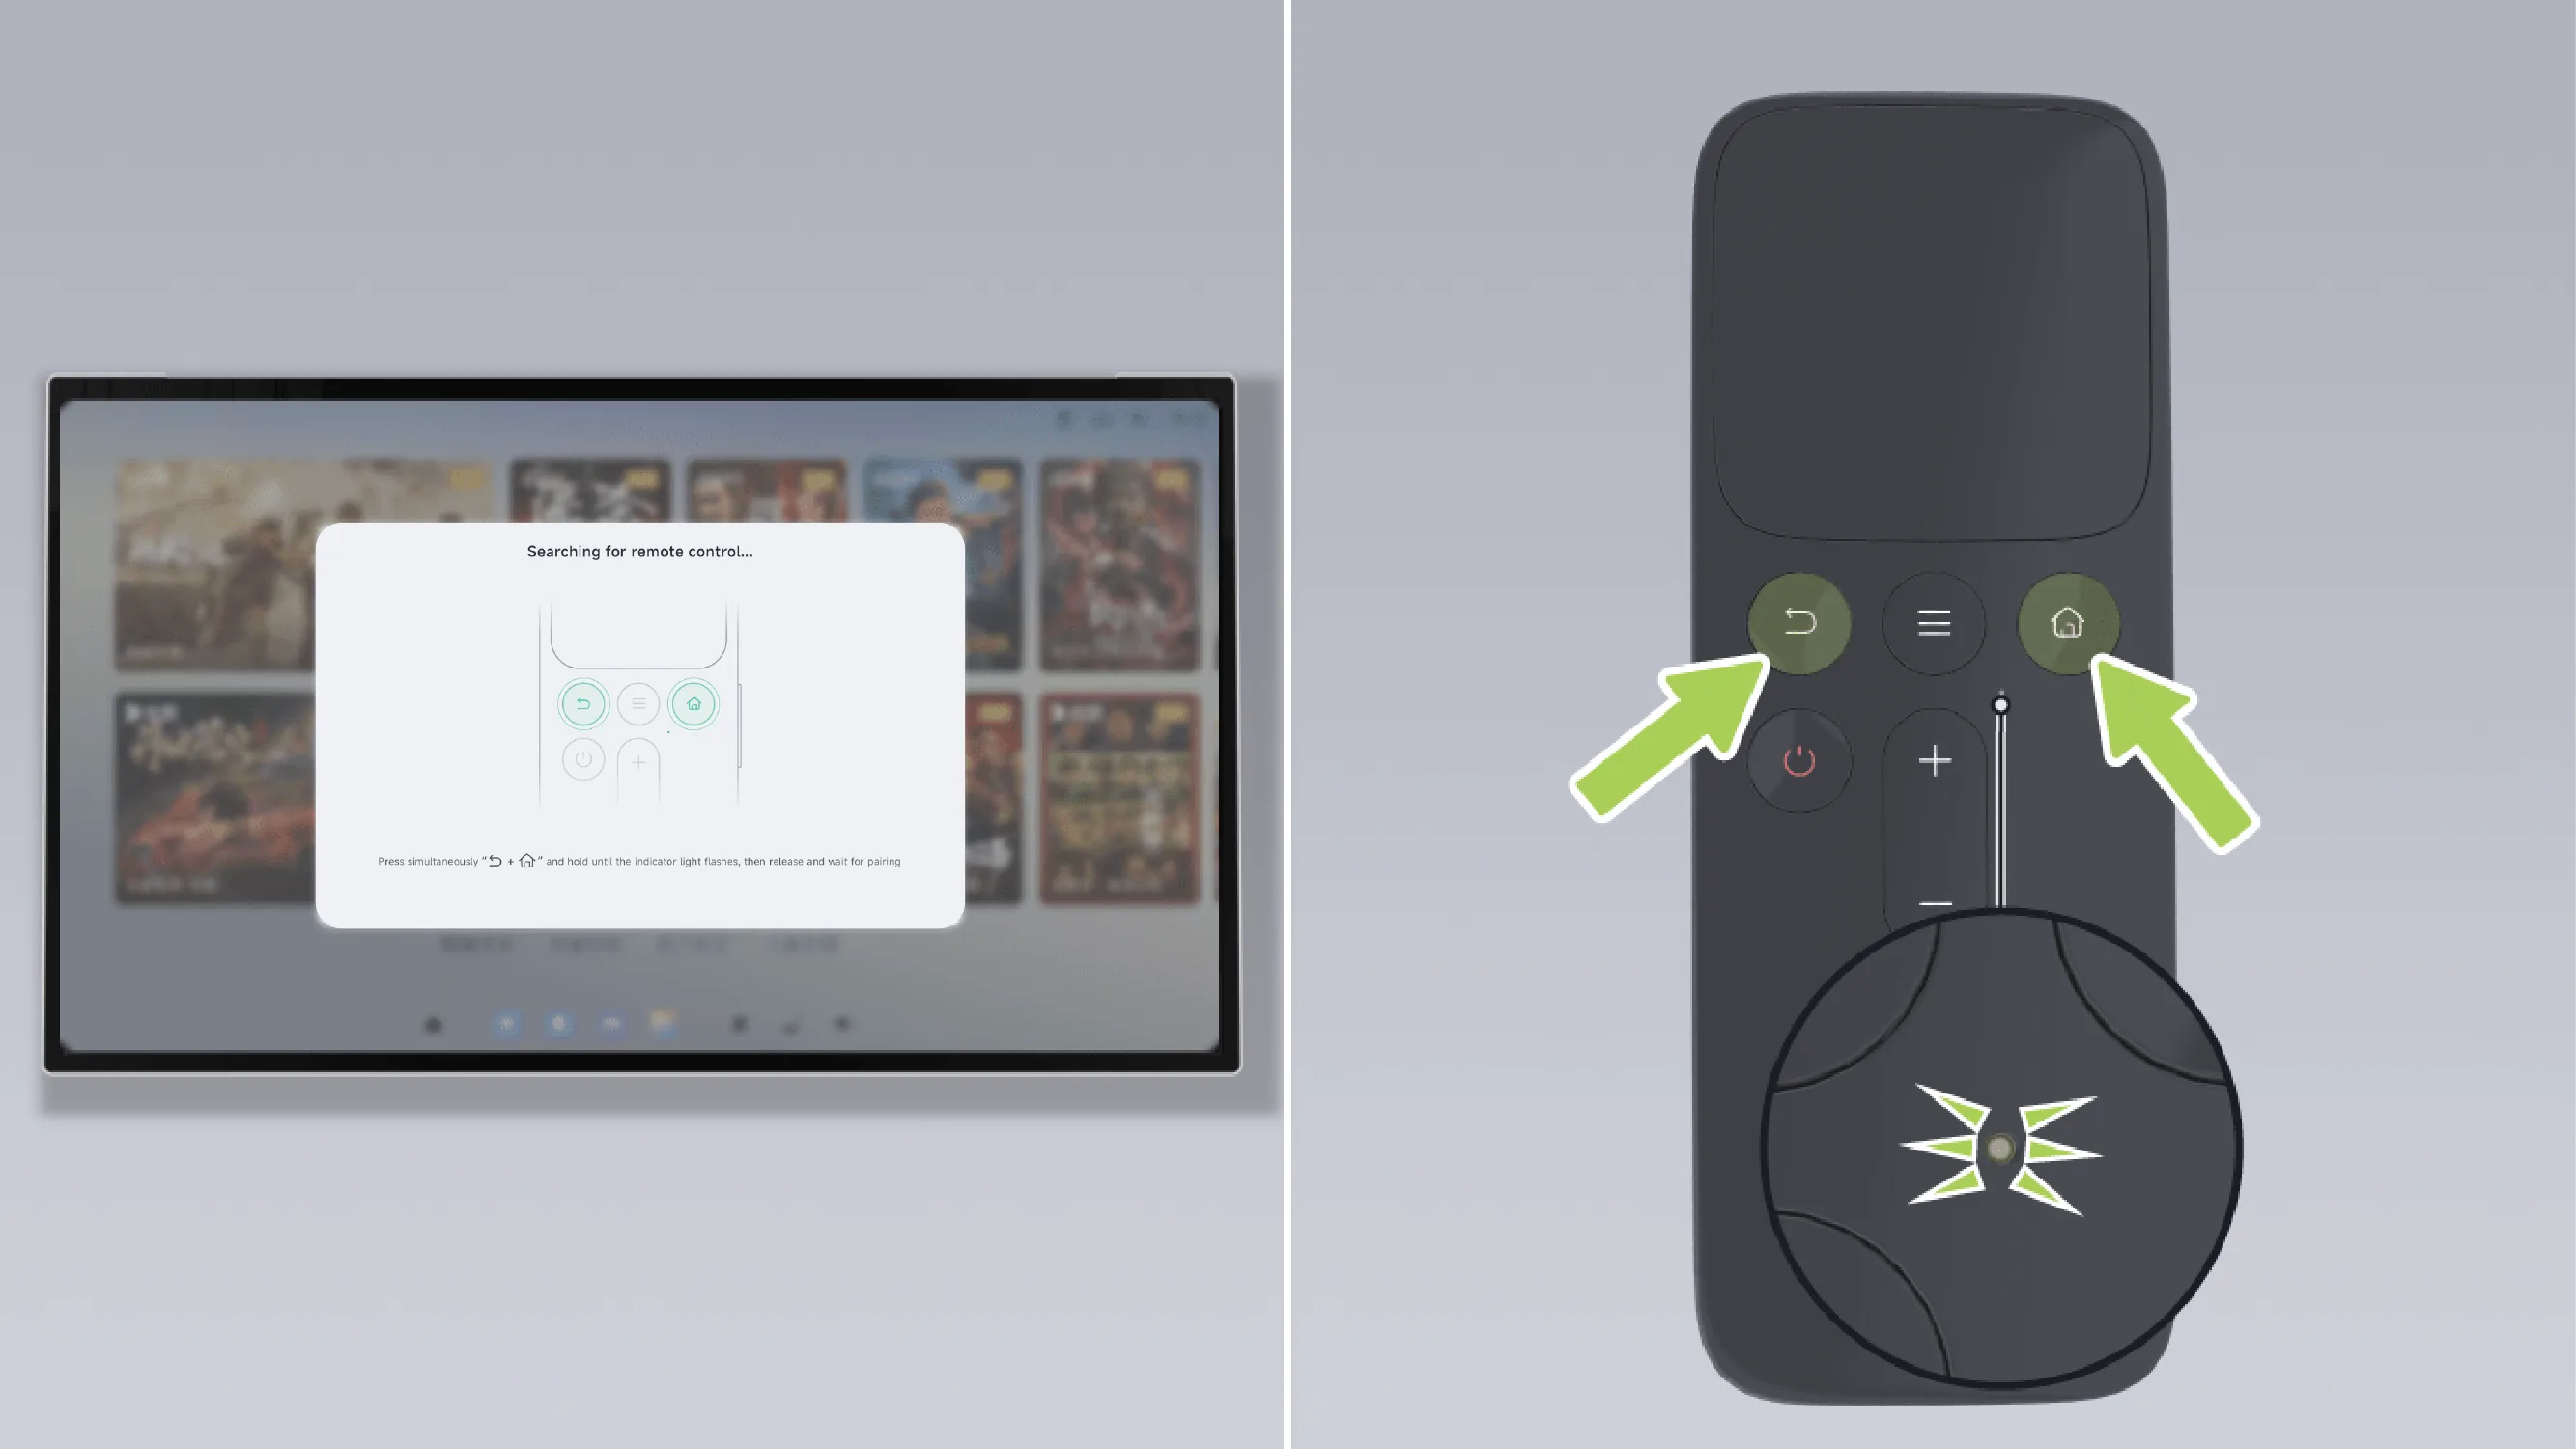
After the pop-up window appears, press and hold the remote control simultaneously. and Press and hold for more than 3 seconds. When the remote control indicator light flashes, release and wait for pairing. After the system detects the remote control, pairing will be completed automatically, and no other operation is required.
Tips Before using the remote control for the first time, remove the battery tab by opening the back cover so the remote can operate normally.
If the entertainment screen does not respond when operating the remote control, first check the indicator light on the remote. If the indicator light turns blue when a button is pressed, try pairing again. If the indicator light turns red, replace the battery and then try pairing again.
After use, it is recommended to store the remote control in the seatback magazine pocket of the front seat.
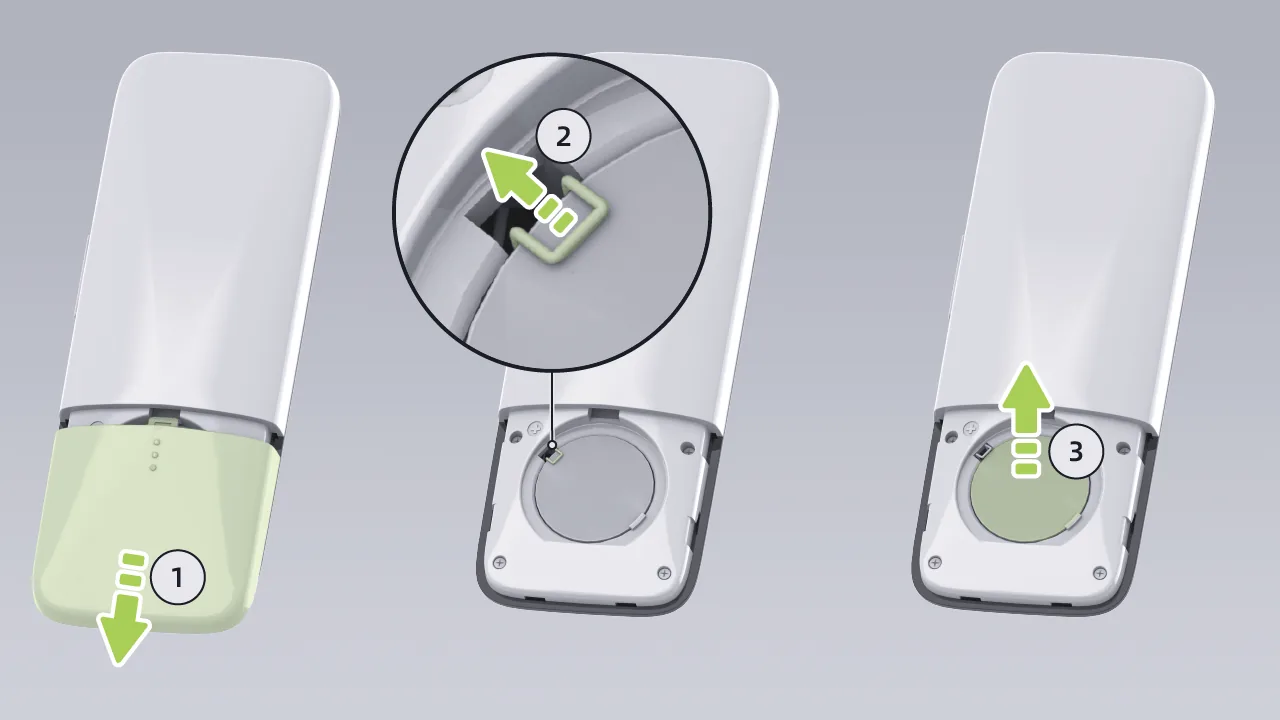
Push open the rear cover.
Release the retaining clip.
Remove the remote control battery. Battery model: CR2450.
Install in the reverse order. Before installation, wipe the battery surface clean; otherwise, fingerprints may affect the battery service life. During installation, the remote control battery (Positive terminal) facing upward.
 Caution
 Please dispose of used batteries properly. Improper disposal of used batteries can damage the environment.
Do not use sharp objects to disassemble the remote control, so as not to damage the remote control.
Warning Keep the battery out of reach of children, and if children ingest it, it could cause serious injury or death.
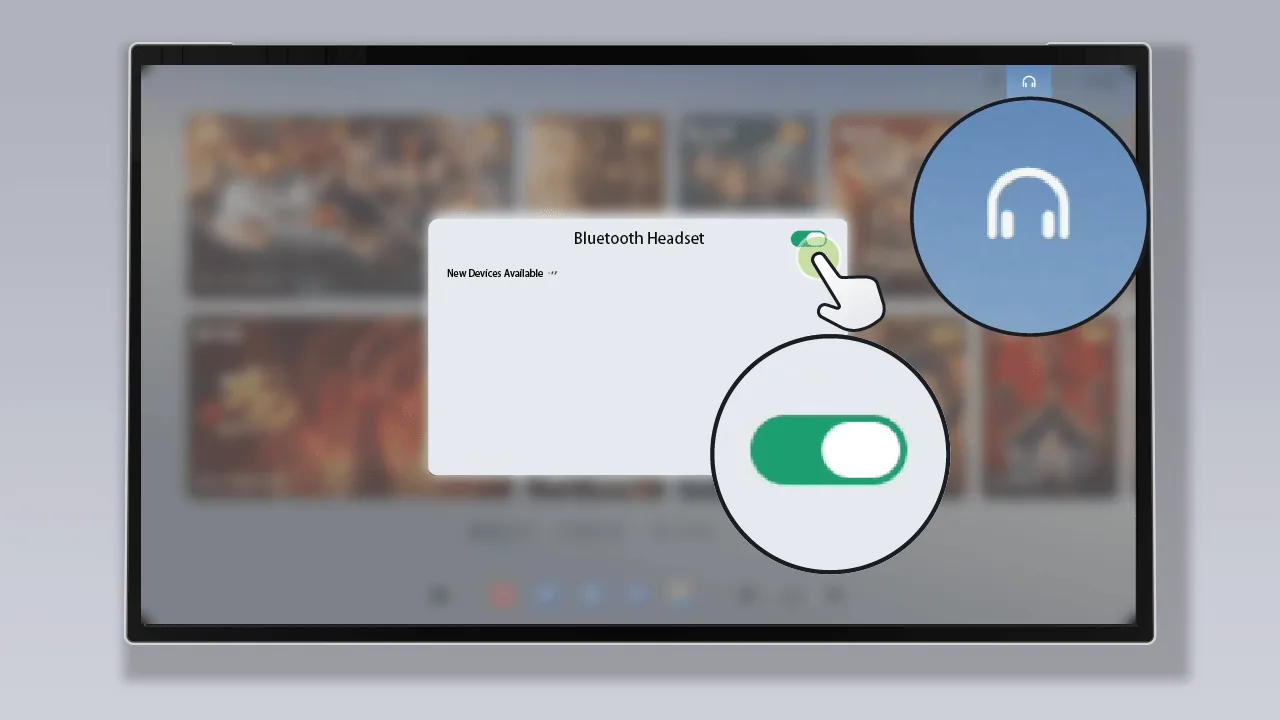
Tap in the entertainment screen status bar “  ”, open the bluetooth headset connection interface to turn the rear entertainment screen bluetooth on or off.
You can connect by following these steps:
Tap in the status bar on the entertainment screen. “ ”, open the Bluetooth headset connection interface, and enable the rear entertainment screen Bluetooth.
Enable the pairing mode of the Bluetooth headset according to the Bluetooth headset manufacturer's instructions, and the system will automatically scan and search for nearby available devices.
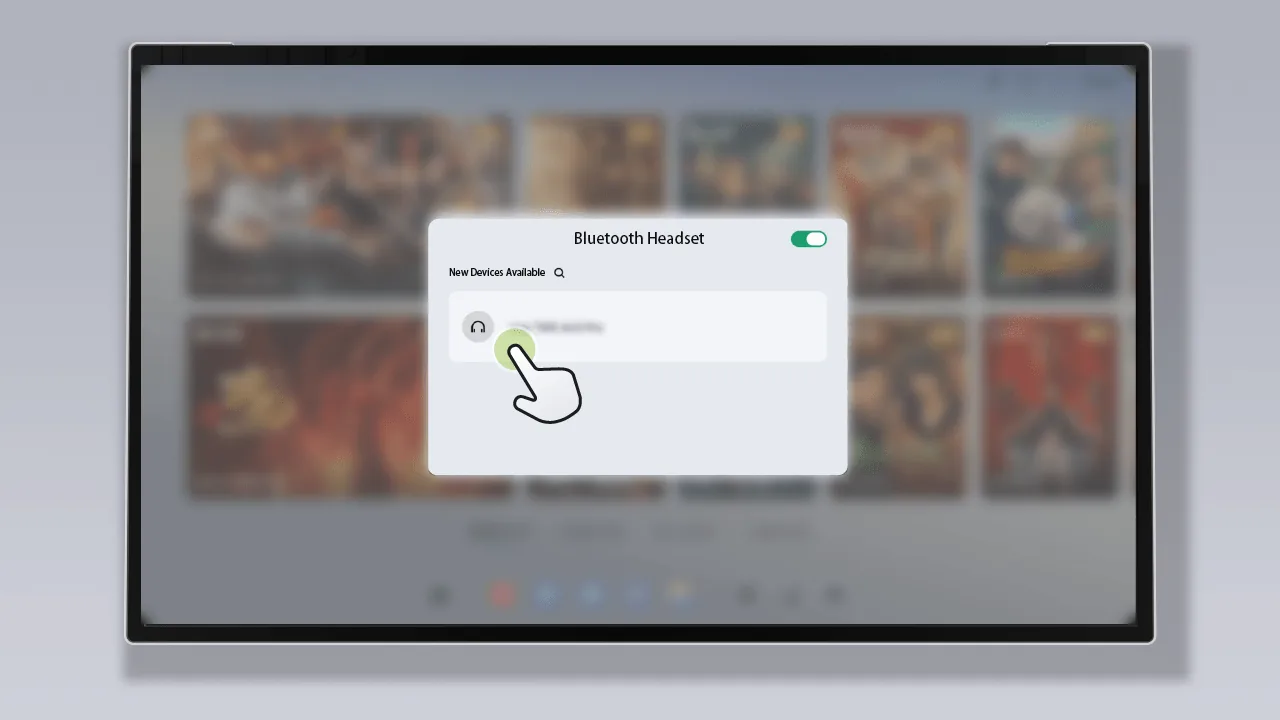
Available new devices found are displayed on the bluetooth headset connection screen. Select the name of the bluetooth headset to be paired from the list of available new devices, and the device will automatically complete pairing and connection.
If the bluetooth headset cannot be found, tap the **[Search]** icon later to search again for available new bluetooth devices.
The rear entertainment screen can connect to Bluetooth headphones. After the connection is successful, the sound played in the rear row will be output through the Bluetooth headphones.
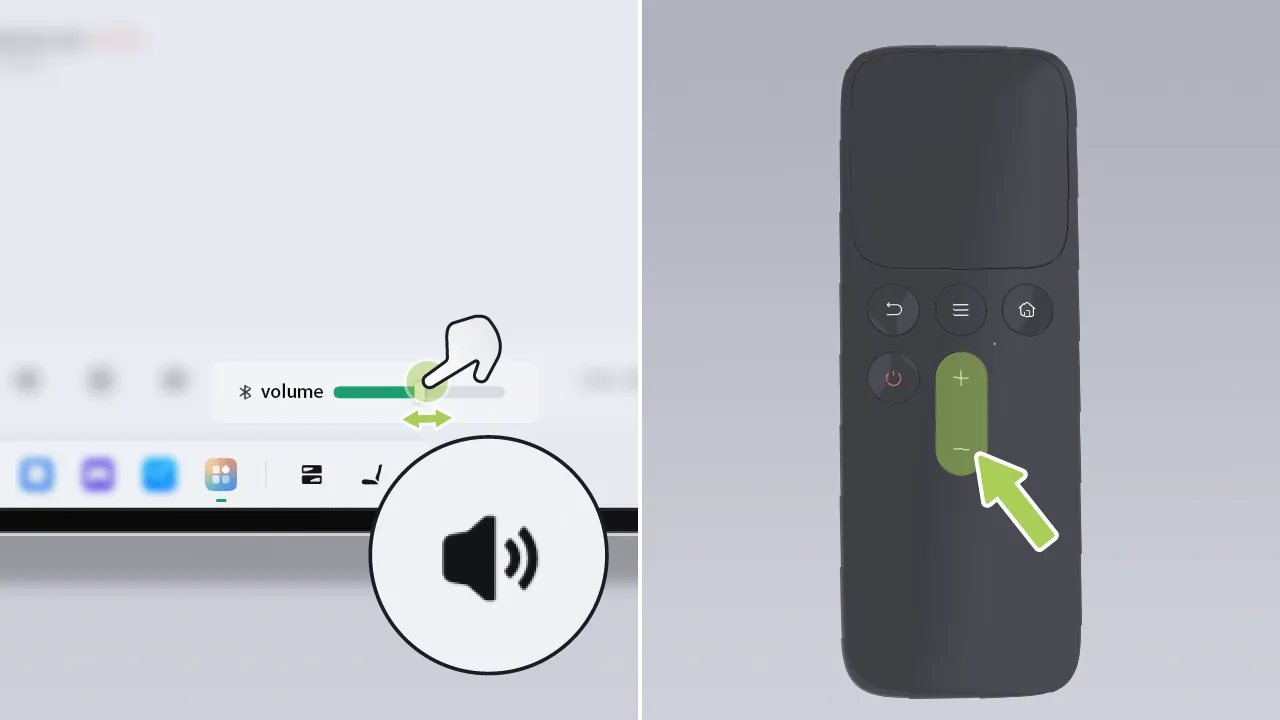
Tap the volume icon in the bottom taskbar of the rear entertainment screen to adjust the volume.
After the vehicle entertainment screen remote control is successfully connected to the vehicle, press the volume button on the remote control to adjust the volume.
After the Bluetooth headset is paired with the vehicle Bluetooth and connected successfully, you can disconnect the Bluetooth headset by following the steps below:
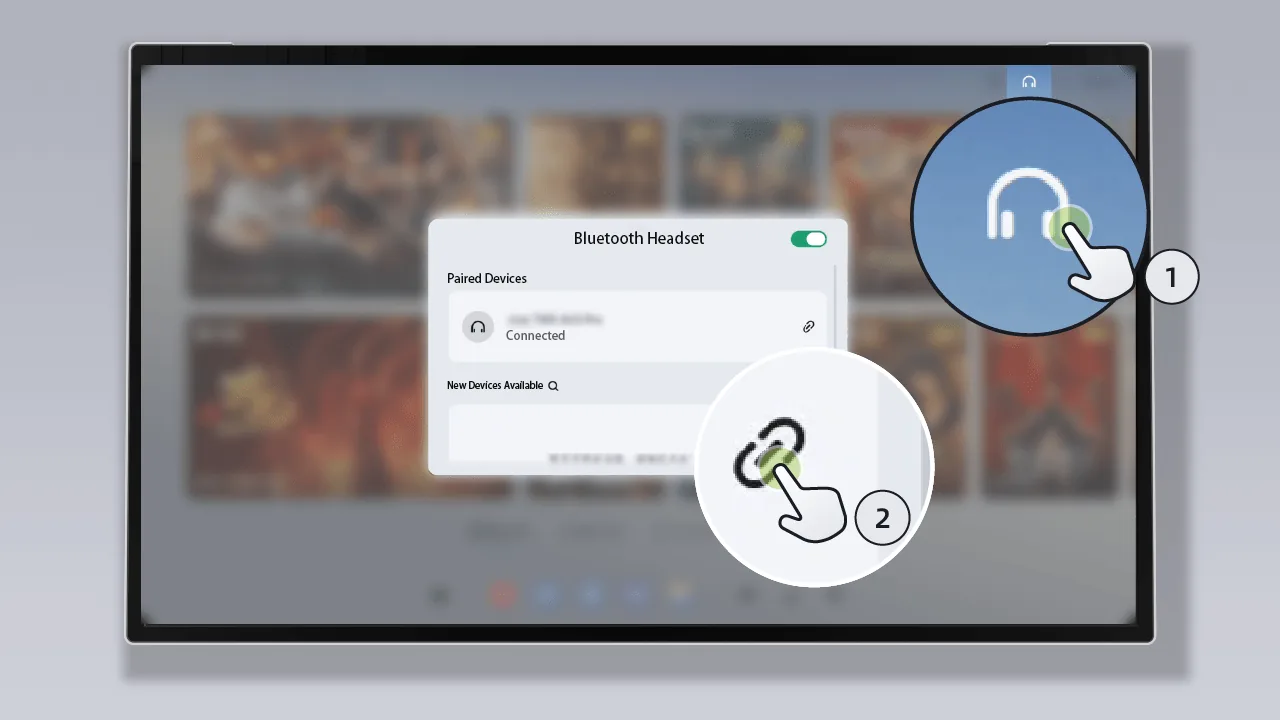
Tap on the entertainment screen status bar “ ”, open the Bluetooth headset connection screen.
Select the Bluetooth headset name in the paired device list and tap Disconnect to automatically disconnect from the device.
Bluetooth pairing can be canceled by following these steps:
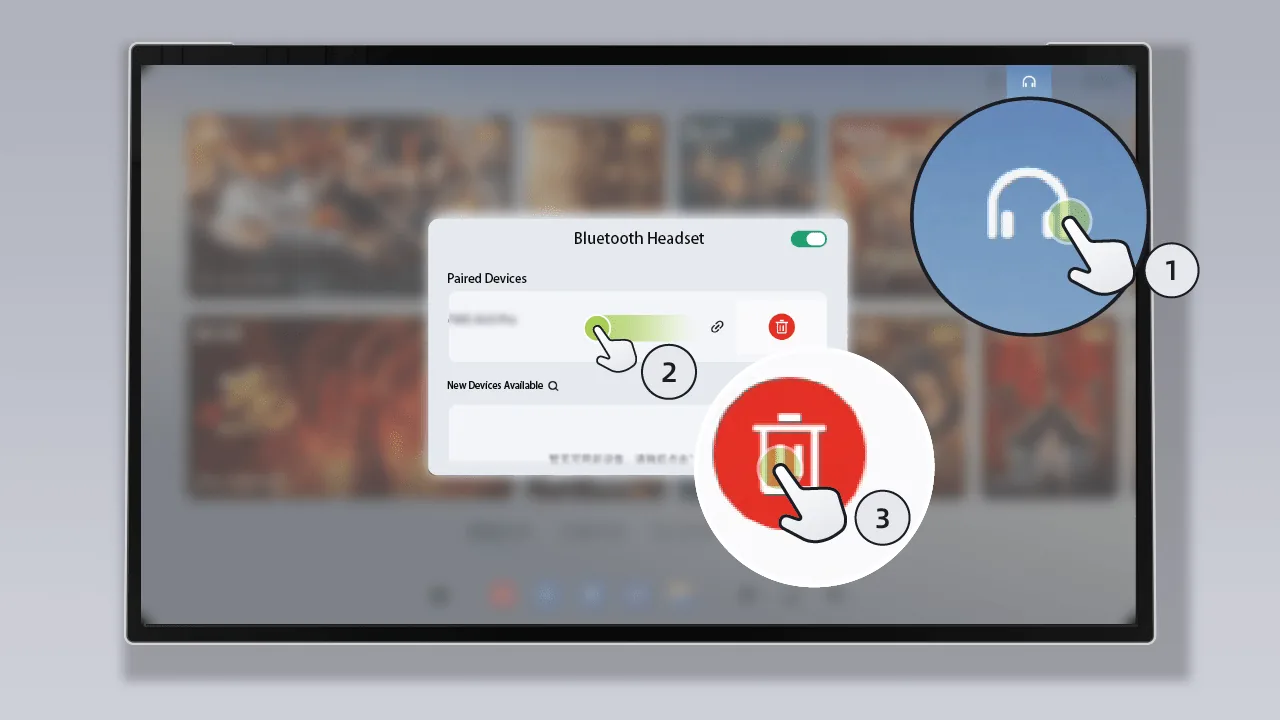
Tap in the entertainment screen status bar. “ ”, open the Bluetooth headset connection screen.
Swipe left on the name of the Bluetooth headset to be unpaired in the list of paired devices.
Tap Delete to remove the device.
The HUD system (AR-HUD) projects the information required by the driver onto the windshield, allowing the driver to view information such as navigation, speed limit signs, and vehicle speed without taking their eyes off the road.
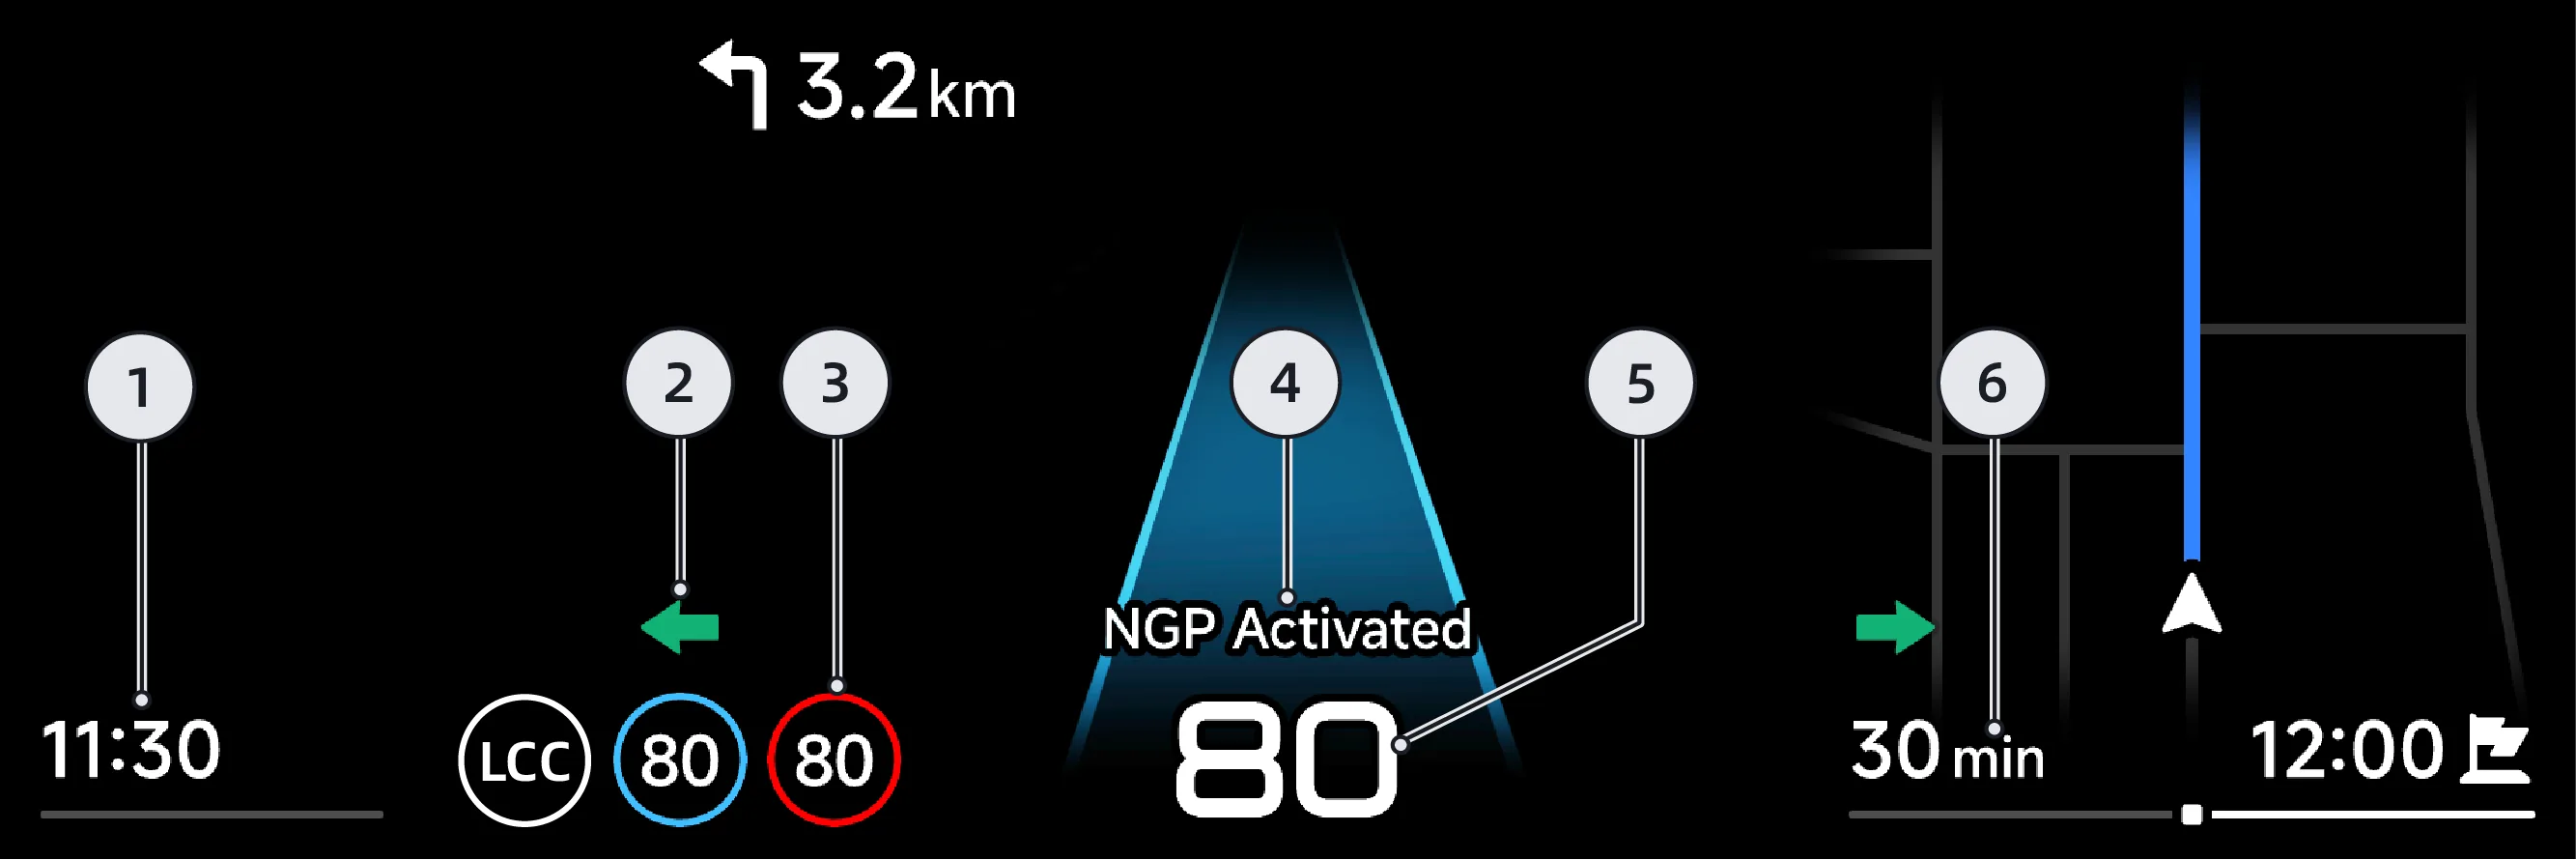
Time, battery level, fuel level*, total driving range, Air Conditioner fan speed and temperature adjustment, switching driving modes, and other vehicle information
Turn Signal
Driving assistance function indicator lights (e.g., assisted driving activated indicator light, speed limit sign speed limit indicator light, etc.)
Prompts and Warning Information (displays various prompt and warning information related to vehicle driving)
Vehicle Speed or Gear Position
Navigation Information
The HUD head-up display can be turned on/off in the following ways:
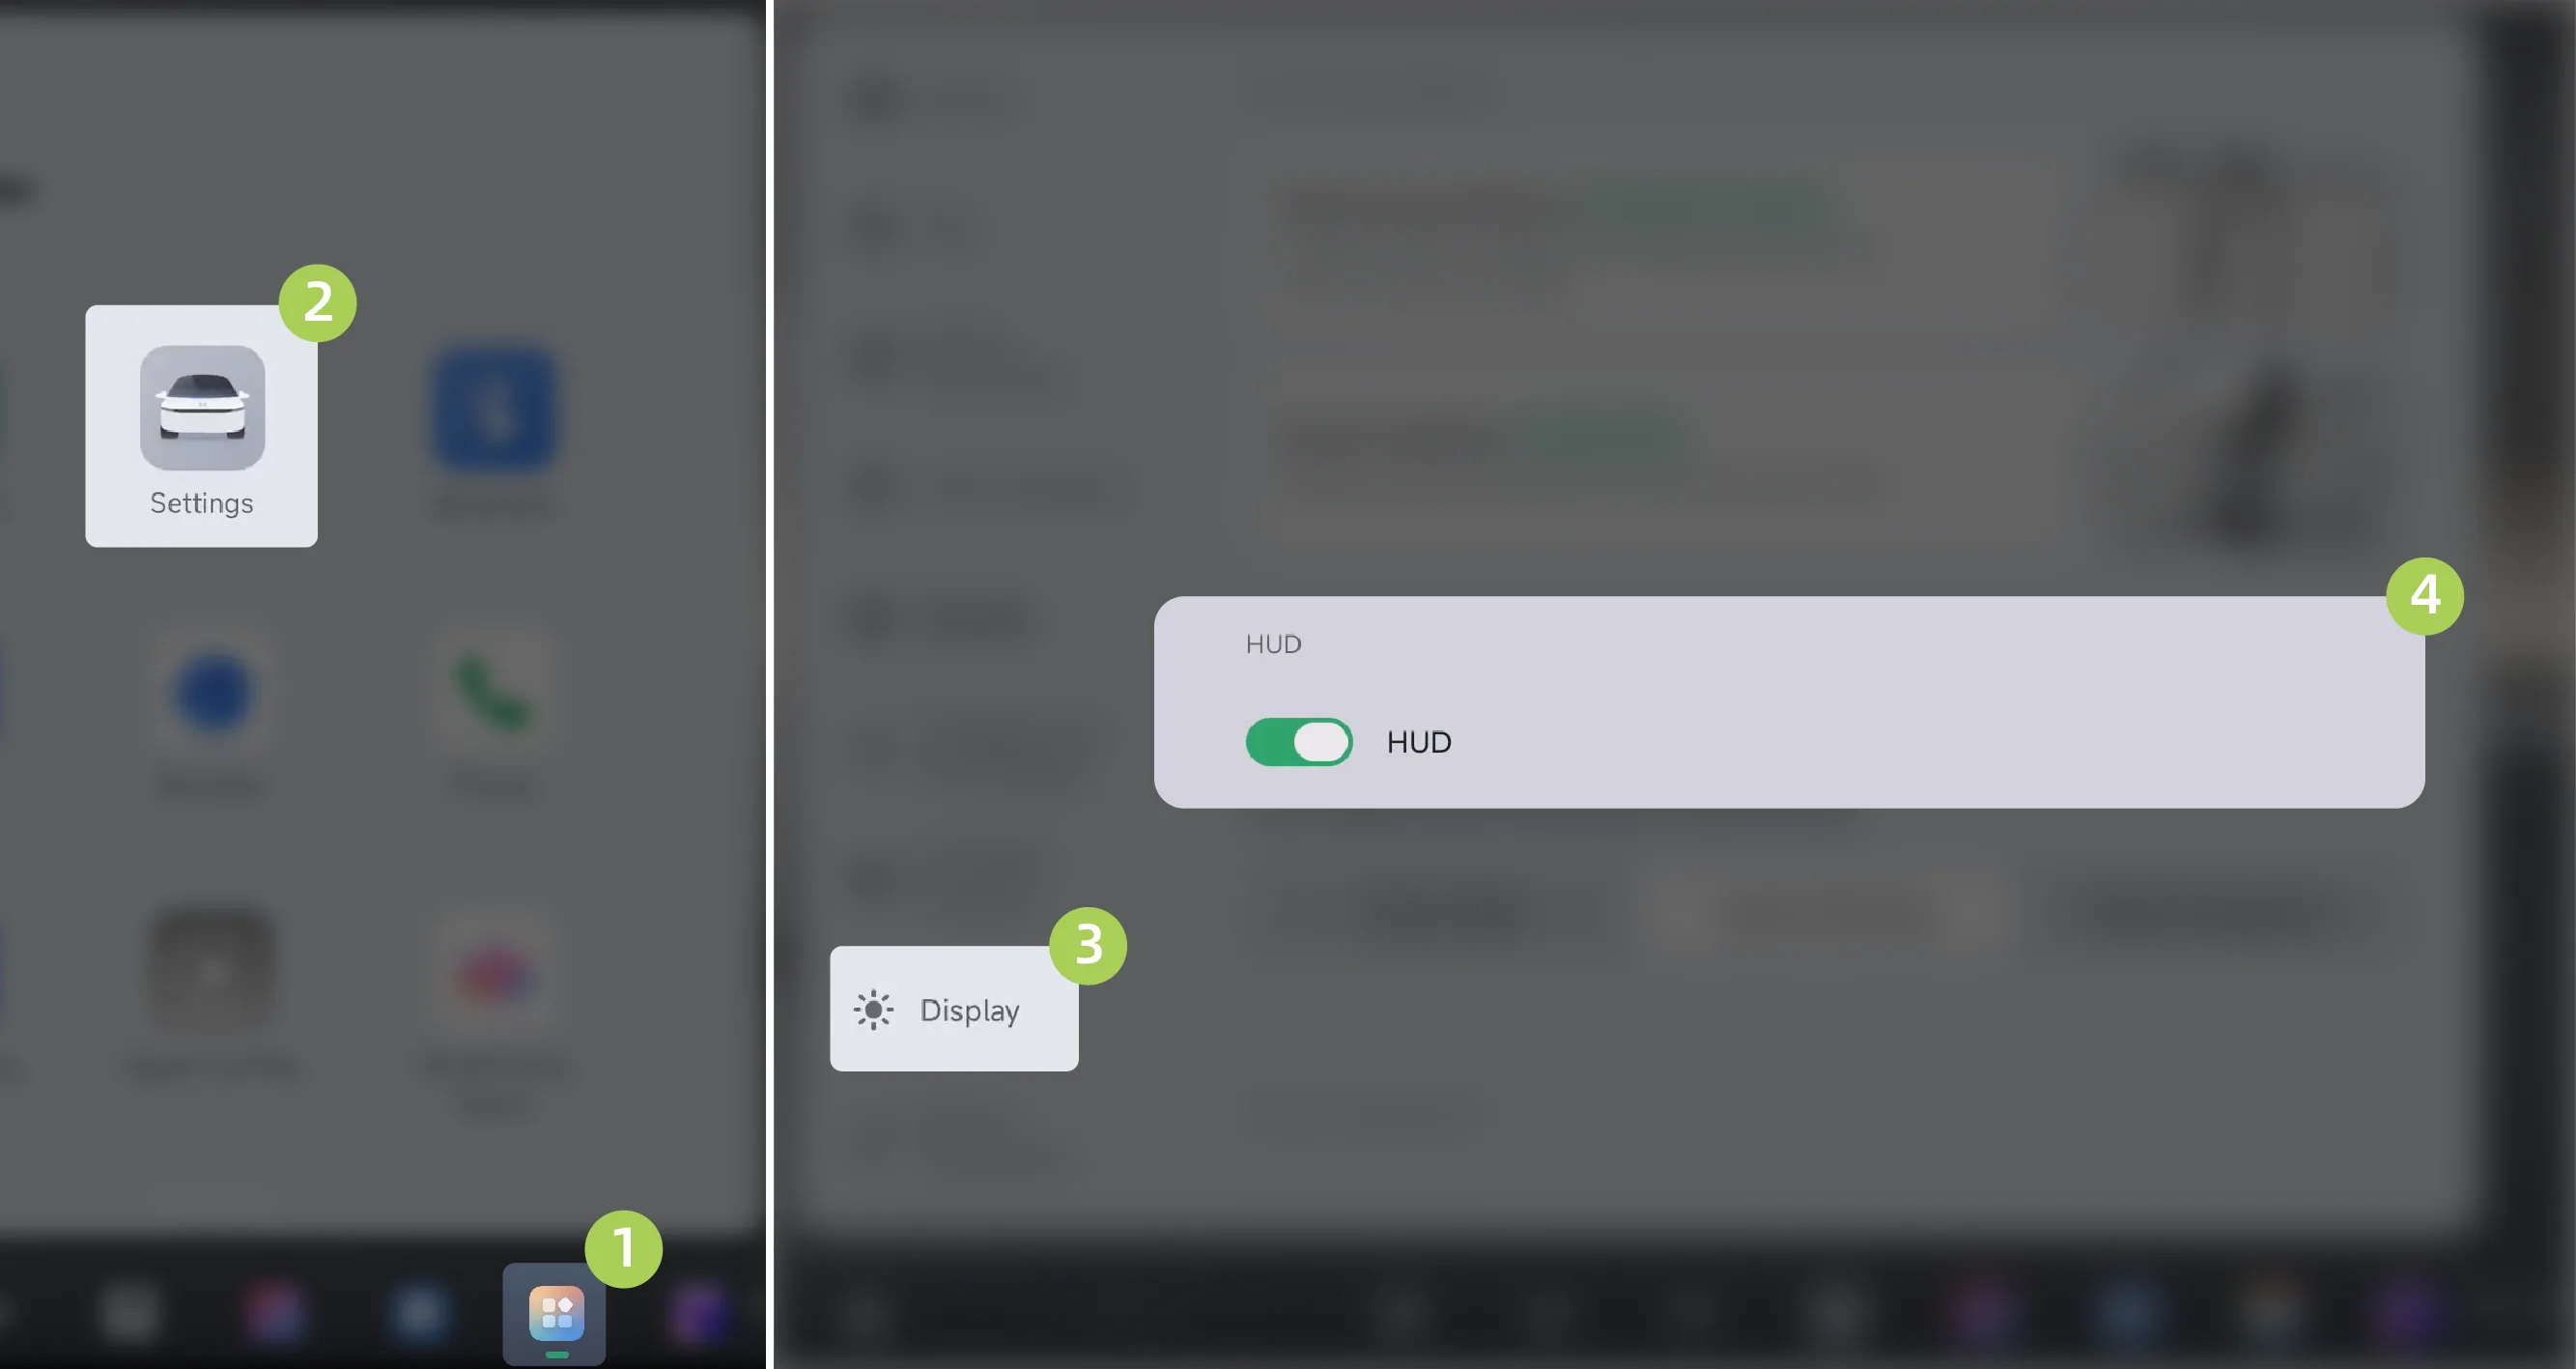
On the center control screen “ →Settings→Display”Interface, where you can turn the HUD head-up display on/off. After the function is turned off, the HUD does not project any content.
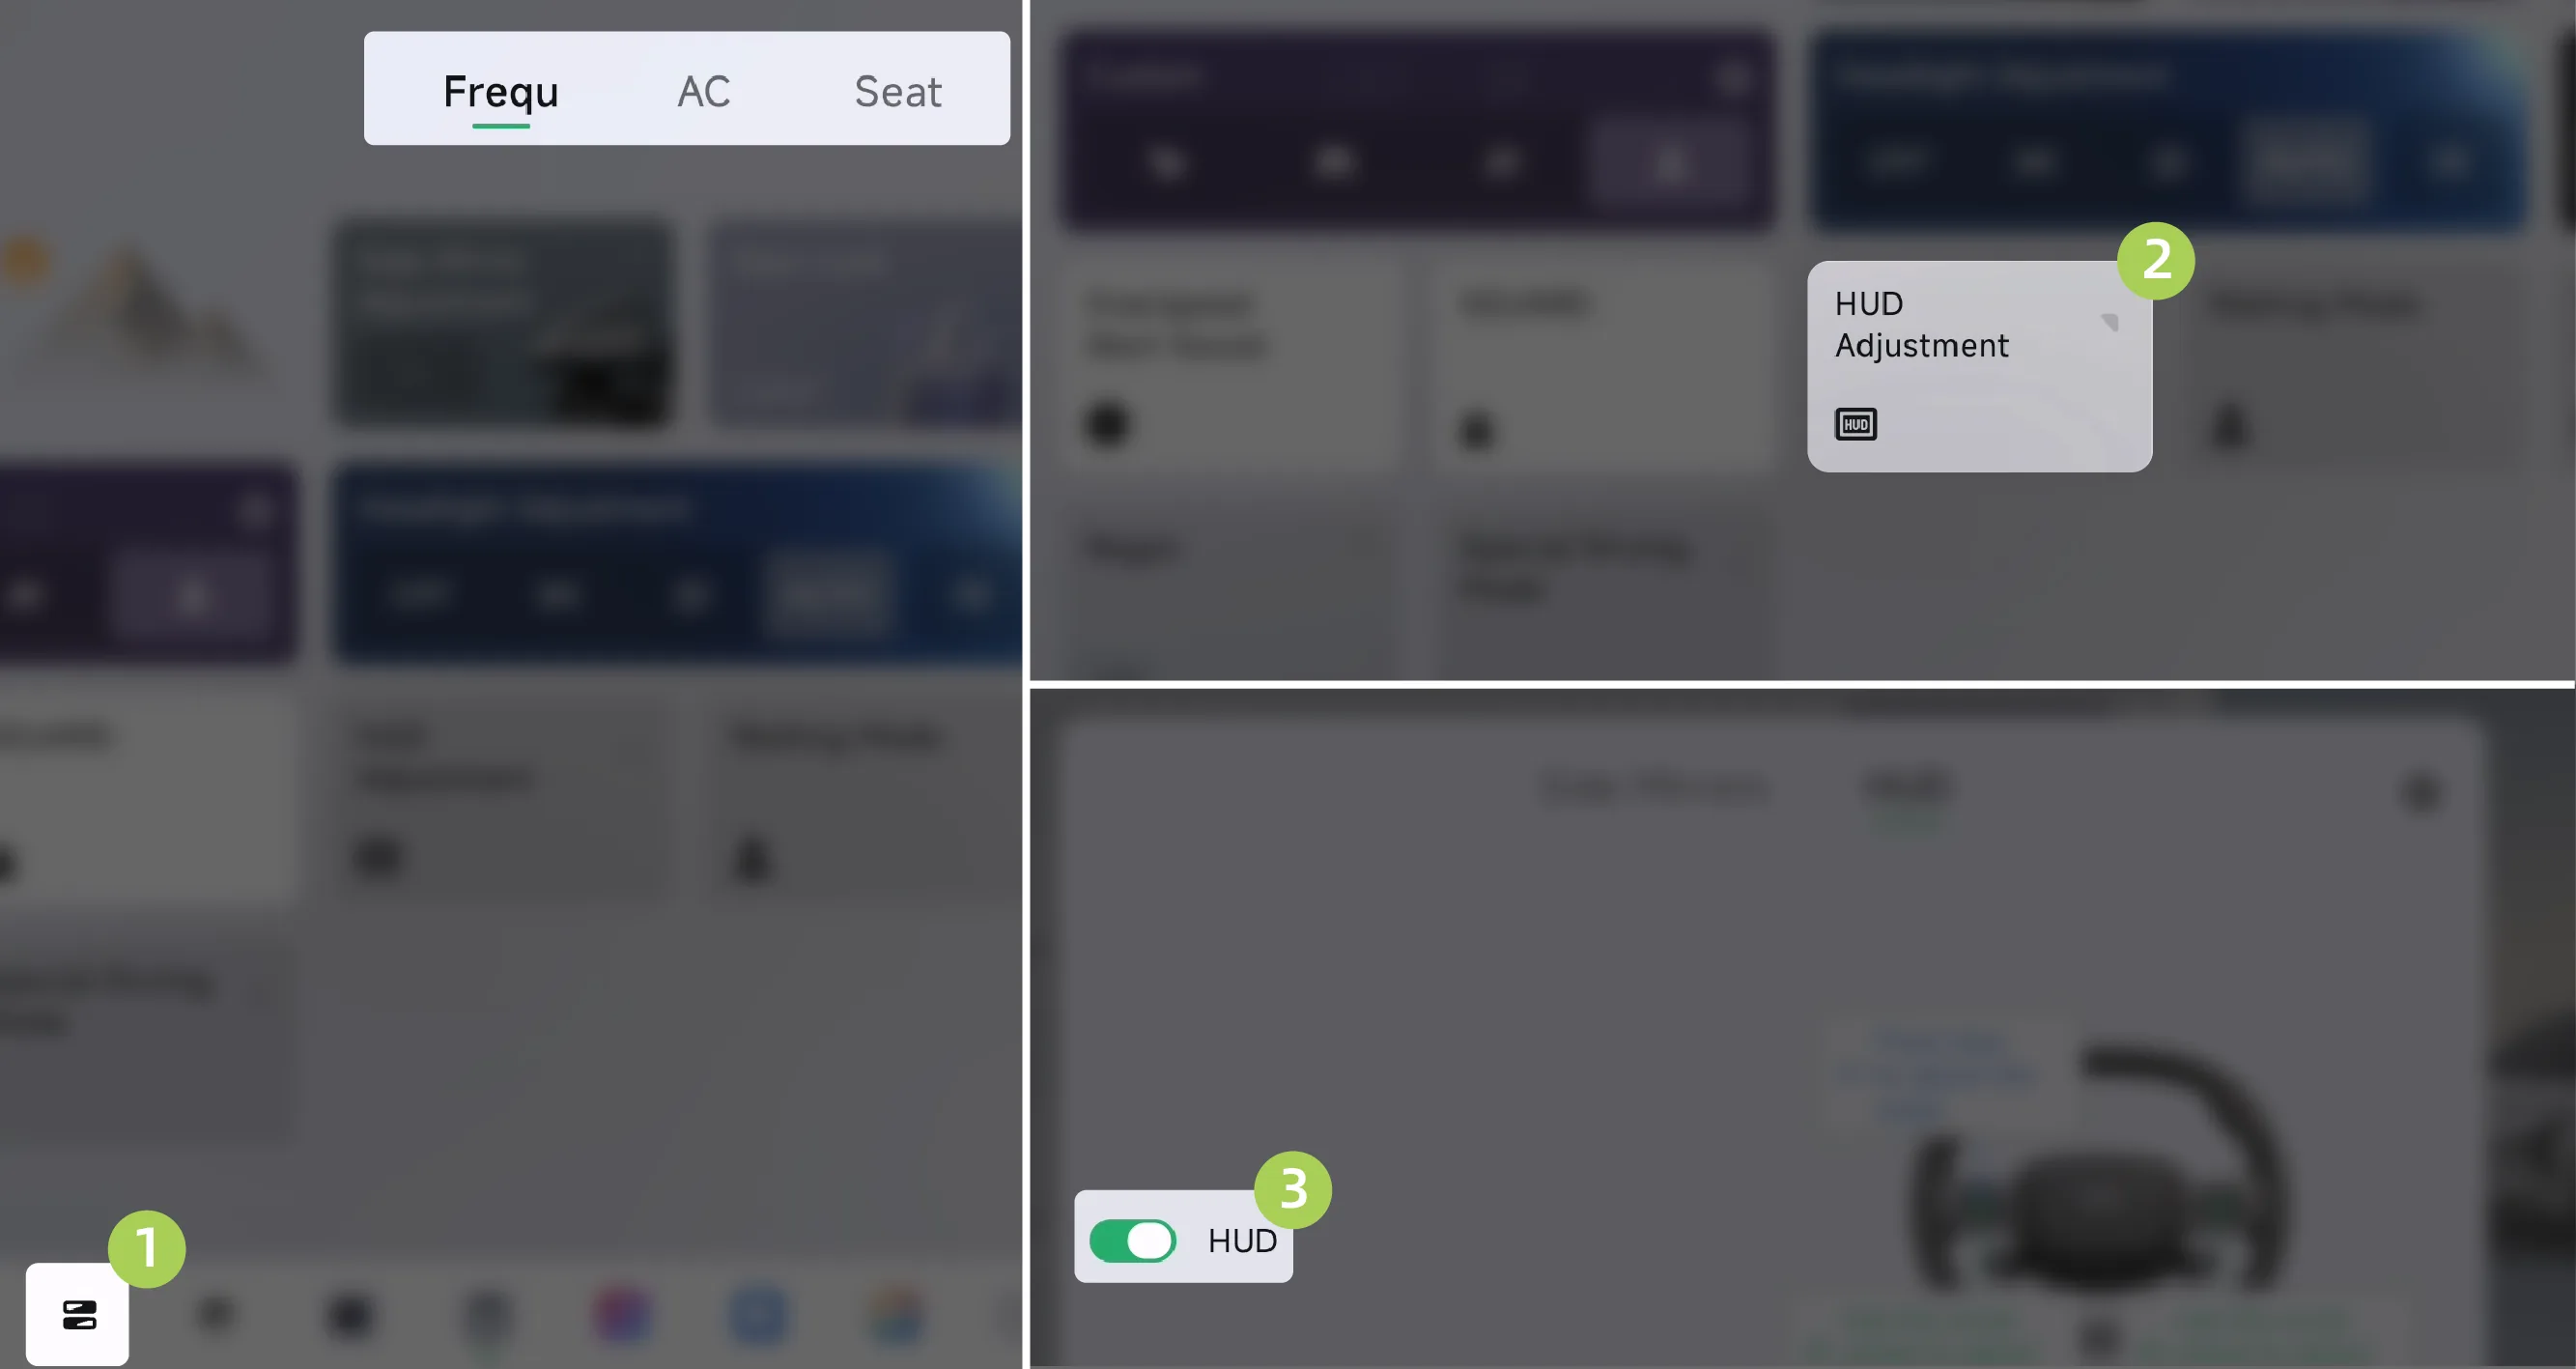
Tap on the center display. “ →HUD adjustment”Enter the HUD screen to turn the HUD on/off. After the function is turned off, the HUD does not project any content. (To learn about custom Control Center, please refer to the custom Control Center section).
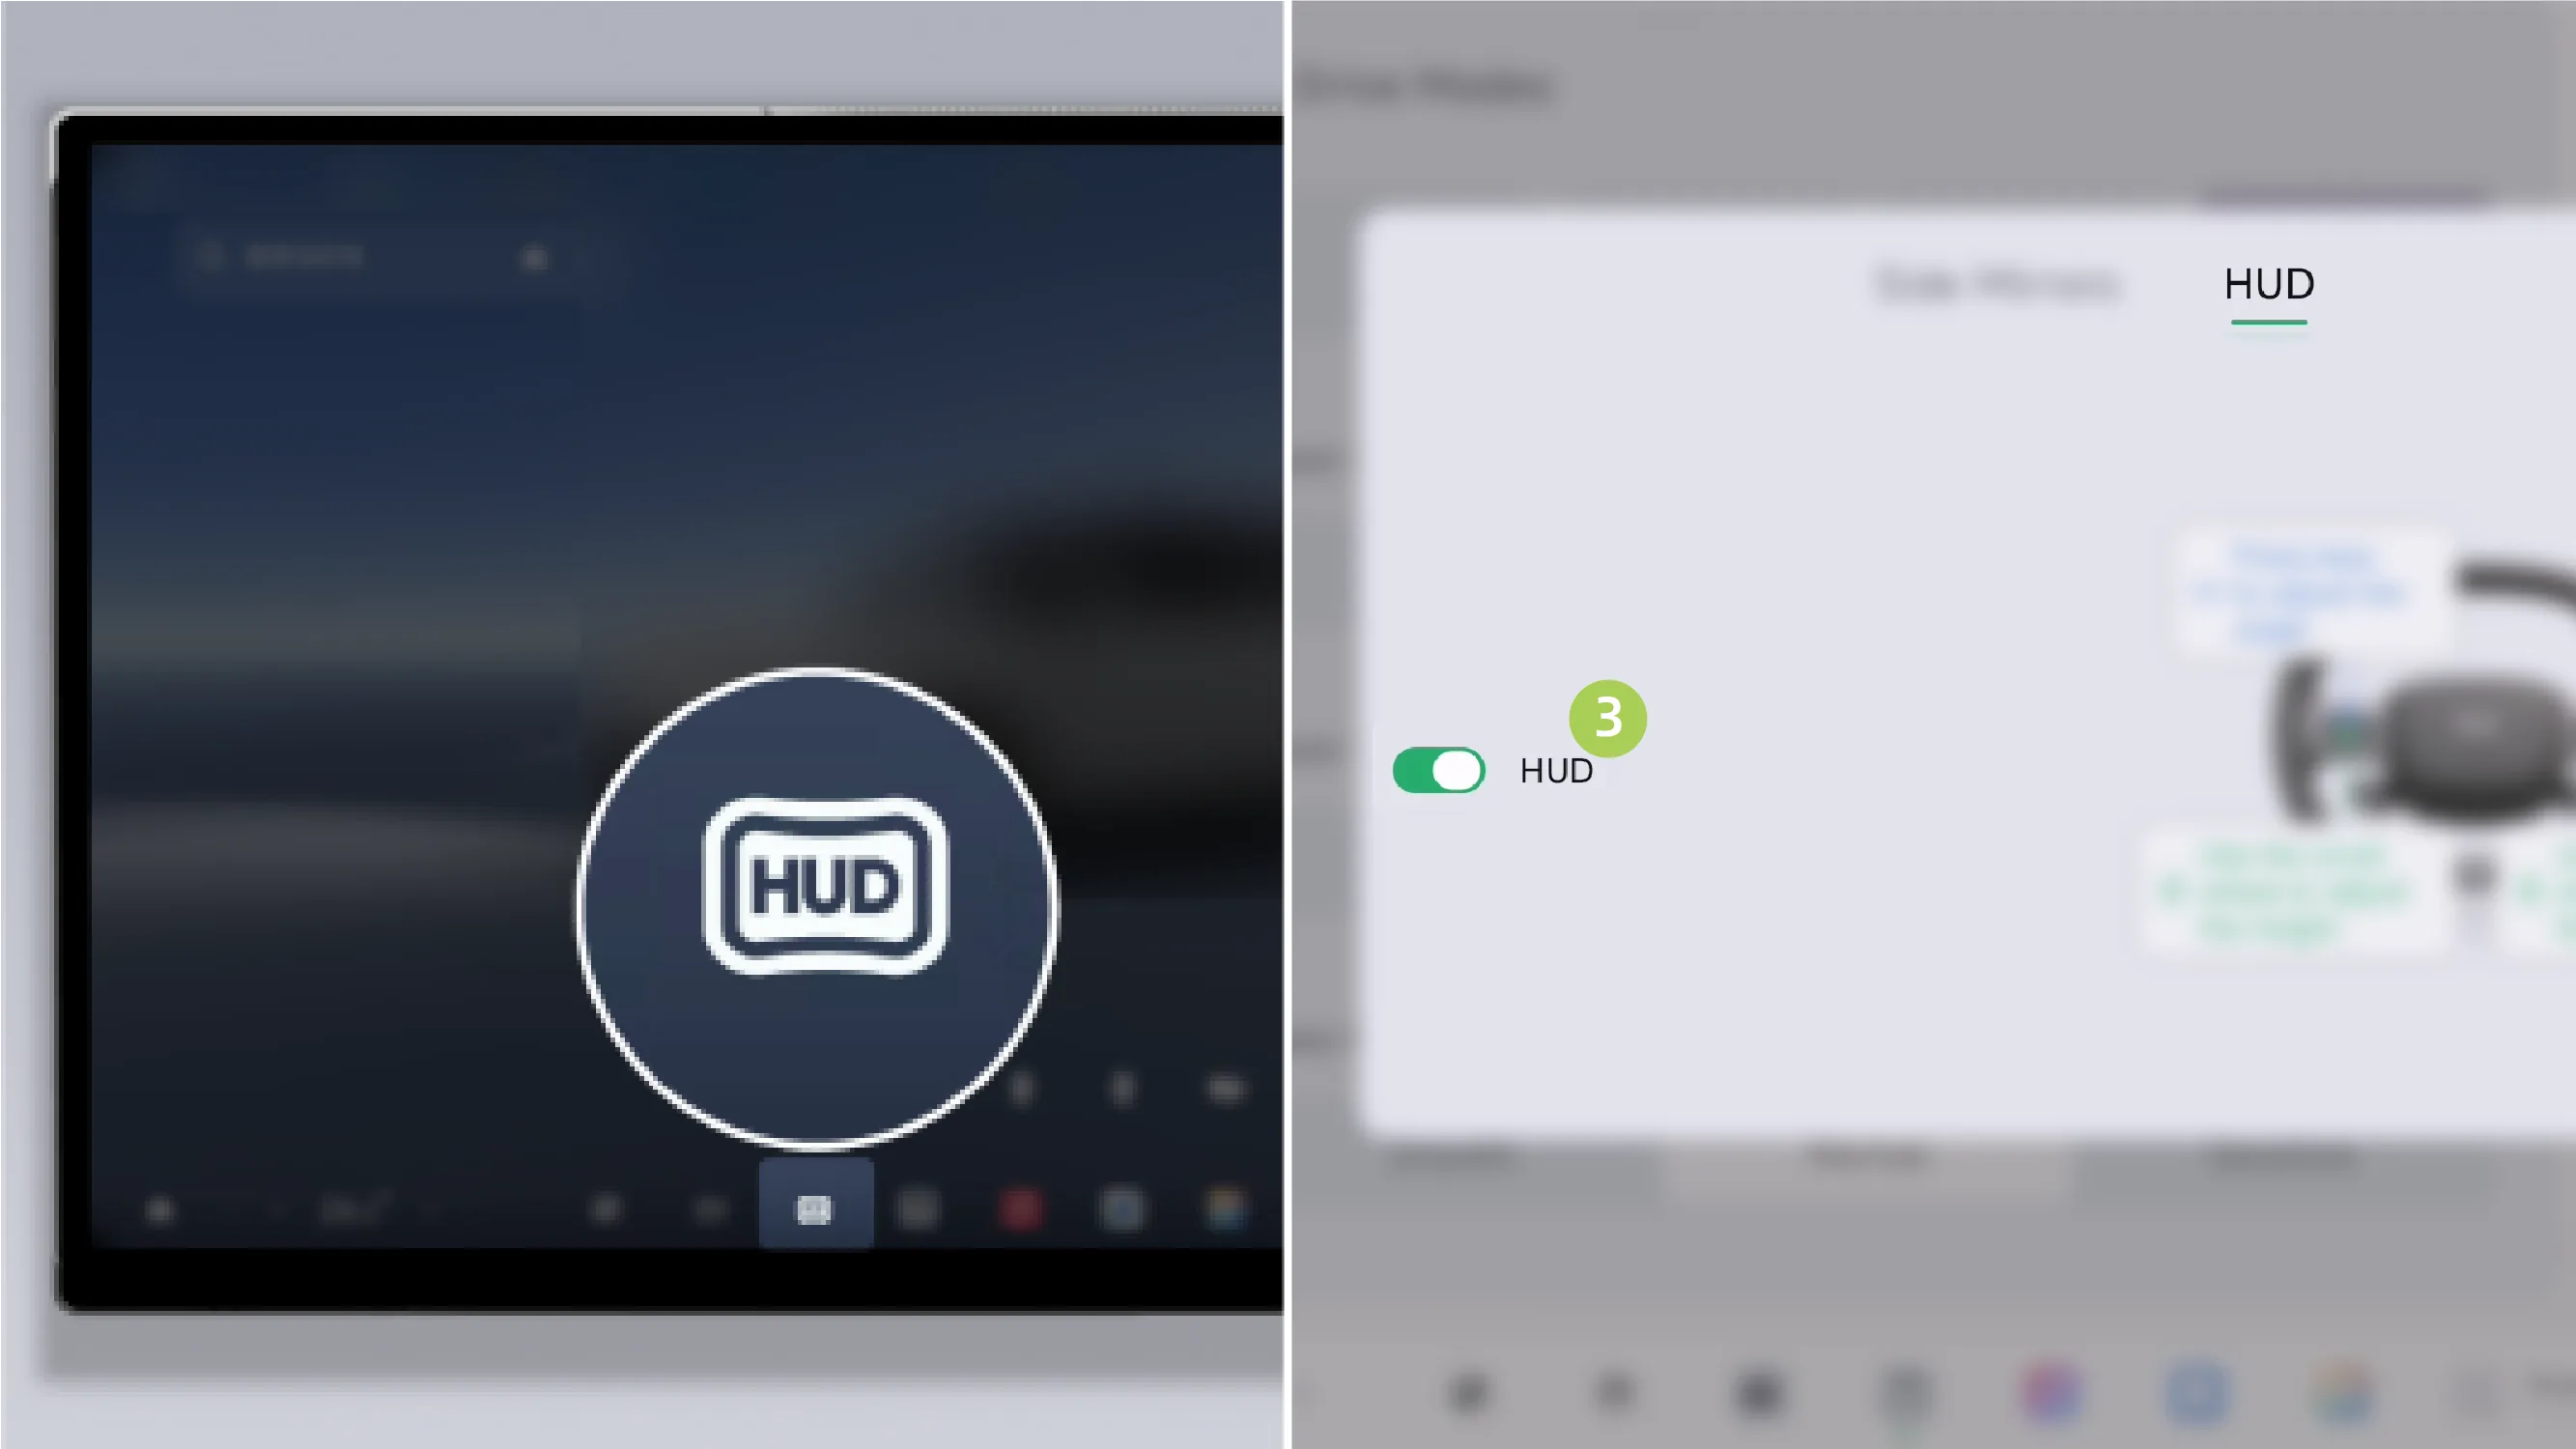
Customize the bottom taskbar through the central control screen, which will  The HUD adjustment icon is added to the bottom taskbar. Tap in the bottom taskbar. Tap the HUD adjustment icon to enter the HUD adjustment interface, where you can turn the HUD on/off. After the function is turned off, the HUD does not project any content (for information about the custom bottom taskbar, please refer to the custom bottom taskbar section).
You can enter the HUD adjustment interface in the following way:
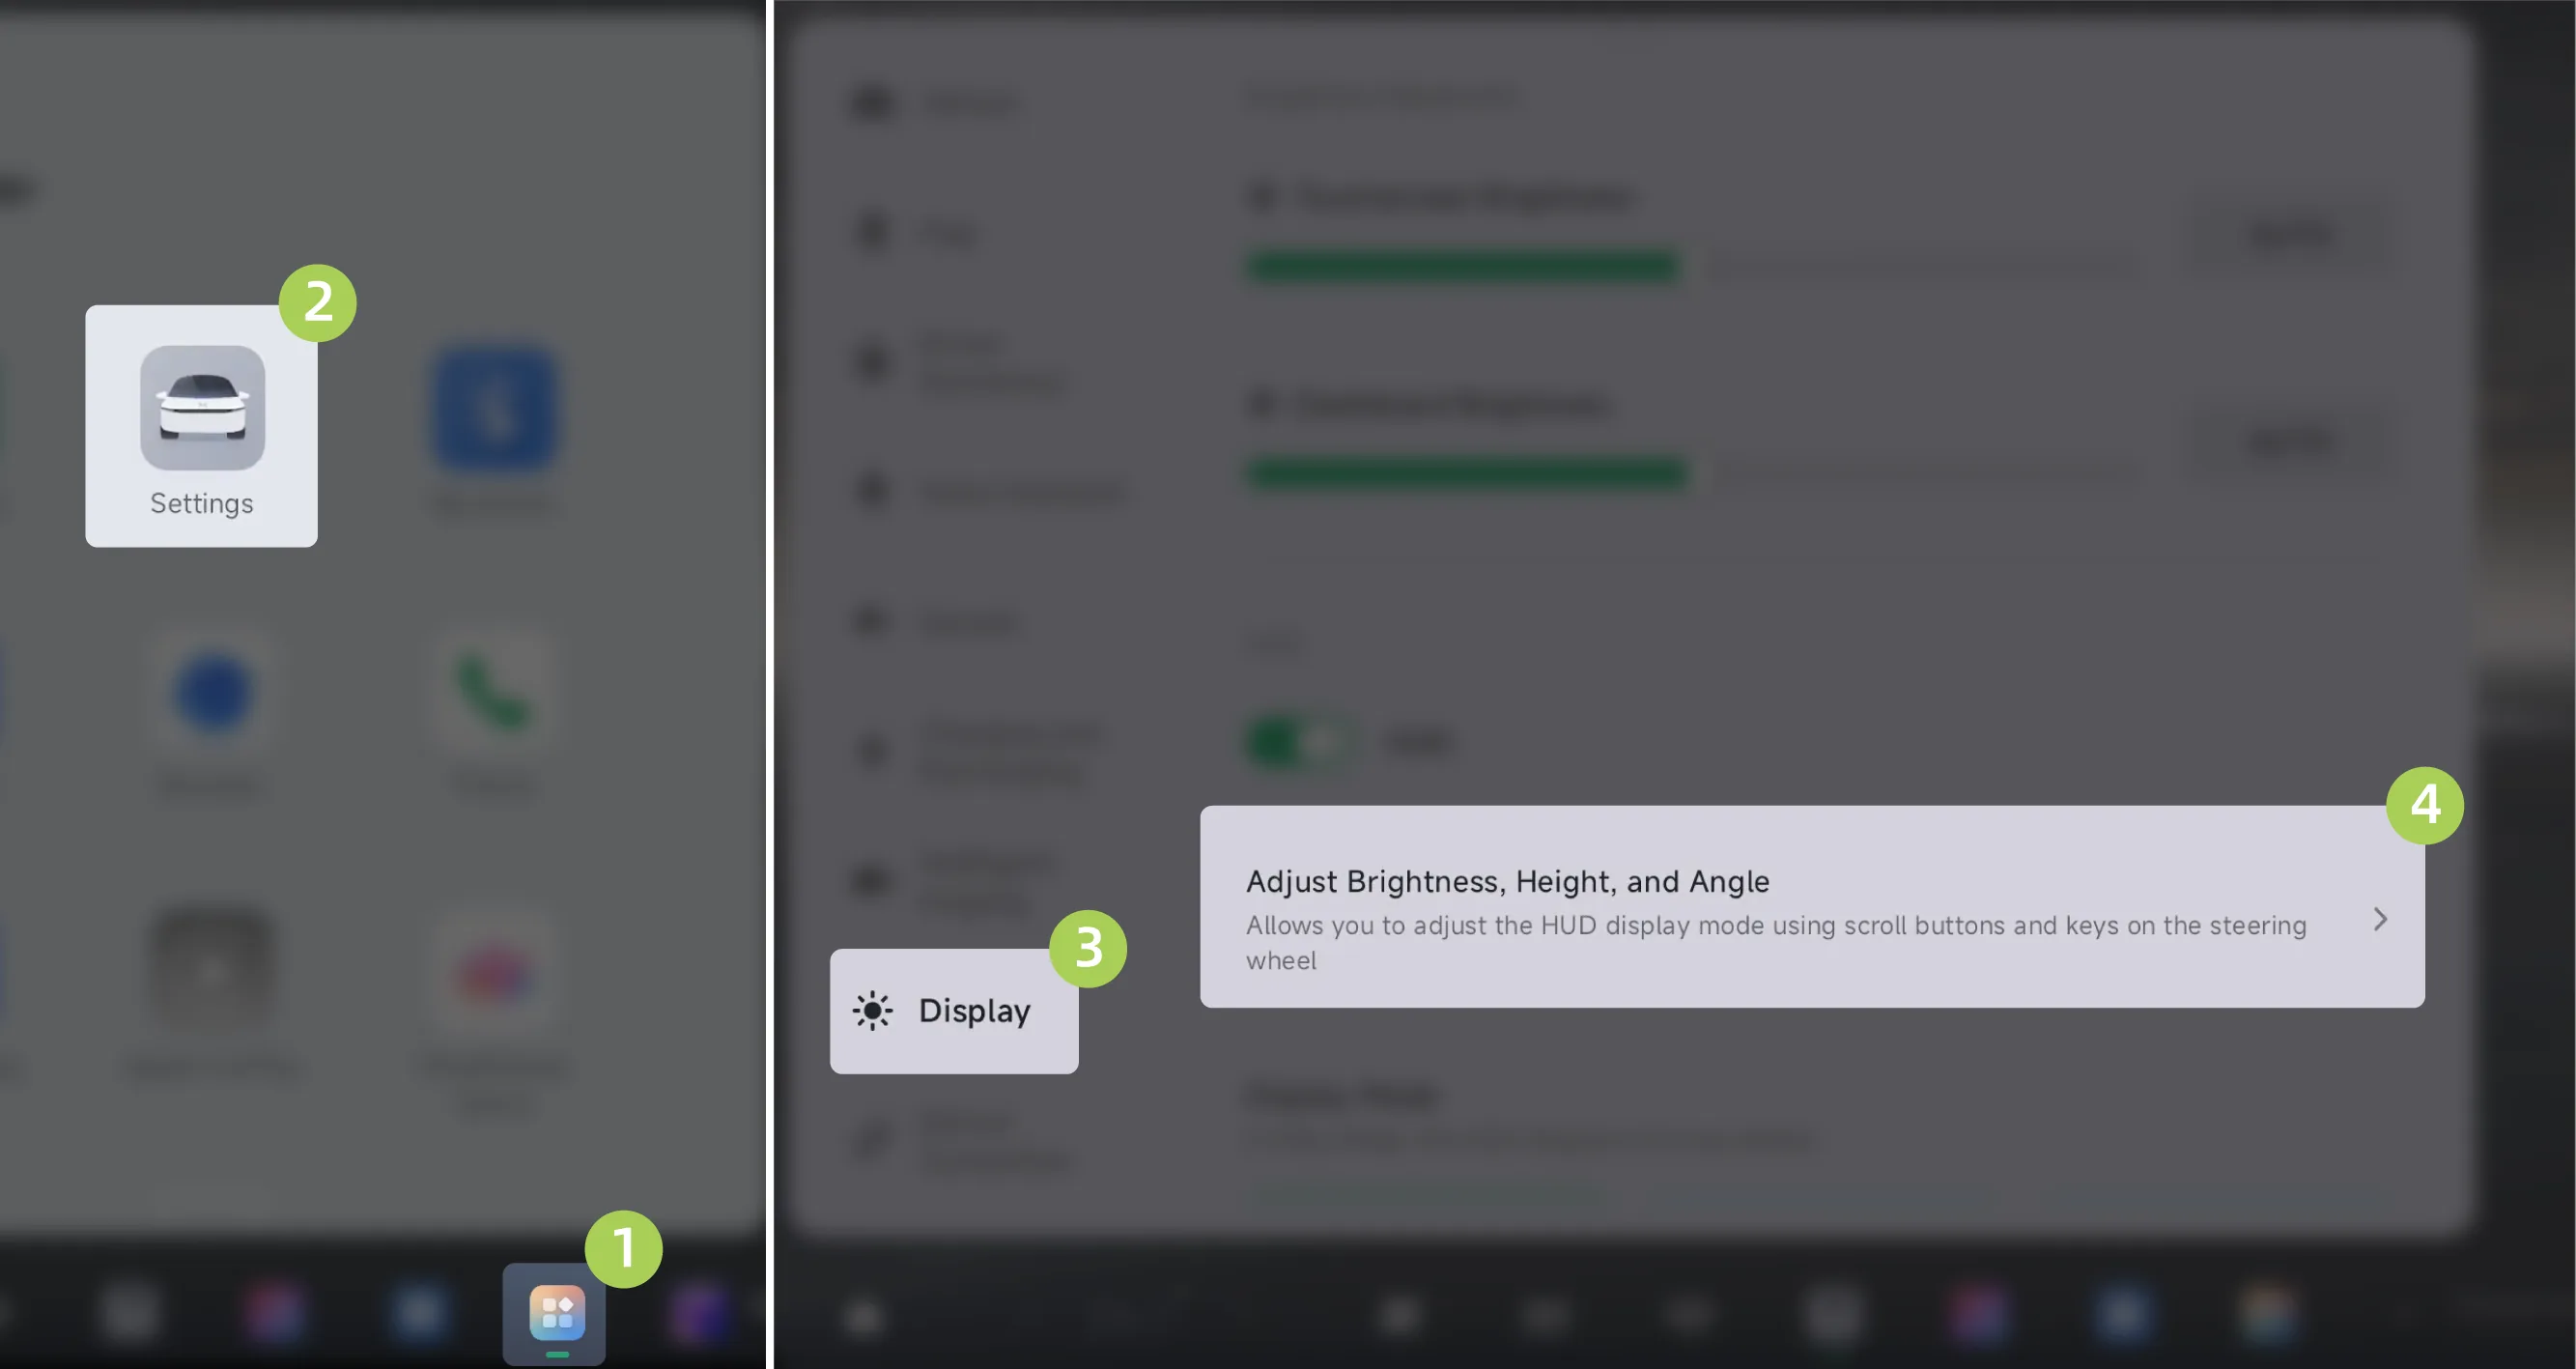
After correctly adjusting the seat position, on the central control screen “ →Settings→Display”Interface, enter the brightness, height, and angle adjustment interface.
Tap on the center display screen. “ →HUD adjustment”Enter the HUD adjustment interface. (To learn about the custom Control Center, refer to the custom Control Center section).
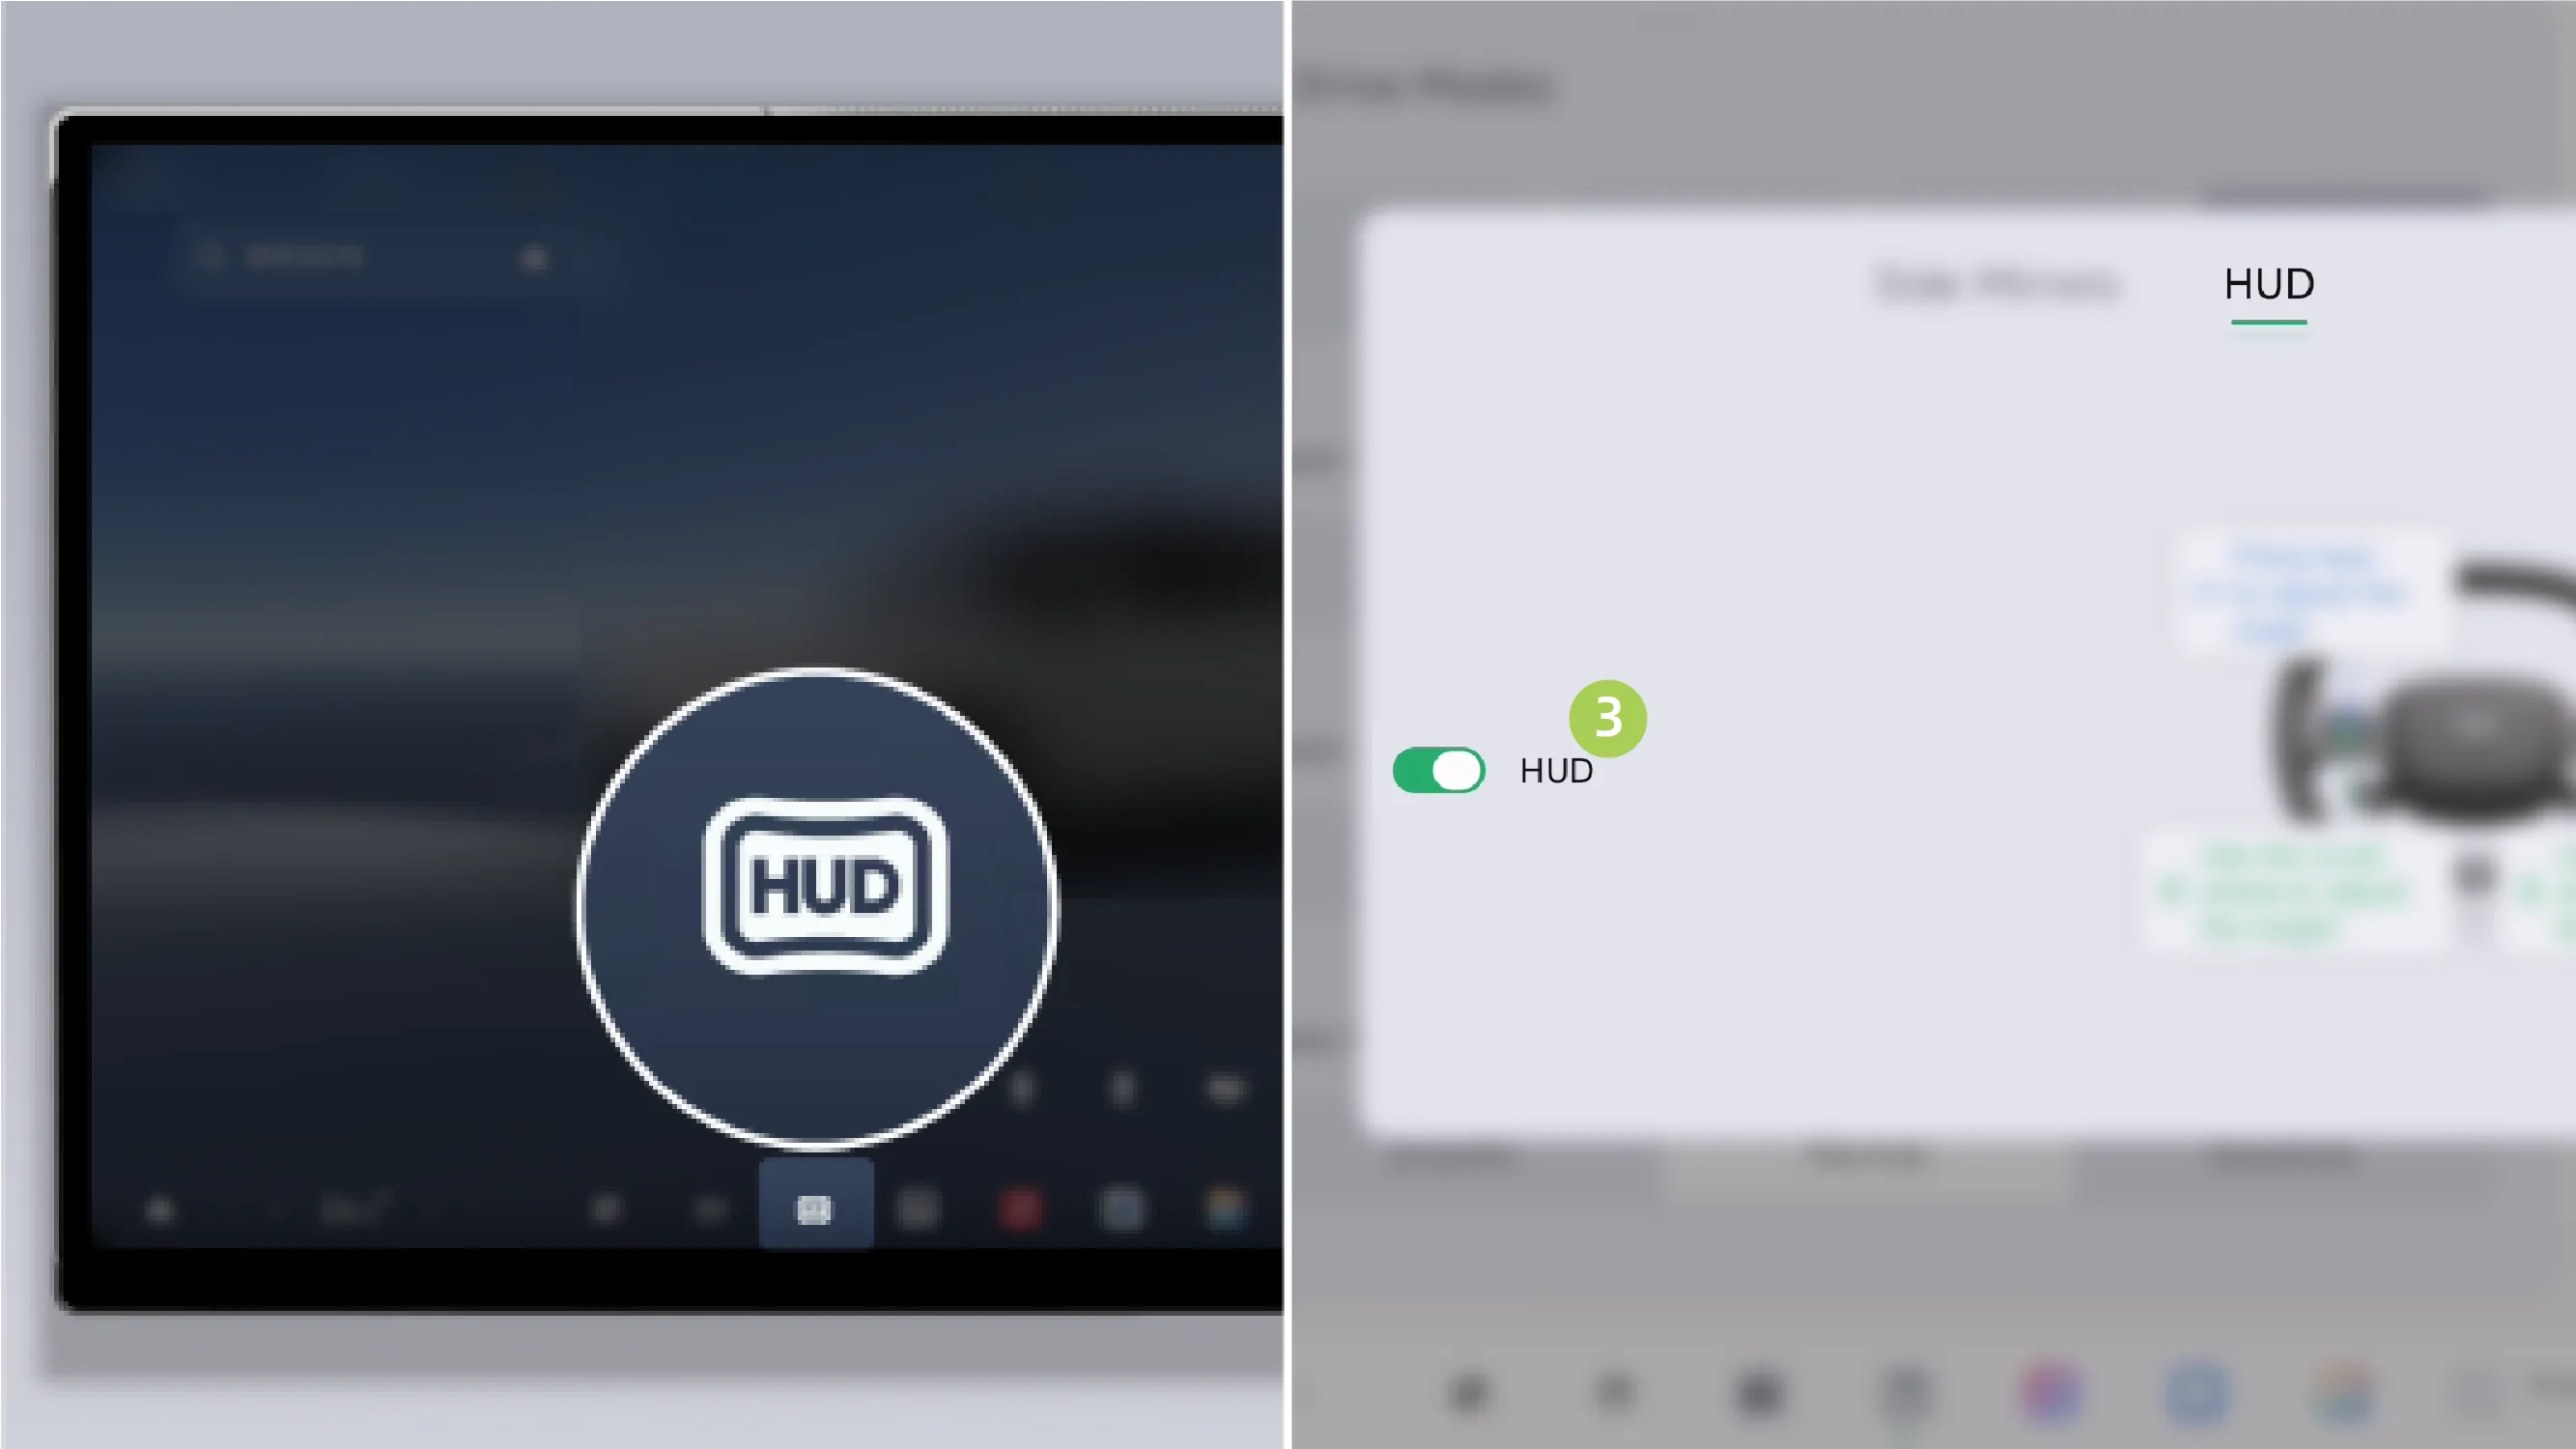
Customize the bottom taskbar through the center control screen, which will The HUD adjustment icon is added to the bottom taskbar. Tap in the bottom taskbar. Tap the HUD adjustment icon to enter the HUD adjustment screen (for information about the custom bottom taskbar, refer to the custom bottom taskbar section).
After waking up XPENG, say your command, for example: “Adjust the HUD height.”
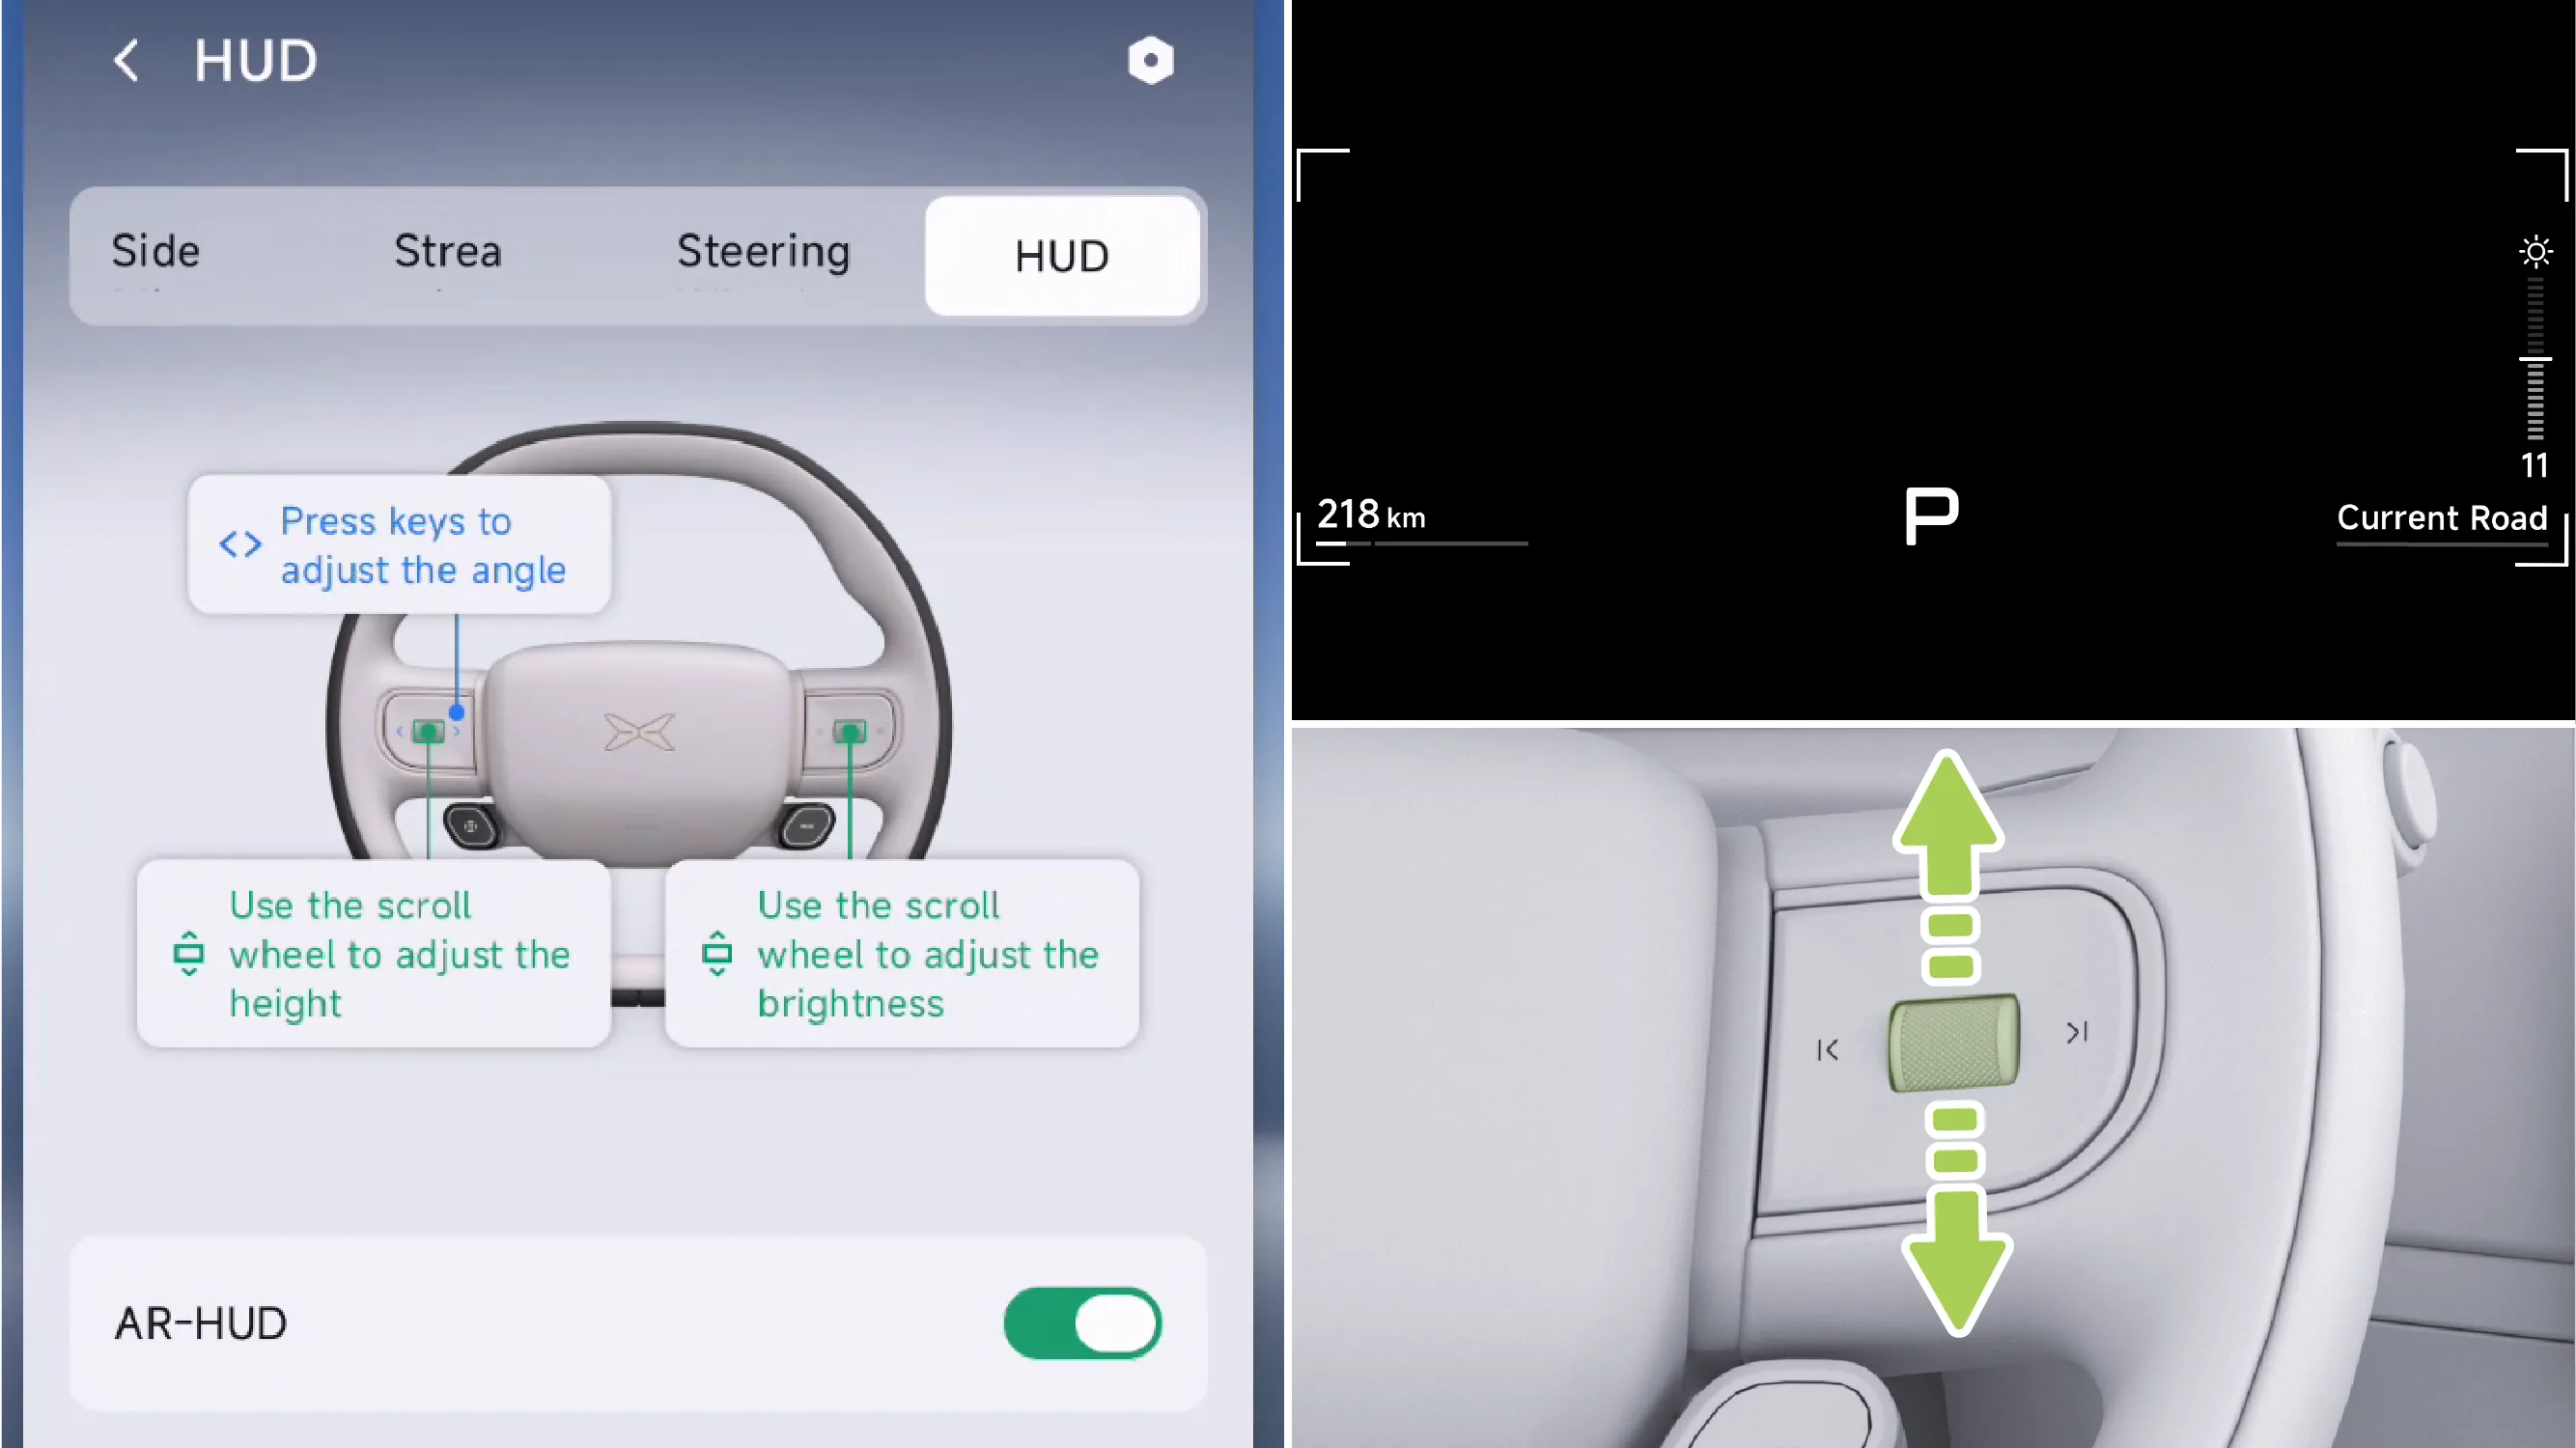
After entering the HUD adjustment interface, scroll the right-side roller on the steering wheel to adjust the brightness of the HUD interface.
Brighten:Scroll the roller on the right side of the steering wheel upward.
Dim: Scroll down the roller on the right side of the steering wheel.
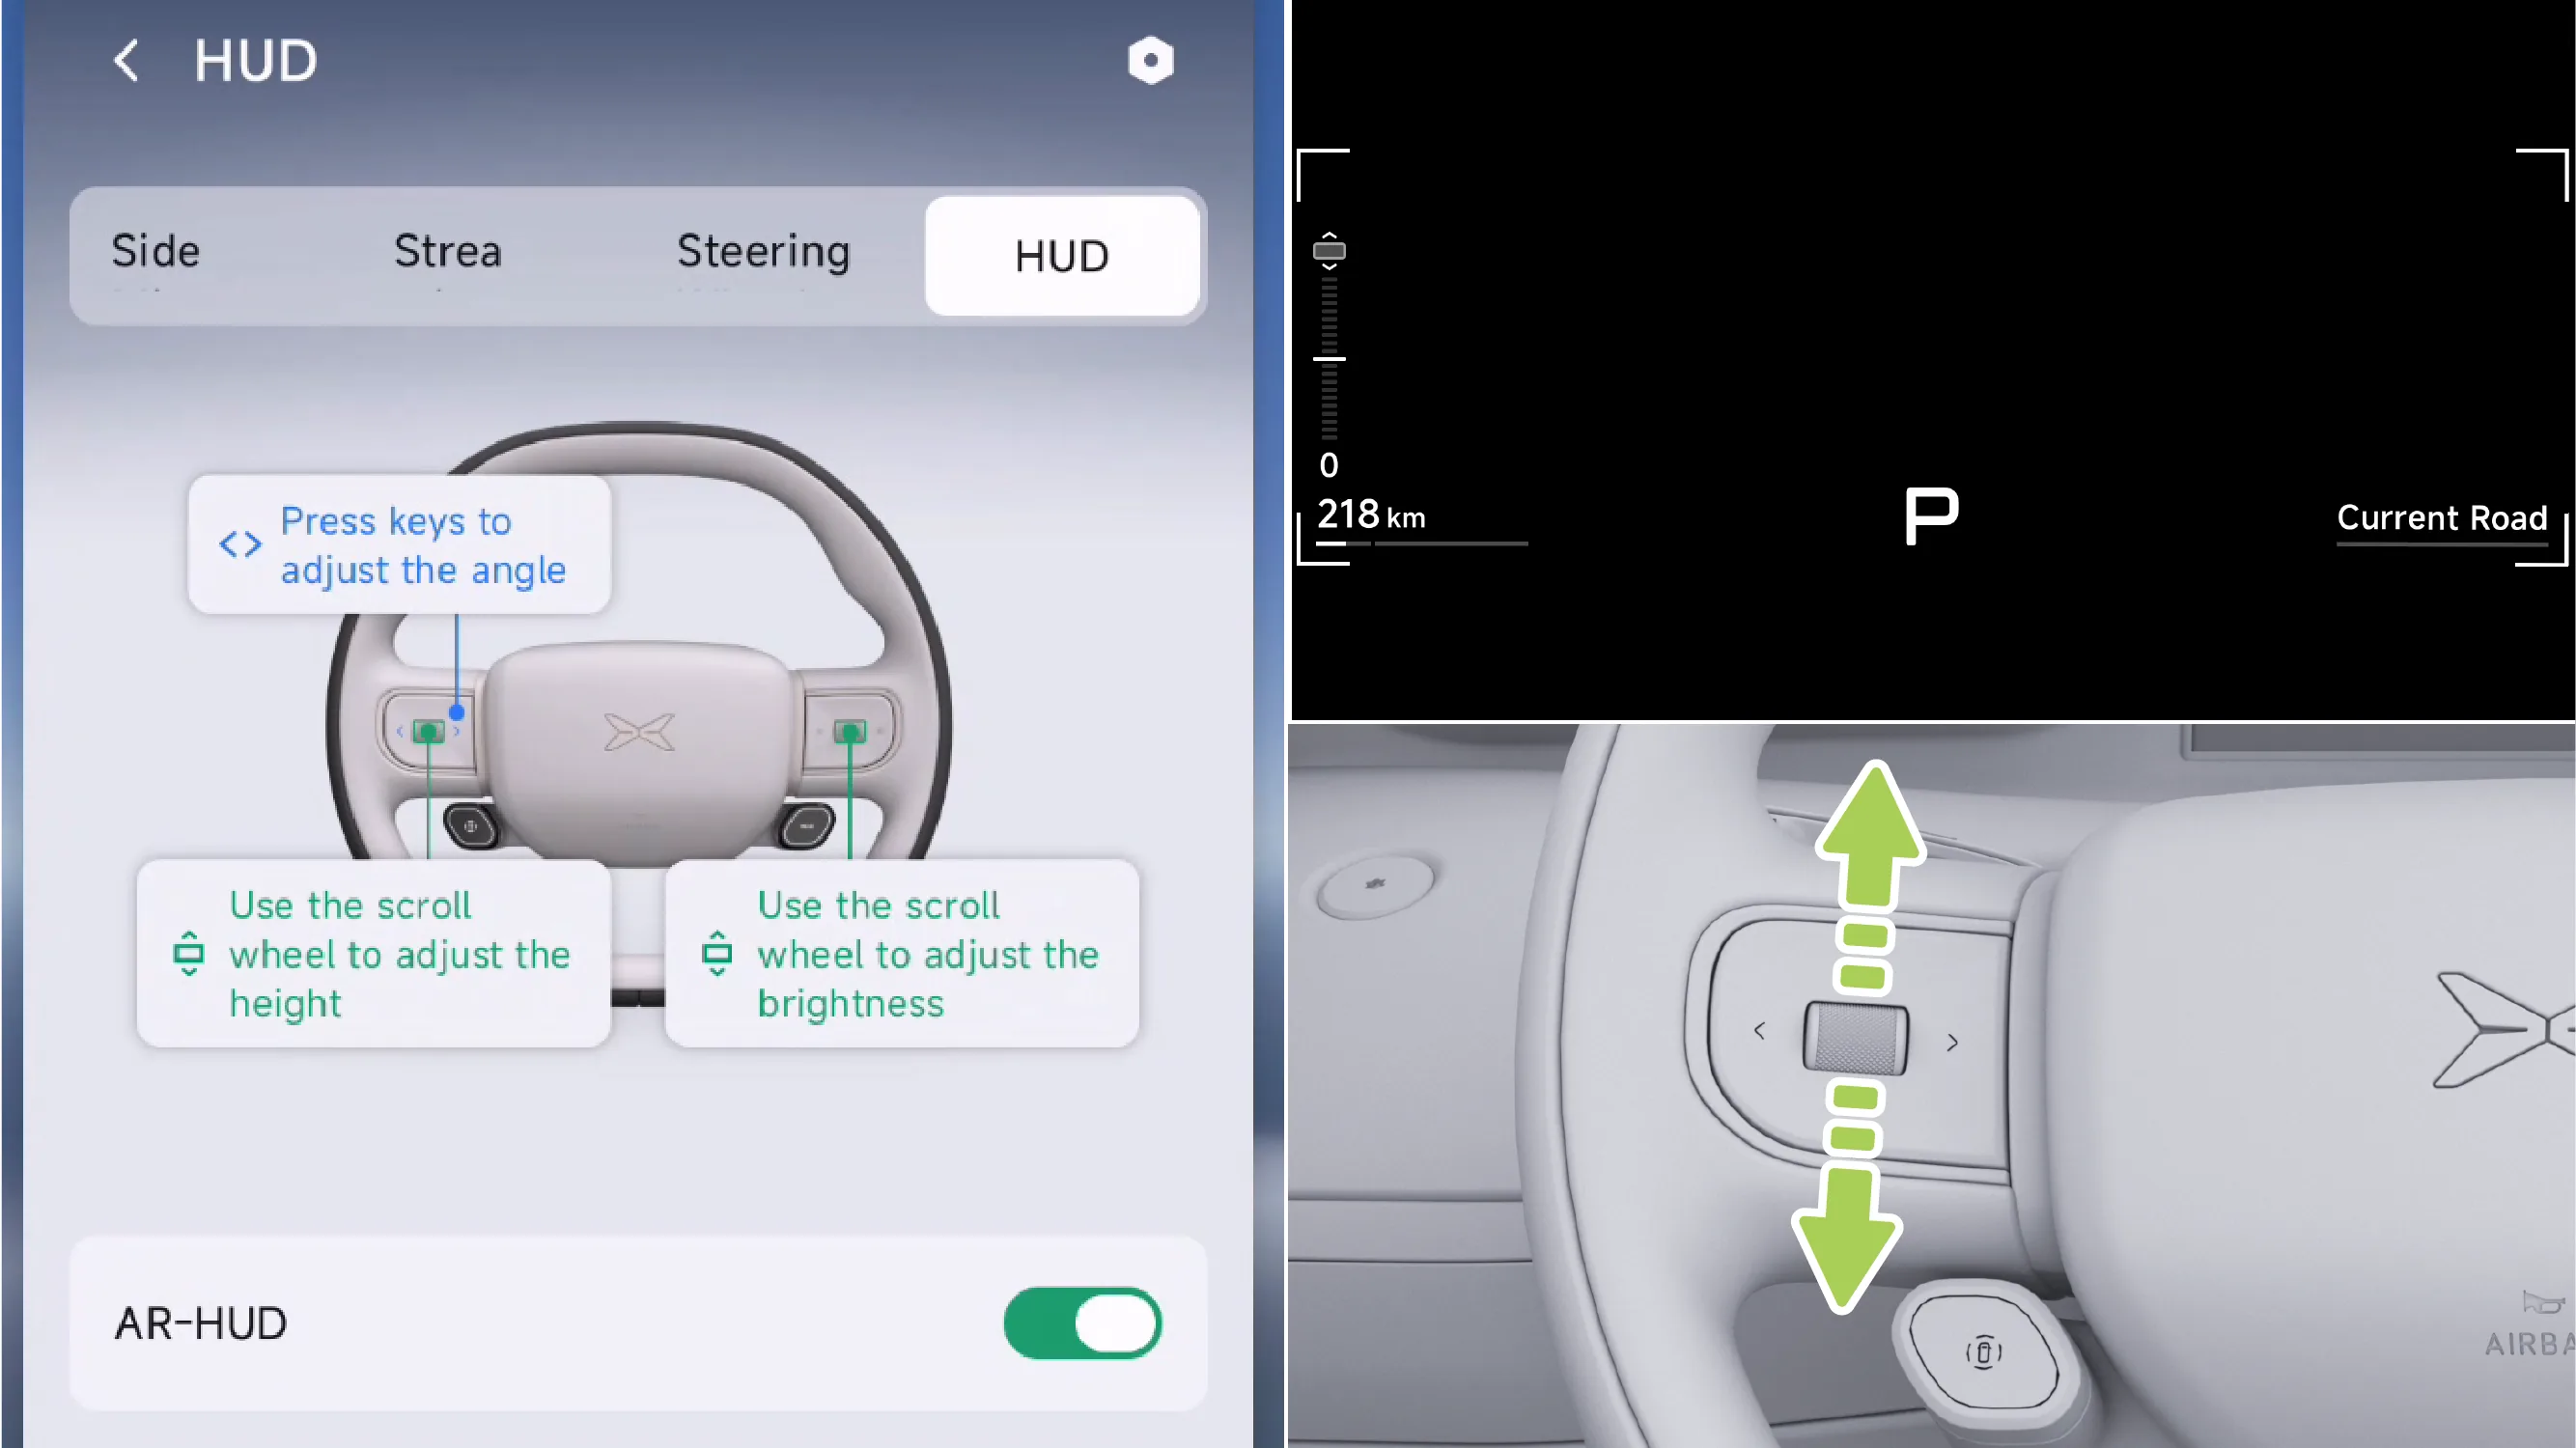
After entering the HUD adjustment interface, scroll the left roller on the steering wheel to adjust the height of the HUD interface.
Raise: Scroll up the roller on the left side of the steering wheel.
Decrease: Scroll down the left scroll wheel on the steering wheel.
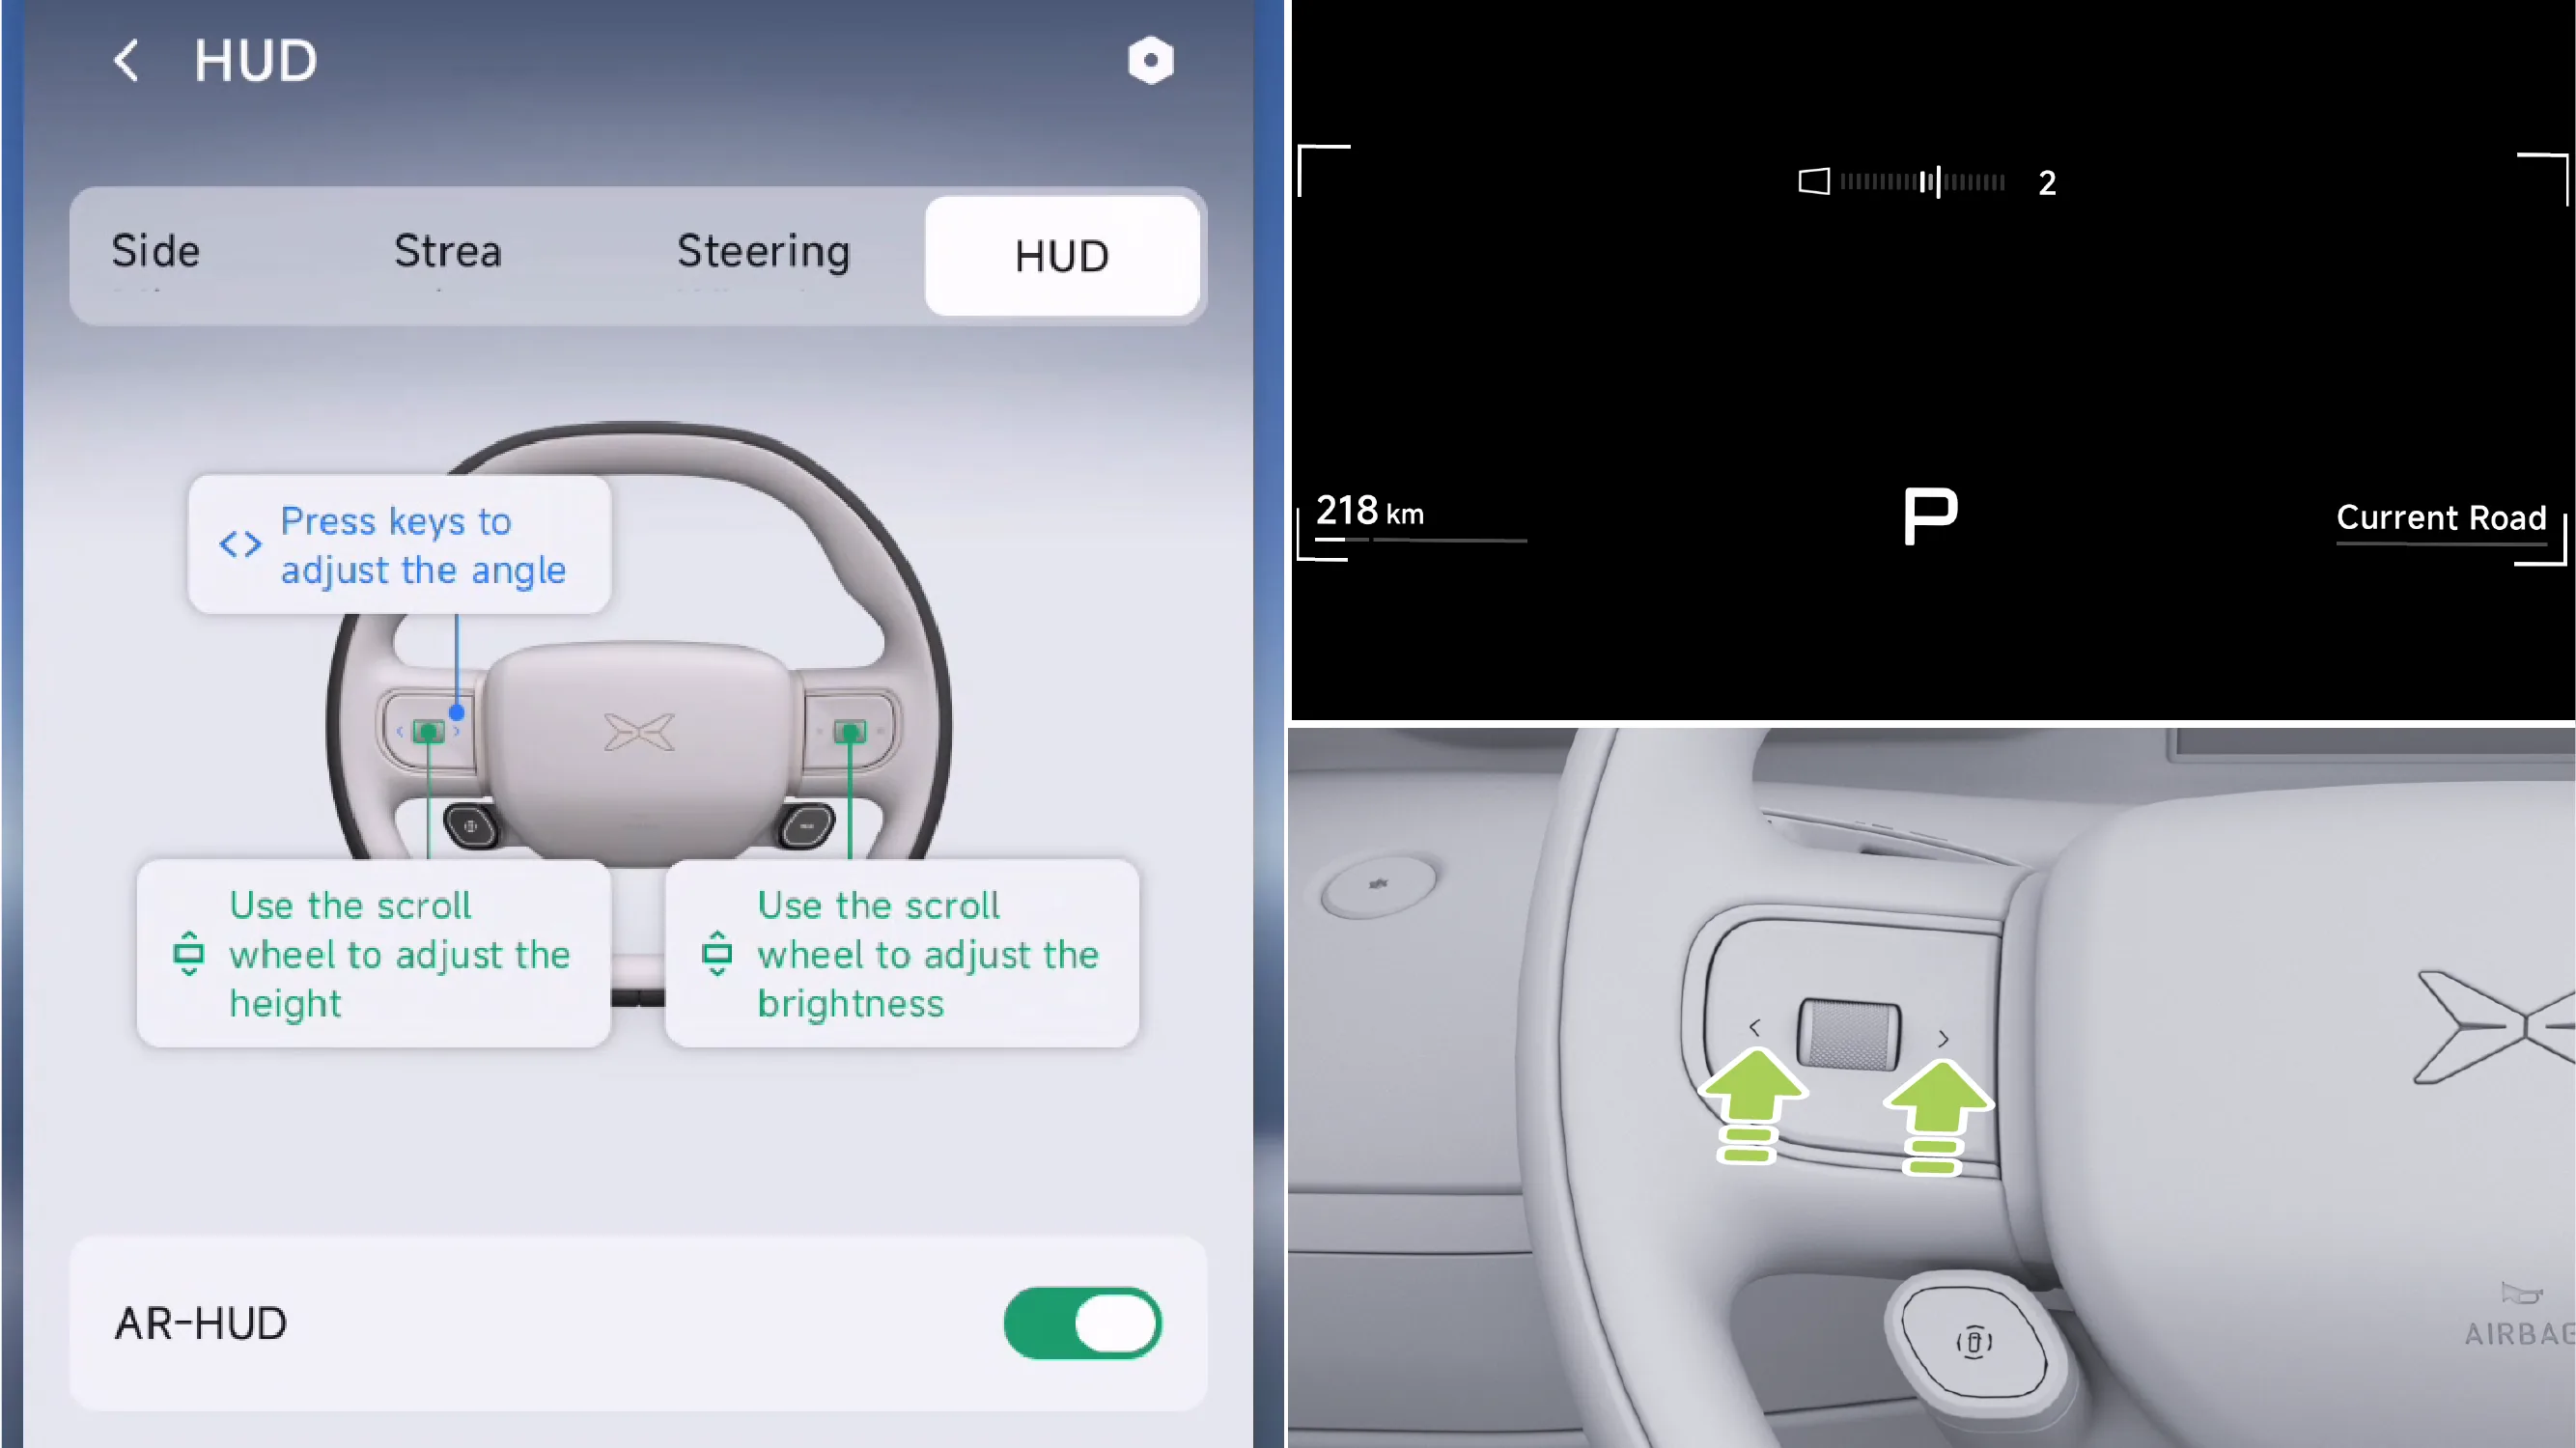
After entering the HUD adjustment interface, press the left and right buttons on the left side of the steering wheel to manually adjust the left-right rotation angle of the HUD interface.
Turn counterclockwise:Press the left button on the left side of the steering wheel.
Turn clockwise:Press the right button on the left side of the steering wheel.
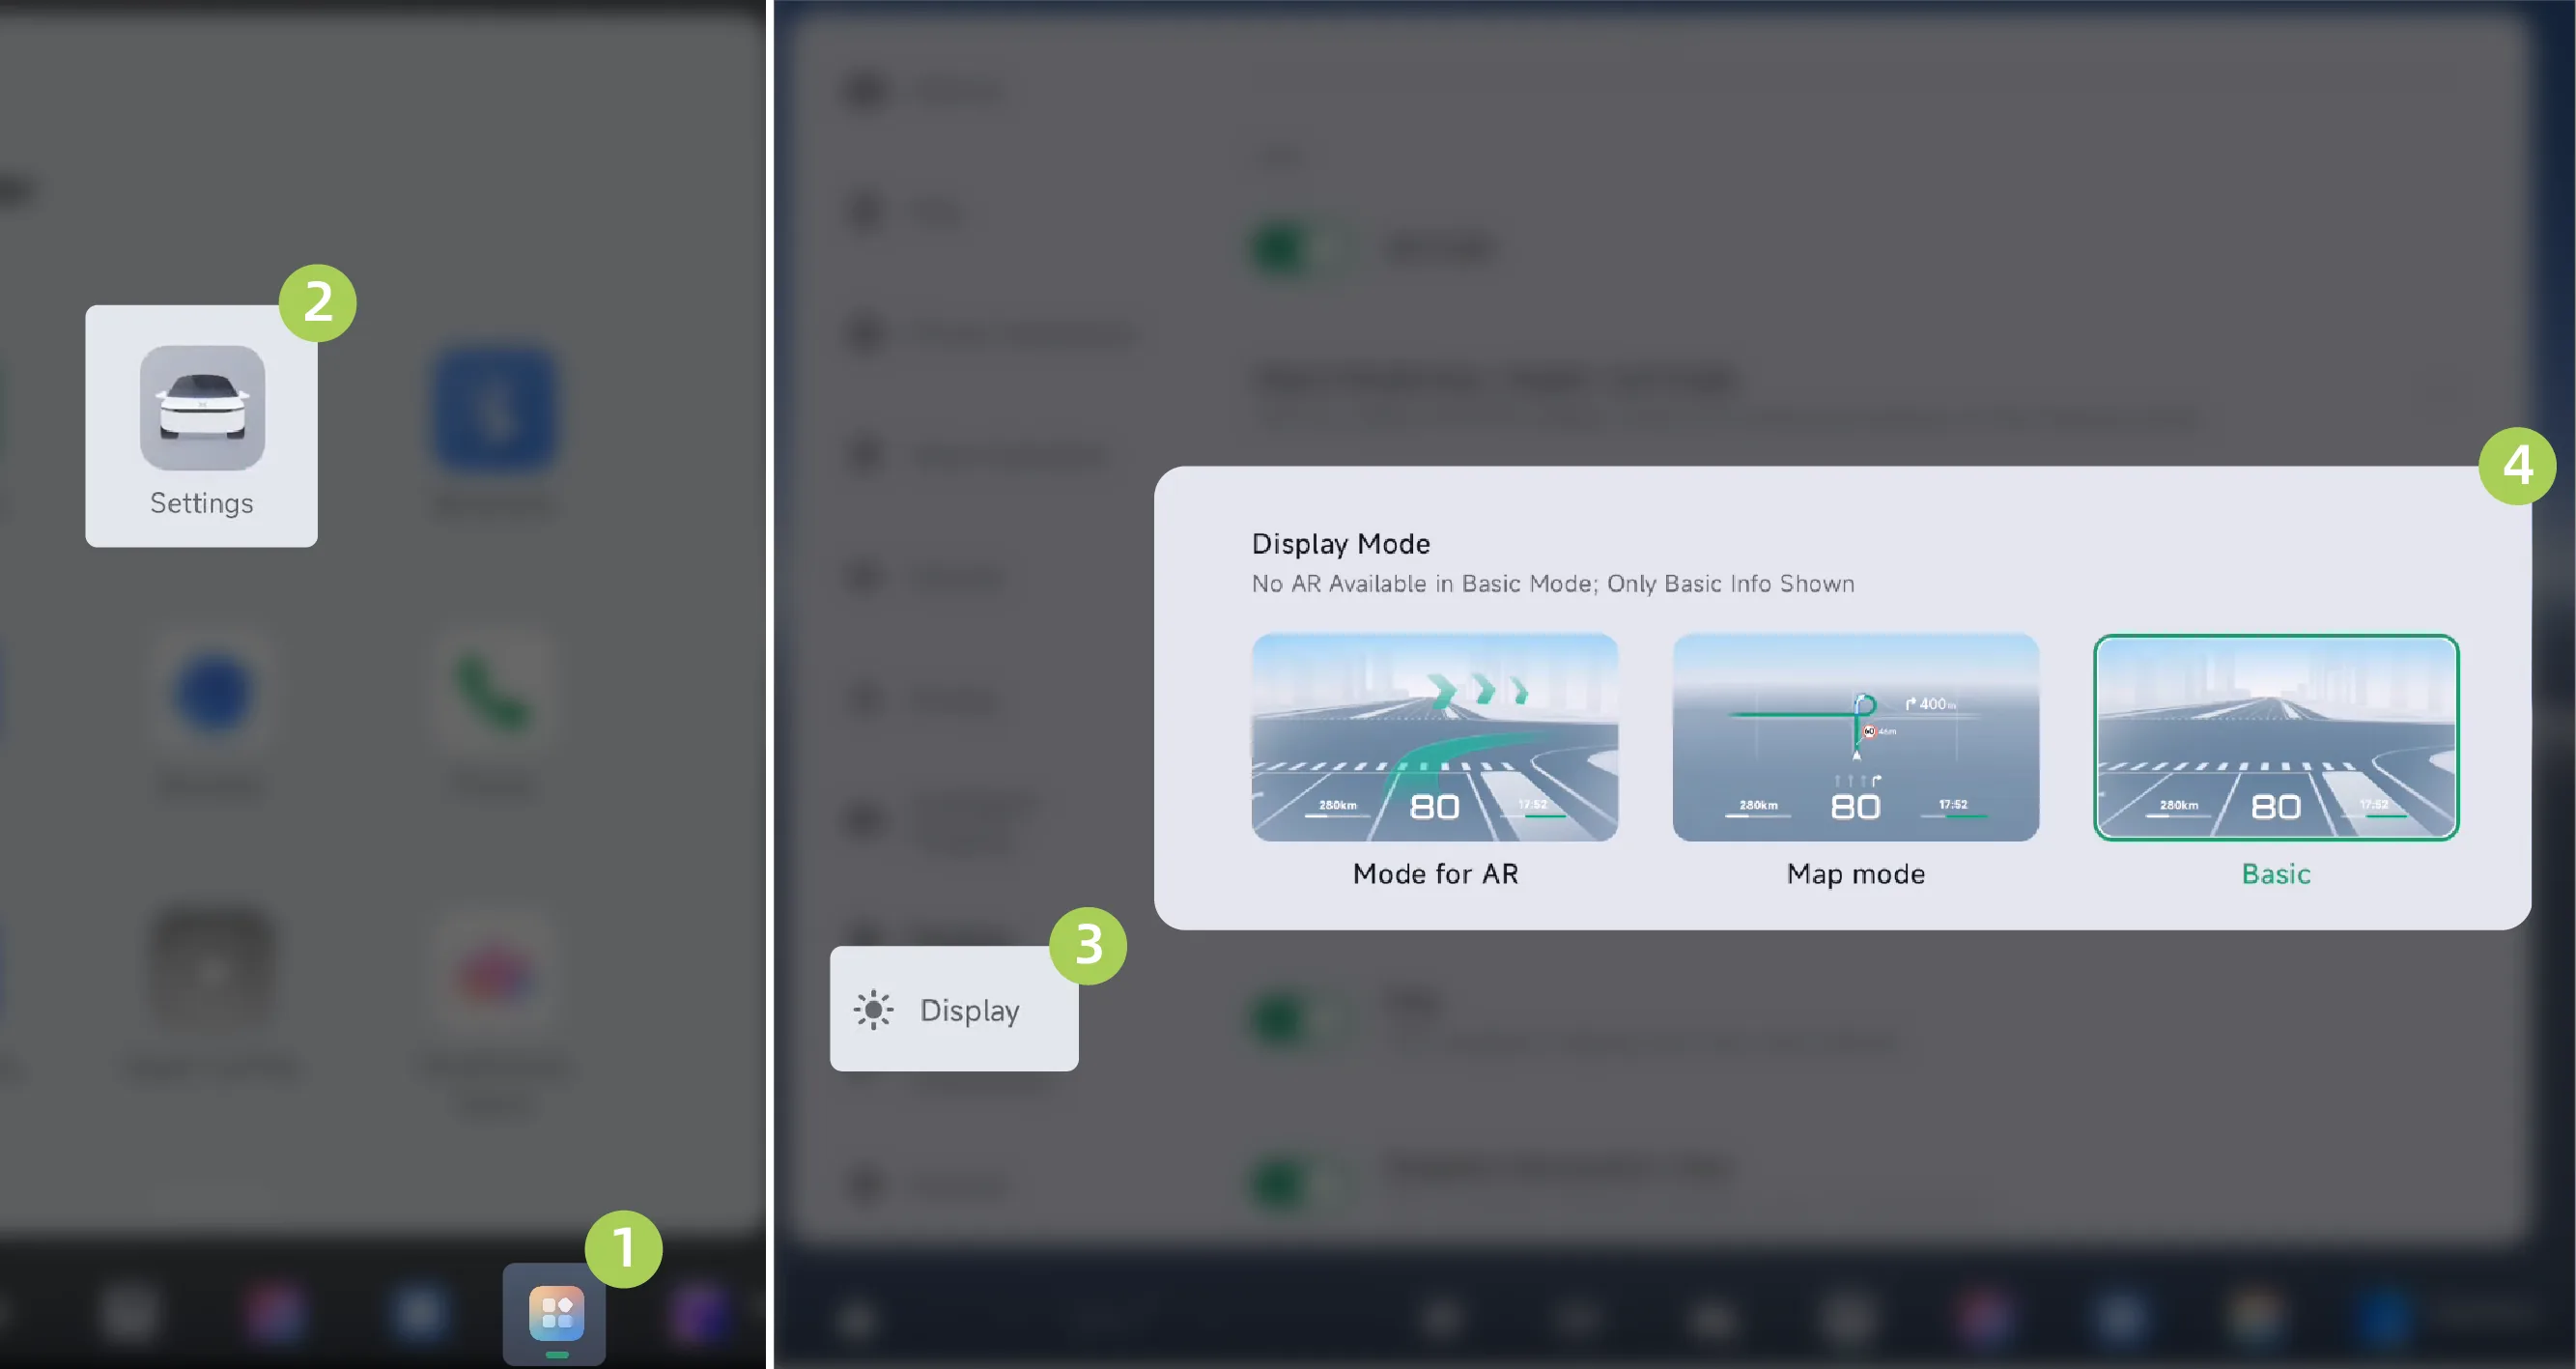
On the central control screen “ →Settings→Display”Interface, switch the AR-HUD display mode. You can select AR Mode、 Map Modeor Simple Mode。
Select AR ModeAfterward, settings can be configured. AR ModePreferences, switch the level of information richness in the HUD.
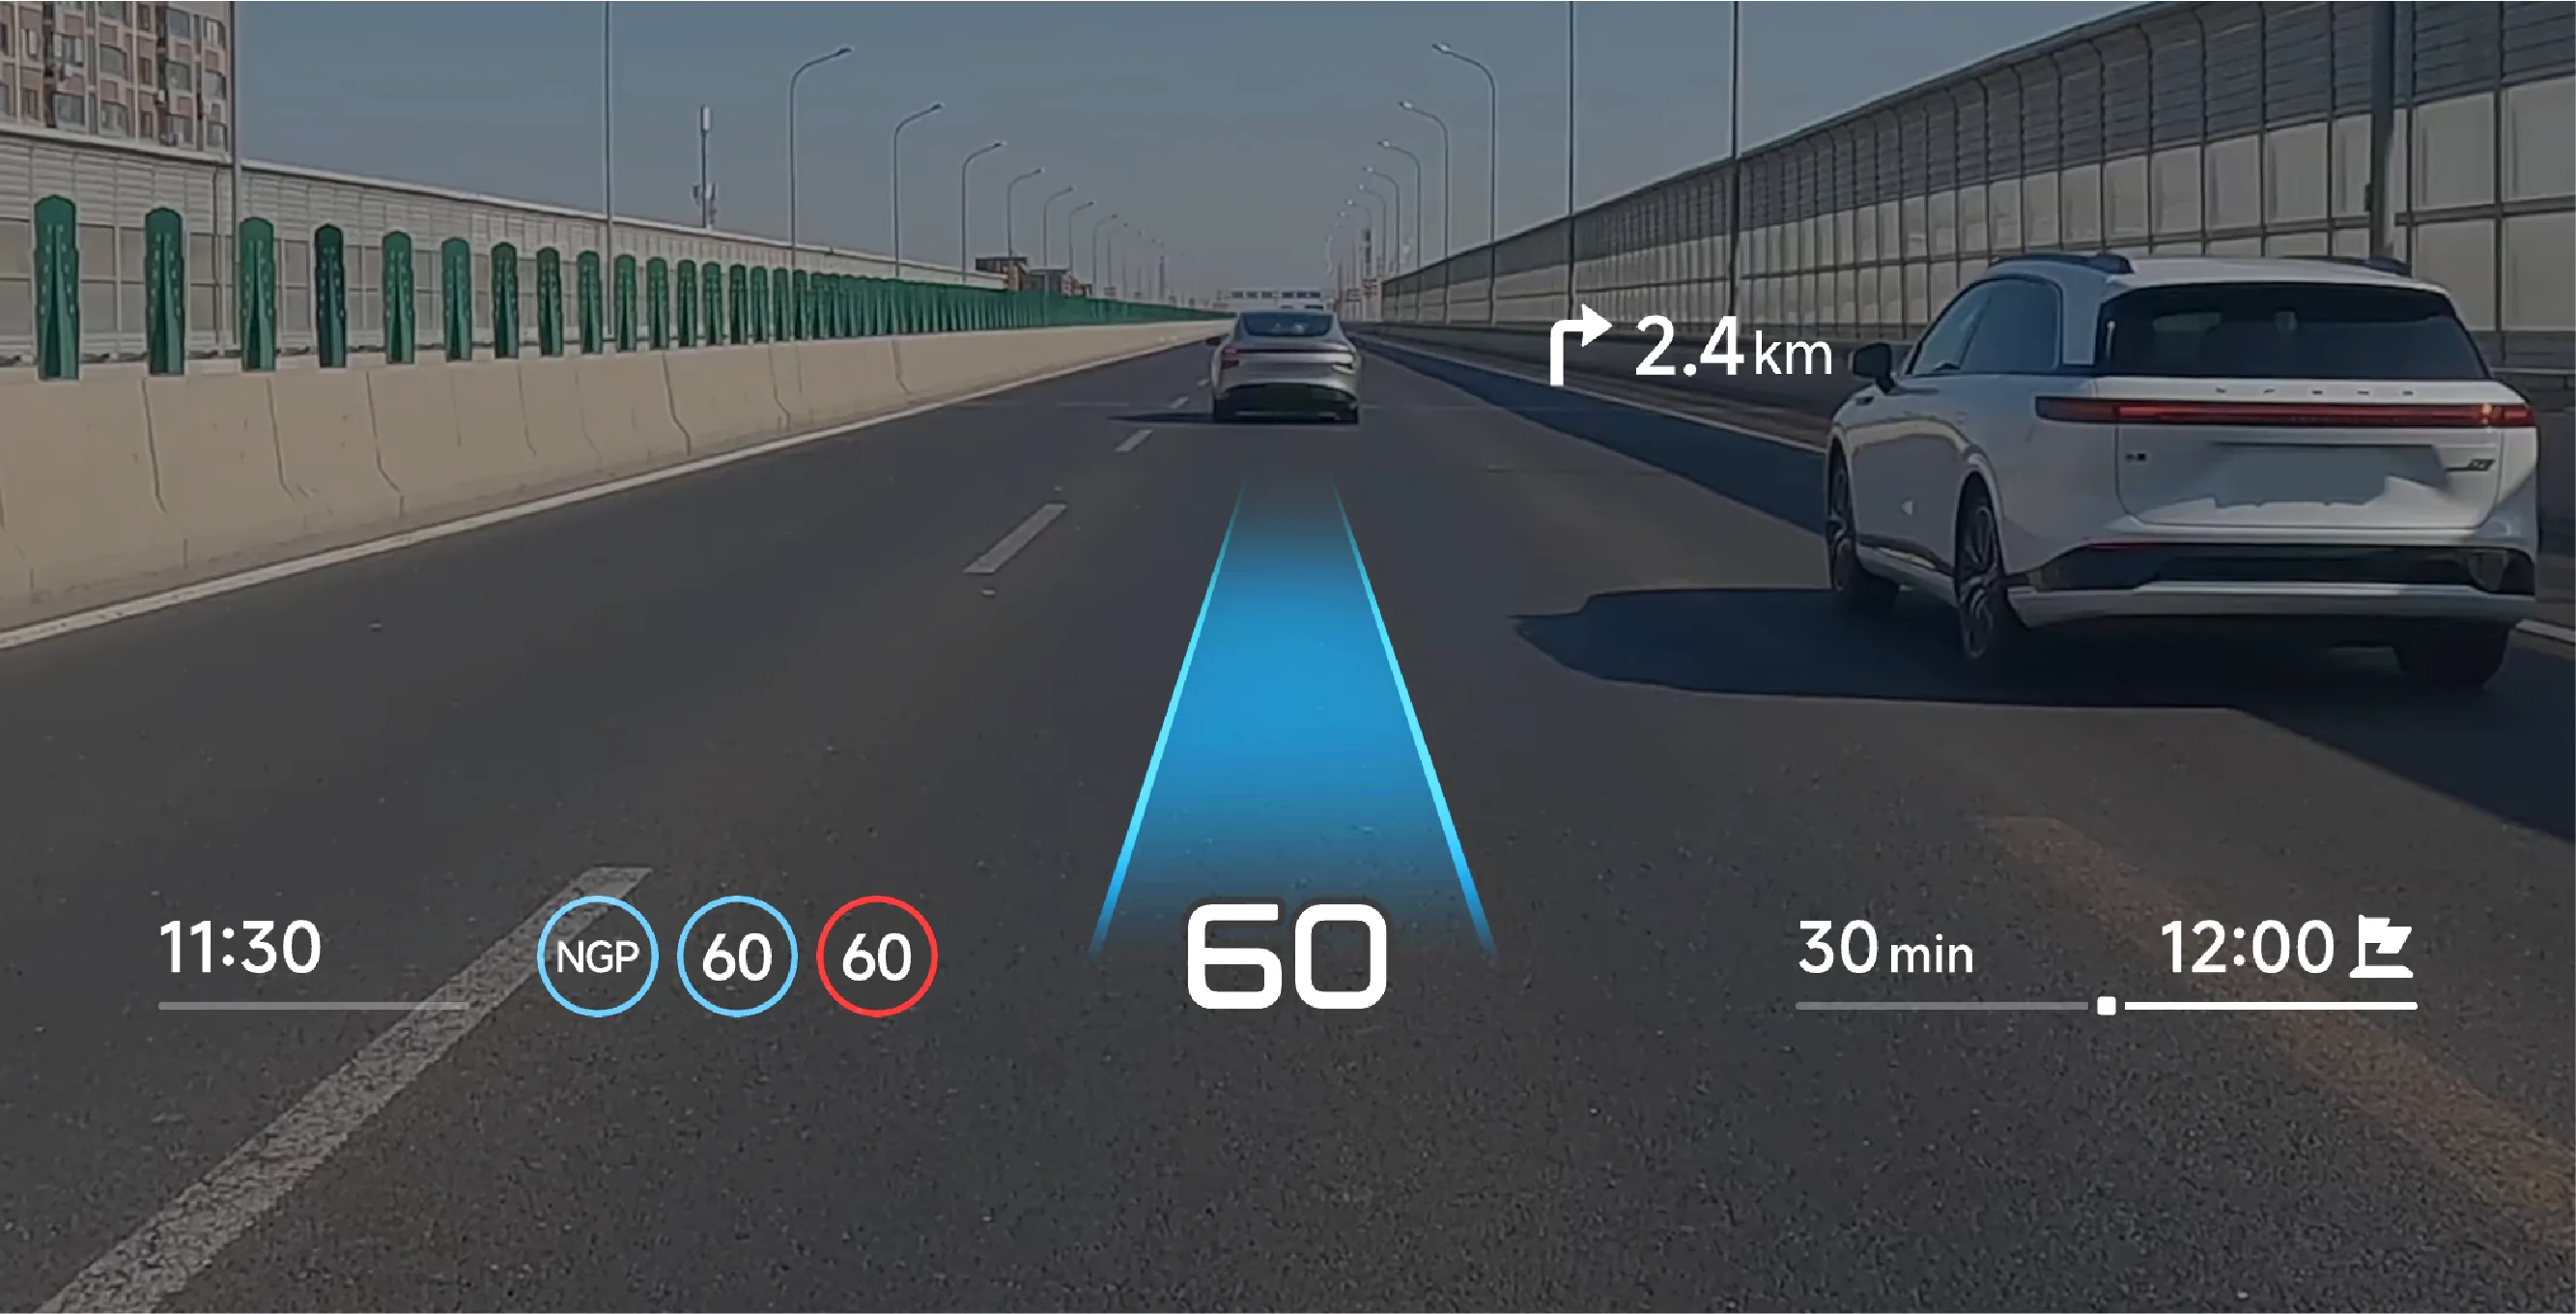
After AR mode is selected, setting the AR mode preference to "Standard" will superimpose driving assistance function prompt information on the basis of Simple mode display (such as: overspeed reminder, adjacent vehicle cut-in reminder, etc.).
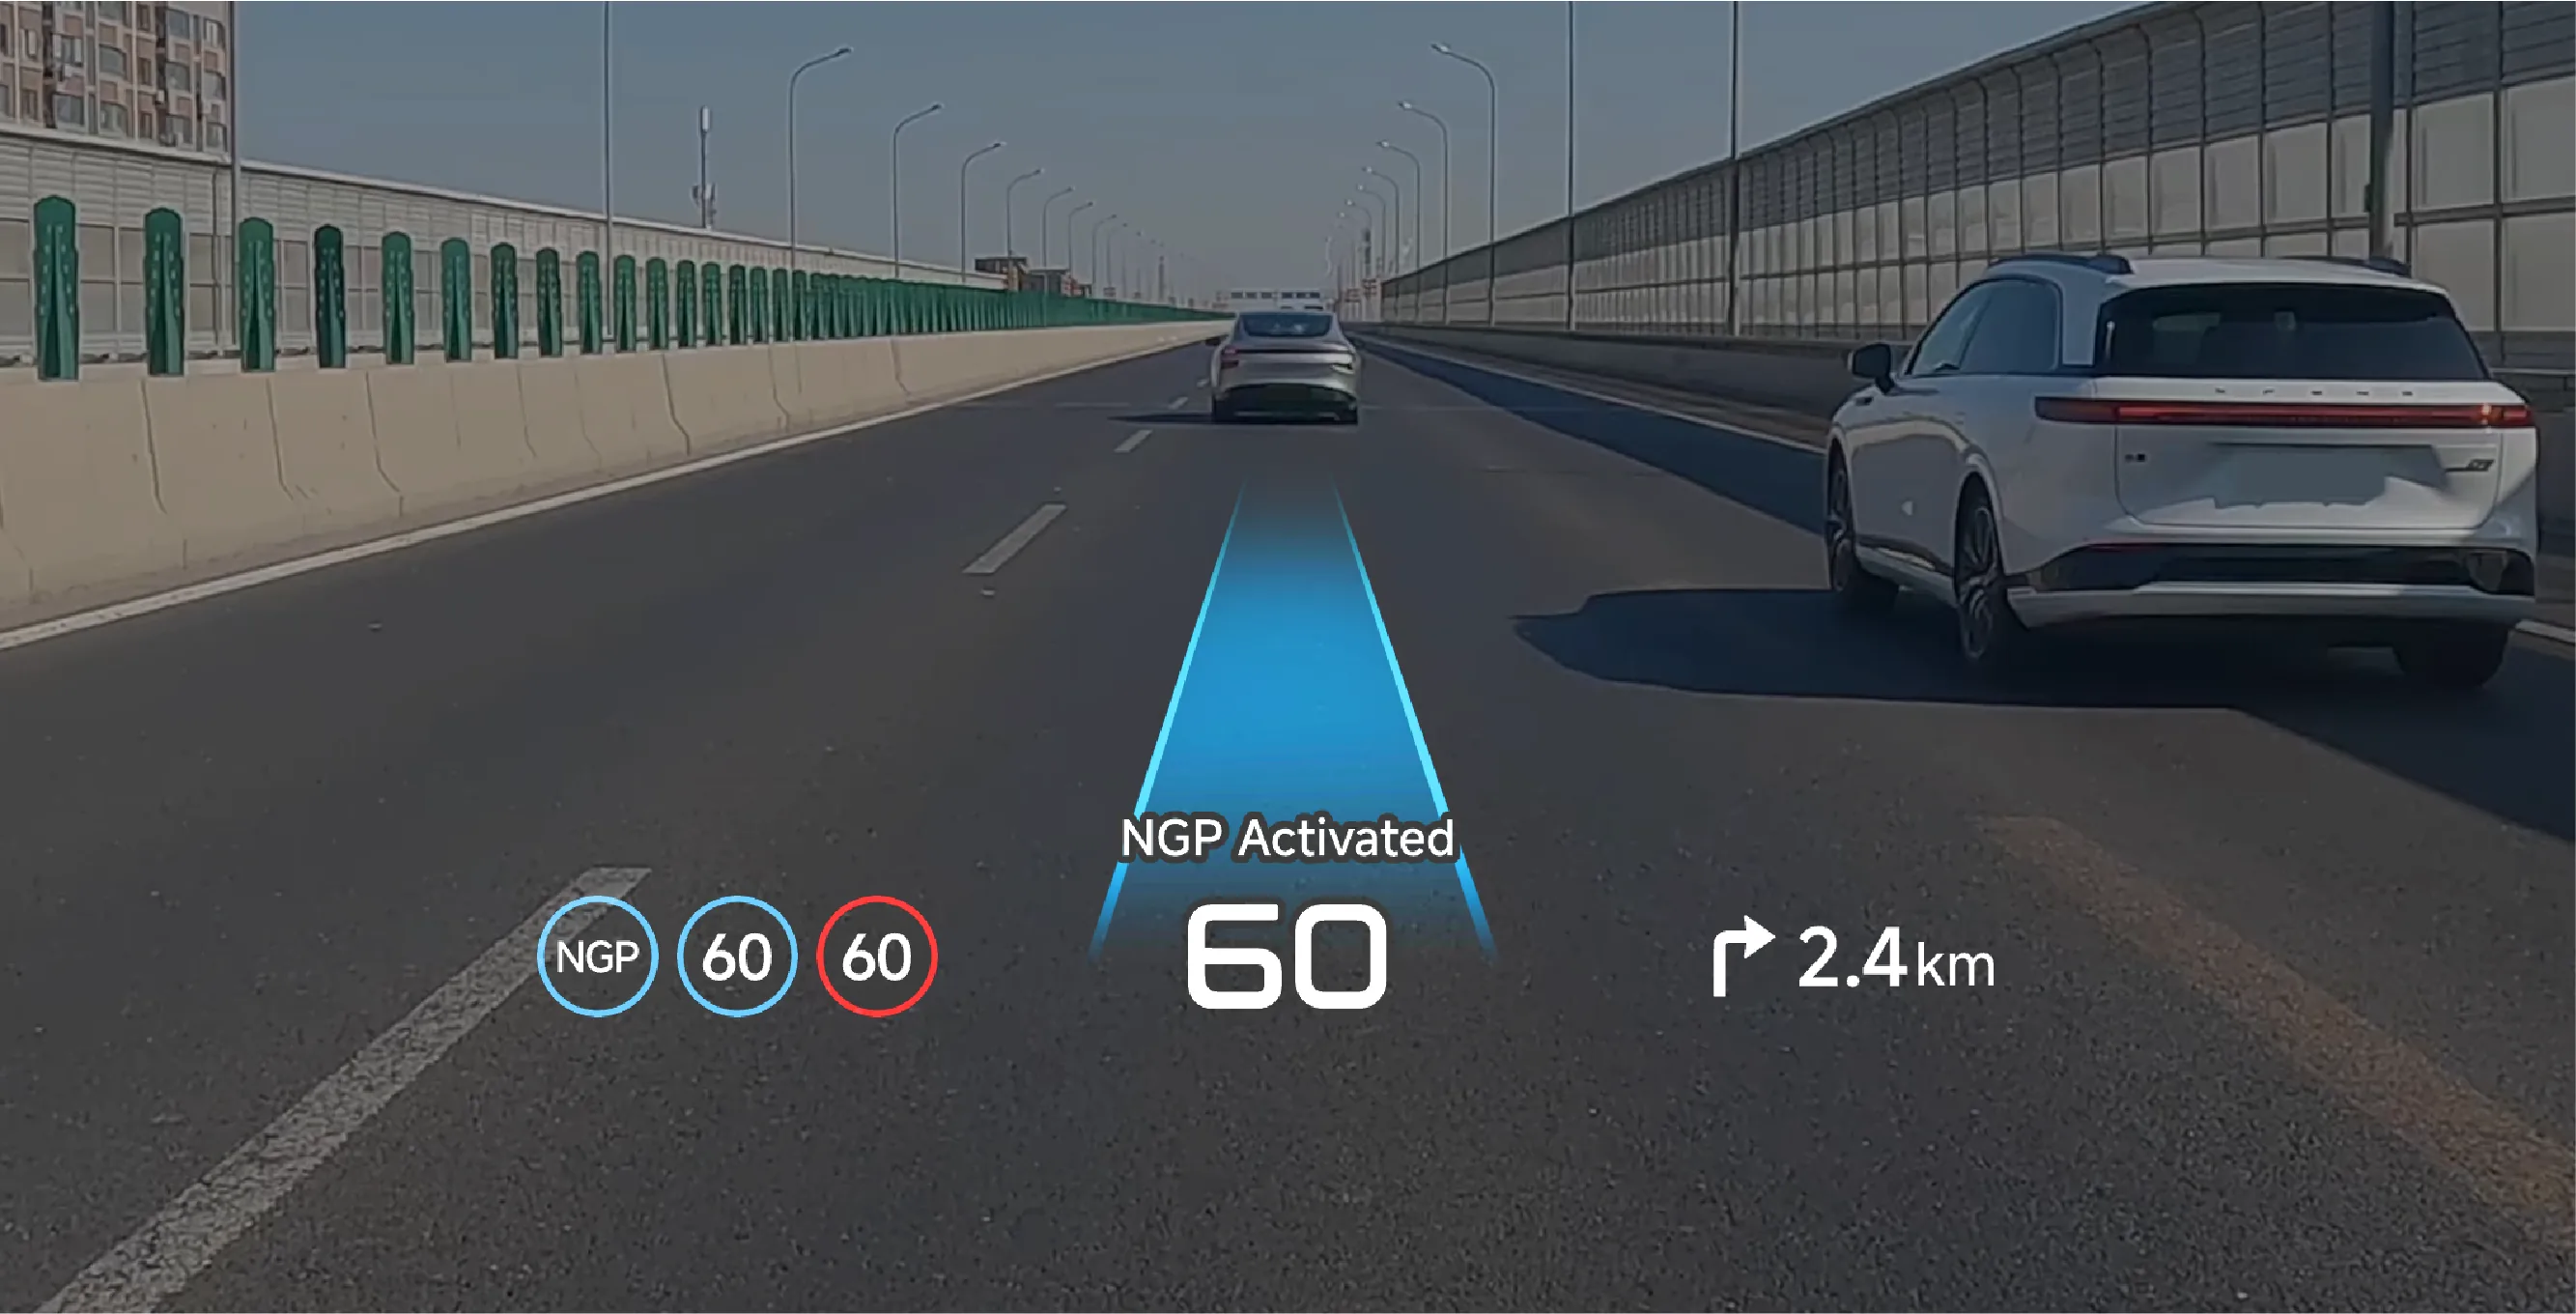
After selecting AR mode, setting the AR mode preference to "Light" will turn off vehicle information and map information.
After map mode is selected, full map information, safety assistance function prompt information, etc. will be displayed.
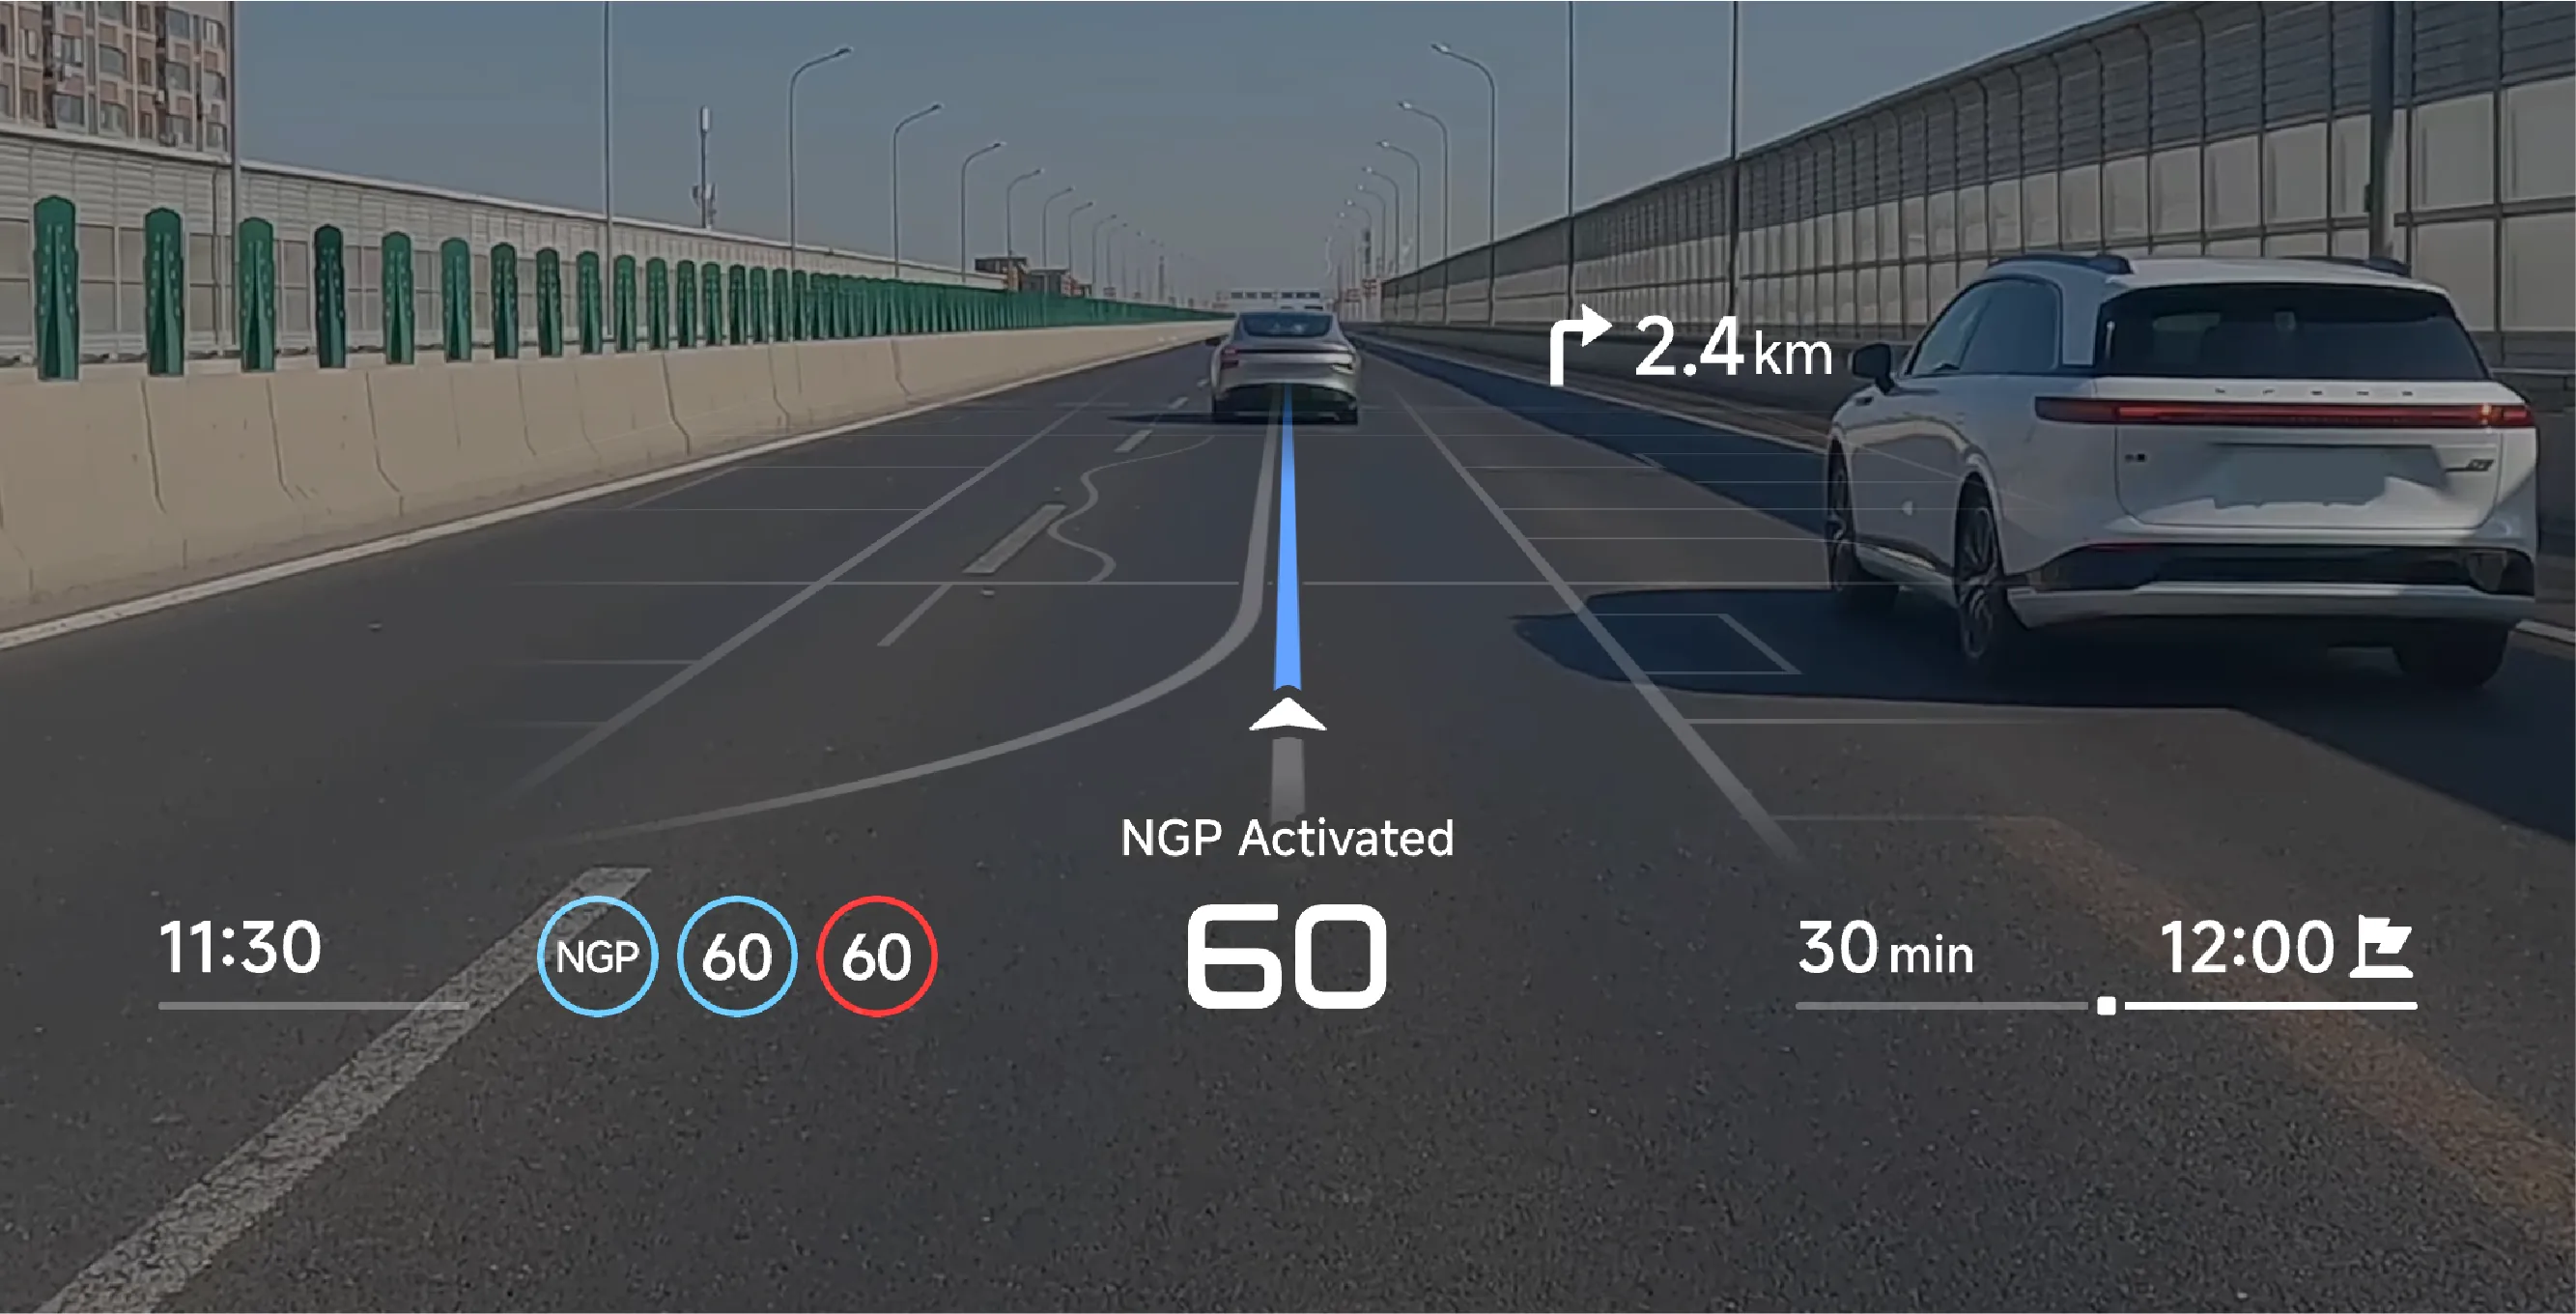
After the map mode is selected, full map information and prompt information for safety assistance functions (such as: overspeed reminder, adjacent vehicle cut-in reminder, etc.) will be displayed.
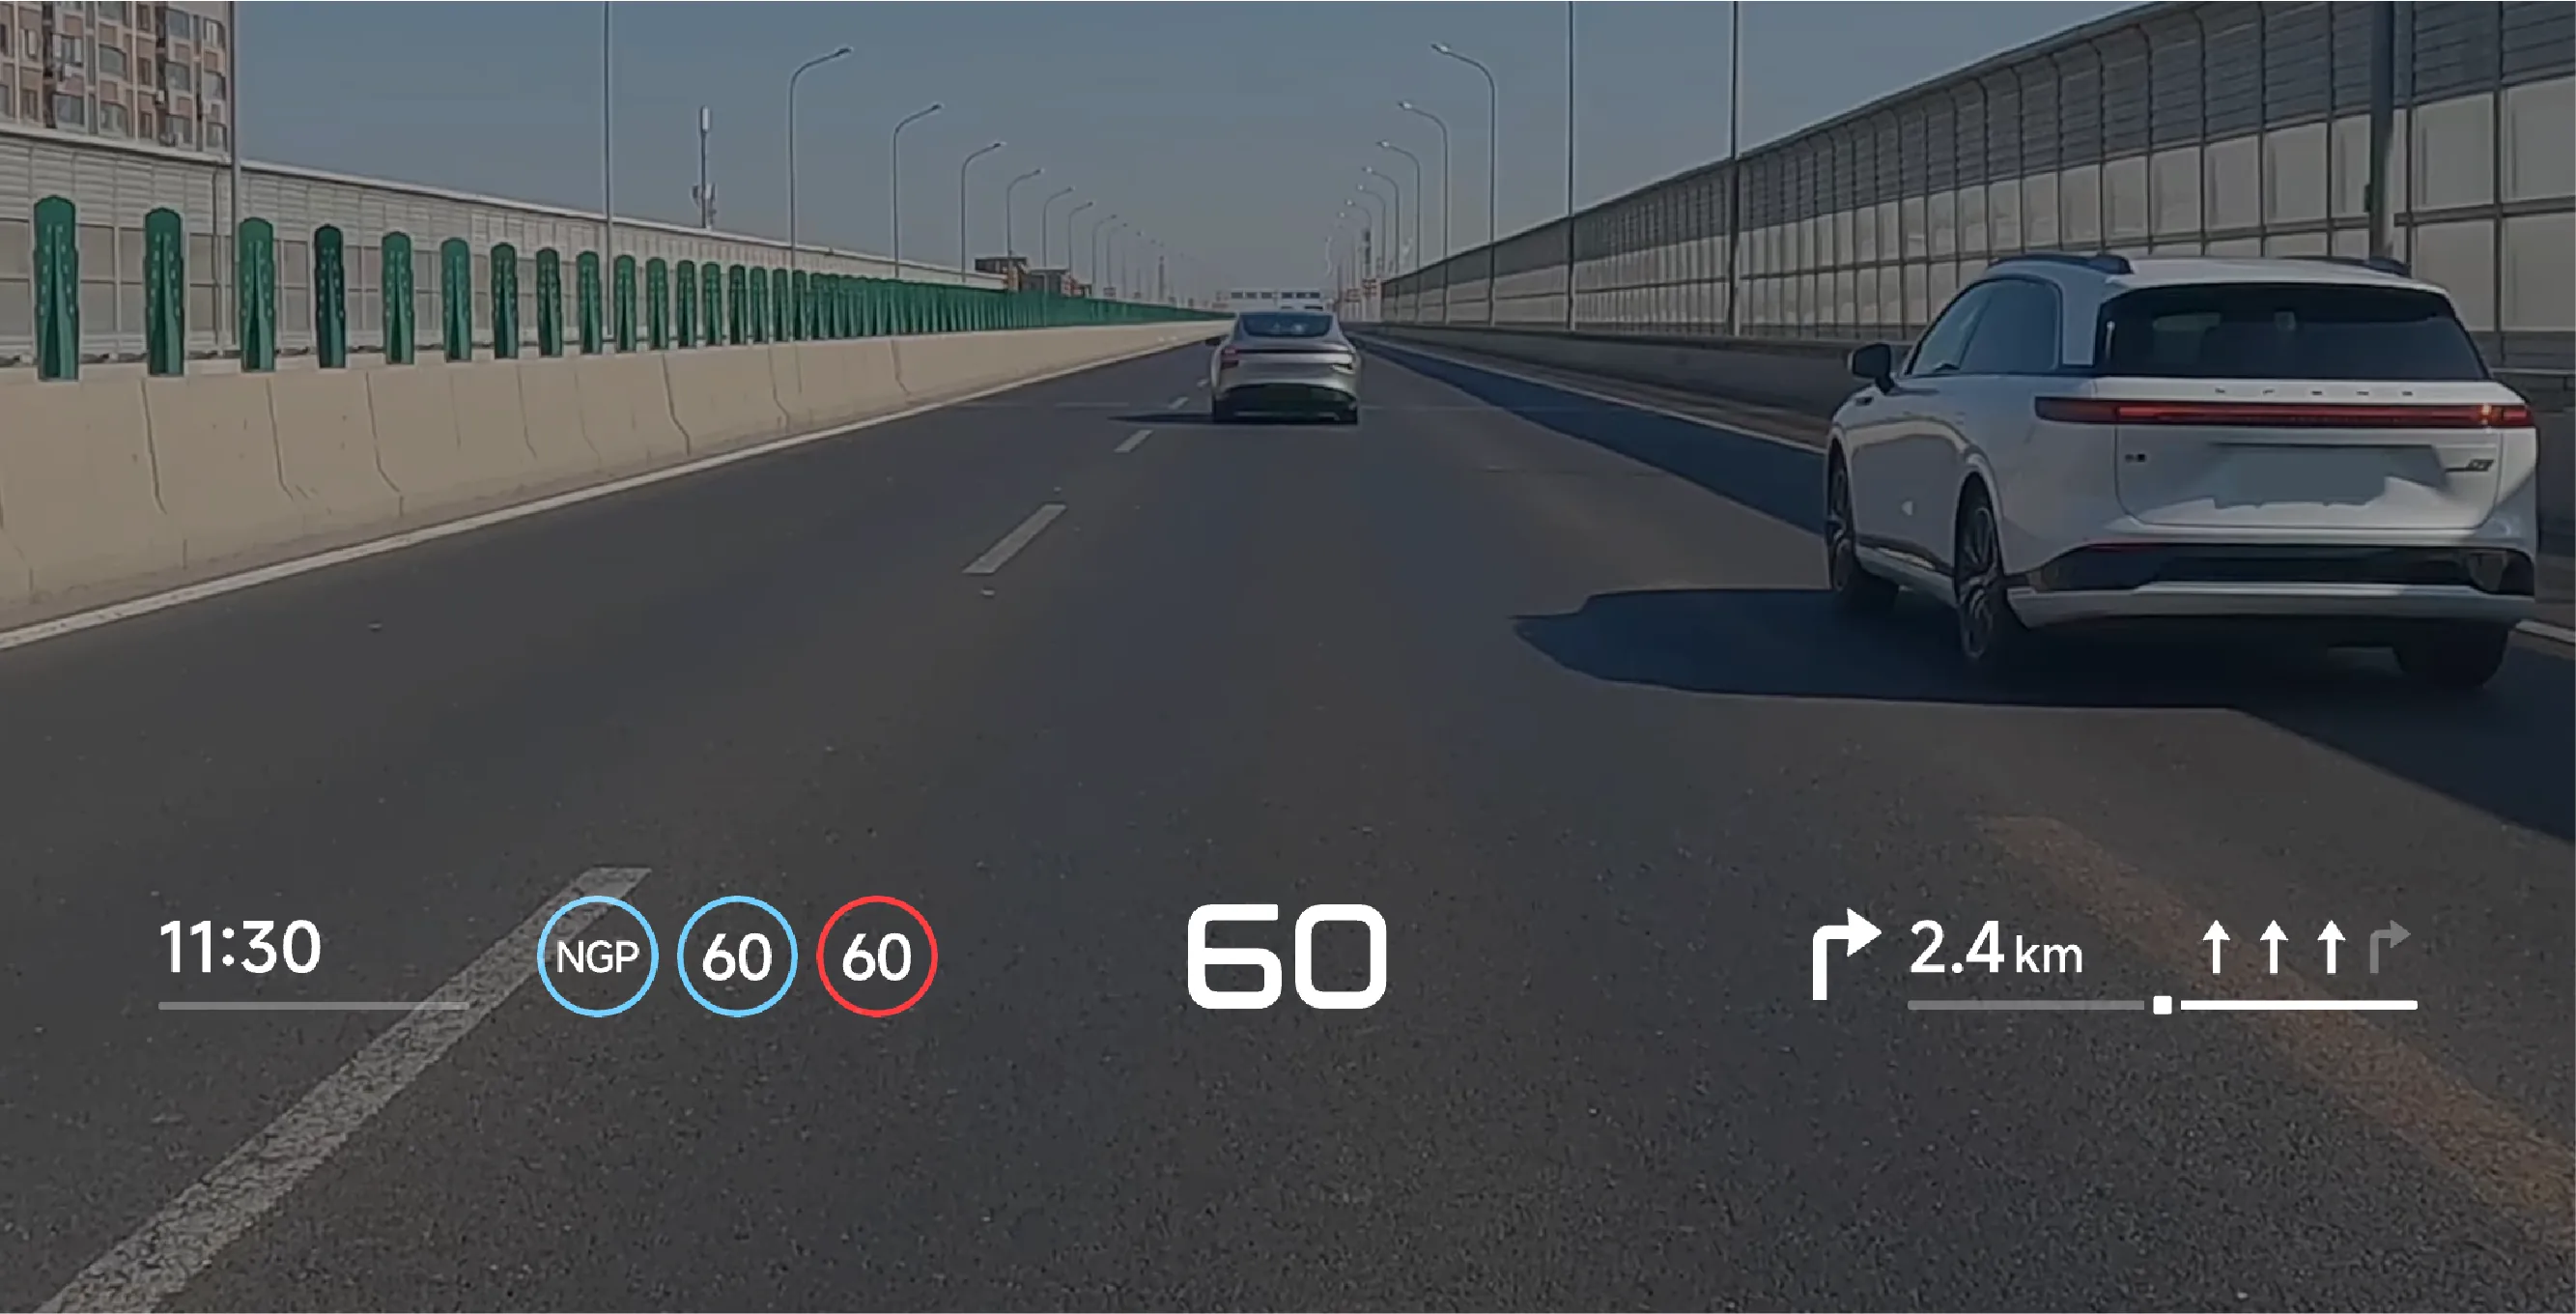
After selecting Simplified Mode, the AR function will be turned off, and only basic information, driving assistance function indicator lights, brief navigation information, and other content will be displayed.
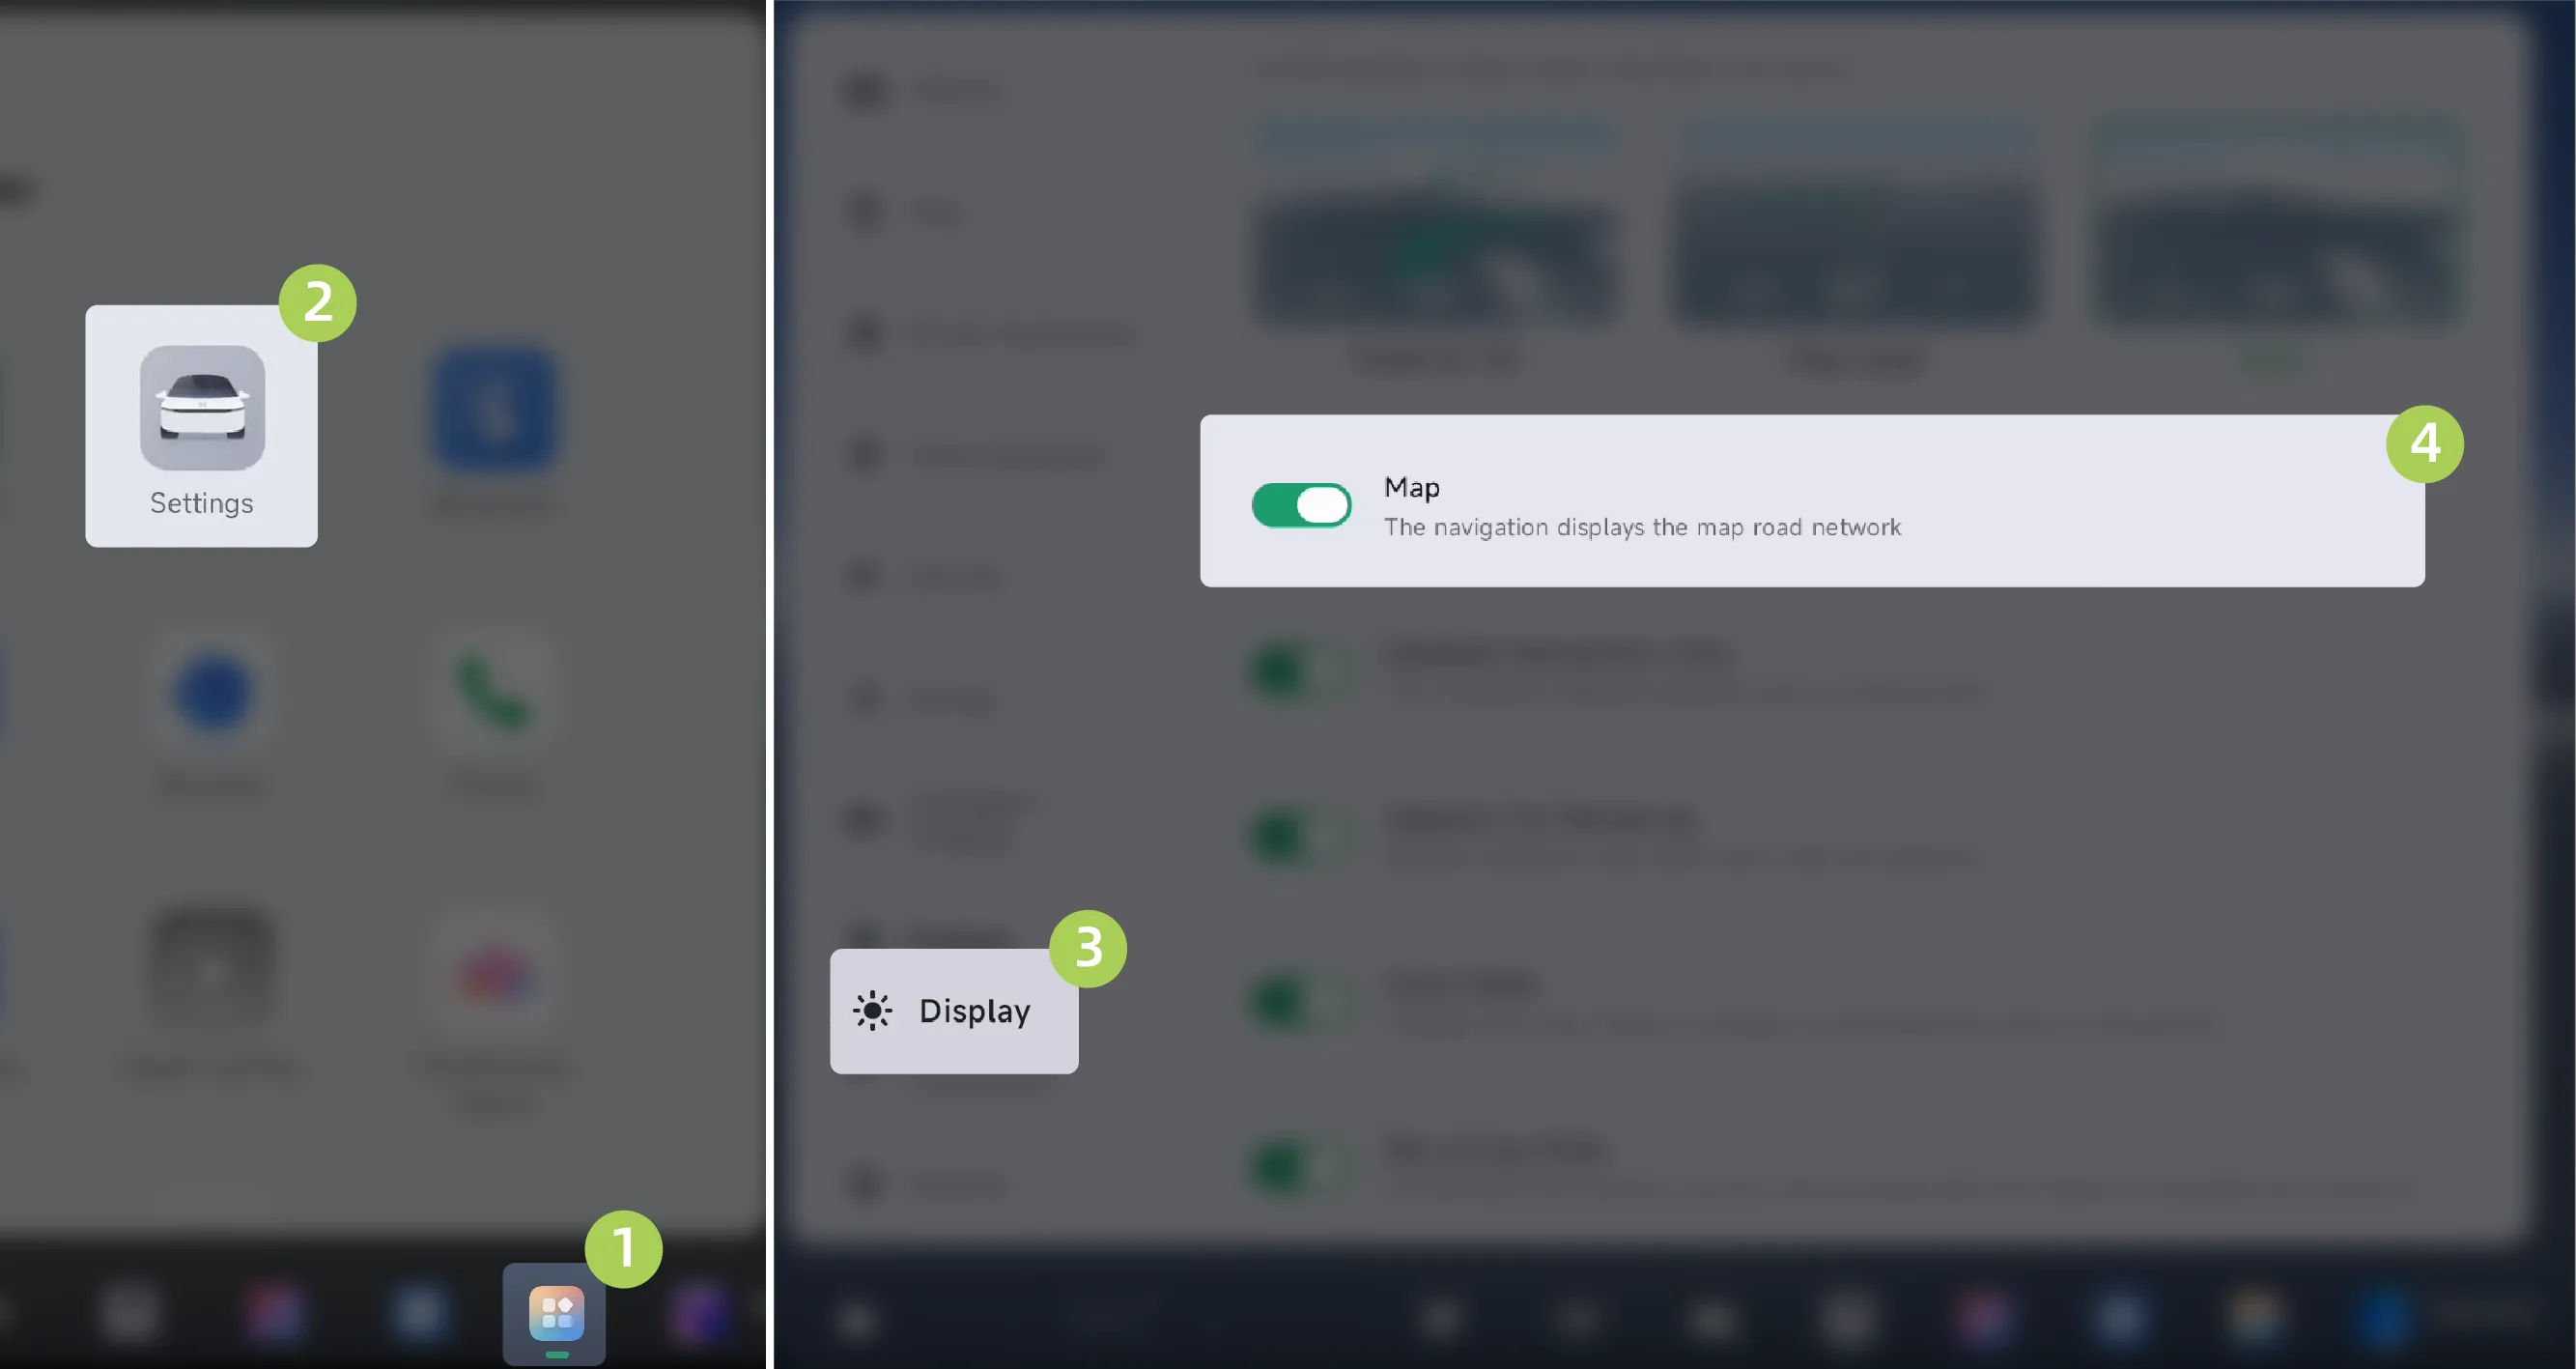
On the center control screen “ →Settings→Display”Interface, tap MapYou can turn the display of the right-side auxiliary map (mini-map) on/off.
Tips When the AR-HUD display mode is AR mode (light display mode) or map mode, the map display switch will be hidden.
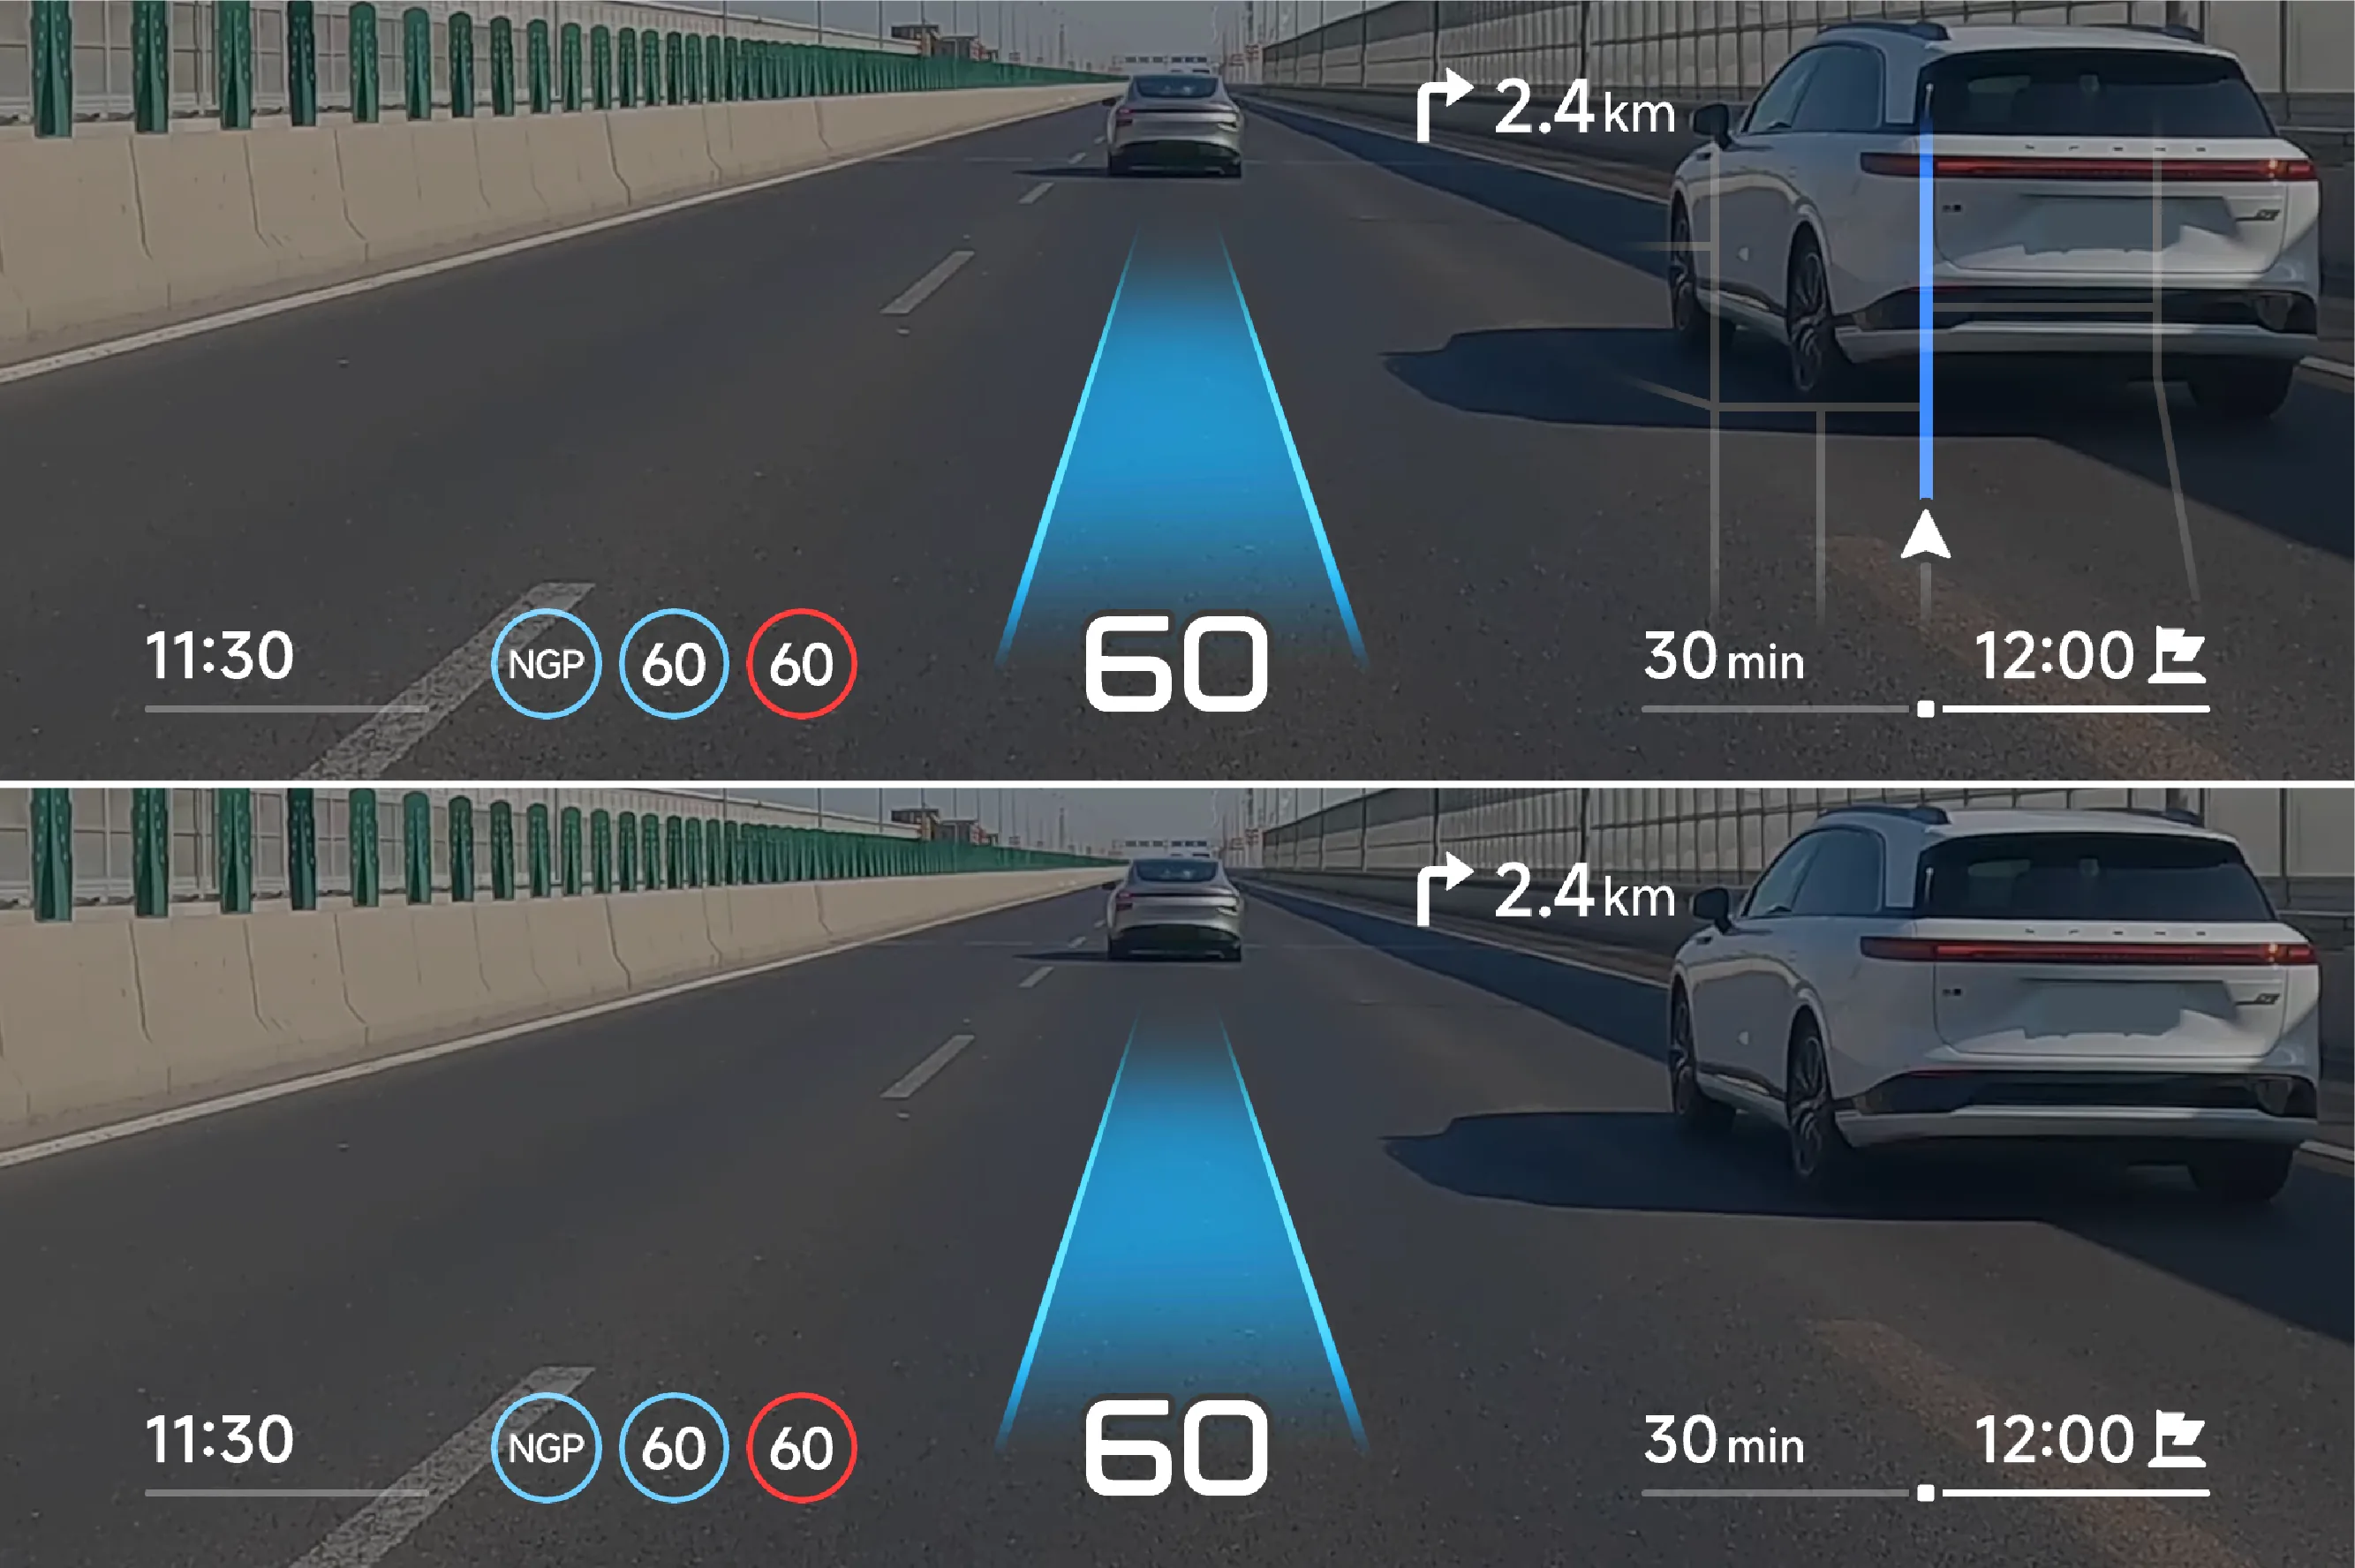
Enable map display: Display the map road network during navigation.
Turn off map display: The map road network is not displayed during navigation.
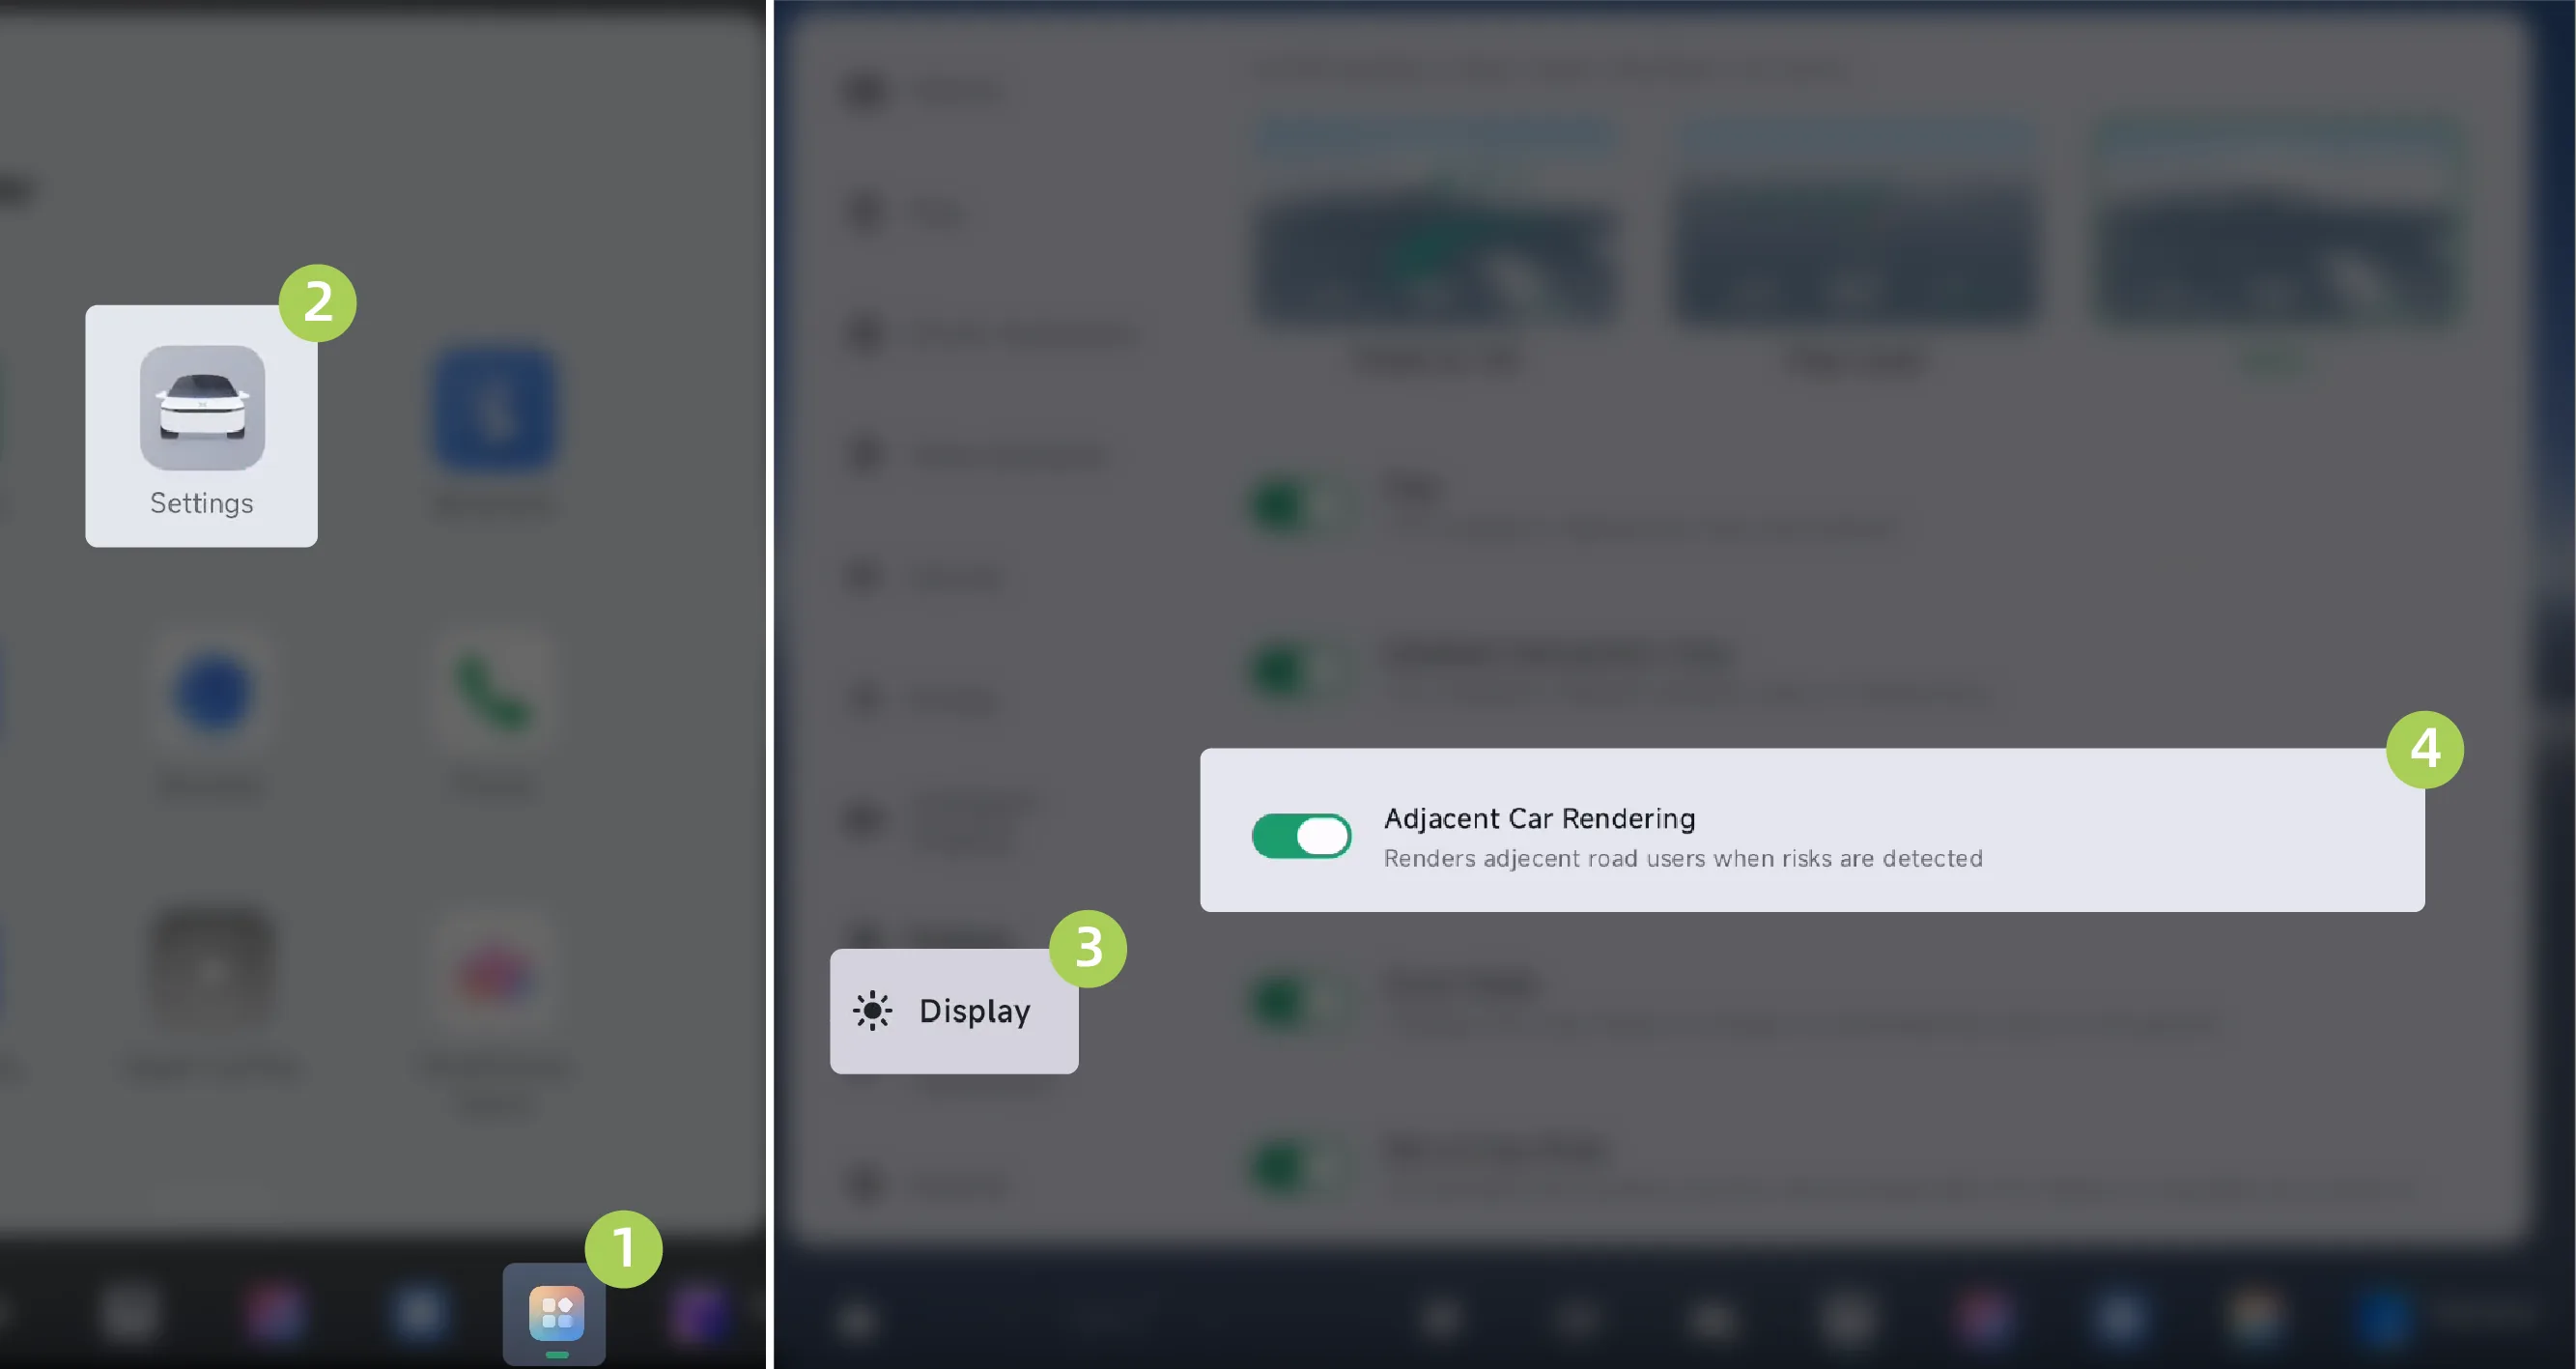
On the central control screen “ →Settings→Display”On the interface, you can turn the adjacent-risk vehicle rendering on/off.
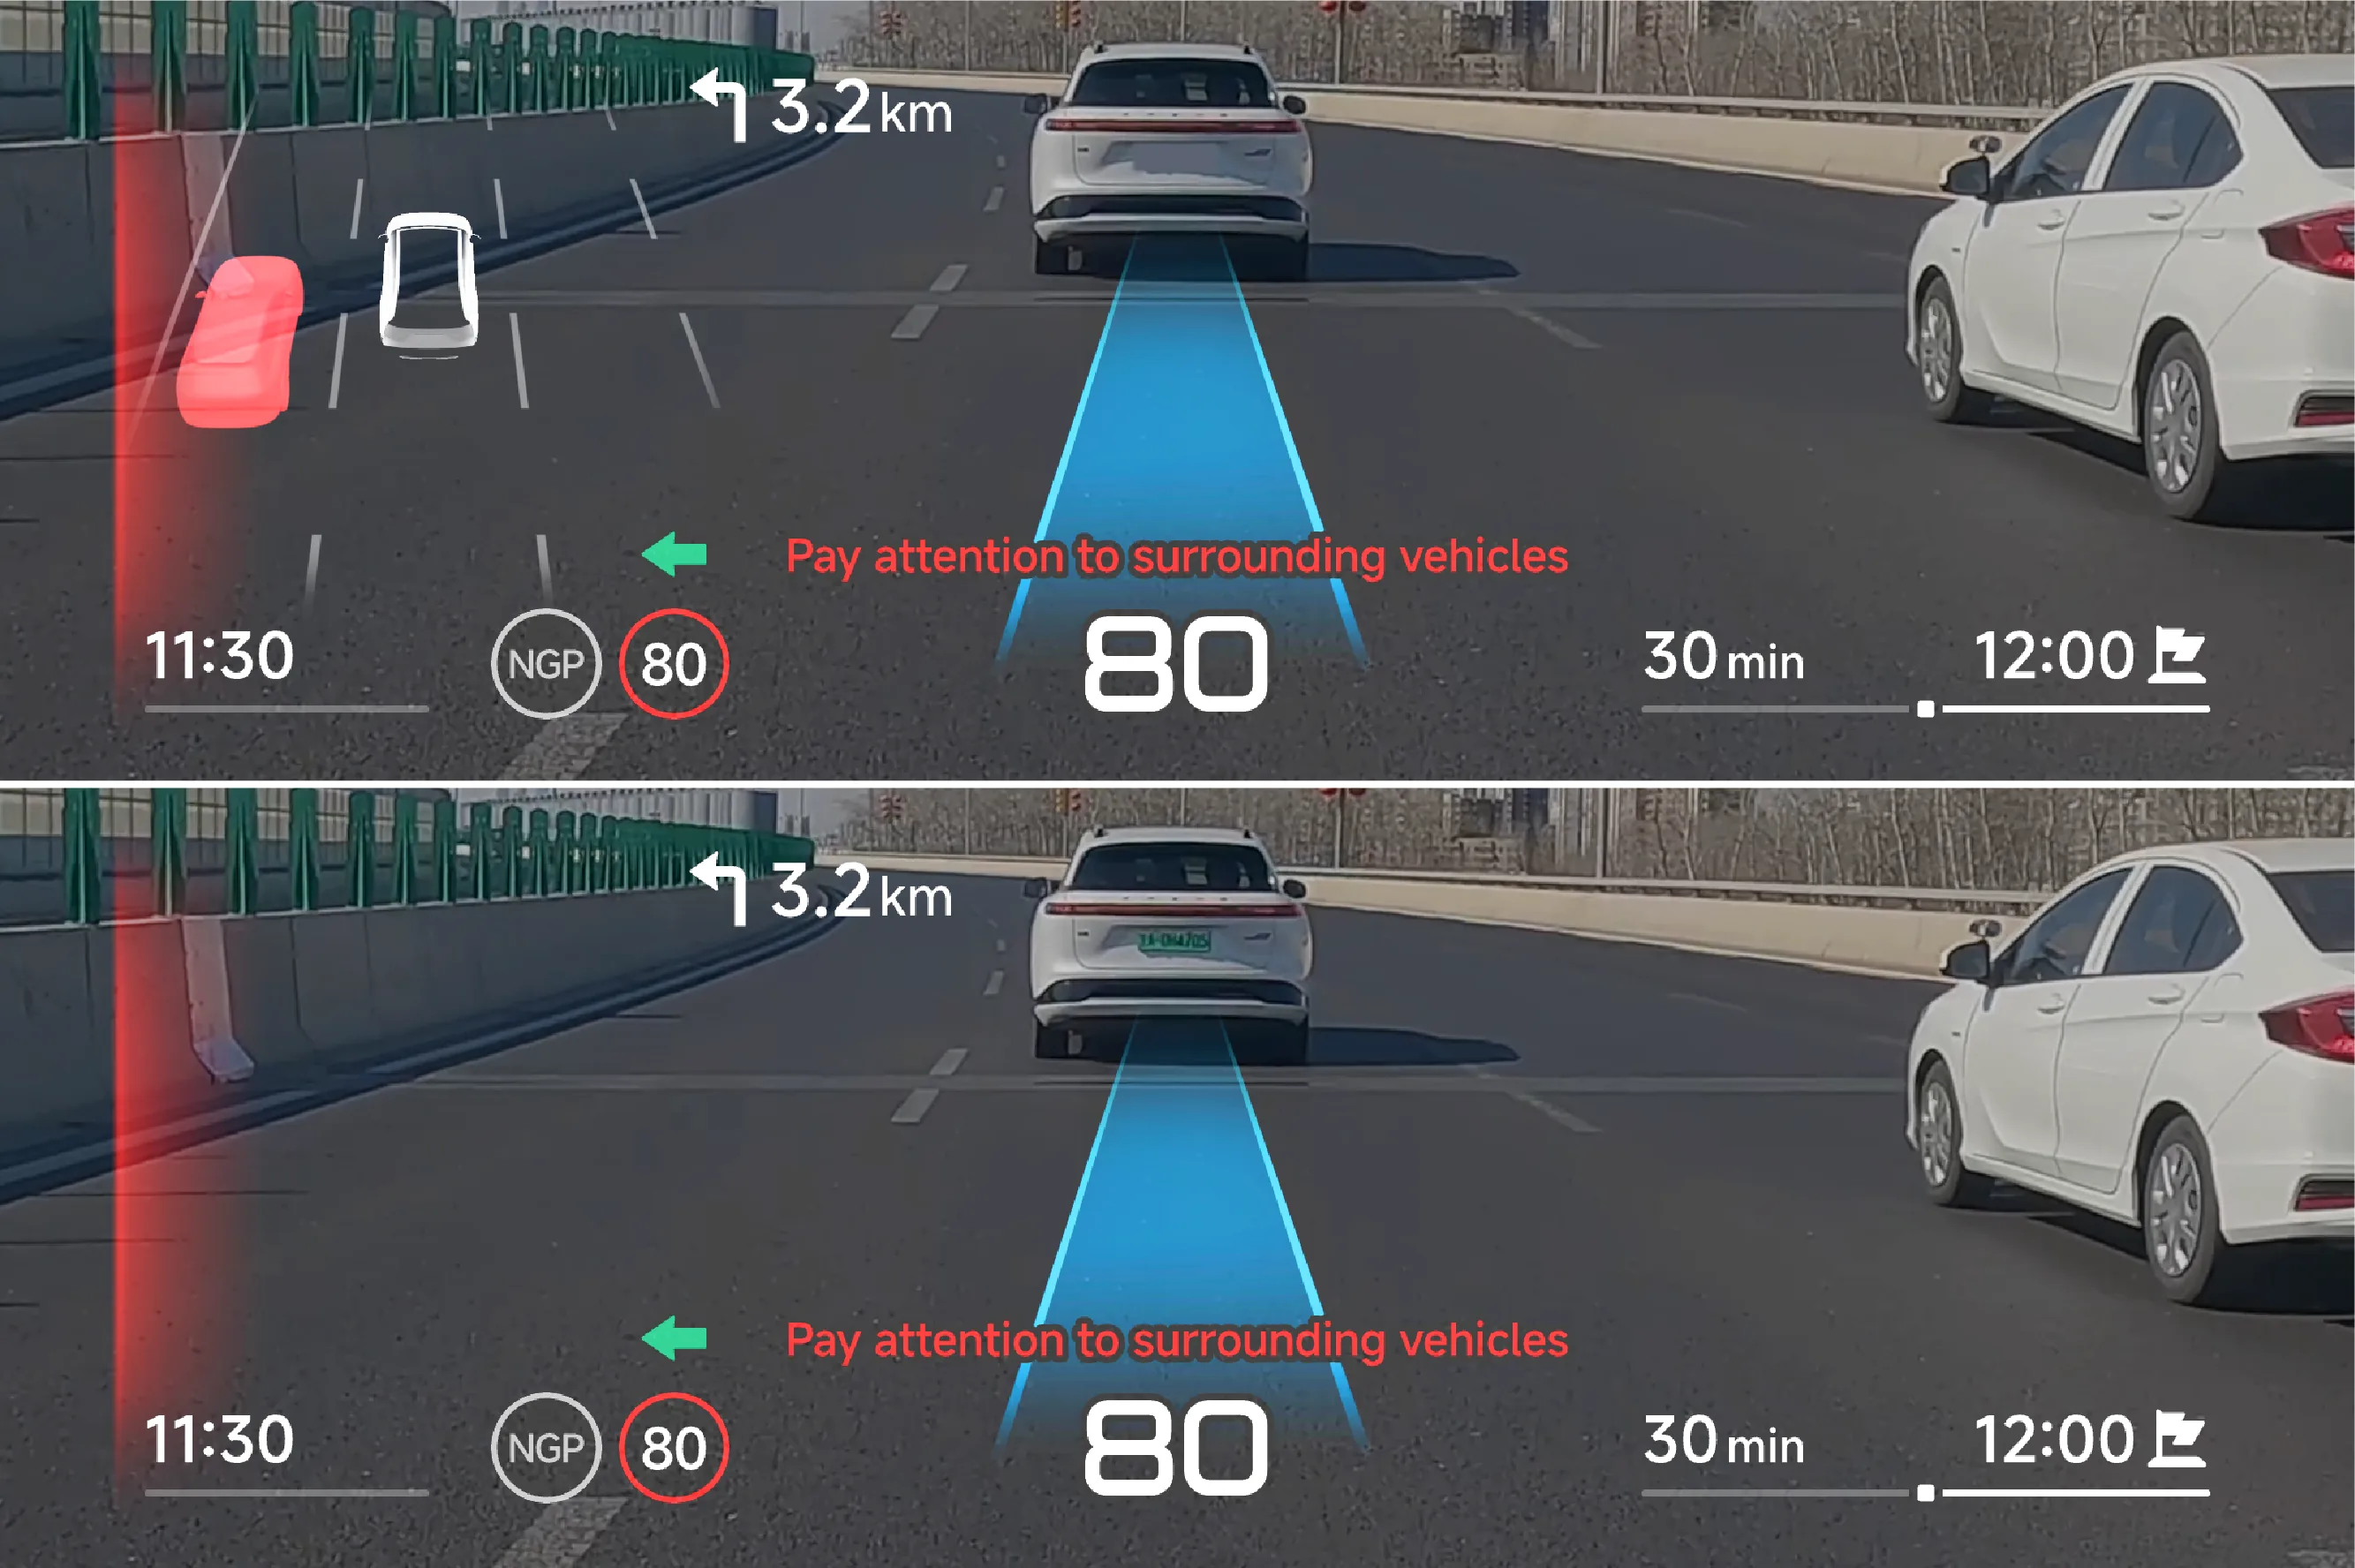
Enable the adjacent risk vehicle rendering switch. The AR-HUD interface displays surrounding risk vehicle/pedestrian targets.
Turn off the adjacent-risk vehicle rendering switch, and the AR-HUD interface will not display surrounding risk vehicle/pedestrian targets.
Tips The illustrations are for informational purposes only, depending on the scenario, the location of the risk targets displayed on the AR-HUD interface may vary, depending on the actual vehicle display.
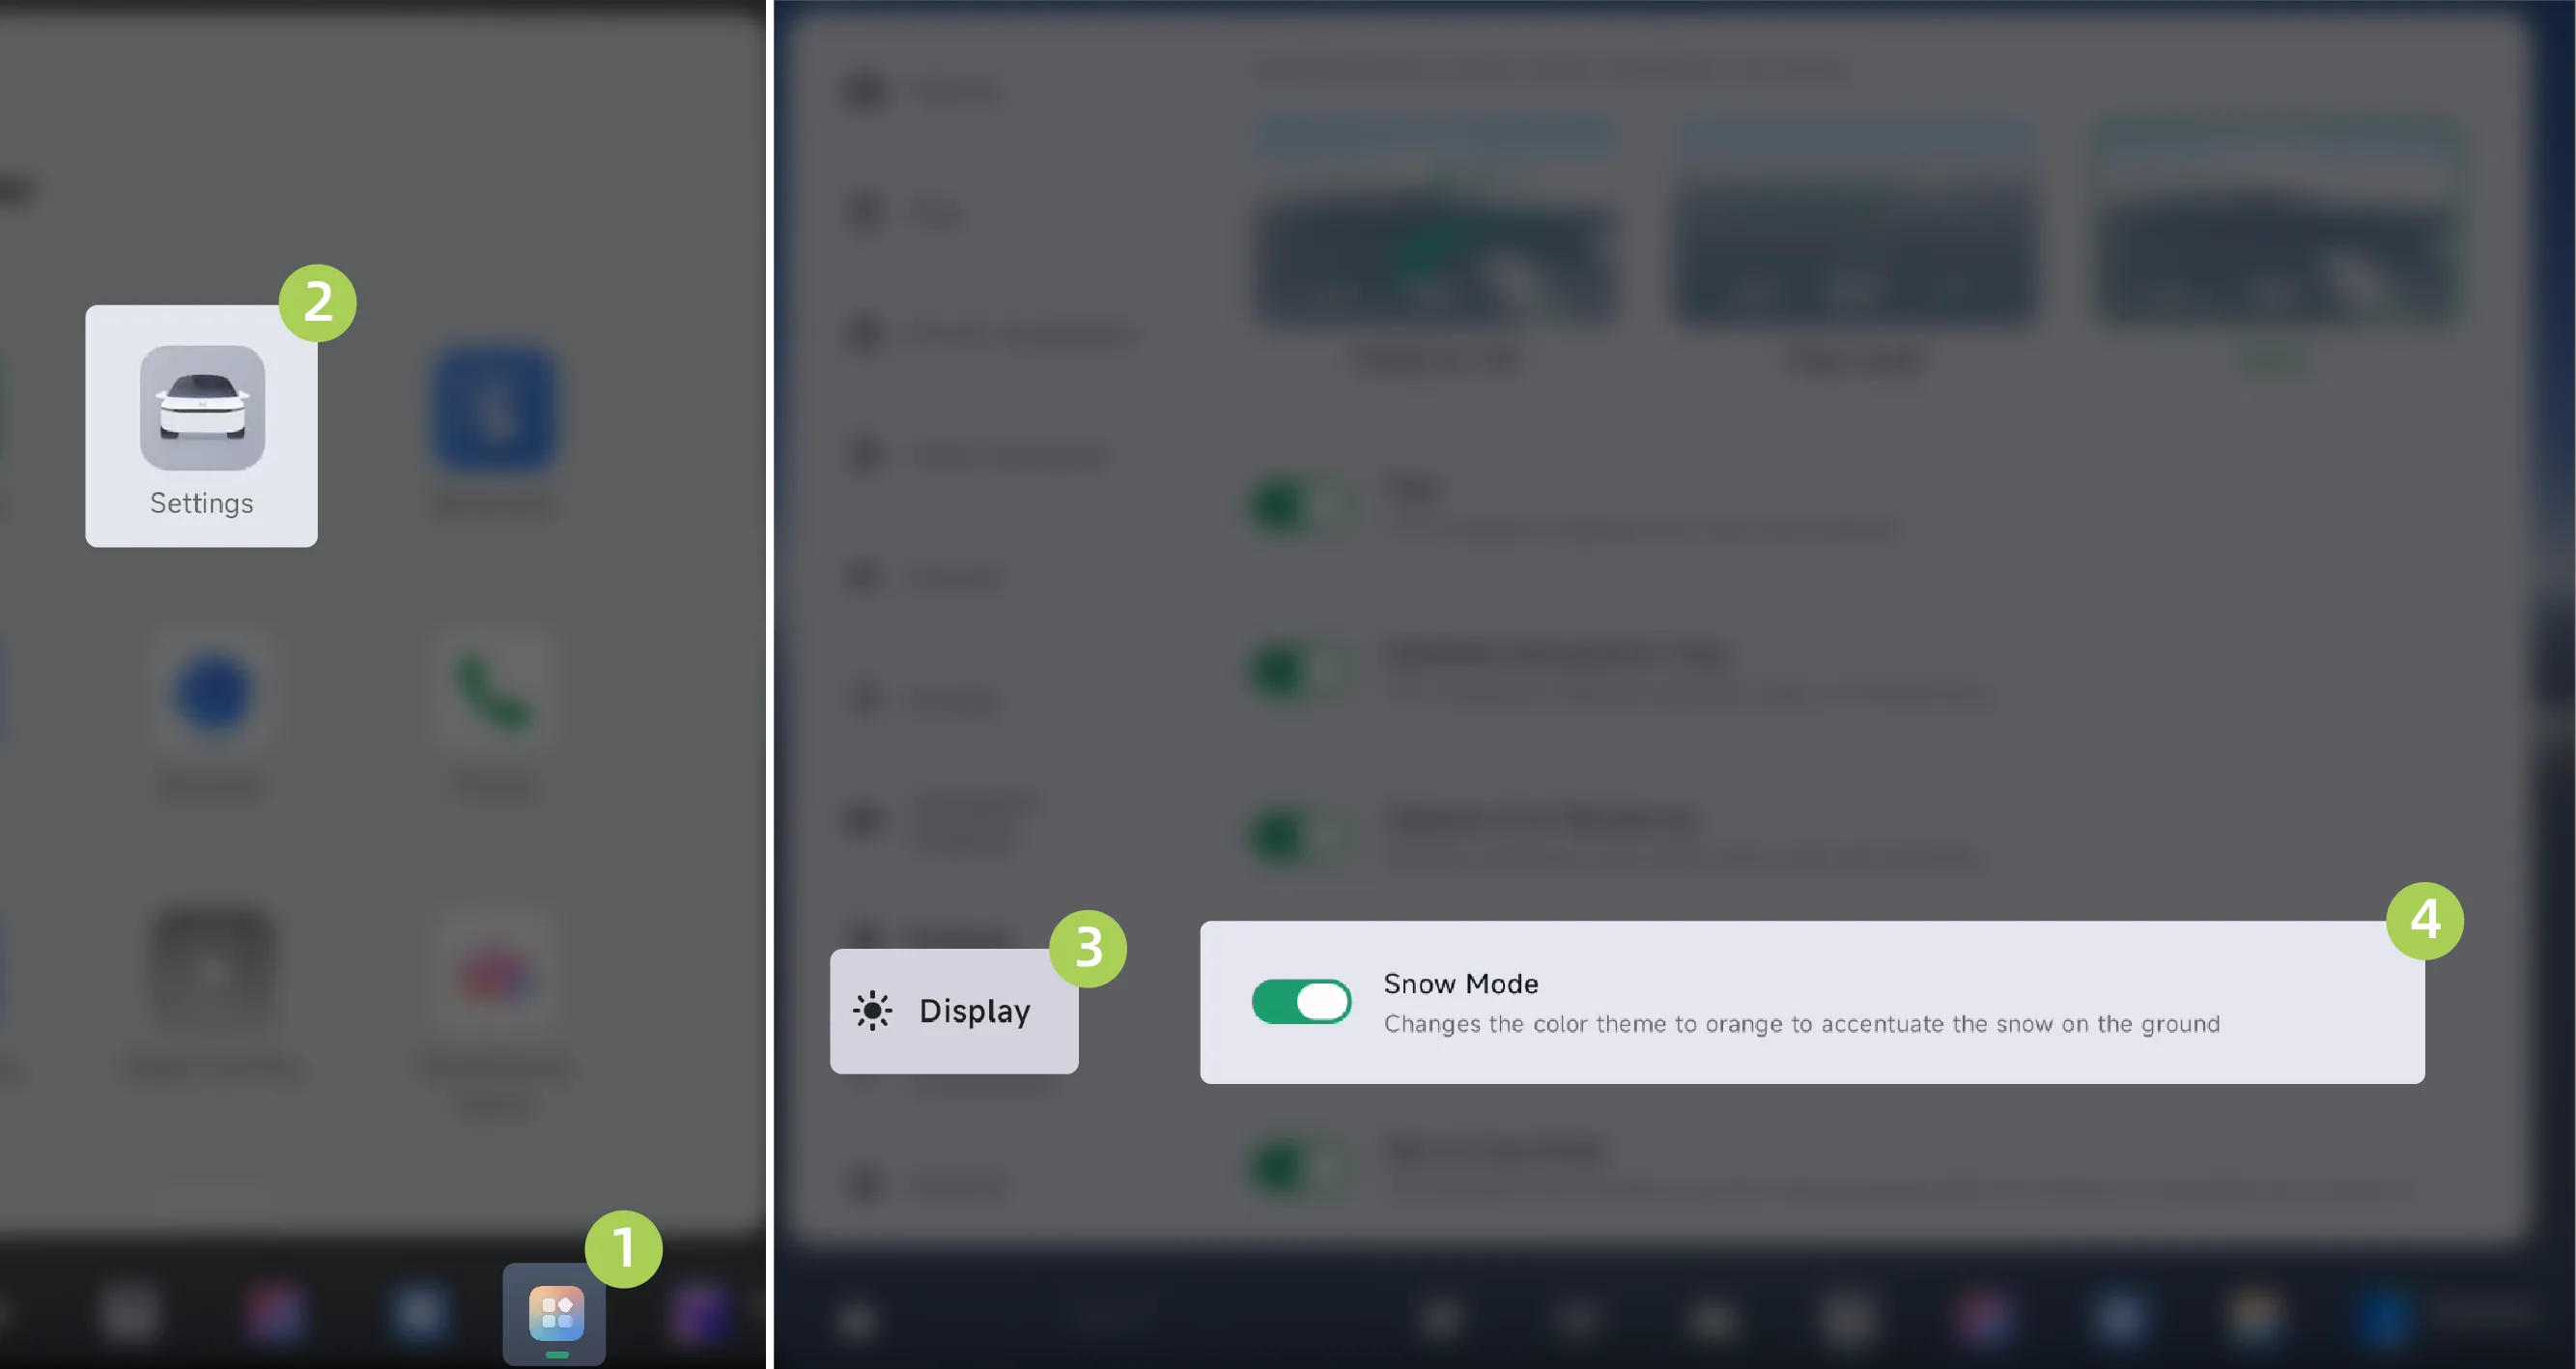
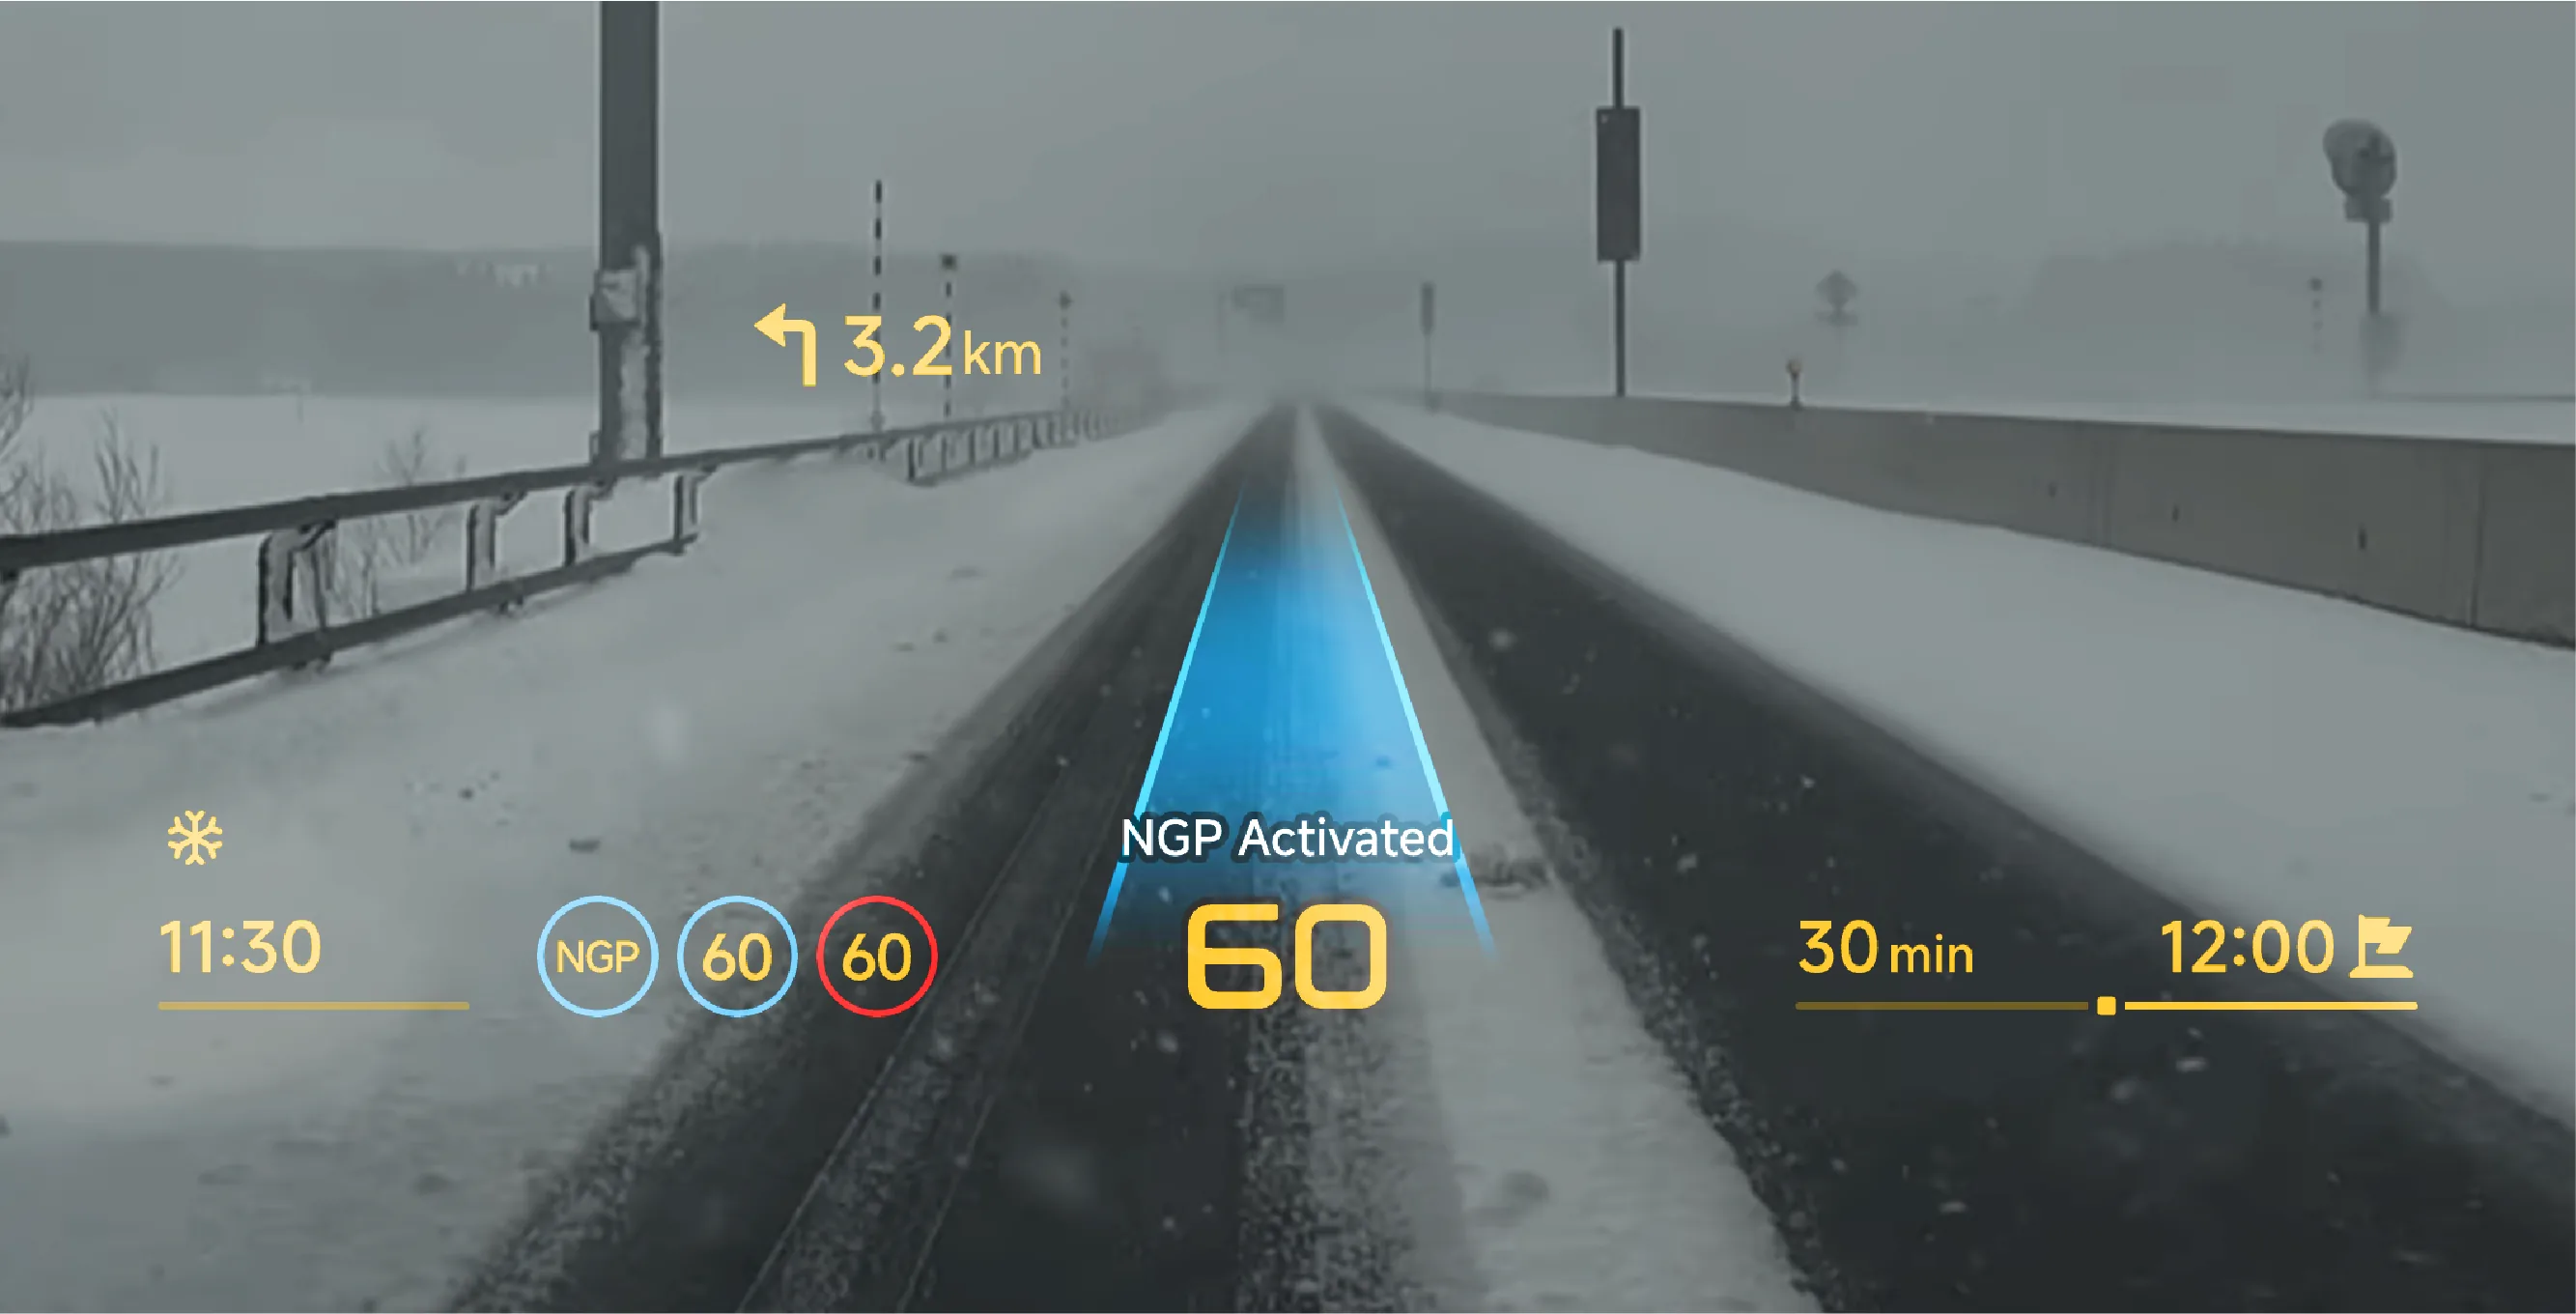
On the center display screen “ →Settings→Display”On the interface, Snow Mode can be turned on/off. After Snow Mode is turned on, the AR-HUD switches to orange, and the snow display becomes clearer.
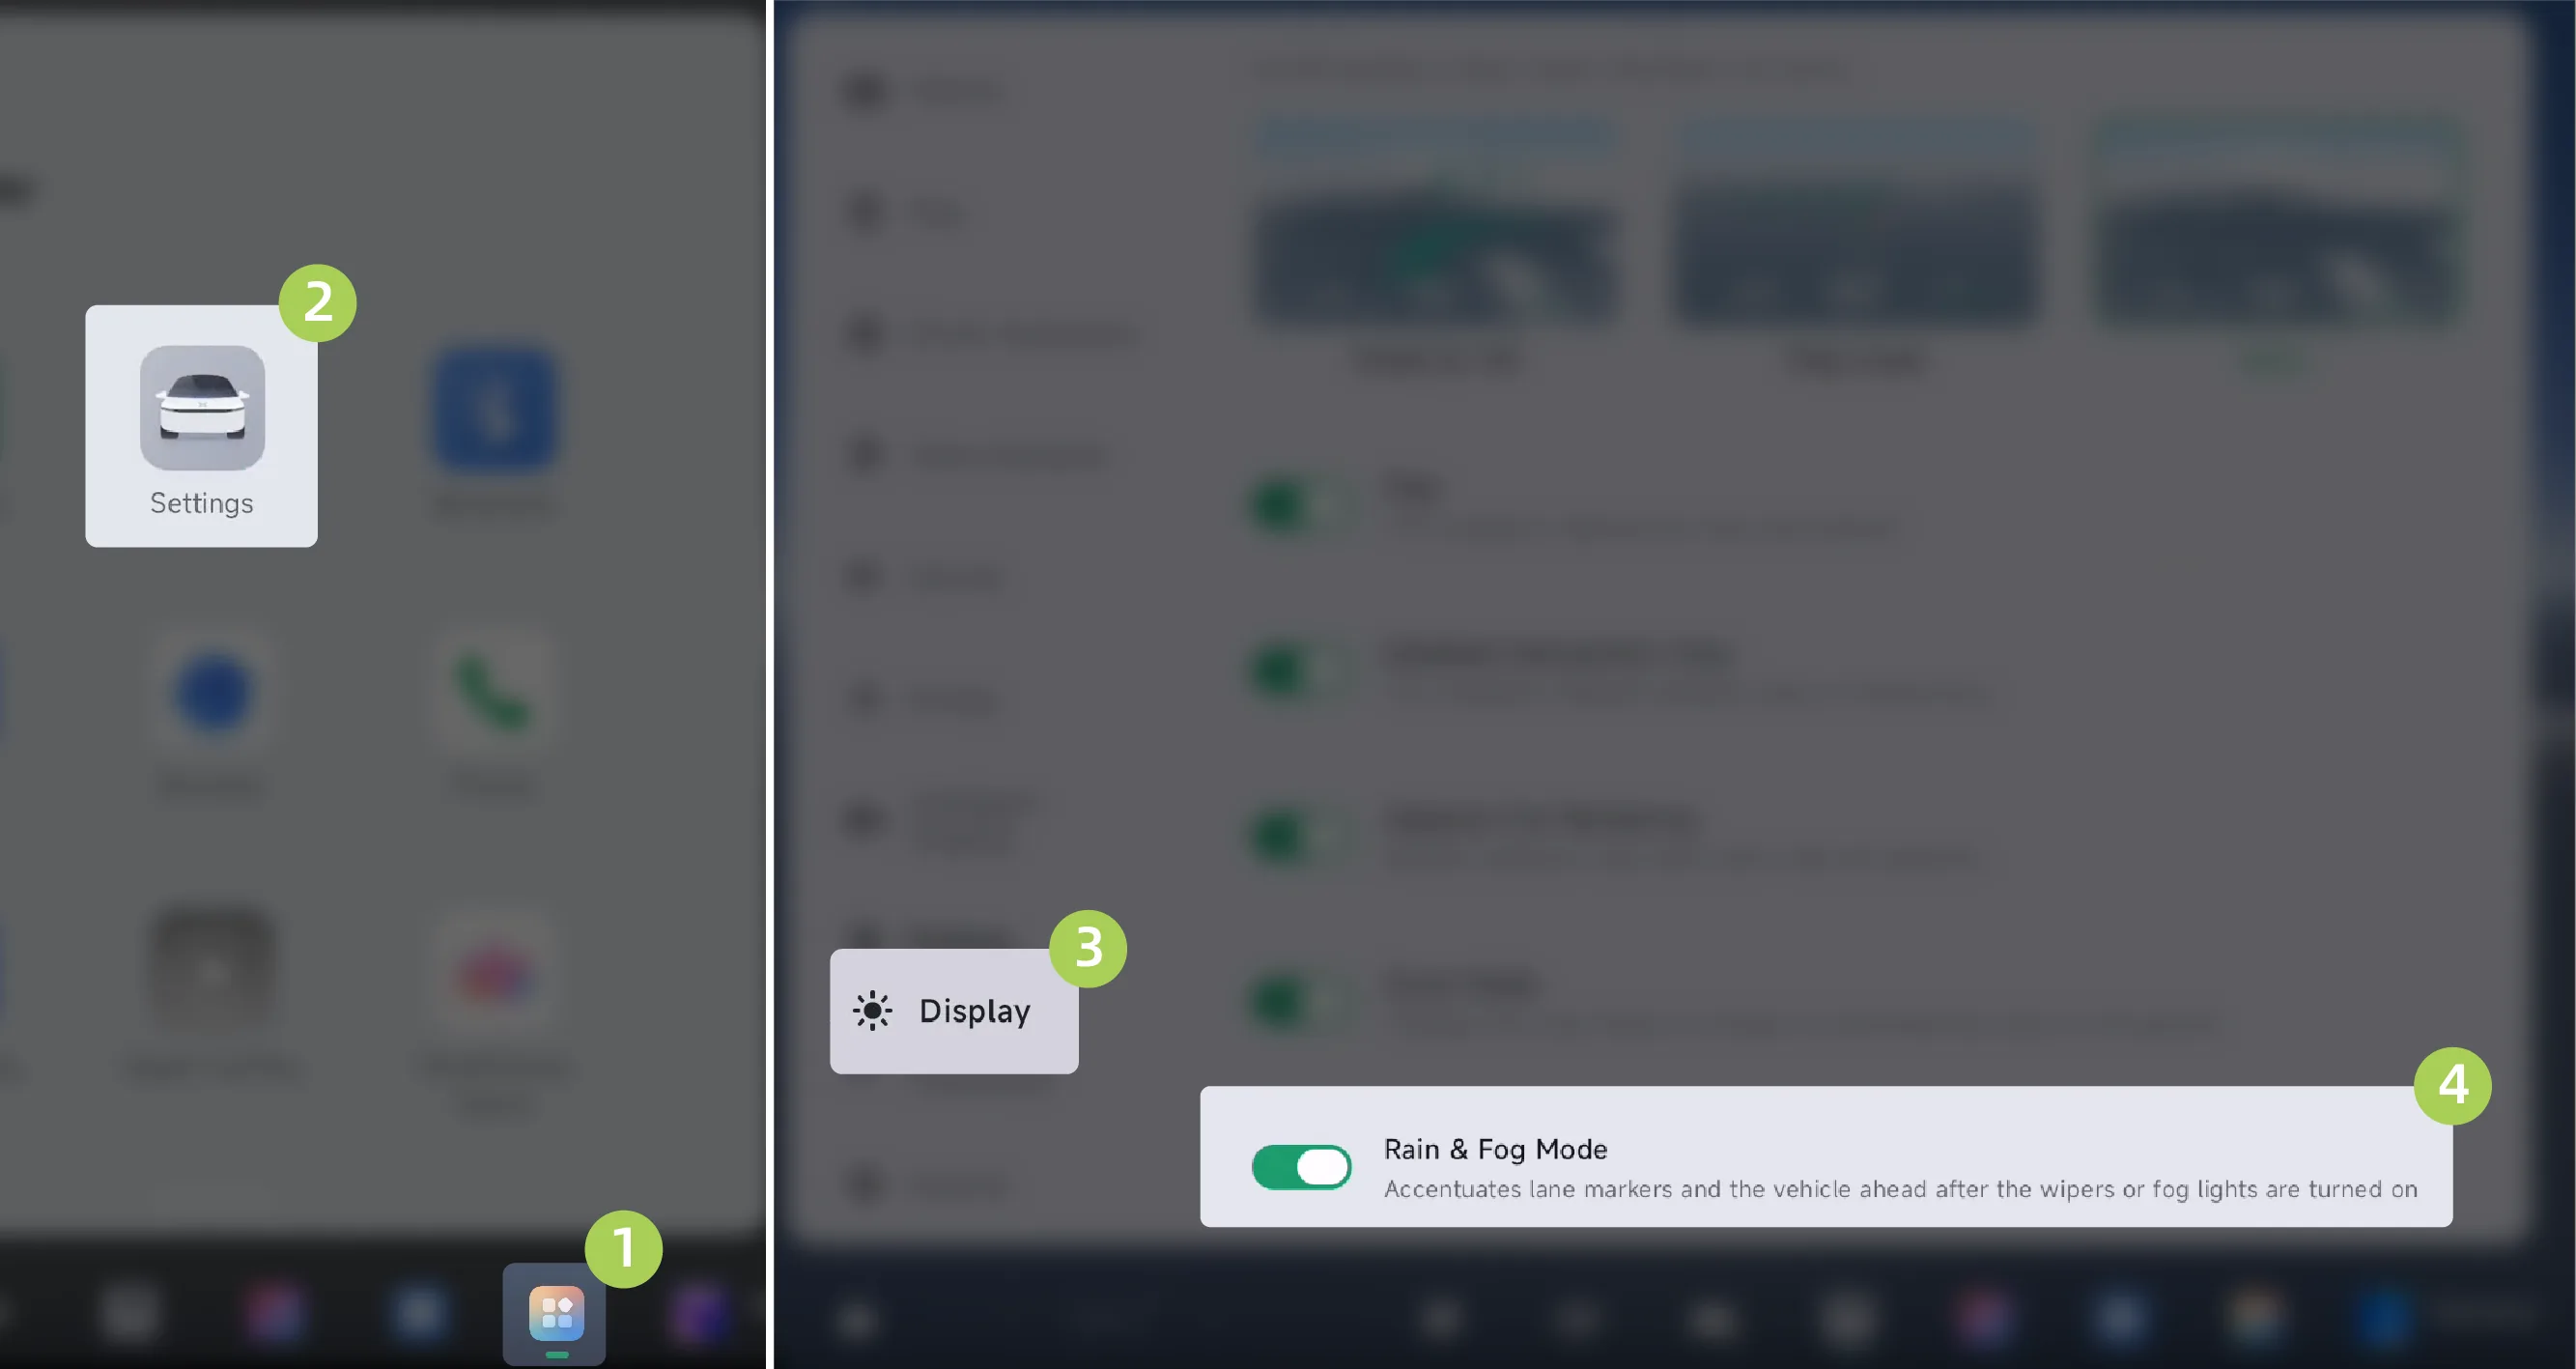
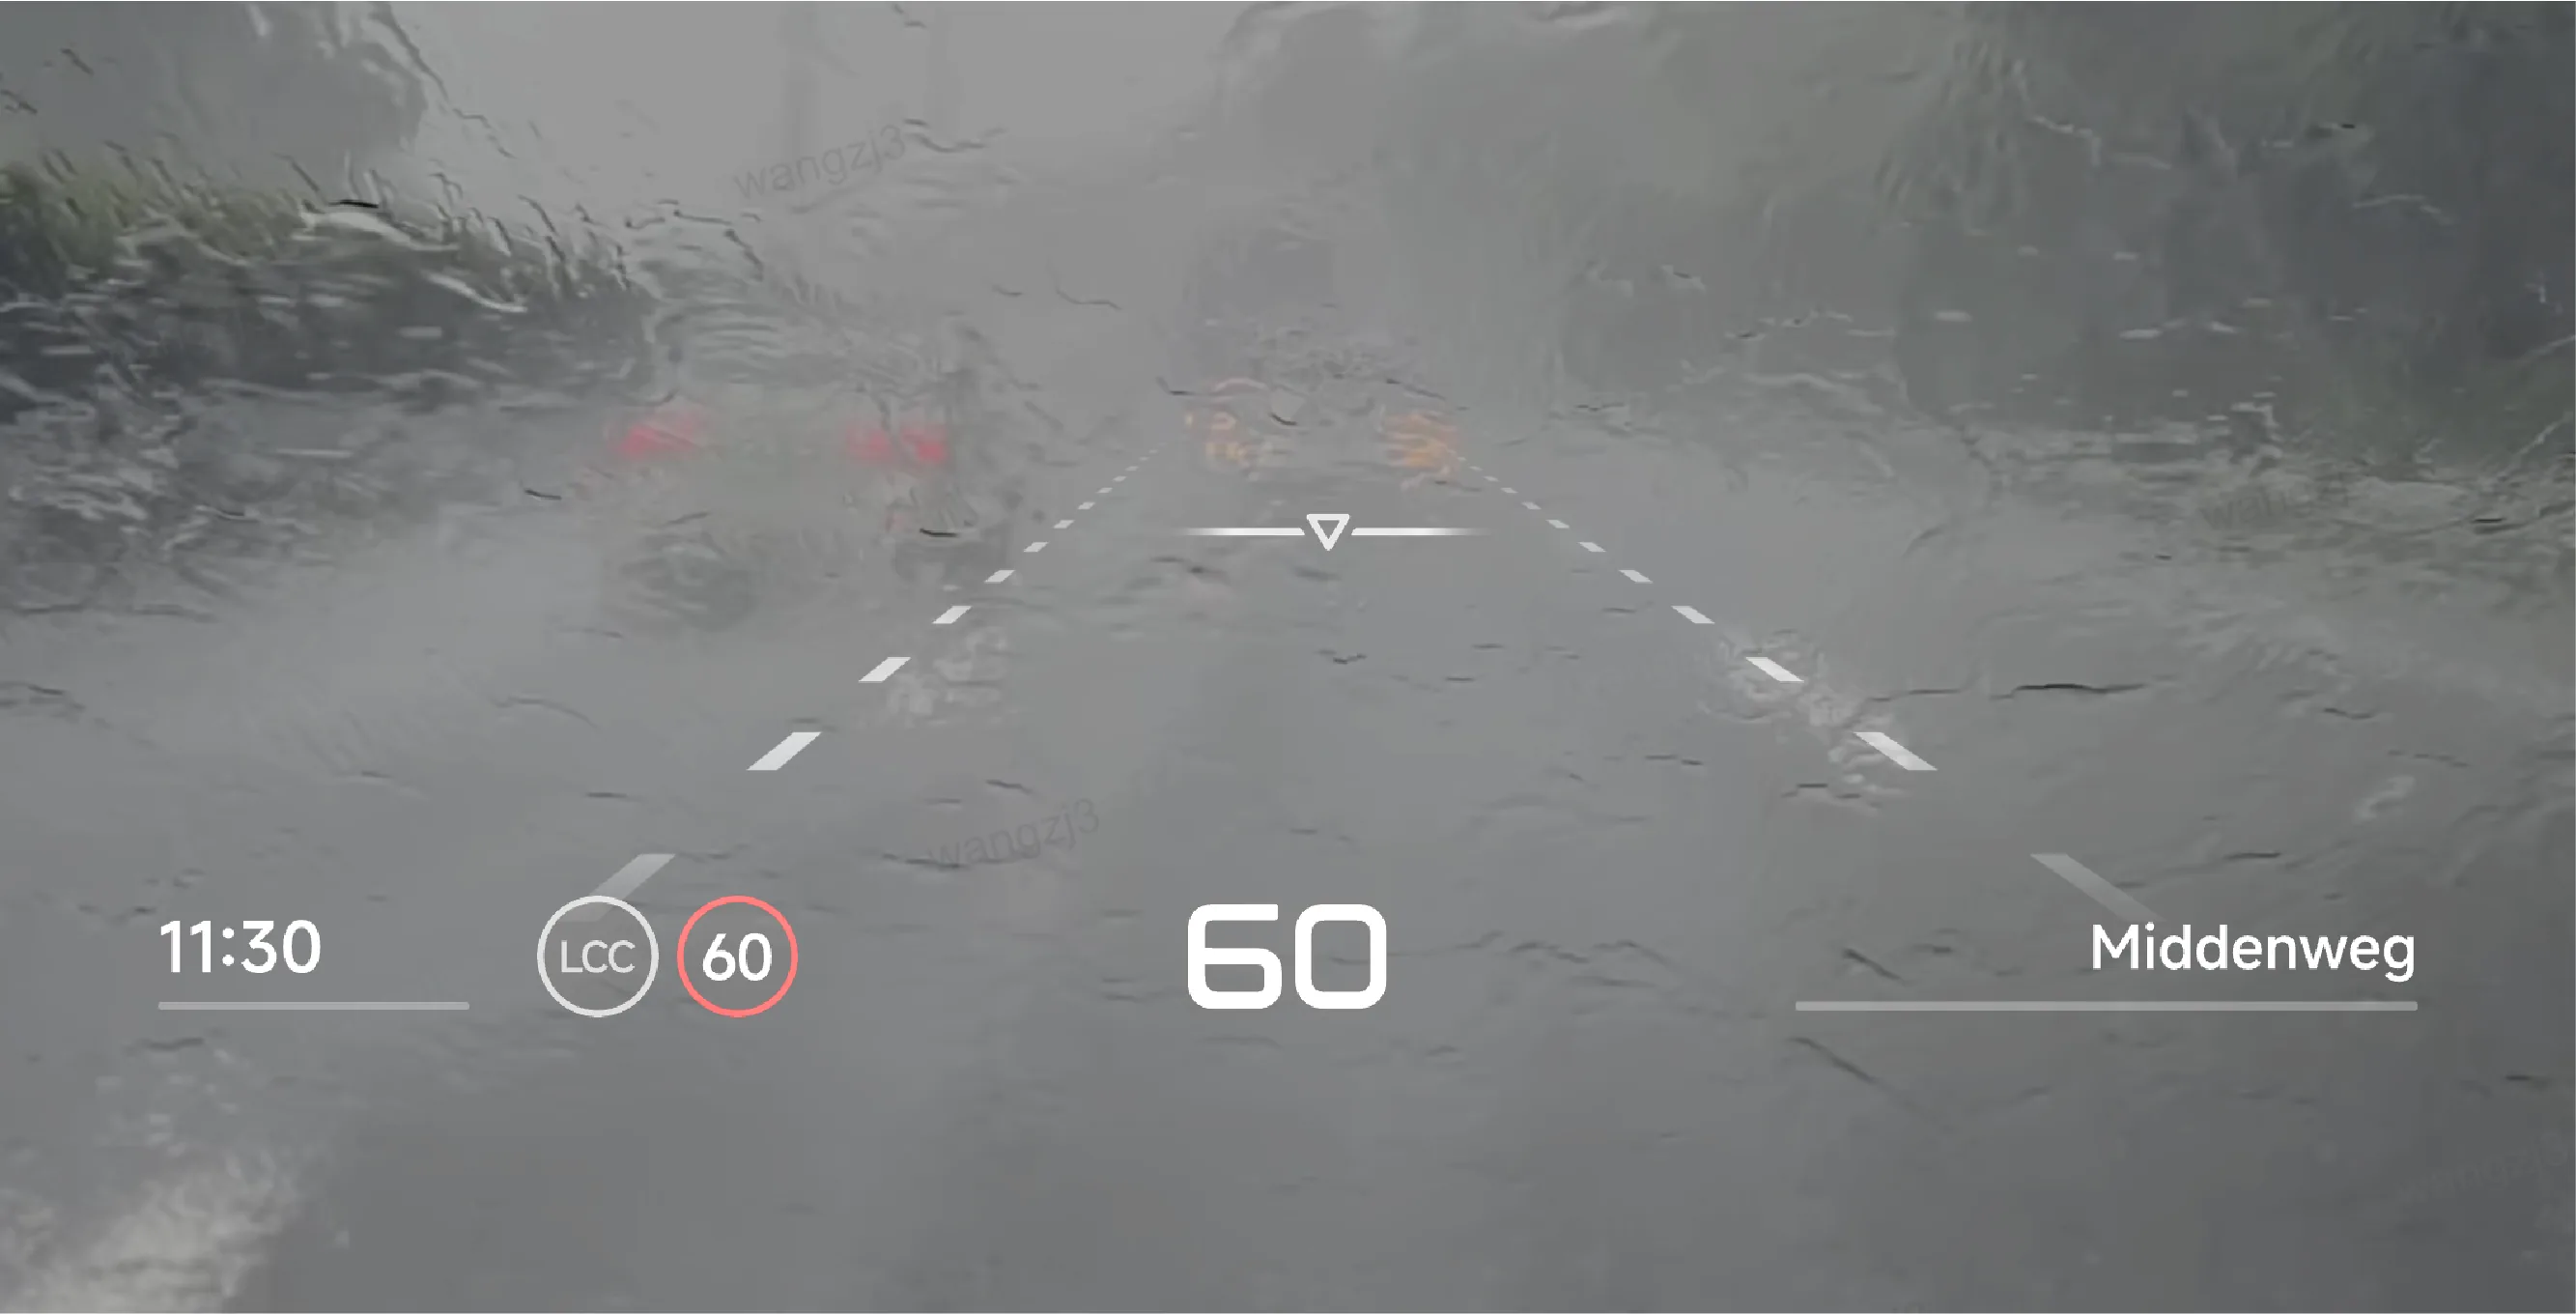
On the central control screen “ →Settings→Display”On the interface, Rain and Fog Mode can be turned on/off. After Rain and Fog Mode is turned on, when the wiper or fog light is turned on, the augmented reality lead vehicle and lane lines are enhanced.
The side rear image when turning can be displayed in the AR-HUD in the following ways:
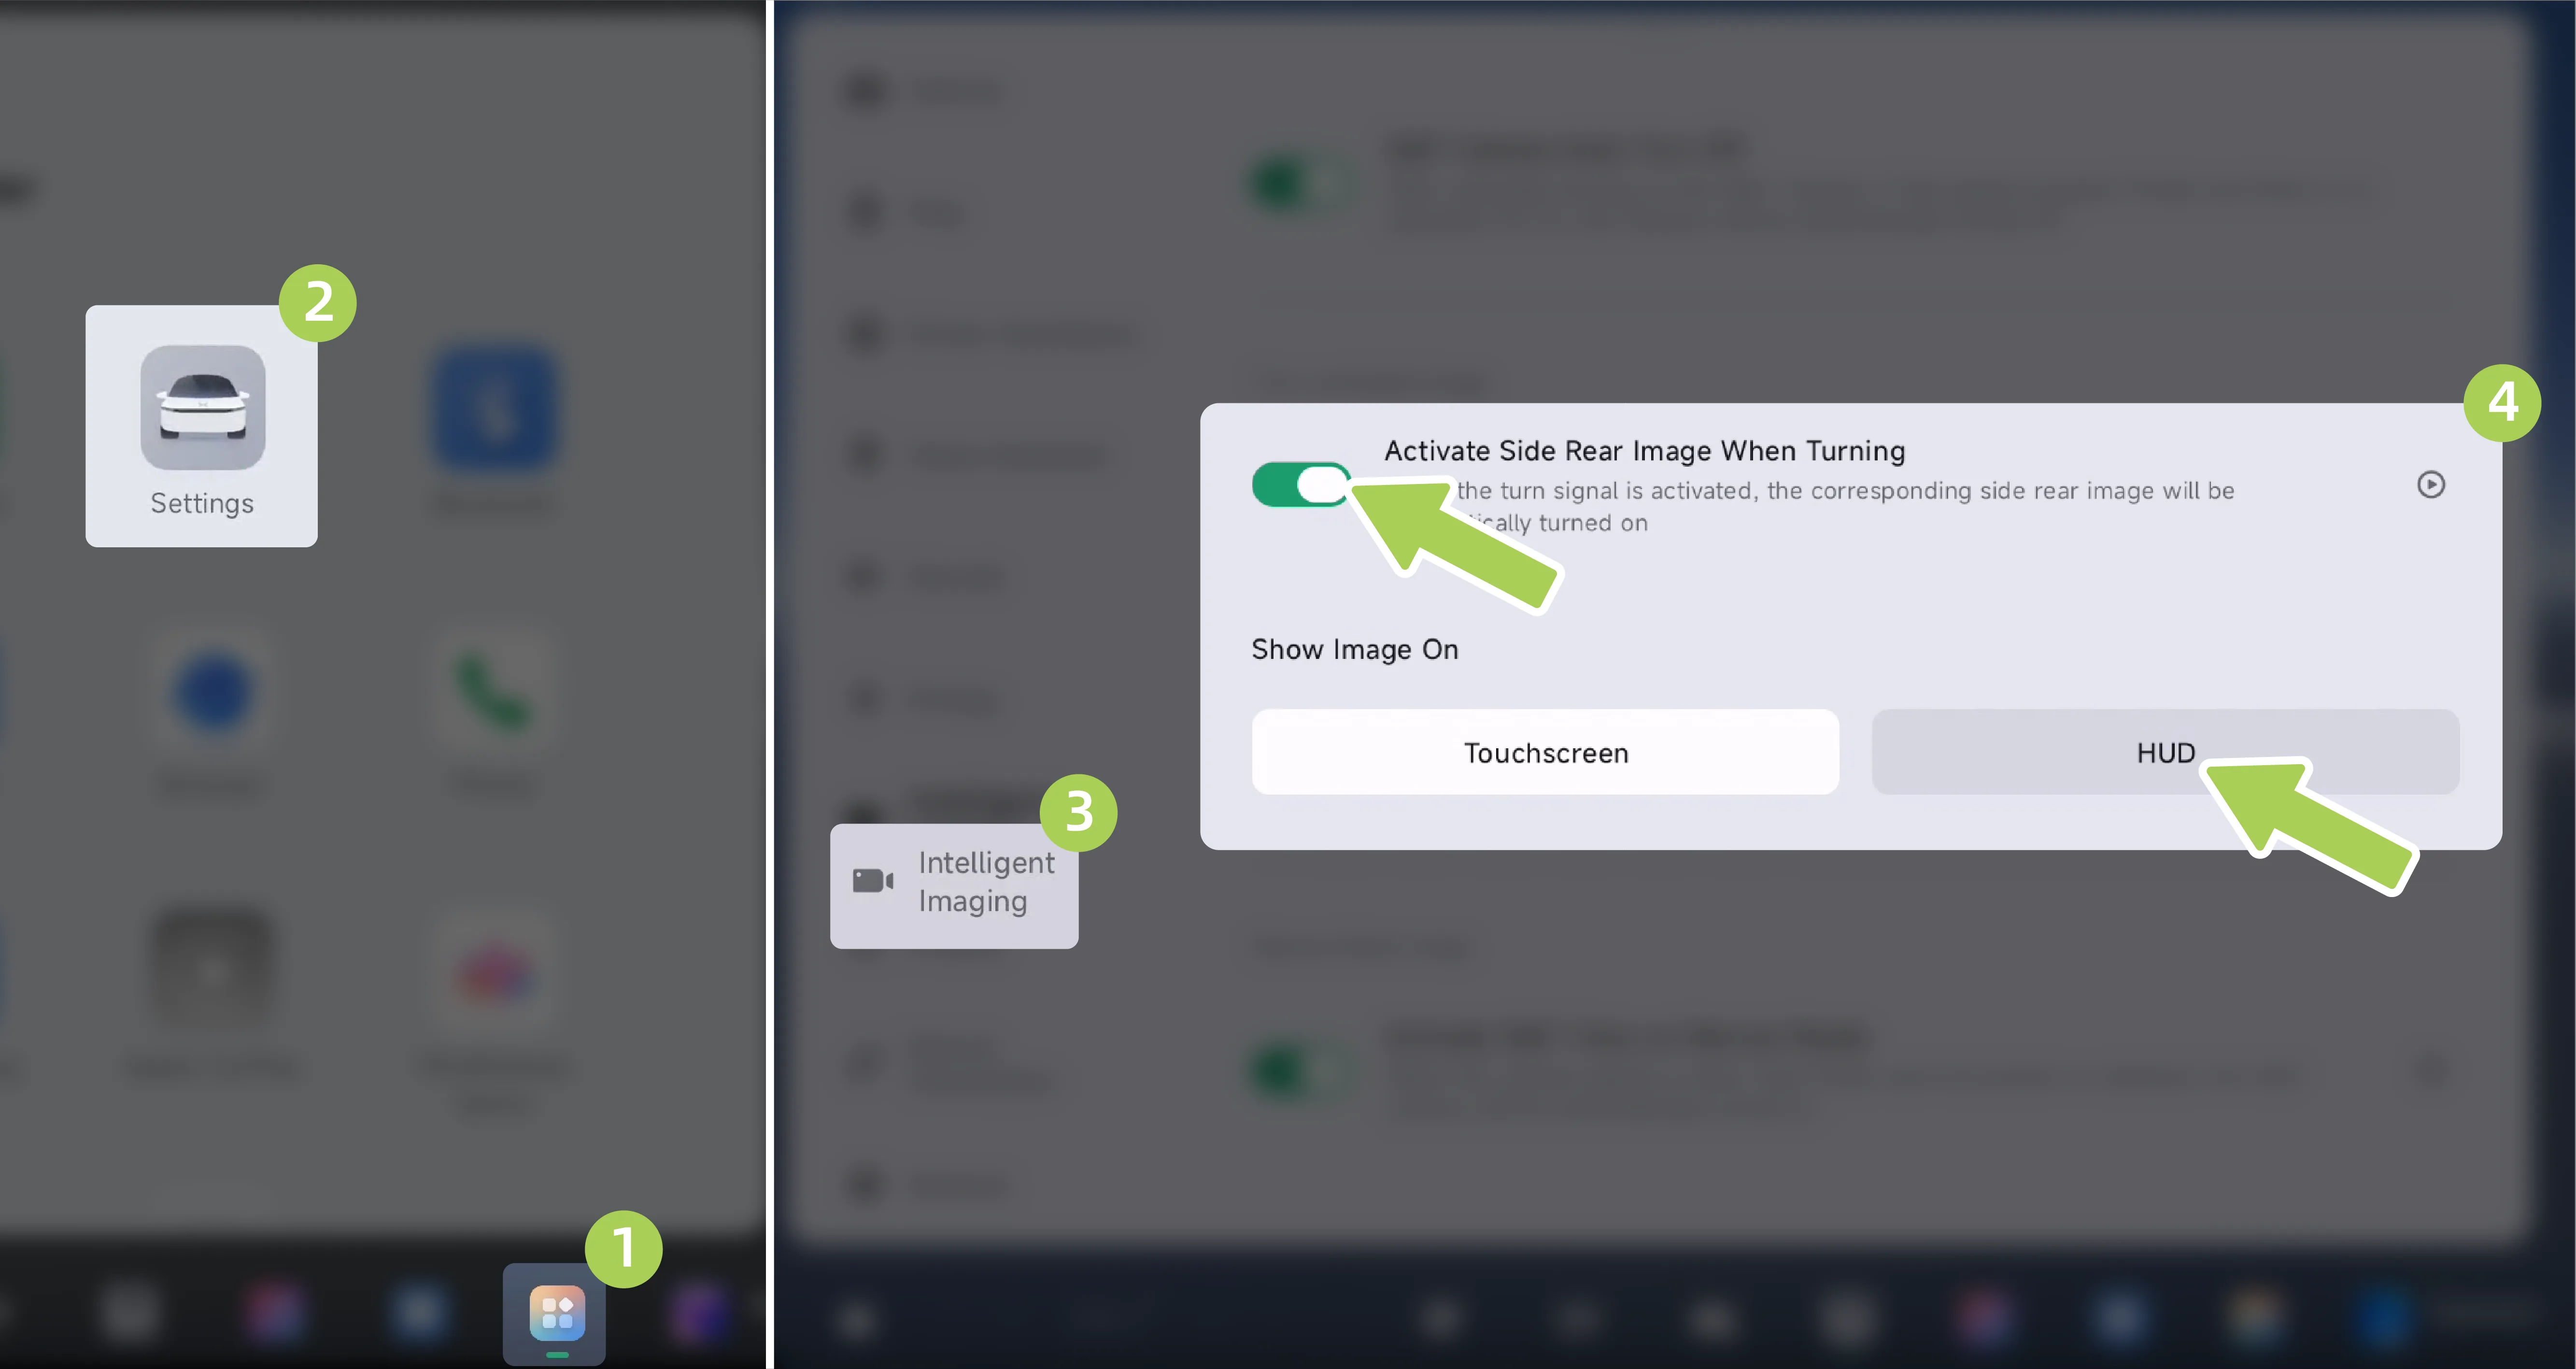
On the center display screen “ →Settings→Intelligent Imaging”On the interface, after turning on Activate Side Rear Image When Turning, you can set the image position to be displayed on the HUD.
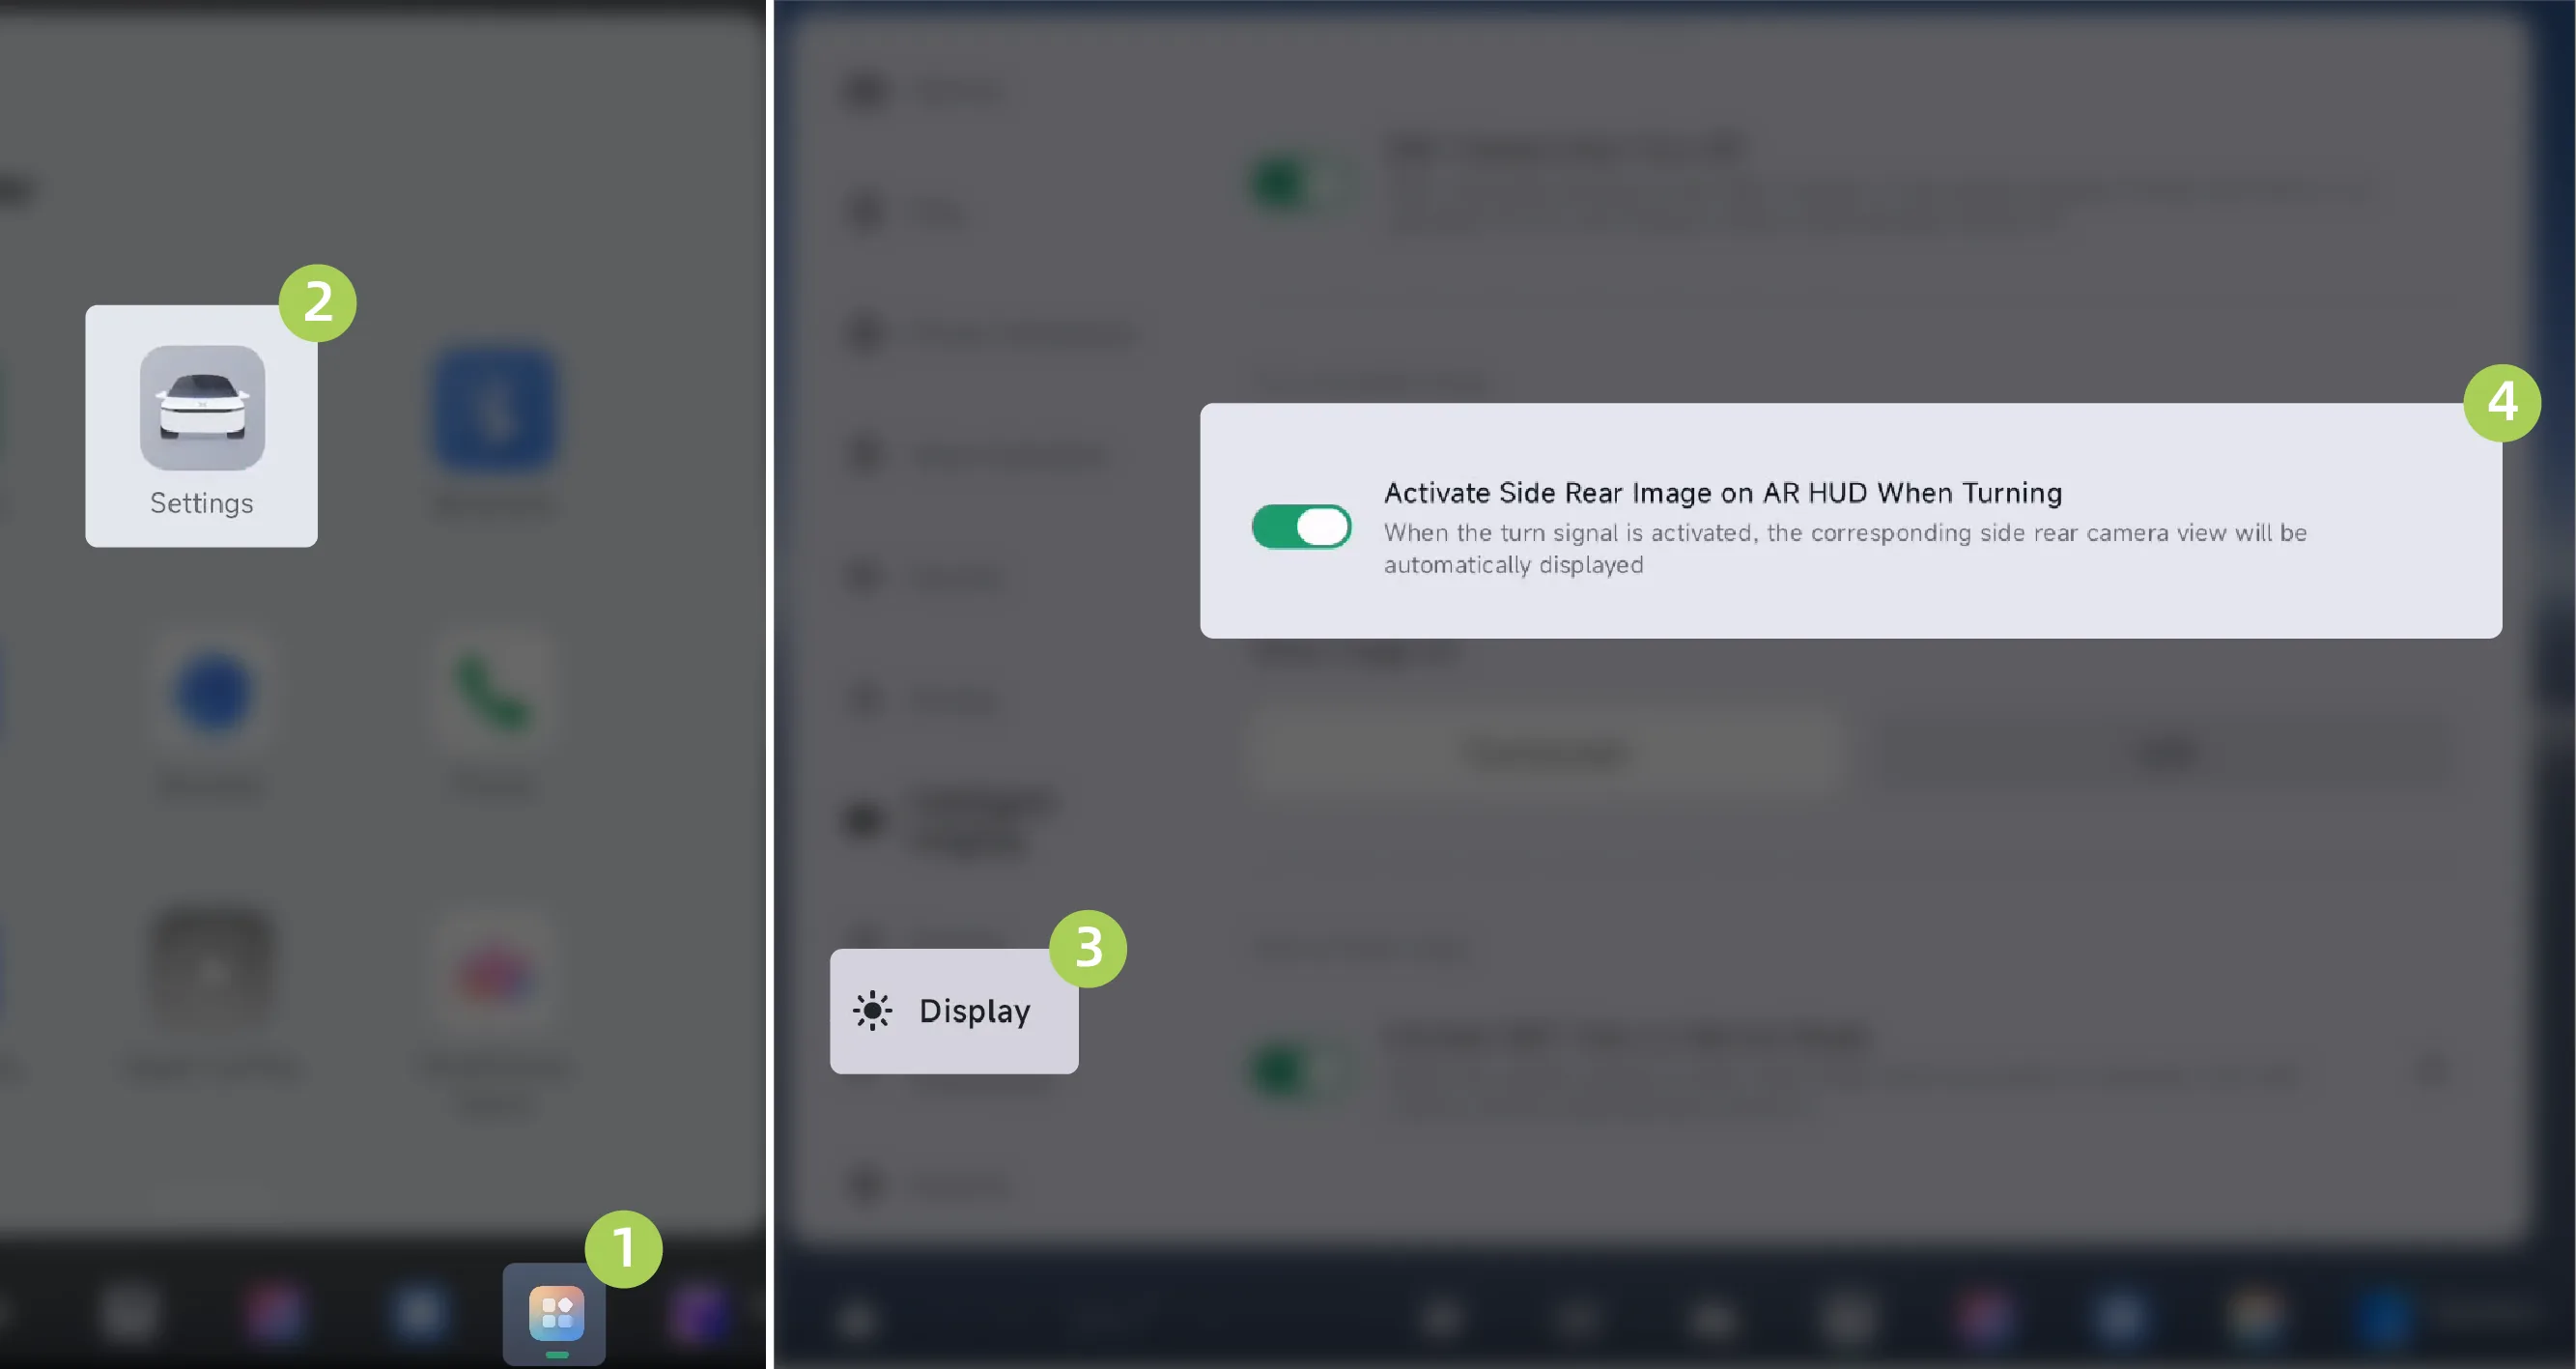
On the central control screen “ →Settings→Display”On the interface, you can turn on/off the Activate Side Rear Image When Turning function of AR-HUD.
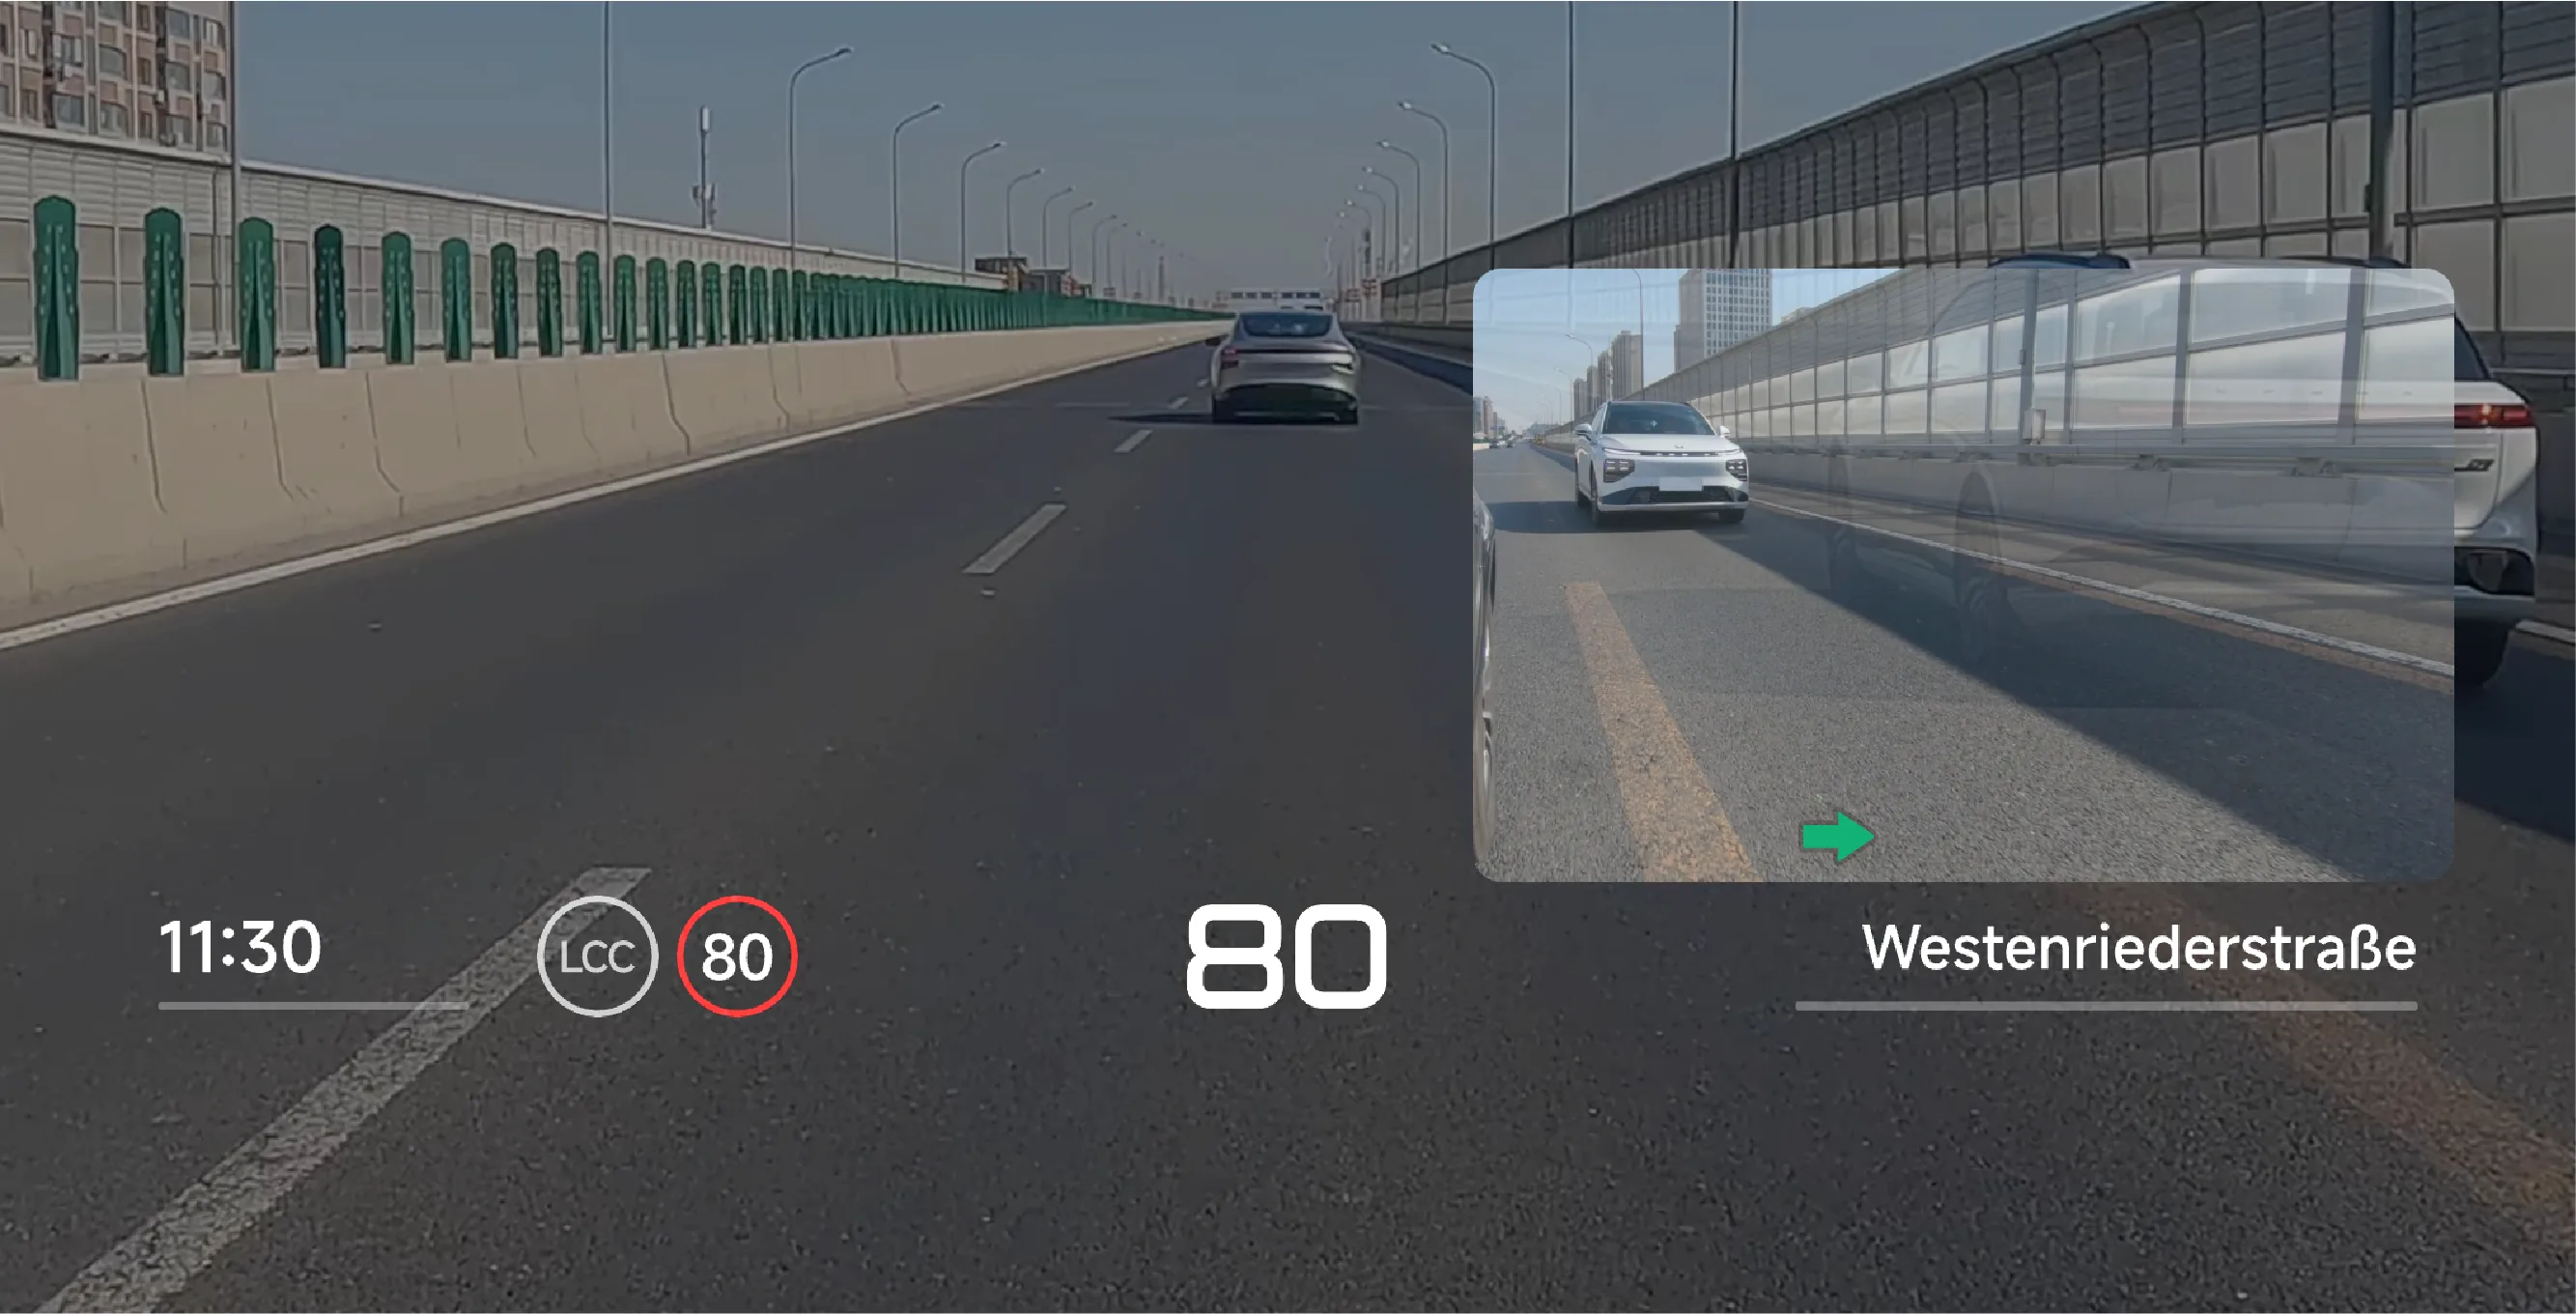
When the vehicle is in D gear and the turn signal is turned on, the AR-HUD automatically displays the corresponding side rear image, making it convenient to view the side rear blind spot and assist driving.
Warning Rear View on the steering active side is an assistance function for reference only and does not replace the driver's view of the surrounding environment. You are responsible for driving safely as the driver of the vehicle, and do not rely on this feature to control the vehicle. Failure to do so could result in injury.
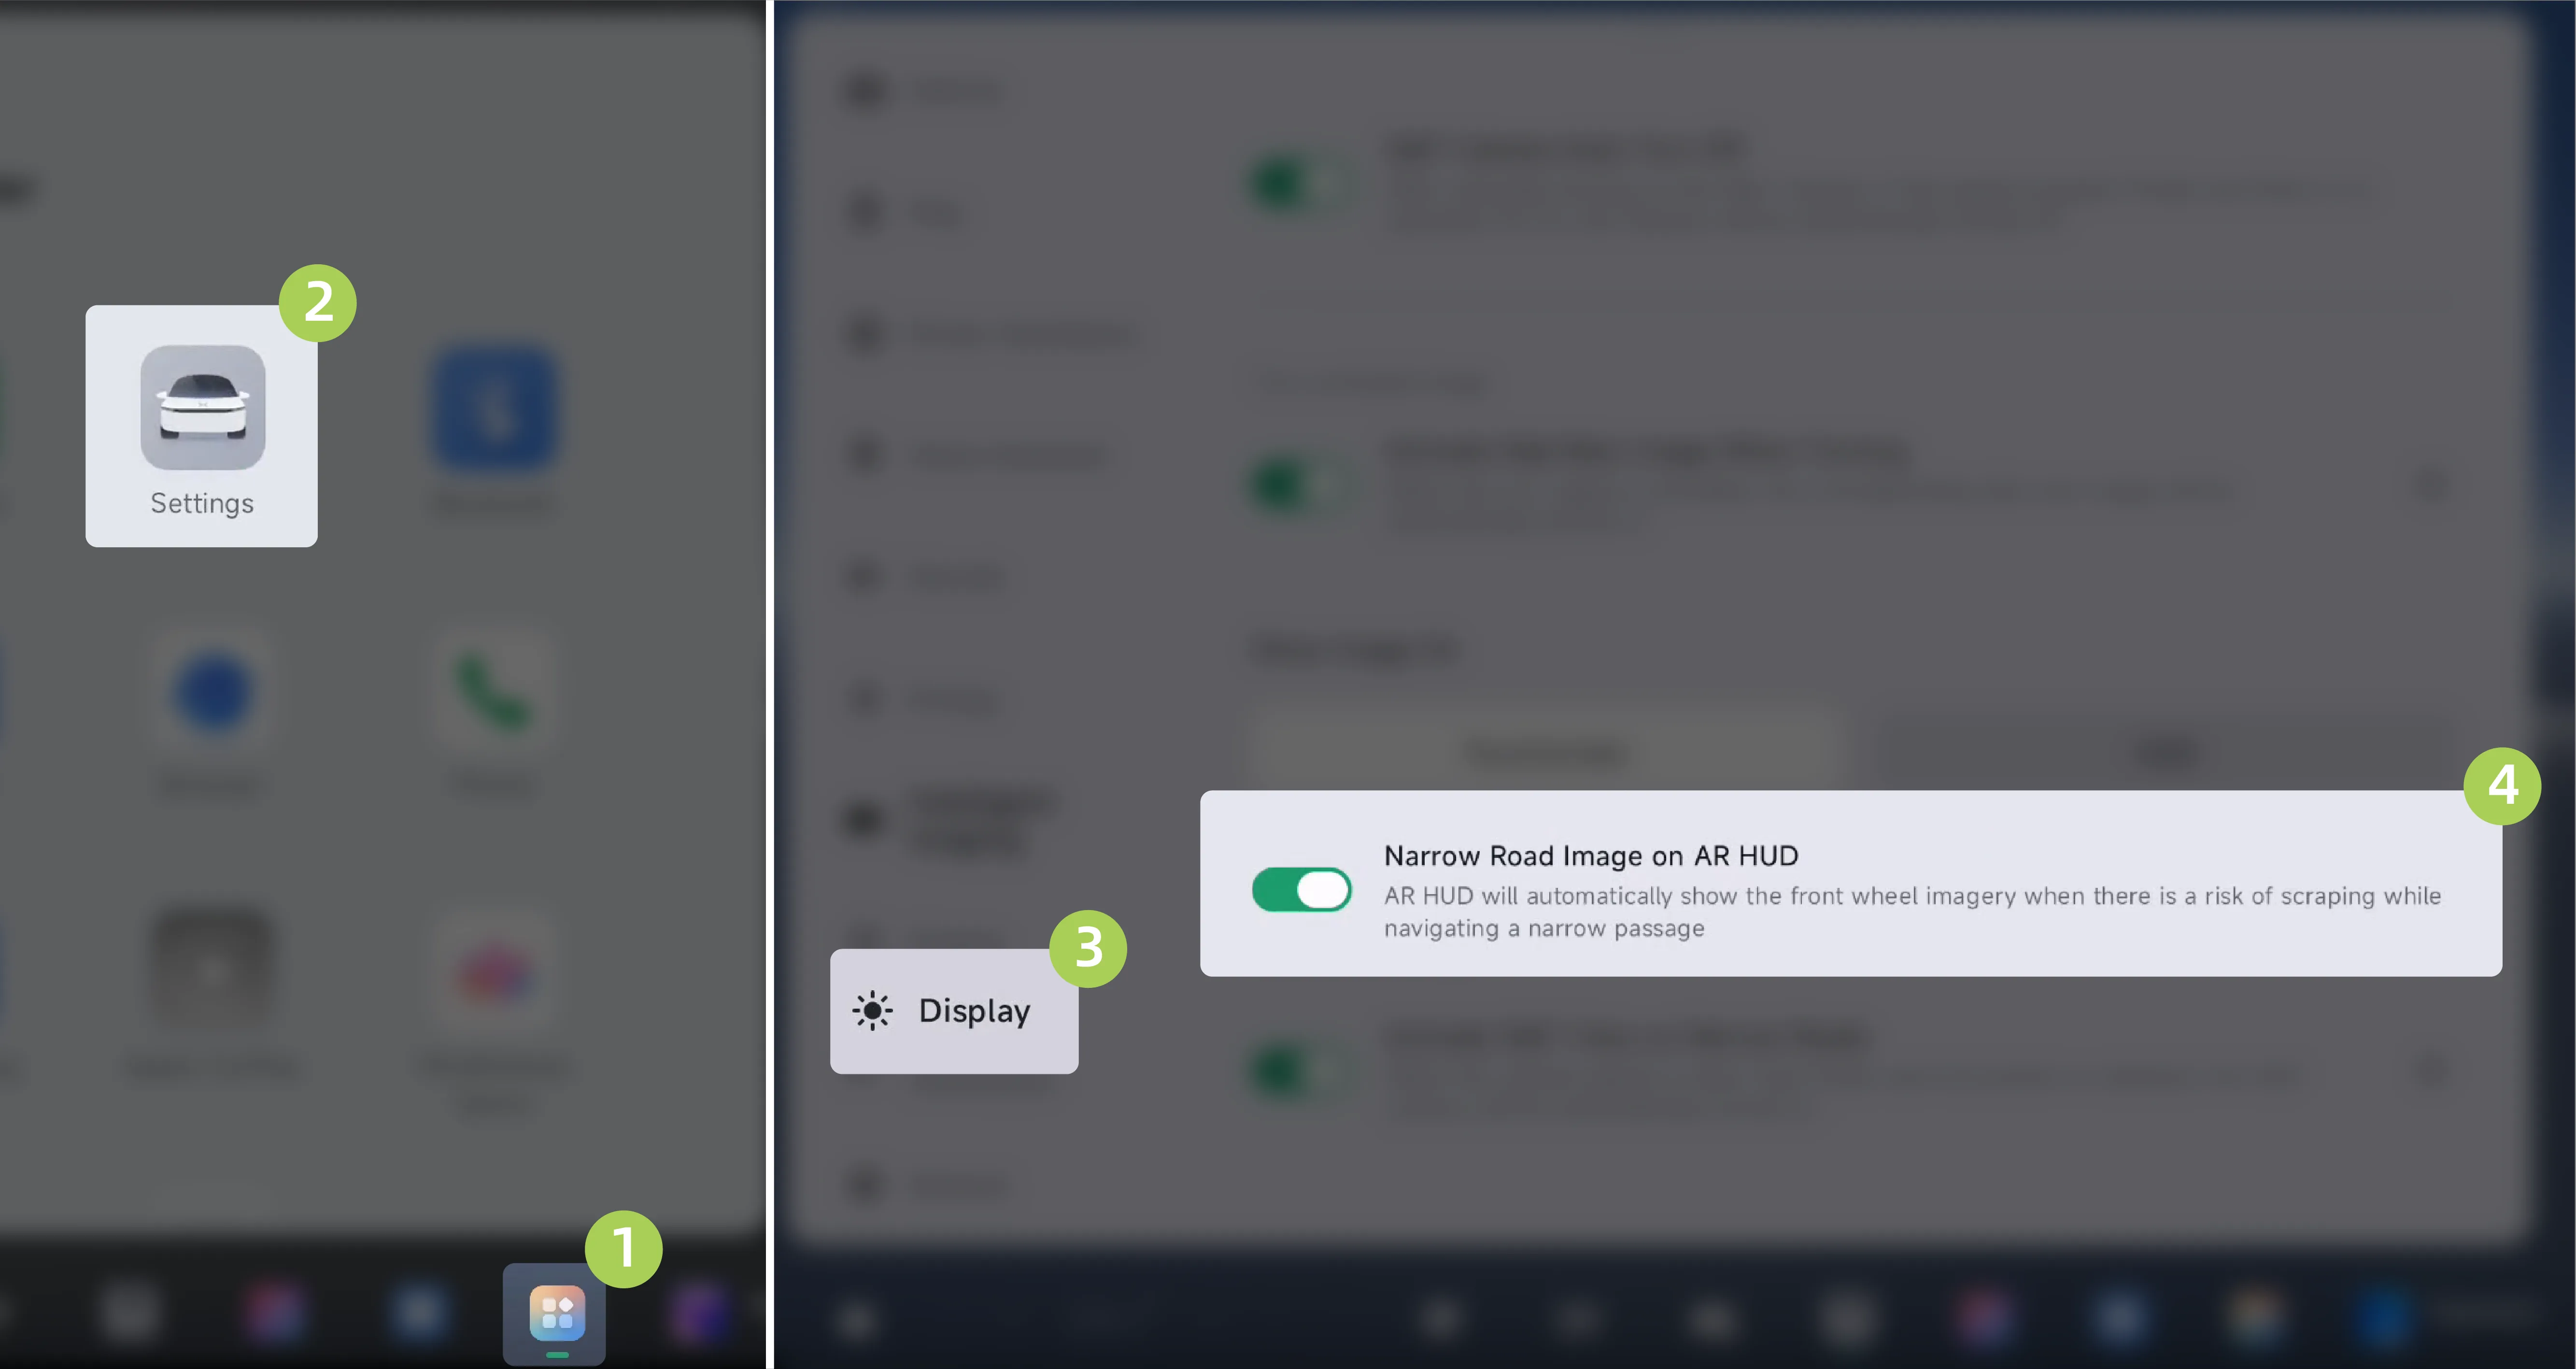
On the central control screen “ →Settings→Display”On the interface, you can turn AR-HUD Intelligent Narrow Road Imaging on/off.
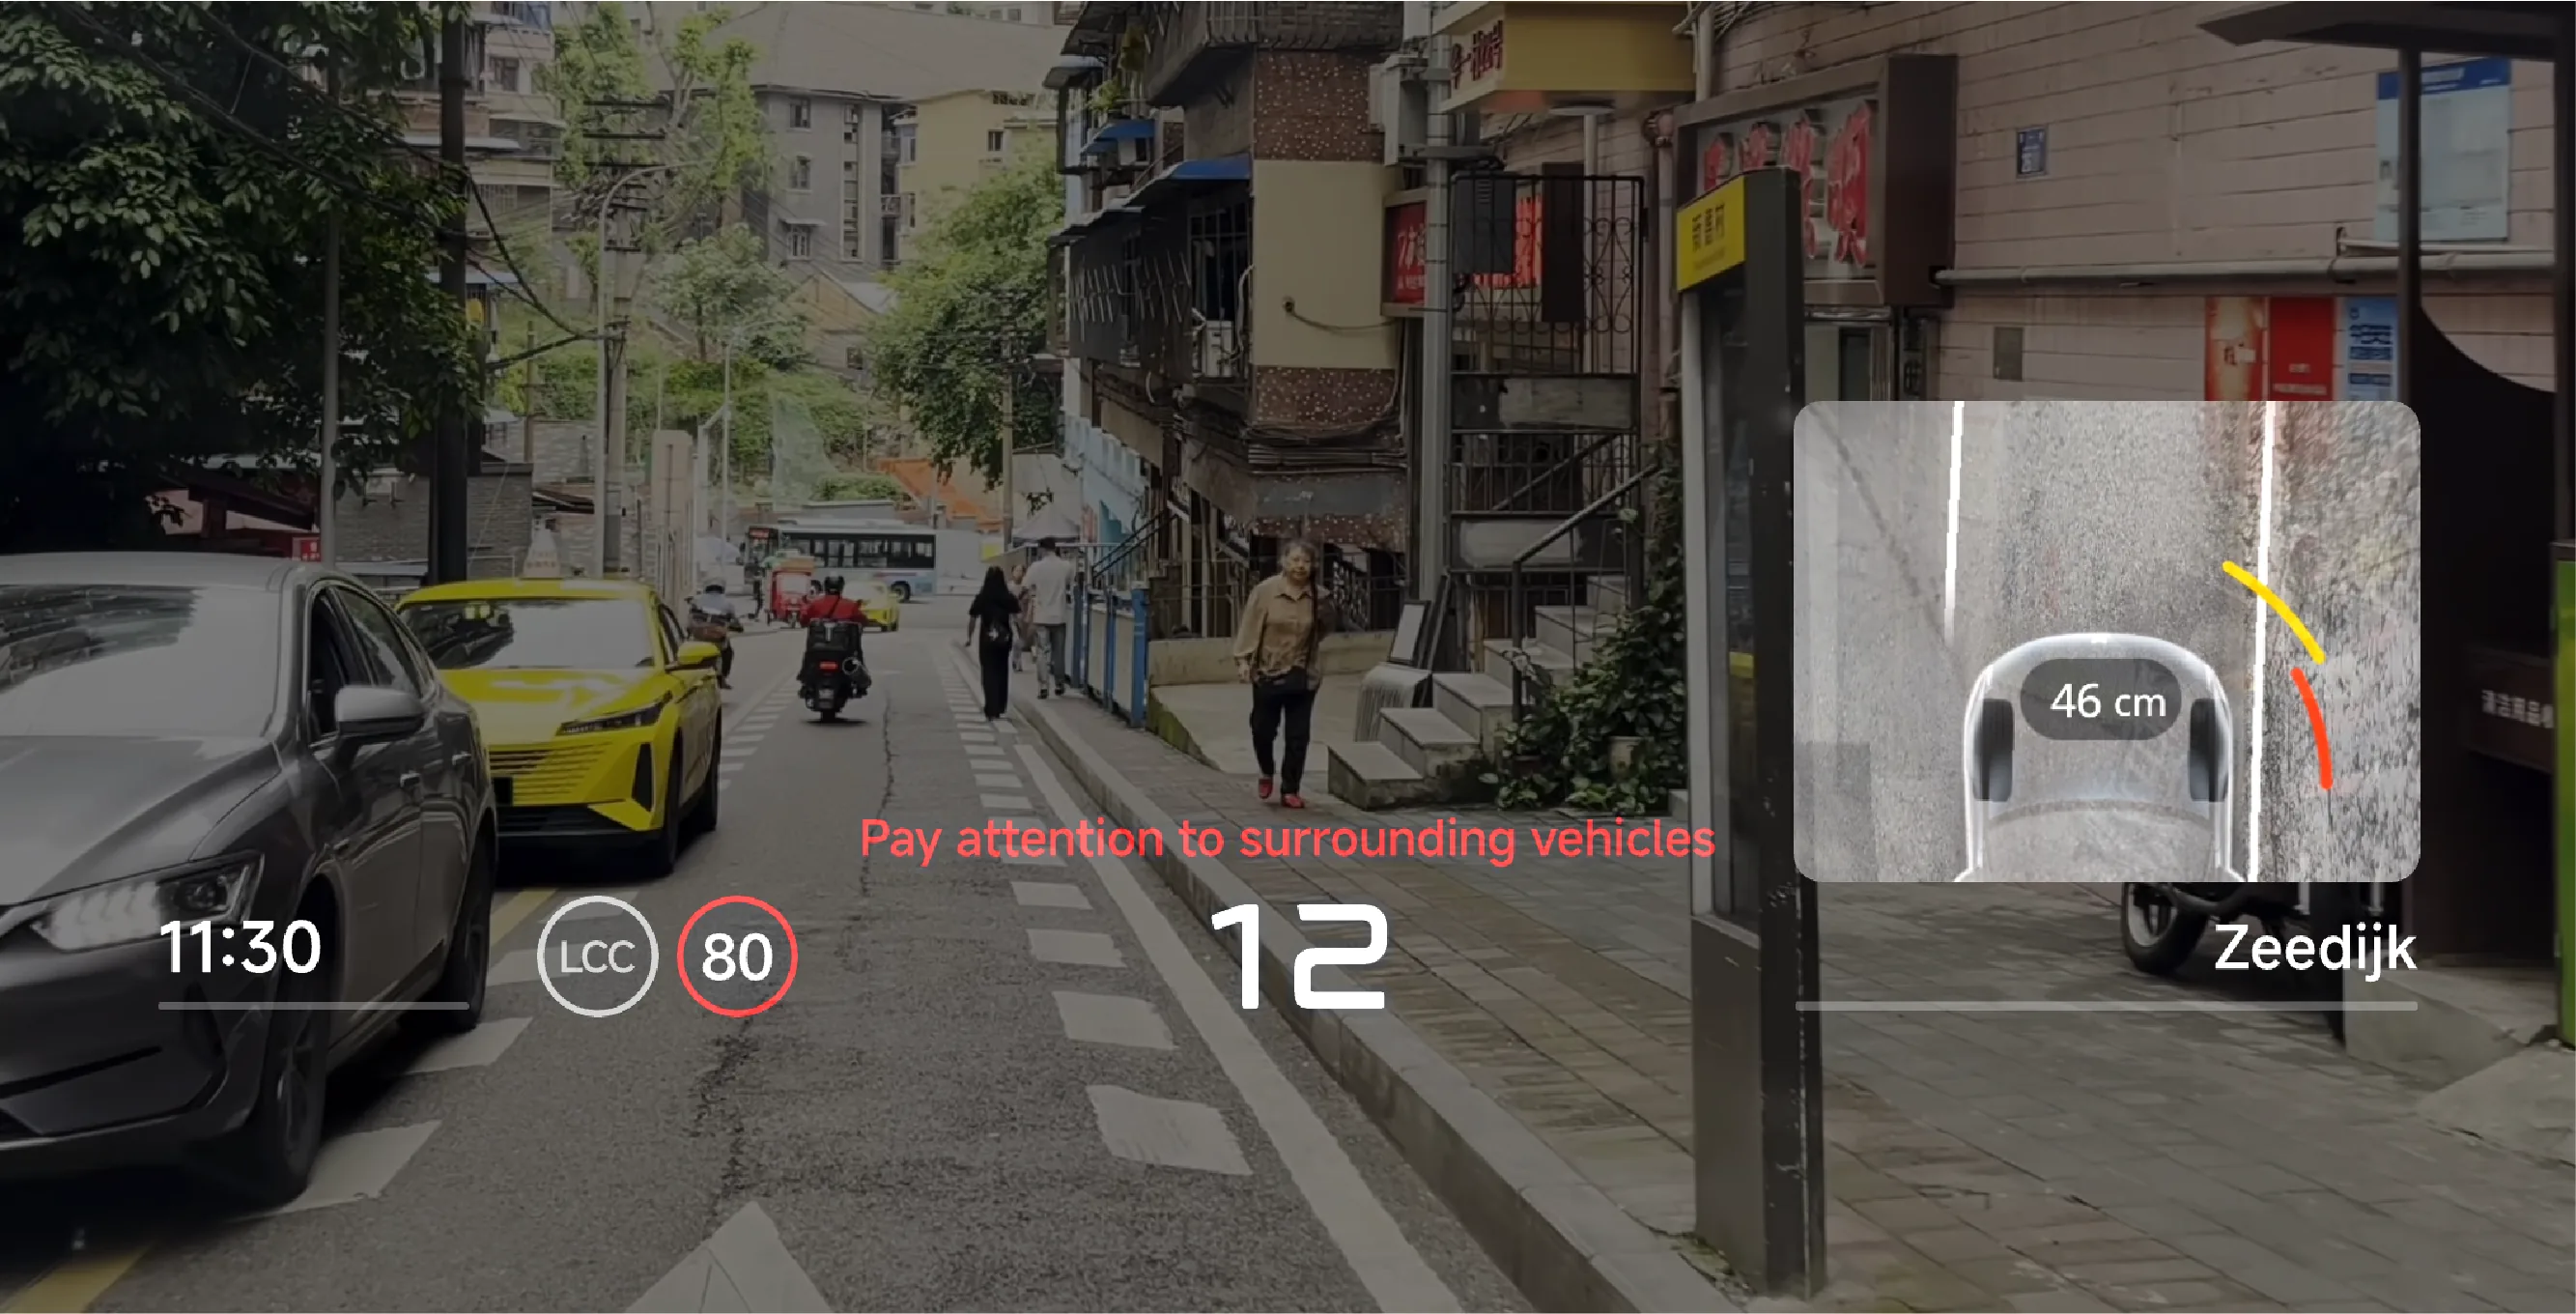
After the function is enabled, when the vehicle is in D gear and there is a risk of scraping as the vehicle passes through a narrow road section, the AR-HUD will automatically display the front wheel hub image.
Warning The AR-HUD Capacity Narrow Track Image is an aid for information only and does not replace the driver's view of the surrounding environment.
AR-HUD Capacity Narrow Car Image cannot handle all traffic, weather and road conditions, and you, as the driver of the vehicle, are responsible for driving safely, do not rely on this feature to control the vehicle. Failure to do so could result in injury.
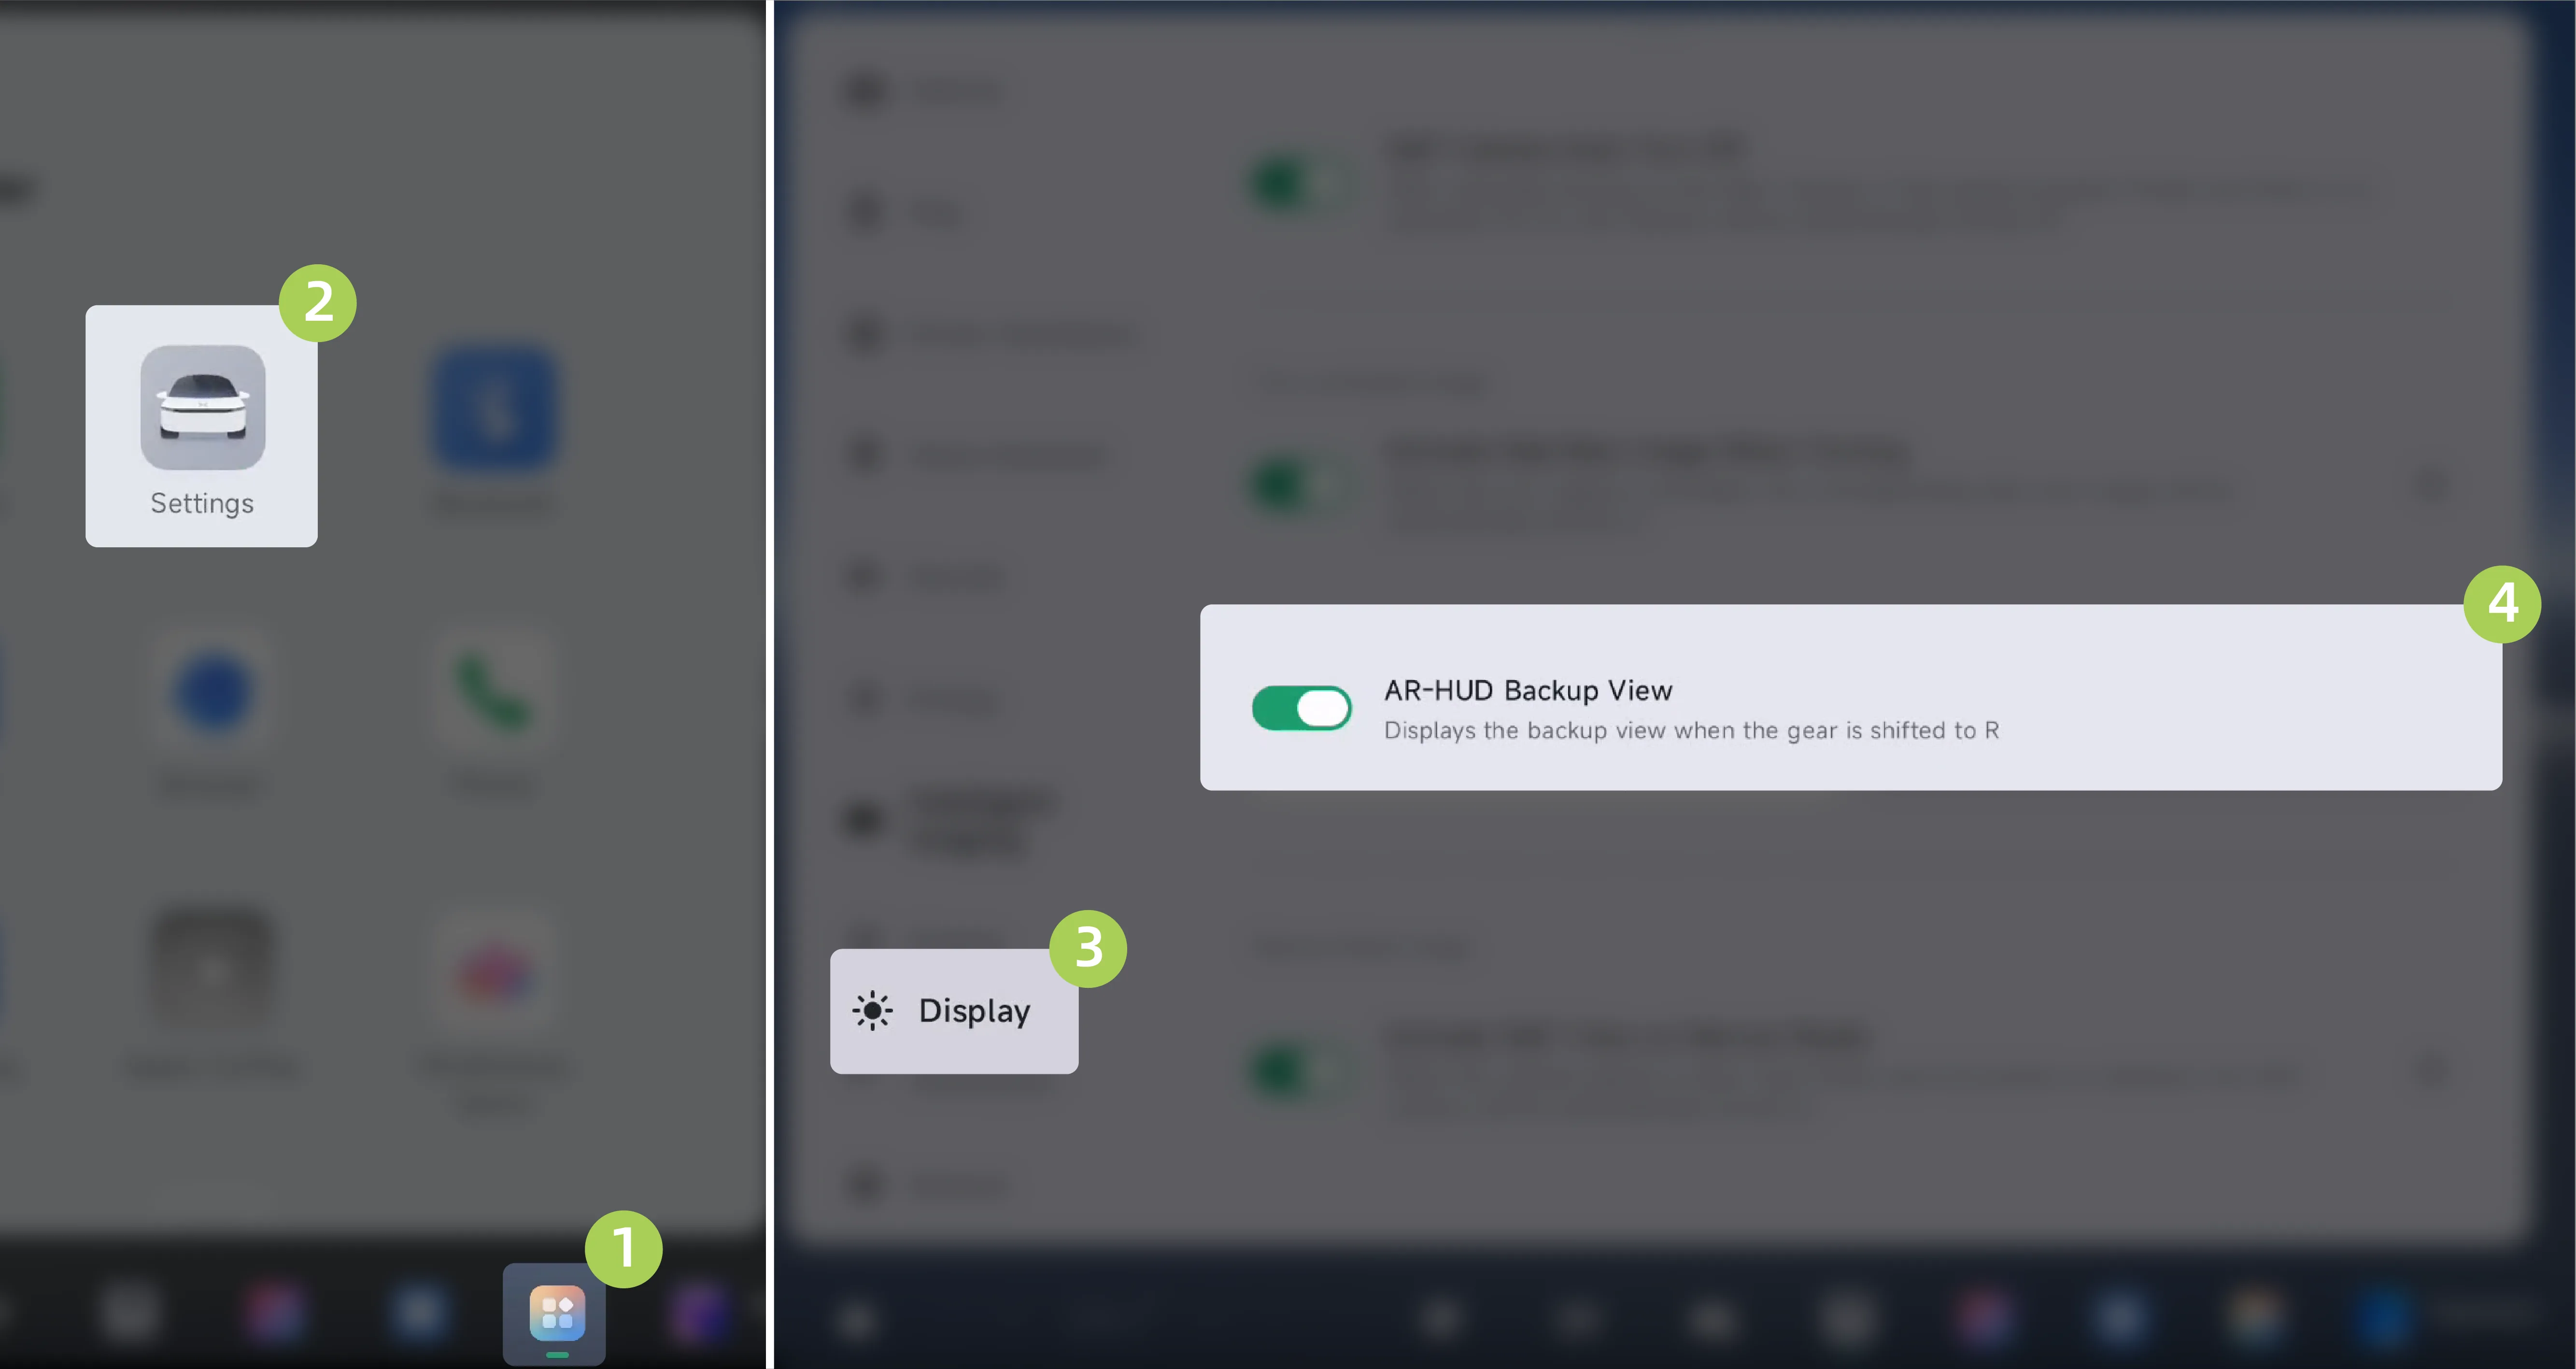
On the central control screen “ →Settings→Display”On the interface, you can turn the AR-HUD reversing image on/off.
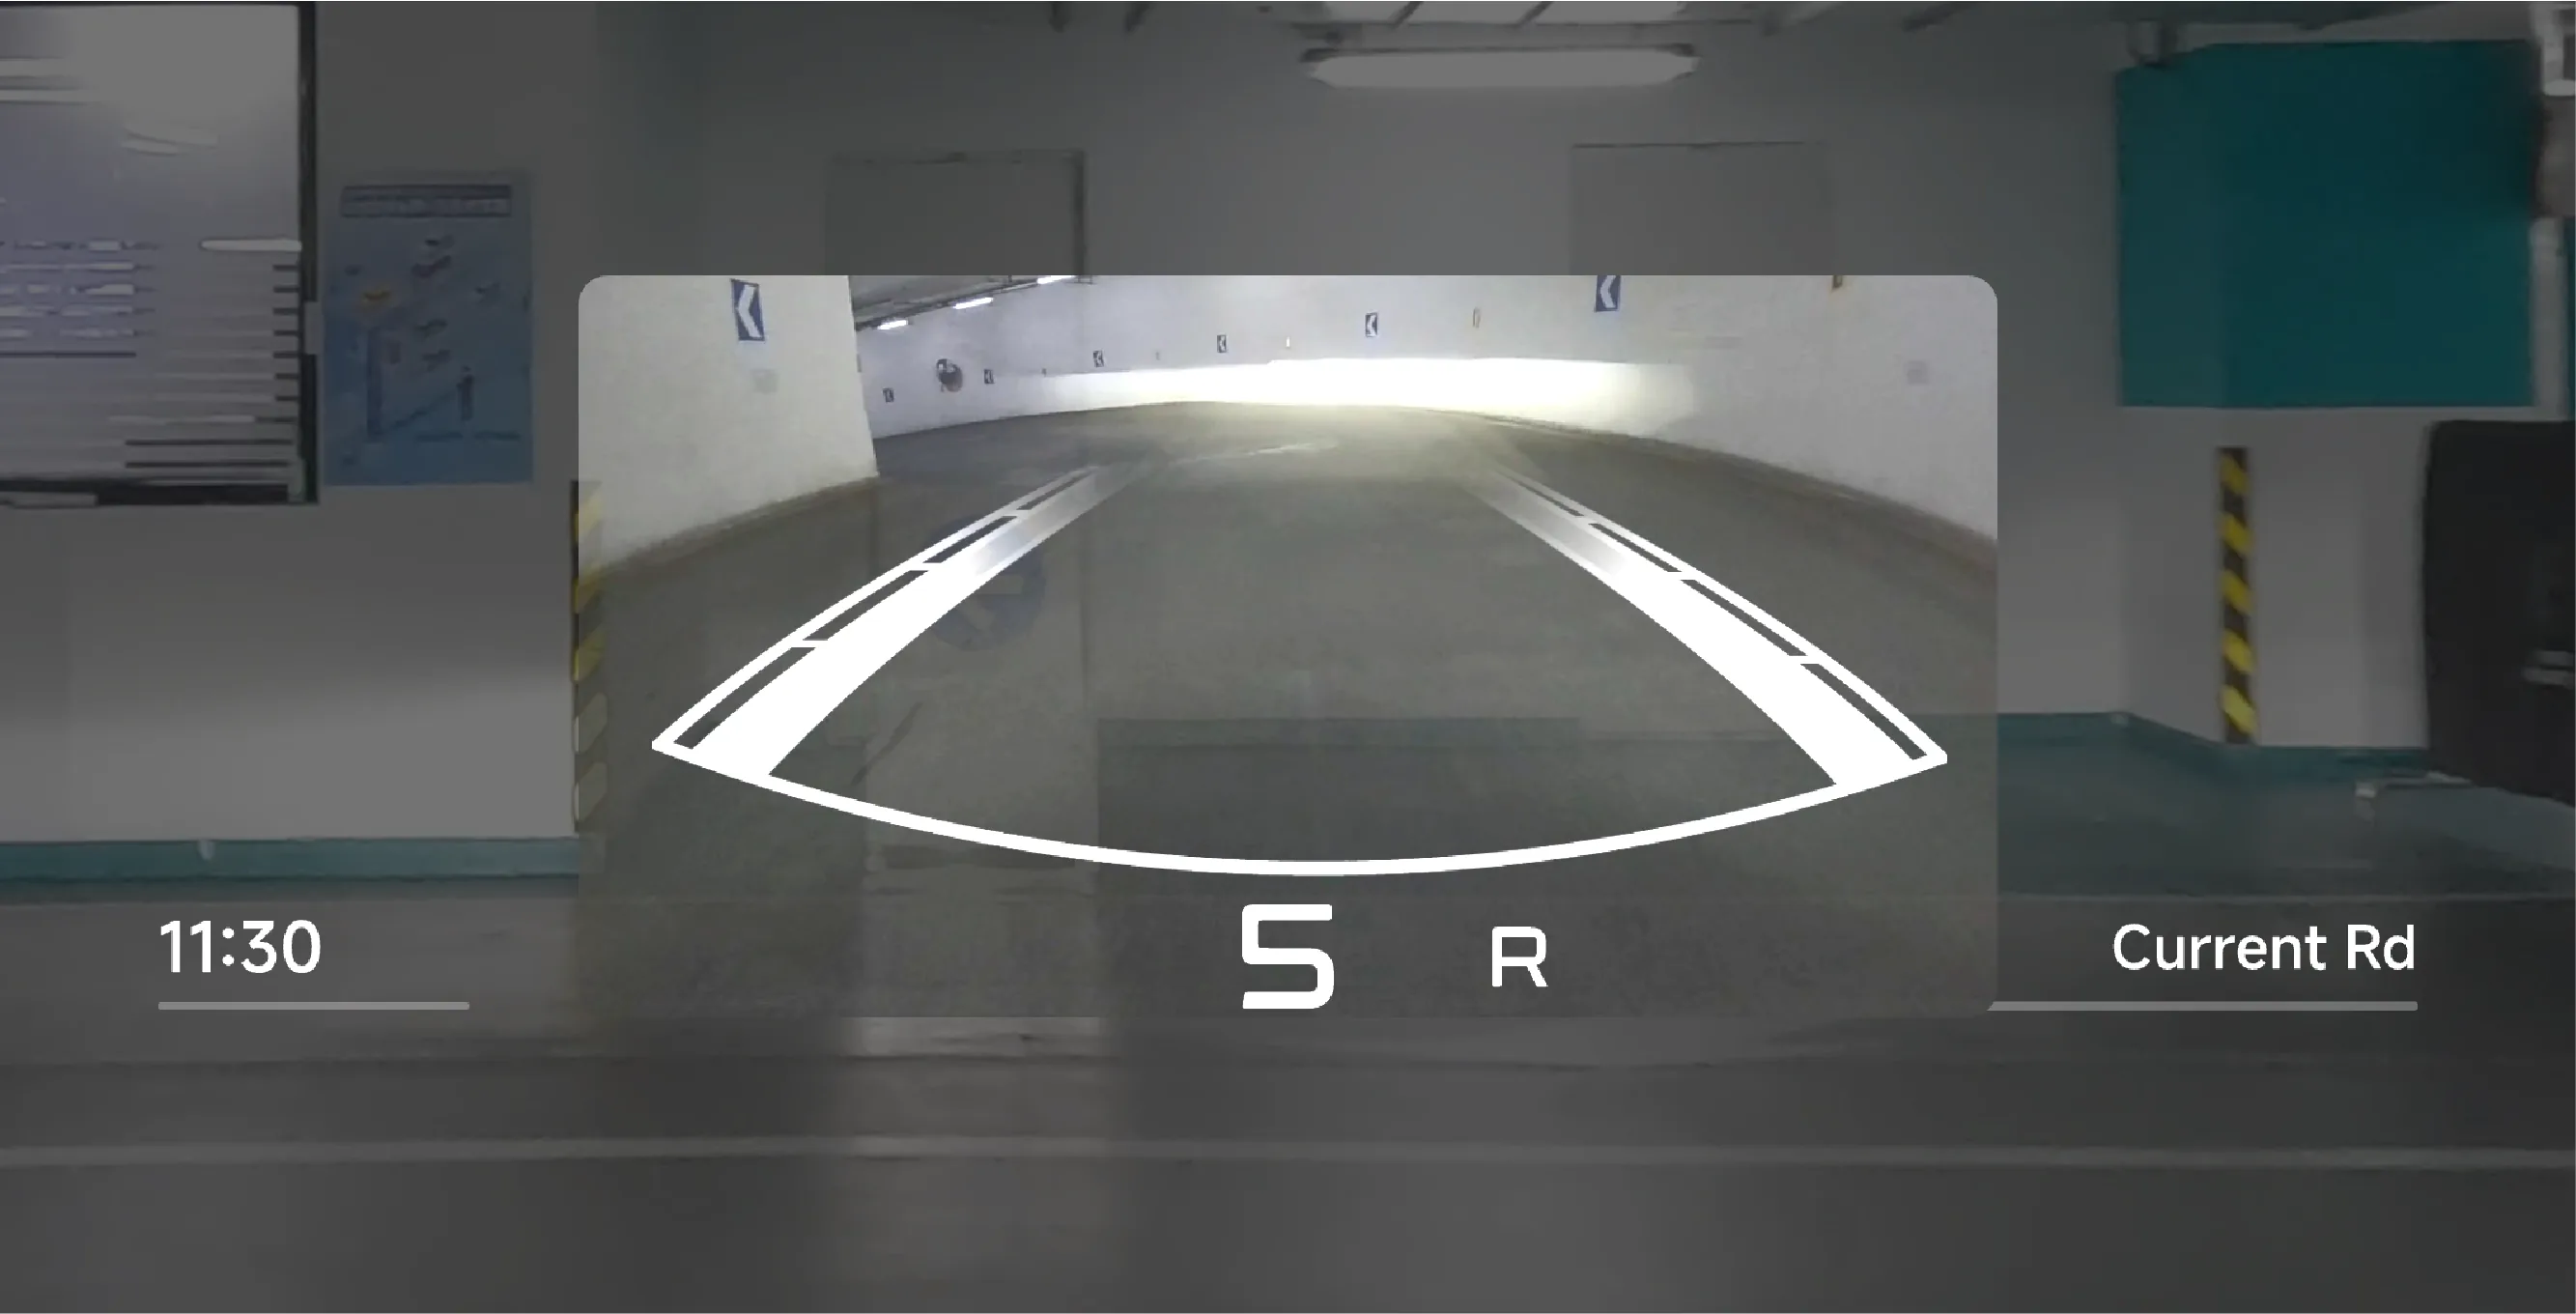
On:When shifting the vehicle into reverse gear (R gear), the AR-HUD will automatically display the rear-view image.
Exit:When the vehicle gear is shifted to another gear, the AR-HUD will automatically exit the reversing image display and return to the state before activation.
Warning When reversing, fully use the Rearview Mirror, Side Mirrors, 360 Camera, and AR-HUD reversing image to observe the surroundings of the vehicle and prevent accidents.
The AR-HUD reversing image is an assistance function and can only provide reference; it cannot replace the driver's observation of the surrounding environment. The AR-HUD reversing image cannot respond to all traffic, weather, and road conditions. You, as the driver of the vehicle, are responsible for driving safety. Do not rely on this function to control the vehicle, otherwise injury may result.
Warning Camera limited.
The camera is obstructed (by dust, coverings, etc.), or weather conditions are poor (such as heavy rain, heavy snow, or dense fog).
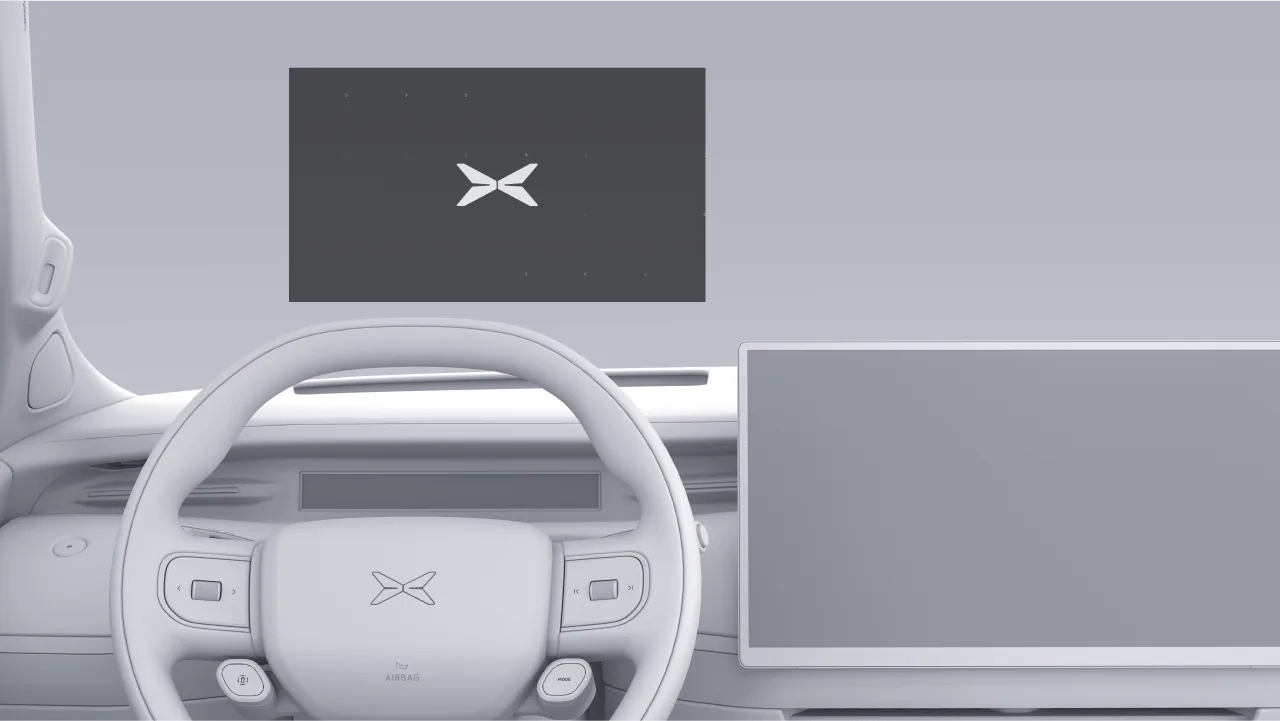
When the vehicle is in P gear, the audio and video content being played on the center control screen, rear control screen, or rear entertainment screen can be transferred to the HUD for playback.
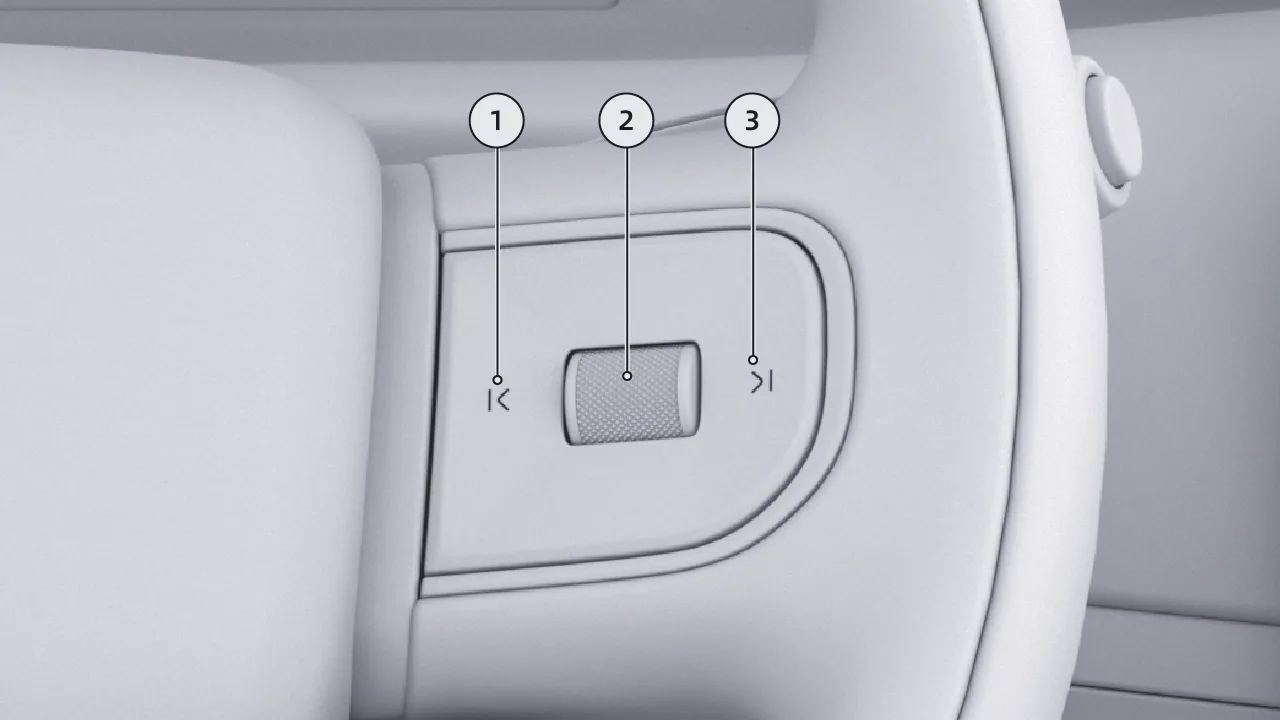
Short press to play the previous audio/video content
Scroll up or down to adjust the media volume; press briefly to play/pause audio or video content
Short press to play the next audio/video content
Tips Use the buttons on the right side of the steering wheel to control media playback. For more information about steering wheel button operations, please refer to the steering wheel section.
Exit the AR-HUD viewing function in the following way, and the audio/video content being viewed will be transferred to the center display for playback:
Tap the video app on the center display to exit the AR-HUD viewing function.
Shift from P gear to another gear to exit the AR-HUD viewing function.
Tips For safety reasons, the AR-HUD viewing function is only available in P, shifting from P to another gear will exit the AR-HUD viewing function.
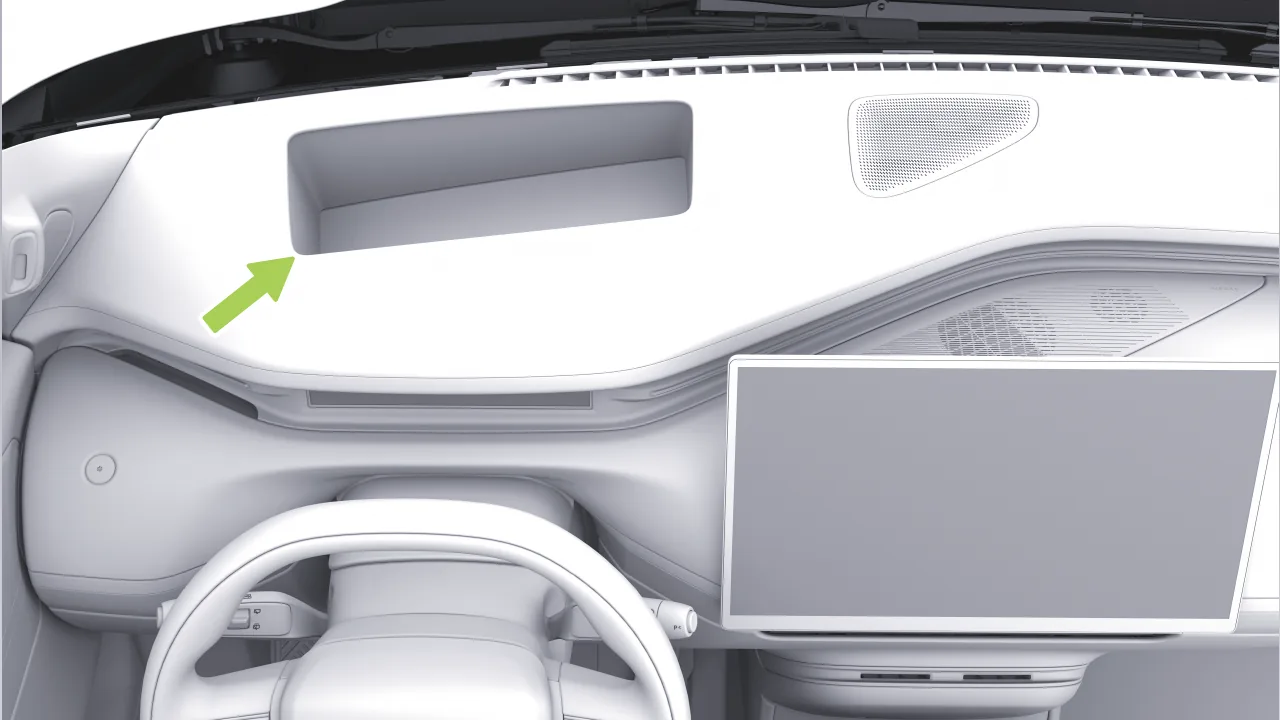
To ensure the HUD display effect, regularly use a clean, dry microfiber cloth to gently wipe away dust or dirt from the inner and outer sides of the windshield and the HUD system area. If there are stains that are difficult to wipe clean, slightly dampen the microfiber cloth before wiping.
Check and confirm that the position and brightness of the HUD system will not interfere with safe driving.
While driving, do not continuously stare at the head-up display system; otherwise, you may fail to see pedestrians, objects, etc. on the road ahead of the vehicle.
Do not place any liquid near the HUD system. If the HUD system becomes wet, it may cause an electrical malfunction.
Do not place any objects or stickers on the HUD system or the projection area of the windshield, otherwise the HUD system display may be interrupted.
Do not touch the HUD system or throw sharp-edged objects into the HUD system. Otherwise, mechanical failure may occur.
Do not use a front windshield film with low light transmittance or a dark color, otherwise the display effect of the HUD system may be affected.
Poor installation workmanship of the front windshield film, resulting in bubbles or wrinkles, will also affect the display effect. It is recommended that you go to an XPENG service center or an XPENG designated partner store and have the installation performed by a professionally trained service technician.
Caution Some sunglasses may affect the reading of the Head Up Display (HUD) information, please remove the sunglasses when adjusting the Head Up Display.
Caution If the windshield needs to be replaced, please visit an XPENG service center to have the special windshield installed, in order to avoid affecting the Head-Up Display system imaging.
The method for downloading the XPENG App is as follows:
Android/iPhone users can directly search for "XIAOPENG Motors" in the app store preinstalled on their phone to download and install it.
On the XPENG page in the XPENG App, perform the following controls on the vehicle:
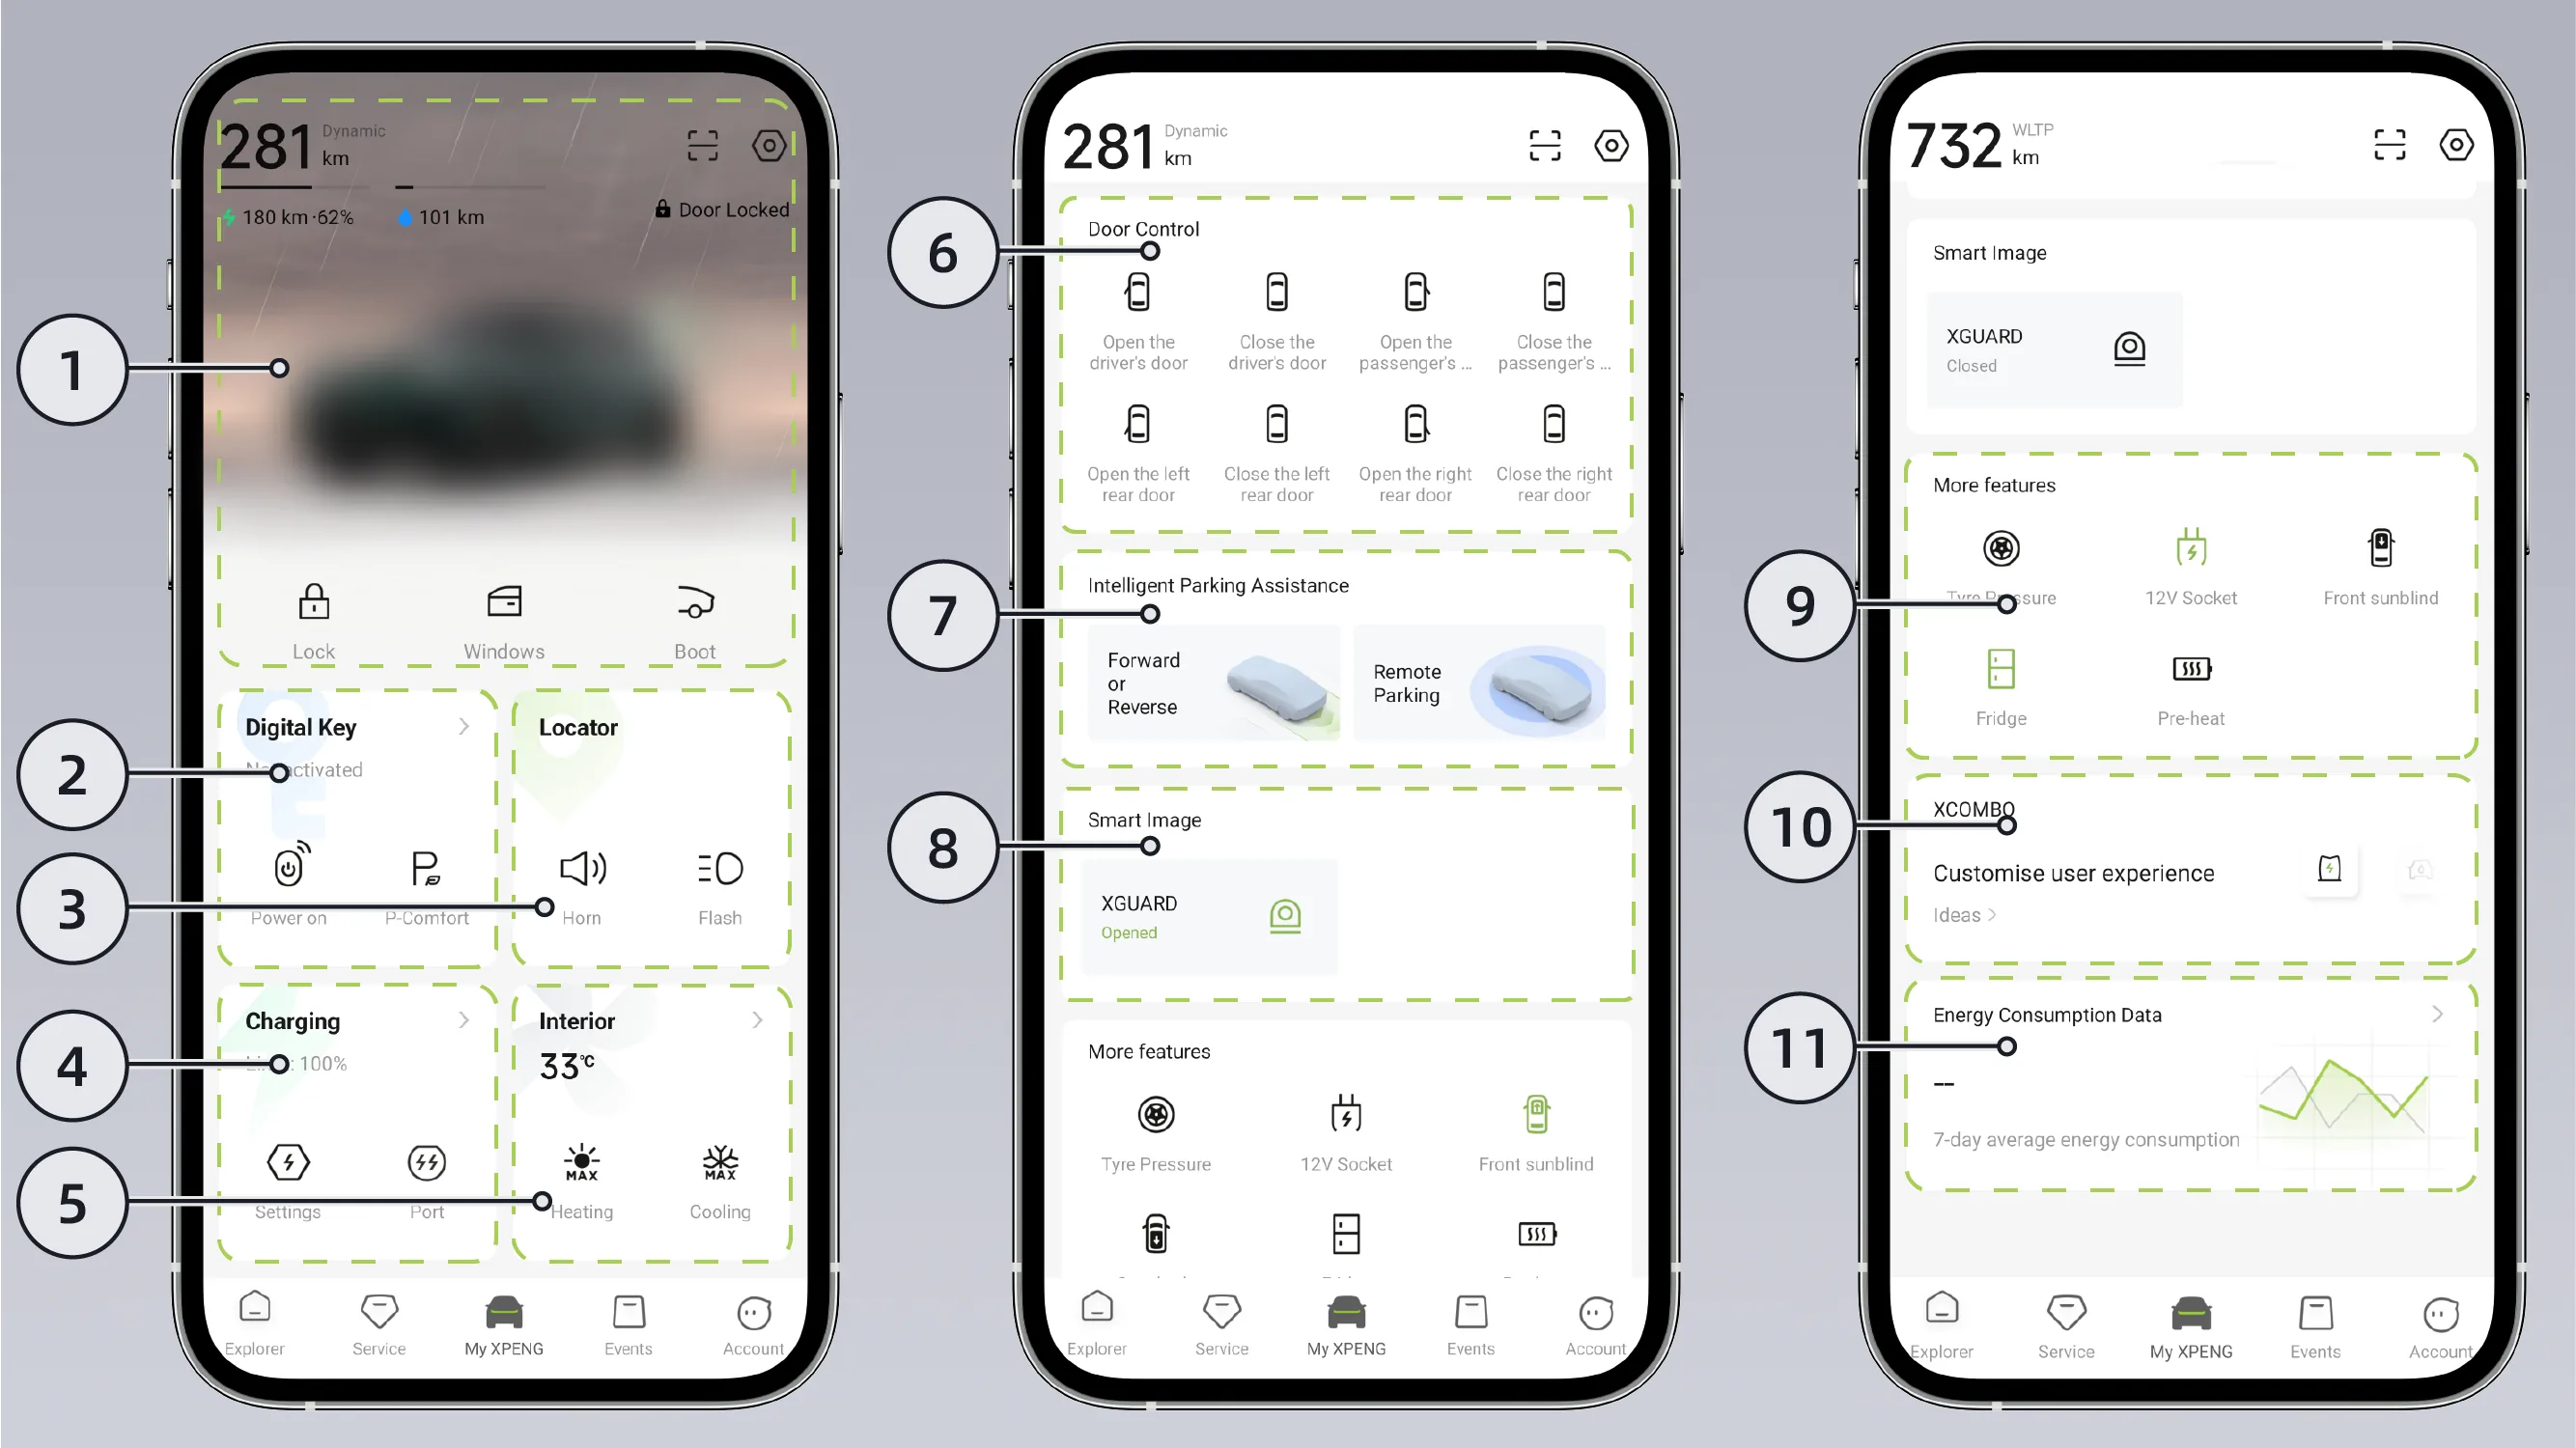
Vehicle status and shortcut bar: View vehicle status information such as the vehicle driving range and door status. Quickly enable the required functions in the shortcut bar.
Digital Key: View the connection status of the phone Bluetooth key, phone NFC key, and the vehicle. Enter the Digital Key interface to perform settings such as creating or deregistering the phone App key.
Find Vehicle: View the vehicle's real-time location (owner account only), generate a navigation route to the vehicle through navigation (owner account only), and make the vehicle flash lights and honk, which helps find the vehicle.
Charging Center: View functions such as battery range, battery charging optimization, setting time periods for AC Charging, and battery preheating.
Smart Air Conditioner: View the temperature inside the vehicle. Enter the Air Conditioner interface to remotely turn the Air Conditioner on or off and set Air Conditioner functions.
Power door control*: open/close the driver's door, passenger door, left rear door, and right rear door.
Intelligent Parking: For parking functions such as Remote Vehicle Summons, remote parking, and parking exit assist, see the Parking chapter for details.
Intelligent Imaging: Turn Sentry Mode on/off.
More functions: view tire pressure; set the activation duration of the in-vehicle 12V power supply; open/close the front sunshade; open/close the sunshade; set the vehicle refrigerator function; open/close the low-temperature battery preheating function; open/close the Super Lock* function; open/close the electric rear tow hook* function.
XCOMBO: You can add, delete, or create Combos.
Vehicle Data (owner account only): View average energy consumption and recent trip records.
Tips The XPENG interface defaults to the standard style. You can adjust the XPENG interface style in Settings and choose either “standard style” or “traditional style”.
The mobile phone key can also be used when it has a bluetooth connection with the vehicle, even in environments without a network signal such as garages.
The vehicle is equipped with both media Bluetooth and key Bluetooth at the same time. The phone key will automatically connect via Bluetooth without needing to be paired on the central control screen.
Usually, the bluetooth connection range in an open area is about 20 m, and there may be differences due to factors such as the mobile phone's Bluetooth hardware, environmental obstruction, and interference.

Press and hold the function icon in the shortcut bar to customize the shortcut bar.
In the custom state, tap the + in the upper right corner of the function icon to add functions such as Quick Vehicle Control, Digital Key, and Find My Car to the custom shortcut bar. Press and hold the function icon in the custom shortcut bar, then drag the function icon to adjust the order.
Tap "Save Settings" to exit the custom state.
Tips The shortcut bar can contain up to 6 functions, and at least 1 function must be retained.
After Nap Mode is enabled, some functions such as the lights, window, and Power Off Automatically will be temporarily disabled, creating an immersive nap environment for you.
Before enabling Nap Mode, ensure that the vehicle meets the following conditions:
The gear is in P.
Battery level is greater than 10%.
Pet Mode, Rescue Mode, Car Wash Mode, Leave-Car Comfort, Camping Mode, Meditation Mode, or Sleep Mode is not enabled, etc.
The vehicle is not in the system update state.
When the conditions for enabling Nap Mode are met, you can enable Nap Mode in the following ways:
Tap the center display in sequence. “ →Scene Mode→Rest Mode”, enable Nap Mode.
Tap on the central control screen home page. “  Scenario ”Enter the scene mode interface and tap Can be enabled and entered into the nap mode settings screen.
Directly use a voice command (for example, say “Hey,XPENG,turn on Nap Mode”).
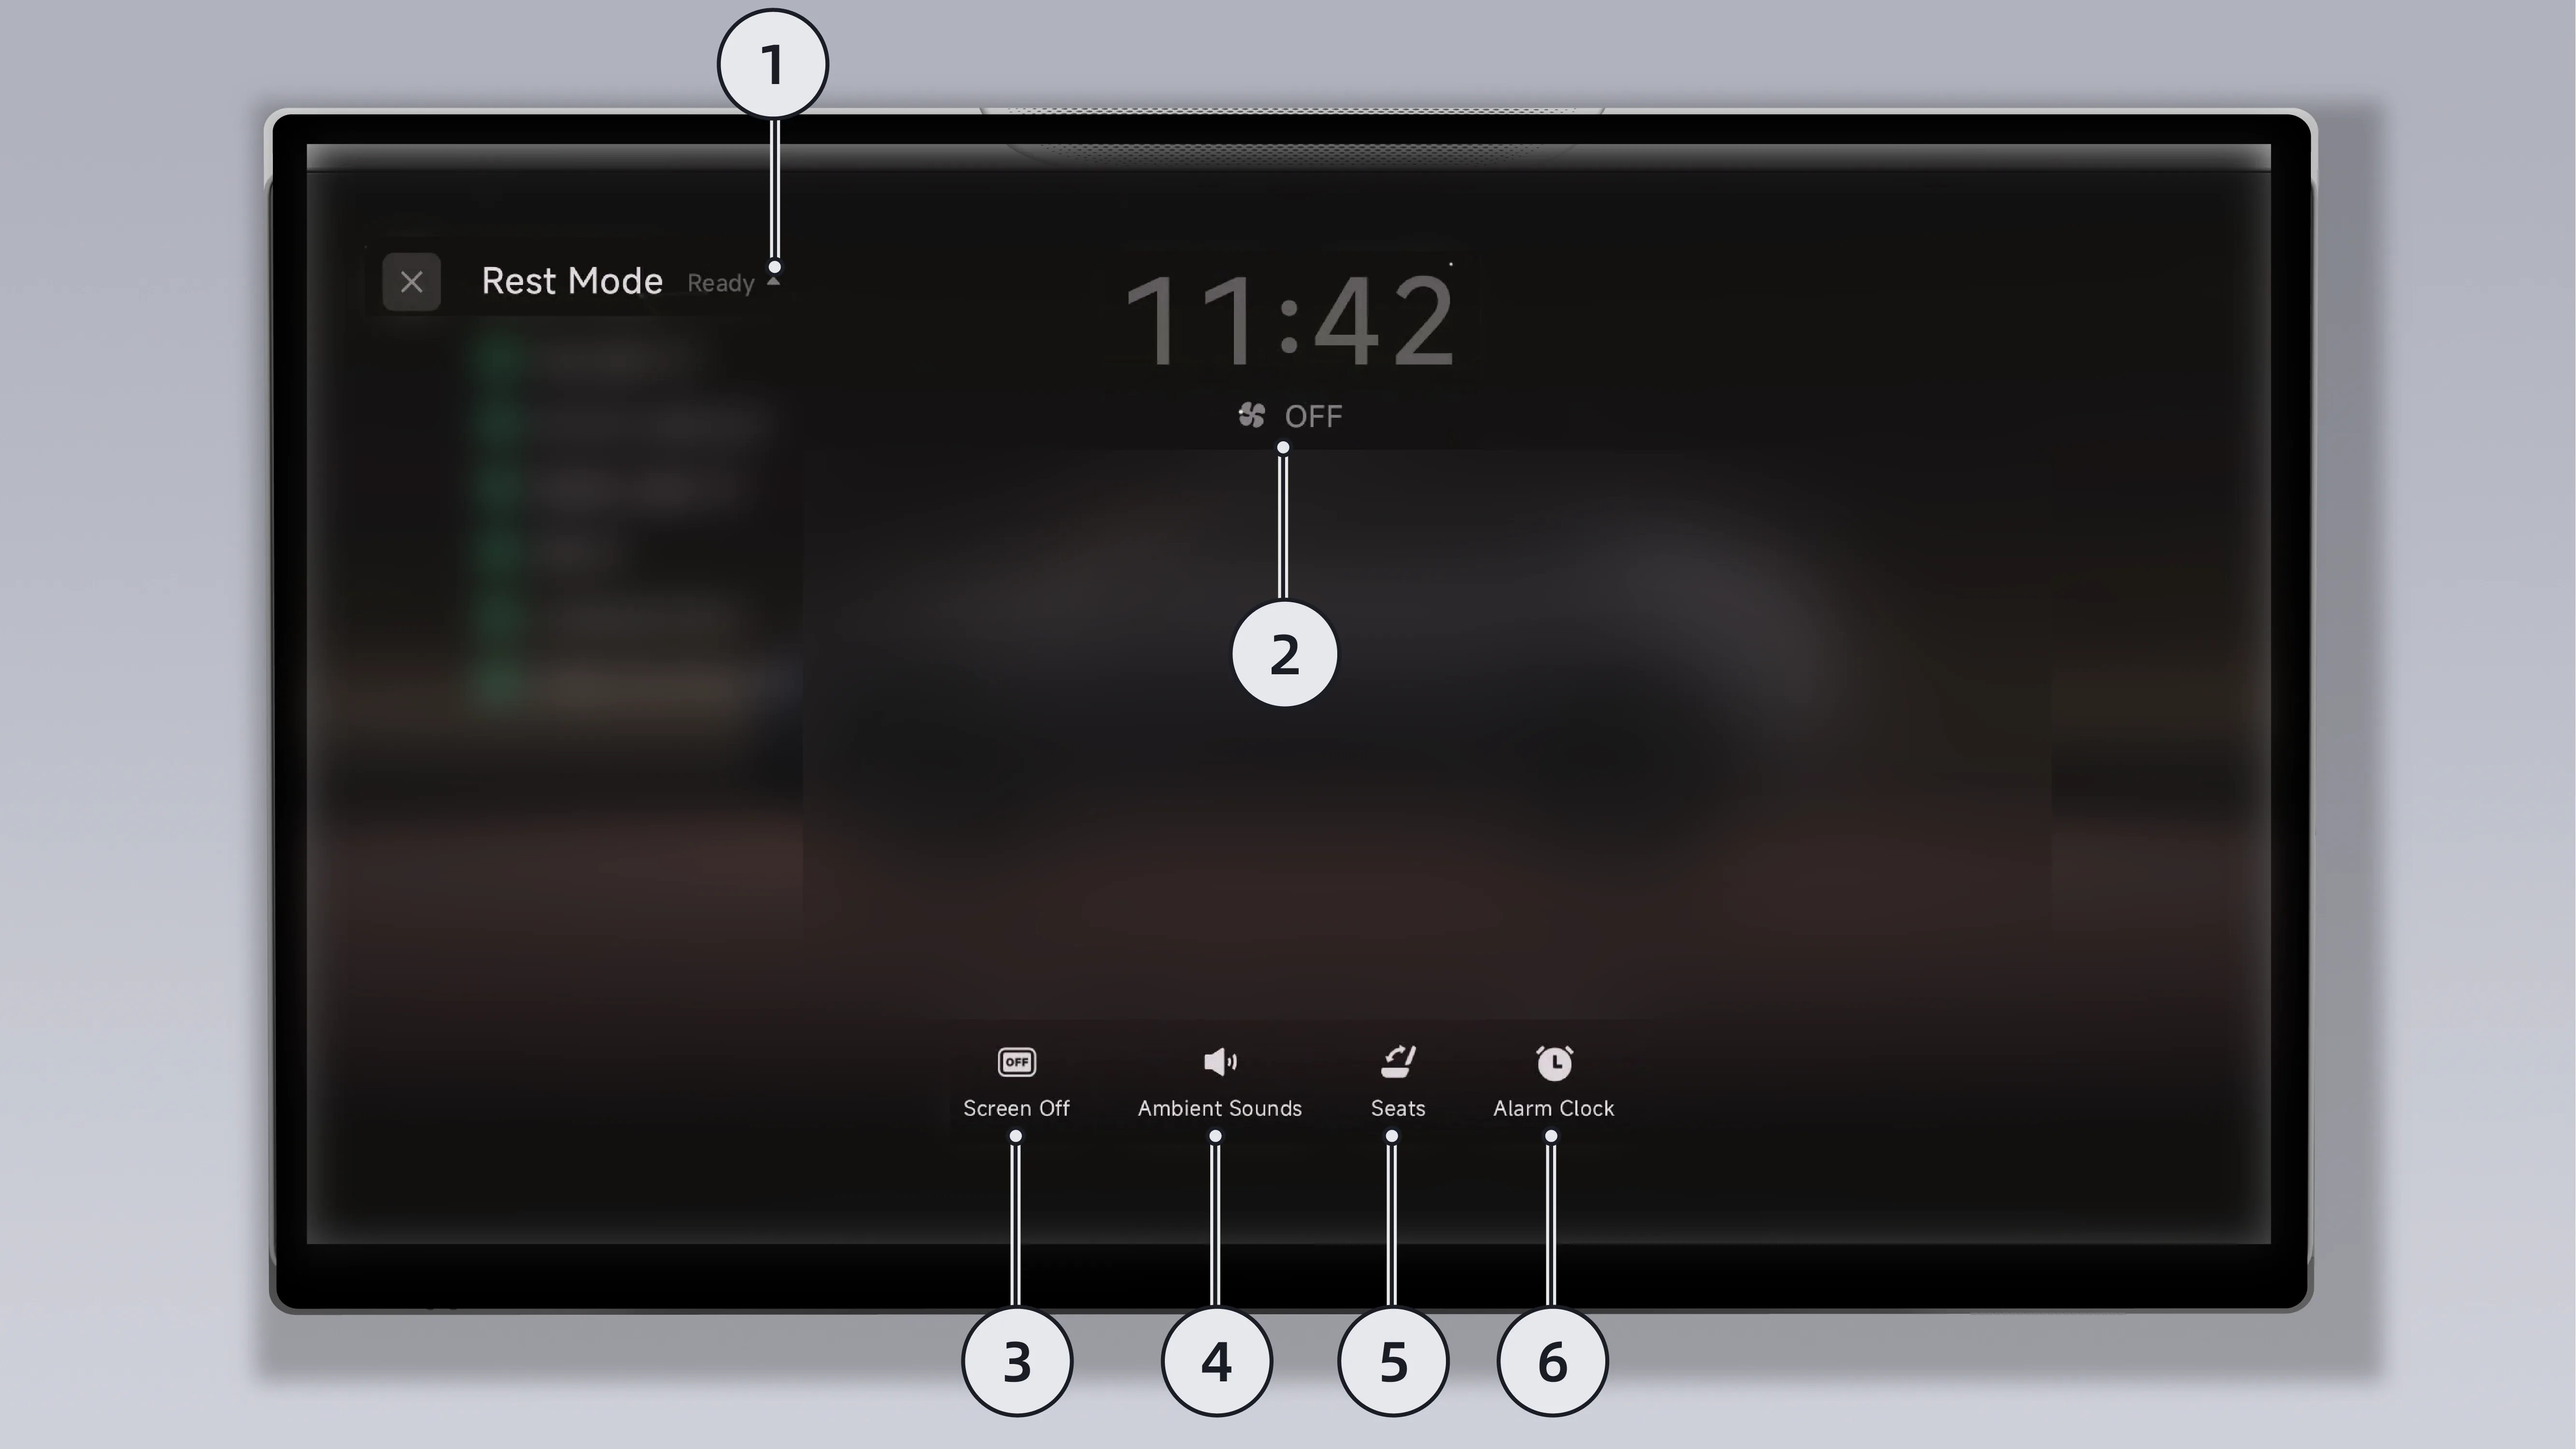
After Nap Mode is enabled, you can perform the following settings on the Nap Mode screen:
Self-check item list: Tap to expand/collapse the self-check item list.
Tips After Nap Mode is enabled, the vehicle will automatically detect the closed status of each component and display a self-check item list on the mode interface. When a component has an abnormal closed status, a red warning symbol will be displayed in front of the corresponding self-check item to prompt you to check the condition of the vehicle components.
Air Conditioner status: Tap to enter the Air Conditioner interface, where you can set the Air Conditioner according to your personal needs.
Screen off: Tap to turn off all screens in the vehicle, including the instrument screen, center control screen, rear control screen, and rear entertainment screen. Tap the corresponding screen or exit Nap Mode to turn the screen back on.
Ambient sound: Tap to turn ambient sound on or off.
seat: Tap to set the seat linkage function. After the linkage function is enabled, the corresponding seat enters the comfort position.
Tips When Nap mode is enabled, if the seat linkage function is enabled and a person is detected on the seat, the system will automatically return to the comfortable position set for this function.
Warning Make sure hands, bodies or objects are not on the seat path during seat adjustment to avoid the risk of pinching.
Alarm: Set the alarm and countdown timer; if the countdown timer is not set, it defaults to 30 minutes.
After Nap Mode is enabled, you can exit Nap Mode by any of the following methods:
Directly use a voice command (for example, say “Hey, XPENG, exit Nap Mode”).
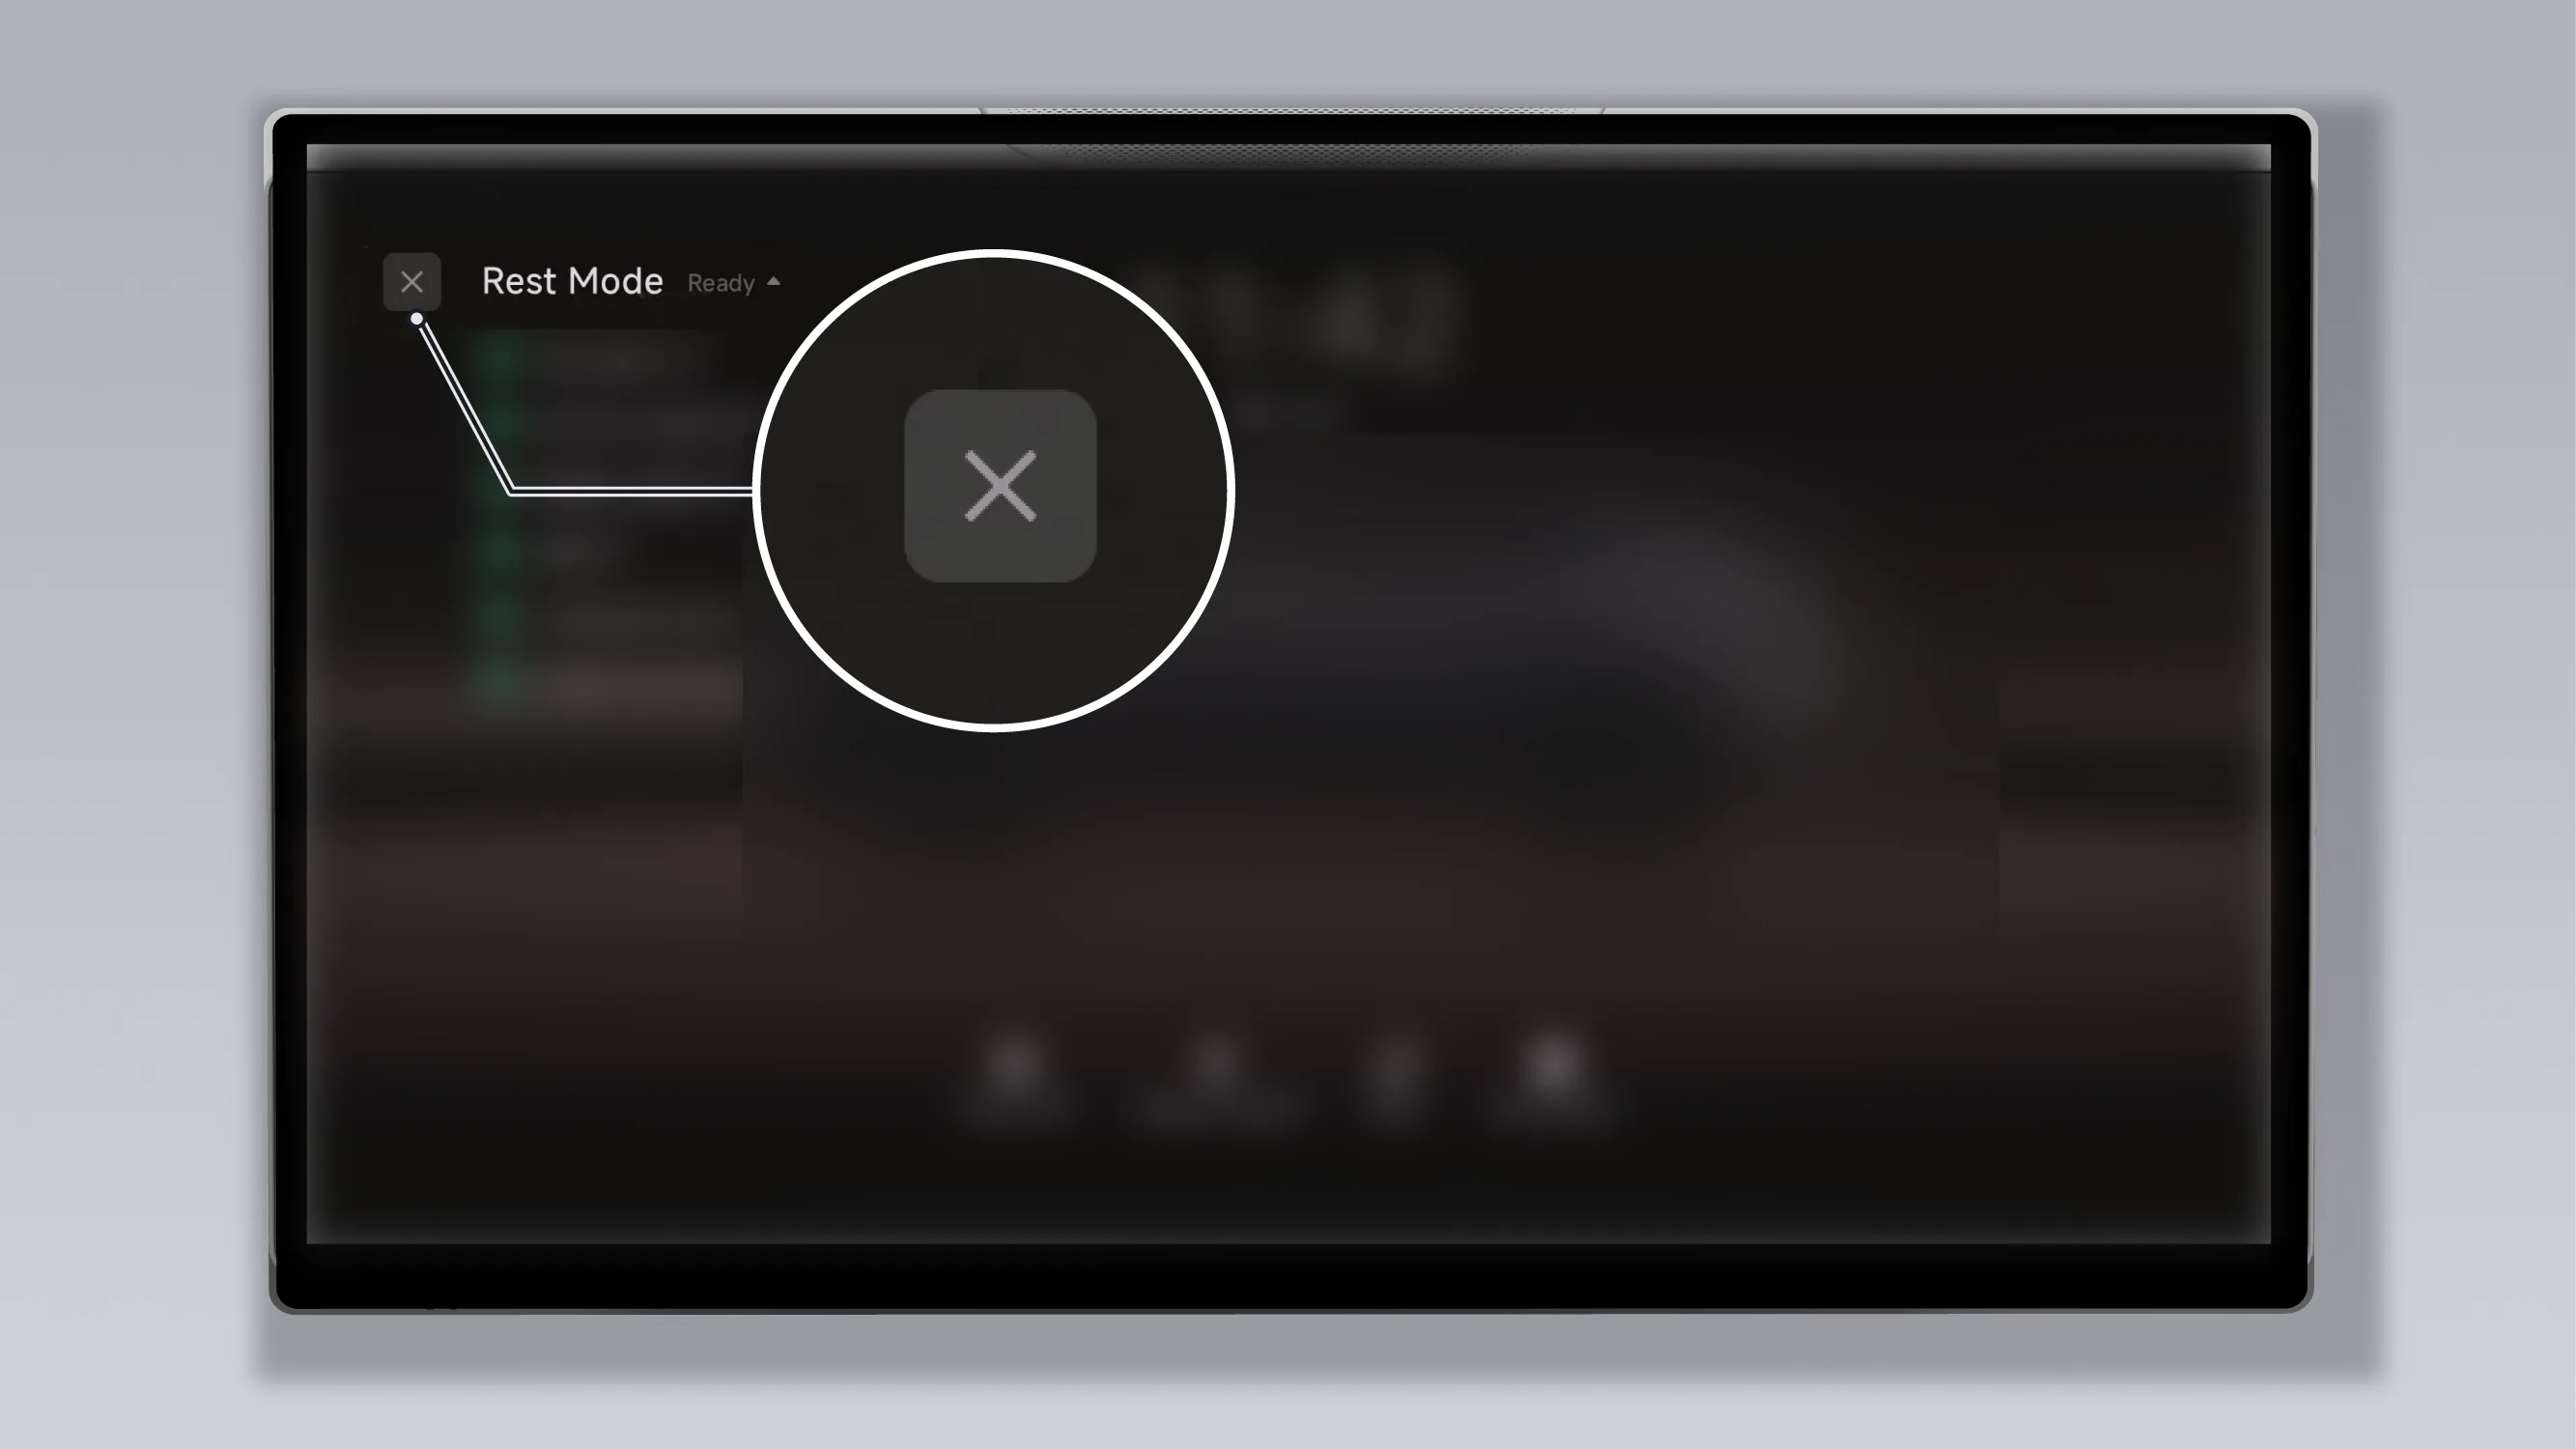
Tap on the Nap Mode screen “  ”, exit Nap Mode.
When the vehicle triggers any of the following conditions, Nap Mode will automatically exit:
Battery level is below 10%.
The gear position switches to a non-P gear.
Power Off in an emergency via the central control screen.
Lock the vehicle using the remote key, mobile APP, or NFC key.
Before a regular car wash or conveyor car wash, please enable Car Wash Mode. The vehicle will automatically detect the closed status of all components. At the same time, some functions such as the window, vehicle lights, and Air Conditioner fresh air intake will be temporarily disabled to prevent water from entering the vehicle and to ensure vehicle safety during the car wash process.
Before enabling Car Wash Mode, ensure that the vehicle meets the following conditions:
The gear is in P.
Battery level is greater than 10%.
Pet Mode, Rescue Mode, Camping Mode, Leave-Vehicle Comfort, Nap Mode, Meditation Mode, and Sleep Mode are not enabled.
The vehicle is not in the system update state.
When the conditions for enabling Car Wash Mode are met, Car Wash Mode can be enabled by any of the following methods:
Tap on the center display in sequence. “ →Scene Mode→Car Wash Mode”, enable Car Wash Mode.
Tap on the home page of the center display. “ Scenario ”Enter the scene mode interface and tap , enable Car Wash Mode.
Directly use a voice command (for example, say: “Hey, XPENG,turn on Car Wash Mode”).
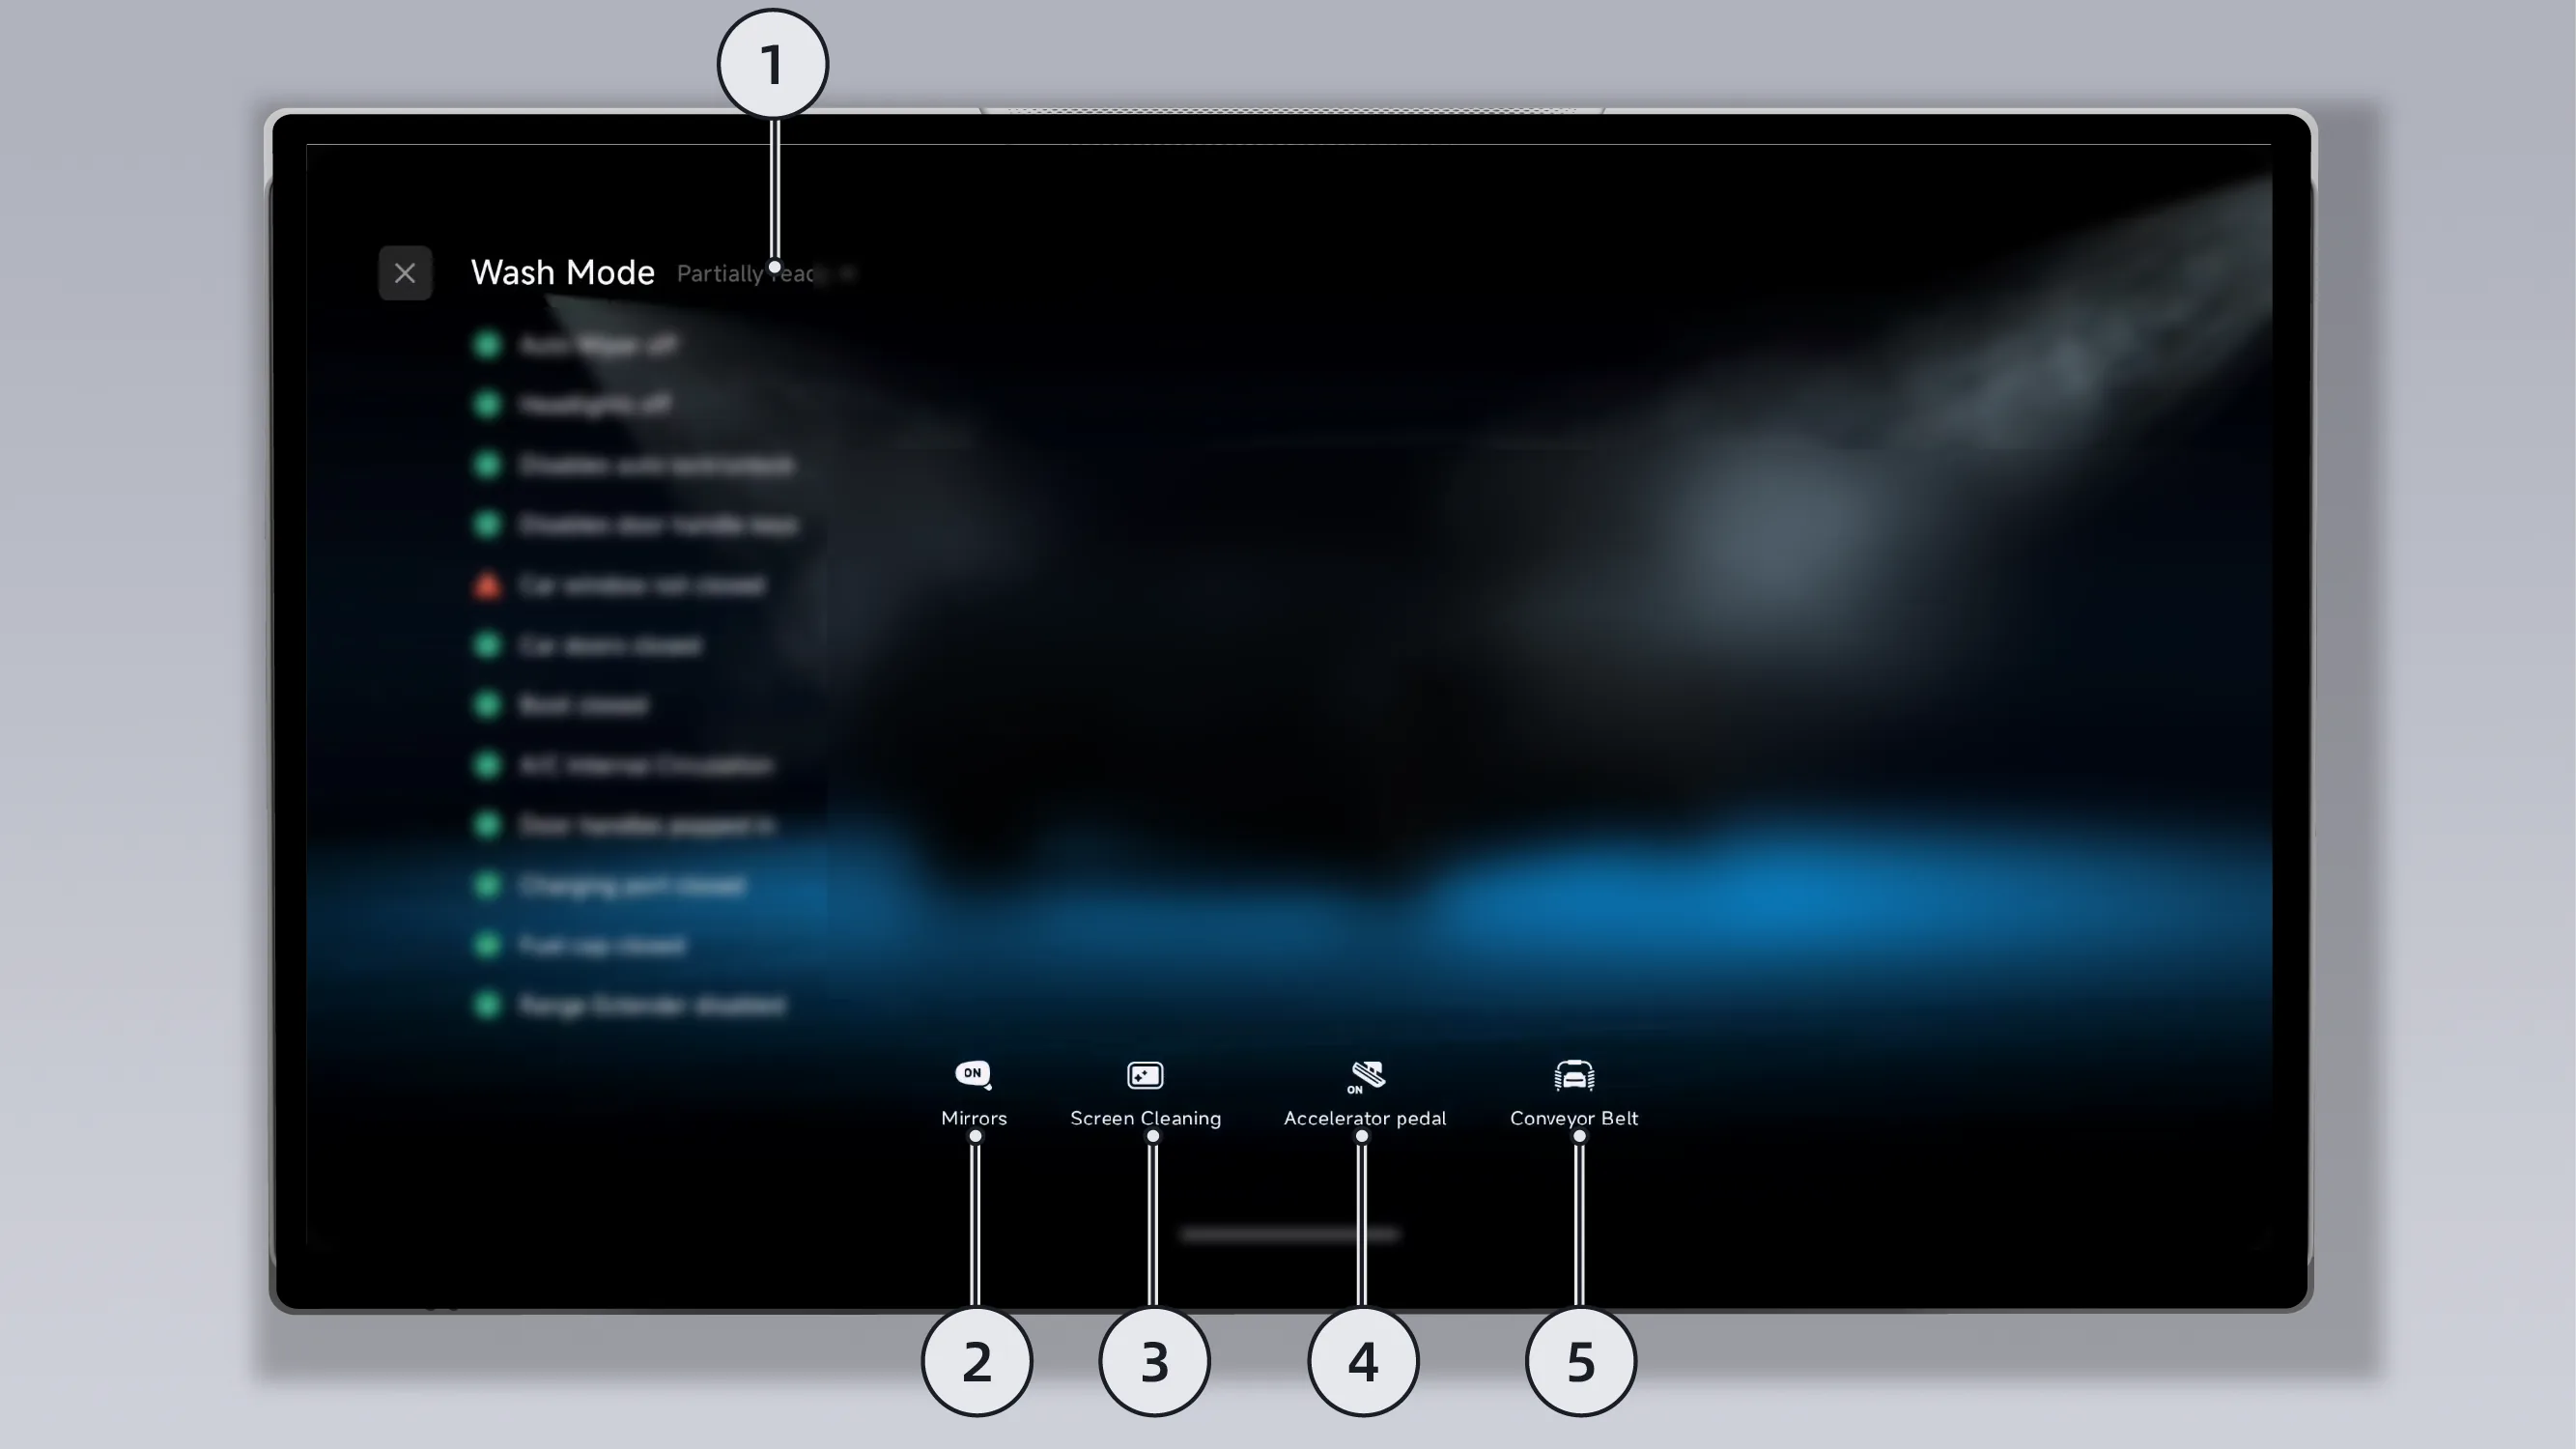
If needed, you can also perform the following operations on the Car Wash Mode screen:
Self-check item list: Tap to expand/collapse the self-check item list.
Tips After Car Wash Mode is enabled, the vehicle will automatically detect the closed status of each component and display a self-check item list on the mode interface. When a component has an abnormal closed status, a red warning symbol will be displayed in front of the corresponding self-check item to prompt you to inspect the vehicle component condition.
Side Mirrors: Fold/unfold the Side Mirrors.
Clean screen: enter screen cleaning mode.
Power running board*: Fold/unfold the power running board.
Conveyor belt: Enable conveyor belt car wash mode.
If a conveyor car wash is required, tap on the Car Wash Mode screen. , a confirmation window will pop up on the central control screen. Please follow the prompt to depress and hold the brake pedal, and tap Enter conveyor car wash mode.
After entering conveyor car wash mode, the vehicle will automatically perform the following operations: shift to N, release the electronic parking brake, and fold the rearview mirrors. After releasing the brake, the vehicle can enter the automatic car wash.
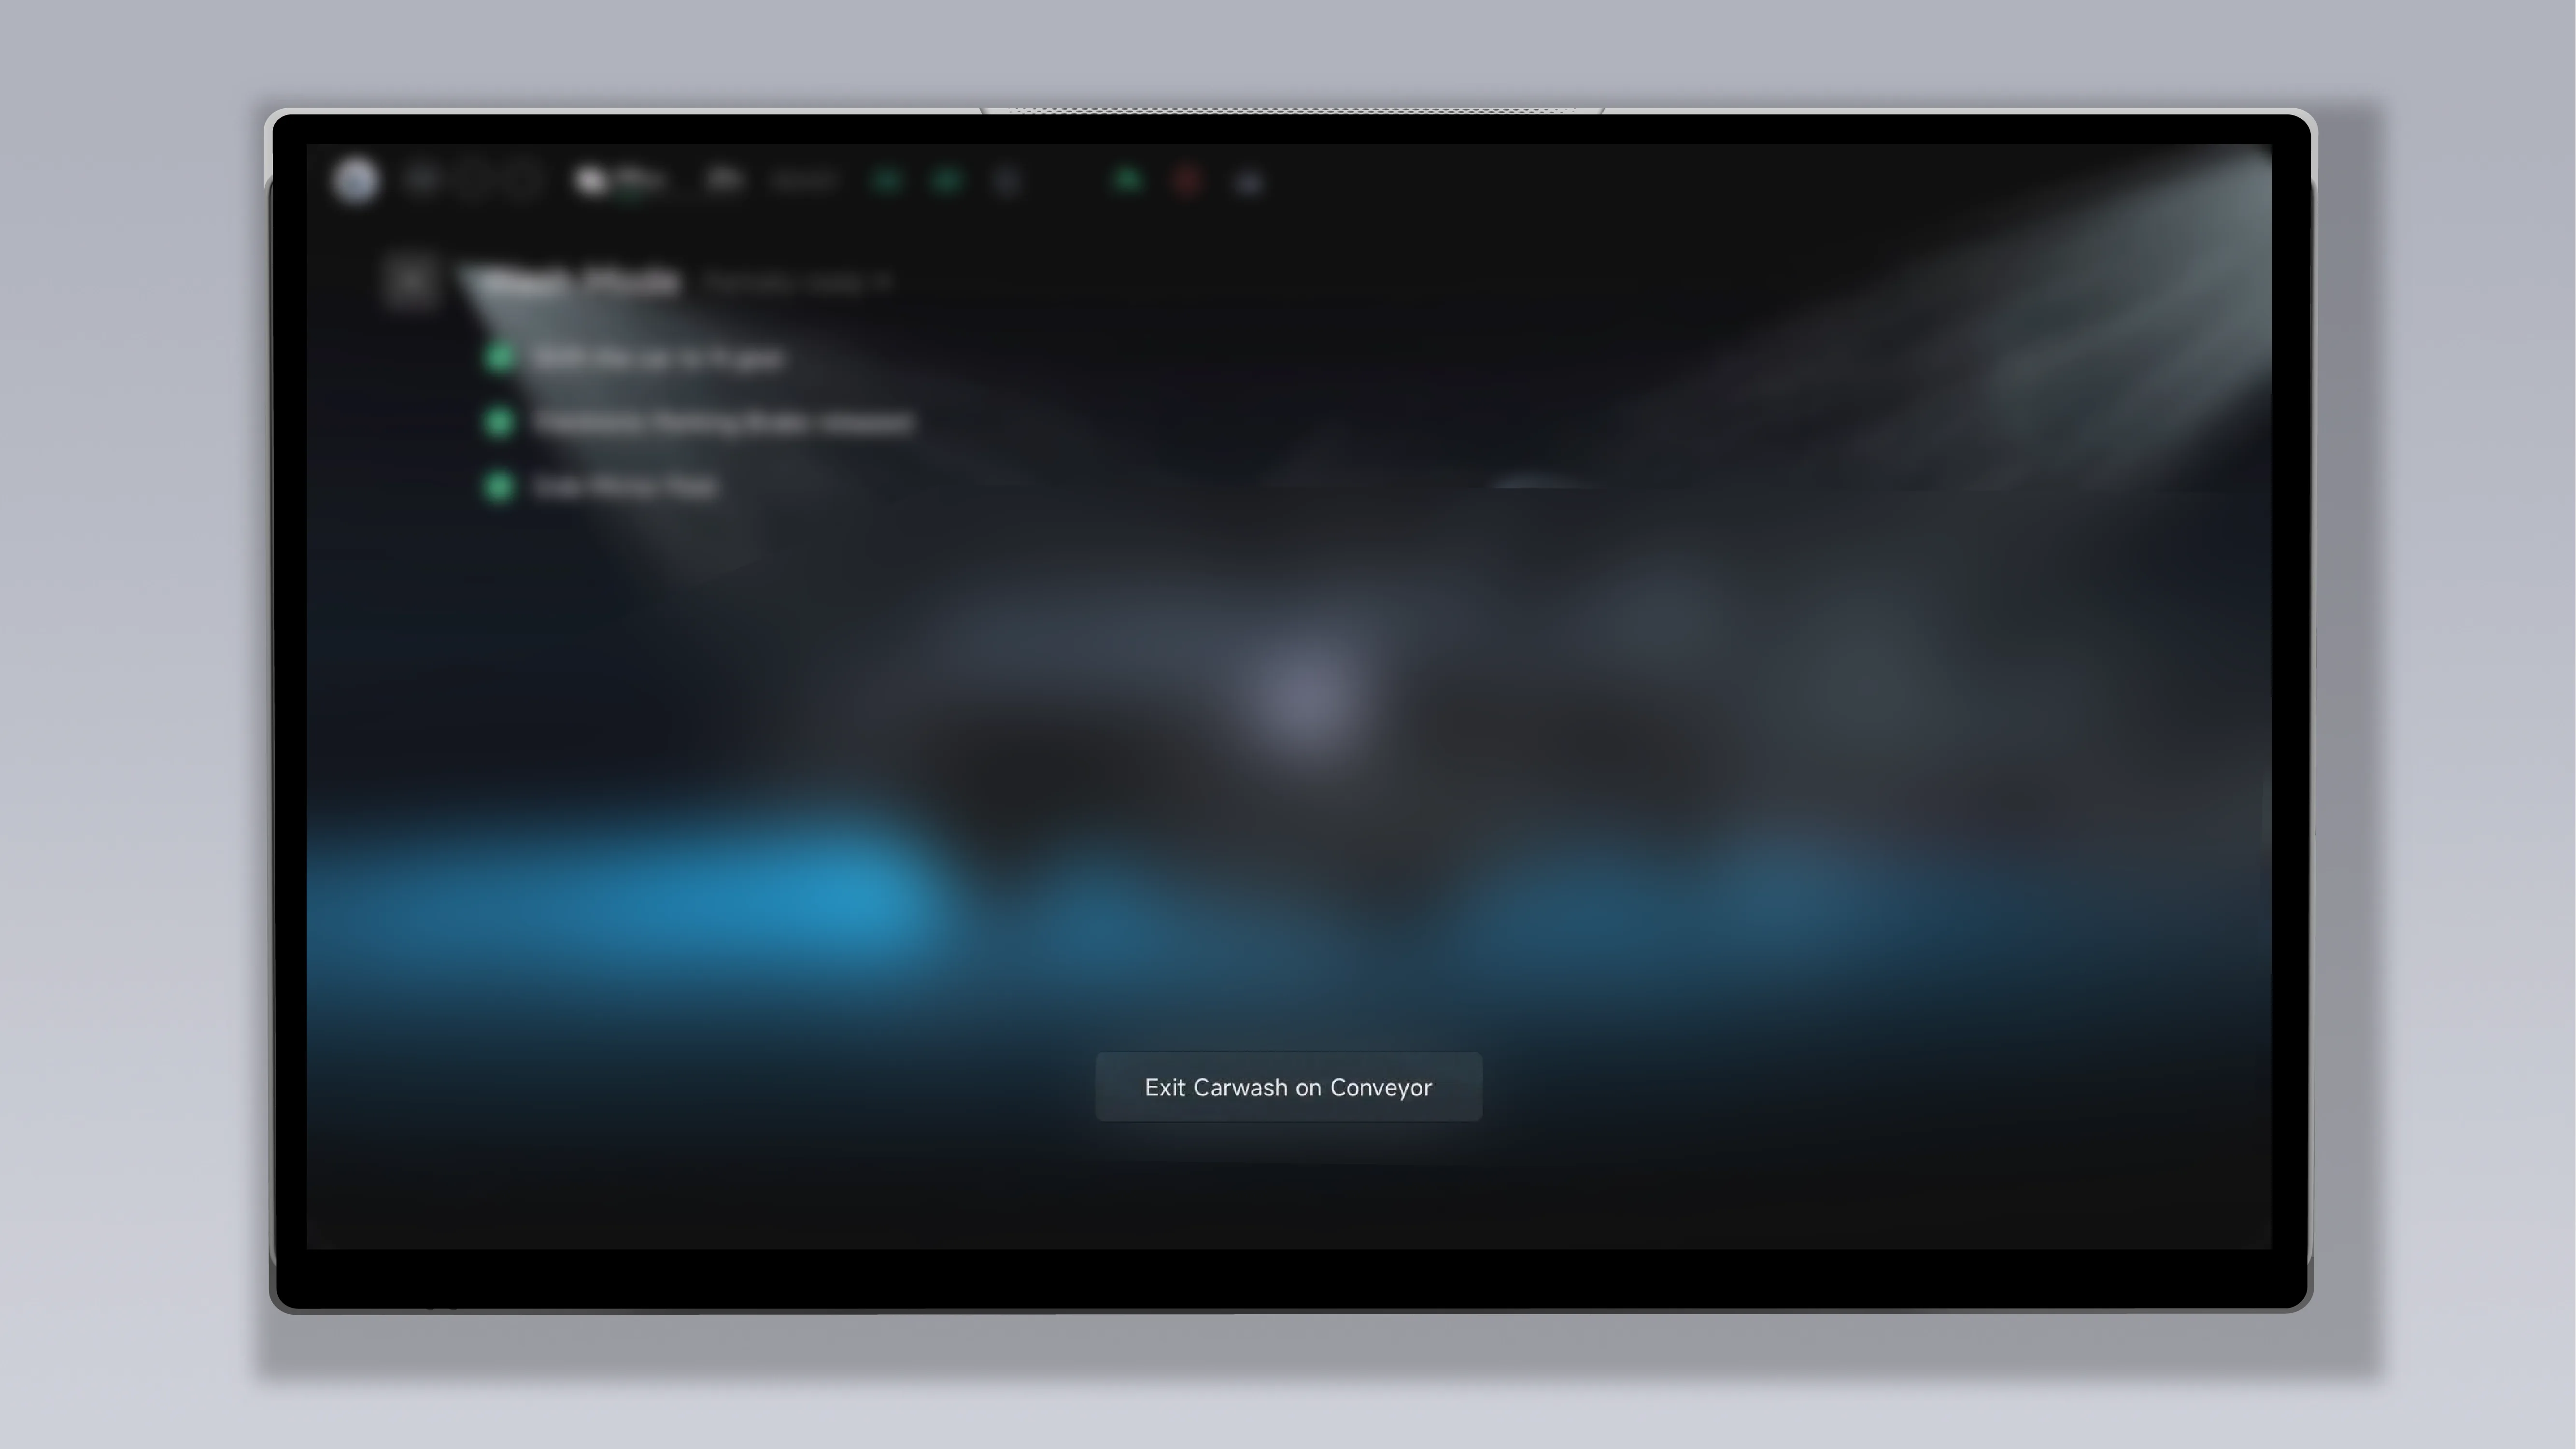
To exit conveyor car wash mode, tap on the center display. , and the conveyor car wash mode will exit.
Tips After exiting conveyor car wash mode, the gear automatically switches to P gear.
After Car Wash Mode is enabled, you can exit Car Wash Mode by any of the following methods:
Directly use a voice command (for example, say: “Hey, XPENG,exit Car Wash Mode”).
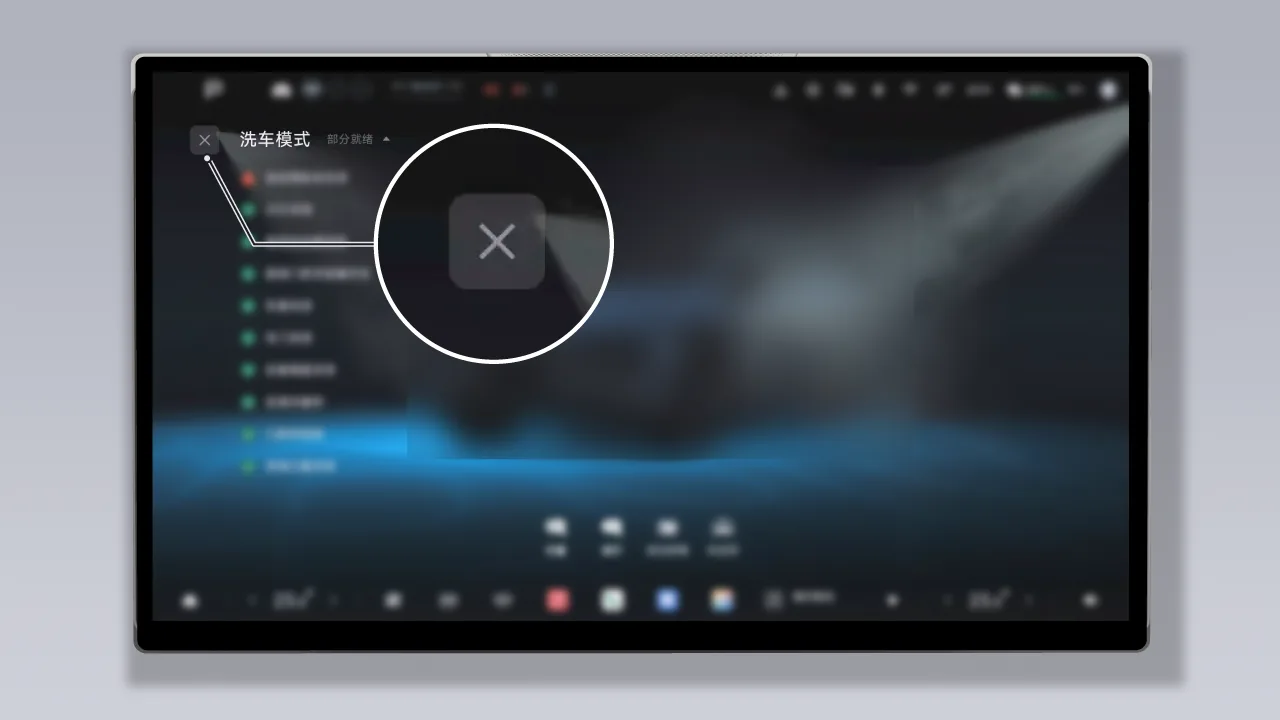
Tap on the car wash mode screen. “ ”, exit Car Wash Mode.
The Car Wash Mode will automatically exit when any of the following conditions occur:
Battery level is below 10%.
The vehicle speed exceeds 15 km/h continuously for 5 seconds.
Car Wash Mode has been enabled for more than 2 hours.
Connect the charging gun.
When you go out for activities such as outings, you can enable Camping Mode. After it is enabled, some functions such as vehicle lights, Power Off Automatically, or automatic lock/unlock will be temporarily disabled to provide a more comfortable and convenient outdoor vehicle use experience.
Before enabling Camping Mode, ensure that the vehicle meets the following conditions:
The gear is in P.
Battery level is greater than 10%.
Pet Mode, Rescue Mode, Camping Mode, Leave-Car Comfort, Nap Mode, Meditation Mode, Sleep Mode, etc. are not enabled.
The vehicle is not in the system update state.
When the conditions for enabling Camping Mode are met, Camping Mode can be enabled by any of the following methods:
Tap the center display in sequence. “ →Scene Mode→Camping Mode”, turn on Camping Mode.
Tap on the home page of the central control screen “ Scenario ”Enter the scene mode interface and tap , enable Camping Mode.
Directly use a voice command (for example, say “Hey, XPENG,turn on Camping Mode”).
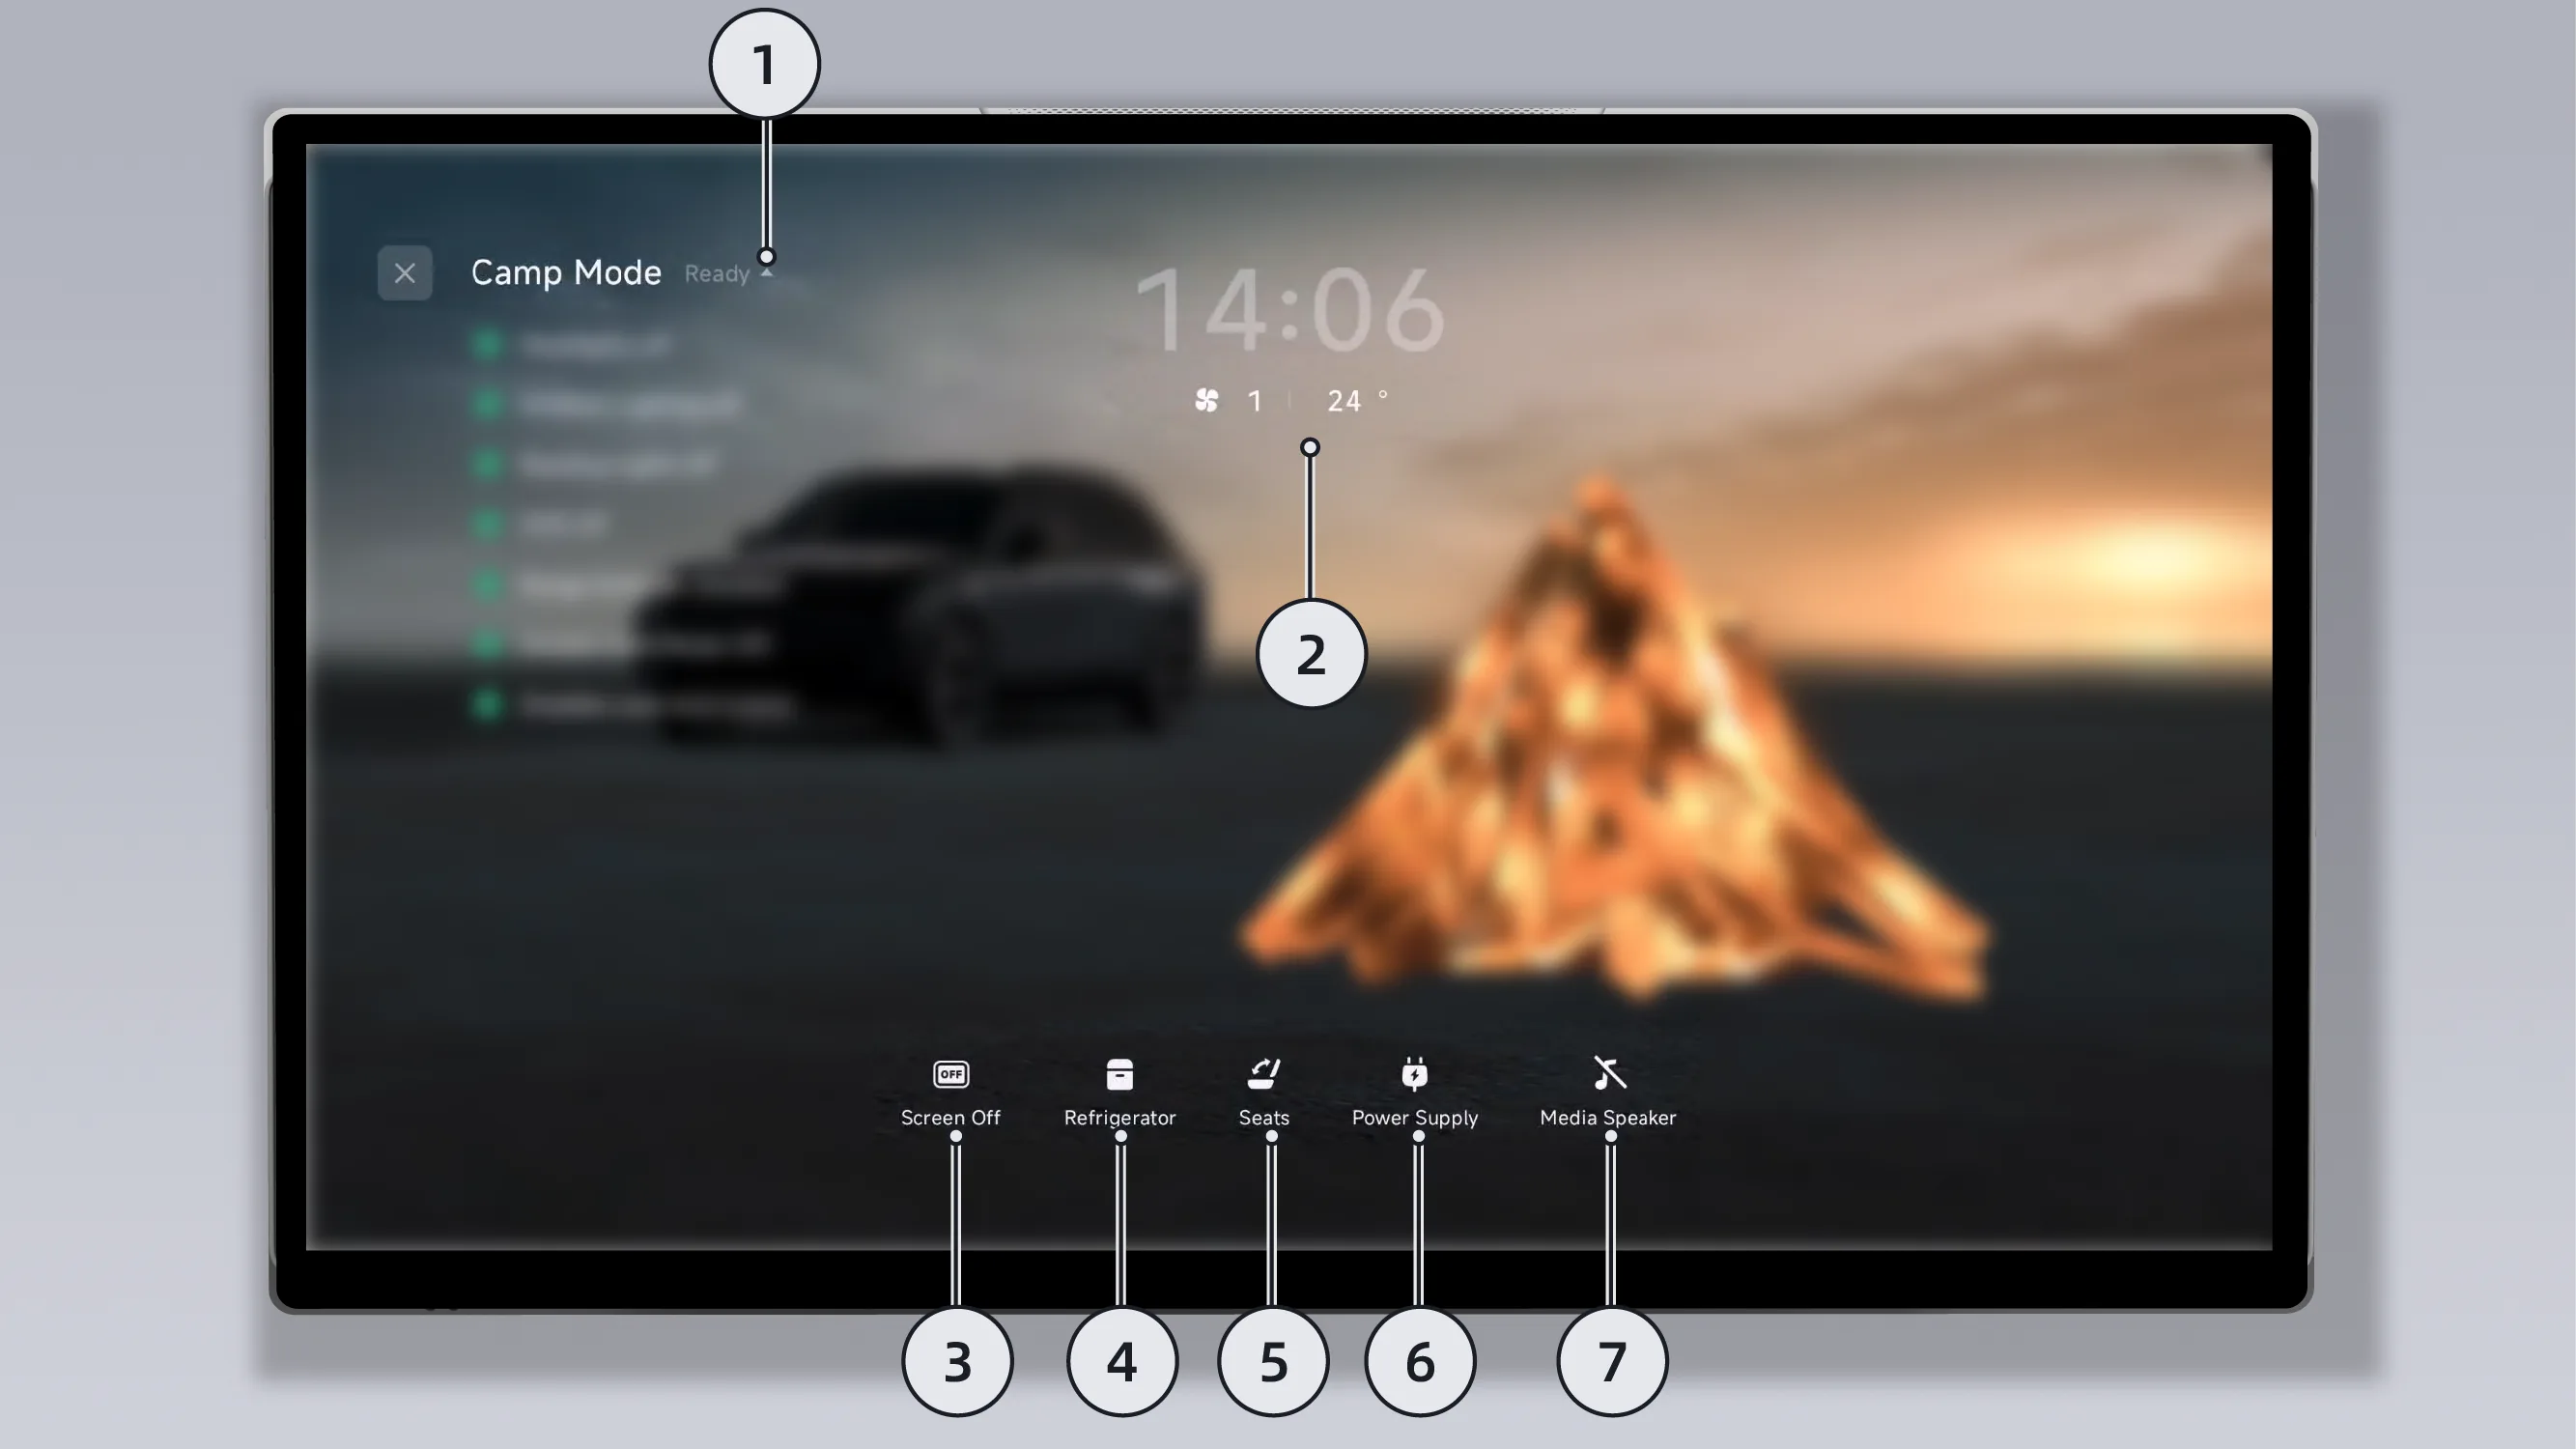
After Camp Mode is enabled, the central control screen and the instrument cluster will simultaneously display the Camp Mode interface. You can also perform the following operations on the Camp Mode interface according to your personal needs:
Self-check item list: Tap to expand/collapse the self-check item list.
Tips; After Camp Mode is enabled, the vehicle will automatically detect the closed status of each component and display a self-check item list on the mode interface. When a component has an abnormal closure status, a red warning symbol will be displayed in front of the corresponding self-check item to prompt you to inspect the condition of the vehicle components.
Air Conditioner status: Tap to enter the Air Conditioner interface, where you can set the Air Conditioner according to your personal needs.
Screen off: Tap to turn off all screens in the vehicle, including the instrument screen, center control screen, rear control screen, and rear entertainment screen. Tap the corresponding screen or exit Camping Mode to turn the screen back on.
refrigerator: Tap to open the refrigerator control panel, where you can set the refrigerator functions according to your personal needs.
Seat: Tap to set the seat linkage function. After the linkage function is enabled, the corresponding seat moves to the comfort position.
Tips When Camp Mode is enabled, if the seat linkage function is enabled and the system detects that someone is on the seat, the system will automatically restore to the comfortable position set for it.
Warning Make sure hands, bodies or objects are not on the seat path during seat adjustment to avoid the risk of pinching.
Power Supply: Tap to open the power supply settings screen, where you can open/close the charging port cover and set the power supply limit.
Tips After the power supply gun is connected for power supply, the Camping Mode interface will display the corresponding power supply information.
Media playback through external speaker: Tap to turn the media playback through external speaker function on/off.
After Camp Mode is enabled, you can exit Camp Mode by any of the following methods. After exiting, some functions such as Power Off Automatically and automatic unlocking/locking will be restored:
Directly use a voice command (for example, say “Hey, XPENG,exit Camping Mode”).
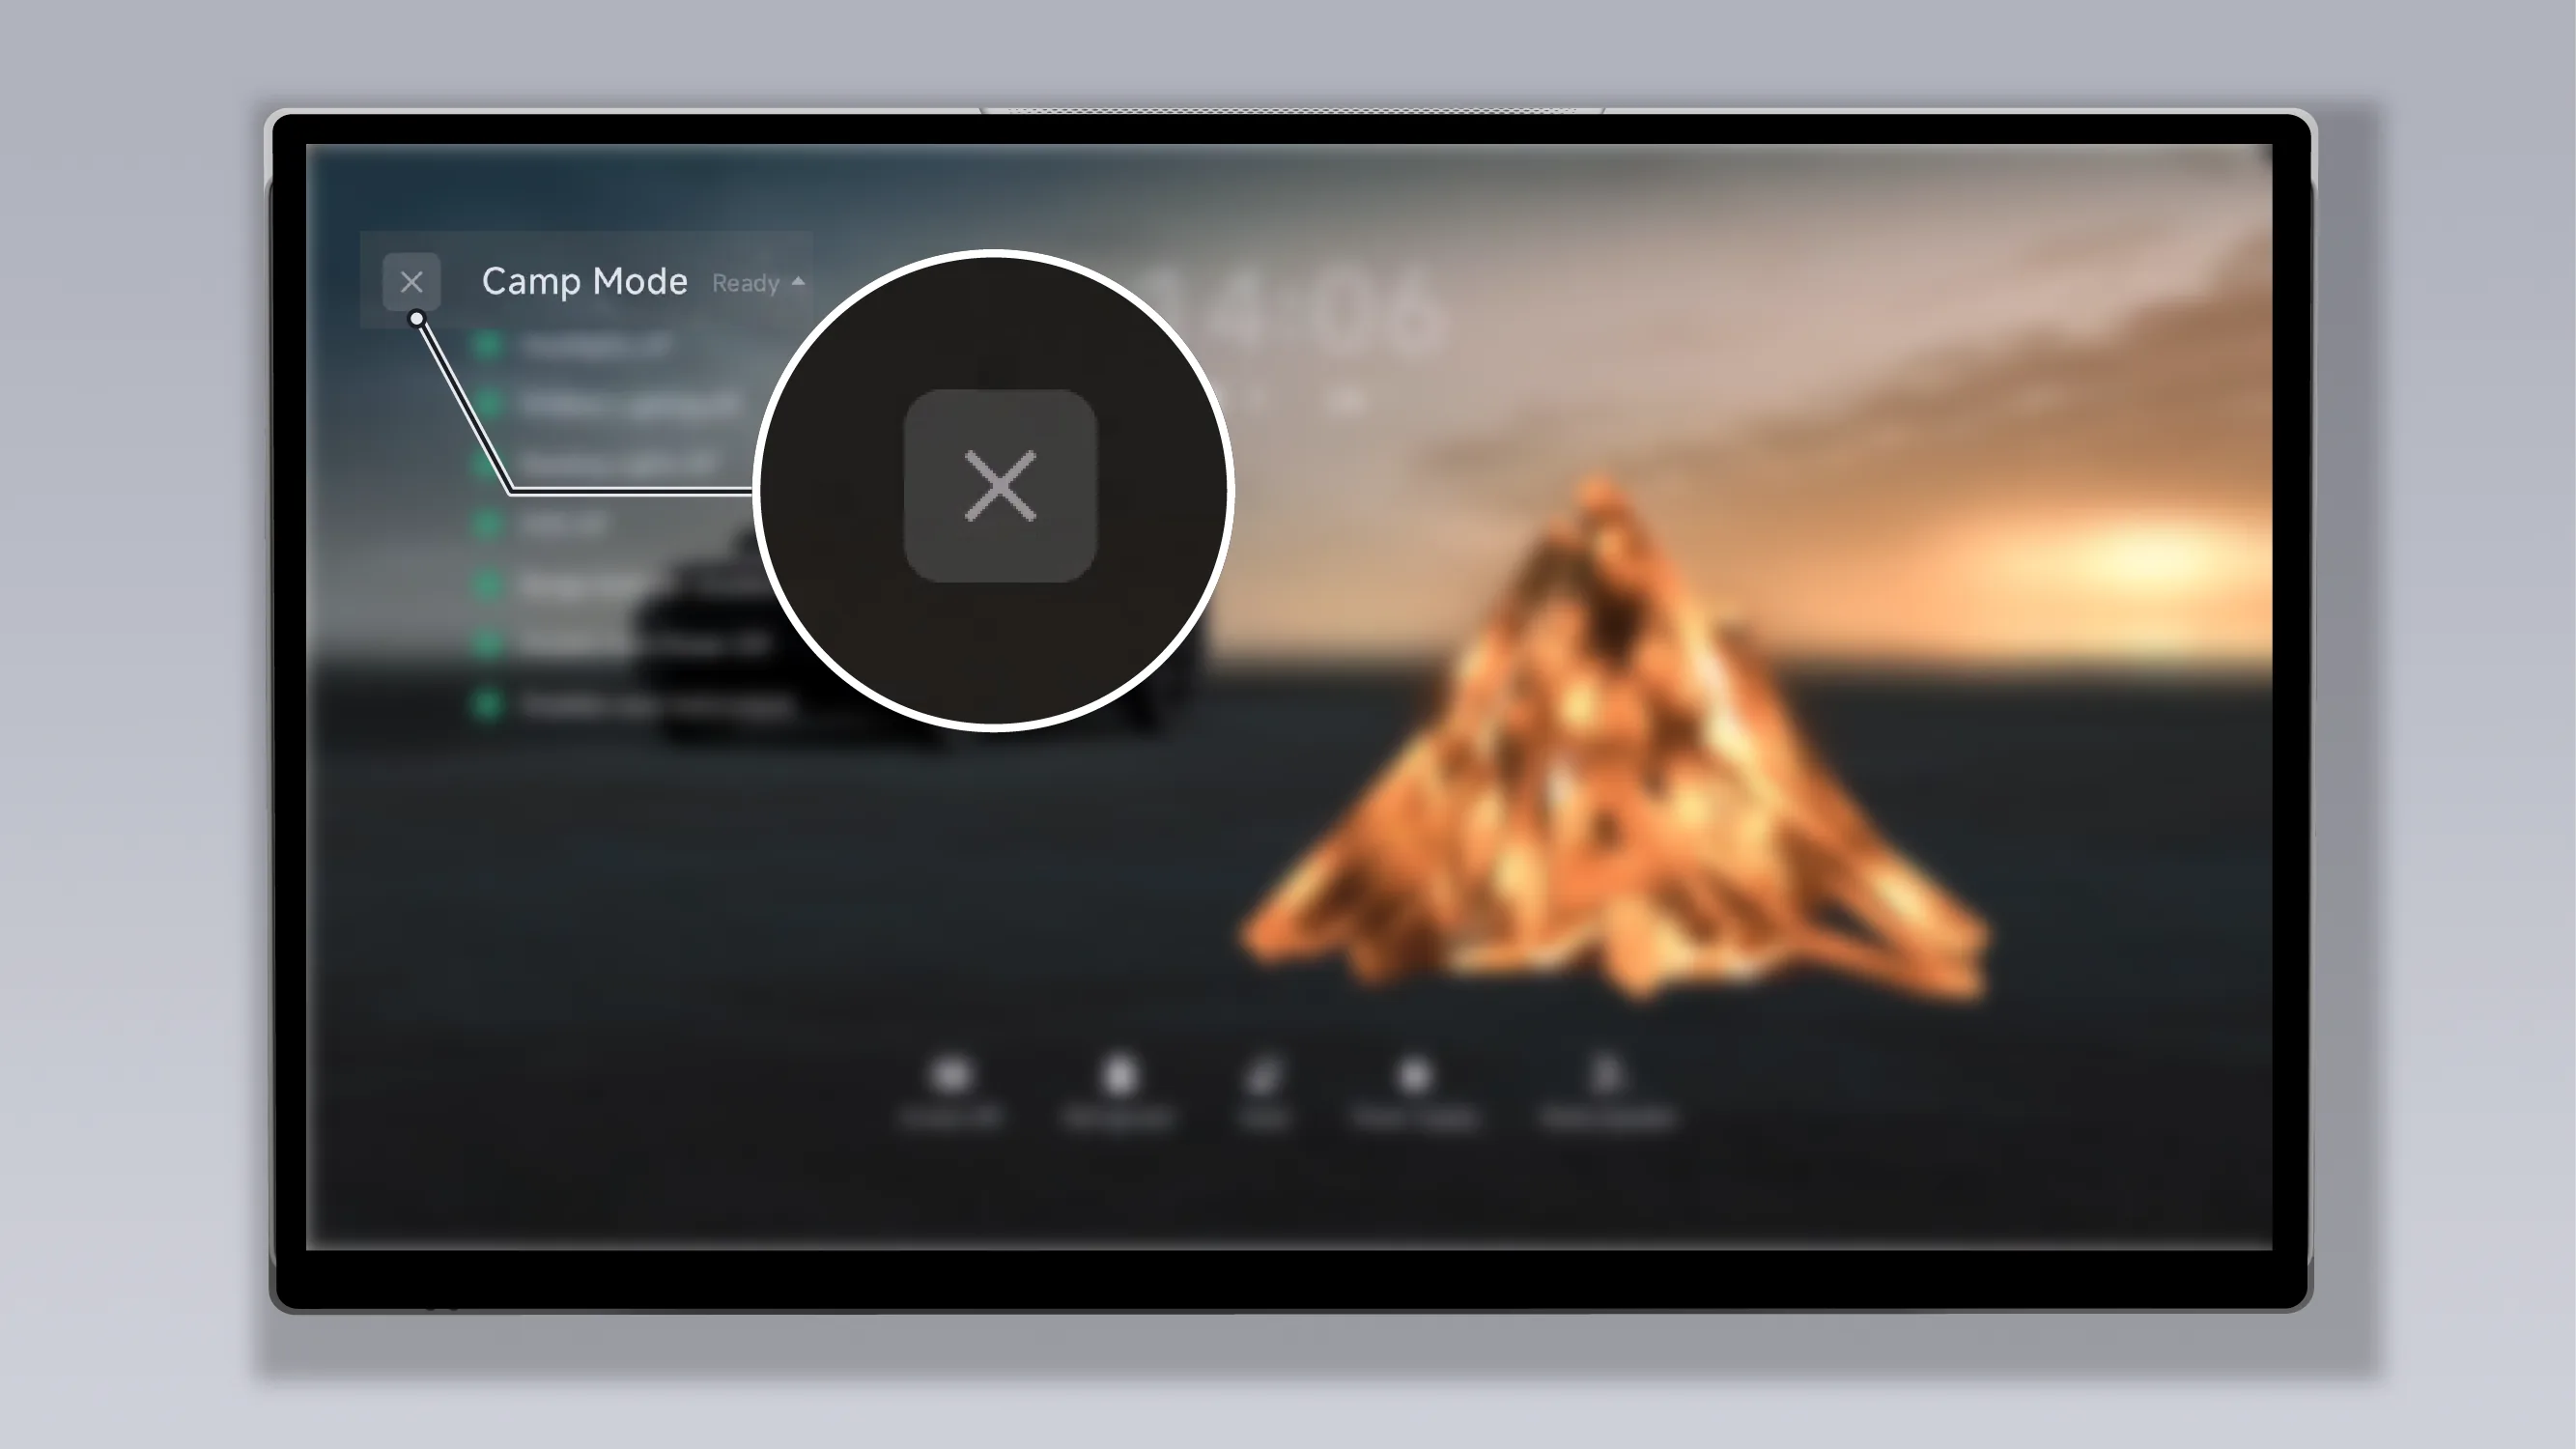
Tap on the Camping Mode interface on the center control screen “ ”, exit Camping Mode.
When the vehicle triggers any of the following conditions, Camping Mode will automatically exit:
Battery level is below 5%.
The gear position switches to a non-P gear.
Power off urgently through the central control screen.
Lock the vehicle using the remote key, mobile app, or NFC key.
When you need to leave the vehicle temporarily, you can enable Leave-Vehicle Comfort Mode. When enabled, after the vehicle is locked, the system will continue to maintain a comfortable interior environment and will not Power Off Automatically.
Before enabling Leave-Vehicle Comfort Mode, ensure that the vehicle meets the following conditions:
The vehicle is powered on.
The gear is in P.
Battery level is greater than 10%.
Pet Mode, Rescue Mode, Car Wash Mode, Camping Mode, Nap Mode, etc. are not enabled.
When the conditions for enabling Leave-Car Comfort Mode are met, you can enable Leave-Car Comfort Mode in any of the following ways:
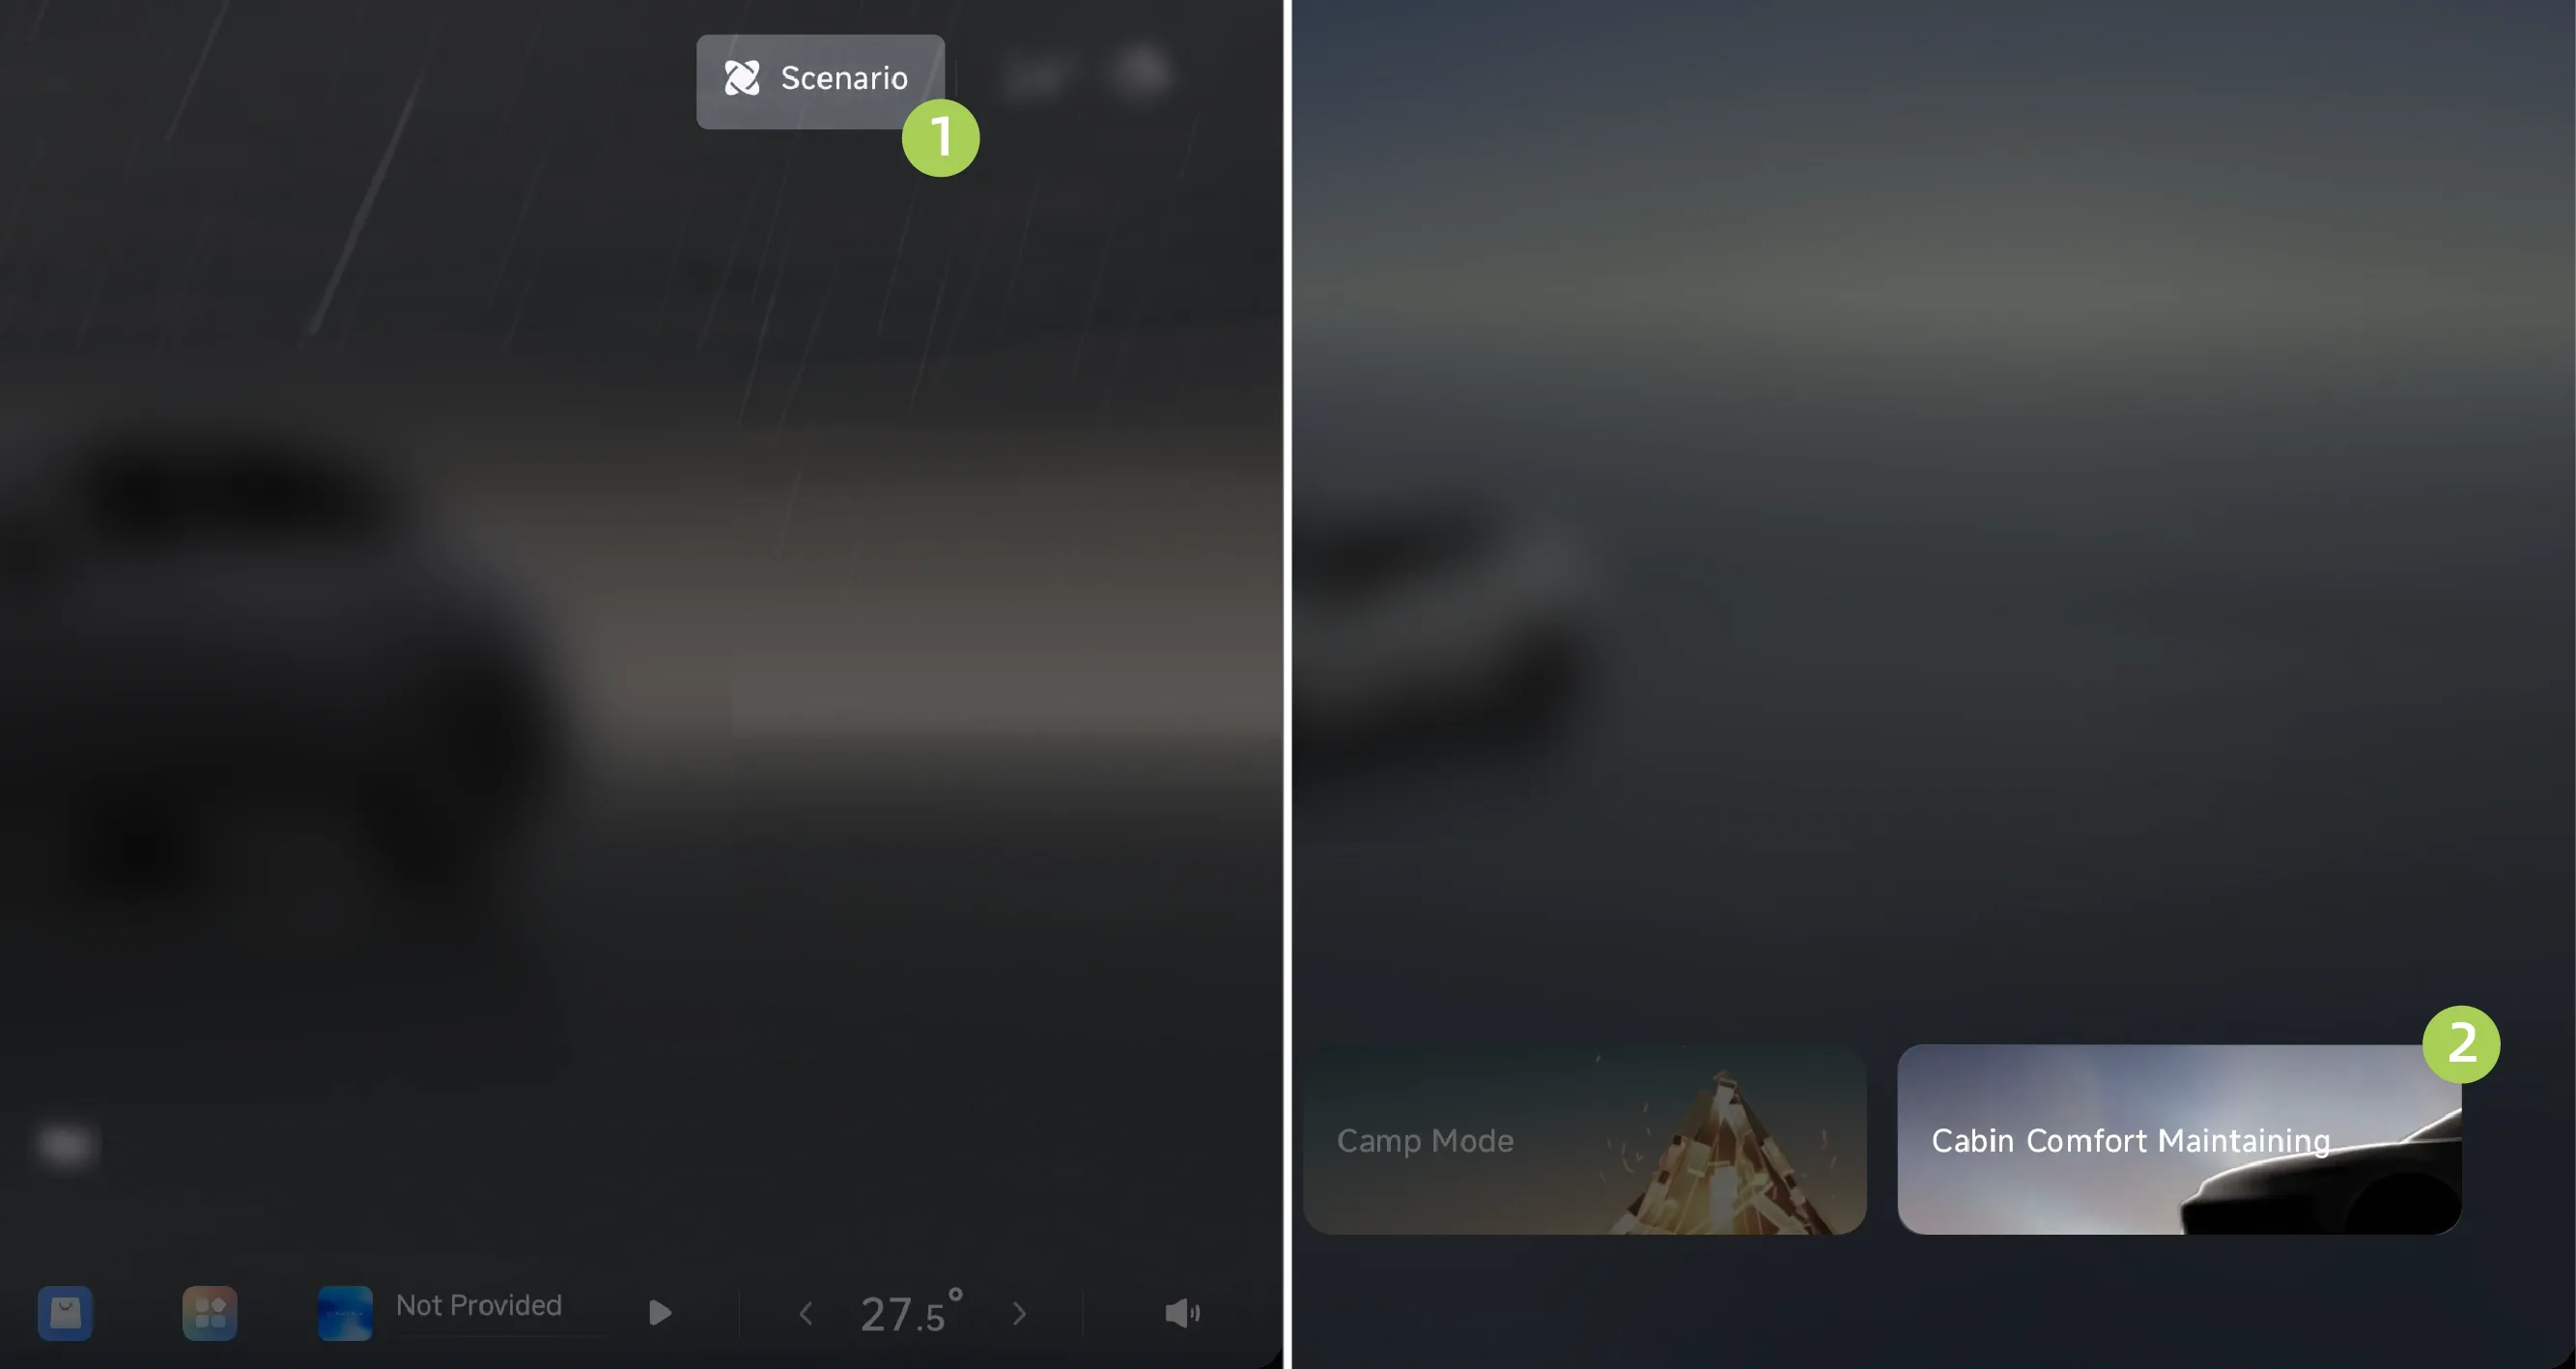
Tap the center display in sequence. “ →Scenario Mode→Departure Comfort”, enable Leave Vehicle Comfort Mode.
Tap on the central control screen home page. “ Scenario ”Enter the scene mode interface and tap , enable Leave-Vehicle Comfort Mode.
Customize the bottom taskbar through the center control screen, where you can “  Departure Comfort ”Add to the bottom taskbar, tap in the bottom taskbar “ Departure Comfort ”, enable Leave-Car Comfort Mode (for information about custom bottom taskbar, please refer to the Custom Bottom Taskbar section).
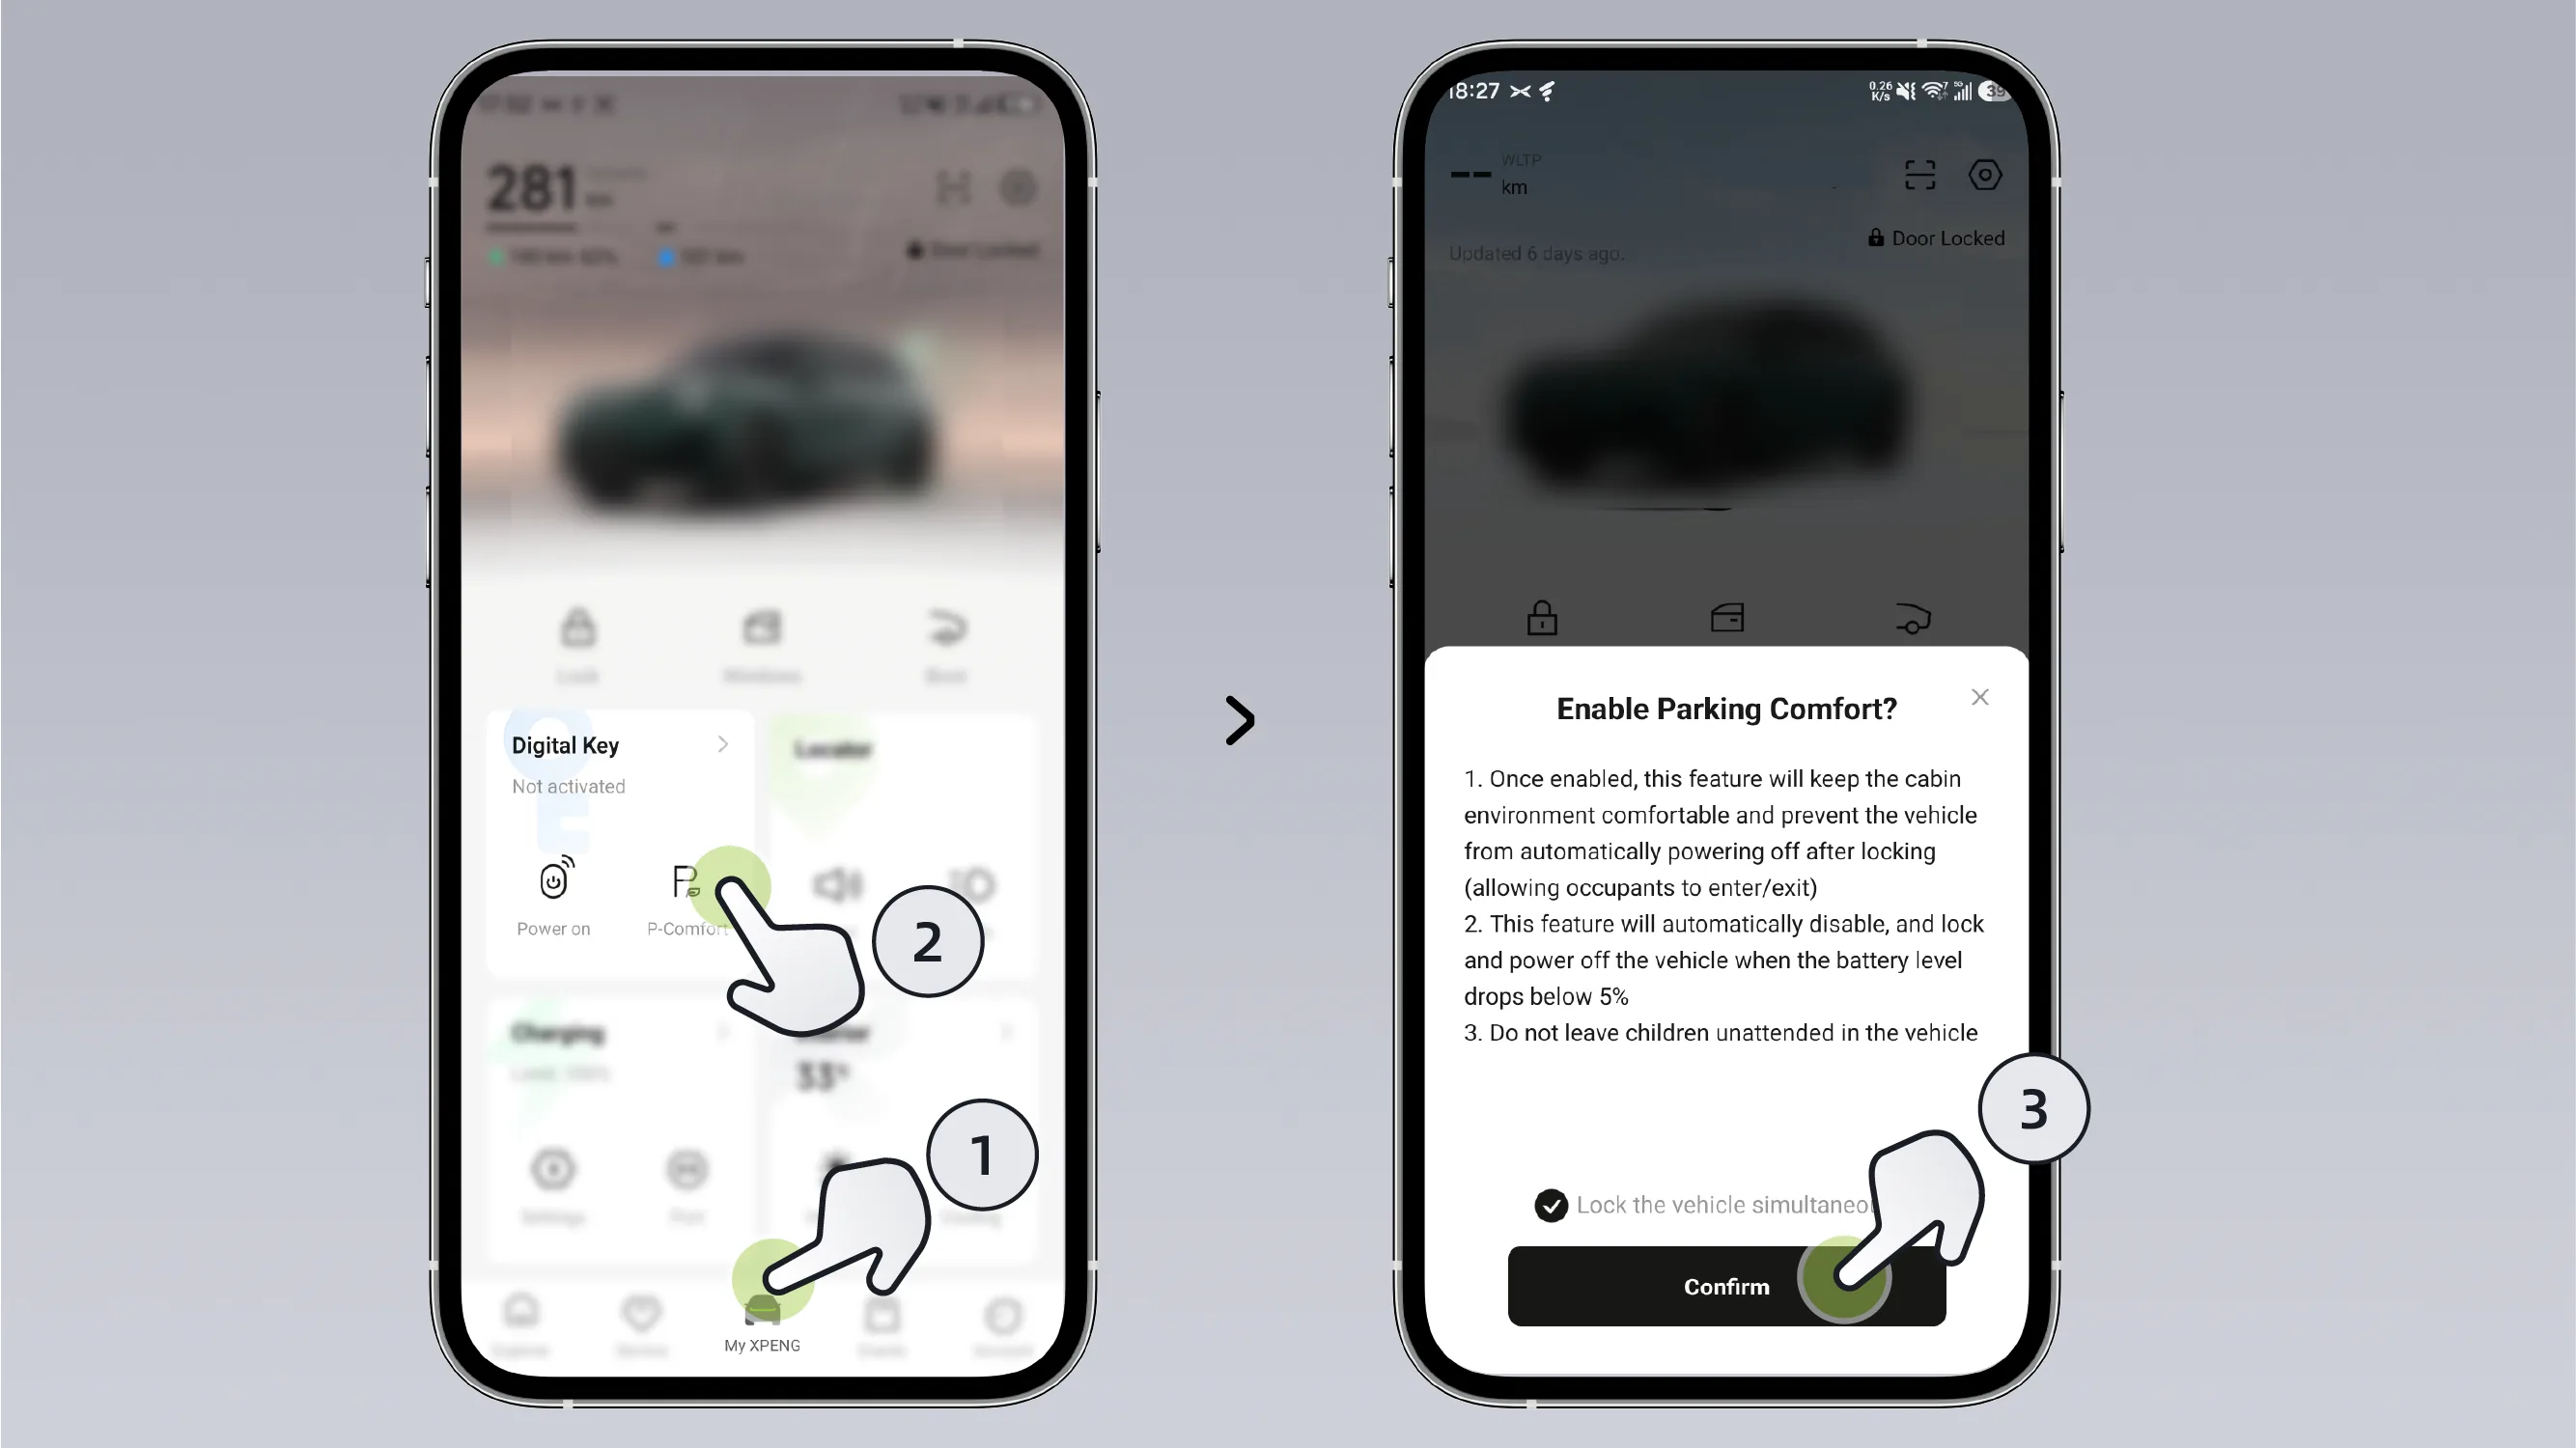
Tap in the XPENG App , confirm in the pop-up window and enable Leave-Car Comfort Mode.
Tips In the pop-up window of the XPENG App, you can select . After selecting it, the vehicle will automatically lock when P-Comfort Mode is activated.
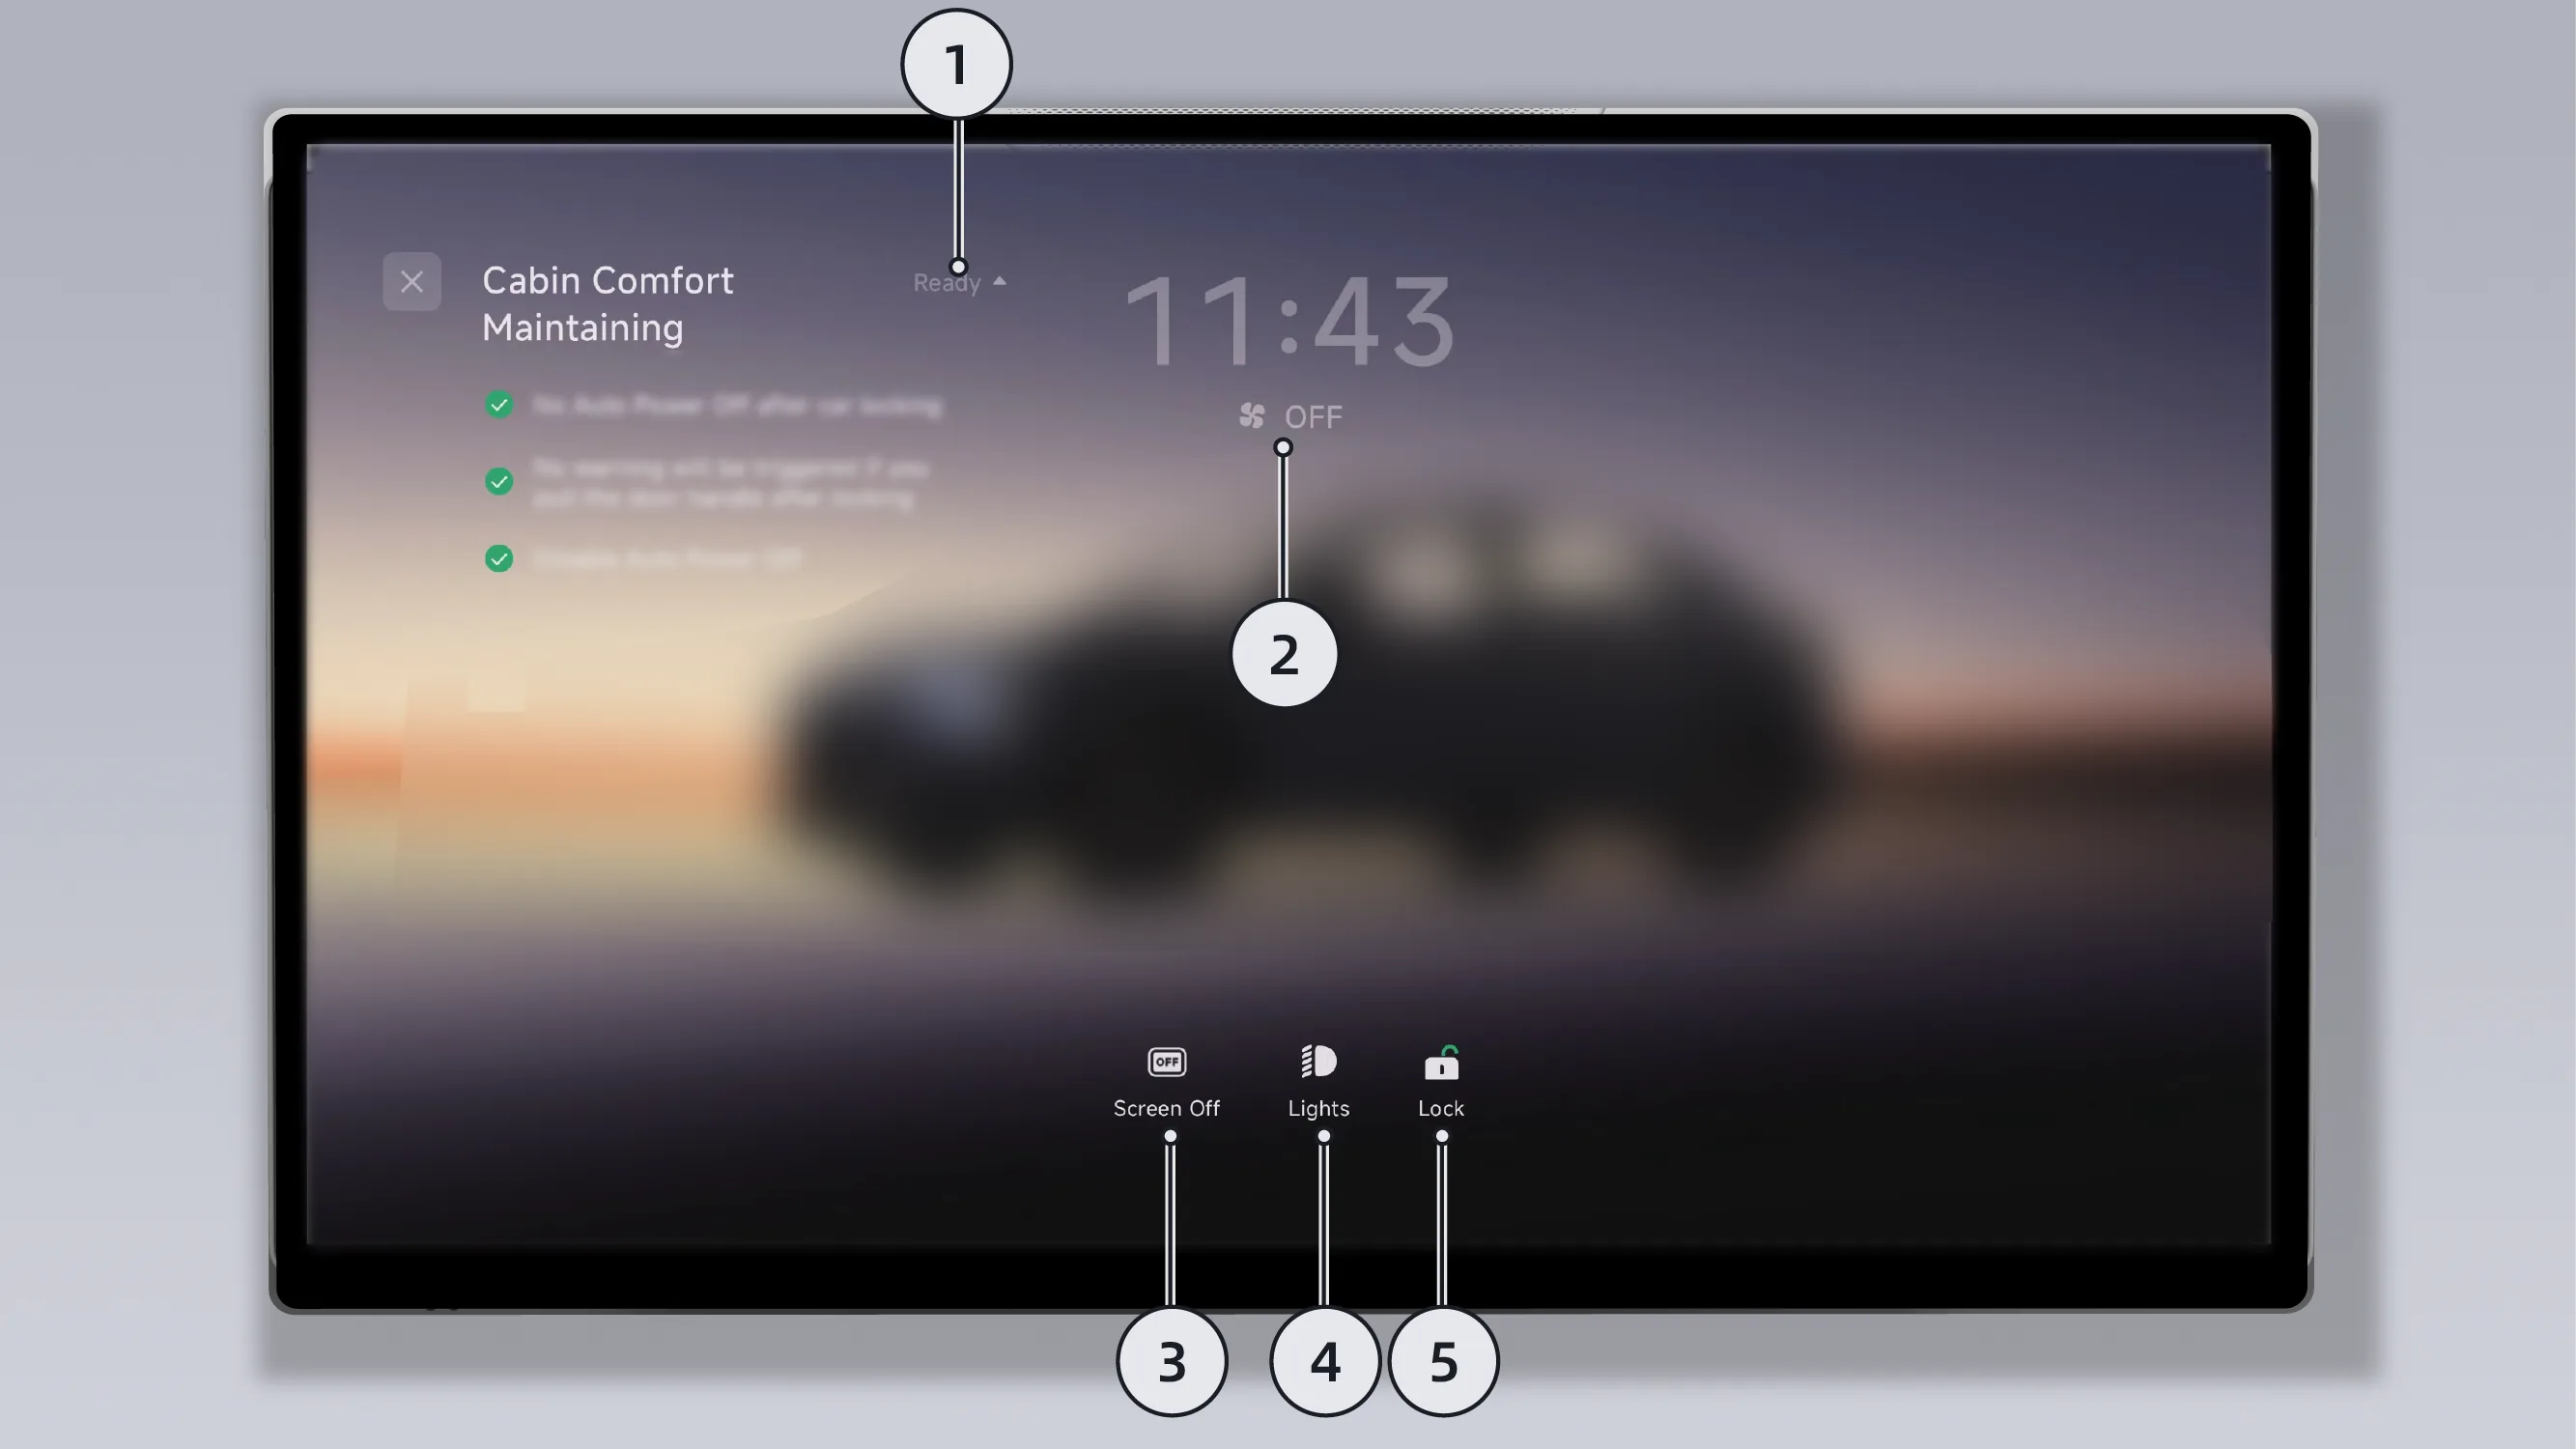
After enabling Leave-Vehicle Comfort Mode, you can also perform the following operations on the Leave-Vehicle Comfort Mode screen according to your personal needs:
Self-check item list: Tap to expand/collapse the self-check item list.
Tips After Leave Vehicle Comfort Mode is enabled, the vehicle will automatically detect the closed status of all components and display a self-check item list on the mode interface. When a component has an abnormal closed status, a red warning symbol will be displayed in front of the corresponding self-check item to prompt you to inspect the condition of the vehicle components.
Air Conditioner status: Tap to enter the Air Conditioner screen, where you can set the Air Conditioner according to your personal needs.
Screen off: Tap to turn off all screens in the vehicle, including the instrument screen, center control screen, rear control screen, and rear entertainment screen. Tap the corresponding screen or exit Leave-Vehicle Comfort Mode to turn the screen on again.
Lights: Tap to turn the exterior headlights on/off.
Door lock: Tap to unlock/lock the doors.
After Leave Comfort Mode is enabled, you can exit Leave Comfort Mode in any of the following ways:
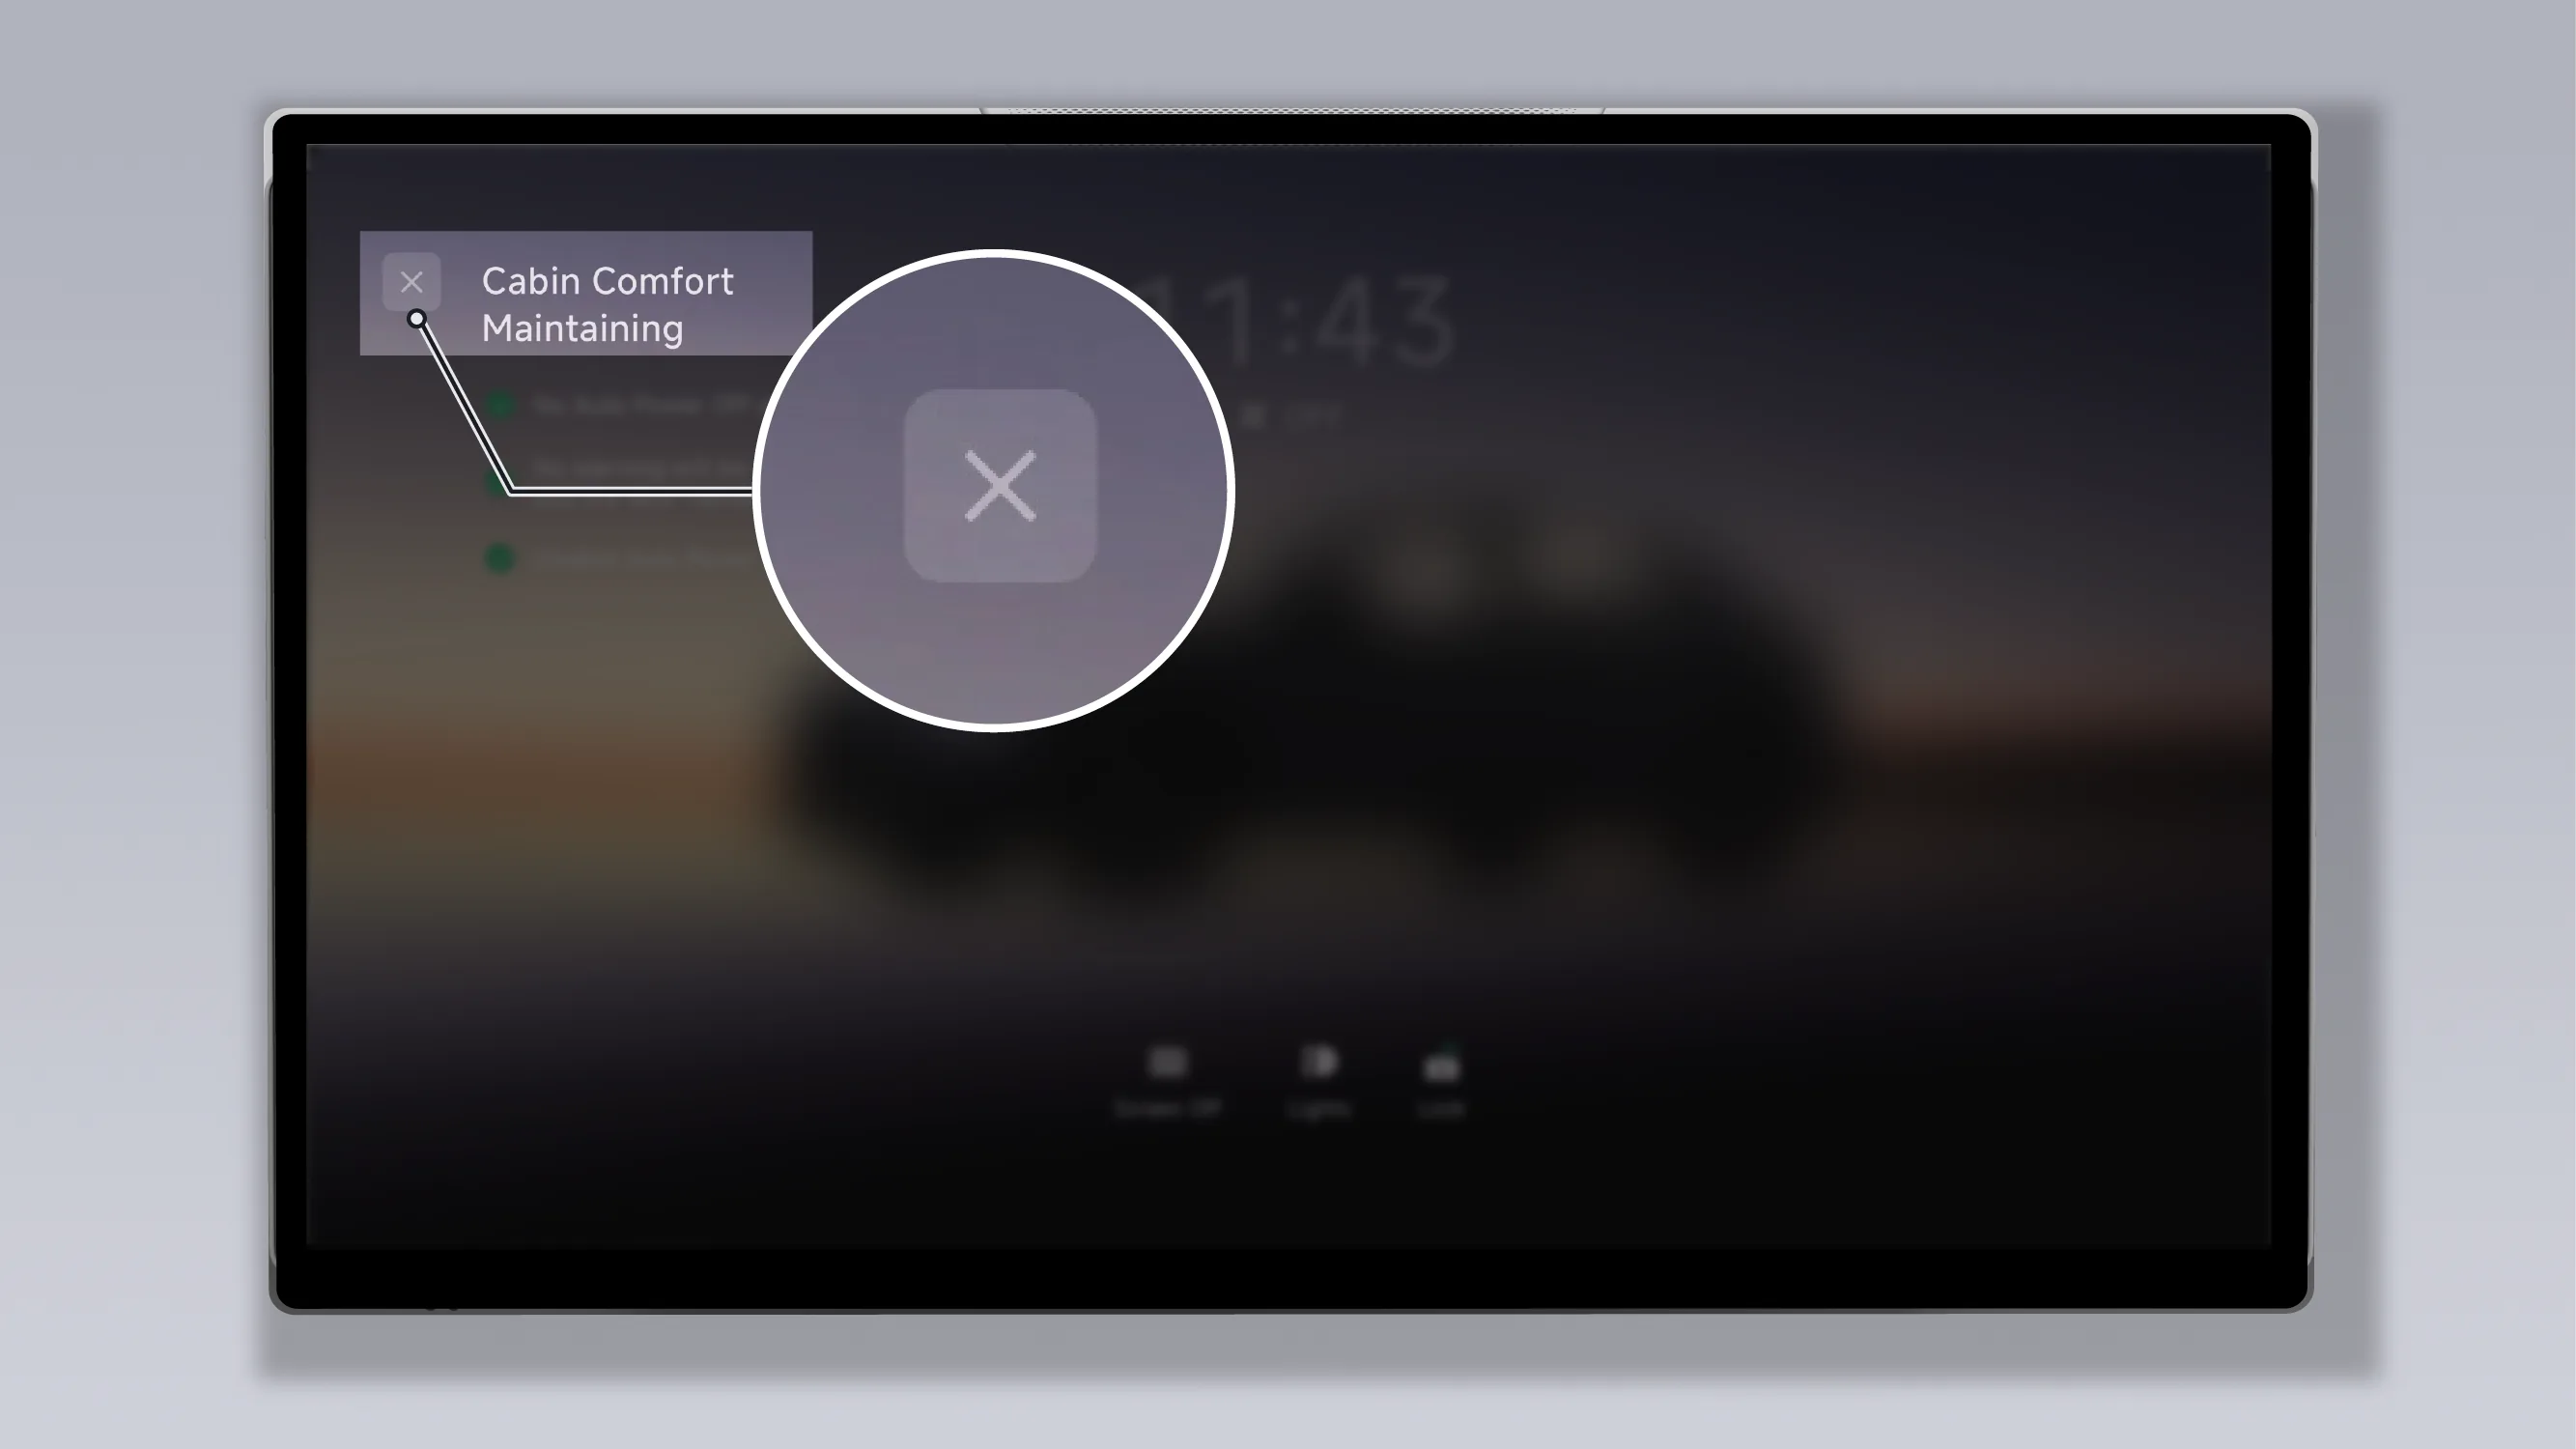
Tap on the center control screen in the Leave Vehicle Comfort Enjoyment interface “ ”, exit Leave-Car Comfort Mode.
Tap in the XPENG App Confirm in the pop-up window and exit Leave-Car Comfort Mode.
In the XPENG App , confirm in the pop-up window and exit Leave-Car Comfort Mode.
When the vehicle meets any of the following conditions, Leave Comfort Mode will automatically exit:
Battery level is below 5%.
The gear is shifted to a non-P position.
Power Off in an emergency via the central control screen.
Tips After P-Comfort Mode has been running for 1 hour, the system will send a notification to the XPENG App indicating that it has been running for 1 hour.
When locking the vehicle from outside, if the vehicle detects that a passenger remains inside, the system will temporarily activate P-Comfort Mode. The vehicle will remain powered on for 5 minutes, and a pop-up notification will appear on the touchscreen while a message is also sent to the XPENG App. At this time, you can tap Confirm on the touchscreen pop-up or use the XPENG App to keep P-Comfort Mode running. If P-Comfort Mode is not activated on the touchscreen or in the XPENG App within 5 minutes, the vehicle will power off automatically.
Caution The P-Comfort Mode is intended only to maintain a comfortable in-vehicle environment during temporary absence from the vehicle. Do not leave children or pets alone in the vehicle.
After P-Comfort Mode is activated, it must be turned off manually via the touchscreen or the XPENG App. If you will be away from the vehicle for an extended period, it is recommended to turn off P-Comfort Mode to avoid excessive range consumption caused by prolonged operation.
After XPLAY is enabled, the rear seats will automatically adjust to a comfortable position, and the rear entertainment screen, sunshade* and sound settings will be adjusted to a state suitable for viewing, creating a private cinema for you with one tap.
Before enabling movie viewing mode, ensure that the vehicle meets the following conditions:
Battery level is greater than 10%.
Pet Mode, Rescue Mode, Camping Mode, Nap Mode, etc. are not enabled.
When the conditions for enabling Camping Mode are met, enable Movie Viewing Mode by following these steps:
You can enter the viewing mode screen in any of the following ways:
Tap the center display in sequence. “ →Scene Mode→Viewing Mode”, enter the movie viewing mode screen.
Tap on the home page of the center display screen. “ Scenario ”Enter the scene mode interface and tap Enter the movie viewing mode screen.
You can select the seat you want to activate in the viewing mode interface according to your personal needs, and tap Tap the button to enable viewing mode. After viewing mode is enabled, the vehicle will automatically perform the following operations:
Rear entertainment screen unfolds.
The sound field switches to the whole vehicle, the sound mode switches to Cinema mode, and the Ambient Lights mode switches (if the Ambient Lights are already turned off, they will remain off).
Sunshade* closes automatically.
Tips During the automatic seat adjustment process, you can operate the seat adjustment switch at any time to interrupt the seat movement.
If the rear entertainment screen cannot unfold, it may result in the inability to enable viewing mode. Please check it and try enabling it again.
Warning During automatic seat adjustment, keep objects and all parts of the body away from the seat movement range to avoid personal injury or property damage.
When unfolding or folding the entertainment screen, keep objects and all parts of the body away from the movement range of the entertainment screen to avoid personal injury or property damage.
When using the entertainment screen, do not use external force to adjust the angle of the entertainment screen, so as to avoid screen damage.
After Movie Mode is enabled, the top status bars of the center display and the rear entertainment screen will show that the current status is in Status.
After Theater Mode is enabled, you can exit Theater Mode in any of the following ways:
Tap in sequence on the rear entertainment screen Follow the prompts to exit Movie Mode.
Tap the entertainment screen in the rear row in sequence. “ →Scene Mode→Viewing Mode”Follow the prompts to exit Movie Mode.
Tap the central control screen in sequence. Follow the prompts to exit viewing mode.
Tap the center control screen in sequence. “ →Scene Mode→Viewing Mode”Follow the prompts to exit Viewing Mode.
Tips After viewing mode is enabled, if the rear entertainment screen is manually turned off, the system will issue an exit viewing mode prompt. Follow the prompt to exit viewing mode.
After exiting viewing mode, the vehicle will automatically perform the following operations:
The rear seats, rear entertainment screen, and sunshade* will automatically return to the states they were in before entering viewing mode.
The sound field, sound mode, and ambient light mode will automatically switch to the settings configured before entering Viewing Mode.
After Pet Mode is enabled, when the driver leaves the vehicle, it can ensure the safety of pets left alone in the vehicle and will prompt the in-vehicle safety status. If there are children in the vehicle, please ensure that they are accompanied by an adult.
Before enabling Pet Mode, ensure that the vehicle meets the following conditions:
The gear is in P.
Battery level is greater than 20%.
When the conditions for enabling Pet Mode are met, enable Pet Mode by following the steps below:
You can enter the Pet Mode screen by using any of the following methods:
Directly use a voice command (for example, say “Hello XPENG, turn on Pet Mode”).
Tap on the home page of the center display. “ Scenario ”Enter the scene mode interface and tap Enter the Pet Mode screen.
On the central control screen “ →Scene Mode→Pet Mode”, enter the Pet Mode screen.
On the center control screen “ →Settings→vehicle→Maintenance→Pet Mode”, enter the Pet Mode screen.
Tap the bottom taskbar on the center display.  Pet Mode icon, enter the Pet Mode screen (for information about the custom bottom taskbar, please refer to the custom bottom taskbar section).
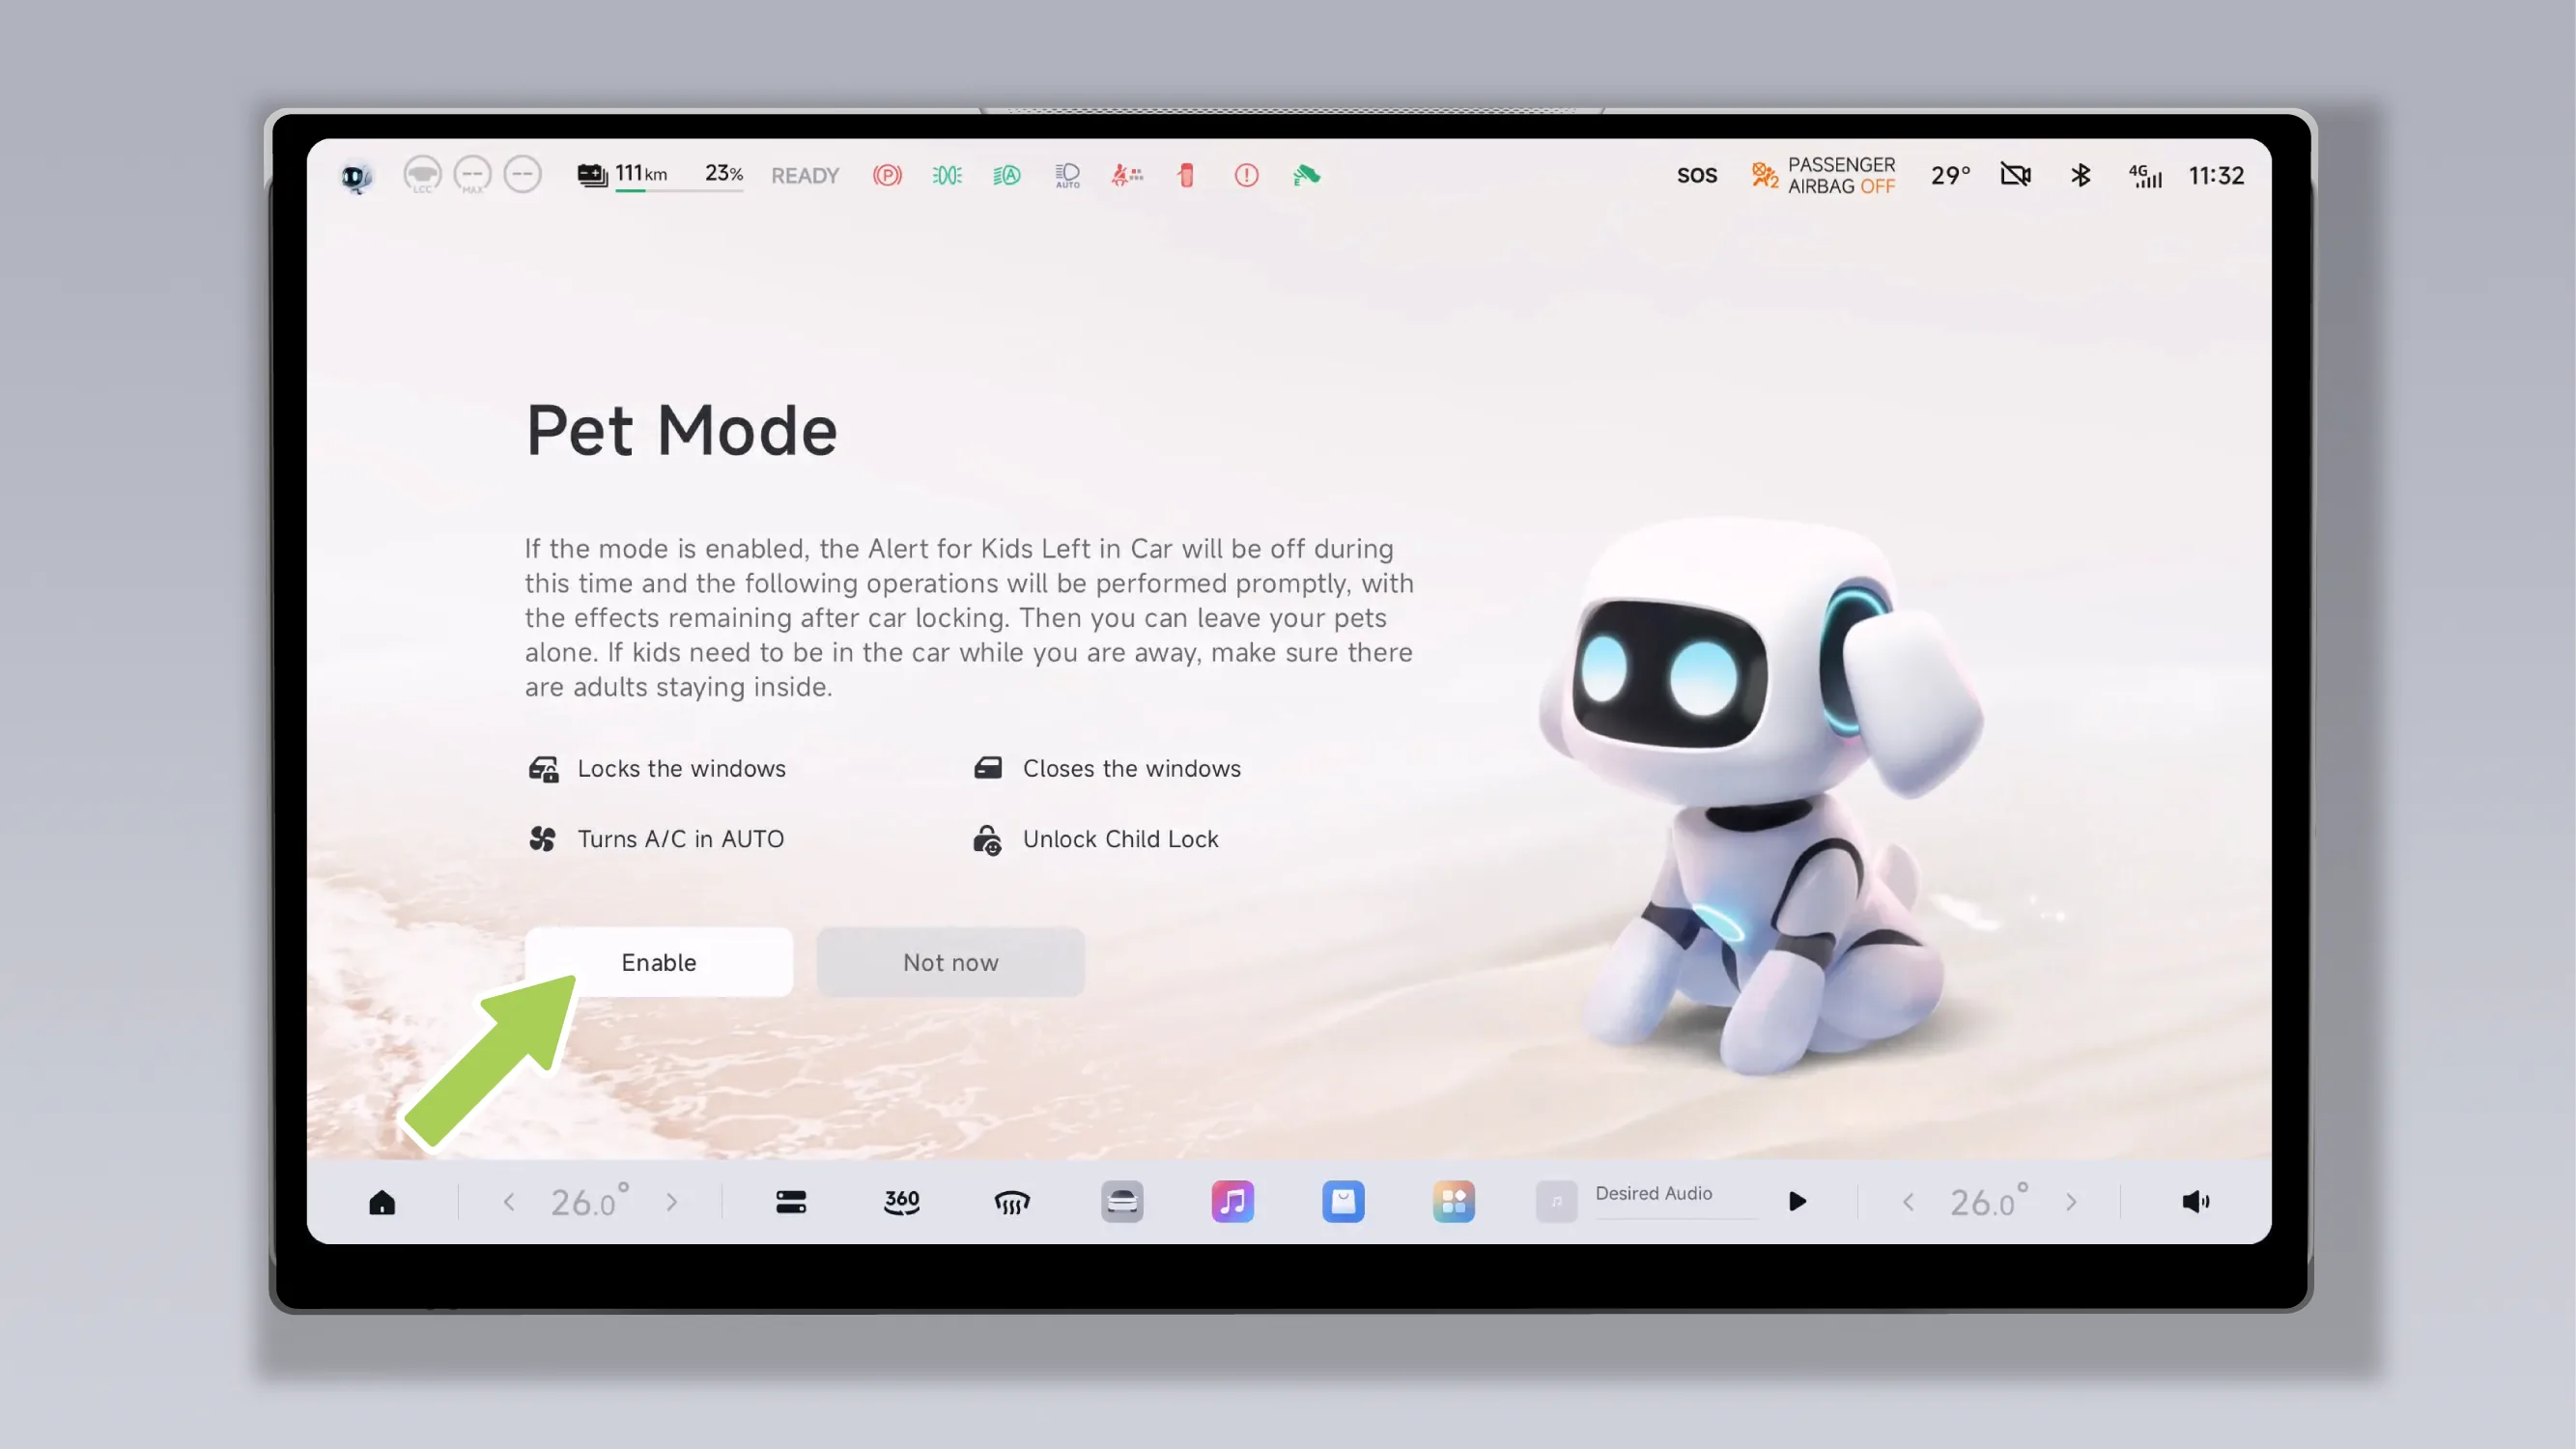
On the Pet Mode screen of the center display, tap Press the button to enable Pet Mode. After Pet Mode is enabled, the vehicle will automatically perform the following operations and continue to maintain them after the vehicle is locked:
Locks the windows.
Closes the windows.
Turns A/C in AUTO.
child lock locked.
Tips Please do not forget to lock the vehicle. After the vehicle is locked, the Air Conditioner and the central control screen will remain on.
If the window cannot be fully closed, Pet Mode may fail to be enabled. Please check it and try enabling it again.
When the vehicle battery level is lower than 5% or a vehicle function is abnormal (for example: Air Conditioner abnormality), the window will open by 10% to ensure air circulation inside the vehicle.

You can leave pets alone in the vehicle. After the driver leaves the vehicle, the center display will show the current temperature inside the vehicle to inform nearby pedestrians that rescue is not required.
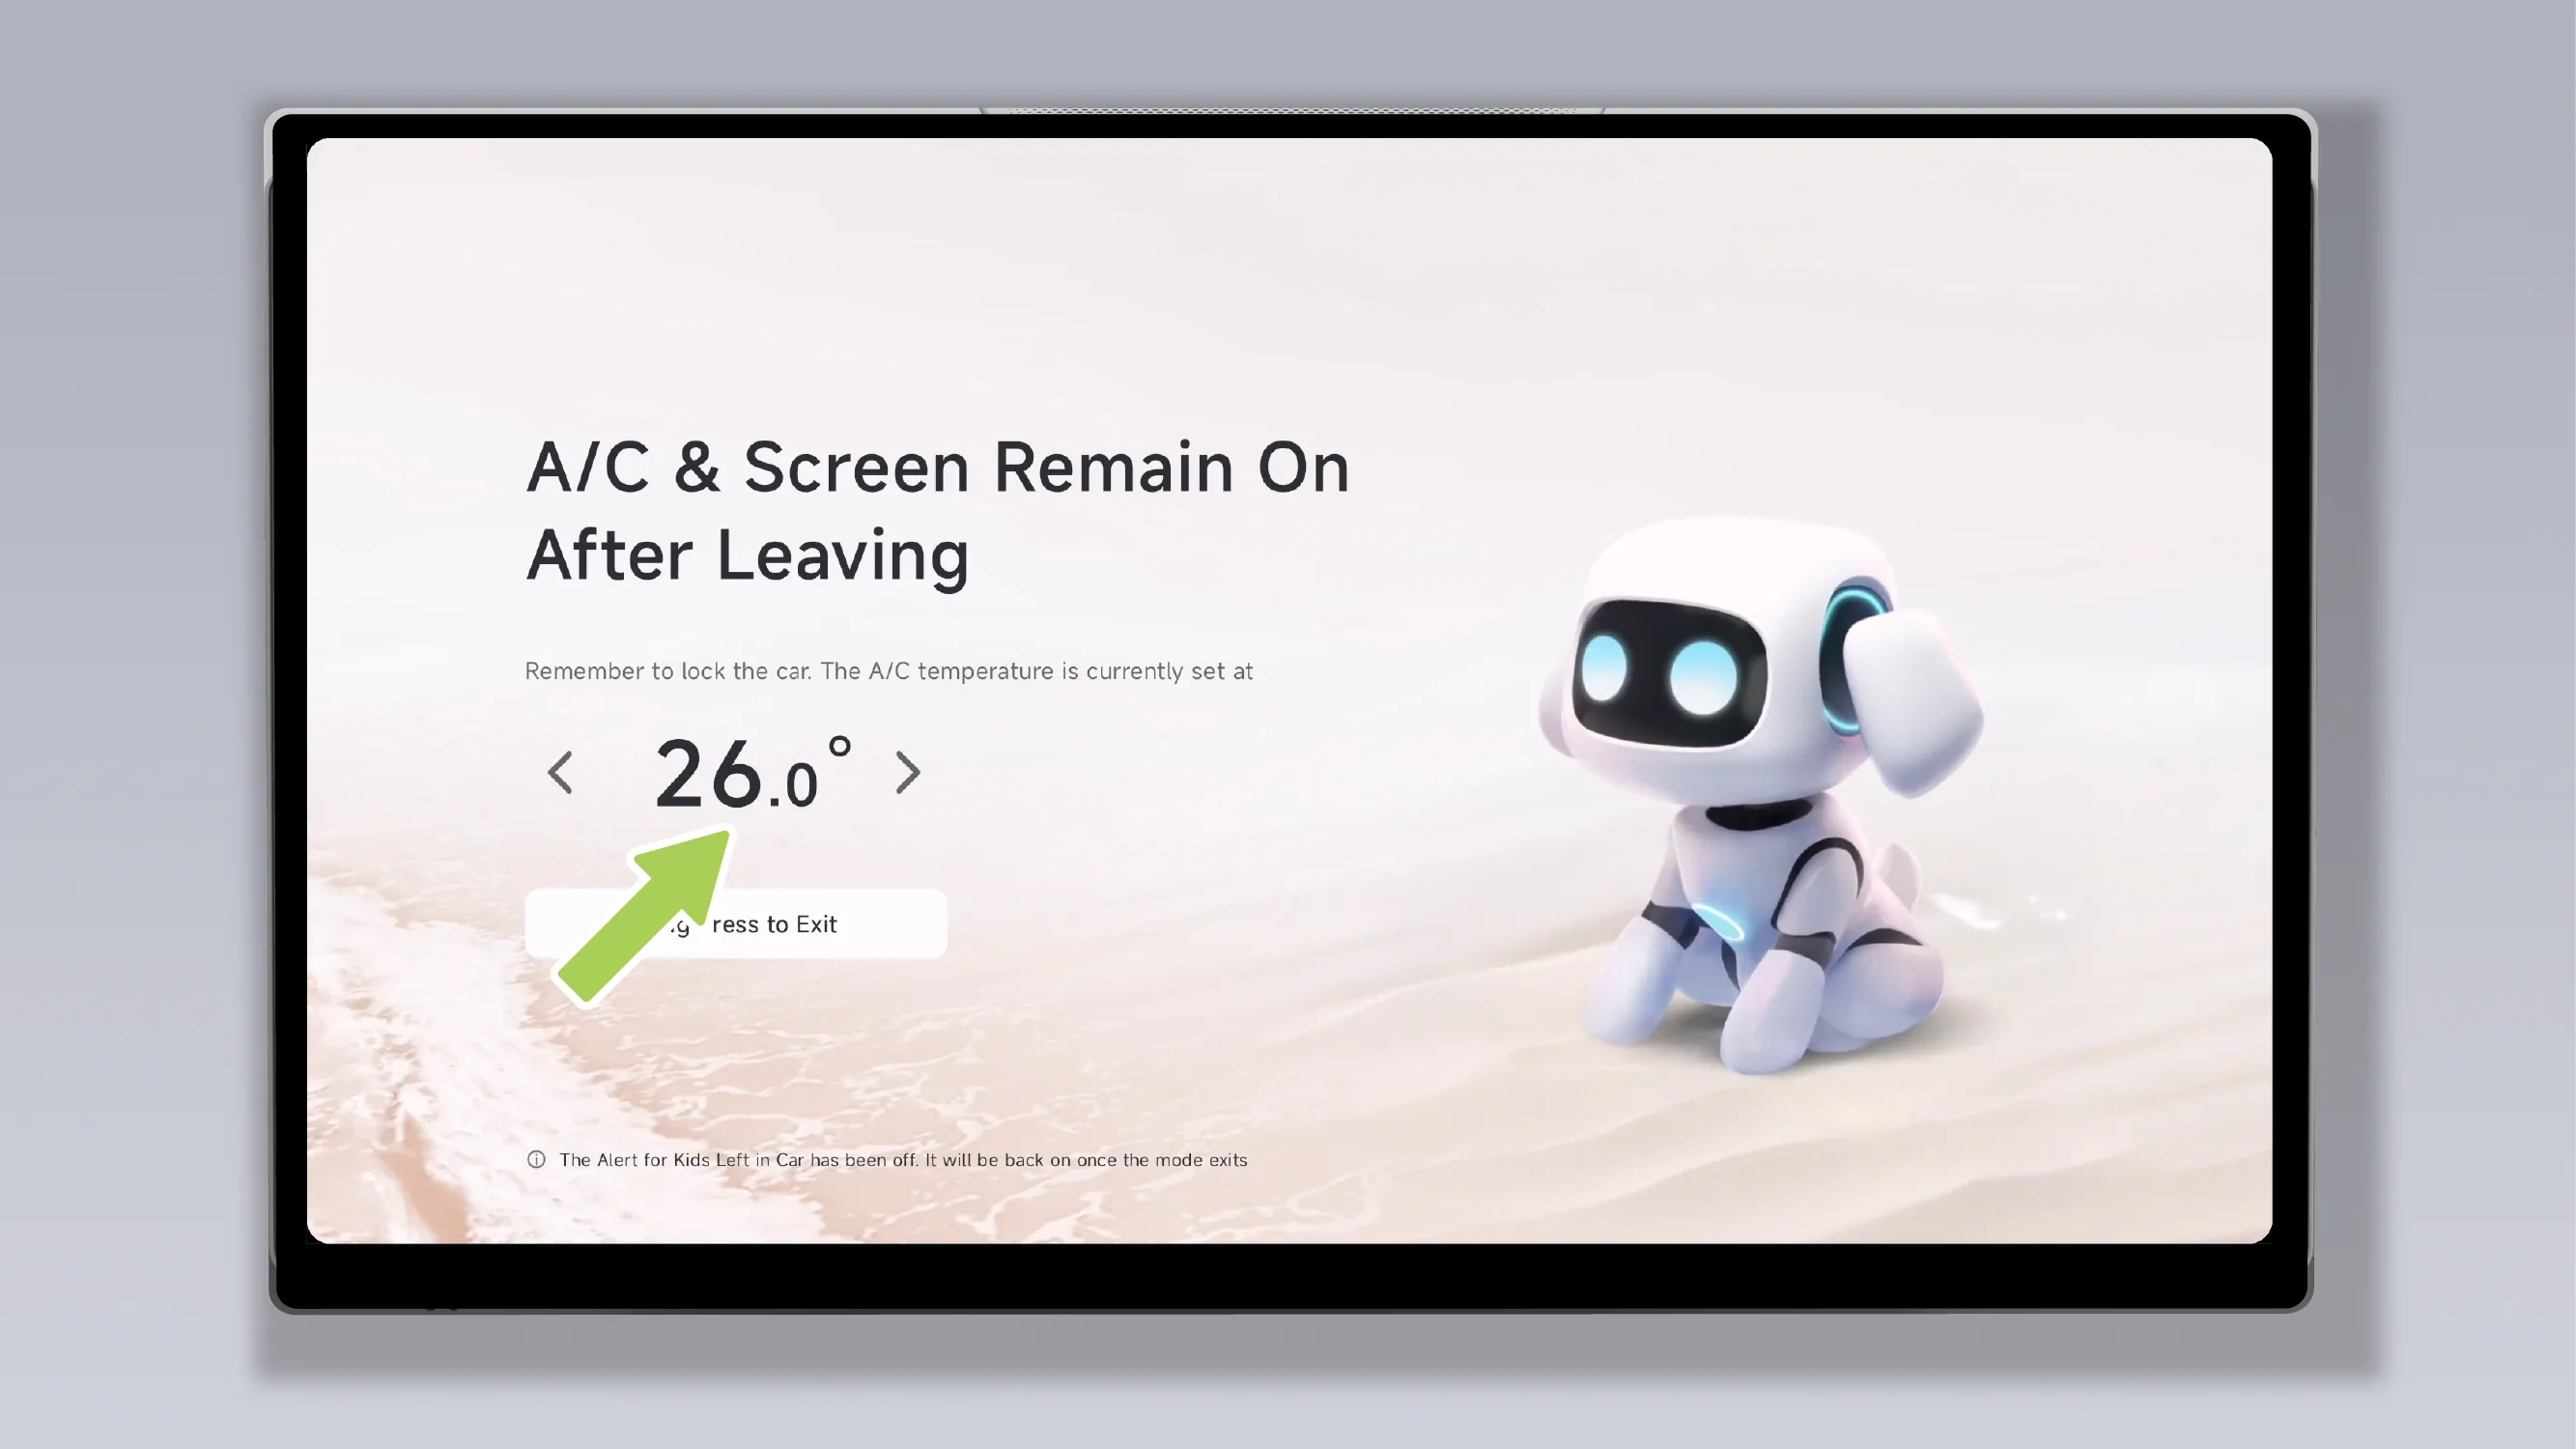
After Pet Mode is enabled, you can manually adjust the air conditioning temperature to ensure a comfortable temperature inside the vehicle.
Tips If there are children in the vehicle, ensure that they are accompanied by an adult.
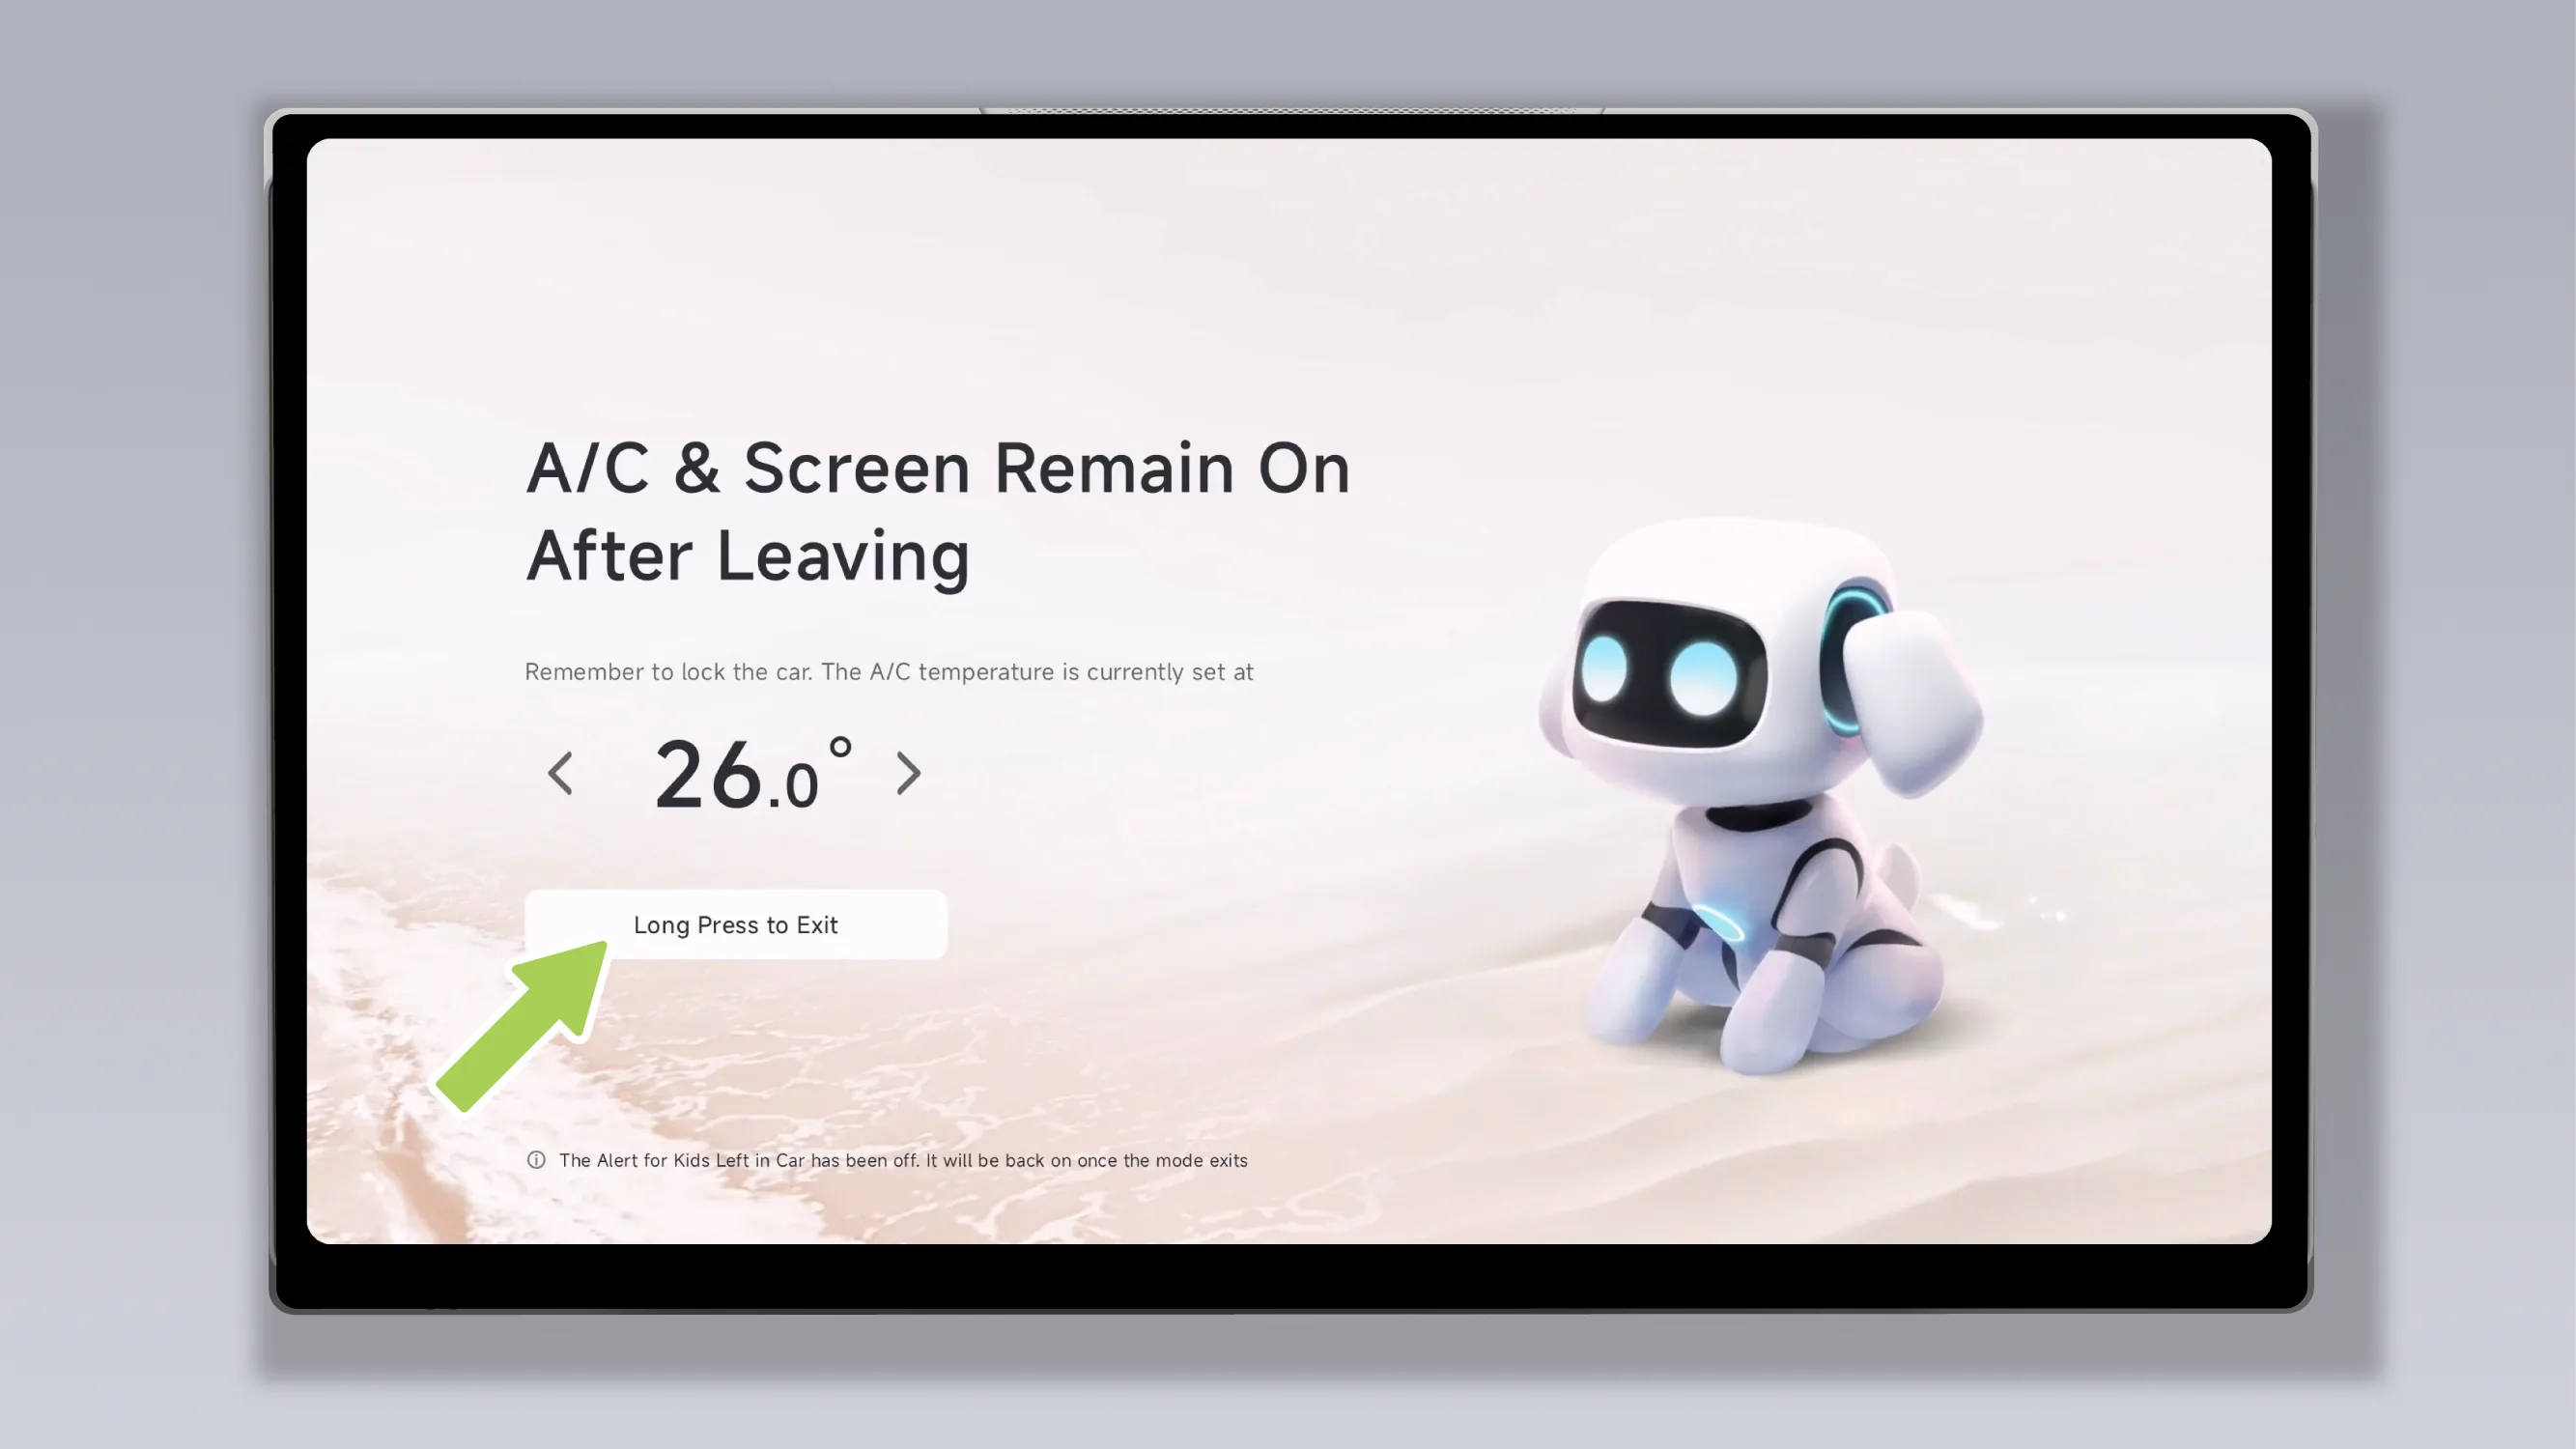
After the driver returns, on the Pet Mode interface of the central control screen, press and hold Press the button to exit Pet Mode.
Enable Pet Mode by following these steps:
Ensure that the vehicle is in P gear and the remaining battery level is greater than 20% before enabling Pet Mode.
Tap in the mobile app , confirm in the pop-up window and enable Pet Mode.
After Pet Mode is enabled, the air conditioner automatically enters AI-AUTO mode. You can manually adjust the air conditioning temperature in the mobile App to ensure a comfortable temperature inside the vehicle. The four windows close automatically, and the window lock and child lock are automatically locked. Please do not forget to lock the vehicle. After the vehicle is locked, the air conditioner and the central control screen will remain on.
After the driver and passengers leave the vehicle, the central control screen will display the current interior temperature to inform nearby pedestrians that rescue is not necessary.
After the driver and passengers return, tap in the mobile app , confirm in the pop-up window and exit Pet Mode.
After Mindfulness mode is enabled, the seats and other Cabin environment settings will be adjusted to a comfortable state for you, starting your Mindfulness time.
Before enabling Meditation Mode, ensure that the vehicle meets the following conditions:
The gear is in P.
Rescue Mode, Meditation Mode, Car Wash Mode, Camping Mode, Pet Mode, Sleep Mode, etc. are not enabled.
When the conditions for enabling Meditation Mode are met, you can enable Meditation Mode in the following ways:
You can enter the Meditation Mode screen in any of the following ways:
Tap the center display in sequence. “ →Scene Mode→Meditation Mode”, enter the Meditation Mode screen.
Tap on the central control screen home page. “ Scenario ”Enter the scene mode interface and tap Enter the Meditation Mode screen.
You can select the seat you want to activate in the Meditation Mode interface according to your personal needs, and tap Press the button to enable Meditation Mode. After Meditation Mode is enabled, the vehicle will automatically perform the following operations:
The seat will automatically adjust to a comfortable position.
The rear entertainment screen unfolds (if only the front row seats are selected to enable Meditation Mode, the rear entertainment screen will not unfold).
The exterior lights turn off automatically.
Switch to Night Mode, turn on the ambient light, adjust the media volume, and play meditation music.
Tips During the automatic seat adjustment process, you can operate the seat adjustment switch at any time to interrupt the seat movement.
Warning During automatic seat adjustment, keep objects and all parts of the body away from the seat movement range to avoid personal injury or property damage.
When unfolding or folding the entertainment screen, keep objects and all parts of the body away from the movement range of the entertainment screen to avoid personal injury or property damage.
When using the entertainment screen, do not use external force to adjust the angle of the entertainment screen, so as to avoid screen damage.
After meditation mode is enabled, the instrument cluster, the central control screen, and the rear entertainment screen will simultaneously display the meditation mode interface. You can perform the following operations on the meditation mode interface according to your personal needs:
Meditation Headband: Connect the meditation headband device according to the prompts. When used with Meditation Mode, meditation records can be obtained to help you scientifically relieve stress and care for your physical and mental health.
Tips The meditation headband device must be purchased separately.
Screen off: Select the front seat meditation mode, and the instrument screen and center control screen will enter the screen-off state; select the rear seat meditation mode, and the rear control screen and rear entertainment screen will enter the screen-off state. Tap the screen again or exit meditation mode to turn on the screen again.
Ambient Lights: Tap to turn Ambient Lights on or off.
Synchronized seat: You can select the seat to be turned on or off as required on the synchronized seat interface, tap Press the button to enable or exit Meditation Mode. After Meditation Mode is enabled, the corresponding seat will automatically adjust to a comfortable position. After exiting Meditation Mode, the corresponding seat will return to its original state.
Warning Make sure hands, bodies or objects are not on the seat path during seat adjustment to avoid the risk of pinching.
Seat massage: Tap to enter the seat massage screen, where you can set the seat massage function according to your personal needs.
Tips If the front seats are equipped with a massage function, it can be set on the Meditation Mode interface of the central control screen. If the rear seats are also equipped with a massage function, it can be set on the Meditation Mode interface of the rear entertainment screen.
Air Conditioner: Tap to enter the Air Conditioner interface, where you can set the Air Conditioner according to your personal needs.
Time and date.
Alarm: Set the alarm and countdown; if the countdown is not set, it defaults to 30 minutes.
Tips You can independently set alarms on the meditation mode interfaces of the center control screen and the rear entertainment screen. After setting an alarm, the set alarm wake-up time will be displayed when entering meditation mode again. If you exit meditation mode before the countdown ends, it will exit directly.
Music card: Tap the Music card to pause or play, and you can also switch music themes according to your personal needs. When switching themes, the animations on the instrument cluster, central control screen, and rear entertainment screen will also switch to the corresponding theme simultaneously.
Tips The Four Seasons Story and Sound of Waves do not require downloading; all other music themes require downloading (the Music card can be used to view the estimated data consumption). Please pay attention to data consumption. The download speed is related to the signal strength of the connected network. If the signal strength is low, the vehicle's Internet access speed may be slow.
If there is no operation for more than 20 seconds or if you tap a blank area, the system will enter immersive mode. In immersive mode, only the theme background animation, time, date, and alarm clock are retained. If there is no operation for more than 5 seconds after entering immersive mode, the instrument screen, center display, and rear entertainment screen will reduce screen brightness.
In immersive mode, tapping the screen again, waking up XPENG, or operating the entertainment screen remote control will exit immersive mode and restore the screen brightness to the setting before entering.
Tips After exiting immersive mode, when setting the various functions of meditation mode, immersive mode will not be entered.
After Meditation Mode is enabled, you can exit Meditation Mode in any of the following ways:
Directly use a voice command (for example, say "Hello XPENG, exit Meditation Mode"), and follow the prompts to confirm exiting Meditation Mode.
Tap on the meditation mode screen interface. “ ”According to the prompt, confirm exiting Meditation Mode.
When the vehicle gear is shifted to a non-P gear, Meditation Mode will automatically exit.
After Meditation Mode exits, the vehicle will automatically perform the following operations:
The seats, rear entertainment screen, and exterior lights will automatically return to the state before entering Meditation Mode.
Pause meditation music playback. Night Mode, ambient lighting, and media volume automatically switch to the settings used before entering Meditation Mode.
Tips After both the central control screen and the rear entertainment screen exit Meditation Mode, Night Mode automatically switches to the settings used before entry.
Warning Make sure hands, bodies or objects are not on the seat path during seat adjustment to avoid the risk of pinching.
After enabling Sleep Mode, you can adjust the seat mode yourself and start your sleep time.
Before enabling Sleep Mode, ensure that the vehicle meets the following conditions:
The gear is in P.
Fast charging state not entered.
The remaining driving range is greater than 30 km.
Rescue Mode, Nap Mode, Car Wash Mode, Camping Mode, Leave-Car Comfort, Meditation Mode, Pet Mode, etc. are not enabled.
The vehicle is not in the system update state.
When the conditions for enabling Sleep Mode are met, you can enable Sleep Mode in the following ways:
Directly use a voice command.
Tap on the home page of the center display screen. “ Scenario ”Enter the scene mode interface and tap Enter the sleep mode screen.
Tap the center control screen in sequence. “ →Scenario Mode→Sleep Mode”, enable Sleep Mode.
After Sleep Mode is enabled, the vehicle will automatically perform the following operations:
The exterior lights turn off automatically.
Switch to Night Mode, enable the air conditioner AI-AUTO mode, automatically adjust the media sound effect mode, and play sleep music.
Disable the Power Off Automatically function to keep the vehicle powered on and disable the seat welcome function.
After Sleep Mode is enabled, the center display and instrument cluster will simultaneously display the Sleep Mode interface. You can perform the following operations on the Sleep Mode interface according to your personal needs:
Time and driving range.
Tips When the driving range is below 60 km, XPENG will issue a voice reminder: "The current battery level is too low. Please do not use Sleep Space for an extended period."
Screen Off: Tap to turn off all screens in the vehicle, including the instrument screen, center control screen, rear control screen, and rear entertainment screen. Tap the screen, wake up XPENG, operate the steering wheel buttons, when the alarm sounds, or exit Nap Mode to turn the screen back on.
Door Lock: Tap to lock or unlock the doors.
Trunk: Tap to open or close the trunk.
Sleep Space Guardian prompt information.
Seat mode: Turn Single Bed Mode or Large Bed Mode on or off.
Tips If needed for use with a mattress, it can be purchased at a XPENG store.
Warning Make sure hands, bodies or objects are not on the seat path during seat adjustment to avoid the risk of pinching.
Alarm settings: Set the alarm and countdown timer; if the countdown timer is not set, it defaults to 5 minutes, and the maximum setting is 24 hours.
Tips After setting an alarm, the set alarm wake-up time will be displayed when entering Sleep Mode again. If Sleep Mode is exited before the countdown ends, it will exit directly.
Air Conditioner status: Tap to enter the Air Conditioner interface, where you can set the Air Conditioner according to your personal needs.
Sleep Music: View the cover and name of the currently playing music, control music play/pause, view the playlist, and tap the card to set the sleep music theme and timed playback.
On the Sleep Mode screen, tap Seat Mode to set the seat mode to Single Bed Mode or King Bed Mode. Taking Single Bed Mode as an example, it can be enabled through the following operations:
Tap . Adjust the front seat headrest to the lowest position according to the prompt, confirm that there are no passengers or items on the rear seat and that the rear seatback is not folded, then tap 。
Tap as prompted Afterward, leave the front-row seat, and the seat will automatically adjust to the flat position. After the seat adjustment is completed, wait a moment and it will return to the sleep mode interface.
Tips During the automatic adjustment of the seat, you can operate the seat adjustment switch or tap on the central control screen at any time. Button, interrupts the seat movement. After confirming safety, tap on the central control screen. Press the button, and the seat will continue to automatically adjust to the flat position.
Warning Make sure hands, bodies or objects are not on the seat path during seat adjustment to avoid the risk of pinching.
To use the airbed, unfold it, lay it out properly, and inflate it according to the airbed user manual to begin your sleep time.
If the airbed has been used, after sleep ends, deflate it according to the requirements in the airbed instruction manual, and store the airbed.
Using single-occupant mode as an example, you can exit seat mode in any of the following ways:
Tap on the sleep mode screen. “ ”, select as prompted , the seat will automatically return to the memorized position and exit Sleep mode.
Tap on the sleep mode screen , tap , the seat will automatically return to the memorized position. After the seat adjustment is completed, wait a moment and it will return to the sleep mode interface.
Tips During the automatic adjustment of the seat, you can operate the seat adjustment switch or tap on the central control screen at any time. Button, interrupts seat movement. After confirming safety, tap on the central control screen. Press the button, and the seat will continue to automatically return to the memorized position.
Warning Make sure hands, bodies or objects are not on the seat path during seat adjustment to avoid the risk of pinching.
After Sleep Mode is enabled, you can exit Sleep Mode by any of the following methods:
Directly use a voice command, and follow the prompts to confirm exiting Sleep Mode.
Tap on the sleep mode screen. “ ”According to the prompt, confirm exiting Sleep Mode.
When the vehicle triggers any of the following conditions, Nap Mode will automatically exit:
The remaining driving range is less than or equal to 30 km.
The gear is shifted to a non-P gear.
After sleep mode is exited, the vehicle will automatically perform the following operations:
The exterior lights will automatically adjust to the state before entering sleep mode.
Pause sleep music playback. Night Mode and media sound effects automatically switch to the settings from before entering sleep mode.
Restore the Power Off Automatically and seat welcome functions.
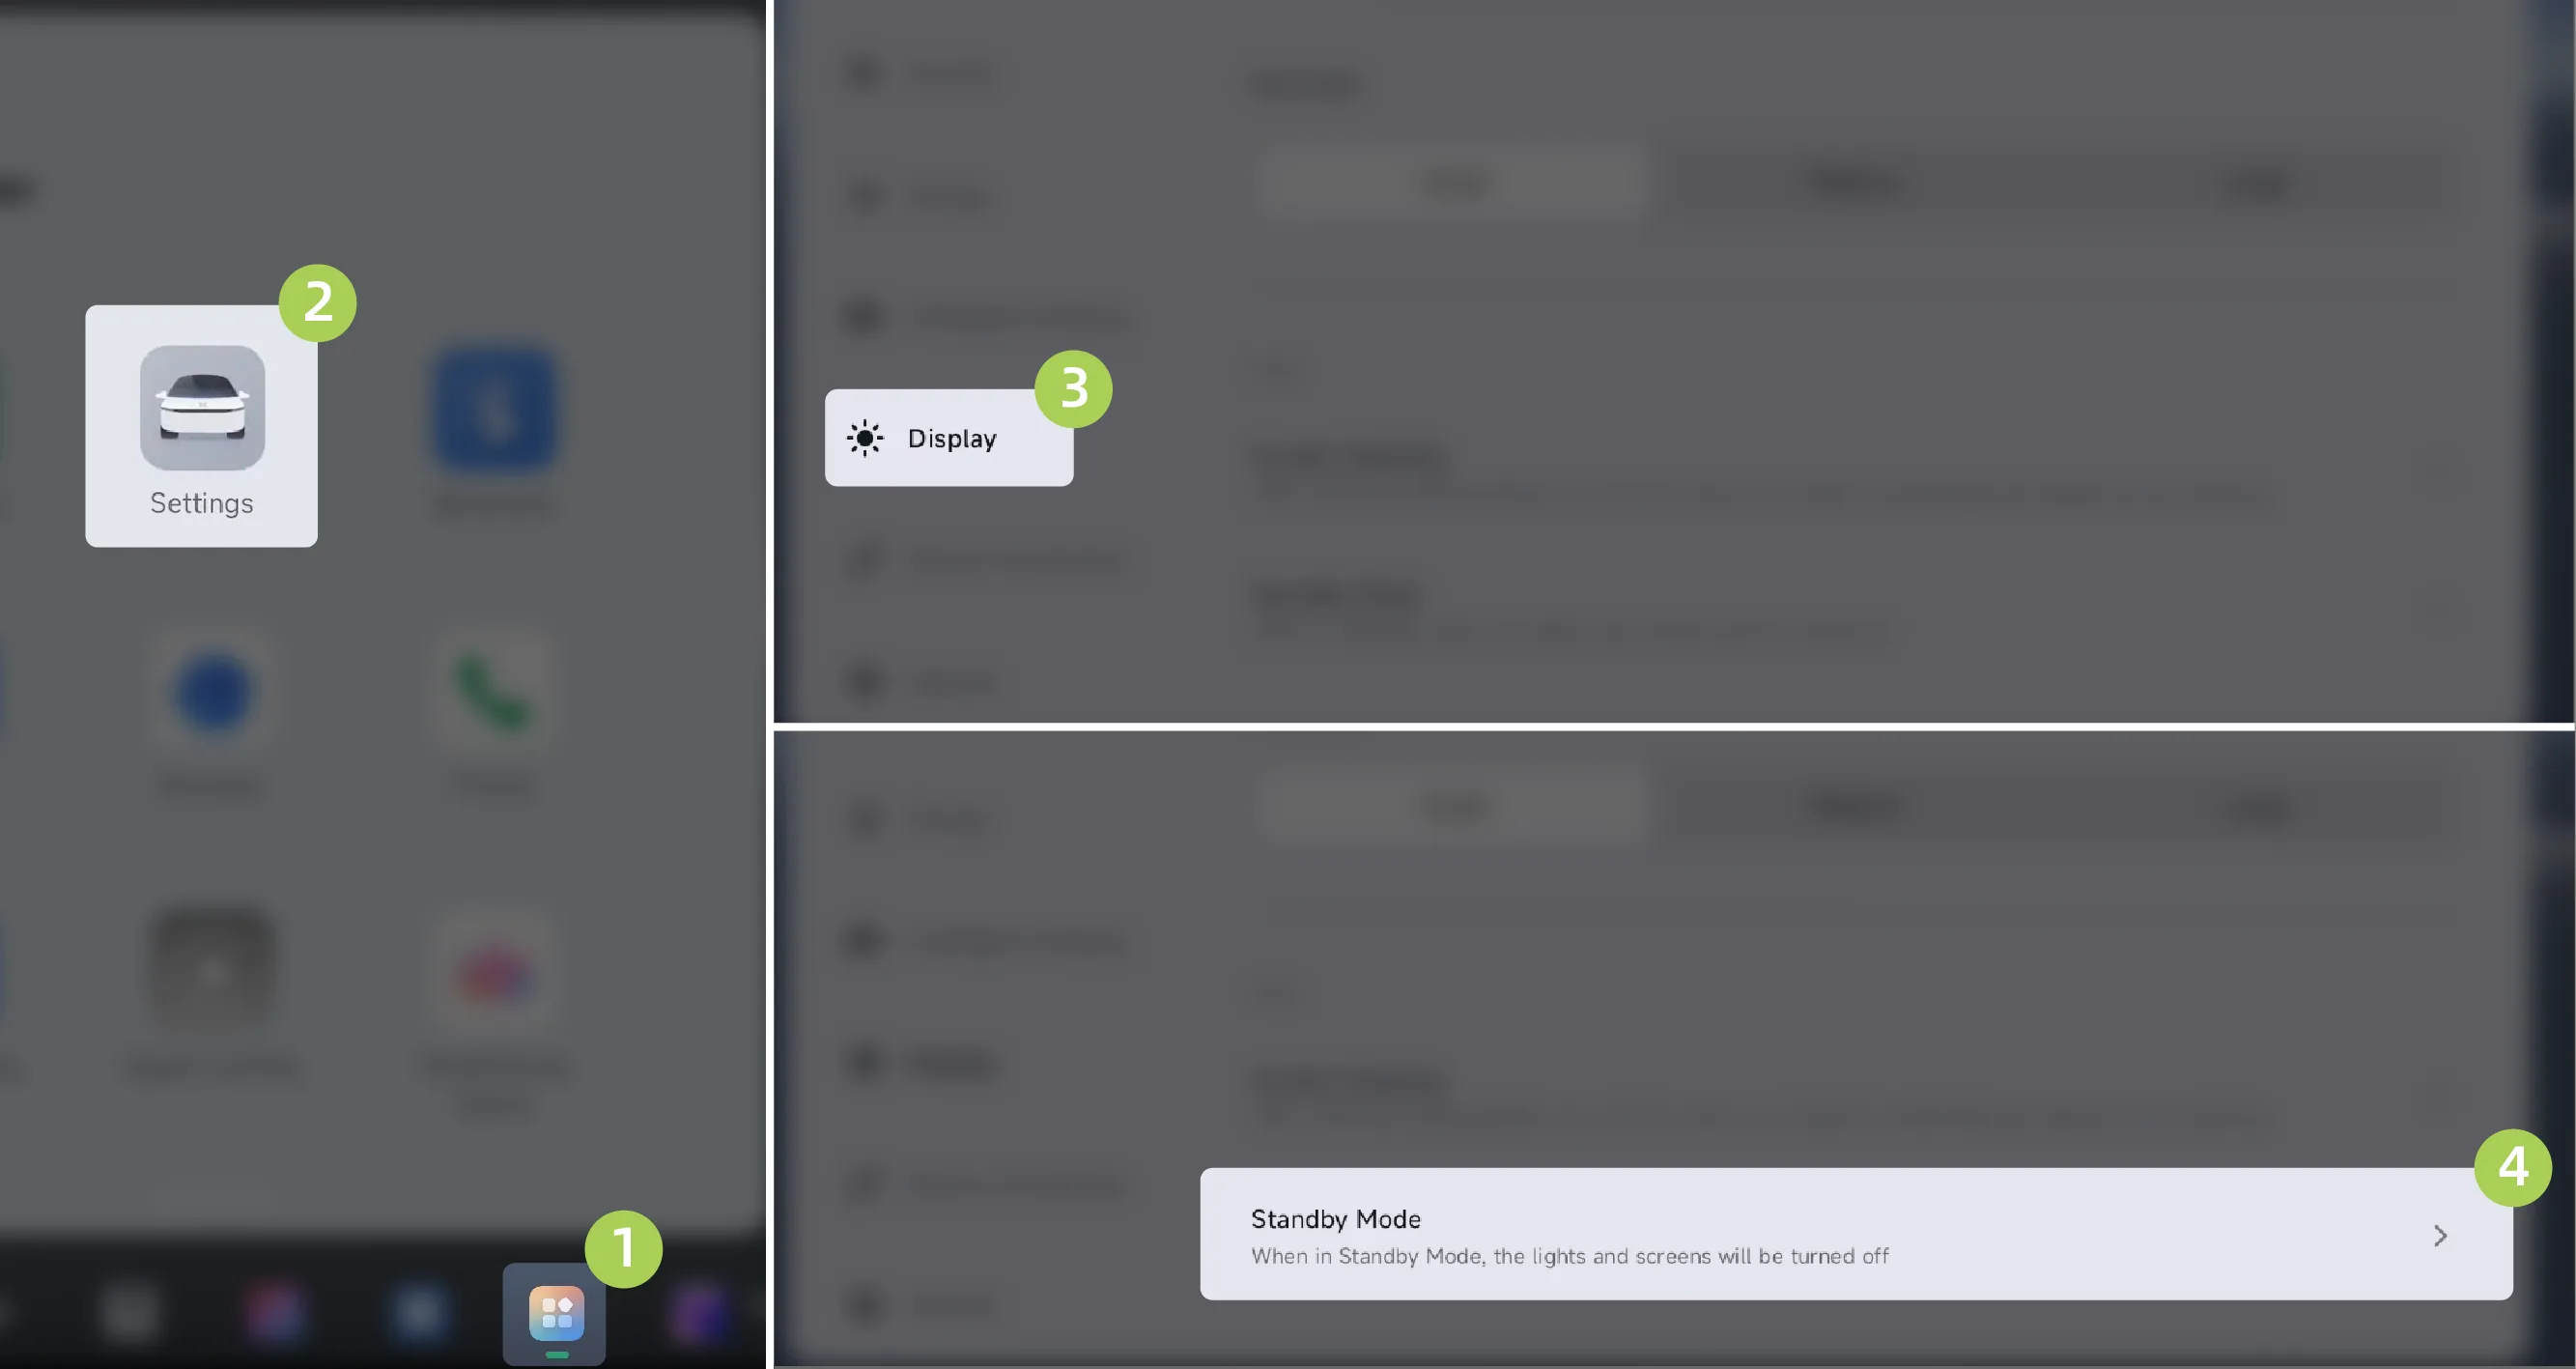
The vehicle is in P gear, on the central control screen “ →vehicle→Display”interface to enter Standby Mode. After entering Standby Mode, the vehicle lights and screen will turn off.
When shifting gears, tapping the center control screen, waking up voice XPENG, turning on the rear control screen, turning on the rear entertainment screen, or opening the door, Standby Mode will automatically exit.
Tips You can also enter Standby Mode via voice commands.
You can enter screen cleaning mode in the following ways. The central control screen, instrument screen, rear control screen, and rear entertainment screen will be turned off to prevent accidental touches during cleaning:
Via a voice command.
Tap on the home page of the center display screen. “ Scenario ”Enter the scene mode interface and tap Enable Cleaning Mode.
Tap on the center display in sequence. “ →Scenario Mode→Cleaning Mode”, enable Cleaning Mode.
Tap the center display in sequence. “ →Settings→Display→Clean the Screen”, enable screen cleaning mode.
After screen cleaning is completed, press and hold the center display screen. Button, after the countdown ends, exit screen cleaning mode.
XCOMBO allows you to personalize and customize Cabin functions according to your own preferences. For example: at noon on a workday, when the vehicle is at the company, turn on the remote air conditioner in advance to adjust the temperature inside the vehicle, and after getting in, automatically adjust the seat position to the lunch break mode.
Caution To ensure the functional experience, please upgrade the XPENG App and the in-vehicle system to the latest versions.
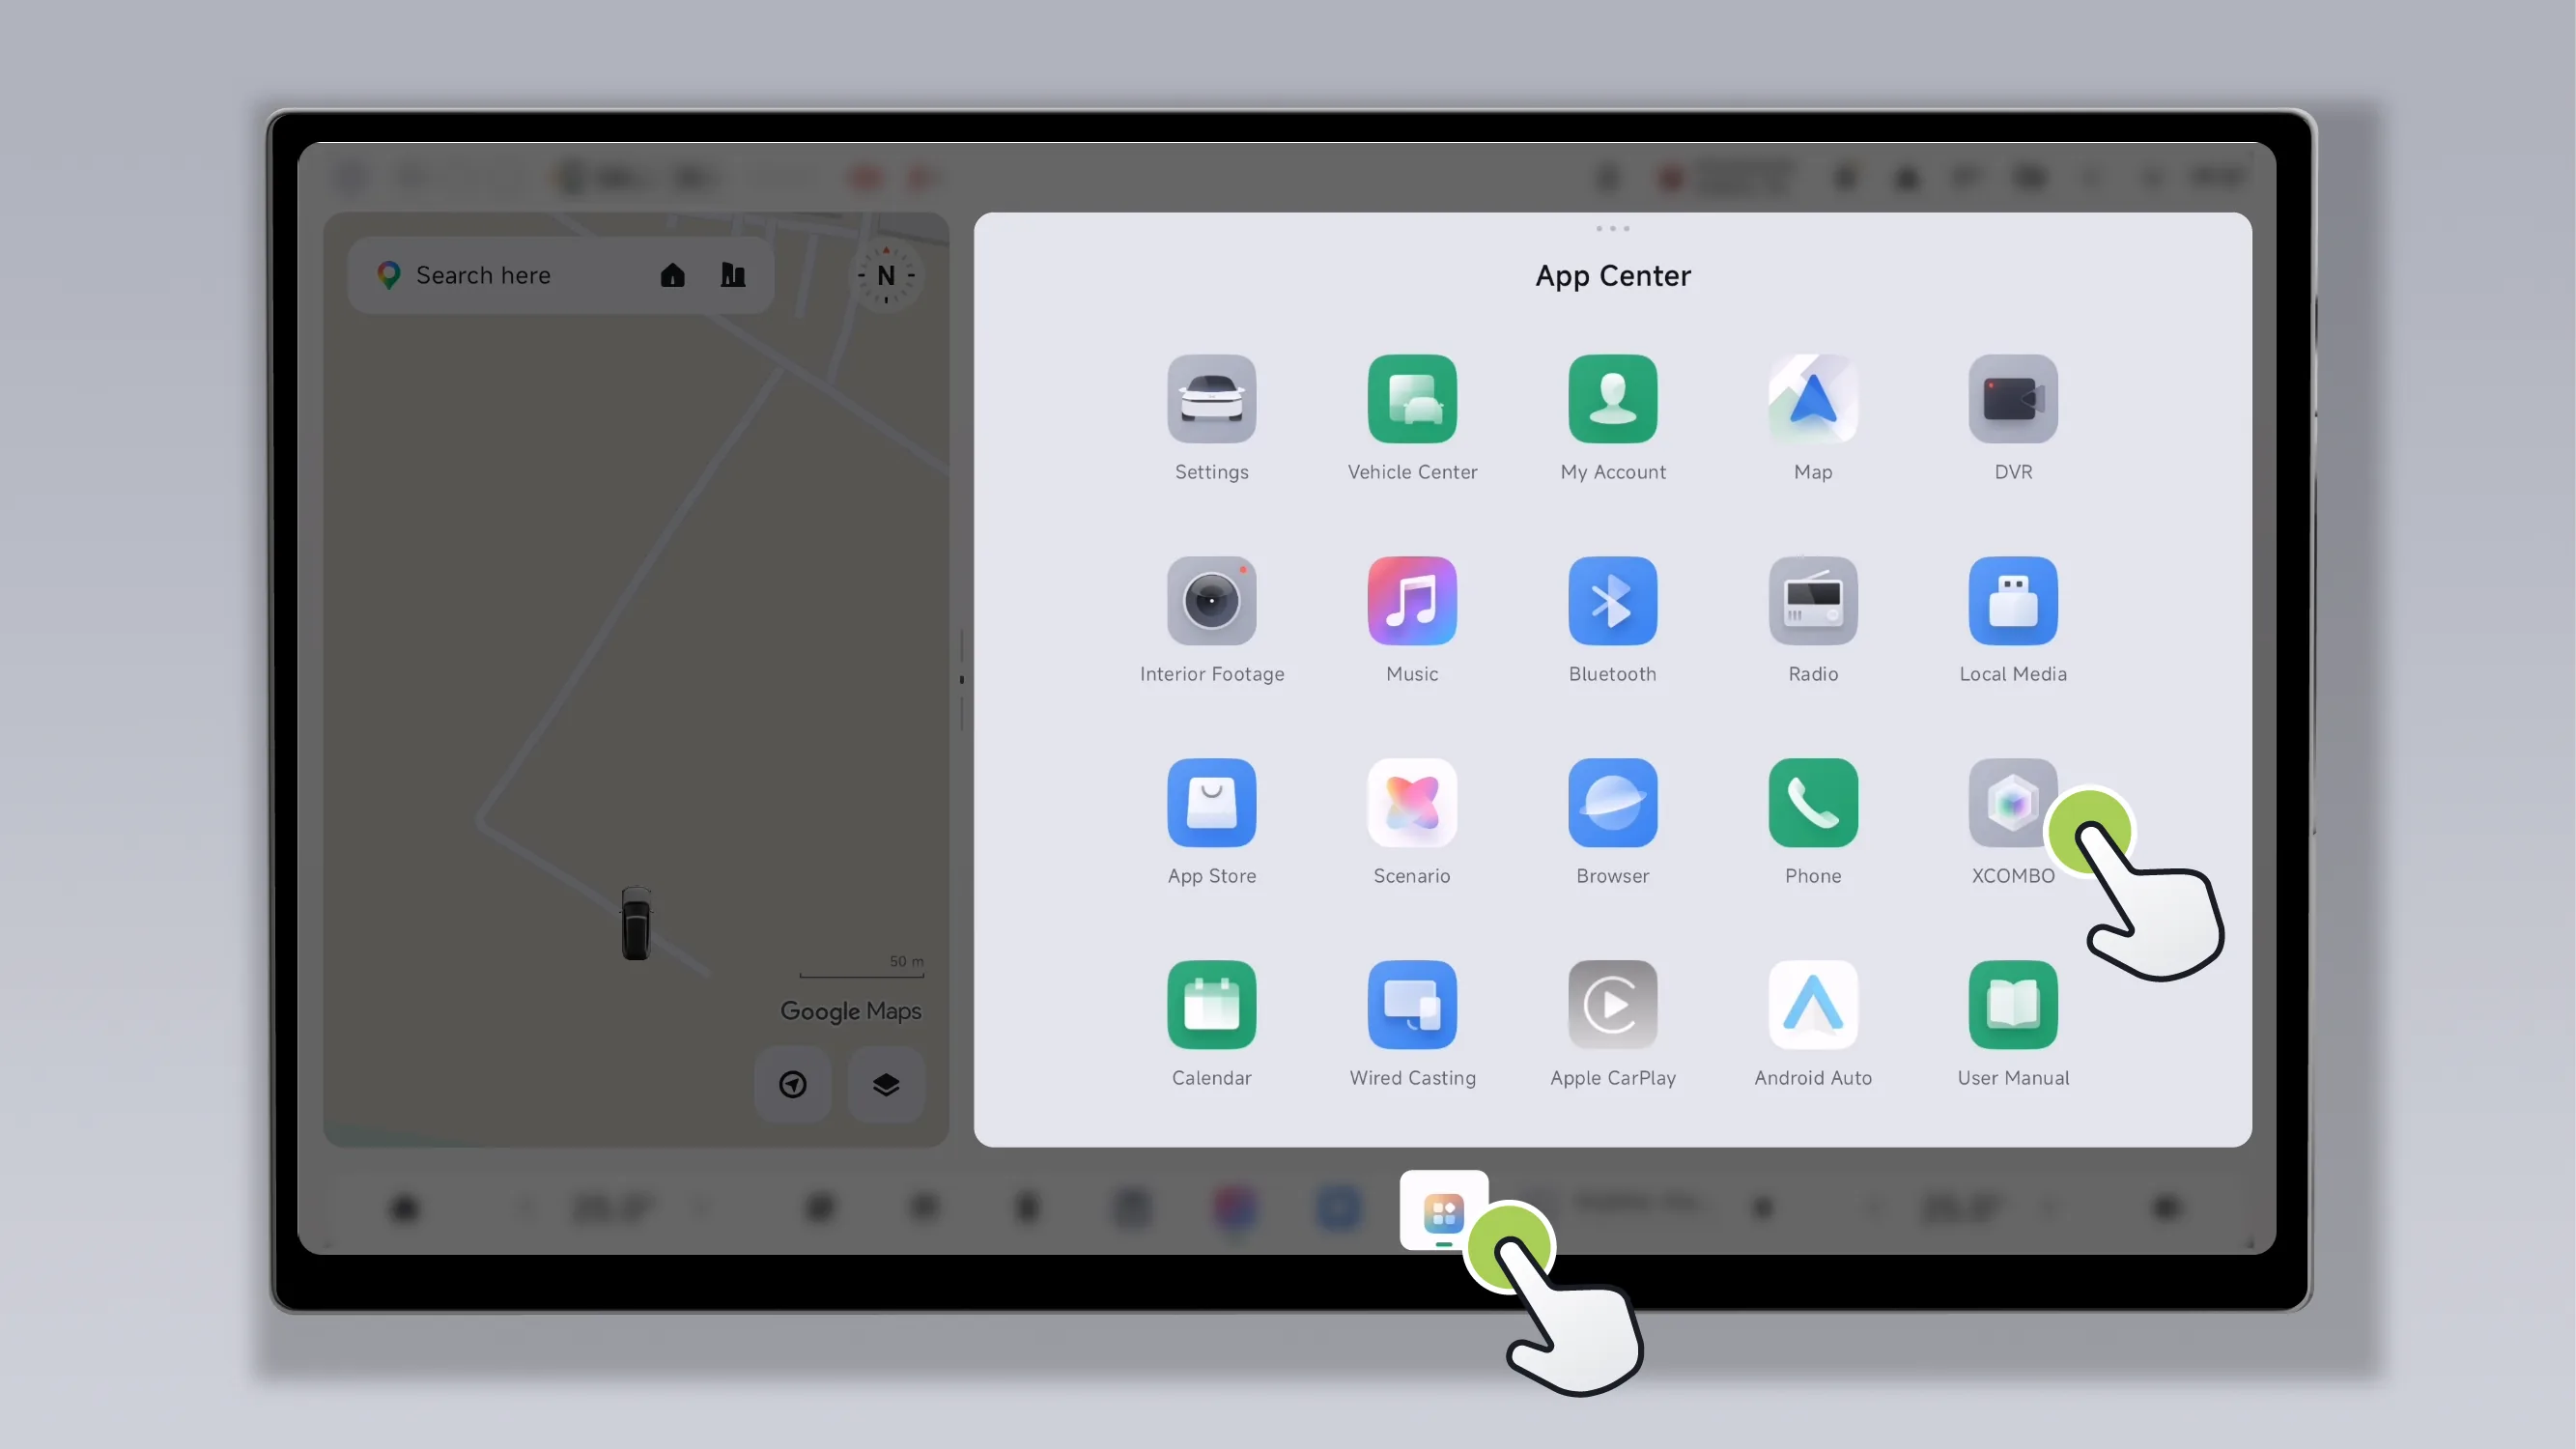
Tap the center display screen “ ”, tap in the App Center , enter the XCOMBO screen.
XCOMBO has selected a series of creative and practical vehicle use scenarios, which can be used in Interface selection, tap You can view the scenario details. Log in to your account on the center display, then tap Can be added to My Scenes. In the search box at the upper right, you can search for scene cards by scene code and keywords.
Tips When adding XCOMBO through a Combo code or the recommended store, if there are Combo cards not supported by this vehicle model, a reminder will be displayed on the Combo details page.
Log in to your account on the center display, and you can enable/disable/delete/restore/run scenarios.
XCOMBO supports custom editing of cards in My Combo.
Log in to your account on the center display. Under the My Scenes screen, tap a scene card to enter the card details screen.
Tap  。
。
Use the XPENG App to search for the scene code or scan the QR code to edit.
Tips After the scenario is changed, both the vehicle system and the mobile phone must be connected to the network before the update can be synchronized.
Enabled combos will automatically execute one or more corresponding continuous functions after the vehicle meets the set trigger conditions. You can view, stop, or resume the currently running combo in the status bar on the center display.
Tips When executing an XCOMBO that requires a second confirmation, you can view and confirm it on the XCOMBO card in the lower-left corner of the center display.
When XCOMBO is running and after it has run, you can restore to the state before the Combo ran in the following ways:
When the scenario is running, tap in the status bar on the center display. This will stop the Combo and restore it to the state before the Combo was running.
When the scenario is running, you can also tap the following on the center display in sequence. “ →XCOMBO→My Scenarios”In , click the corresponding scenario to proceed This will stop the Combo and restore it to the state before the Combo was running.
After the scenario operation ends, tap the following on the central control screen in sequence. “ →XCOMBO→My Scenes”Select the scene to be restored, and click This will stop the Combo and restore it to the state before the Combo was running.
Tips Currently supported recoverable states include Air Conditioner, seat position, and screen display. More recoverable states will be added in subsequent versions.
In the XPENG Motors App On this screen, you can configure exclusive scenarios.
XCOMBO has selected a series of creative and practical vehicle use scenarios, which can be used in Interface selection, click You can view the scenario details. Click Can be added to My Scenes. At the same time, you can also according to your own vehicle usage habits through Make adjustments. In the search box at the upper right, you can search for scene cards by scene code and keywords.
Tips After the scenario is changed, both the vehicle system and the mobile phone must be connected to the network before the update can be synchronized.
XCOMBO supports personalized customization needs for Cabin functions. Tap You can then start personalization.
System provides and Two trigger methods are available for scenario operation, supporting voice, time, location, environment, multimedia playback, vehicle status, and others as trigger conditions for automated operation, and also supporting the setting of rich execution actions, such as: XPENG Q&A, driving mode adjustment, Air Conditioner settings, and others.
Can also be done through Configure advanced application scenarios such as continuous perception and judgment under multiple conditions, synchronized execution of multiple tasks, and delayed execution of commands.
Caution When the scenario is running, be sure to ensure the safety of the vehicle and personnel.
Recommendation Time selection mode, so that before the Combo task is executed on the vehicle side, the scene safety level will be determined based on the vehicle status. If there is a driving safety risk (for example, adjusting the driving mode in D gear), the XPENG Smart Recommendation card on the center control screen will ask whether to execute the Combo; if you select When the trigger conditions are met, the scenario will execute immediately. Please be aware of the relevant safety risks.
Scenario supports sharing, tap of Share with one tap or externally in the form of a link. After others click the Combo link, they can view the Combo details. After entering the XPENG Motors App, click Done to save the Combo. It can also be edited and adjusted according to preferences, and enabled to run.
It is also possible to in / Enter at the bottom of the page , Turn On , indicating that you agree to participate in the premium Combo selection, and the premium Combo you create will be regularly selected for display in the function's The scenario interface is available for PENG users to select and enable.
Tips The scenario sharing and execution capabilities among different vehicle models are subject to the functions actually supported by the vehicle.
The operation is based on the capability to continuously perceive condition variables after the Combo is triggered. After the Combo is triggered, the vehicle will continuously perceive the set condition variables until they are satisfied, thereby executing the corresponding action.
For example, if the scenario is set so that after the vehicle shifts to D Gear, seat ventilation is turned on when the in-vehicle temperature is higher than 27°C, then after the vehicle shifts to D Gear, if the set temperature is not reached in the short term, XCOMBO will continuously detect the in-vehicle temperature until it reaches above 27°C, and then execute the seat ventilation operation.
The operation is based on the capability to evaluate conditions at the exact moment when the scenario is triggered. If the configured condition state is satisfied, the corresponding action is executed. If the trigger condition state is not satisfied, the system will no longer sense, evaluate, or execute the corresponding action.
For example, the Combo is set so that when the vehicle shifts to D Gear, seat ventilation is turned on if the in-vehicle temperature is higher than 27°C. When the vehicle shifts to D Gear, if XCOMBO detects that the in-vehicle temperature has not reached above 27°C, the seat ventilation task set in the Combo will not be executed. Even if the in-vehicle temperature subsequently reaches above 27°C, the seat ventilation task will still not be executed.
The vehicle supports updates via the center display or mobile App, providing your vehicle with the latest functions. It is recommended that you update the system as soon as possible after receiving a new version notification.
Tips Make sure the vehicle is connected to the network and will not receive updates until the vehicle is connected to the network.
The traffic consumption resulting from the system updates is borne by Xpeng Motors, the vehicle package traffic will not be used, the user will not be responsible for the system update traffic cost.
If you have any further questions, please contact the Xpeng Car Service Center or the Customer Service Center.
On the central control screen “ →Settings→General”Interface, tap the top , you can view the details of the current vehicle system version.
The status bar at the top of the central control screen will display Icon. After tapping the icon, a prompt pops up. Tap You can select the system update method.
Center Display Pop-up Prompt. Tap You can select the system update method.
On the update details page, you can select the system update method.
Update Now: After tapping, the vehicle immediately starts updating. During the update process, the vehicle cannot be used. Please ensure the vehicle is parked in a safe area and allow sufficient time.
Scheduled UpdateTap to set the update time. When the set time is reached and the vehicle is in the locked state, the system automatically performs the update.
After receiving the new version update prompt, tap in the mobile app After pressing the button, enter the upgrade details page and tap , the vehicle will immediately begin updating.
On the central control screen general interface, tap Afterward, you can enable the automatic update function.
After being enabled, when the vehicle detects that a new version is available for update, it will start updating at 3:00 a.m. at night without manual confirmation.
Before updating, ensure that the vehicle remaining battery level is greater than 10%, the vehicle is in Park (P gear), and parked in a safe area.
Once the update starts, it cannot be interrupted. The vehicle cannot be used during the update. Please allow sufficient time for the update to complete.
The vehicle cannot be charged during the update process. Please reasonably arrange the update and charging time.
A system update failure may cause some functions to operate abnormally. If the update fails, do not use the vehicle. Tap The update can be retried. If repeated retry attempts are unsuccessful, please contact a XPENG service center or customer service center.
After the system is updated, it cannot be rolled back to a previous version.
Supports Wired Projection, allowing you to easily project images from devices such as game consoles and computers (including Switch and MacBook) to the center display or rear entertainment screen, and enjoy an unprecedented visual feast.
Open Wired Projection in the following way:
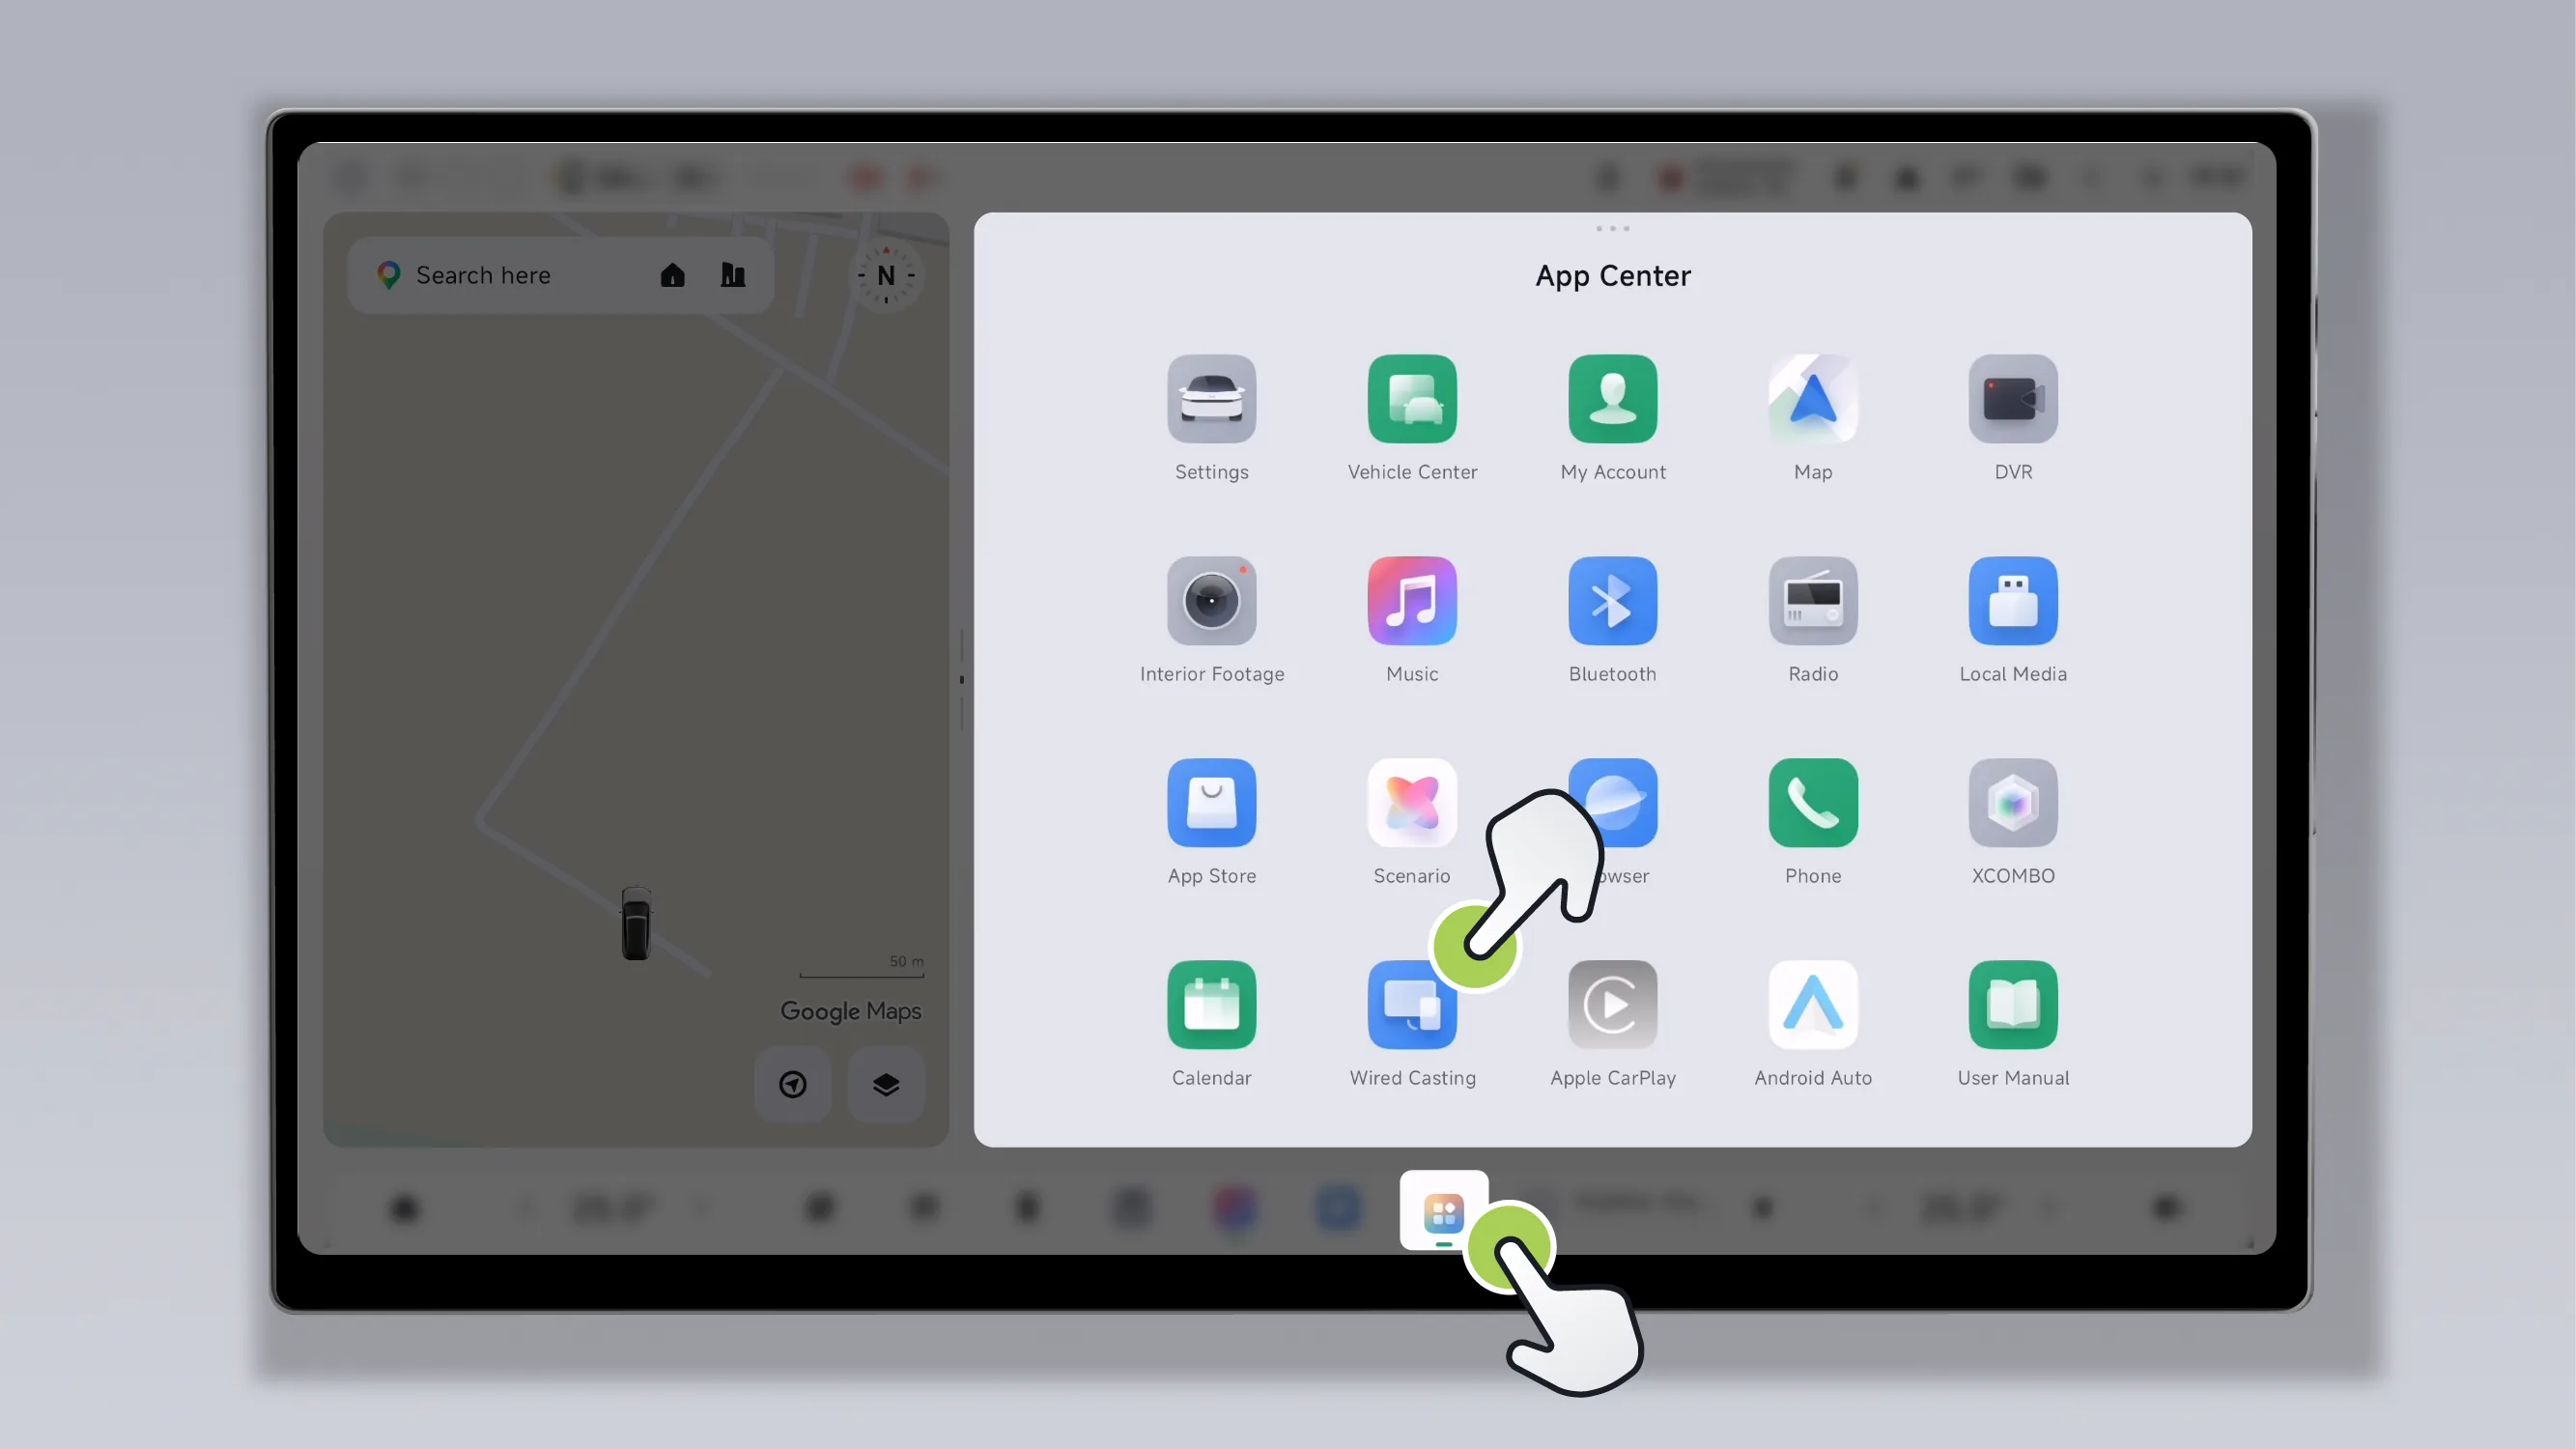
Tap the center display screen “ ”Tap in the App Center. 。
Tap the taskbar at the bottom of the central control screen Icon, can open (For information about the custom bottom taskbar, please refer to the custom bottom taskbar section).
Tap the rear entertainment screen “ ”Tap in the App Center. 。
Tap the bottom taskbar of the rear entertainment screen Icon, can open (For information about customizing the bottom taskbar of the rear entertainment screen, please refer to the Rear Entertainment Screen App Center section).
Use an HDMI cable and a video capture card to connect to the front row USB Type-C or USB Type-A port. Or use a full-featured video data cable to connect to the second-row left USB Type-C port.
Connection successful. The image will be displayed on the screen.
Projection Control:
Swipe up or down on the left side to adjust the screen brightness.
Swipe up or down on the right side to adjust the media volume.
Supports the touch mute function.
Exit Screen Projection:
Tap the screen, then tap the upper left corner. Can exit screen projection.
Tips For Sony PS, Xbox, etc., due to their relatively high voltage requirements, it is recommended to use the in-vehicle 220V power socket* or, after parking, use the external power supply port to power the device for screen projection.
Android Auto allows users to access services more safely and conveniently while driving by mapping core Android functions to the CID.
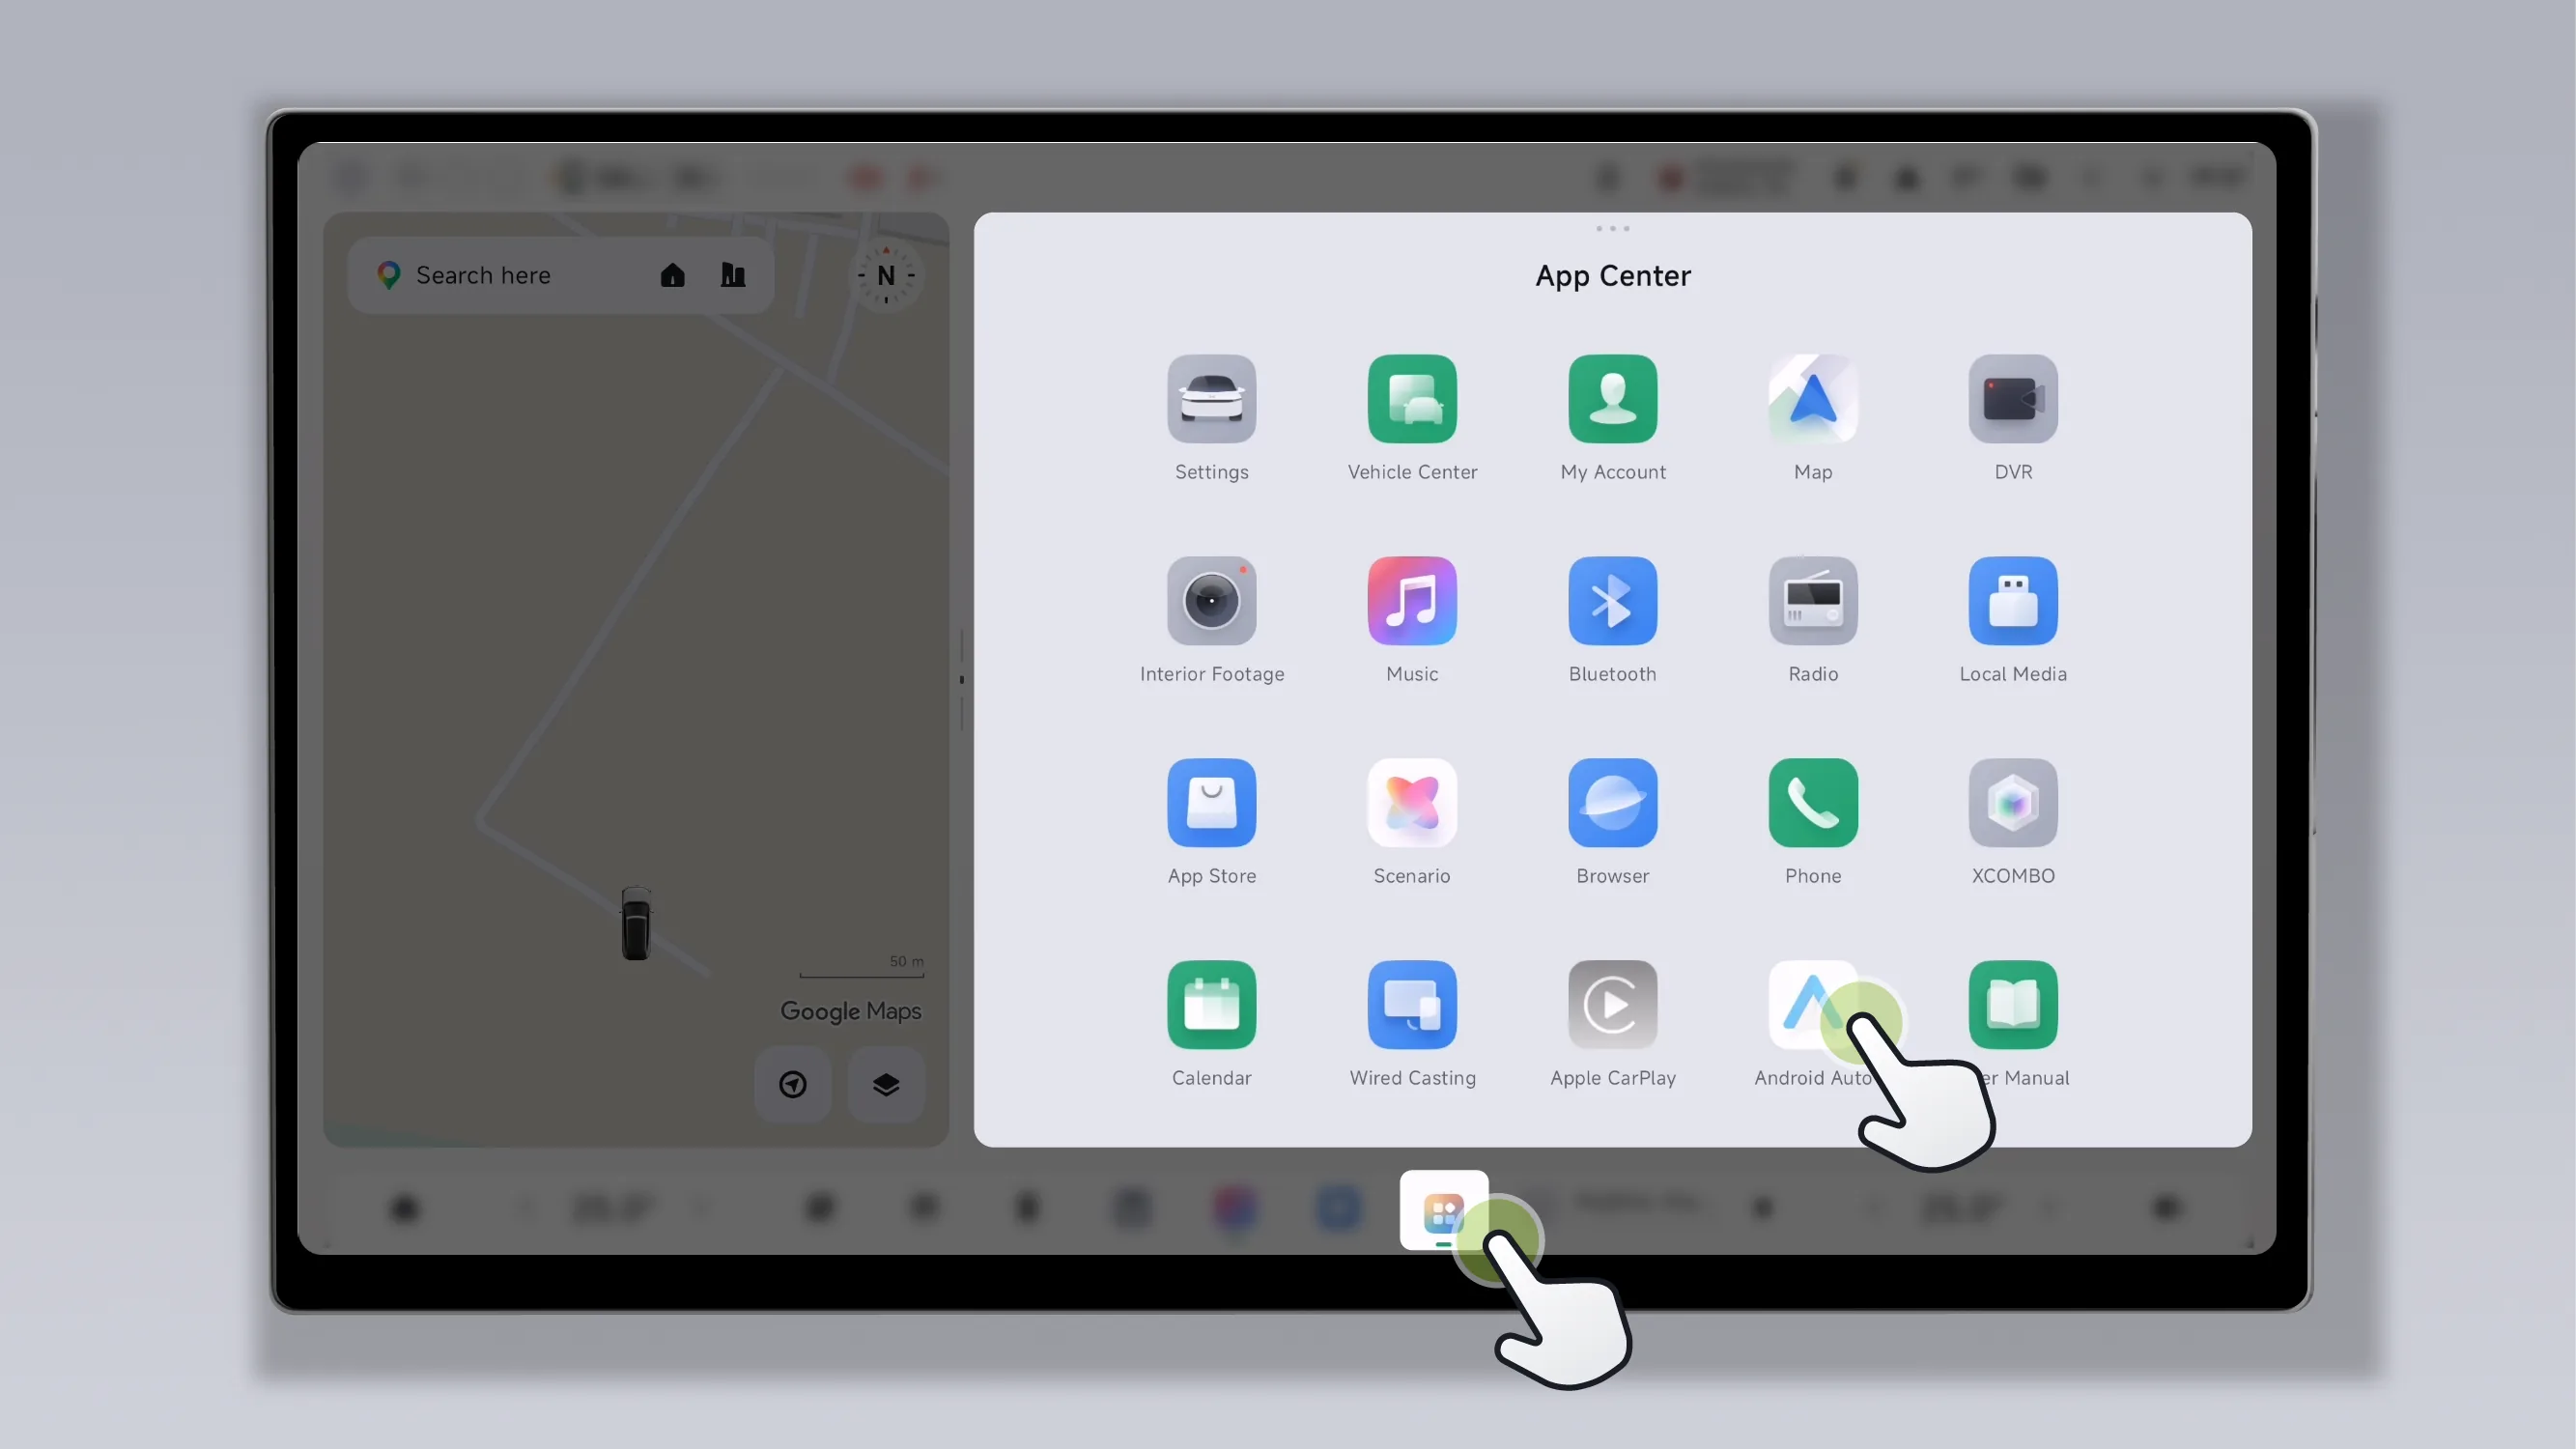
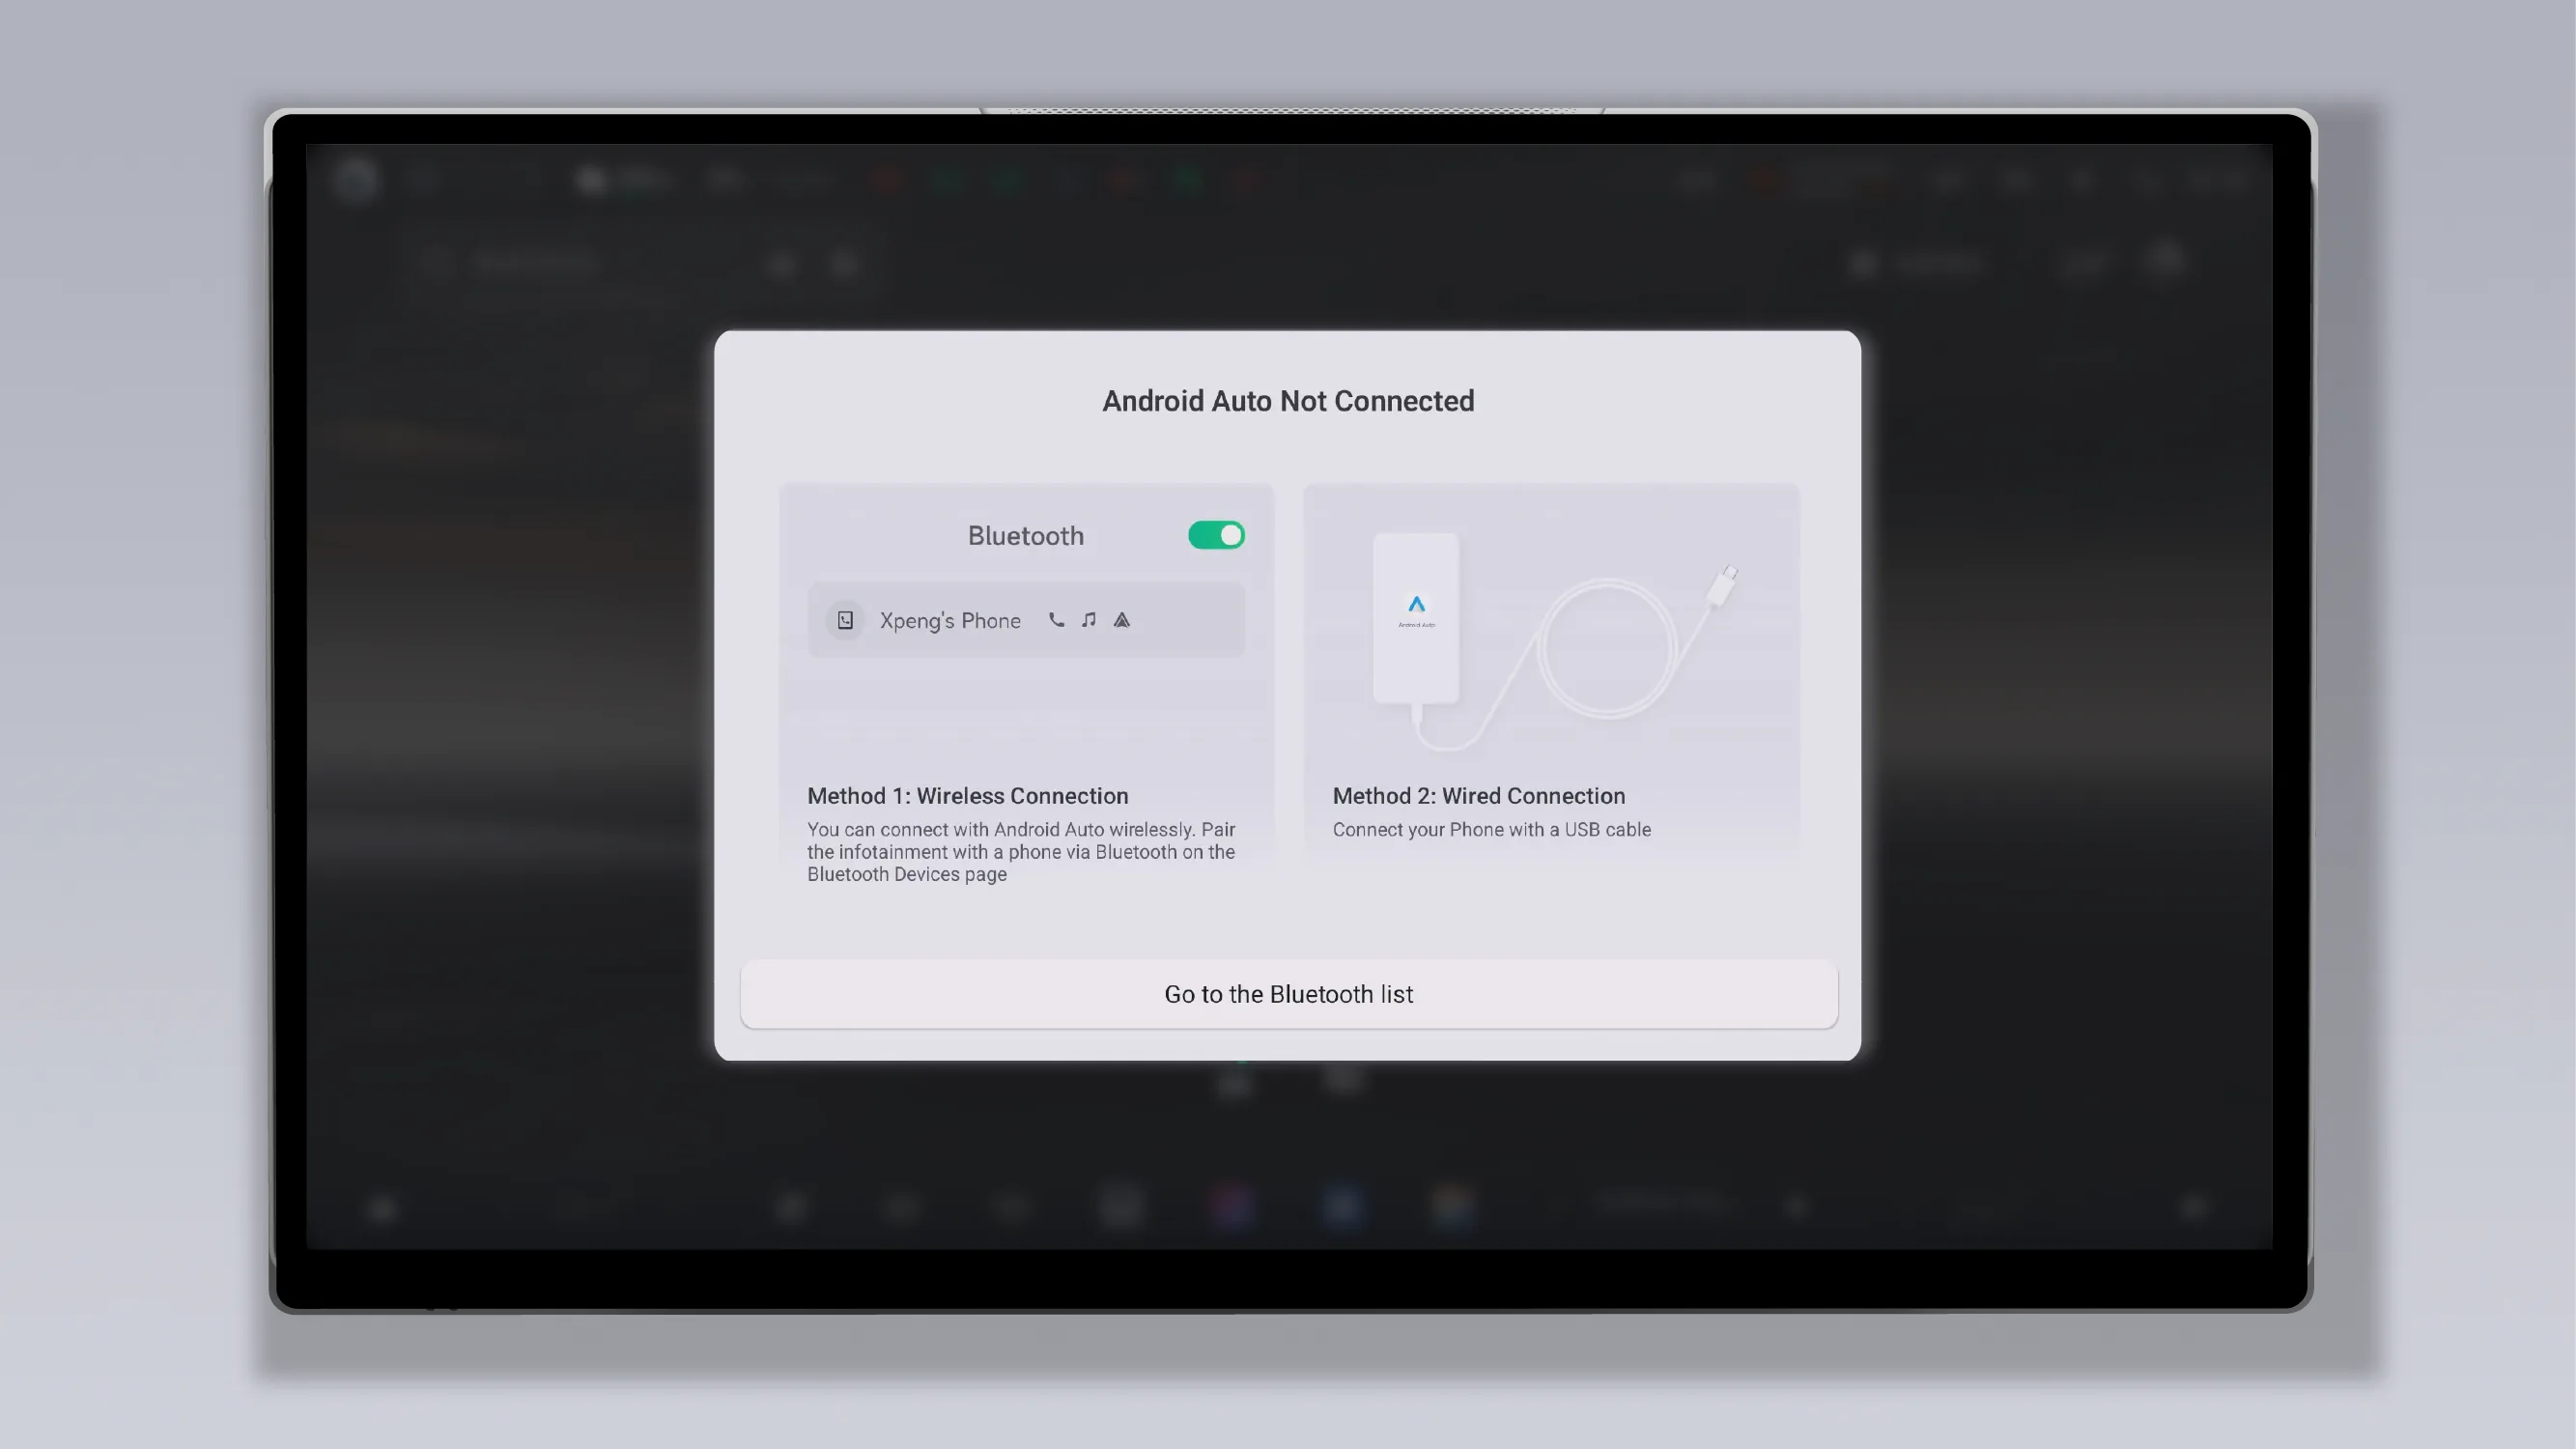
Method 1: Match your phone's Bluetooth in the Bluetooth listpage.
Method 2: Connect your Phone with a USB cable.
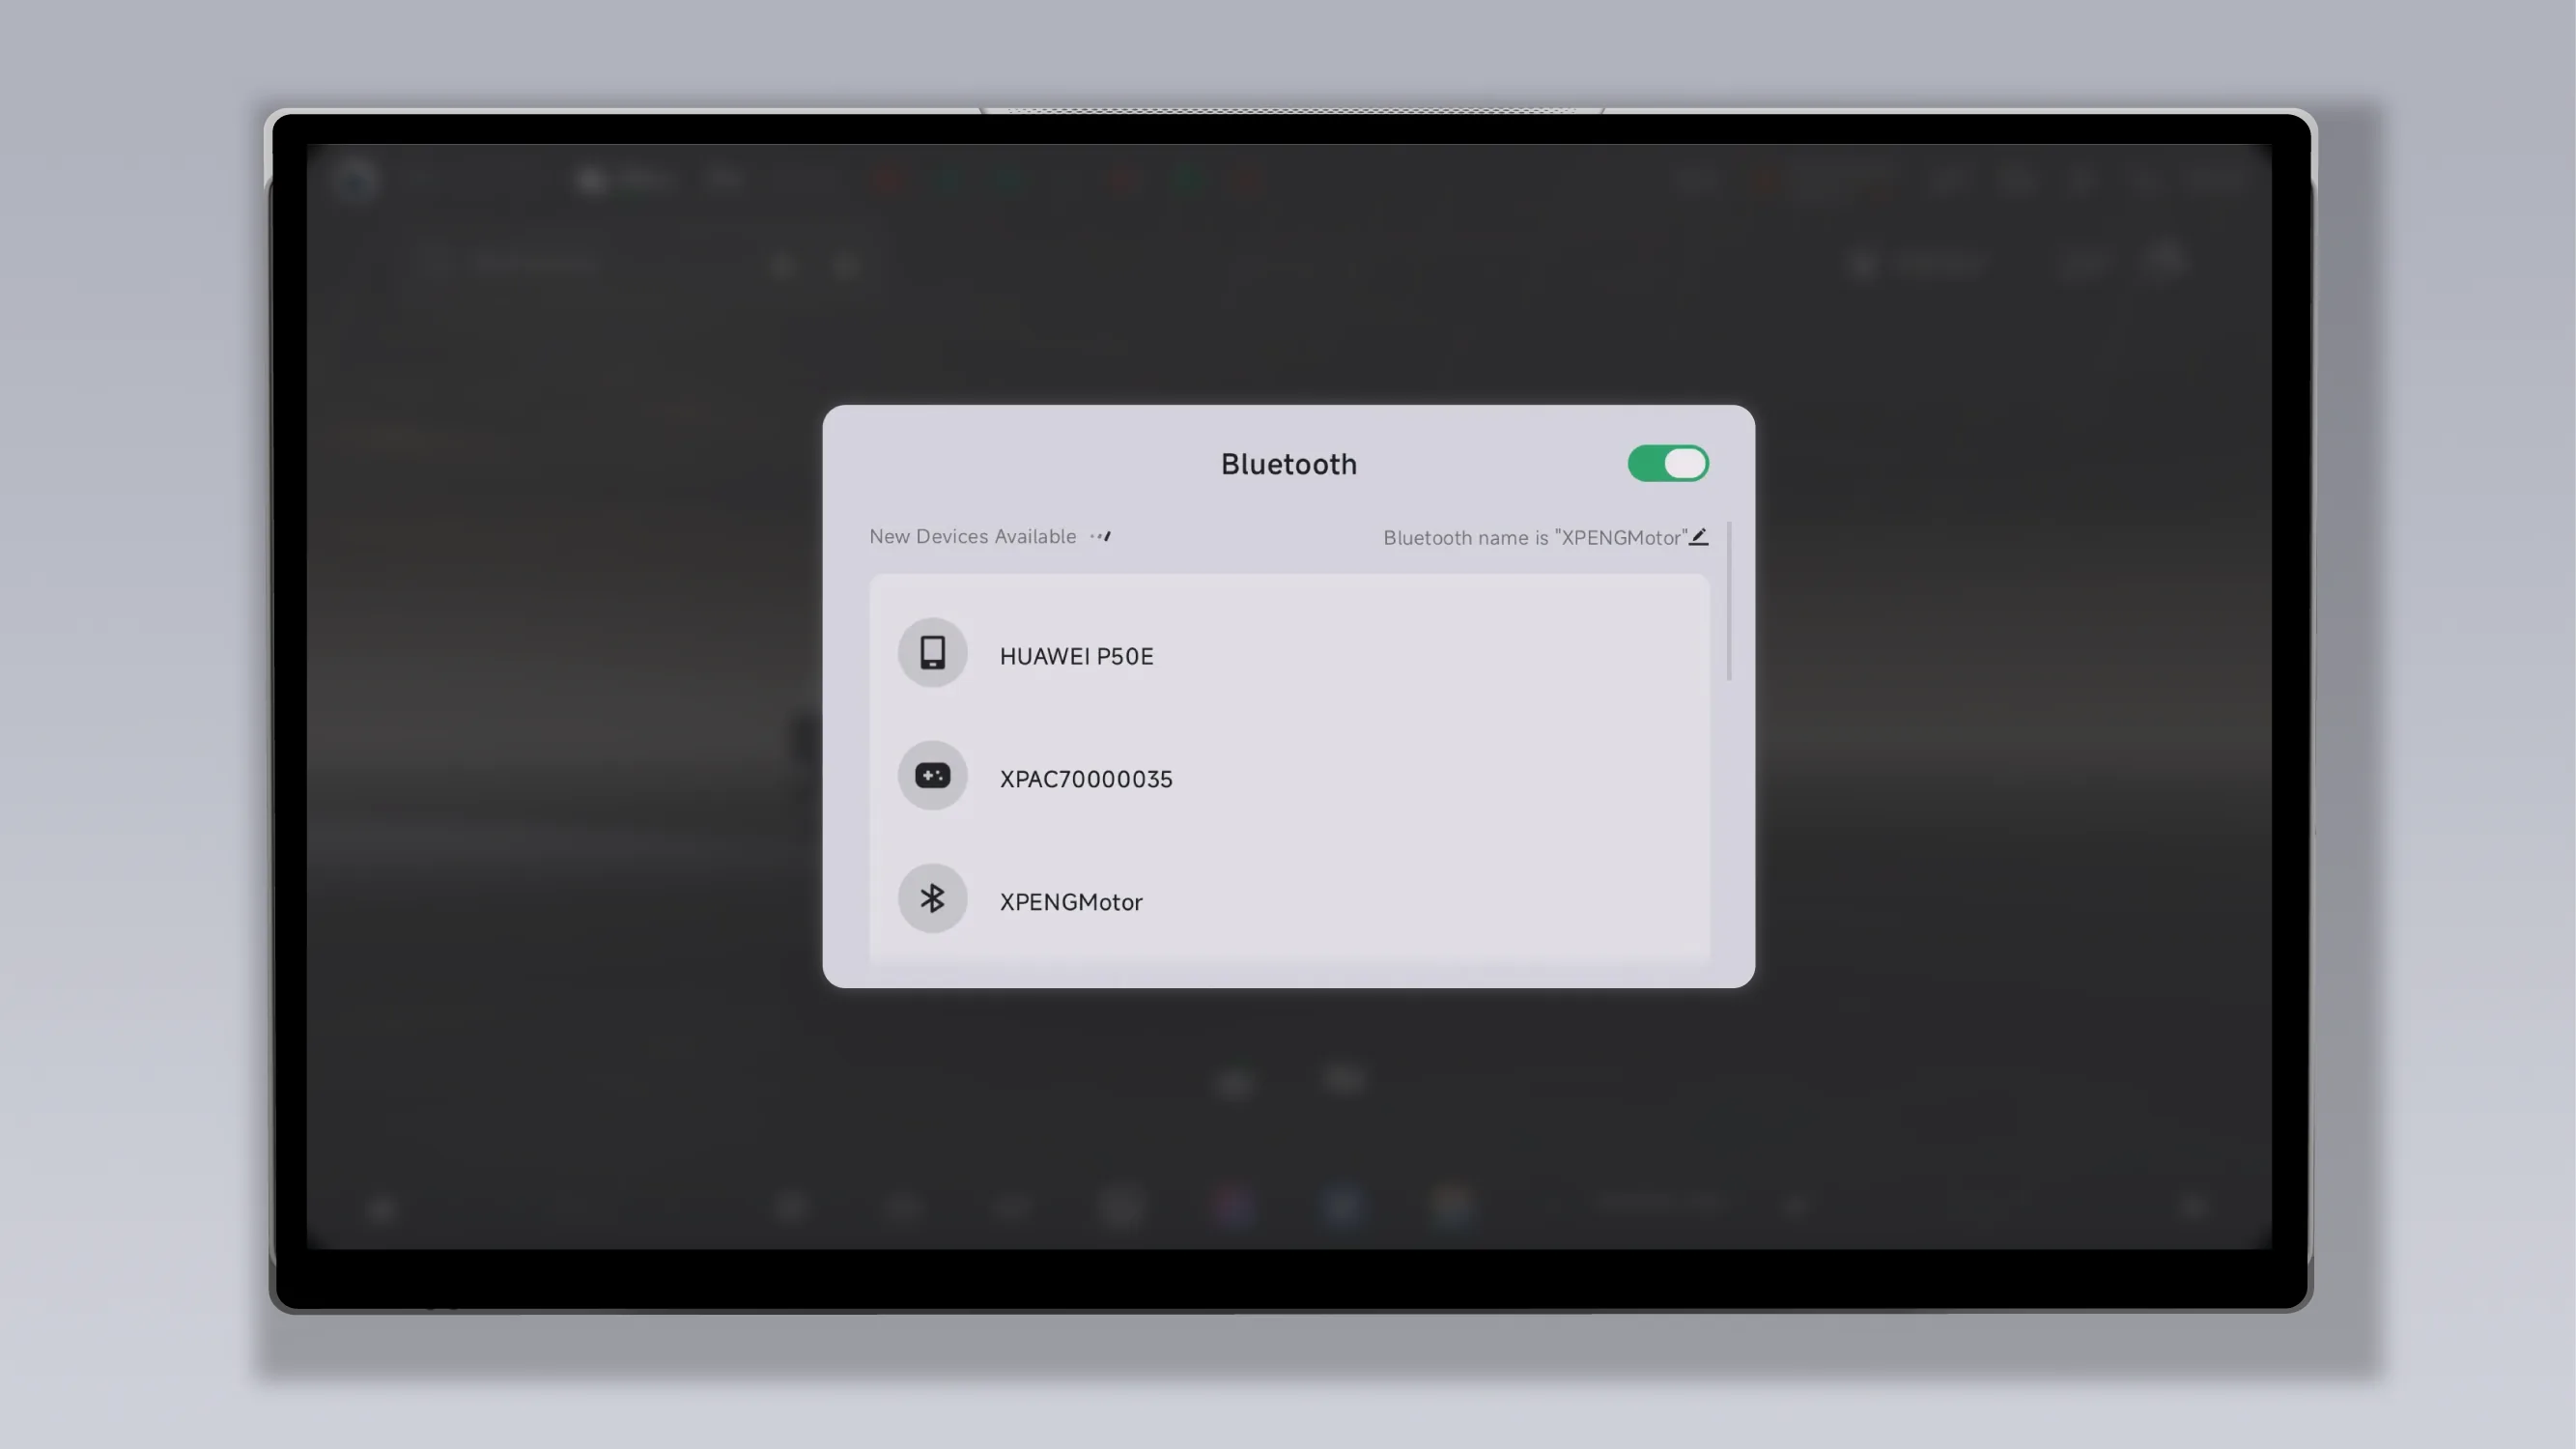
Apple CarPlay allows users to access services more safely and conveniently while driving by mapping core iPhone functions to the CID.
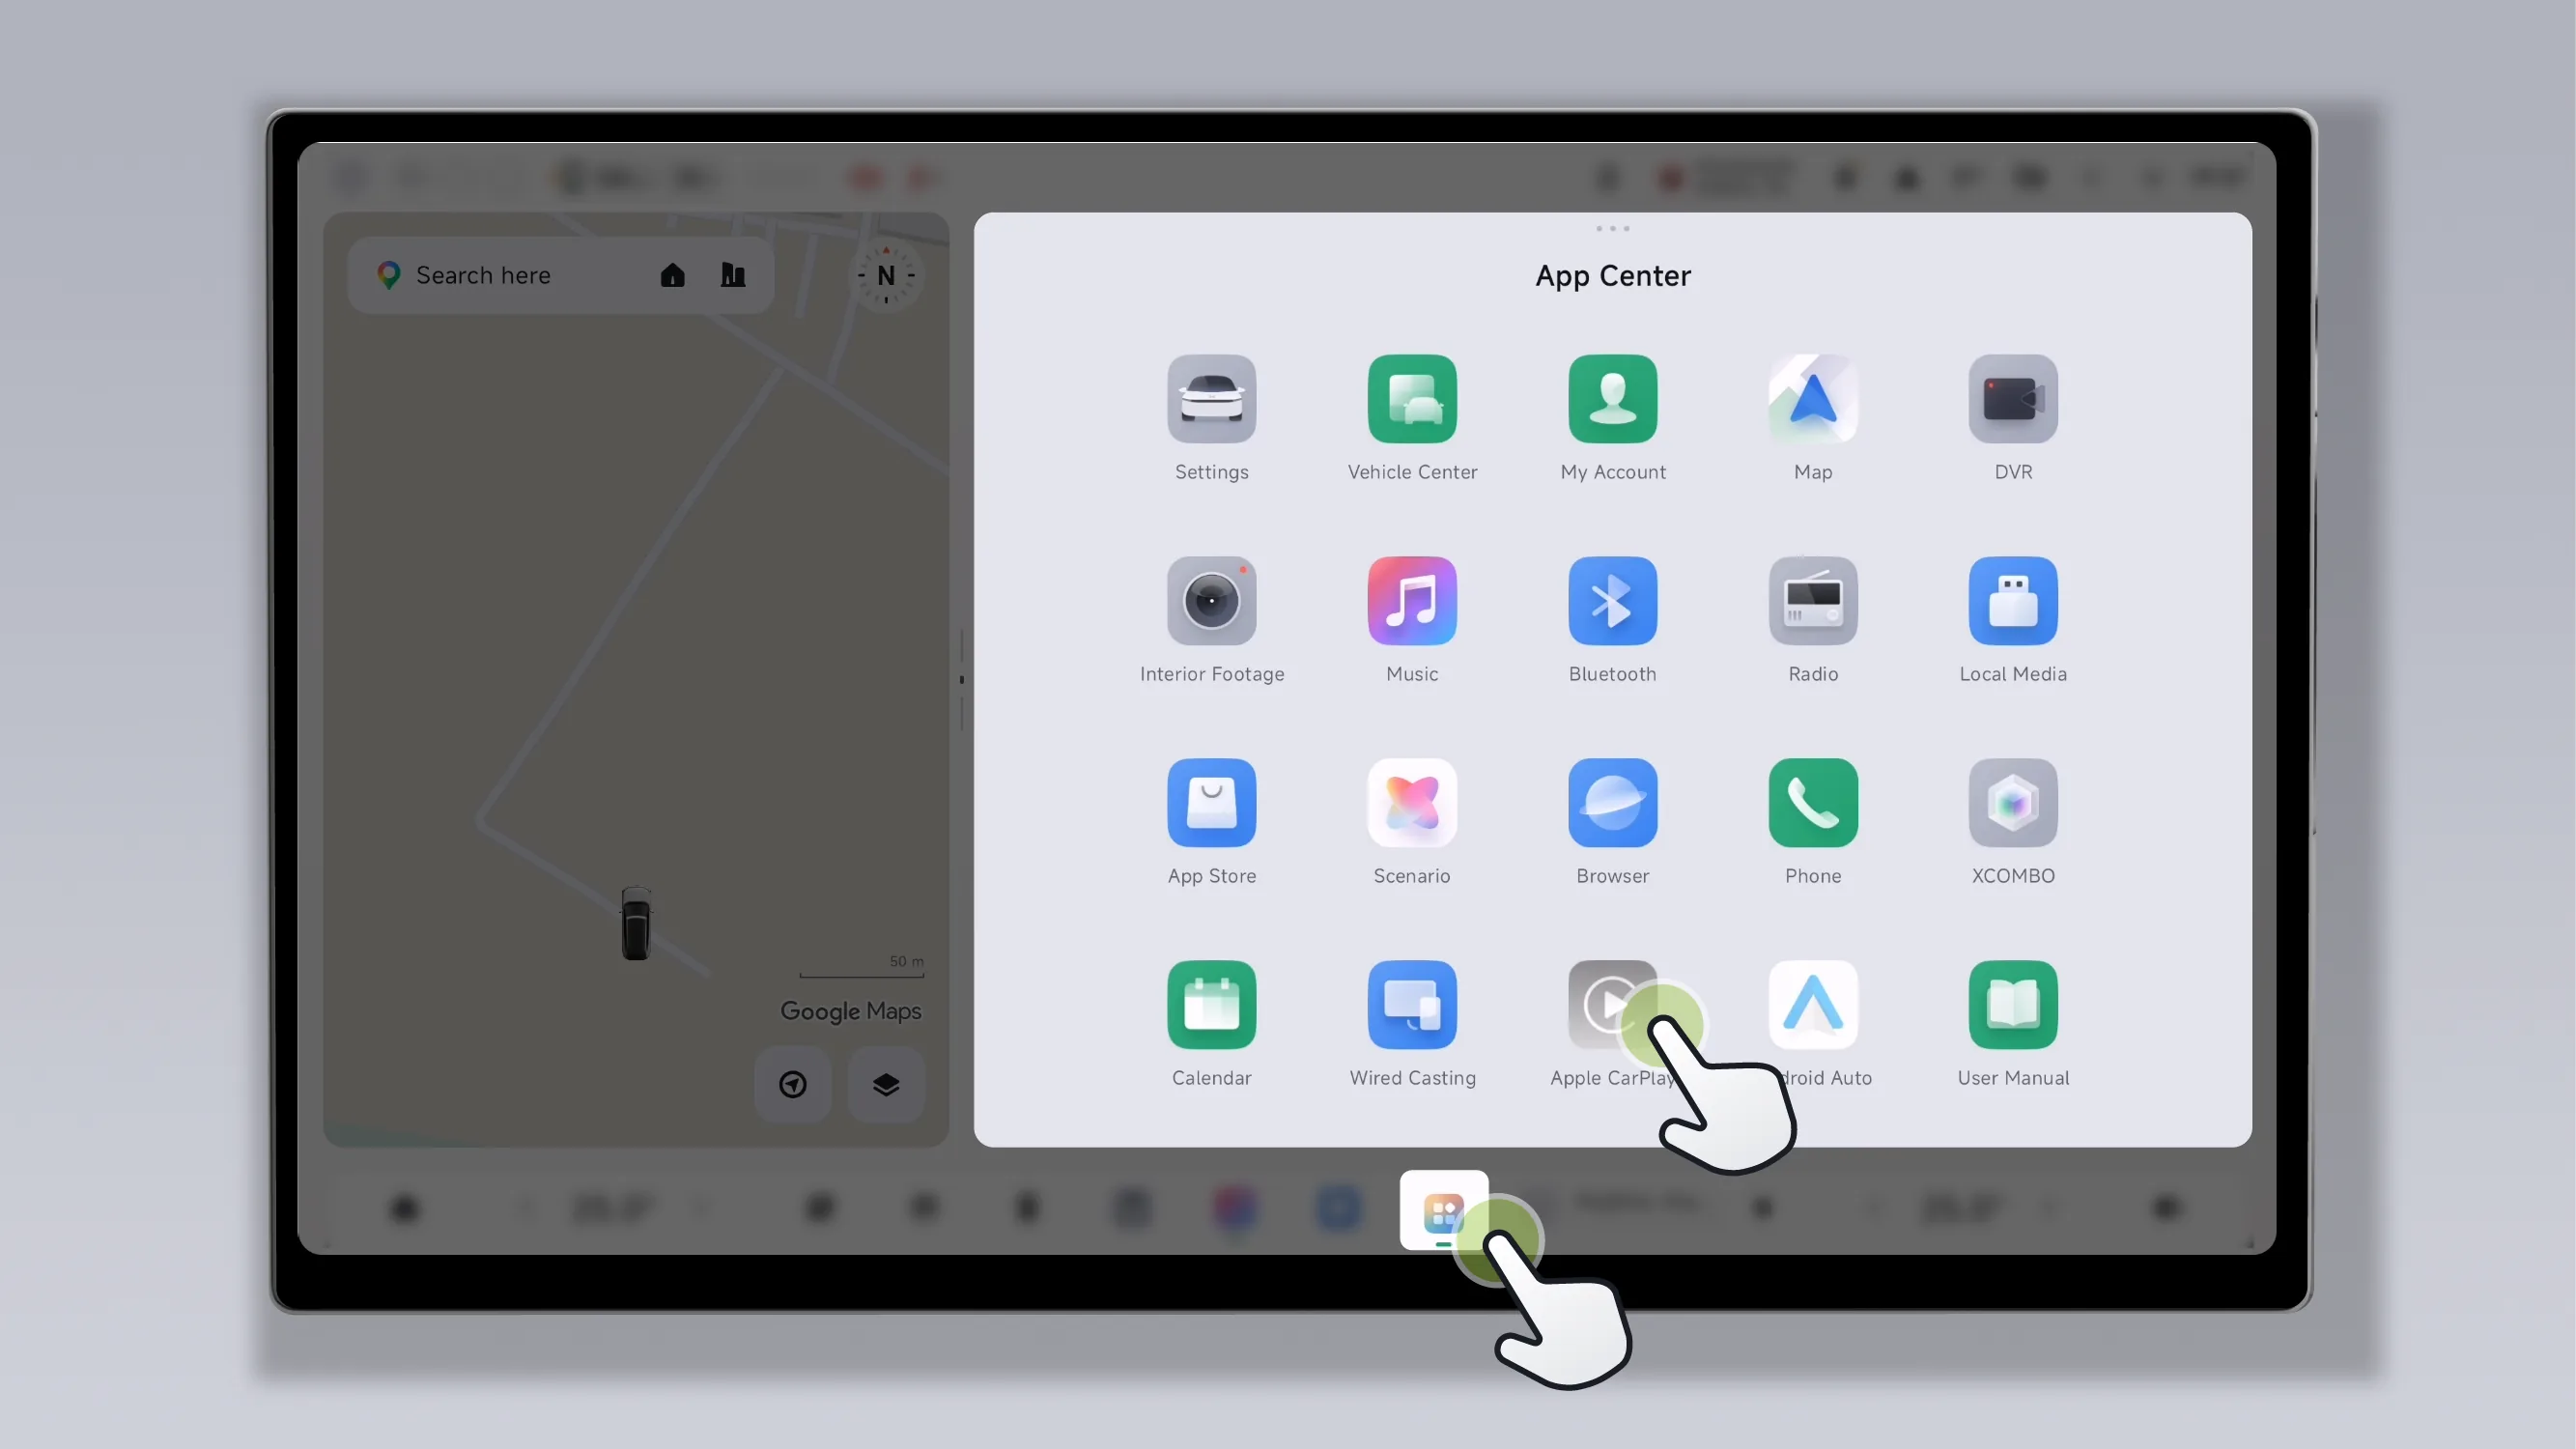
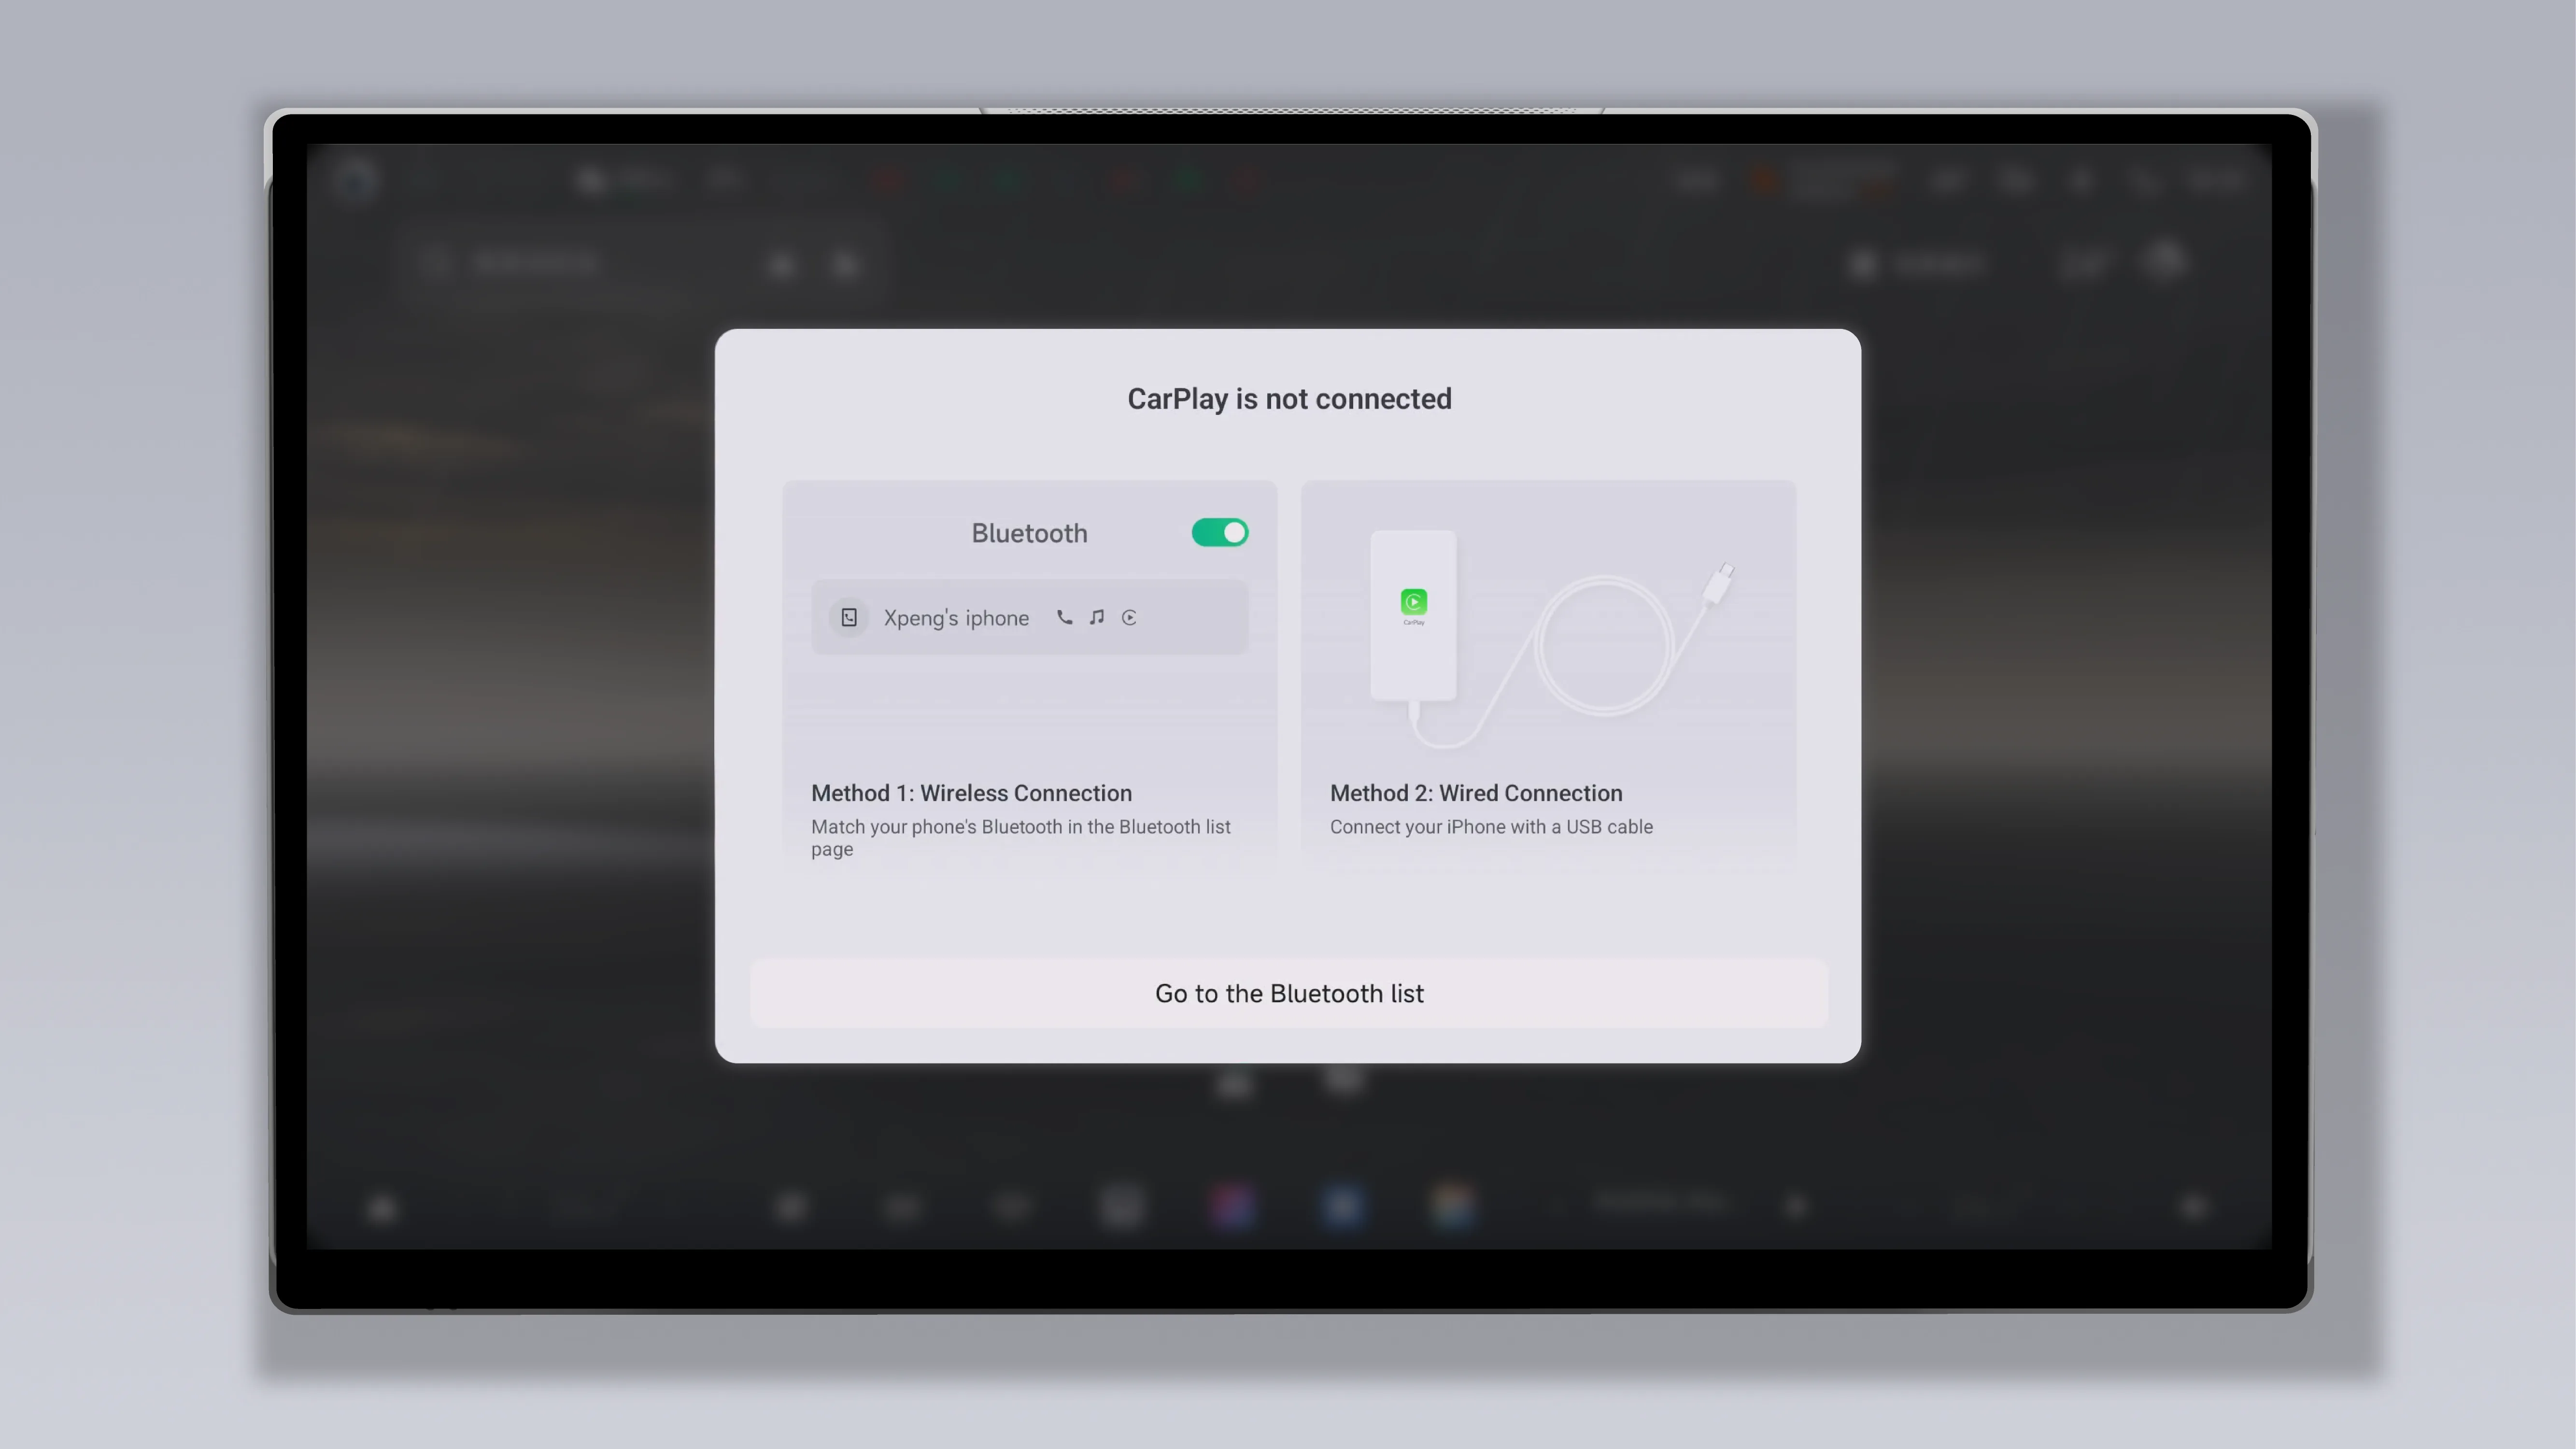
Method 1: Match your phone's Bluetooth in the Bluetooth listpage.
Method 2:Connect your iPhone with a USB cable.
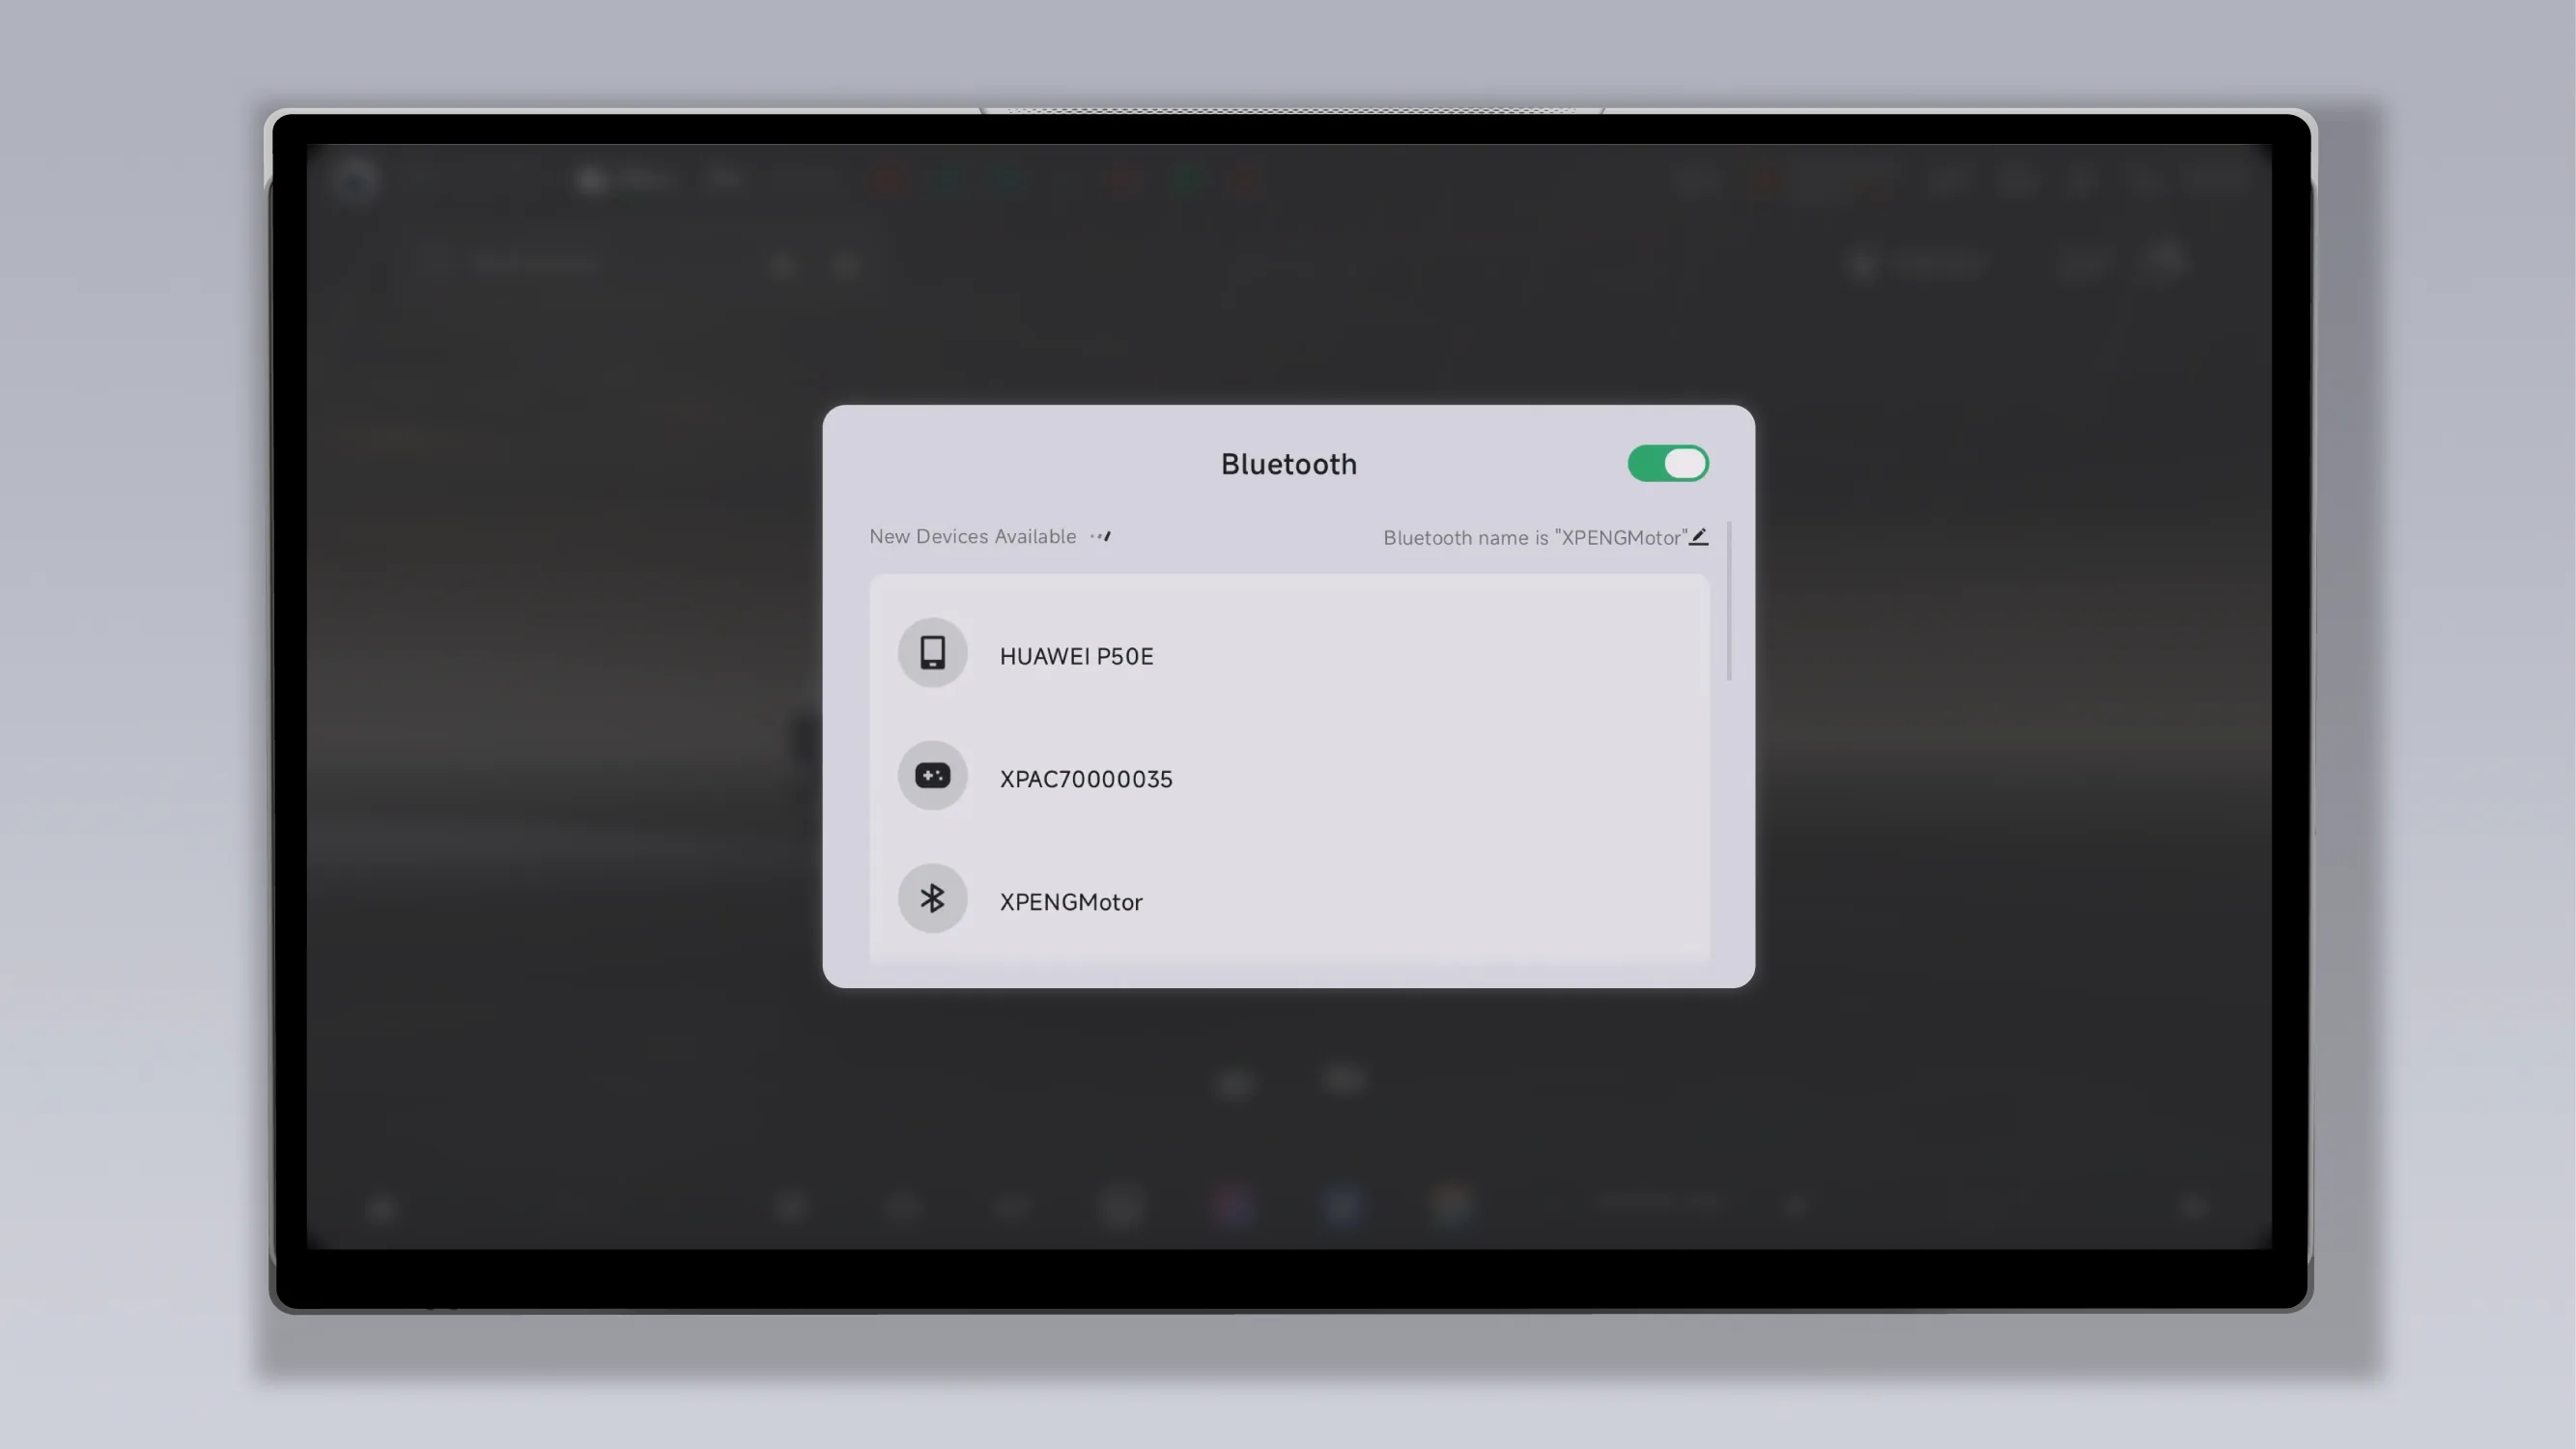
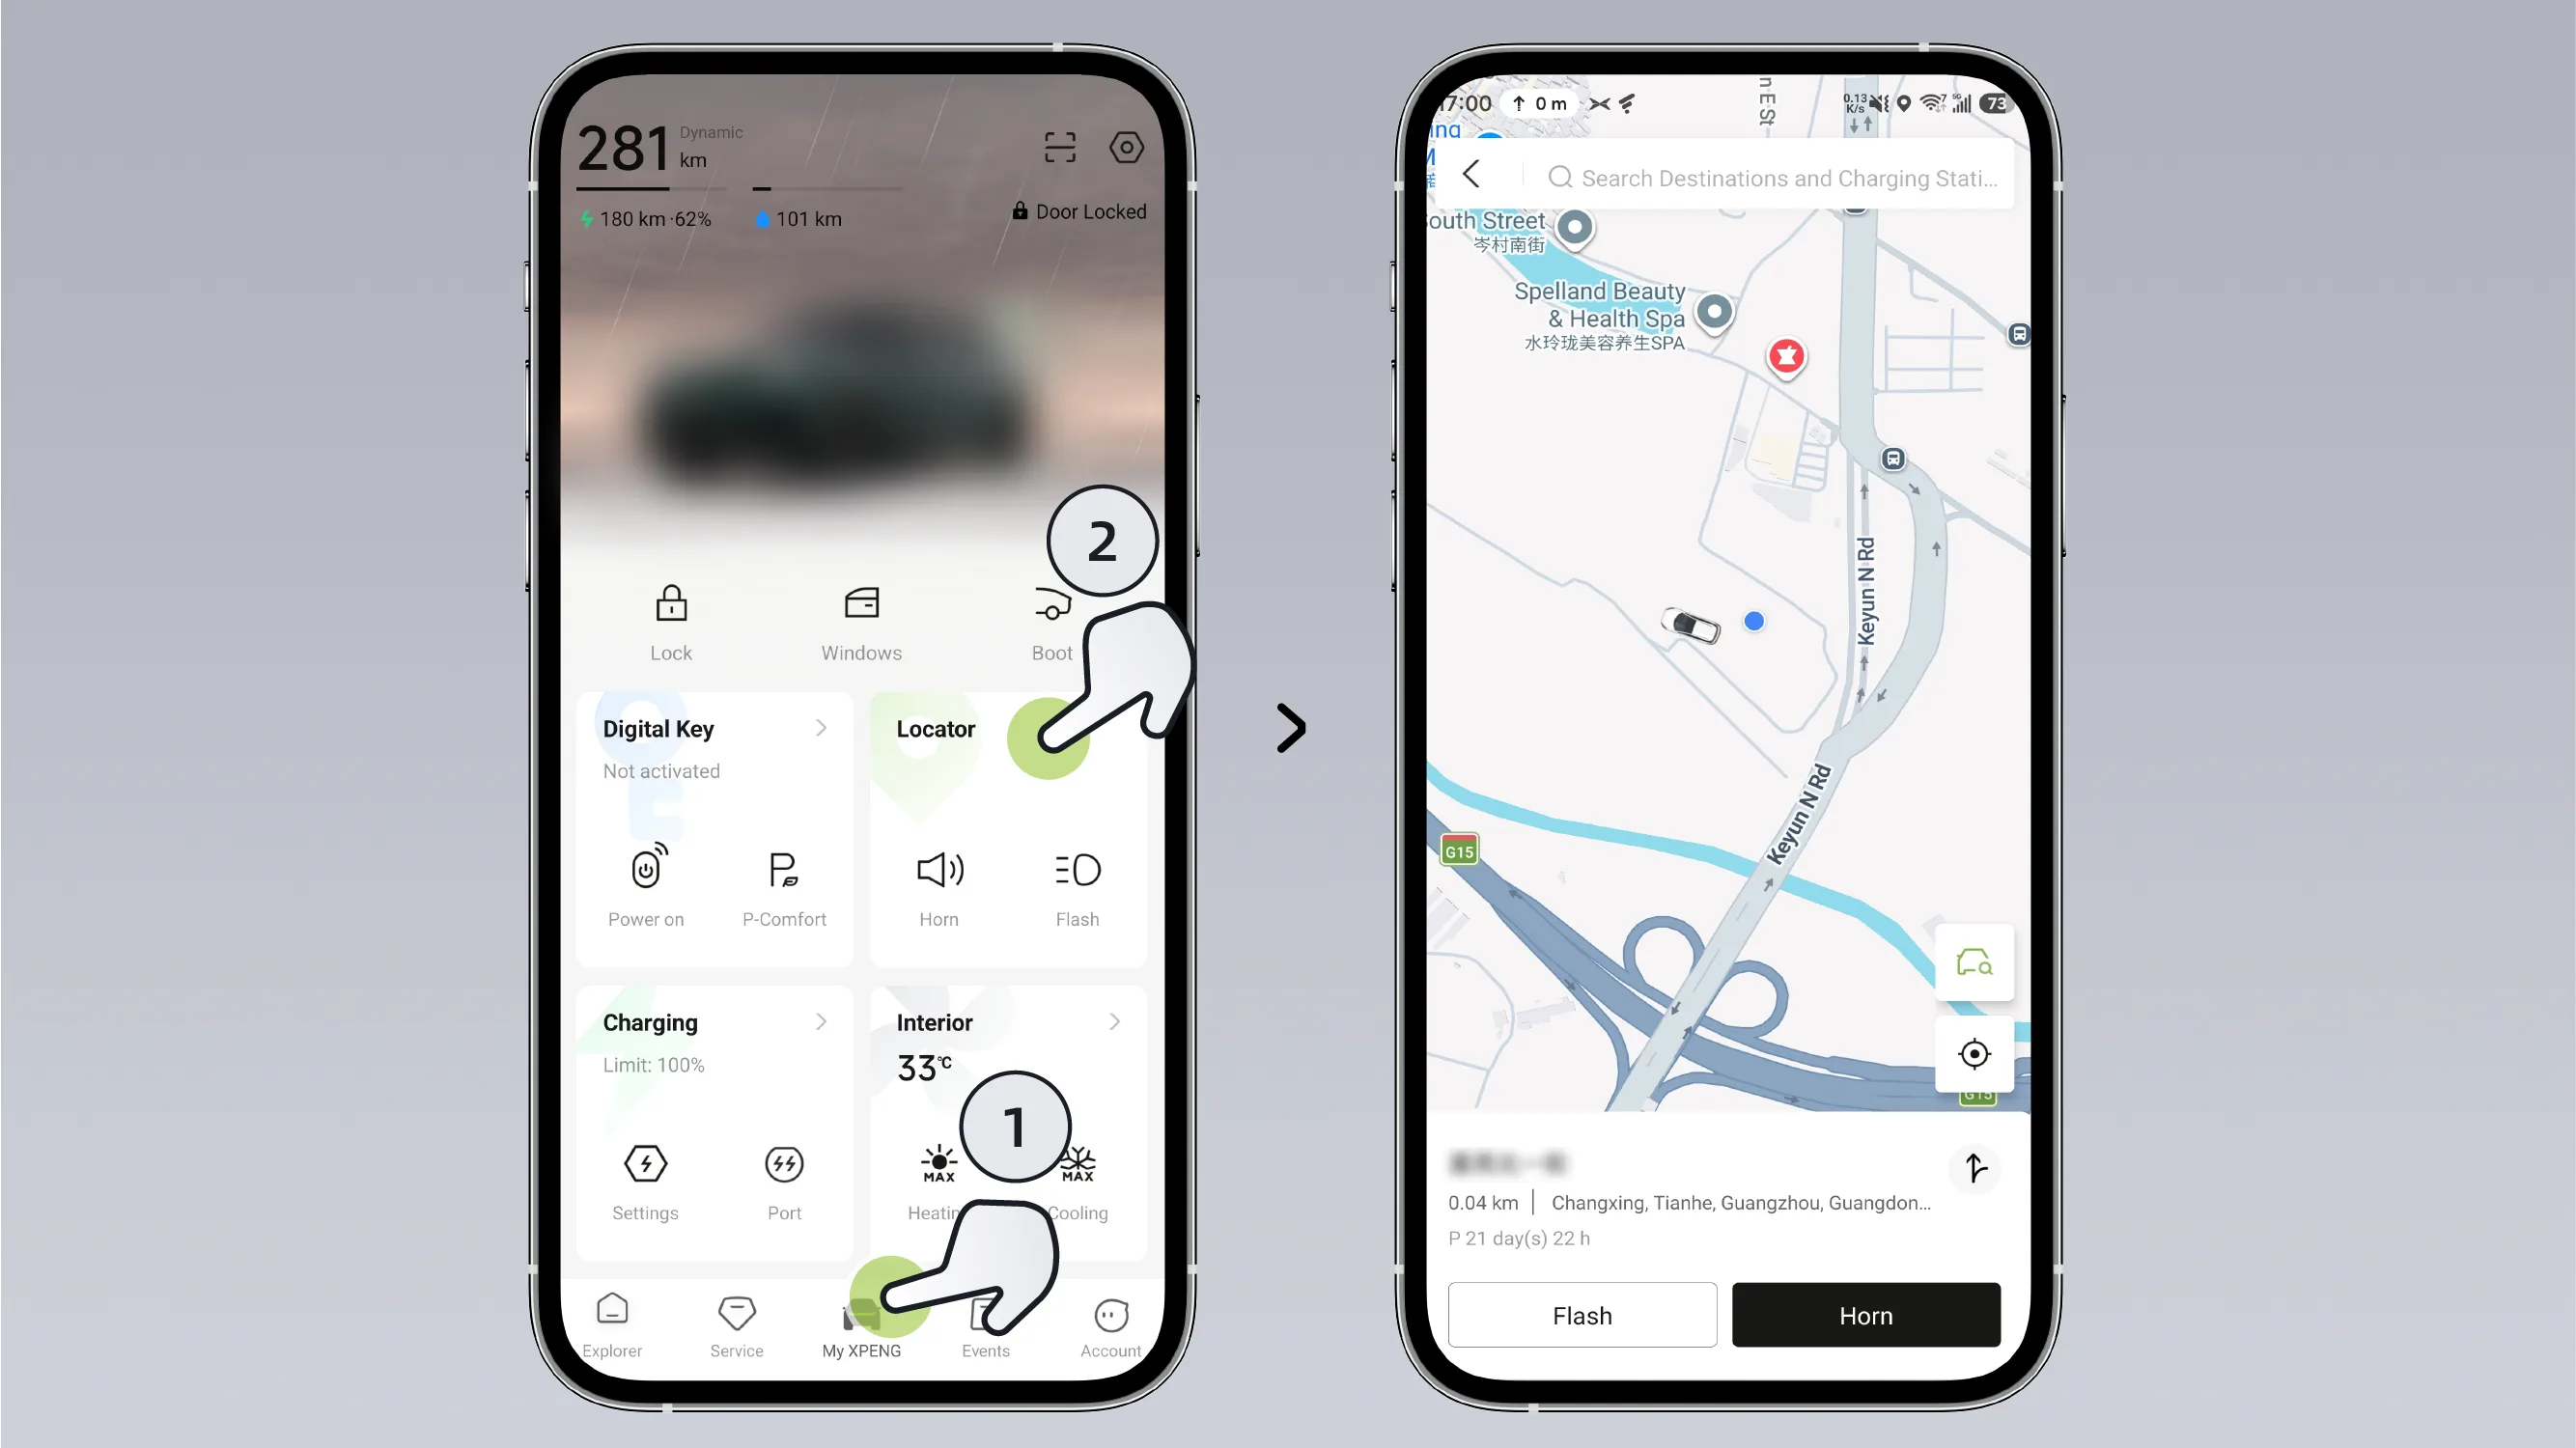
When you are far away from the vehicle or do not know where the vehicle is parked, you can use the mobile App Interface, query the geographic location information of the parked vehicle, or generate a vehicle-finding navigation route.
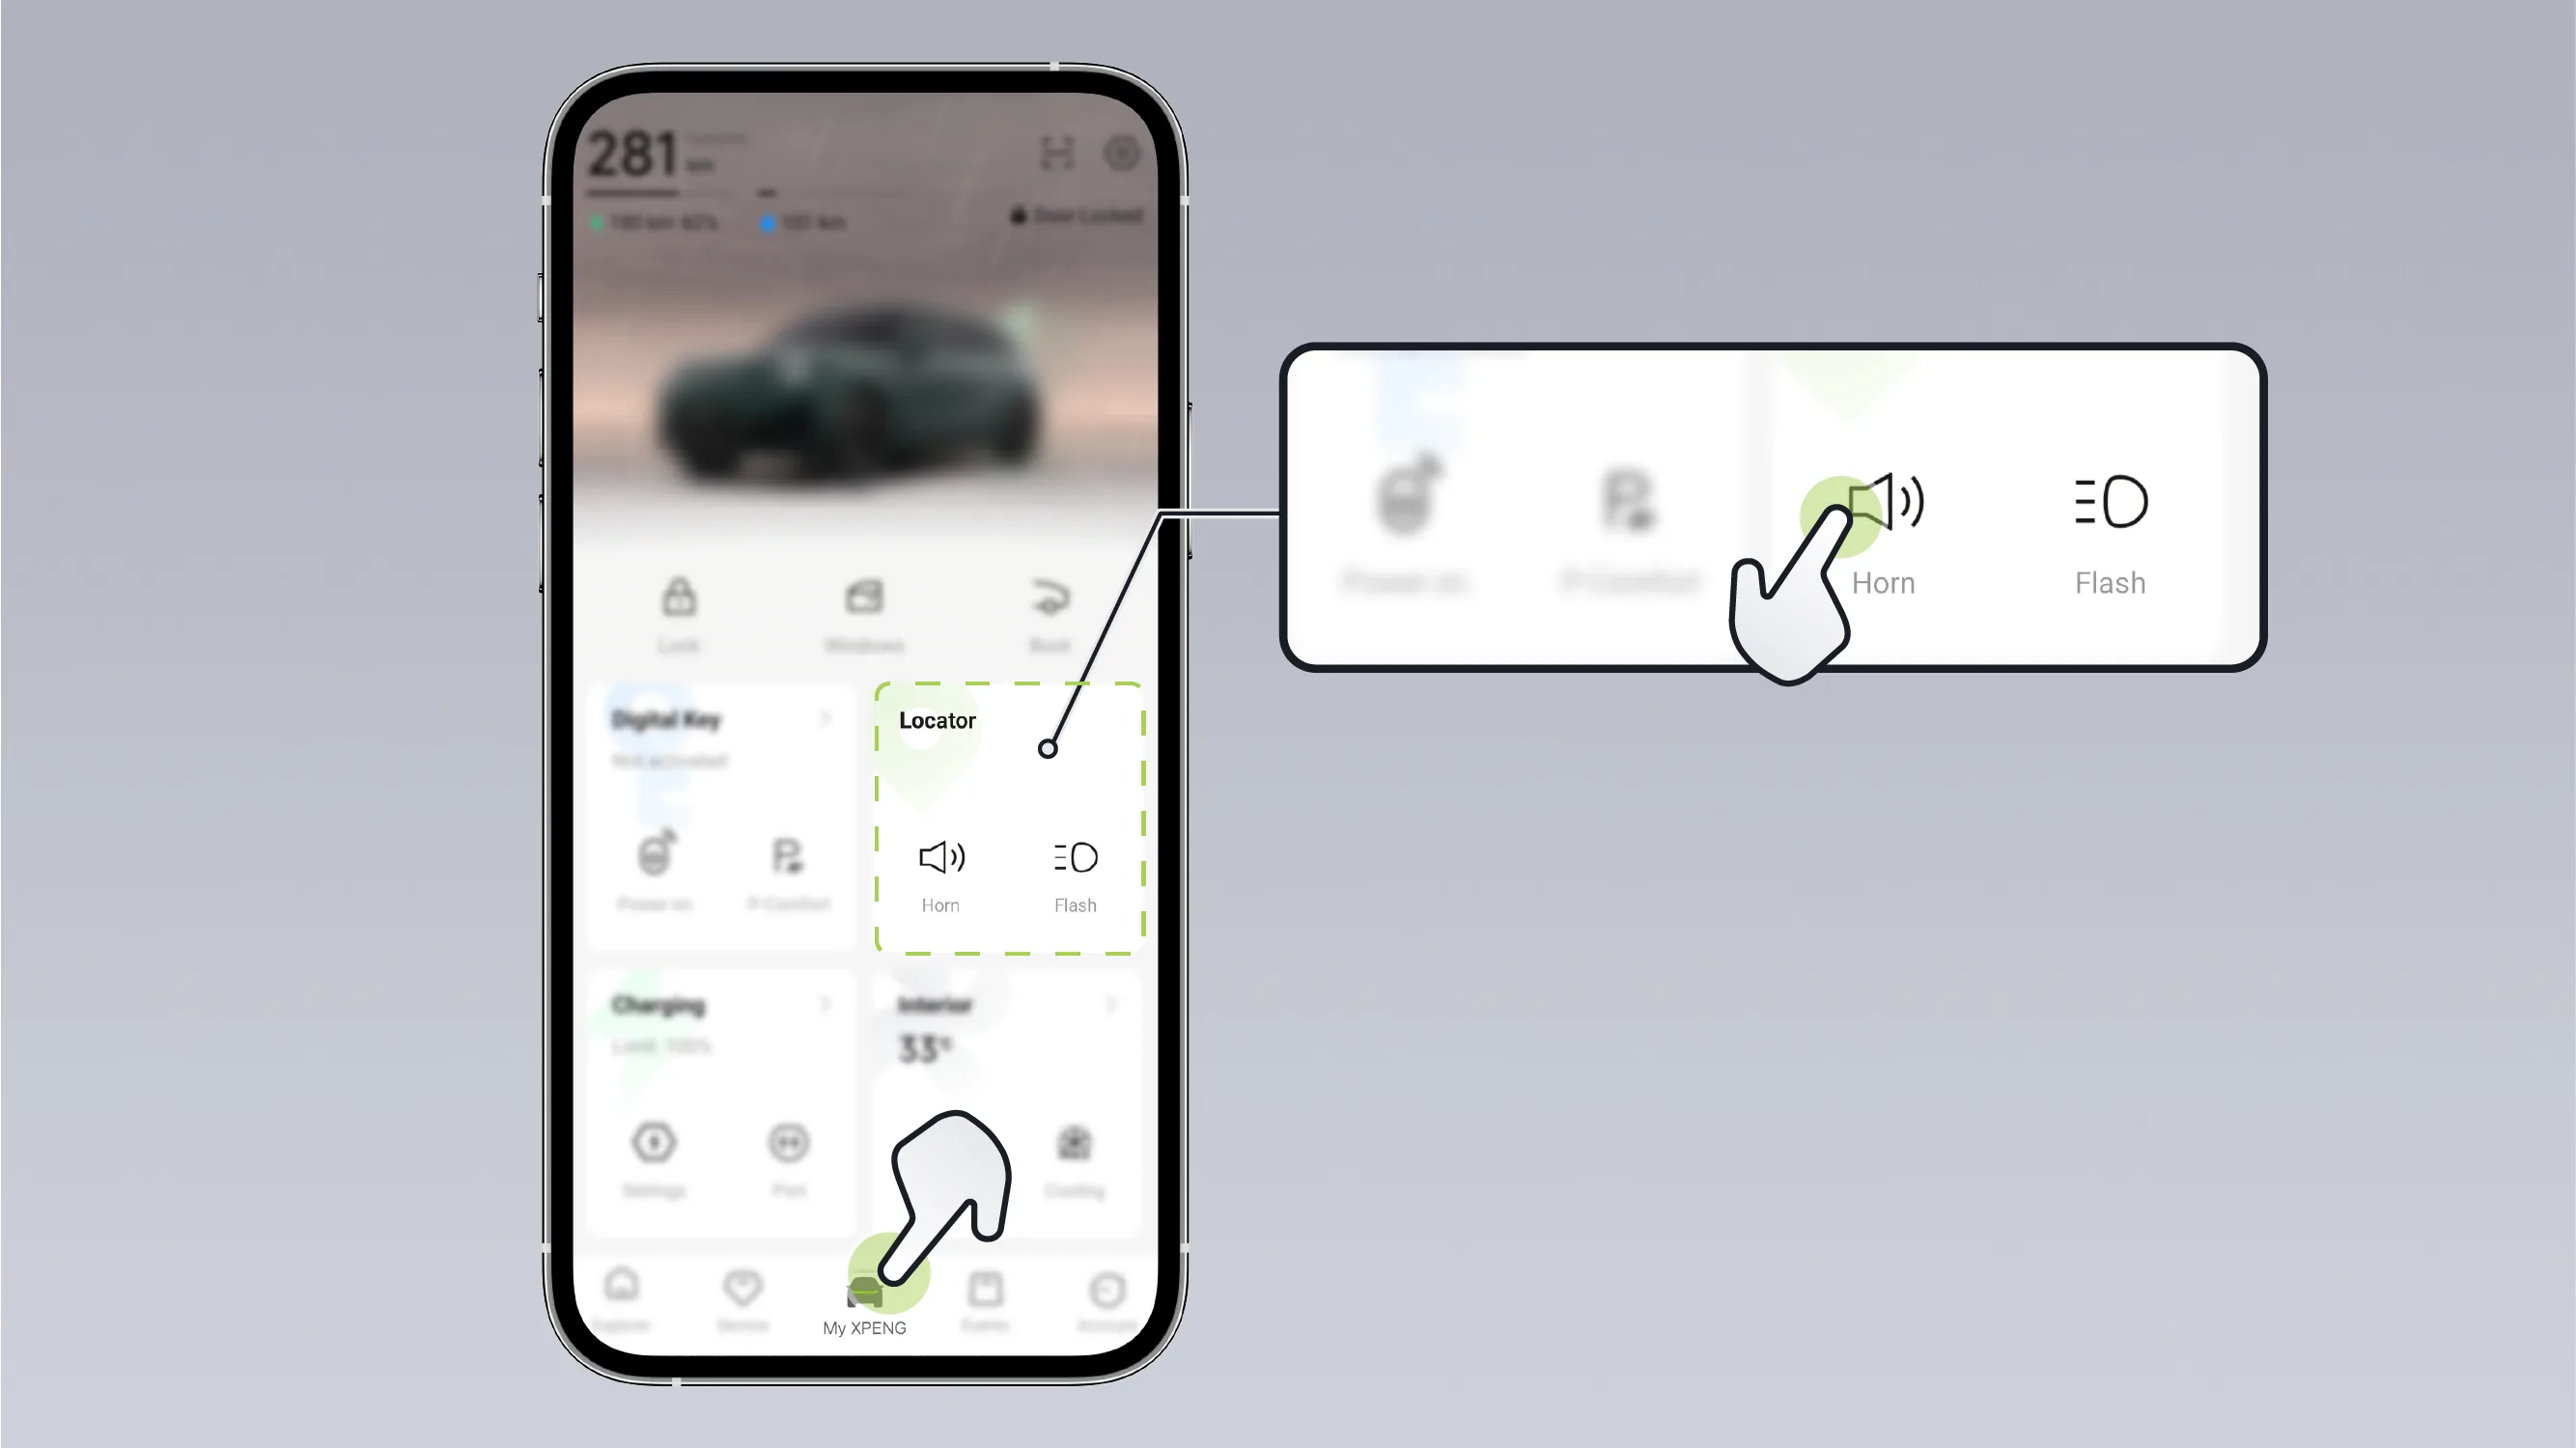
When you are close to the vehicle (for example: a residential parking lot), in the mobile app On the interface, select honking or flashing lights for alerts so that you can quickly locate the vehicle.
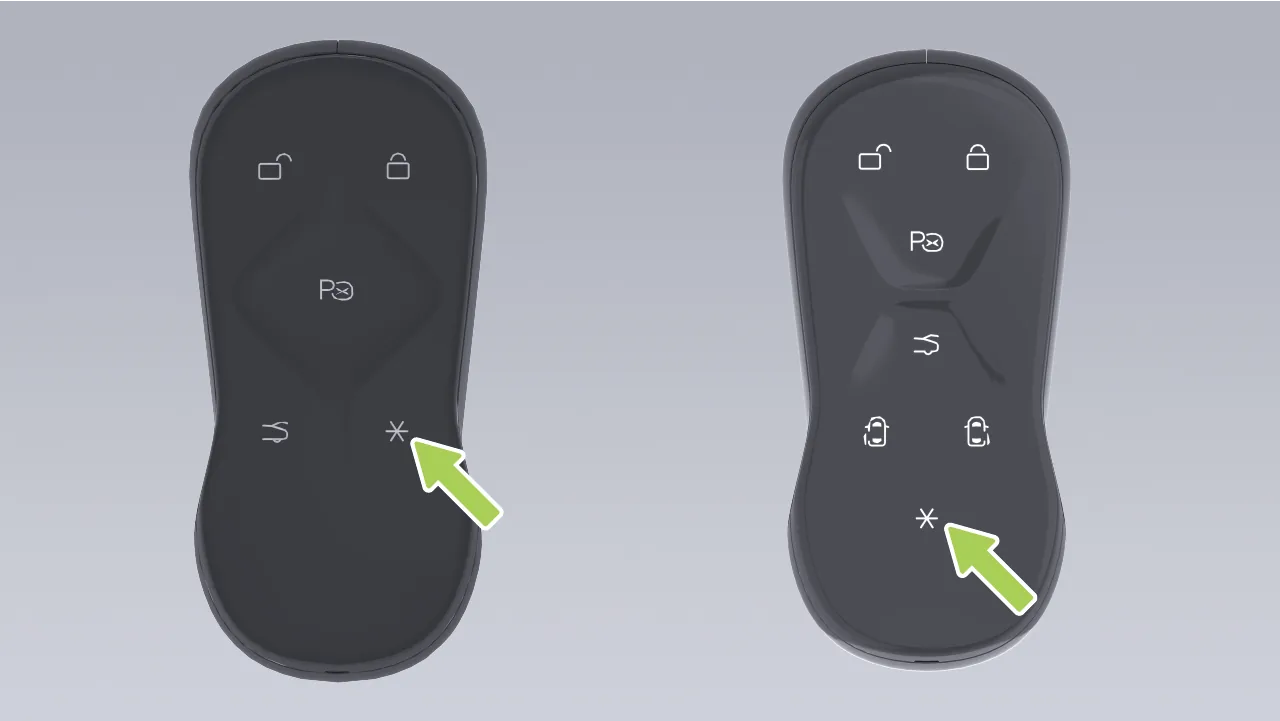
When the custom key of the remote key is set to Afterward, double-press this button within the effective range of the remote key, and the vehicle will trigger the vehicle search function. At this time, the vehicle turn signals will flash and the horn will sound, helping you quickly find the vehicle.
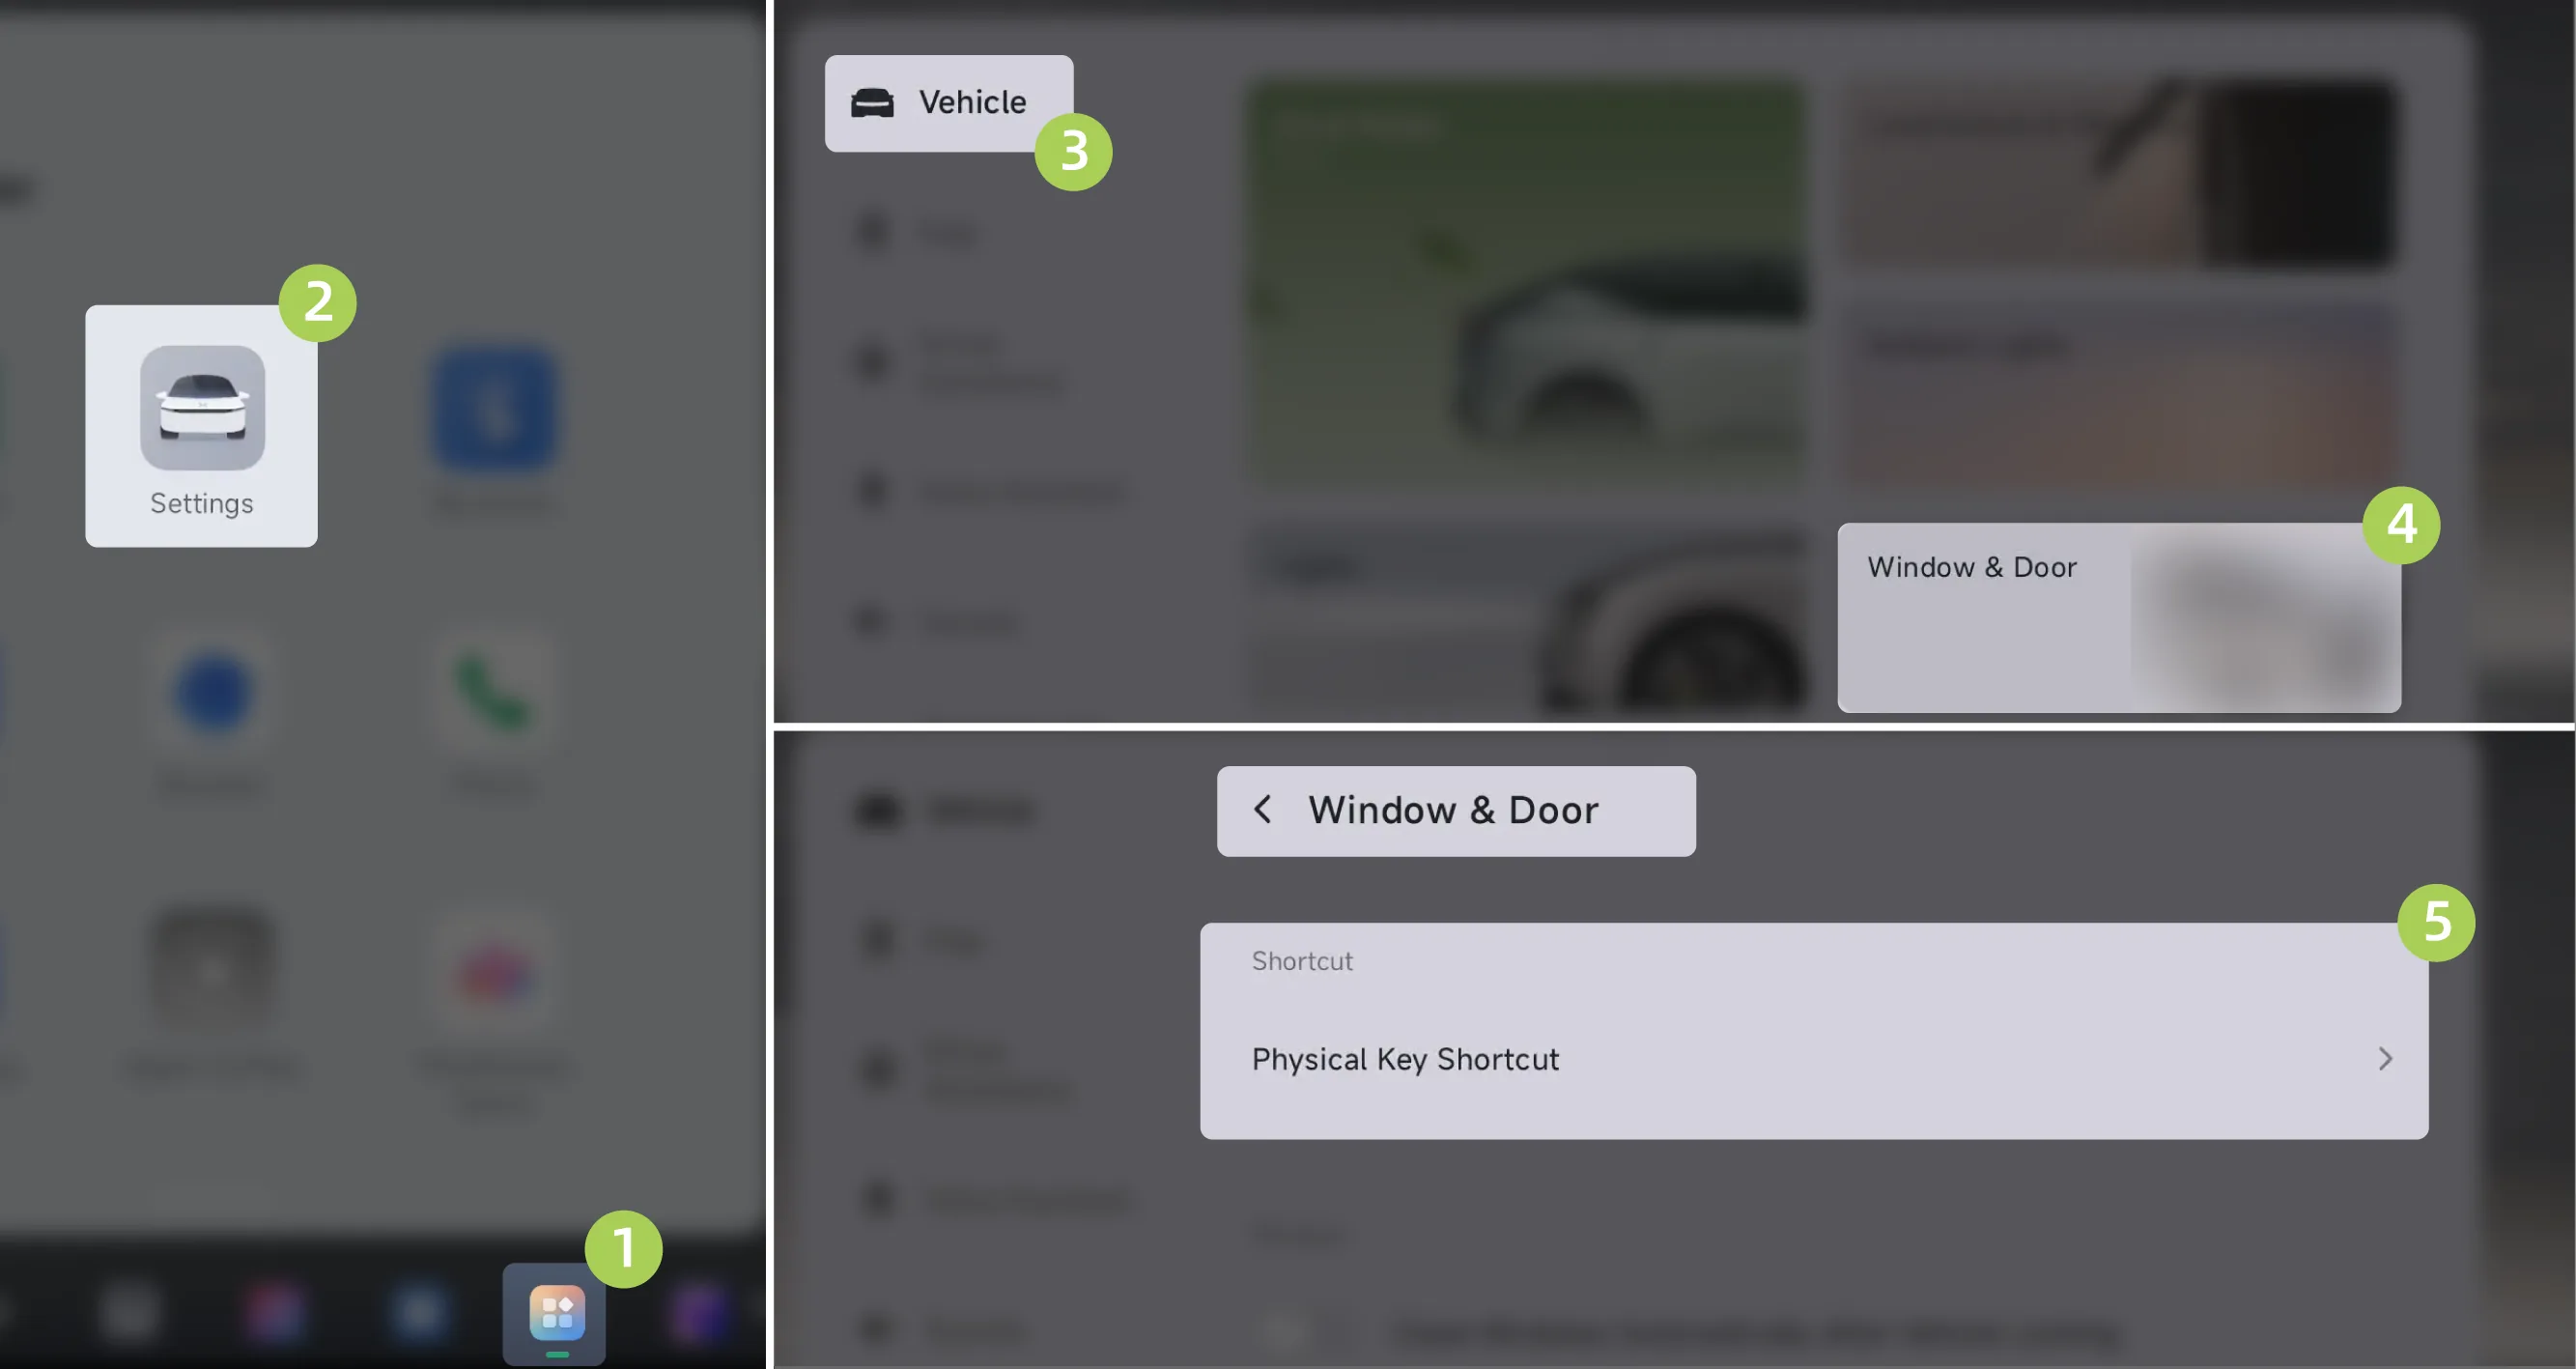
On the central control screen “ →Settings→vehicle→Doors and Windows→Physical Key Shortcuts”Interface, set the custom key to 。
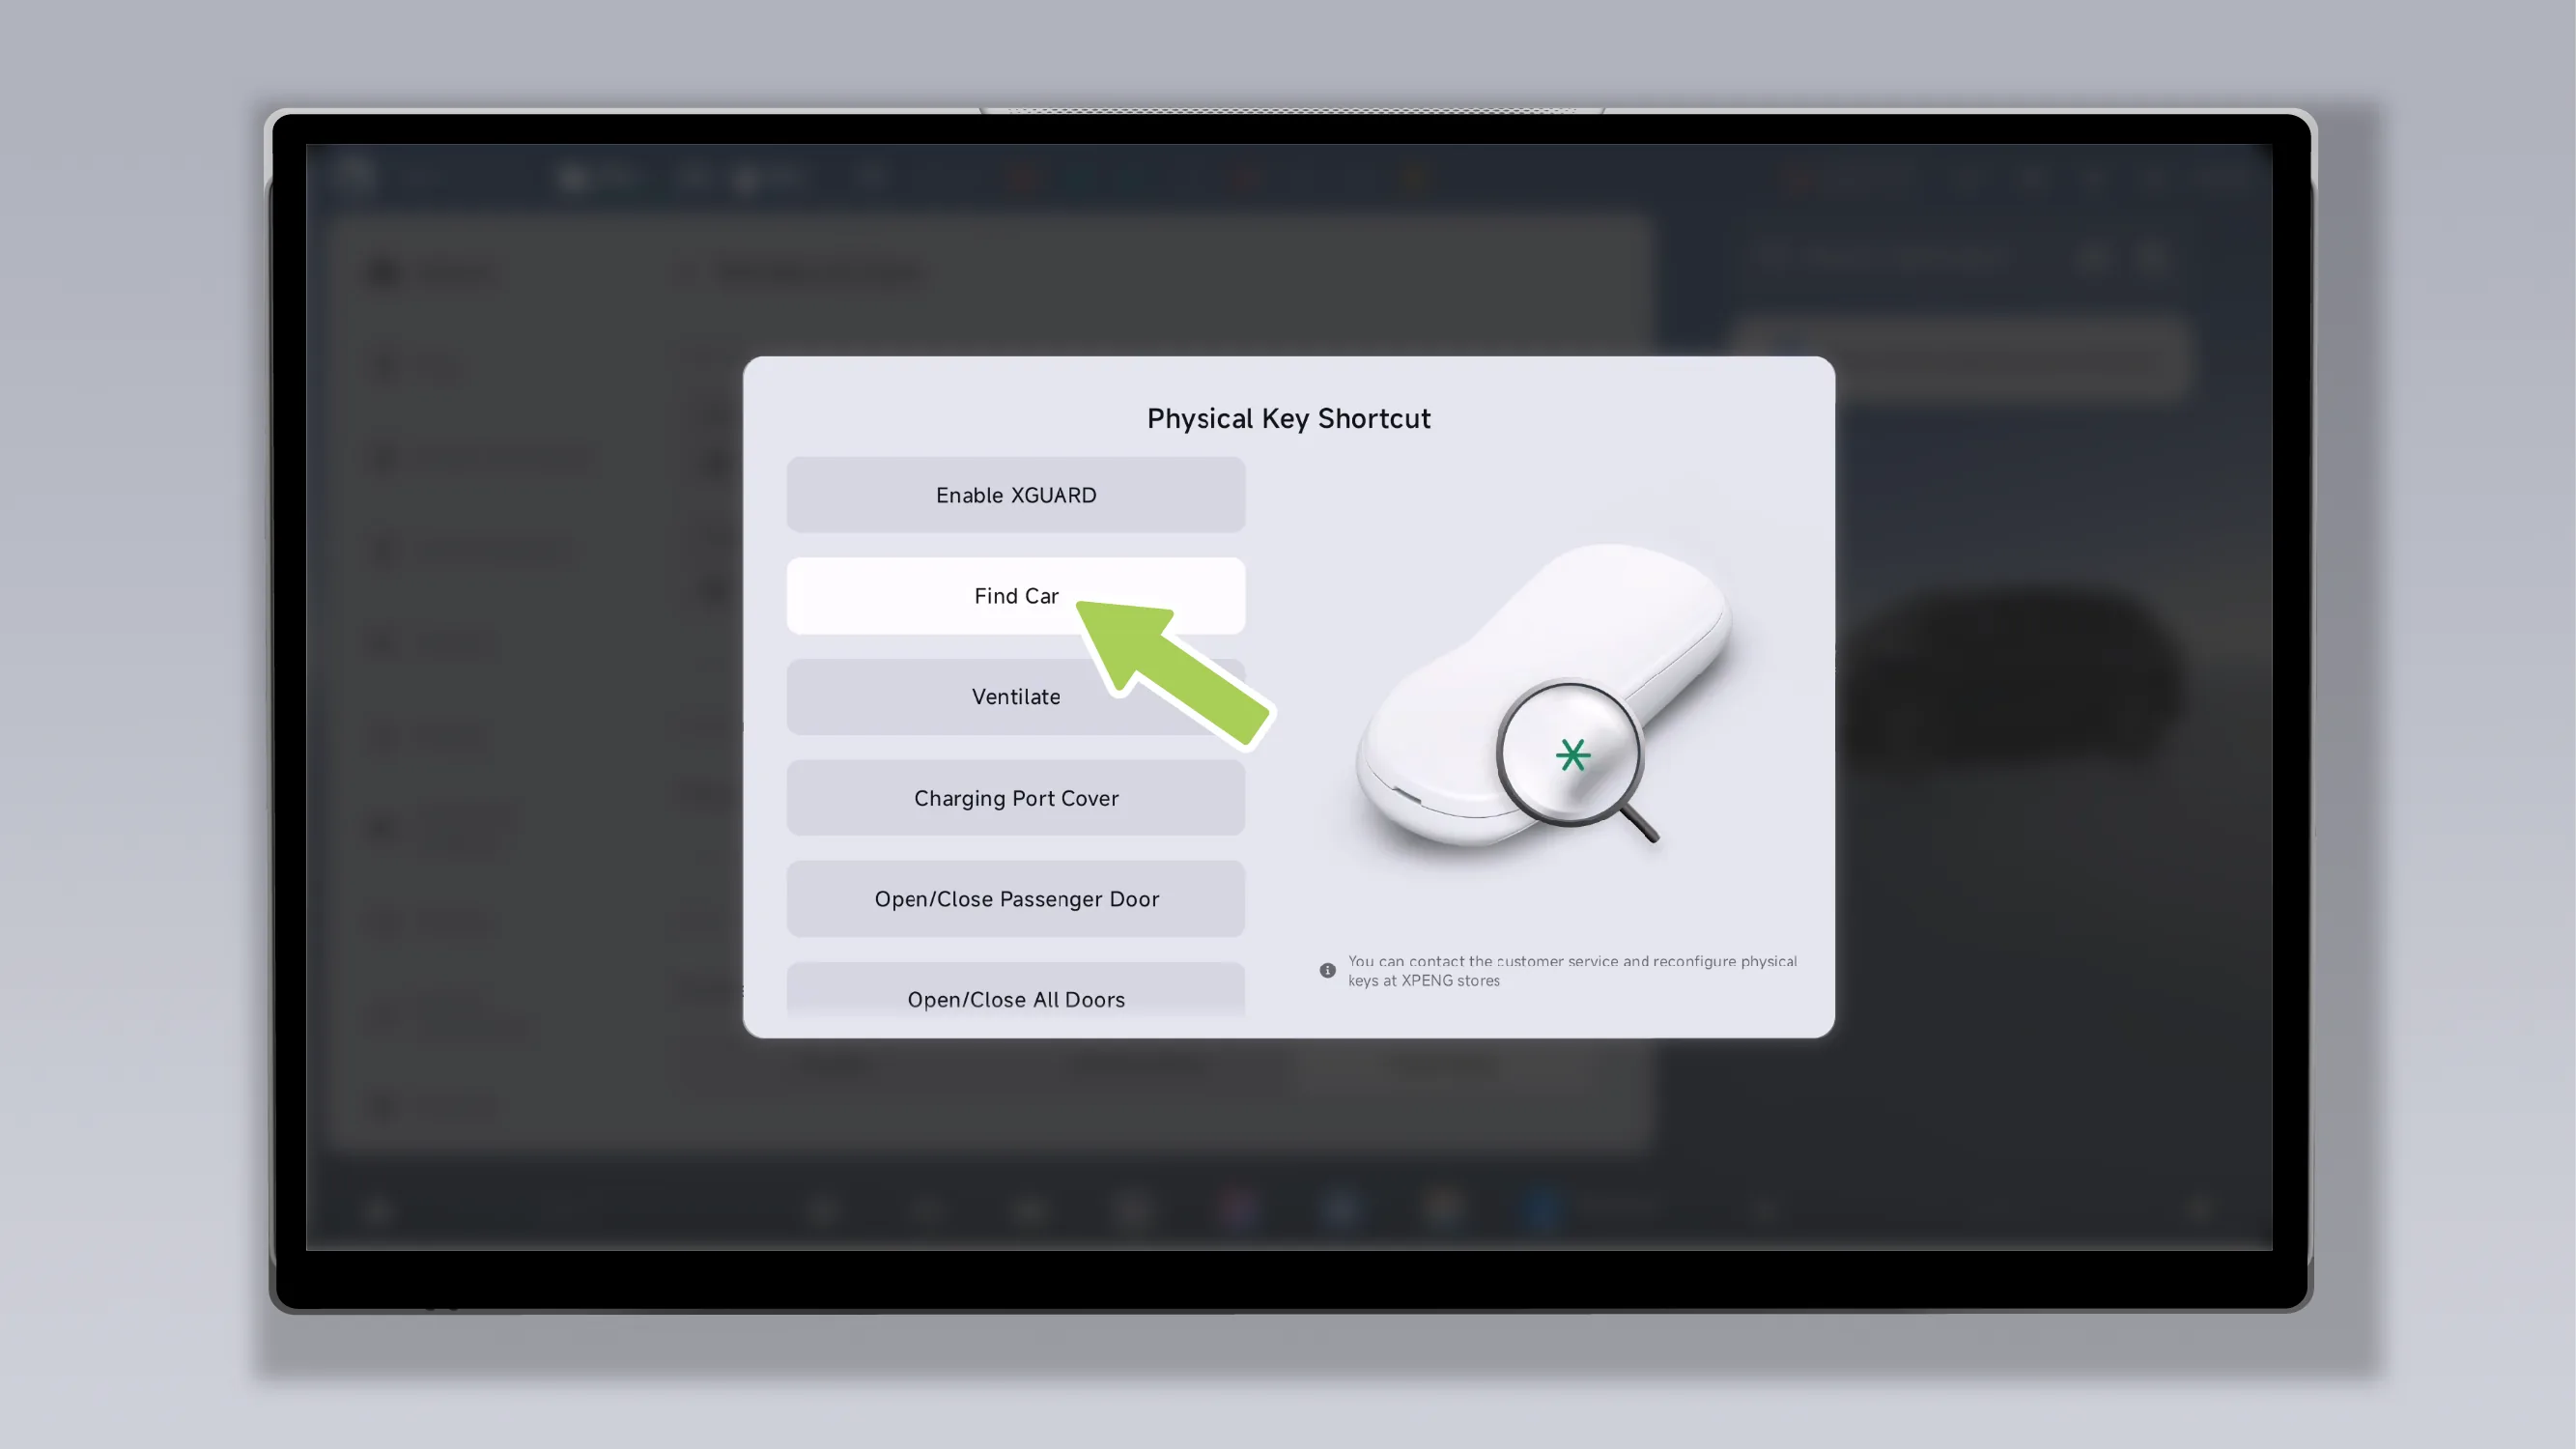
You can unlock or lock the vehicle from inside the vehicle in the following ways.
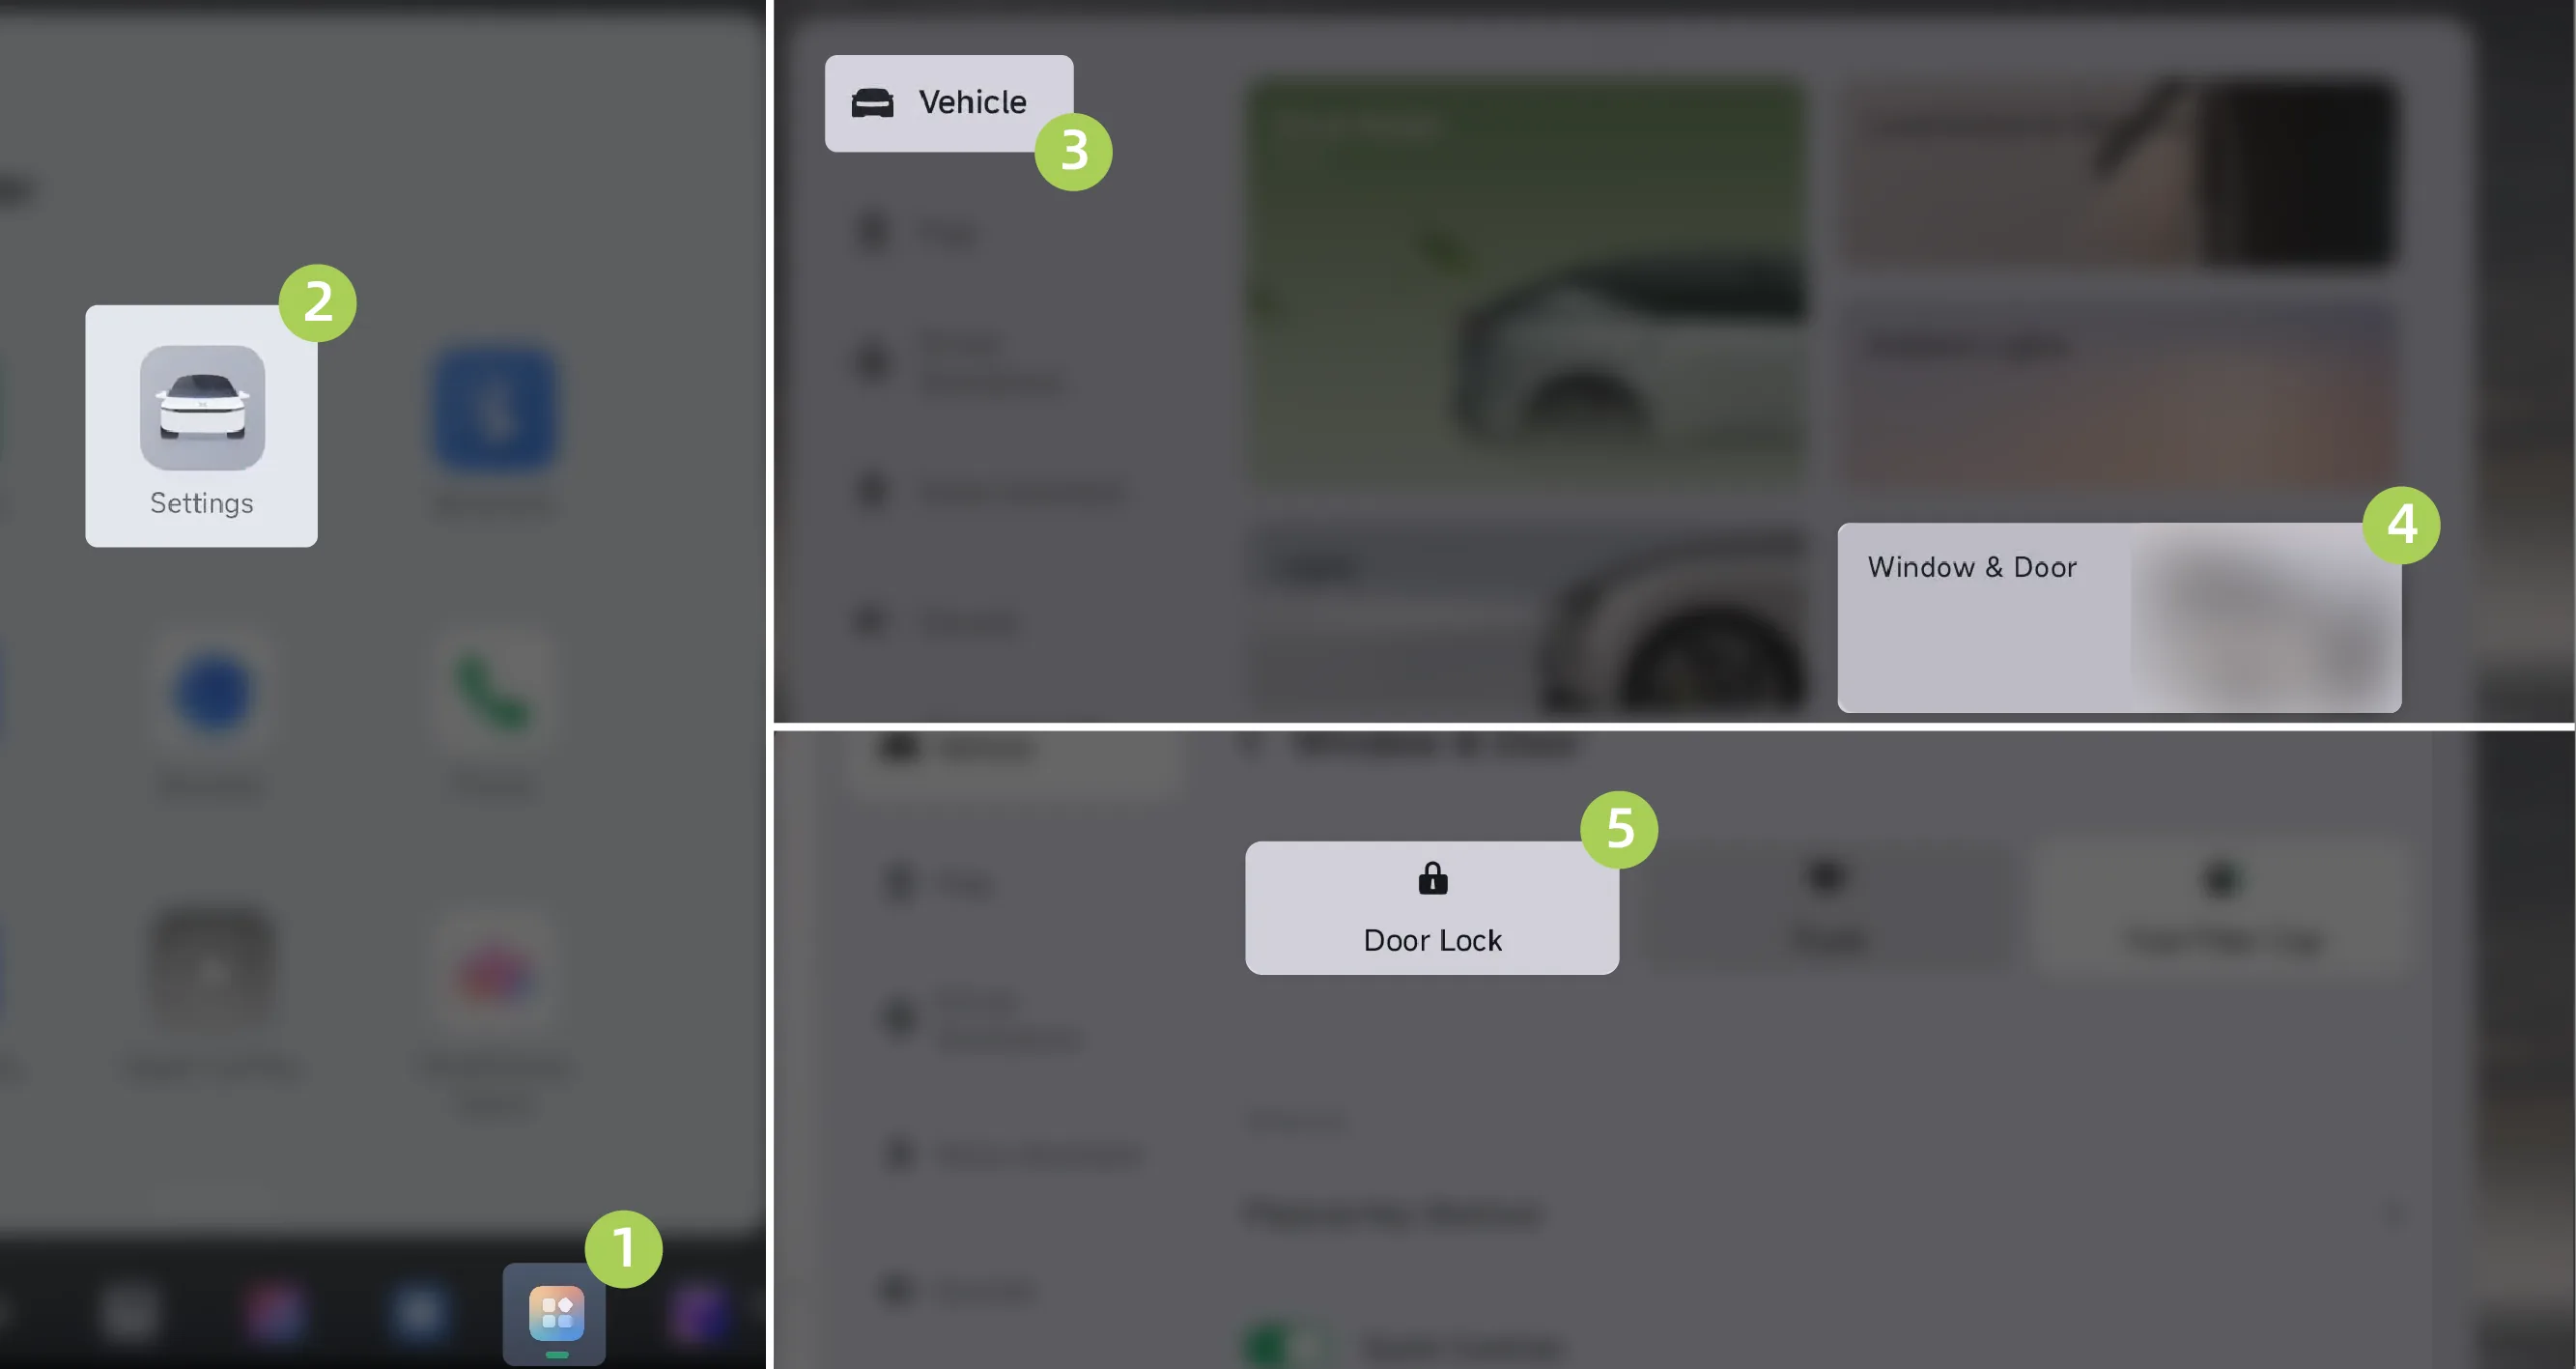
On the center display screen “ →Settings→vehicle→Doors and Windows”Interface, tap “  Door Lock ”Press the button to unlock or lock the doors.
Tap on the center display. “ ”Enter the Control Center screen and tap Tap the icon to unlock or lock the doors.
On the central control screen SR interface, tap the central locking icon below the 3D vehicle model to unlock or lock the doors.
Tap the bottom taskbar on the center display. Tap the icon to unlock or lock the doors (for information about the custom bottom taskbar, refer to the Custom Bottom Taskbar section).
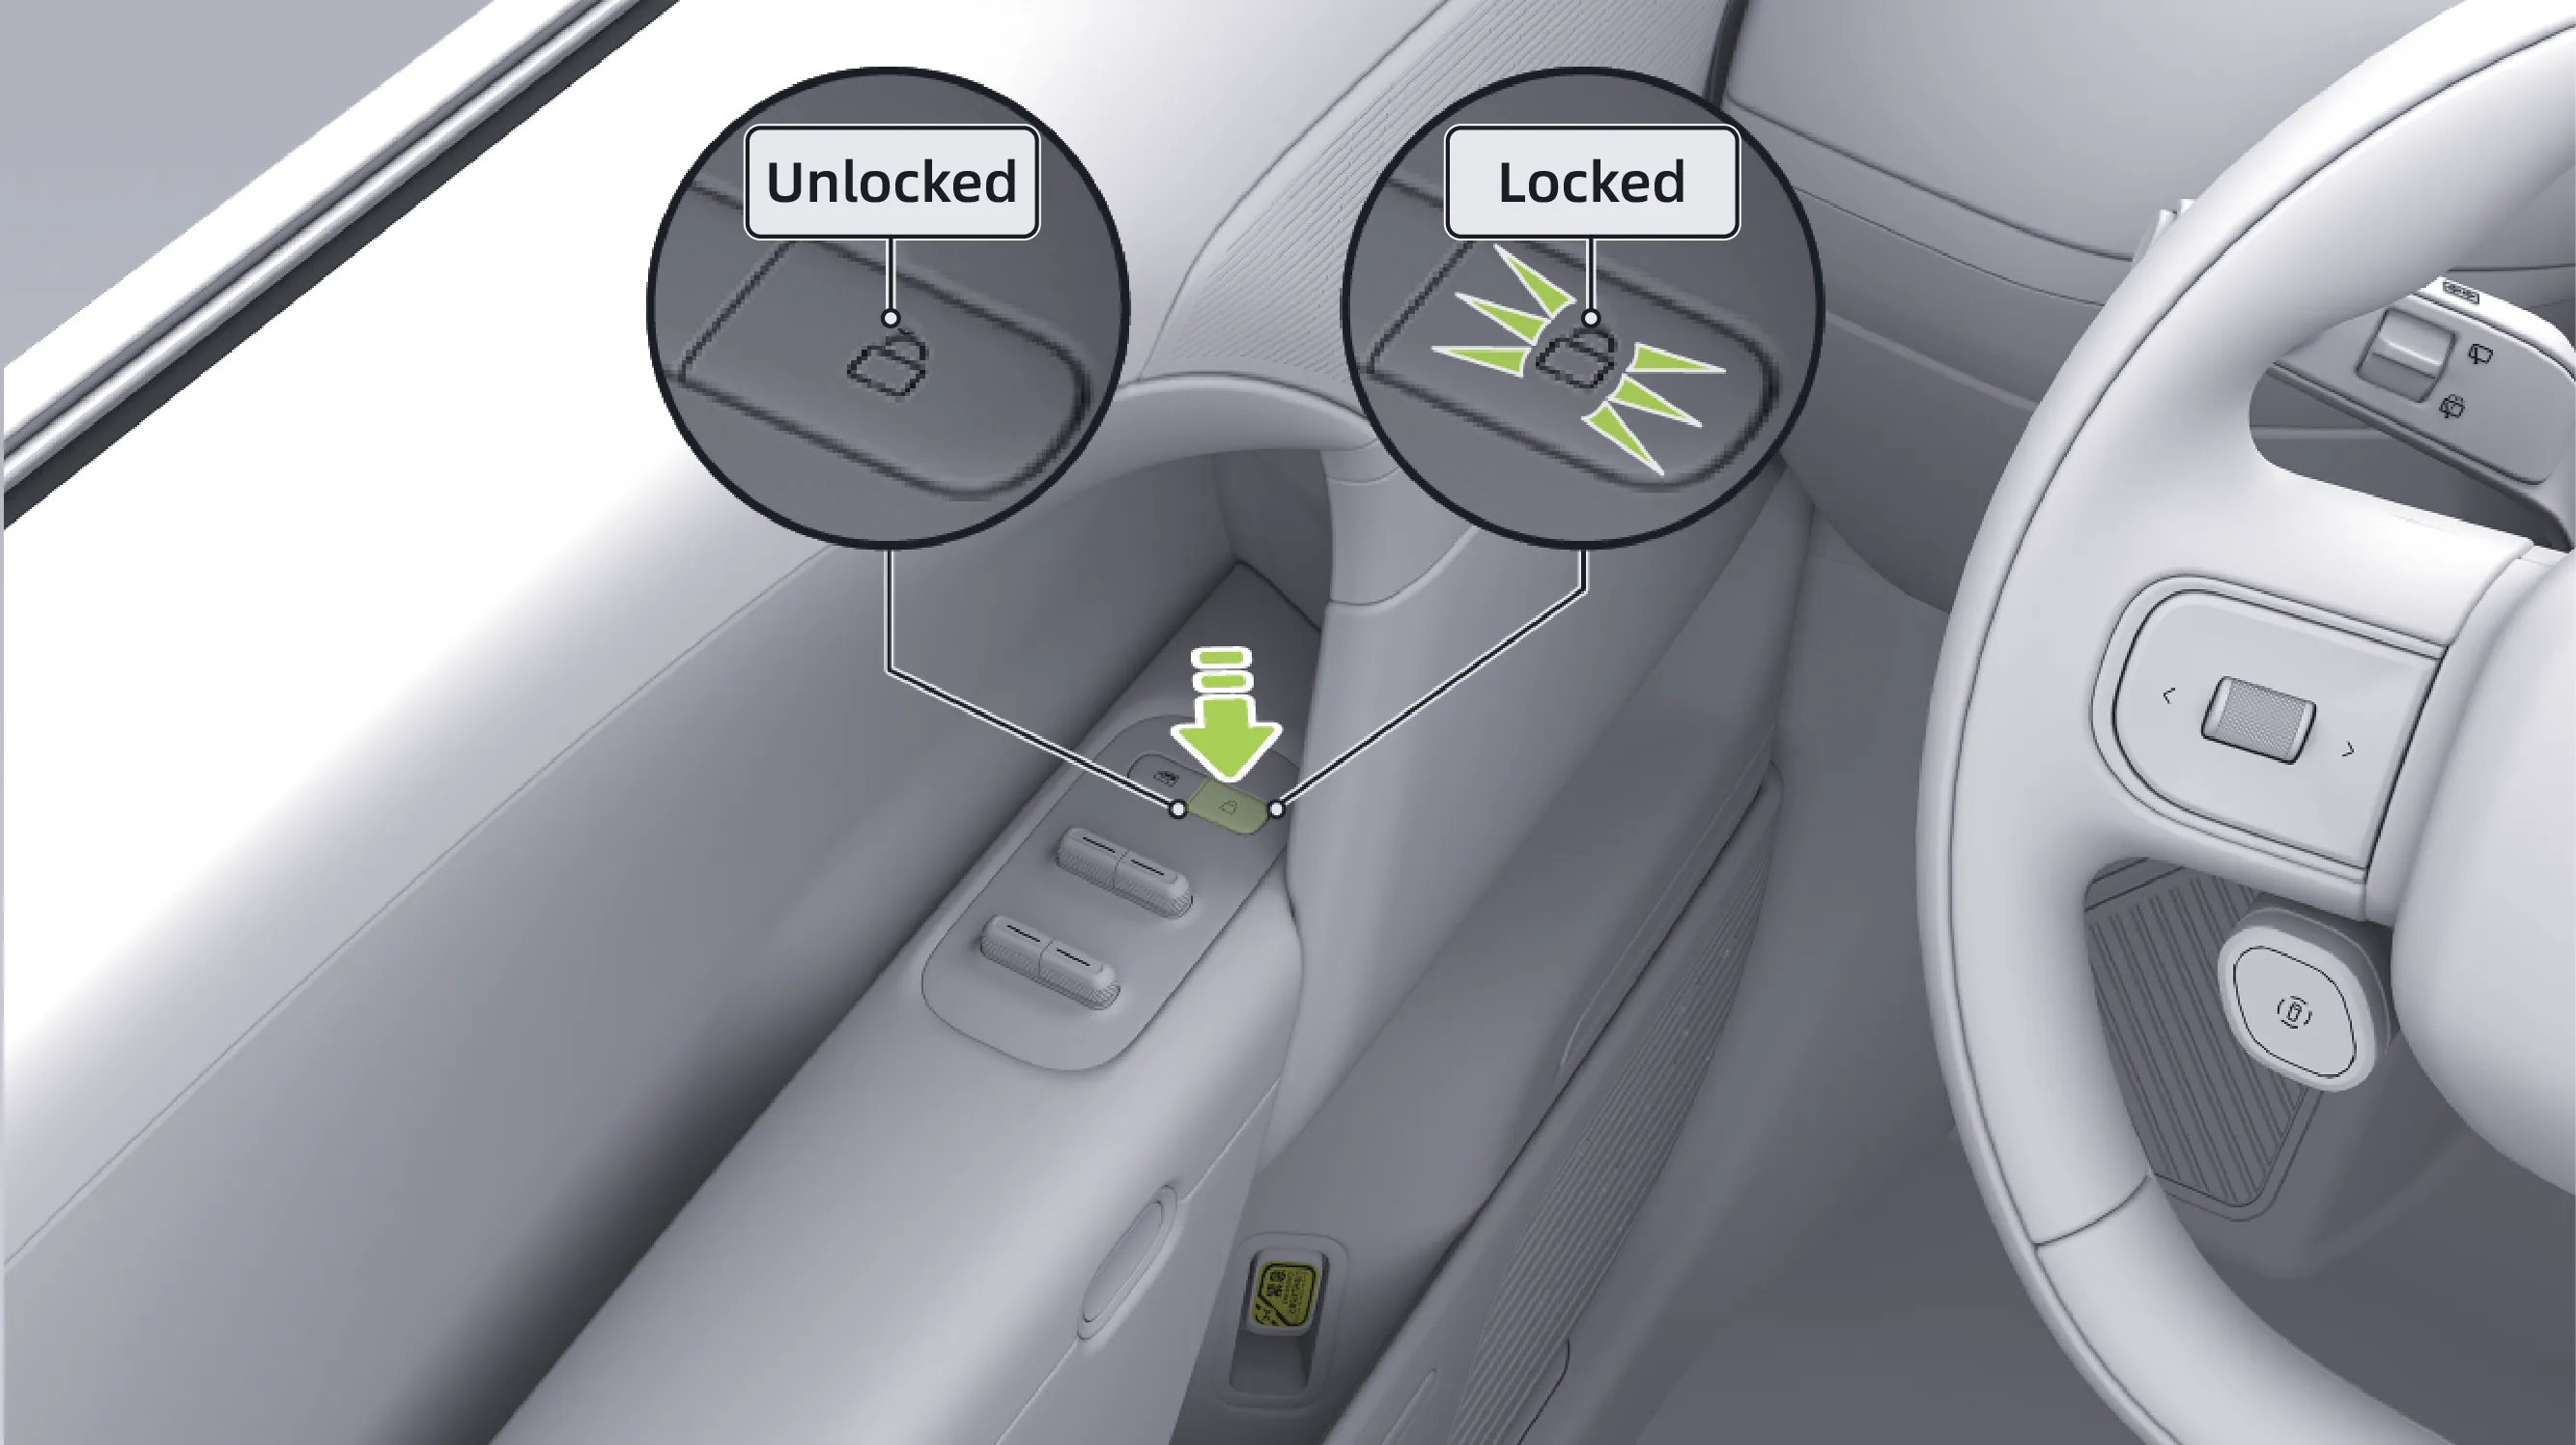
When the vehicle is locked, press the door lock button to unlock the vehicle;
When the vehicle is unlocked, press the door lock button to lock the vehicle. The indicator light in the door lock button illuminates amber.
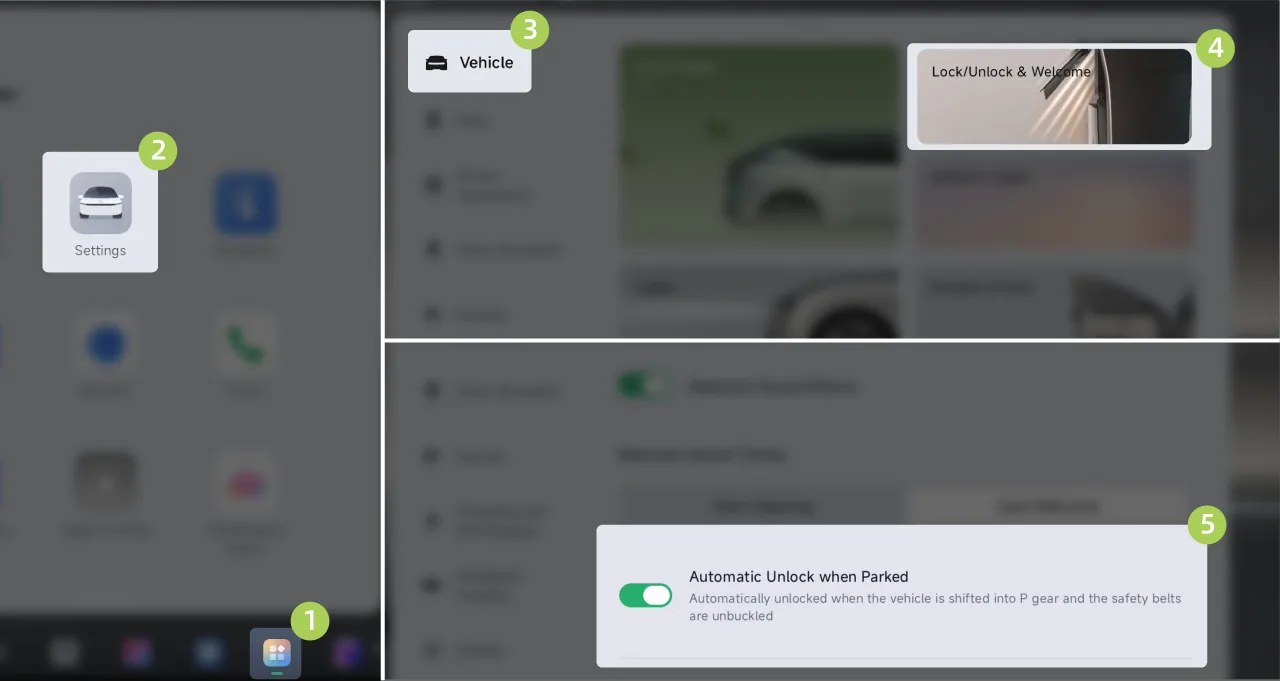
On the central control screen “ →Settings→vehicle→Unlocking/Locking and Welcome”Interface, where On/Off can be selected 。
Tips You can also turn Automatic Unlock when Parked on or off using voice commands.
After the function is enabled, when the vehicle shifts to P gear and the (driver's) seat belt is unfastened, the door locks automatically unlock.
Tips The door locks are also automatically opened/closed if certain conditions are met:
Drive-in automatic locking: When the doors (including the boot) and the front compartment cover are closed, the door locks automatically lock if the vehicle speed is greater than 10 km/h.
Automatic door unlock: The door is opened from inside the vehicle (front power release door button/emergency open) and the door lock is automatically unlocked.
Automatic emergency unlocking: The door locks automatically when the vehicle is involved in a collision or in an emergency such as a thermal loss.
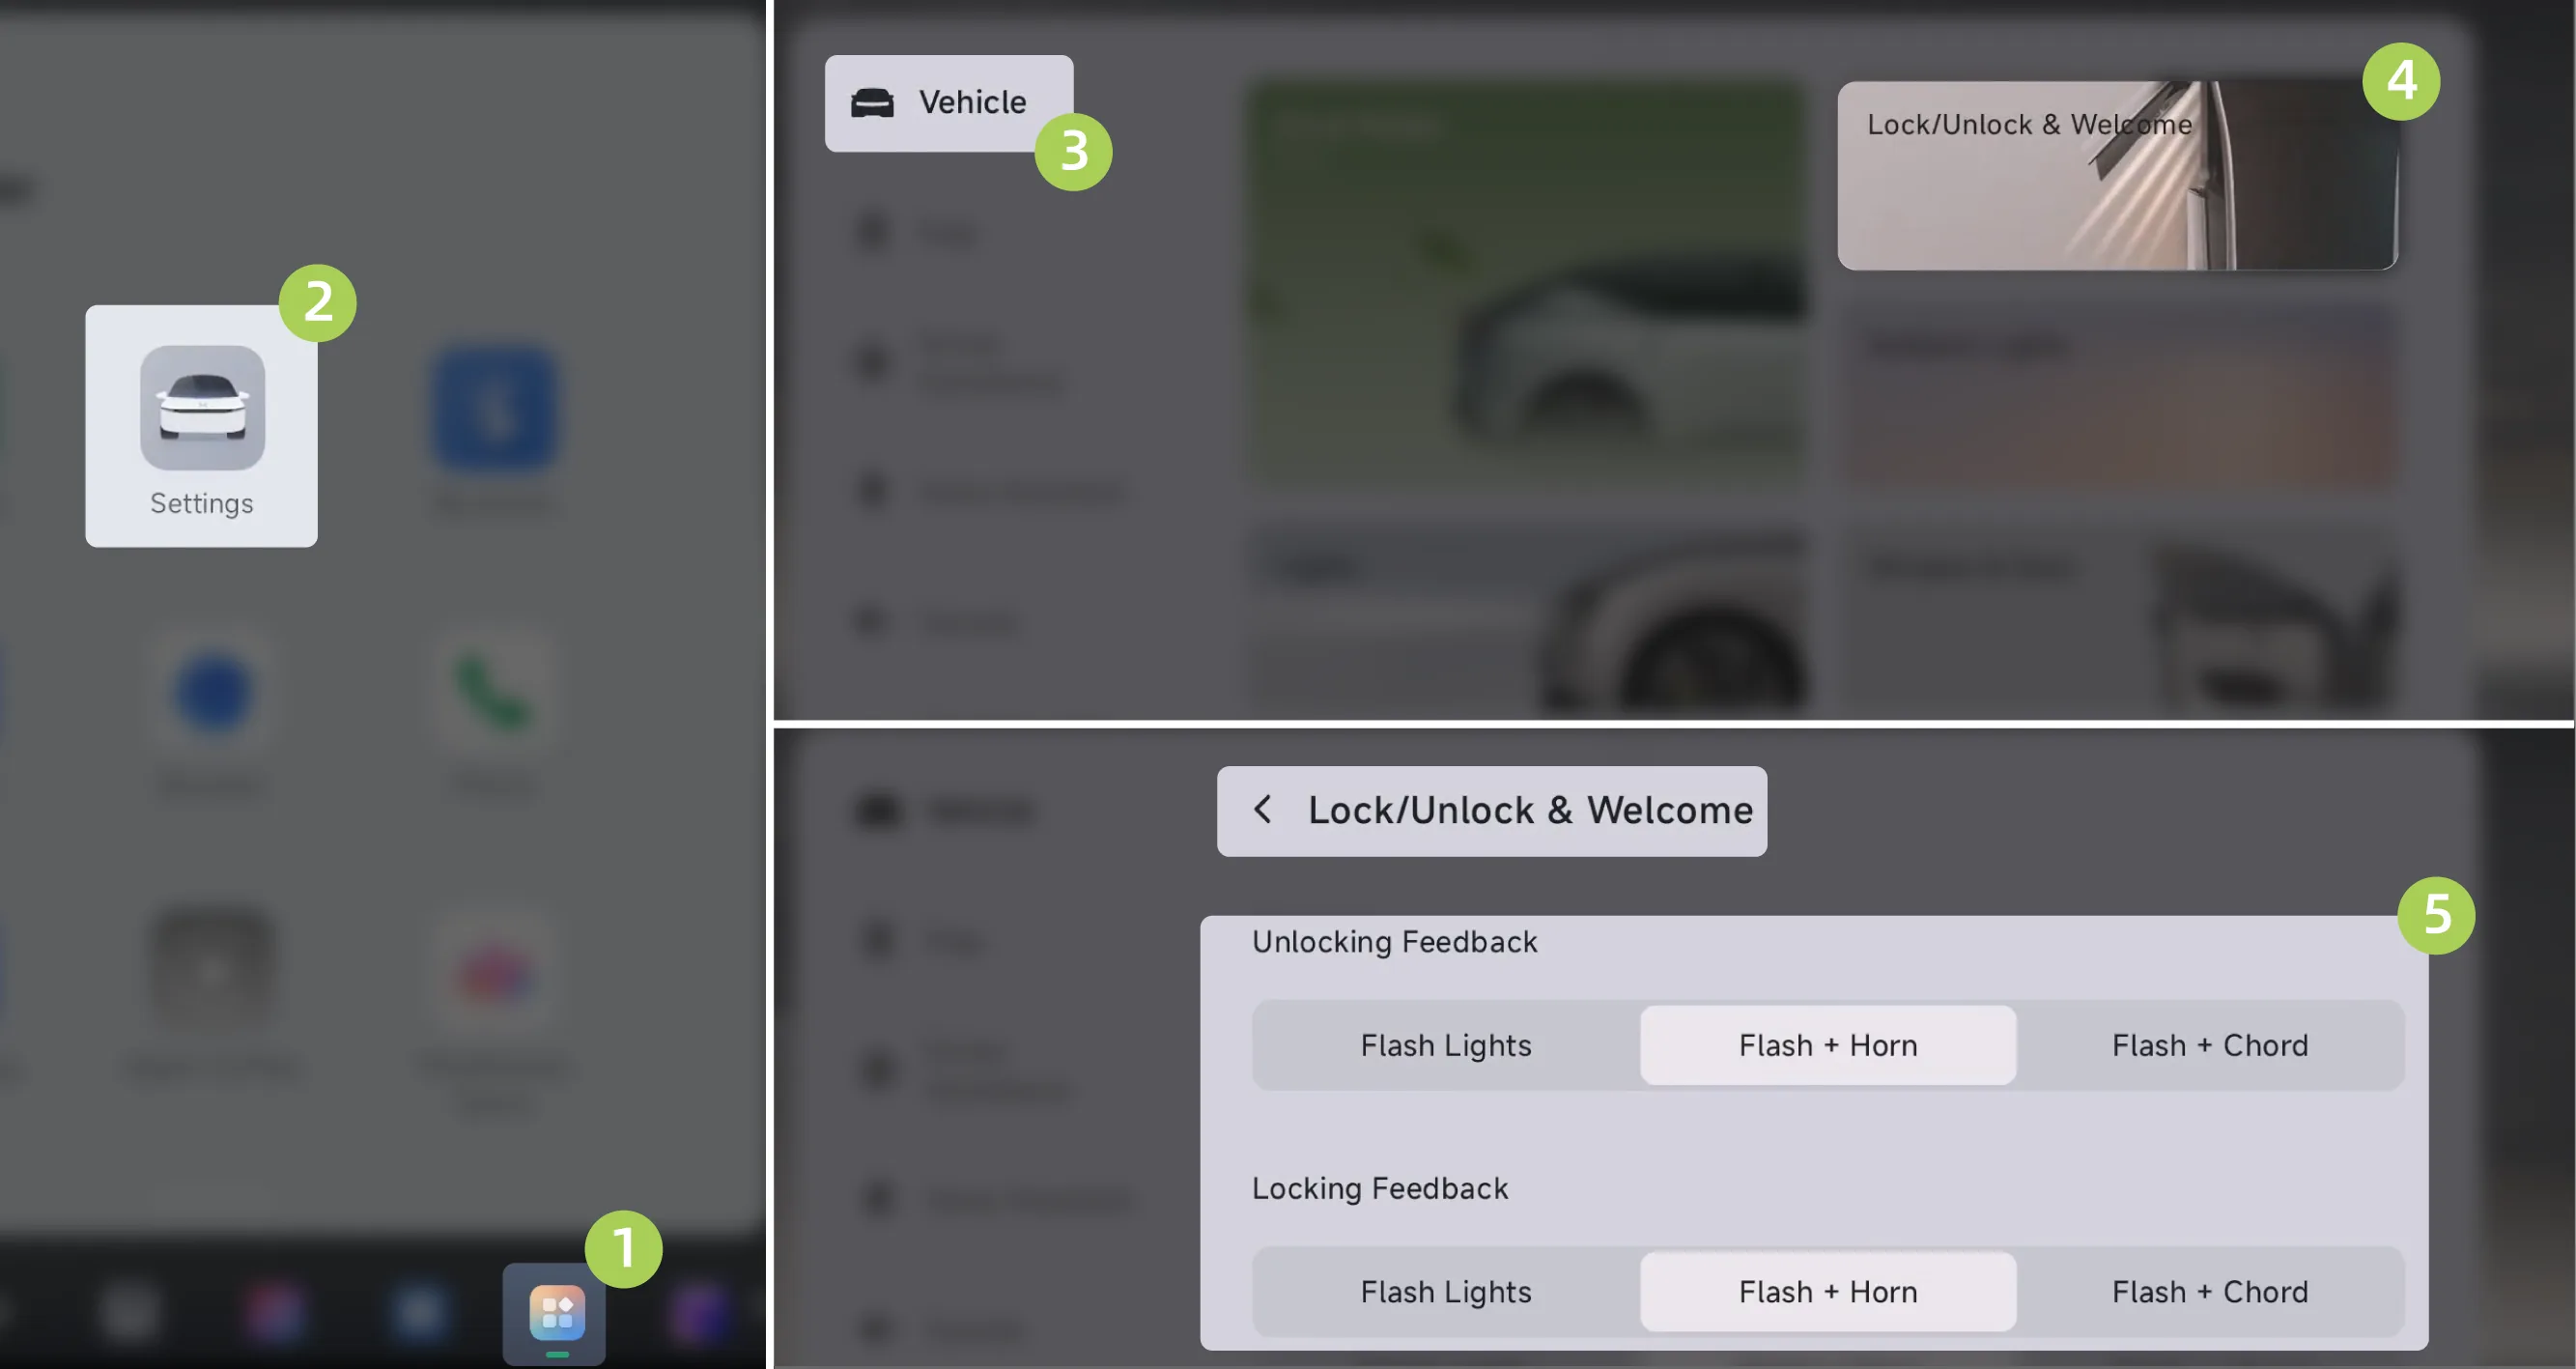
On the center control screen “ →Settings→vehicle→Unlocking/Locking and Welcome”On the interface, you can set the unlock and lock feedback methods.
Flashing lights: When the vehicle is unlocked, the turn signals will flash twice. When the vehicle is locked, the turn signals will flash once.
Flashing lights + honking: While the turn signal is flashing, a horn sound is emitted.
Flashing lights + chord: While the turn signal is flashing, a musical sound is emitted.
The vehicle is equipped with a rich and diverse scene-based light signal system, and you can choose to enable the light signals according to actual needs.
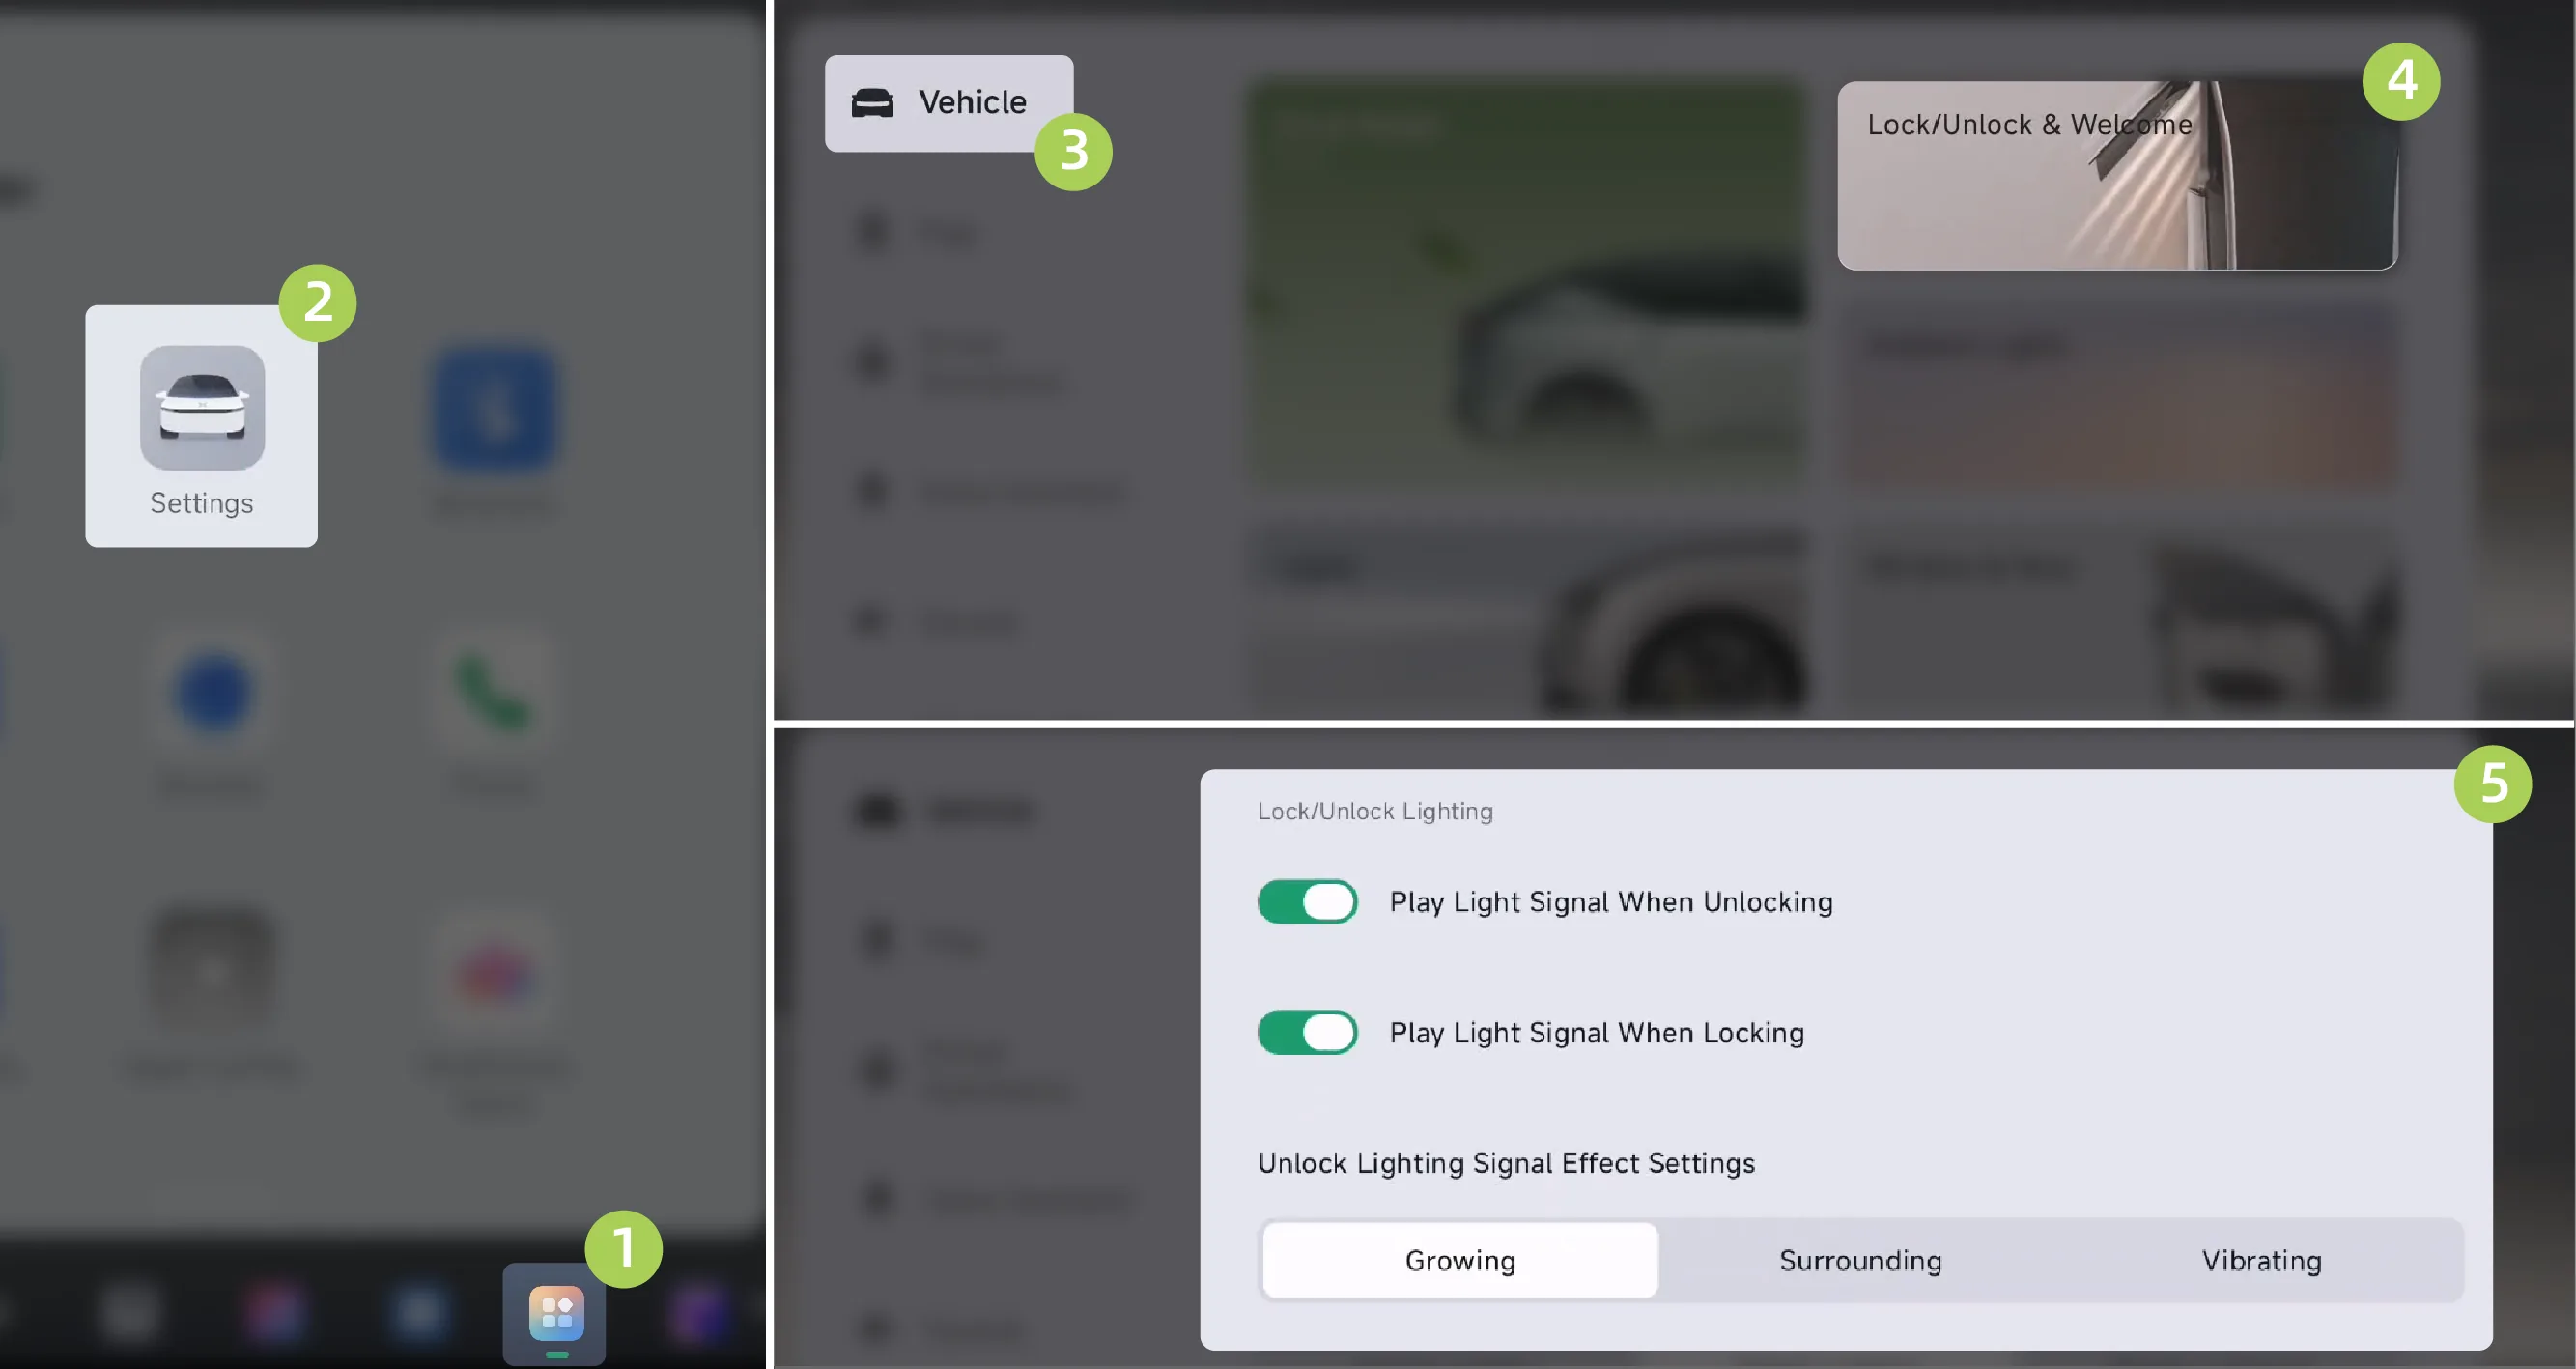
On the center display screen “ →Settings→vehicle→Unlocking and Welcome”Interface, set Light Signals to play when unlocking and locking:
Play Light Signals on Unlocking: After this function is enabled, the vehicle exterior plays the unlocking Light Signals effect when the vehicle is unlocked.
Play Light Signals When Locked: After this function is enabled, the vehicle exterior plays the lock Light Signals effect when the vehicle is locked.
Unlock/Lock Light Signals Effect Settings: The vehicle provides Three unlock/lock Light Signals effects are available, and you can set them according to your personal preference.
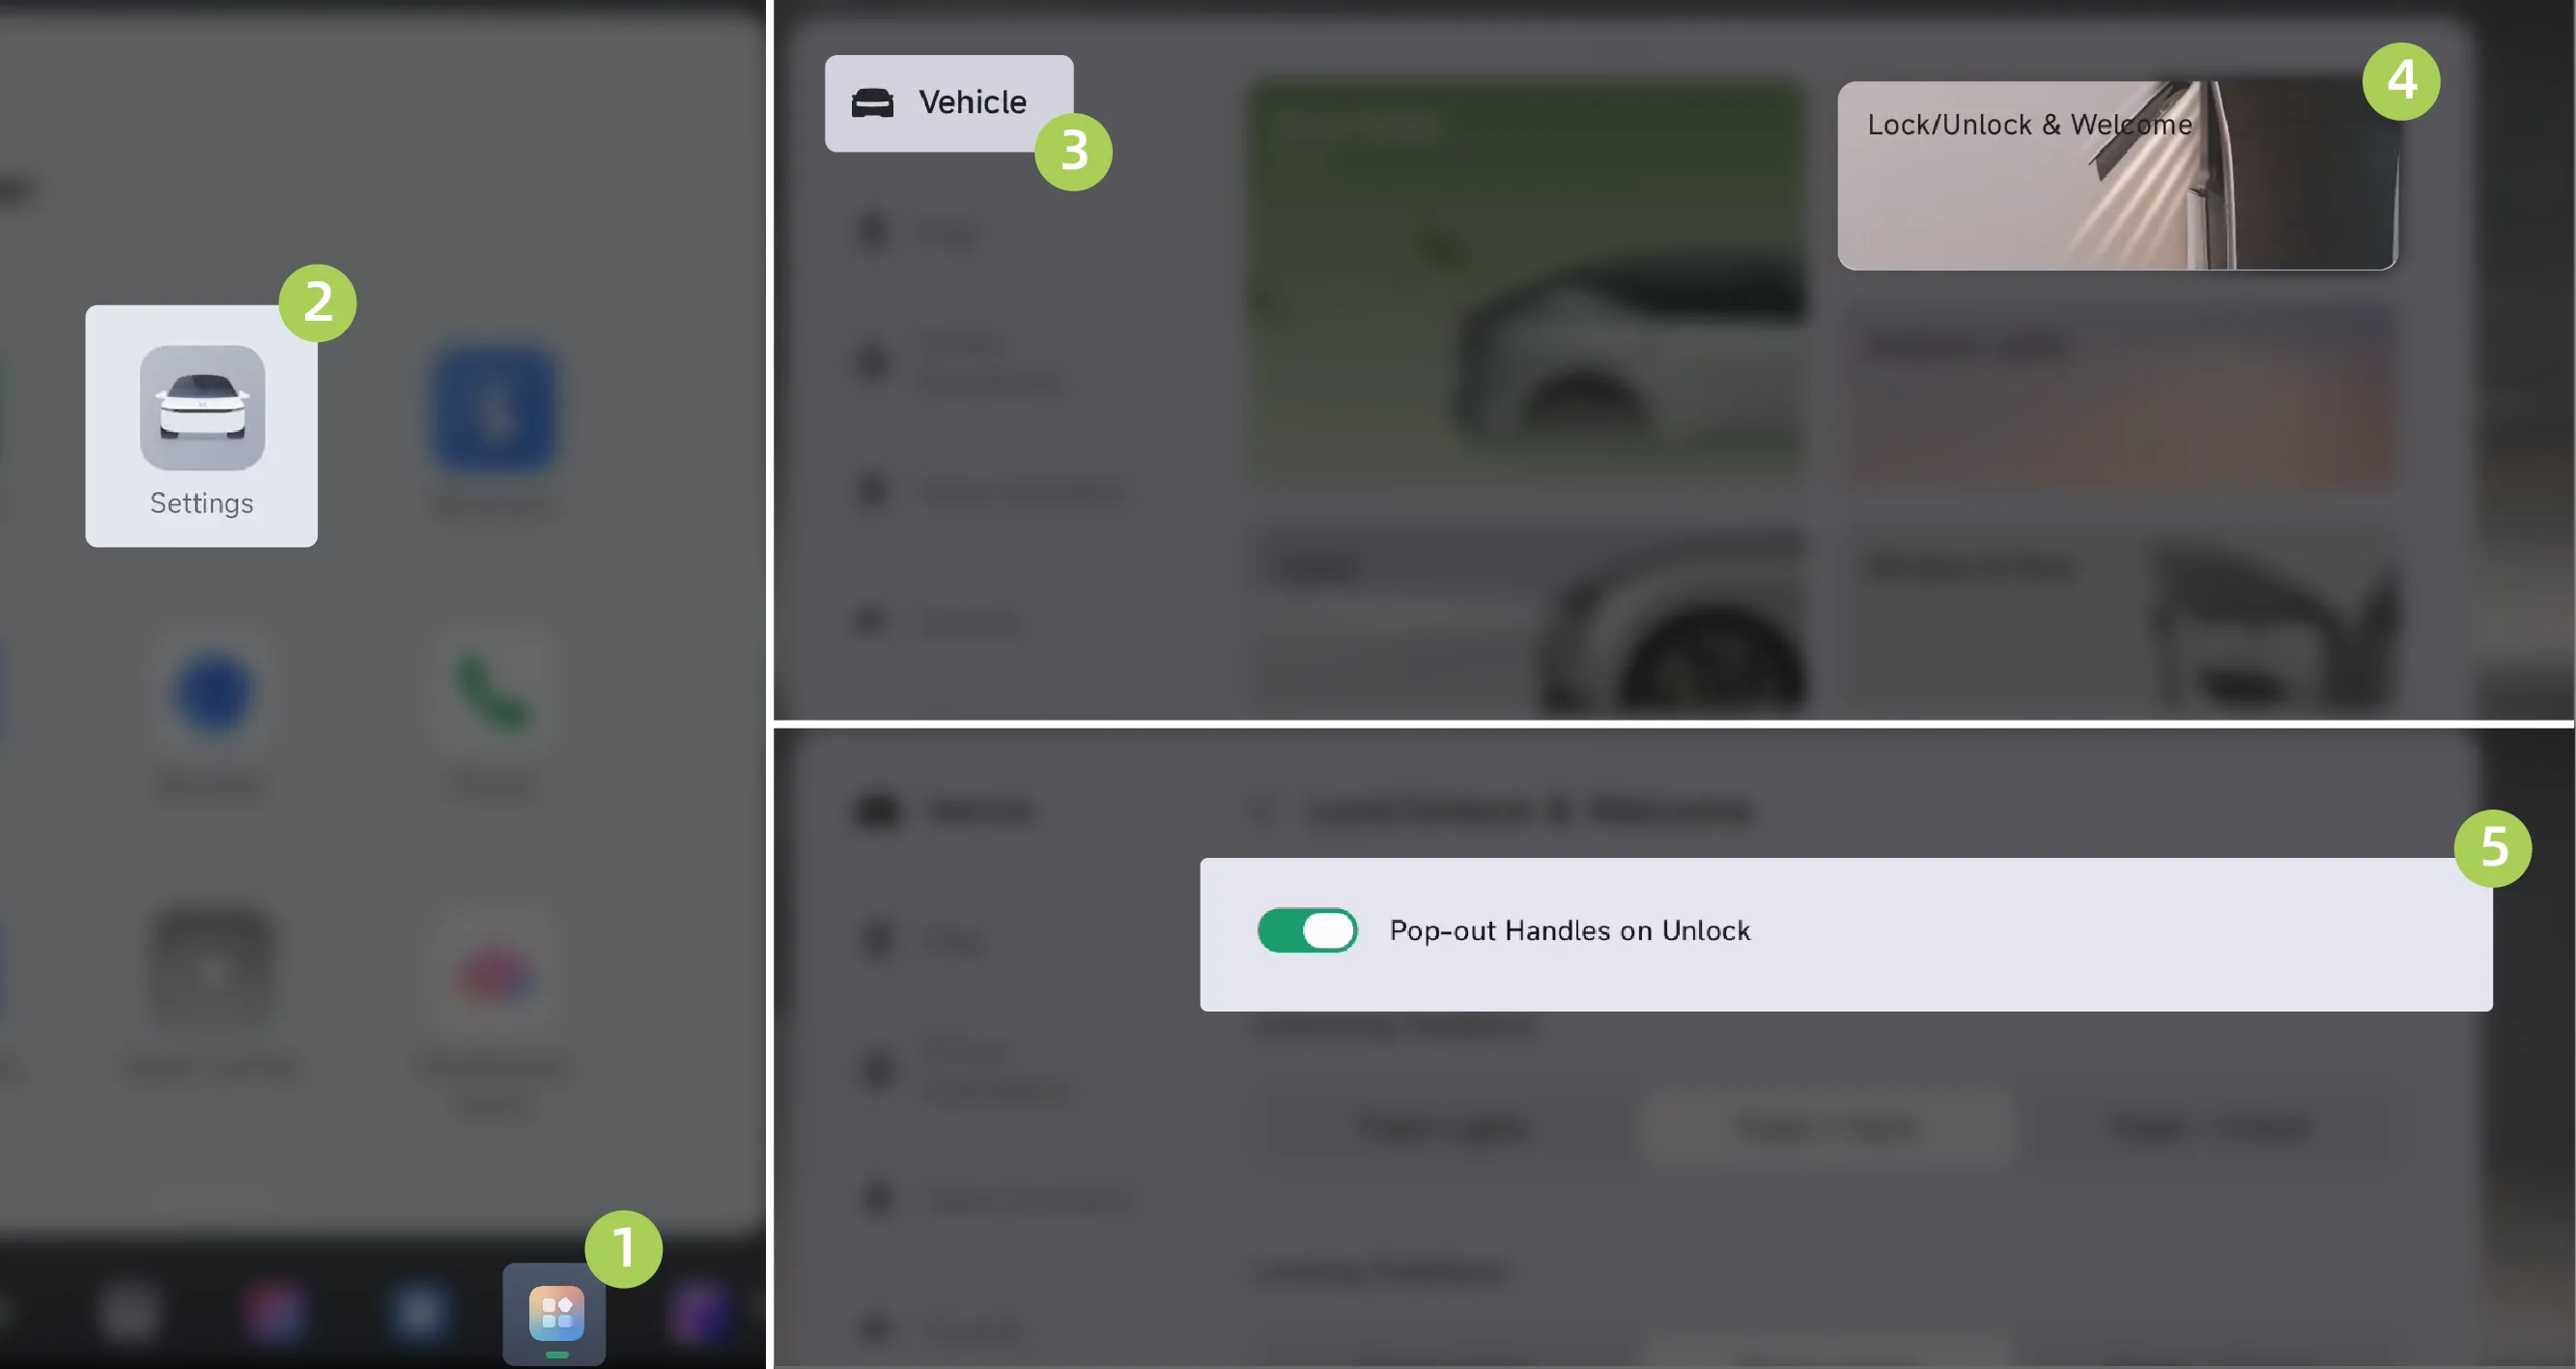
You can on the central control screen “ →Settings→vehicle→Unlocking/Locking and Welcome”Interface, Open/Close Function. After this function is enabled, when the vehicle is unlocked, the door handles automatically extend.
Tips When the exterior door handle automatically pops out, the exterior door handle light automatically turns on; when the exterior door handle automatically retracts, the exterior door handle light automatically turns off.
Warning When using the door handles, be careful that fingers, jewelry, acrylic nails, etc. are not trapped by the door or door handle mechanism. Failure to do so could result in damage to objects or personal injury.
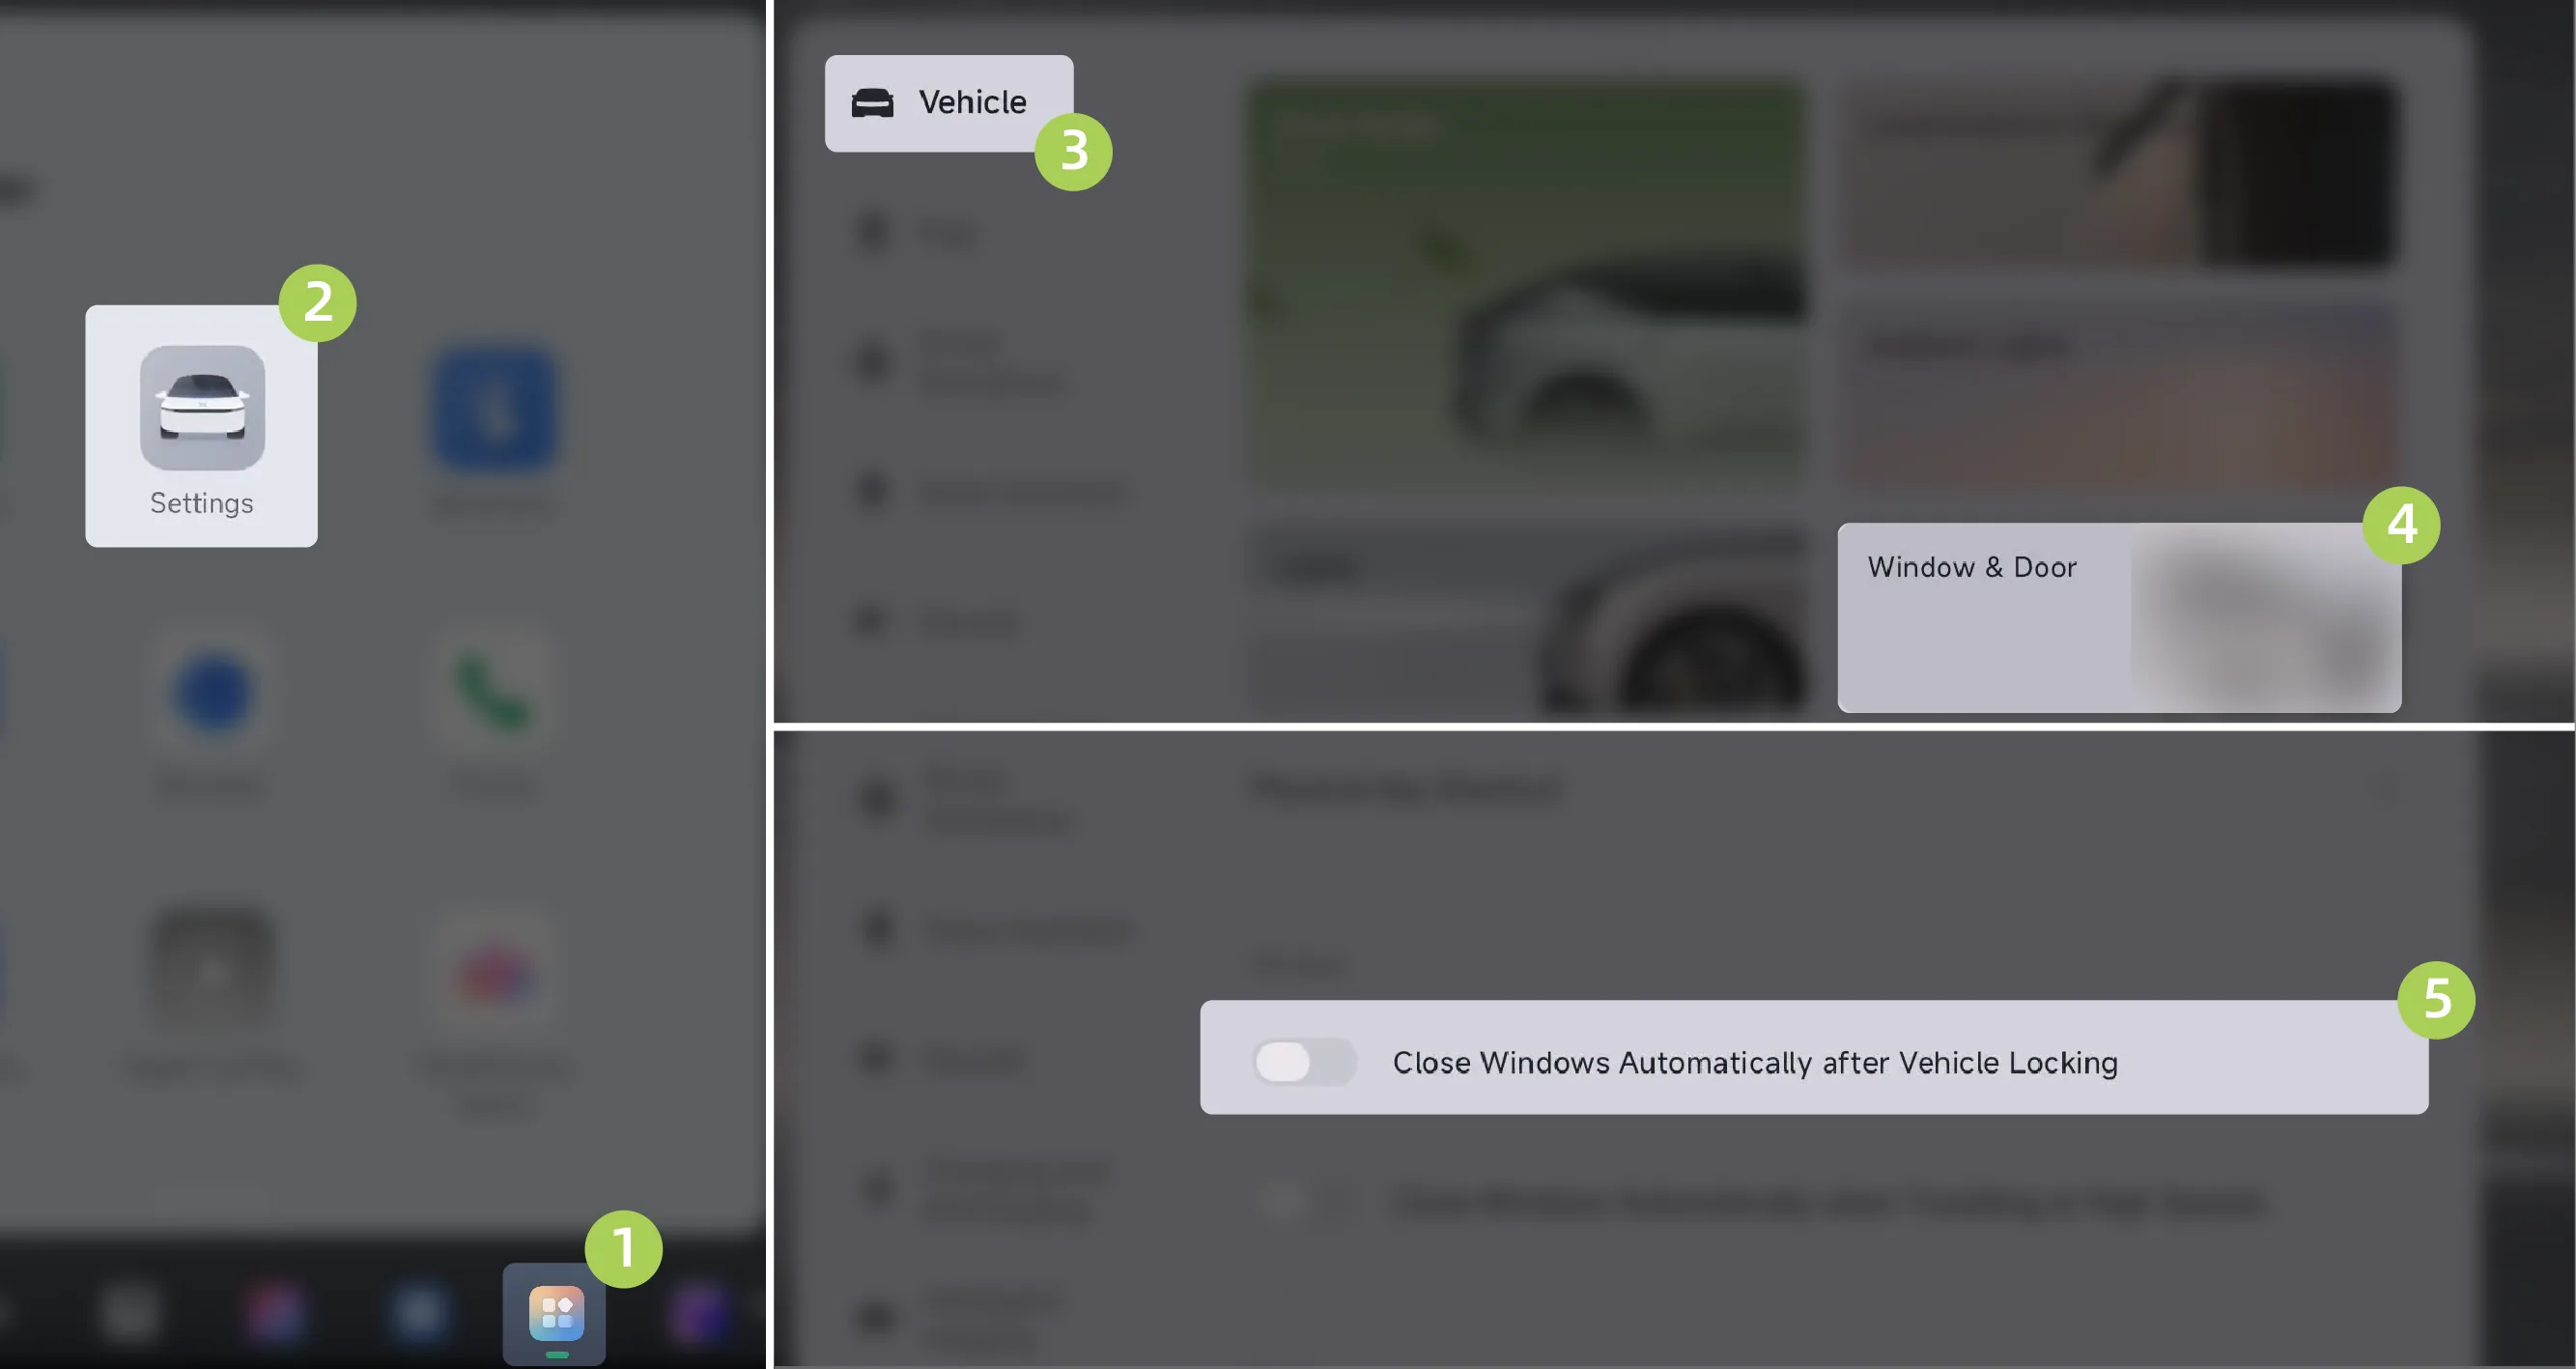
You can on the central control screen “ →Settings→vehicle→Doors and Windows”Interface, Open/Close 。
Warning When the automatic window locking feature is switched on, the windows will close automatically when the vehicle is locked, make sure that the windows do not jam occupants or obstructions and that there are no occupants in the vehicle, especially children. Then lock.
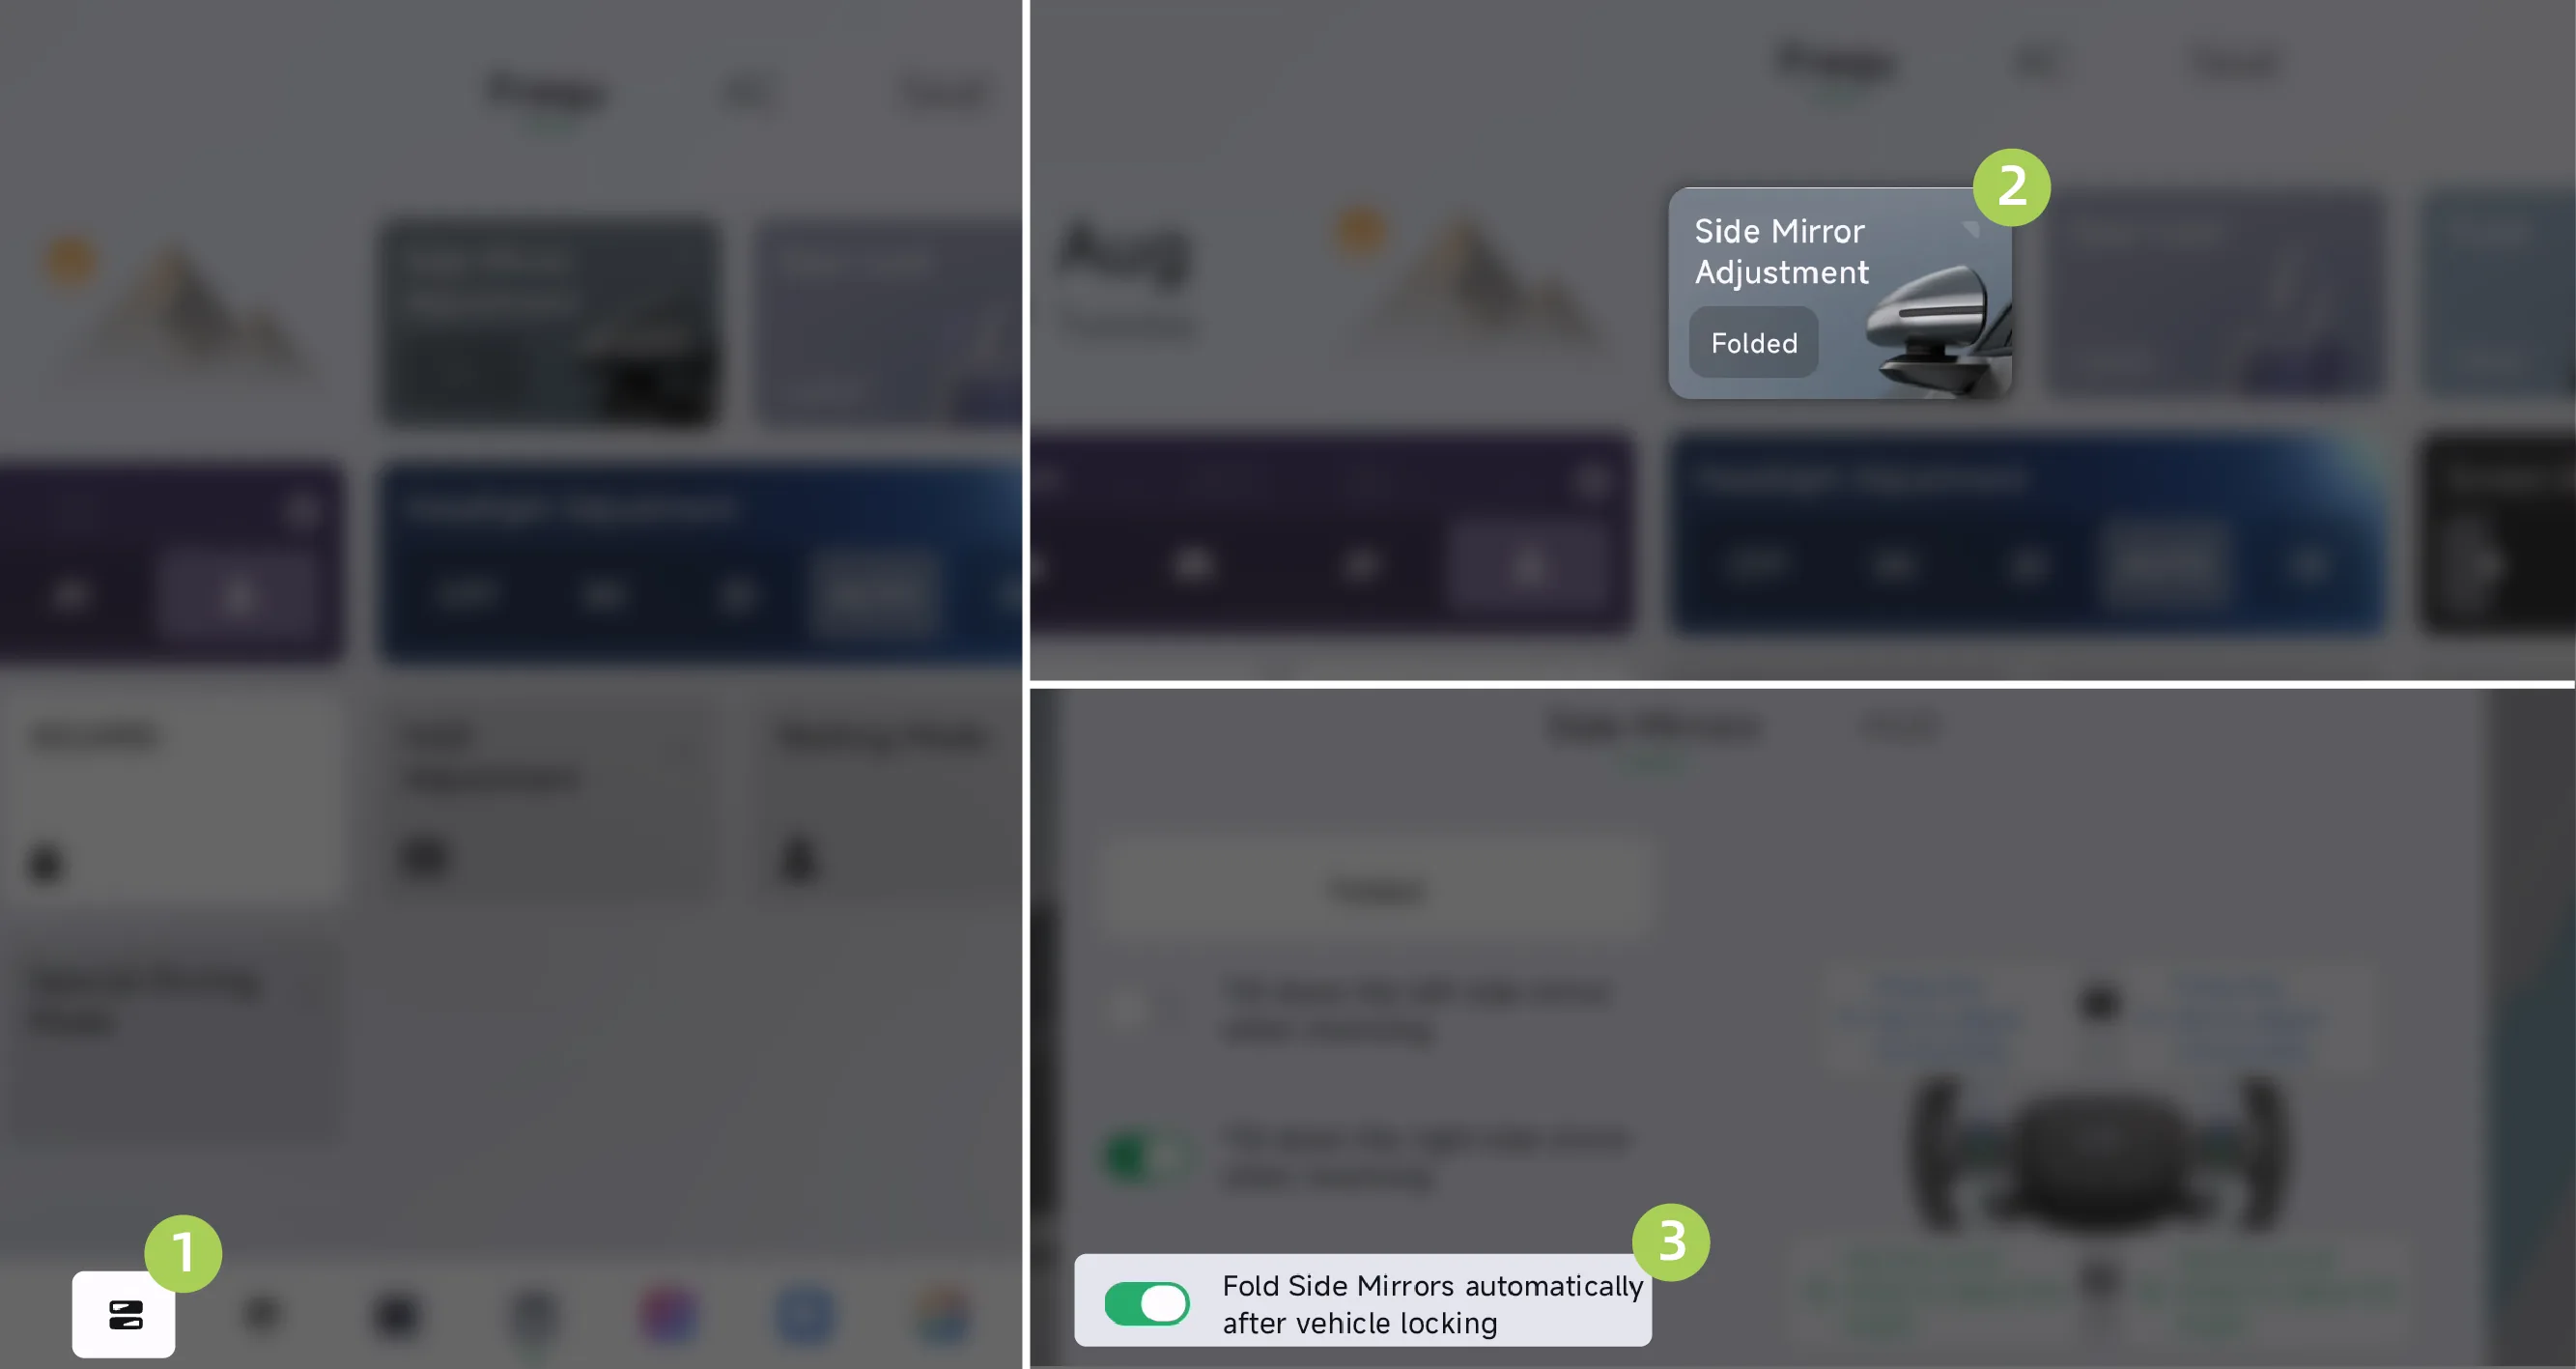
You can on the central control screen “ →Mirror Adjust”Interface, Open/Close 。
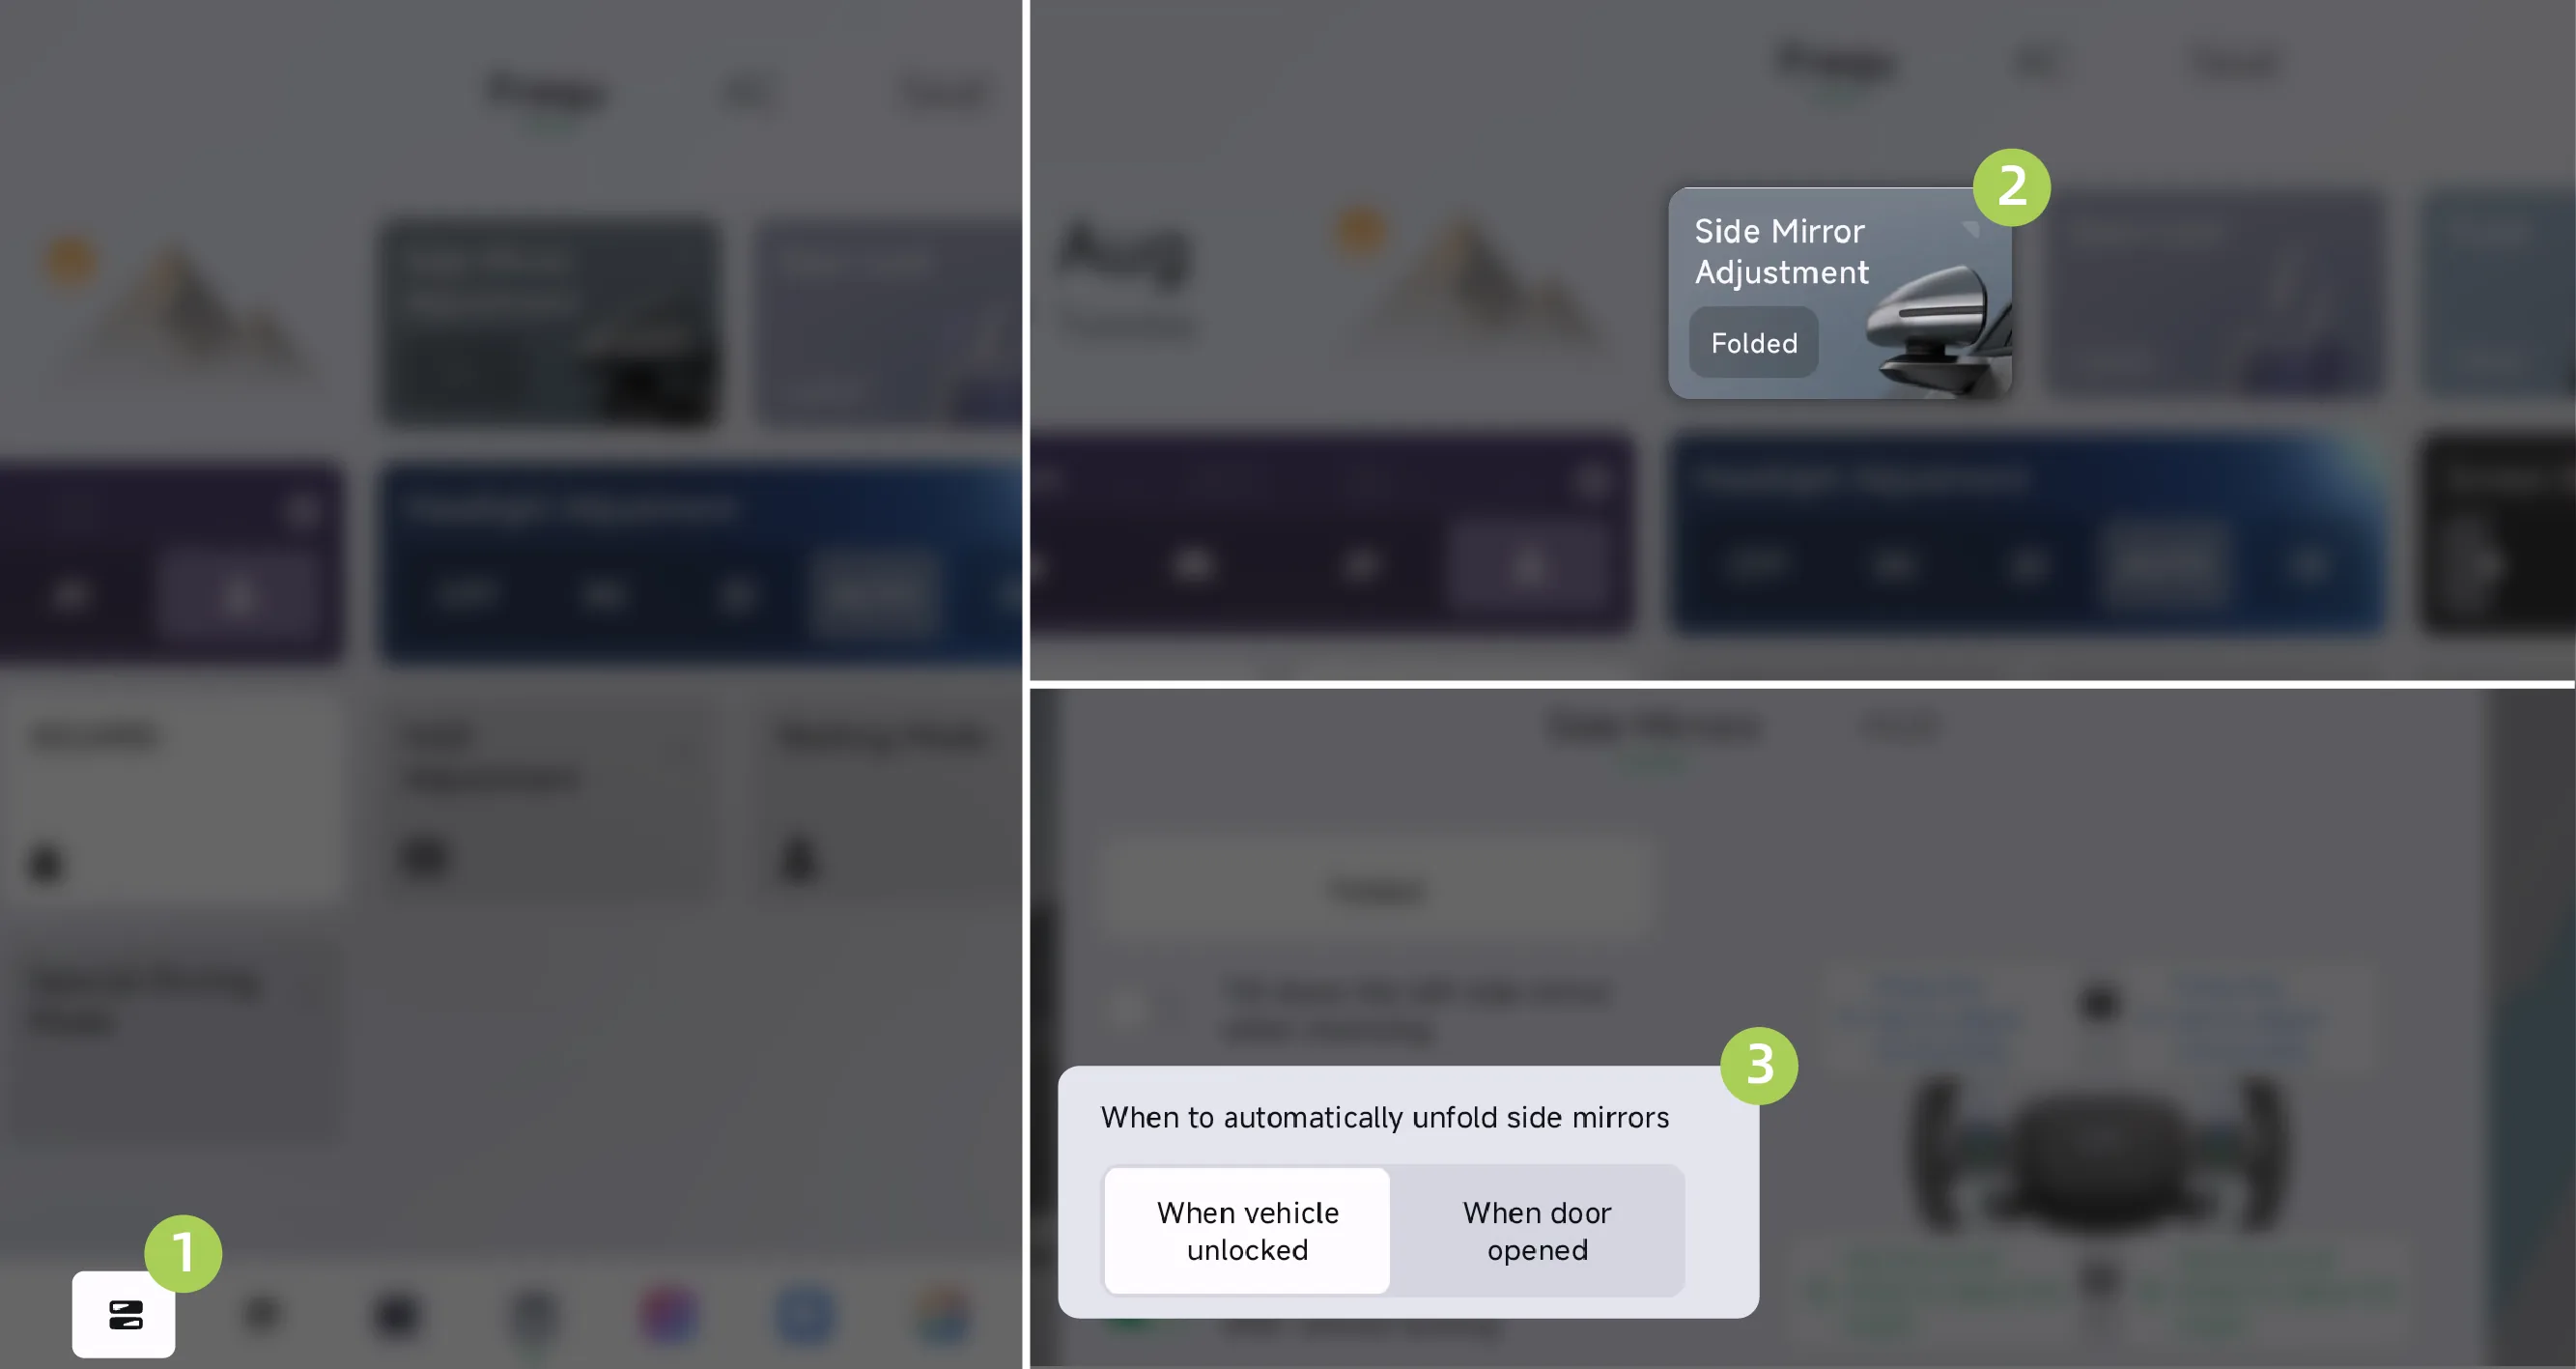
You can on the central control screen “ →Mirror Adjust”Interface, Settings for or 。
Set to , when the vehicle is unlocked, the Side Mirrors automatically unfold.
Set to After the vehicle is unlocked and the door is opened, the Side Mirrors automatically unfold.
When the anti-theft system is activated, if any door (including the trunk) or the front hood is opened, the anti-theft system will alarm through the horn and turn signals. After unlocking the vehicle, the anti-theft system alarm can be stopped.
Tips The anti-theft system alarm lasts for approximately 28 seconds and is re-timed if the doors (including the boot) or the front compartment lid are opened again.
Warning Modifications to the vehicle anti-theft system are prohibited, as this may result in the system not functioning correctly.
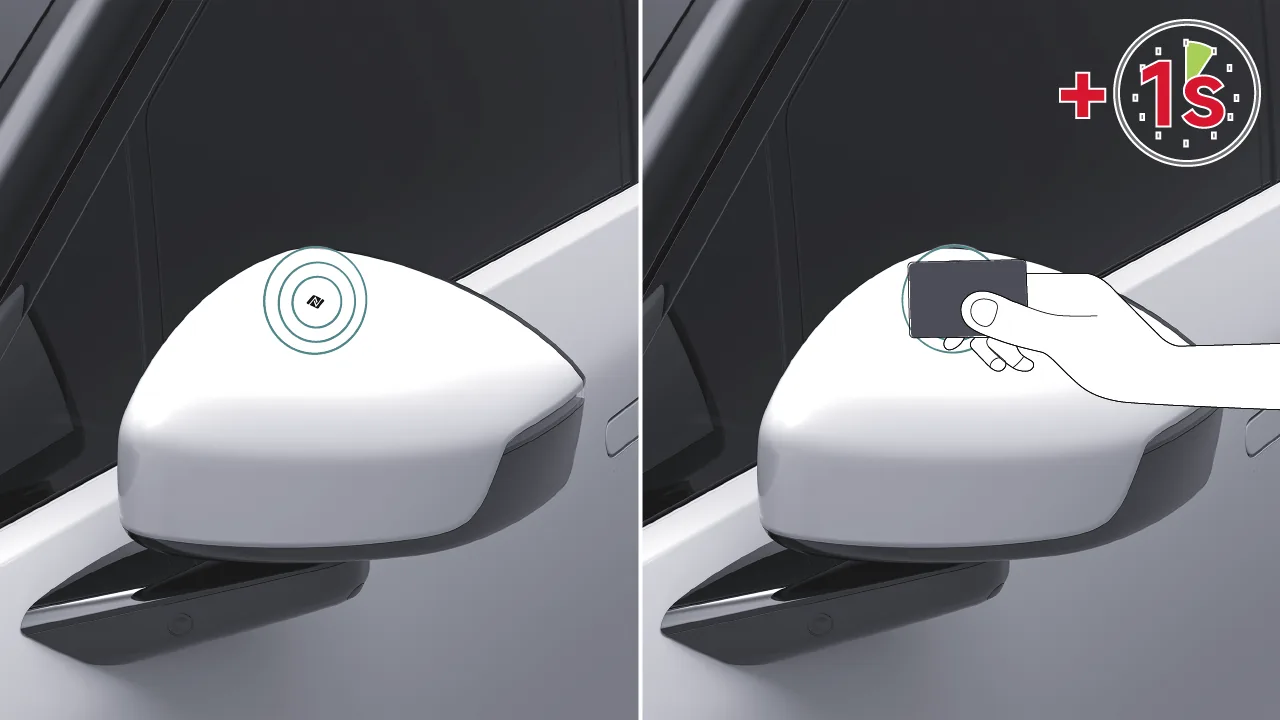
Unlocking: When the vehicle is locked, place the NFC key against the NFC key sensing area on the driver's side Side Mirror to unlock all doors.
Locking: When all doors (including the front hood and trunk) are closed, place the NFC key against the NFC key sensing area on the driver's side Side Mirrors to lock all doors.
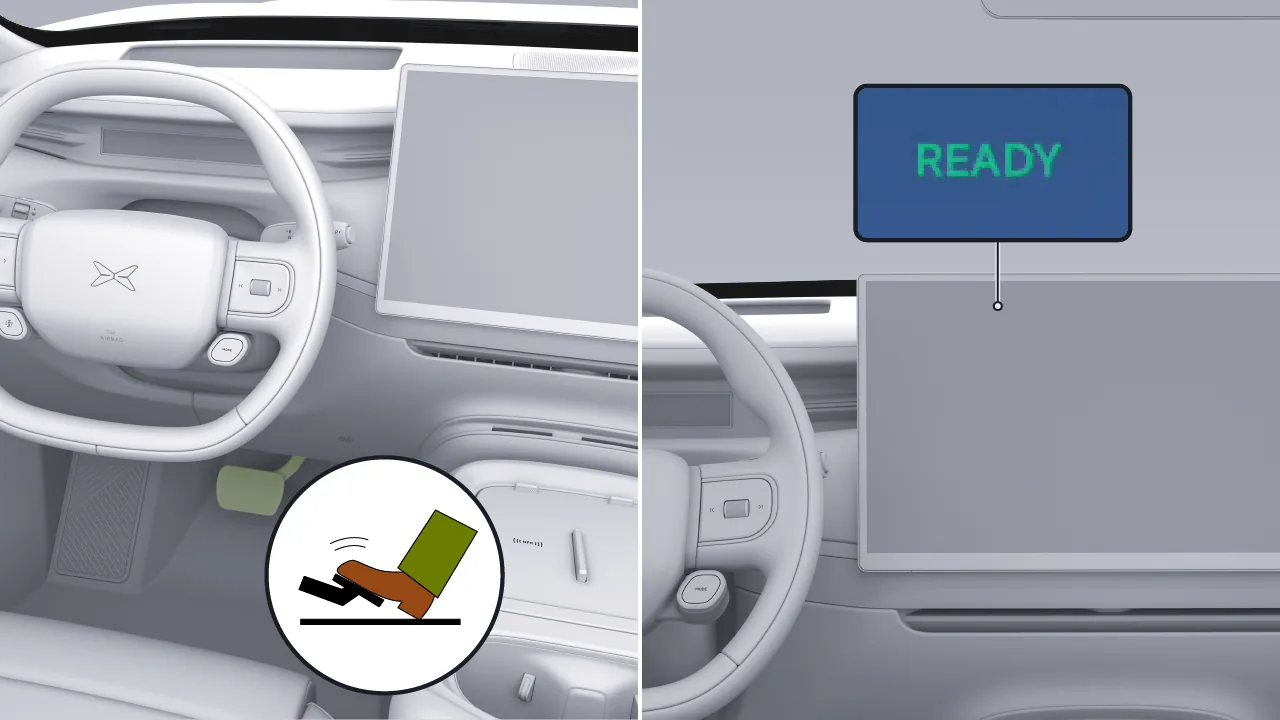
Within 30 seconds after unlocking the vehicle, get in, depress the brake pedal, and shift gears to start the vehicle. At this time, the central control screen displays the green READY indicator.
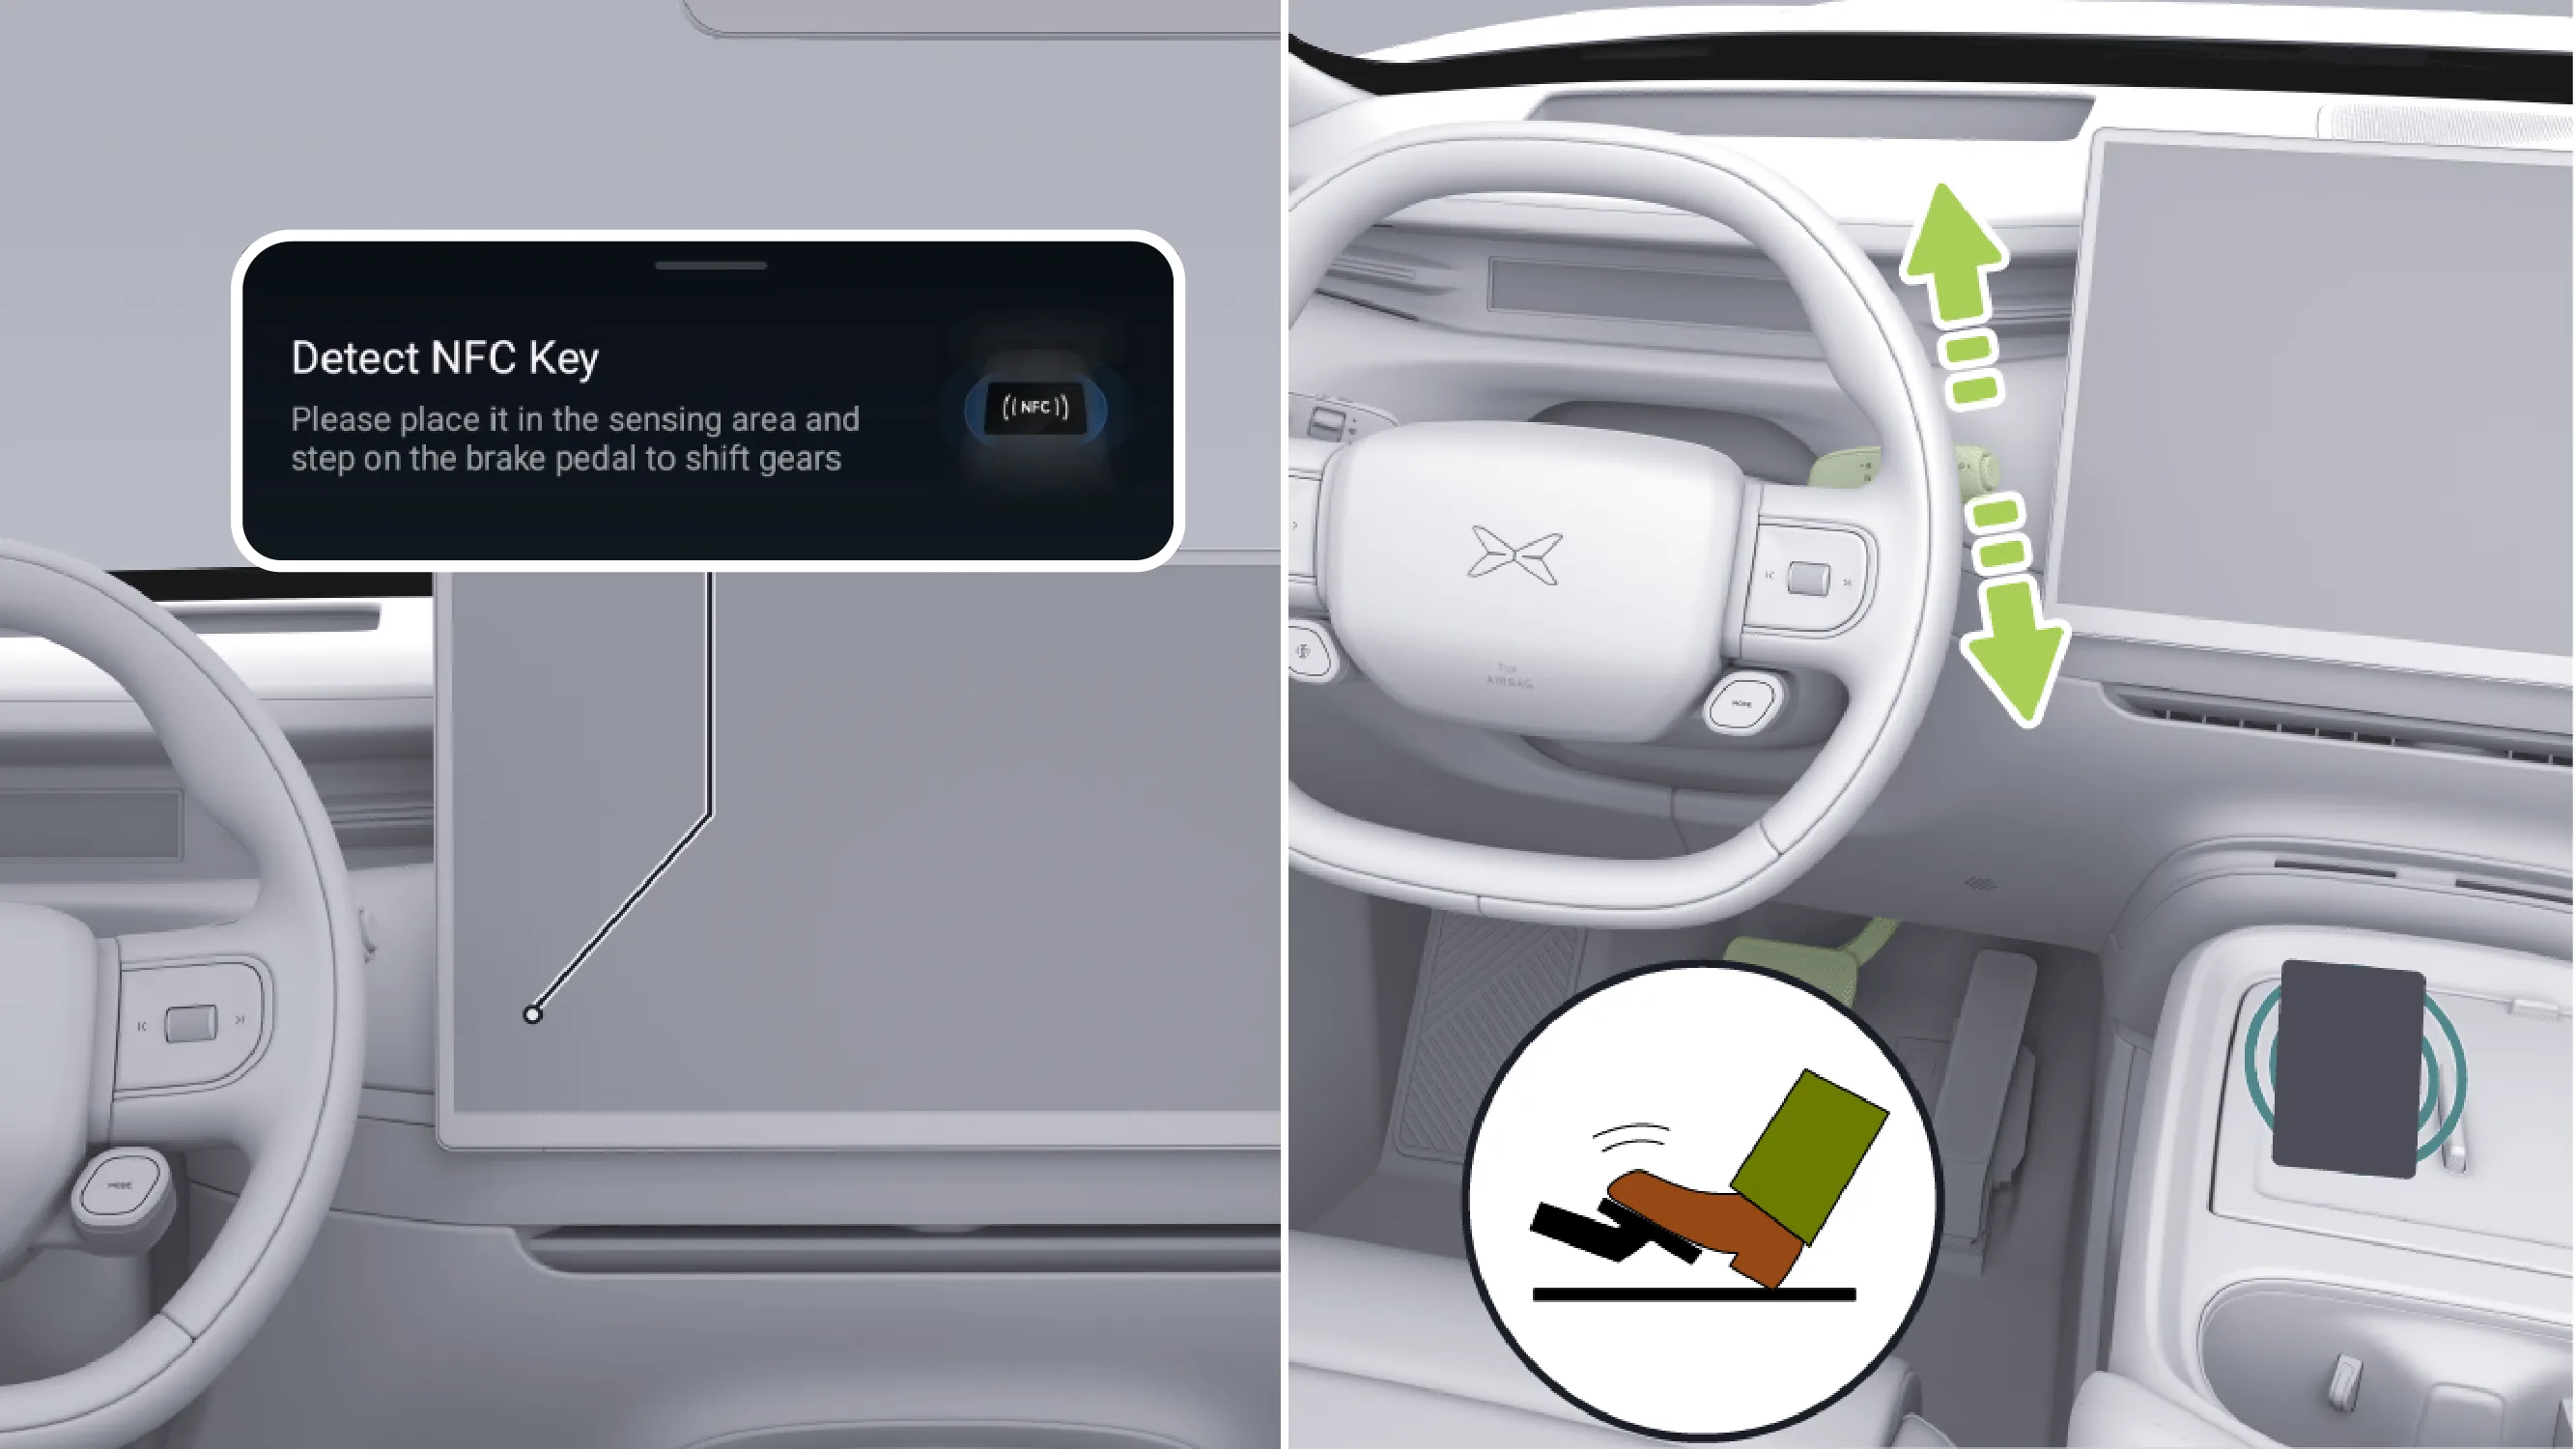
Exceeds 30 seconds or the central control screen pops up Note: Place the NFC key in the in-vehicle NFC detection area. Only after the NFC key is detected can you depress the brake pedal, shift gears, and start the vehicle.
Caution Do not bend, twist or cut the NFC card key;
Do not place the NFC card key in a hot place (e.g. instrument console);
Do not place mobile phones or other metal objects in the wireless charging area of your phone when you start the vehicle using the NFC card key;
Do not place the NFC card key in the wireless charging sensing area when using the mobile phone wireless charging feature.
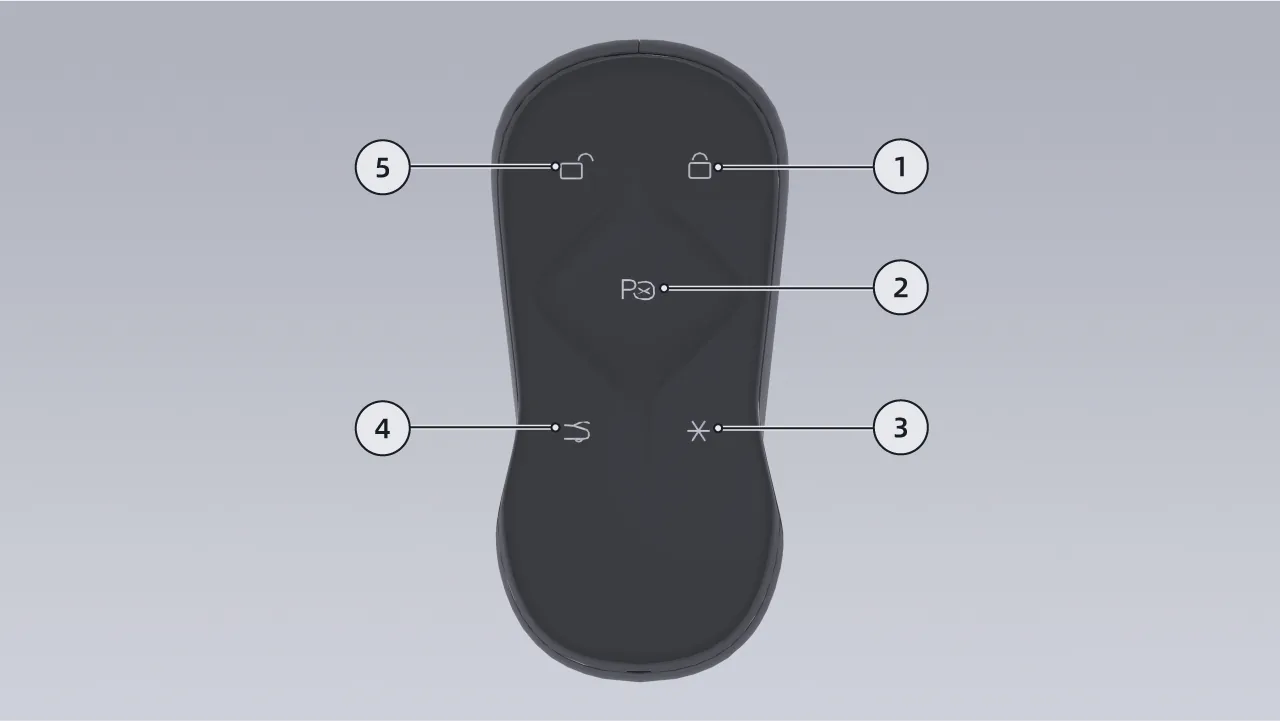
Lock button: Briefly press the lock button to lock all doors and the trunk, and enable the anti-theft system.
Parking button: Press and hold this button to use parking-related functions together.
Caution During parking maneuver operations, the remote key cannot be used for locking/unlocking or opening/closing doors.
Custom key: Double-press this key to enable or disable the corresponding function according to the center display settings.
Trunk button: Double-press the trunk button to automatically open or close the trunk. Or pause the trunk while it is opening/closing.
Unlock button: Press the unlock button briefly to unlock all doors and the trunk, and deactivate the anti-theft system.
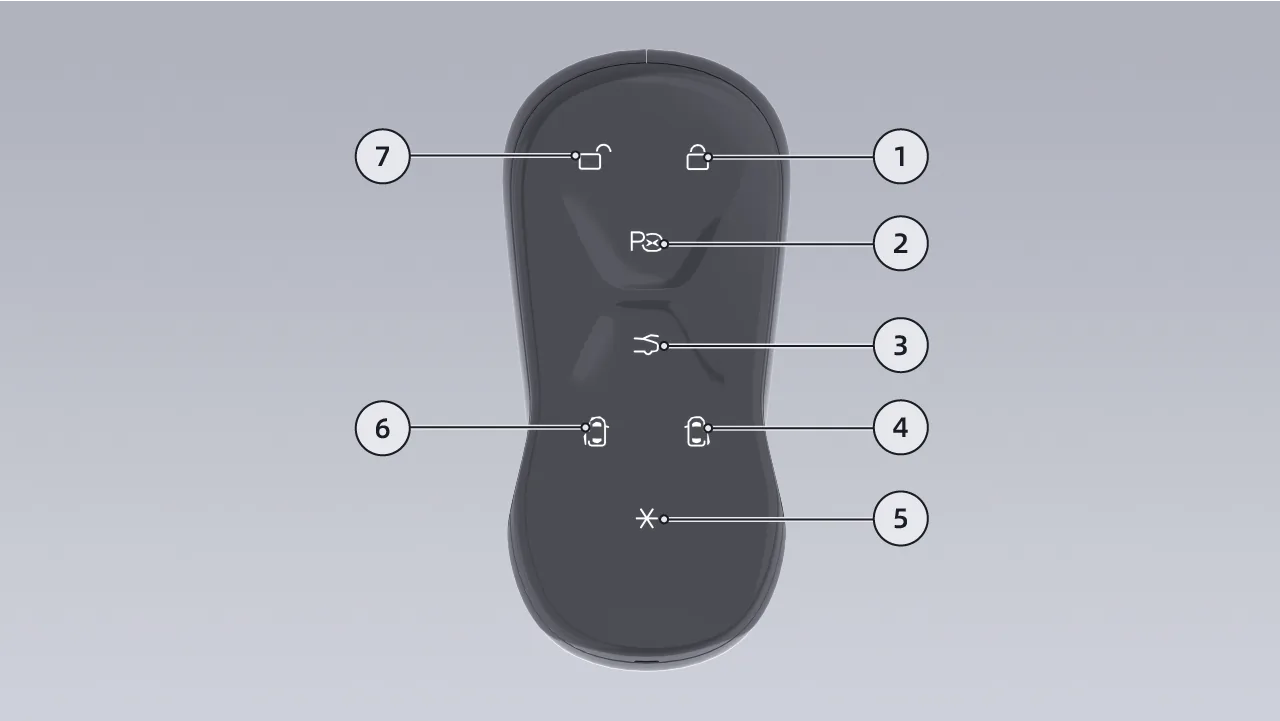
Press the lock button briefly to lock all doors and the trunk, and activate the anti-theft system.
Double-press this button (for models equipped with power doors). Depending on the central control screen settings, the driver's or front row power door can be closed.
Parking button: Press and hold this button to use parking-related functions together.
Caution During parking maneuver operations, the remote key cannot be used for locking/unlocking or opening/closing doors.
Trunk button: Double-press the trunk button to automatically open or close the trunk. Or pause the trunk while it is opening/closing.
Rear right power door open/close button: Double-press this button to open/close the rear right power door. Or pause the rear right power door that is opening/closing.
Custom key: Double-press this key to enable or disable the corresponding function according to the center display settings.
Rear left power door open/close button: Double-press this button to open/close the rear left power door. Or pause the rear left power door that is opening/closing.
Press the unlock button briefly to unlock all doors and the trunk, and deactivate the anti-theft system.
Double-press this button (on models equipped with power doors); according to the center display settings, the driver's or front row power door can be opened.
Tips The trunk/power tailgate* can be opened with the remote key only when the vehicle is in P gear.
In an open area, the effective range of the remote key is greater than 30 meters. Insufficient battery power will affect the remote control range. In this case, try moving closer to the vehicle or use another method to operate it.
Press any button. If the key is successfully connected to the vehicle, the indicator light flashes once; if the connection is unsuccessful, the indicator light flashes twice.
Caution The vehicle will not lock unless the vehicle is in P and all doors (including the front compartment lid, the boot) are closed, unless the vehicle is left unattended.
Keep the key fob safe to prevent damage caused by impact, heat, or corrosion of liquids.
Do not leave children or pets unattended in the vehicle. Take the key with you when leaving the vehicle and lock the vehicle.
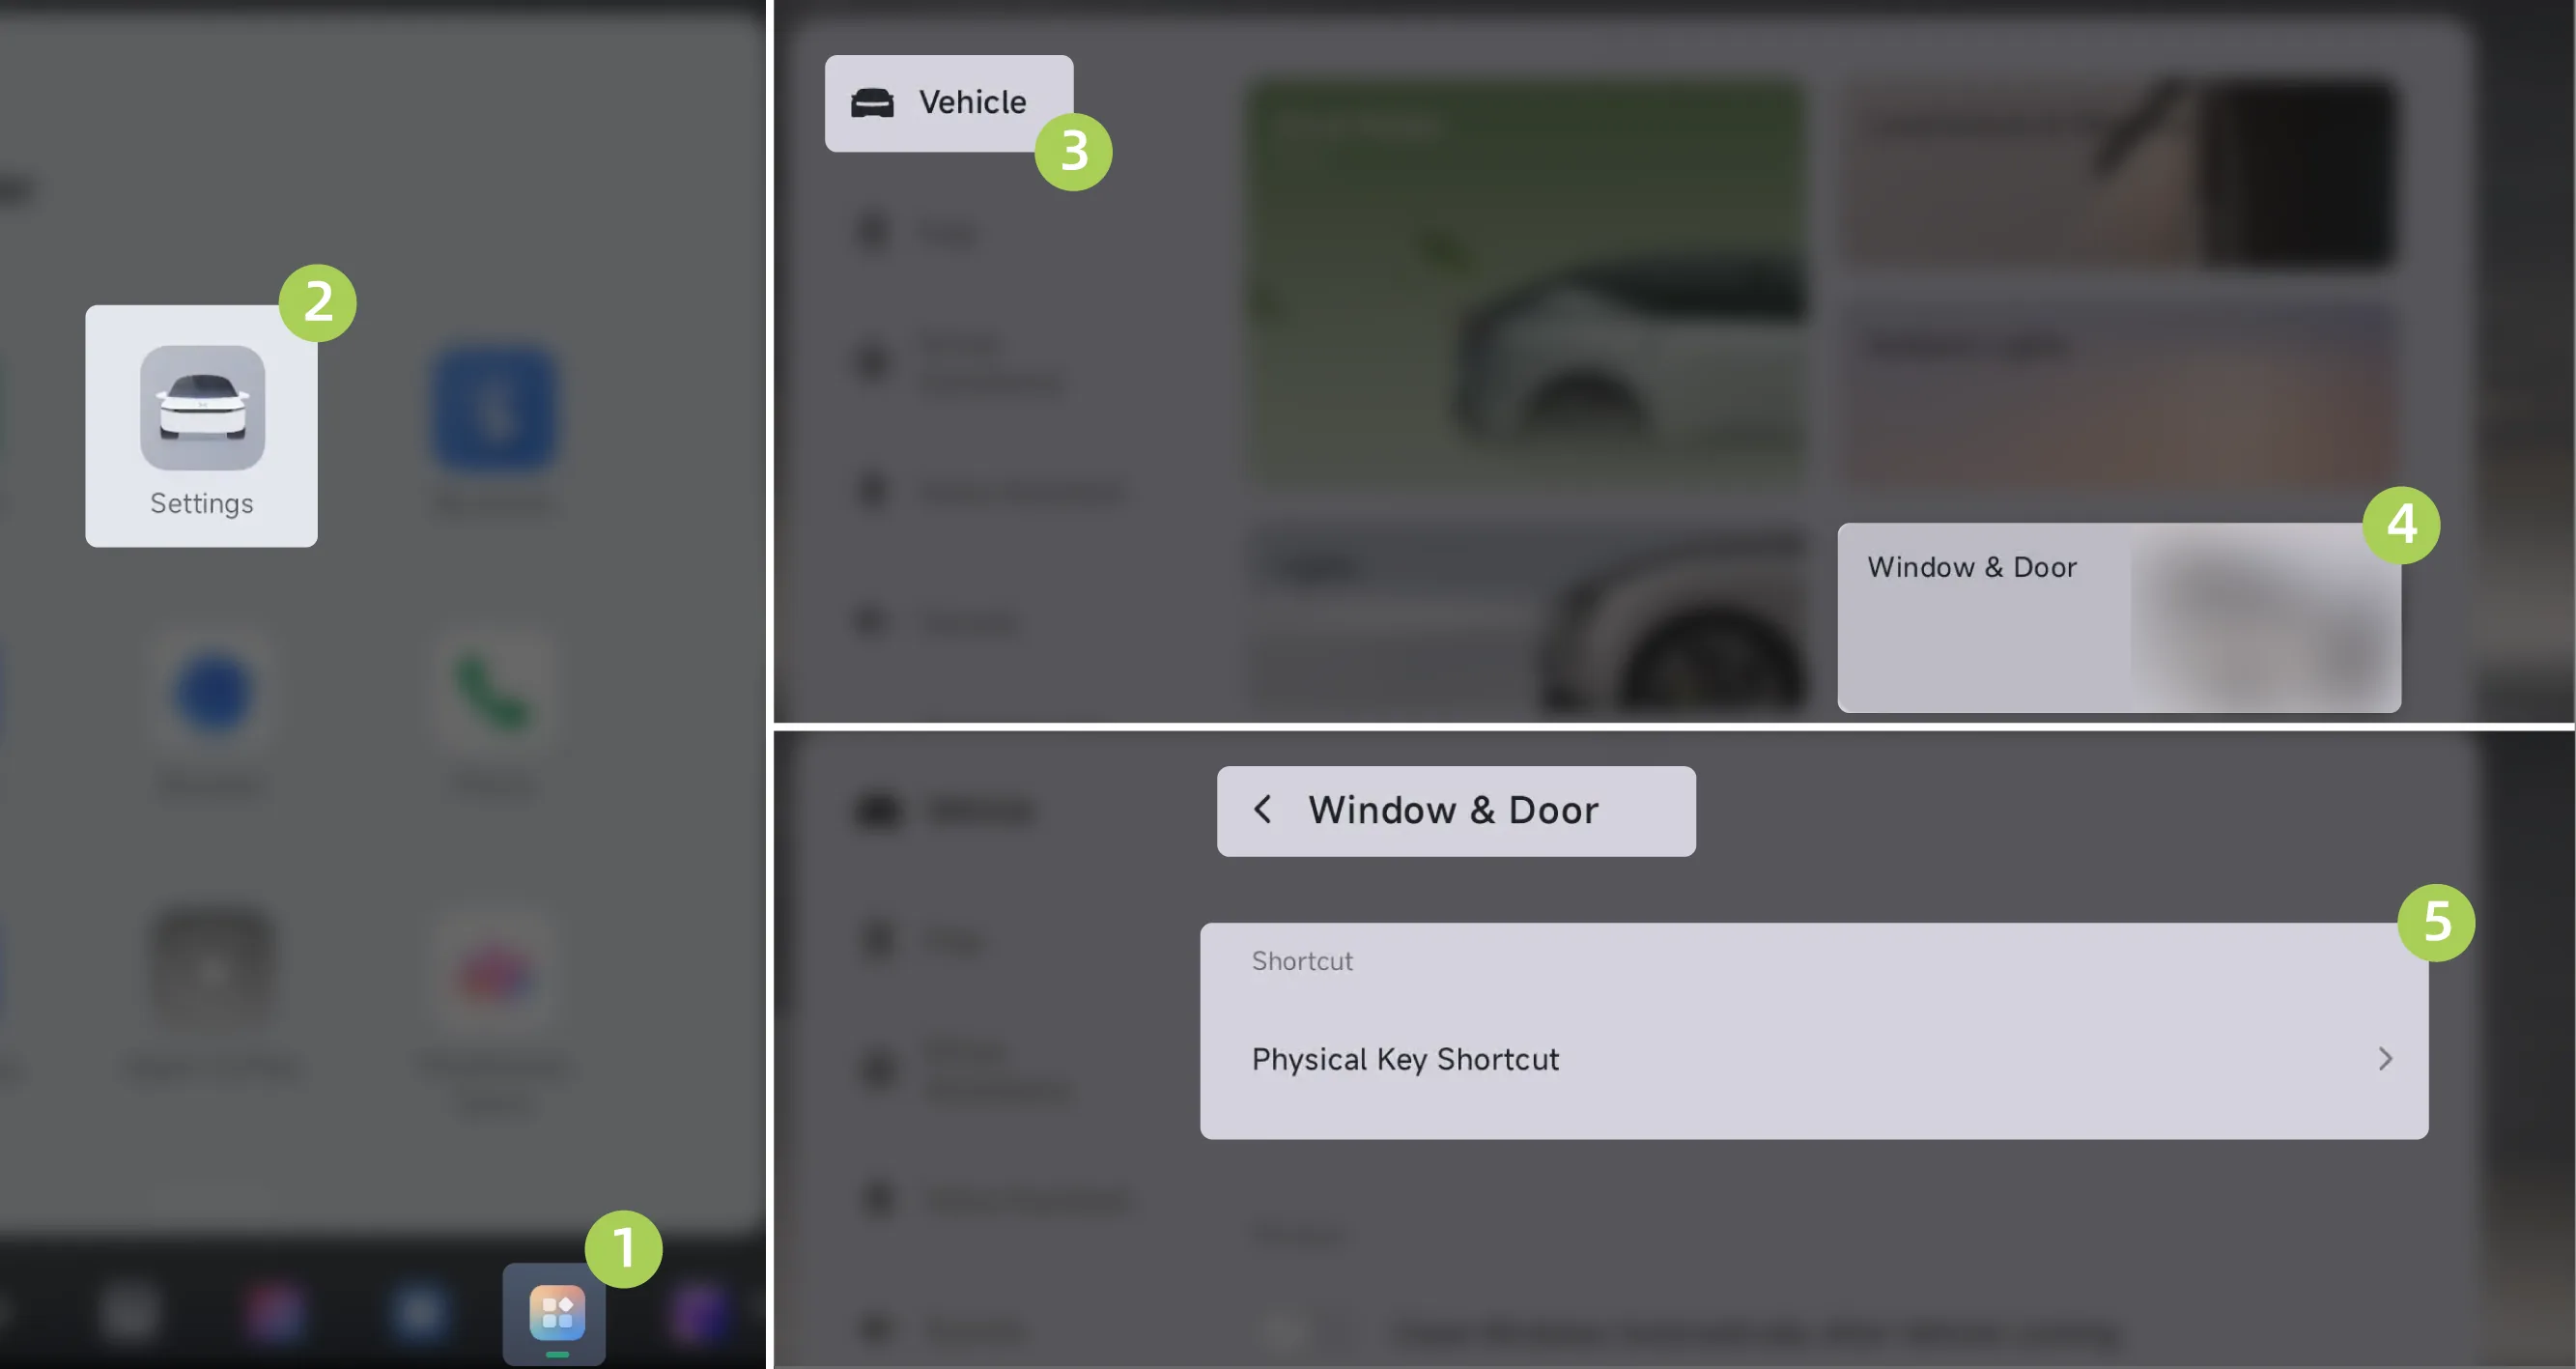
On the center display screen “ →Settings→vehicle→Doors and Windows→Physical Key Shortcuts”On this screen, you can set the shortcut key function of the physical key.
Sentry Mode On
Frunk
Vehicle Search Reminder
window Ventilation On/Off
Charging Port Lid Open/Close
Passenger Door Open/Close (Only applicable to models equipped with power doors)
All Doors Open/Close (Only applicable to models equipped with power doors)
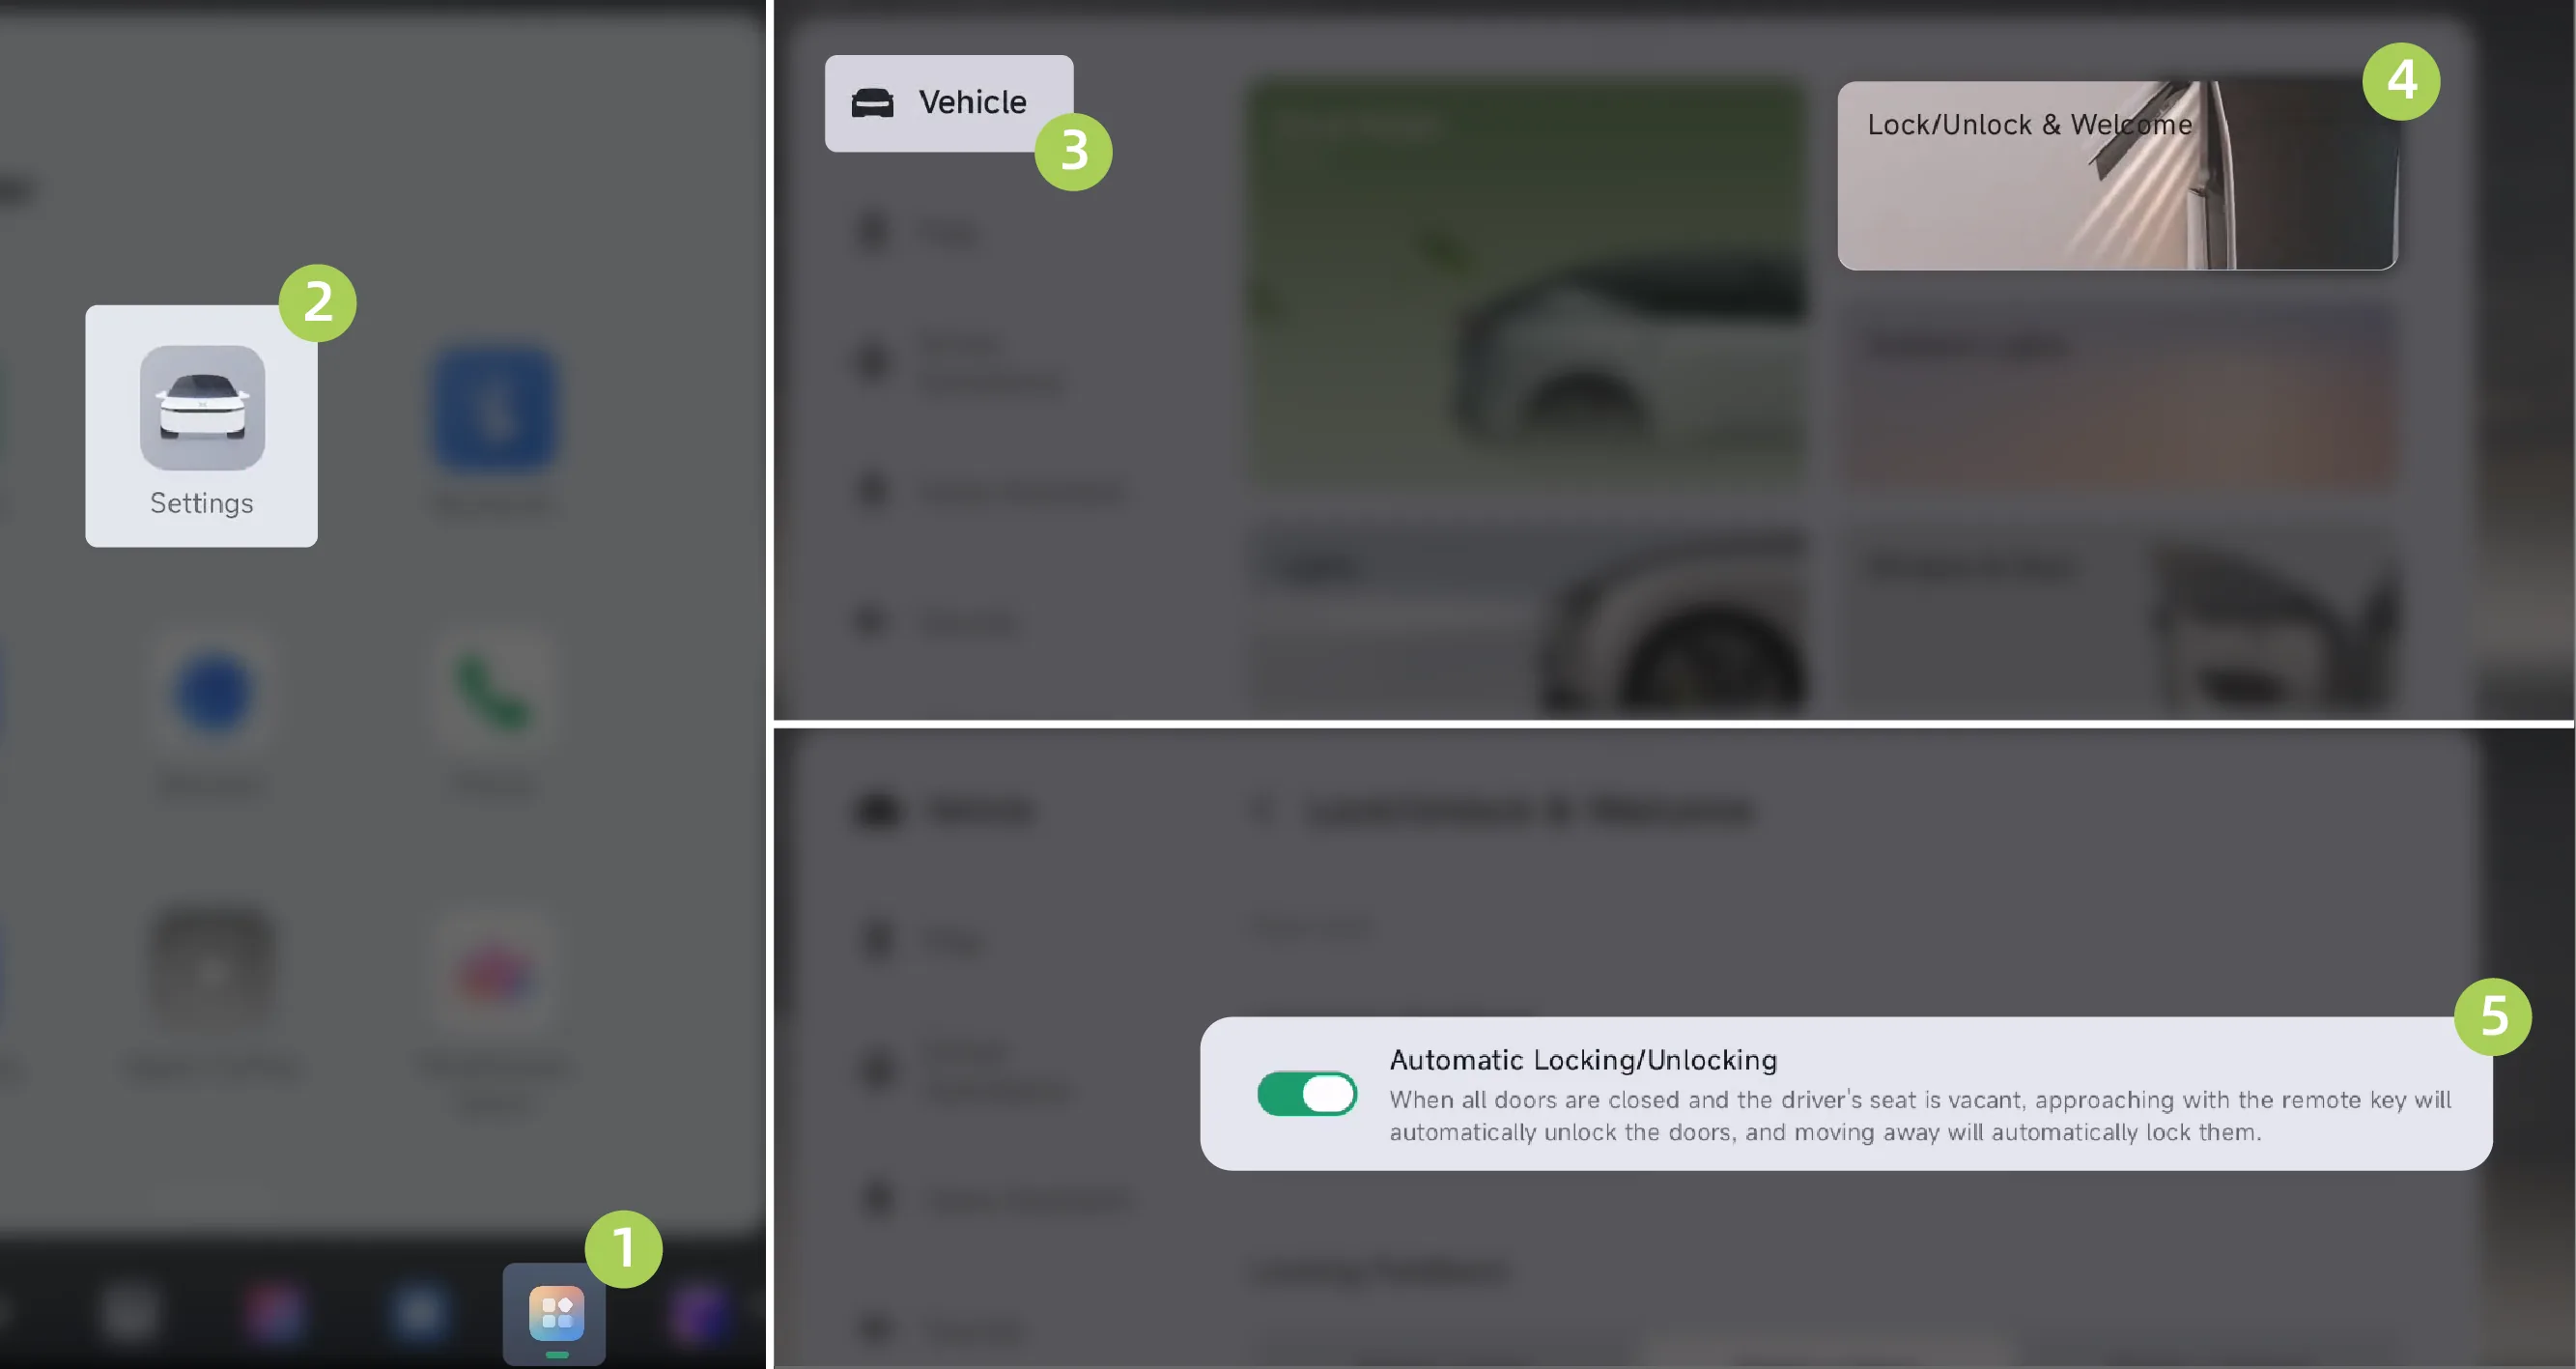
On the center control screen “ →Settings→vehicle→Unlocking and Welcome”Interface, selectable on/off 。
When enabled, when carrying the remote key and approaching the vehicle to about 3.5 m, the vehicle automatically unlocks. When moving about 8 m away from the vehicle, the vehicle automatically locks.
Tips The vehicle is stationary, the doors (including the boot) and the front compartment lid are closed, the vehicle is in P, the vehicle is unmanned. The key is clear of the vehicle for automatic locking, please make sure the vehicle is locked before leaving.
Once the vehicle is automatically locked, it may not be possible to sense unlocking the vehicle when approaching the vehicle again if the vehicle is still within the feature sensing range, either by pulling the door handle or manually unlocking using the key.
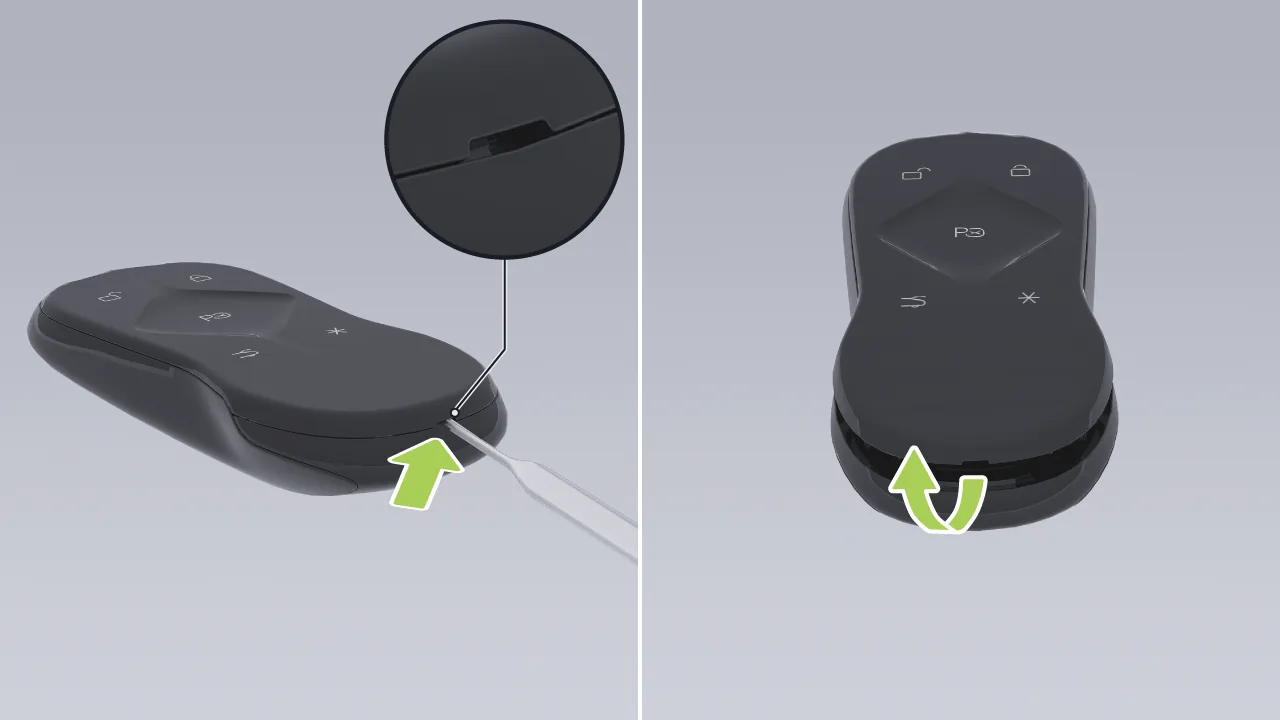
Use a suitable tool (a flat-head screwdriver covered with a soft cloth/wrapped with tape, or a similar tool) to pry up from the key notch and remove the key button panel.
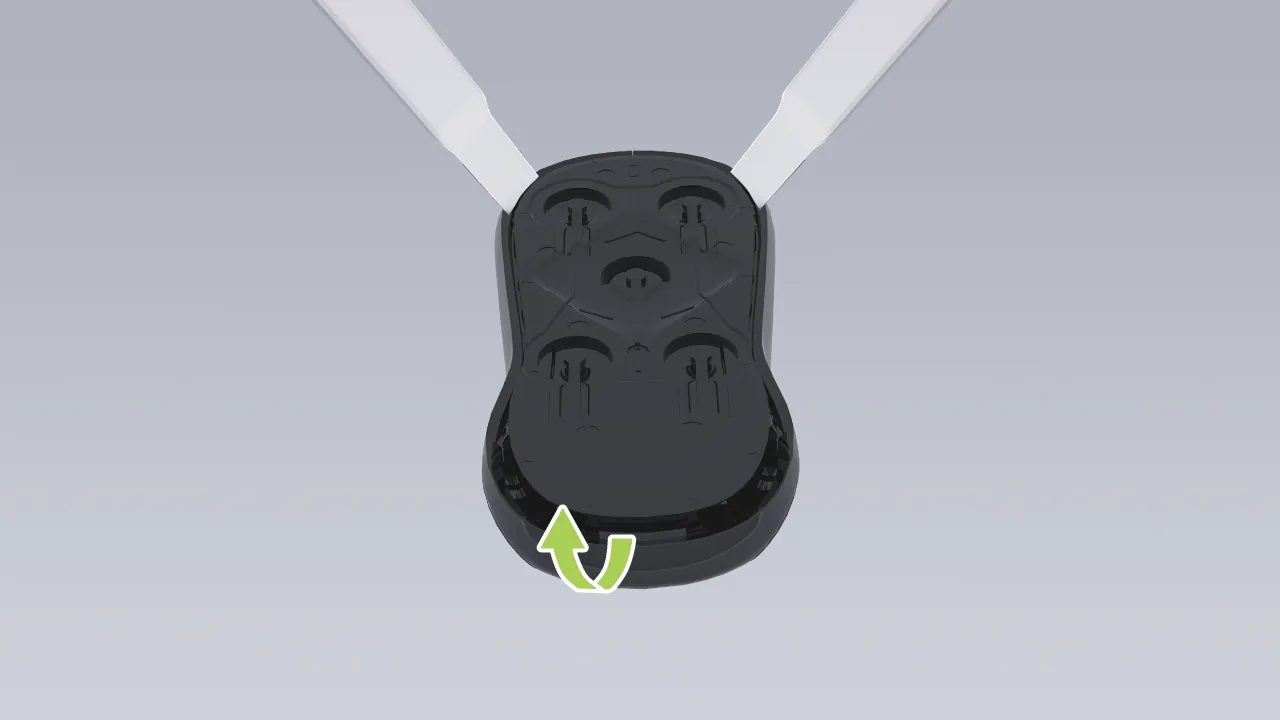
Pry up the left and right sides of the key main board and remove the key main board.
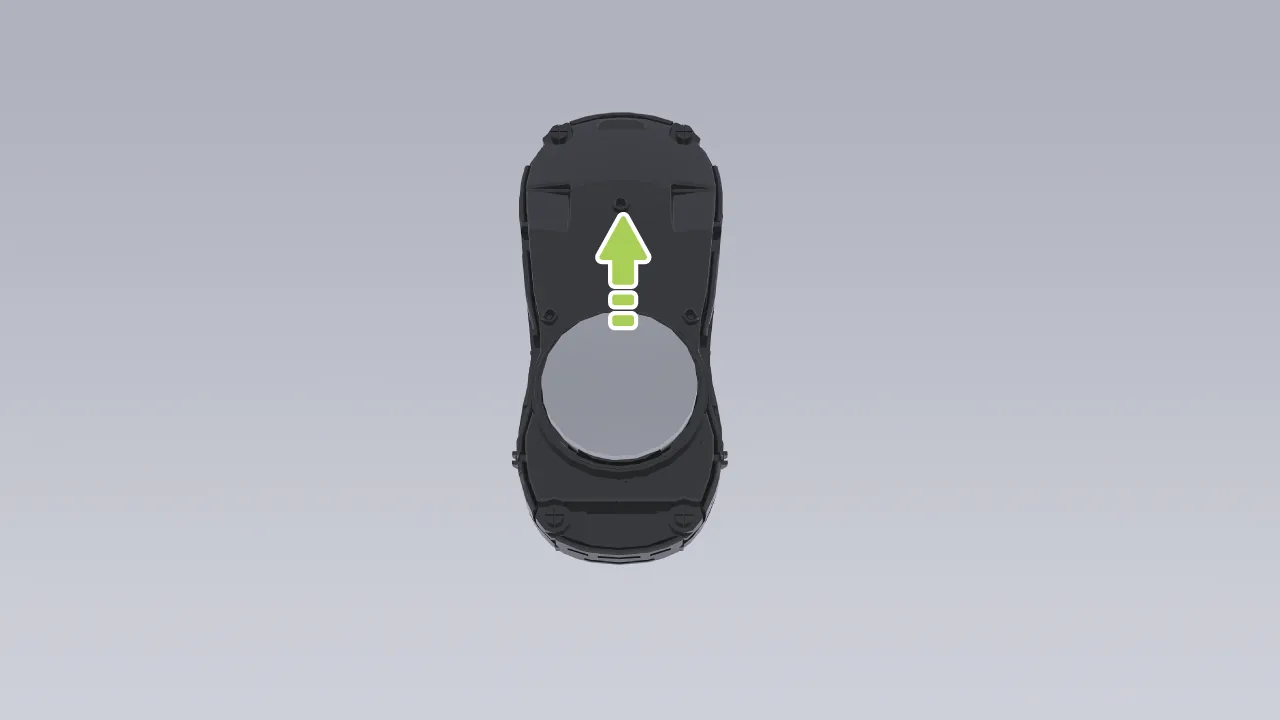
Remove the key battery. Battery model: CR2450.
Install in the reverse order. During installation, the key battery (Positive terminal) facing upward.
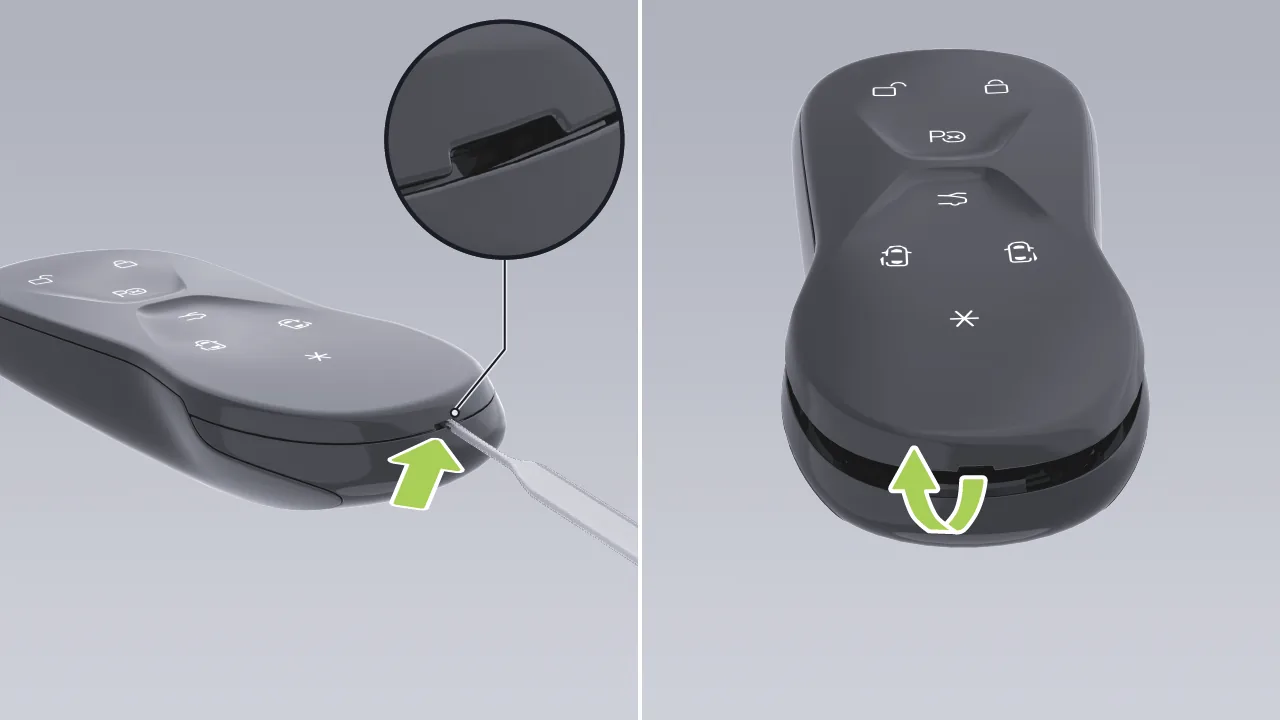
Use a suitable tool (a flat-head screwdriver covered with a soft cloth/wrapped with tape, or a similar tool) to pry up from the key notch and remove the key button panel.
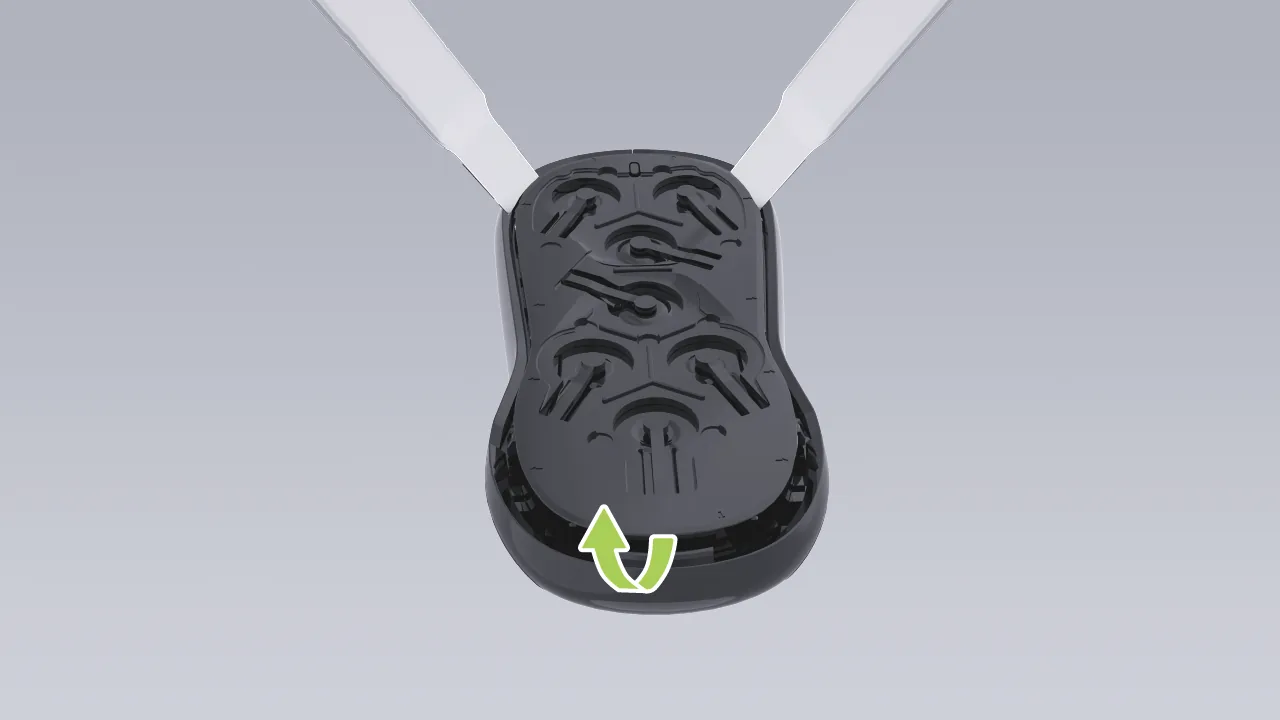
Pry up the left and right sides of the key main board and remove the key main board.

Remove the key battery. Battery model: CR2450.
Install in the reverse order. During installation, the key battery (Positive terminal) facing upward.
Tips Wipe the battery surface clean before installation, or finger marks may affect battery life.
It is recommended that you do not replace the key fob battery yourself, send it to Xpeng Automobile Service Centre for replacement.
Caution Dispose of used batteries properly, incorrect disposal of used batteries can damage the environment.
Do not use sharp objects to remove the key fob, as this may damage the key fob.
Warning Keep the battery out of the reach of children. If a child accidentally swallows it, it may cause serious injury or even death.
After installing the XPENG Motors App, you can register your mobile phone as a vehicle key and use Bluetooth and NFC technologies to communicate with the vehicle, helping users conveniently and safely realize unlocking and locking, starting the vehicle, and more vehicle controls.
The XPENG Motors App supports the following three types of vehicle keys:
Phone Bluetooth Key
Applicable devices: mobile phones running iOS, 鸿蒙, and Android systems.
Phone NFC Key
Applicable devices: Android phones that support NFC.
Tips After activating the key, you must set the default NFC card-swiping application to "XIAOPENG Motors APP" before it can be used.
Wallet Key
Applicable device:
Mobile UWB & NFC Key: iPhone 11 and later models, and the latest iOS version.
Mobile Bluetooth & NFC key: iPhone SE 2nd/3rd generation or iPhone 16e/17e and later models, and the latest iOS version.
Tips Different models have hardware differences. If the device supports UWB, the UWB positioning capability is used with priority.
iPhone 11 and later models are equipped with UWB hardware and support UWB key-related functions; iPhone SE series phones do not support UWB functions.
Please use models launched after 2017, requiring Android 13 and iOS 18.0 or later operating systems.
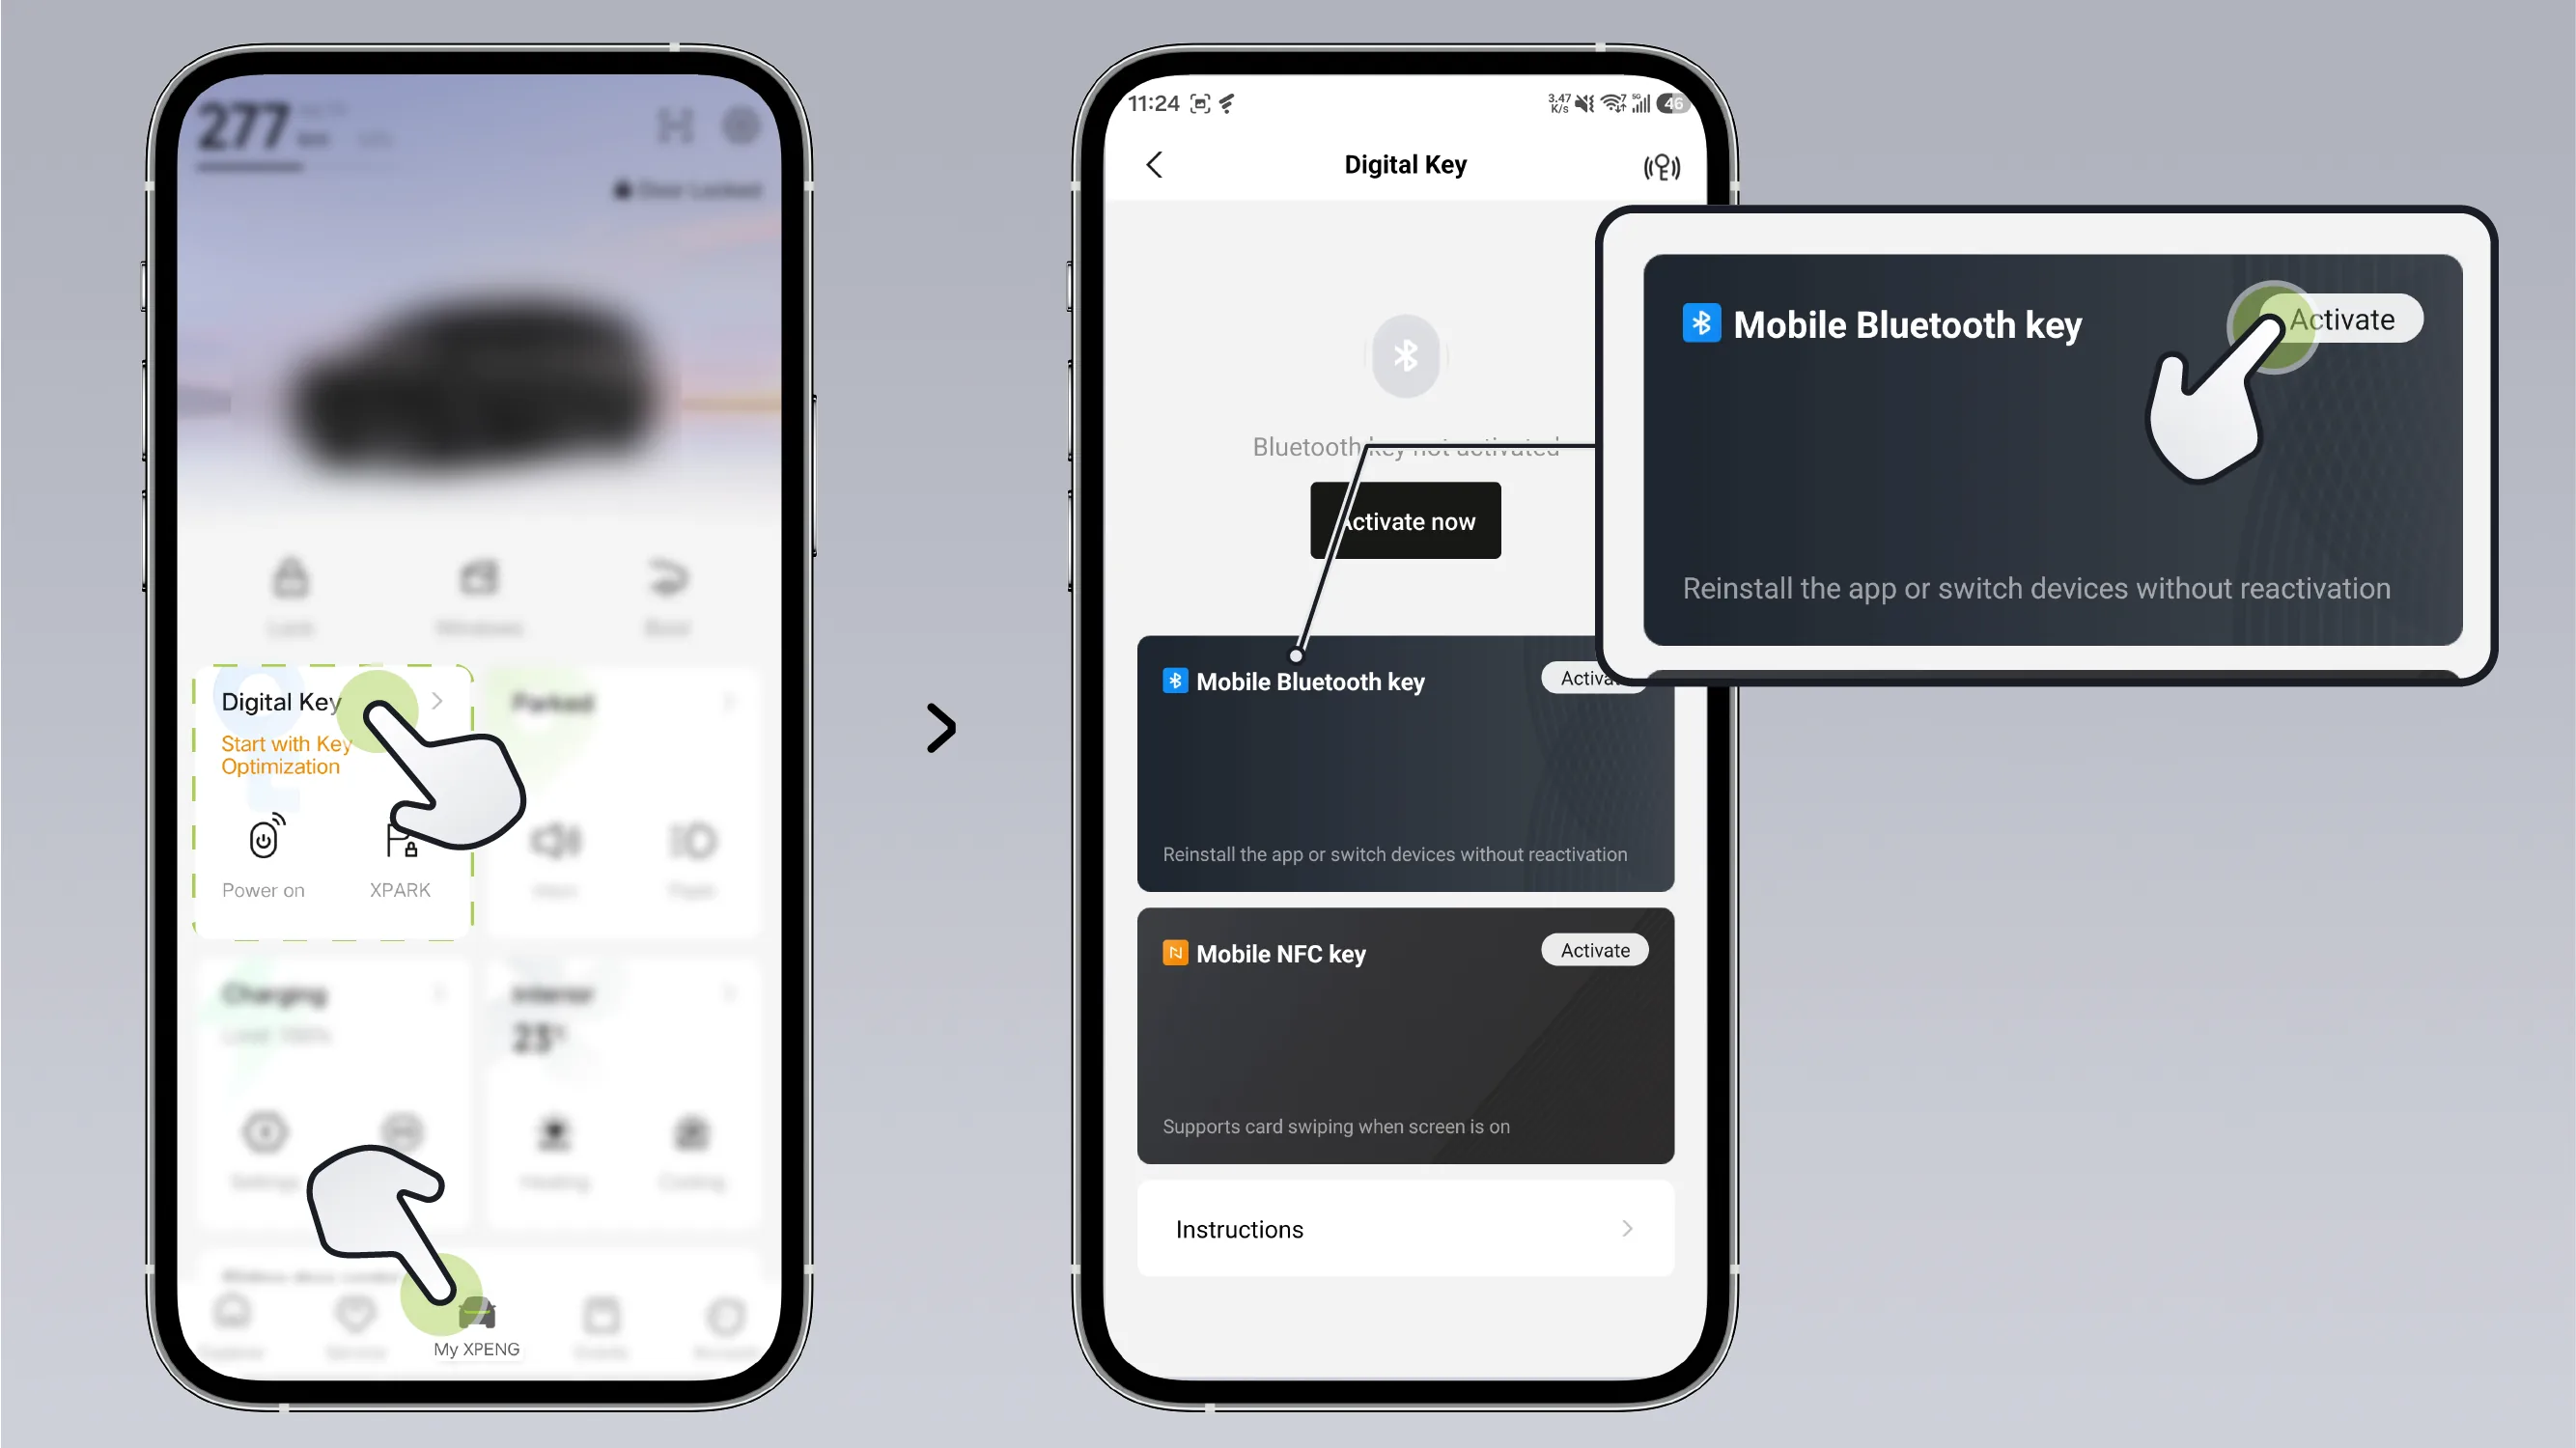
In the XPENG Motors App Digital KeyTap Bluetooth Key in ActivateTap the button and follow the prompts in the XIAOPENG Motors App to create a mobile phone Bluetooth key.
Bluetooth key: Supports multiple lock/unlock operation methods.
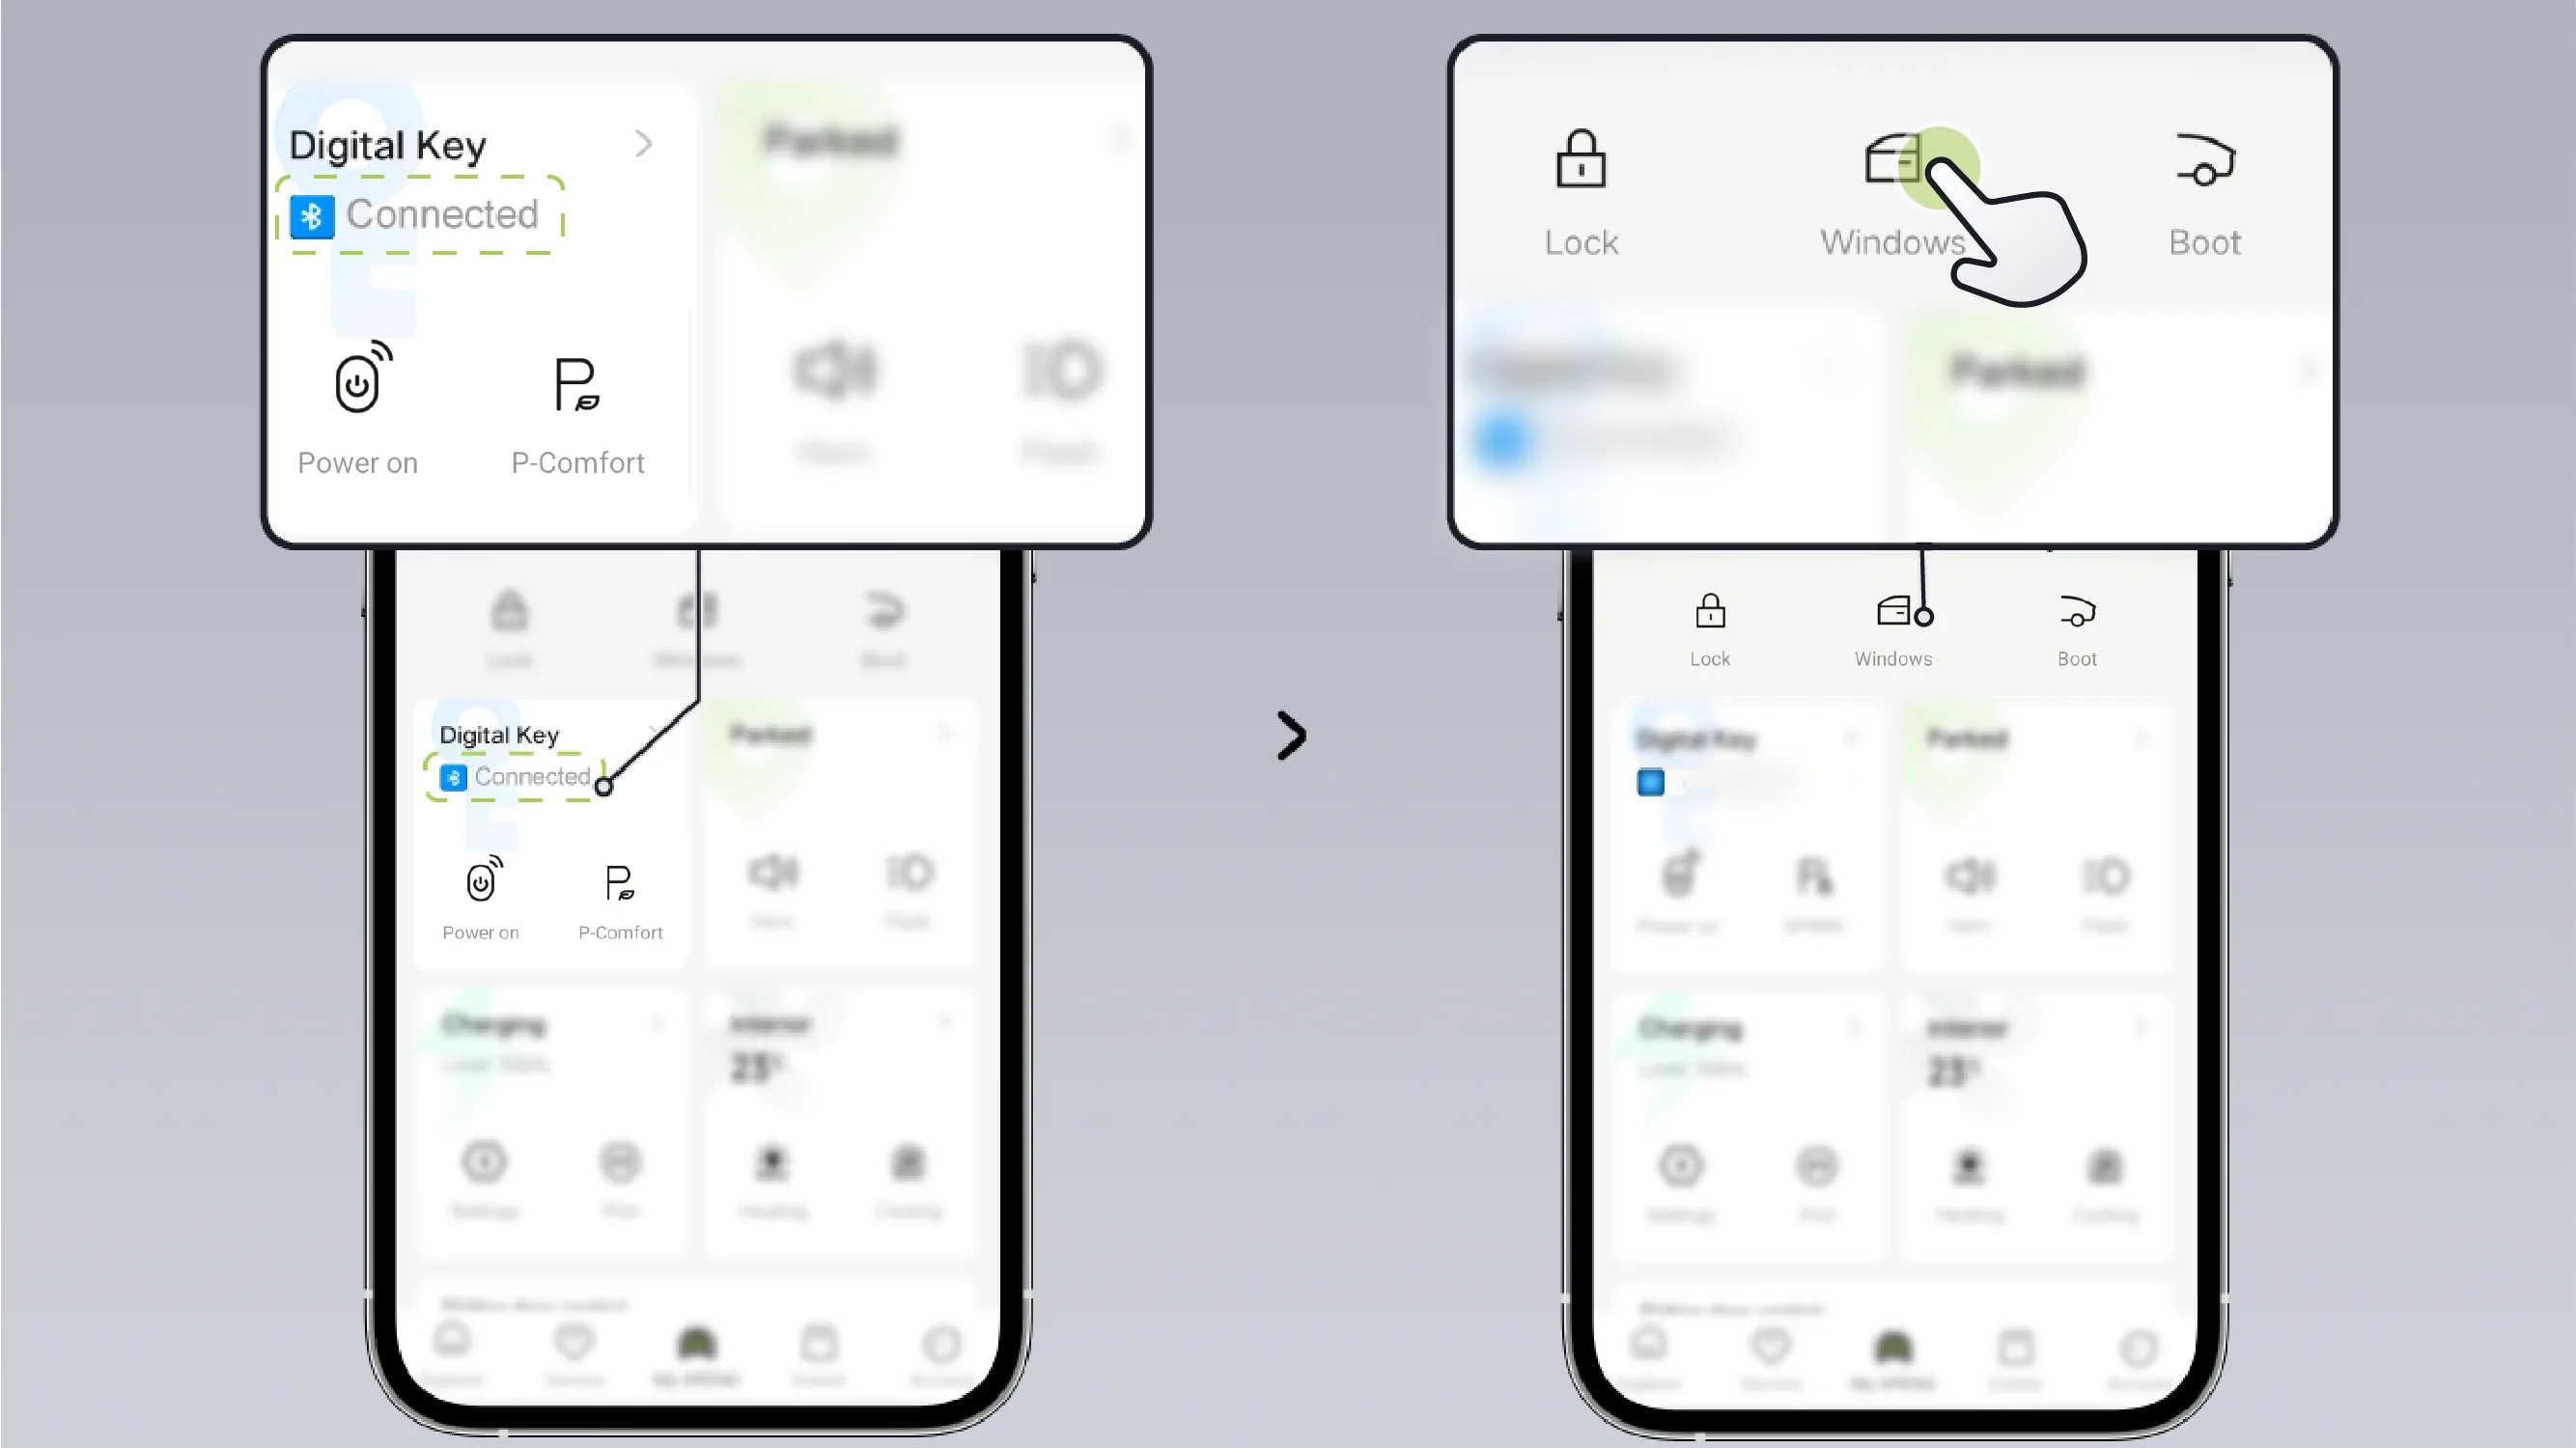
Manual Unlocking/Locking:After the mobile phone is successfully paired with the vehicle via Bluetooth, open the XPENG APP to lock/unlock, raise/lower the window, open the trunk, etc.
Door Handle Unlocking/Locking:In the XPENG Motors App Digital Key ManagementOpen in the middle Door Handle Unlocking and LockingAfter switching on and when the phone and the vehicle bluetooth connection has been established, press the microswitch on the outer door handle to unlock/lock and unlock the trunk.
Automatic Unlock:In the XPENG App Digital Key ManagementOpen in the middle Automatic UnlockAfter the switch is turned on and the phone and the vehicle bluetooth connection has been established, carry the phone close to the vehicle to automatically unlock it.
Automatic Locking:In the XPENG App Digital Key ManagementOpen in the middle Automatic LockingAfter the switch is on and the phone and the vehicle bluetooth are connected, carry the phone away from the vehicle, and it will lock automatically.
Tips After reactivating the Bluetooth key, reinstalling the XPENG App, or logging in to the XPENG App on a new phone, you must reset Automatic Locking/Unlocking.
Tips After upgrading the XPENG App to the latest version, the digital key supports combined settings for multiple locking and unlocking methods such as "Automatic Unlock", "Automatic Lock", and "Door Handle Lock/Unlock".
Caution After unlocking, do not close the XPENG App. Keep the XPENG App running in the background so that the relative position of the mobile phone and the vehicle can be determined, thereby performing automatic locking and unlocking. To ensure normal use of the function, be sure to enable the following permissions for the XPENG App:
Bluetooth Permission
Auto-Start Permission
Background Running Permission
Location permission must be set to Always Allow
Background App Refresh
Location Services (Phone Settings > Privacy > Location Services)
Before activating the key, please ensure that it has been enabled in the phone system. Function.
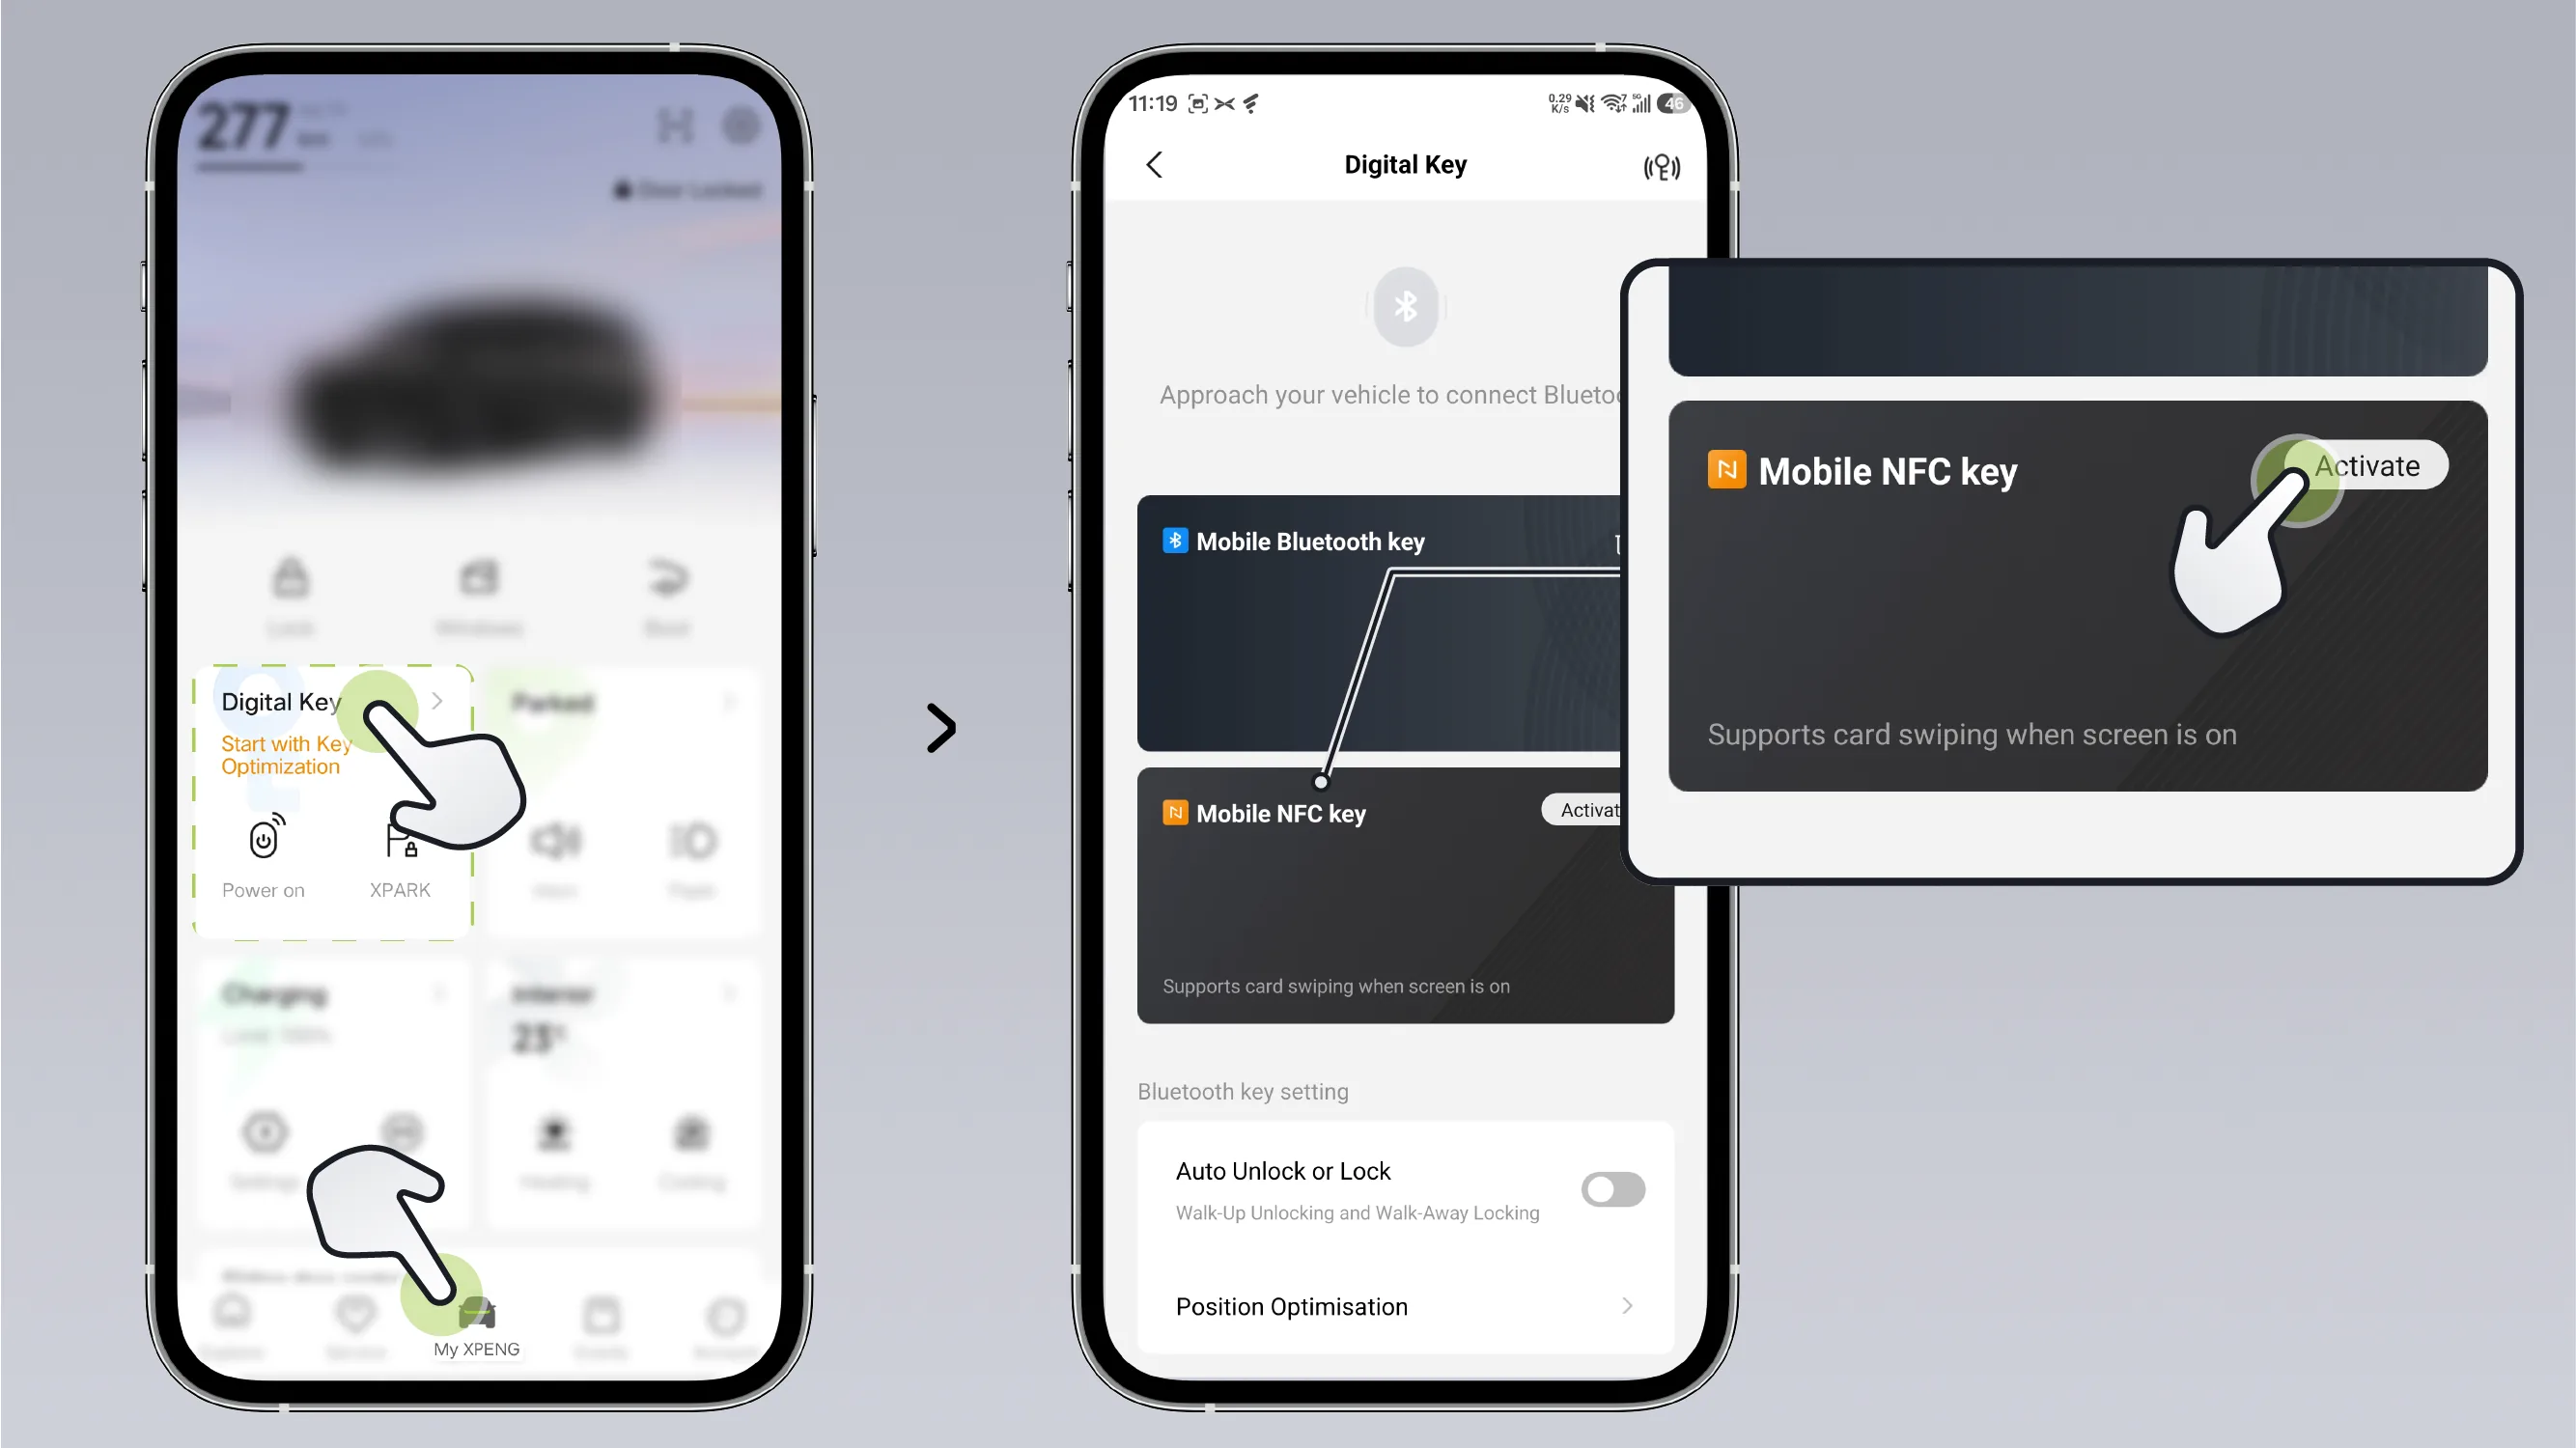
In the XPENG Motors App Digital KeyTap the NFC key in the middle ActivateAfter pressing the button, follow the prompts in the XPENG App to create the phone NFC key.
After activating the phone NFC key, to ensure the card-tapping experience, set the phone's default payment app to XPENG App (path: Settings → search for "Default wallet", "Contactless payment" app, or "Select card app" → select "XPENG"). If the phone's default payment app is not set to XPENG App, you need to manually select the default payment app as XPENG App before each card tap.
Tips Please use a phone model launched in 2017 or later, with Android 13.0 or above, and equipped with NFC hardware.
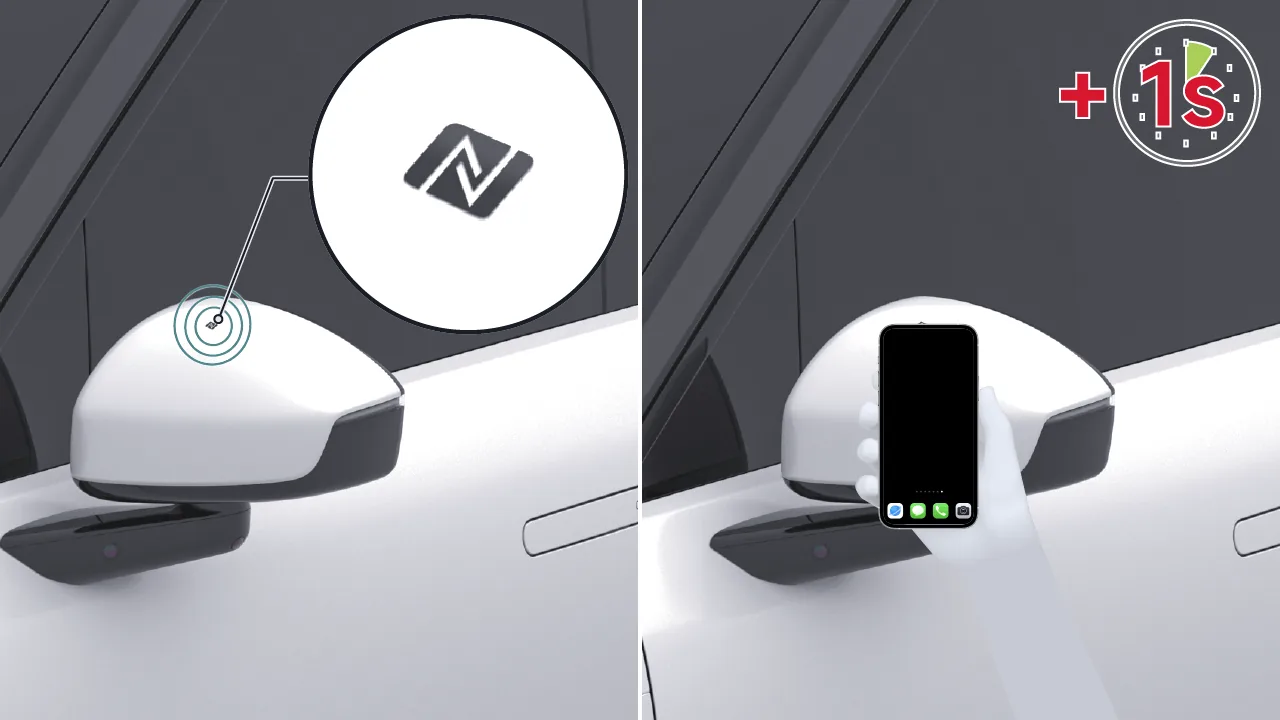
Unlock:When the vehicle is locked, after lighting up the phone screen, hold the phone close to the NFC key sensing area on the driver-side exterior rearview mirror for about 1 second to unlock all doors.
Lock:When the vehicle is unlocked and all doors (including the front hood and trunk) are closed, light up the phone screen, then hold the phone close to the NFC key sensing area on the driver-side exterior rearview mirror for about 1 second to lock all doors.
Within 30 seconds after unlocking the vehicle, get in, depress the brake pedal, and shift gears to start the vehicle.
If more than 30 seconds have passed after unlocking the vehicle, or if the center display shows the prompt "Detect NFC key", place the mobile phone on the wireless charging panel with the NFC mark inside the vehicle. Only after key authentication is completed can you depress the brake pedal and shift gears to start the vehicle.
Tips When unlocking with an Xpeng Auto key, the Xpeng Auto default payment app needs to be set to the Xpeng Auto app, otherwise NFC will not work properly.
When unlocking/starting the vehicle using the NFC key, the phone screen will need to be unlocked. The phone may be turned off or the screen will not work properly, which may result in the NFC key not being used.
Keep the back of your phone close to the NFC sensing area as much as possible, depending on the back of your phone.
Initial Key Activation
In the XPENG App, press in sequence Follow the prompts on the phone to activate the Bluetooth key.
After activating the Bluetooth key, a prompt will appear to upgrade to "Phone UWB & NFC Key or Phone Bluetooth & NFC Key". Tap "Go to Upgrade" to jump to Apple Wallet. Please move to inside the vehicle, then add the car key on the "Wallet" screen and tap "Continue". After waiting for the phone and vehicle to complete pairing, tap "Continue" on the "Use Car Key" screen, and then you can use the newly added car key in Apple Wallet. If you are wearing an Apple Watch, the system will prompt you to enable the watch key synchronously.
After successfully adding a new car key for use in Apple Wallet, return to the XPENG App. “Phone UWB&NFC Key or Phone Bluetooth&NFC Key” will be automatically bound to your XPENG Account. After unlocking with this phone key, the central display will automatically log in to your XPENG Account, allowing one-click switching to your vehicle usage preferences.
Non-initial key activation
If you did not activate "phone UWB&NFC key or phone Bluetooth&NFC key" when activating the Bluetooth key for the first time in the XPENG App, you can later enter the XPENG App , update the key according to the mobile phone.
After tapping "Activate", you will be redirected to Apple Wallet. Please move to inside the vehicle, then add the car key on the "Wallet" screen and tap "Continue". After waiting for the phone and the vehicle to complete pairing, tap "Continue" on the "Use Car Key" screen, and then you can use the newly added car key in Apple Wallet. If you are wearing an Apple Watch, the system will prompt you to enable the watch key synchronization.
After successfully using Add New Car Key in Apple Wallet, return to the XPENG App. “Phone UWB&NFC Key or Phone Bluetooth&NFC Key” will be automatically bound to your XPENG Account. After unlocking with this phone key, the central display will automatically log in to your XPENG Account, allowing one-click switching to your vehicle usage habits.
Tips Call the Customer Service Center using the owner's phone to activate the Wallet key. The owner's phone will receive a digital key email. Tap the link in the email to go to Apple Wallet. When adding the car key to Tap on the screen. , wait until the phone and the vehicle are paired, then in Tap the screen , you can use the newly added car key in Apple Wallet. If you are wearing an Apple Watch, the system will prompt you to enable the watch key in sync.
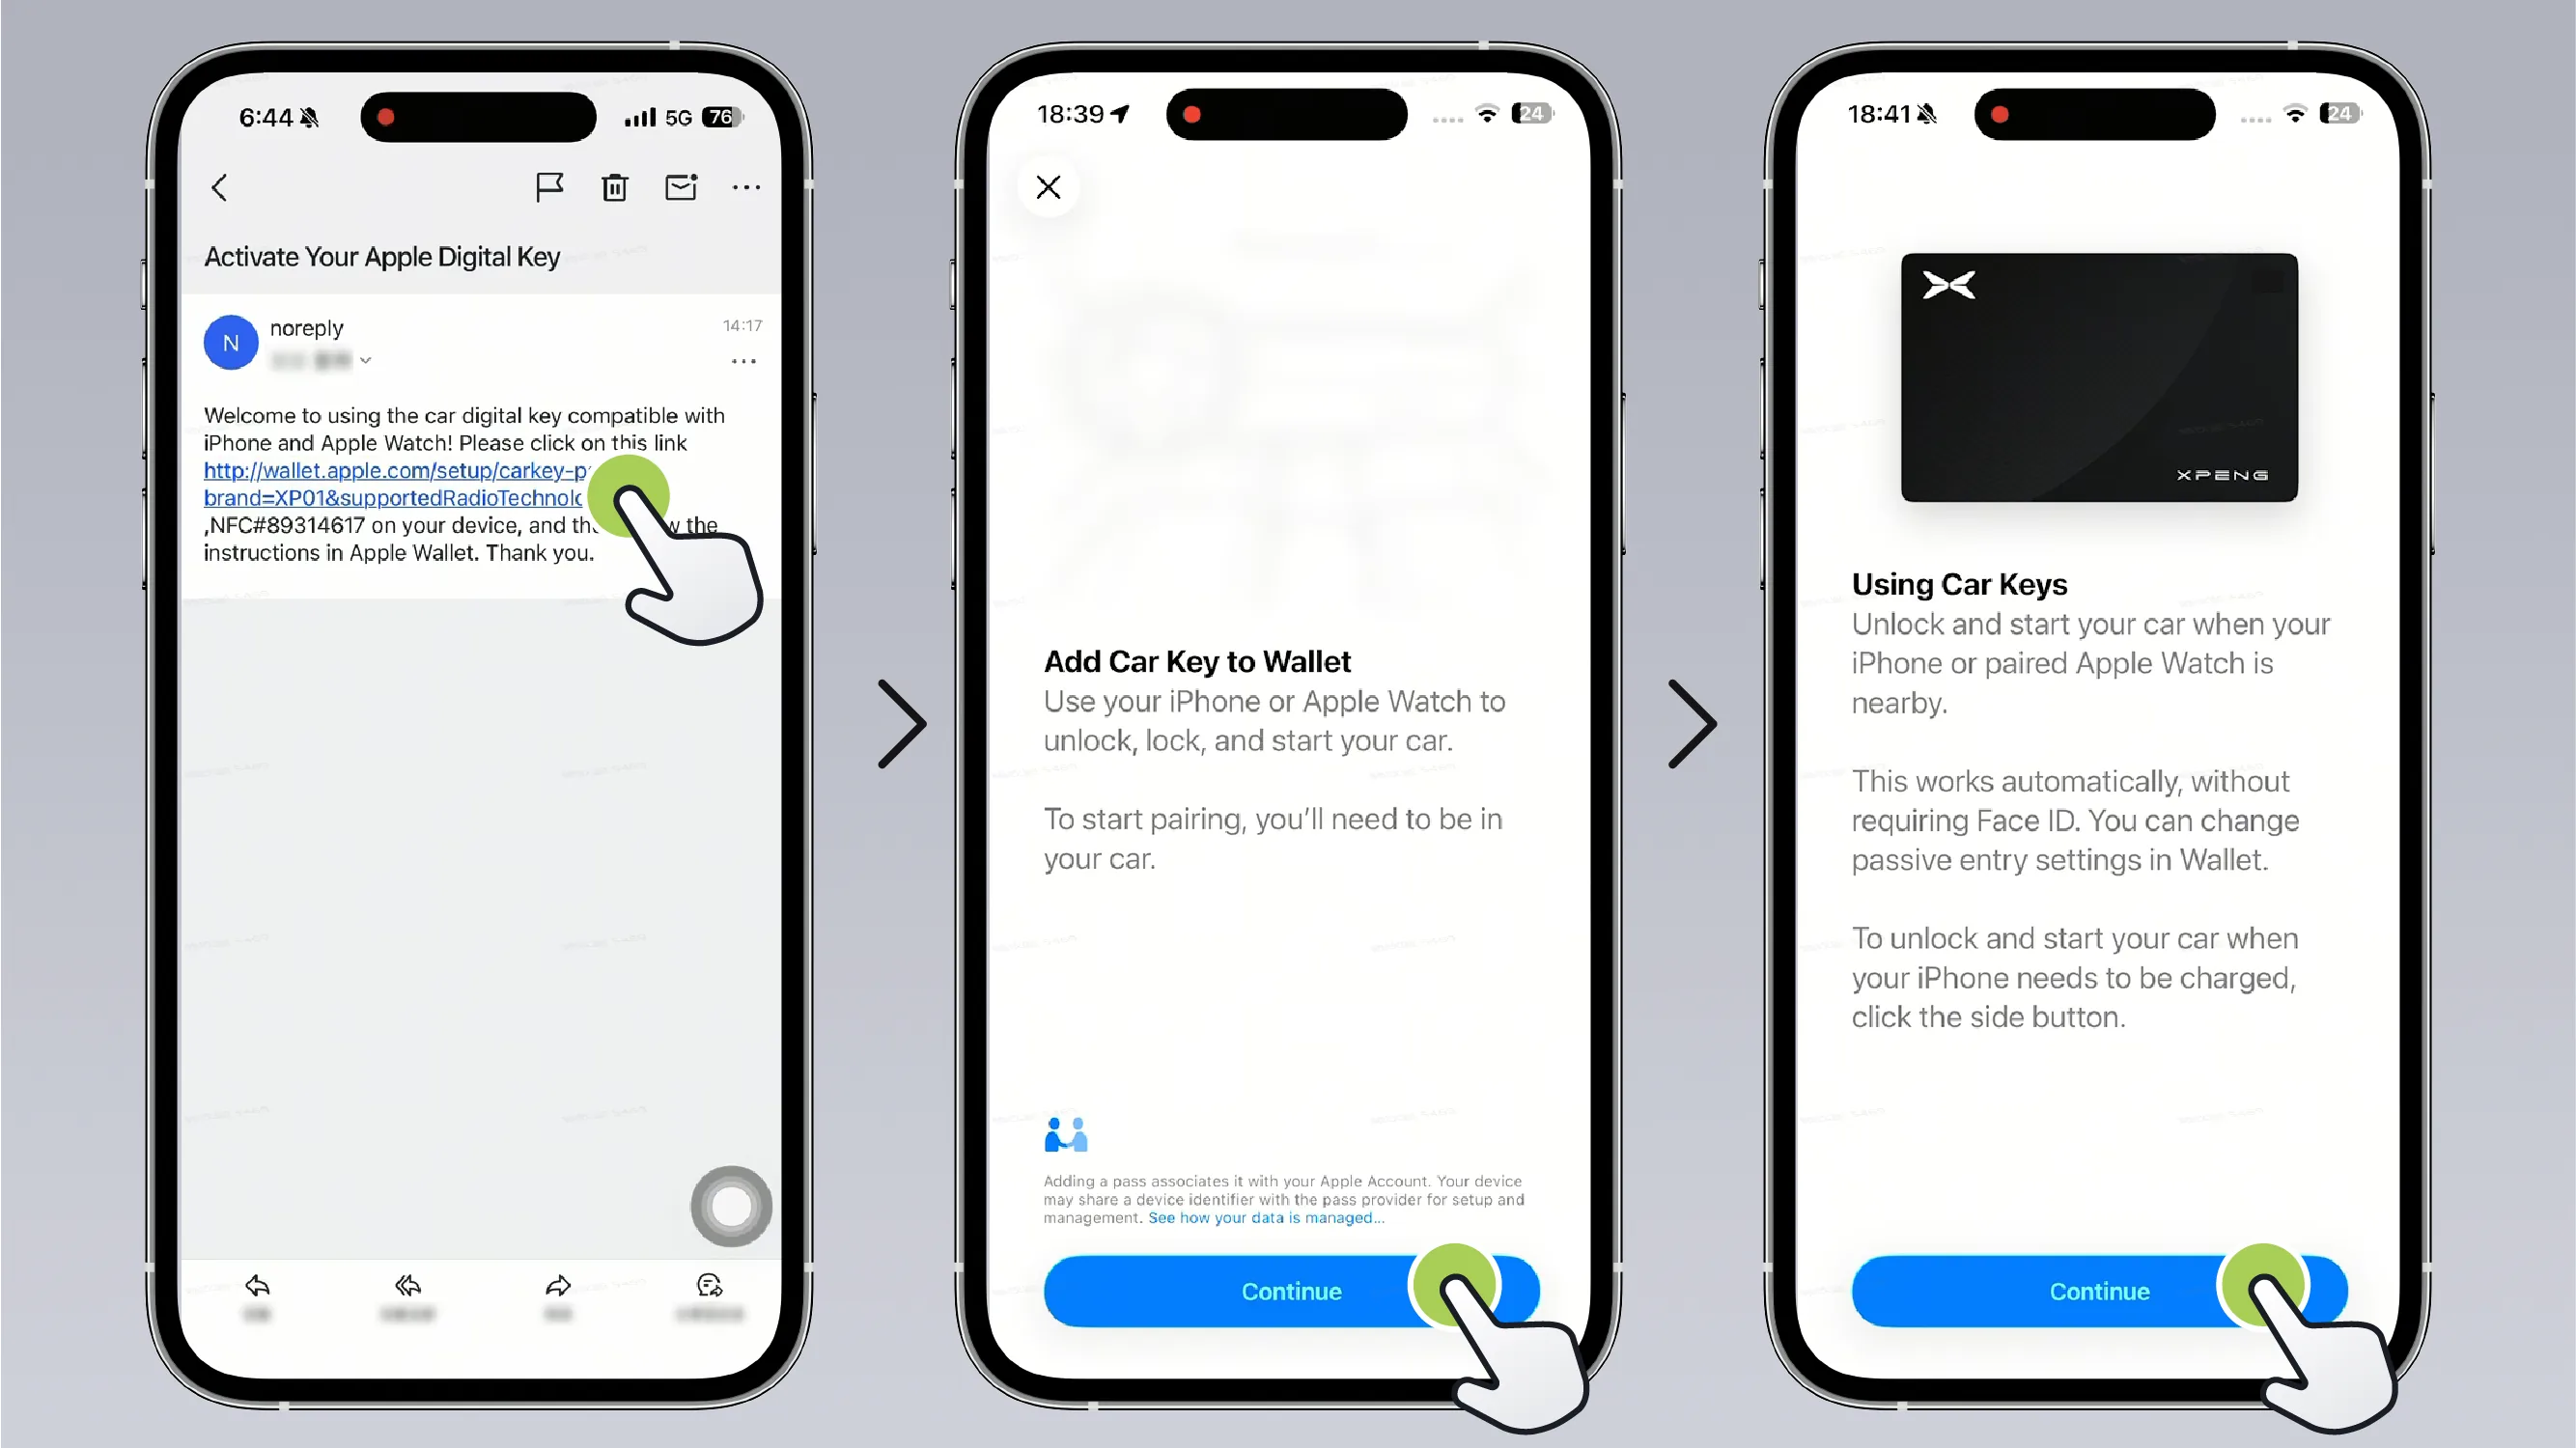 Tips
Tips You can find the customer service center phone number on the local official website.
The email link is sent by default to the email address reserved by the vehicle owner at the time of purchase.
Add the vehicle key to During use, please keep the phone inside the vehicle.
After the vehicle owner has activated the "Phone UWB&NFC Key", you can share your digital key with relatives and friends in the following ways.
Share your wallet key via the XPENG App.
Share your wallet key via Apple Wallet.
Tips Only mobile phones of the same brand are supported for use (iPhone users can only share keys with iPhone users). iPhone users can share via the XPENG App and the Apple Wallet app.
In the XPENG App, tap in sequence 。
The authorized person receives the link to the shared wallet key.
After the authorized person activates the key, the vehicle owner will receive a notification that the addition was successful.
In the XPENG App, press in sequence Go to Apple Wallet or open Apple Wallet.
In Apple Wallet, tap in sequence “Key Card→Tap the upper right corner  →Select “AirDrop””Wait until a shareable device is found, then tap 。
Select , wait for the shared device to complete activation according to the prompts on the phone.
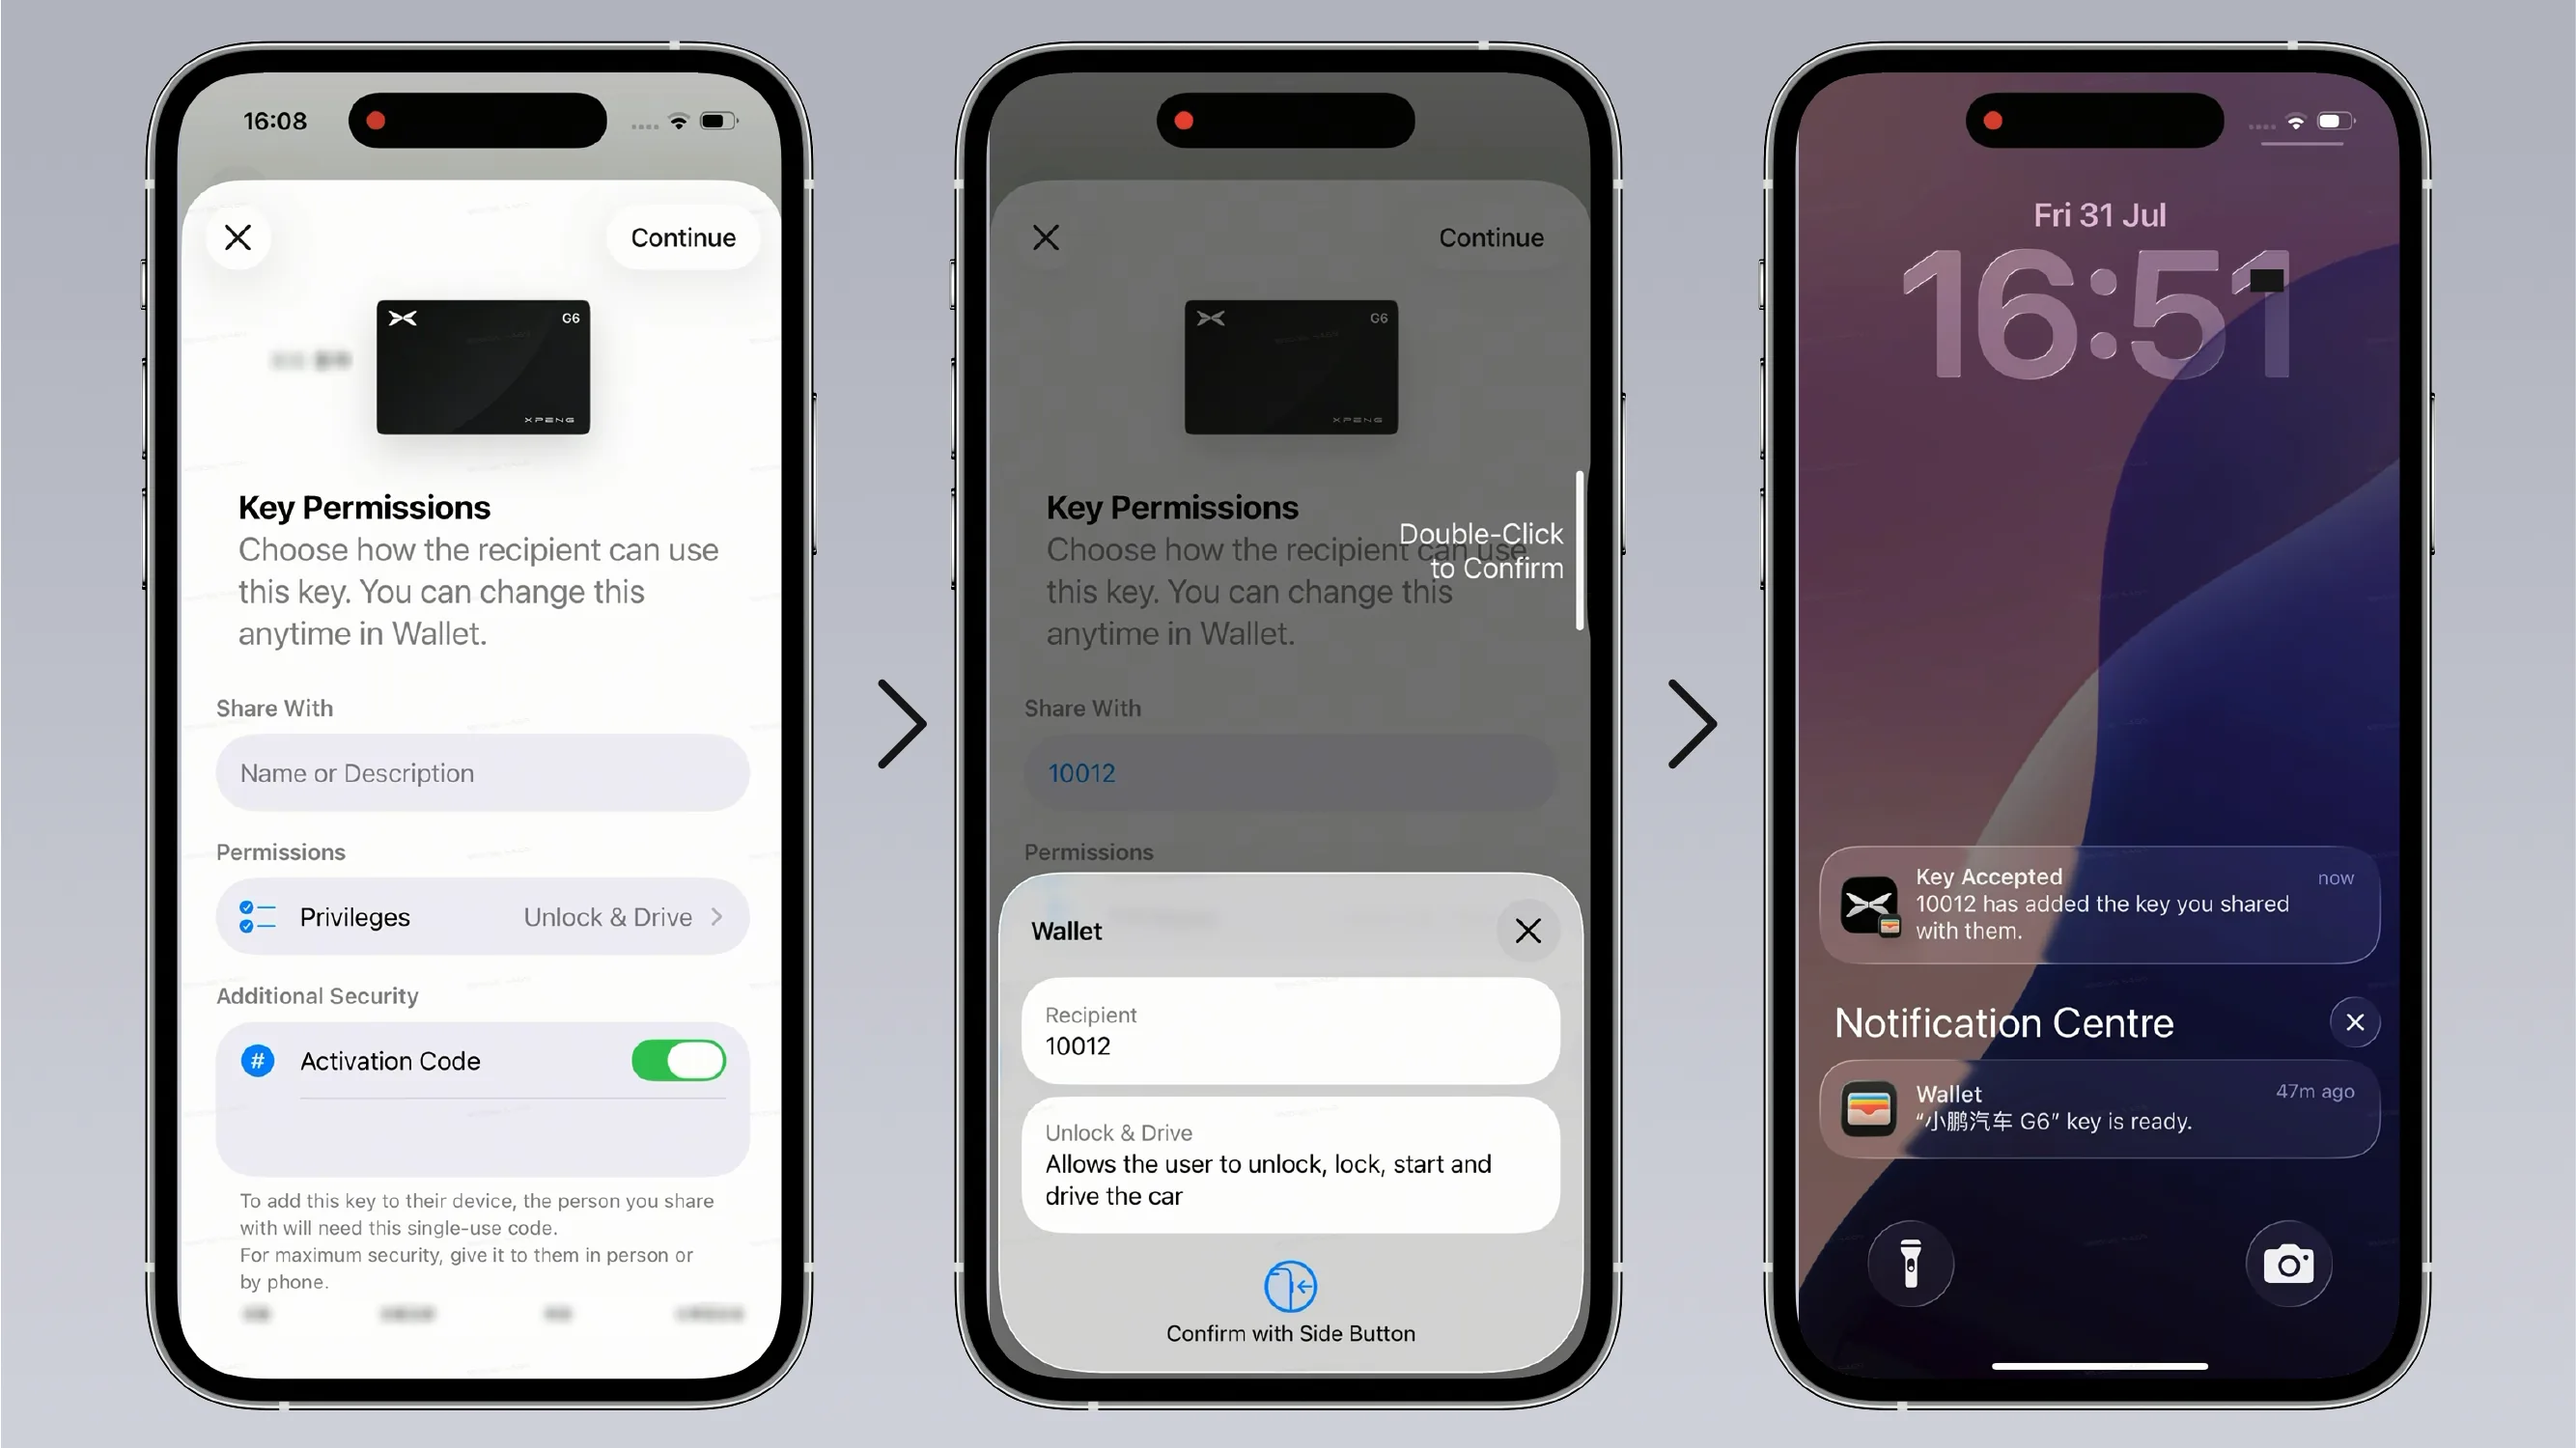
The shared device receives the “AirDrop” prompt, tap in sequence After the vehicle key has been added, in Interface, tap Go to Apple Wallet to use it.
Tips As smartphone system applications are updated, the actual operating procedure may change. Please refer to the prompts in the actual mobile phone application.
In the XPENG App, press in sequence Go to Apple Wallet or open Apple Wallet.
In Apple Wallet, press in sequence “Key Card→Tap  →Remove the vehicle key”。
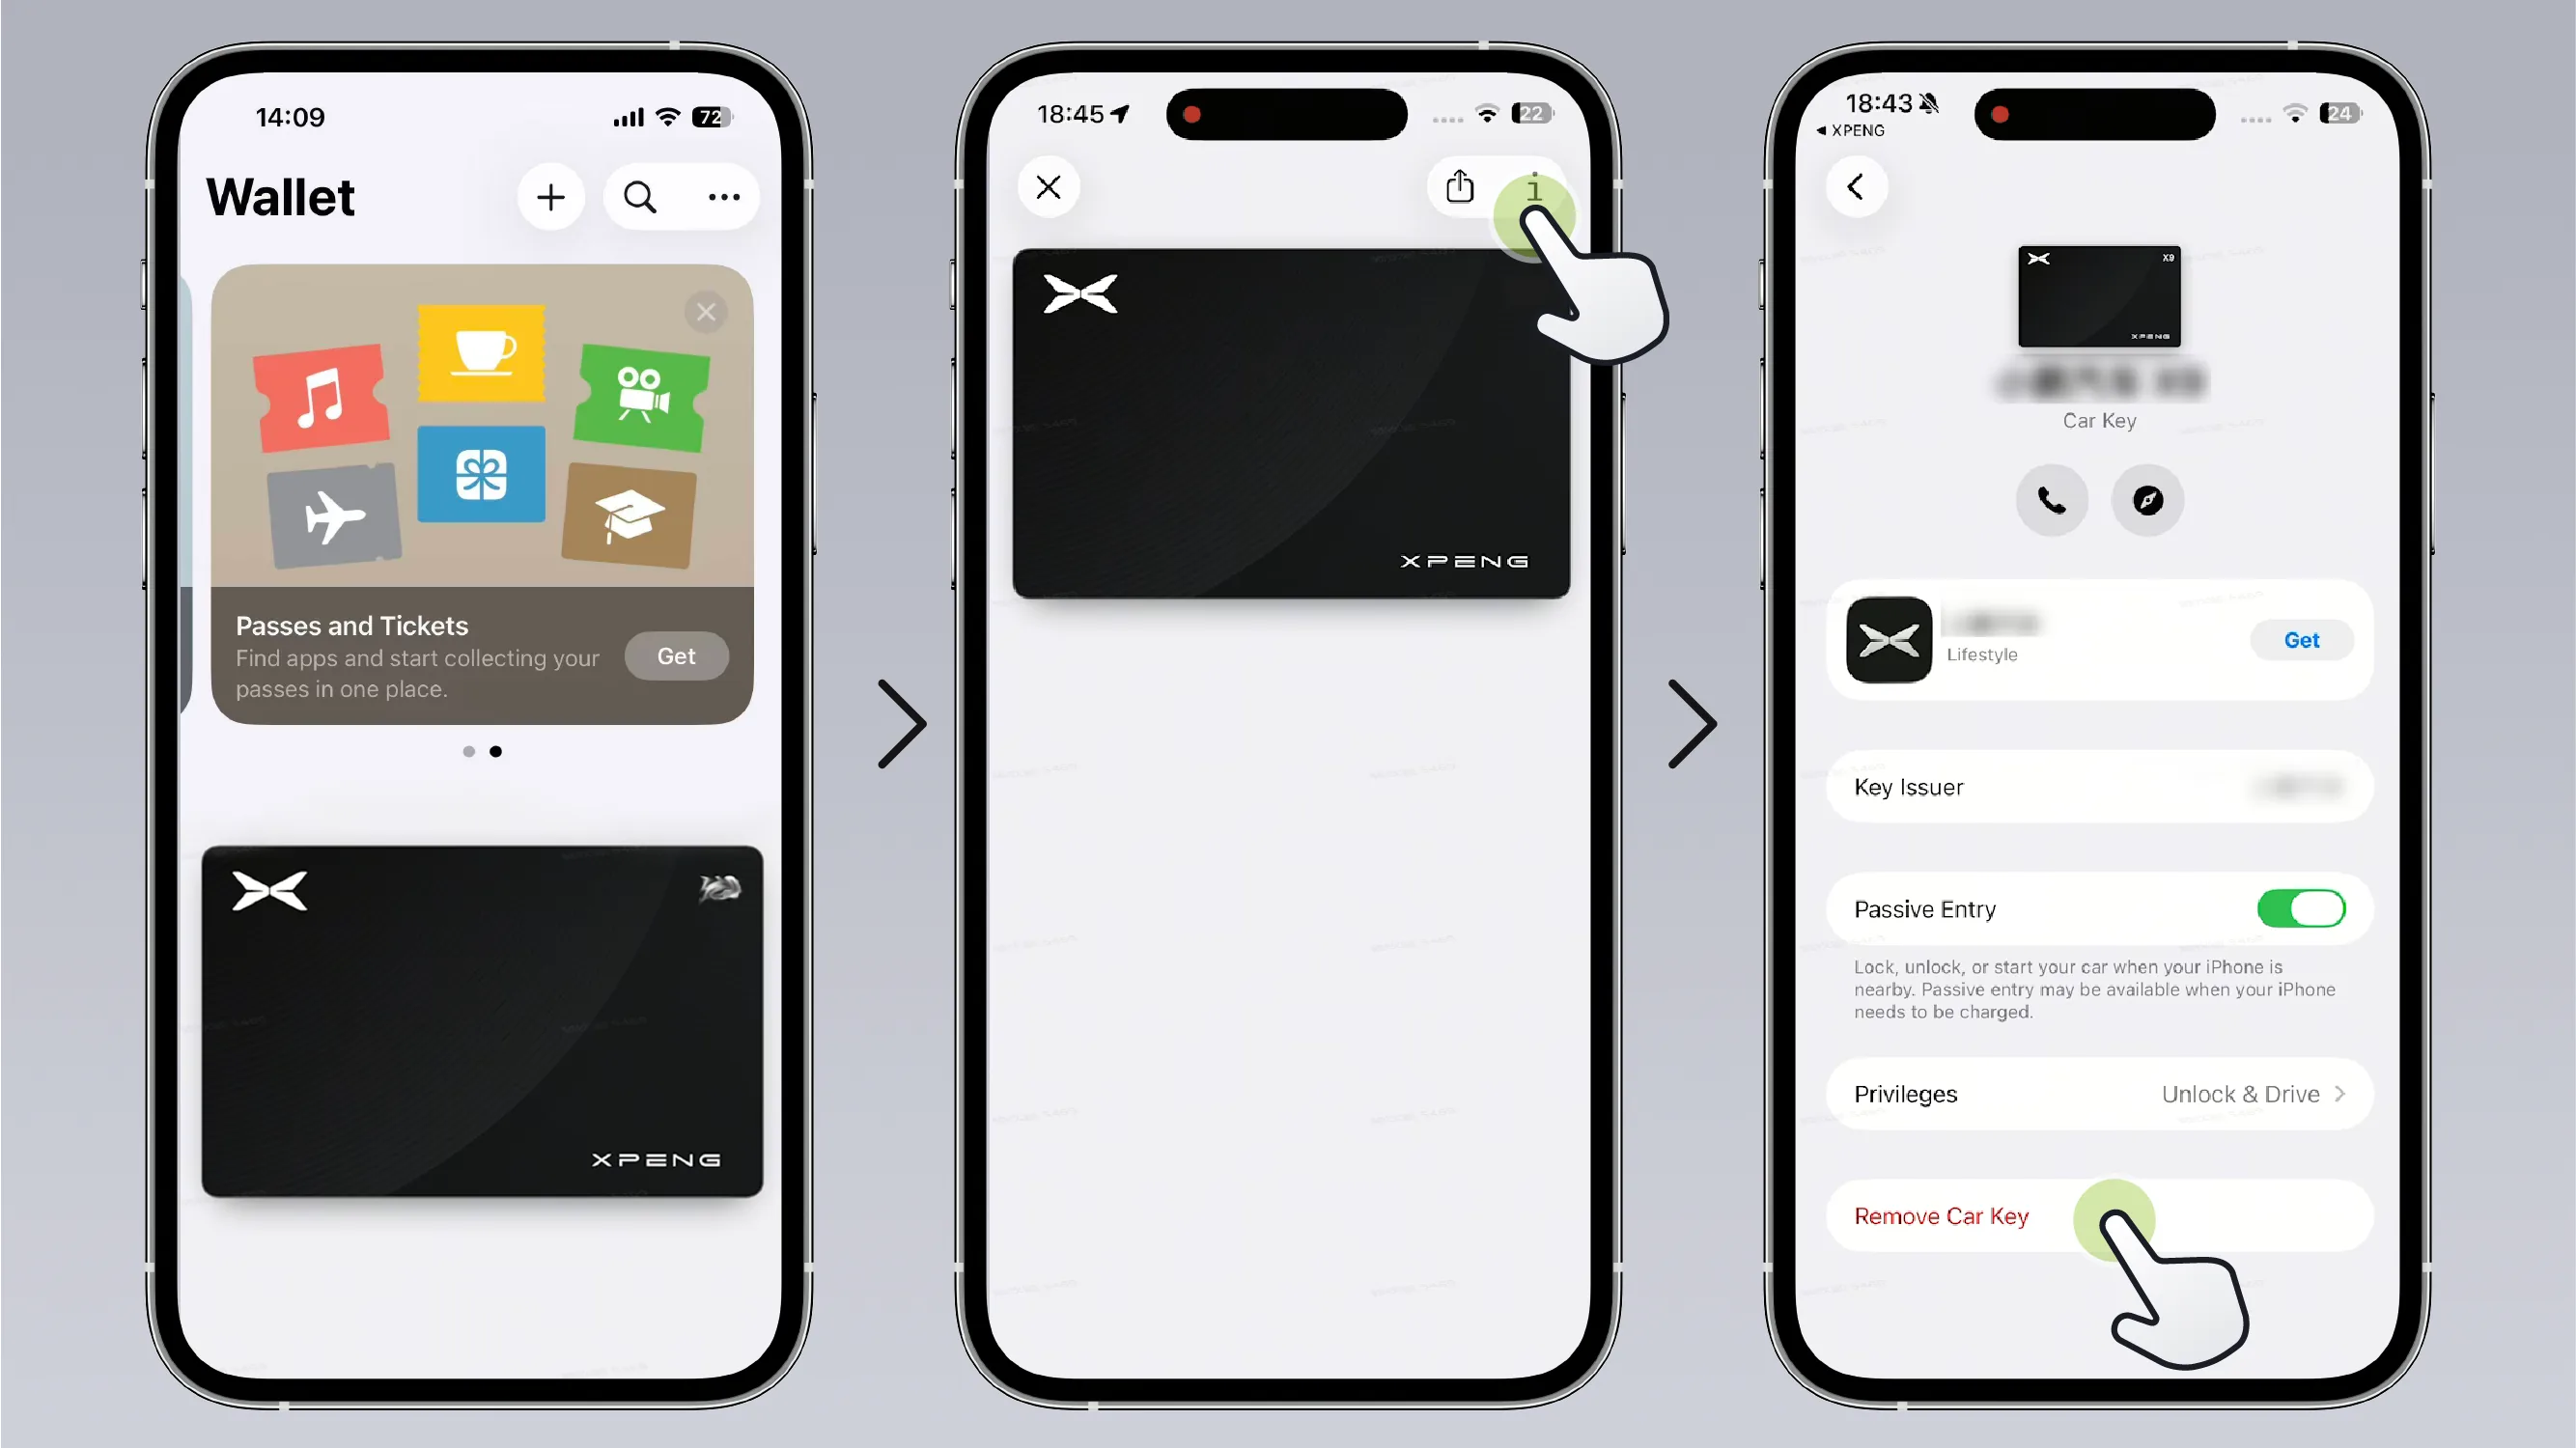 Tips
Tips As the smartphone system application is updated, the actual operating procedure may change. Please refer to the prompts in the actual mobile application.
To register the owner key again, re-register by following the Activate Wallet Key (IOS) procedure.
In the XPENG App, press in sequence Go to Apple Wallet or open Apple Wallet.
In Apple Wallet, press in sequence “Key Card→Upper right corner  →Select "Shared Person Name"→Stop Sharing”。
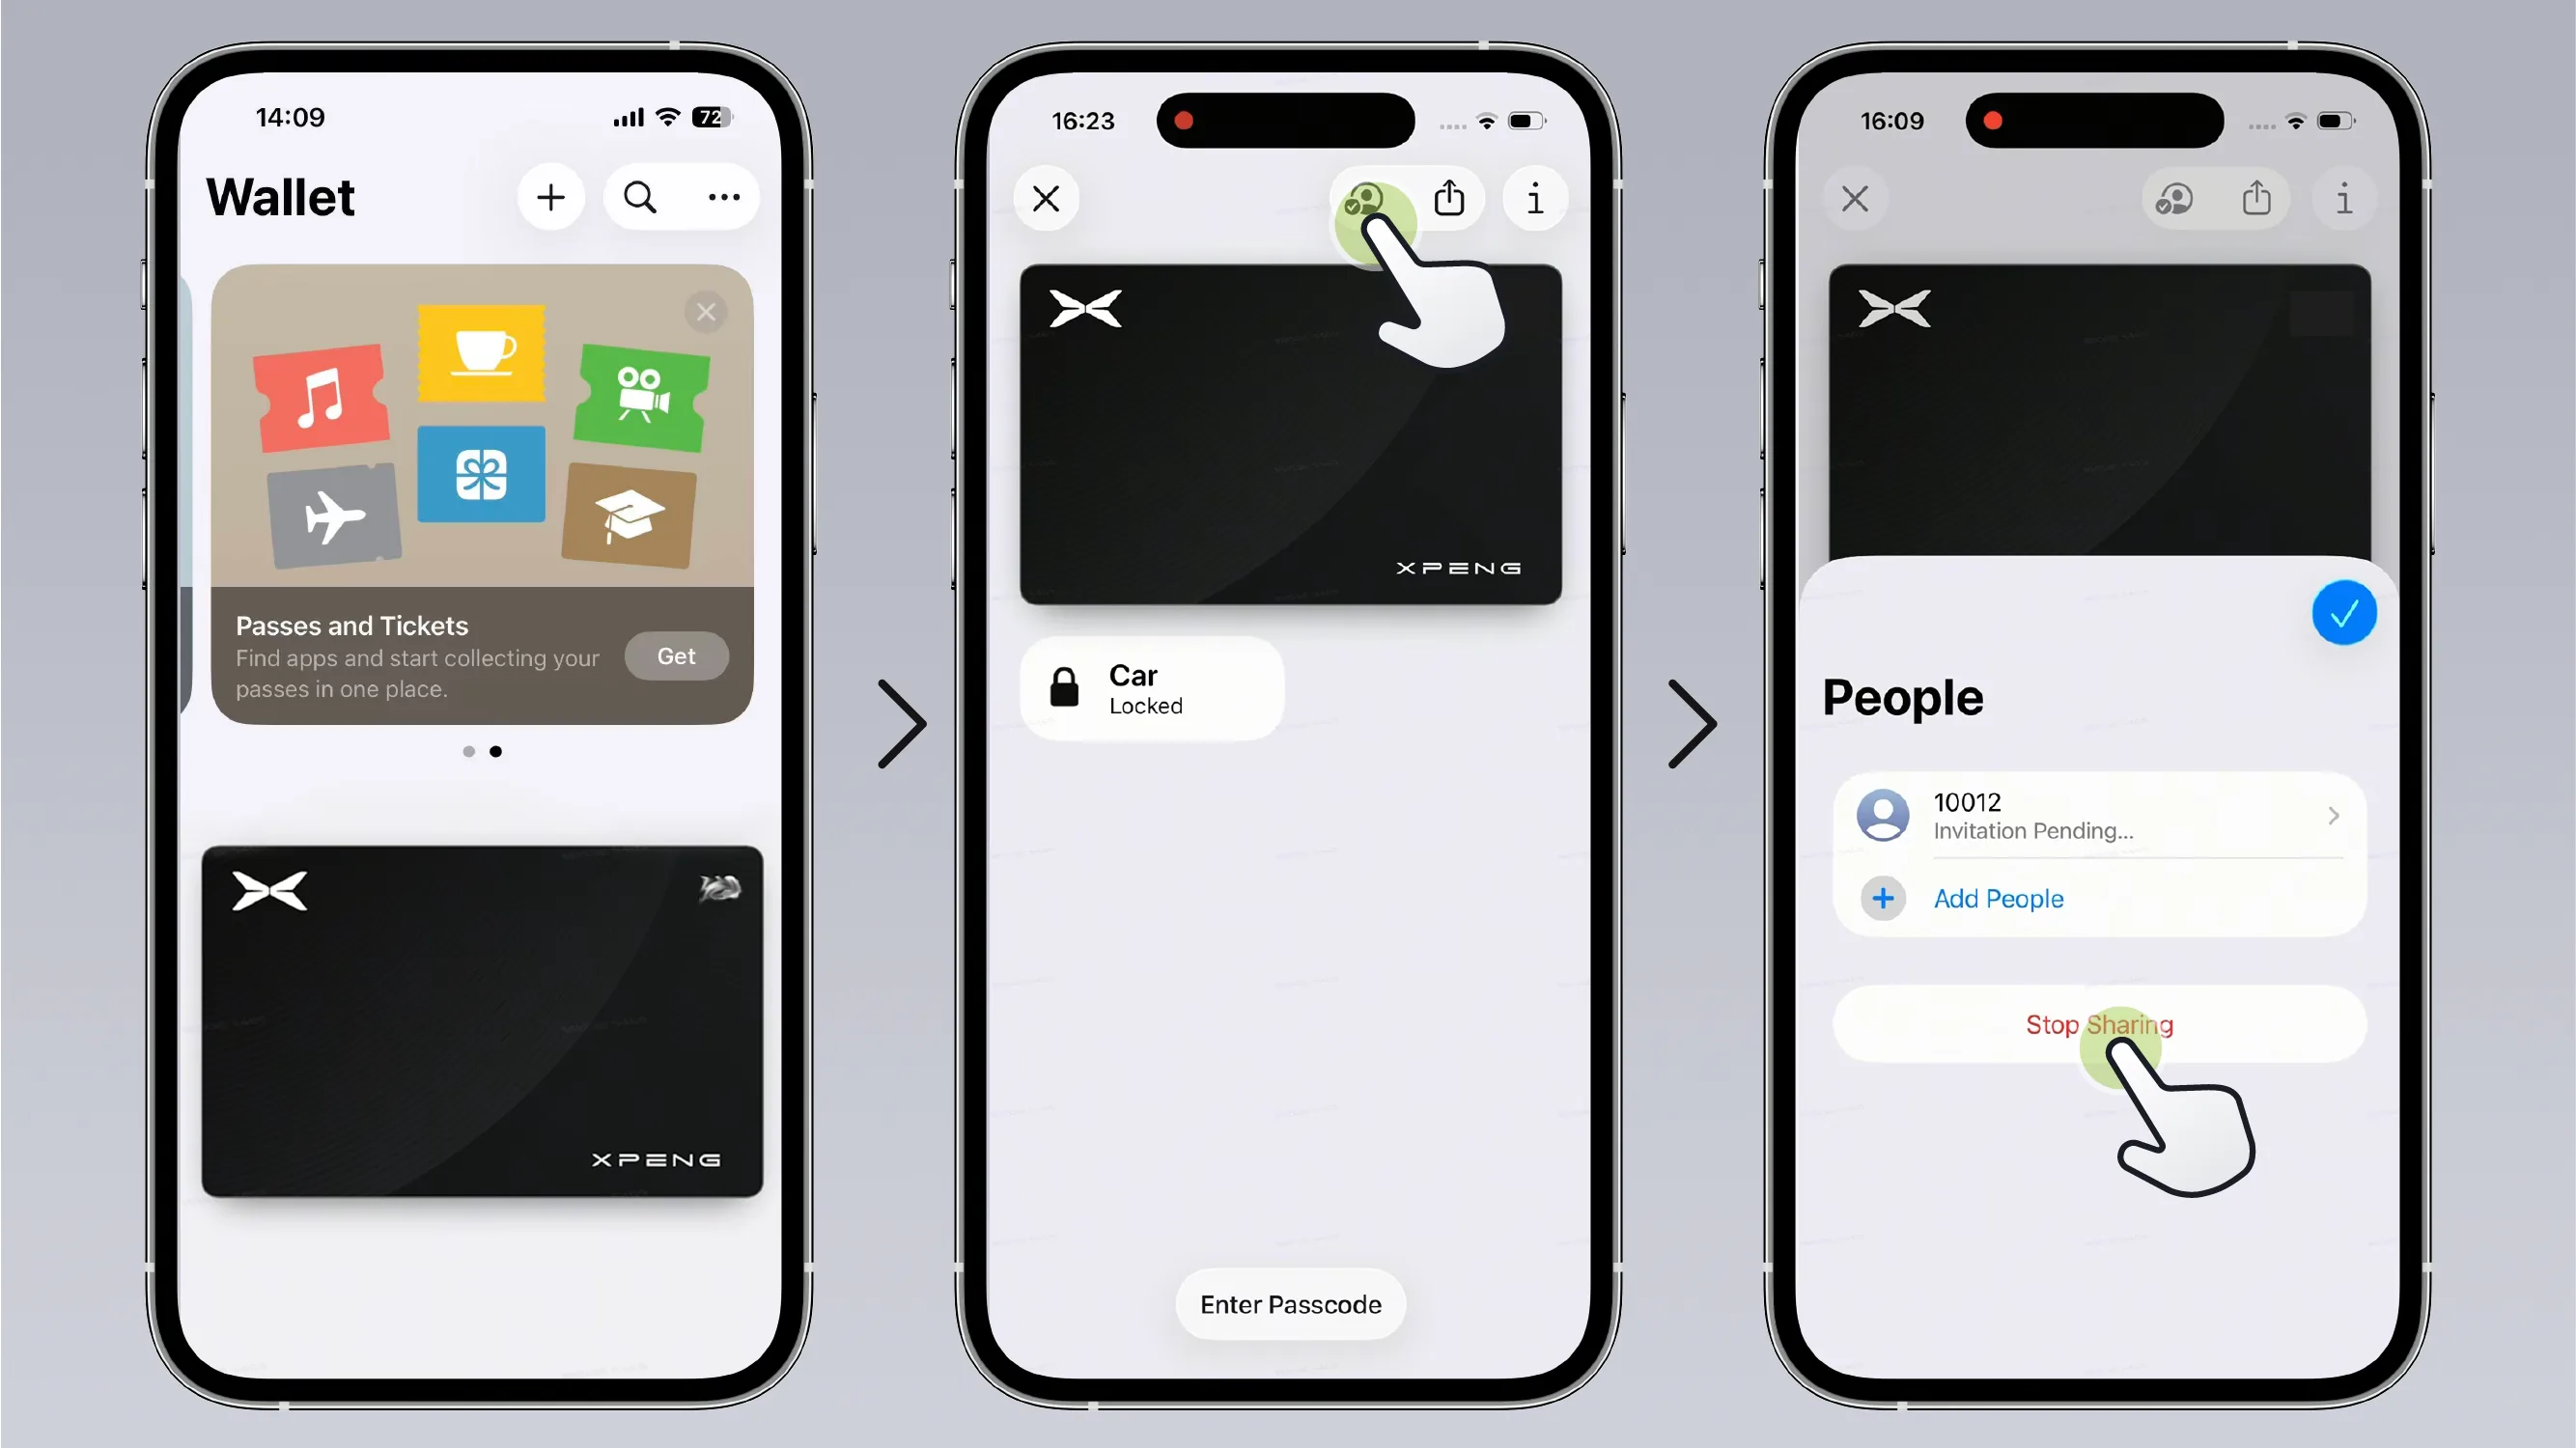 Tips
Tips As the smartphone system application is updated, the actual operating procedure may change. Please refer to the prompts in the actual mobile phone application.
After the iPhone phone shares the key and the owner key is deleted, the shared keys that have already been activated can continue to be used, and the shared keys that have not been activated will not be able to be activated.
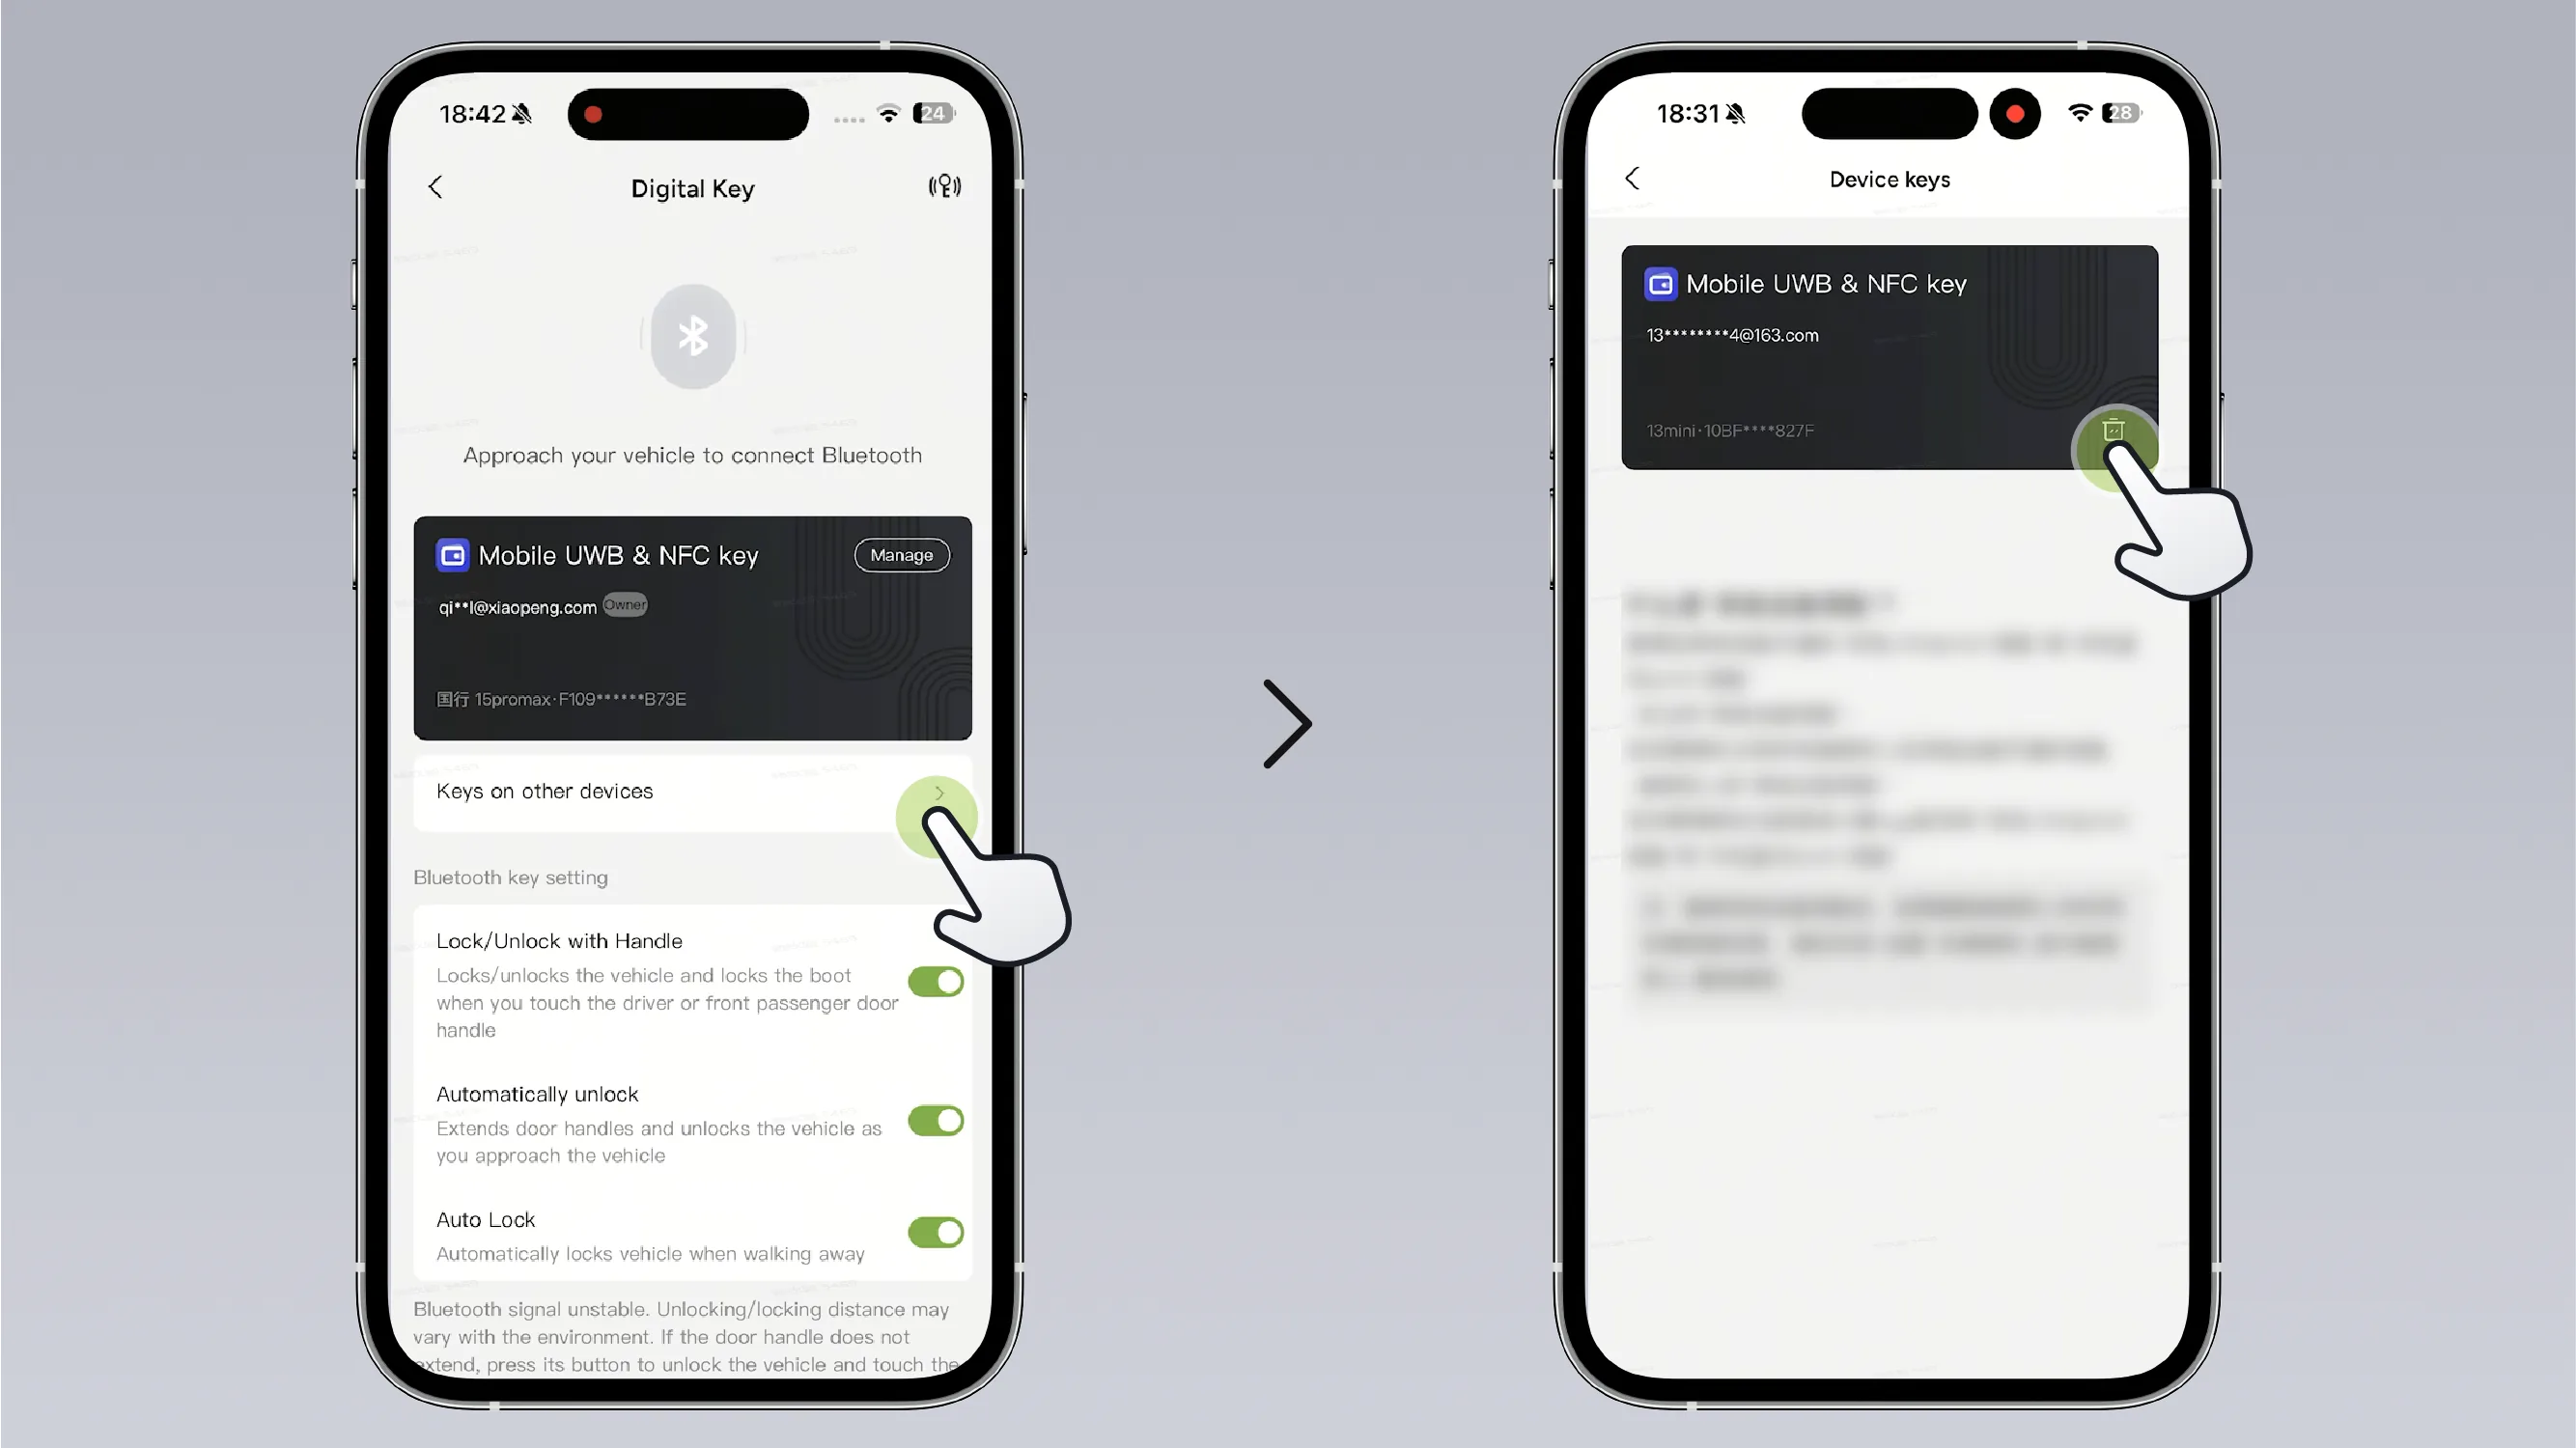
OwnerIn the XPENG App, press in sequence , and you can view or delete all of that vehicle's 。
Authorized PersonIn the XPENG App, press in sequence , you can view or delete those bound to the current XPENG Account 。
As long as you carry an iPhone with Ultra Wideband wireless communication technology (UWB) functionality, you can lock and unlock the vehicle and start the vehicle without opening the XPENG App.
Open Apple Wallet, and in Apple Wallet, press in sequence “Key Card→Tap the upper right corner →Comfort Entry”On/Off.
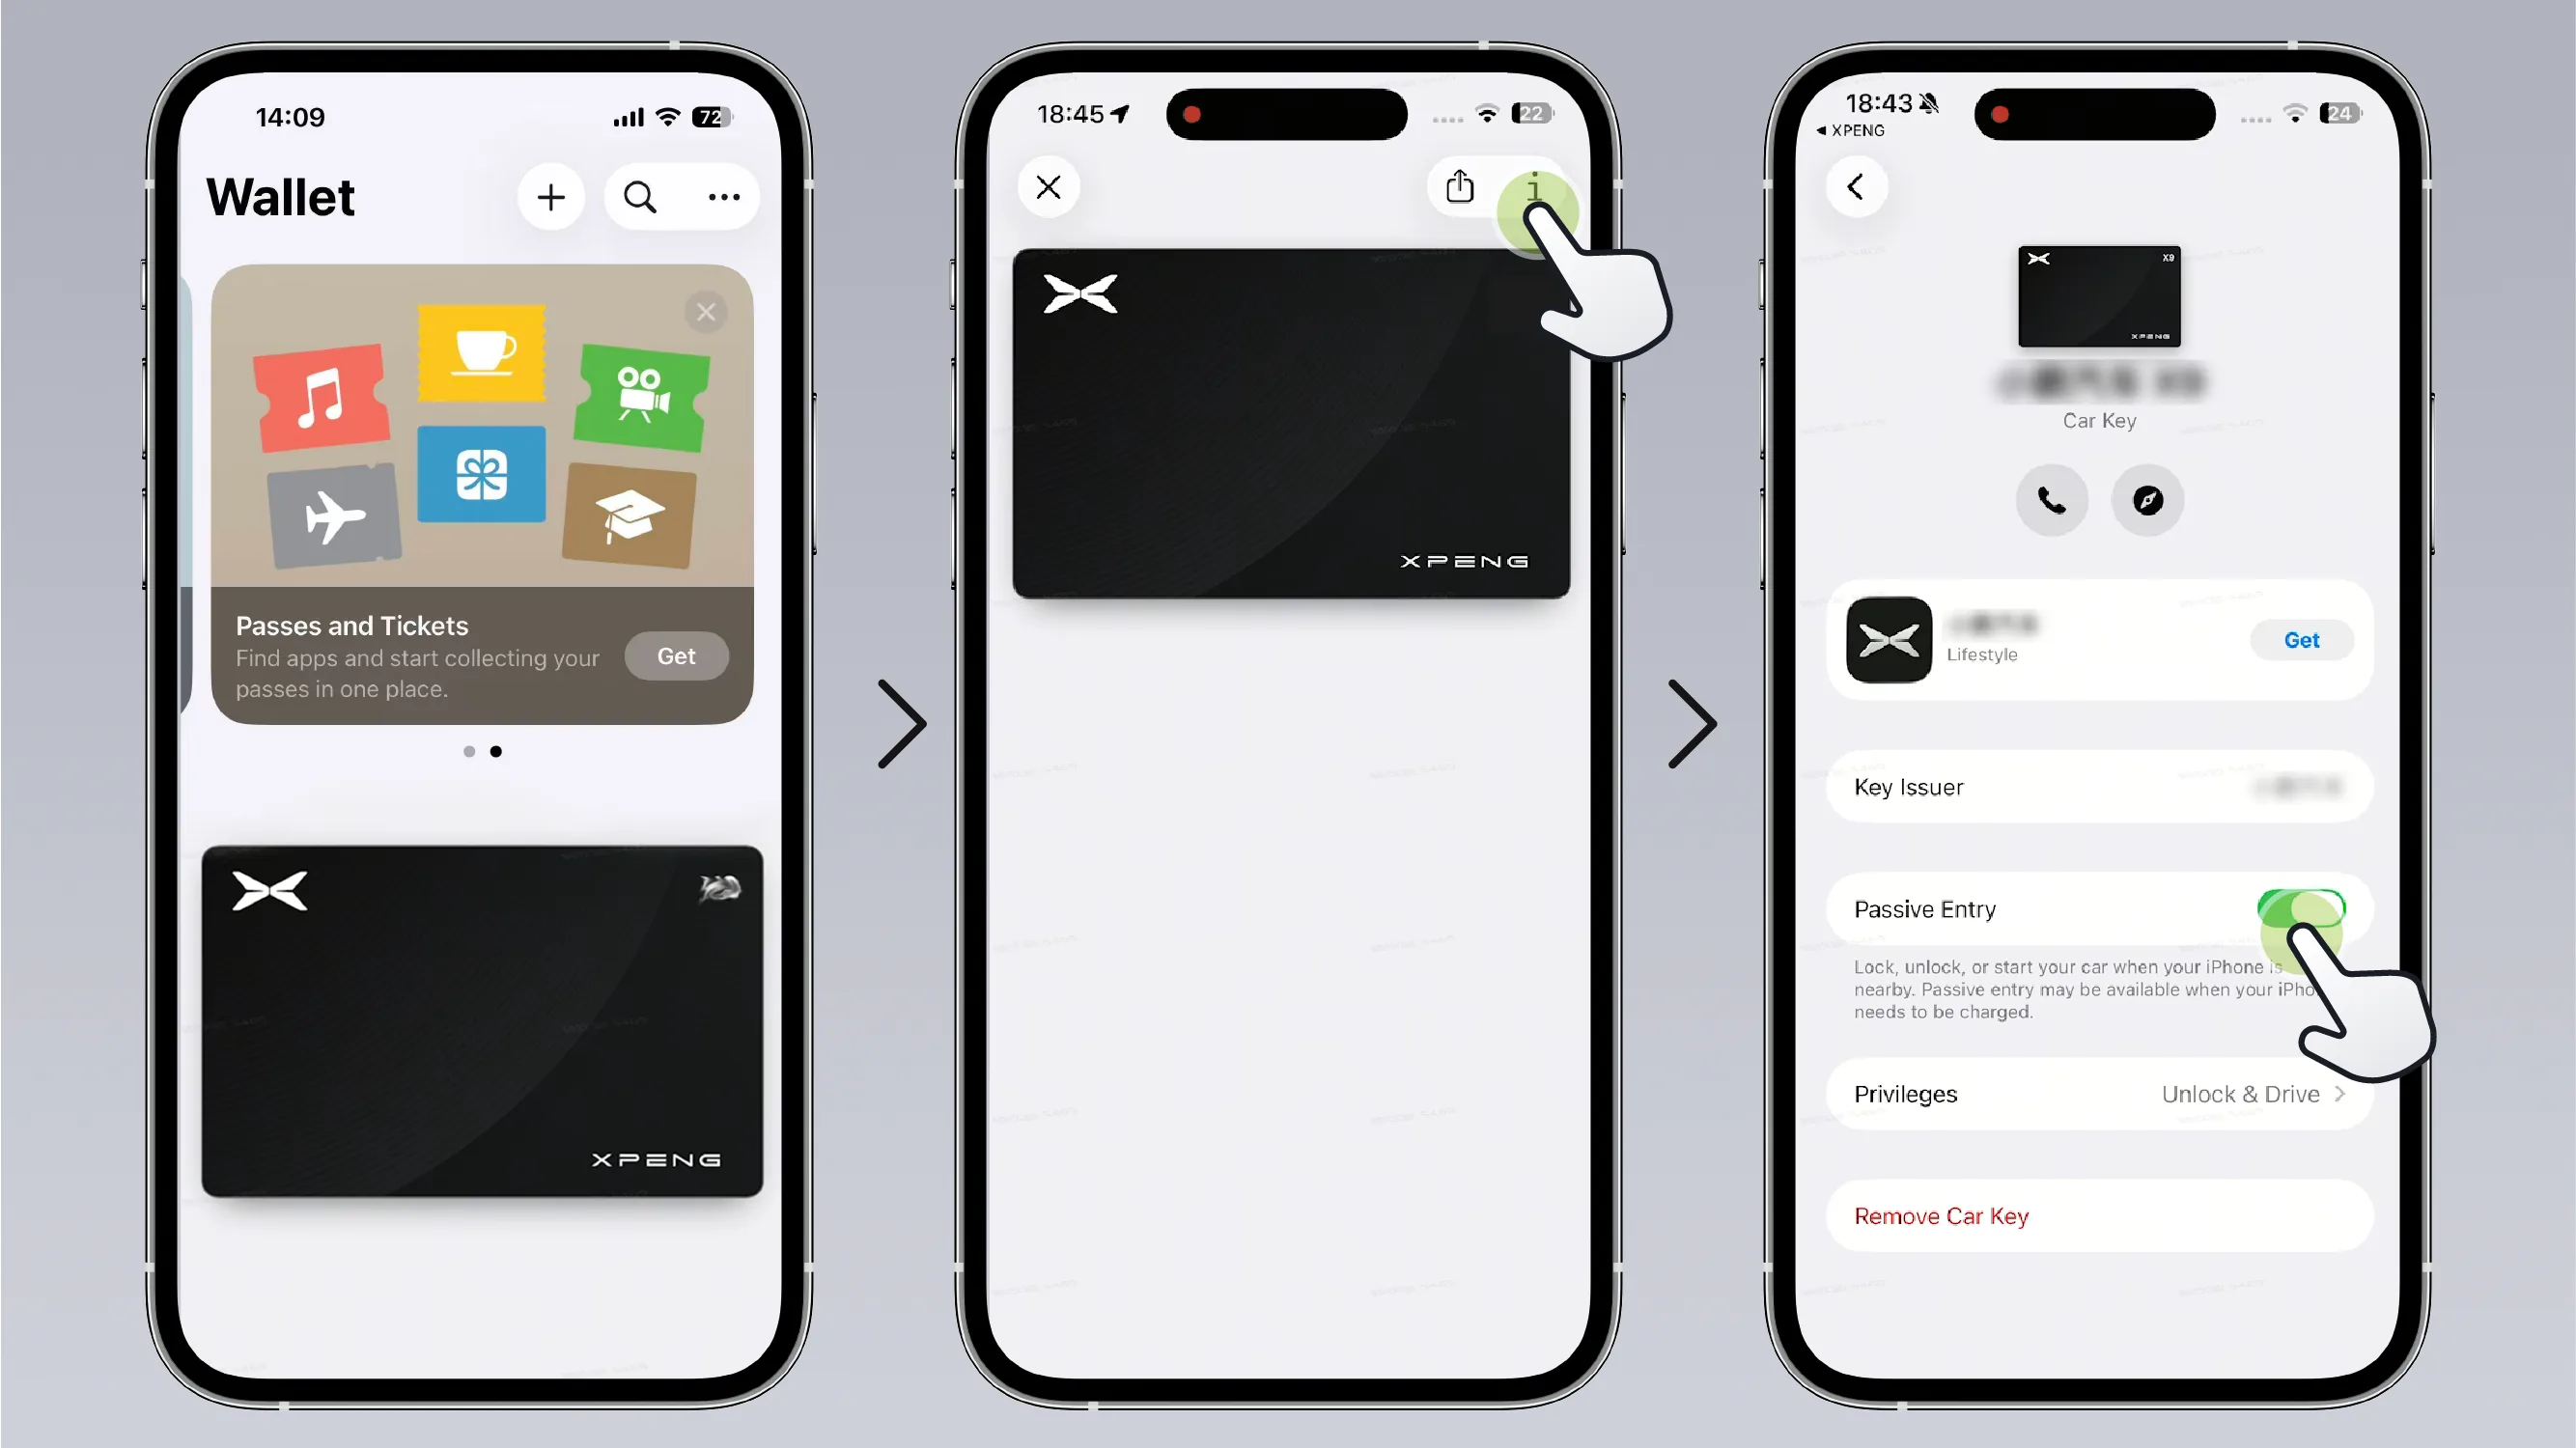
Turn on Bluetooth and NFC on your phone.
Enable core location services:
Enter the phone , enable location services.
Swipe to the bottom and tap , enable network and wireless functions.
When this function is enabled and the mobile phone is successfully paired with the vehicle via Bluetooth, carrying the mobile phone near the vehicle will automatically unlock the doors, and leaving the vehicle will automatically lock them.
Tips As the mobile wallet app is updated, changes may occur. Please refer to the actual steps in the mobile wallet app.
After the phone is successfully paired with the vehicle via Bluetooth, tap in Apple Wallet in sequence , use the key Vehicle Control function to unlock or lock the doors.
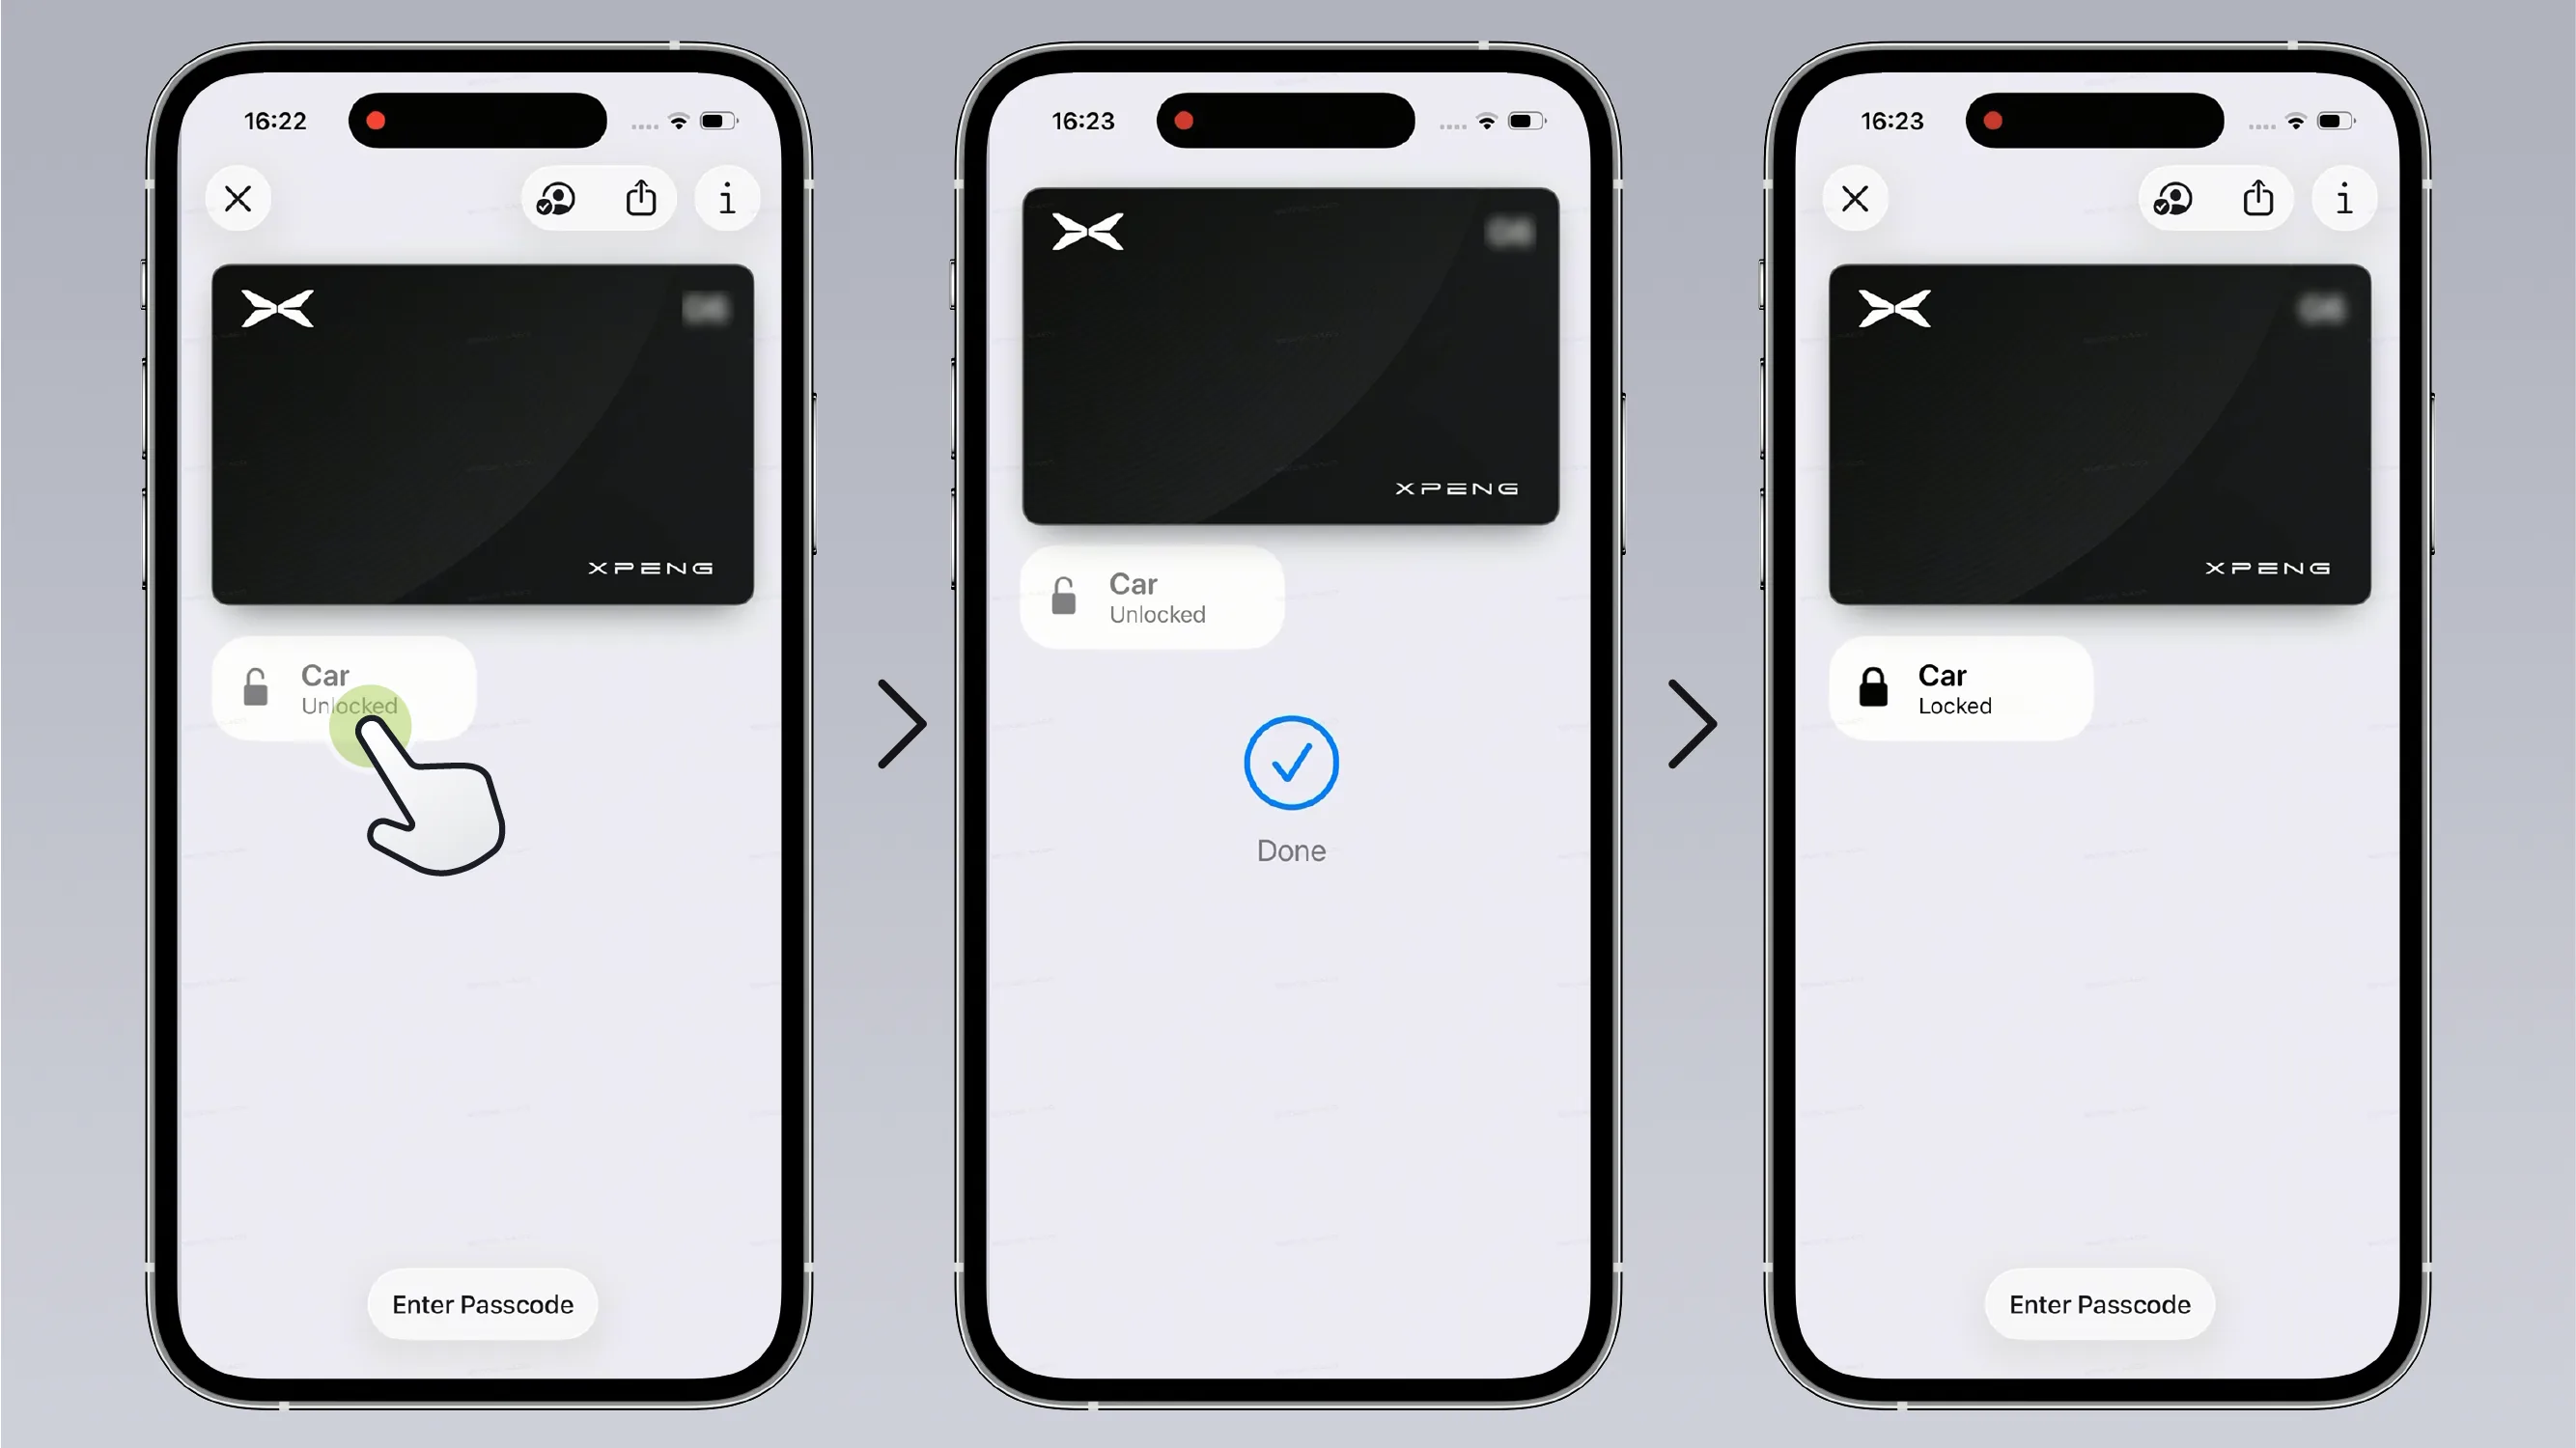 Tips
Tips As the mobile wallet app is updated, changes may occur. Please refer to the actual steps in the mobile wallet app.
In Apple Wallet, tap in sequence Enable the NFC function.

Hold the phone within 2 cm of the NFC recognition area on the driver's side Side Mirrors (for more than 1 second) to unlock and lock the vehicle.
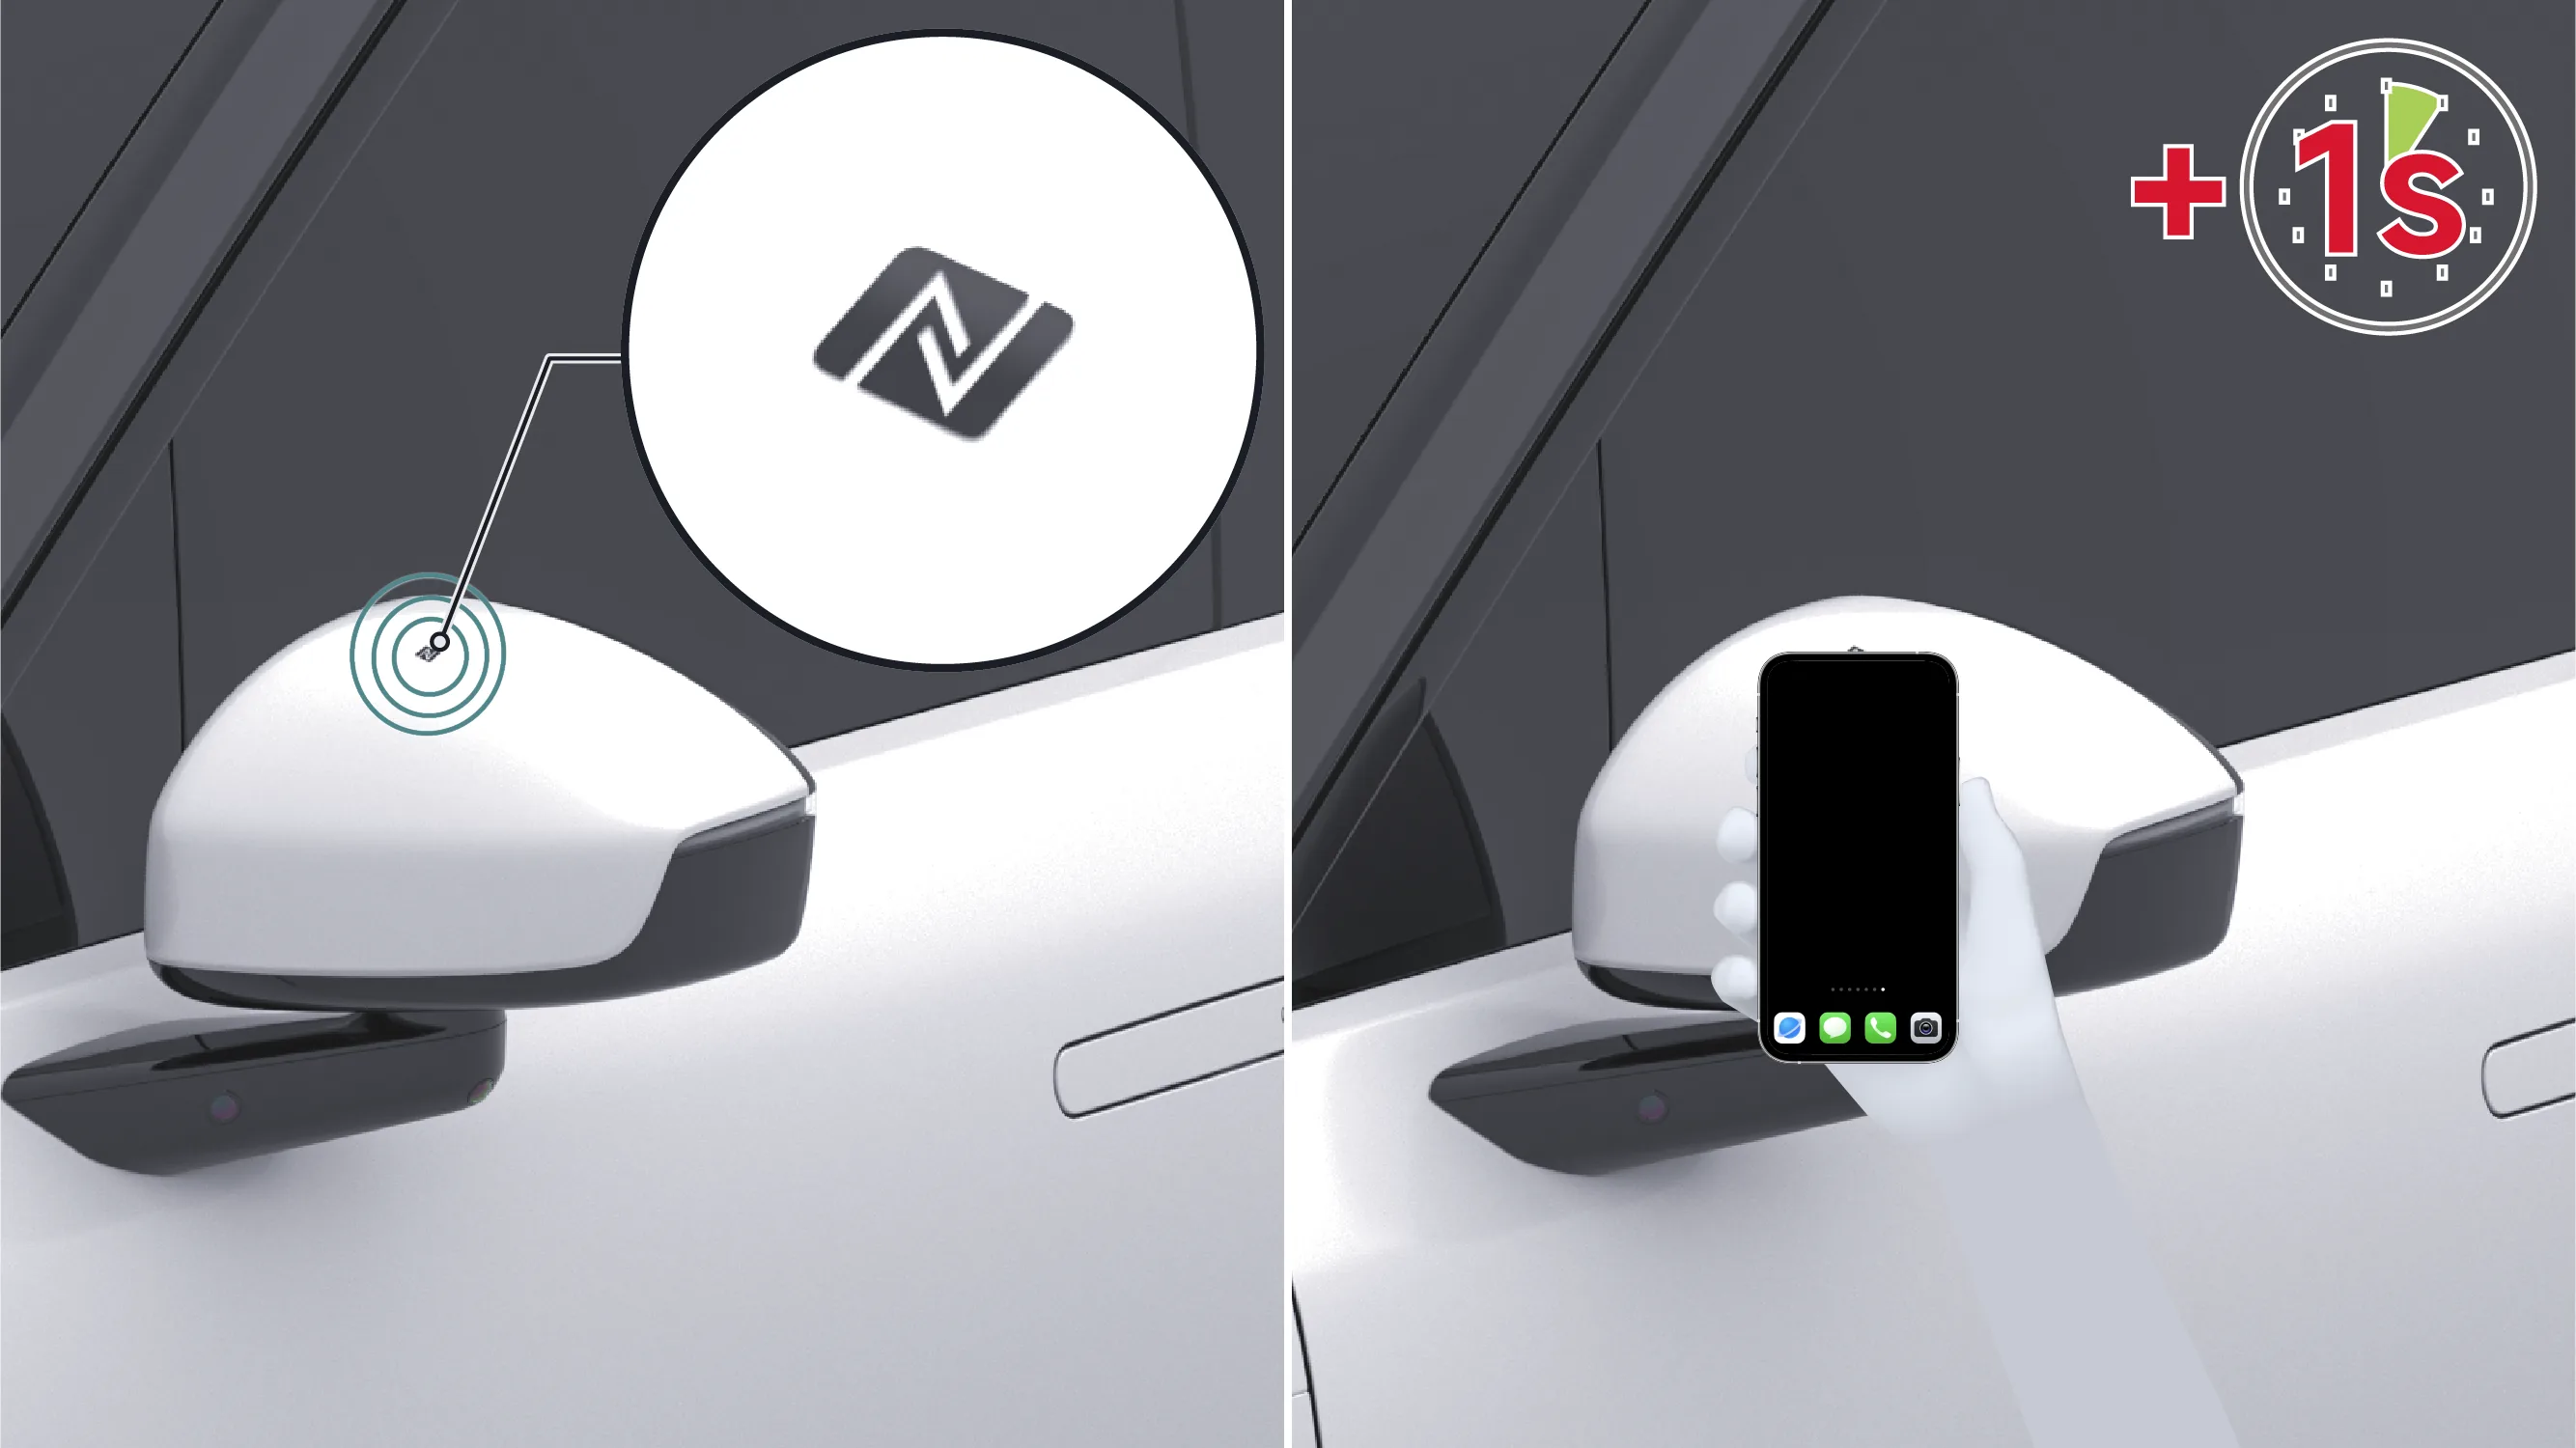
After holding the phone close to the NFC recognition area on the in-vehicle wireless charging pad to complete key authentication, depress the brake pedal and shift gears to start the vehicle.
Bluetooth signals are easily blocked by the human body or interfered with by radio waves in complex environments. If the XPENG App displays that Bluetooth is not connected when approaching the vehicle, go to the phone system settings to manually restart Bluetooth (turn it off and then turn it on again).
Tips Please do not habitually "swipe up to fully kill" the XPENG App from the background during daily use; just let it quietly protect you in the background.
If the key is reactivated, the App is reinstalled, or you log in on a different phone, the "Automatic Lock/Unlock" function must be set again.
Handling Methods When the Phone Is Powered Off Due to a Dead Battery or Shifting Is Not Possible
When the phone powers off due to a depleted battery, you can unlock/lock by holding the top of the iPhone (or Apple Watch) close to the NFC sensing area on the exterior rearview mirror on the driver's side.
After unlocking the vehicle, you can start the vehicle within 30 seconds. If more than 30 seconds have passed after unlocking, place the phone on the wireless charging panel in the vehicle marked with the NFC symbol. After key verification is completed, press the brake pedal again to start normally and shift into gear.
On the central control screen “ →Settings→General→Safety and Privacy”Interface, tap , click in the pop-up prompt window Send the email verification code to the vehicle owner’s email address. After the entered verification code passes verification, the digital vehicle keys of all users will be deactivated.
Tips After the digital car key is deregistered, all authorized users must reactivate the digital car key. Please use with caution.
What situations (including but not limited to the following) will cause the Bluetooth key automatic lock/unlock function to fail?
When the phone battery is low and Low Power Mode is enabled.
Bluetooth is not enabled on the phone.
The phone system closed the XPENG Motors App.
Bluetooth signal is unstable and disconnects unexpectedly.
The Bluetooth signal is blocked by obstacles (such as a backpack, the body, walls, etc.), causing abnormal distance measurement.
After the phone restarts or the system is updated, the XPENG Motors App is not opened.
When the doors, front hood, and trunk are not fully closed, leaving the vehicle causes the Bluetooth connection to disconnect.
What situations (including but not limited to) will cause the phone NFC key lock/unlock function to fail?
When the phone battery is low and Low Power Mode is enabled.
The phone's NFC function is not enabled.
The phone's default payment application is not set to the XPENG Motors App.
What situations (including but not limited to) will cause wallet key lock/unlock failure?
When the phone battery is low and Low Power Mode is enabled.
Bluetooth and NFC are not enabled on the phone.
The Bluetooth signal is unstable and disconnects abnormally.
The Bluetooth signal is blocked by obstacles (such as backpacks, the body, walls, etc.), causing abnormal distance measurement.
The phone's default payment application is not set to the XPENG Motors App.
Tips If the mobile phone Bluetooth key cannot unlock or lock the vehicle, first restart the XPENG App. If the problem still cannot be resolved, please in On the interface, resolve the connection issue according to the guidance.
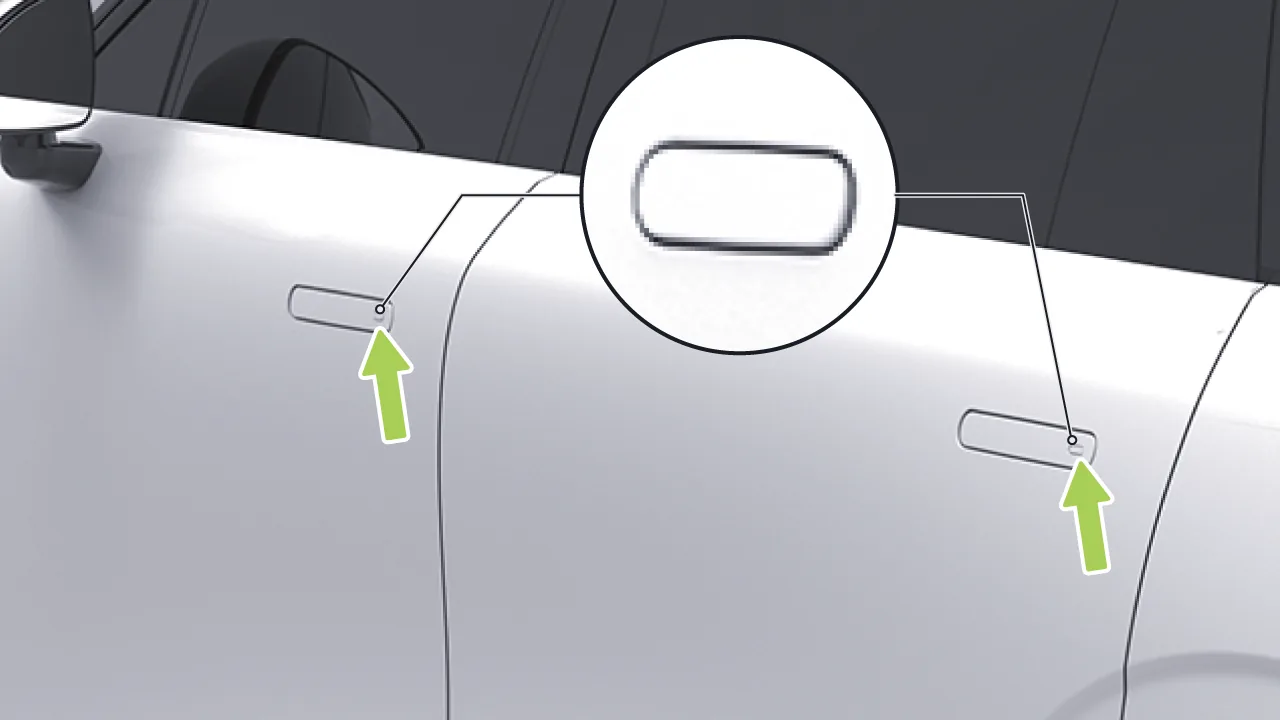
Carry a valid smart remote key*, mobile phone Bluetooth key, or mobile phone wallet key, and press the door handle microswitch to unlock or lock the vehicle.
Unlock the vehicle:When the vehicle is in the locked state, press the microswitch on the door handle. At this time, the vehicle provides an unlocking feedback prompt, indicating that unlocking is successful.
Lock the vehicle:When the vehicle is in the unlocked state and all doors (including the front hood and trunk) are closed, press the door handle microswitch. At this time, the vehicle provides lock feedback, indicating that locking is successful.
Tips With a valid NFC key present, the vehicle cannot be unlocked or locked by pressing the slight switch on the door handle.
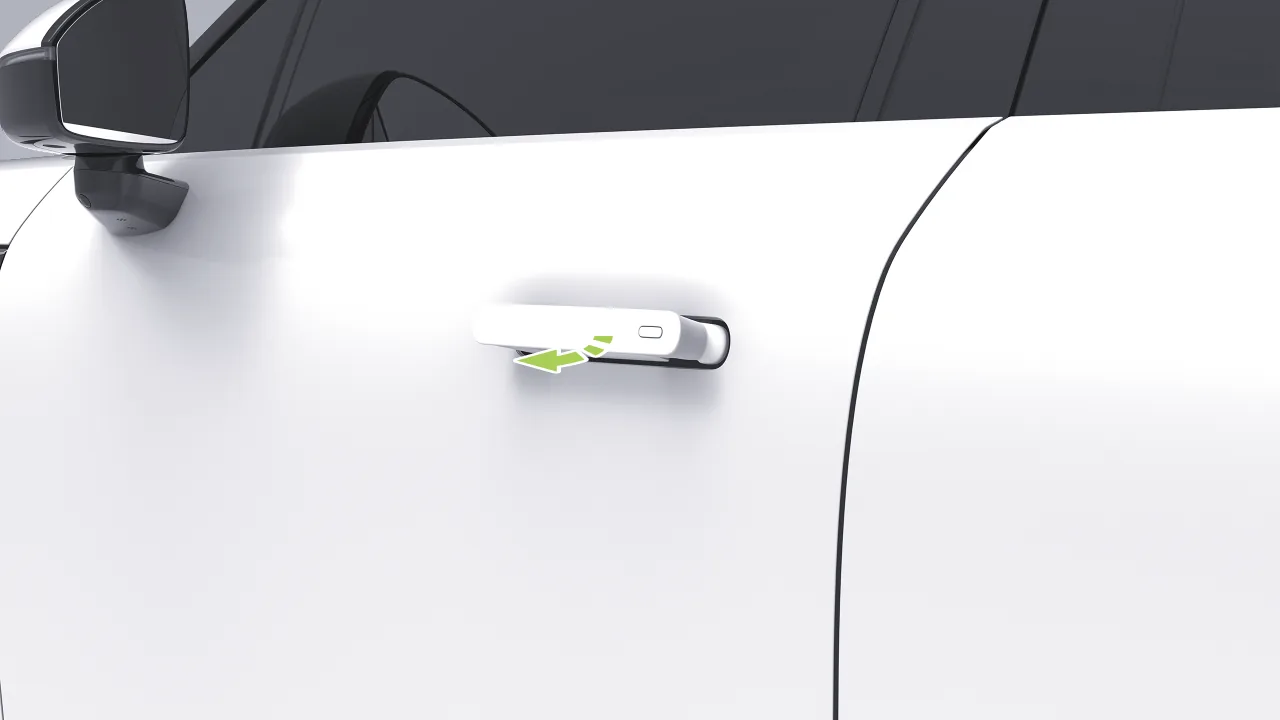
When the vehicle is unlocked, the exterior door handles automatically pop out, and the doors can be opened by pulling the exterior door handles.
Tips When any door, the hood, or the trunk is opened, the center display and the head-up display (HUD) show 'The vehicle door is not closed.'
Retract on lock: When the door is locked, the door handle automatically retracts.
Retract on gear shift: When shifting from P gear to N/R/D Gear, the door handle will retract automatically.
Overspeed retraction: When the vehicle speed exceeds 3 km/h, the door handle will automatically retract.
Timeout Retraction: After the doors (including the trunk) and the front compartment lid are closed, if the above retraction operation is not performed within 120 seconds, the door handles will automatically retract.
When the exterior handle is retracted, press the door handle microswitch to pop the exterior handle out again.
Warning Be sure to use caution when using the door handle to prevent fingers, jewelry, acrylic nails, etc. from being caught by the door or the door handle mechanism. Otherwise, damage to items or personal injury may occur.
Tips When using the automatic parking feature, the flush door handle remains deployed, pulling the door handle suspends the automatic parking feature.
Control the door handle fold/show more than 8 times within 1 minute, will trigger the anti-play mode, the door handle no longer moves, after 20 seconds the function will resume.
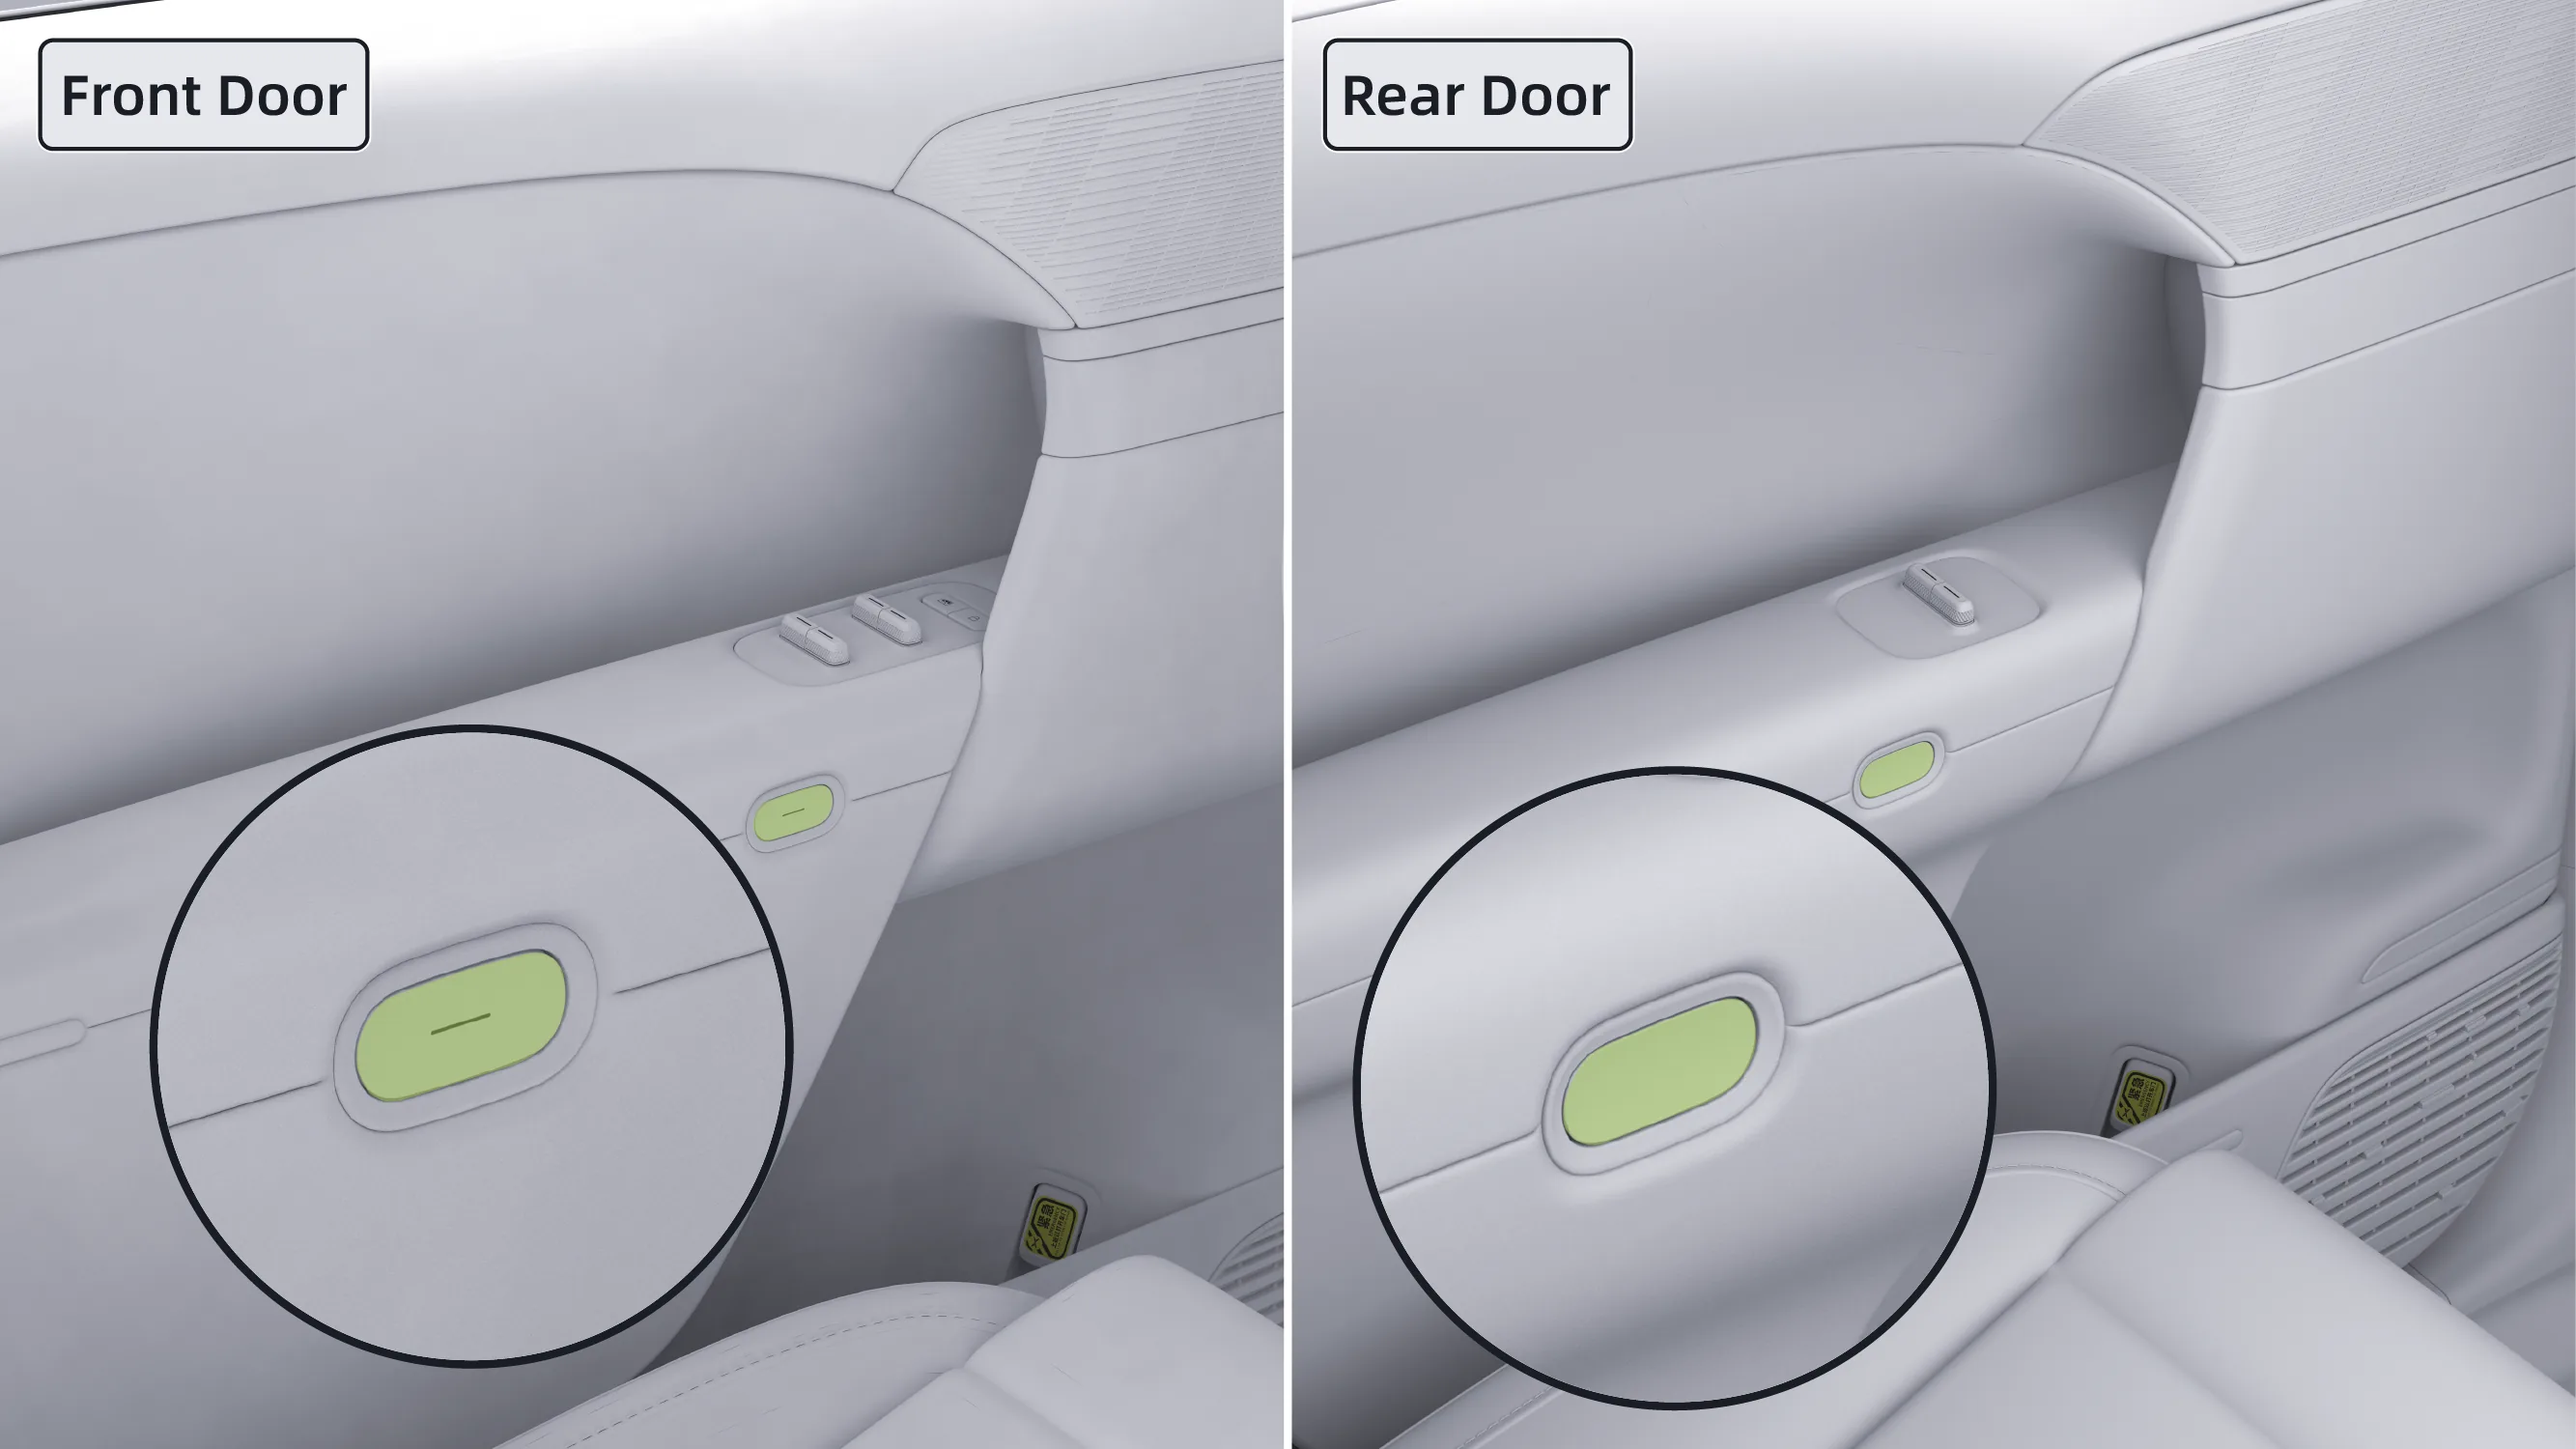
The front row doors and rear doors each have an interior door opening button at the door armrest.
You can set the interior door opening method on the central control screen to prevent the door from opening accidentally when the vehicle is locked due to unintentionally touching the interior door opening button.
Tips When any door, the hood, or the trunk is opened, the center display and the head-up display (HUD) show 'The vehicle door is not closed.'
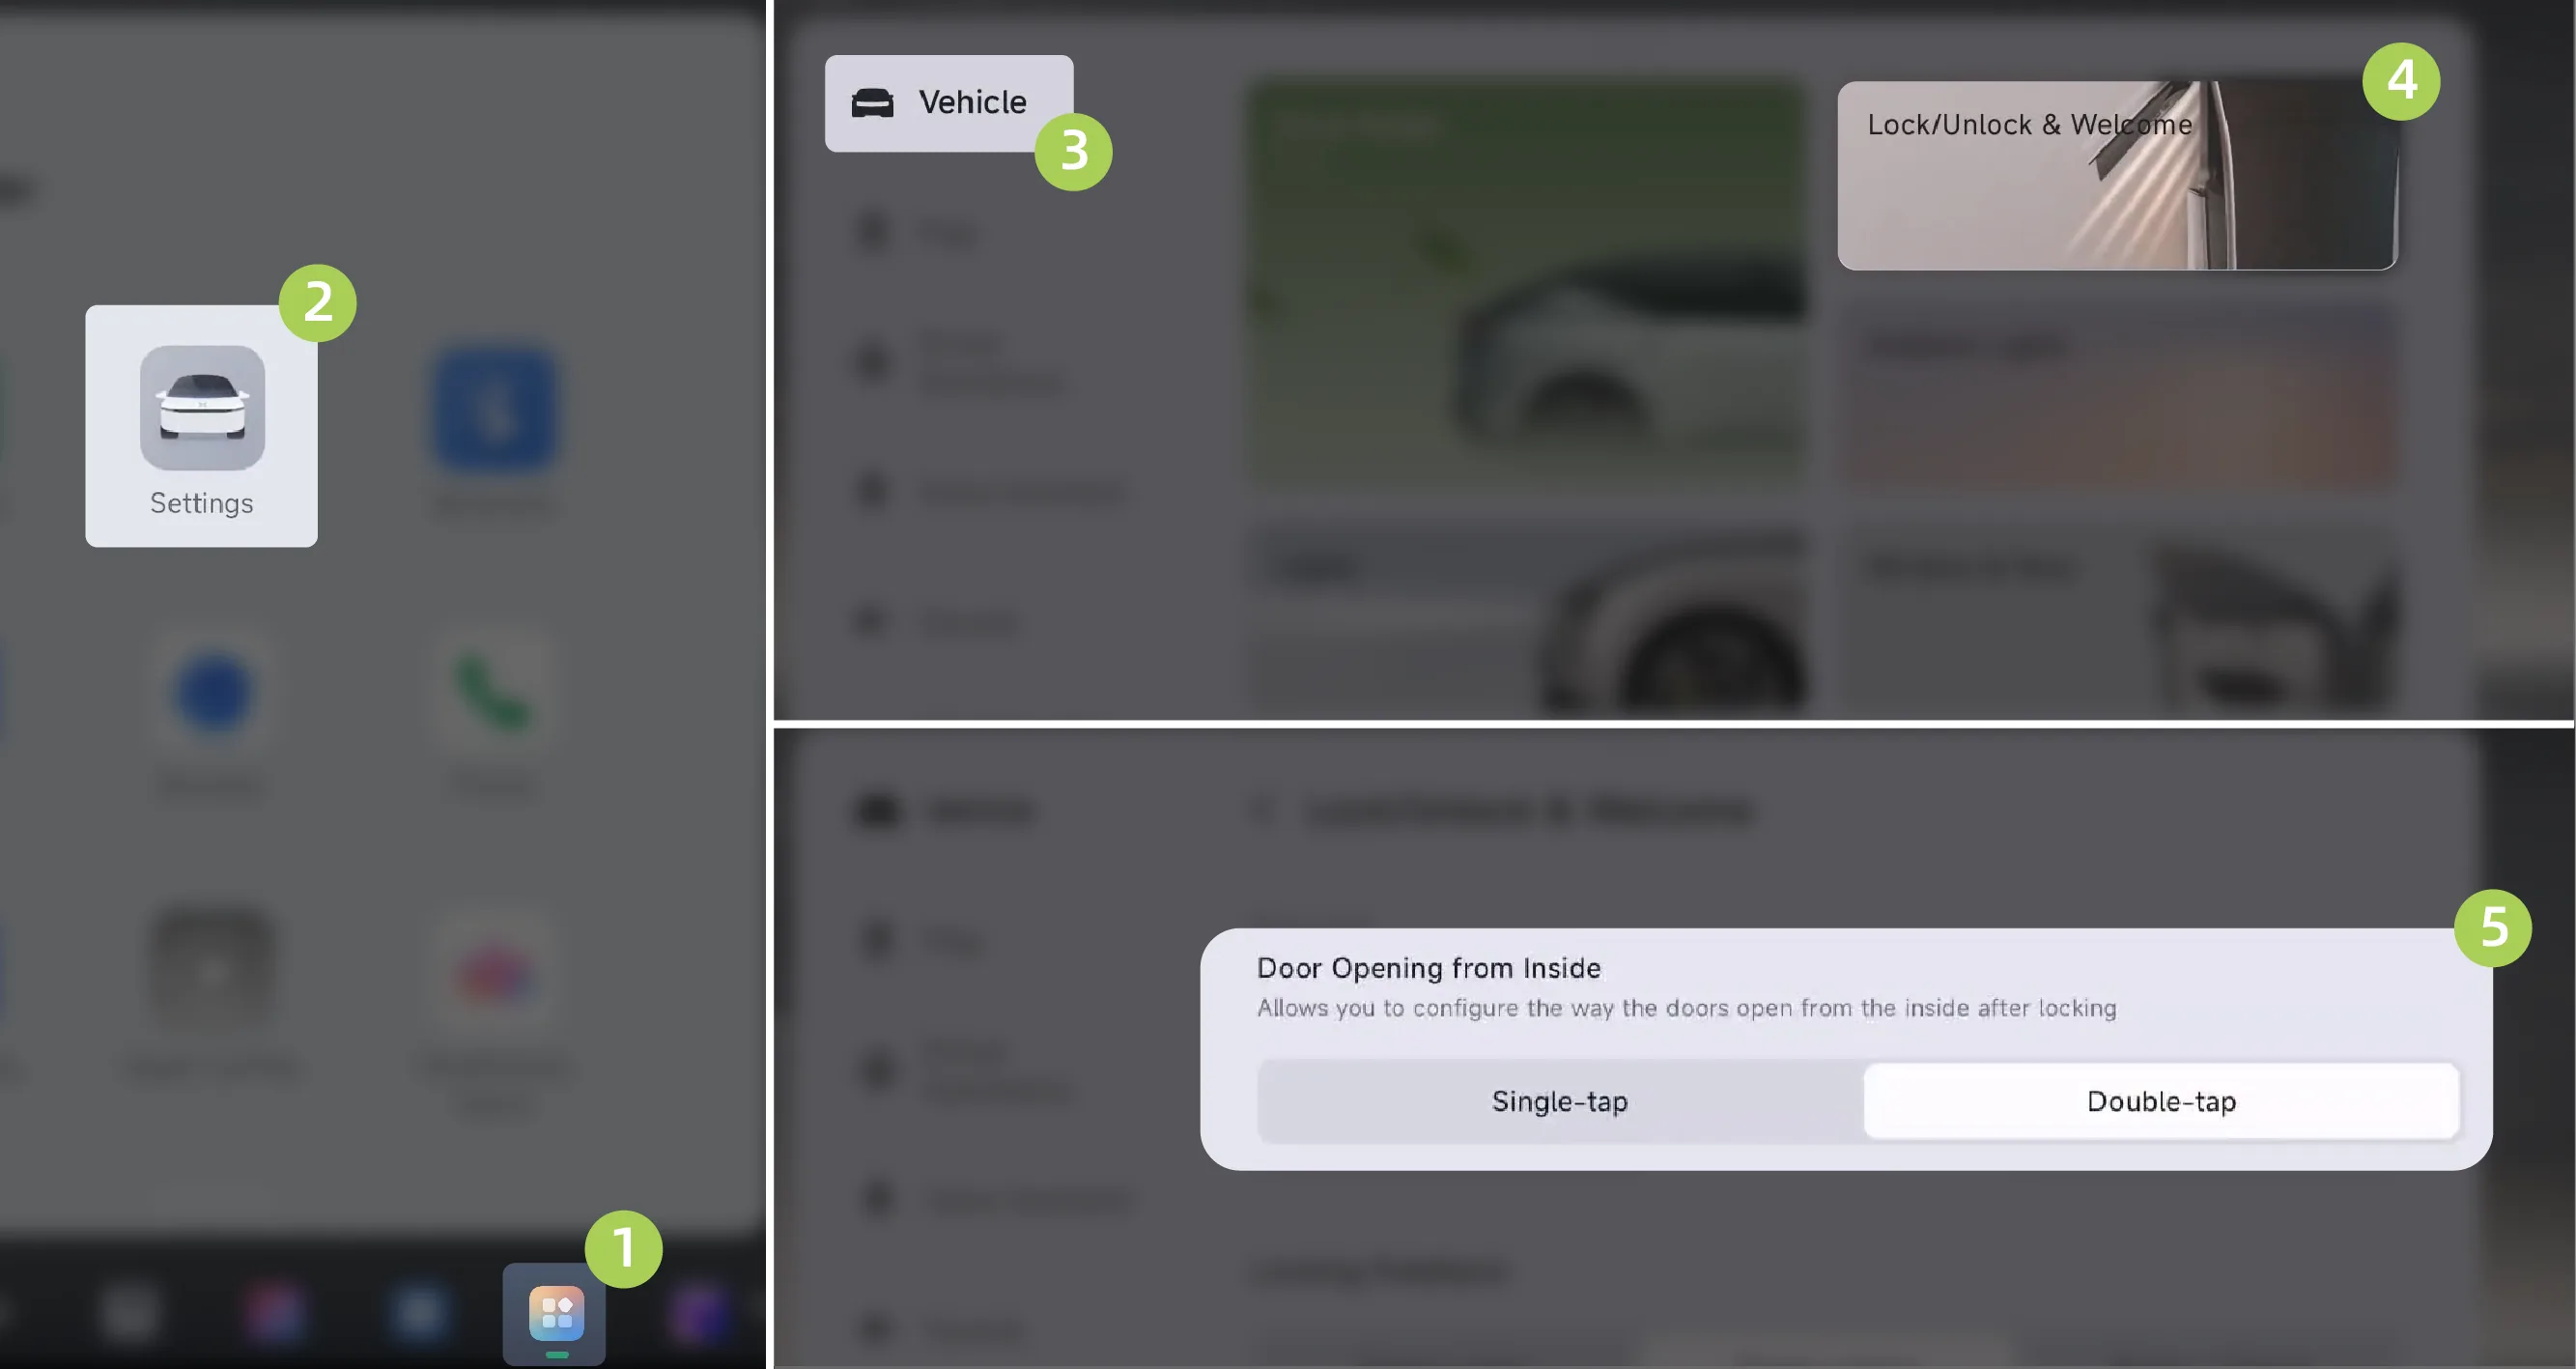
On the central control screen “ →Settings→vehicle→Unlocking and Welcome”Interface, where the in-vehicle door opening method can be set to / 。
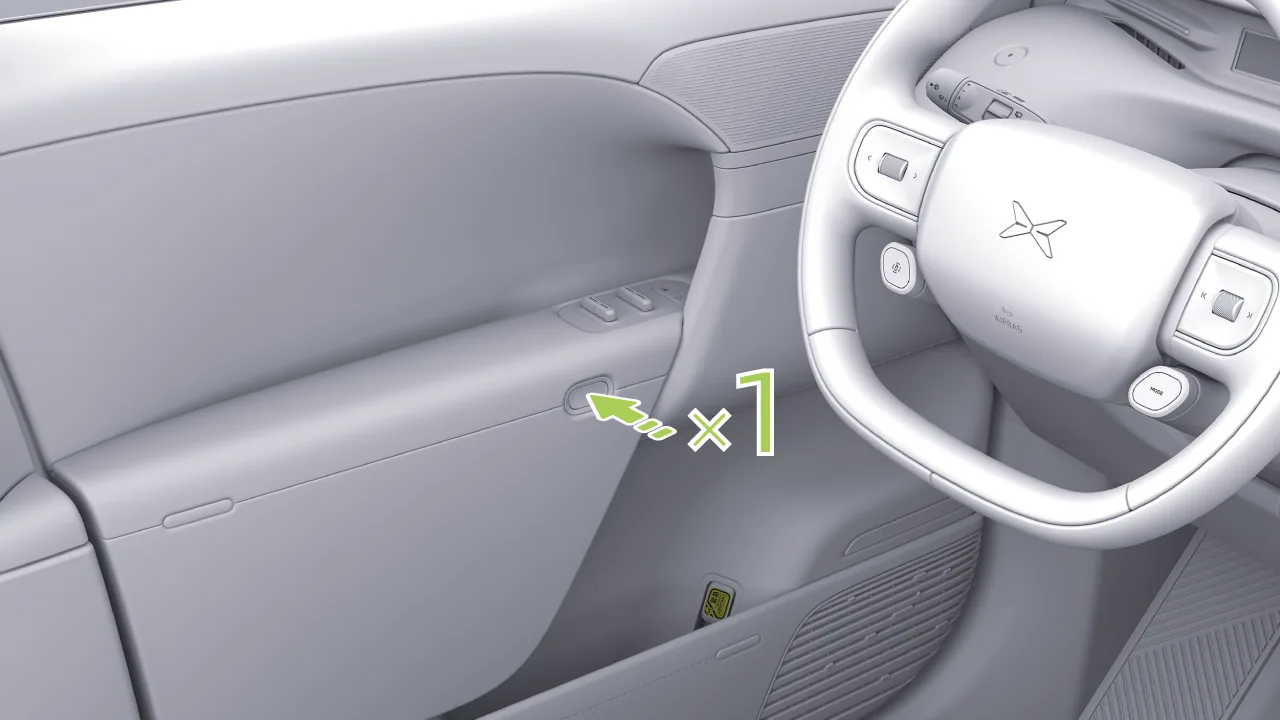
Single-press door opening: In the unlocked/locked state, press the interior door open button once and push outward at the same time to open the door.
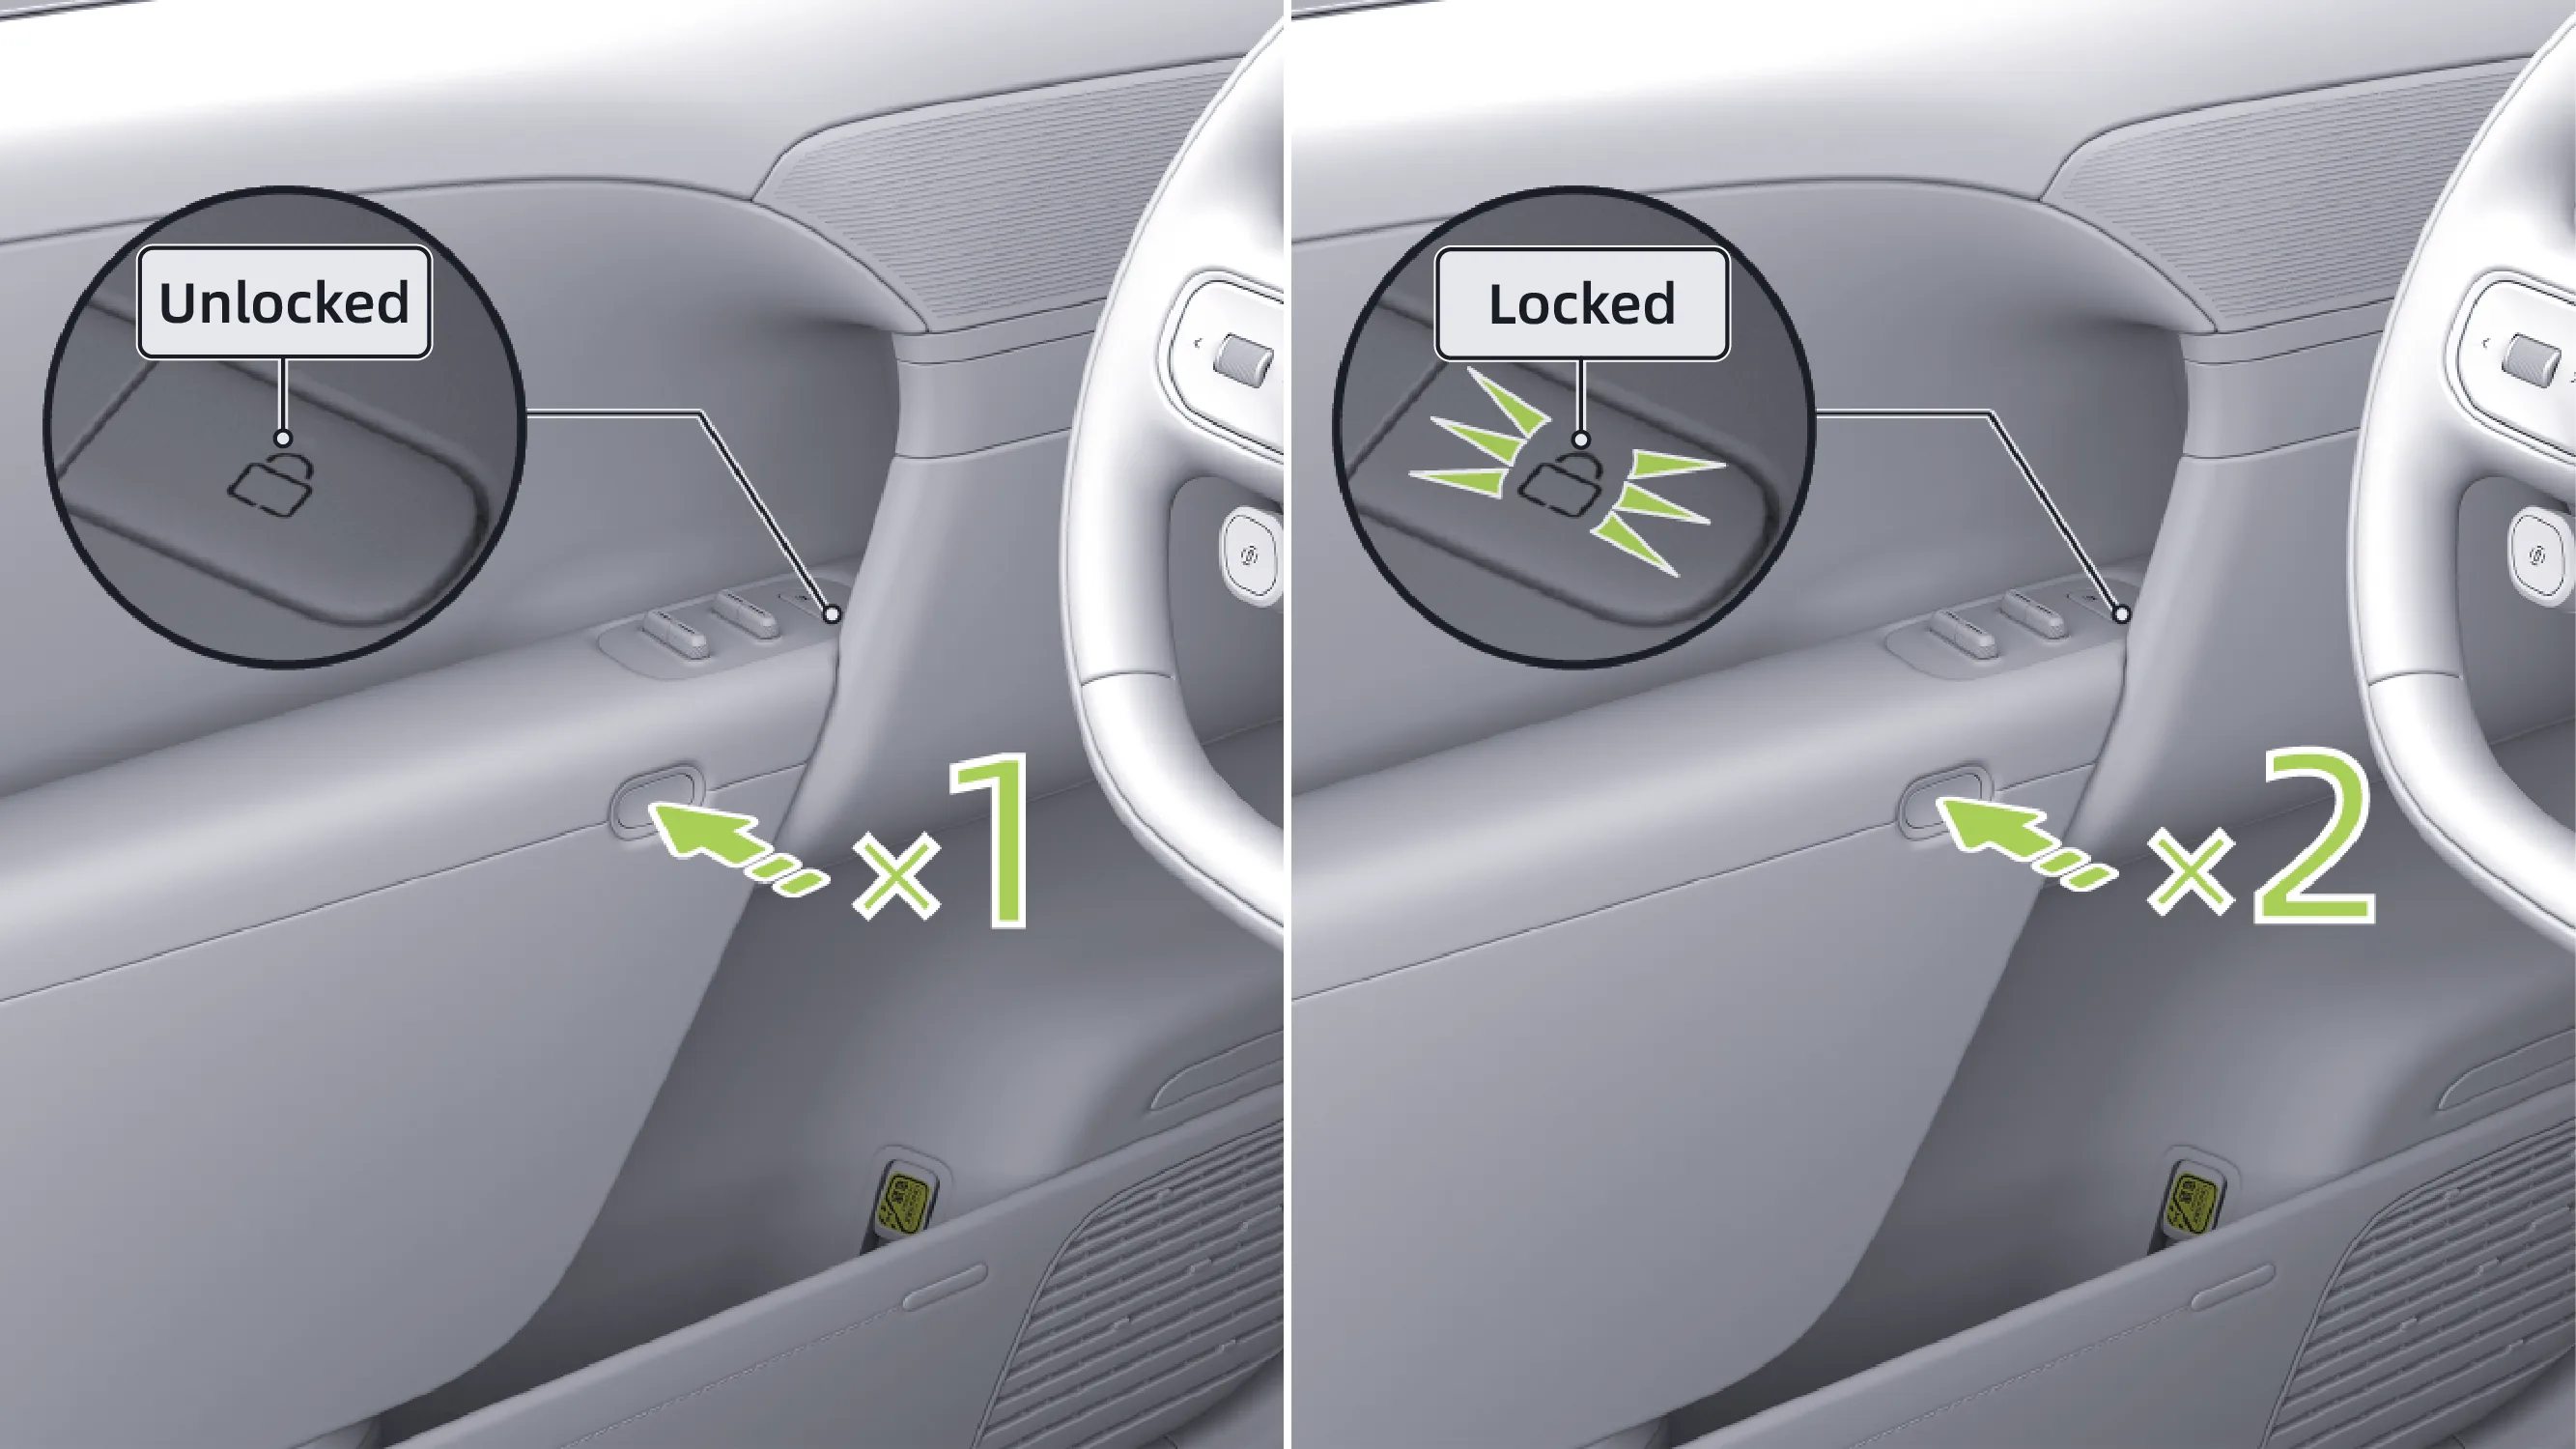
Double-click to open the door: In the unlocked state, press the interior door open button once and push outward at the same time to open the door. In the locked state, press the interior door open button twice consecutively and push outward at the same time to open the door.
Tips When the vehicle speed exceeds 3 km/h, the interior door-open button cannot be used to open the door.
When the vehicle is unlocked and the interior door-opening method is switched from “single press to open” to “double press to open,” you must press the interior door-open button twice in succession the next time you open a door.
Caution Always check for approaching traffic from behind before opening the door. We recommend keeping Door Opening Warning enabled at all times. Open the door only after confirming that it is safe to avoid accidents that could result in personal injury or property damage.
For vehicles equipped with non-electric doors, on the central control screen “ →Settings→vehicle→Doors and Windows”On the interface, you can set the door mode.
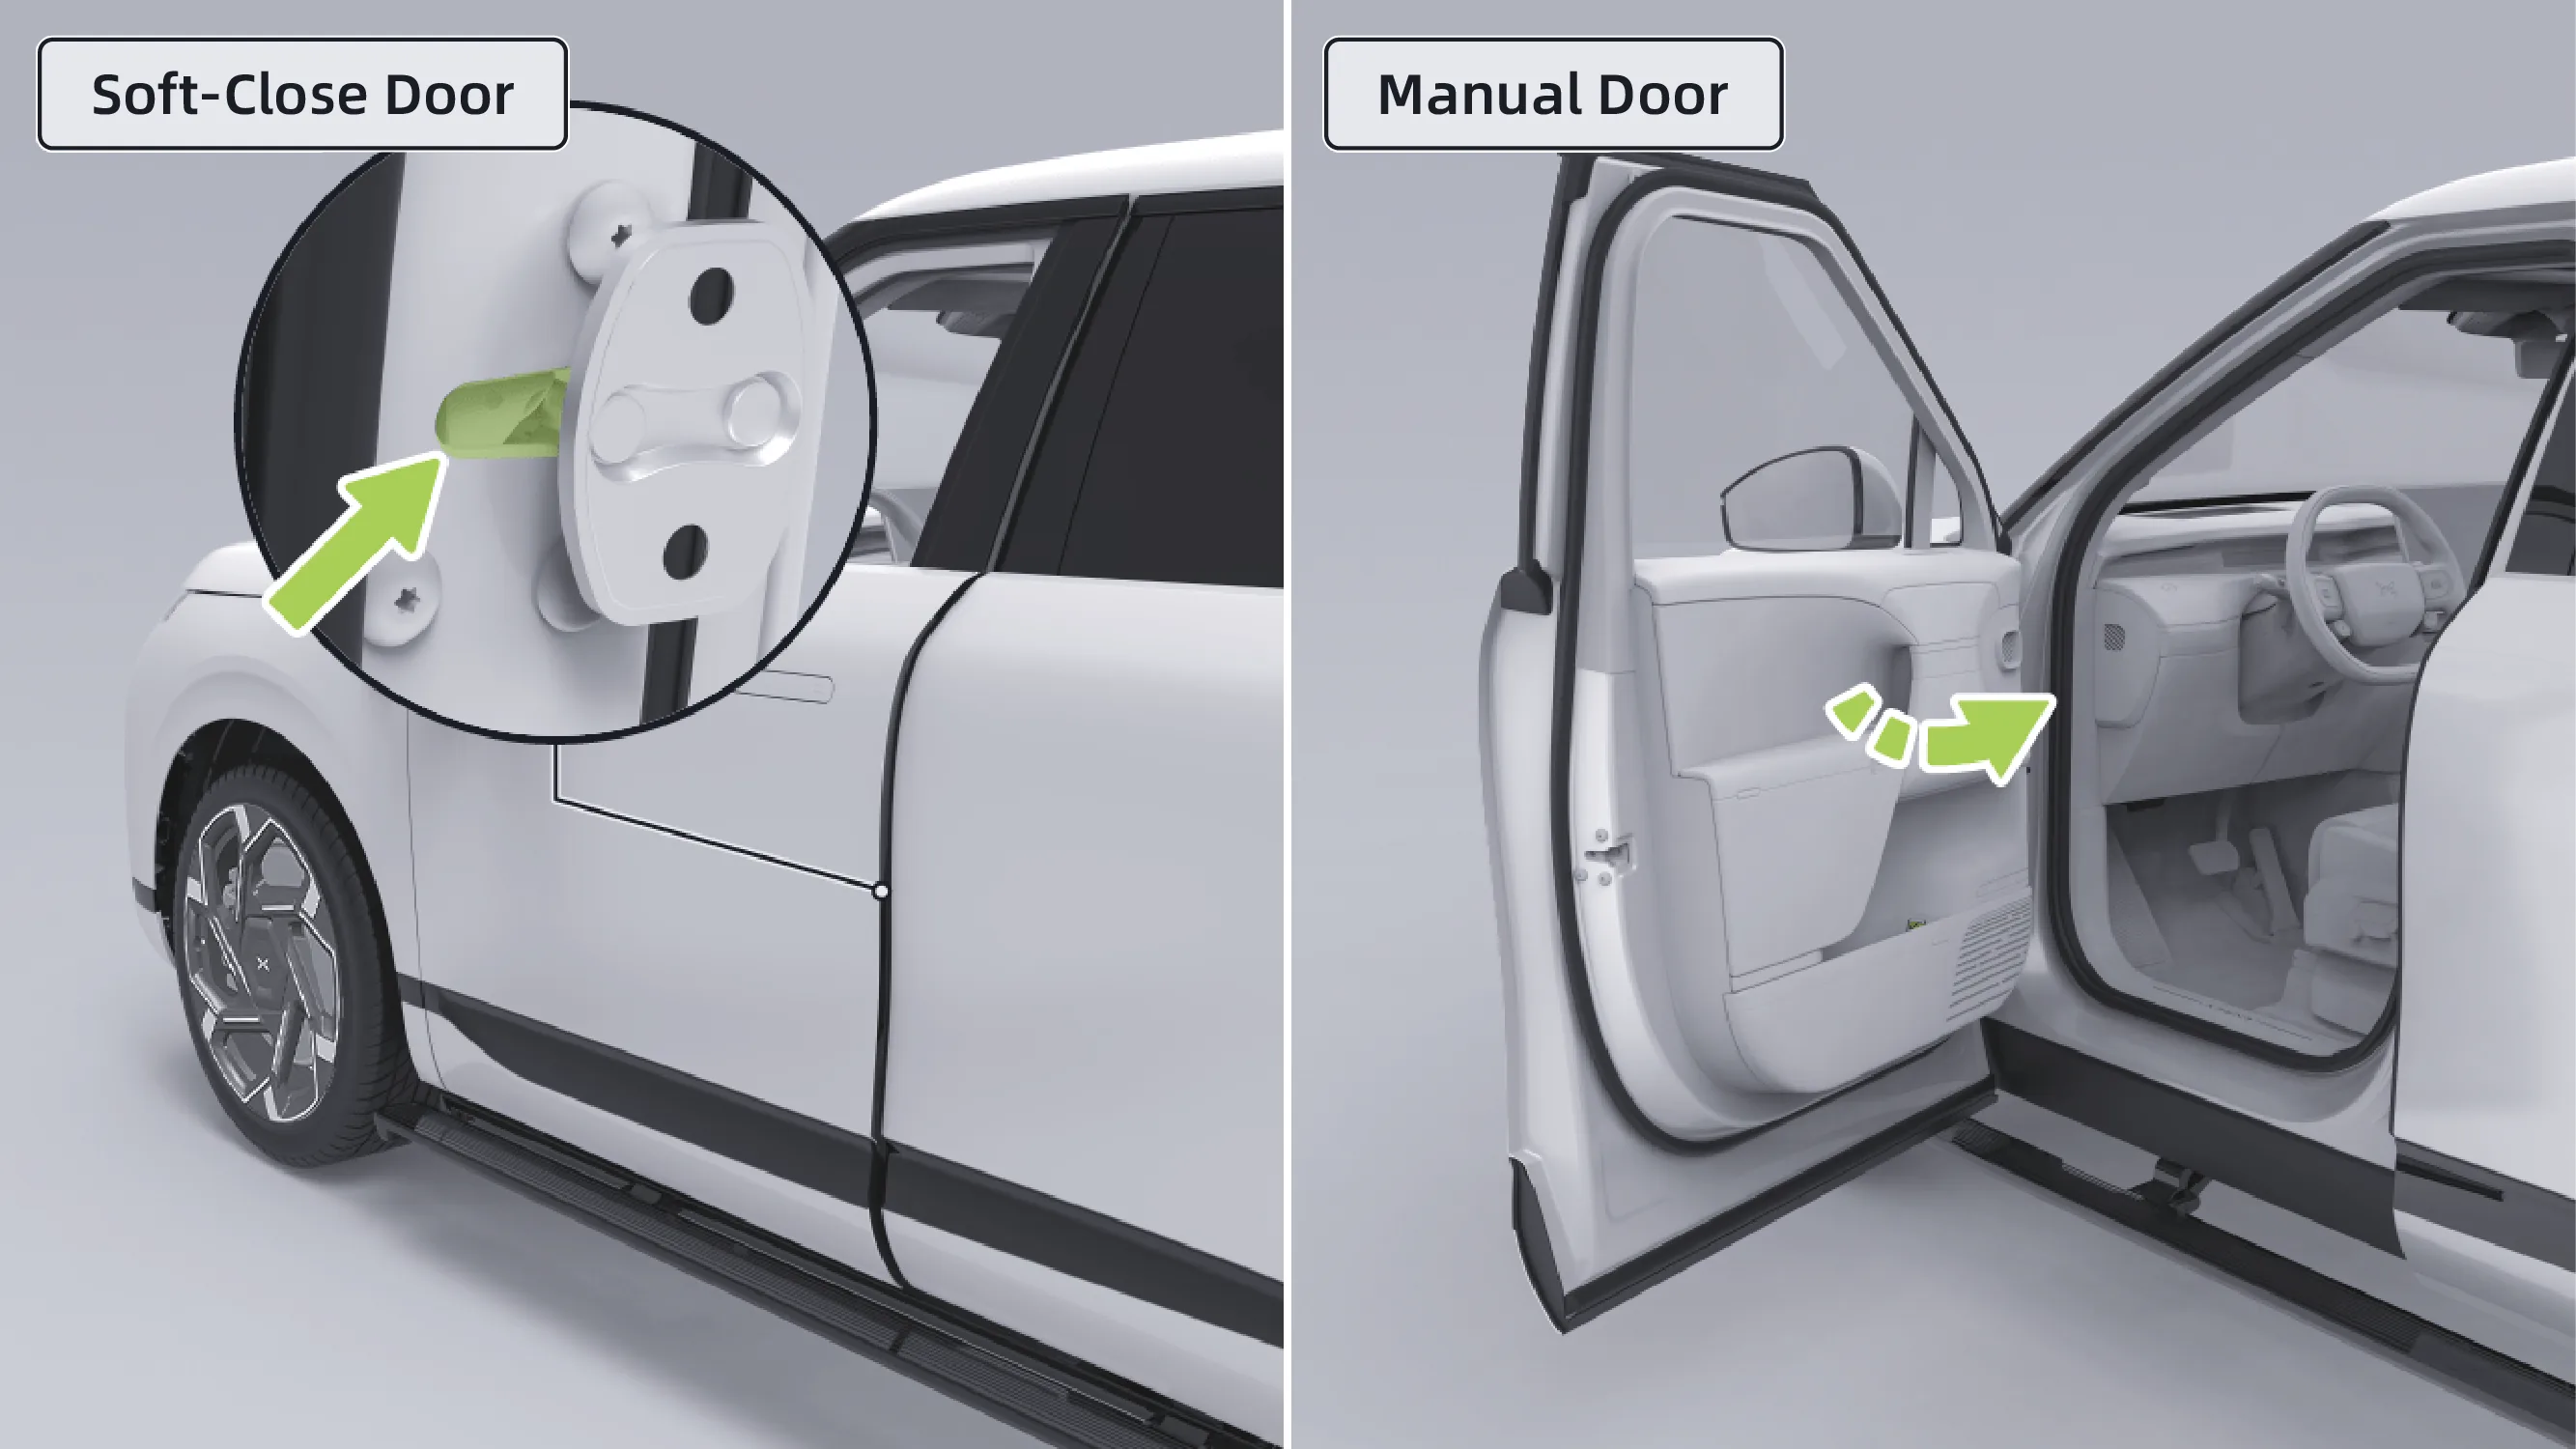
When the door mode is set to soft close door, when the door is closed to the latching position, the soft close door lock will automatically latch until the door is fully closed. During the door latching process, press the microswitch on the exterior door handle to reopen the door, and the door latching action will stop.
When the door mode is set to manual door, push the door inward directly until the door is fully closed.
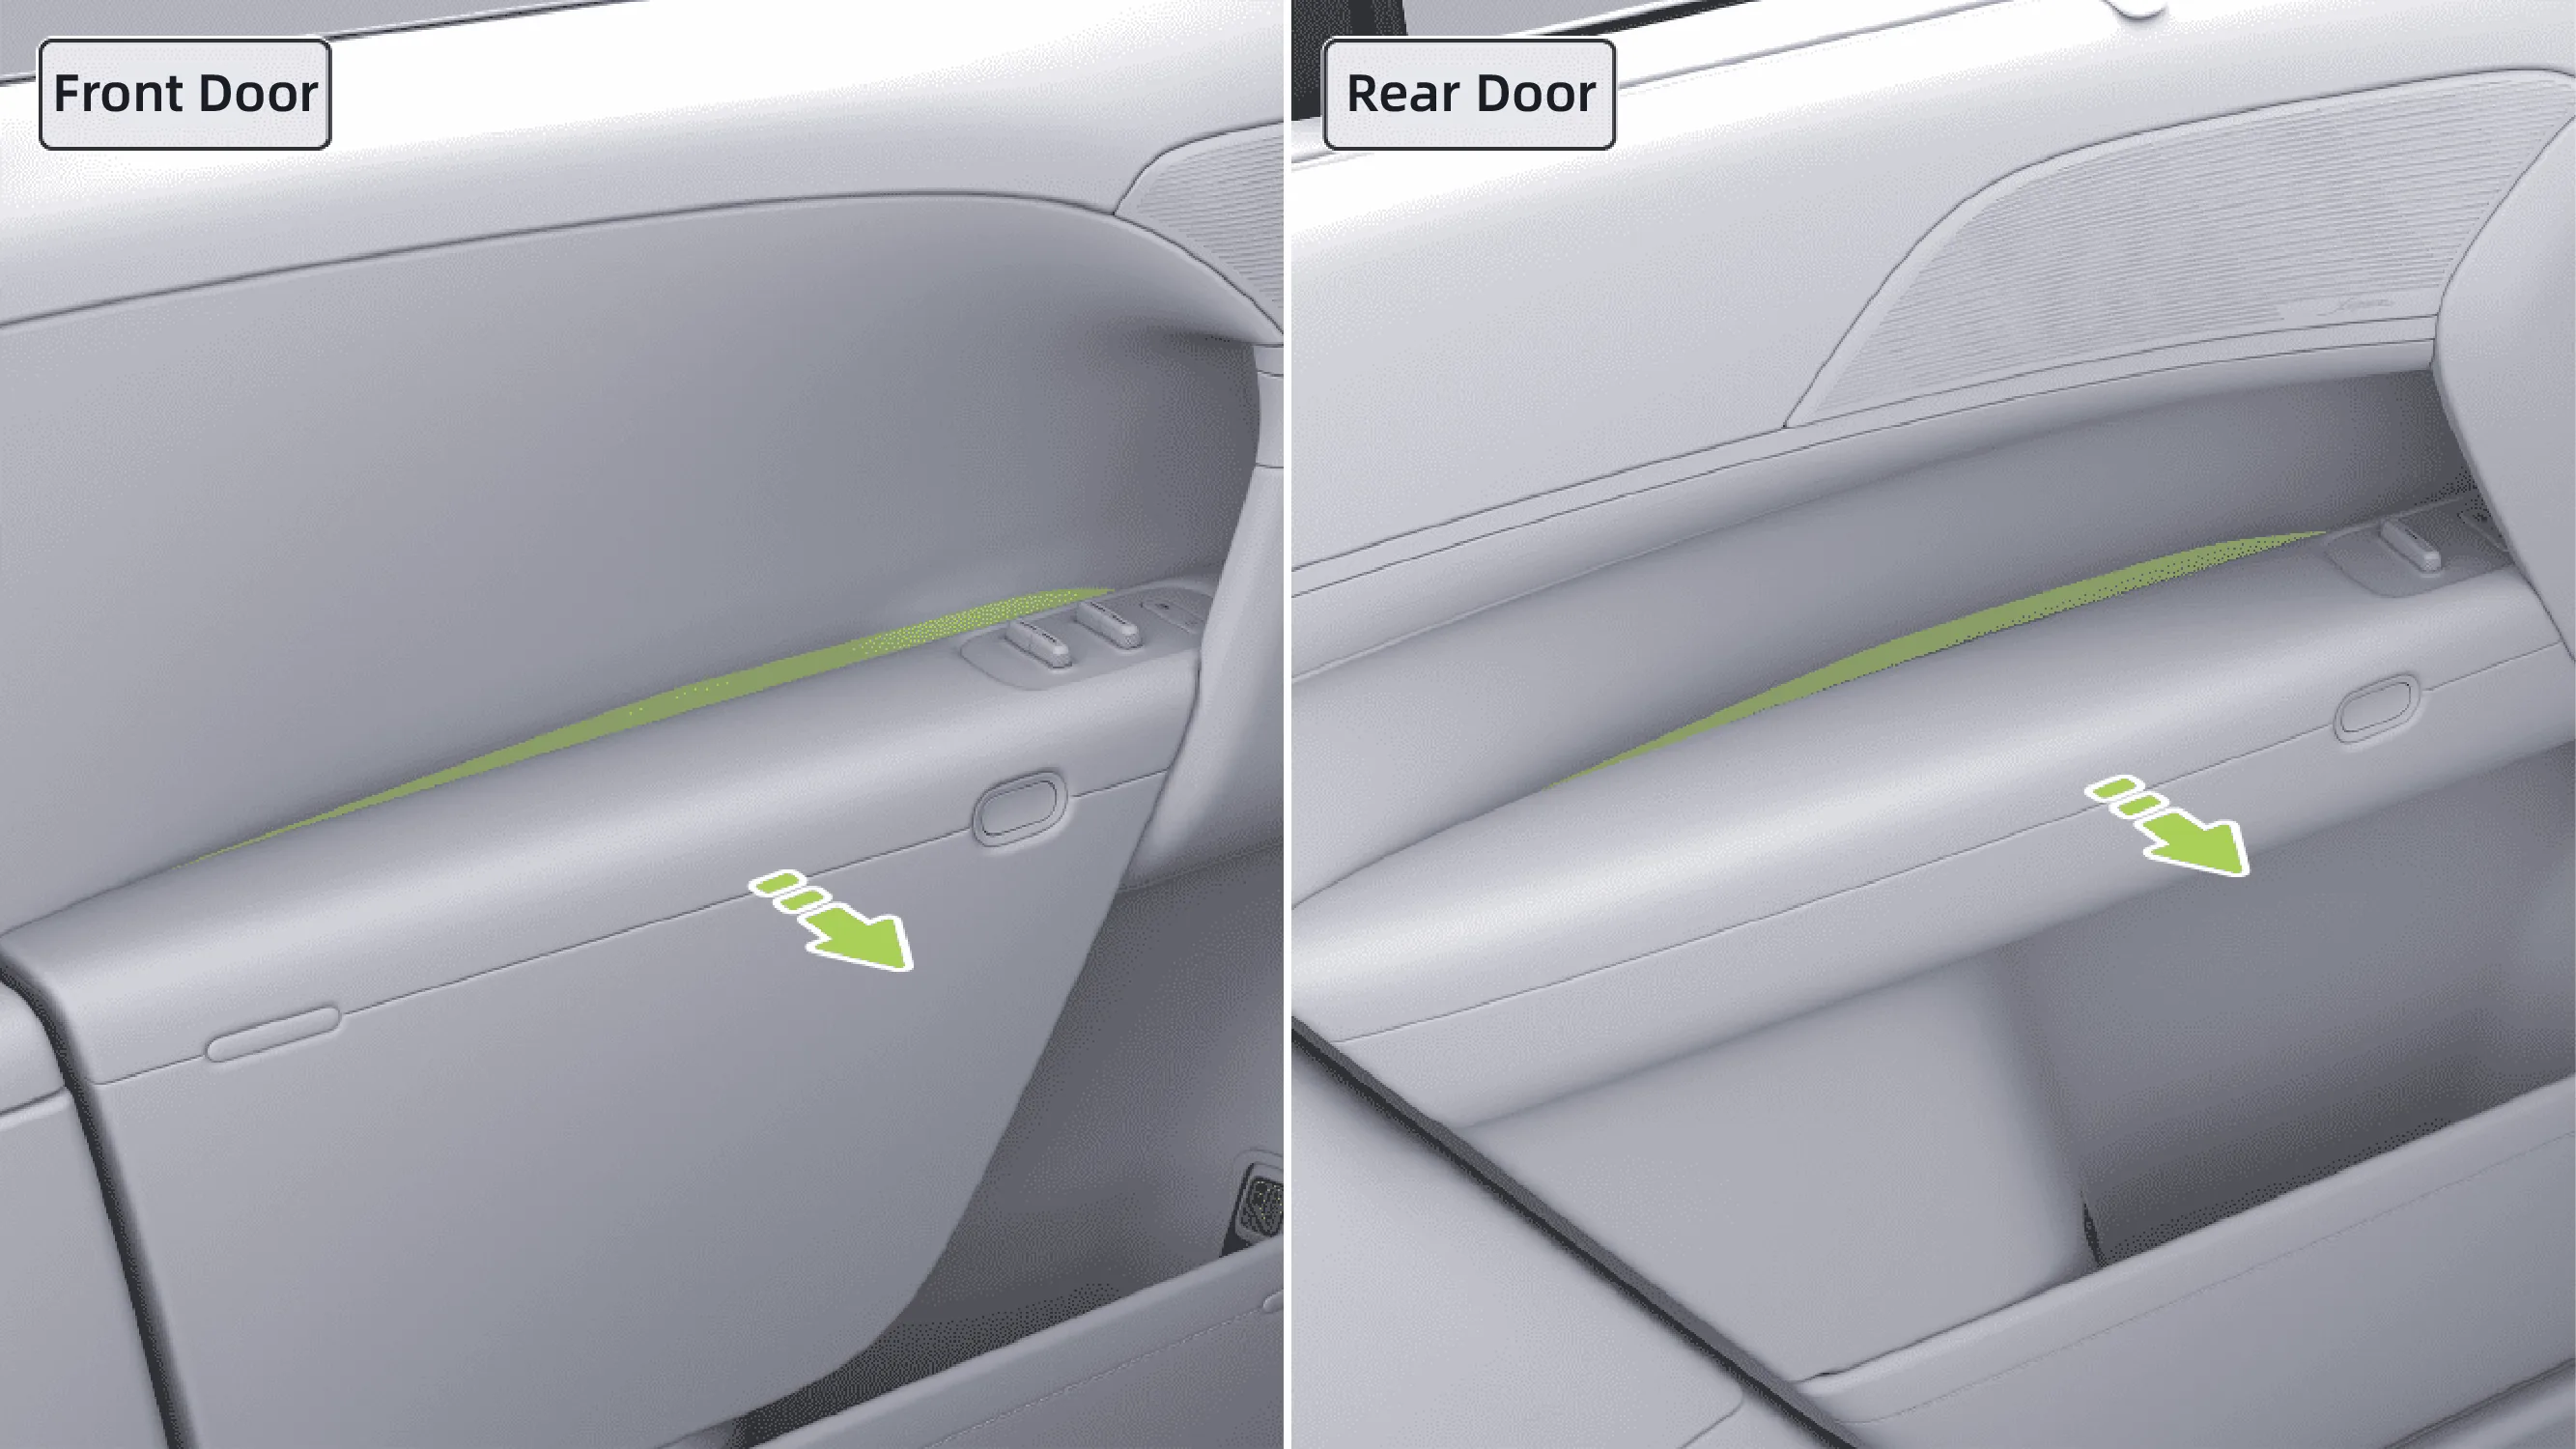
When the door mode is set to soft close door, if you hold the grab handle inside the vehicle and close the door to the latching position, the soft close door lock will automatically latch until the door is fully closed. During the door latching process, press the interior door open button to reopen the door, and the door latching action will stop.
When the door mode is set to manual door, grasp the handle inside the vehicle and pull the door inward until the door is fully closed.
Caution When closing the doors, ensure all persons inside and outside the vehicle are in a safe position. Children must not operate the Soft Close Doors Lock to prevent pinching injuries.
Do not place any part of your body or any object in the door gap when closing the vehicle door or during the soft‑close/latching process. Do not reach into the door opening to stop the door from closing. Doing so may result in pinching injuries and may damage the door.
If any part of your body or any object is accidentally trapped, immediately pull it free or pull the exterior door handle to open the door.
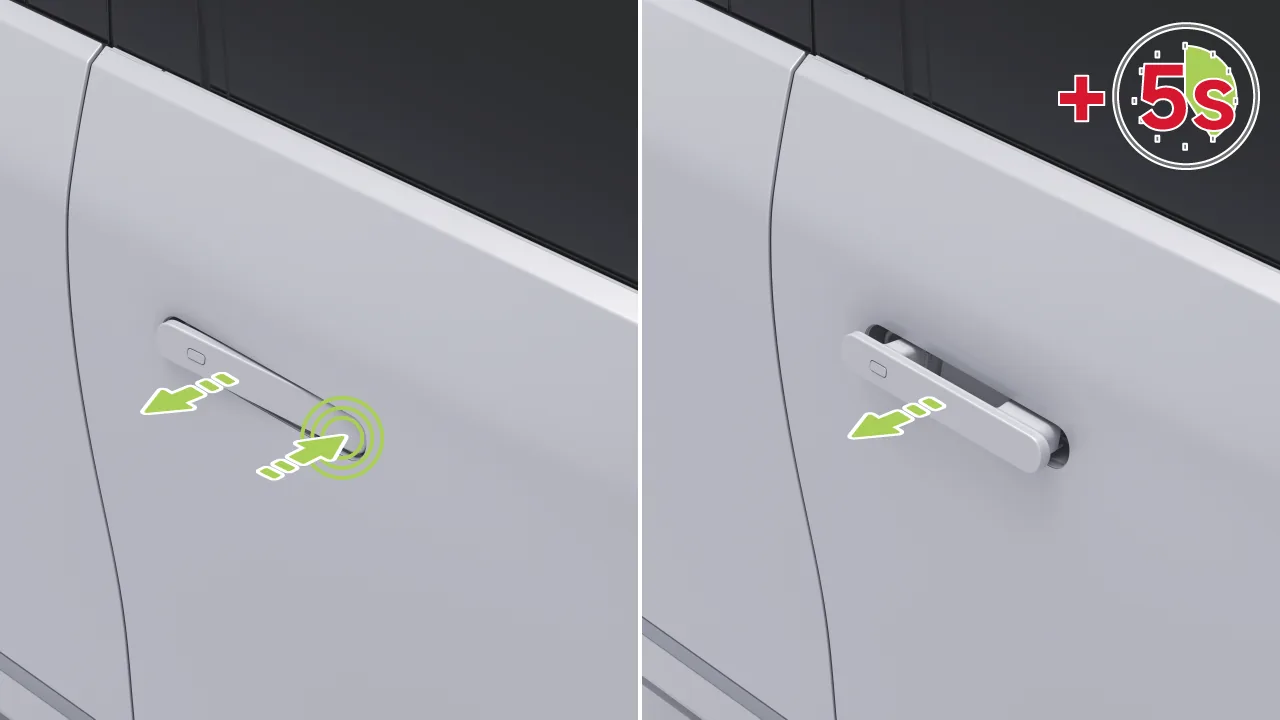
The vehicle battery has a battery lock function. When the battery level is too low or under other special circumstances, causing the vehicle to be unable to unlock, the battery can be awakened in the following way:
Press lightly on the front end of the exterior handle of the right front door so that its rear end naturally tilts upward, and hold the raised handle steadily with the other hand;
Then release the pressure on the front end of the exterior door handle and adjust the exterior handle to an appropriate angle;
Pull the exterior handle of the right front door and hold it for more than 5 seconds to wake up the battery;
Immediately use the remote key, mobile phone Bluetooth key, or NFC card key to unlock the vehicle and open any door to power on the vehicle; otherwise, the battery will enter lock power mode again.
If the battery still cannot be awakened after pulling the outer handle of the right front door and holding it for more than 5 seconds, the left front door can be unlocked through the following jump-start operation:
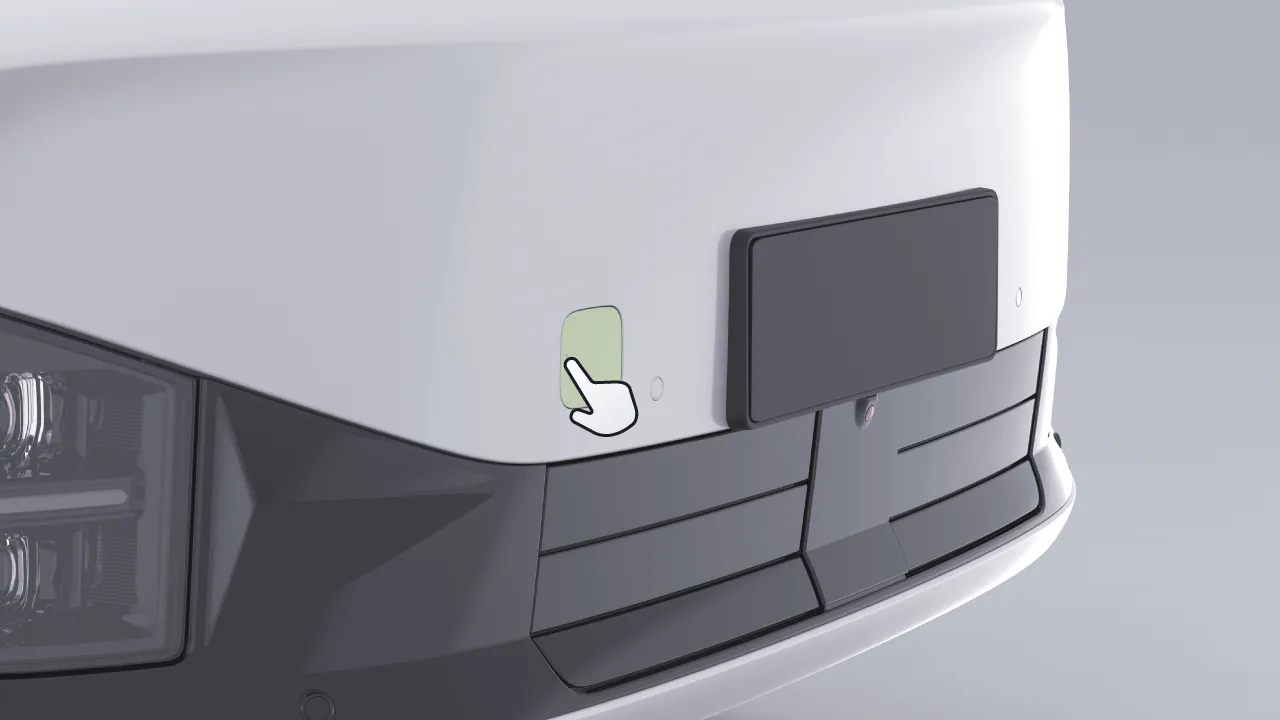
When the vehicle is in the parked state, press the lower left corner of the tow hook cover to open the tow hook cover.
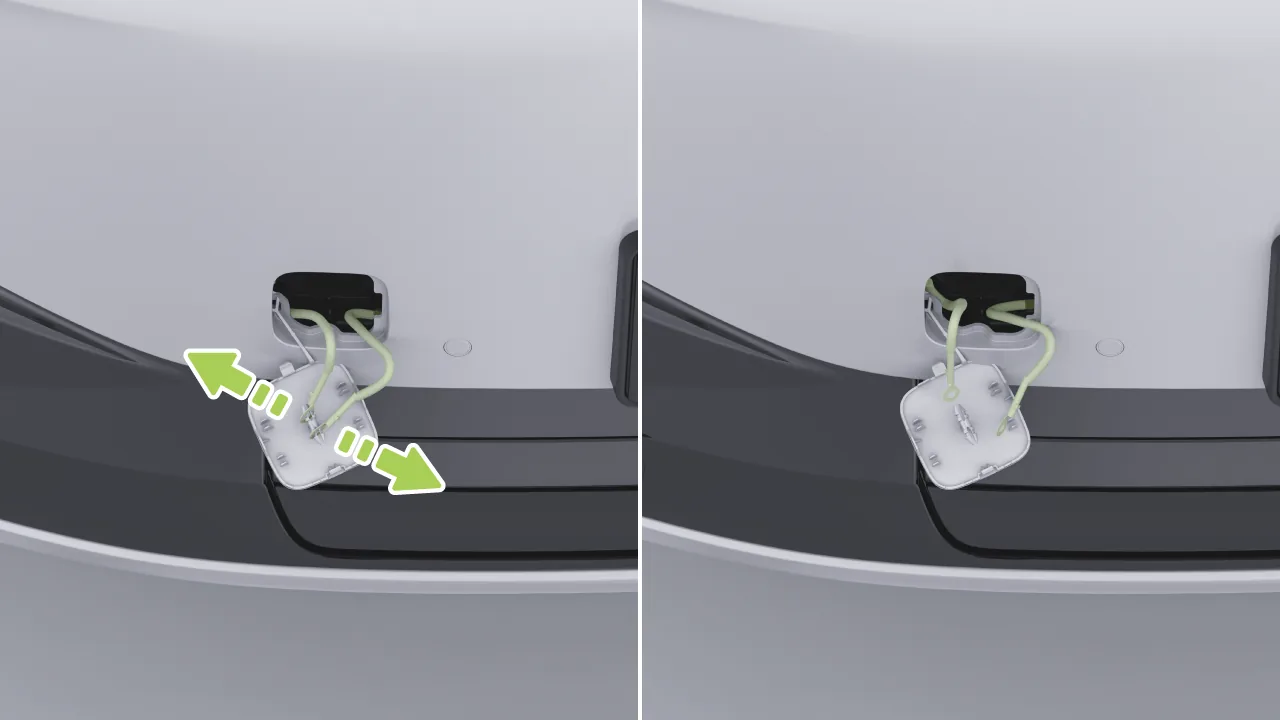
Detach the two jumper cables from the towing cover.
Caution Always connect positive (+) to positive (+) and negative (-) to negative (-).
Ensure that the booster cable clamps do not contact any other metal.
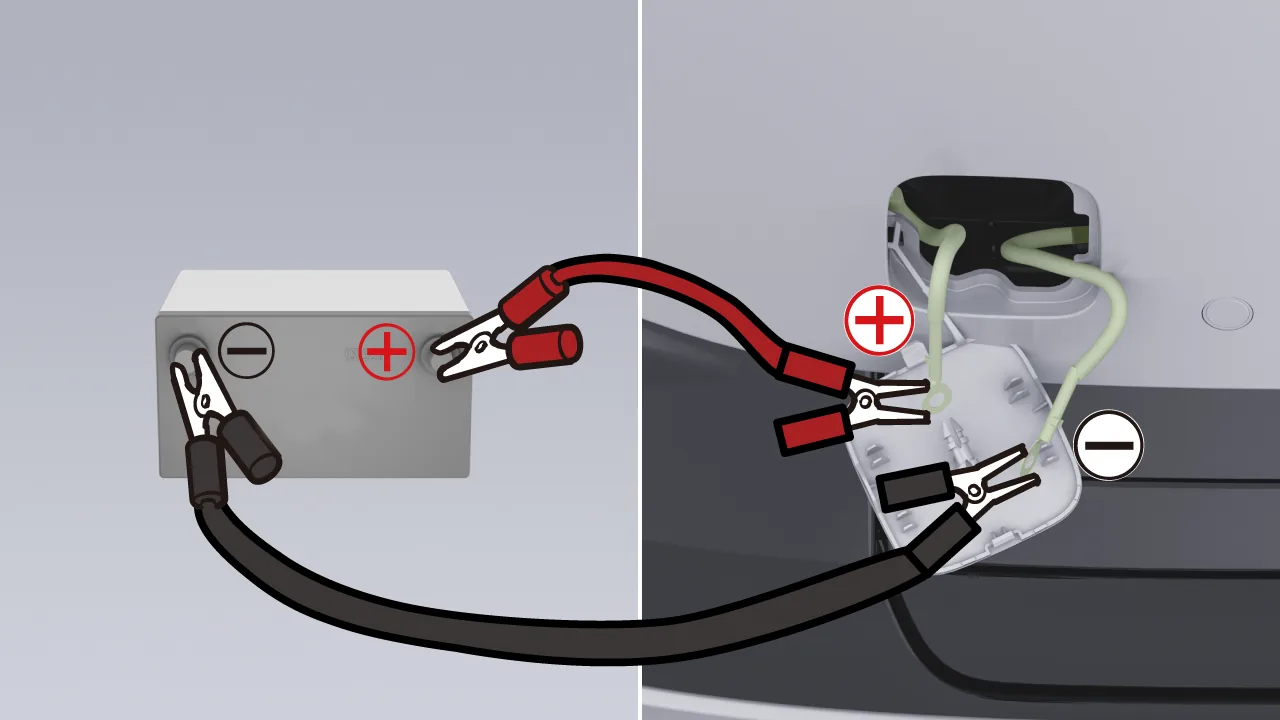
Use a 12 V power source (such as a portable emergency power supply), place it in a position convenient for jump-starting, connect one end of the red cable to the vehicle's red positive jump-start terminal (+), and the other end to the positive terminal (+) of the auxiliary power source; connect one end of the black cable to the vehicle's black negative jump-start terminal (-), and the other end to the negative terminal (-) of the auxiliary power source.
Caution This jump-starting procedure is intended solely for unlocking the front left door. Never use it to charge the 12V battery or to power any other electrical equipment in the vehicle.
Use the remote key, mobile phone Bluetooth key, or NFC card key to unlock the vehicle.
When the vehicle is unlocked, the exterior handle of the left front door automatically extends. Pull the exterior door handle to open the left front door.
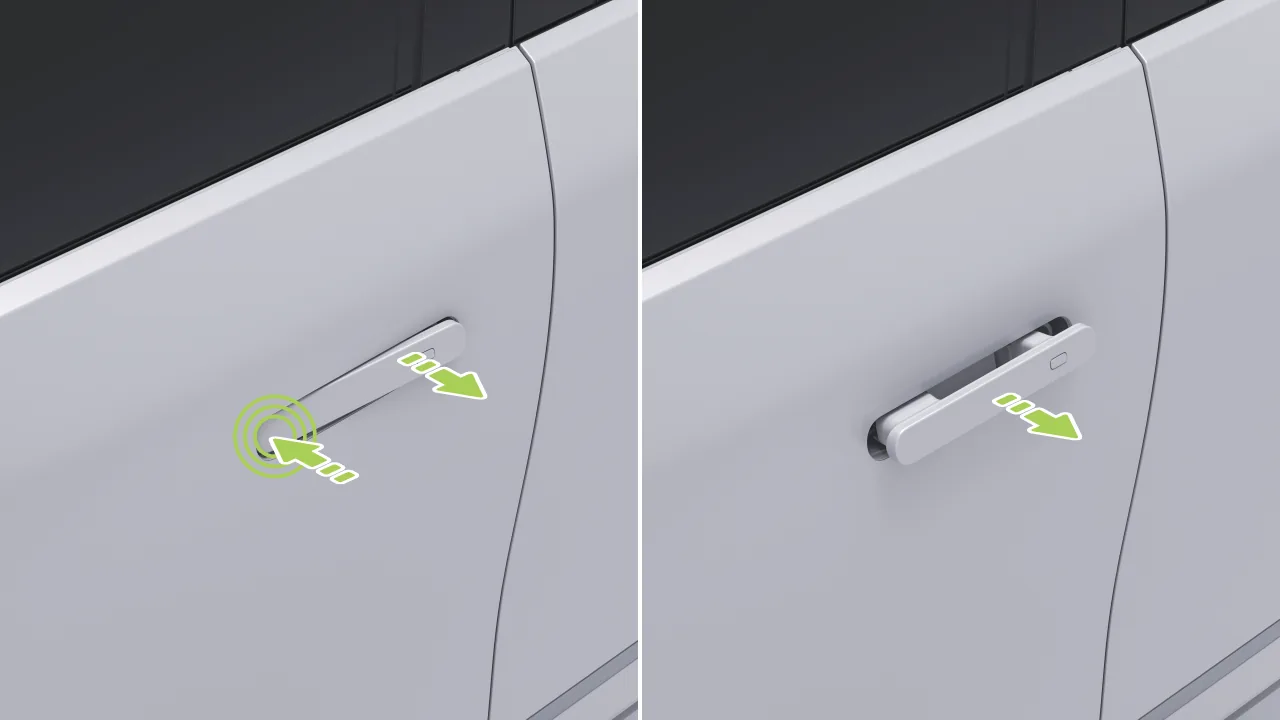
If the left front exterior door handle does not pop out, gently press the front end of the door handle so that its rear end naturally tilts upward. Use the other hand to hold the raised handle firmly, then release the pressure on the front end of the door handle, adjust the exterior handle to an appropriate angle, and then pull the exterior door handle to open the left front door.
Disconnect the connections in sequence between the auxiliary power supply negative terminal, the vehicle negative jumper lead, the auxiliary power supply positive terminal, the vehicle positive jumper lead, and the cable, then stow the cable properly and reinstall the tow hook cover.
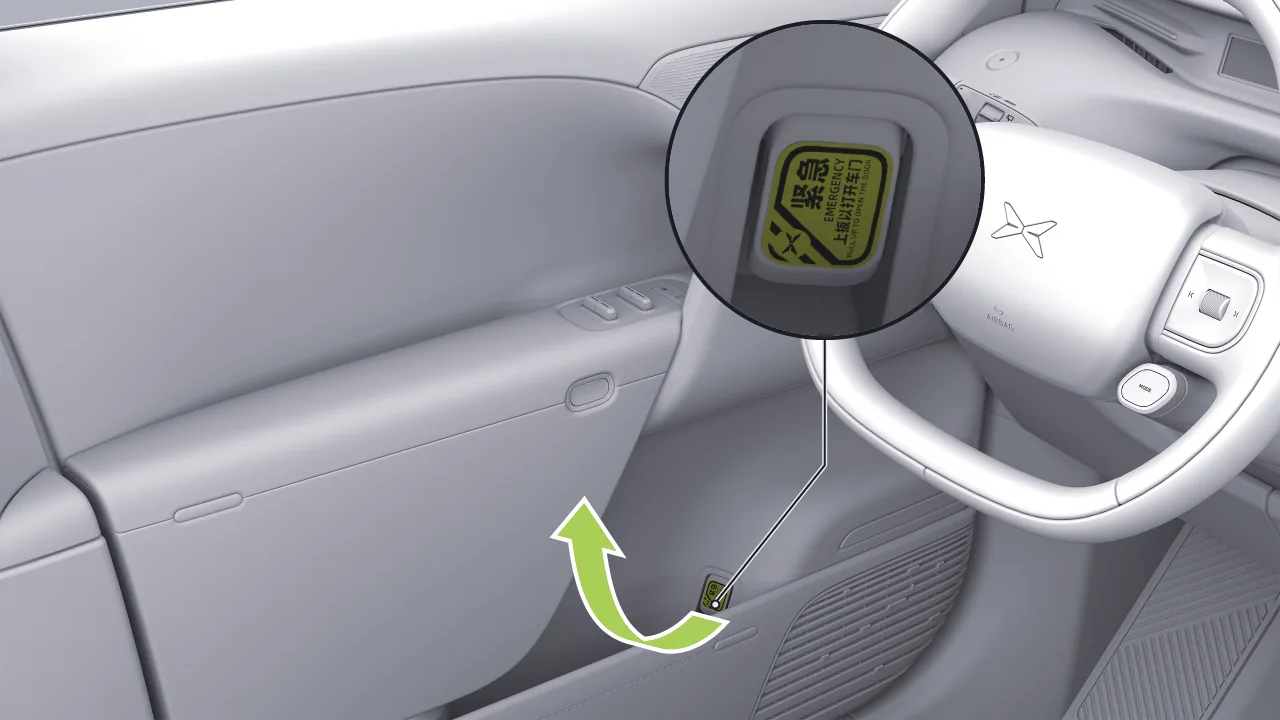
If the vehicle has no power or in other special circumstances, pull the emergency opening handle located below the front row door armrest and simultaneously push the door outward to open the front row door.
Warning Whether the vehicle is stationary or in motion, pulling the emergency opening handle once will open the door. In non-emergency situations, do not pull the emergency opening handle while driving.
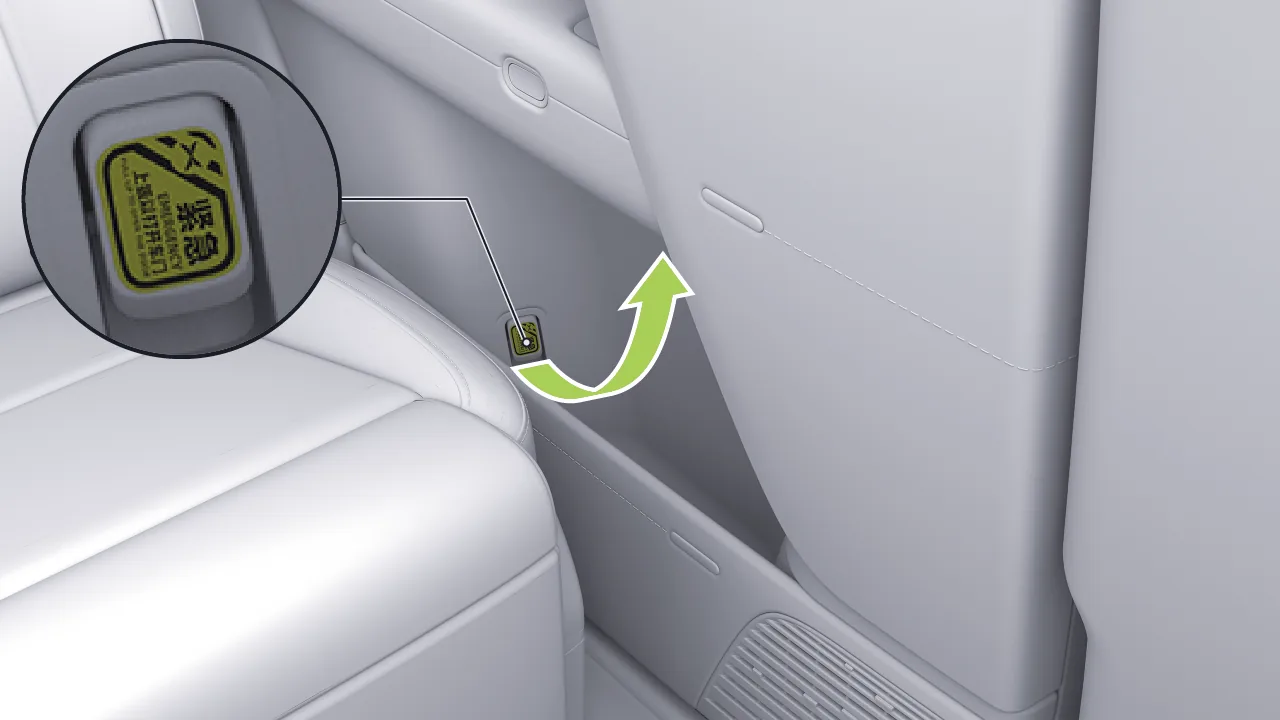
If the vehicle has no power or in other special circumstances, pull the emergency opening handle located below the rear door armrest and simultaneously push the door outward to open the rear door.
Caution When the Left Rear Child Lock or Right Rear Child Lock is enabled, the rear door cannot be opened by pulling the emergency release handle on the rear door. Disable the Left Rear Child Lock or Right Rear Child Lock first, then pull the emergency release handle to open the door.
If the vehicle detects an emergency accident such as a collision causing airbag deployment or thermal runaway of the battery pack, a pop-up window will appear on the central control screen to indicate the location of the emergency handle and how to open it, so that occupants can escape.
If the assisted driving function has been activated, the system issues During the reminder, the emergency switch location reminder window may not pop up on the central control screen.
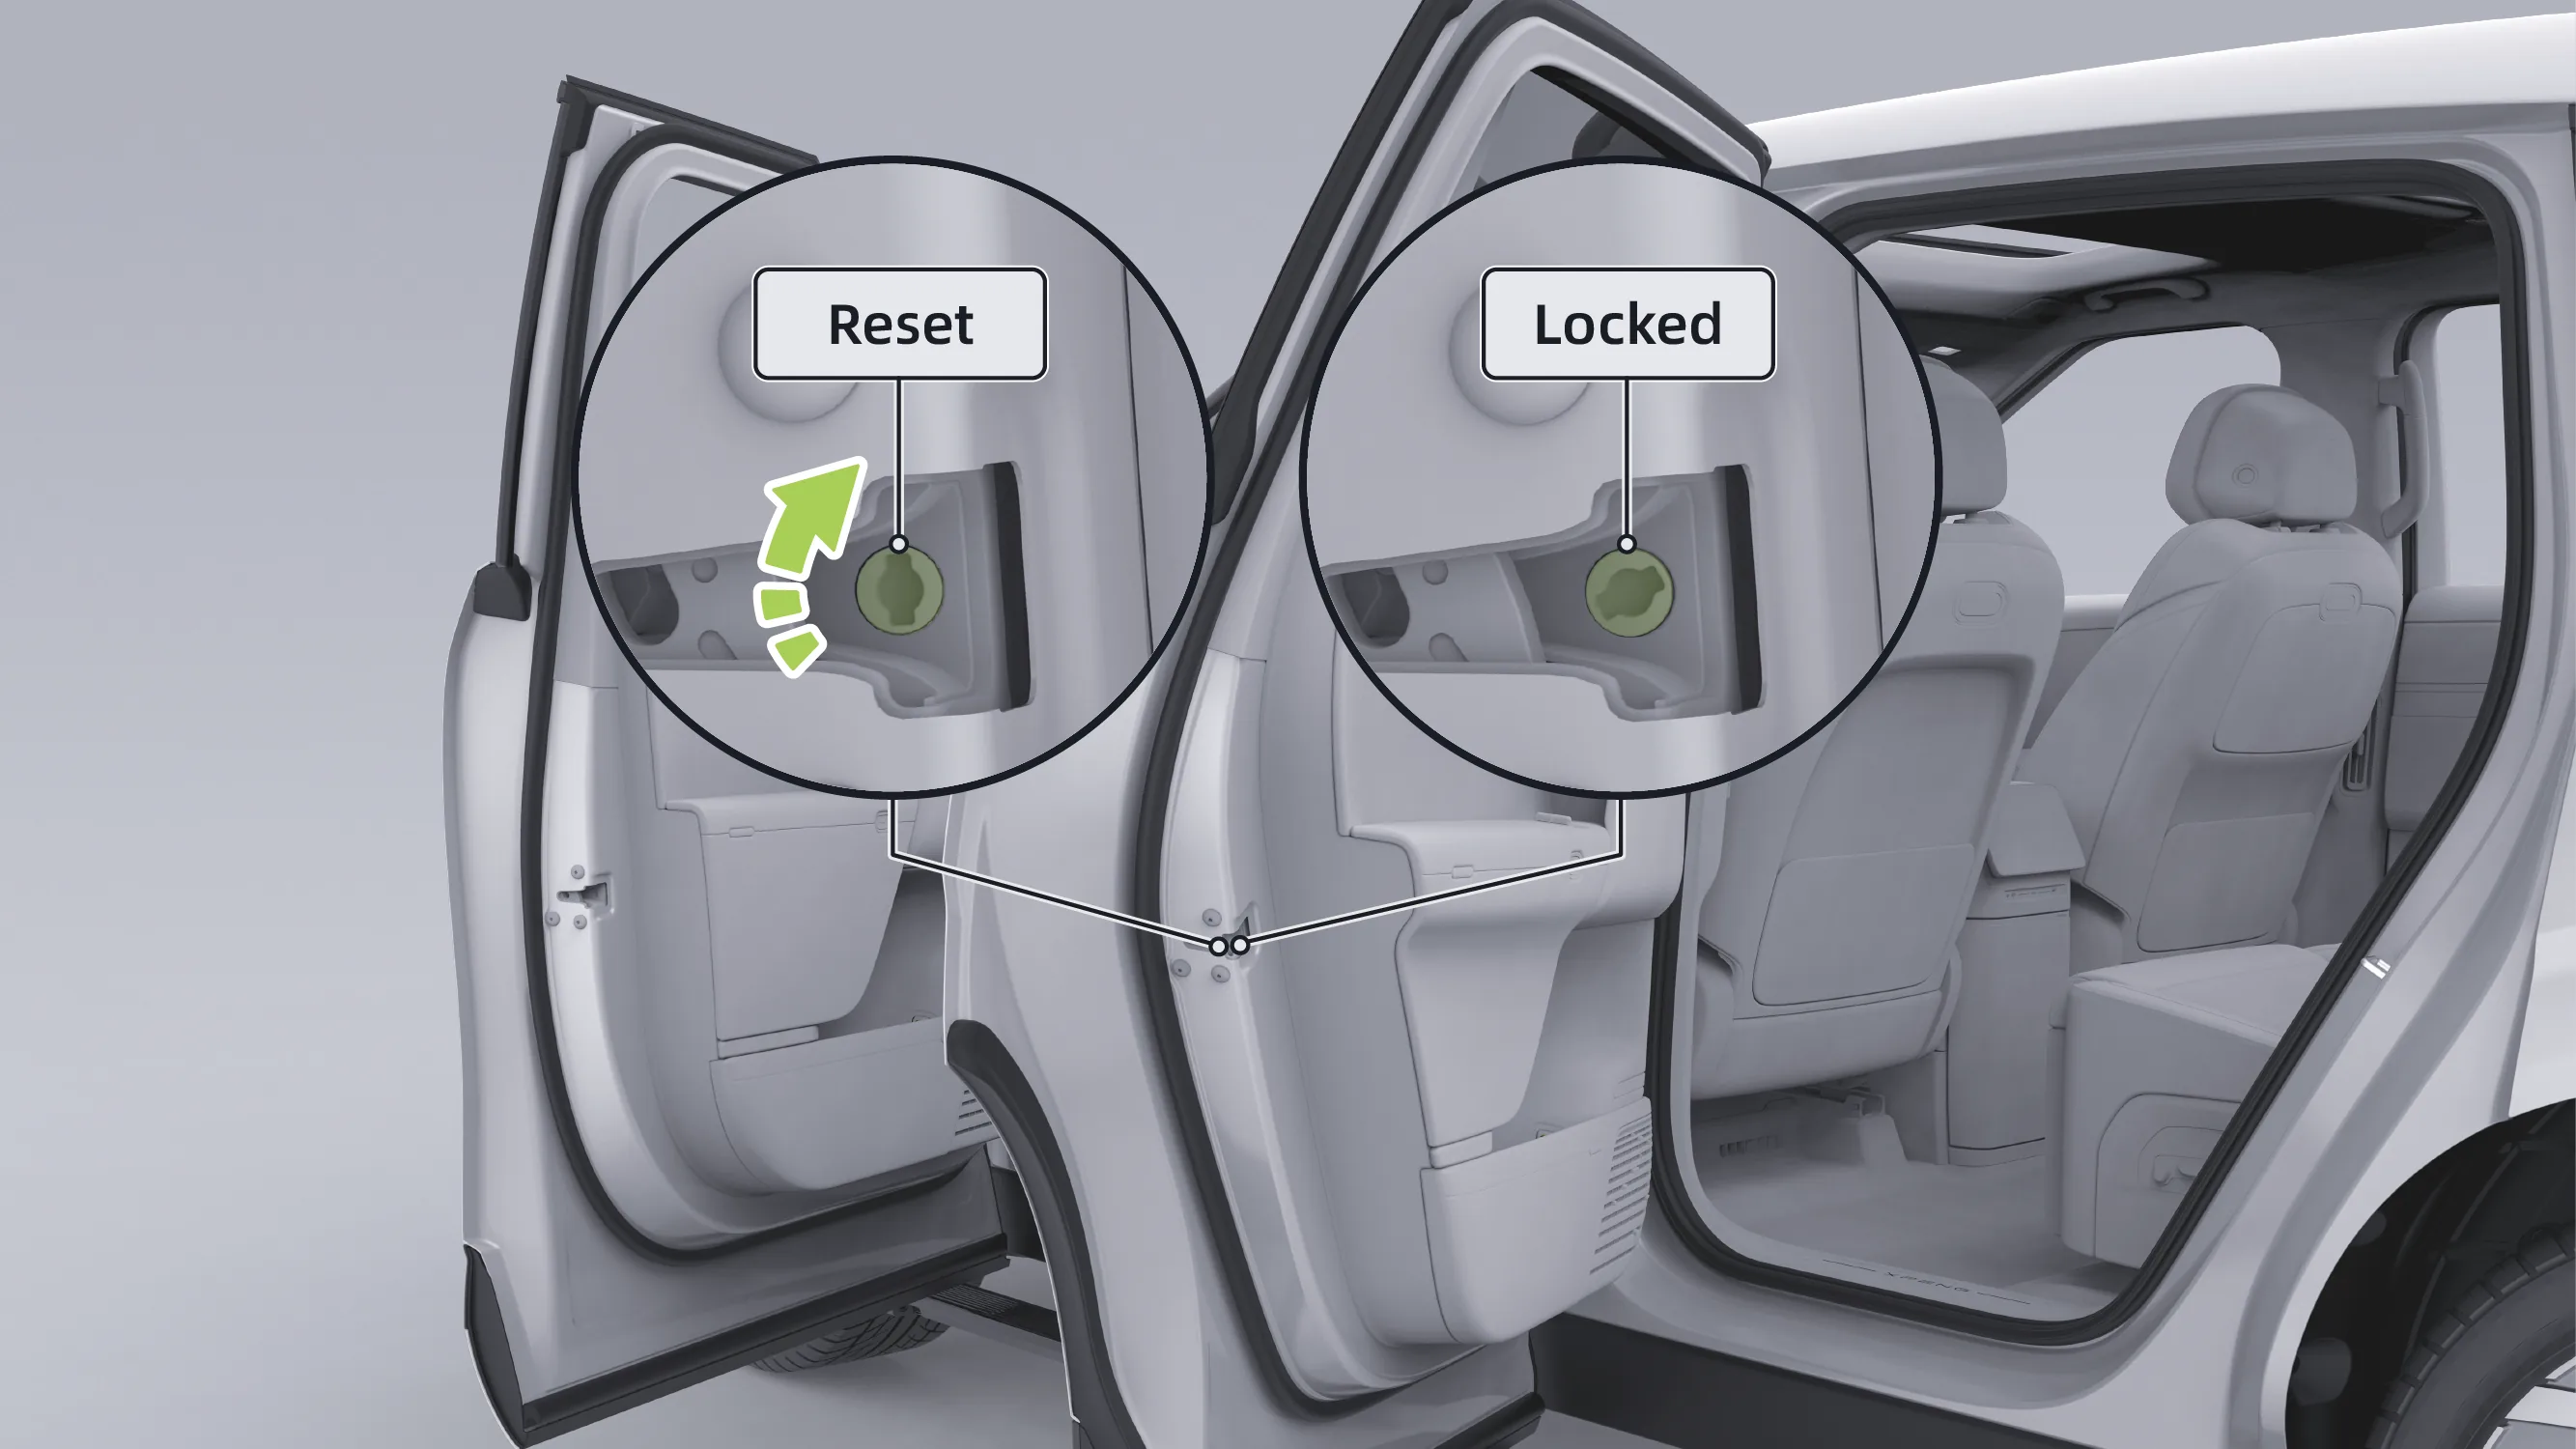
If the door cannot be locked due to special circumstances, use a suitable tool to turn the knob at the door lock, and push the door inward until the door is completely closed and locked.
The power doors support multiple opening/closing methods: the power doors can be opened/closed through the micro-switch button on the exterior door handle, the door button, the central control screen, voice, the remote key, or the mobile App, and the driver's door or front row doors can also be electrically closed by depressing the brake pedal, bringing you a more comfortable and convenient driving and riding experience.
On the center control screen “ →Settings→vehicle→Doors and Windows”On this screen, you can set the door mode.
Power door: After setting, the vehicle door is in electric mode.
Soft Close Doors: After setting, the vehicle doors are in soft close mode.
Manual door: After setting, the door is in manual mode.
Tips After the door mode is set to Soft Close Doors Lock or manual door, functions such as double-pressing the key unlock/lock button to open/close the door, pressing the brake pedal to close the door, and setting the electric door opening range will be unavailable for setting.
Caution When closing the doors, ensure all persons inside and outside the vehicle are in a safe position. Children must not operate the Soft Close Doors Lock to prevent pinching injuries.
Do not place any part of your body or any object in the door gap when closing the vehicle door or during the soft‑close/latching process. Do not reach into the door opening to stop the door from closing. Doing so may result in pinching injuries and may damage the door.
If any part of your body or any object is accidentally trapped, immediately pull it free or pull the exterior door handle to open the door.
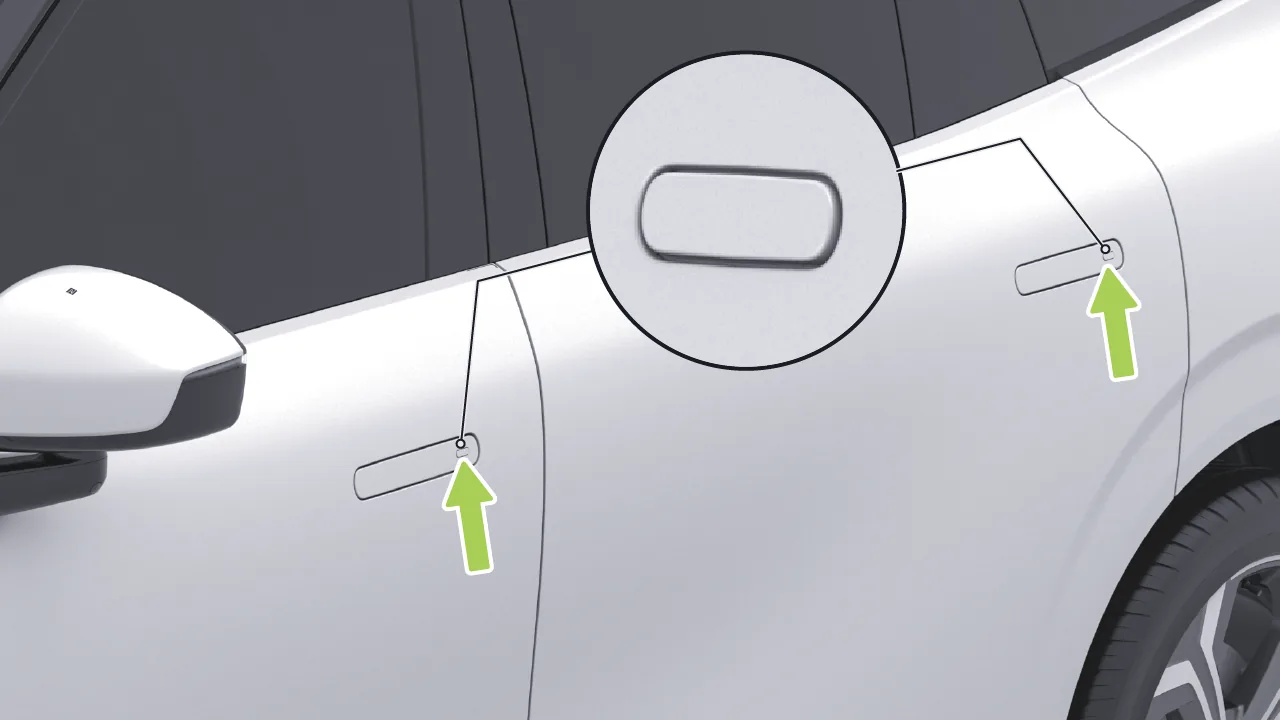
Unlock the vehicle:When the vehicle is in the locked state, carry a valid smart remote key or mobile phone Bluetooth key, and press the door handle microswitch to unlock the vehicle.
When the door mode is set to power door, if the vehicle is unlocked and the door is closed, press the microswitch on the exterior door handle, and the corresponding door will open electrically.
After the door mode is set to soft close door or manual door, when the vehicle is unlocked and the door is closed, press the microswitch on the exterior door handle, and the corresponding door will automatically open a short distance. At this time, pull the exterior door handle to open the door manually; if the door is not opened within a certain period of time, the door will automatically close.
Close the door:When the door mode is set to power door, after the door opens to the set position or the fully open position, press the microswitch on the exterior door handle, and the door will close automatically. After the door mode is set to soft close door or manual door, the door must be closed manually.
When opening the door using the exterior door handle, only the power-assisted opening function is available; there is no power opening function. You need to manually open the door to an angle convenient for entering the vehicle.
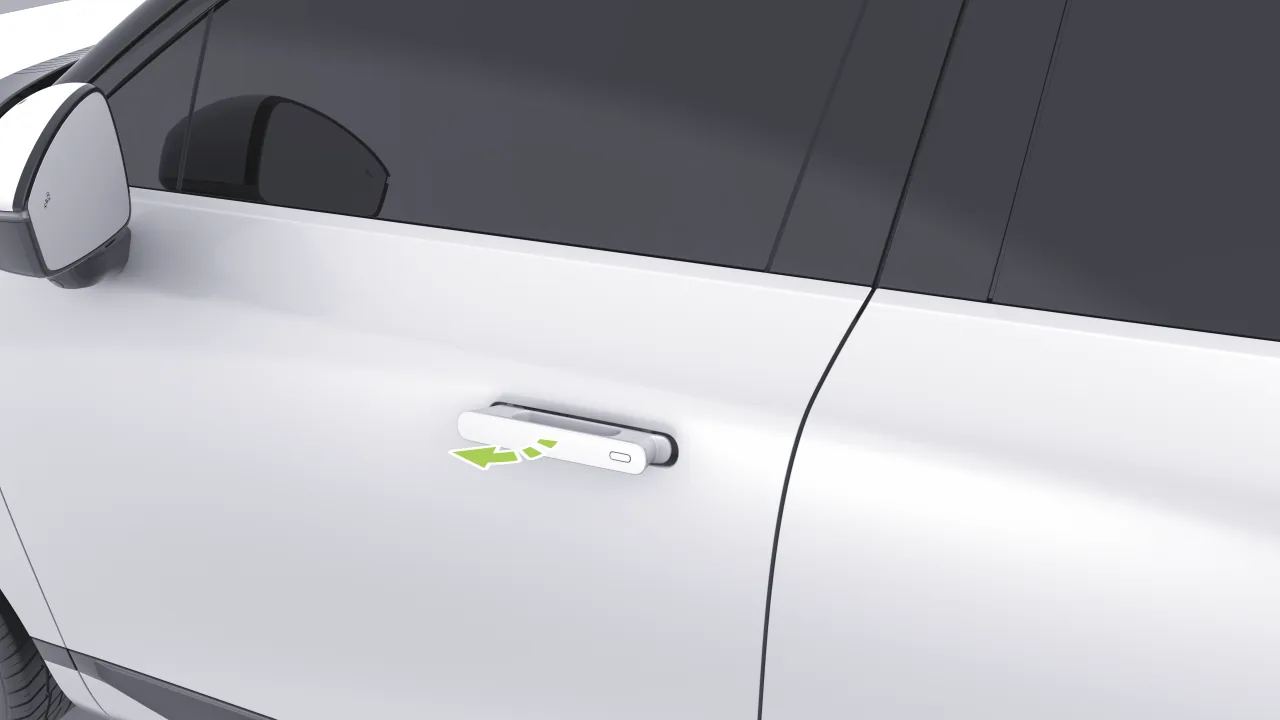
When the vehicle is unlocked, the exterior door handles automatically pop out, and the doors can be opened by pulling the exterior door handles.
Tips When any door, the hood, or the trunk is opened, the center display and the head-up display (HUD) show 'The vehicle door is not closed.'
Caution When using the exterior door handle to open the door, if an obstacle is detected, the door will automatically stop; after the obstacle moves away, the door will automatically continue opening. This function is not applicable to all scenarios. In special circumstances, the door may open incorrectly, stop moving, or experience stuttering during the opening process. Therefore, the user must always pay attention to the surrounding environment to ensure safety.
Manual prevention.
Press the microswitch on the exterior door handle.
Briefly press the unlock/lock button on the remote key.
Press the interior button briefly or tap the button on the center display.
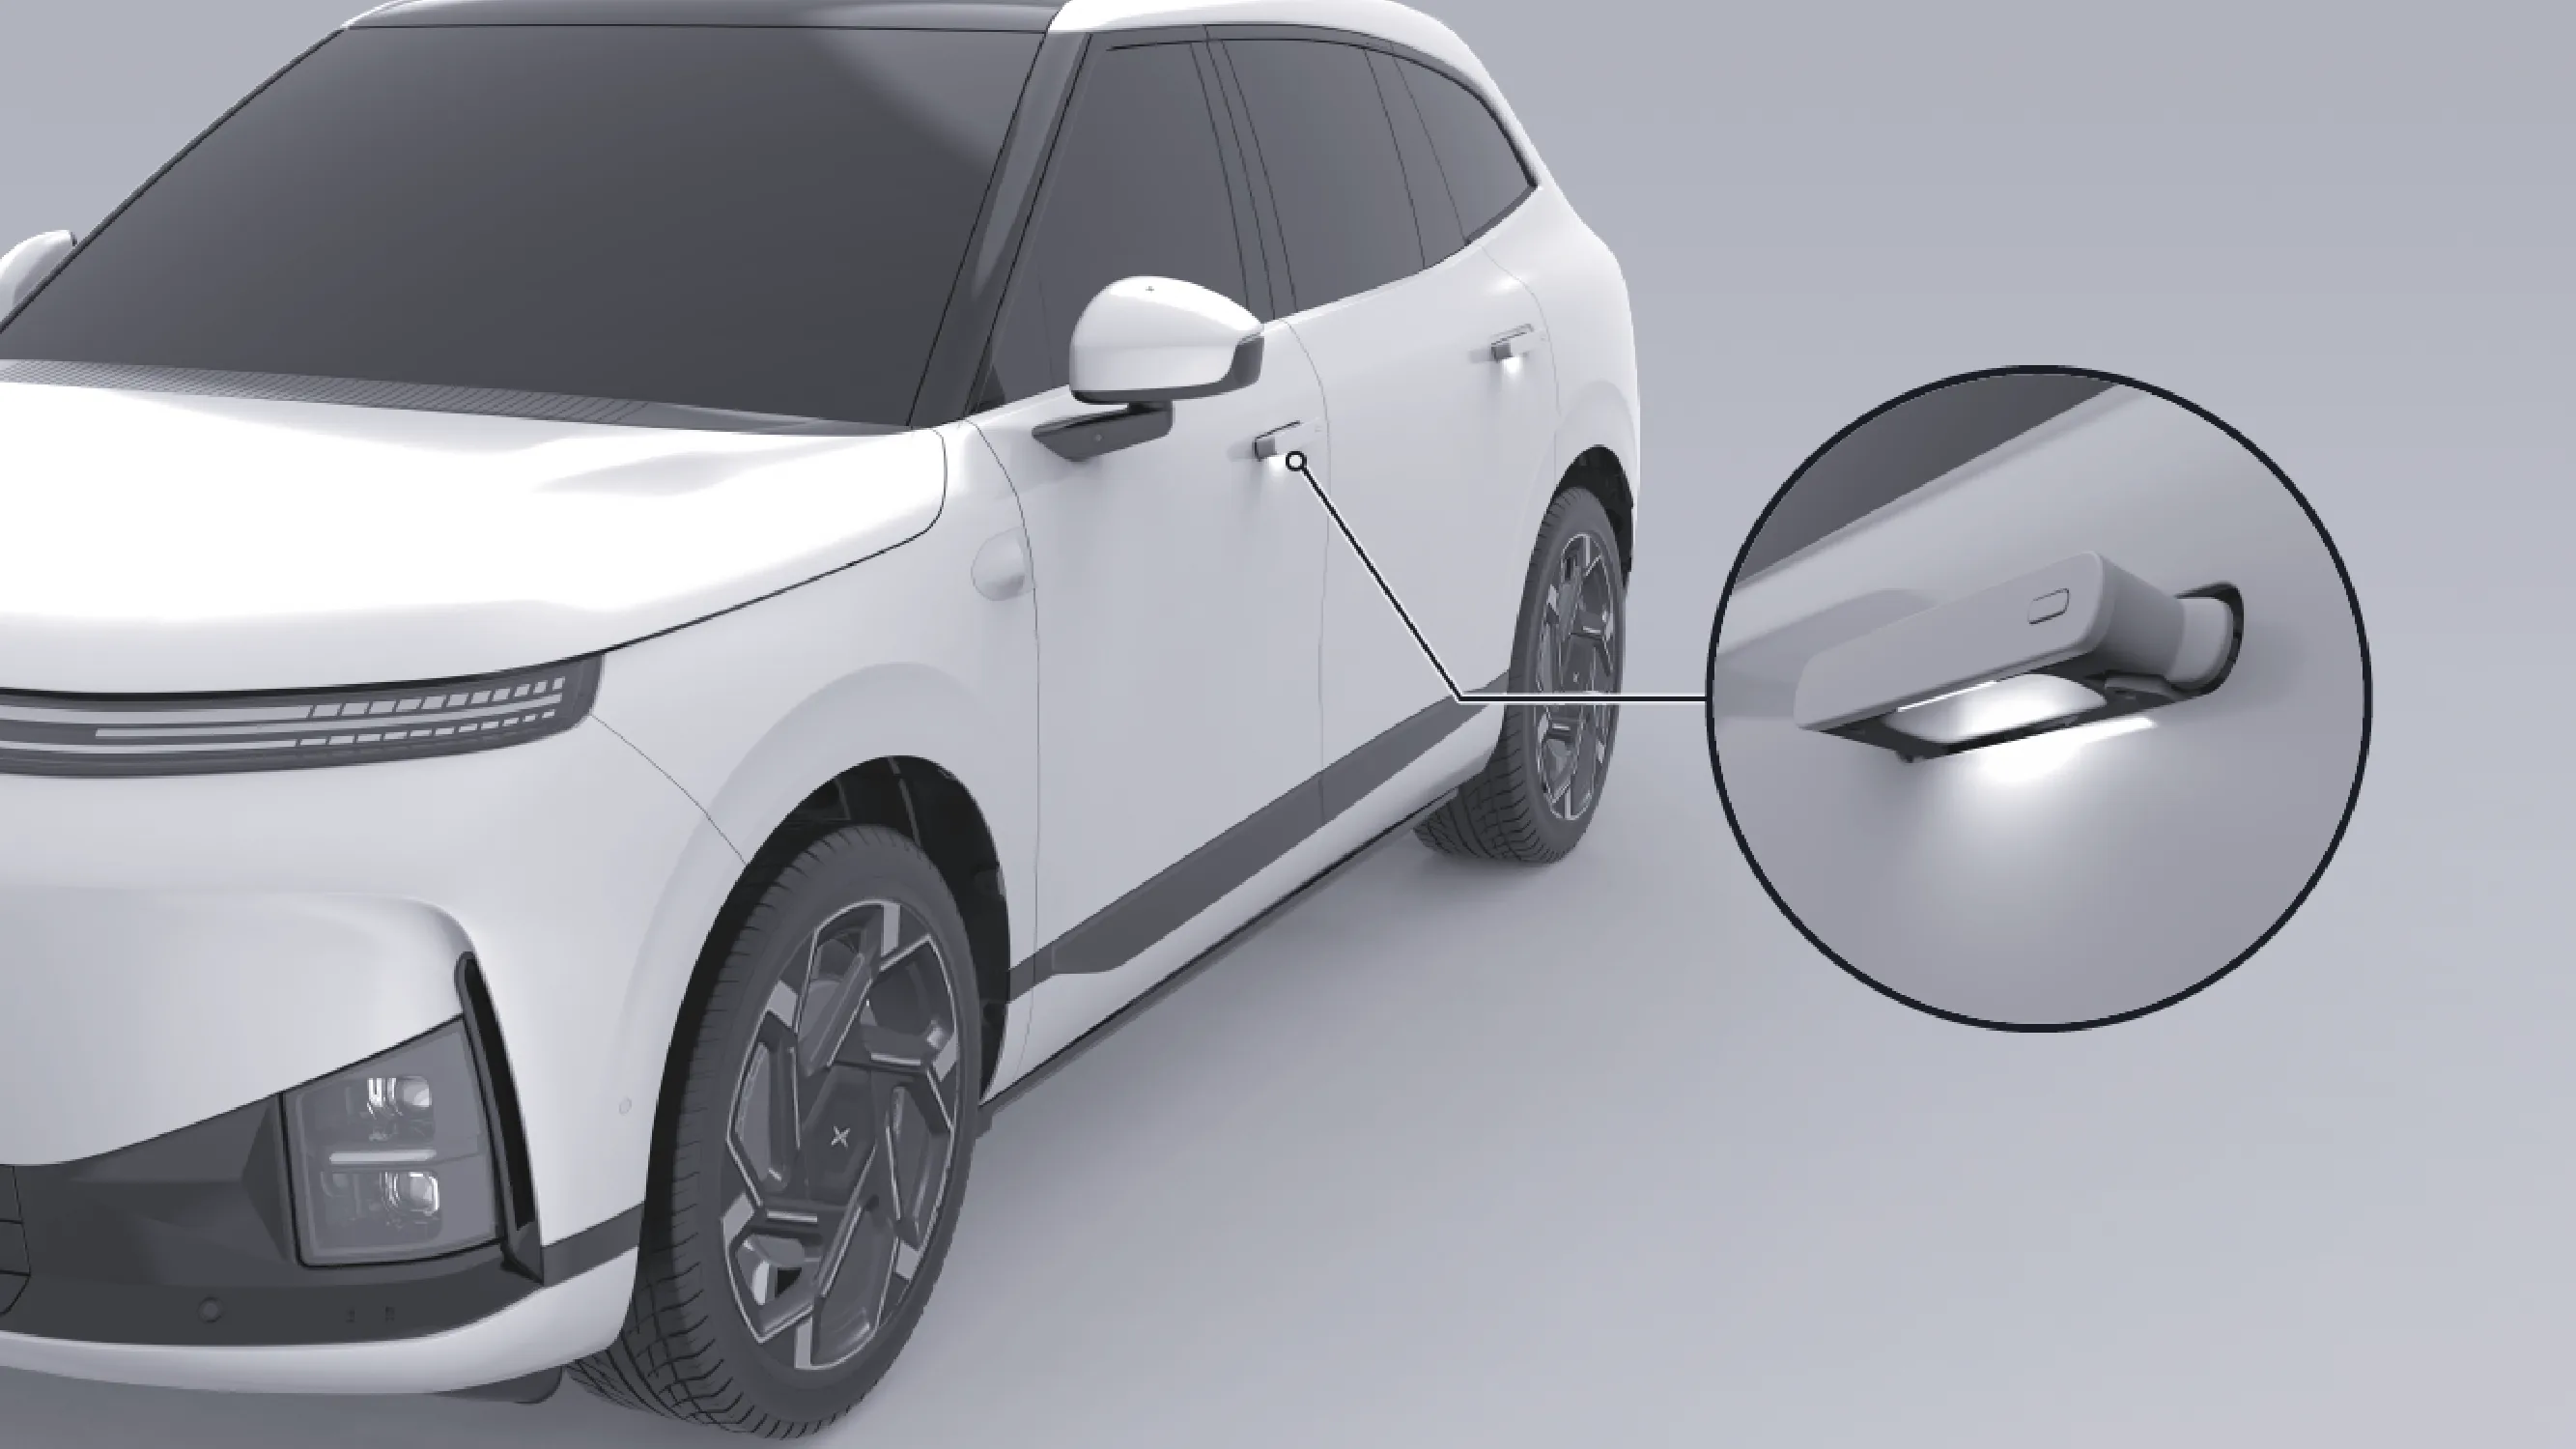
After the exterior door handle extends, the exterior door handle illumination lamp will automatically turn on. After the exterior door handle retracts, the exterior door handle illumination lamp will automatically turn off.
Retract on locking: When the vehicle door is locked, the door handle automatically retracts.
Shift retract: When shifting from P gear to N/R/D Gear, the door handle will retract automatically.
Overspeed retraction: When the vehicle speed exceeds 3 km/h, the door handle will automatically retract.
Timeout retraction: After the doors (including the trunk) and the front compartment lid are closed, if the above retraction operation is not performed within 120 seconds, the door handles will automatically retract. After the exterior handles retract due to timeout, press the door handle microswitch to make the exterior handles pop out again.
Warning Be sure to use caution when using the door handle to prevent fingers, jewelry, acrylic nails, etc. from being caught by the door or the door handle mechanism. Otherwise, damage to property or personal injury may result.
Tips When using the automatic parking feature, the flush door handle remains deployed, pulling the door handle suspends the automatic parking feature.
Control the door handle fold/show more than 8 times within 1 minute, will trigger the anti-play mode, the door handle no longer moves, after 20 seconds the function will resume.
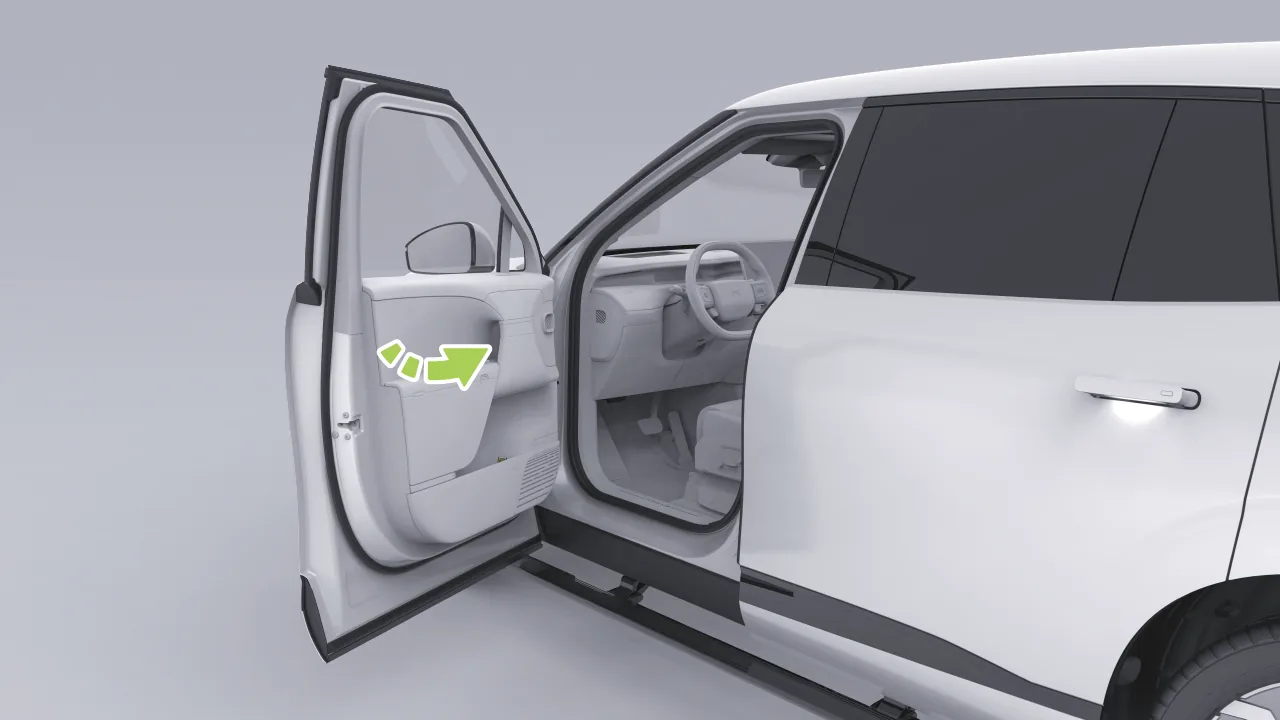
When the door mode is set to power door, push the door inward for a certain distance, and the door will close automatically.
Caution While the door is closing, ensure that no part of your body is within the door’s path of movement to prevent pinching.
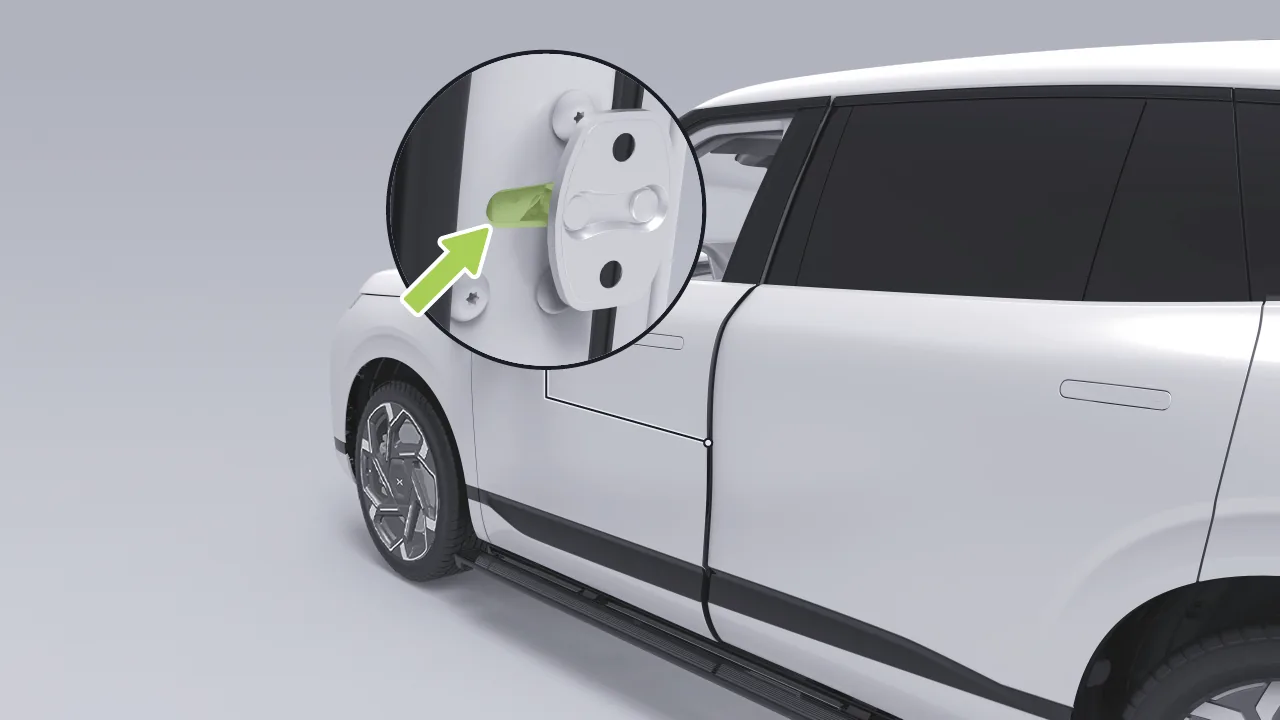
When the door mode is set to soft close door, when the door is closed to the latching position, the soft close door lock will automatically latch until the door is fully closed.
When the door mode is set to manual door, push the door inward directly until the door is fully closed.
Caution When closing the doors, ensure all persons inside and outside the vehicle are in a safe position. Children must not operate the Soft Close Doors Lock to prevent pinching injuries.
Do not place any part of your body or any object in the door gap when closing the vehicle door or during the soft‑close/latching process. Do not reach into the door opening to stop the door from closing. Doing so may result in pinching injuries and may damage the door.
If any part of your body or any object is accidentally trapped, immediately pull it free or pull the exterior door handle to open the door.
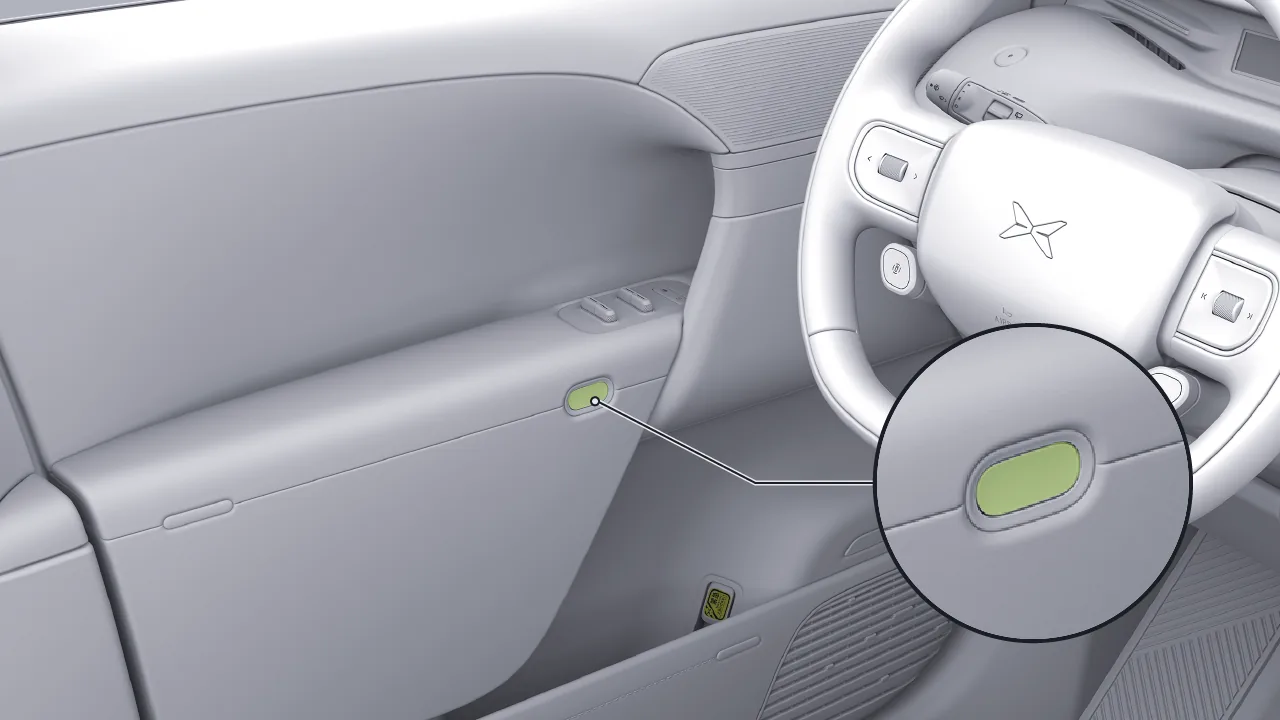
The front row door has a control button inside the vehicle, located at the door armrest (armrest door button).
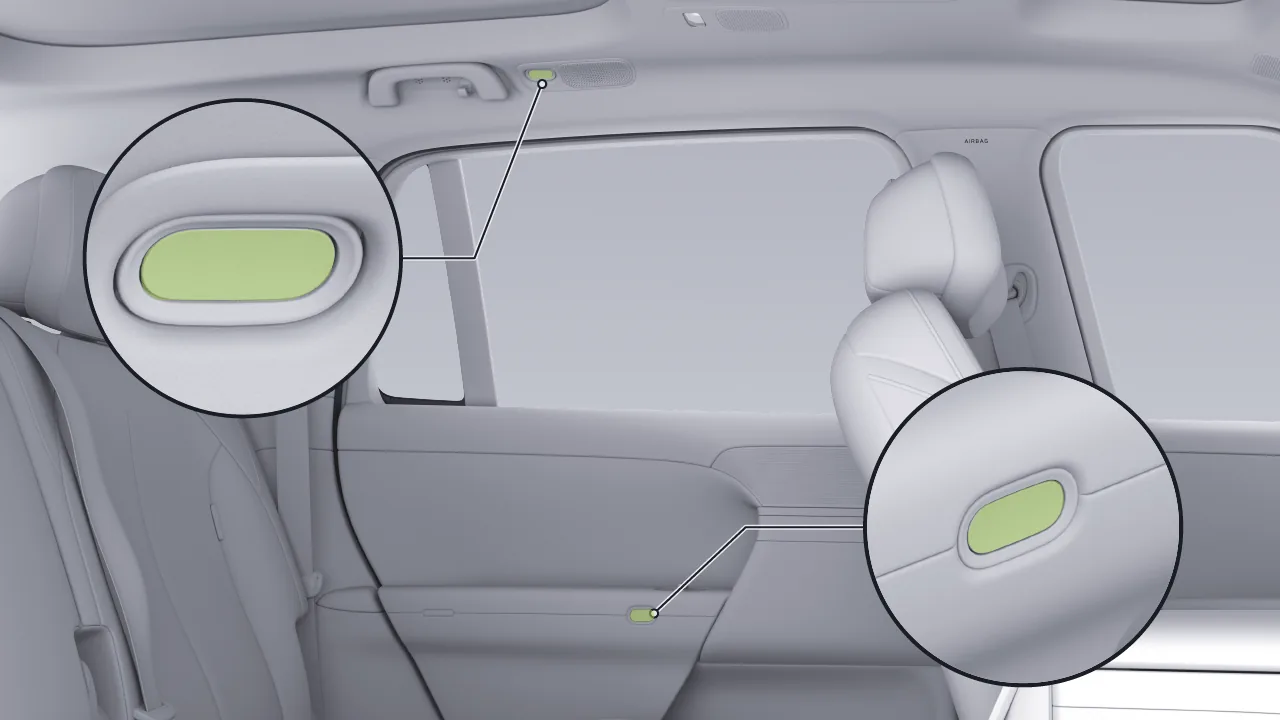
The rear doors have two control buttons inside the vehicle, located respectively beside the roof grab handle (roof button) and at the door armrest (armrest door button).
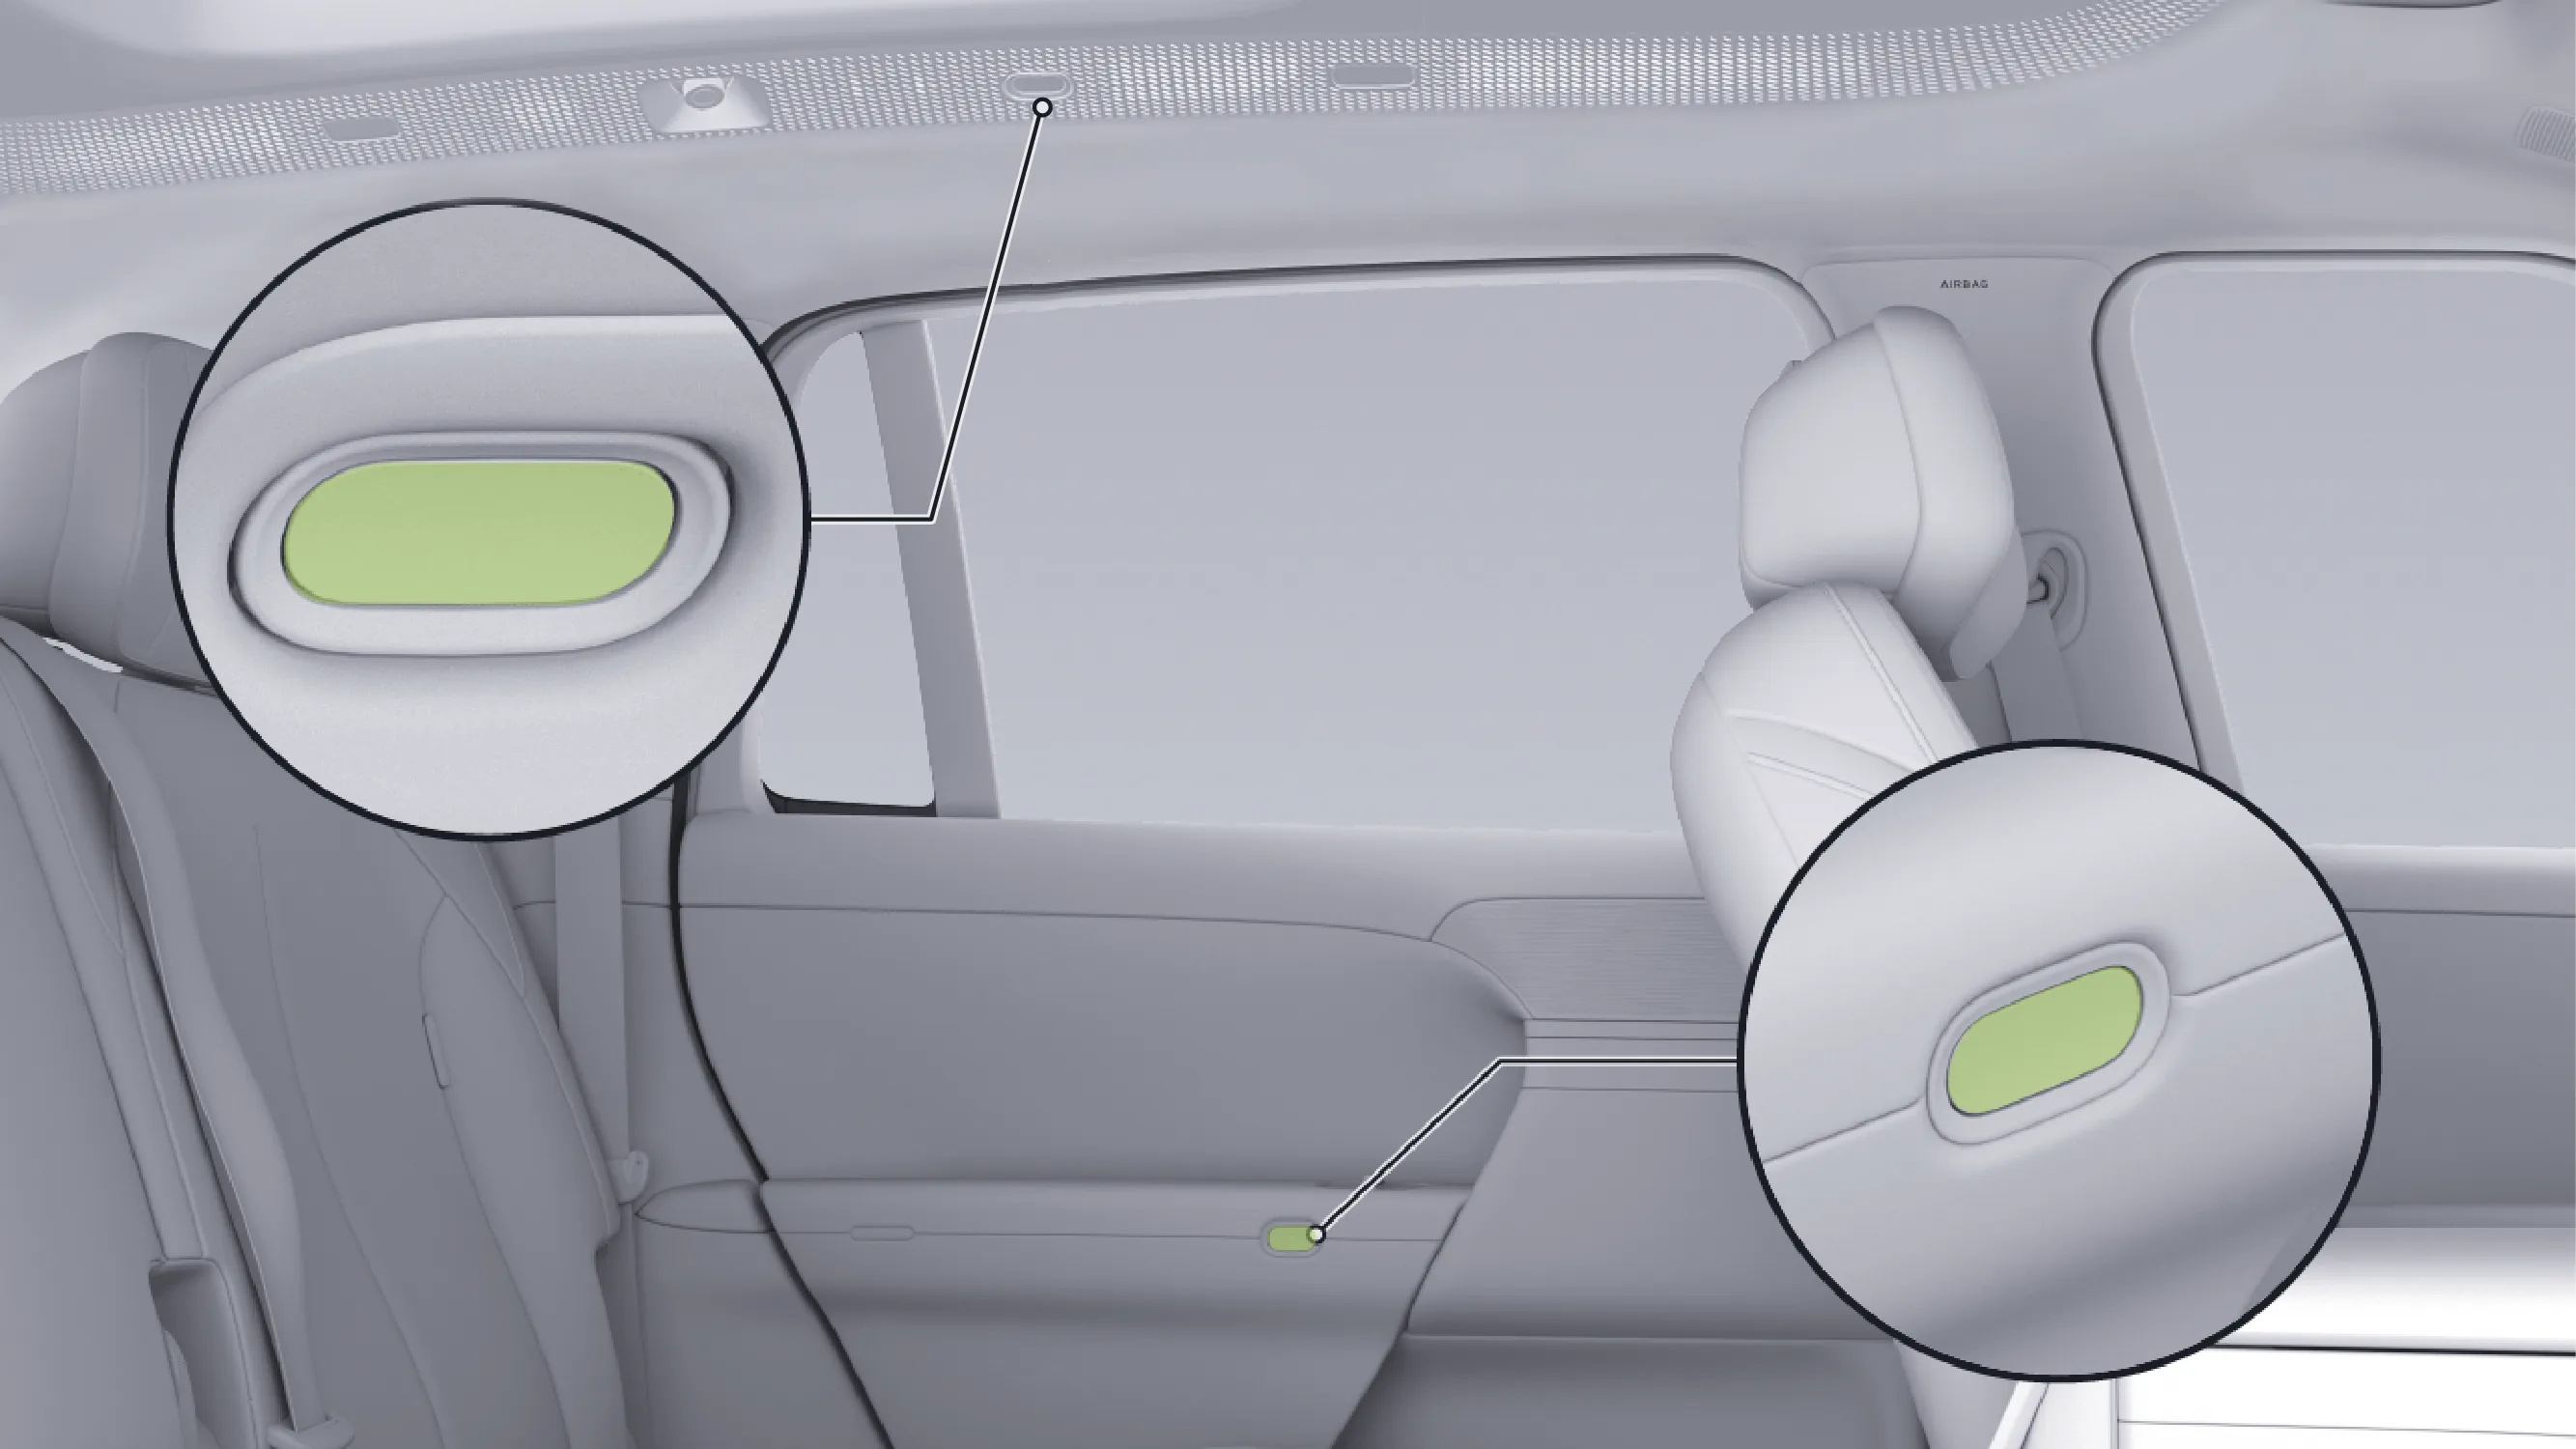
There are two control buttons for the rear doors inside the vehicle, located respectively beside the roof grab handle (roof button) and at the door armrest (armrest door button).
You can set the door opening method for the in-vehicle armrest door button, door button, and roof button on the central control screen to prevent accidental door opening caused by unintentionally touching the in-vehicle door opening button when the vehicle is locked.
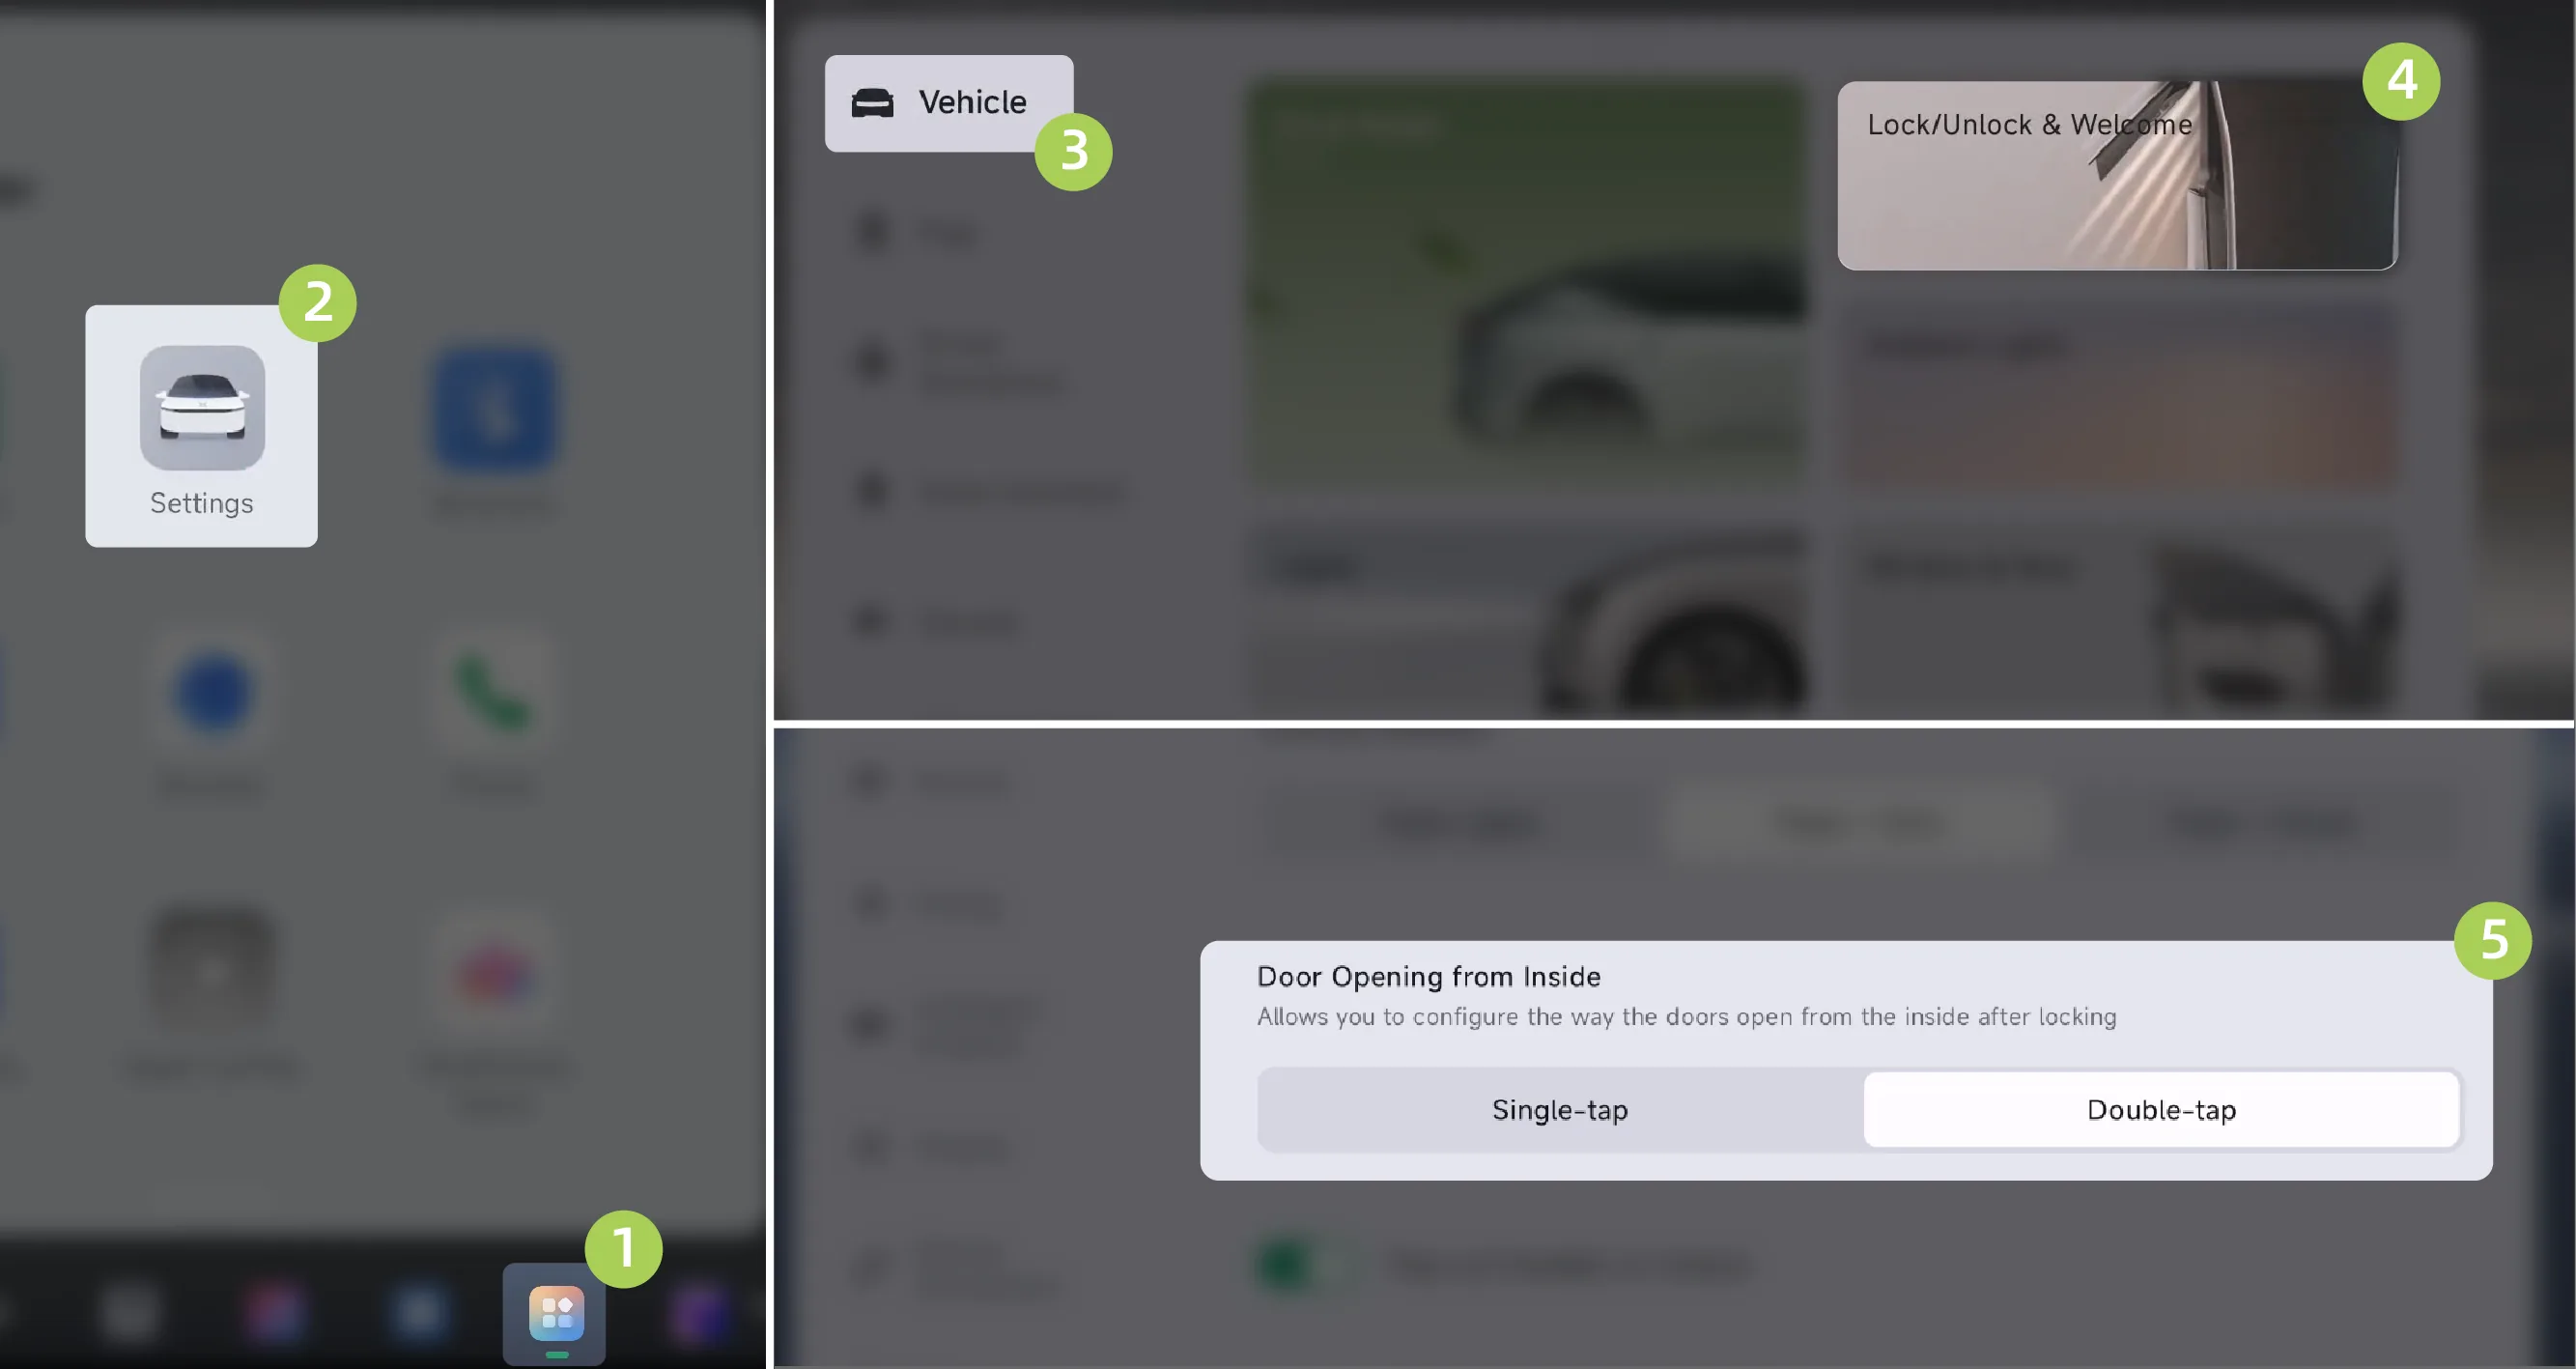
On the central control screen “ →Settings→vehicle→Unlocking and Welcome”On the interface, you can set the door opening method for the in-vehicle armrest door button and the headliner button to be / 。
When the door mode is set to power door, with the vehicle in the unlocked/locked state, press the armrest door button or the overhead button once, and the corresponding door will open electrically.
After the door mode is set to soft close door or manual door, when the vehicle is in the unlocked/locked state, press the armrest door button or the overhead button once, and the door will automatically open a small distance. At this time, manually open the door to an angle convenient for getting in and out of the vehicle; if the door is not opened within a certain period of time, the door will automatically close.
When the door mode is set to power door, if the vehicle is in the unlocked state, press the armrest door button or the overhead button once, and the corresponding door will open electrically; if the vehicle is in the locked state, press the armrest door button or the overhead button twice consecutively, and the corresponding door will open electrically.
After the door mode is set to Soft Close Doors Lock or manual door, when the vehicle is in the unlocked state, press the armrest door button or the overhead button once, and the door will automatically open a short distance; at this time, you need to manually open the door to an angle convenient for getting in and out of the vehicle;
When the vehicle is in the locked state, press the armrest door button or the overhead button twice consecutively, and the door will automatically open a short distance. At this time, you need to manually open the door to an angle convenient for entering and exiting the vehicle. In addition, if the door is not opened within a certain period of time, the door will automatically close.
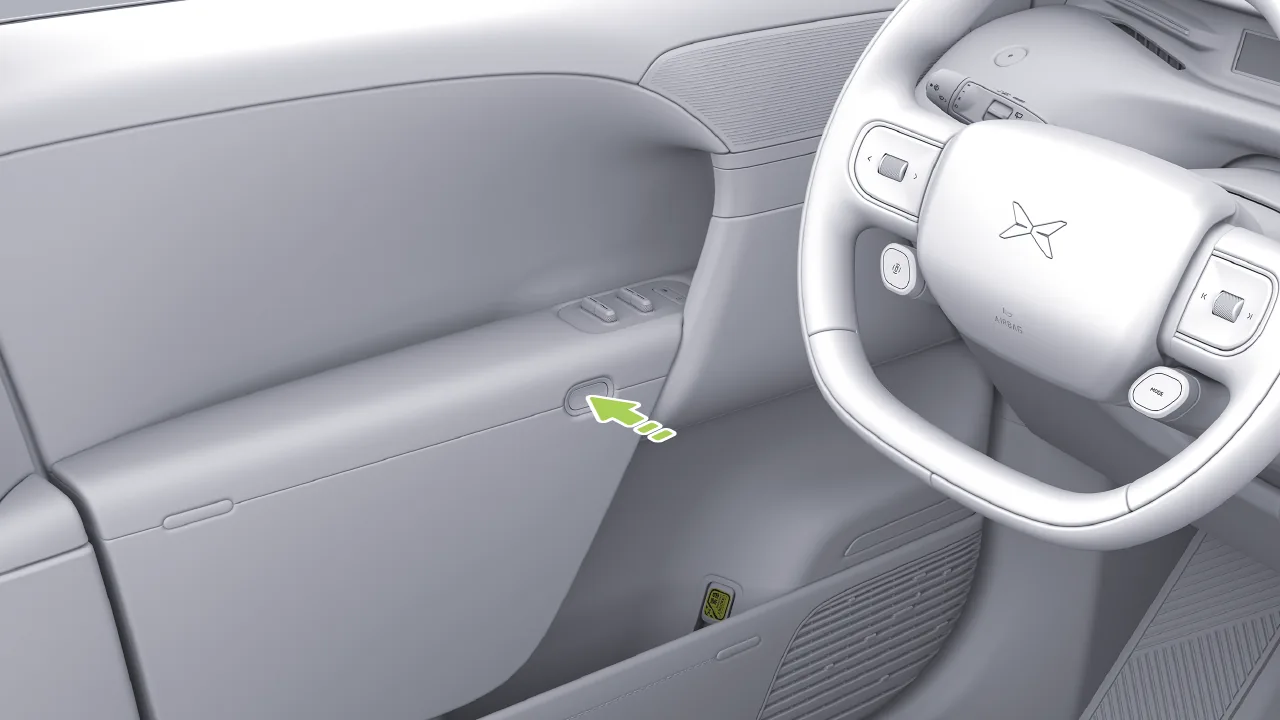
Short press to close the door: When the vehicle is stationary and the door is open, briefly press the armrest door button or the roof button, and the corresponding door will close electrically.
During the powered opening movement of the door, press the armrest door button or the overhead button, and the movement travel of the corresponding door will pause immediately; press the armrest door button or the overhead button again, and the corresponding door will close electrically;
During the power closing movement of the door, press the armrest door button or the overhead button, and the movement travel of the corresponding door will pause immediately. Press the armrest door button or the overhead button again, and the corresponding door will open electrically.
Tips When the vehicle speed is greater than 3 km/h, the door cannot be opened using the door button on the grab handle or the overhead button.
In the unlocked state, after the in-vehicle door opening method is switched from “single-press opening” to “double-press opening”, the next time the door is opened, press the armrest door button or the roof button twice consecutively.
Caution Always check for approaching traffic from behind before opening the door. We recommend keeping Door Opening Warning enabled at all times. Open the door only after confirming that it is safe to avoid accidents that could result in personal injury or property damage.
Caution Even if the power door is equipped with an anti-collision feature, do not rely solely on it. Before opening the power door, check the surrounding area. When opening, be mindful of obstacles outside the vehicle. If obstacles are present outside the vehicle, the door’s opening angle will be limited. In this case, manually open the door to an angle suitable for exiting the vehicle.
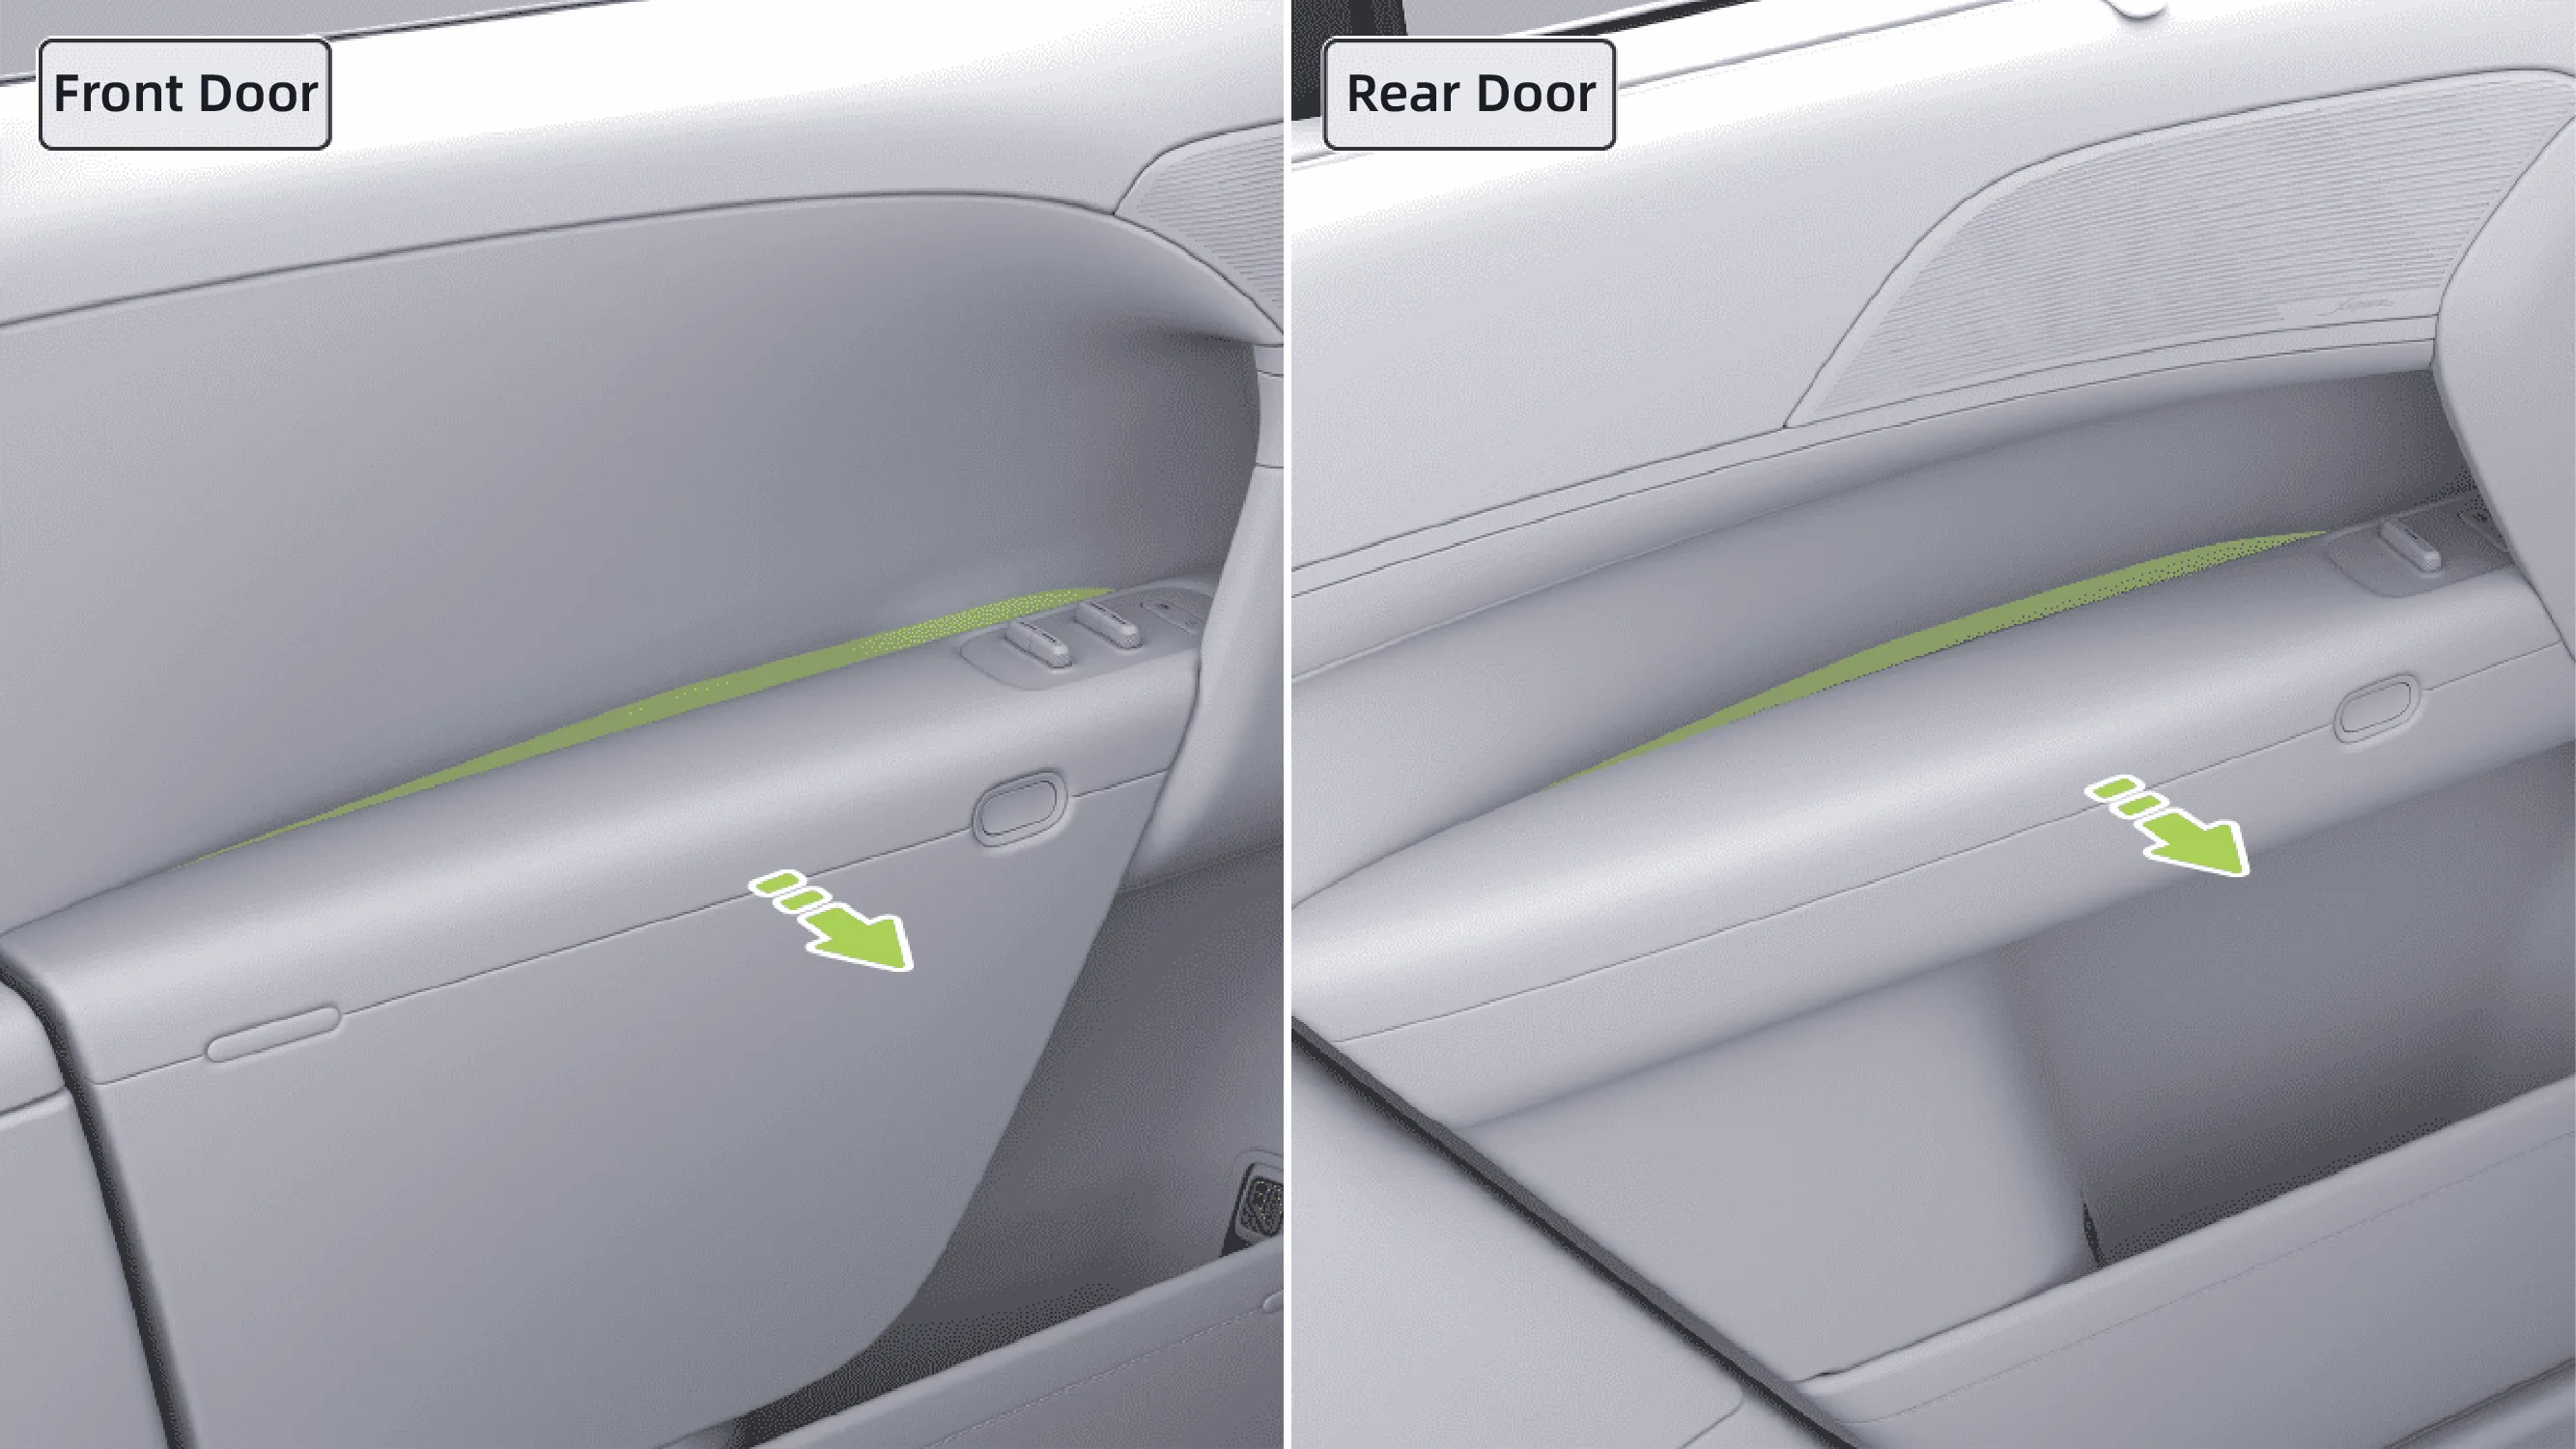
When the door is open, grasp the handle inside the vehicle and pull the door inward until the door is fully closed.
Caution While the door is closing, ensure that no part of your body is within the door’s path of movement to prevent pinching.
When the manual door opening mode is off, the electric doors can be turned on and off on the central control screen in the following ways:
On the central control screen “ →Settings→Vehicle→Window&Door”Interface, tap respectively DoorTap front left door/front right door/left rear door/right rear door below to automatically open the corresponding door; tap again to automatically close the corresponding door.
Tap on the center display. “ →  Power Door ”Enter the electric door control interface to open/close the corresponding doors separately. (For information about custom Control Center, please refer to the Custom Control Center chapter).
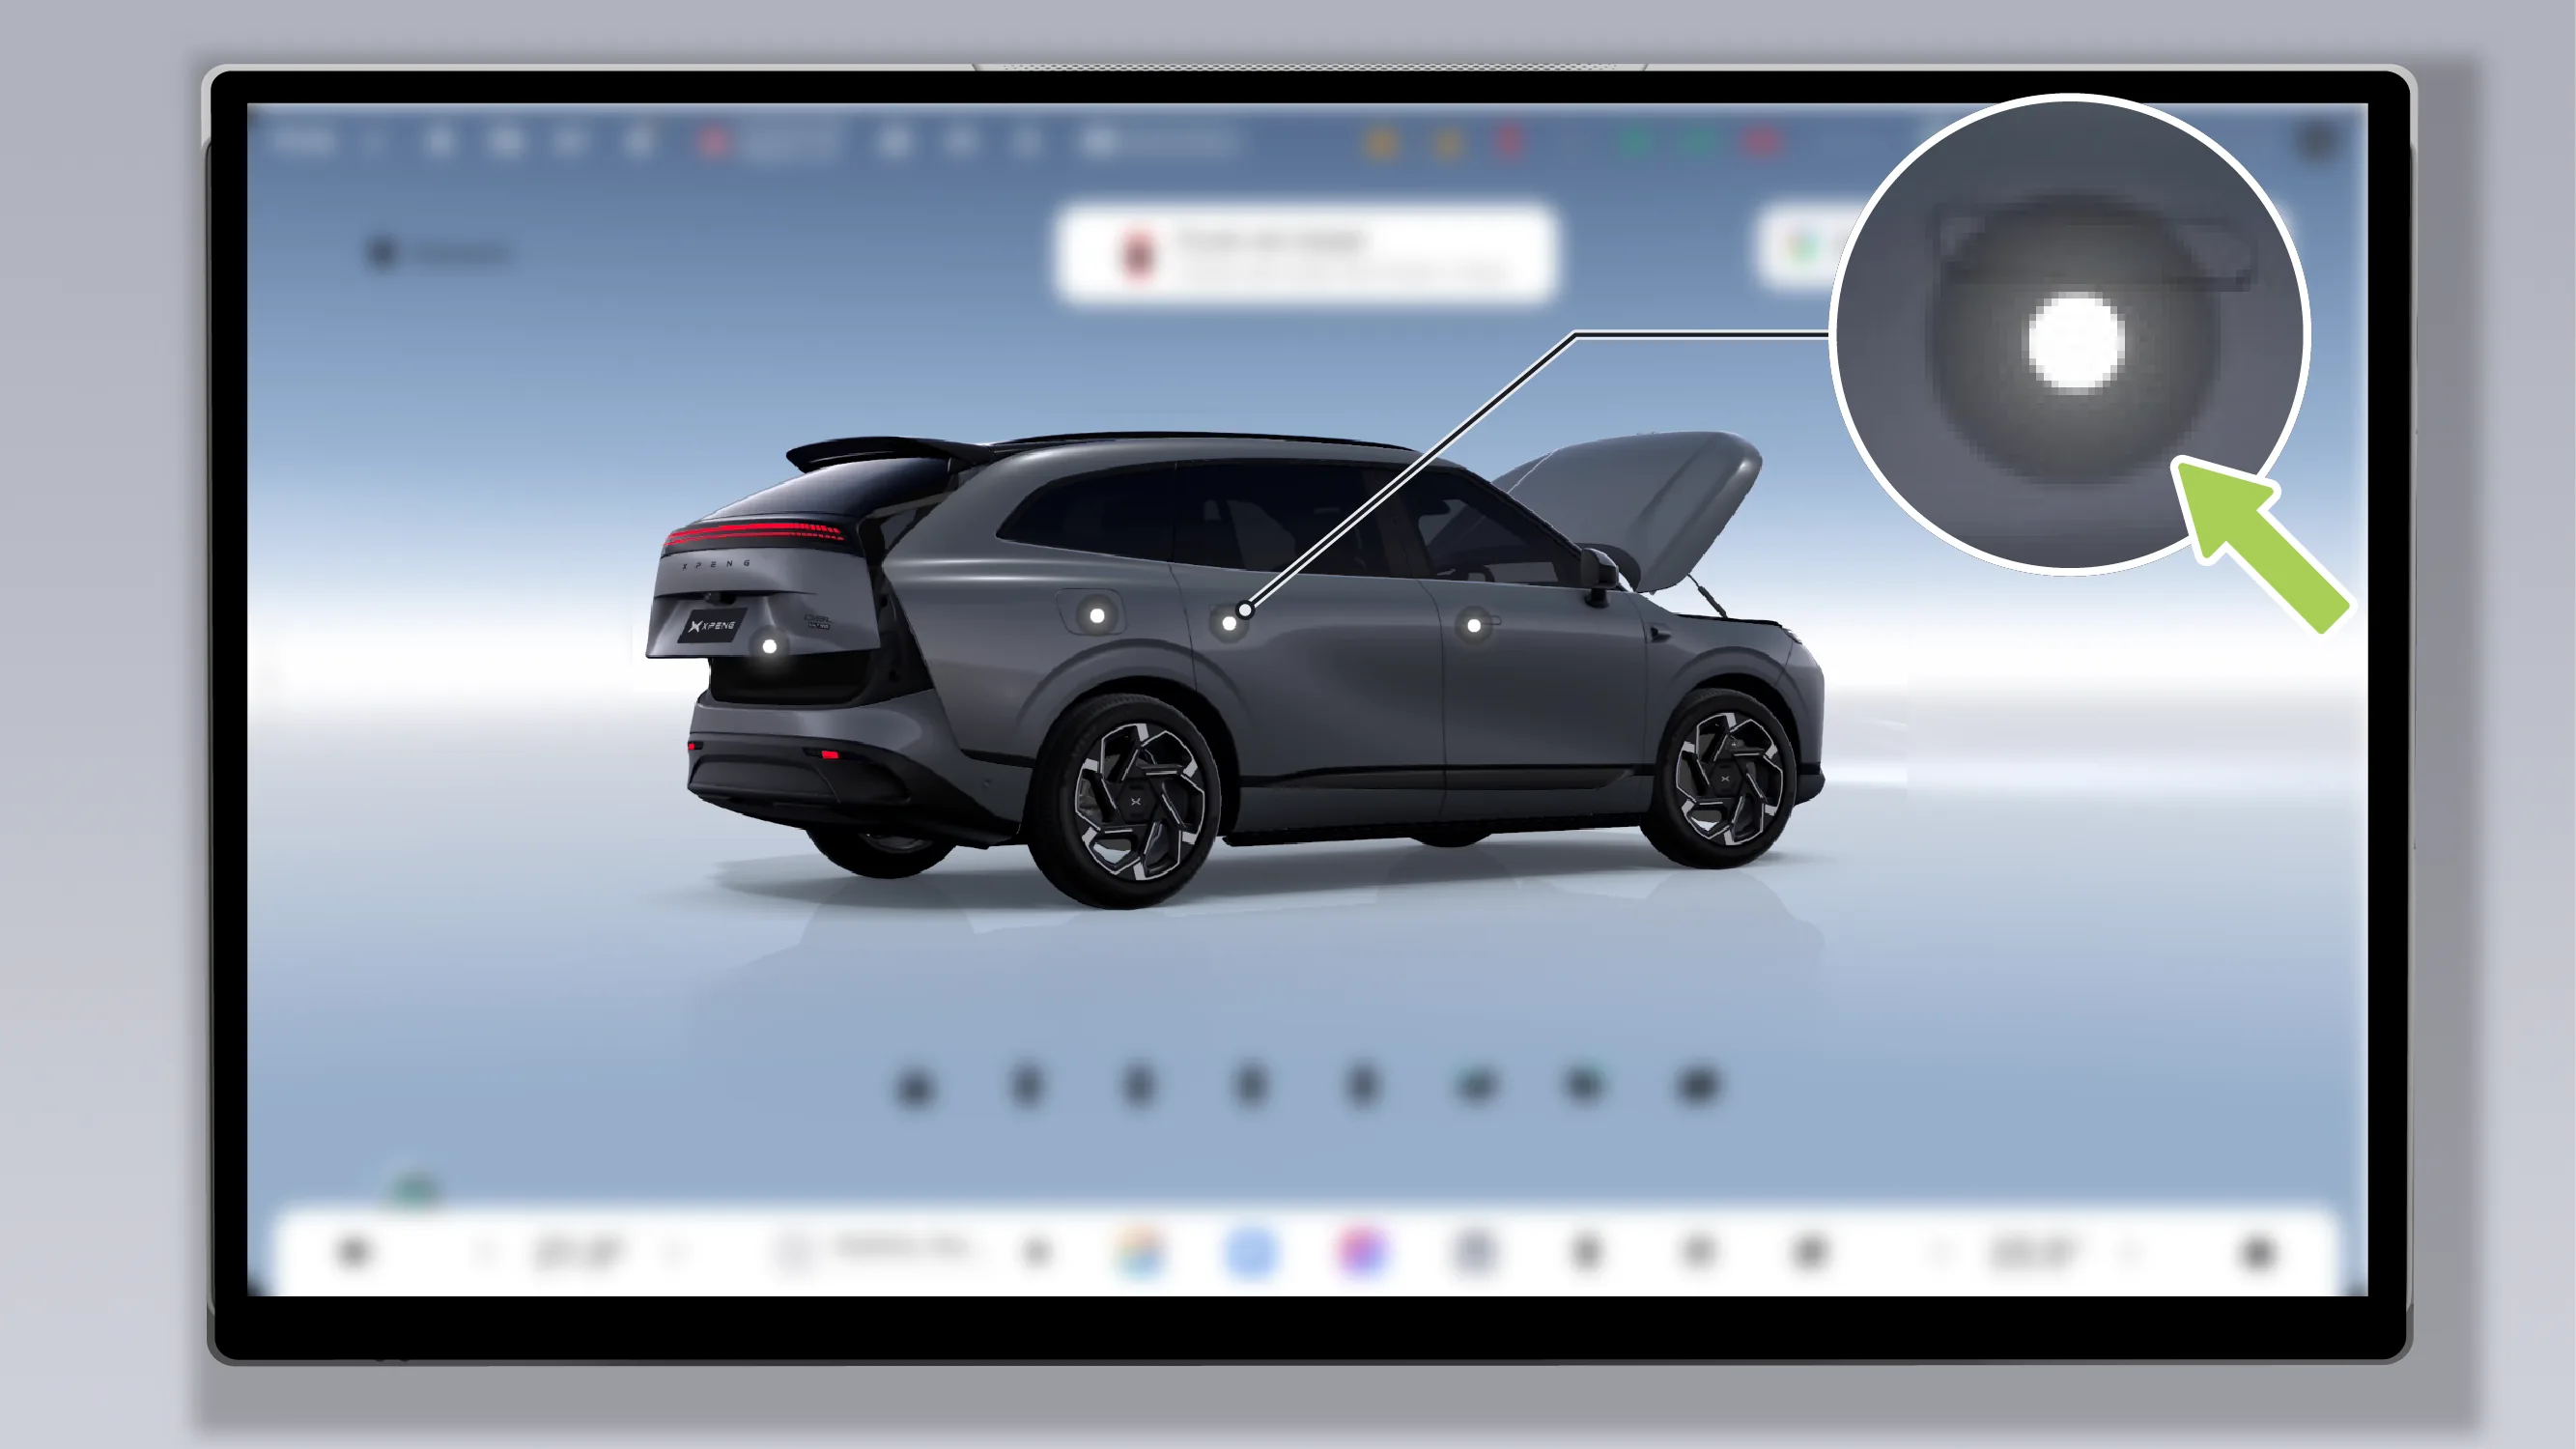
On the SR interface of the center display, rotate the 3D vehicle model, and tap the door area of the 3D vehicle model to display hotspot icons. Tap the hotspot icon at the driver's power door/passenger power door/left rear power door/right rear power door to automatically open the corresponding door; tap again to automatically close the corresponding door.
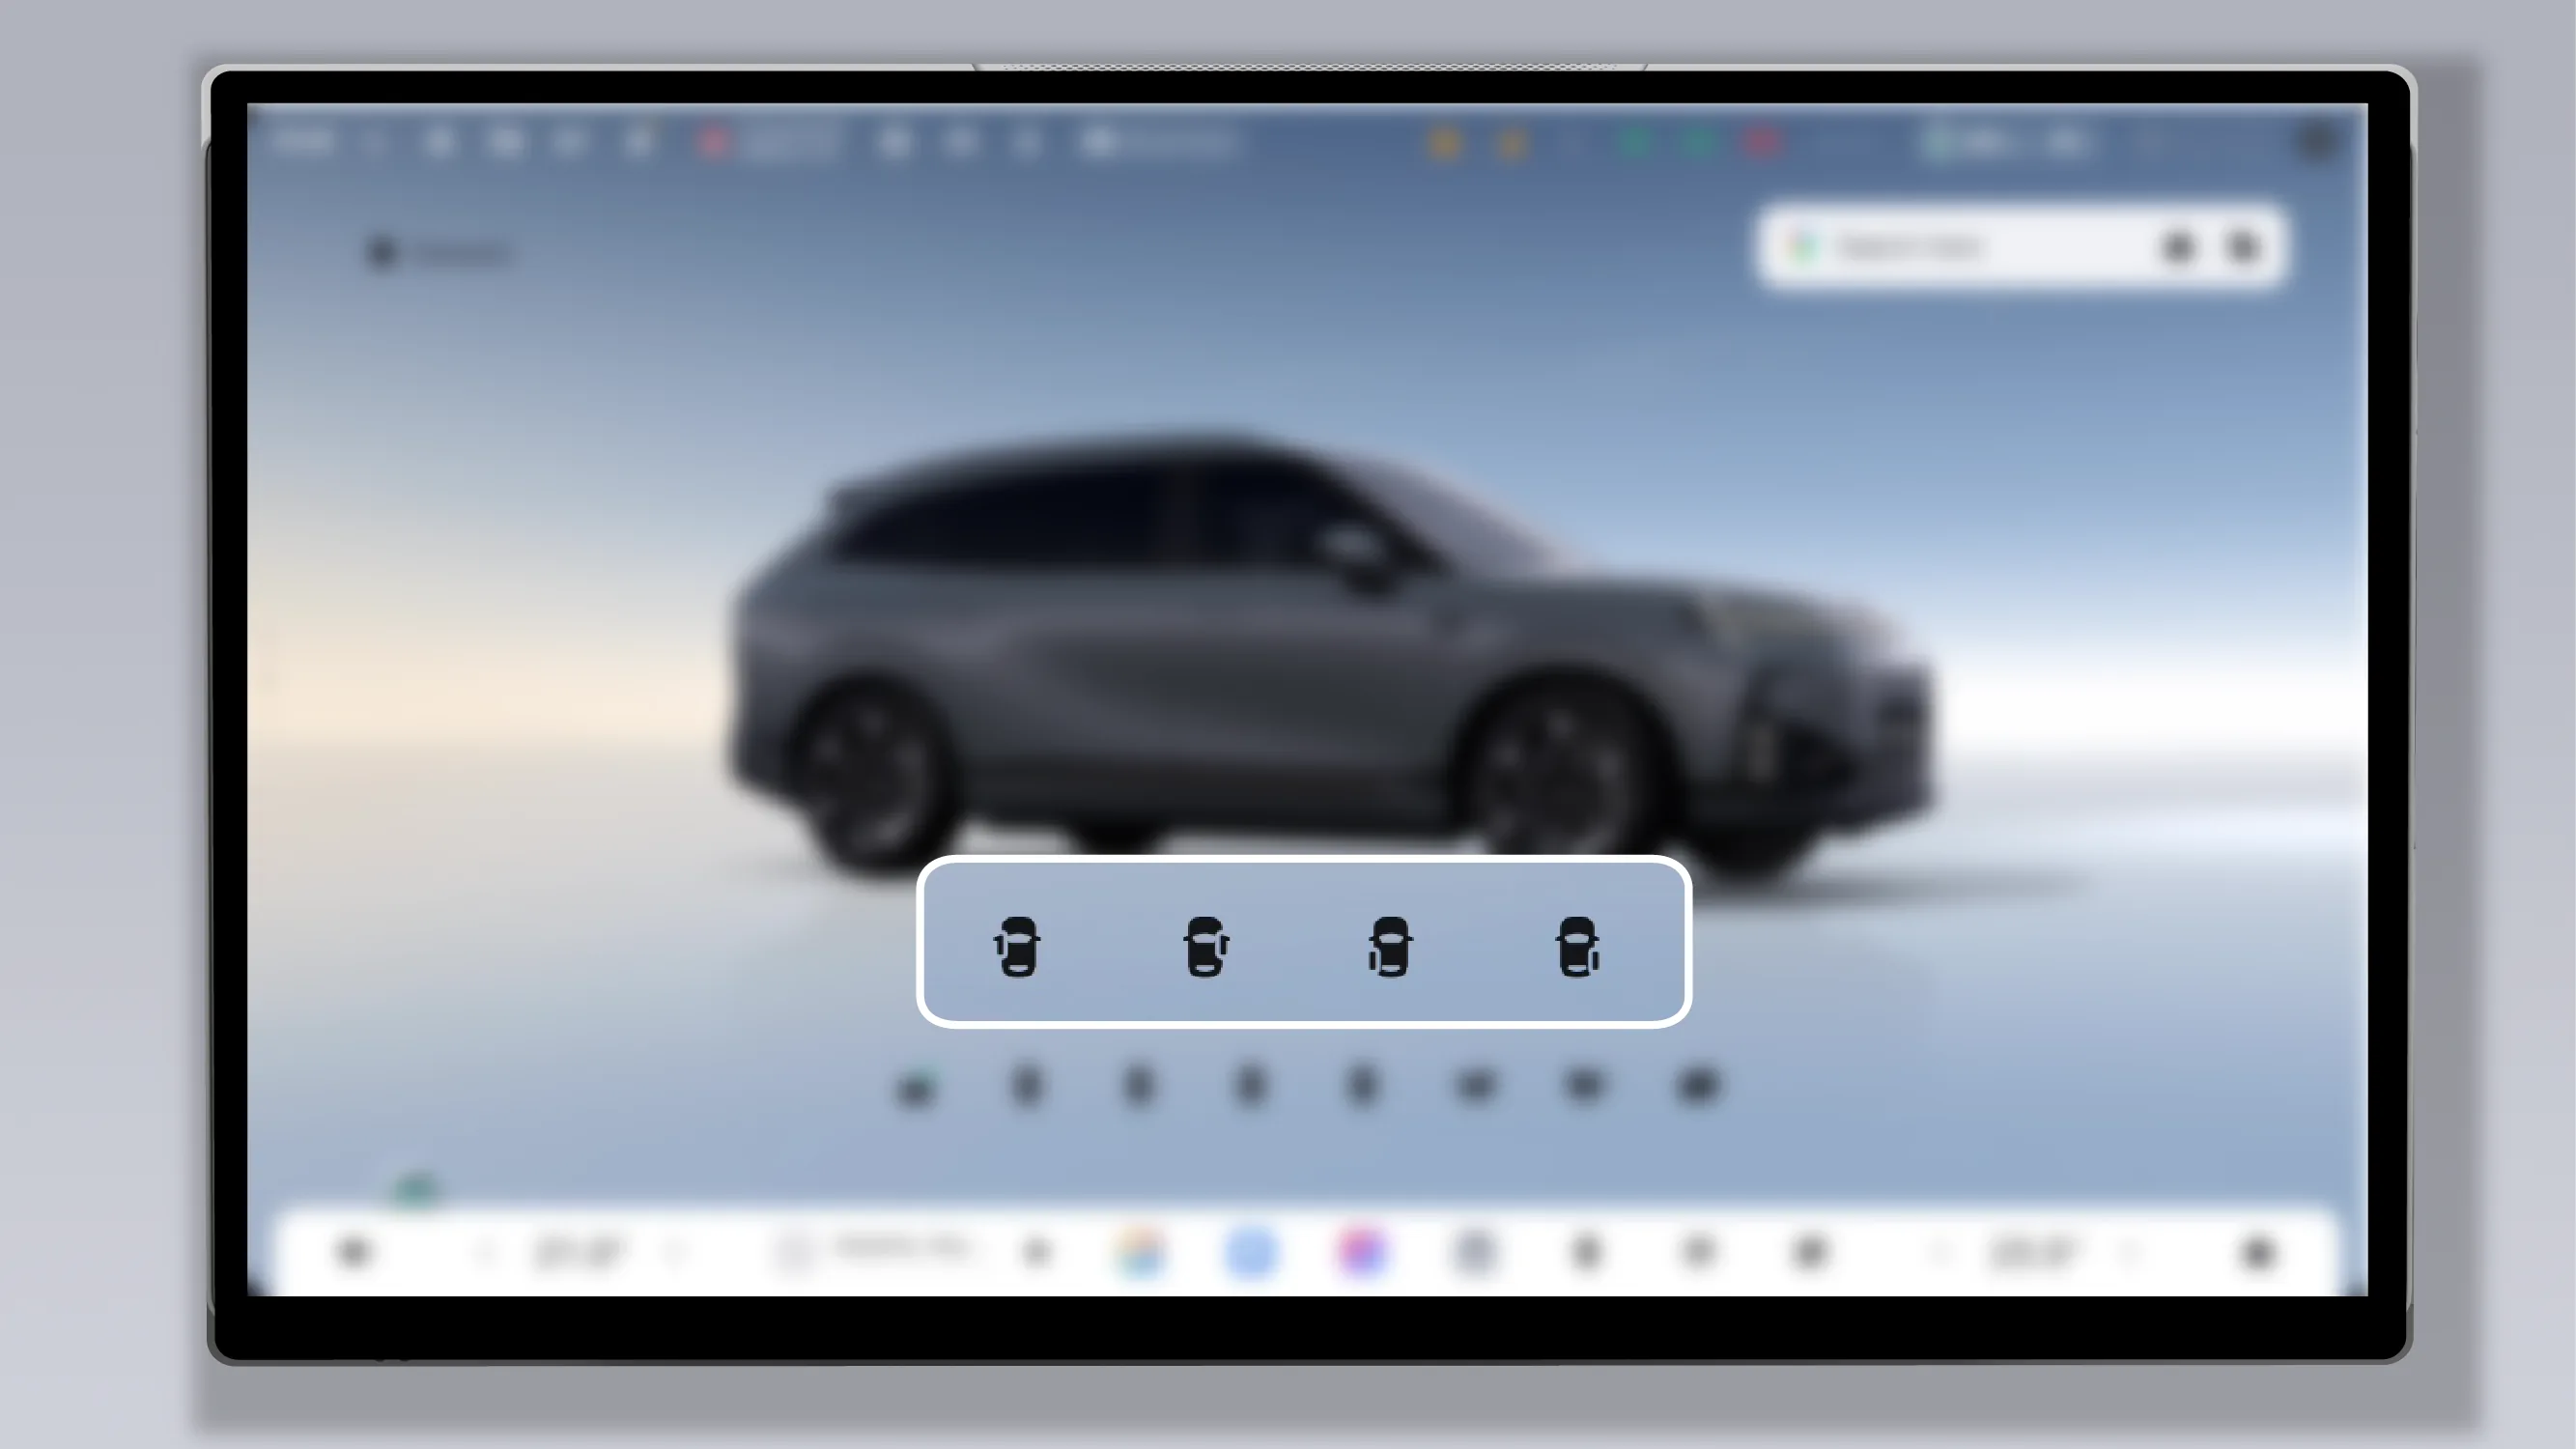
On the SR screen of the central control display, tap the driver power door/passenger power door/left rear power door/right rear power door icon to automatically open the corresponding door; tap again to automatically close the corresponding door.
Tips When the manual door opening mode is enabled, the power door cannot be opened or closed on the central control screen, and you need to manually open the door to an angle convenient for getting in and out of the vehicle.
Caution Before opening the door, be sure to observe the traffic approaching from the rear. It is recommended to always enable the side door opening warning function. Open the door only after confirming safety, so as to avoid accidents, which may result in personal injury or property damage.
Even if the power door is equipped with an anti-collision function, do not rely excessively on this function. Before opening the power door, observe the surrounding environment first; when opening the door, pay attention to obstacles outside the vehicle. If there are obstacles outside the vehicle, the door opening angle will be limited. In this case, you need to manually open the door to an angle convenient for you to get out of the vehicle.
Even if the power door is equipped with an anti-collision function, do not rely on this function excessively. Before opening the power door, observe the surrounding environment first; when opening the door, pay attention to obstacles outside the vehicle. If there are obstacles outside the vehicle, the door opening angle will be limited. In this case, you need to manually open the door to an angle that is convenient for you to exit the vehicle.
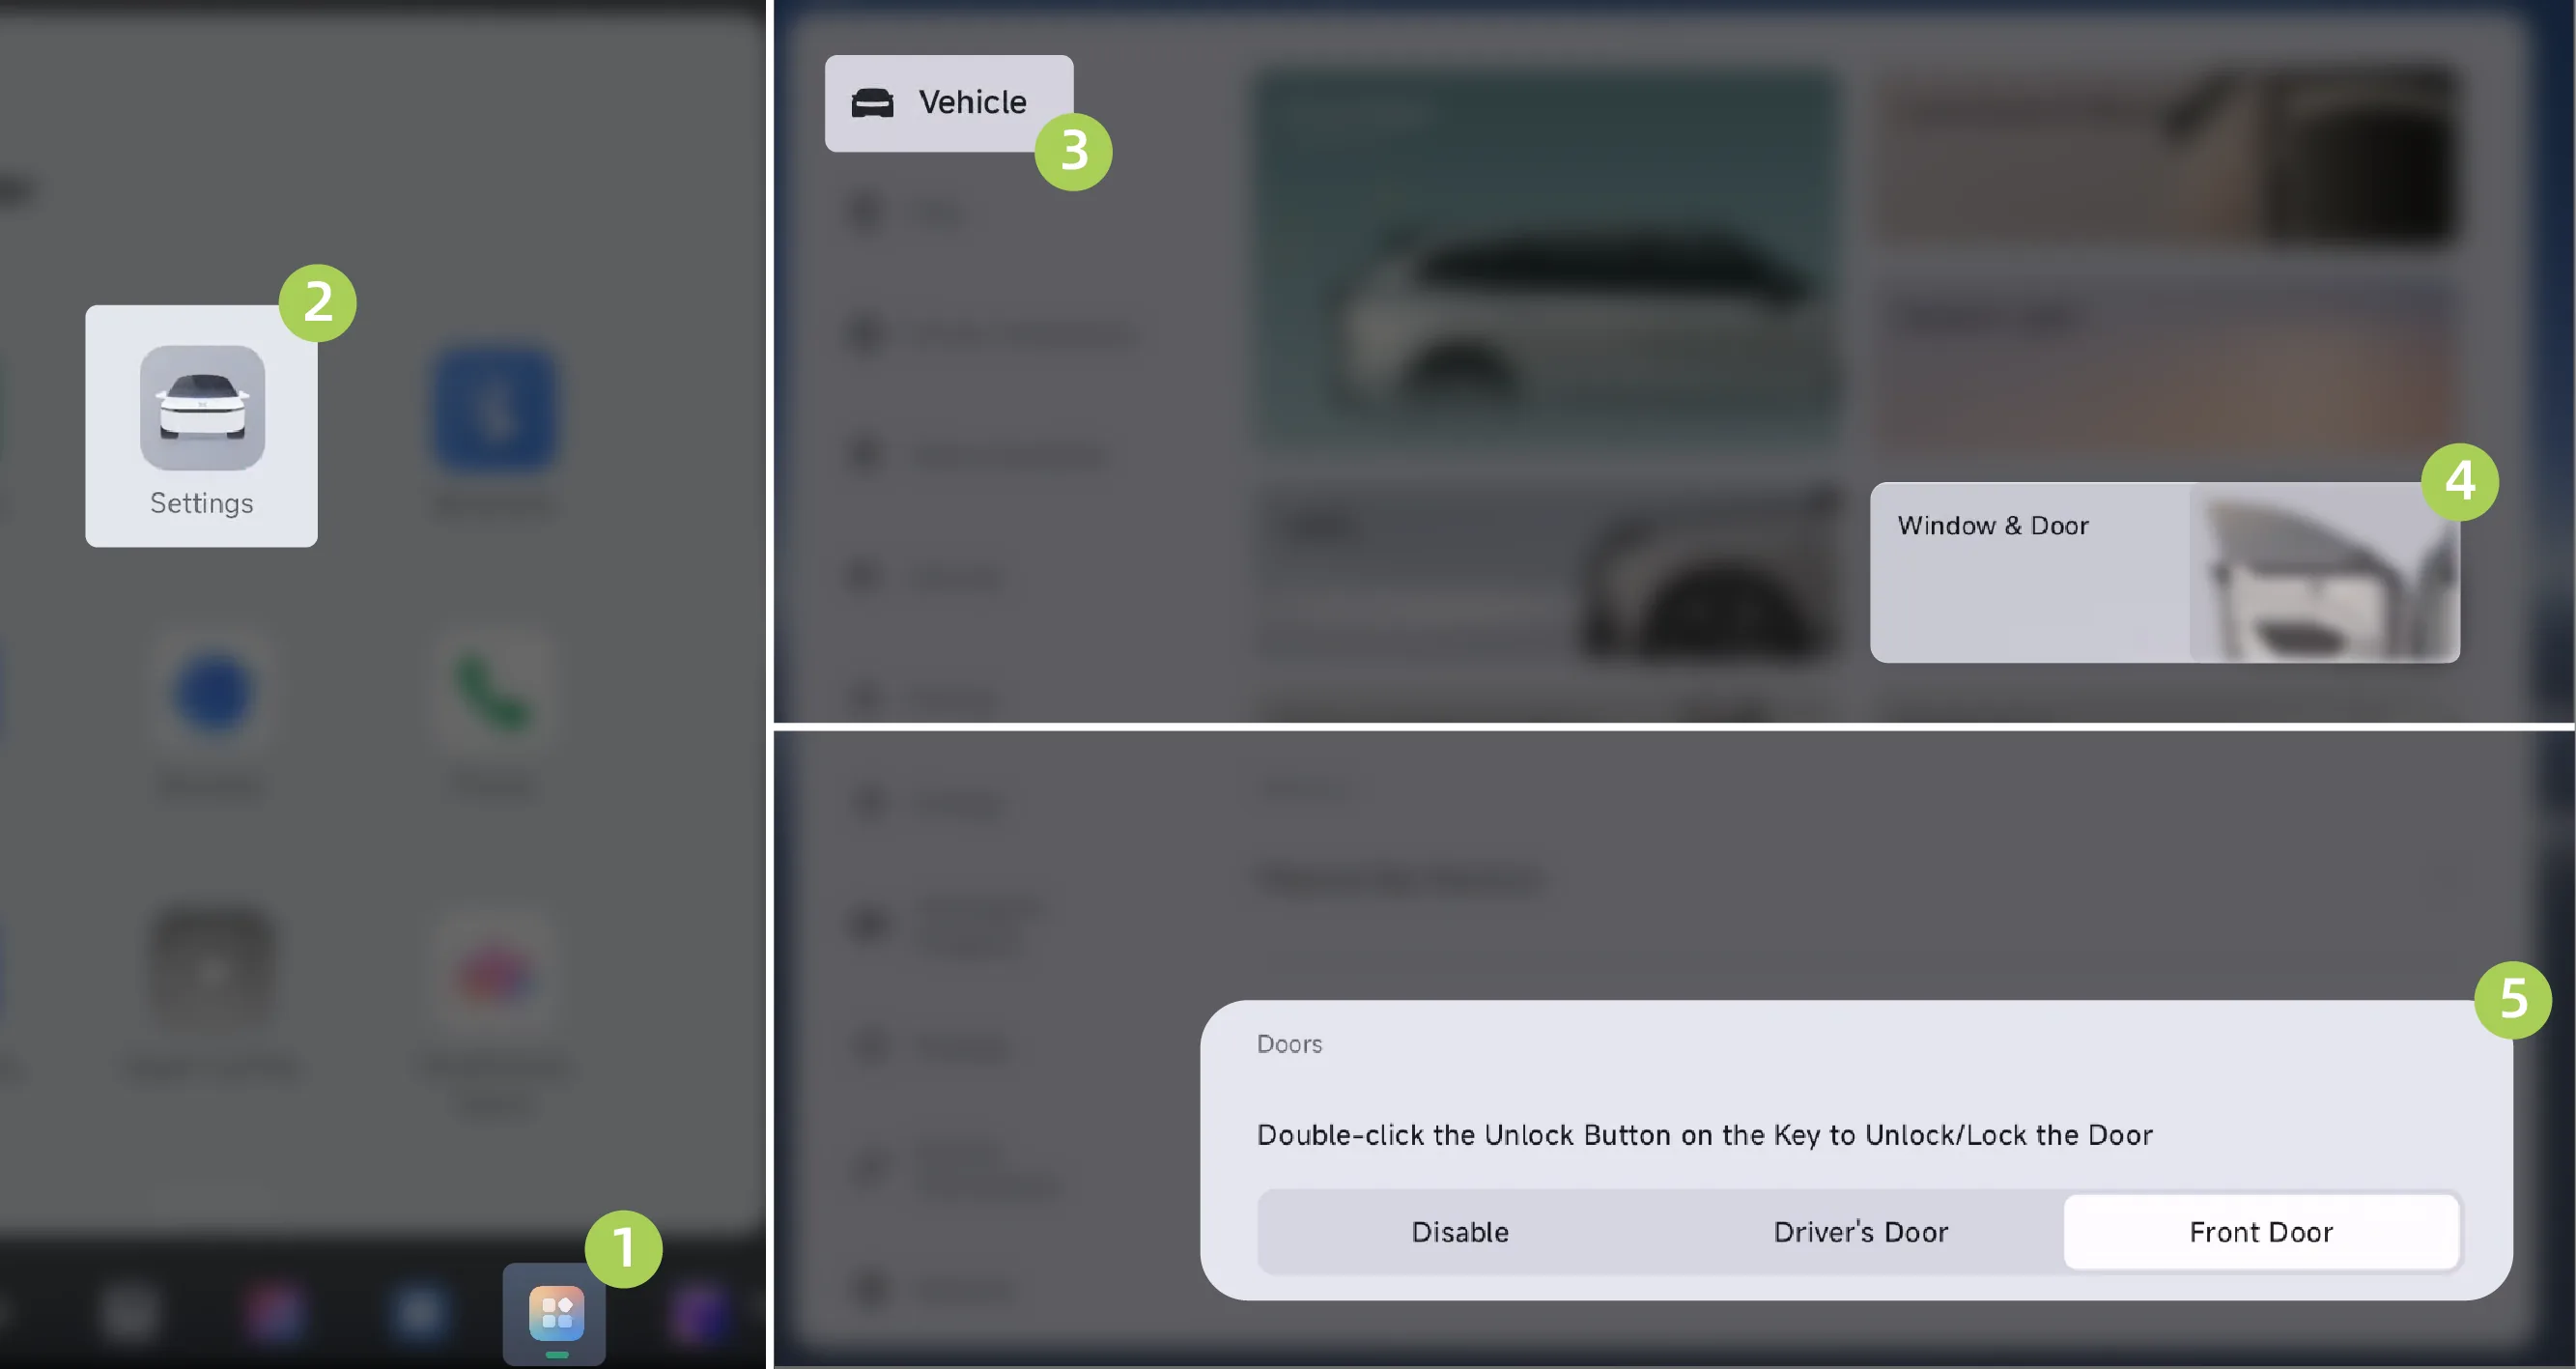
On the central control screen “ →Settings→vehicle→Doors and Windows”On the interface, you can set the function of opening and closing the doors by double-pressing the key unlock/lock button.
Disabled: Turns off the function of opening and closing the doors by double-pressing the key unlock/lock button.
Driver door: Within the effective range, double-press the key unlock button to open the driver door; double-press the key lock button to close the driver door.
Front row doors: Within the effective range, double-press the key unlock button to open the front row doors; double-press the key lock button to close the front row doors.
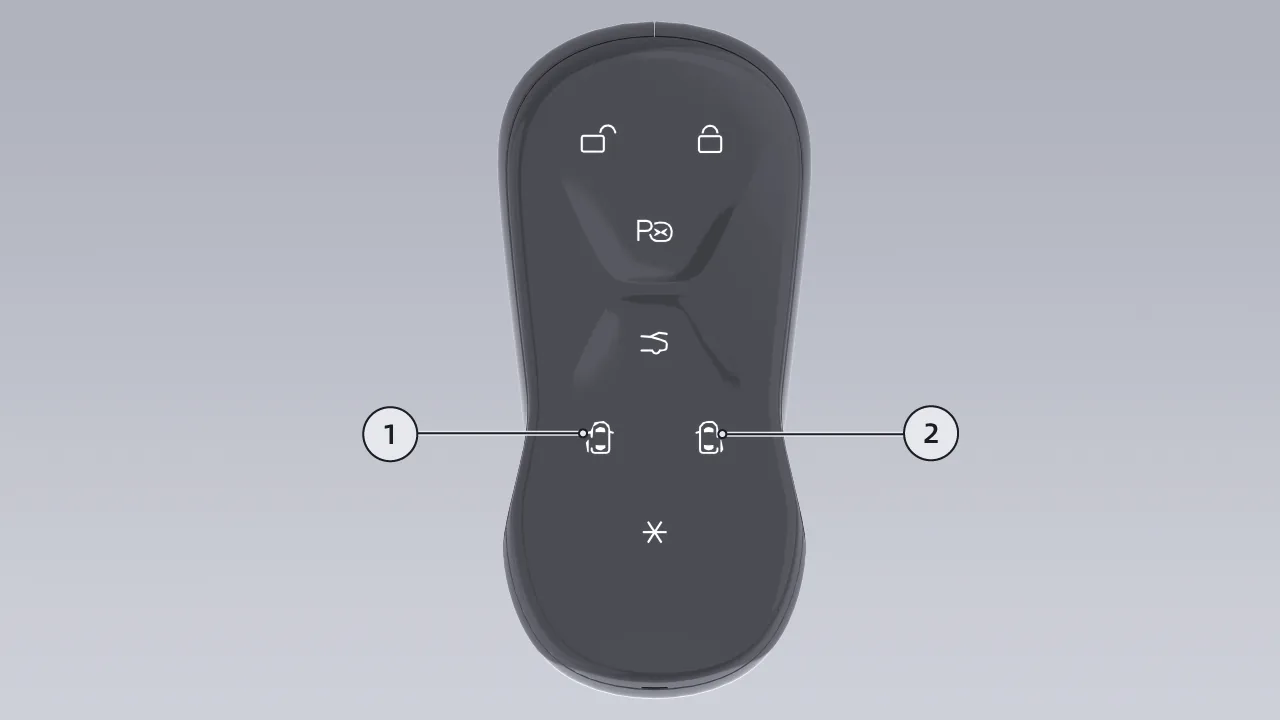
Rear left power door open/close button: Within the effective range, double-press this button to open/close the rear left power door. Or pause the rear left power door that is opening/closing.
Rear right power door open/close button: Double-press this button within the effective range to open/close the rear right power door. Or pause the rear right power door that is being opened/closed.
On the center control screen “ →Settings→vehicle→Doors and Windows→Physical Key Shortcuts”On the interface, you can set the physical key shortcut function to: "passenger door open/close" or "all doors open/close".
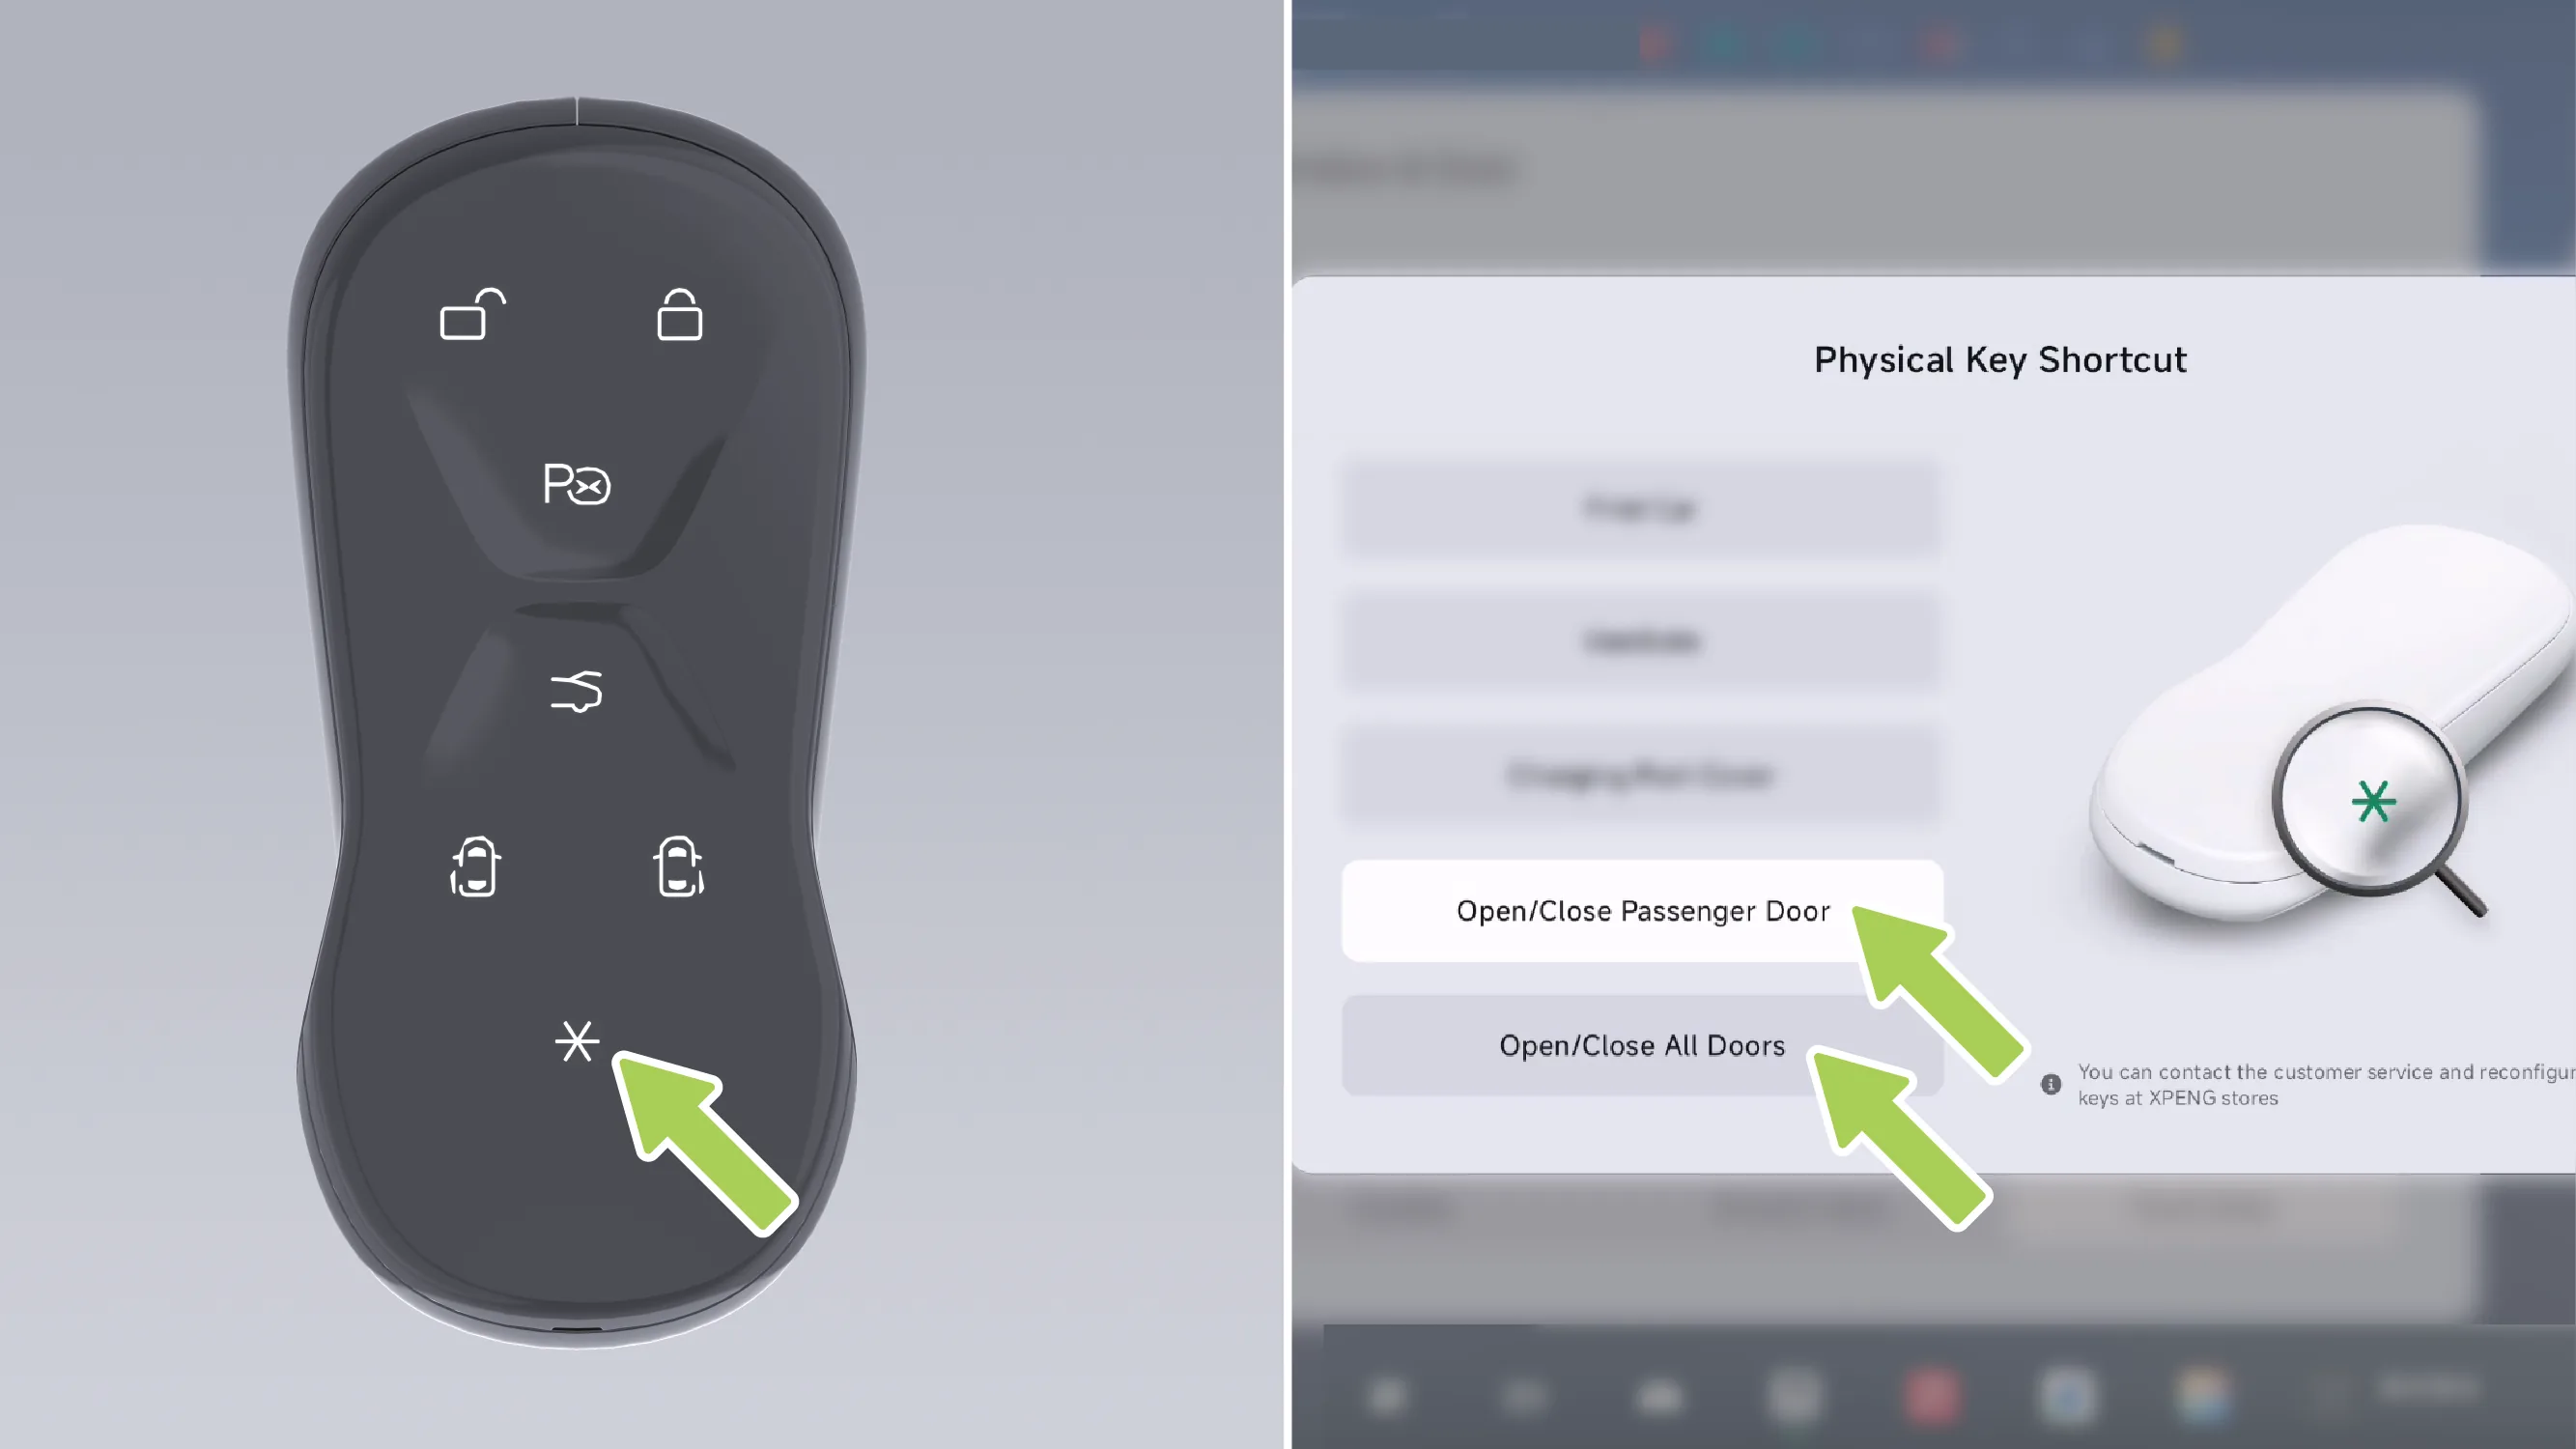
Passenger door open/close: Within the effective range, double-press the physical key shortcut button to open/close the passenger door.
Open/close all doors: Double-press the physical key shortcut button within the effective range to open/close all vehicle doors.
When manual door opening mode is enabled, the electric door cannot be opened in the mobile App.
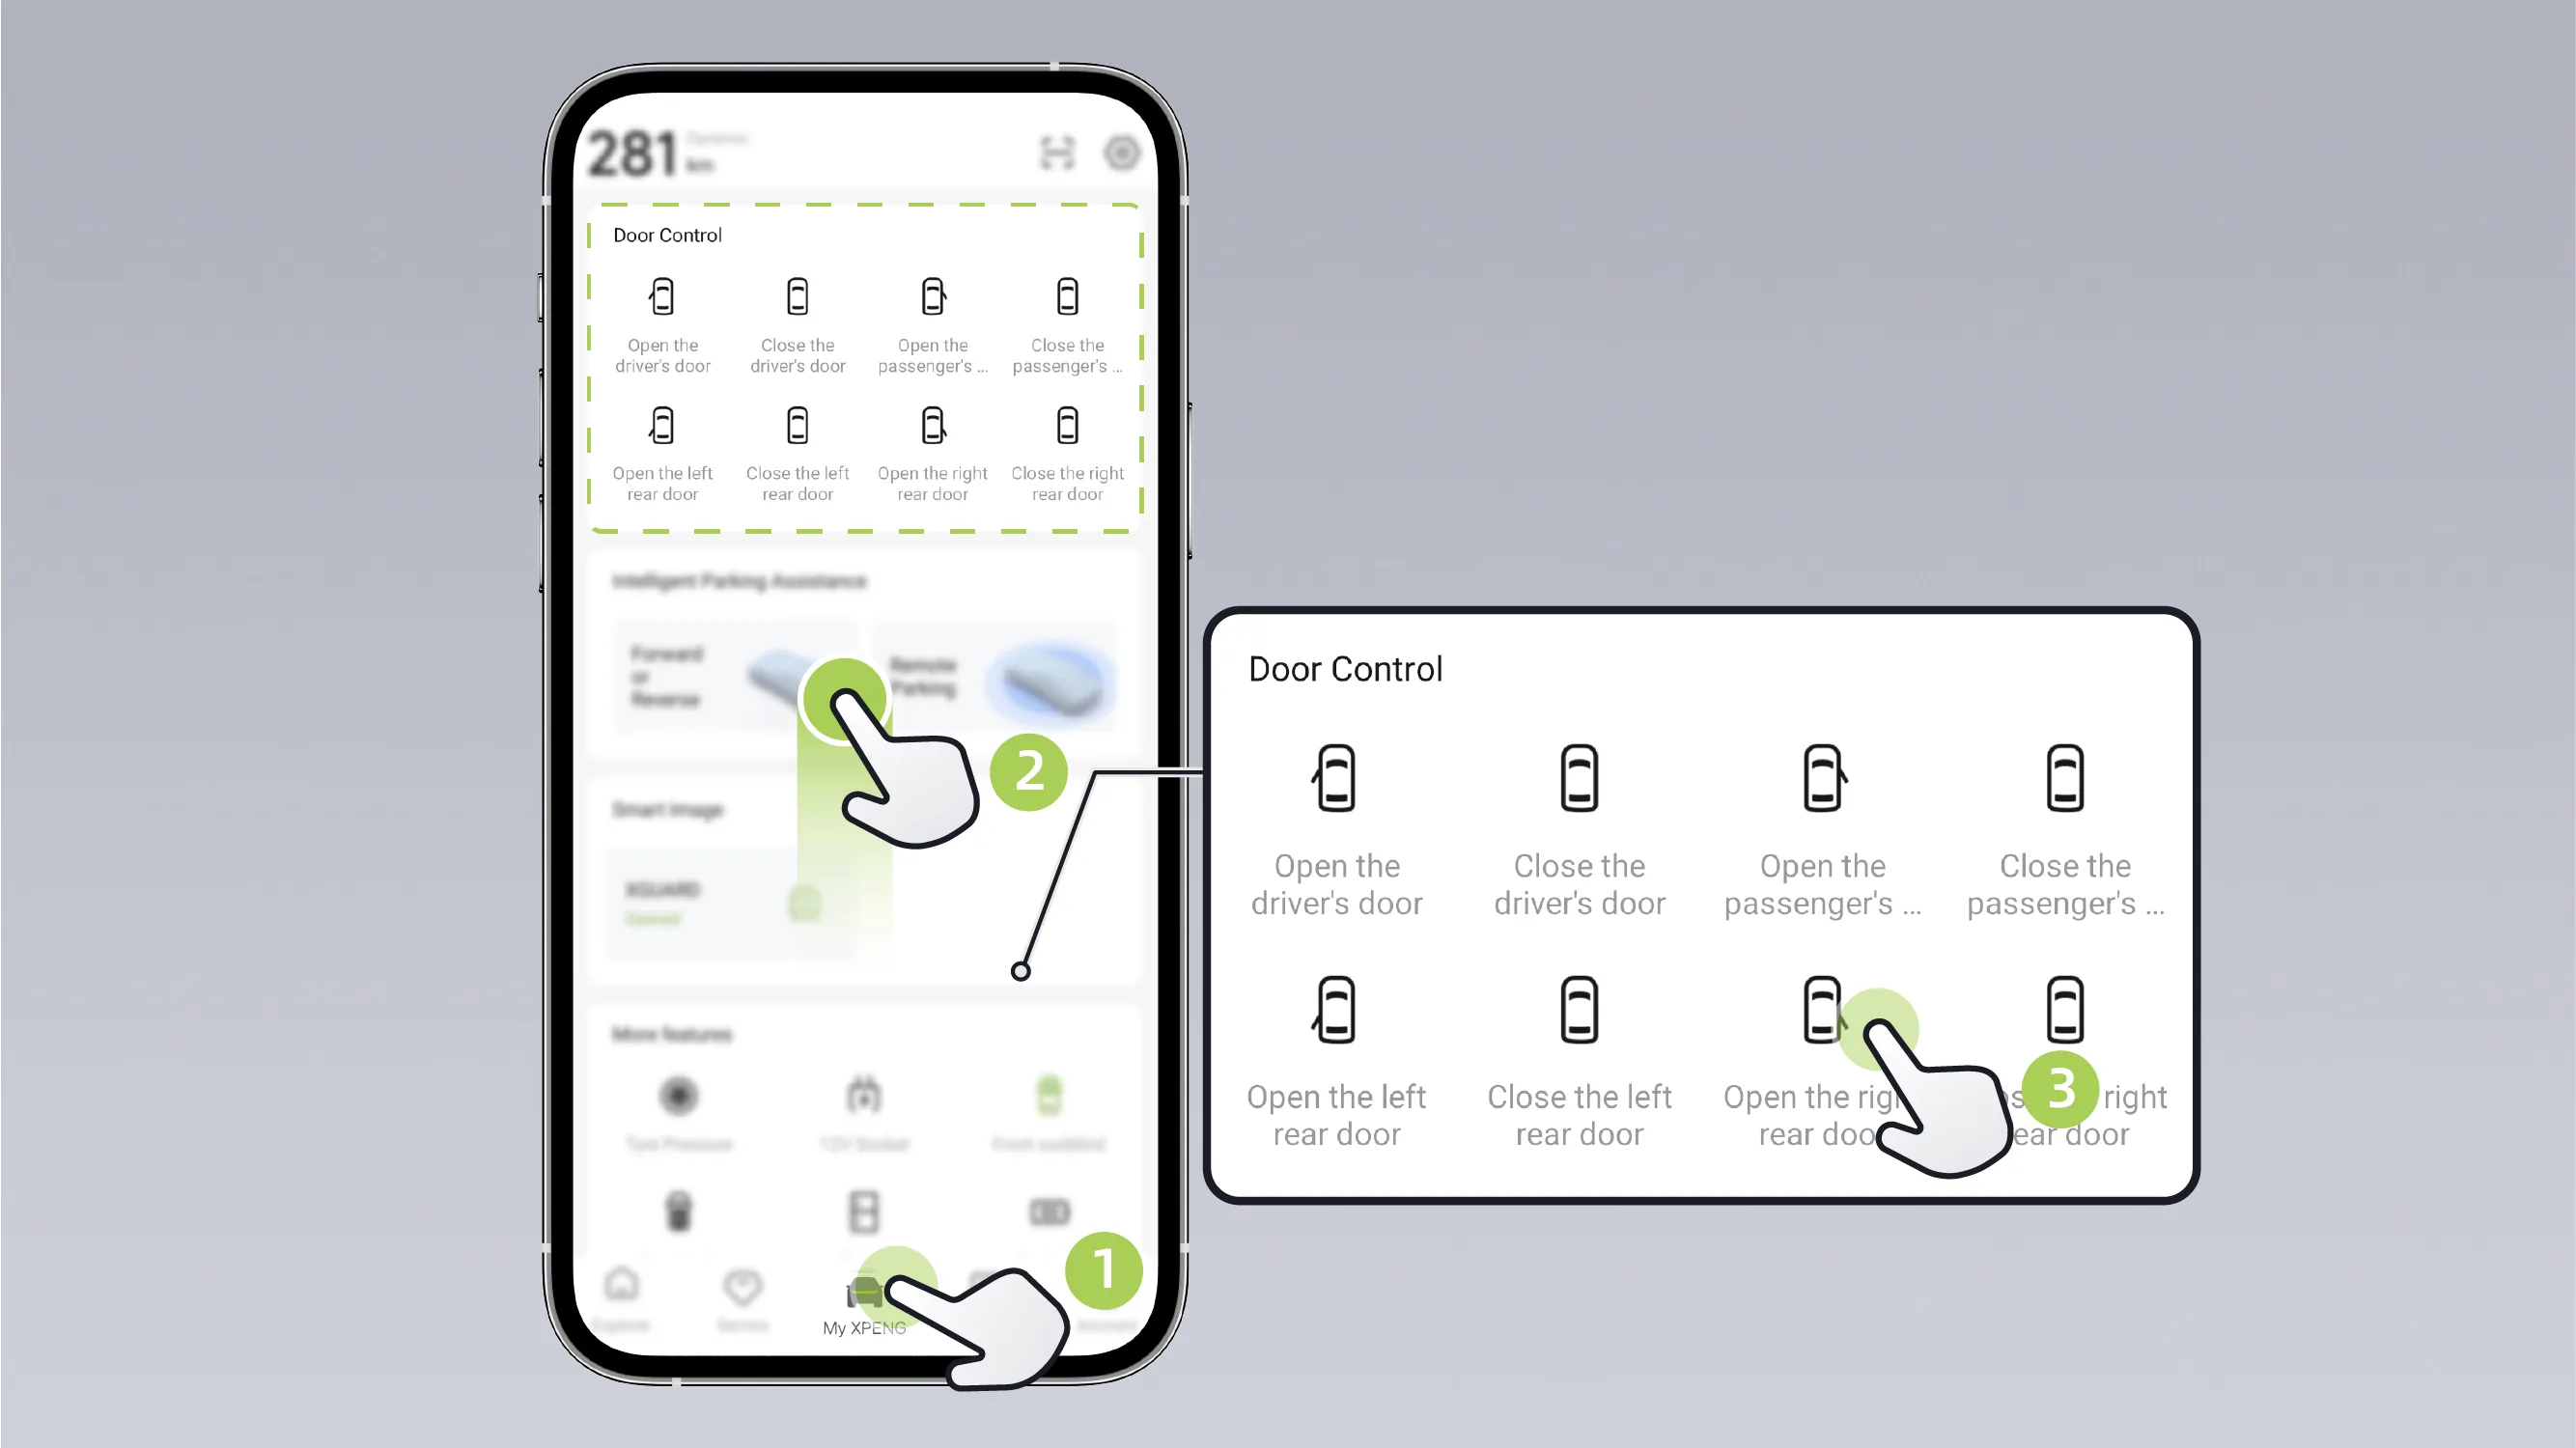
When the manual door opening mode is off, when you are close to the vehicle, the mobile phone App Bluetooth key is successfully connected, and the vehicle is in the unlocked state, in the mobile phone App On the interface, tap driver door open/passenger door open/left rear door open/right rear door open respectively, and the corresponding door will open automatically; tap driver door close/passenger door close/left rear door close/right rear door close respectively, and the corresponding door will close automatically.
Tips Keep your phone’s Bluetooth turned on when using the mobile app to open or close the doors.
Before using the Mobile App to lock or unlock the doors, activate the Digital Key as prompted in the Mobile App.
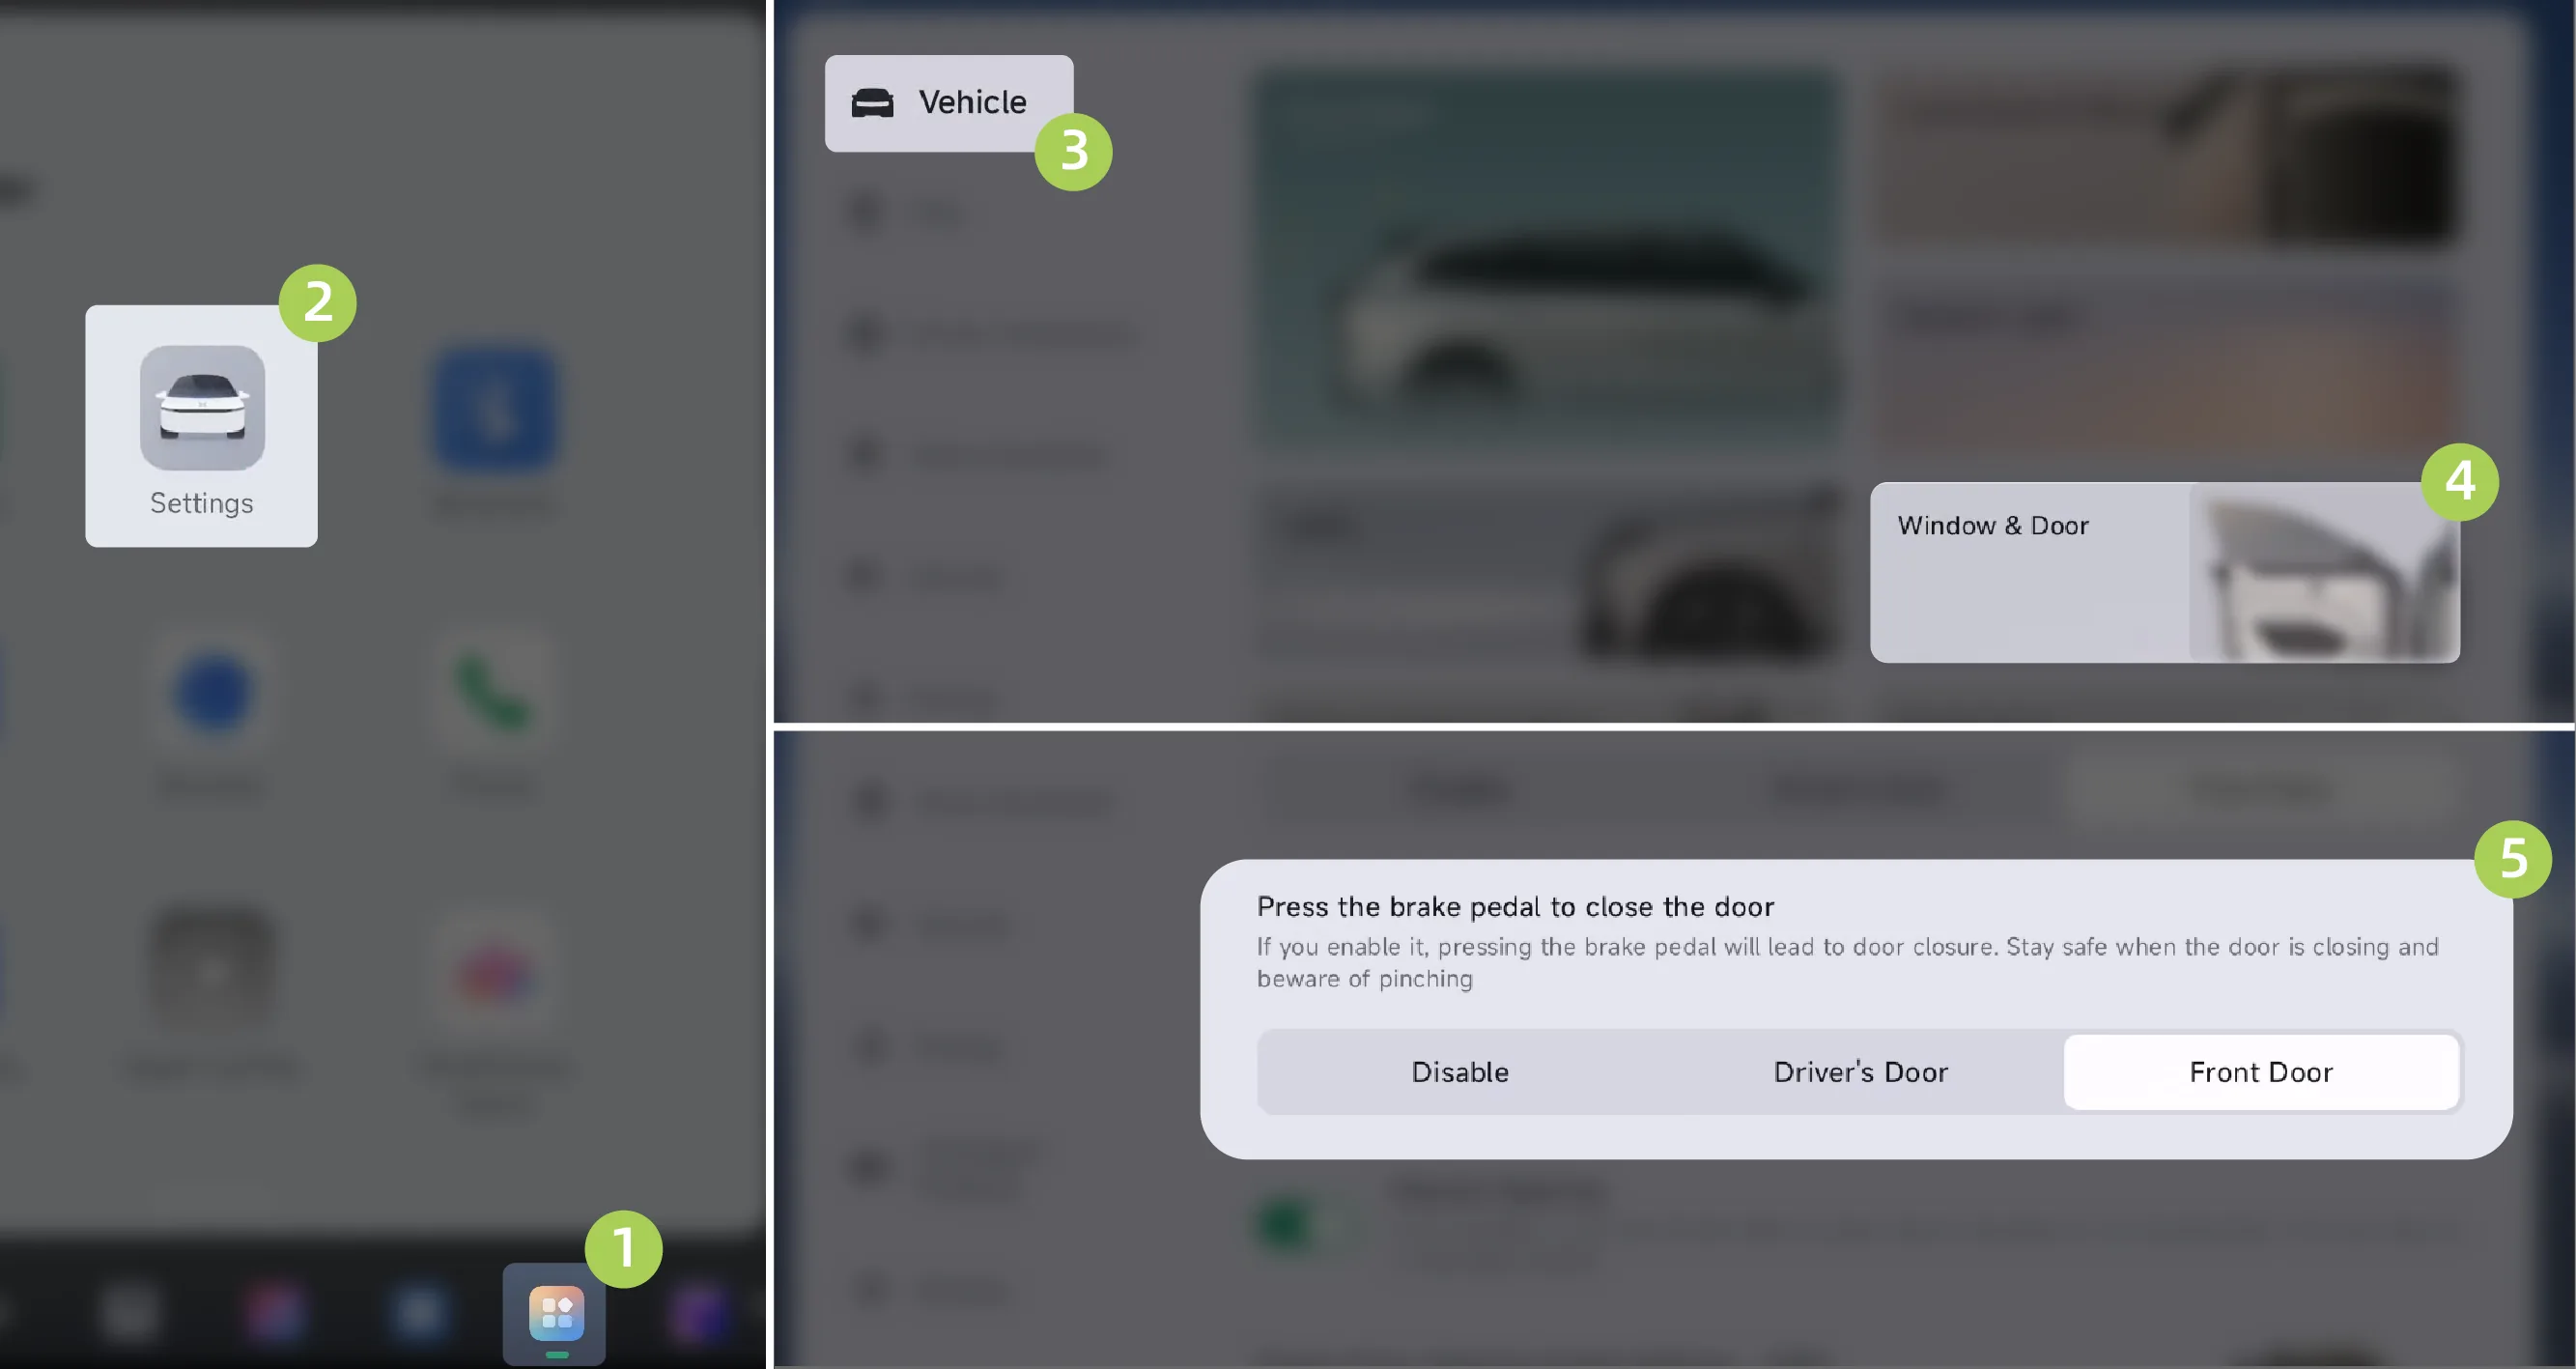
On the center control screen “ →Settings→vehicle→Doors and Windows”On this screen, you can set the brake-pedal door-closing function.
Disabled: Turn off the brake-pedal door-closing function.
Driver door: After sitting in the driver seat, depress the brake pedal, and the driver door will close automatically.
Front row doors: After sitting in the driver's seat, depress the brake pedal, and the front row doors will close automatically.
Warning After this function is enabled, pressing the brake pedal will close the corresponding door, and pressing the brake pedal again will stop the door from closing. Pay attention to safety when closing the door to prevent pinching injuries!
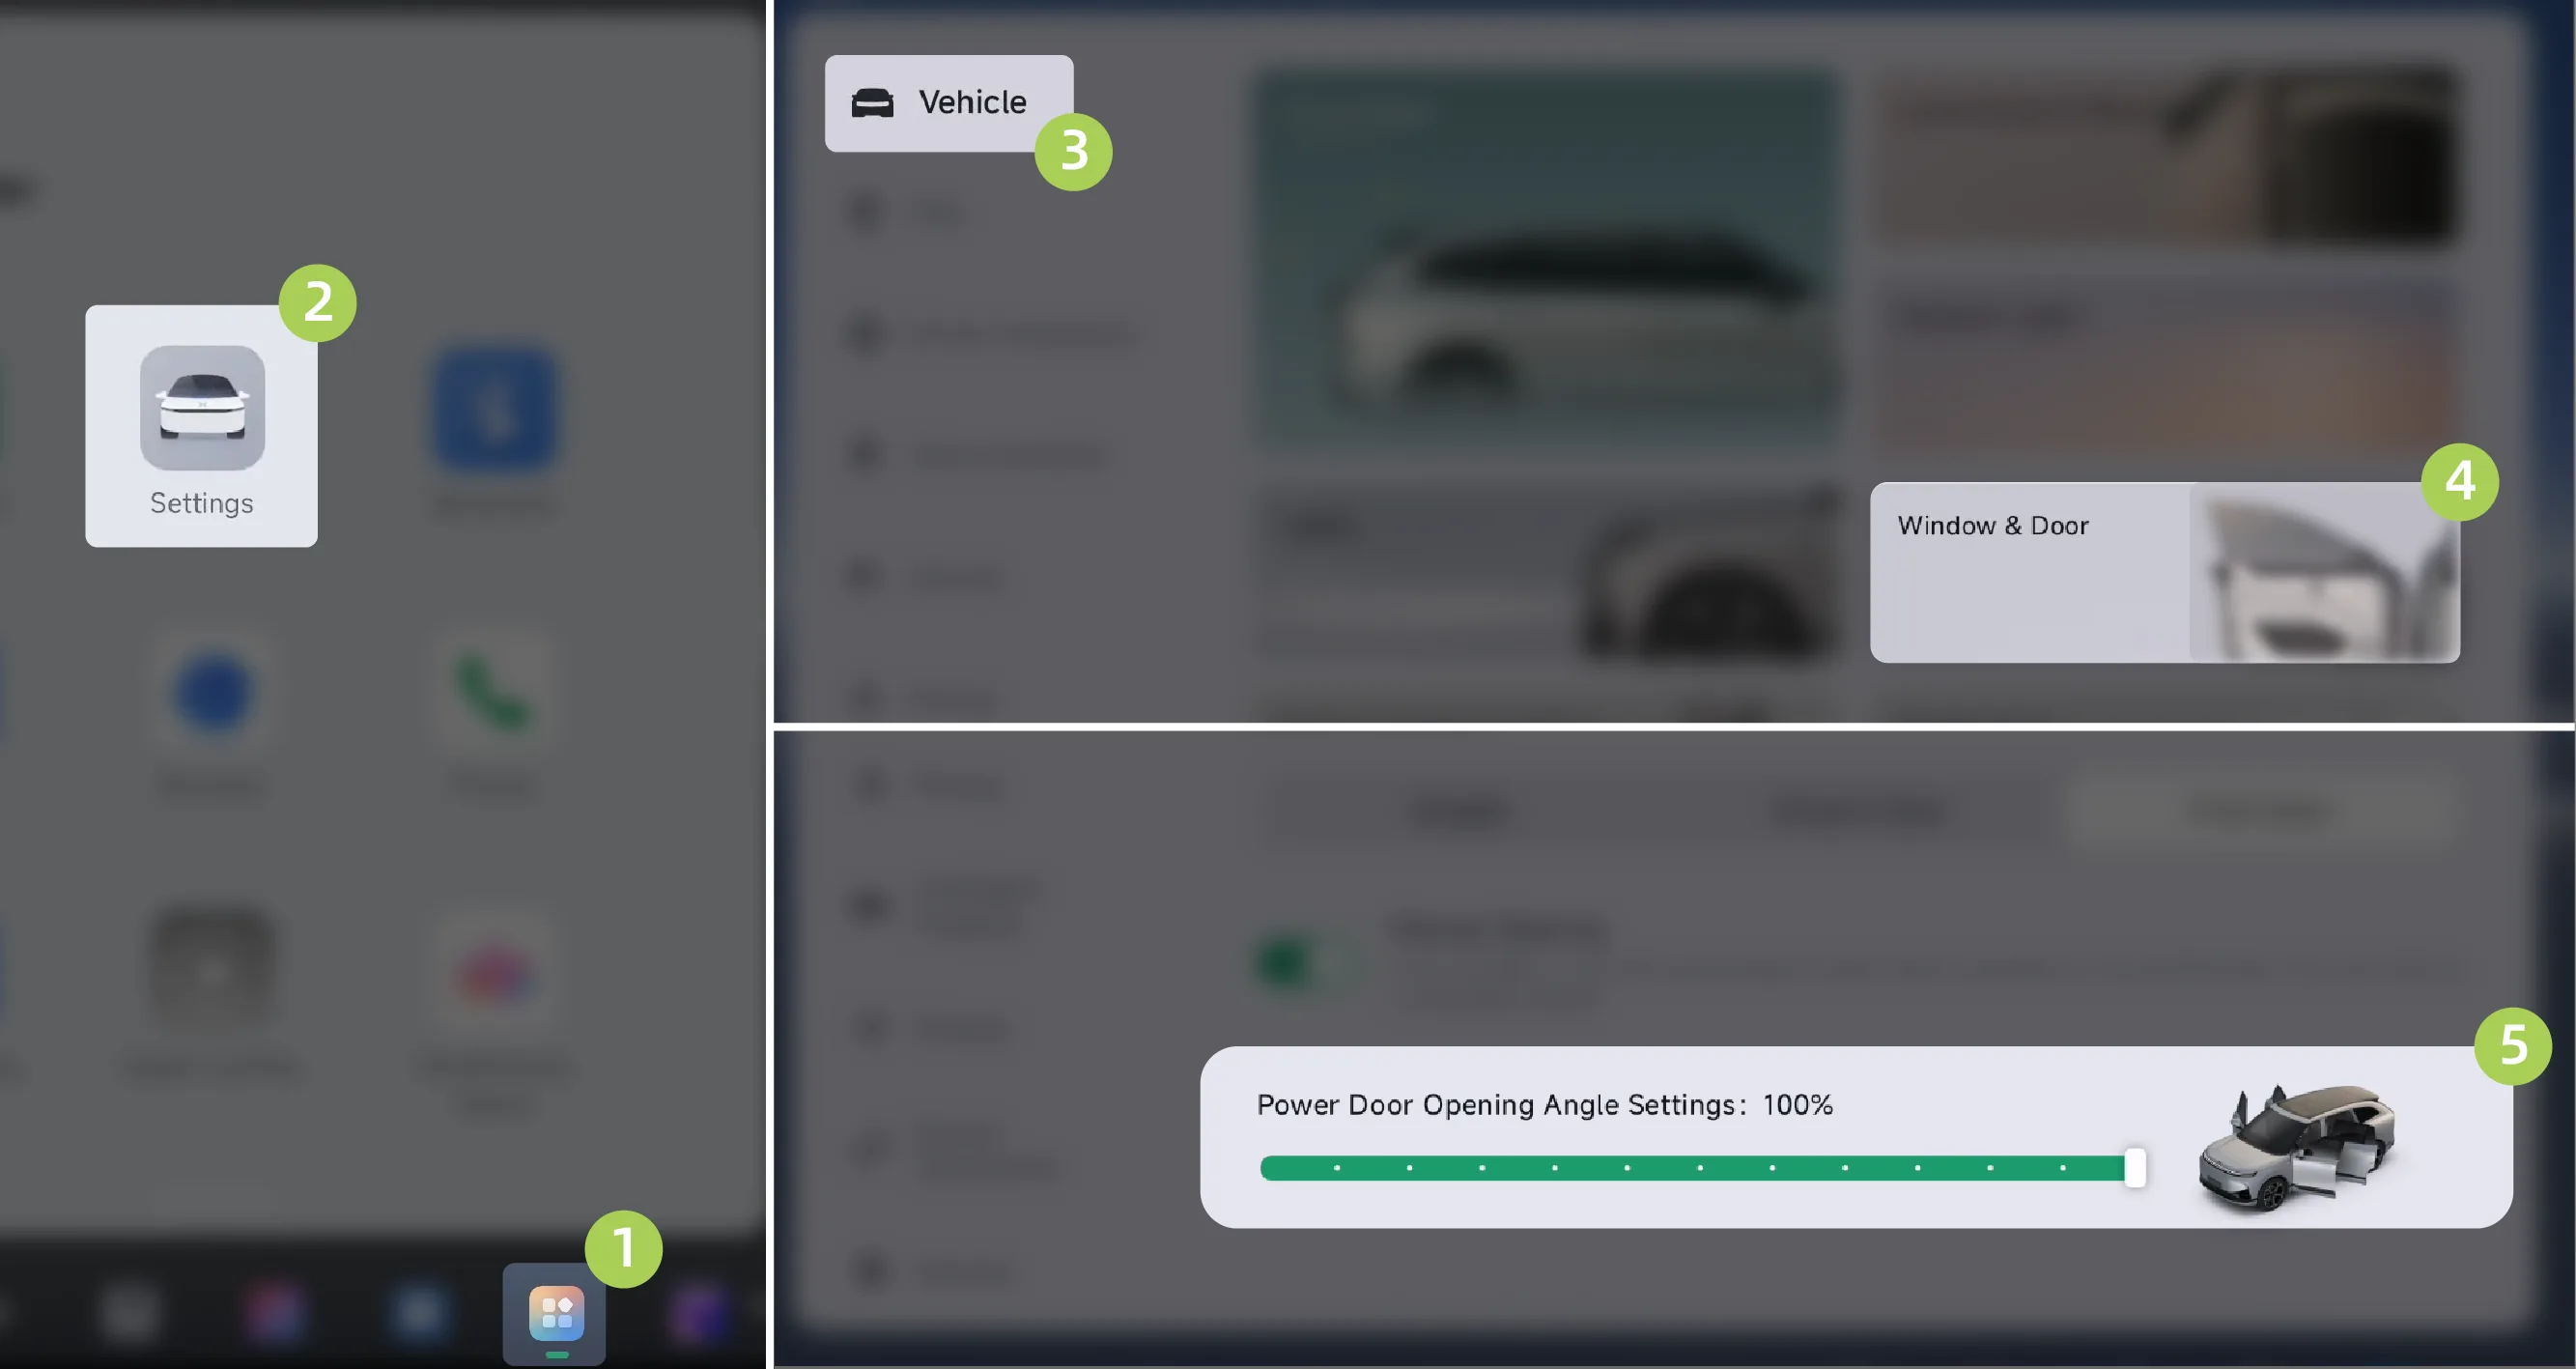
On the central control screen “ →Settings→vehicle→Doors and Windows”On the interface, you can set the opening range of the front row doors.
By default, the door opening range is 40%. The adjustable range is 40% to 100%. When sliding the progress bar, the value increases or decreases in increments of 5%.
This function is used to set the automatic opening range of the power door (for example, double-press the unlock button on the smart key). During jog opening (for example, press and hold the unlock button on the smart key), the power door can open to 100%.
During electric door movement, you can use the door exterior handle microswitch or the interior button to stop the current movement and suspend the door in position.
Tips The power door will only stay open after it has been opened to a certain angle.
When the vehicle is on a left side slope, right side slope, uphill, or downhill, and the door is in the hover state, the system will trigger the hover timeout and slope limit exceeded functions:
When the slope is less than or equal to 7°, if no door opening or closing operation is performed within 30 minutes, the central control screen will issue a door closing countdown and a door closing reminder, and the door will close automatically;
When the slope is between 7° and 11°, if no door opening or closing operation is performed within 3 minutes, the central control screen will issue a door closing reminder, and the door will automatically close.
Slope exceeds limit: When the slope is greater than 11°, the central control screen will issue the reminder "The current slope is too steep, and the power door cannot be opened automatically. Please try manually". The power door opening function will be disabled. It is necessary to press the door button and push outward at the same time to manually open the door to an angle convenient for exiting the vehicle.
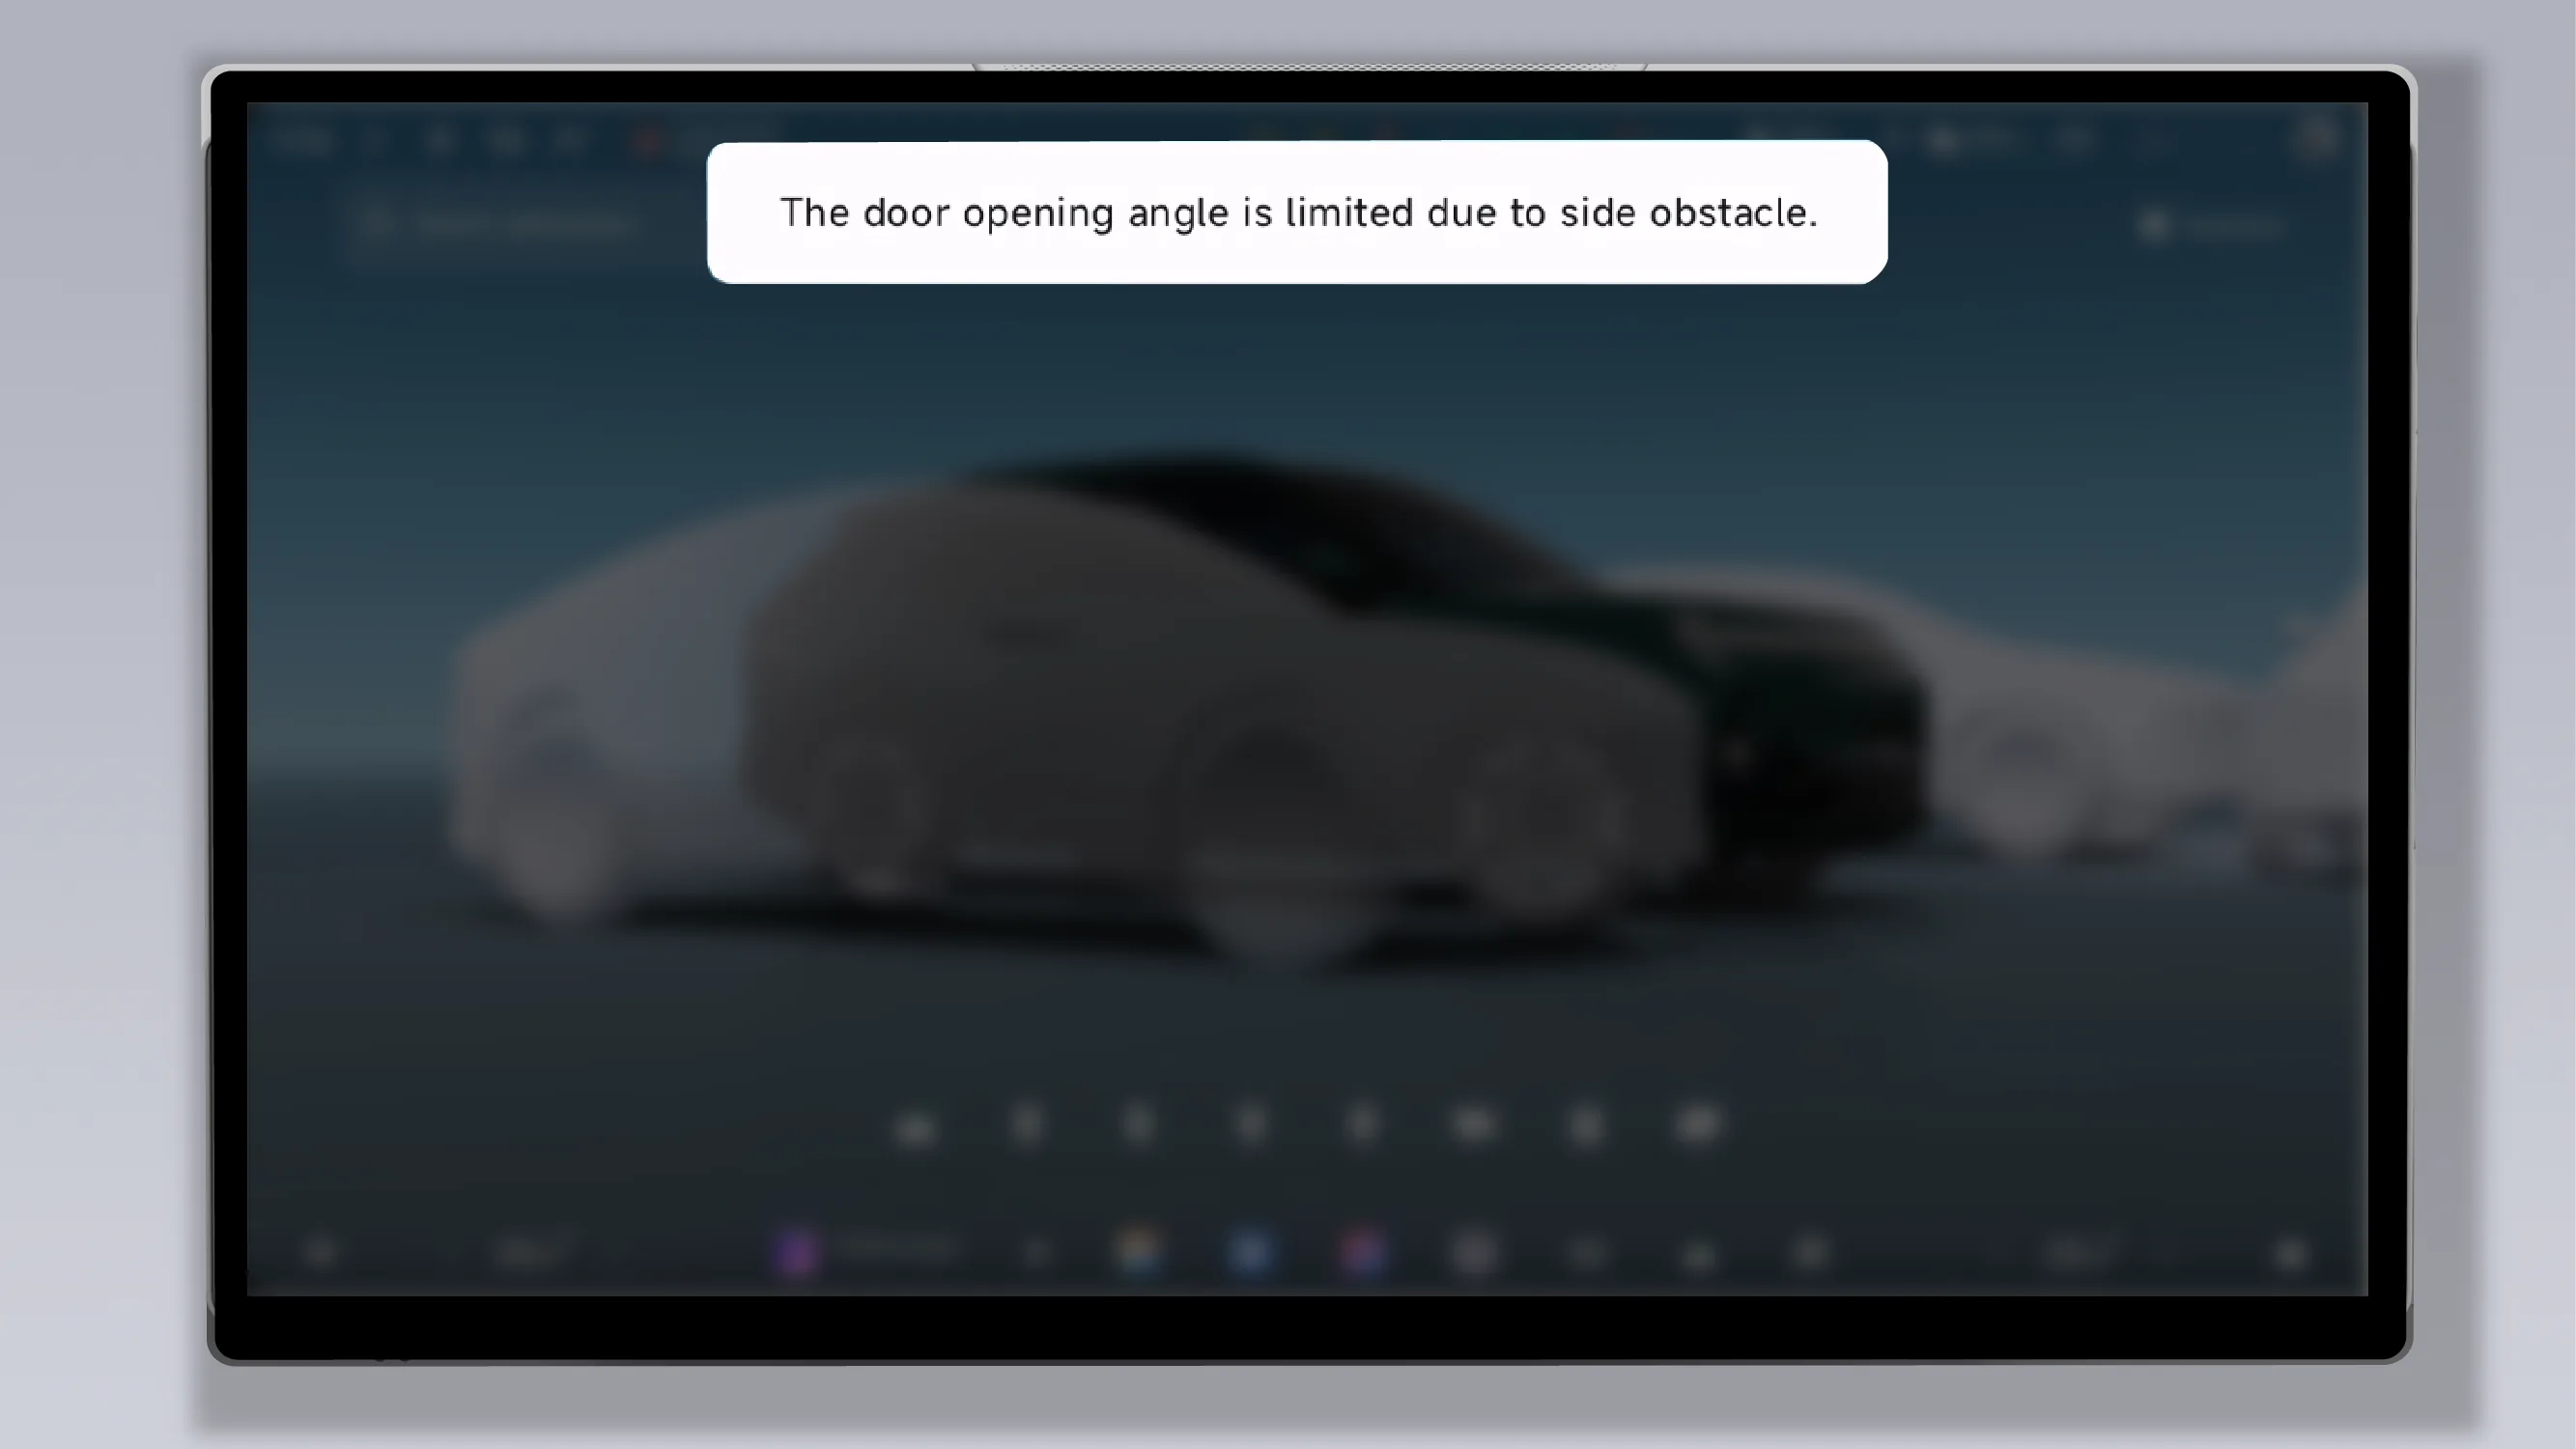
During the door opening process, when the system detects an obstacle, the door will stop at a certain distance from the obstacle, and a text reminder will also be displayed on the central control screen; after the door stops, when the system detects that the obstacle has moved away from the door, the door will continue to open automatically.
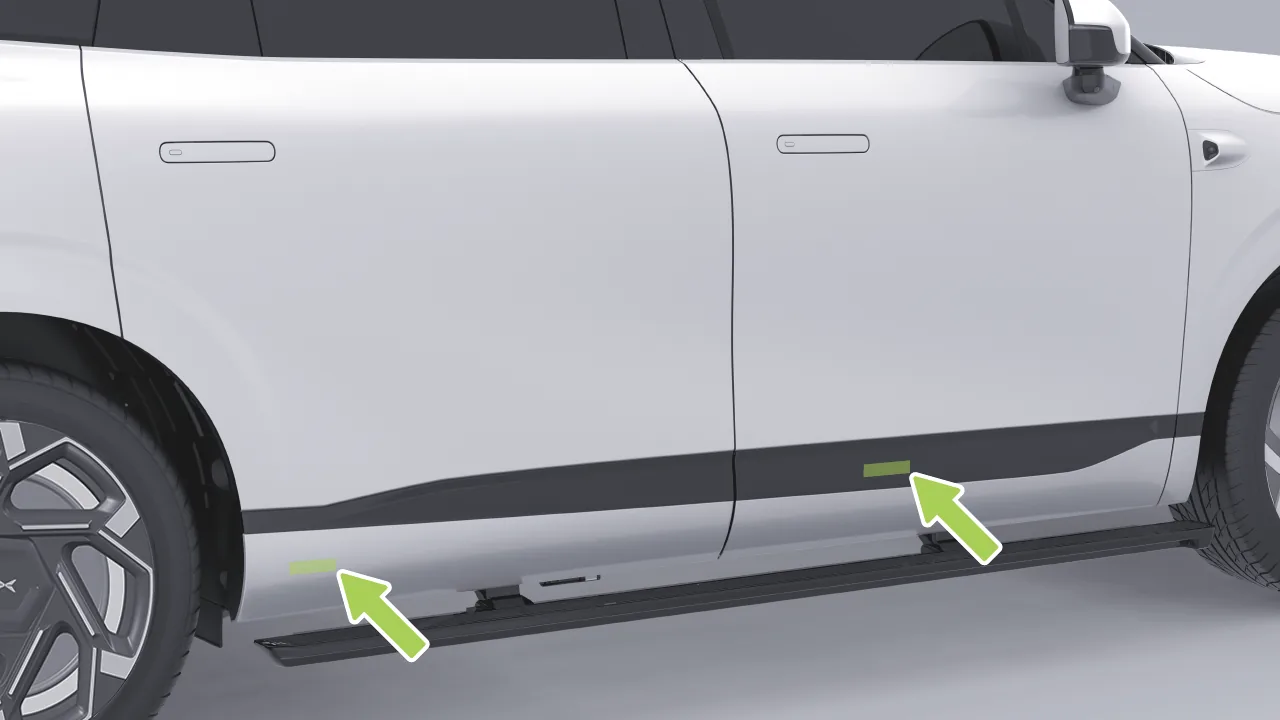
The obstacle avoidance radars for the power doors are installed inside the lower trim panels of the front and rear doors respectively.
Caution Even if a power door is equipped with obstacle detection, please ensure its path of travel is free of obstructions before it opens or closes automatically. Before opening a power door, please check the surrounding area to avoid hazards.
The door is equipped with an obstacle avoidance function and can detect whether there is an object in the door opening path. In most cases, if an object is detected, the door will stop moving. However, the sensors cannot provide comprehensive detection in all situations, especially when the door is closing. Therefore, you must observe the movement of the door, ensure that there are no obstacles in the door movement path, and be ready at all times to take action to prevent the door from contacting objects (including people). Otherwise, vehicle damage or serious personal injury may occur.
In the following scenarios, the power door obstacle avoidance radar may fail to effectively detect obstacles, may perform incorrect obstacle avoidance, or may be unable to correctly complete obstacle avoidance during power door opening. Keep observing the surroundings and confirm that the door environment is safe and suitable:
The door obstacle avoidance function may be limited by conditions such as door obstacle avoidance millimeter-wave radar failure or blockage;
When a nearby vehicle opens its door and your vehicle door is opened at the same time, the radar may fail to detect it.
If the rear door of the vehicle is fully open, opening the front door at this time may cause the radar to generate a false alarm.
When the obstacle is a high or low step, multiple steps, or a curb, step, stone, etc. that is slightly higher or lower than the lower edge of the door, the radar may generate false alarms or fail to detect it.
When the road surface has an incline, the ground is uneven, or the surface is highly reflective, the radar may generate false alarms.
When the obstacle is irregularly shaped or made of sound-absorbing material (such as sponge), the radar may generate false alarms.
If an obstacle is within the sensor detection blind spot range (such as the rearview mirror area, or a person or other obstacle near the vehicle B- or C-pillar), do not open the door here.
If the obstacle is a relatively high suspended object (such as a half-open rolling shutter door, distribution box, fire hydrant, barrier gate, turnstile, outdoor unit of the Air Conditioner, Side Mirrors of adjacent vehicles, suspended pipelines, etc.), do not open the door beside it.
When parking, avoid positioning the vehicle too close to such obstacles when the distance between the obstacle and the door is too small (such as a person or other obstacle close against or not directly facing the sensor), as well as weak targets too close to the door edge and hinge area.
Obstacles include garage square-column corners, flowerbed corners, carton corners, sparse shrubs, dry branches, inclined poles, foam, plastic bags, plastic chains between parking barriers, trucks, square walls, a stationary adult at the center position of the vehicle door, bicycles, chairs, water-filled barriers, shopping carts, stone spheres, pillars diagonally in front of the vehicle door (such as small pillars in parking sheds), trees, plastic cylindrical barrels, as well as the physical limitations of the sensors and composite scenarios.
Covering the lower door trim panel with body film, trim panels with a high dielectric constant, metal, or other materials.
If a thick layer of ice adheres to the door surface, or snow covers the lower door trim panel, etc., it should be cleaned promptly.
Interference at the same frequency from other vehicles near the vehicle.
In rainy or snowy weather conditions.
The obstacle is an object moving too fast (such as a vehicle or pedestrian).
Do not apply car wrap or adhesive products (such as tape, stickers, rubber coating, etc.) to the outer side of the front door to block or cover the power door obstacle avoidance radar, otherwise the detection performance of the power door obstacle avoidance radar will be affected.
Before opening the door, ensure that there is sufficient clearance on the side and at the top of the door; otherwise, the door or window glass may be damaged.
If there is snow or ice on the door, clear the snow or ice before opening the door. Otherwise, snow may enter the vehicle, and ice may obstruct door opening.
The power opening and closing of the door requires time. In rainy weather outdoors, when opening the door, rainwater may flow from the door into the front and rear seat areas or onto the occupant.
Wash the vehicle regularly to prevent the sensors from becoming dirty or being covered by other objects, which may affect the sensors' detection performance.
If the sensor is damaged, promptly contact a XPENG service center for replacement or repair.
The above warnings, cautions, and limitations do not cover all situations that affect the normal operation of the door obstacle avoidance function. When opening the door, always pay attention to and check the surrounding environment, and be ready at any time to take auxiliary measures to take over the door and be responsible for the door.
During the electric opening or closing process of the door, there is an anti-pinch protection function. That is, if resistance is detected or a foreign object is caught in the door during the electric opening or closing process, the door will automatically stop moving or reverse for a certain distance to prevent personal injury caused by pinching.
Warning Despite the anti-pinch protection, there is still a risk of pinching injury. Always ensure that the opening and closing area of the door is unobstructed; otherwise, in special cases (e.g. if the obstacle is thin or soft), interruption of the movement process cannot be ensured.
Before closing the door, check the passengers, especially the elderly and children, and ensure that there are no people or obstacles beside the door. Never place your hands or other body parts near the door hinge or in the gap between the doors. Some parts at the edge of the door may not detect resistance or stop moving. If a person is trapped during door opening/closing, serious injury may result.
Anti-misuse protection is triggered: After the power door is opened or closed multiple times consecutively within a short period, the central control screen will display the reminder “Power door overheat protection activated, please try again later”. The power door will enter anti-misuse protection status. In this status, operations on the power door will not be executed.
Exit anti-play protection: The power door can be opened or closed only after the anti-play protection status is released or the door is fully closed.
Thermal protection triggered: Repeatedly opening or closing the power door continuously may cause the power door drive motor to overheat. To protect the power door drive motor, the center display will issue the prompt "Power door overheating protection activated, please try again later". The power door will enter the thermal protection state. In this state, operations of the power door will not be executed.
Exit thermal protection: after the power door drive motor cools down, normal operation can resume automatically.
After exiting overheat protection, it is recommended to wait for an additional period of time so that the power door drive motor can cool down more fully.
When traveling with children, to prevent children from accidentally opening or closing the rear doors, you can enable the rear door child lock function. After it is enabled, the doors can only be opened using the rear door exterior handles.
The rear door child lock function can be enabled or disabled in the following ways:
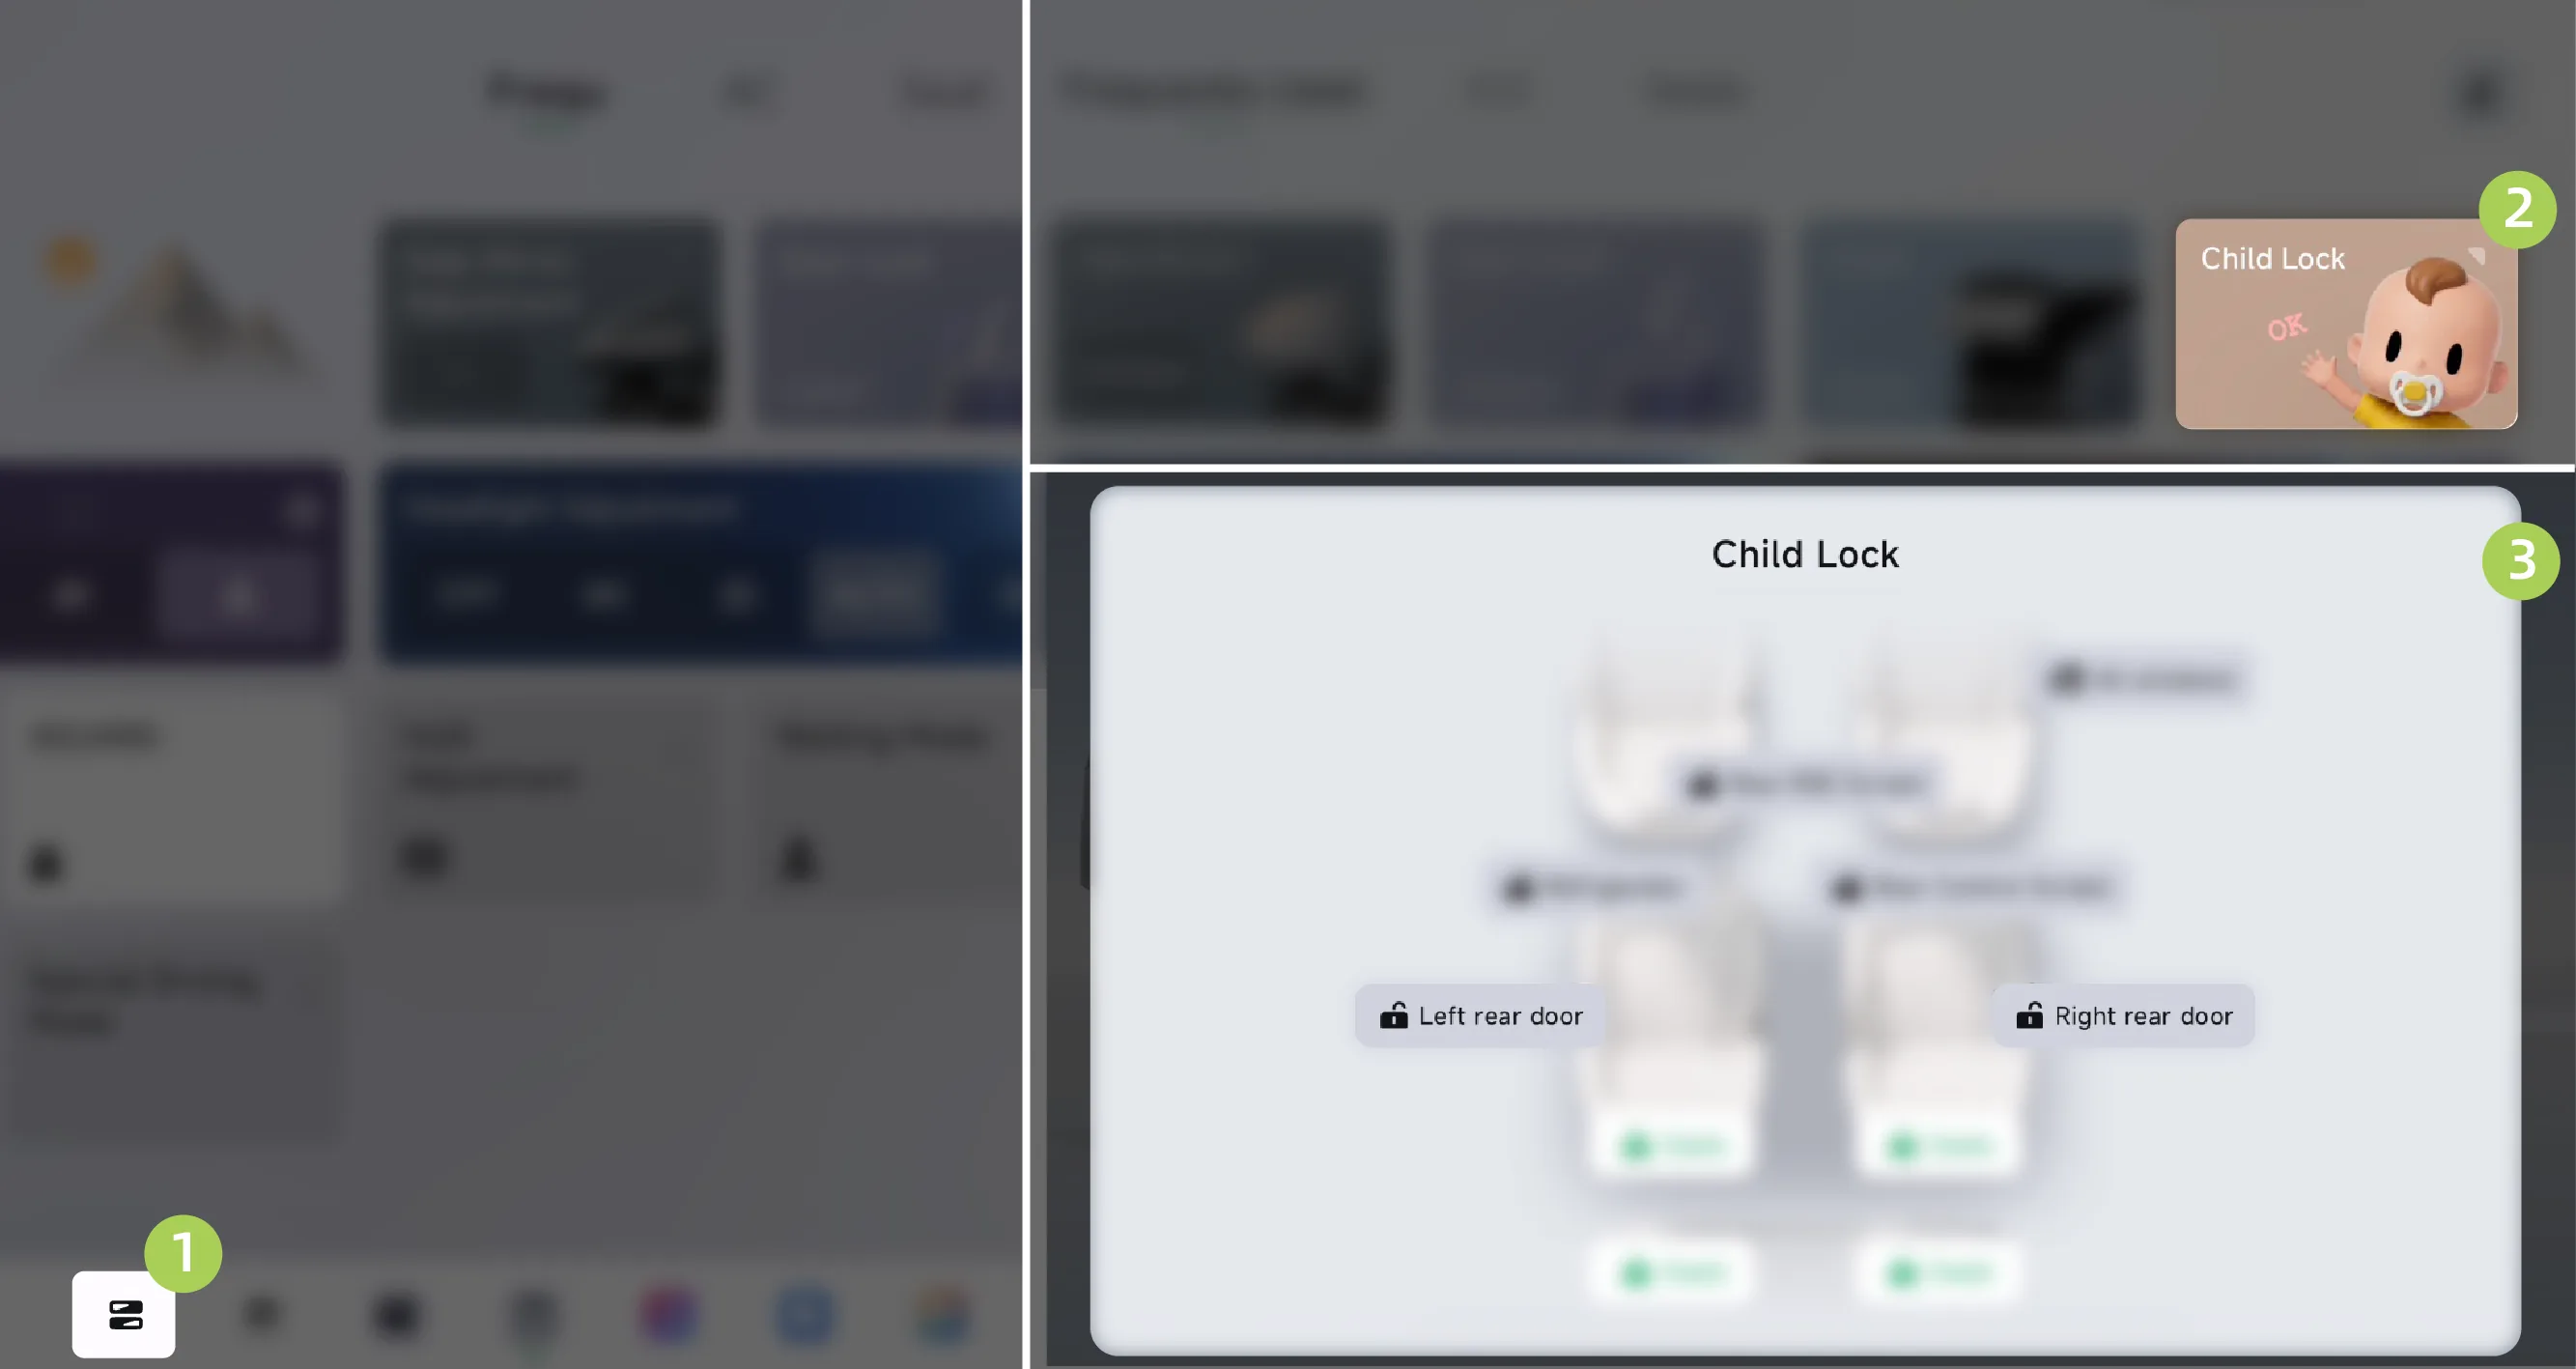
Tap on the center display screen. “ →child lock”Enter the child lock settings screen and tap or , turn the rear door child lock function on or off.
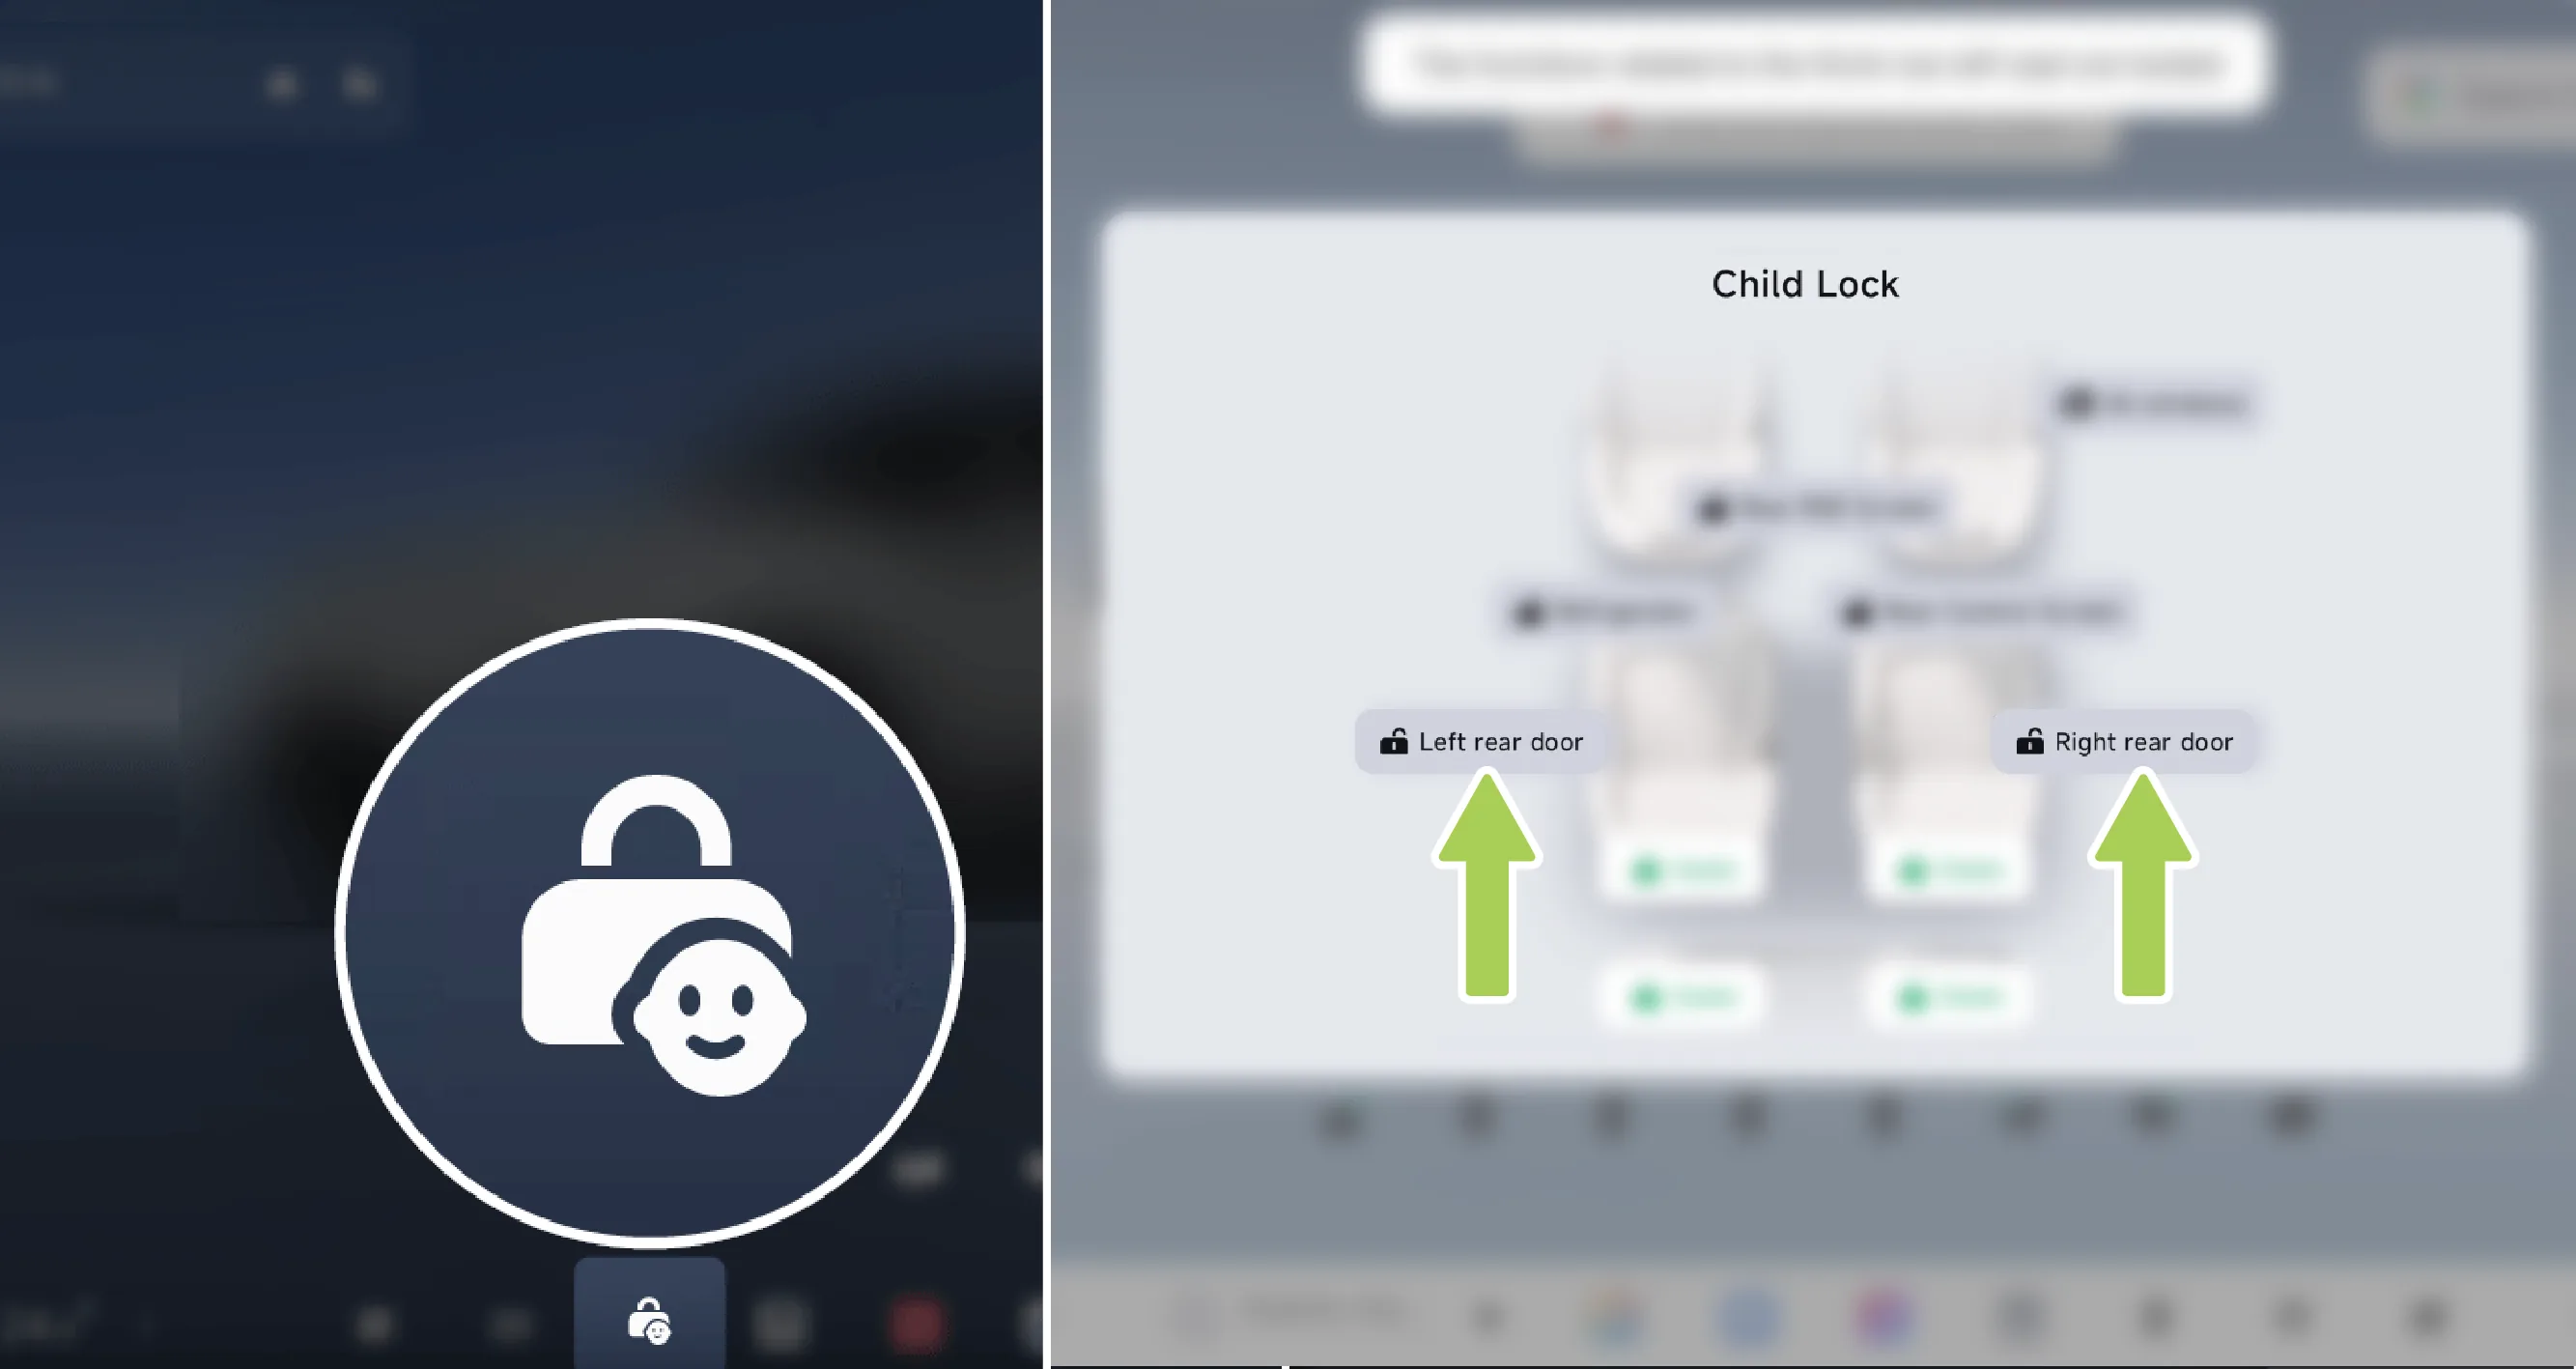
Customize the bottom taskbar through the central control screen, where you can “  ”The child lock icon is added to the bottom taskbar. Click in the bottom taskbar. “ ”child lock icon on Interface, tap or , turn on or off the child lock function for the rear doors.
Tips It is recommended to enable the child lock of the doors when children are seated in the rear row.
When there are children in the vehicle, to ensure safety, the child lock for the window should be enabled to prevent children from operating the window and avoid pinching injury.
Warning When the child lock function of the door is enabled, the corresponding door cannot be opened from the inside. Do not leave children alone in the vehicle.
The vehicle battery has a power lock function. When the battery level is too low or under other special circumstances, causing the vehicle to be unable to unlock, the battery can be awakened in the following way:
Lightly press the front end of the exterior handle of the right front door so that its rear end naturally tilts upward, and use the other hand to hold the raised handle firmly;
Then release the pressure on the front end of the exterior door handle, and adjust the exterior handle to an appropriate angle;
Pull the exterior handle of the right front door and hold it for more than 5 seconds to wake up the battery;
Immediately use the remote key, mobile phone Bluetooth key, or NFC card key to unlock the vehicle and open any door to power on the vehicle; otherwise, the battery will enter lock mode again.
If pulling the right front exterior door handle and holding it for more than 5 seconds still cannot wake up the battery, the left front door can be unlocked through the following jump-start operation:
When the vehicle is in the parked state, press the lower left corner of the tow hook cover to open the tow hook cover.
Detach the two jumper cables from the towing cover.
Caution Always connect positive (+) to positive (+) and negative (-) to negative (-).
Ensure that the booster cable clamps do not contact any other metal.
Use a 12 V power source (such as a portable emergency power supply), place it in a position convenient for jump-starting, connect one end of the red cable to the vehicle's red positive jump-start terminal (+), and the other end to the positive terminal (+) of the auxiliary power source; connect one end of the black cable to the vehicle's black negative jump-start terminal (-), and the other end to the negative terminal (-) of the auxiliary power source.
Caution This jump-starting procedure is intended solely for unlocking the front left door. Never use it to charge the 12V battery or to power any other electrical equipment in the vehicle.
Unlock the vehicle using the remote key, mobile phone Bluetooth key, or NFC card key.
When the vehicle is unlocked, the exterior handle of the left front door automatically extends. Pull the exterior handle of the left front door to open the left front door.
If the outer handle of the left front door does not pop out, lightly press the front end of the door handle so that its rear end naturally tilts upward, hold the raised handle steadily with the other hand, then release the pressure on the front end of the door handle, adjust the outer handle to an appropriate angle, and then pull the outer door handle to open the left front door.
Disconnect the connections in sequence between the auxiliary power supply negative terminal, the vehicle negative jumper cable, the auxiliary power supply positive terminal, the vehicle positive jumper cable, and the cable, then store the cable properly and reinstall the tow hook cover.
If the vehicle has no power or in other special circumstances, pull the emergency opening handle located below the front row door armrest and simultaneously push the door outward to open the front row door.
Warning Whether the vehicle is stationary or in motion, pulling the emergency opening handle once will open the door. In non-emergency situations, do not pull the emergency opening handle while driving.
If the vehicle has no power or in other special circumstances, pull the emergency opening handle located below the rear door armrest and simultaneously push the door outward to open the rear door.
Caution When the Left Rear Child Lock or Right Rear Child Lock is enabled, the rear door cannot be opened by pulling the emergency release handle on the rear door. Disable the Left Rear Child Lock or Right Rear Child Lock first, then pull the emergency release handle to open the door.
If the vehicle detects an emergency accident such as a collision causing airbag deployment or thermal runaway of the battery pack, a pop-up window will appear on the central control screen to indicate the location of the emergency handle and how to open it, so that occupants can escape.
If the assisted driving function has been activated, the system issues During the reminder, the emergency switch location reminder window may not pop up on the center display.

The emergency locking switch is located at the door lock. If the door cannot be locked under special circumstances, use the emergency locking switch to lock the door.
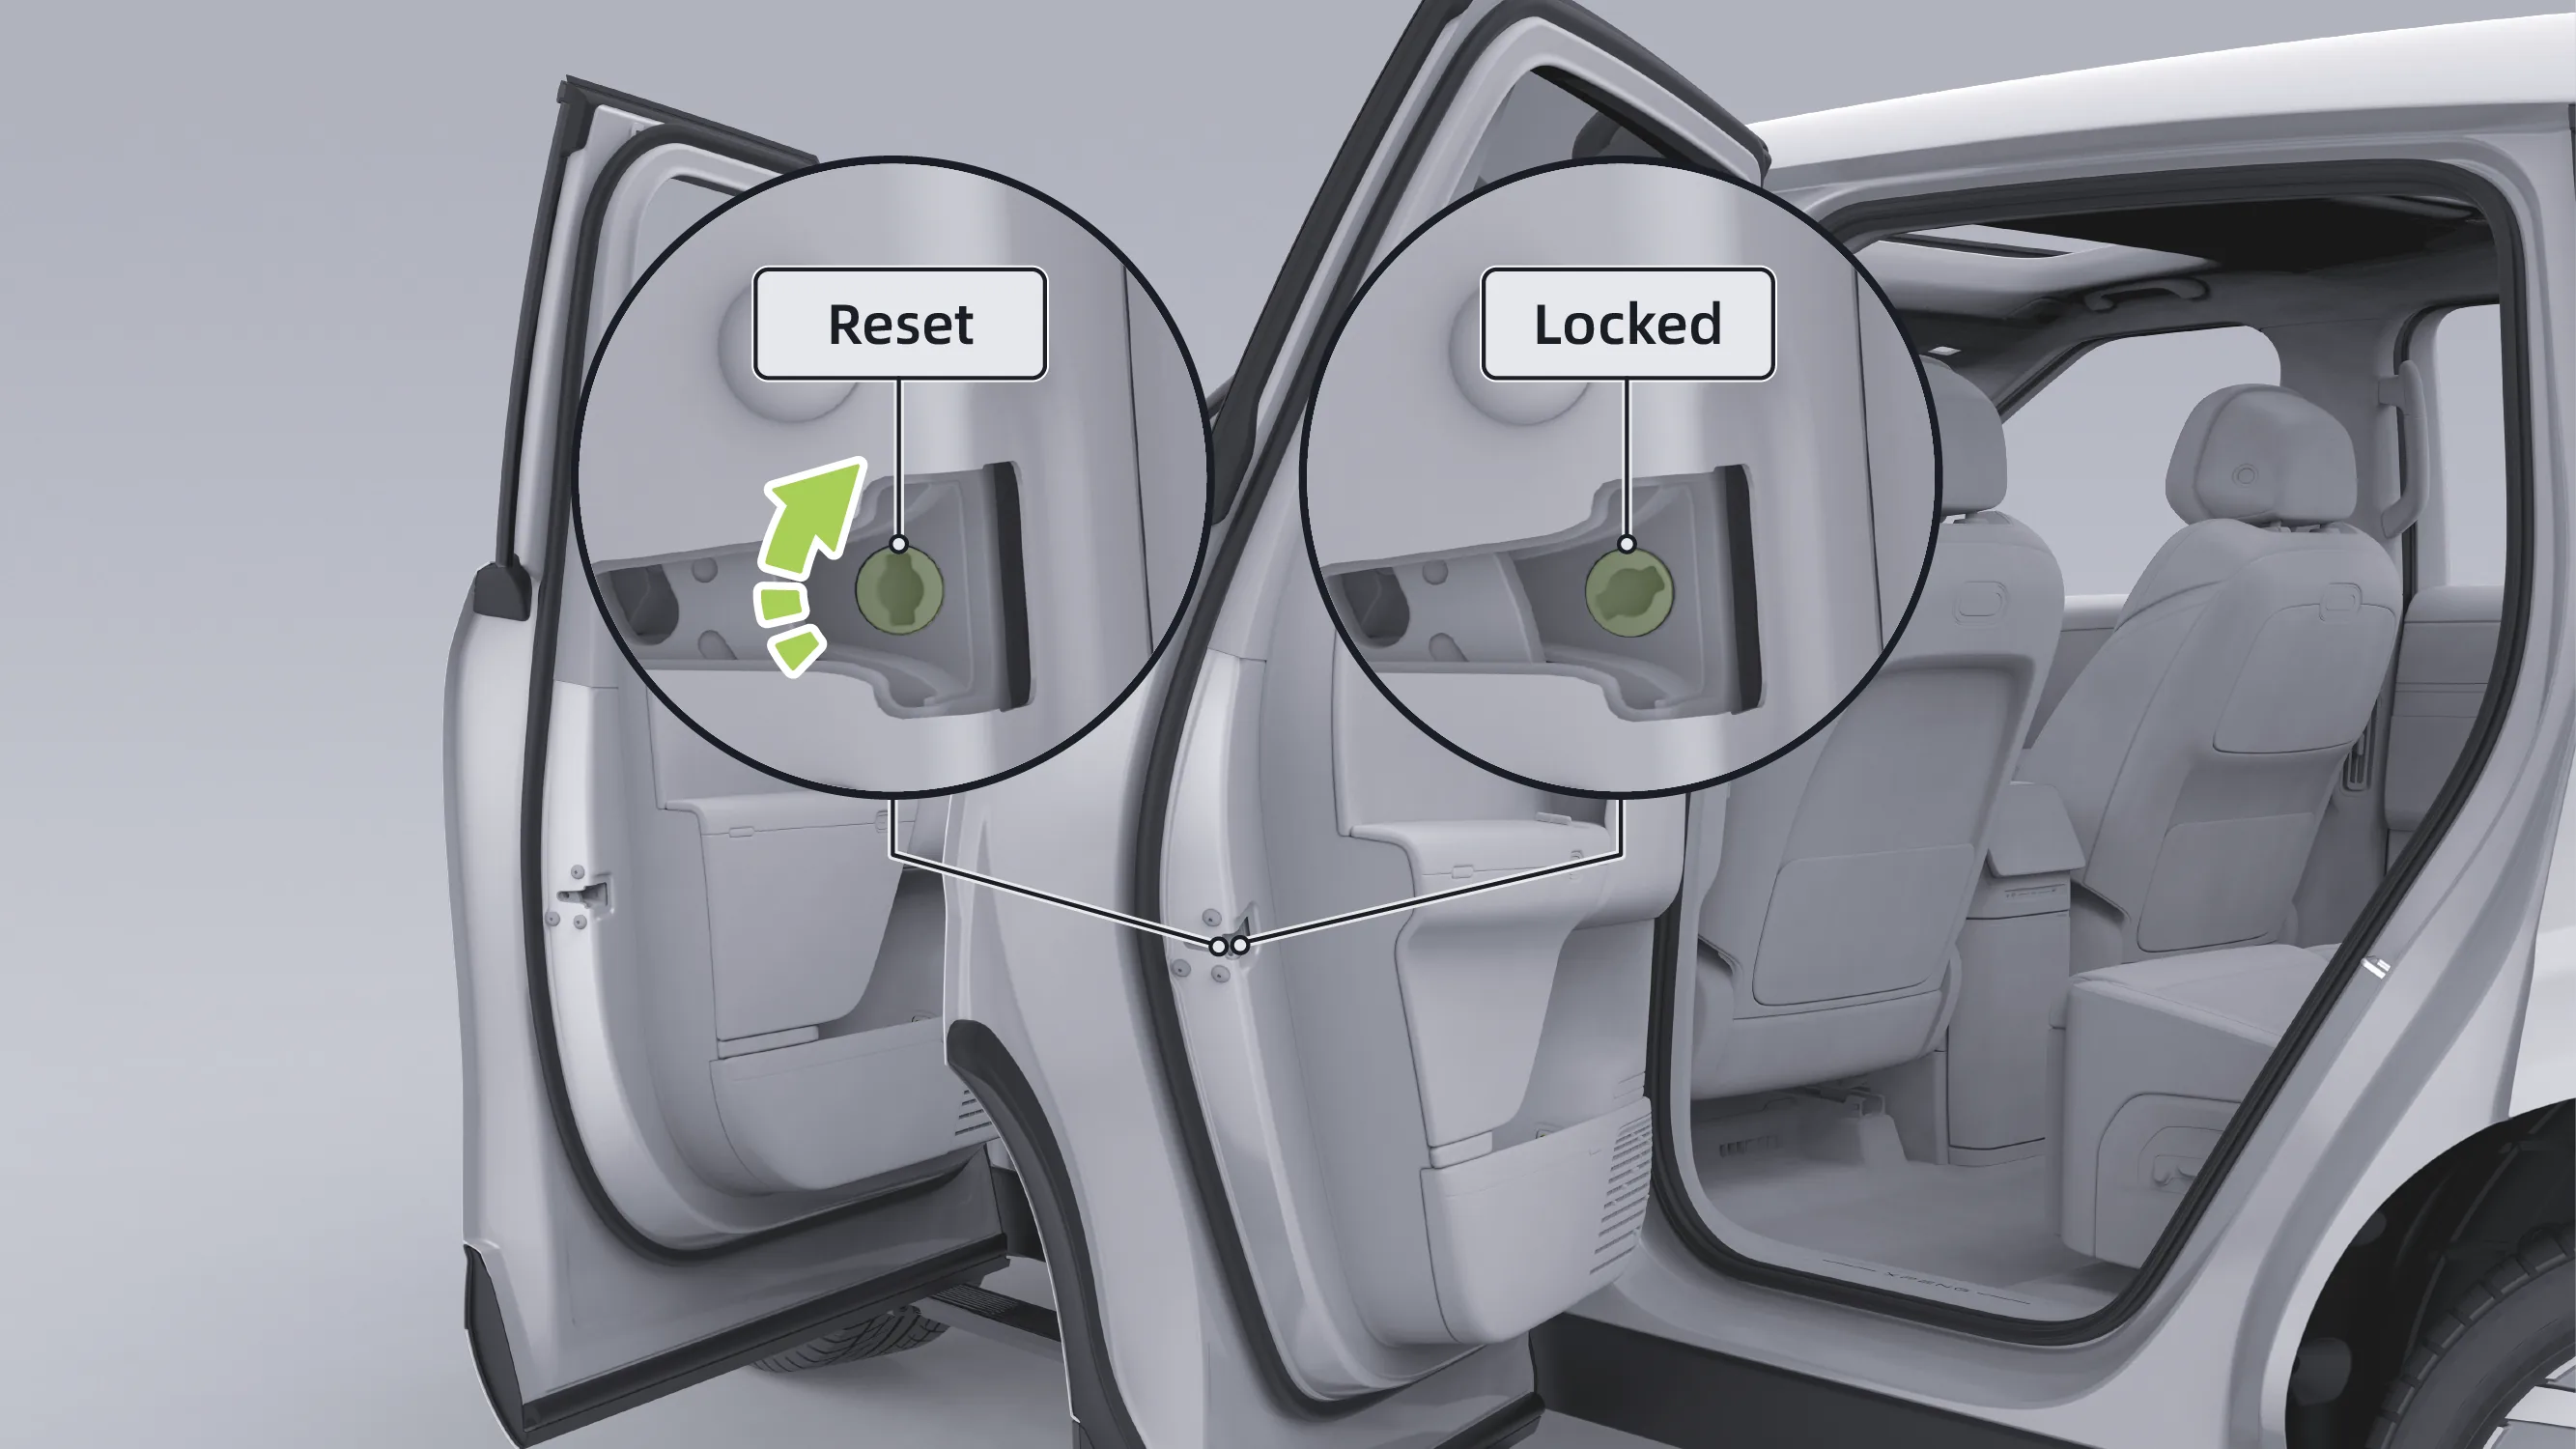
Locking: Insert a suitable tool into the knob at the door lock. Turn the left door clockwise (turn the right door counterclockwise) to the limit position, and push the door inward until the door is fully closed and locked.
Reset: After opening the door, use a suitable tool to insert into the knob at the door lock. Turn the left door counterclockwise (the right door clockwise) to the limit position to reset the emergency lock switch.
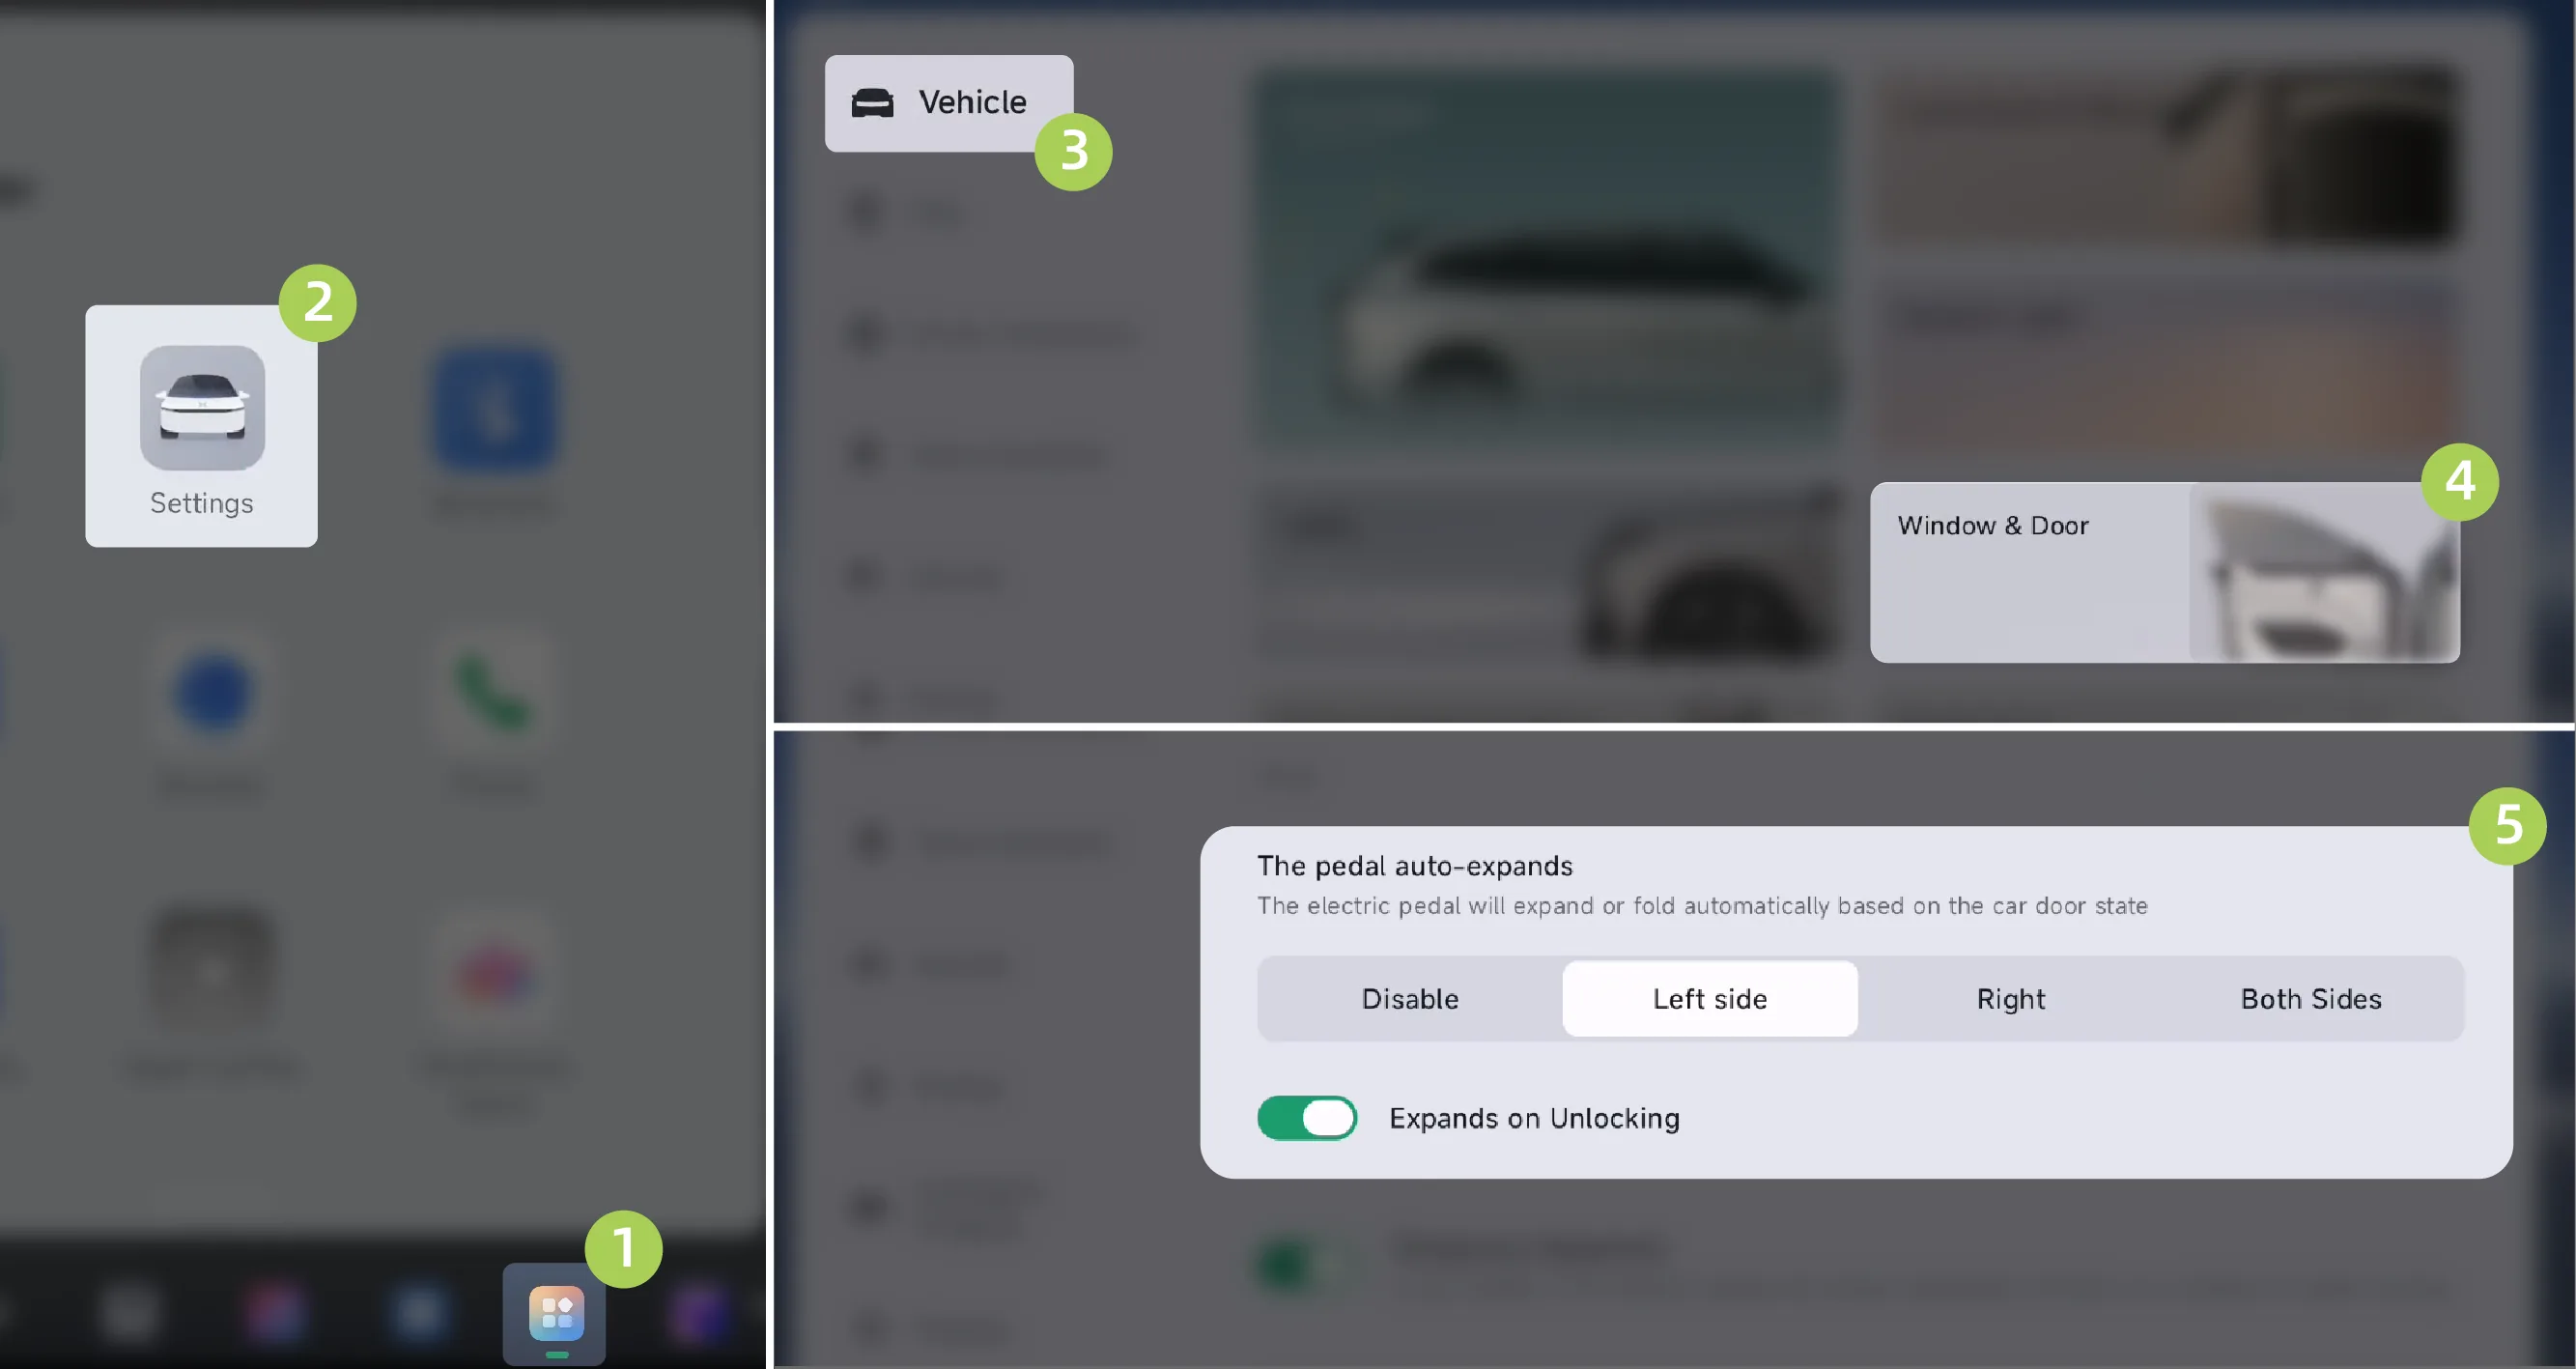
On the center display screen “ →Settings→vehicle→Doors and Windows”Interface, set the automatic deployment mode and on/off of the electric pedal Function.
Disabled: Turns off the automatic deployment mode of the power pedal.
Left side: The left electric running board automatically extends or retracts according to the door status or door lock status, and the right electric running board remains closed.
Right side: The right electric running board automatically deploys or retracts according to the door status or door lock status, and the left electric running board remains closed.
Both sides: The left and right power running boards automatically deploy or retract according to the door status or door lock status.
Tips When the power running board mode is changed from 'Left'/'Right'/'Both' to 'Disabled', if the running board(s) are deployed, they will automatically retract after the next door closure and will not deploy when the door is opened again.
When the electric pedal's Auto Mode is set to "Left" "Right" or "Both" you can enable or disable the "Expands on Unlocking" feature.
The power running board can be manually deployed in the following ways:
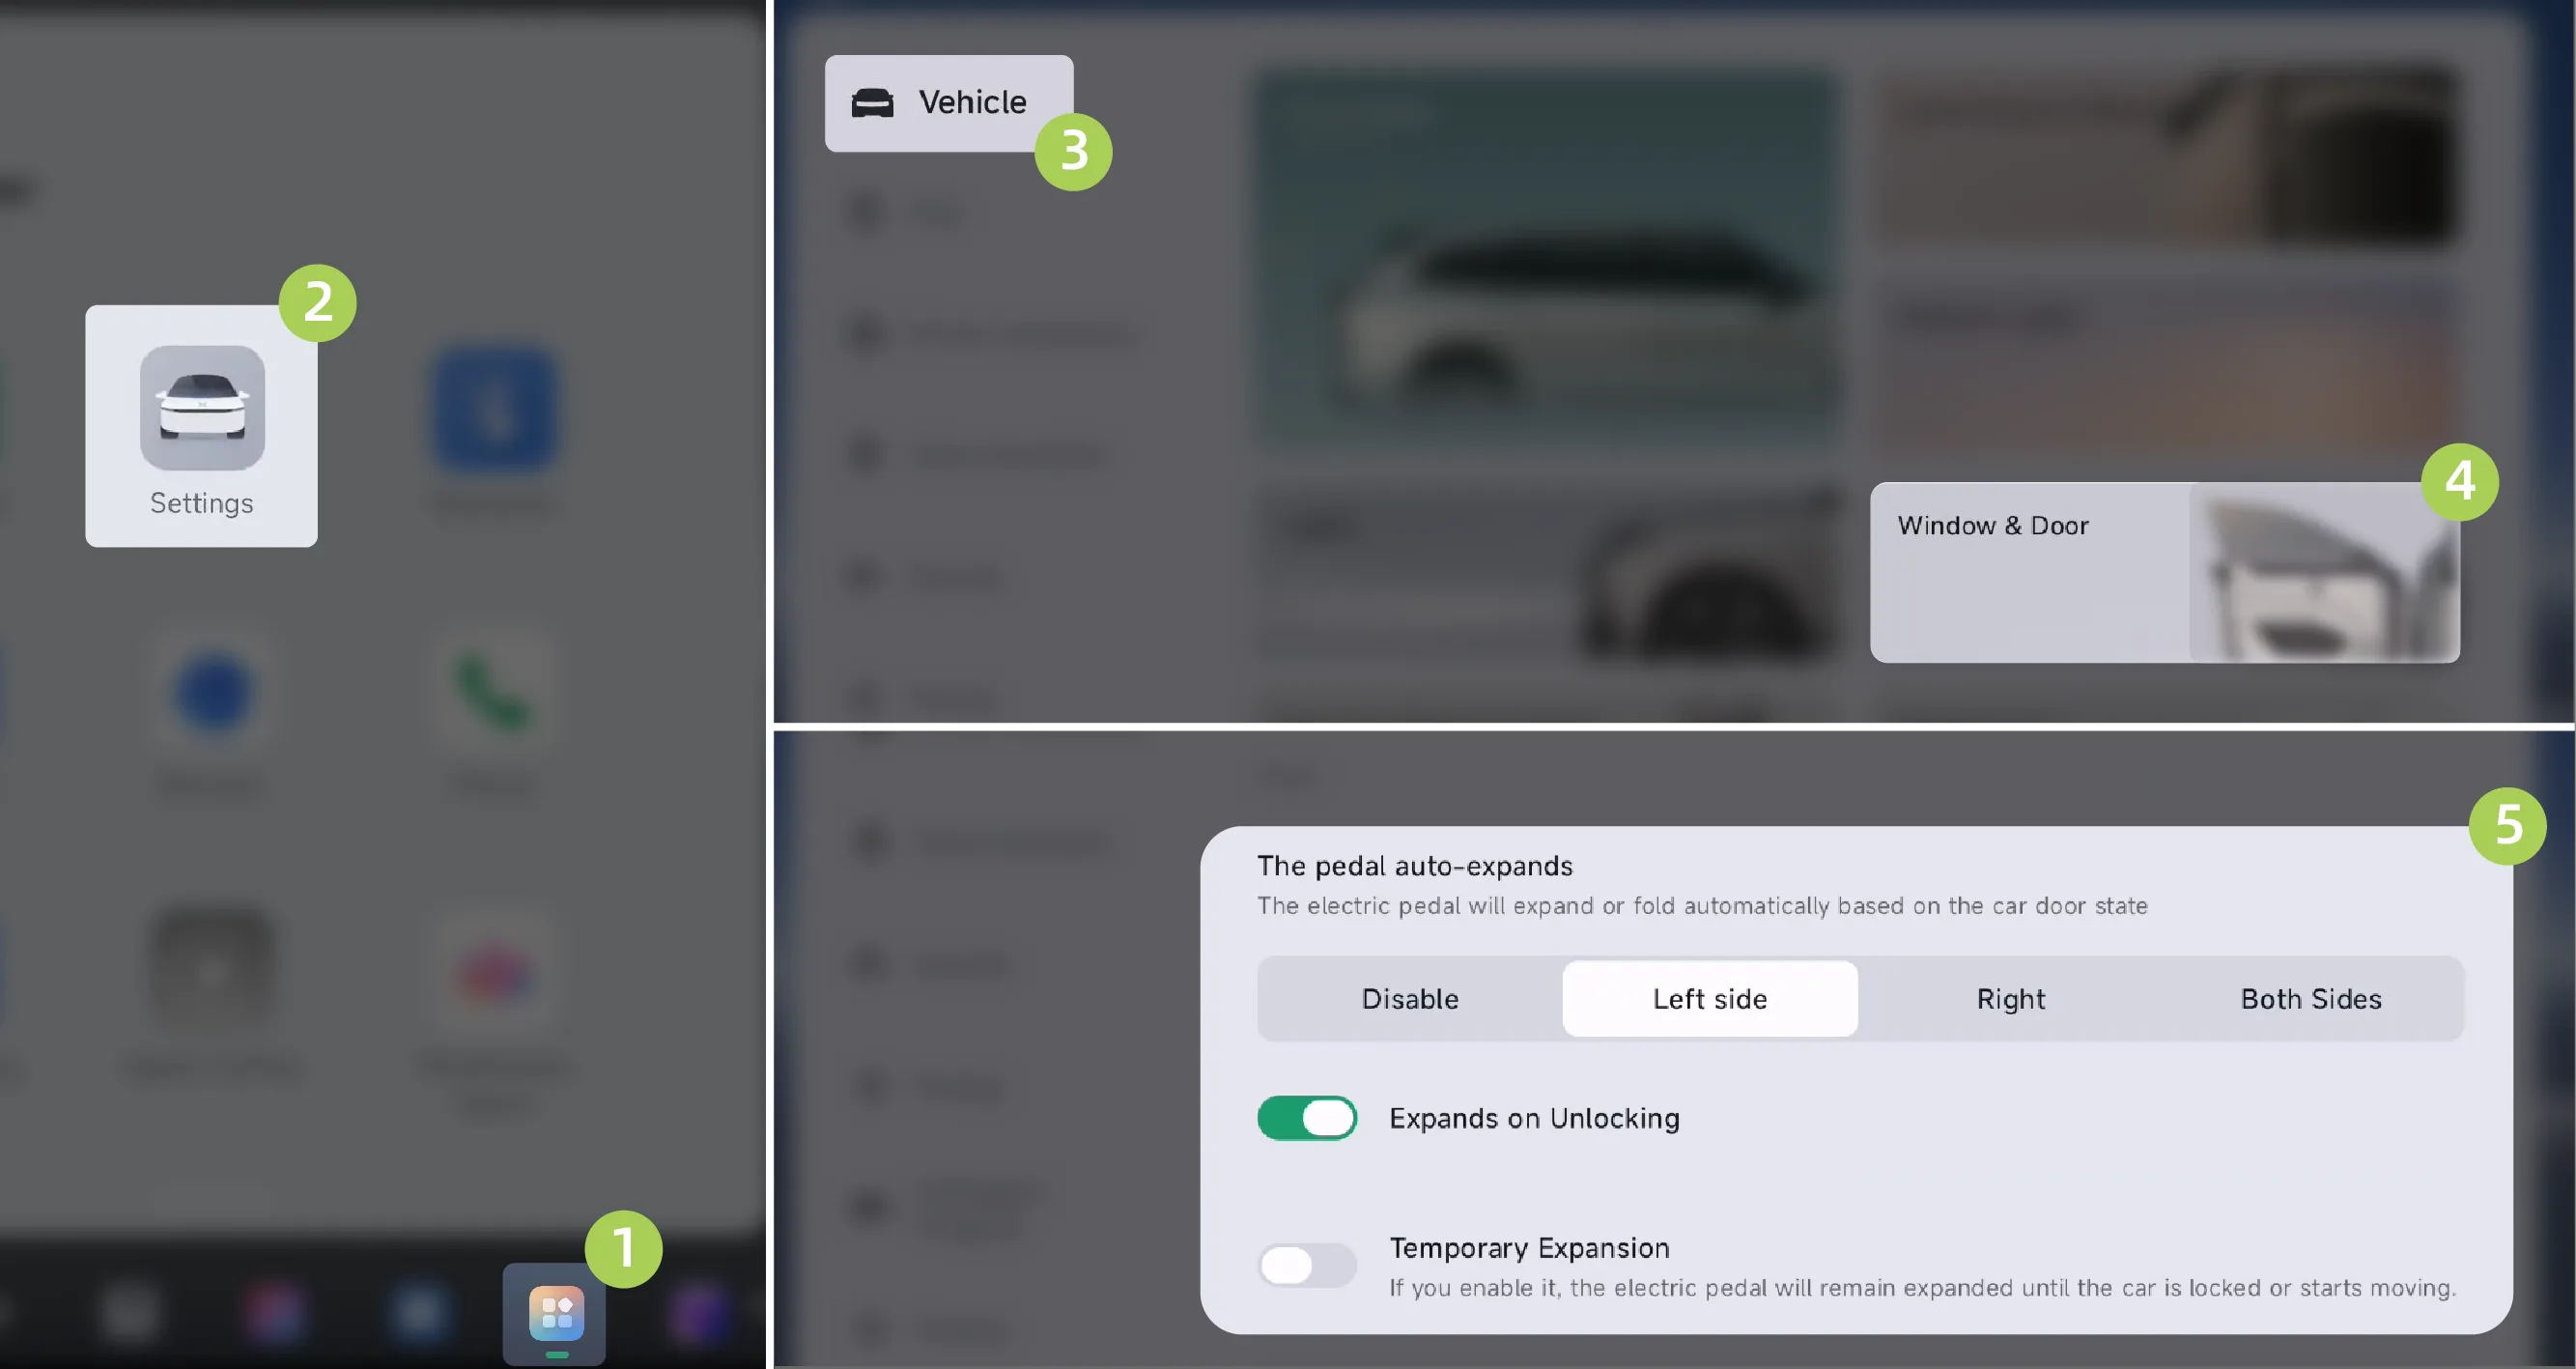
The vehicle is in P gear, on the central control screen “ →Settings→vehicle→Doors and Windows”Interface, On Function: the power running boards on both sides will remain deployed.
Caution Temporary Expansion is valid for one use only. After the electric pedal is temporarily expanded, the feature exits when the vehicle is in motion. The pedal retracts automatically, and Temporary Expansion is unavailable while driving.
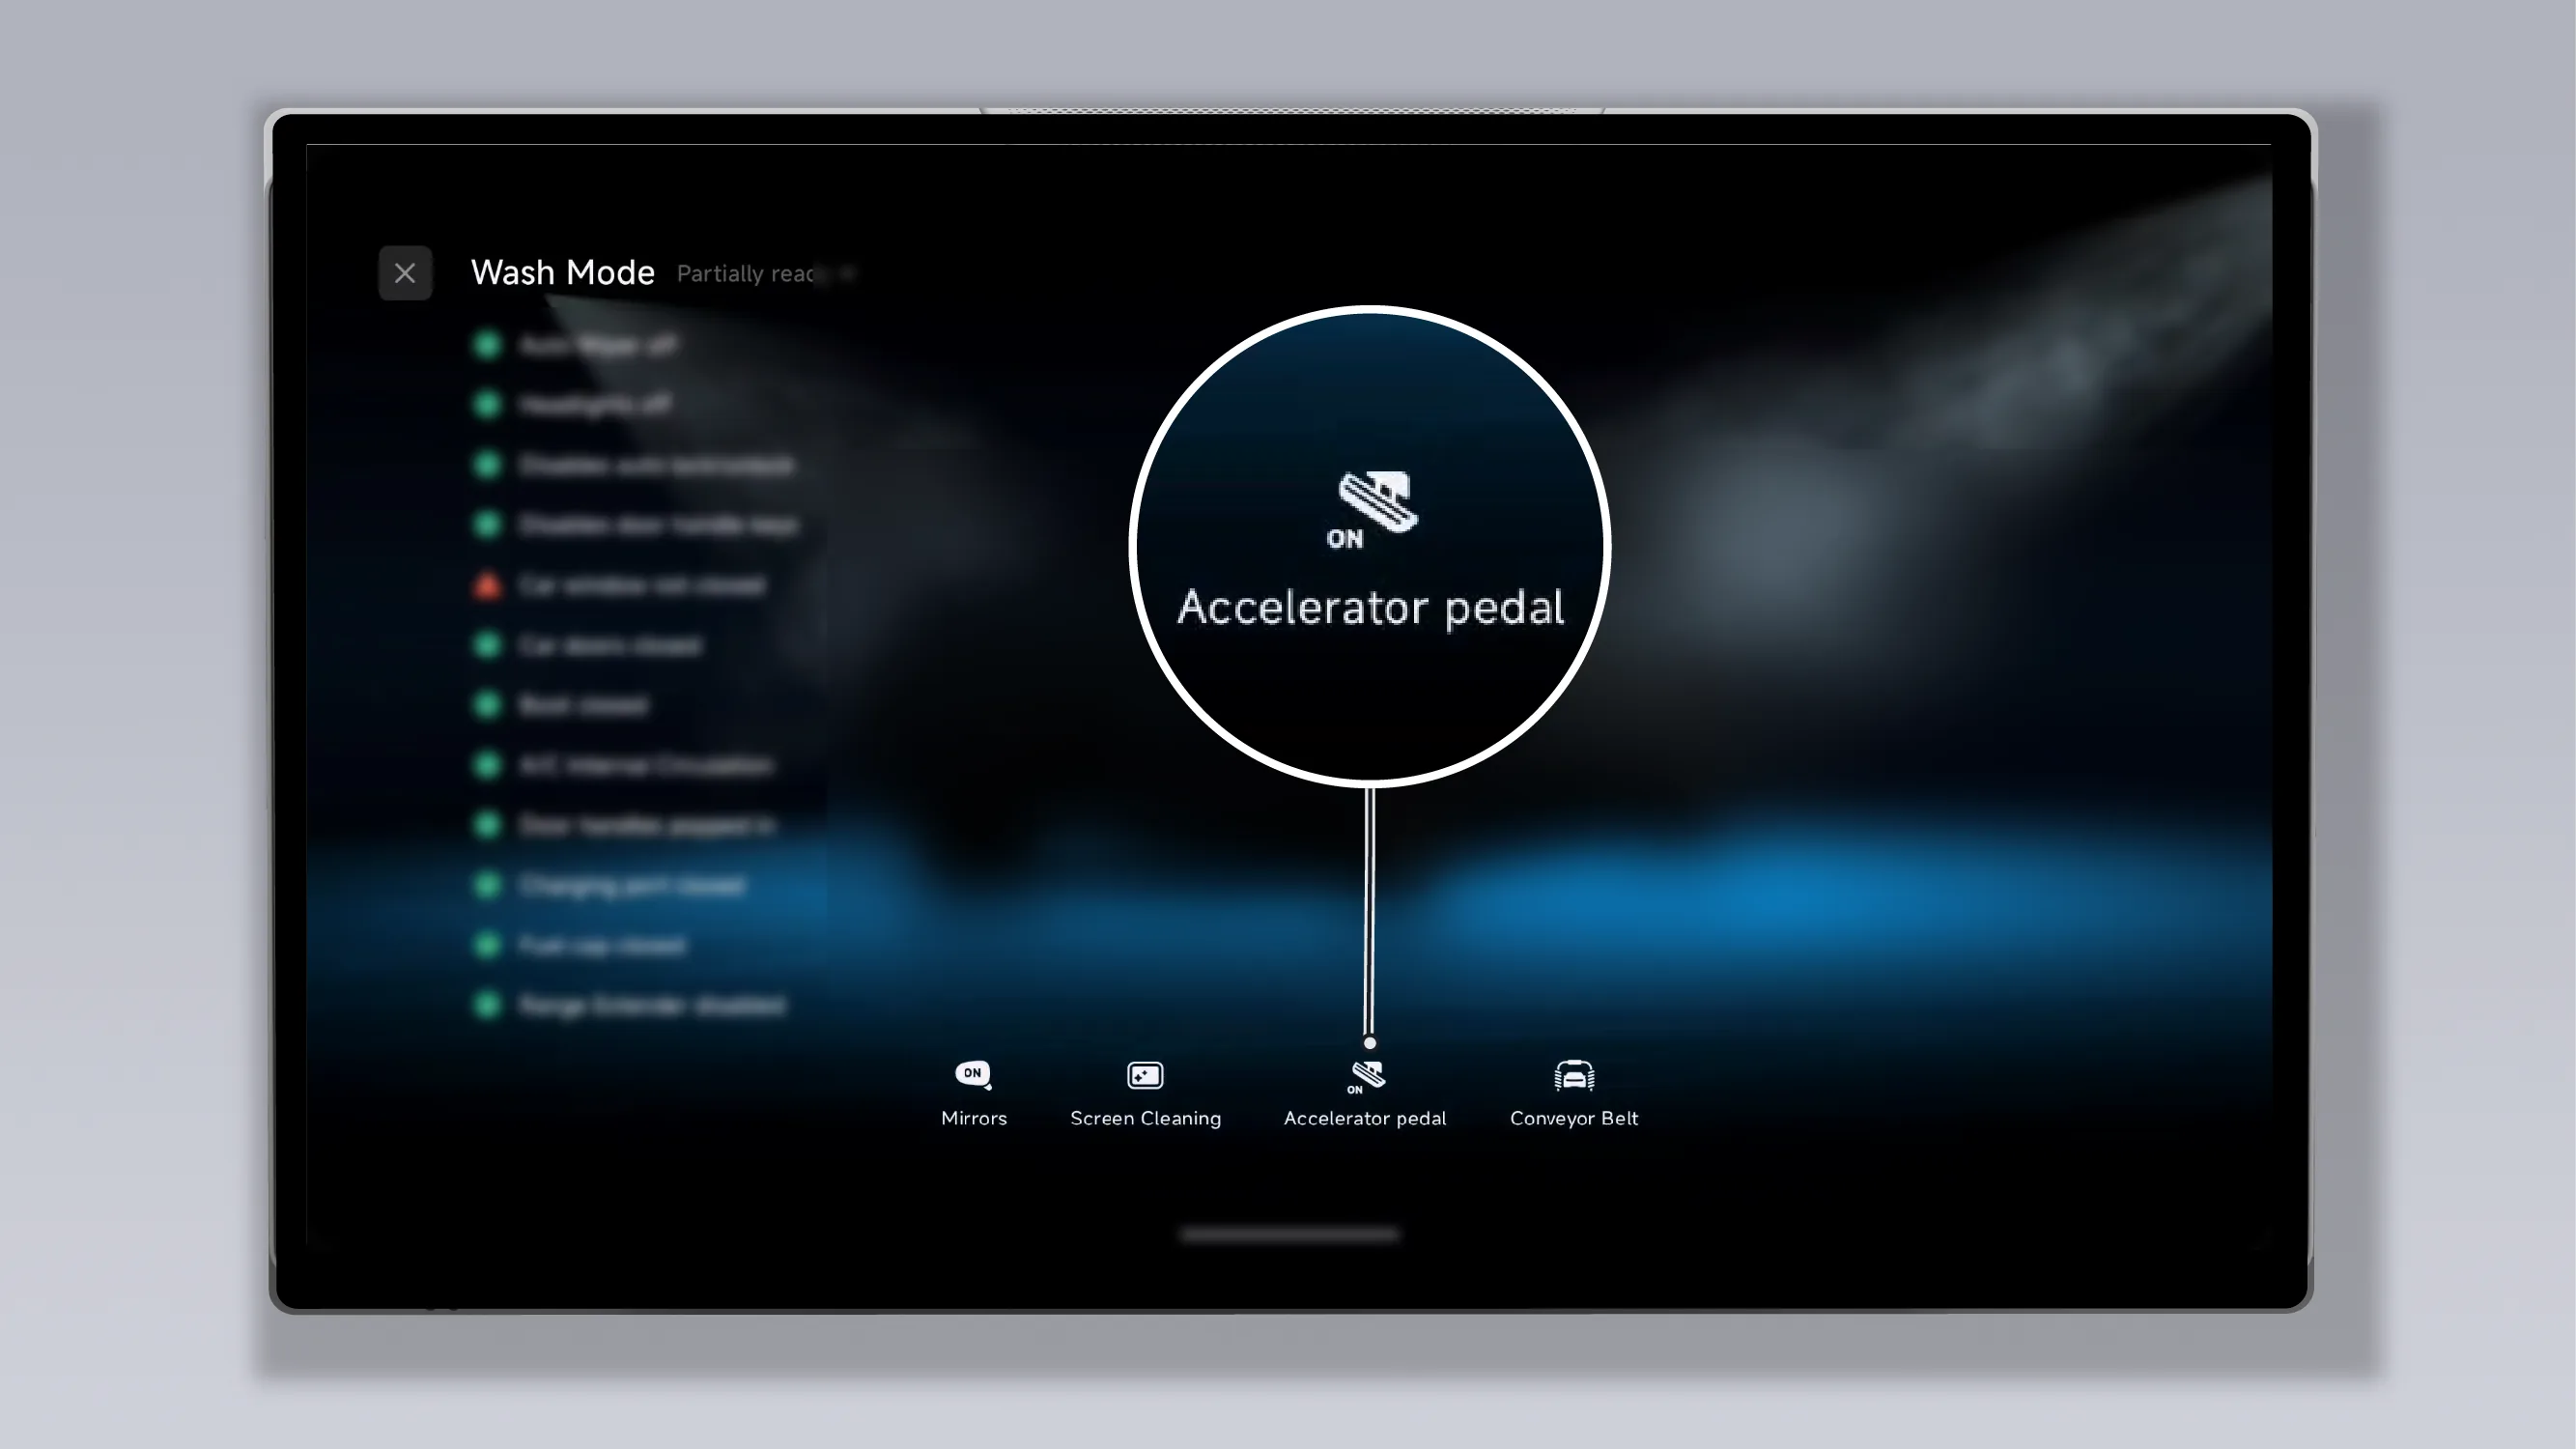
Enter Car Wash Mode, tap The icon will deploy the power running boards on both sides.
Set the power pedal automatic mode on the center display to / / and turn on When functioning, the power running board will automatically deploy under the following conditions:
When all doors are fully closed, open a door on either side, and the corresponding side power running board will automatically deploy.
When the vehicle is in P gear, use a valid key to unlock the vehicle, and the power running board will automatically extend.
Warning Use the side step only after it is fully deployed. Failure to do so may result in personal injury.
Ensure your footing is secure when using the side step. Do not allow your foot to slip into the gap between the side step and the vehicle; this could result in personal injury.
Caution Before deploying the power running board, ensure its path of travel is clear of obstacles to prevent damage to the running board.
The power running board can be manually retracted in the following ways:
When the power running board is in the temporarily deployed state, confirm that the vehicle is in P gear, on the central control screen “ →Settings→vehicle→Doors and Windows”Interface, close Function, the power running board will retract.
When the power running board is in the deployed state, enter Car Wash Mode, tap The icon will retract the power running board.
Set the power pedal automatic mode on the center control screen to / / and turn on When functioning, the power running board will automatically retract under the following circumstances:
Retract on door closing: When all doors are fully closed, the power running board will automatically retract.
Timeout Retraction: If no door is opened within 120 seconds after the vehicle is unlocked, the power running board will automatically retract.
Enable on the central control screen When the function is active, the power running board will automatically retract under the following conditions:
Gear shift retraction: When the vehicle gear is shifted from P gear to D / N / R gear, the power running board will automatically retract.
Retract on lock: When all doors are fully closed, use a valid key to lock the vehicle, and the power running board will automatically retract.
Overspeed retraction: When the vehicle speed exceeds 5 km/h, the power running board will automatically retract.
If the power running boards are not required in special scenarios such as off-road driving or vehicle recovery, please turn them off. function, while setting the electric pedal automatic mode to 。
Caution Before driving onto an uphill or downhill grade, set the suspension height to High to prevent the power running boards from contacting the ground on steep slopes.
During the deployment or retraction of the power running board, the anti-pinch protection function is active. If resistance is detected or a foreign object is trapped on the power running board during deployment or retraction, it will automatically stop moving and reverse for a certain distance to prevent personal injury from pinching.
Warning Do not use any part of your body to test the anti-pinch function.
Despite the anti-pinch protection, there is still a risk of pinching injury. Always ensure that the movement area of the power running board is unobstructed; otherwise, in special cases (for example, if the obstacle is thin or soft), interruption of the movement process cannot be ensured.
If anti-pinch is triggered frequently, it may easily cause anti-pinch protection and the automatic function to fail, and it is necessary on the central control screen “ →Settings→vehicle→Doors and Windows”Interface, set the electric pedal automatic mode to / / or turn on When using the function, please complete the power pedal initialization according to the prompts on the central control screen. The power pedal will automatically start initialization. After initialization is completed, the automatic function will be restored, and the anti-pinch function will also be restored.
Caution During electric pedal initialization, do not obstruct or interfere with the pedal’s movement to prevent initialization failure or incorrect positioning.
Warning During electric pedal initialization, the anti-pinch function is disabled. Keep all objects and body parts away from the electric pedal’s operating range to prevent personal injury or property damage.
Warning The power running boards cannot support the vehicle's weight. Never use them as jacking or lifting points.
When the vehicle needs to be lifted for maintenance, first deploy the power running boards before lifting. Please follow the steps below:
The vehicle is in P gear, on the central control screen “ →Settings→vehicle→Maintenance”Interface, On Function.
On the center display screen “ →Settings→vehicle→Doors and Windows”Interface, On Function: the power running boards on both sides will remain deployed.
When lifting the vehicle, check whether the lift interferes with the pedal mechanism. Replace with a suitable lift support pad to avoid force being applied to the power pedal and damaging the power pedal. Do not retract the pedal during lifting.
After lifting is completed, first remove the support pads and lift arms, and turn off on the central control screen. function, then move the vehicle.
The power running board is located below the door. After a period of use, dust, gravel, and other debris can easily accumulate on the board surface. To avoid causing functional abnormalities, please clean it regularly according to the following steps:
The vehicle is in P gear, on the central control screen “ →Settings→vehicle→Doors and Windows”Interface, On Function: the power running boards on both sides will remain deployed.
Use a brush, water spray gun, or other tools to clean foreign matter (it is prohibited to use a high-pressure water gun to directly spray parts such as the pedal motor connector and welcome light), and wipe dry the moisture on the pedal surface to avoid rust caused by residual water stains.
Turn off the center control screen Function.
Warning Before using the power running board, make sure there are no foreign objects on it, such as rain, snow, or fine sand. Otherwise, unstable footing may cause personal injury.
If the power running board makes an abnormal noise or is impacted, promptly contact a XPENG Motors Service Center for inspection to avoid abnormal operation or damage of the power running board.
You can open the Frunk using any of the following methods:
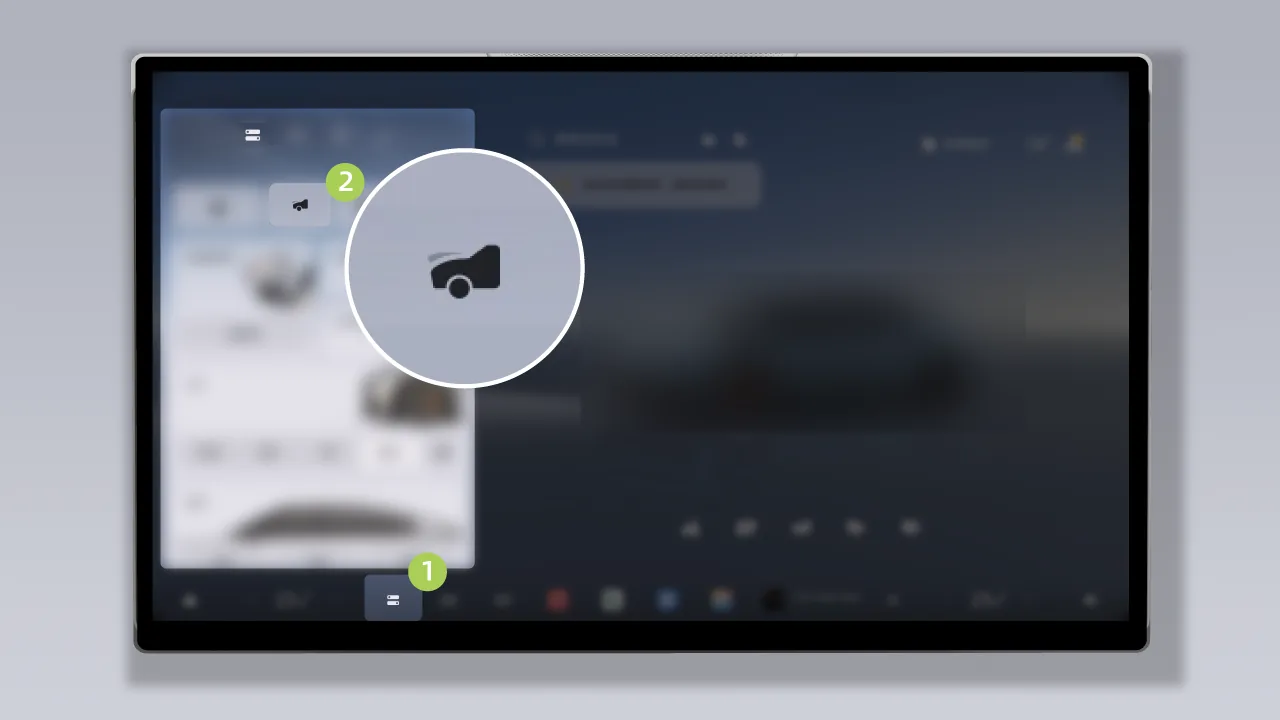
Tap on the center display. “  ”Enter the Control Center screen to turn on , after being turned on, it must be turned off manually.
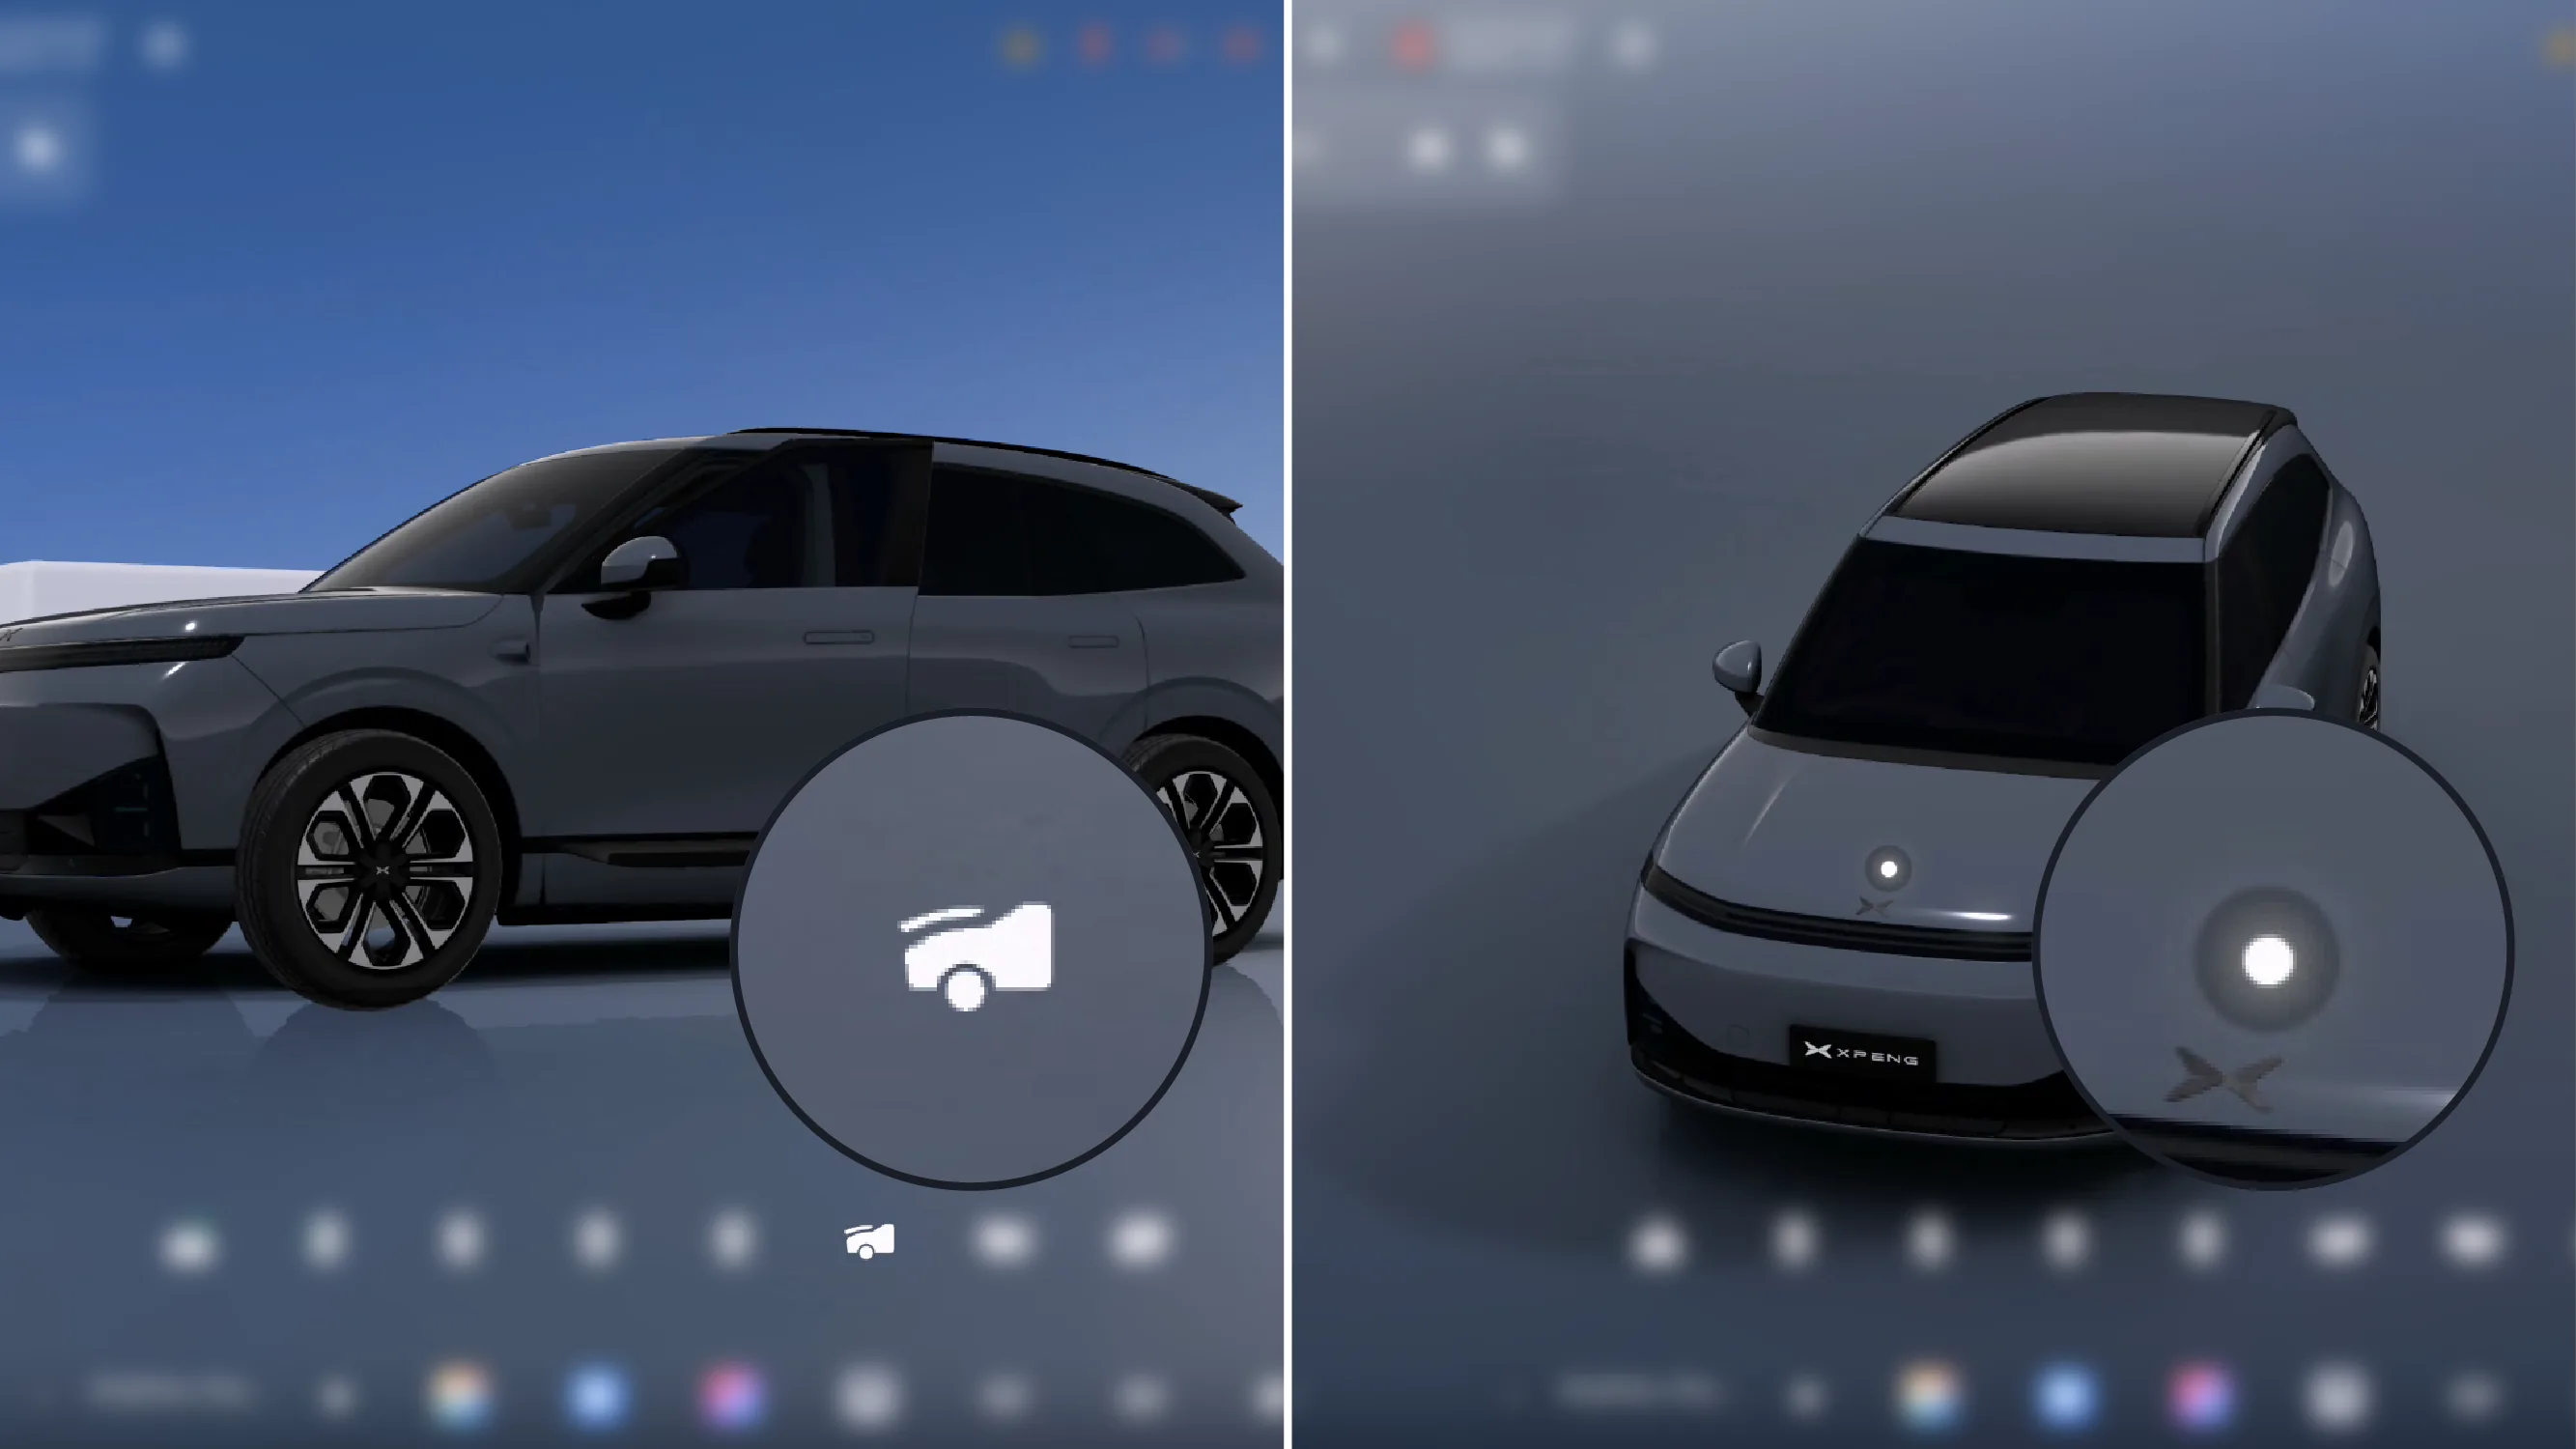
On the central control screen SR interface, tap the Frunk icon below the 3D vehicle model, or tap the hotspot icon on the Frunk area of the 3D vehicle model to open the Frunk. After opening, it must be closed manually.
Tips The hotspot icons on the 3D vehicle model are hidden by default. You need to tap the 3D vehicle model to display them.
After waking XPENG, say a voice command to open the Frunk, for example, say and other voice commands.
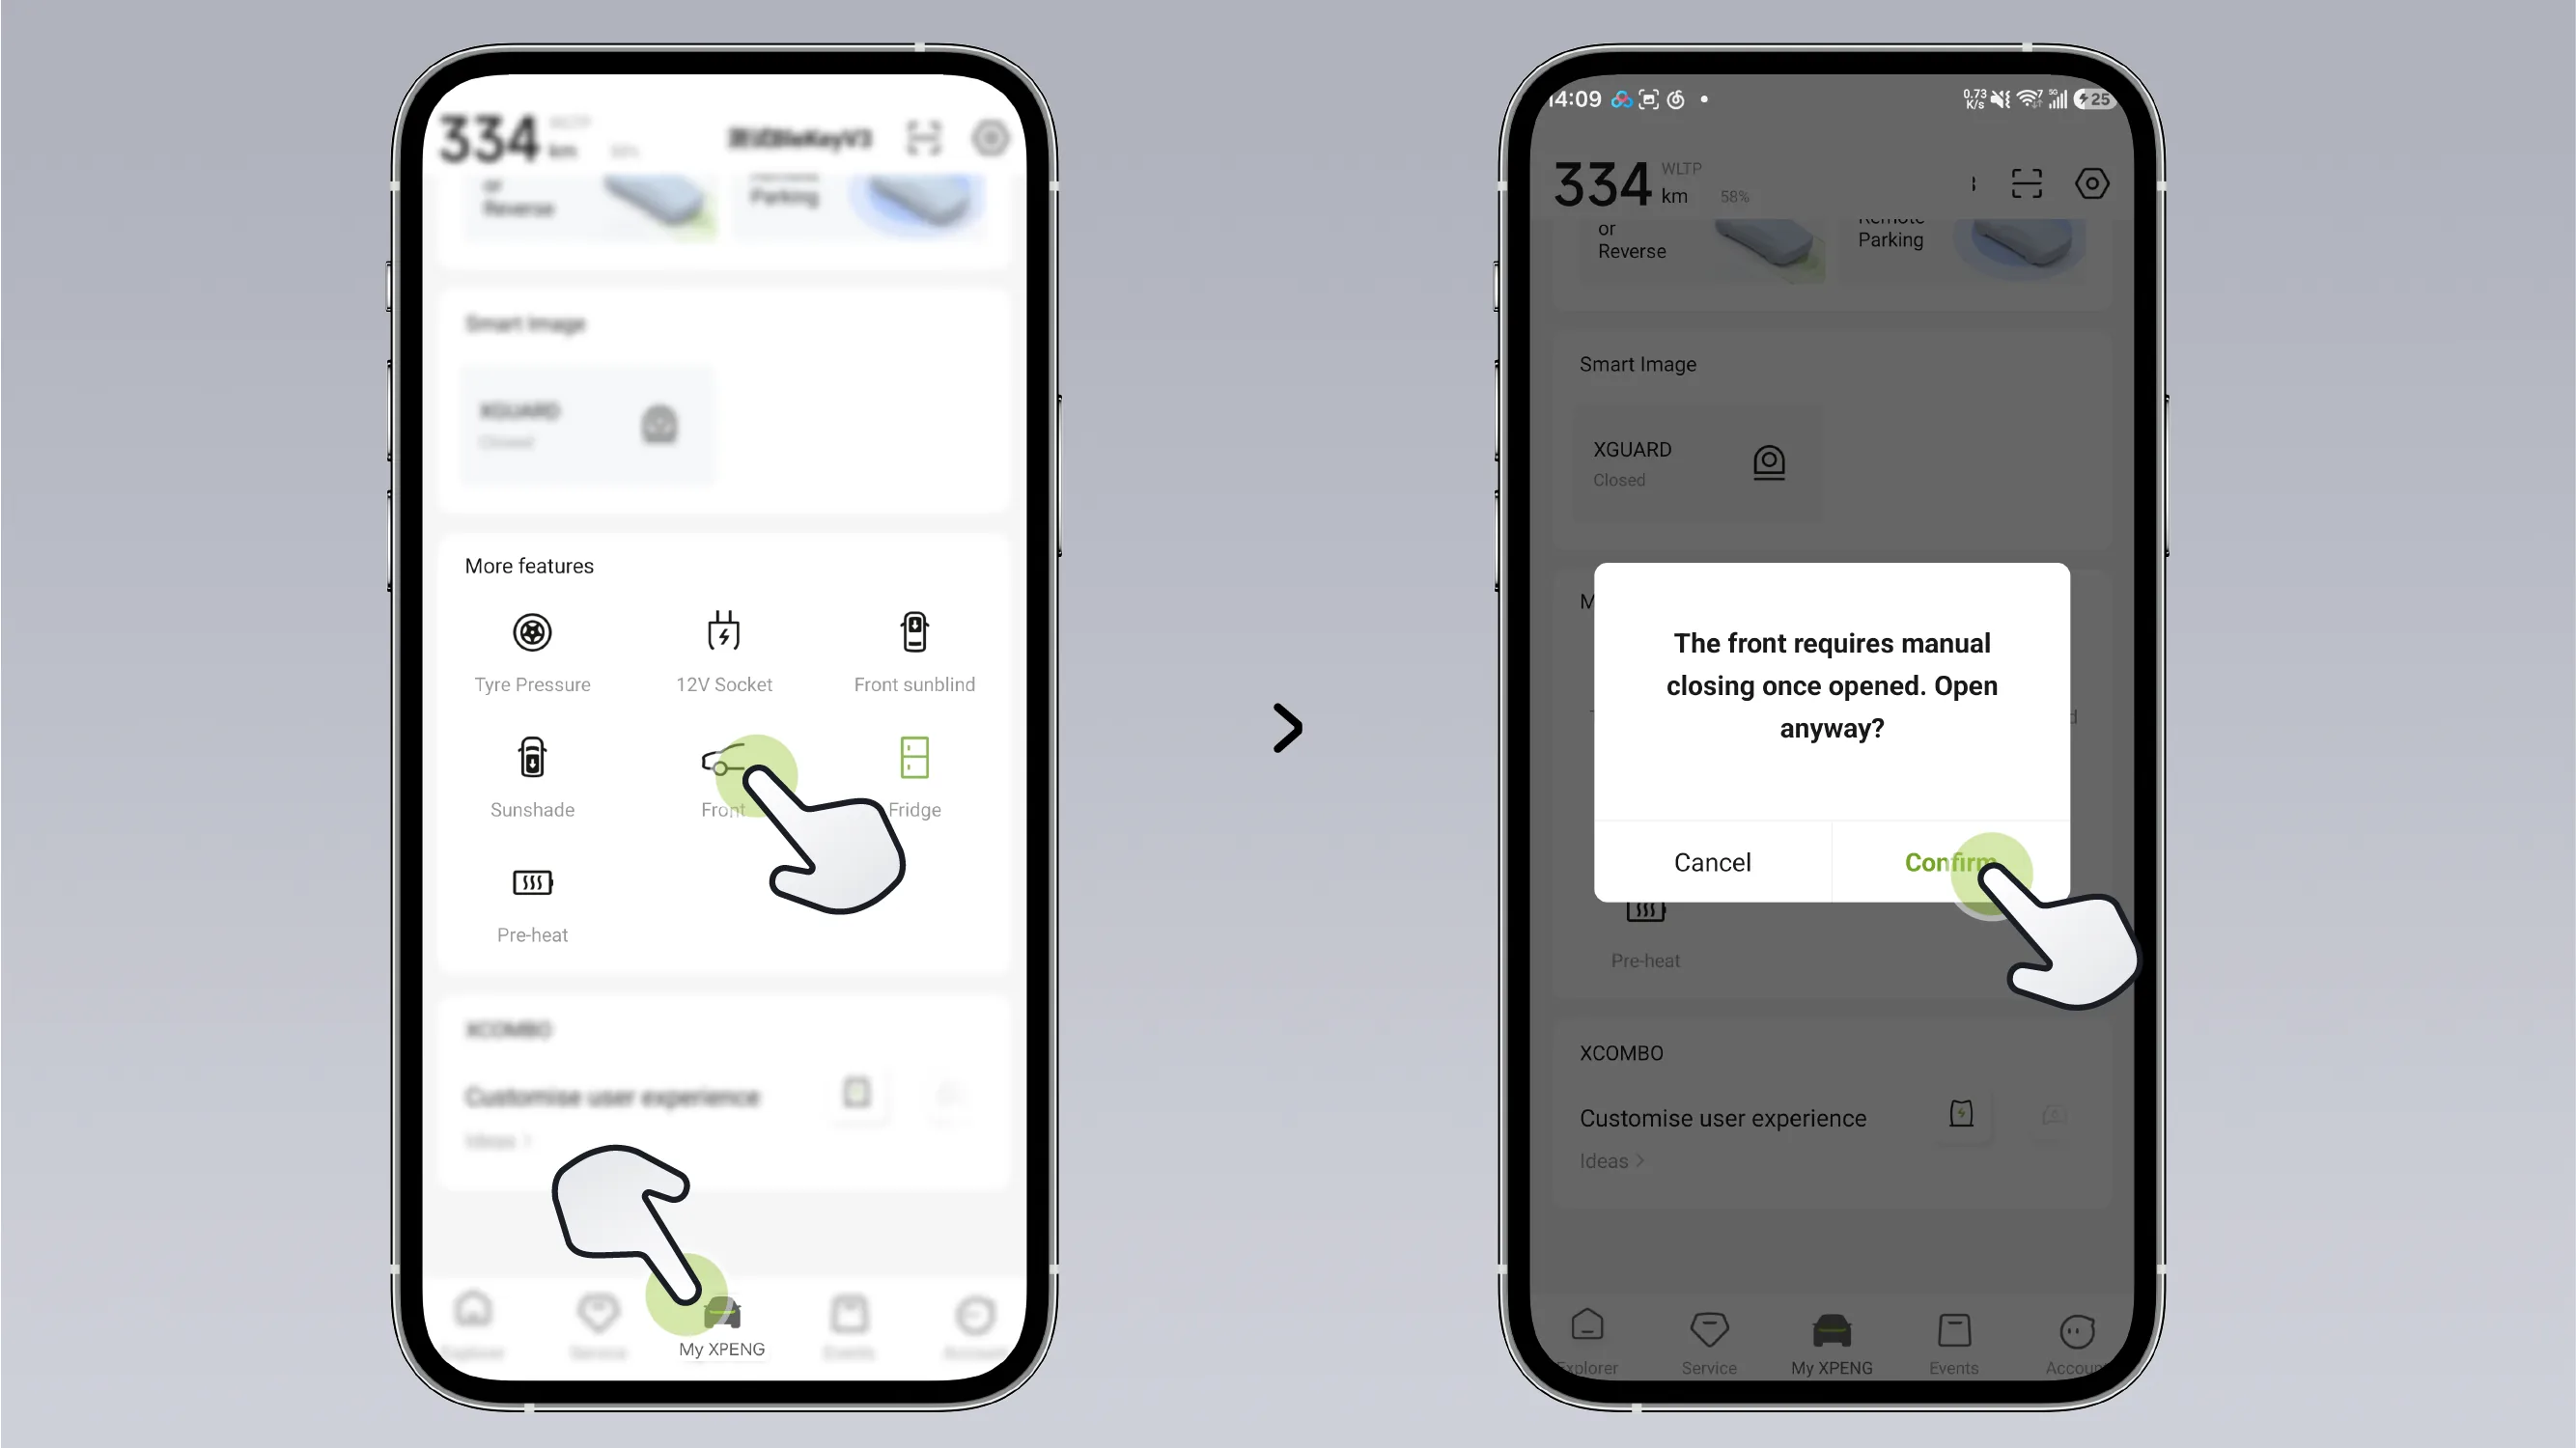
You can also use the mobile APP Interface, confirm and enable in the pop-up window , after being turned on, it must be turned off manually.
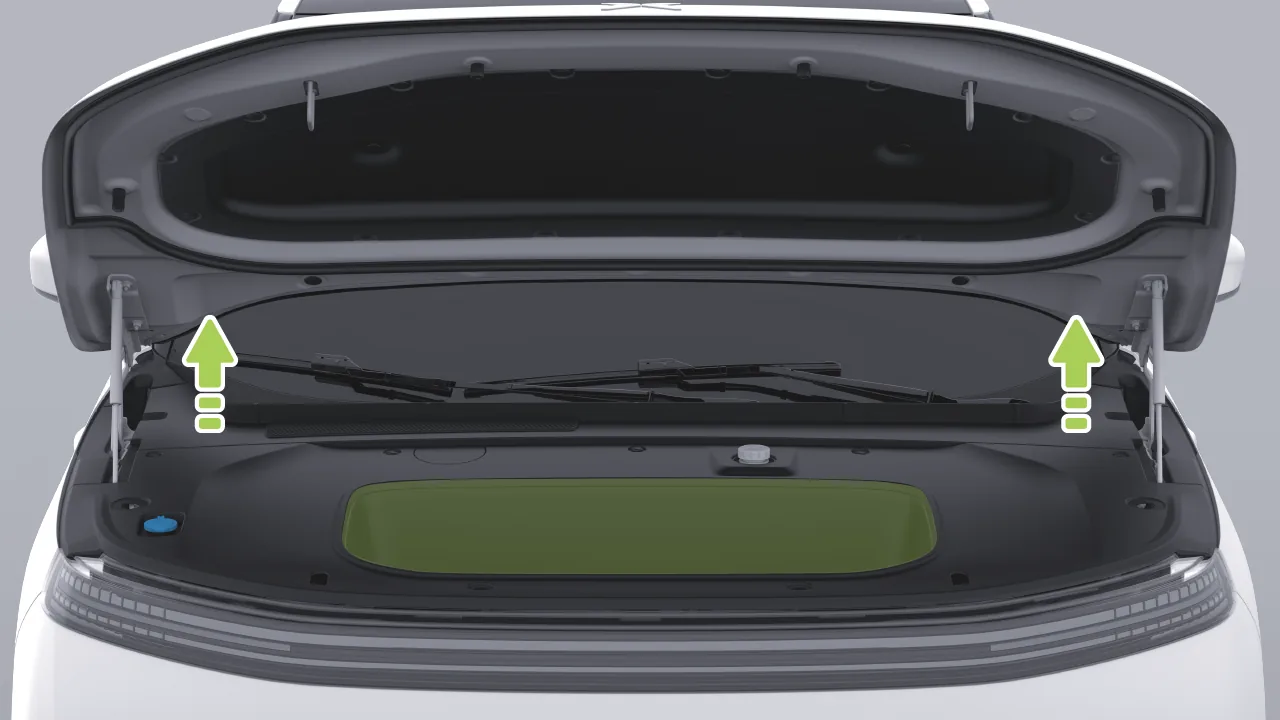
Lift the front hood upward. The support rod will automatically hold the front hood open. You can place items in the storage space inside the Frunk.
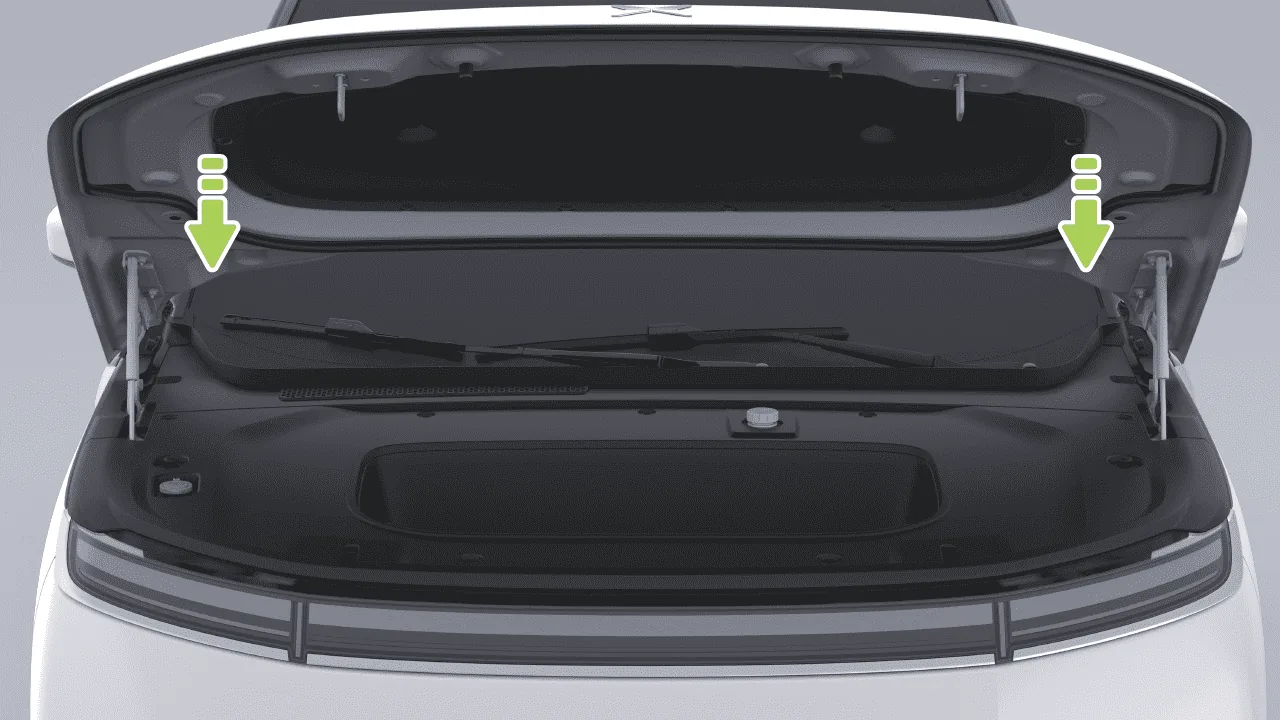
Lower the hood until the hood latch contacts the striker.
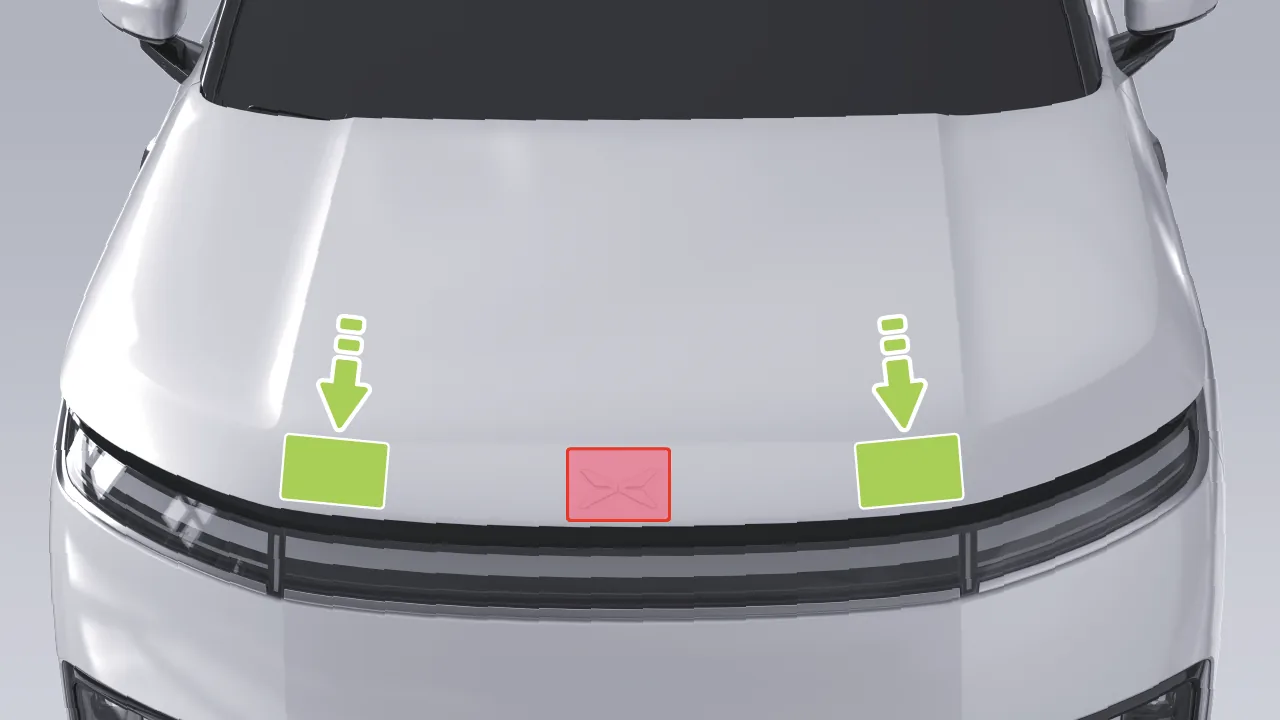
Place both hands on the front-side inclined surface of the front hood (green area), then press down twice on the left and right sides respectively to close the front hood.
After closing, please check whether the front compartment lid is securely locked. The center display, instrument cluster display, and AR-HUD will all provide prompts indicating the opening/closing status of the front compartment lid.
Warning Before driving, ensure the hood is fully closed and both latches are fully locked.
Apply pressure only to the green area shown in the illustration. Do not press the XPENG emblem area with one hand, as concentrated force may cause damage.
Do not apply pressure to the hood's crease area to avoid bending the edges.
Use extra caution when closing the hood to prevent fingers or other body parts from being pinched.
If the central control screen is black or in other special circumstances, the Frunk can be opened by the following operation:
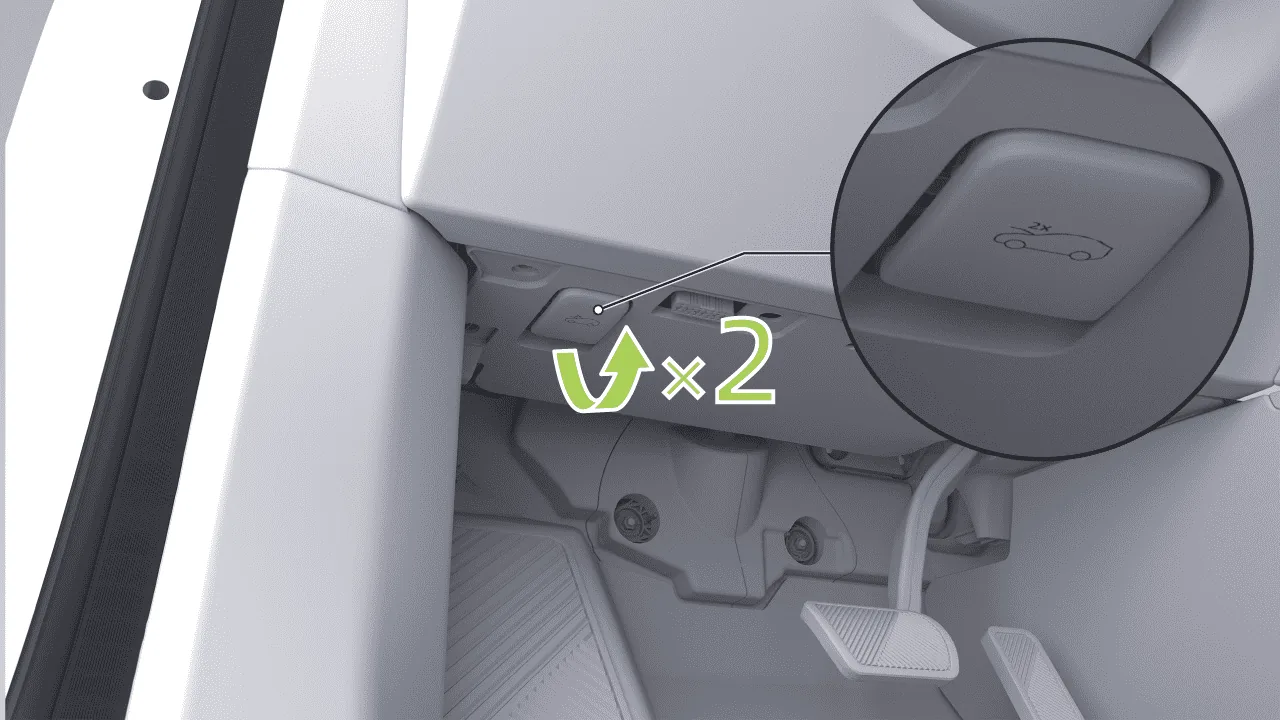
Pull the front hood release handle at the lower left side of the instrument panel twice consecutively. The front hood will pop up twice to complete unlocking.
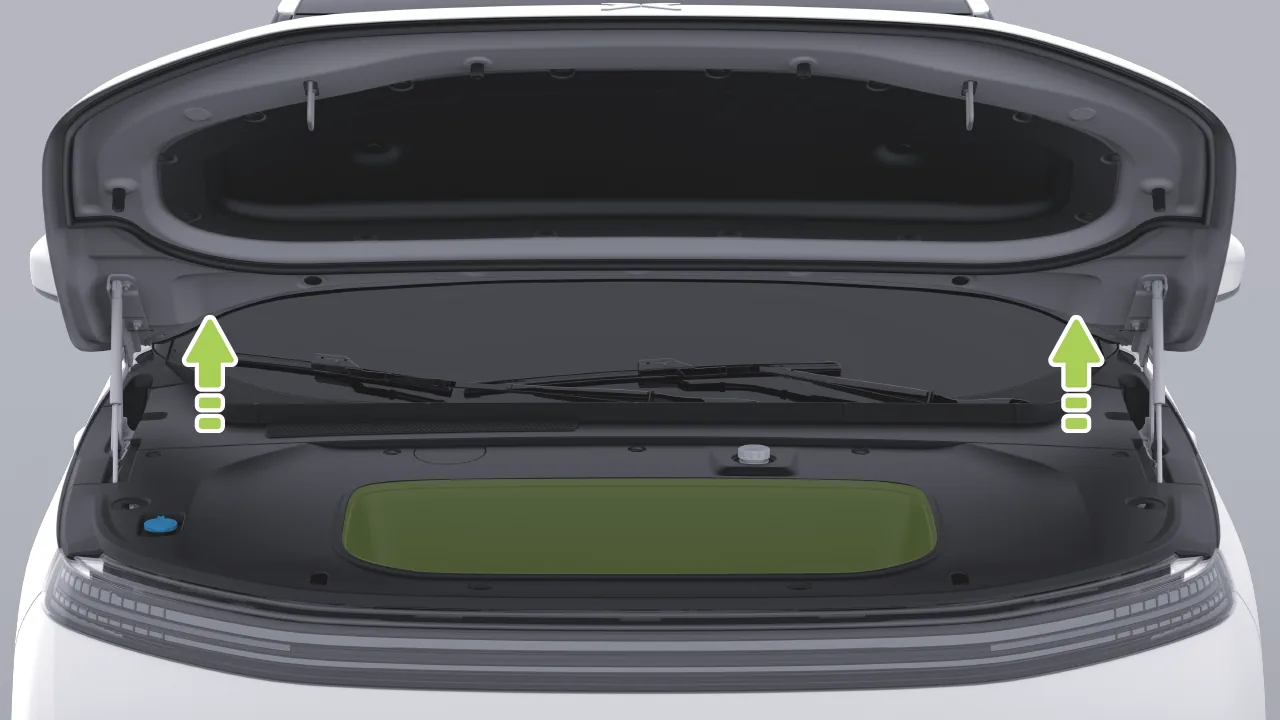
Open the front hood upward, and the support rod will automatically hold the front hood up, then you can directly use the Frunk.
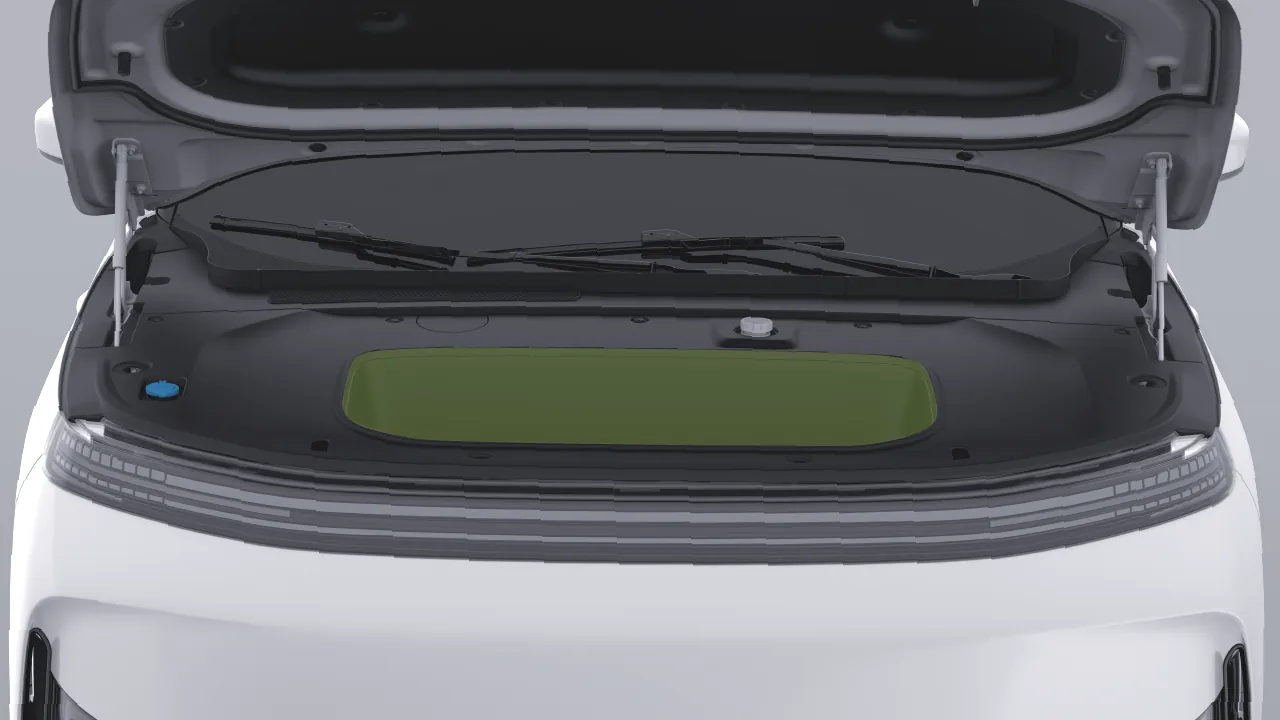
You can temporarily store in the front trunk items that are damp, dirty, have strong odors, or are otherwise inconvenient to place in the passenger compartment or trunk.
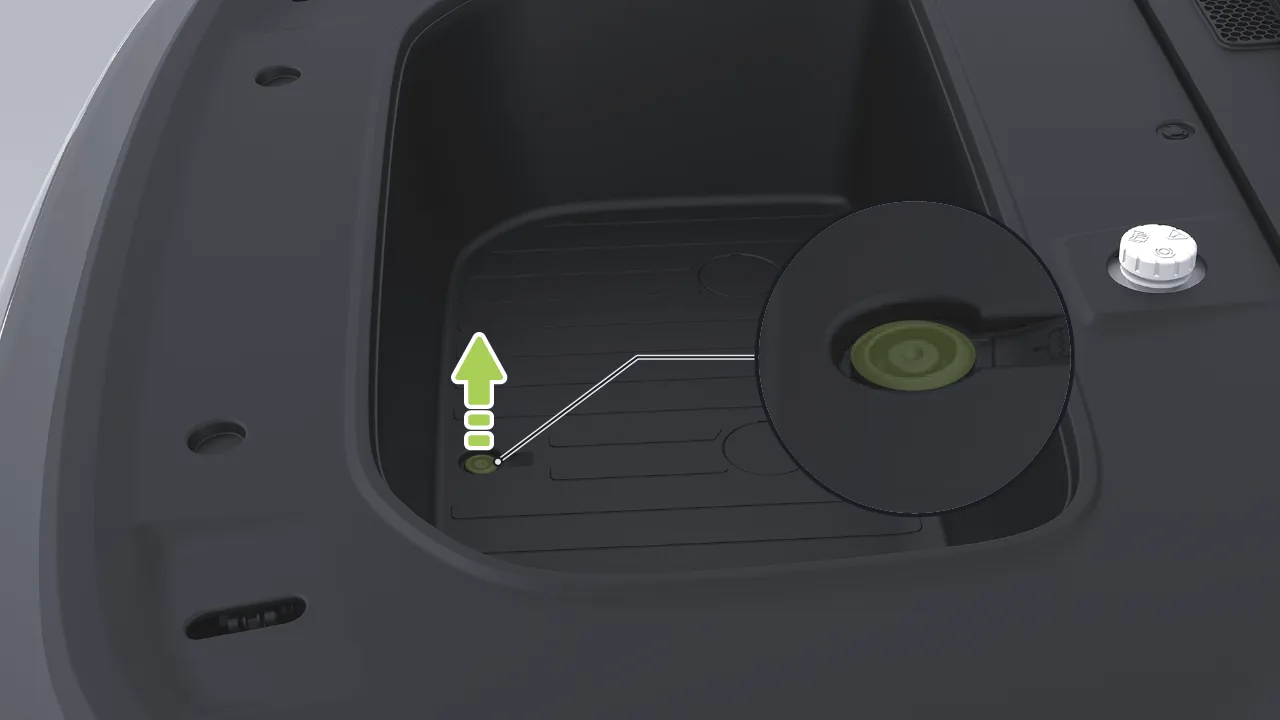
The Frunk is equipped with a drain outlet and can be washed with water. Remove the sealing cap on the drain outlet to drain the liquid in the Frunk. After draining the liquid in the Frunk, rinse it with clean water and wipe it dry, then install the drain outlet sealing cap.
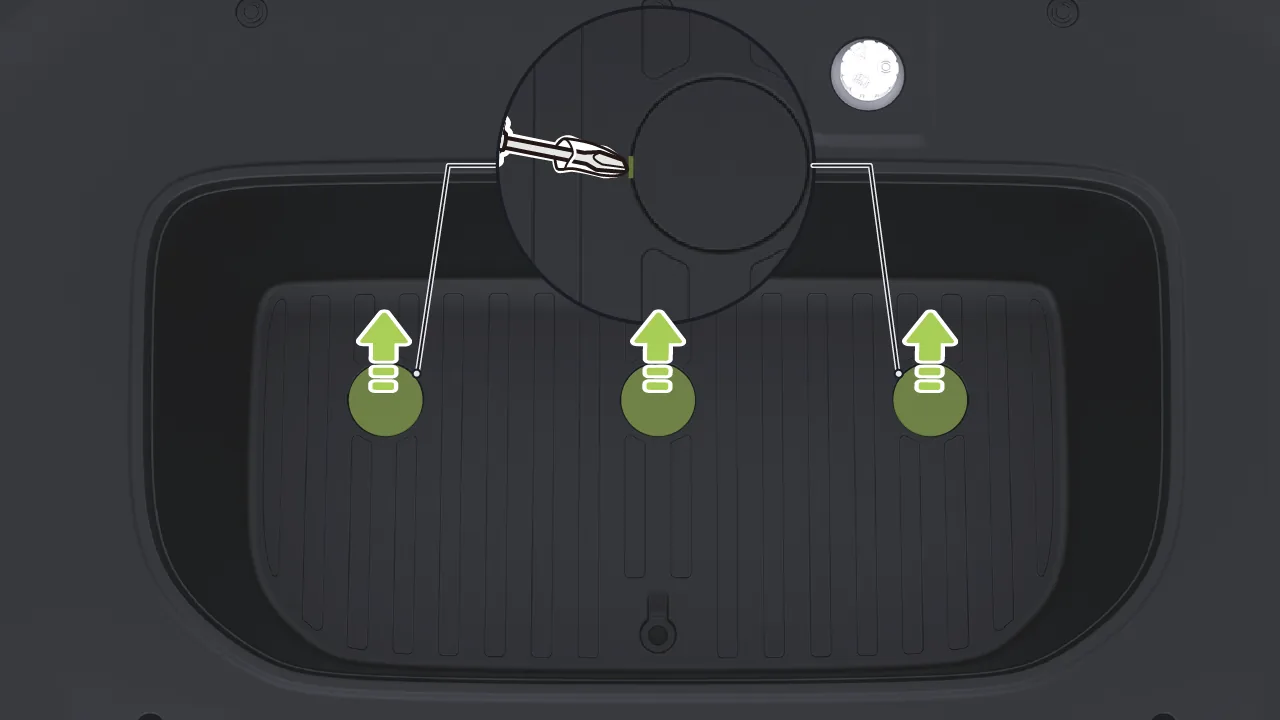
Use a suitable tool to remove the screw plug cover, clean out any accumulated liquid inside the screw plug cover and wipe it dry, then install the screw plug cover. Keep the Frunk storage compartment dry to avoid causing odors or mold growth.
Tips The Frunk is not a sealed water tank. During prolonged water storage, the water level may slowly decrease. This is normal.
The Frunk may also be used to temporarily store fresh items such as live fish. However, due to factors such as a drop in water level, high ambient temperatures in summer, and road vibrations, the allowable storage duration is limited. Prolonged storage may result in damage or spoilage of these items.
Caution To prevent damage to the Frunk, do not place items exceeding 25 kg in it.
When loading items into the Frunk, distribute the weight as evenly as possible.
Keep liquids properly sealed when stored. Do not store unsealed liquids, as leaks could damage the vehicle. If leakage occurs, promptly clean the storage compartment and the inside of the screw plug cap to remove any accumulated liquid.
Before closing the hood, check the height of items in the Frunk to prevent them from being pinched or damaged and to ensure the hood latches fully.
Before opening the Frunk, ensure there are no obstructions around the hood (such as pedestrians or objects). Otherwise, vehicle damage or personal injury may occur.
Warning Do not store flammable, explosive, and heavy items in the front spare box when the temperature is high.
When the doors are unlocked, press the exterior trunk switch to open/close the trunk, or to stop the trunk while it is opening/closing.
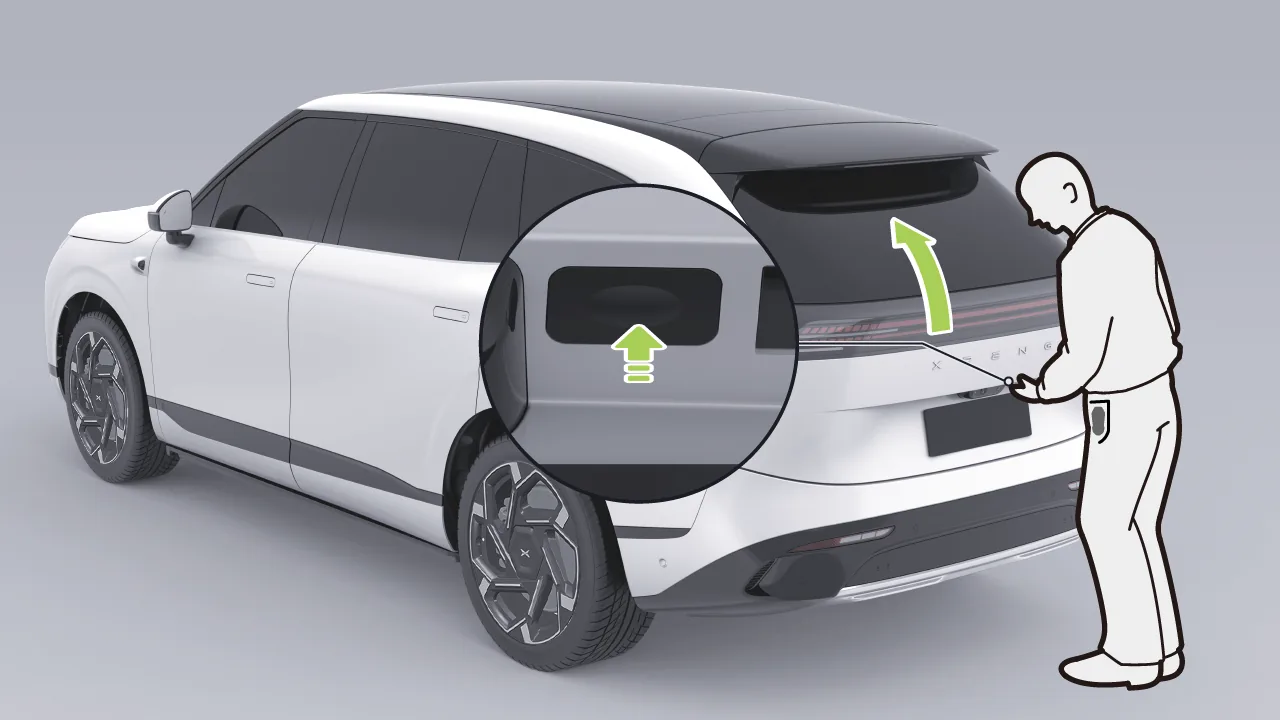
When the vehicle is locked, carry the key near the trunk and press the external trunk switch to open the trunk.
Tips When any door, the hood, or the trunk is opened, the center display and the head-up display (HUD) show 'The vehicle door is not closed.'
Tips When the trunk is opened, the trunk illumination lamp and the position lamps at the rear bumper turn on, and the turn signals flash twice.
Warning Do not open or close the trunk when people or obstacles are within the trunk’s travel path.
Do not place any part of your body within the trunk’s path of motion while it is opening or closing. Personal injury may result.
Do not drive with the trunk lid not properly latched. It may open suddenly, causing items to fall or a crash.
Do not allow children to play in the trunk or operate the trunk while the vehicle is in motion.
Do not open the trunk when there is a heavy load on the trunk lid (e.g. snow or ice). Doing so may damage the vehicle or cause an accident.
No passengers in the trunk.
There are two control buttons in the vehicle, located on the tailgate and on the control panel on the right side of the trunk, respectively.
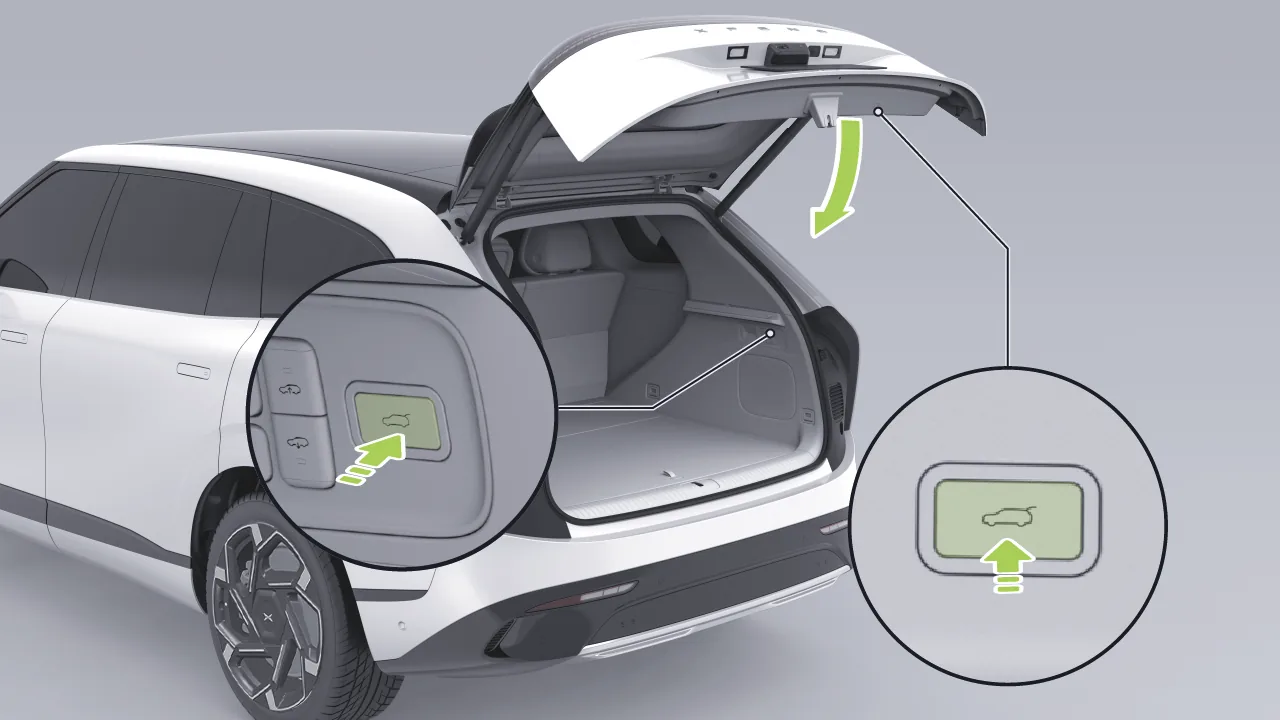
Press the interior trunk switch to close the trunk, or to stop the trunk while it is opening/closing.
Tips After the trunk is closed, the trunk light turns off.
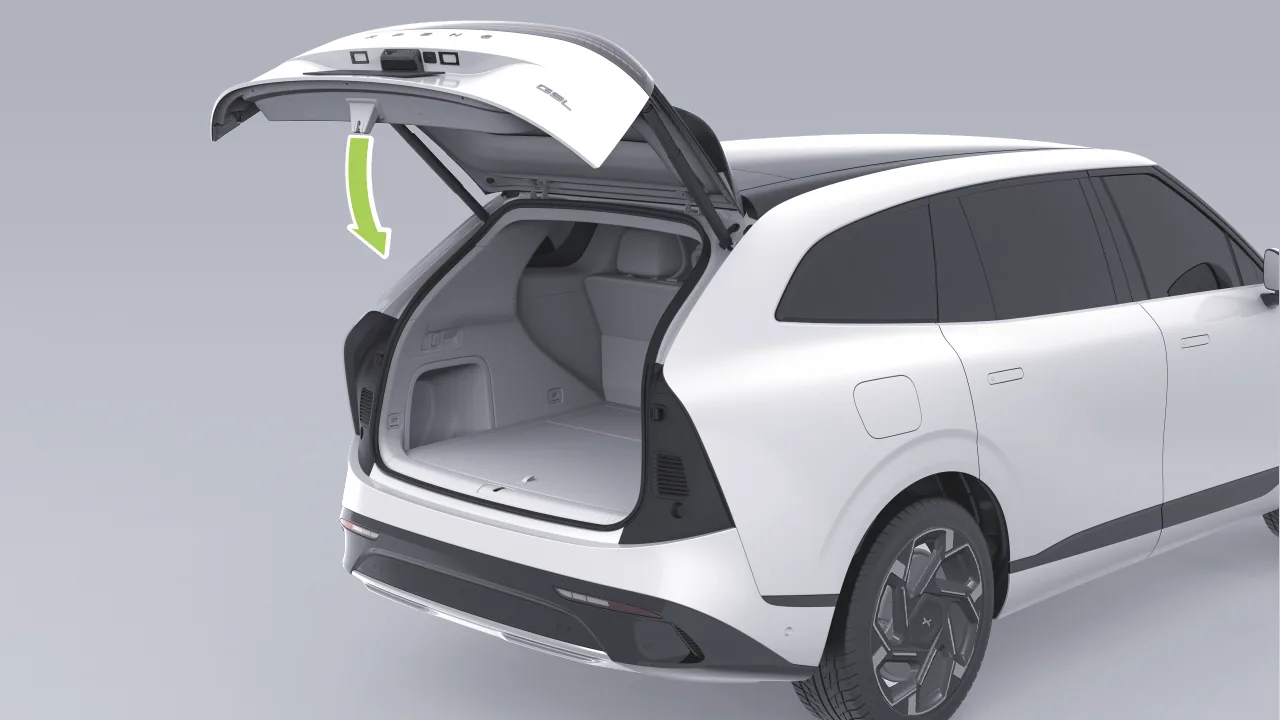
With the vehicle powered off, pull the trunk down by hand to the closed position.
When the vehicle is not powered off, manually pulling down to close the trunk will activate the trunk follow-up function, and the vehicle will then automatically close the trunk.
Caution Always use caution when opening the trunk in high winds. High winds may cause the trunk to open beyond its normal range, resulting in deformation.
If the trunk is frozen shut or covered with ice or snow, do not force it open. Turn on the heater and wait for the interior temperature to rise before opening the trunk.
In an emergency, if you need to manually open or close the trunk, keep the trunk moving slowly and at a constant speed. Do not apply sudden force to accelerate the trunk’s opening or closing.
Do not apply excessive force to reverse the trunk’s movement during Open Trunk or Close Trunk; otherwise, personal injury or damage to the trunk may result.
Exercise extra caution when manually closing the trunk to prevent pinch injuries.
Do not install or affix any decorative items to the trunk lid struts.
Do not pull the trunk sideways forcefully. Doing so may bend or deform the support struts.
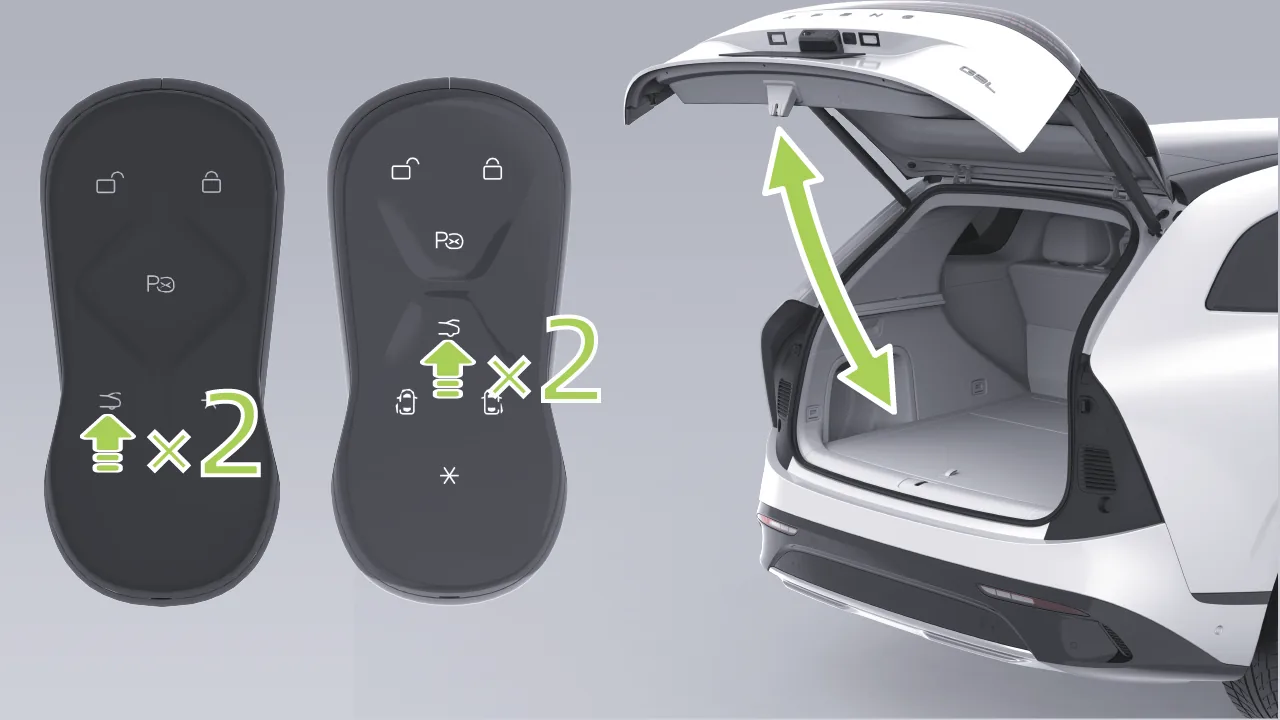
When the vehicle is in P gear, double-press the trunk button on the remote key to open/close the trunk, or pause the trunk while it is opening/closing.
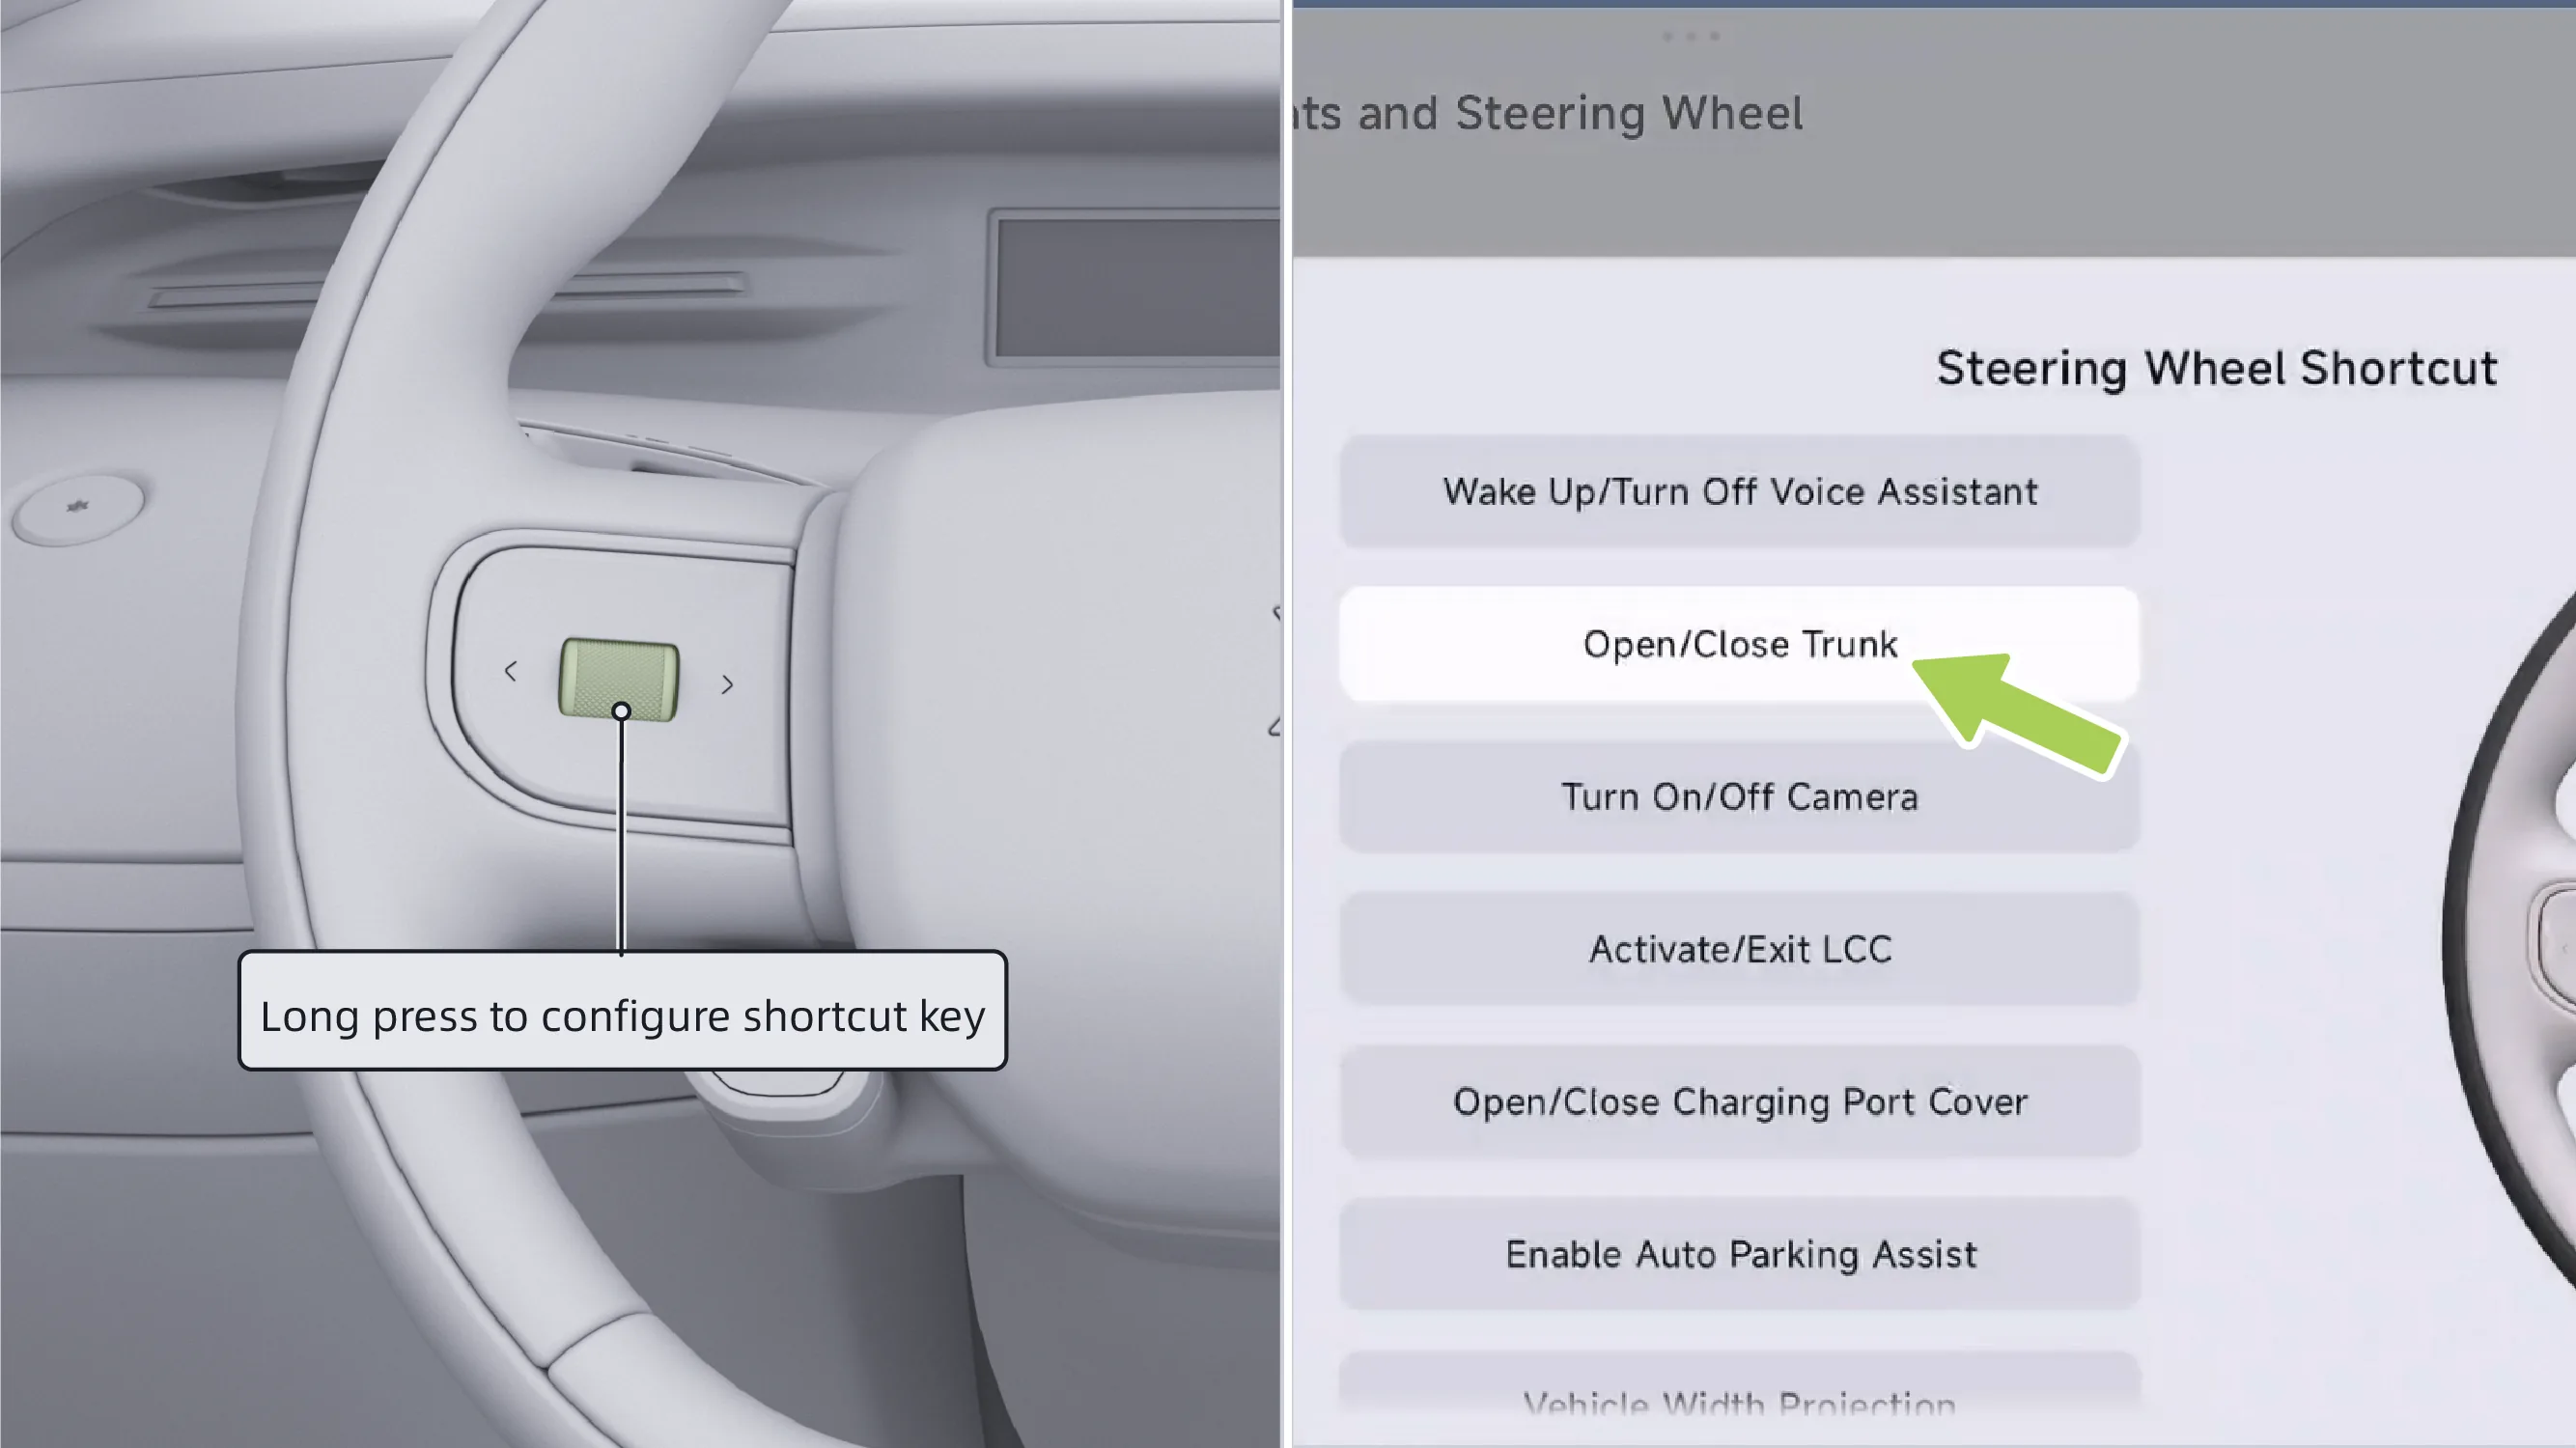
When the steering wheel shortcut button has been set to When enabled, you can open/close the trunk using the steering wheel shortcut button.
On the central control screen, the trunk can be opened/closed by any of the following methods:
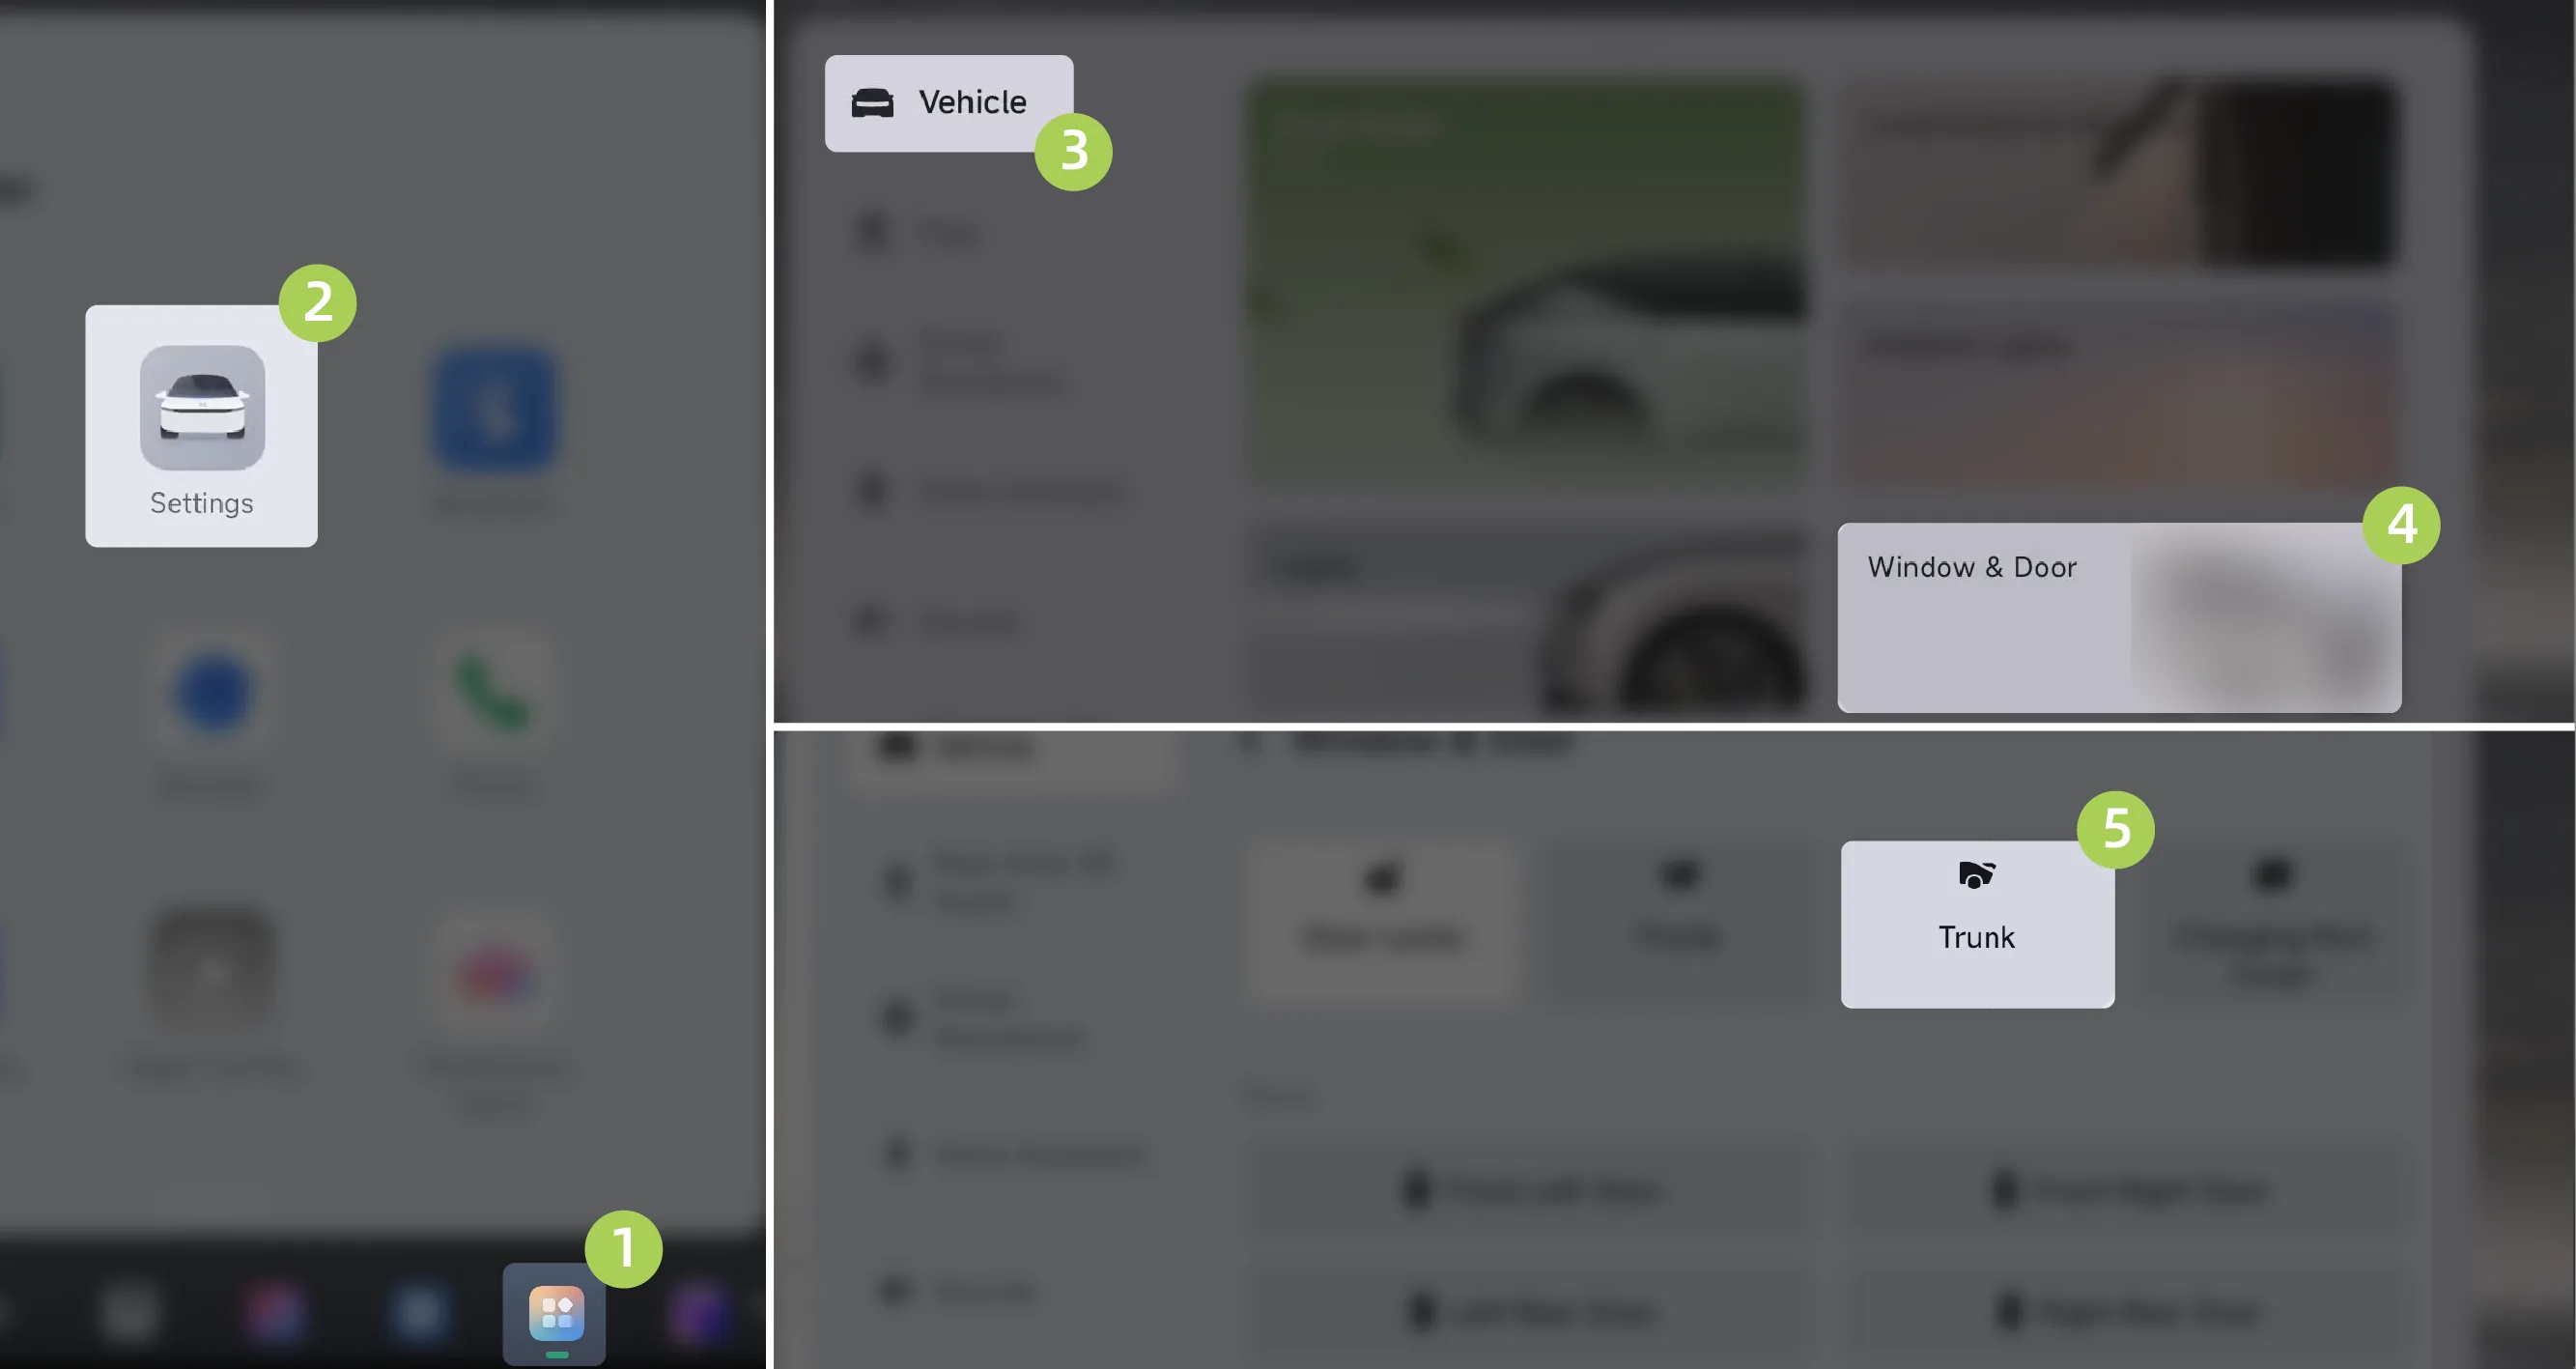
On the center control screen “ →Settings→Vehicle→Window&Door”Interface, tap TrunkCard: opens/closes the trunk. Tap again while it is in motion to pause opening/closing.
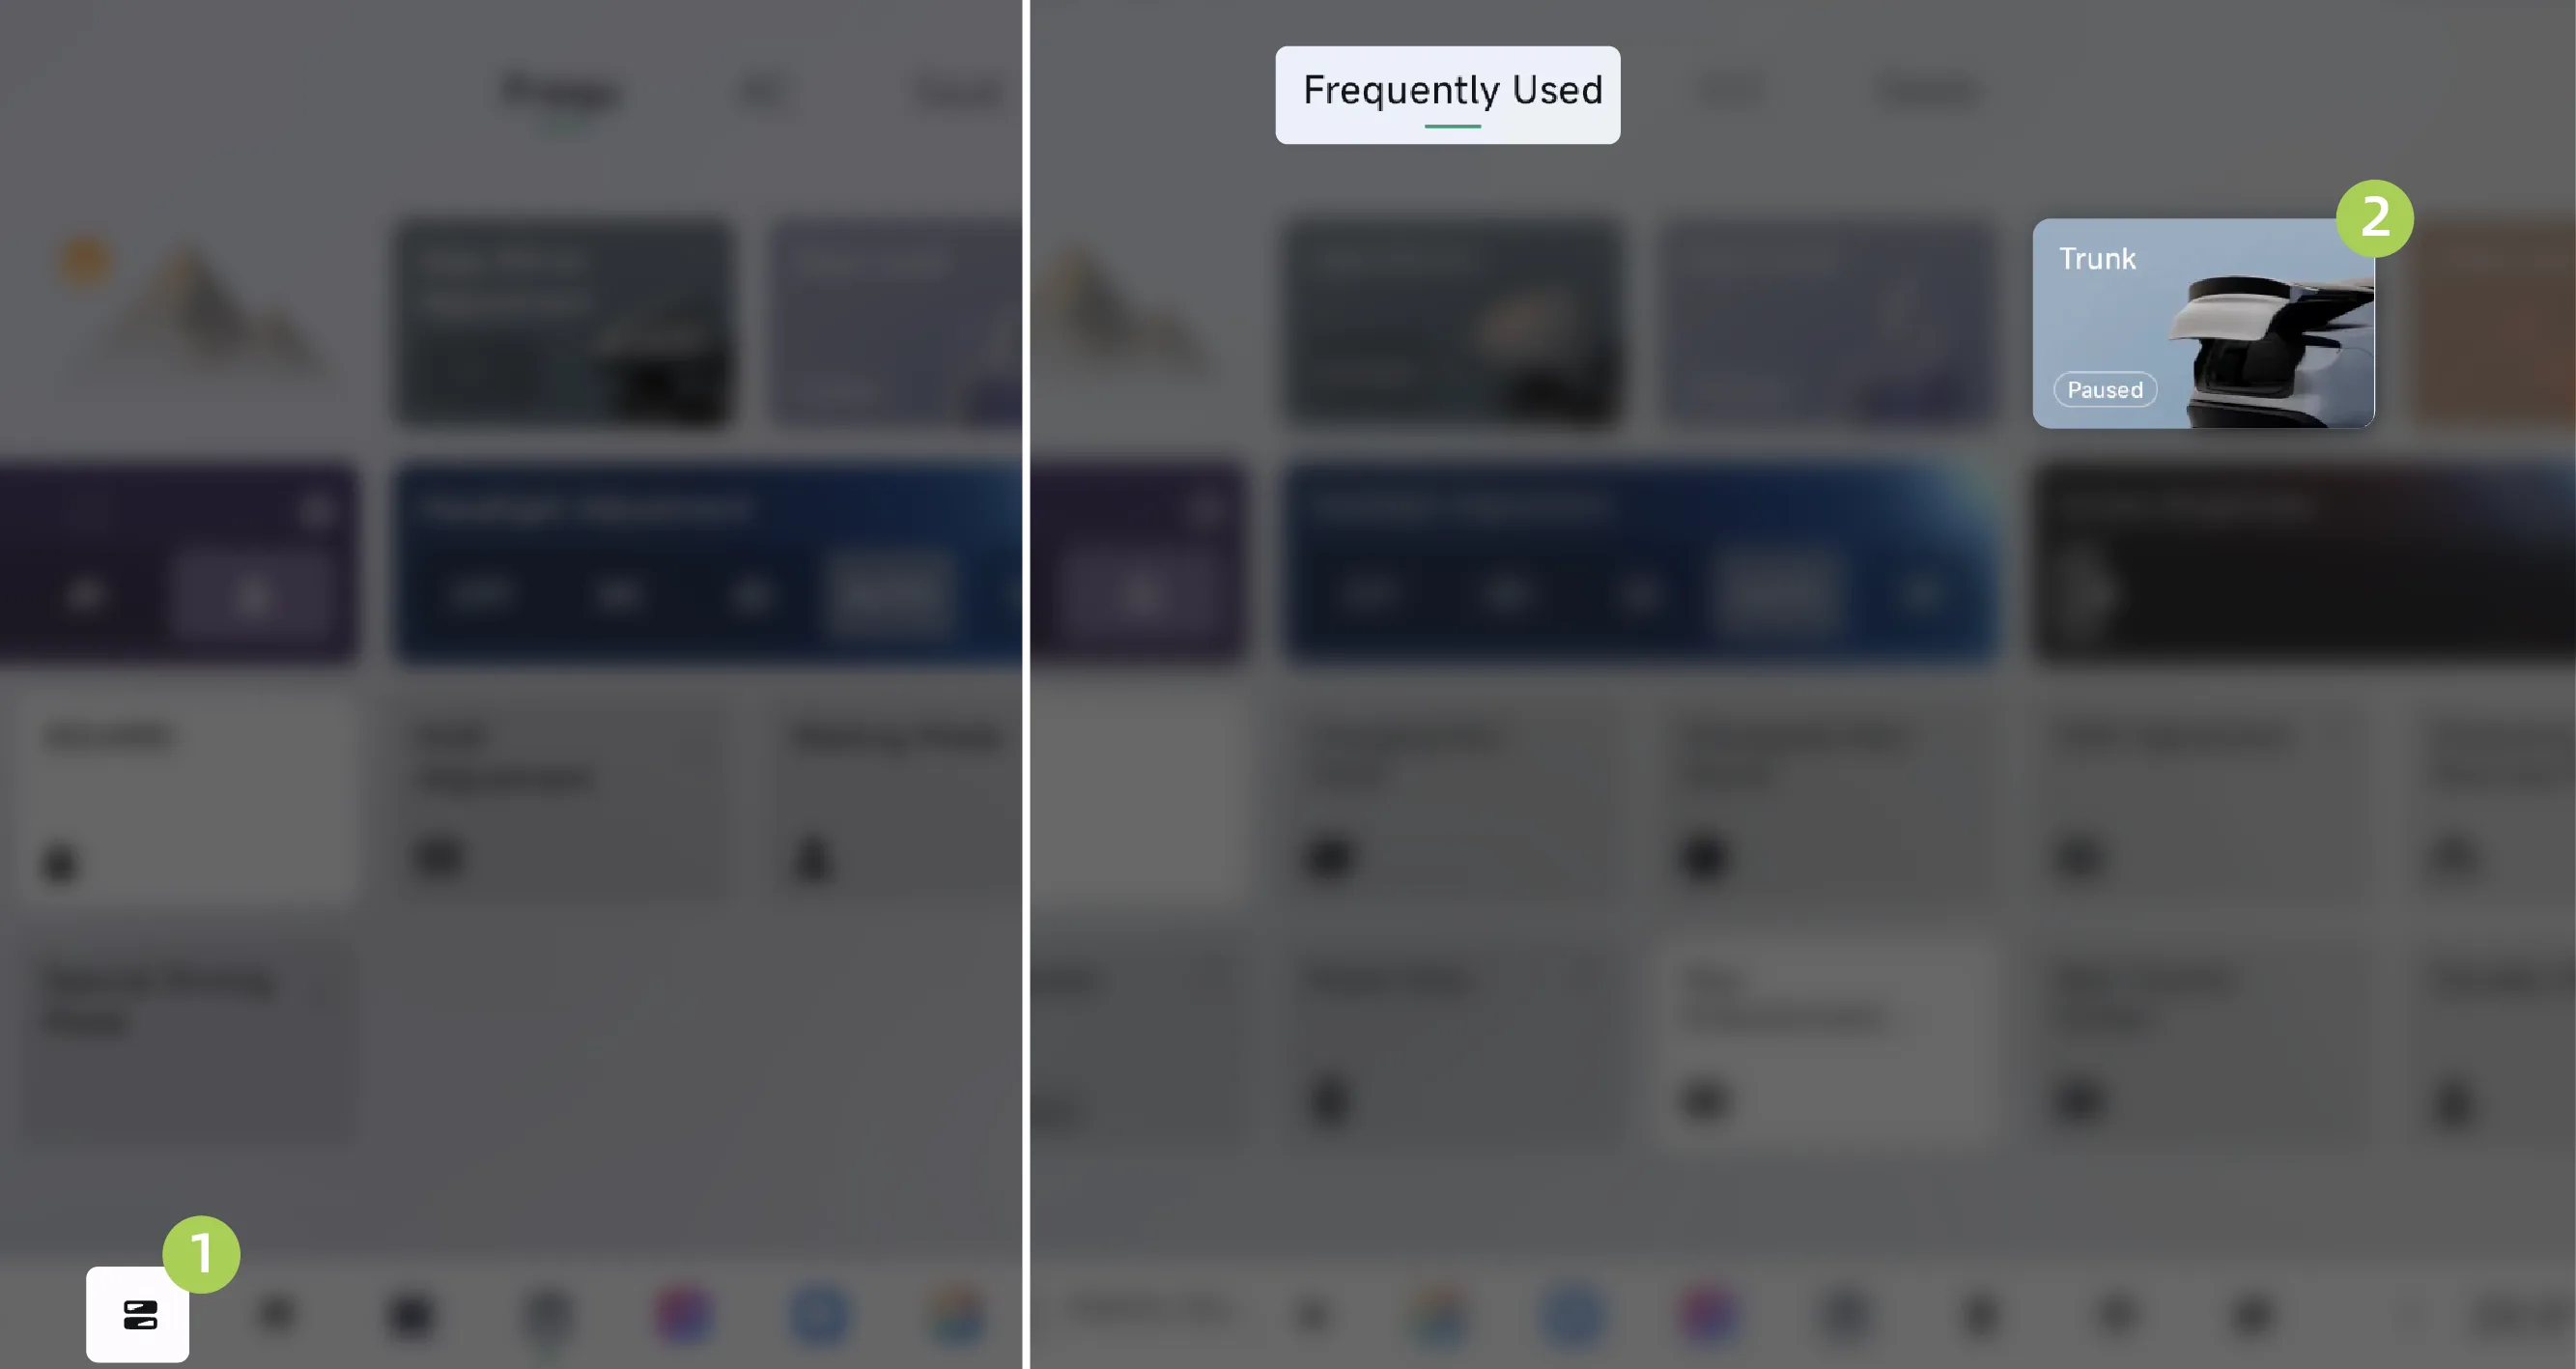
Tap on the central control screen. “ ”Enter the Control Center interface and tap Card: can open/close the trunk; click again during movement to pause opening/closing.
On the SR screen of the central control display, tap the trunk icon below the 3D vehicle model, or tap the hotspot icon on the trunk area of the 3D vehicle model, to open/close the trunk.
Tips The hotspot icons on the 3D vehicle model are hidden by default. You need to tap the 3D vehicle model to display them.
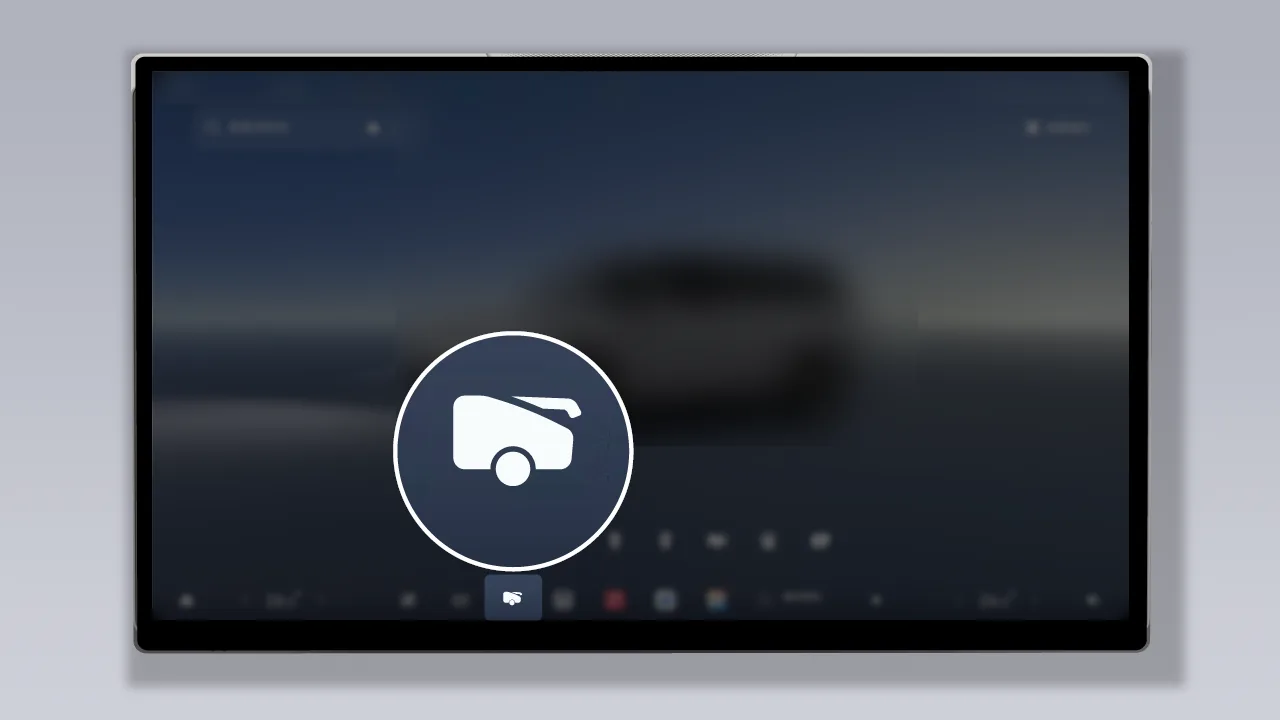
Tap the taskbar at the bottom of the central control screen  Trunk icon, used to open/close the trunk. Tap again during movement to pause opening/closing (for information about custom bottom taskbar, please refer to the custom bottom taskbar section).
Tips When opening/closing the trunk, if there is an obstacle blocking it, the trunk will move back a certain distance.
Warning When opening/closing the trunk, ensure that there are no people or other obstacles within the opening/closing range of the trunk, so as to prevent personal injury or vehicle damage.
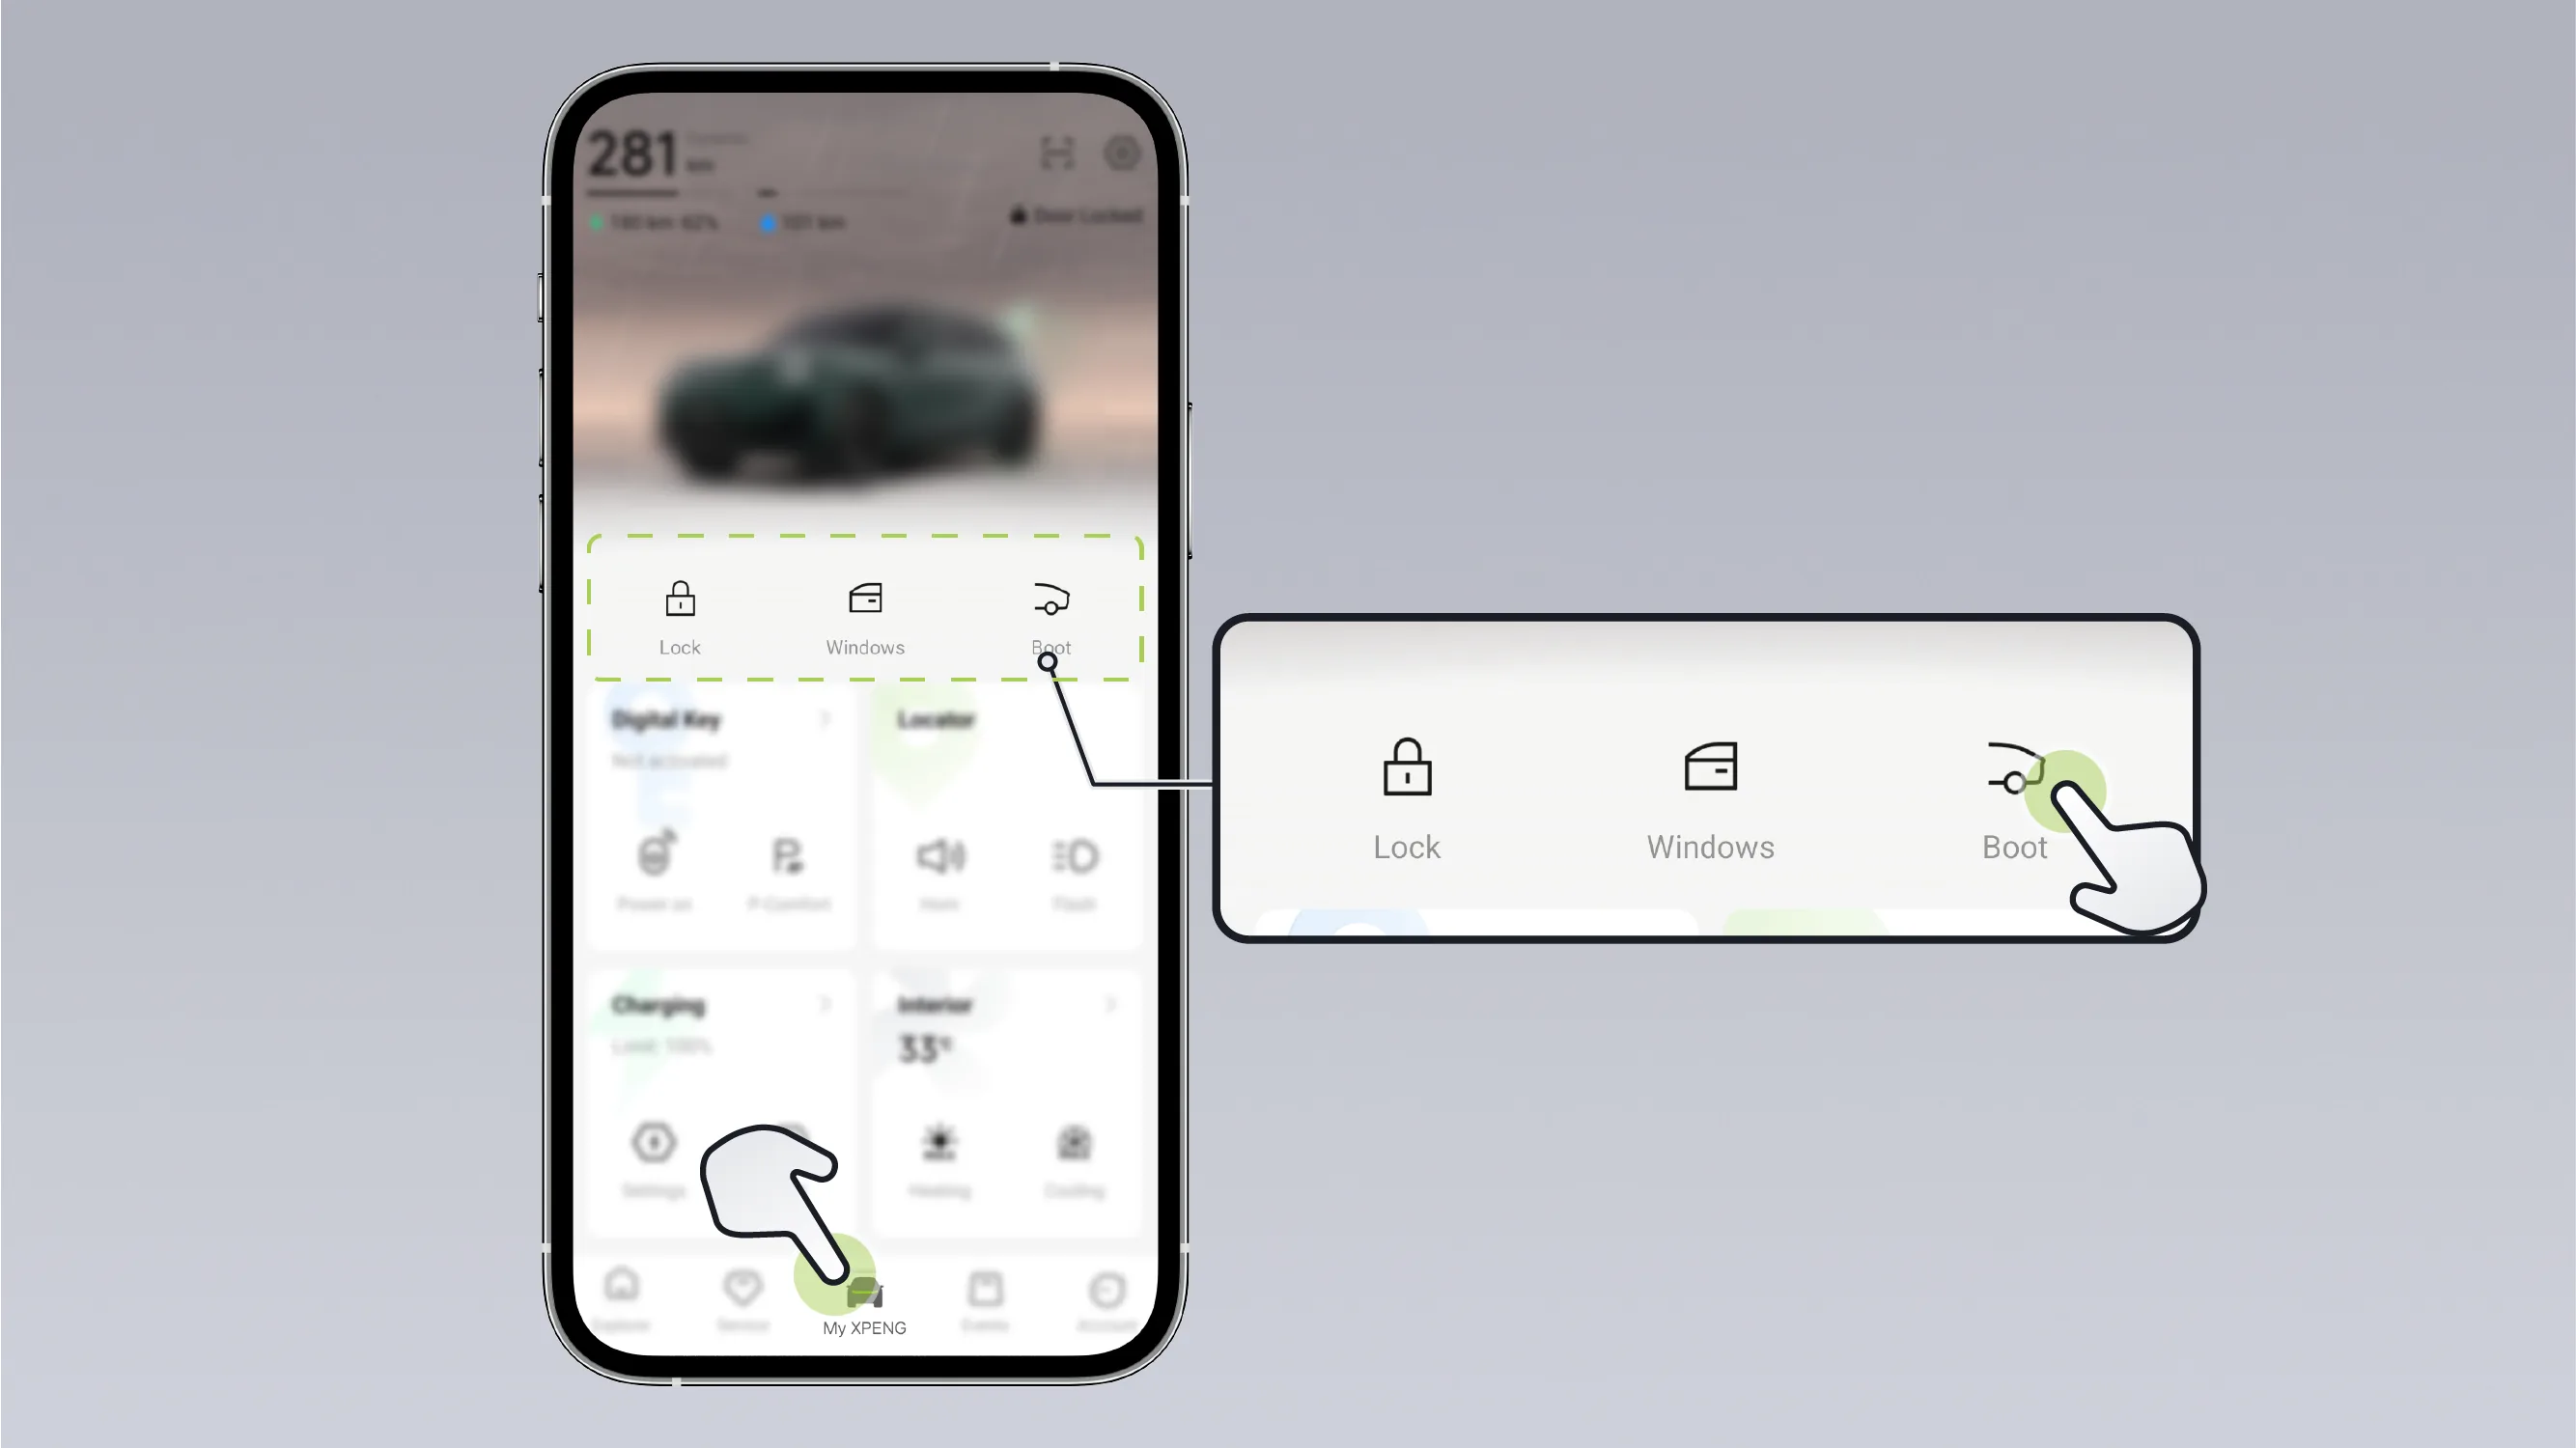
In the mobile app Interface for opening/closing the trunk.
Tips You can also open/close the trunk via voice commands.
When opening/closing the trunk, if there is an obstruction, the trunk will reverse by a certain distance.
If the trunk is opened/closed frequently within a short period of time, thermal protection will be activated and the trunk opening/closing function will be temporarily disabled. You must wait for the system to cool down before it can return to normal operation.
Warning When opening/closing the boot, ensure that there are no persons or other obstructions within the open/closed boot area to prevent personal injury or vehicle damage.
When the lighting is sufficient, the vehicle is in P gear, in the unlocked state, and no one is seated in the driver's seat, if your hands are inconvenient for operation, you can open the trunk by foot-kick sensing.
On the center control screen “ →Settings→vehicle→Doors and Windows”On the interface, you can enable/disable the kick-sensing rear hatch opening function.
After enabling the kick-sensing trunk opening function, you can open the trunk by following the steps below:
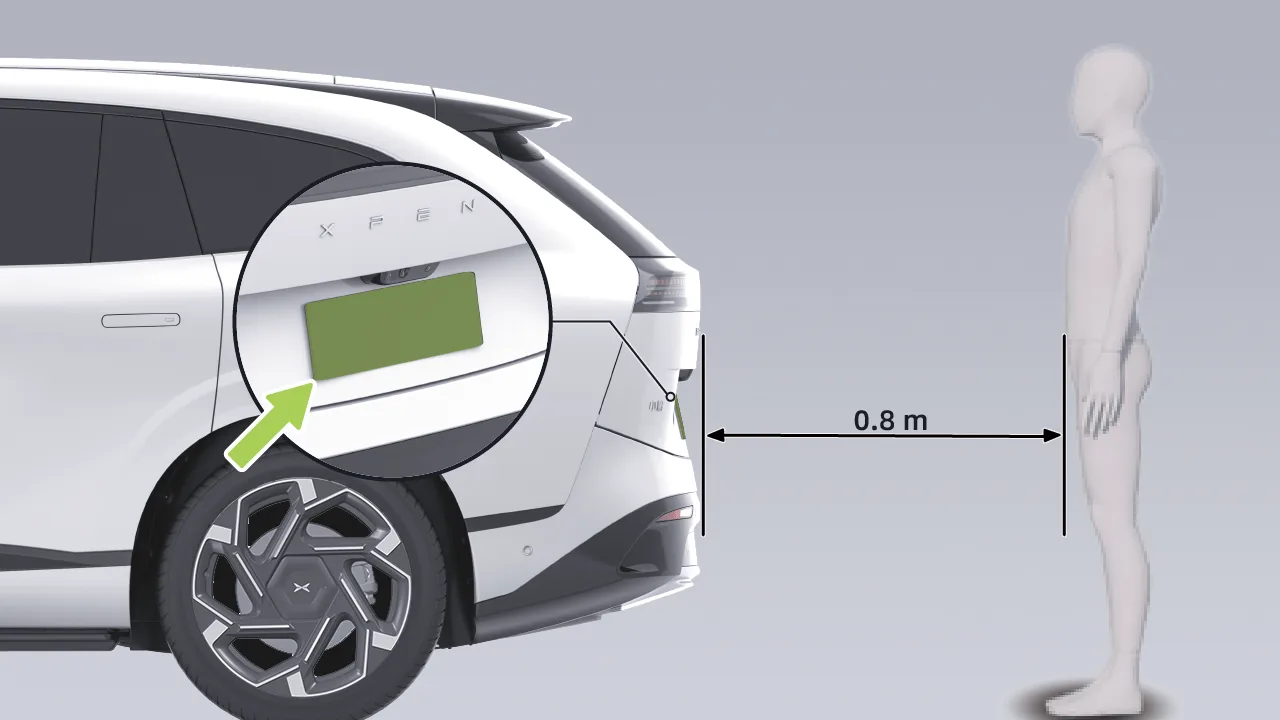
You need to face the rear of the vehicle, stand approximately 0.8 m from the trunk, directly facing the license plate and remain still for 1 second, ensure that the foot movement is within the visible range of the vehicle's rear surround-view camera, and then perform the kicking motion;
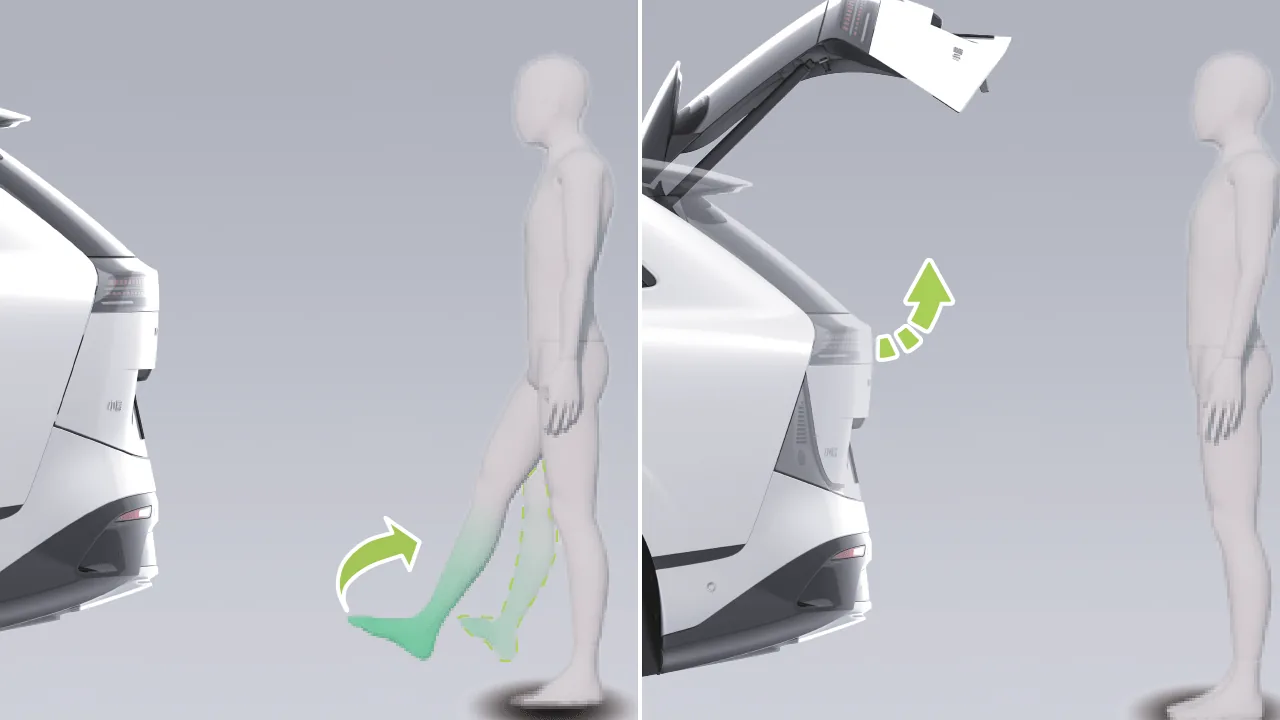
Lift one foot forward at a constant speed, then draw a circle outward and naturally return the foot to its original position, and the trunk can be opened.
The following conditions may cause the function not to be activated:
The kicking motion is incorrect, non-standard, or the kicking motion duration is too long.
If the kicking motion is too large and the toe kicks to the area beneath the vehicle, it may interfere with the system's recognition of the kicking motion.
When wearing garments such as wide-leg pants or over-the-knee long skirts, the loose hem may interfere with the system's recognition of the kicking motion.
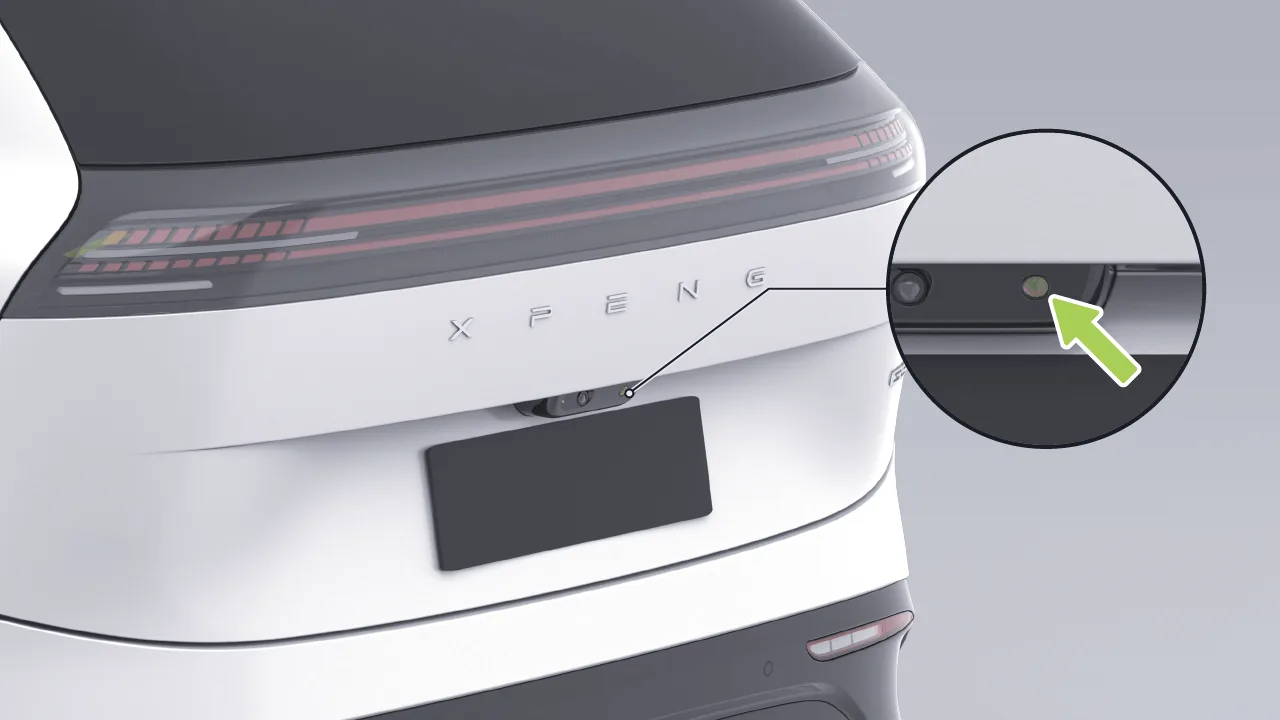
The ambient light is too dim, or the camera is dirty/obstructed. The rear Surround View Monocular Camera is located above the rear license plate panel. Do not obstruct or cover the camera. Keep the camera clean. If there is any dirt, clean it promptly.
Heavy rain and other severe weather.
If the kick-to-open trunk function is not activated due to the above conditions, wait a few seconds and retry using the correct kicking motion, retry after cleaning the camera, or use another method to open the trunk.
Tips For first-time use, it is recommended to try it in an open area to become familiar with the vehicle's response sensitivity and the movement range of the trunk.
Caution When performing the kicking motion, ensure that you are standing steadily on the ground. Otherwise, you may lose your balance, for example on icy surfaces.
When performing the kicking motion, do not touch the bumper.
In some situations, the sensor trunk function may be unintentionally triggered, thereby causing trunk movement. For example, when cleaning in the valid detection area or performing maintenance and repairs in the trunk area, an accidentally automatically opened trunk may injure people within the trunk movement range and cause damage to objects.
Before performing any maintenance and repair work on the vehicle, be sure to disable the kick-sensing tailgate opening function on the central control screen.
Before each car wash, be sure to disable the kick-sensing trunk opening function on the central control screen.
Using this function requires access to the vehicle's external camera permissions. It is triggered only in specific scenarios. The collected data is processed locally only and will not be stored or uploaded to the cloud, in order to protect your privacy and security.
The vehicle supports two methods for adjusting the trunk opening angle: the central control screen and the switch inside the trunk:
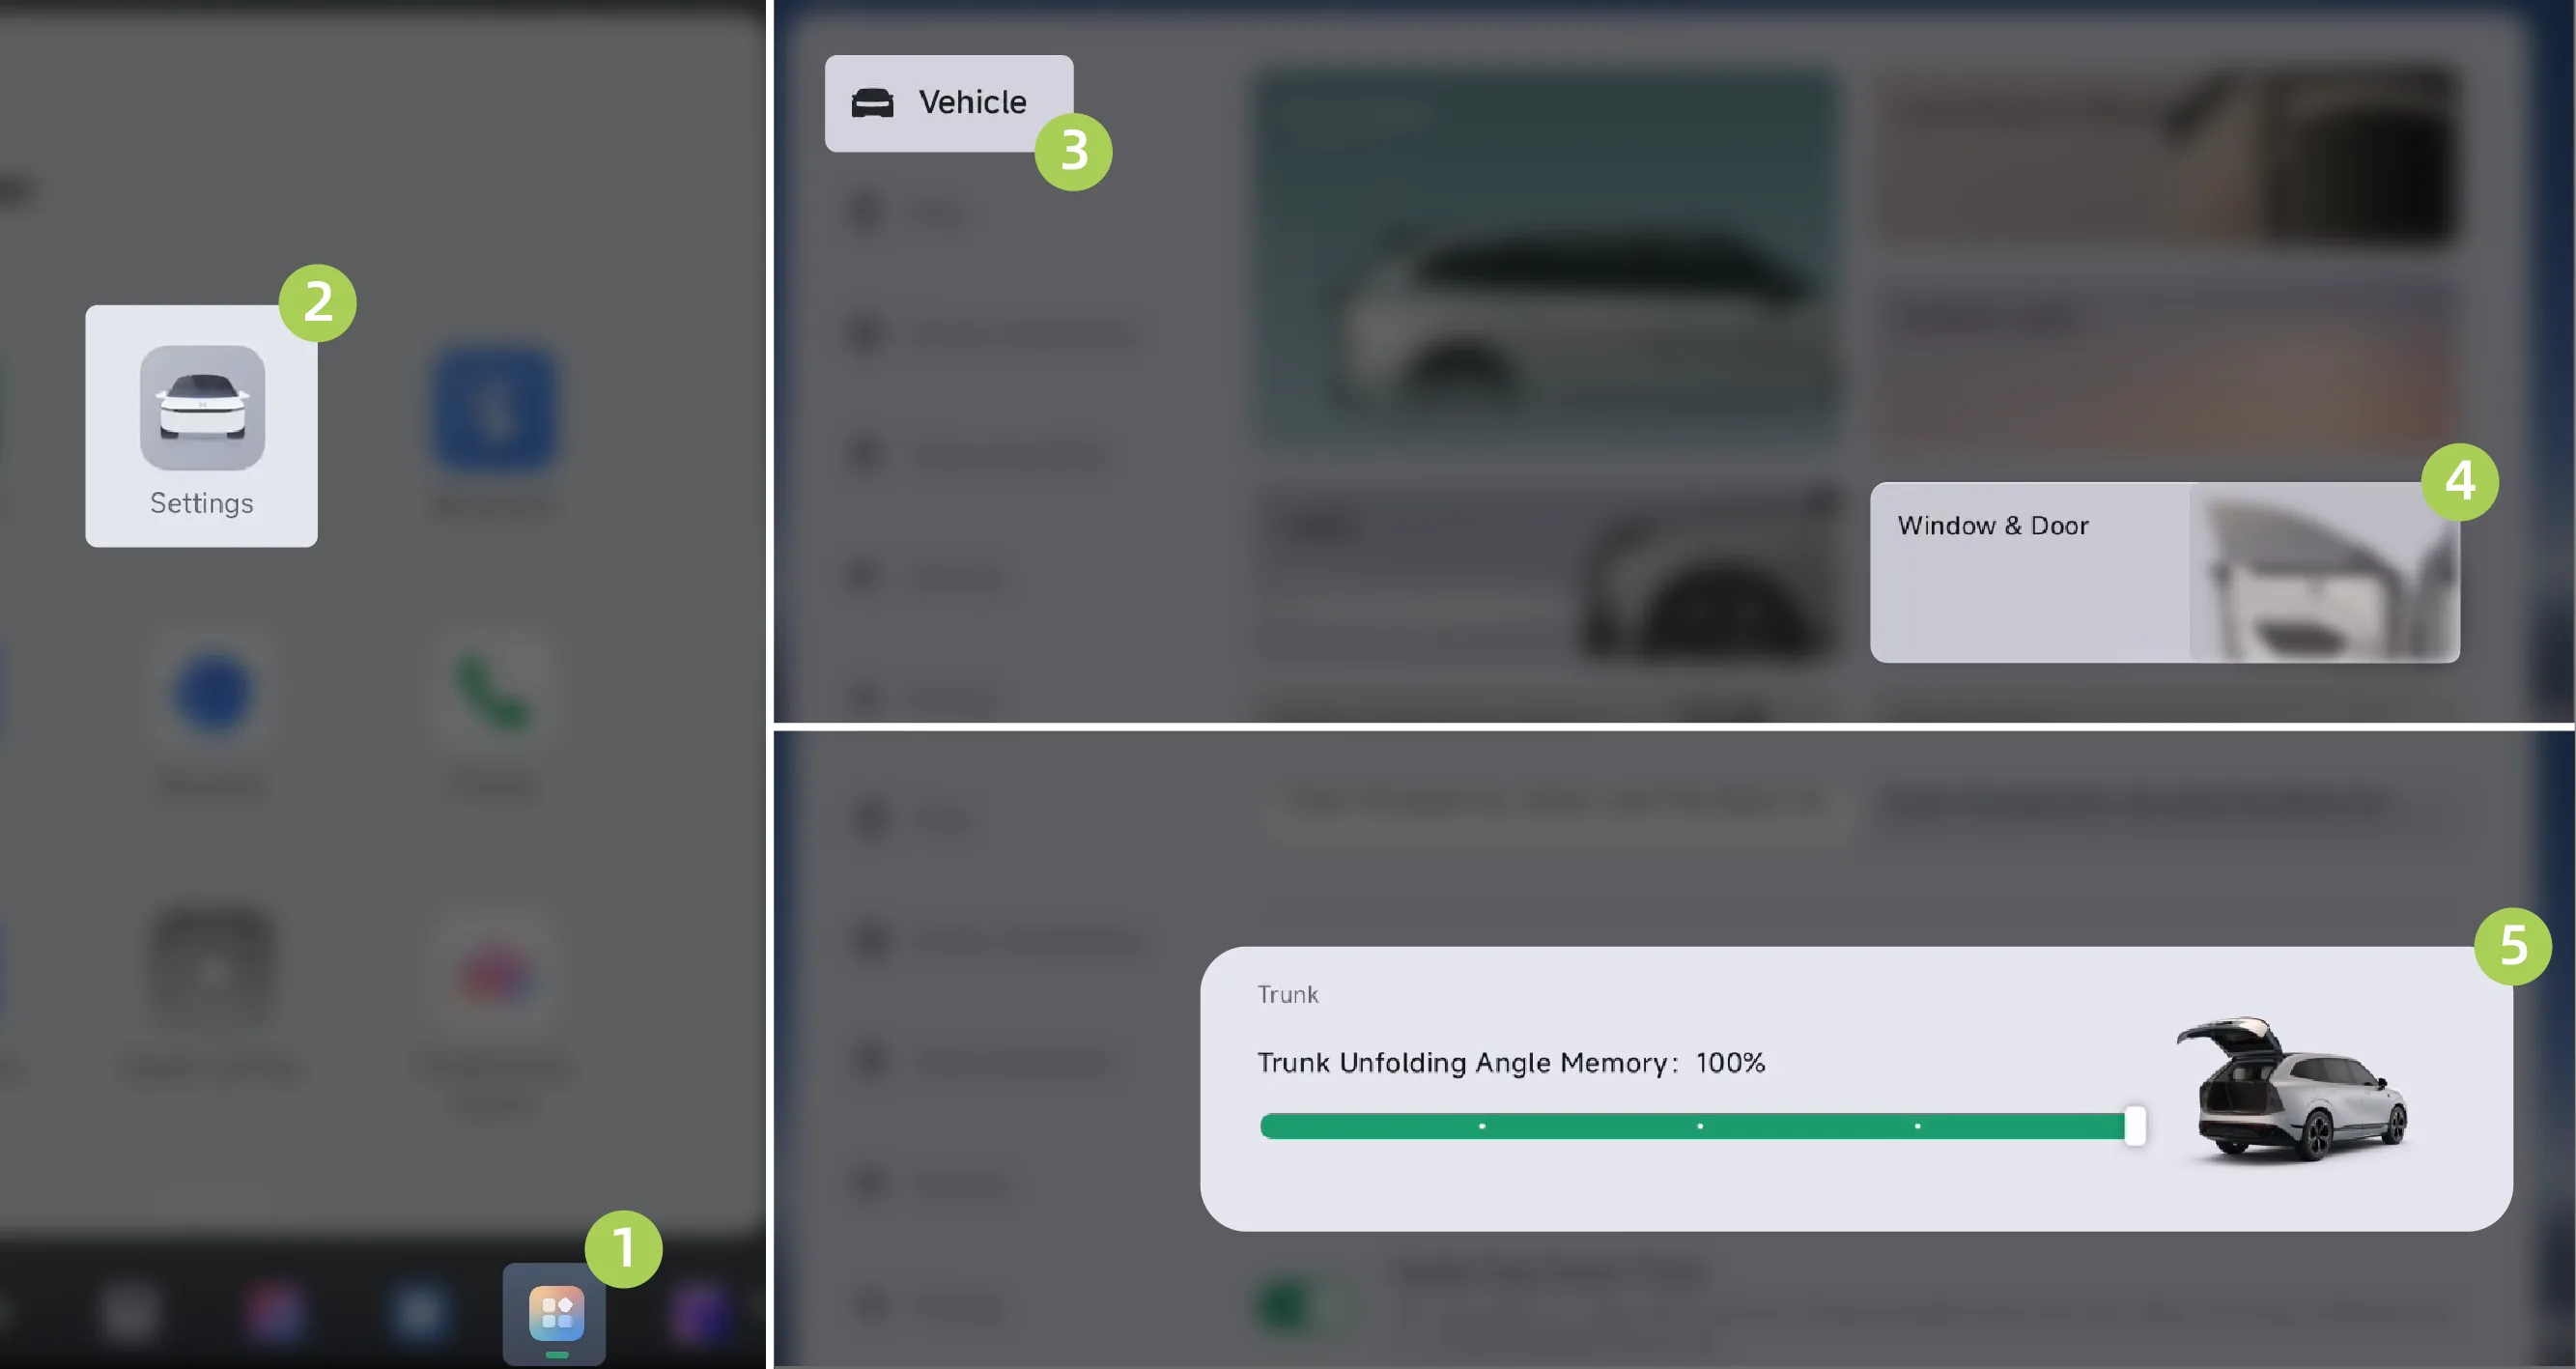
On the center control screen “ →Settings→vehicle→Doors and Windows”Interface, adjustable 。
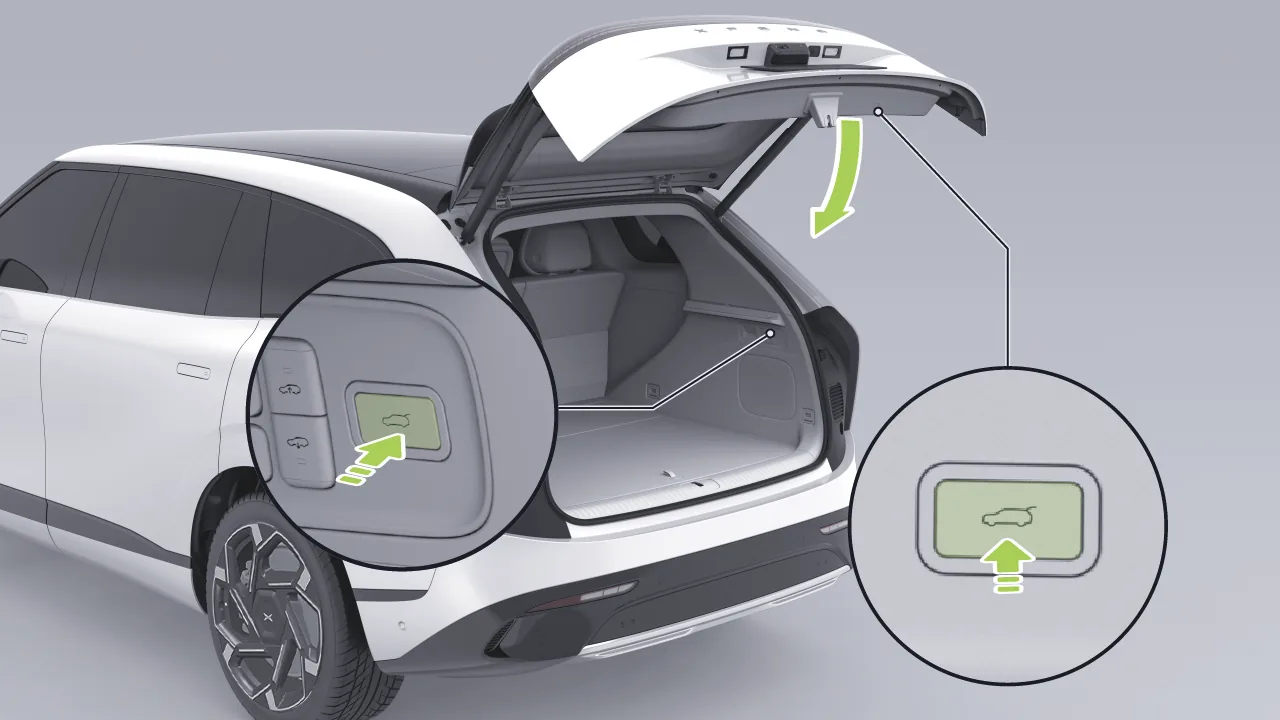
After opening the trunk, use the internal trunk switch to lower or raise the trunk to the desired angle.
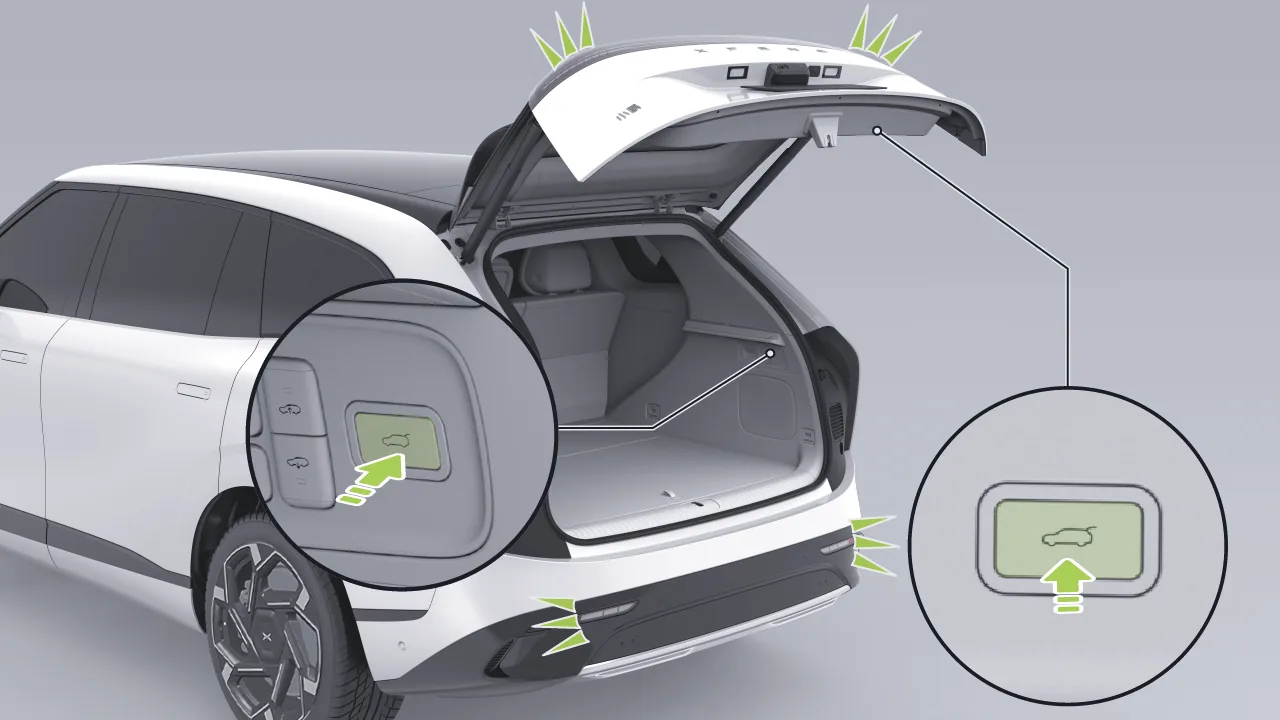
Press and hold the interior switch of the trunk until the flashing-light alert is seen, then the trunk opening angle setting is completed.
Tips When the switch is pressed and held, the trunk deployment angle will be set to the lowest value if the trunk deployment angle is below the minimum allowable setting.
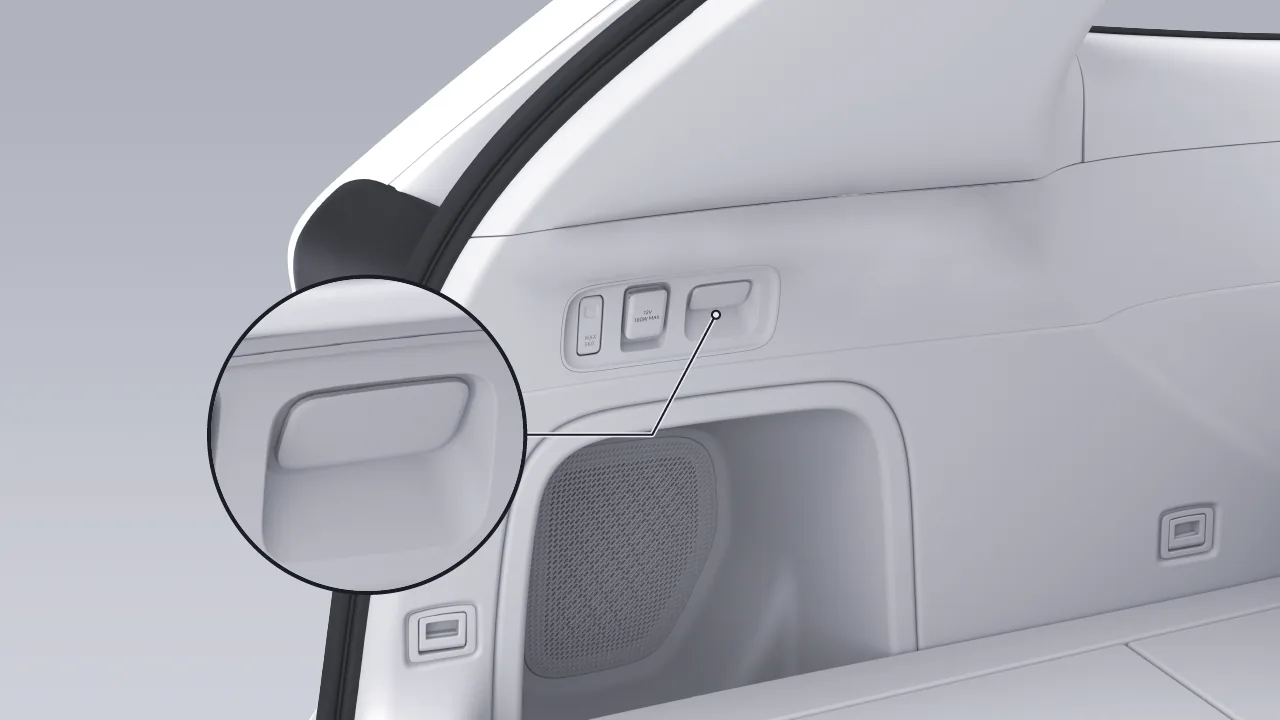
The trunk lamp is located on the left trim panel of the trunk. When the trunk is opened, the trunk lamp turns on automatically.
During the opening or closing process of the trunk, the Anti-pinch protection for trunk function is available. That is, if resistance is detected or a foreign object is trapped in the trunk during the opening or closing process, it will automatically stop moving and reverse for a certain distance to prevent injury caused by pinching.
Warning Do not use any part of your body to test the anti-pinch function.
Despite the presence of anti-pinch protection, there is still a risk of pinching injury. Always ensure that the movement area of the trunk is unobstructed; otherwise, in special cases (for example, if the obstacle is thin or soft), interruption of the movement process cannot be ensured.
The anti-pinch function may not operate before the trunk lid is about to fully close.
If the trunk cannot be opened, open the trunk by performing the following operations:
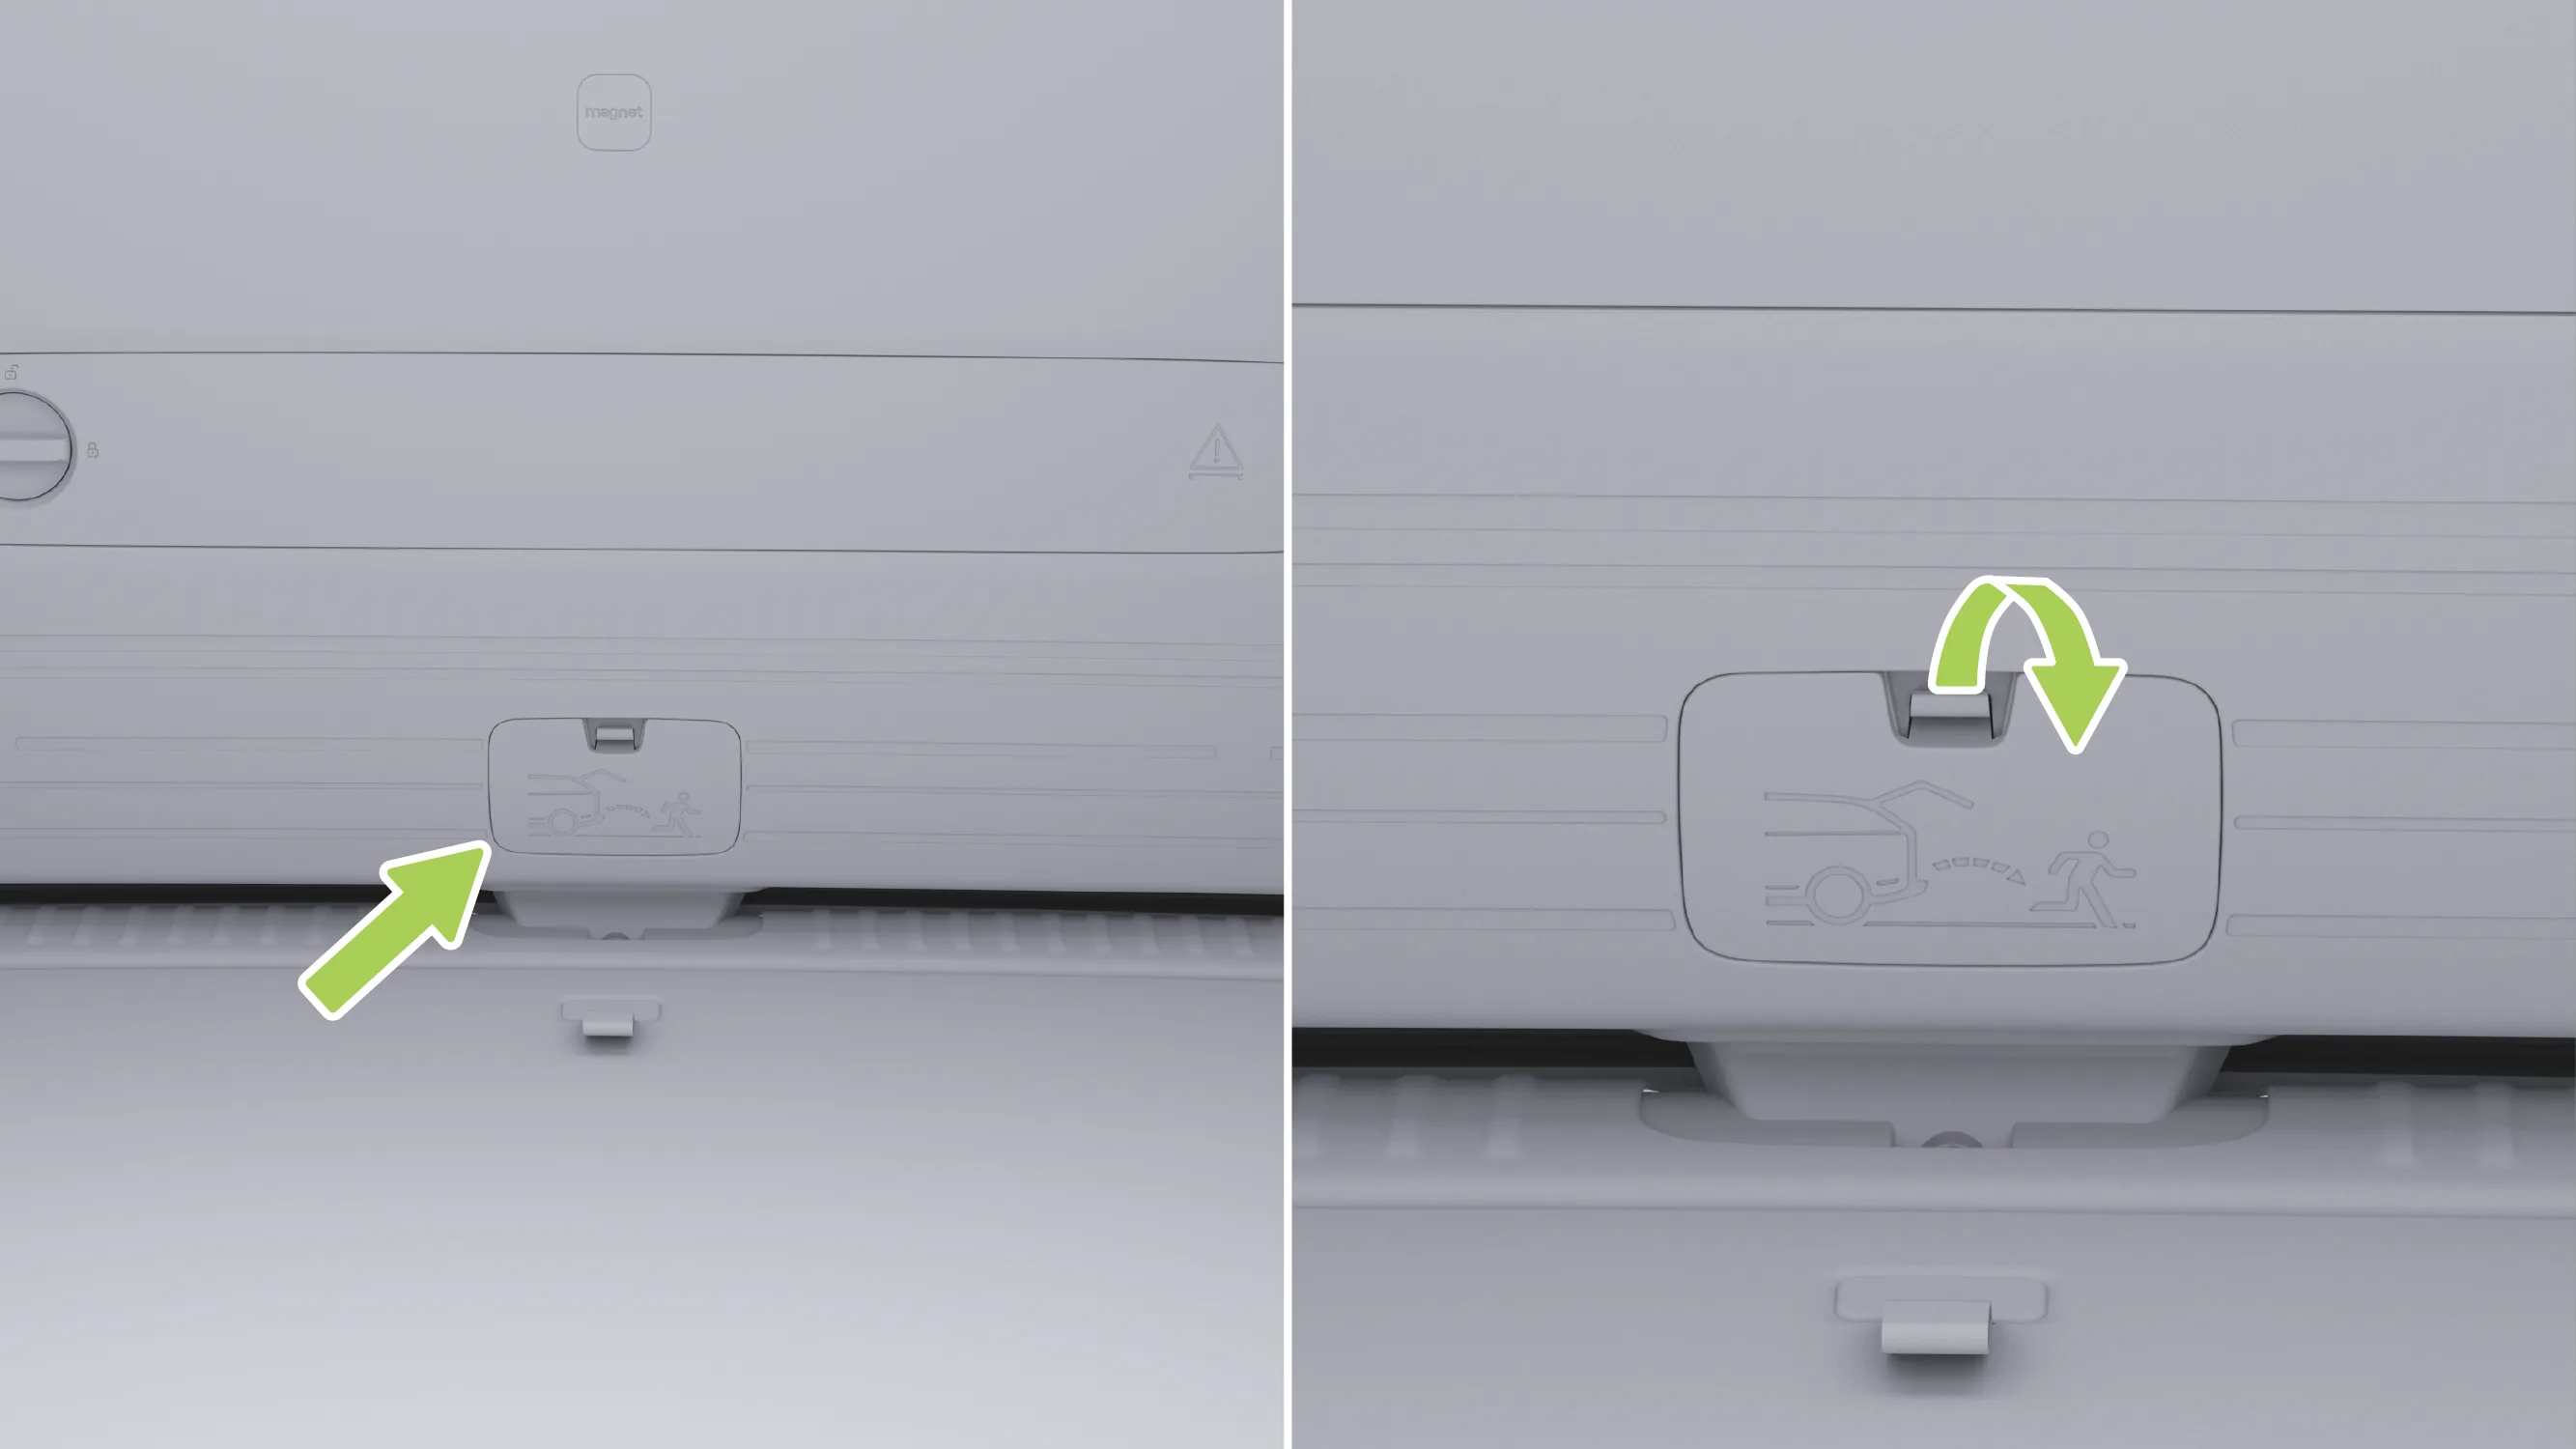
Open the trim cover on the emergency unlocking device.
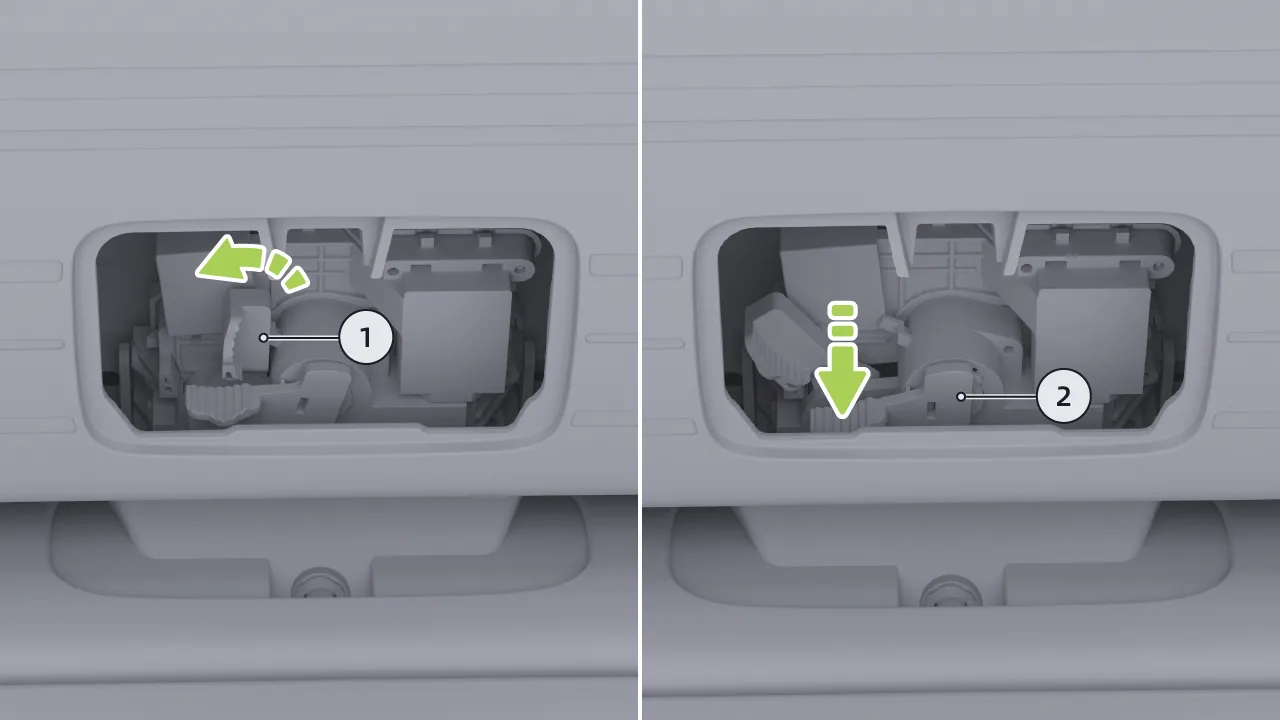
First move lever ① to the left and hold it, then press lever ② to unlock the trunk, and then push the trunk outward to open it in an emergency.
Tips After emergency opening, press the trunk downward to close the trunk.
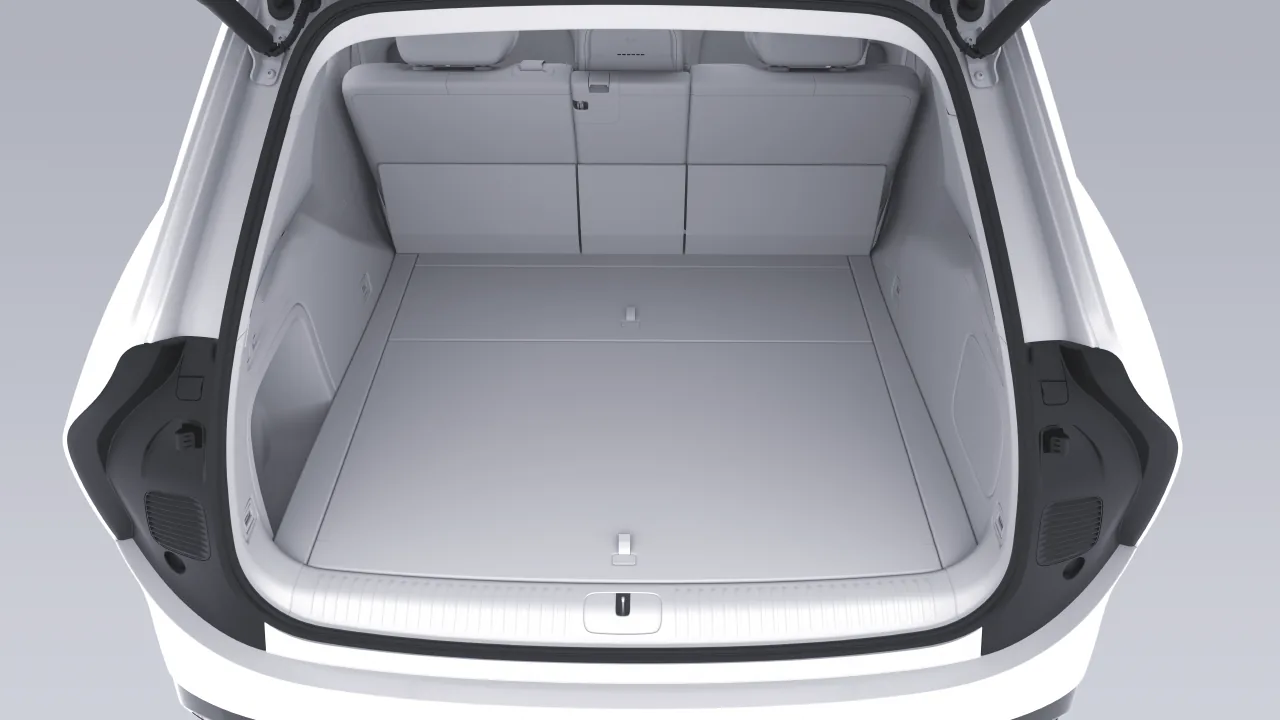
After opening the trunk, you can place luggage and cargo in the trunk storage space.
The trunk storage space includes front storage space and rear storage space, both divided into two levels: the above-cover storage space and the under-cover storage space, respectively.
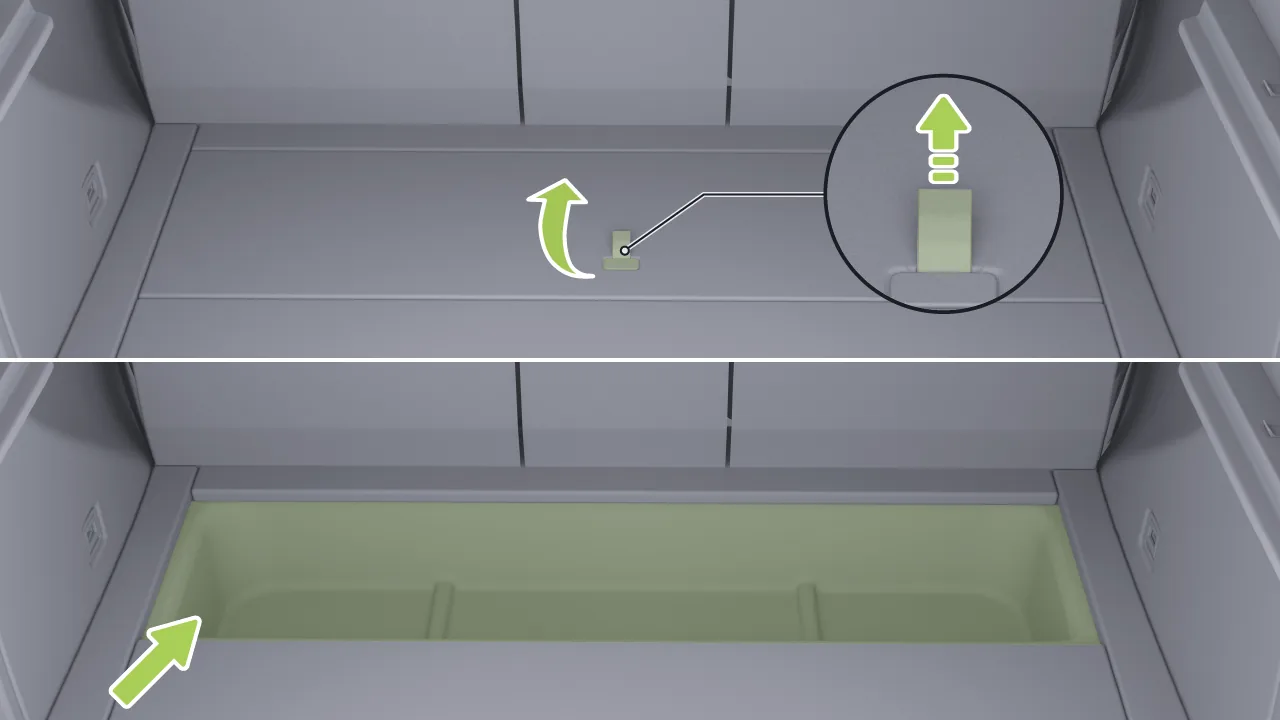
Pull the strap and remove the front cover panel to load items into the lower front storage compartment.
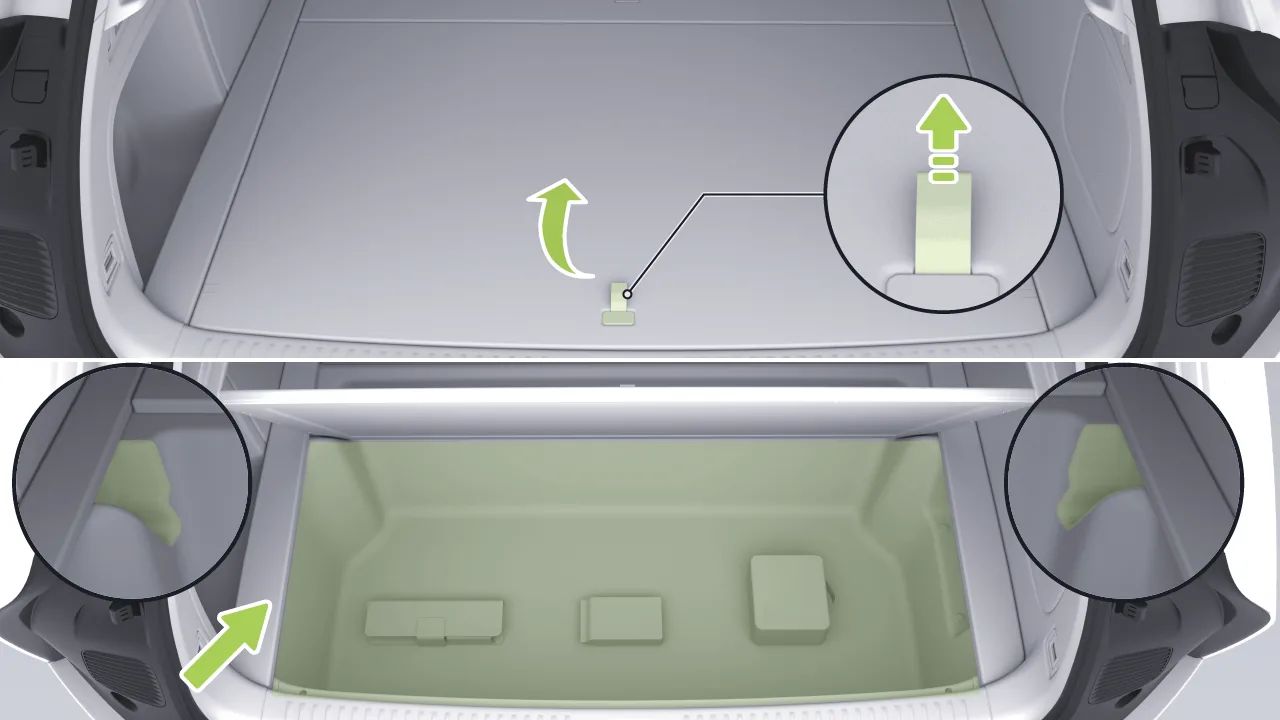
Pull the strap and lift the trunk rear cover panel, then place it in the retaining slot to load items into the lower rear storage space.
Caution Do not store fragile, flammable, explosive, etc. in the trunk to avoid fire, explosion, or damage.
Store liquid items with a tight seal to avoid damage to the vehicle due to fluid leaks. Clean up if leakage occurs.
Do not drive the vehicle with an overloaded vehicle to avoid excessive braking distances due to excessive inertia, which could result in an accident.
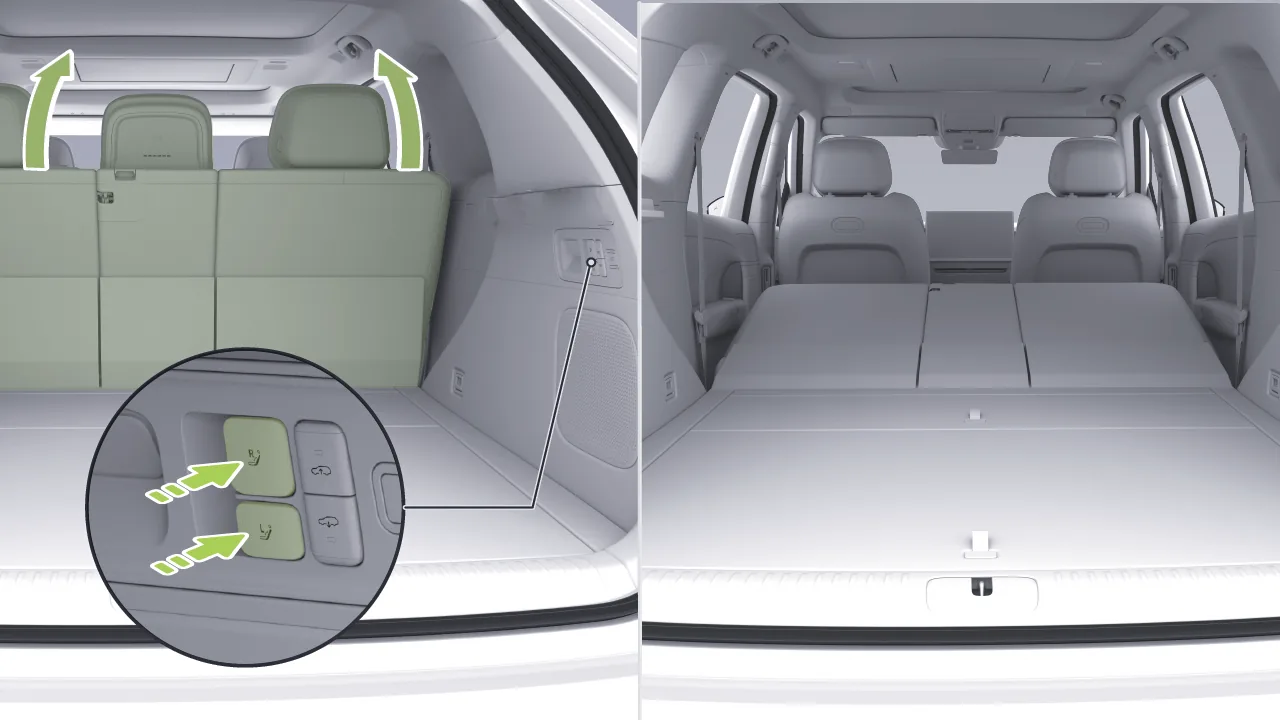
If greater storage is required, the trunk storage space can be expanded by folding the rear seat backrest (for information on the rear seat folding operation, please refer to Section).
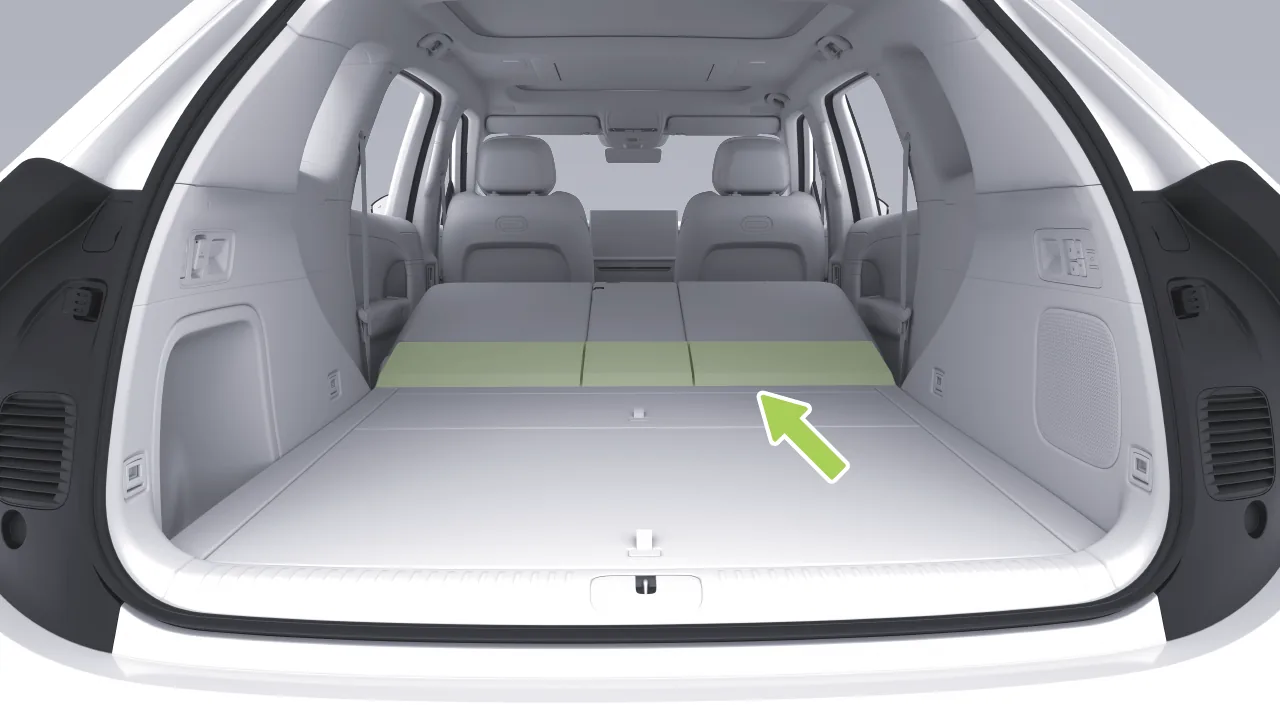
Before returning the rear seats from the folded position, ensure that the cargo cover is flat.
Caution One-touch folding requires certain conditions to be met, such as: the vehicle is in P gear, no one is seated in the rear seats, the seats have been initialized, the rear seat positions are appropriate, and the rear seat belts are all unfastened.
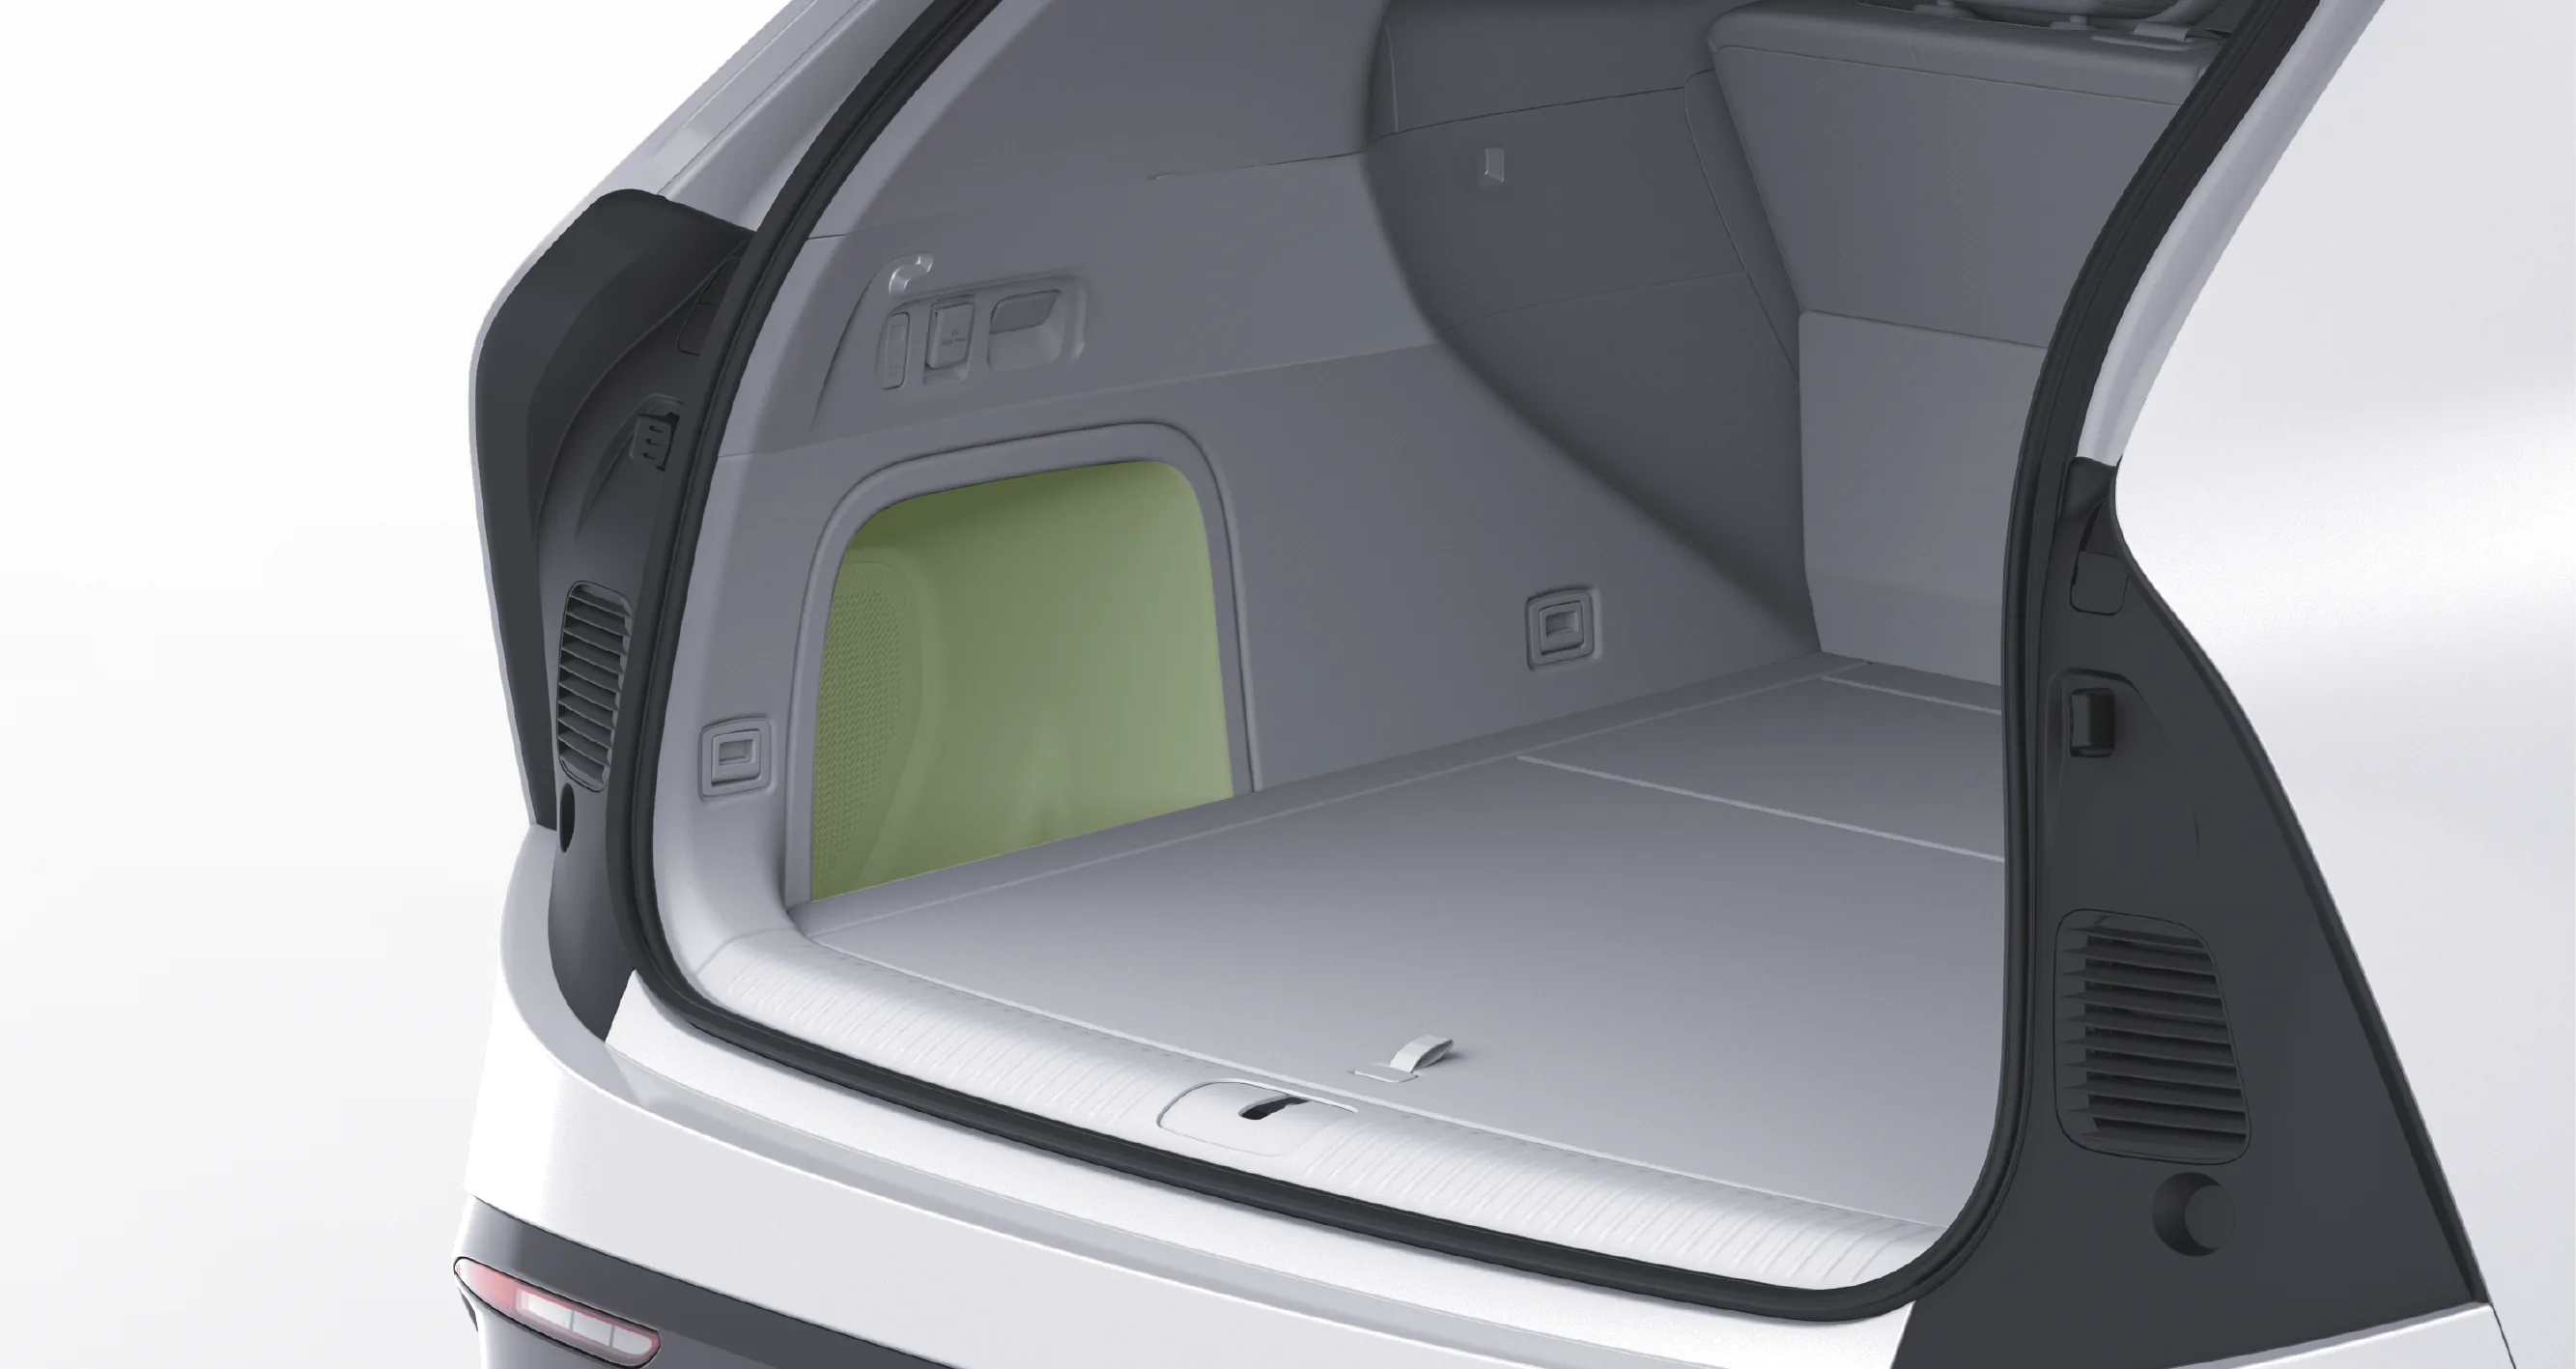
After opening the trunk, items (such as basketballs, soccer balls, etc.) can be placed in the storage space on the left side.
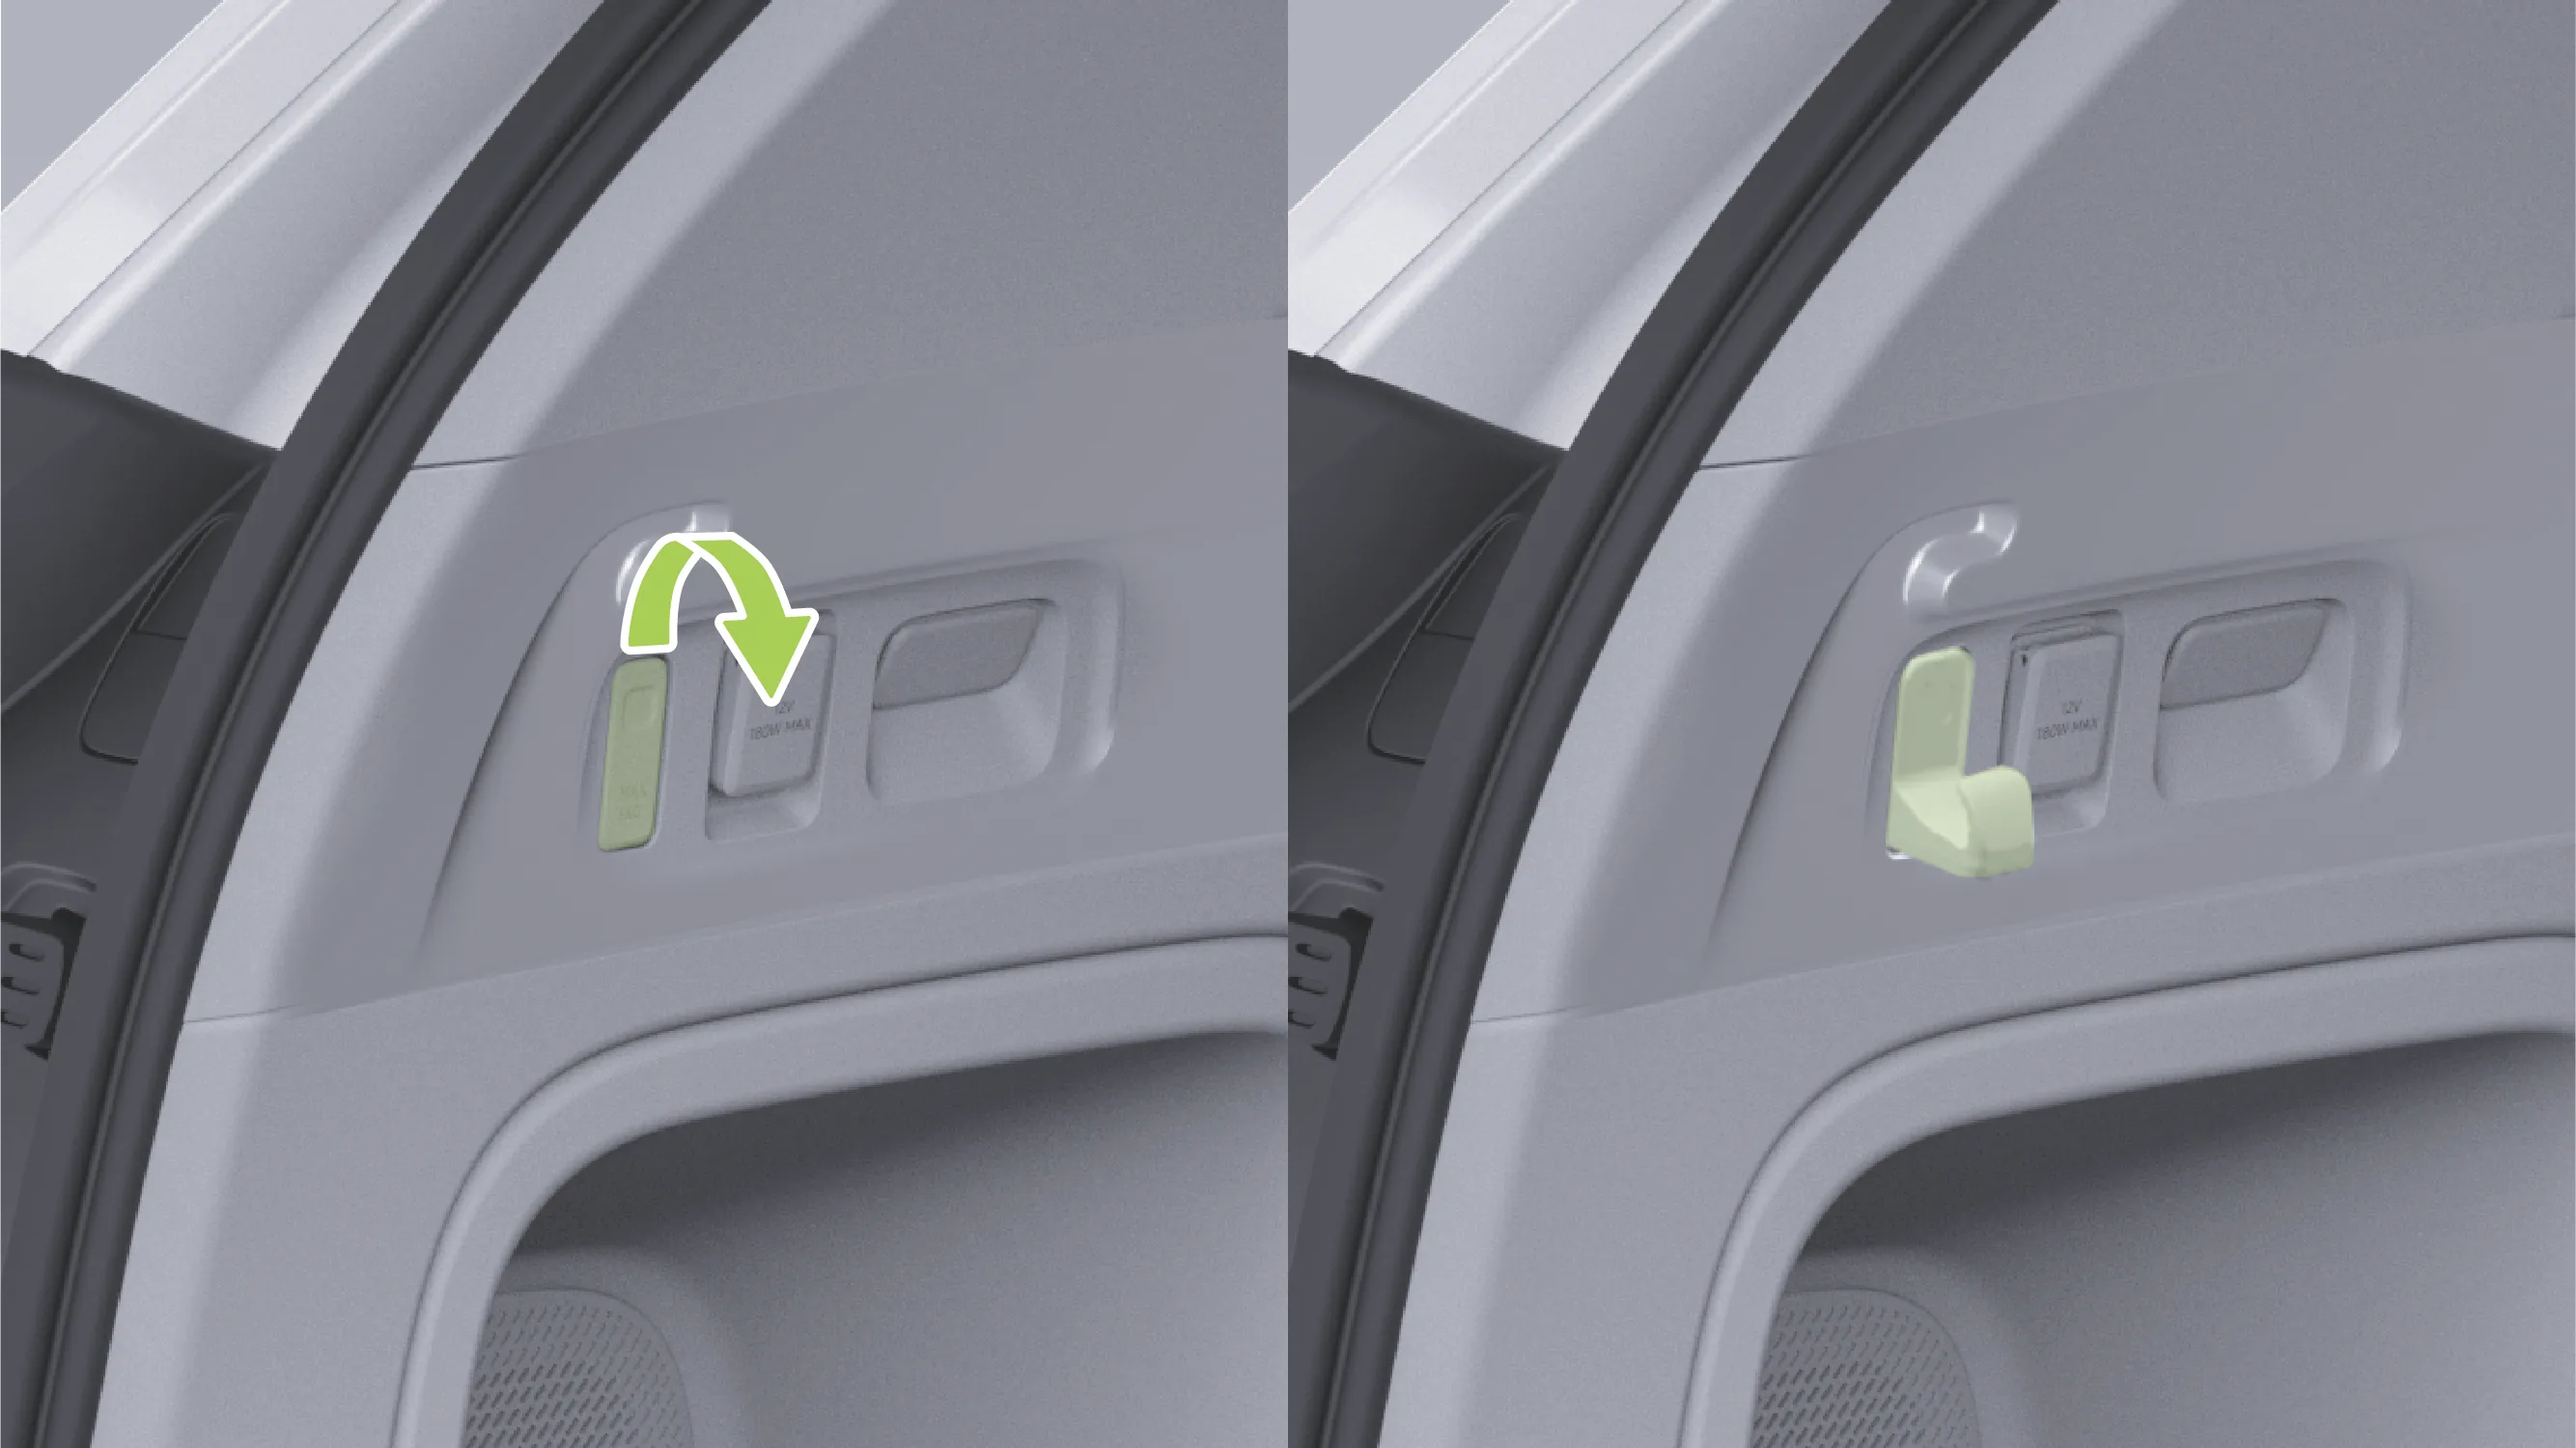
There is a hook on the left side of the trunk. Press the upper part to pop it out when in use; retract it when not in use.
Caution Do not hang items weighing more than 3 kg to avoid damaging the hook.
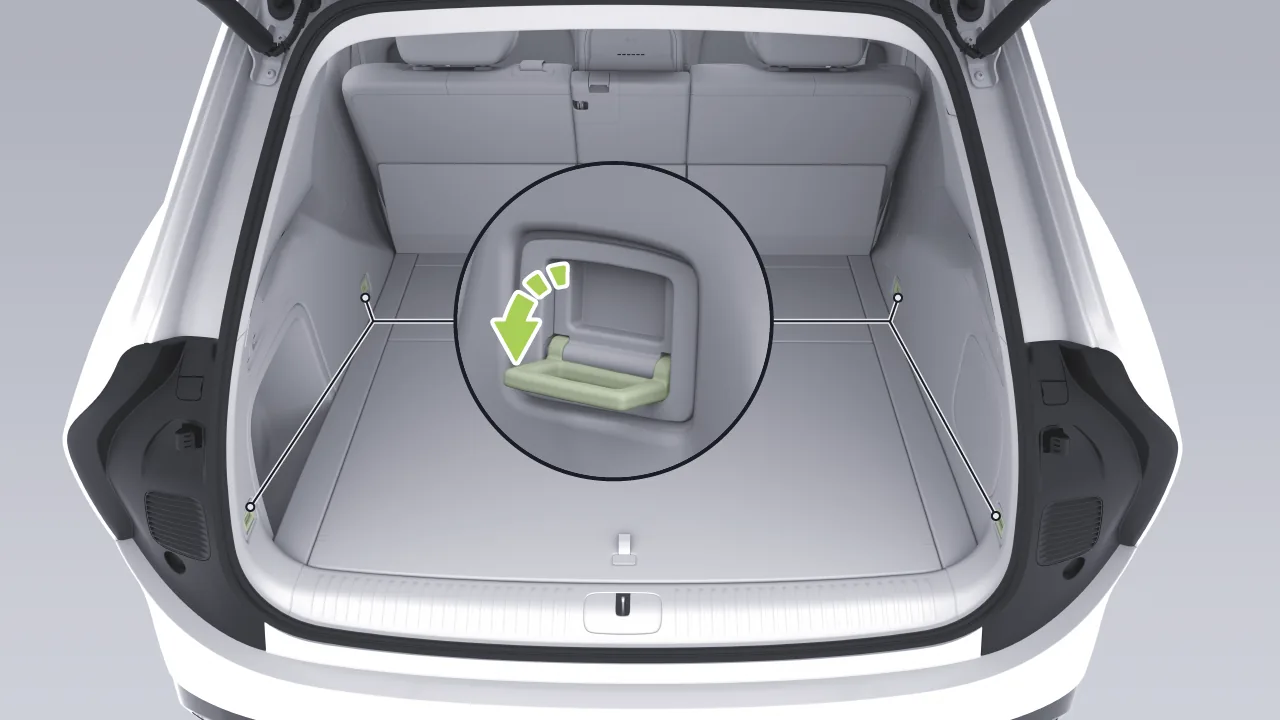
Pull up the trunk floor tie-down to secure loose items.
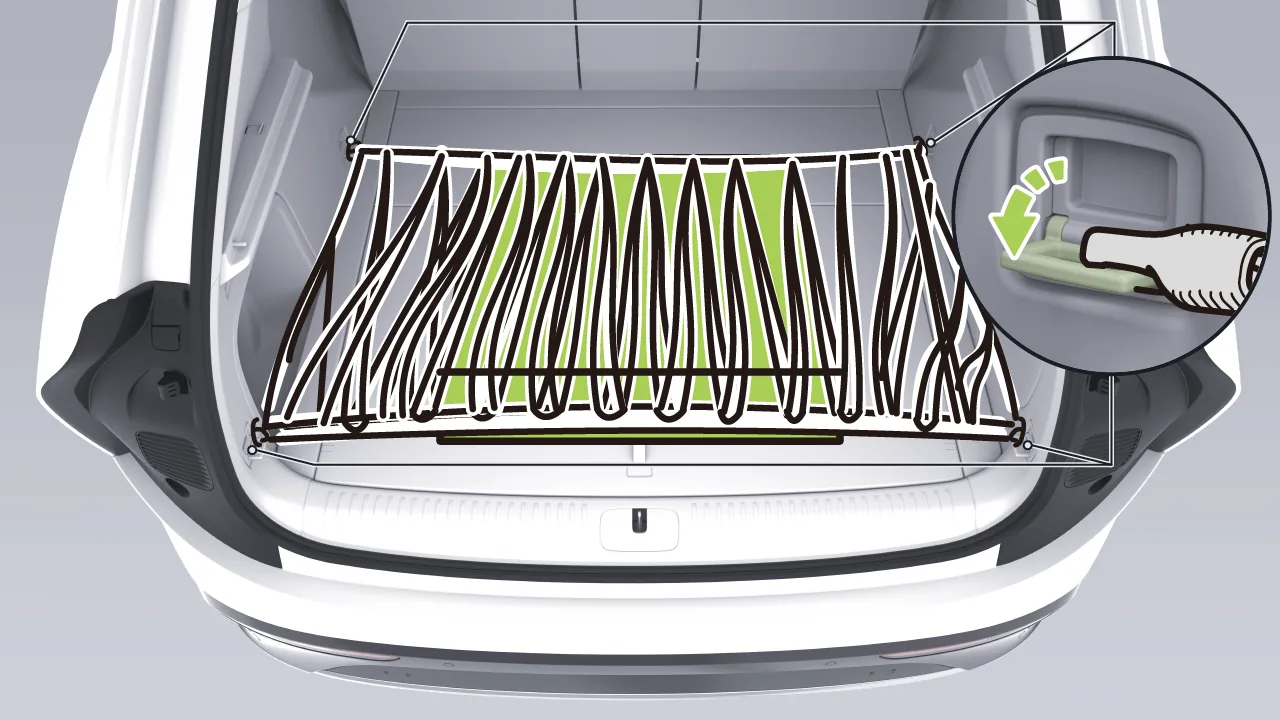
Install the cargo net hooks onto the trunk floor anchors to secure loose items.
Caution When not in use, be sure to return the floor anchor to the stowed position to avoid injury.
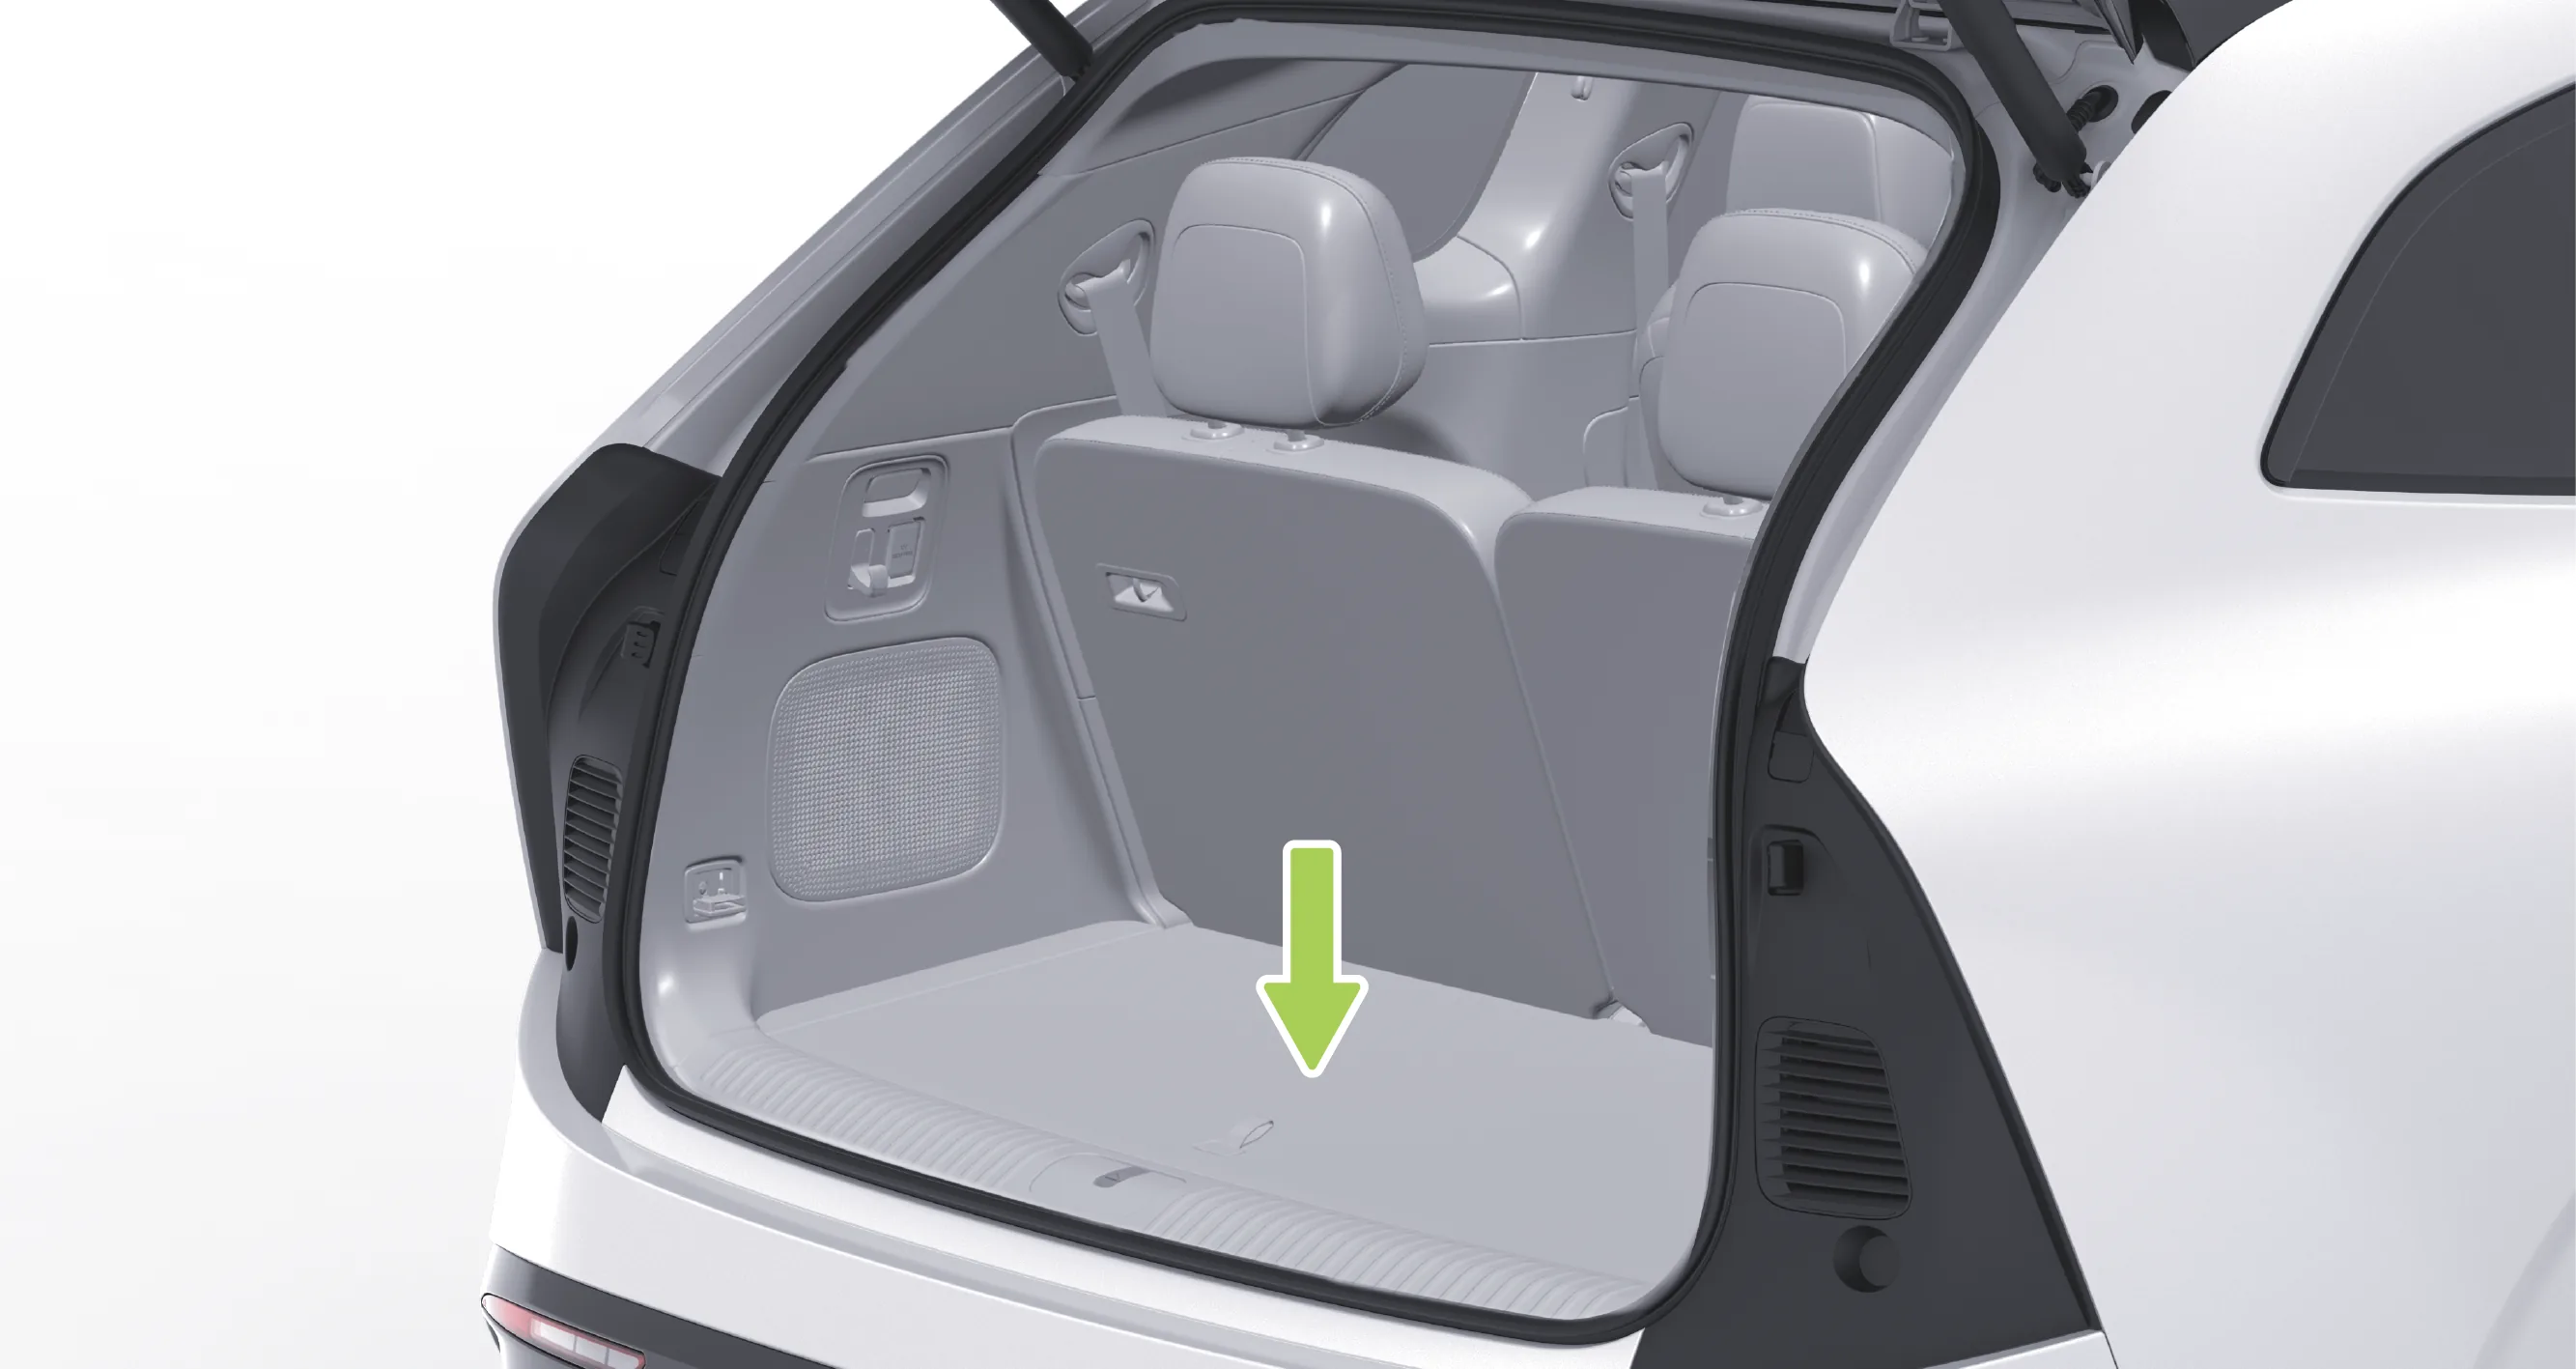
After opening the trunk, you can place luggage and cargo in the trunk storage space.
If greater storage capacity is required, the trunk storage space can be expanded by folding the backrest of the third row seat (for information on the third row seat folding operation, please refer to Section).
Caution Do not store fragile, flammable, explosive, etc. in the trunk to avoid fire, explosion, or damage.
Store liquid items with a tight seal to avoid damage to the vehicle due to fluid leaks. Clean up if leakage occurs.
Do not drive the vehicle with an overloaded vehicle to avoid excessive braking distances due to excessive inertia, which could result in an accident.
Caution One-touch folding requires certain conditions to be met, such as: the vehicle is in P gear, no one is seated in the third row seats, the seats have been initialized, the second row seat position is appropriate, and all third row seat belts are unfastened.
If the second-row seat position is too far rearward and unoccupied, the second-row seat will first move forward to avoid interference, and then perform the one-touch folding action.
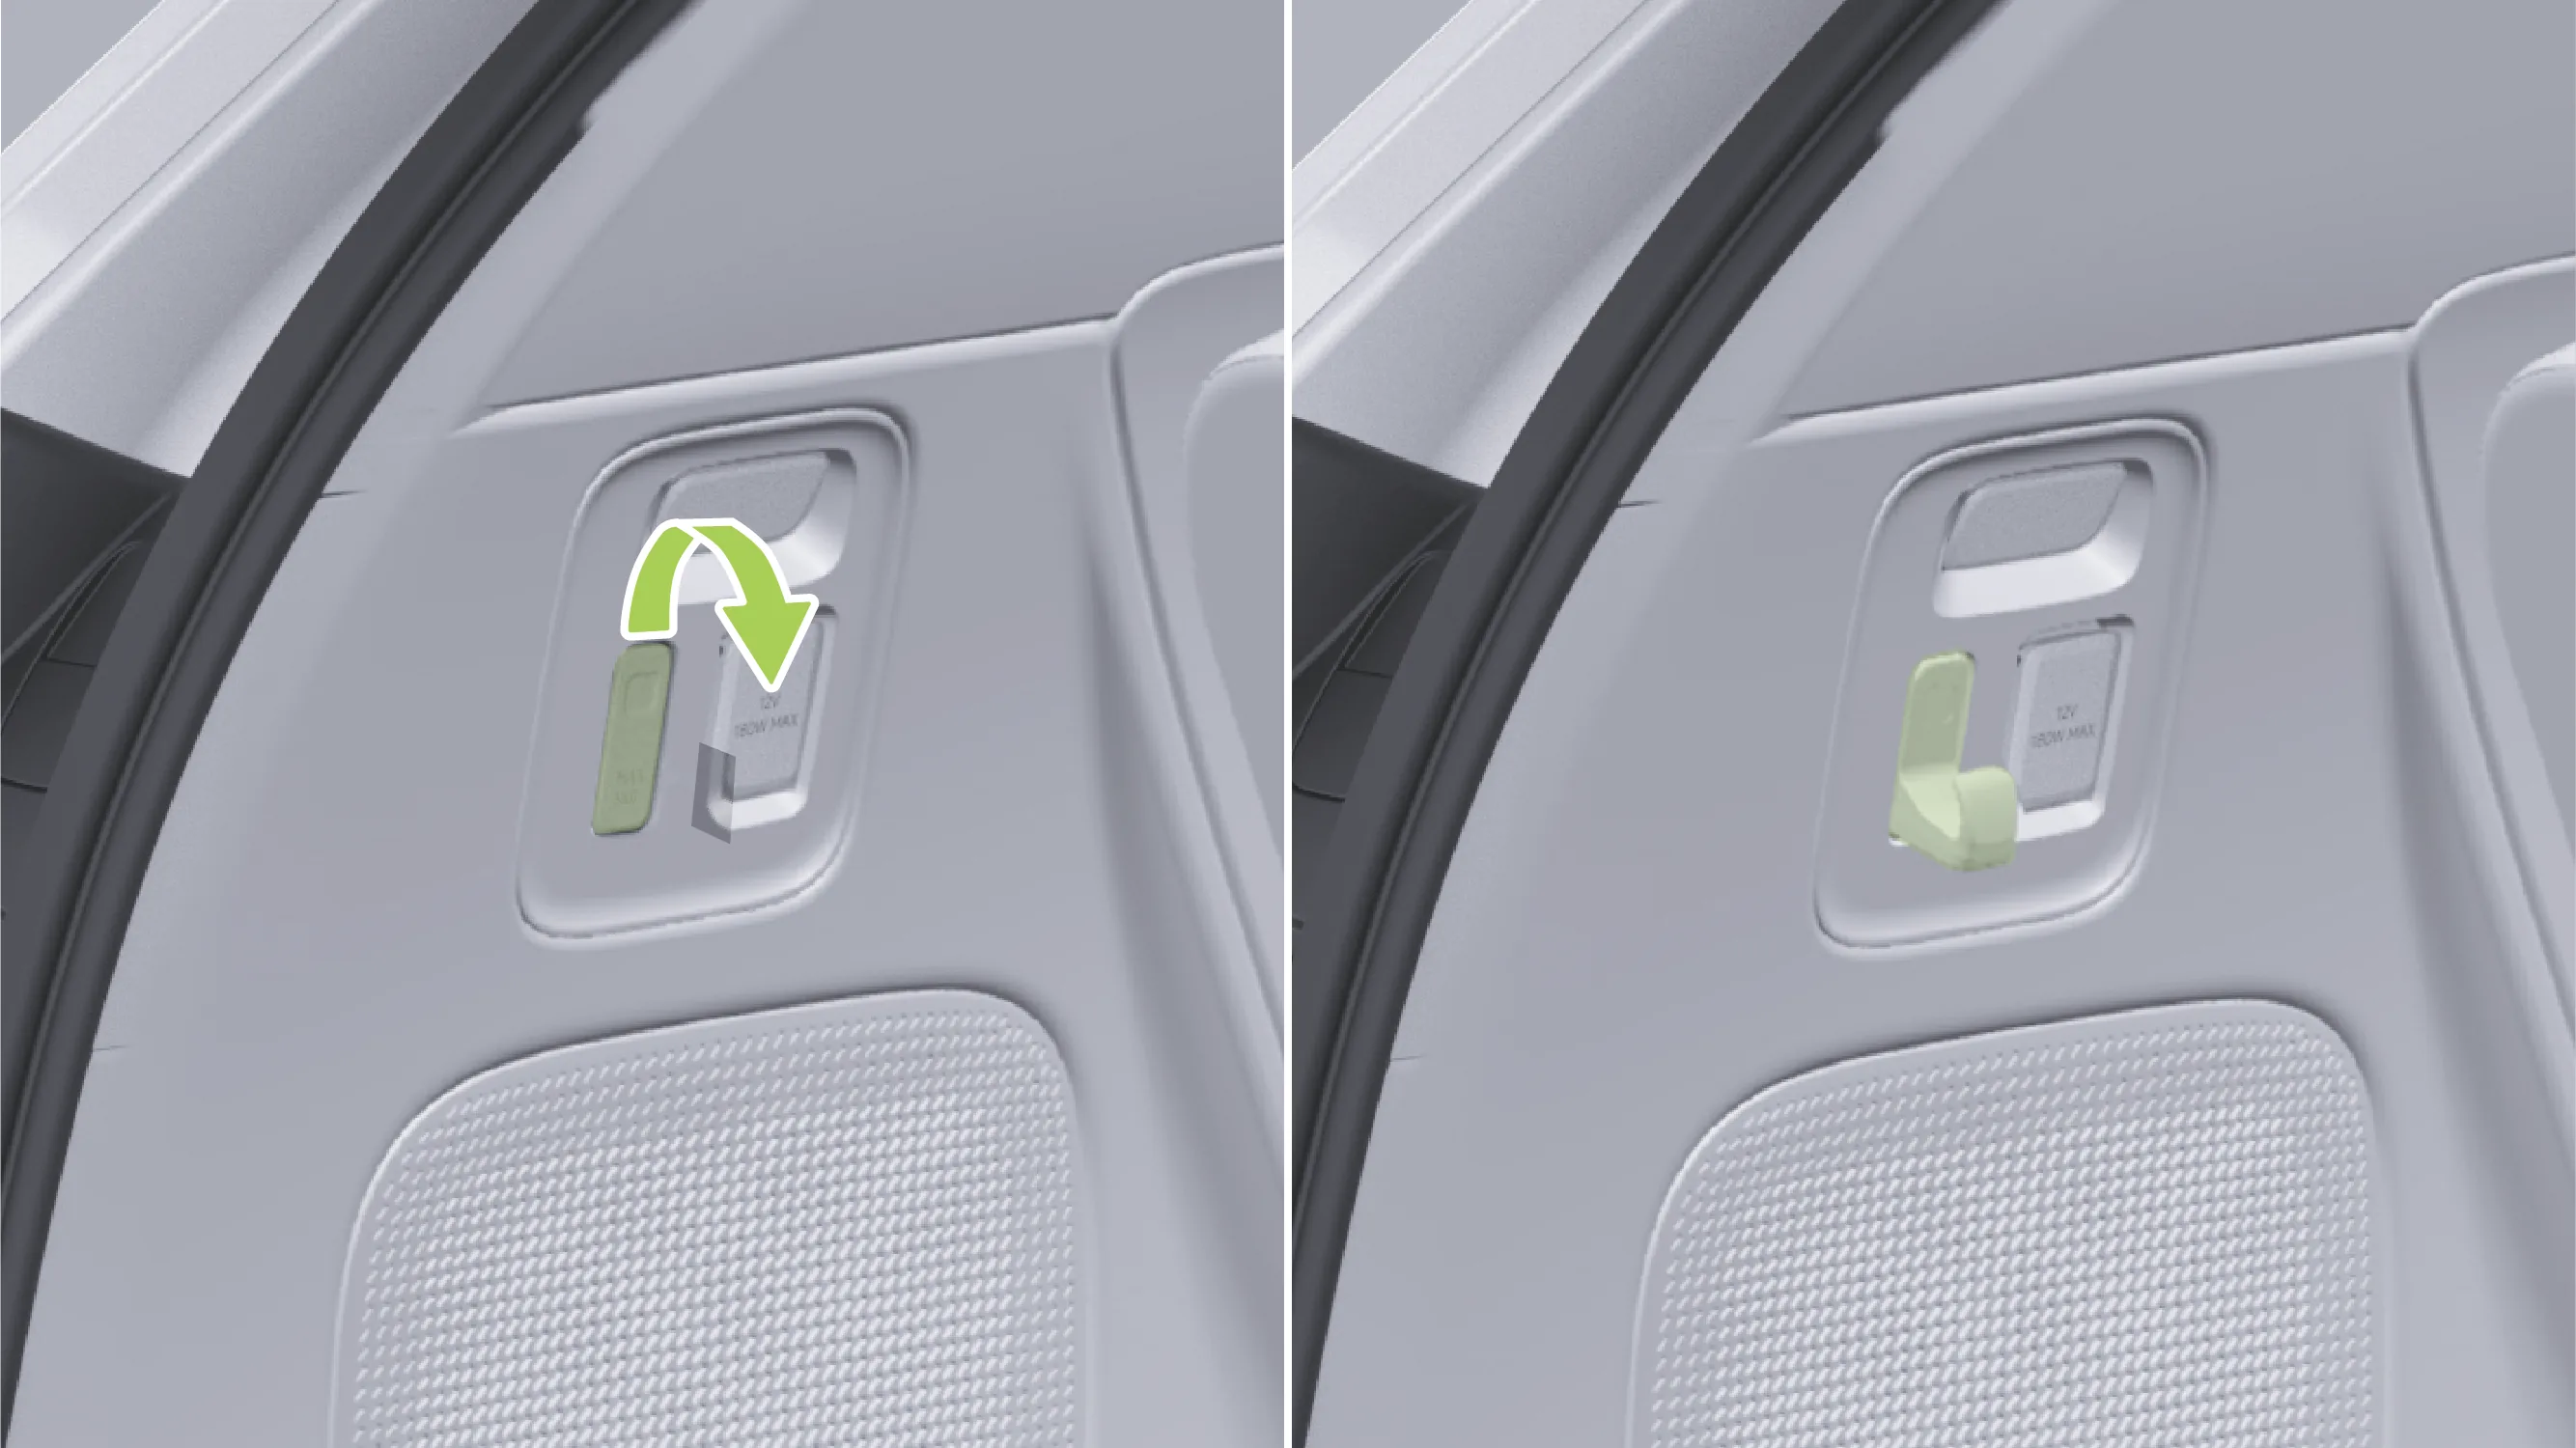
There is a hook on the left side of the trunk. Press the upper part to pop it out when in use; retract it when not in use.
Caution Do not hang items weighing more than 3 kg to avoid damaging the hook.
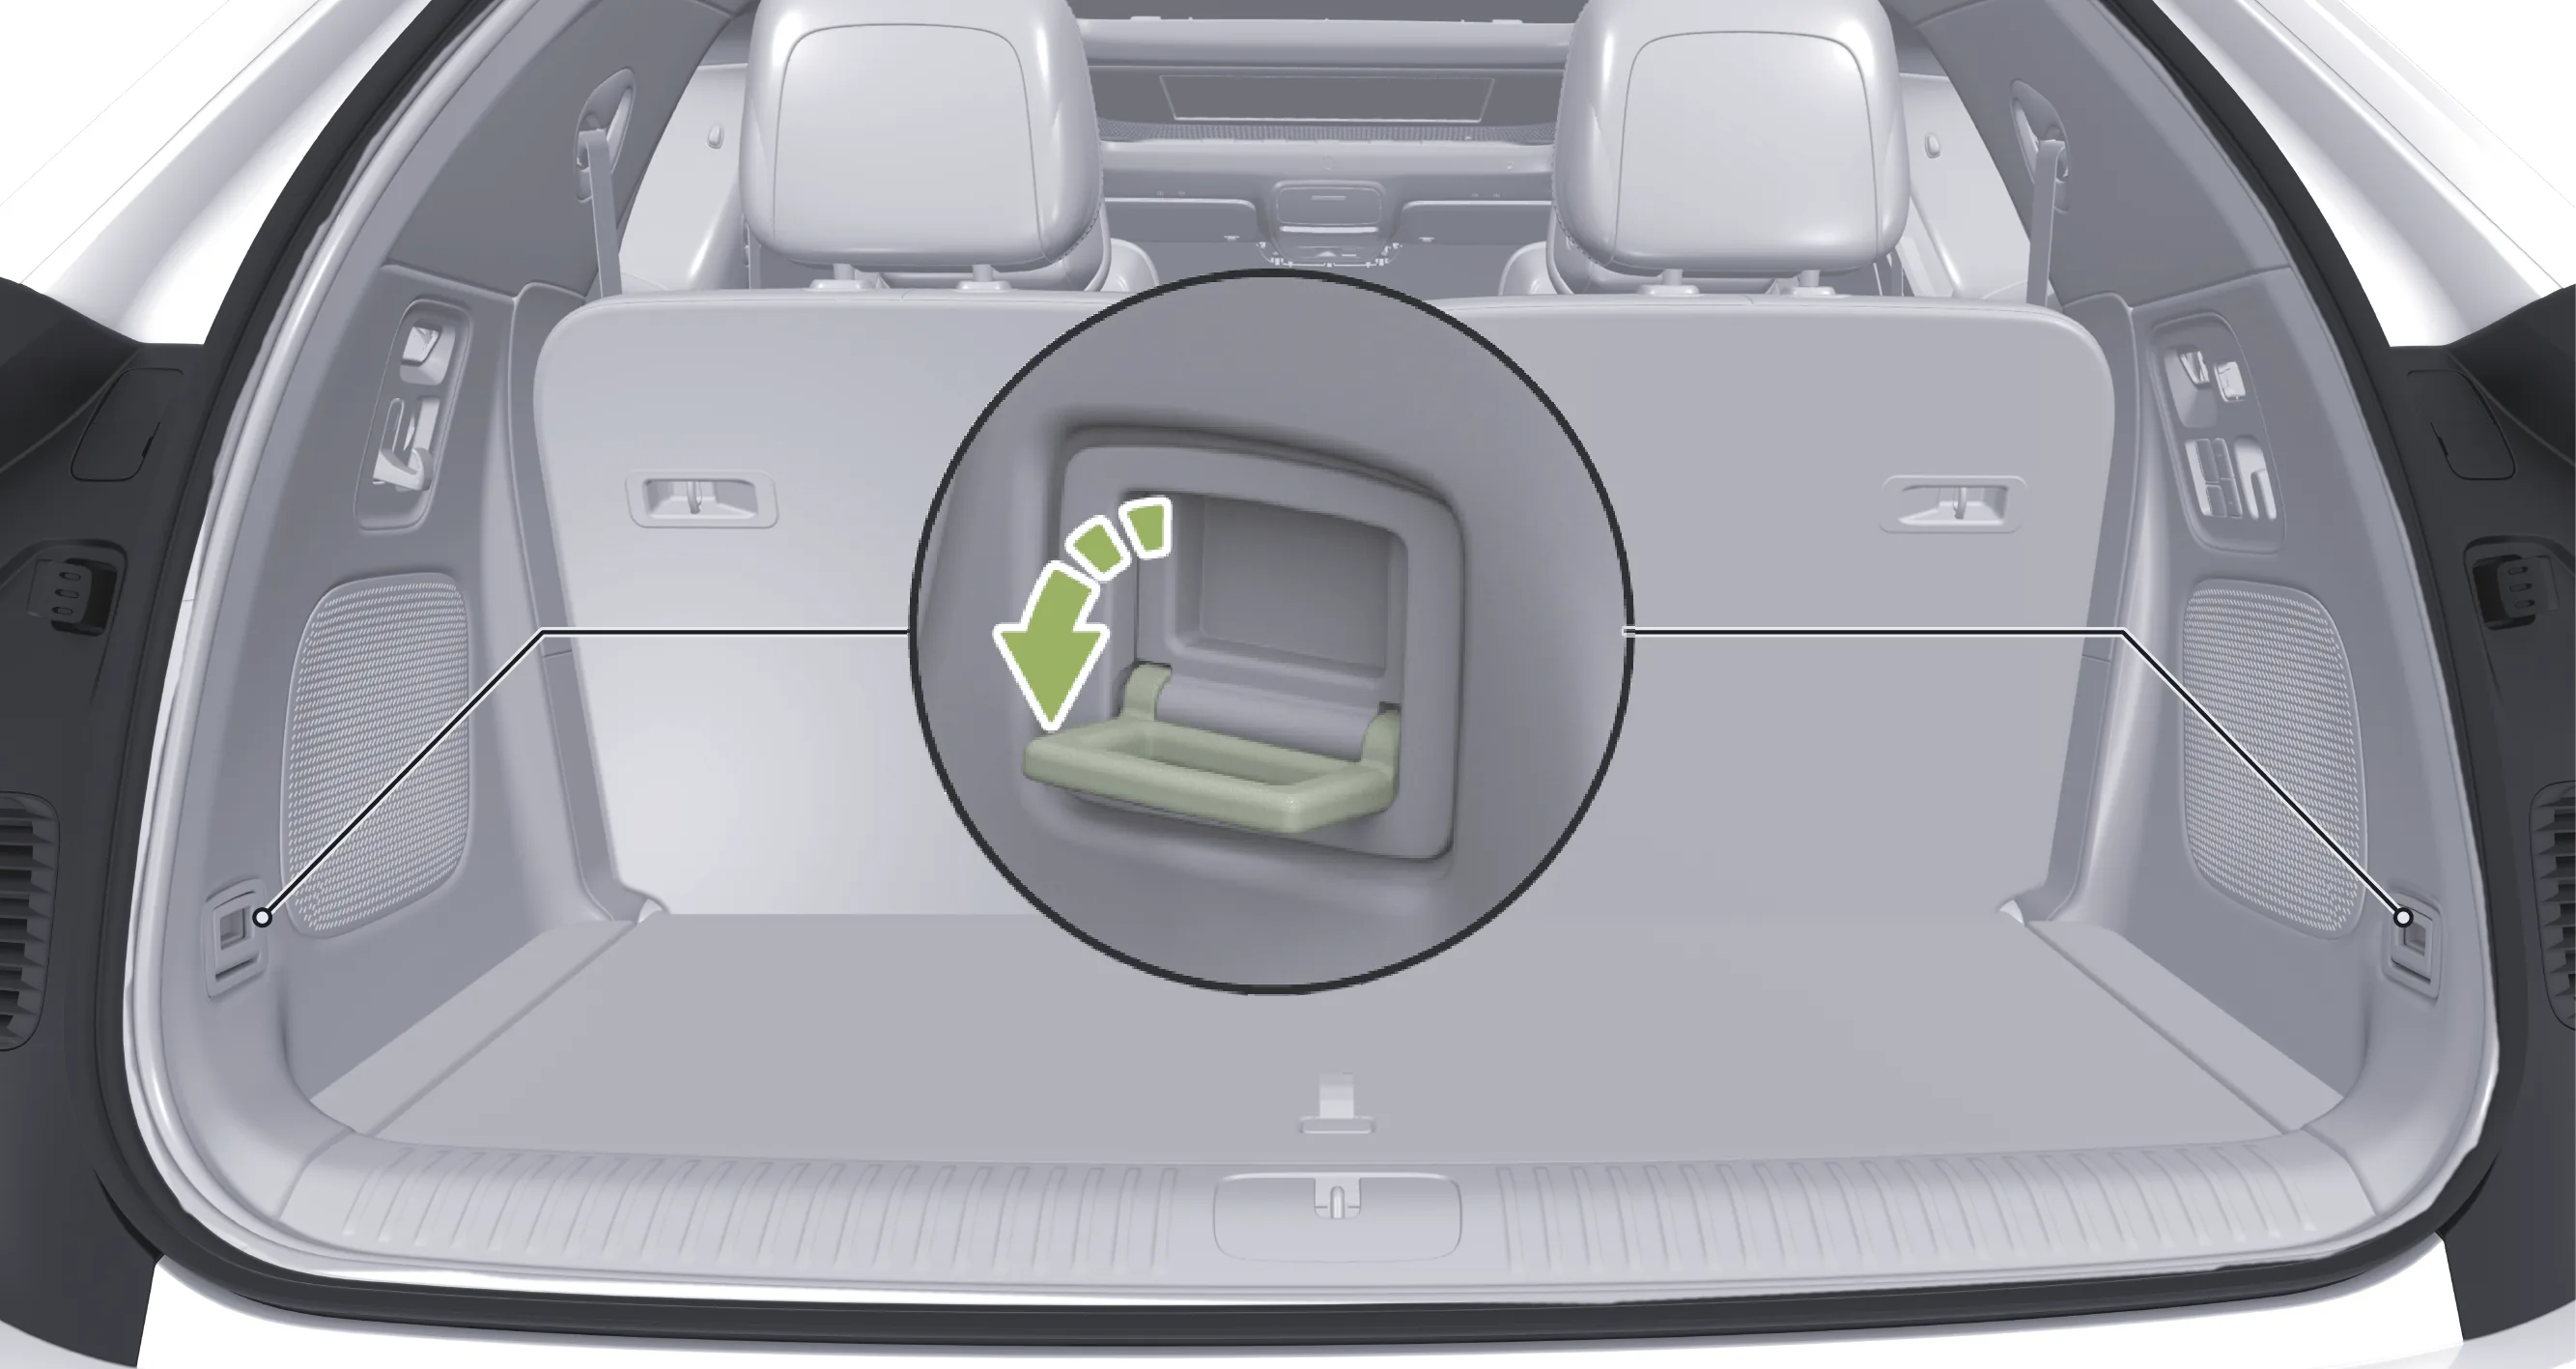
Unfold the trunk floor hooks to secure loose items.
Caution When not in use, be sure to return the floor latch to the stowed position to avoid injury.
Before installing the trunk net pocket, expose the third row seat floor buckle by folding the third row seat (for information on the third row seat folding operation, please refer to Section).
Install the cargo net hooks on the third row seat floor anchors and the luggage compartment floor anchors to secure loose items.
Caution When not in use, be sure to return the floor latch to the stowed position to avoid injury.
The child presence detection function uses sensors to detect whether a child has been left in the vehicle. If the relevant conditions are met, the system will remind the driver in multiple ways and automatically turn on the vehicle Air Conditioner to help prevent the risks of suffocation and heatstroke that may occur if a child is forgotten in the vehicle for an extended period.
The Child Left Reminder function is activated only when all of the following conditions are met:
Child Presence Reminder switch is turned on.
Leave Comfort, Pet Mode, Sleep Mode, and Meditation Mode are not activated.
The vehicle is in P gear.
The vehicle is locked or the door status changes from “any open” to “all closed” and remains so for 740 seconds.
There are no faults in the system components.
Warning This function cannot guarantee complete accuracy. When leaving the vehicle, carefully check the interior area, and never leave children, persons needing assistance, or pets alone in the vehicle.
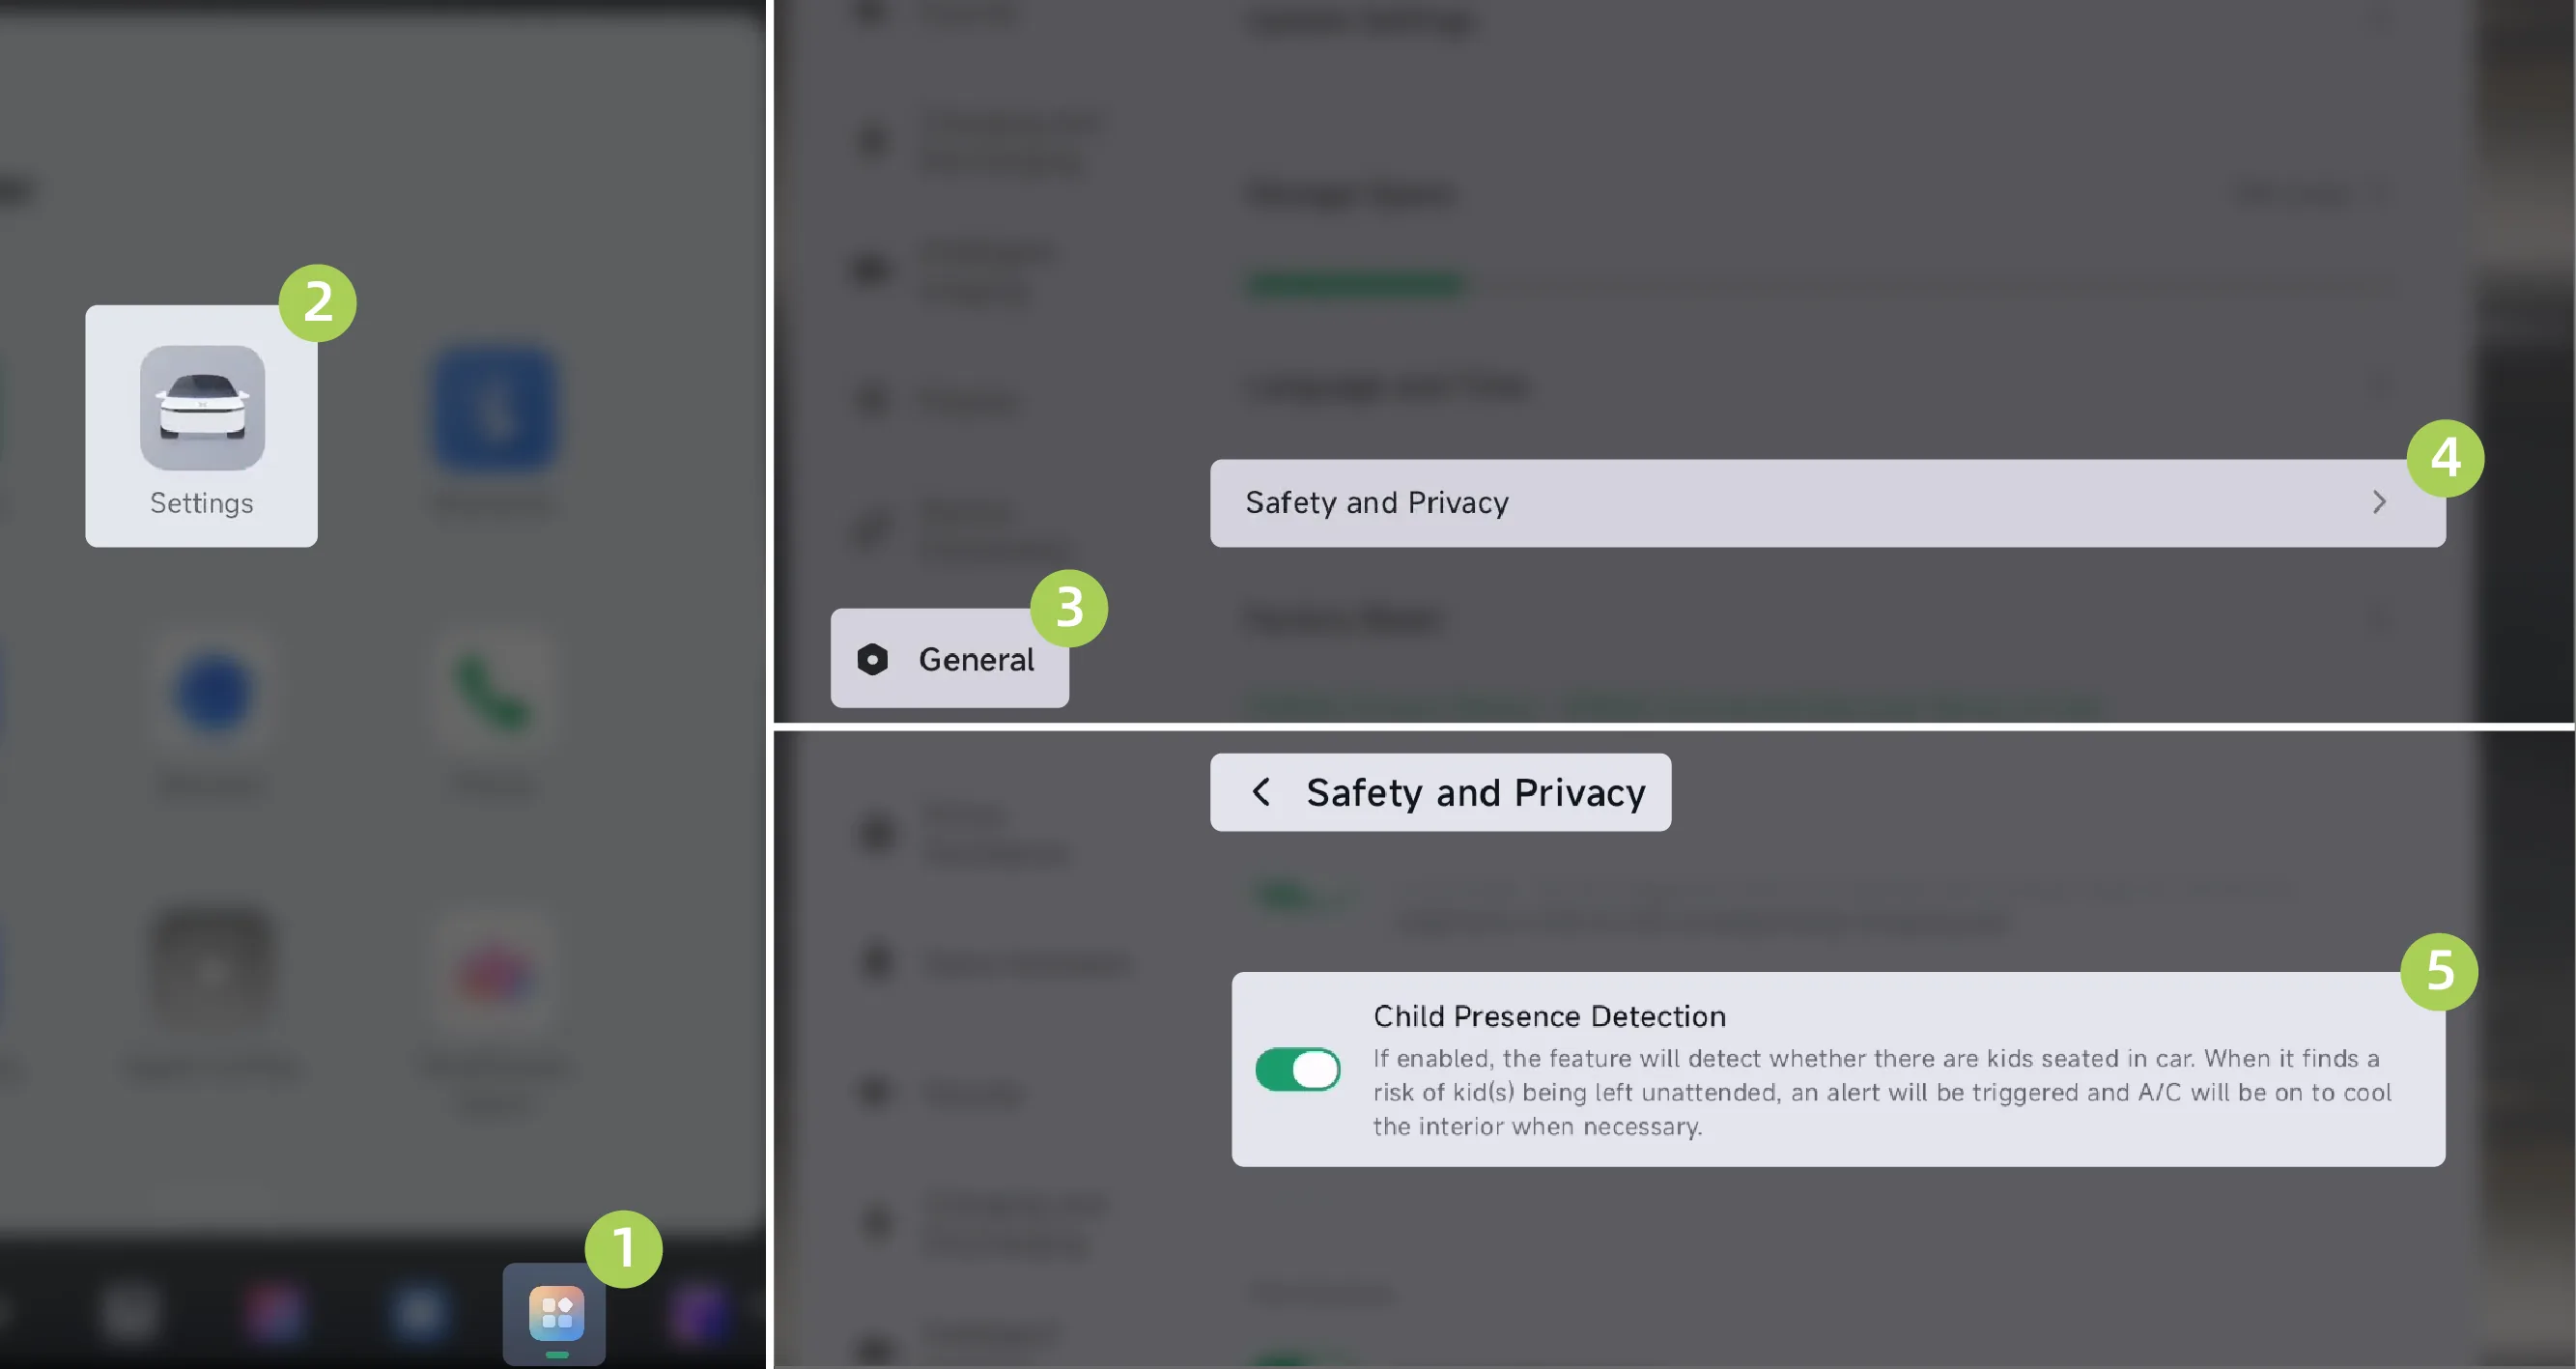
On the center control screen “ →Settings→General→Safety and Privacy”On this screen, you can enable/disable the Child Presence Detection function.
Enabled by default when the vehicle leaves the factory.
This switch state will be saved to the user account. Each time the vehicle is restarted, the switch state will return to the memorized state.
Each time it is set to Off, a pop-up window will appear on the central control screen to inform you of the relevant risks, and you need to confirm again before this function can be turned off. It may only be turned off for 30 days. After expiration, a pop-up window will ask whether to enable this function.
Caution When you turn off the Child Presence Reminder function, the central control screen will prompt you that the function has been turned off at the moment it is turned off and at the end of each trip.
If the child presence reminder is activated and the system detects that a living being has been left in the vehicle:
The vehicle will enter the initial alarm state within 15 seconds for approximately 1 minute. In this state:
The hazard warning lights will flash for approximately 25 seconds.
The system will send you a reminder via the XPENG APP.
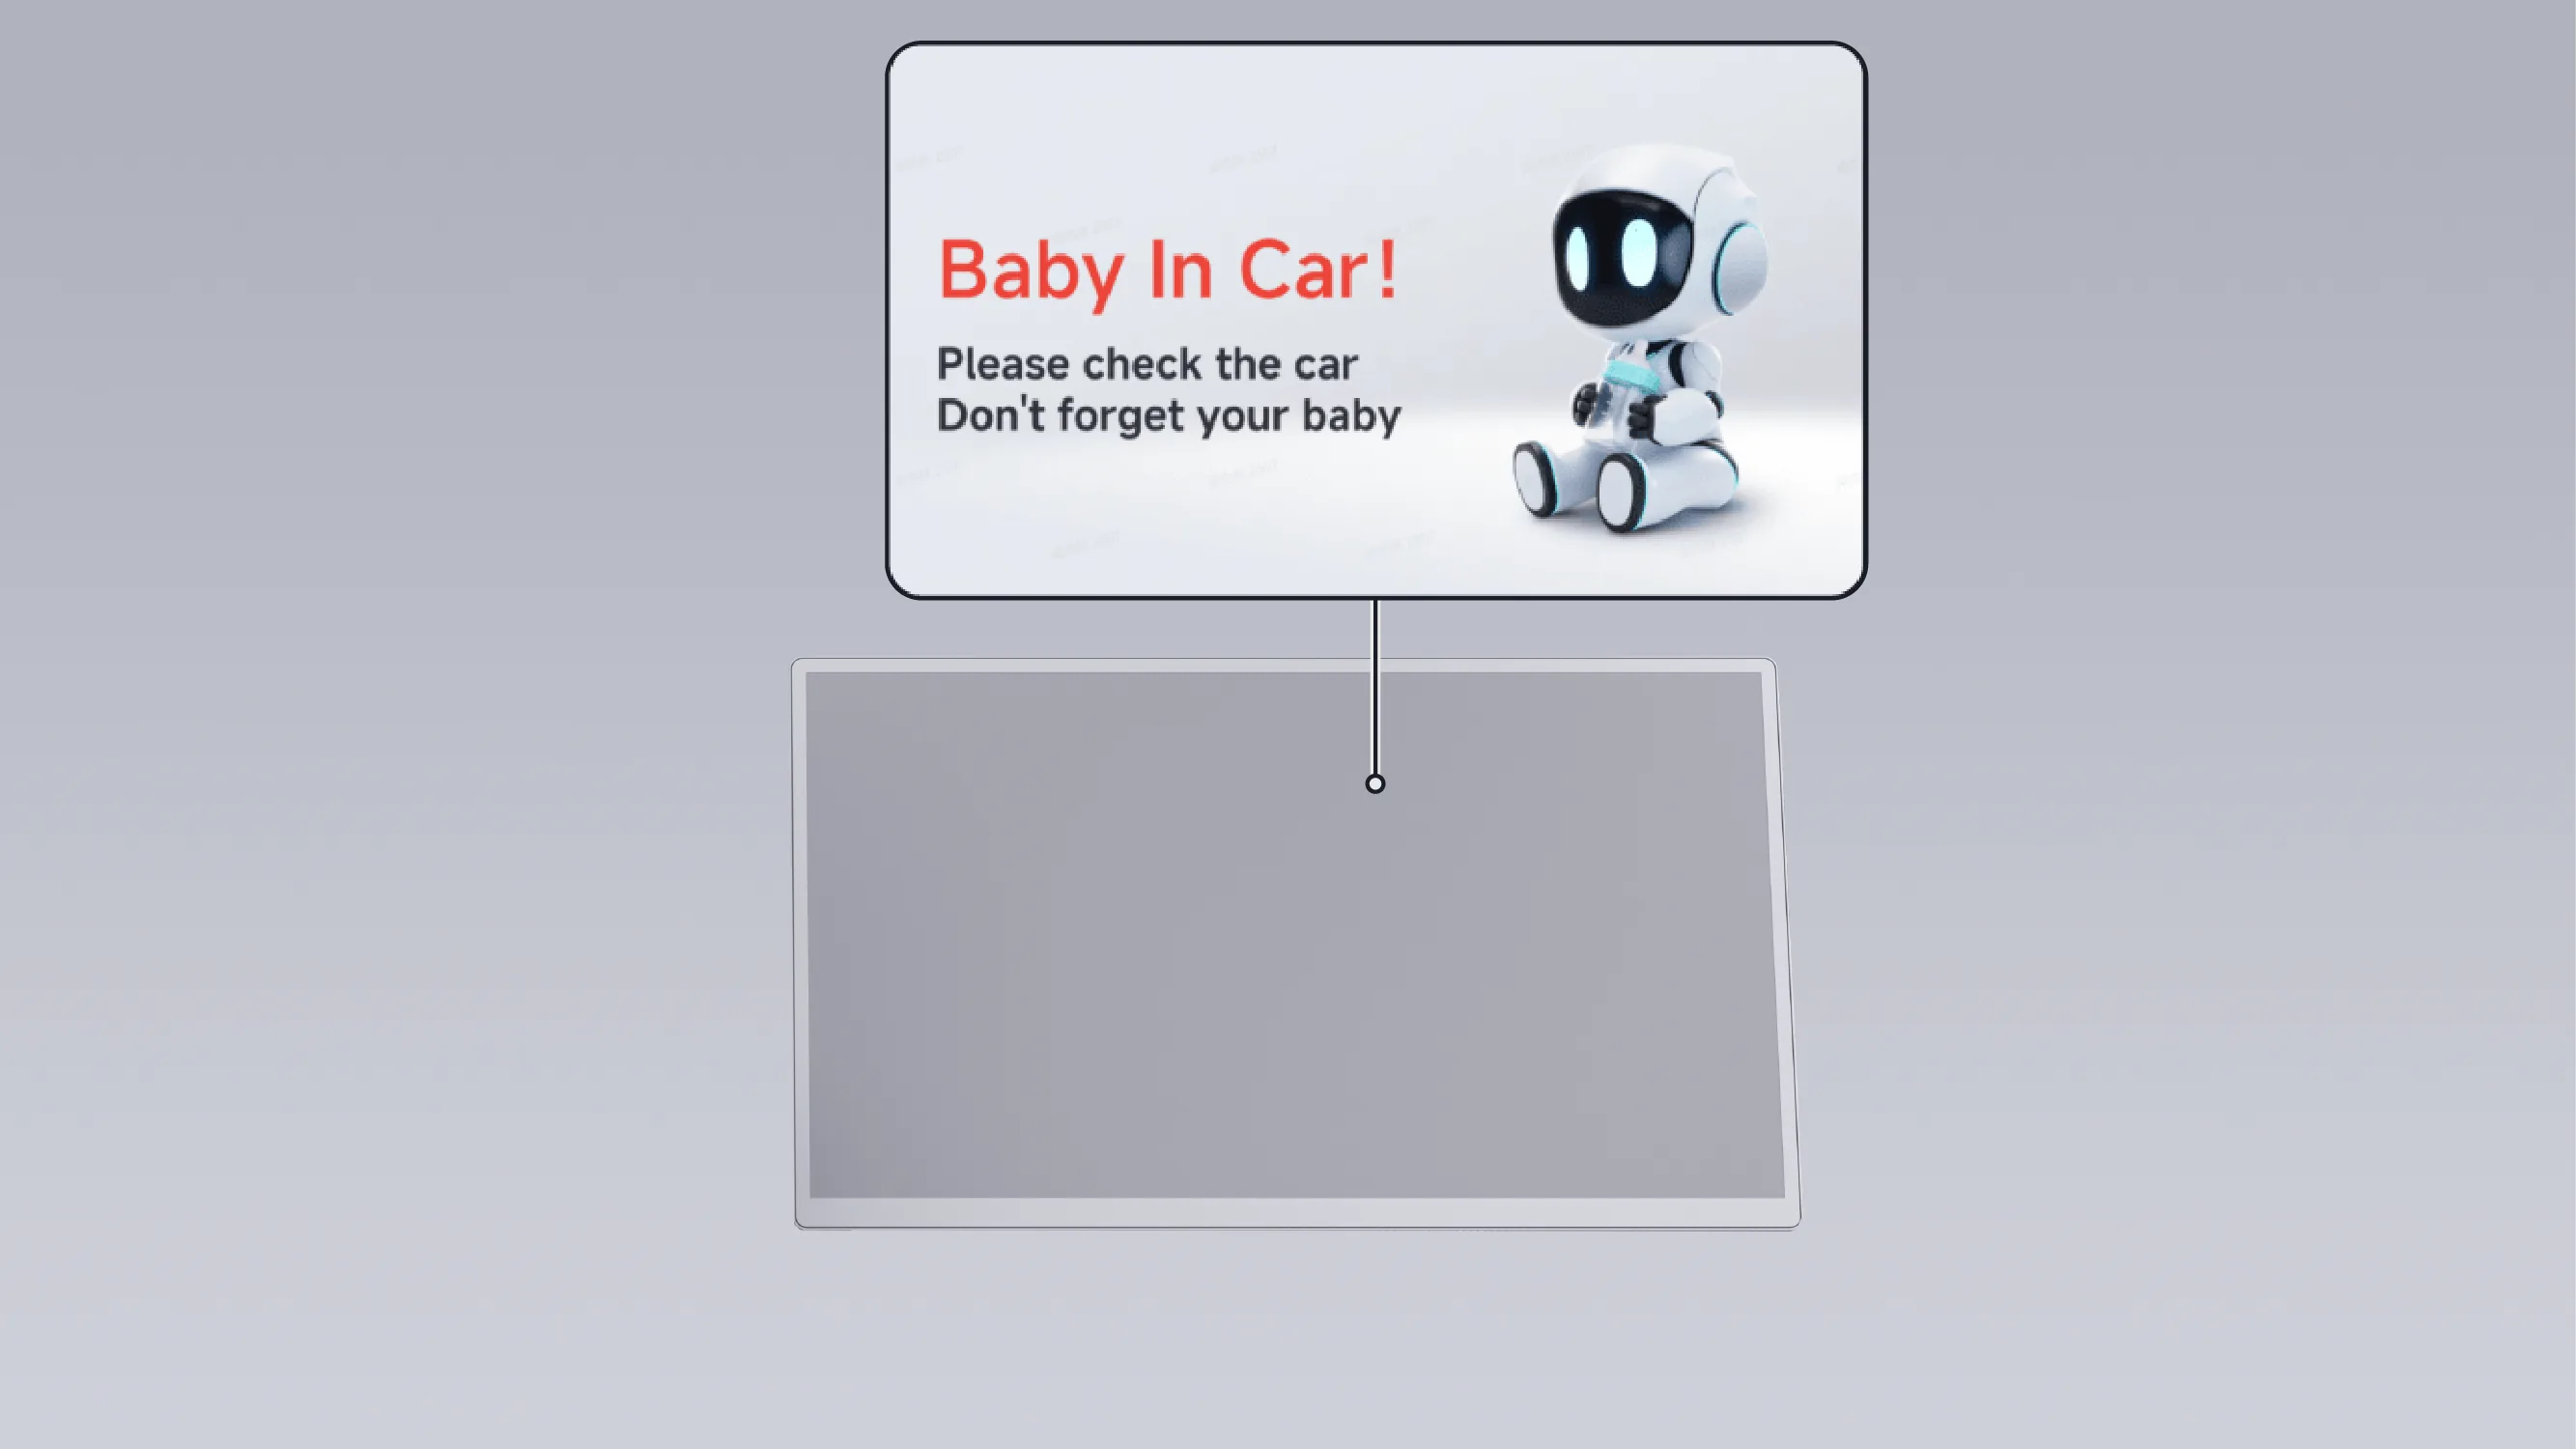
The central control screen will display the "Child Presence Warning Interface"
After the primary alarm ends, the vehicle will enter an upgraded alarm state for approximately 25 minutes. In this state:
The hazard warning lights will flash for approximately 25 seconds every minute.
The system will send you a reminder via the XPENG APP.
The central control screen will display the “Child Presence Warning Interface”
During the primary/escalated alarm period, if you close the doors and lock the vehicle again after canceling the alarm, or if you close the doors after canceling the alarm and keep them closed for approximately 45 seconds, the vehicle will re-enter the escalated alarm state within 15 seconds.
When the vehicle is in the child presence initial warning state and the cabin temperature is ≥30°C, or when it is in the escalated warning state, the system will automatically take necessary intervention measures, including:
Automatically turn on the Air Conditioner, mode AUTO, target temperature 24℃.
The system will send you a reminder via the XPENG APP.
Caution When the vehicle battery level is too low, the intervention will automatically exit, and a reminder will be pushed to you again via the XPENG APP.
Warning In addition to children, when there are adults, pets, or other movable objects in the vehicle, the child left-behind alarm may also be triggered.
If the child presence alert is triggered, it cannot be turned off remotely via the XPENG APP. You need to go to the vehicle and open the door to cancel the alert.
This function cannot guarantee complete accuracy. When leaving the vehicle, carefully check the interior area, and never leave children, persons needing assistance, or pets alone in the vehicle.
Caution In the following situations, the system may be affected or may not operate:
The sensor area is covered by other objects.
There are objects in the cockpit that strongly reflect electromagnetic waves, such as large metal items.
When locking the vehicle, there is a powered toy with moving functions operating in the vehicle.
When locking the vehicle, there are pendants or other objects swinging in the vehicle.
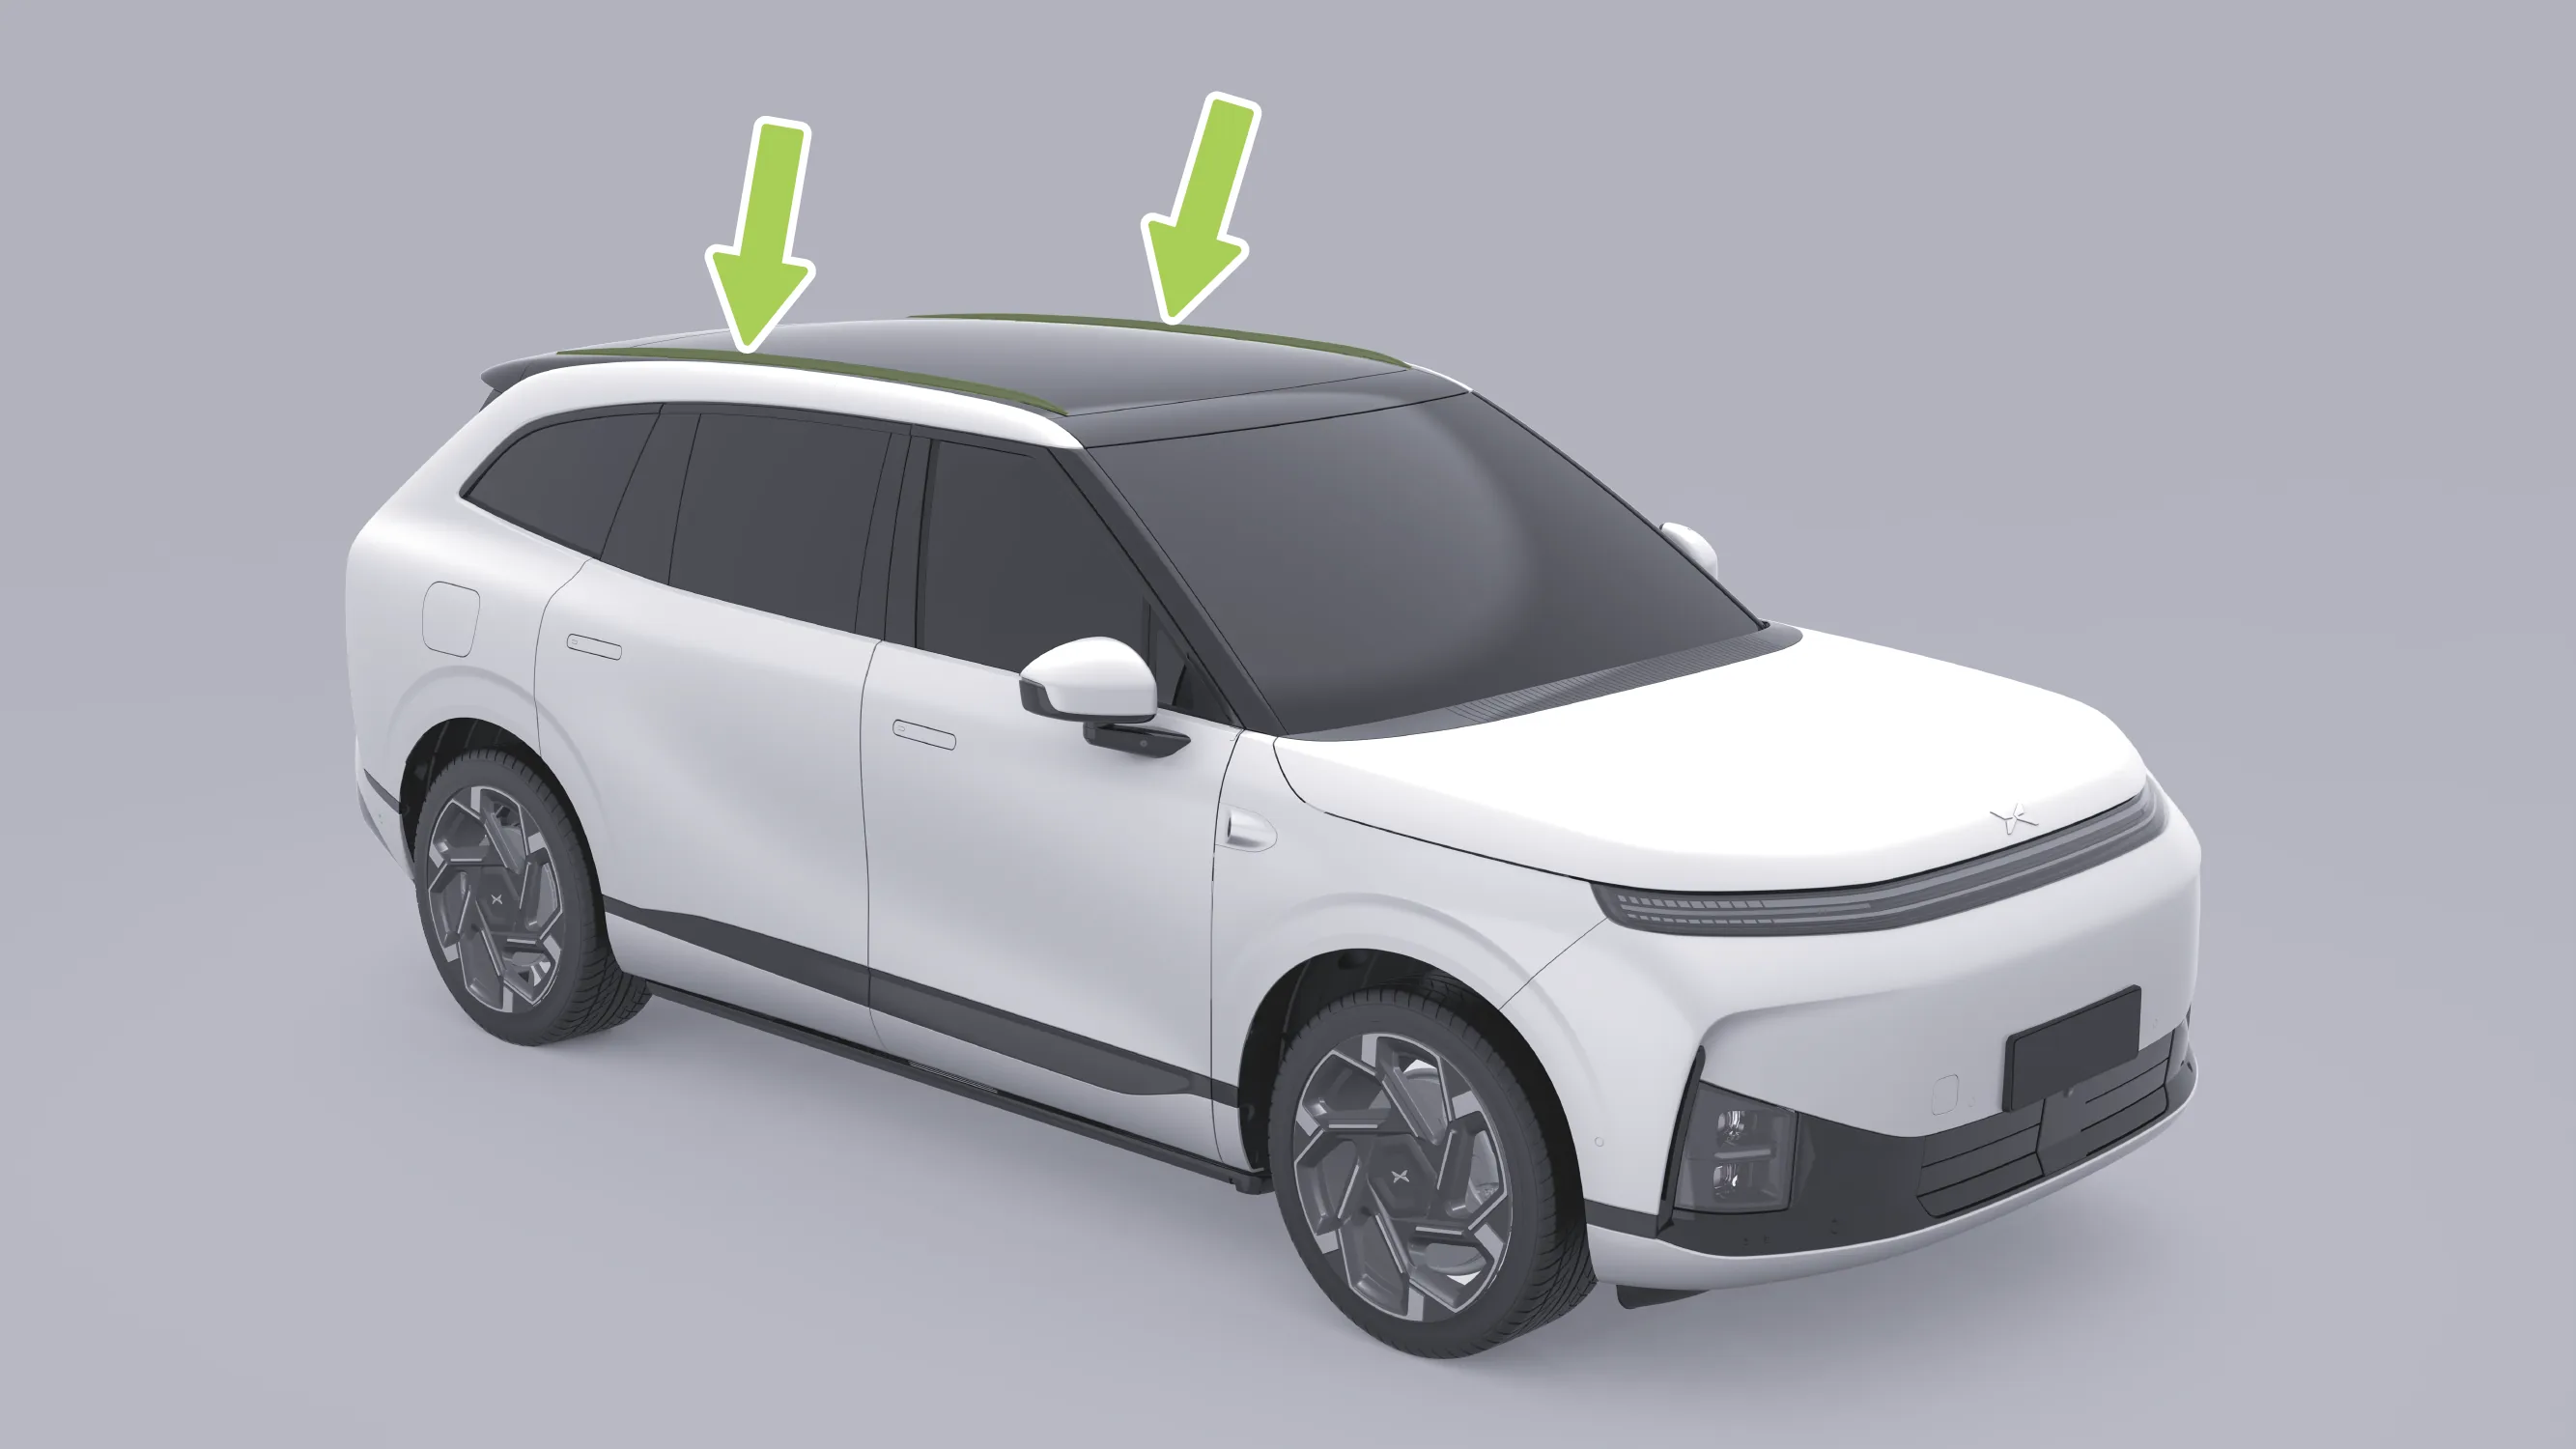
The luggage rack is located on the left and right sides of the roof and can carry a maximum load of 75 kg of luggage.
Do not exceed the maximum roof load capacity, otherwise serious vehicle damage or personal injury may result.
When loading items onto the roof rack, distribute them evenly on the roof rack and ensure that the items are securely fastened; otherwise, there is a risk of the items falling off or causing an accident.
After loading items onto the roof rack, the vehicle center of gravity will be raised. Avoid high-speed driving, sudden starts, sharp turns, emergency braking, or aggressive maneuvers, otherwise improper operation may cause the vehicle to lose control or roll over, resulting in serious injury or death.
When loading items on the roof rack, reduce vehicle speed when driving in strong crosswinds.
Regularly check that the roof rack and its load are secure to avoid vehicle damage or personal injury caused by looseness.
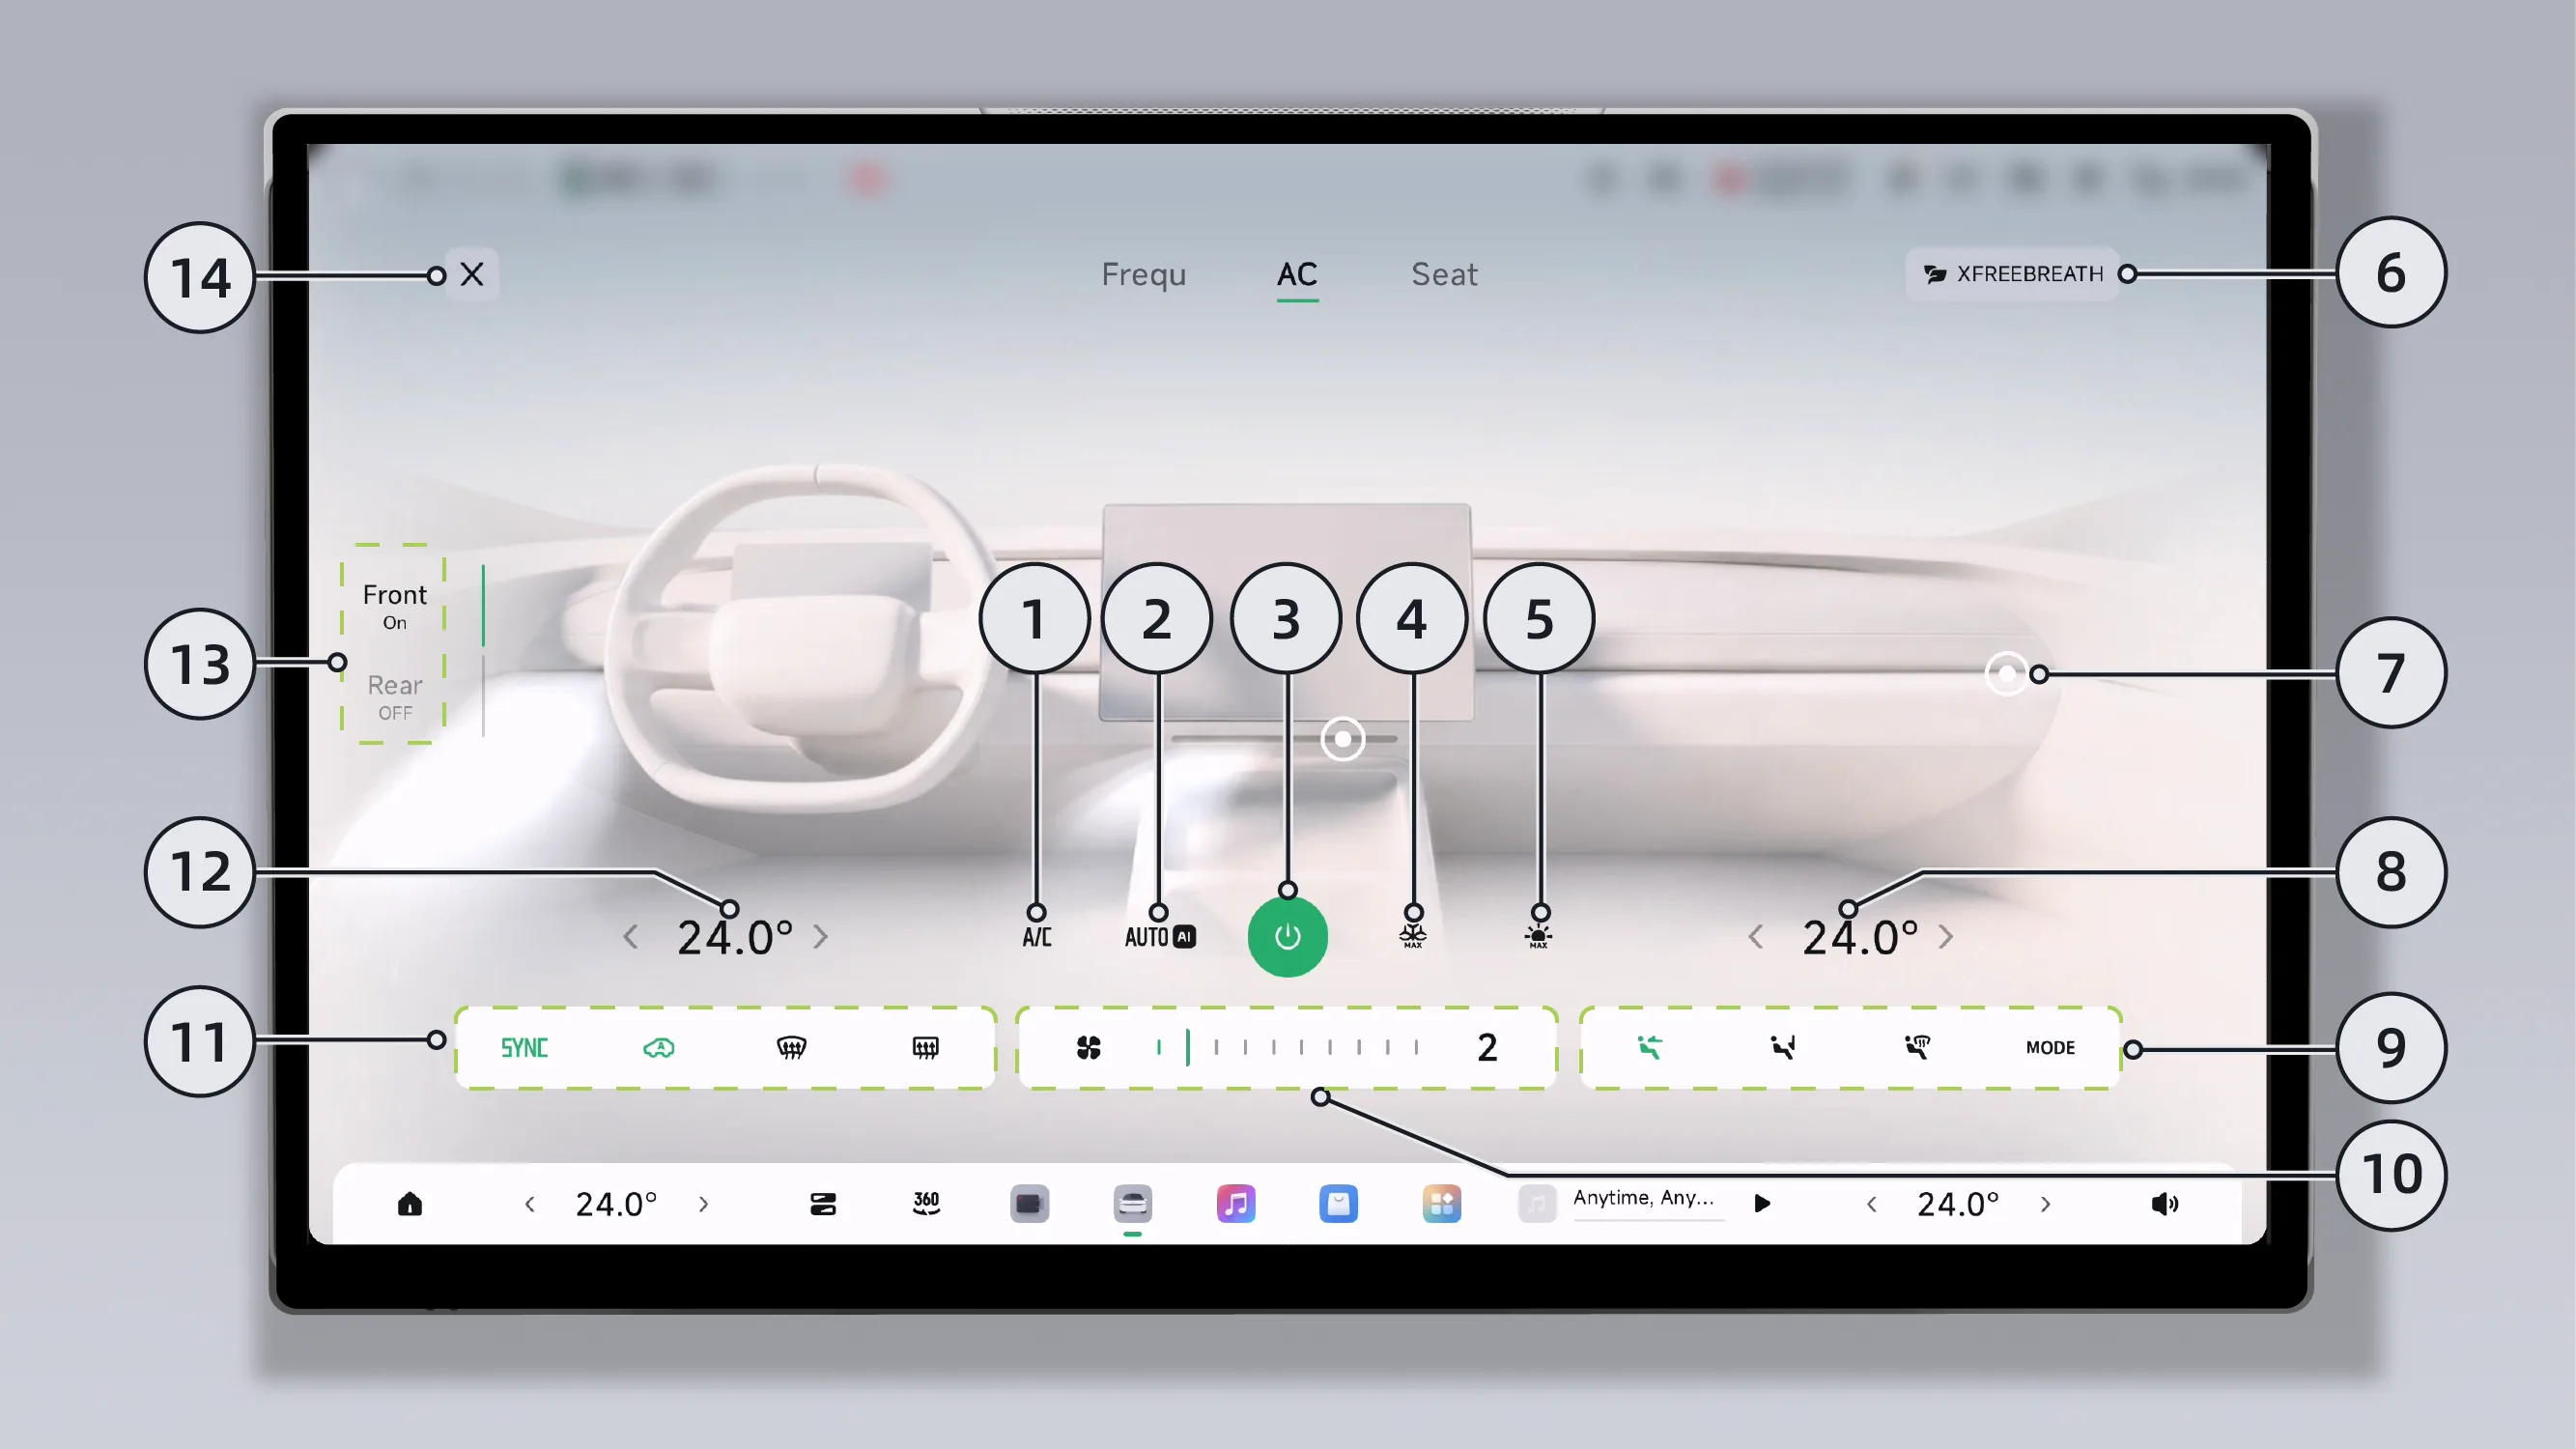
| 1. A/C Mode | 8. Adjust the driver's temperature |
| 2. AI-AUTO Mode | 9. Air Outlet Mode/MODE |
| 3. Turn the front row Air Conditioner switch on/off | 10. Air Volume Adjustment |
| 4. Rapid Cooling Mode | 11. SYNC/Internal/External Circulation/Front Windshield Heating Defrosting/Rear Windshield Heating Defrosting |
| 5. Rapid Heating Mode | 12. Adjust passenger temperature |
| 6. PM2.5 Purification | 13. Front/Rear Air Conditioner Page Switching (with Front/Rear Air Conditioner Switch Display) |
| 7. Front Row Air Vent Switches (four independent air vent switches in total) | 14. Close page |
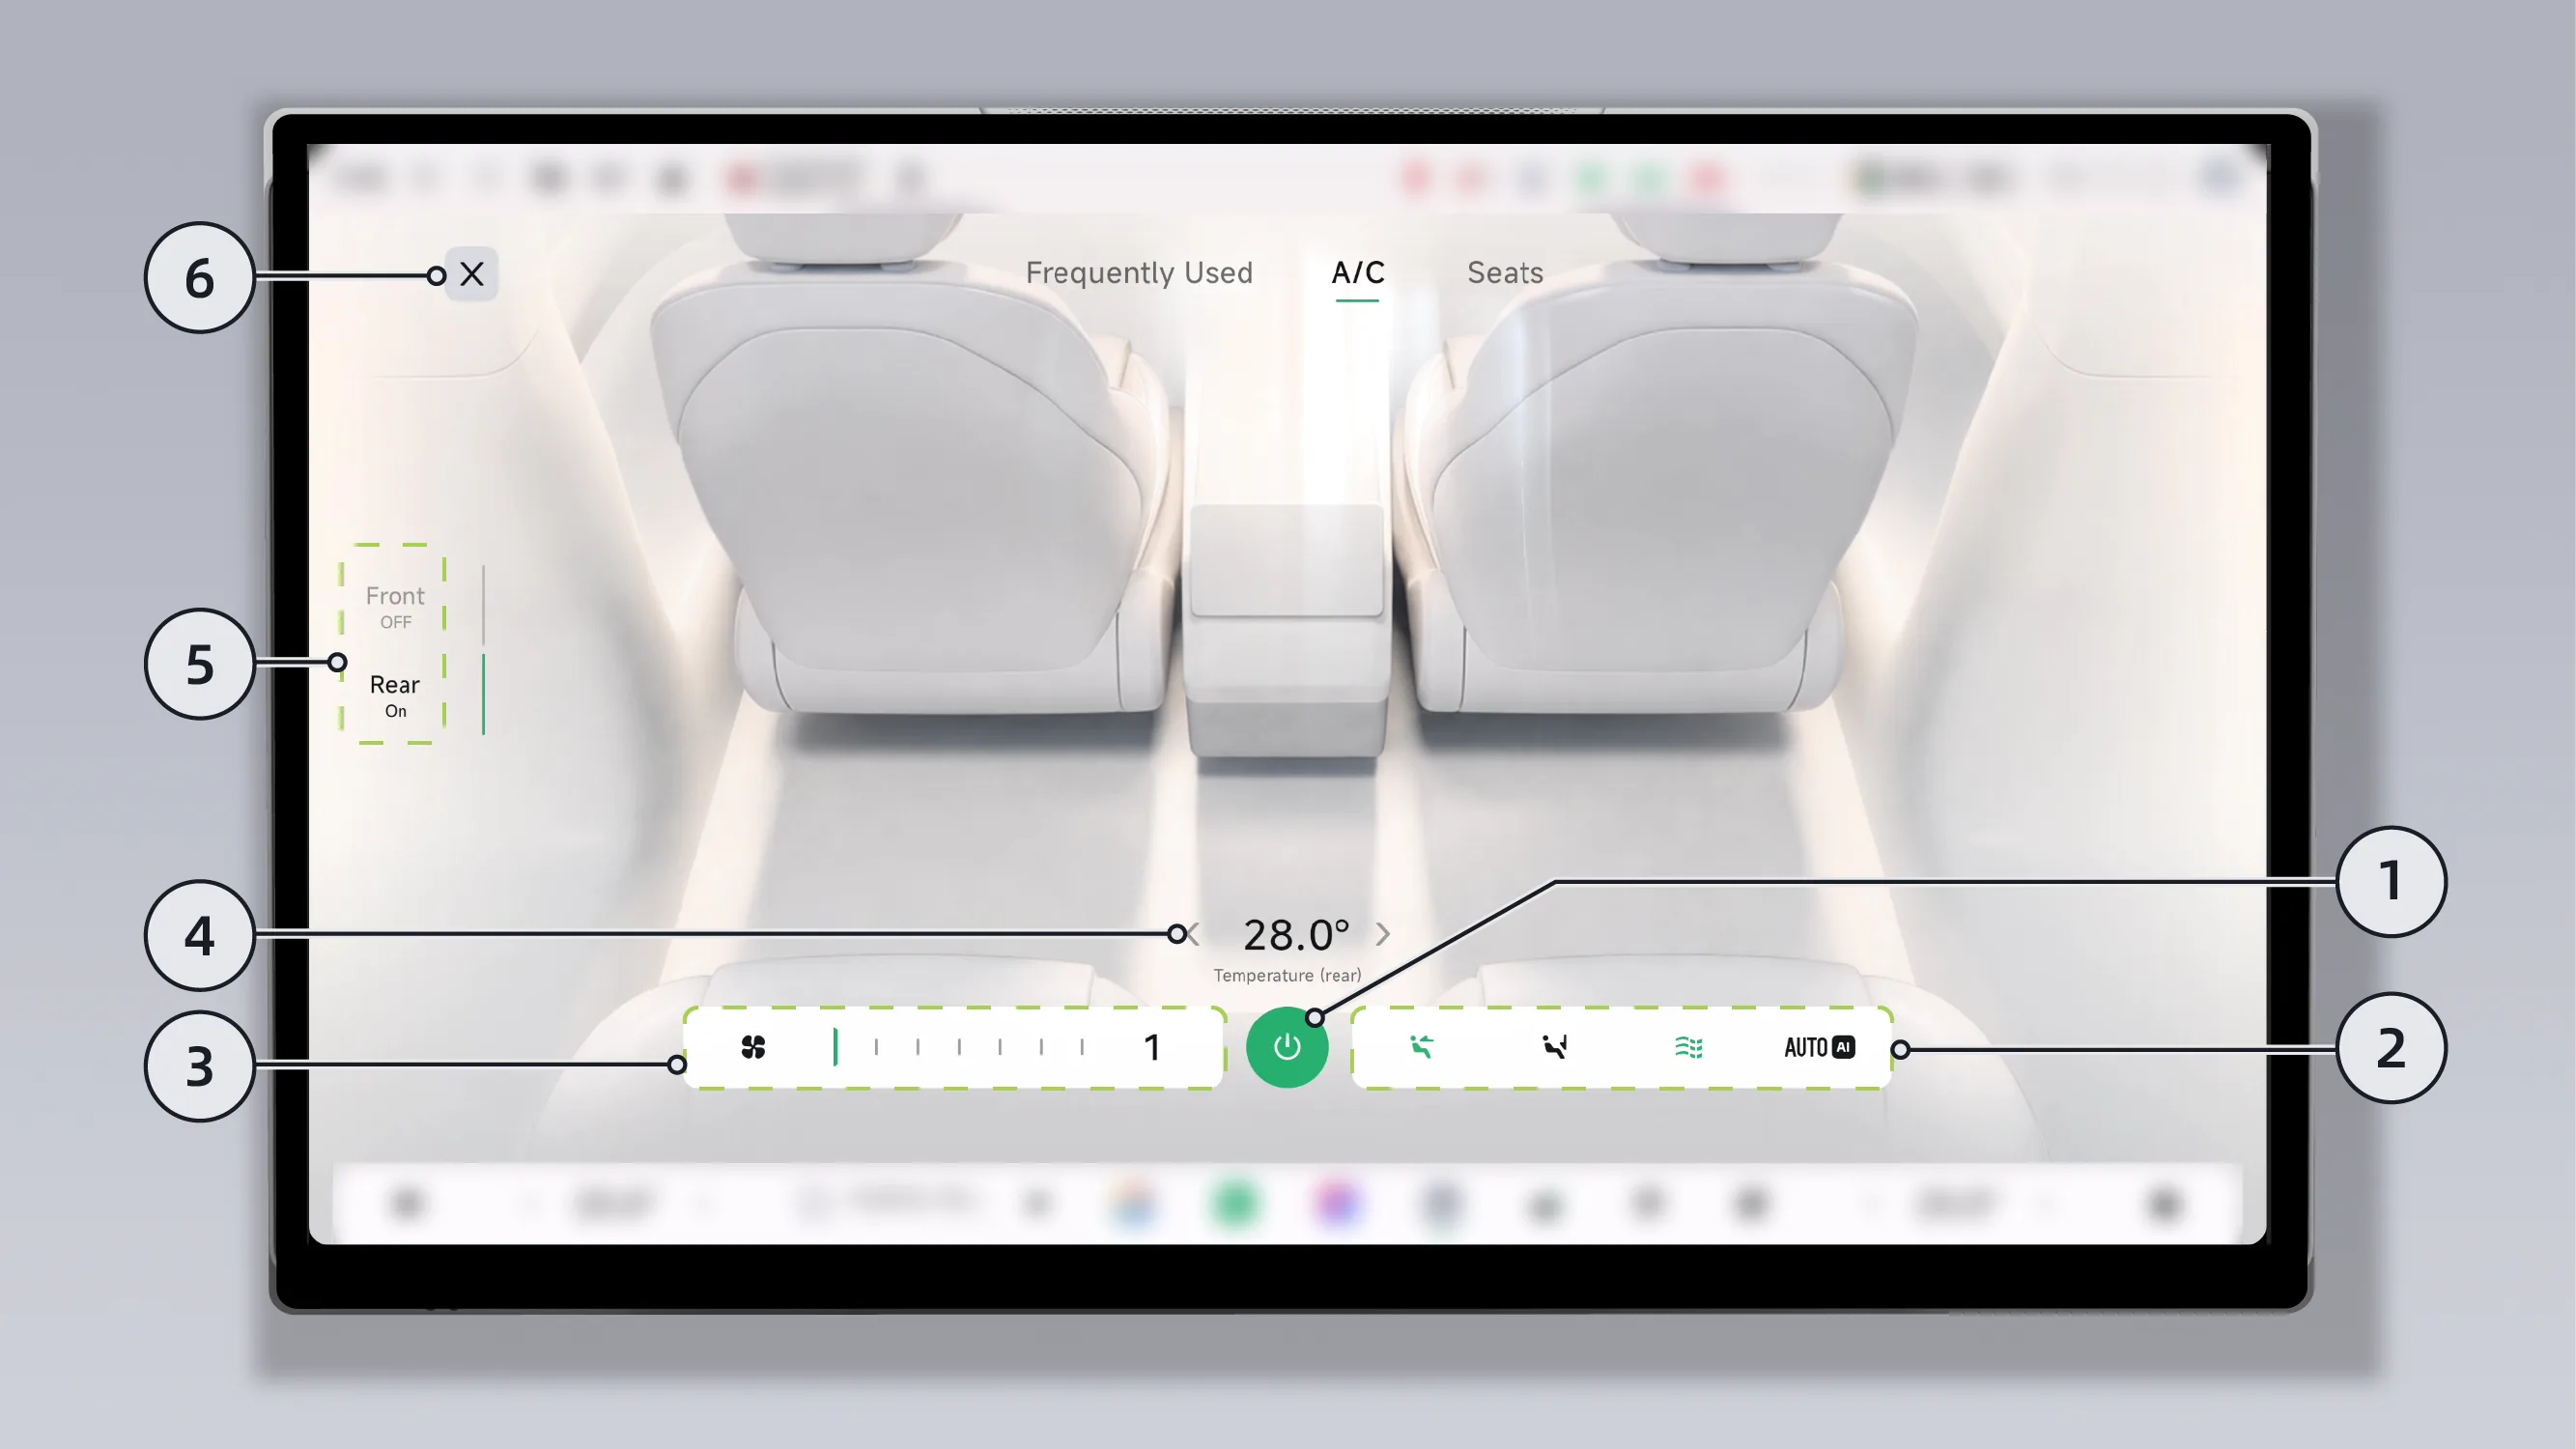
| 1. Turn the rear Air Conditioner on/off | 4. Adjust Rear Temperature |
| 2. Air Blowing Mode/No-Sensation Air Blowing/AI-AUTO Mode | 5. Front/Rear Air Conditioner Switching (with Front/Rear Air Conditioner Switch Display) |
| 3. Adjust airflow | 6. Close Page |
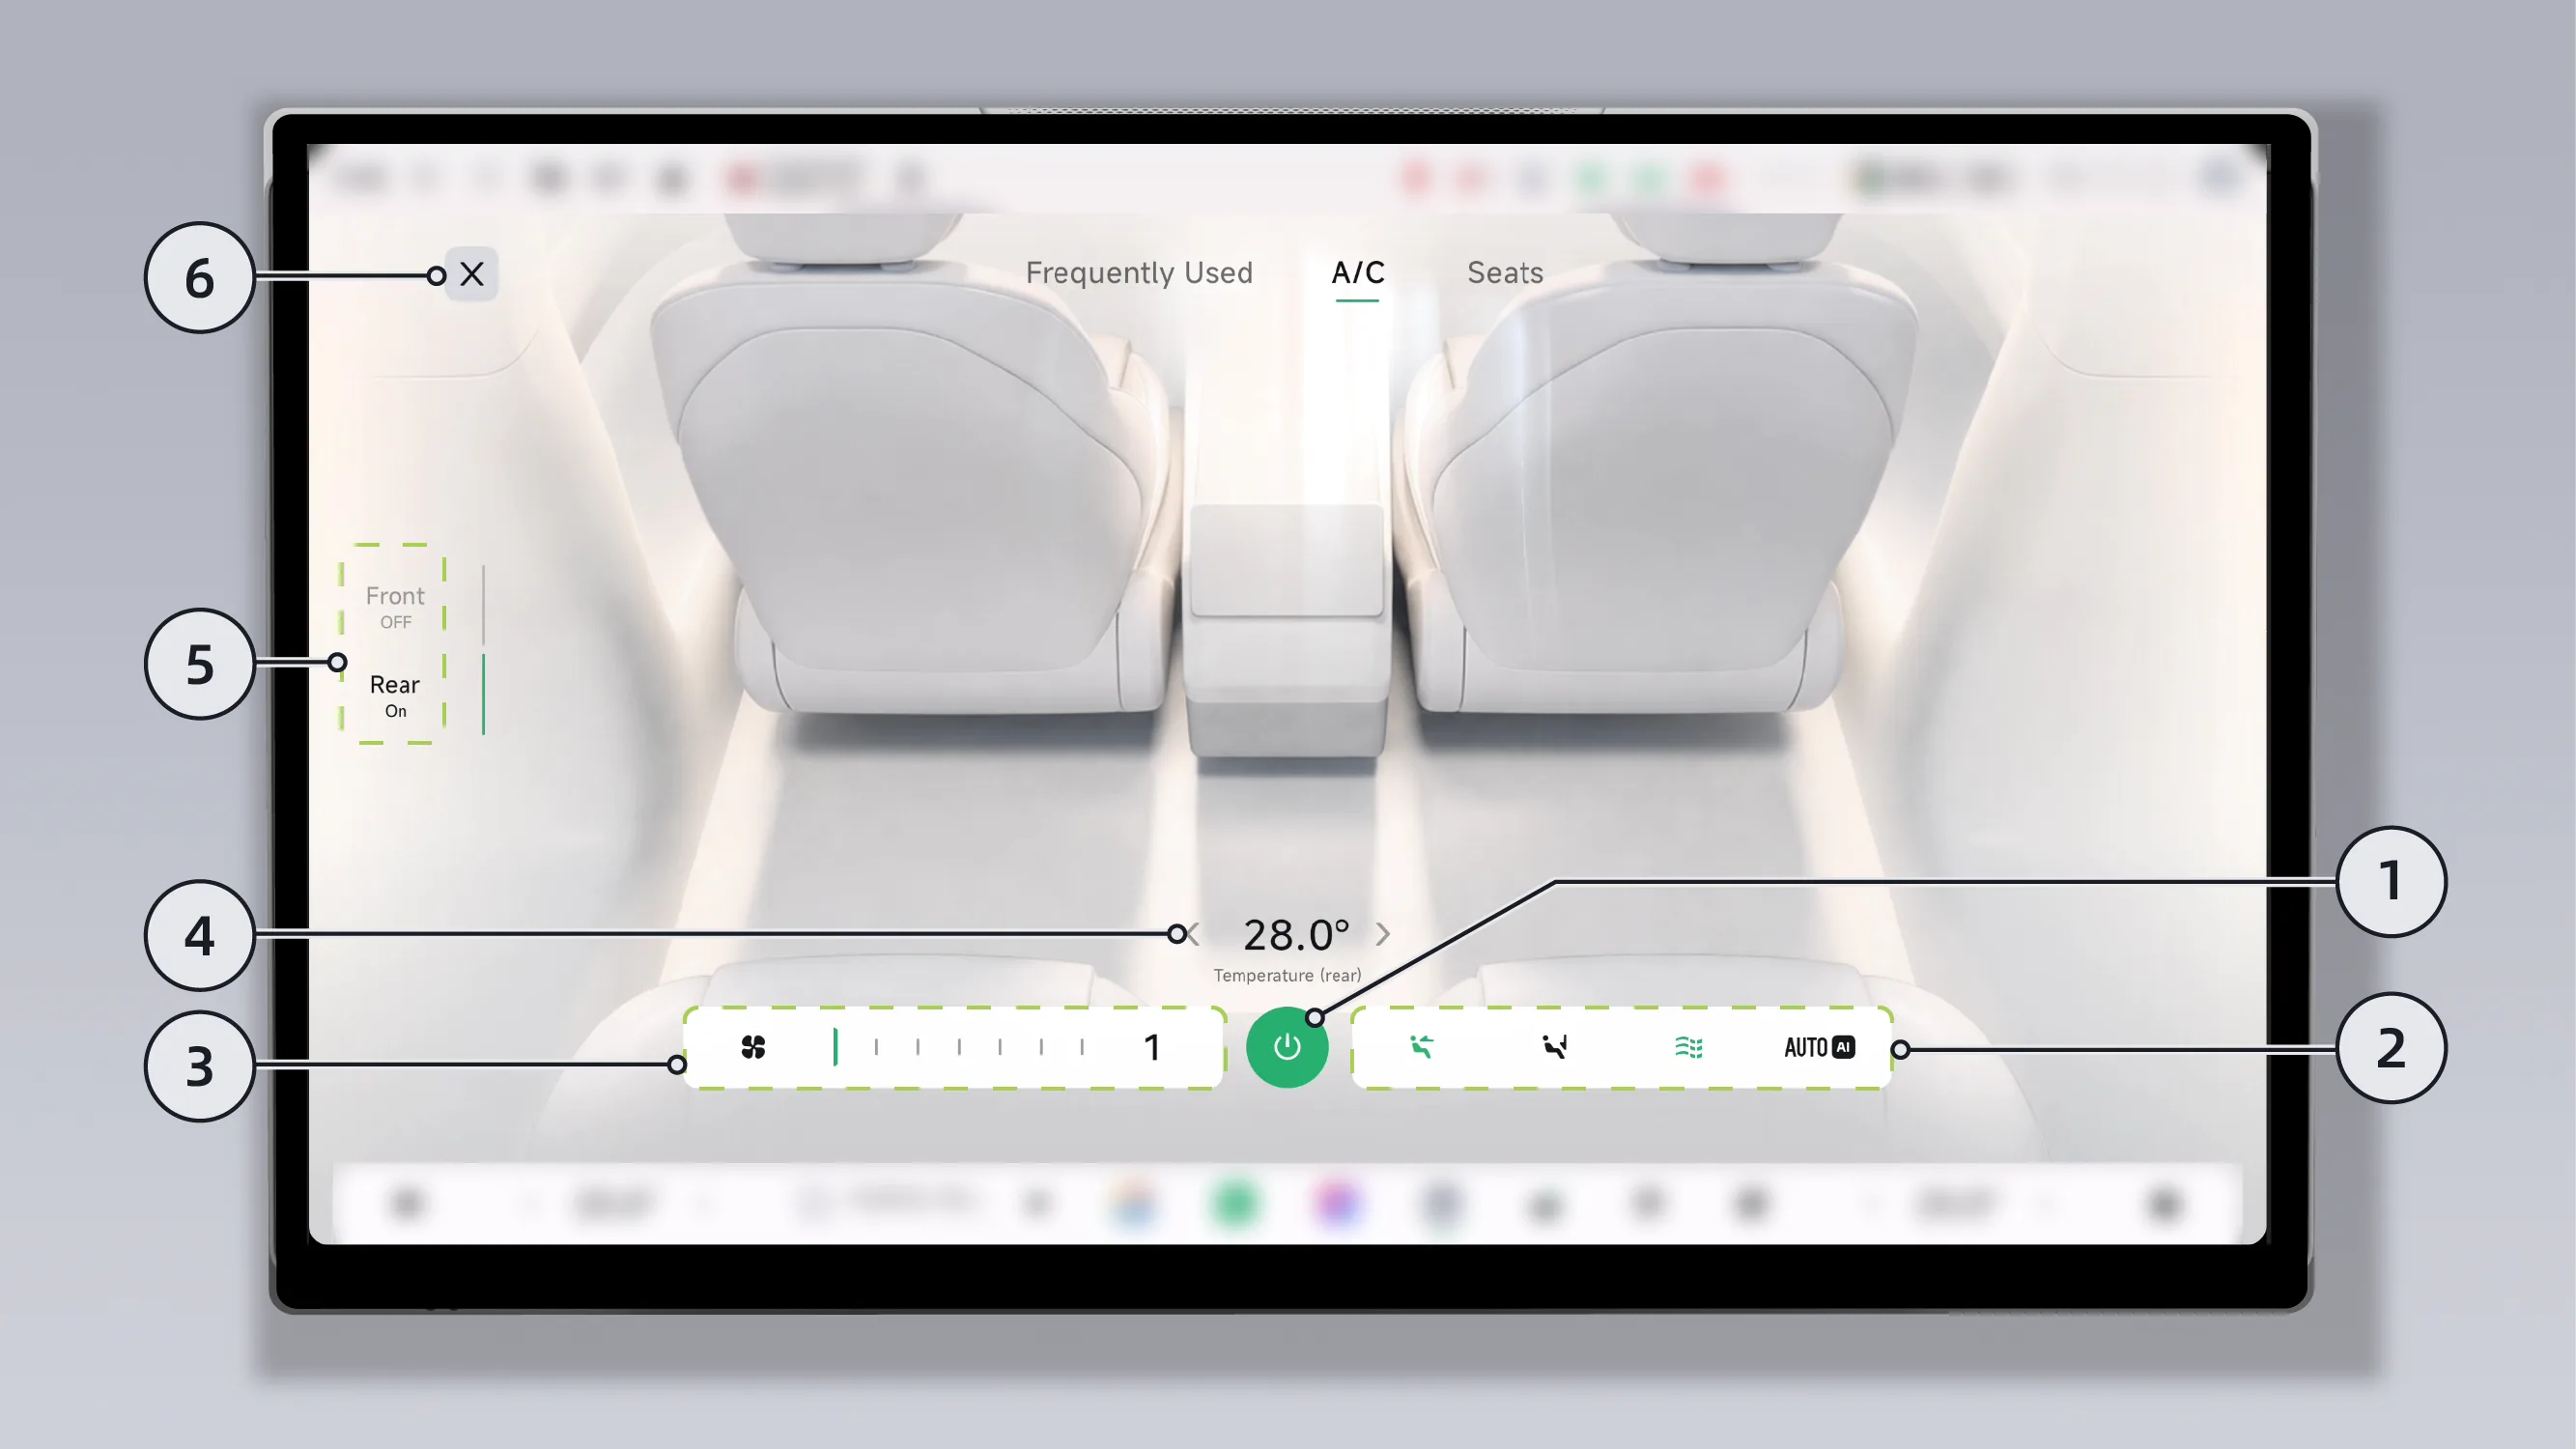
| 1. Turn the rear Air Conditioner on/off | 4. Adjust Rear Temperature |
| 2. Air Blowing Mode/Gentle Airflow/AI-AUTO Mode | 5. Front/Rear Air Conditioner Switching (with Front/Rear Air Conditioner Switch Display) |
| 3. Adjust Air Volume | 6. Close Page |
You can enter the Air Conditioner interface on the central control screen in any of the following ways:
Enter the Air Conditioner interface by voice command, for example, by saying keywords such as “Open the Air Conditioner interface”.
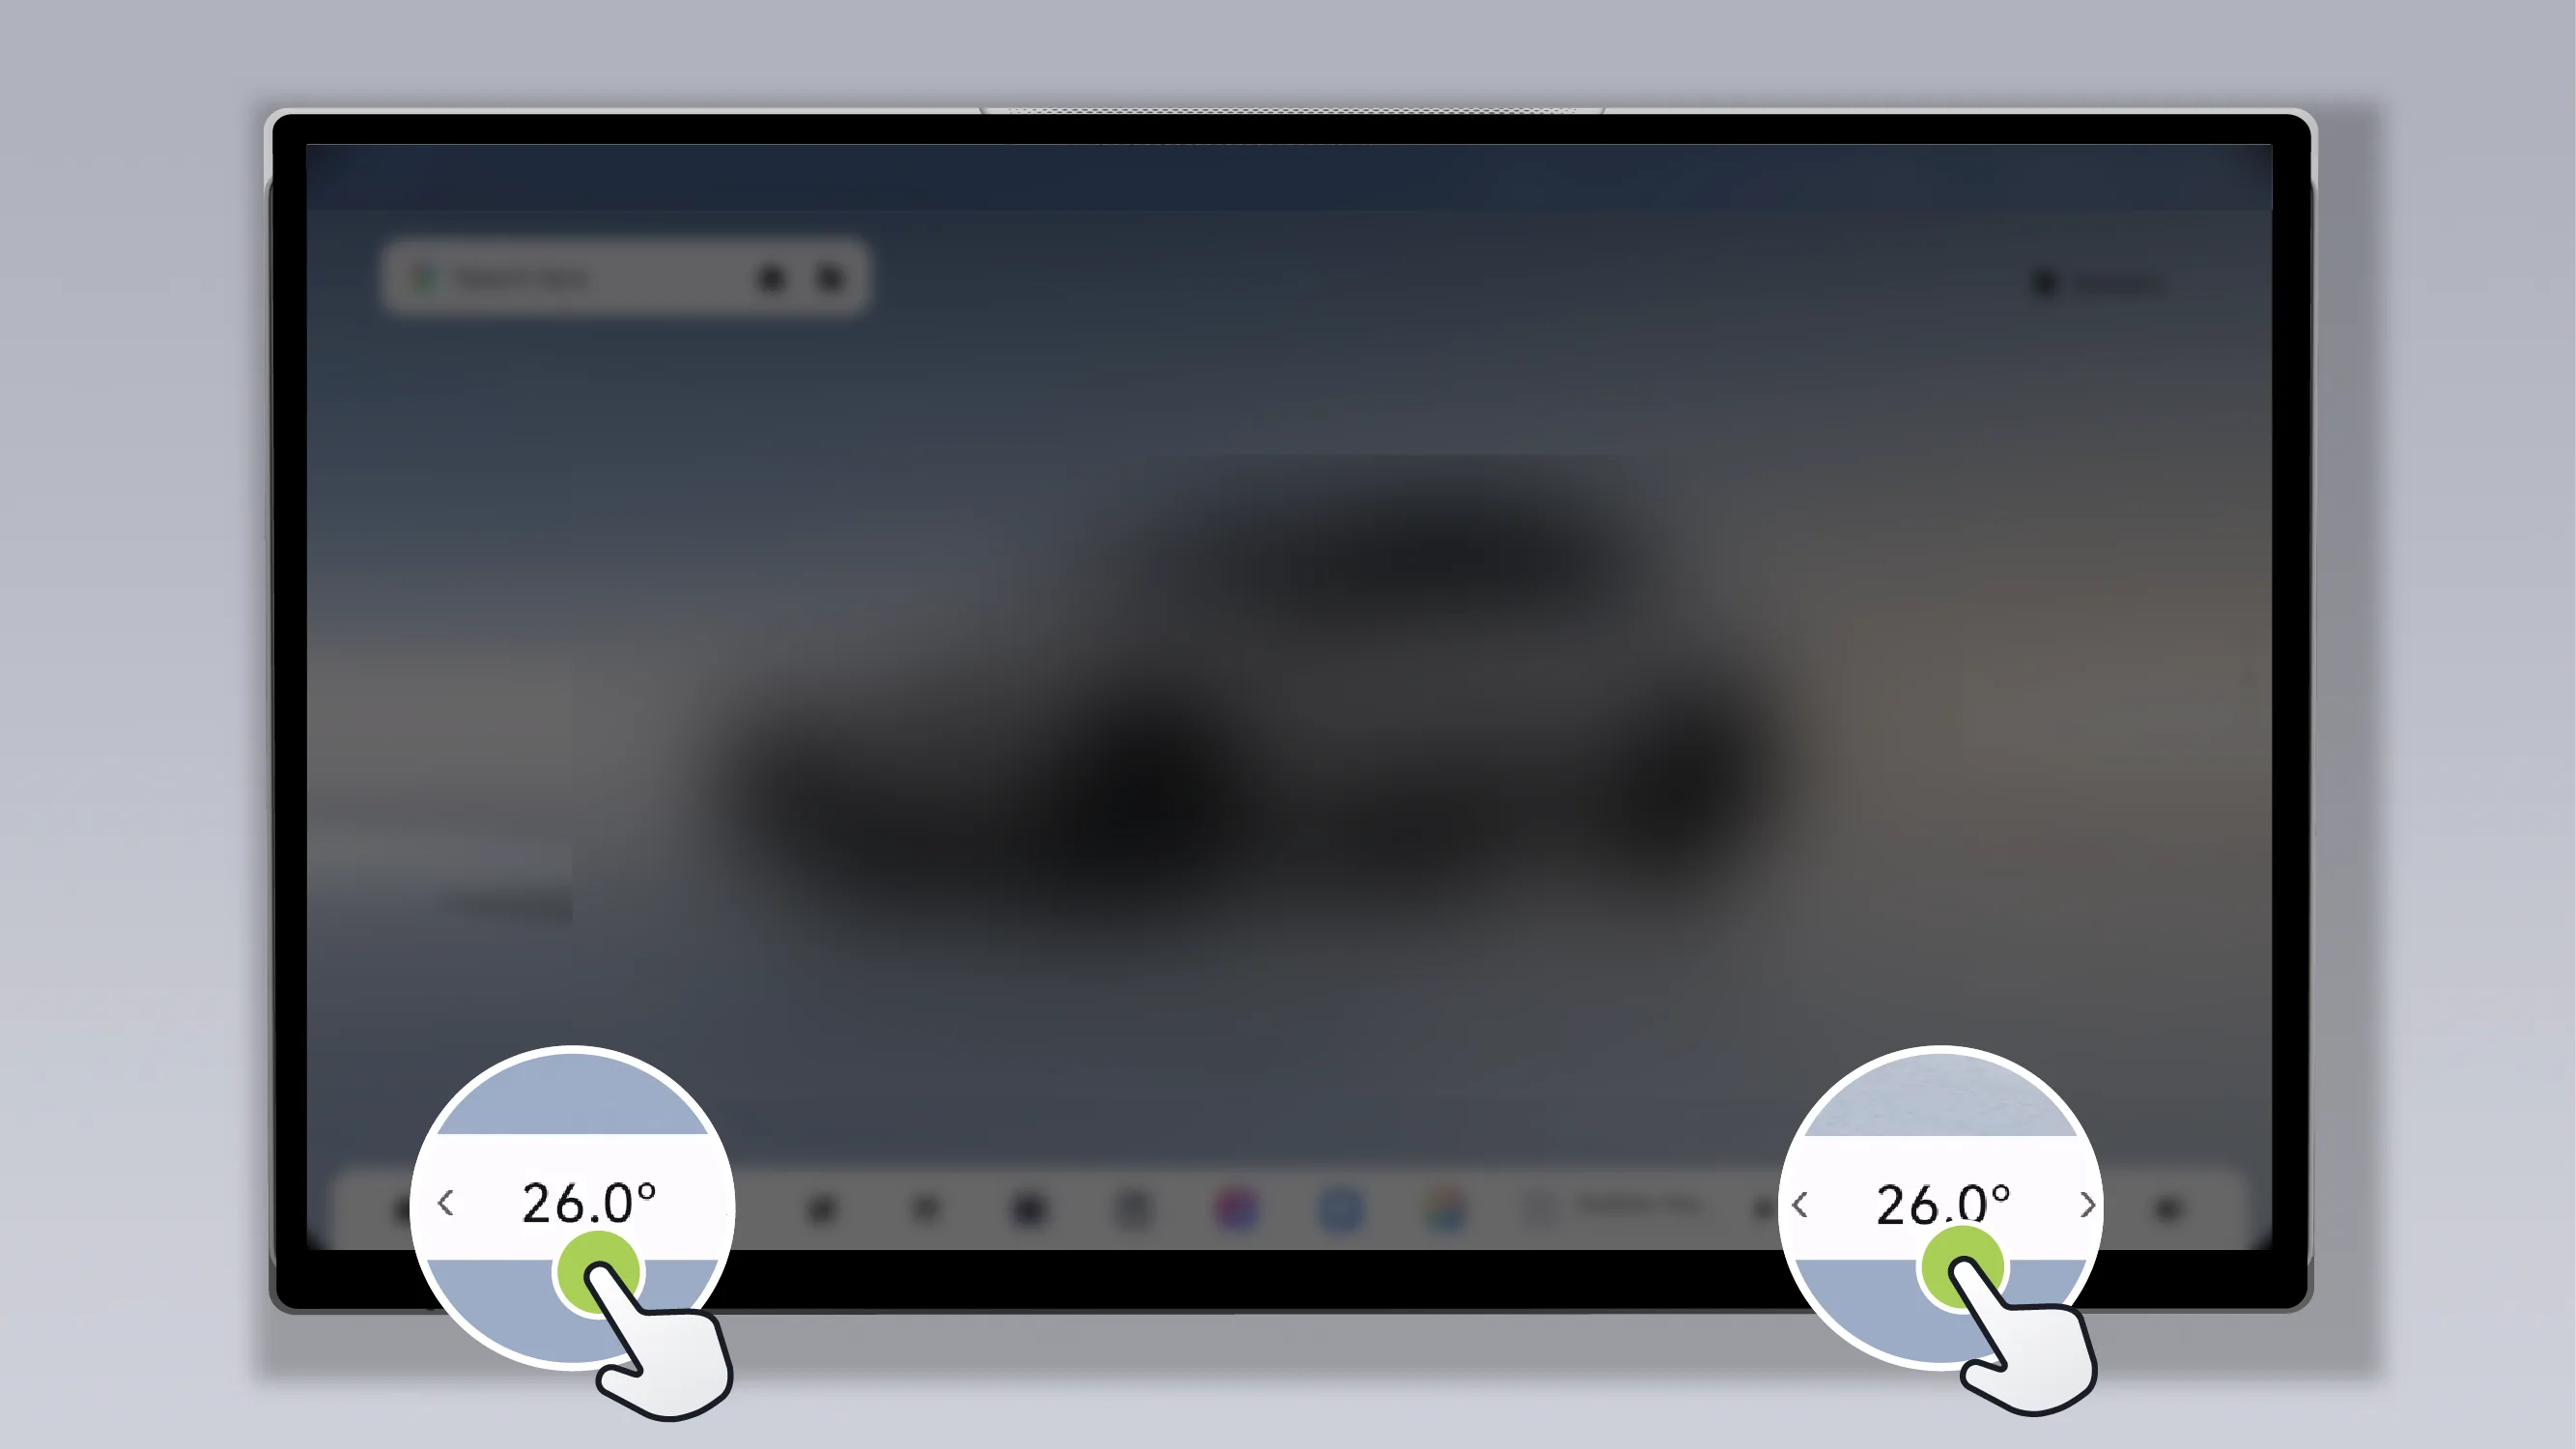
Tap the driver-side or passenger-side Air Conditioner widget in the bottom taskbar of the center control screen to enter the Air Conditioner screen.
Tips Before using the Air Conditioner component, ensure that the Air Conditioner component has been added to the bottom taskbar of the center display.
After entering the Air Conditioner interface, you can switch between the front/rear Air Conditioner interfaces by any of the following methods:
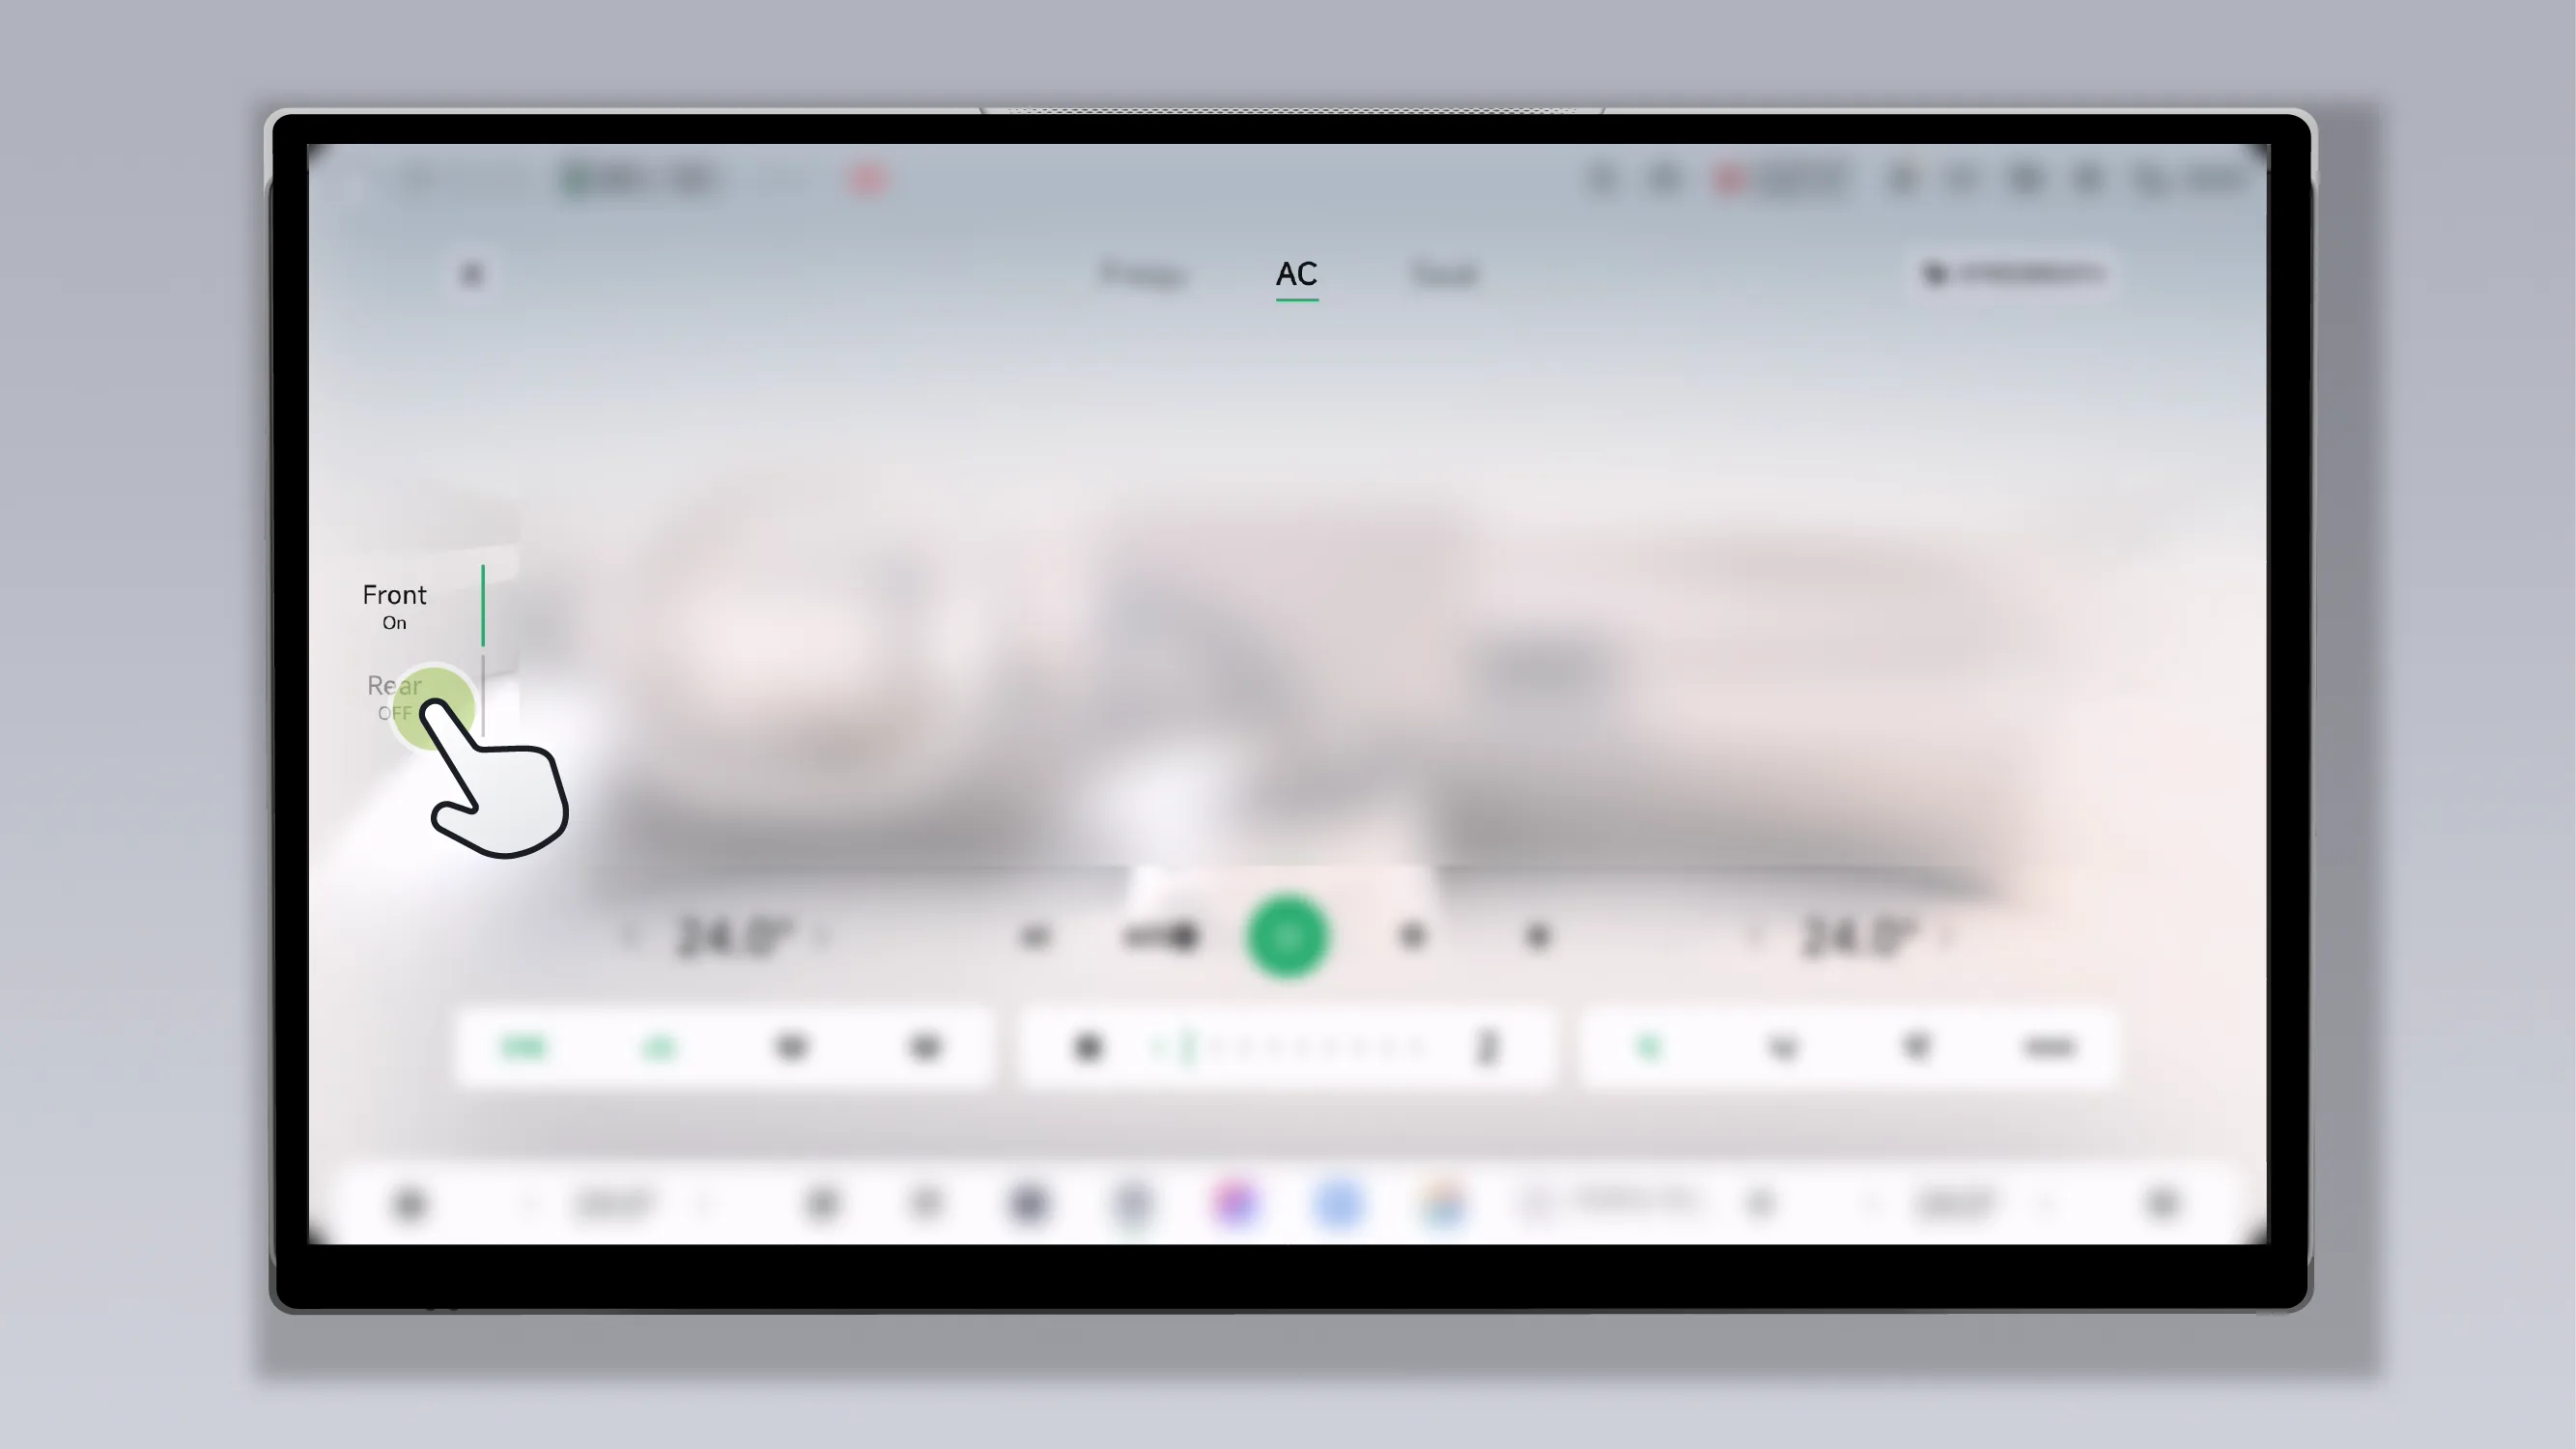
Button operation: Tap the front/rear Air Conditioner switch button on the Air Conditioner interface.
Tap the bottom taskbar on the rear control screen.  Air Conditioner icon, enter the rear control screen Air Conditioner interface.
You can turn the Air Conditioner on/off via the center control screen, rear control screen, steering wheel buttons, mobile app, or voice commands.
On the center control screen, the Air Conditioner can be turned on/off in any of the following ways:
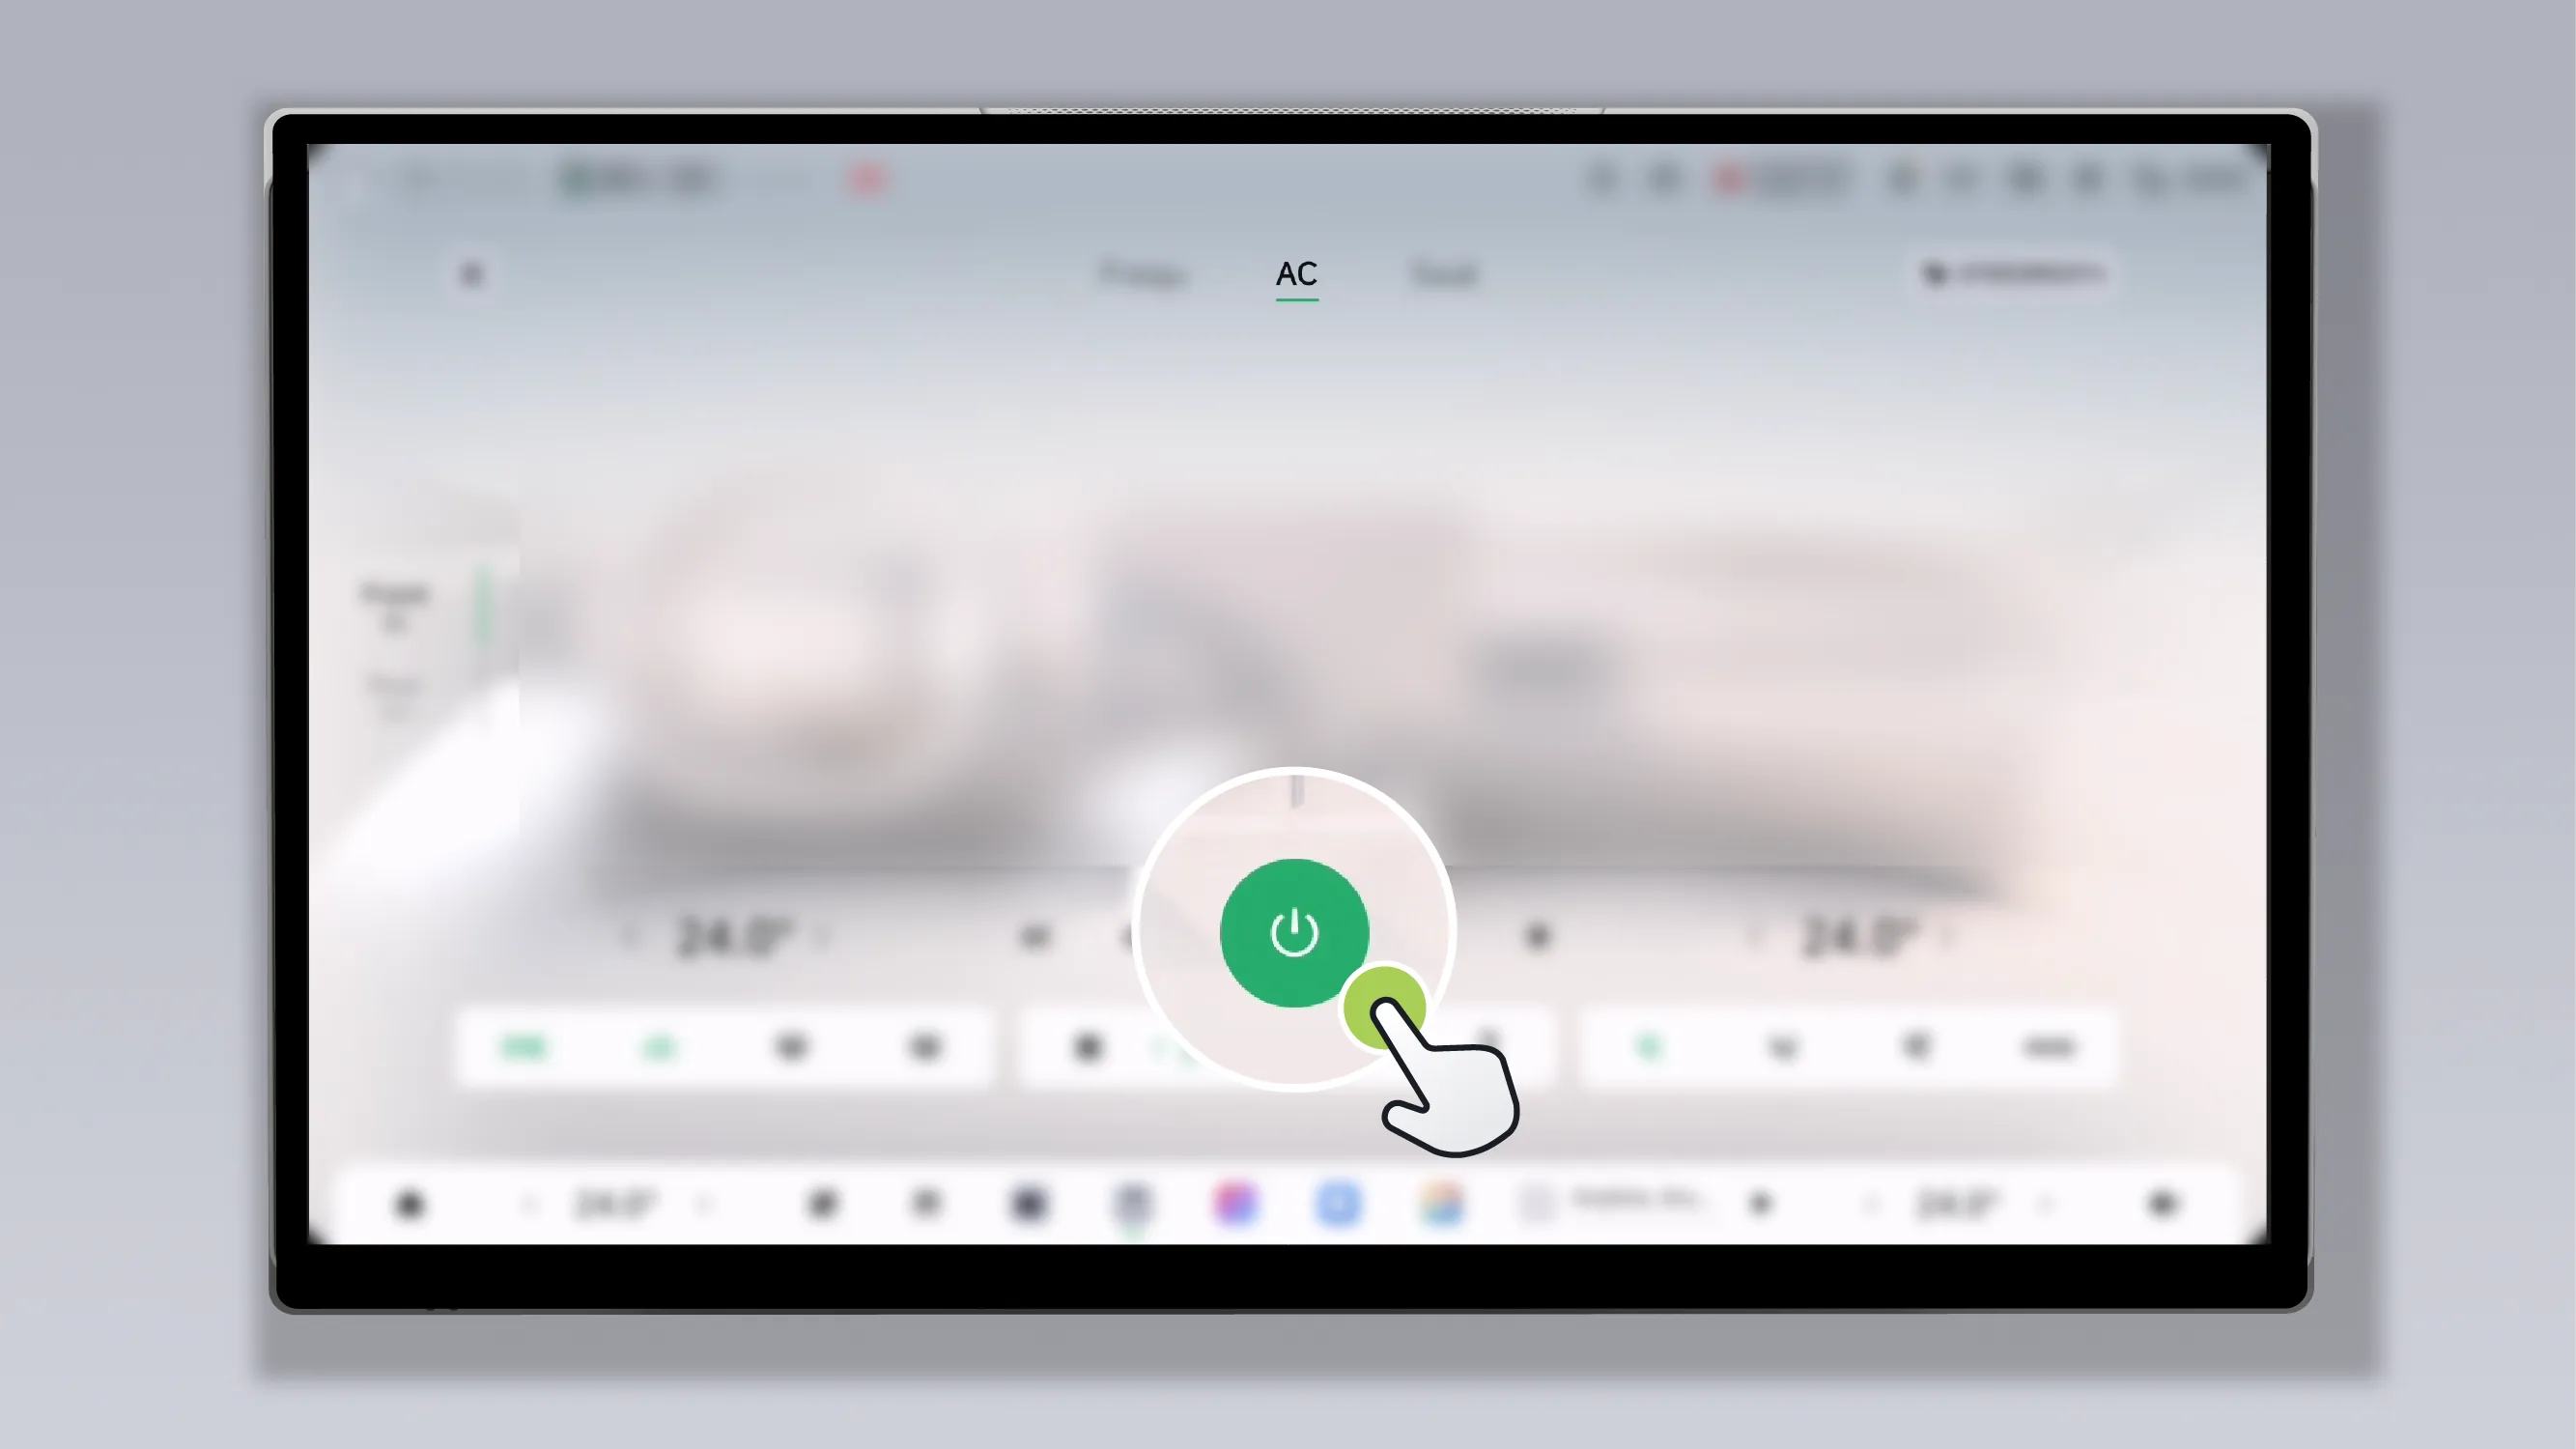
Tap on the front row Air Conditioner interface on the central control screen. “  ”, turn on/off the Air Conditioner in the front row.
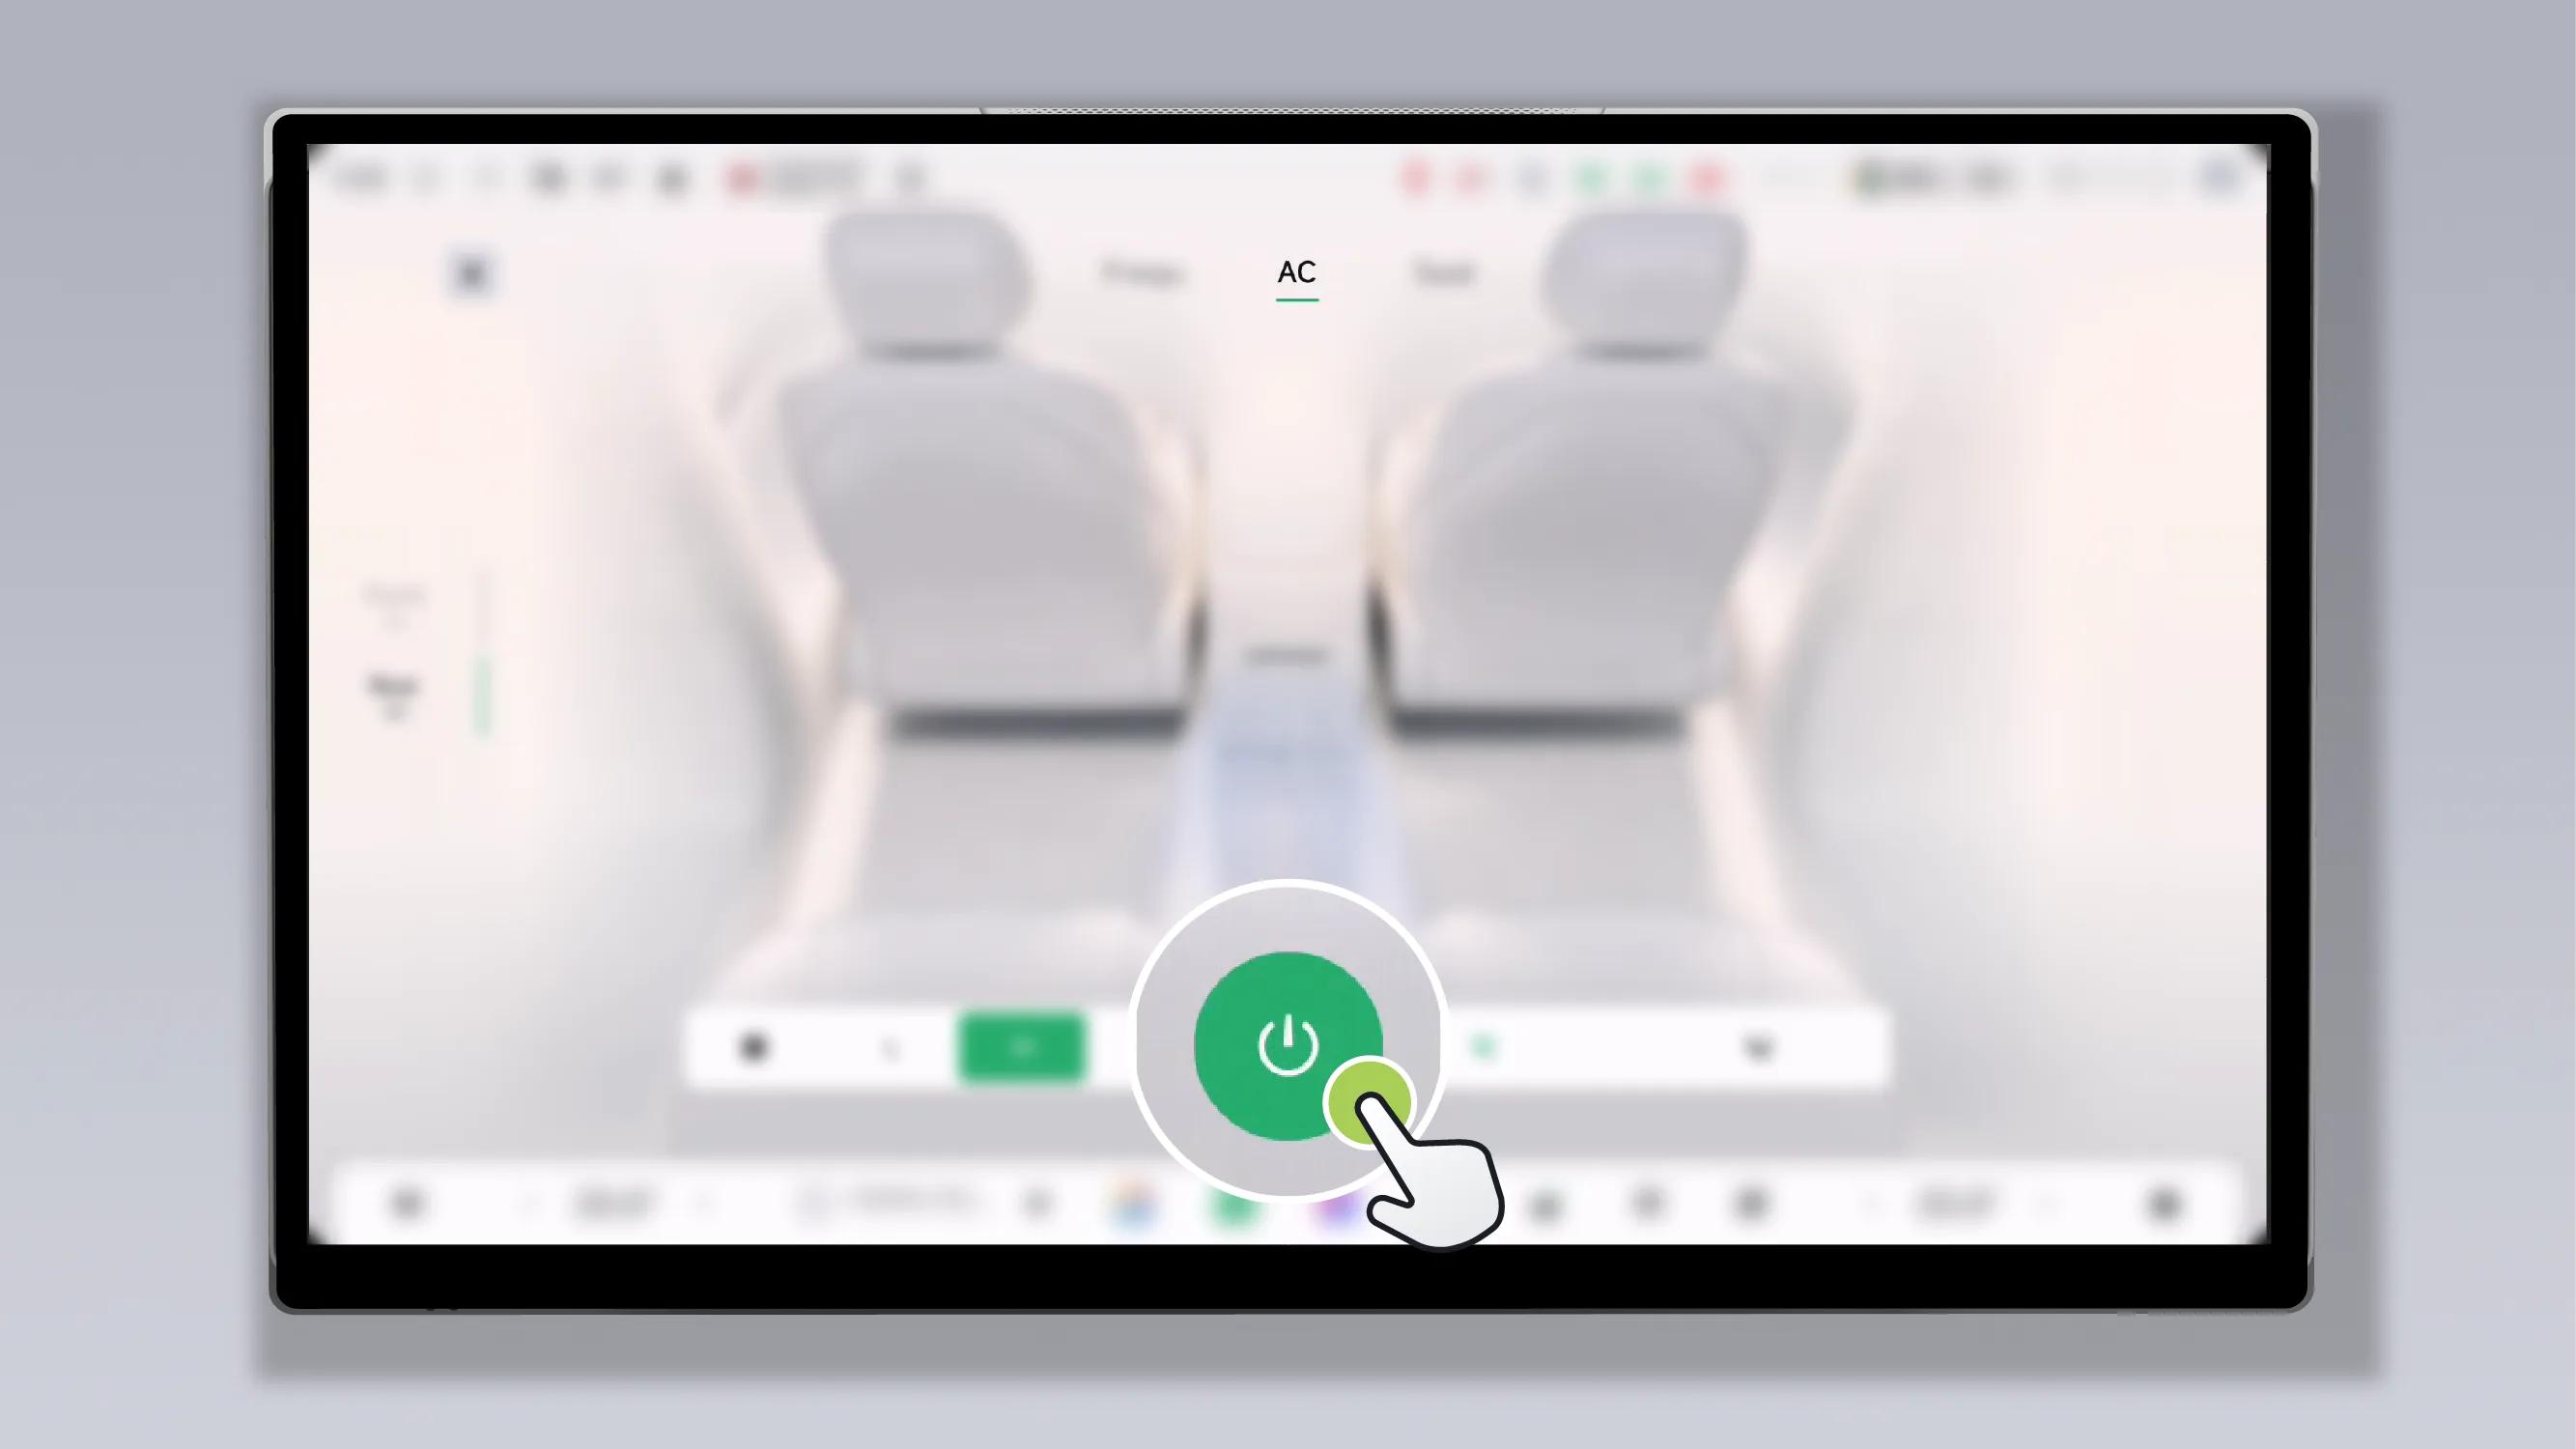
Tap on the rear Air Conditioner interface on the center control screen. “ ”, turn the rear Air Conditioner on/off.
Tap on the Air Conditioner interface on the rear control screen “ ”, turn the rear Air Conditioner on/off.
Tips When the vehicle is powered off, the system will automatically memorize the Air Conditioner status. If the Air Conditioner was on before Power Off, after the vehicle is powered on again, the system will automatically restore the Air Conditioner to the on state.
When the Air Conditioner is off, adjusting the Air Conditioner airflow, temperature, etc. will cause the system to automatically turn on the Air Conditioner.
When the Air Conditioner in the front row is off, if the rear Air Conditioner is turned on through the rear control screen, the front row Air Conditioner will be turned on simultaneously.
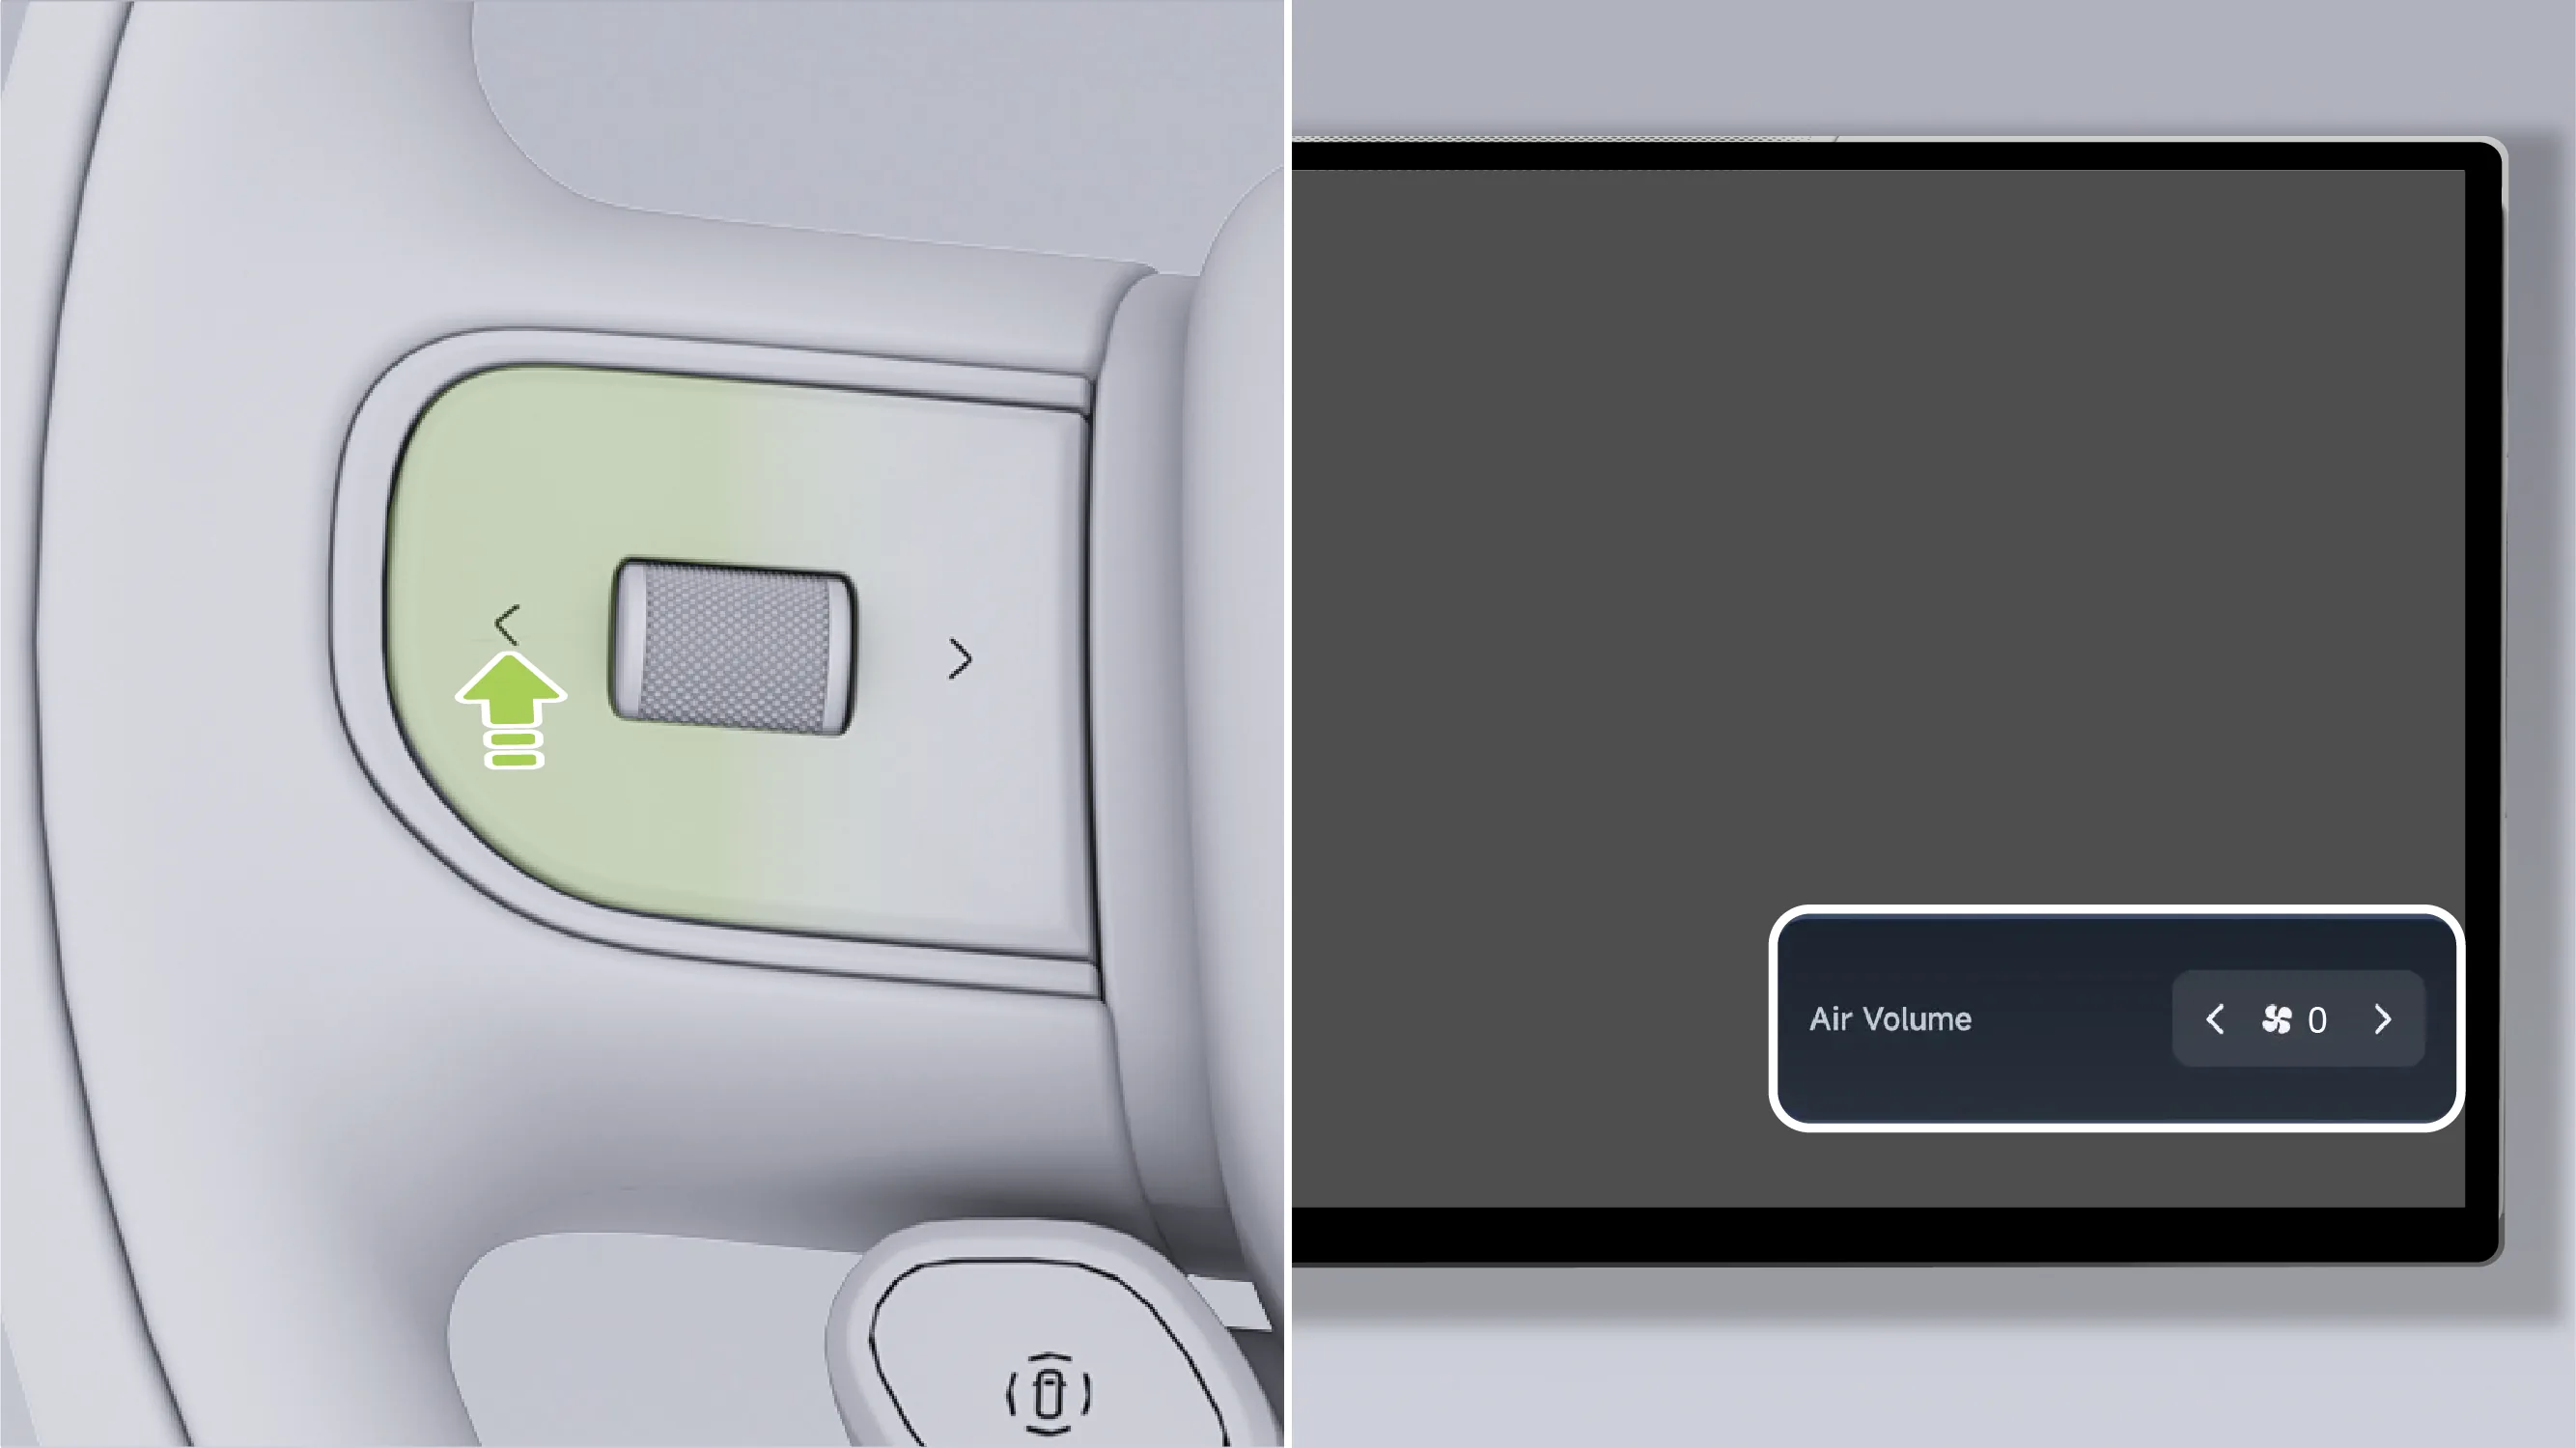
When the Air Conditioner is on, set the fan speed to level 1 and press the left button on the left side of the steering wheel once. The instrument cluster will display the pop-up message "Press again to turn off". Press this button again to quickly turn off the Air Conditioner.
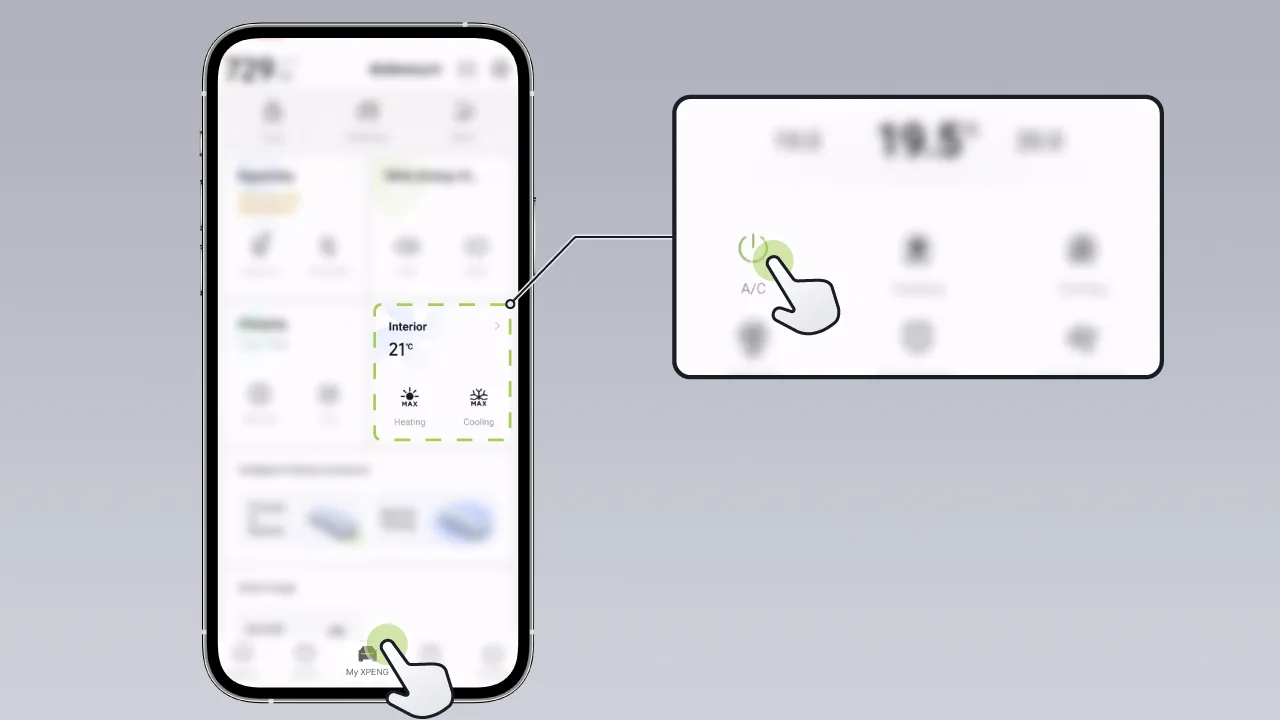
Tap the mobile app in sequence “XPENG→Smart Air Conditioning→ ”, turn the Air Conditioner on/off.
The vehicle is equipped with an electric compressor. When the A/C button is turned on on the center display, the compressor starts operating. The system performs cooling or heating according to the currently set air conditioning temperature. When the set temperature is lower than the temperature inside the vehicle, the vehicle performs cooling. When the set temperature is higher than the temperature inside the vehicle, the vehicle performs heating.
When the A/C button is turned off, the compressor stops working. At this time, the Air Conditioner blows Natural Breeze, with no cooling or heating function.
You can turn the A/C on/off in any of the following ways:
Turn A/C on/off by voice command.
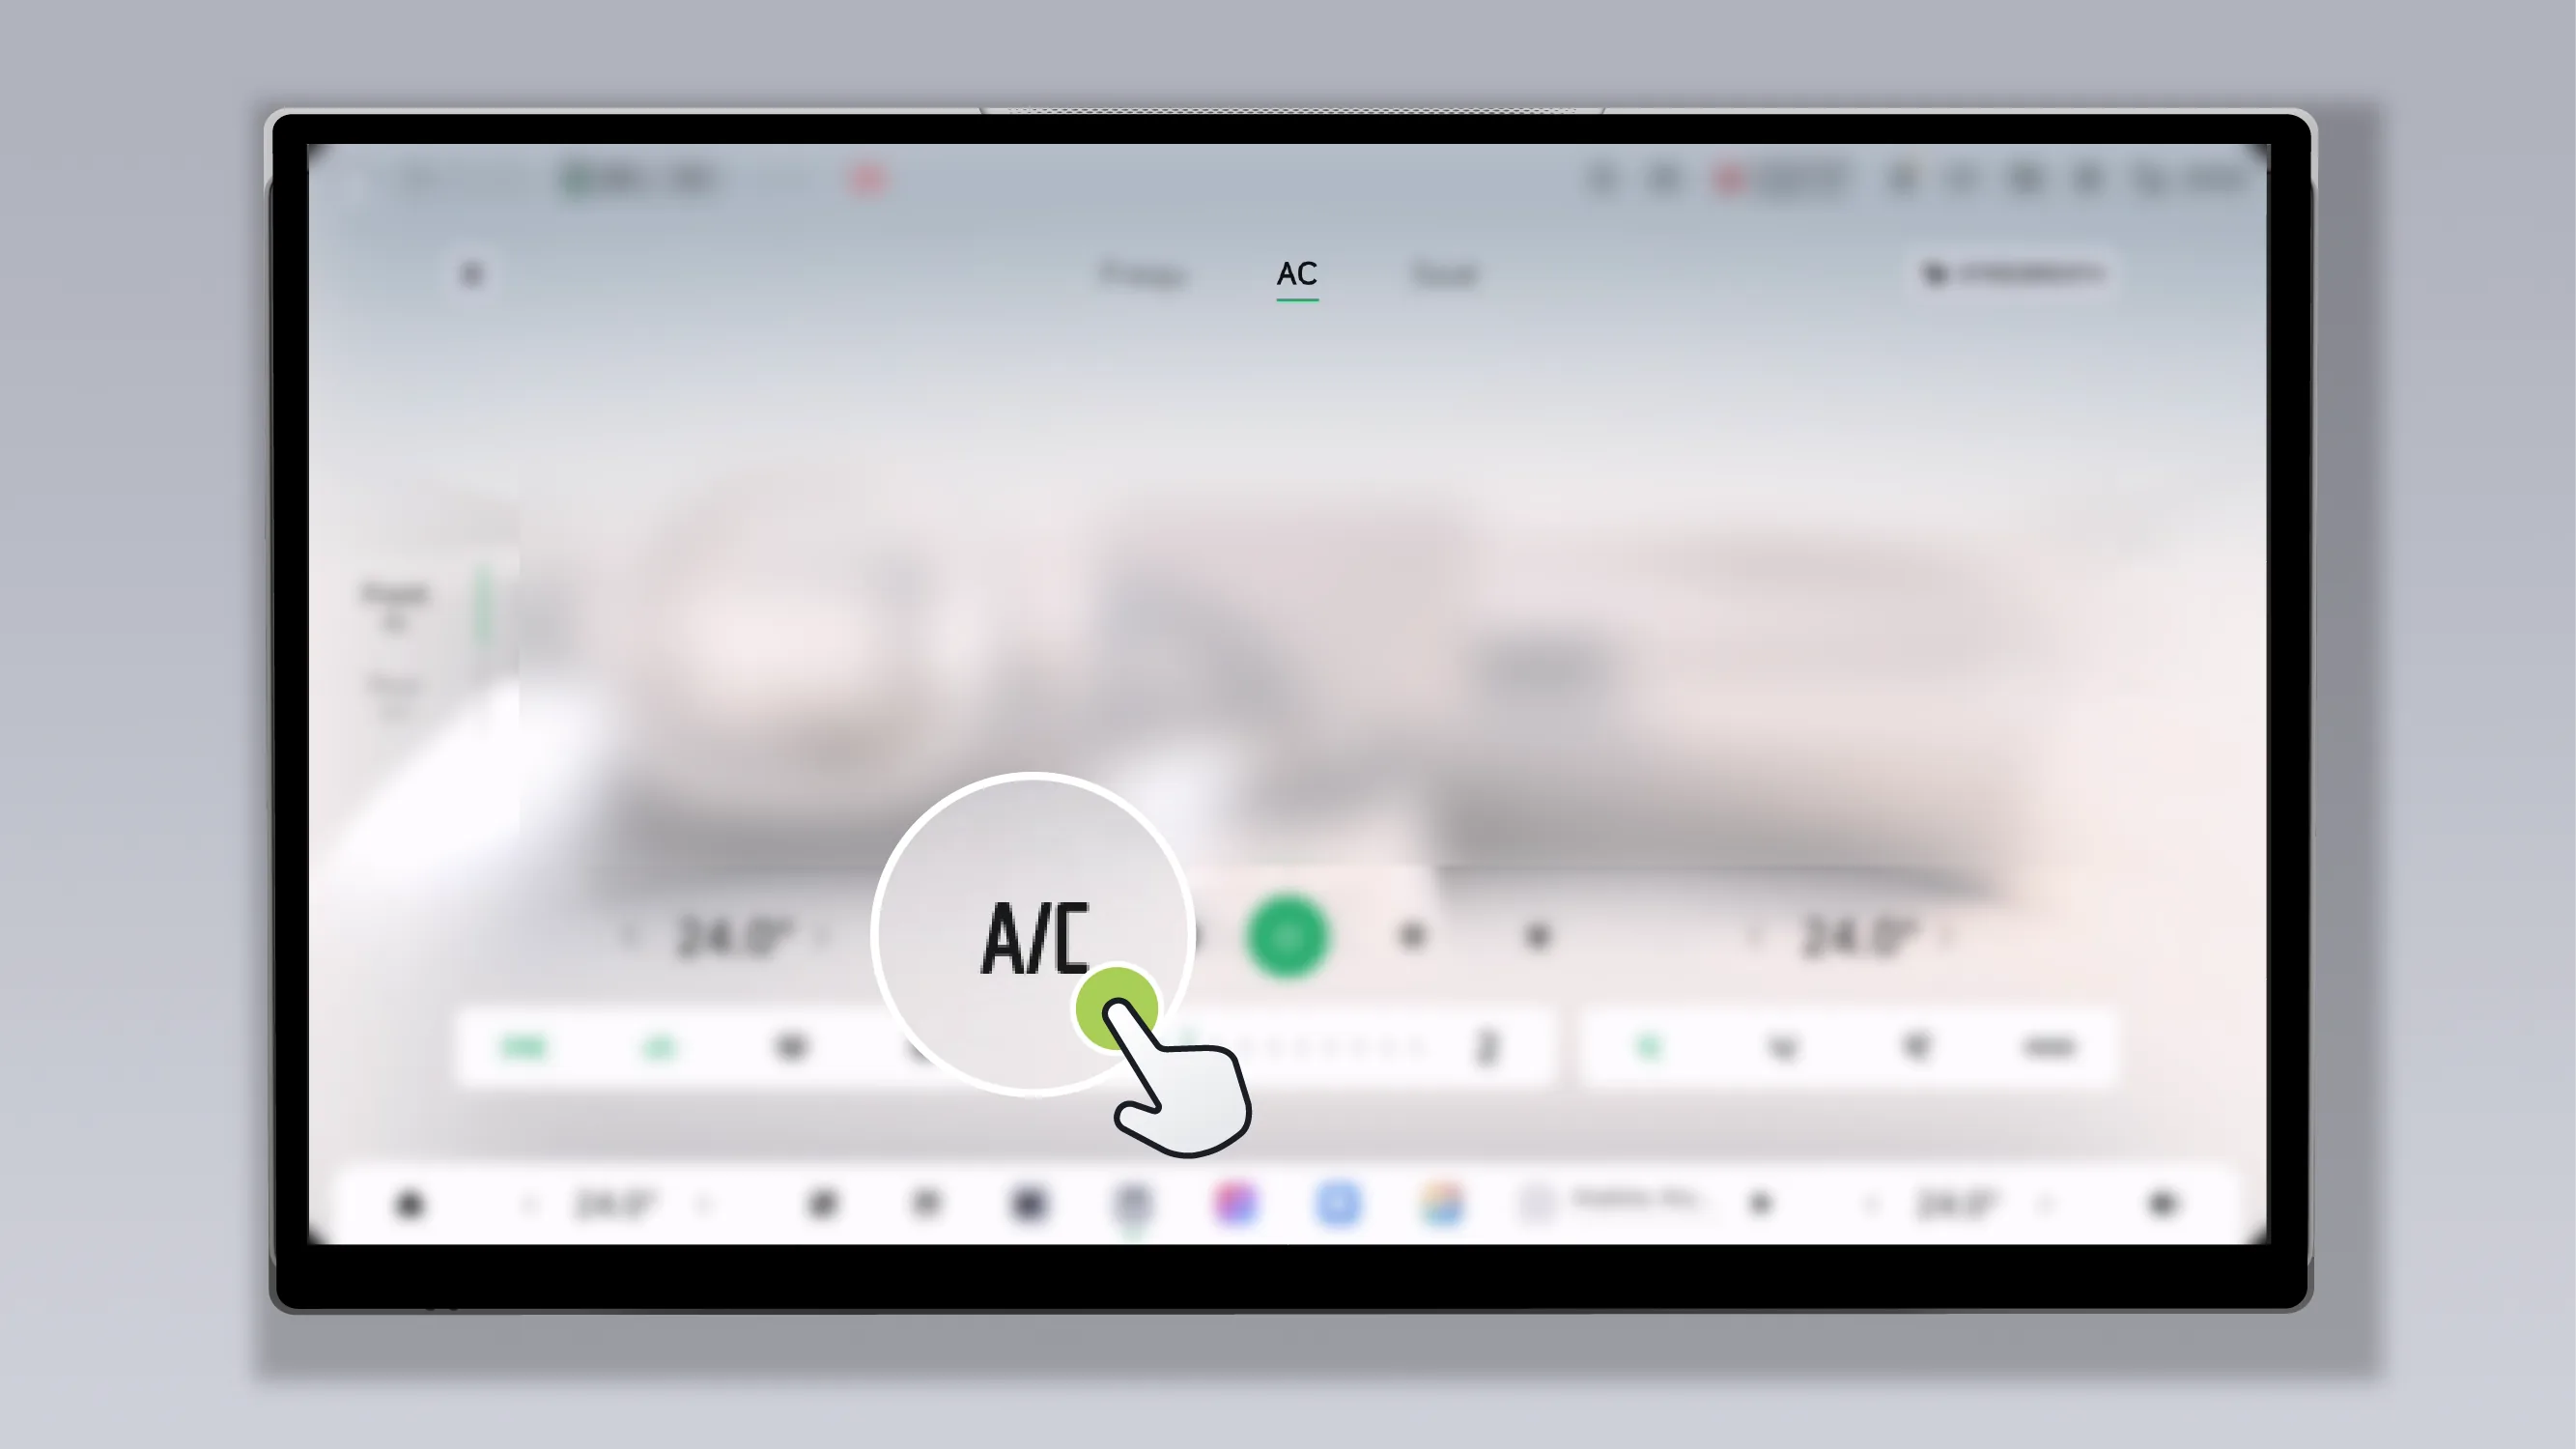
Tap on the Air Conditioner interface on the center control screen , turn A/C on/off.
When the Air Conditioner is in AI-AUTO mode, you can manually adjust the temperature value. The system will automatically control the air volume, inside/outside air circulation, etc. according to the set Air Conditioner temperature. For daily use, it is recommended that you select the Air Conditioner AI-AUTO mode.
You can turn the Air Conditioner AI-AUTO mode on/off through the center control screen, rear control screen, or voice command.
On the central control screen, you can turn the Air Conditioner automatic mode on/off in any of the following ways:
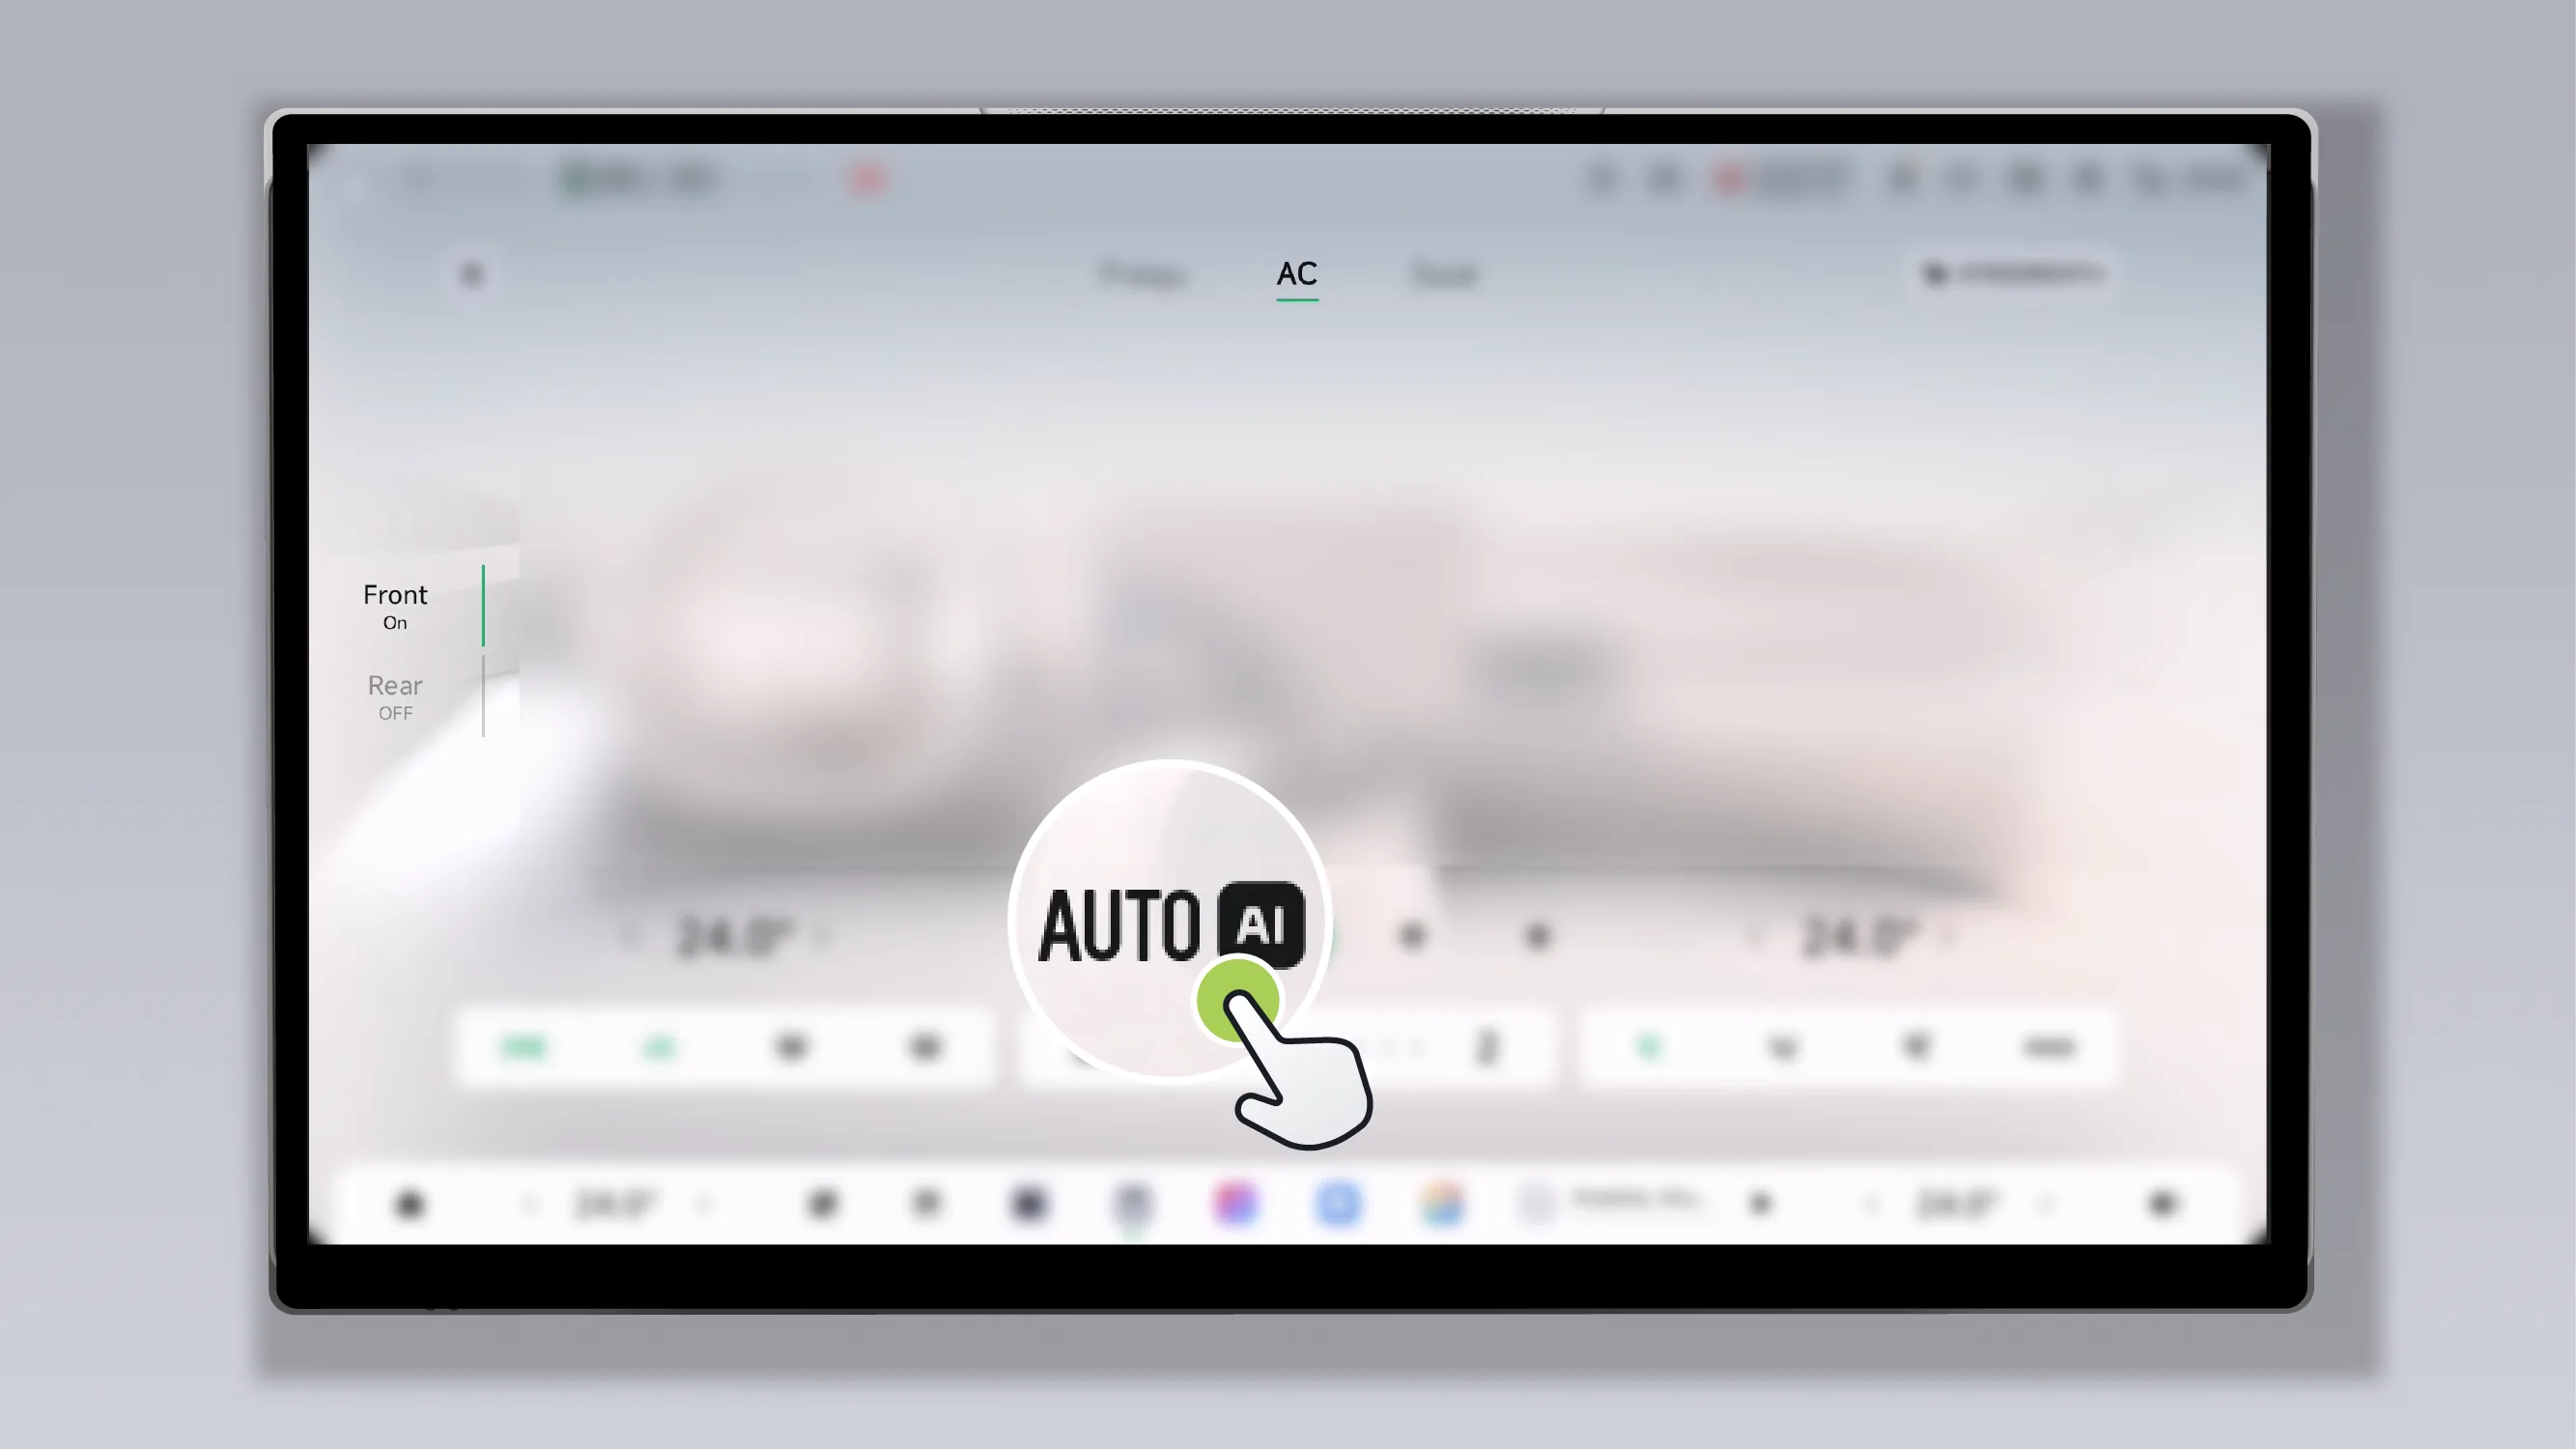
Tap on the front row Air Conditioner interface on the central control screen. , turn on/off the front row Air Conditioner AI-AUTO mode.
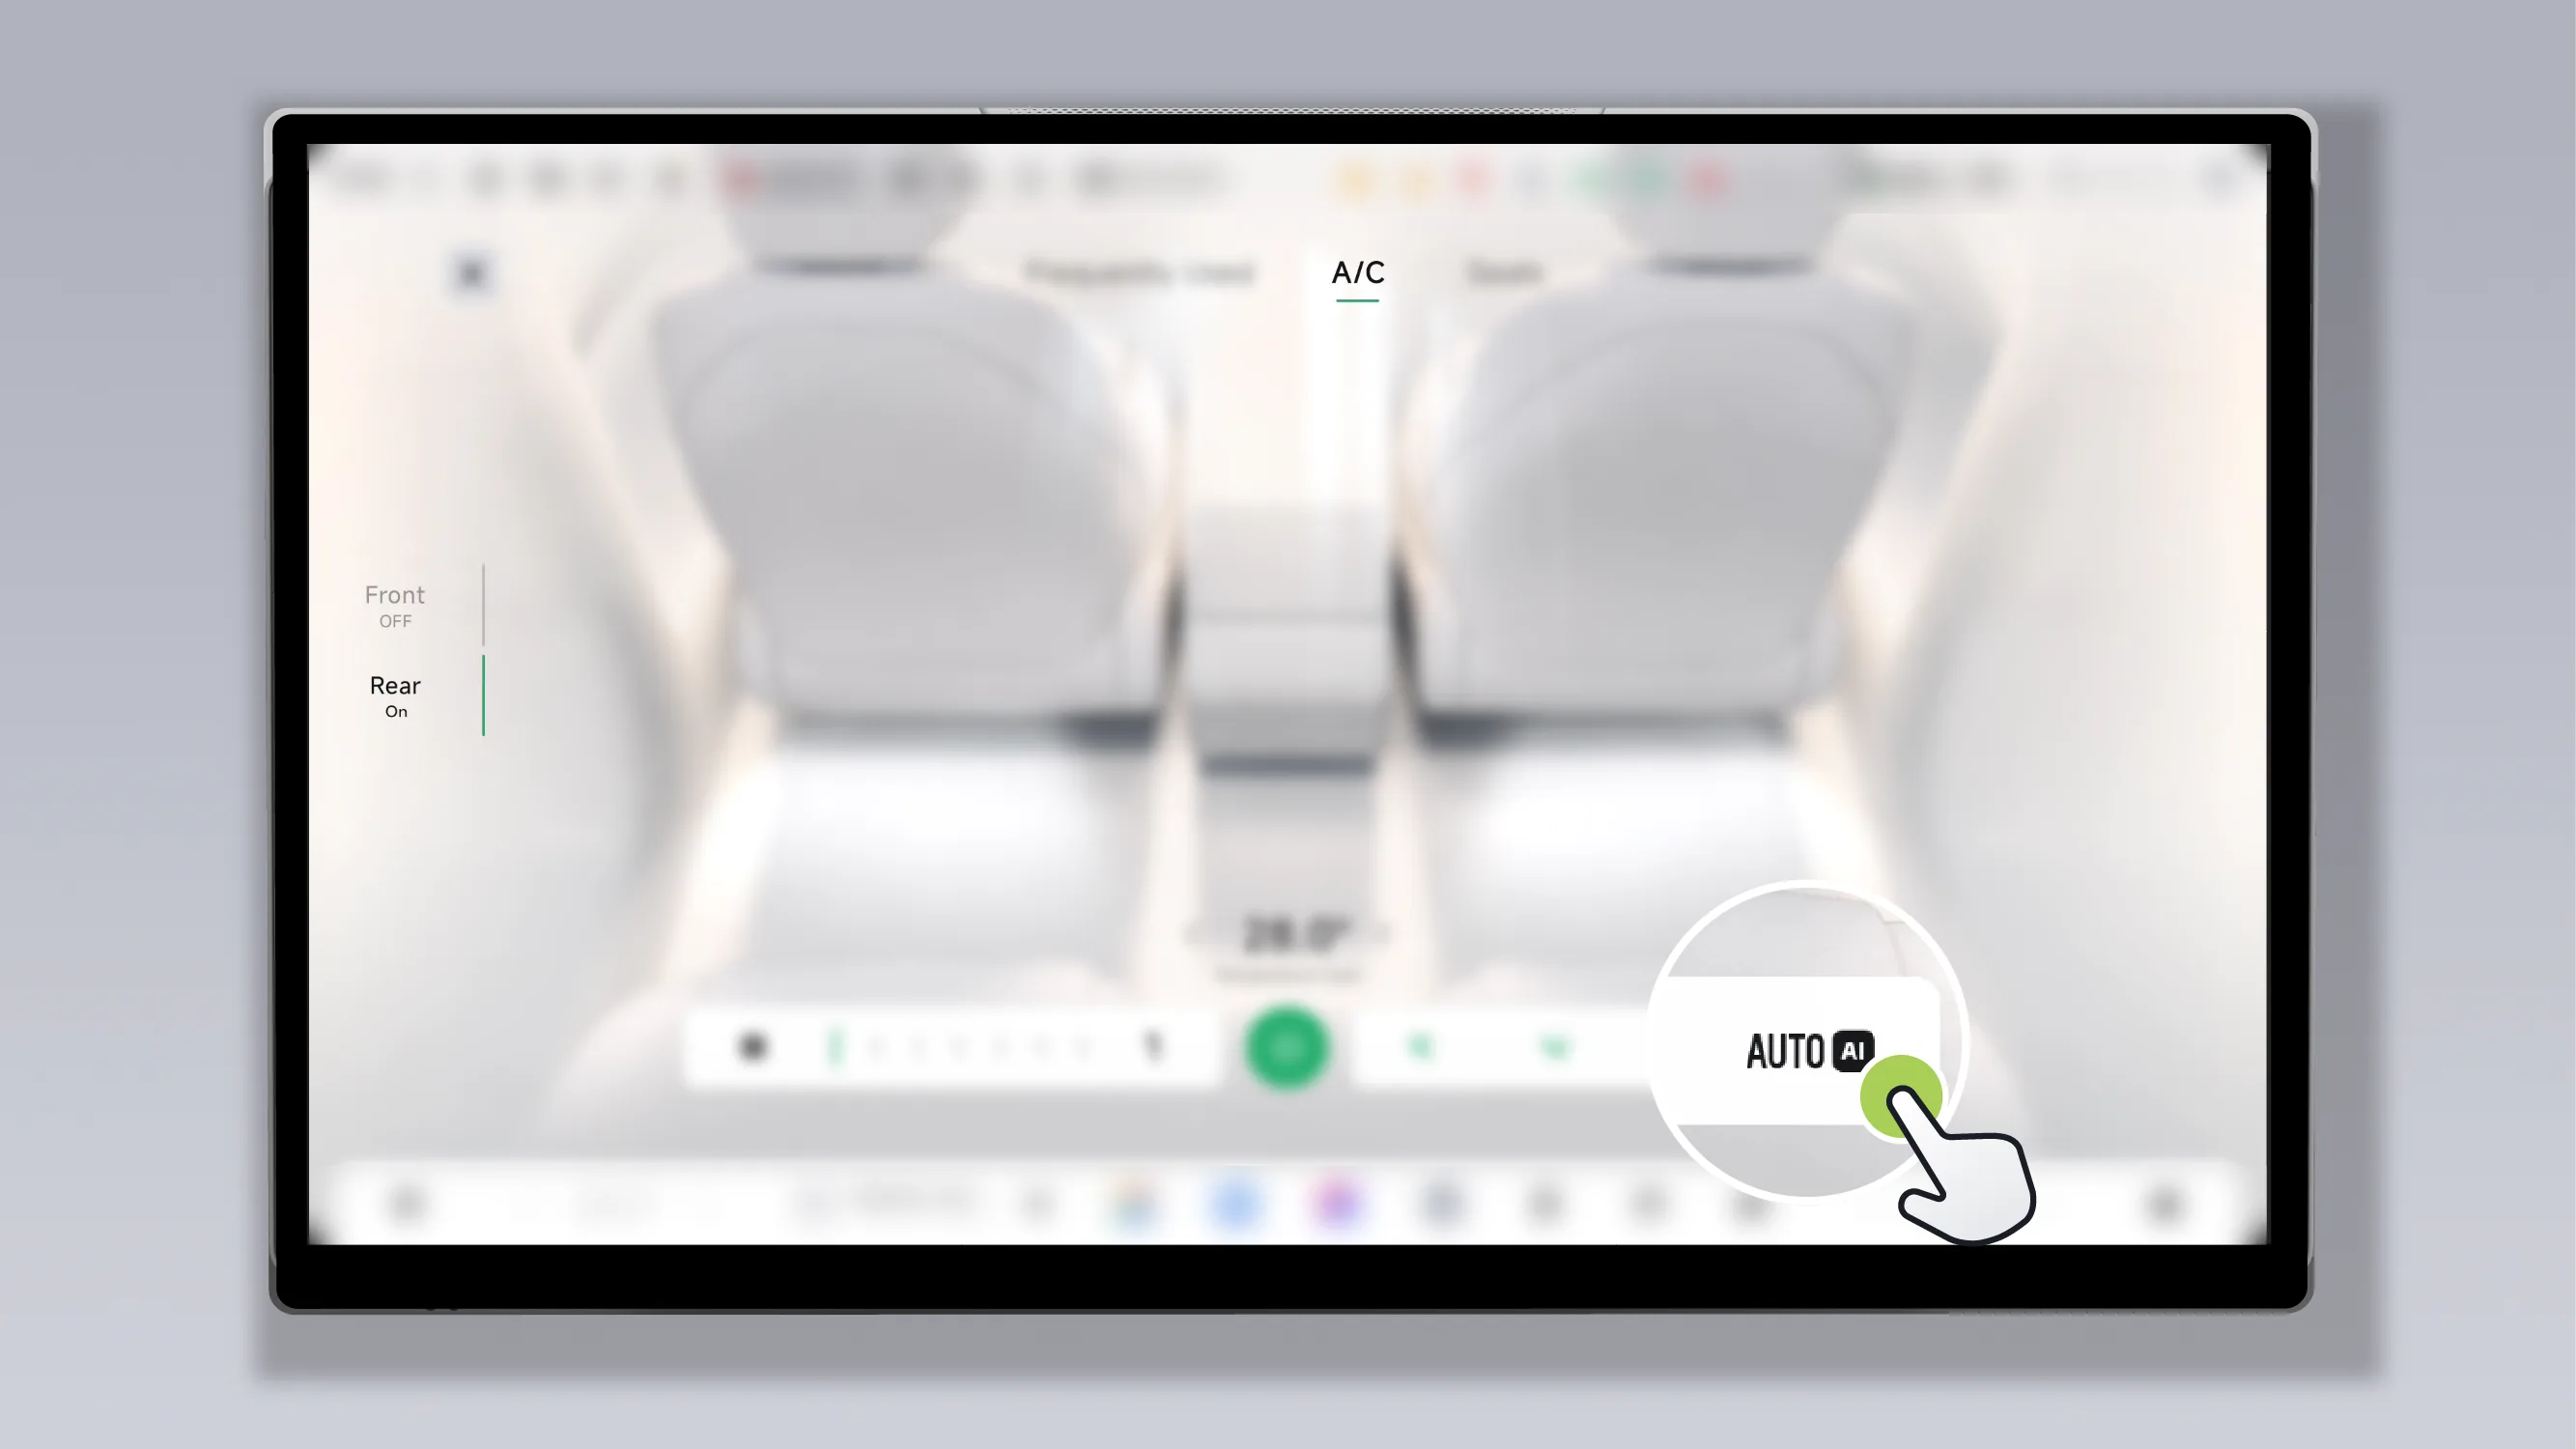
Tap on the rear Air Conditioner interface on the central control screen. , turn on/off the rear Air Conditioner AI-AUTO mode.
Tap on the Air Conditioner interface on the rear control screen. , turn on/off the rear Air Conditioner AI-AUTO mode.
Tips When the air conditioner AI-AUTO mode is turned on, the A/C button and airflow mode button will be automatically hidden; after AI-AUTO mode is turned off, these buttons will be displayed again.
To exit AI-AUTO and resume manual control, perform any of the following operations:
Manually tap the AI-AUTO switch.
Adjust the Air Conditioner airflow volume (levels 1 to 10) by voice/steering wheel.
Turn off A/C mode by voice.
Operate the front defrost/ defogger switch.
You can adjust the air conditioning temperature through the center display, rear control display, steering wheel scroll wheel, mobile app, or voice commands.
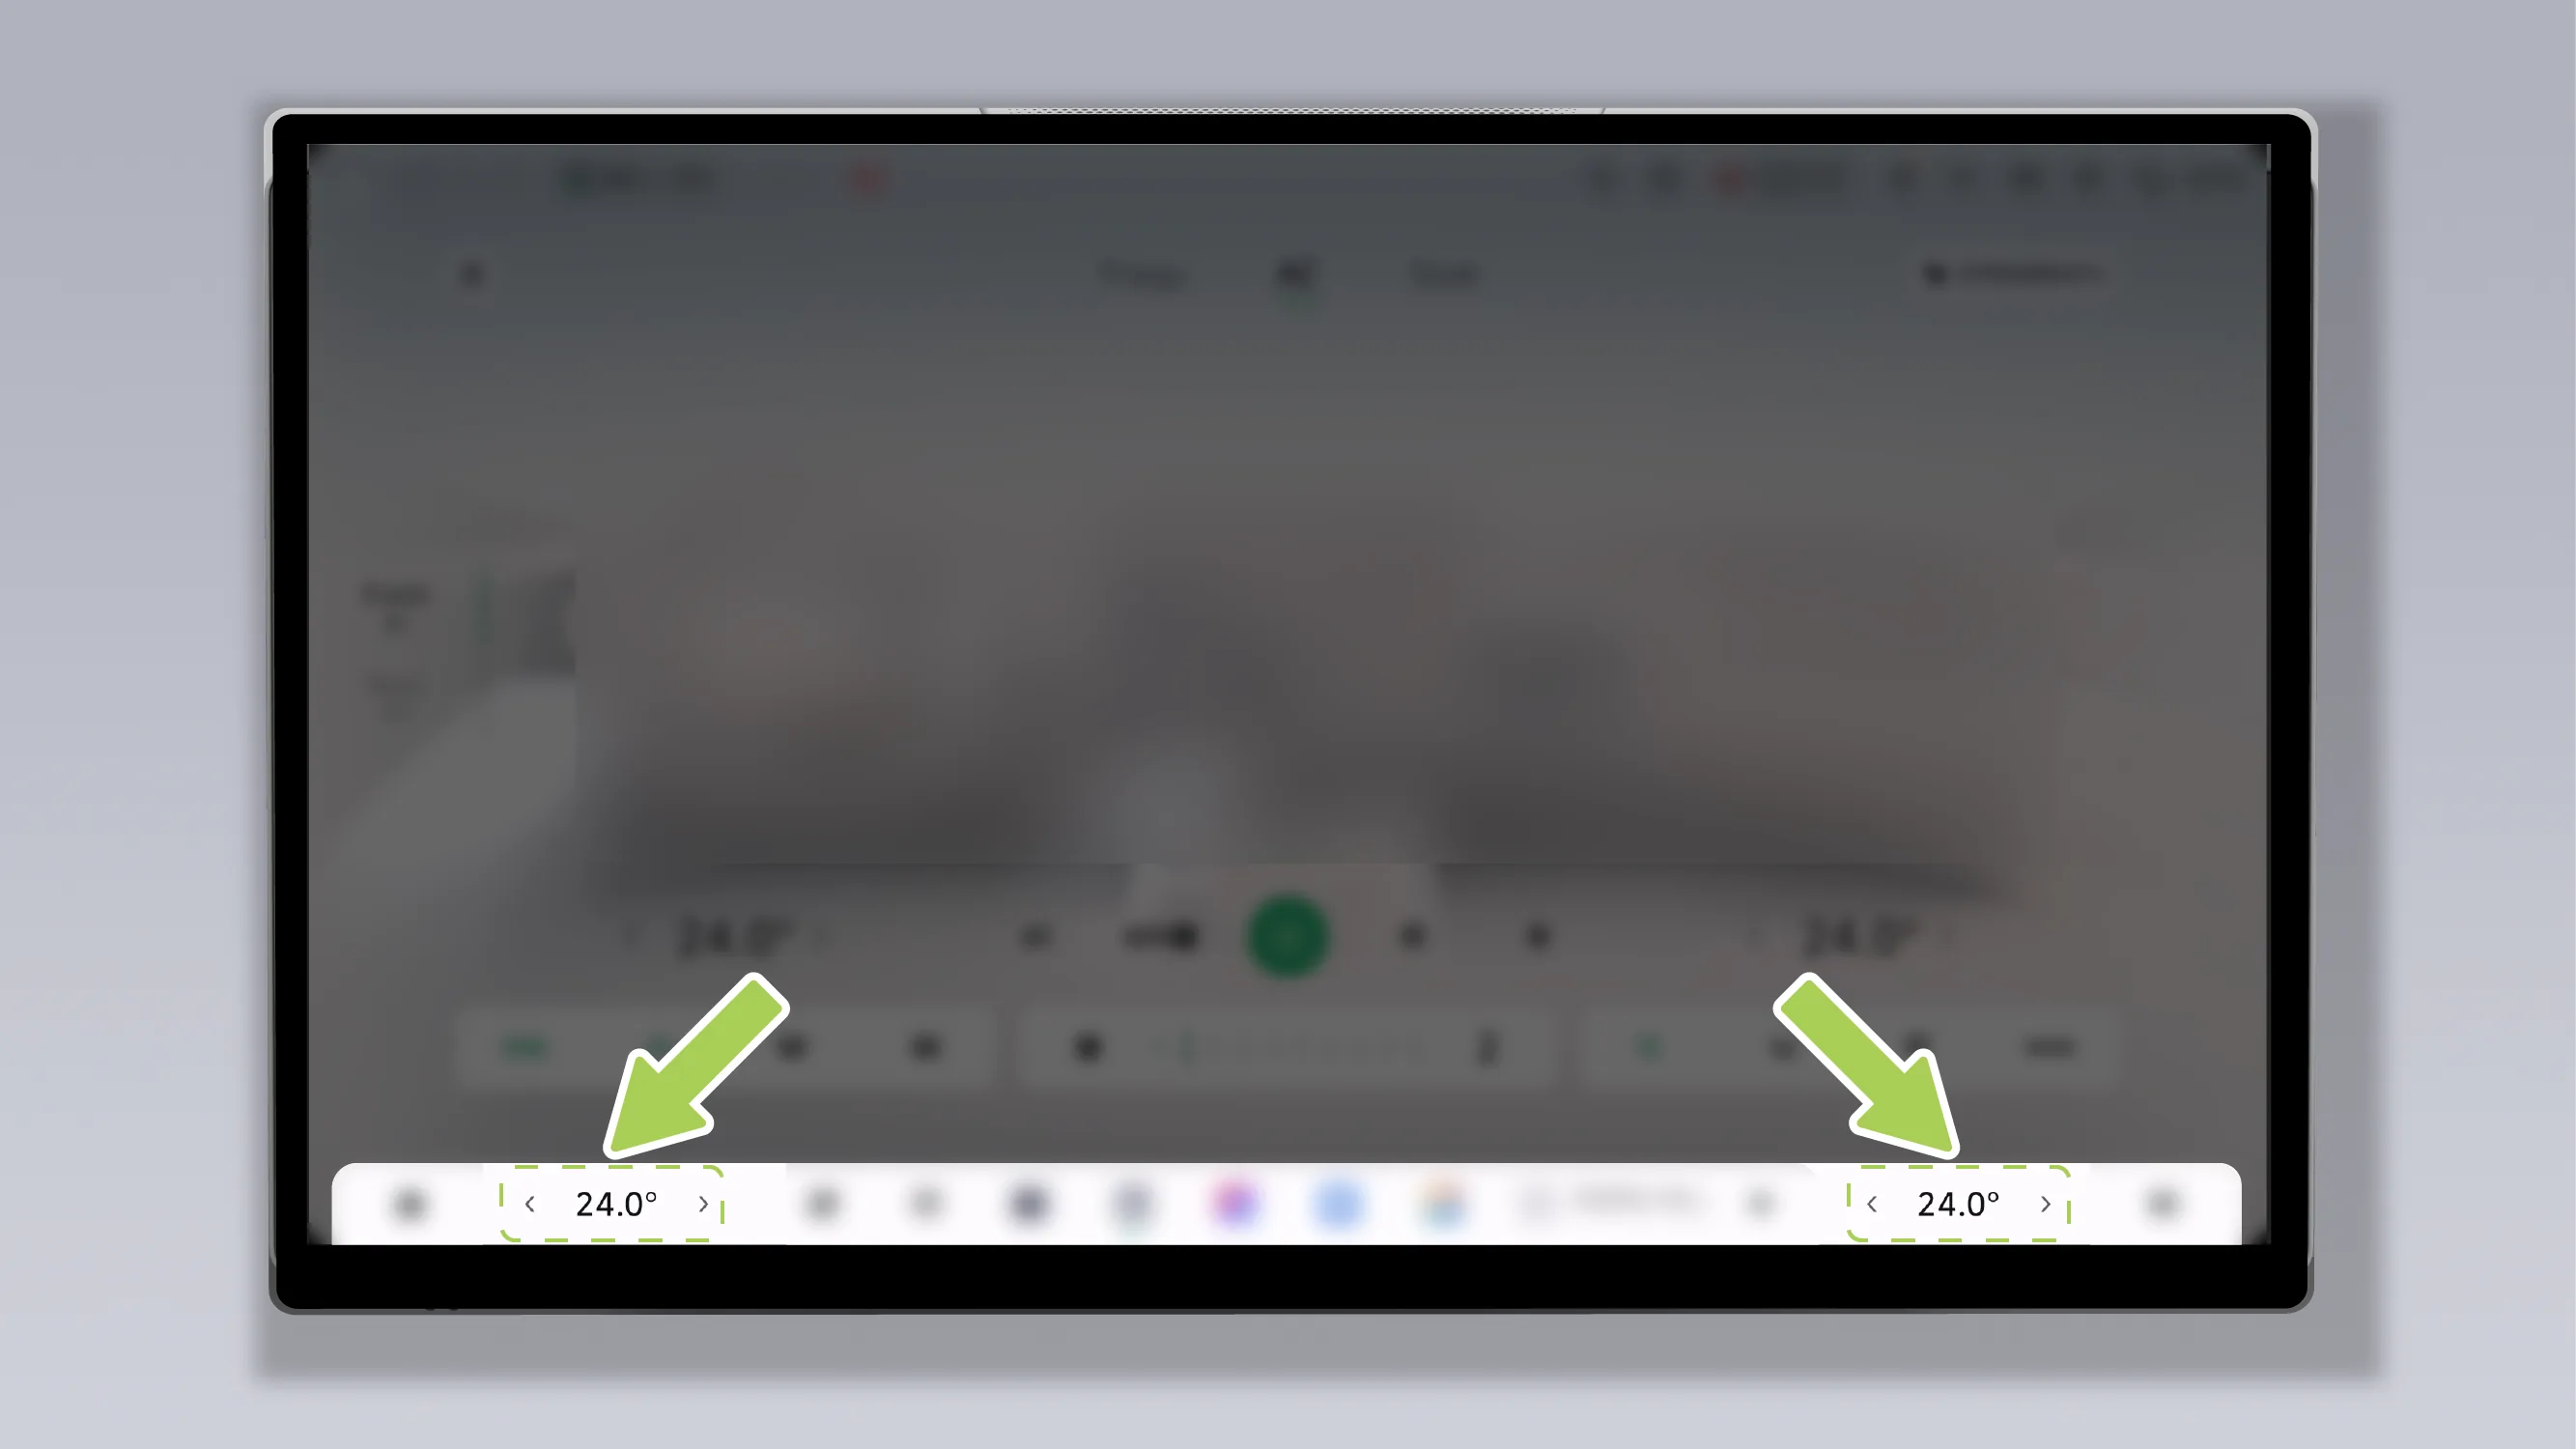
Adjust the air conditioning temperature in the bottom status bar of the center control screen:
Tap  or
or  The driver/passenger air conditioning temperature can be adjusted step by step.
Swipe left or right to quickly adjust the driver/passenger air conditioning temperature.
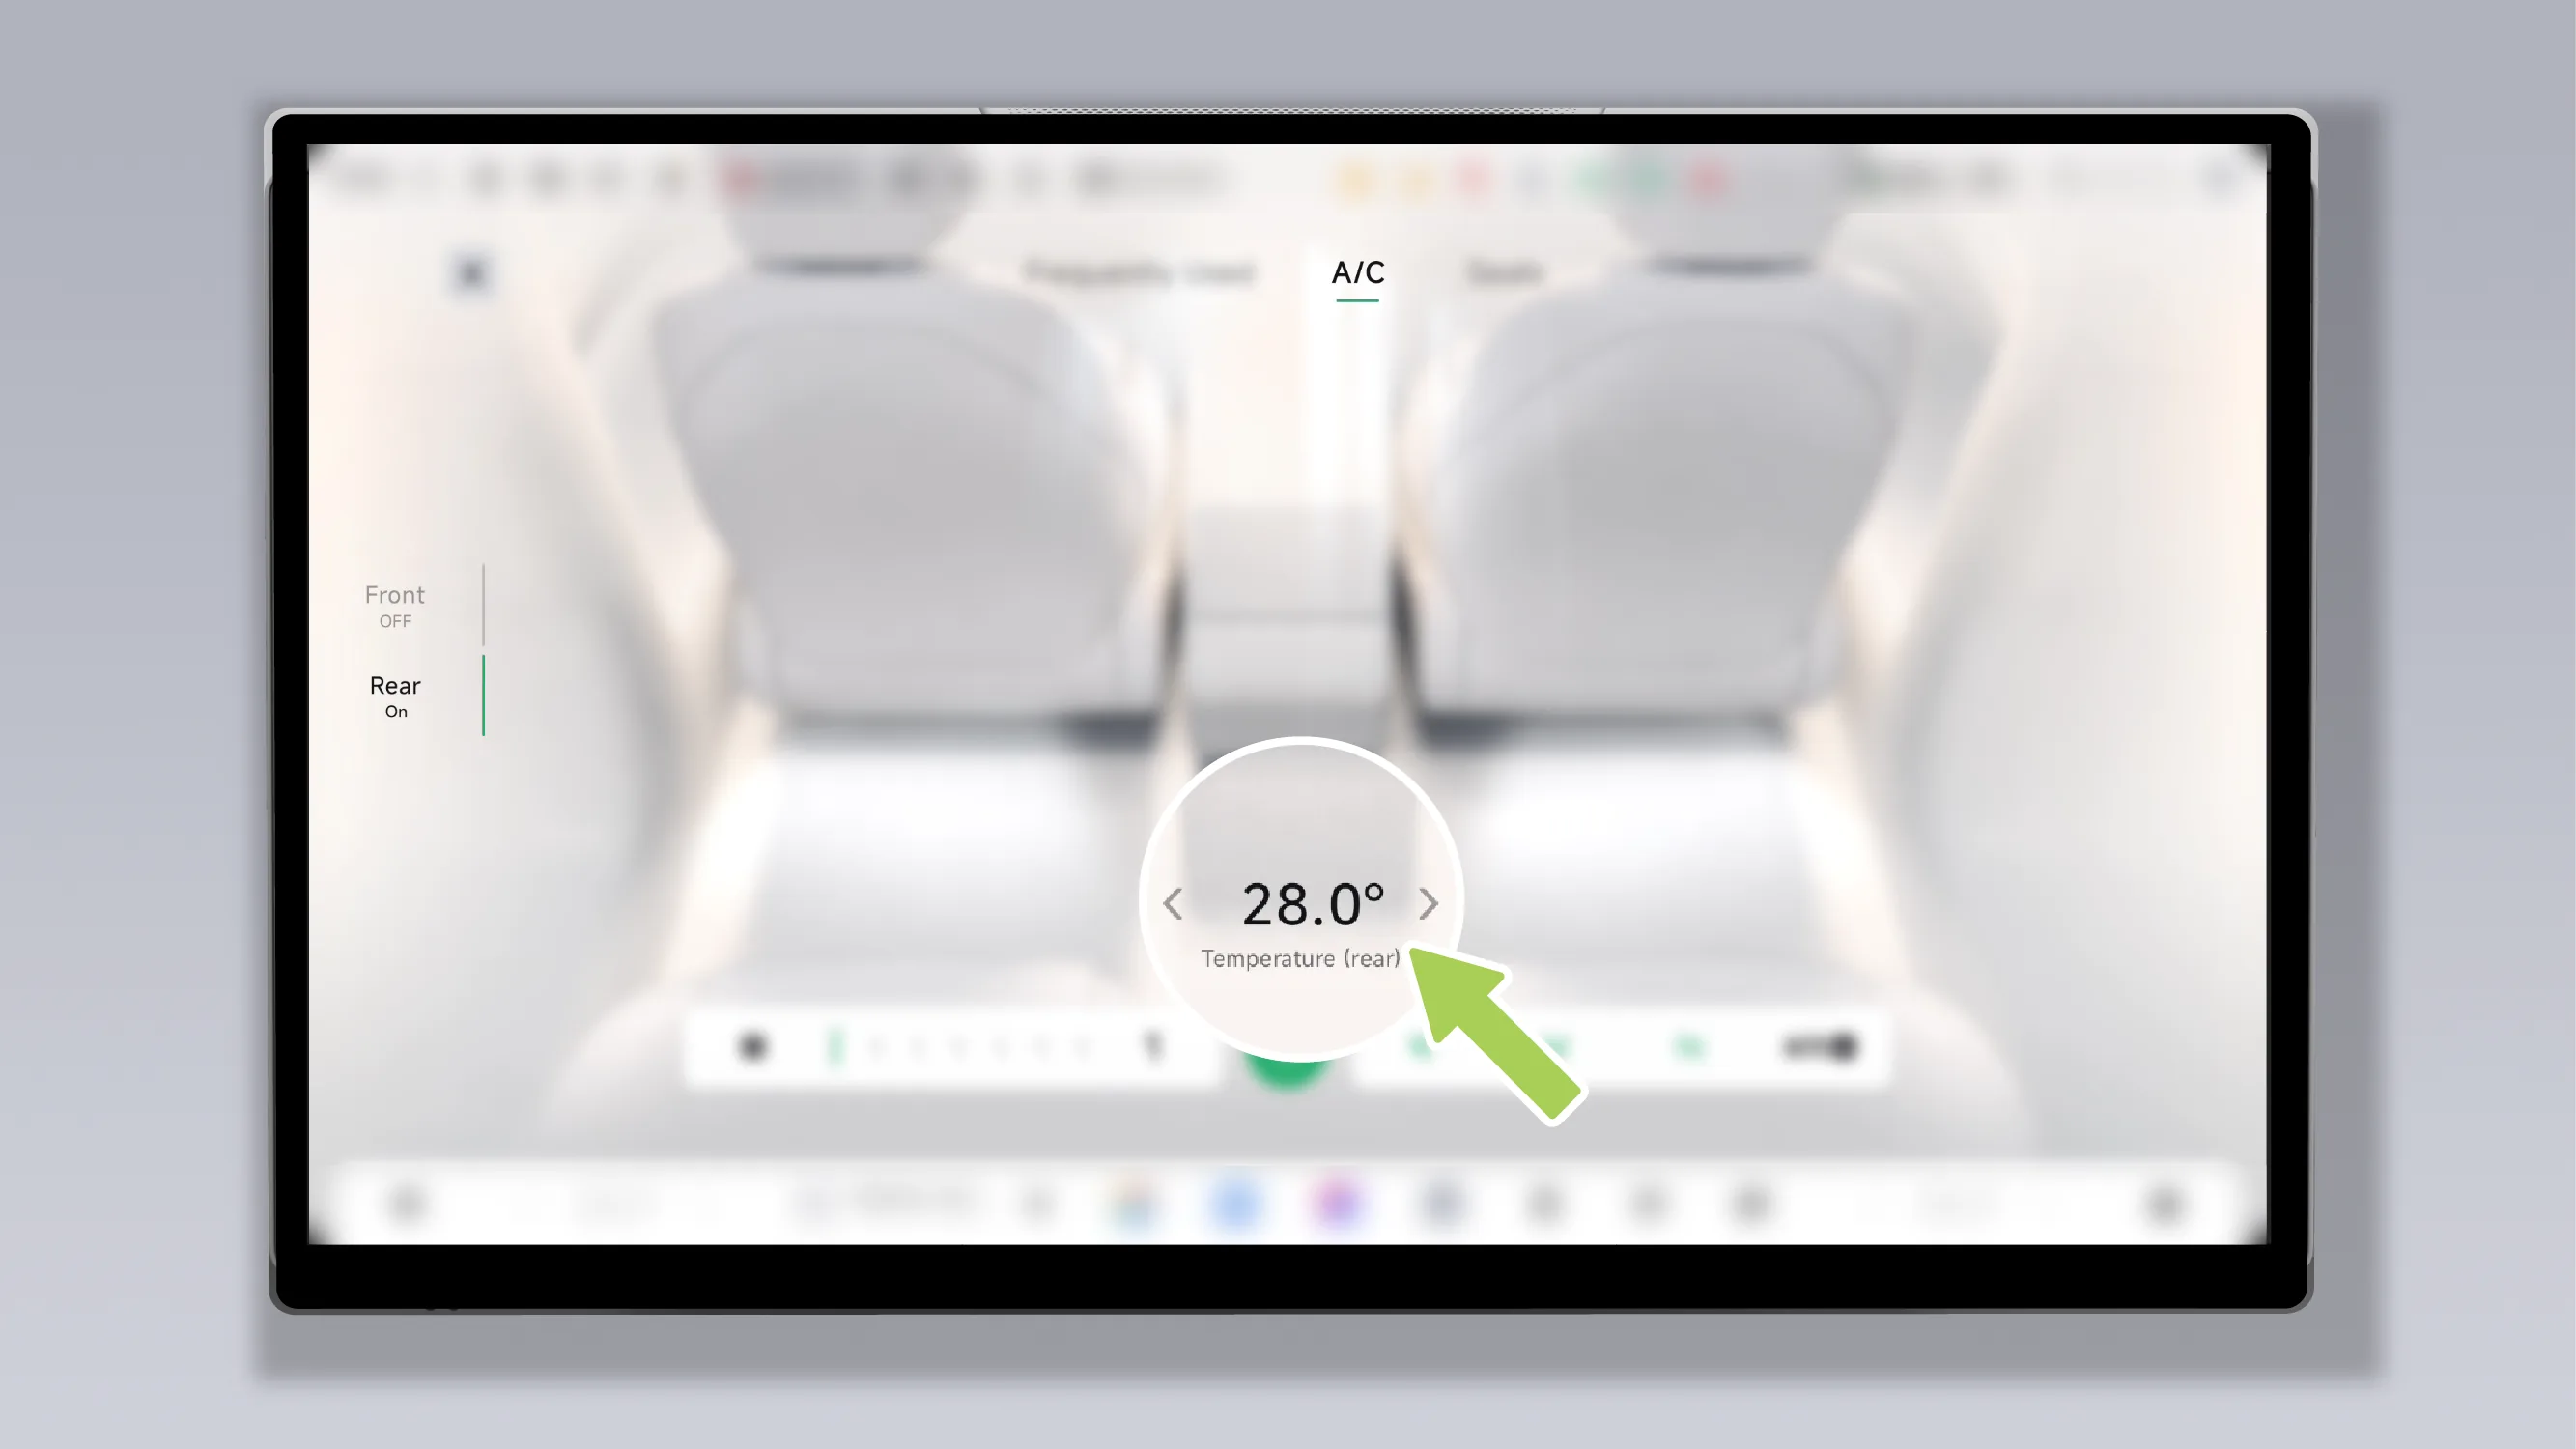
Adjust the Air Conditioner temperature on the rear Air Conditioner interface of the central control screen:
Tap or The rear air conditioning temperature can be adjusted step by step.
Swipe left or right to quickly adjust the rear air conditioning temperature.
Adjust the Air Conditioner temperature on the rear control screen Air Conditioner interface:
Tap or The rear air conditioning temperature can be adjusted step by step.
Swipe left or right to quickly adjust the rear air conditioning temperature.
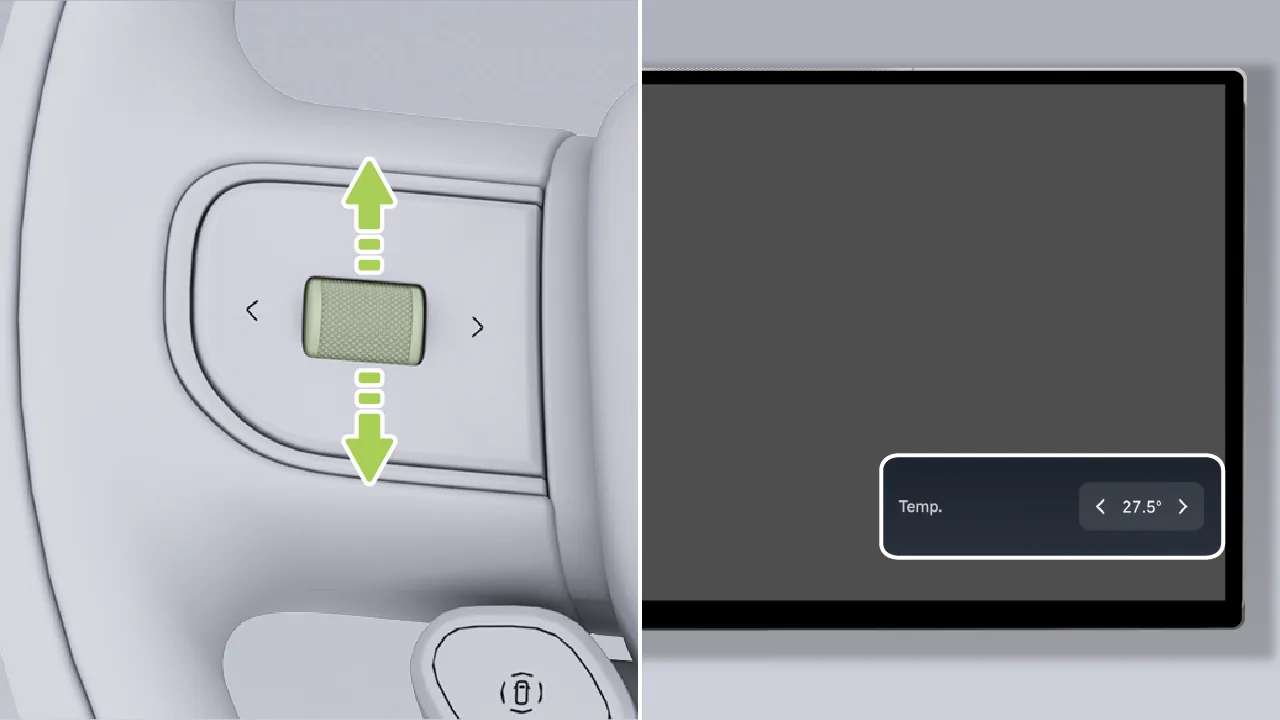
When the ACC/LCC function is not enabled, you can use the left scroll wheel on the steering wheel to adjust the air conditioning temperature.
Push the left scroll wheel on the steering wheel upward to increase the air conditioning temperature.
Push down the scroll wheel on the left side of the steering wheel to lower the air conditioning temperature.
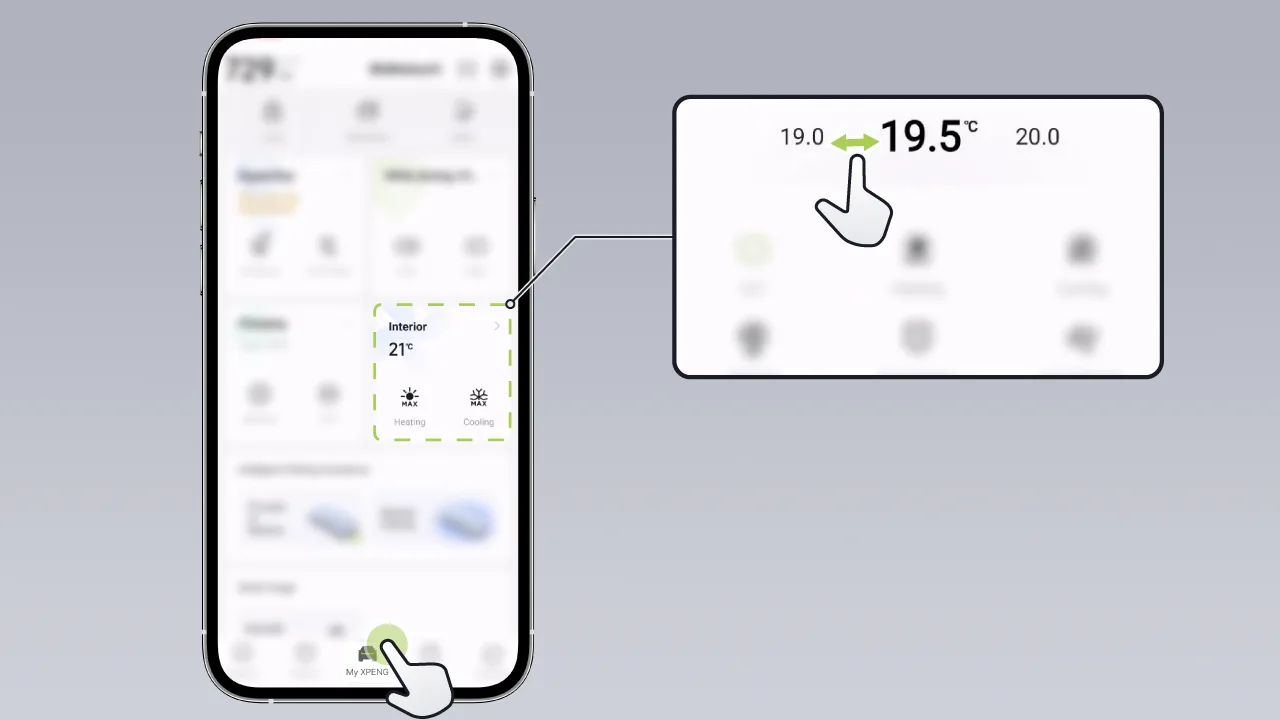
Tap in the mobile app Swipe left or right on the temperature display area to quickly adjust the air conditioning temperature.
The air conditioning temperature zones support synchronized control. After Temperature Sync mode is enabled, the passenger temperature and rear temperature will be adjusted synchronously with the driver's temperature.
The synchronization mode can be turned on/off in any of the following ways:
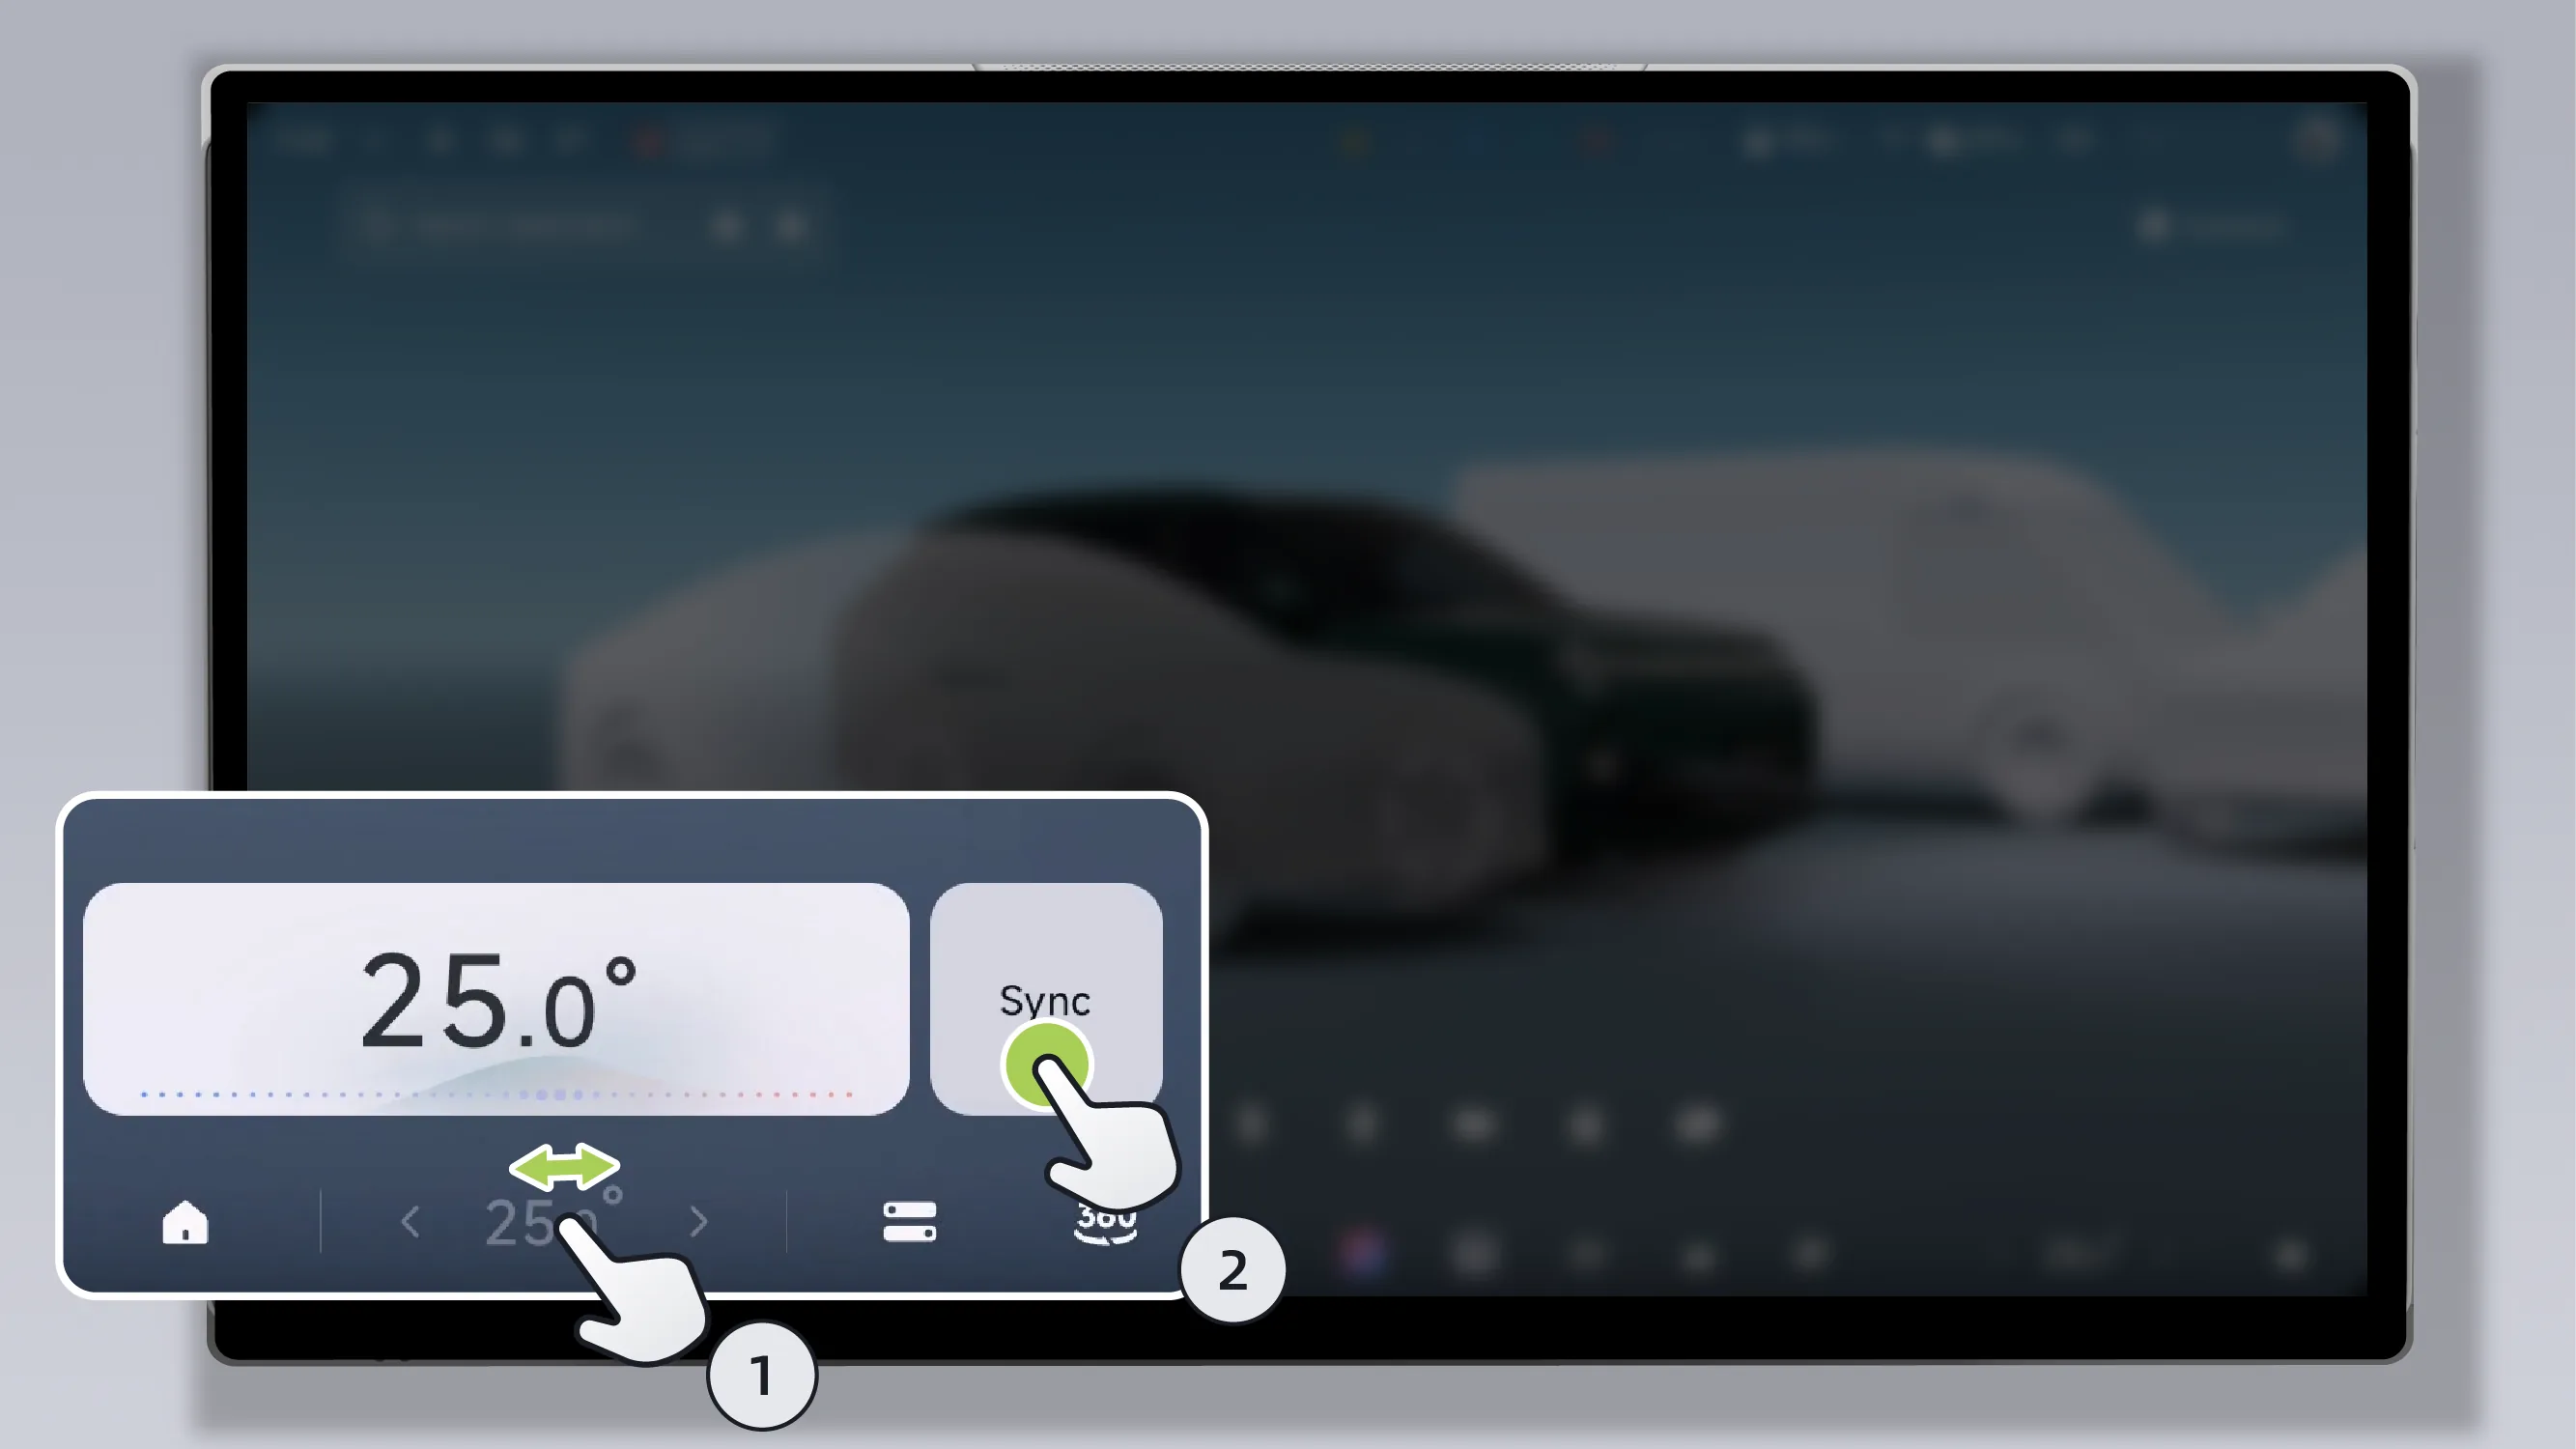
Slide the main driver's Air Conditioner component, then tap in the pop-up window the , turn Temperature Sync mode on/off.
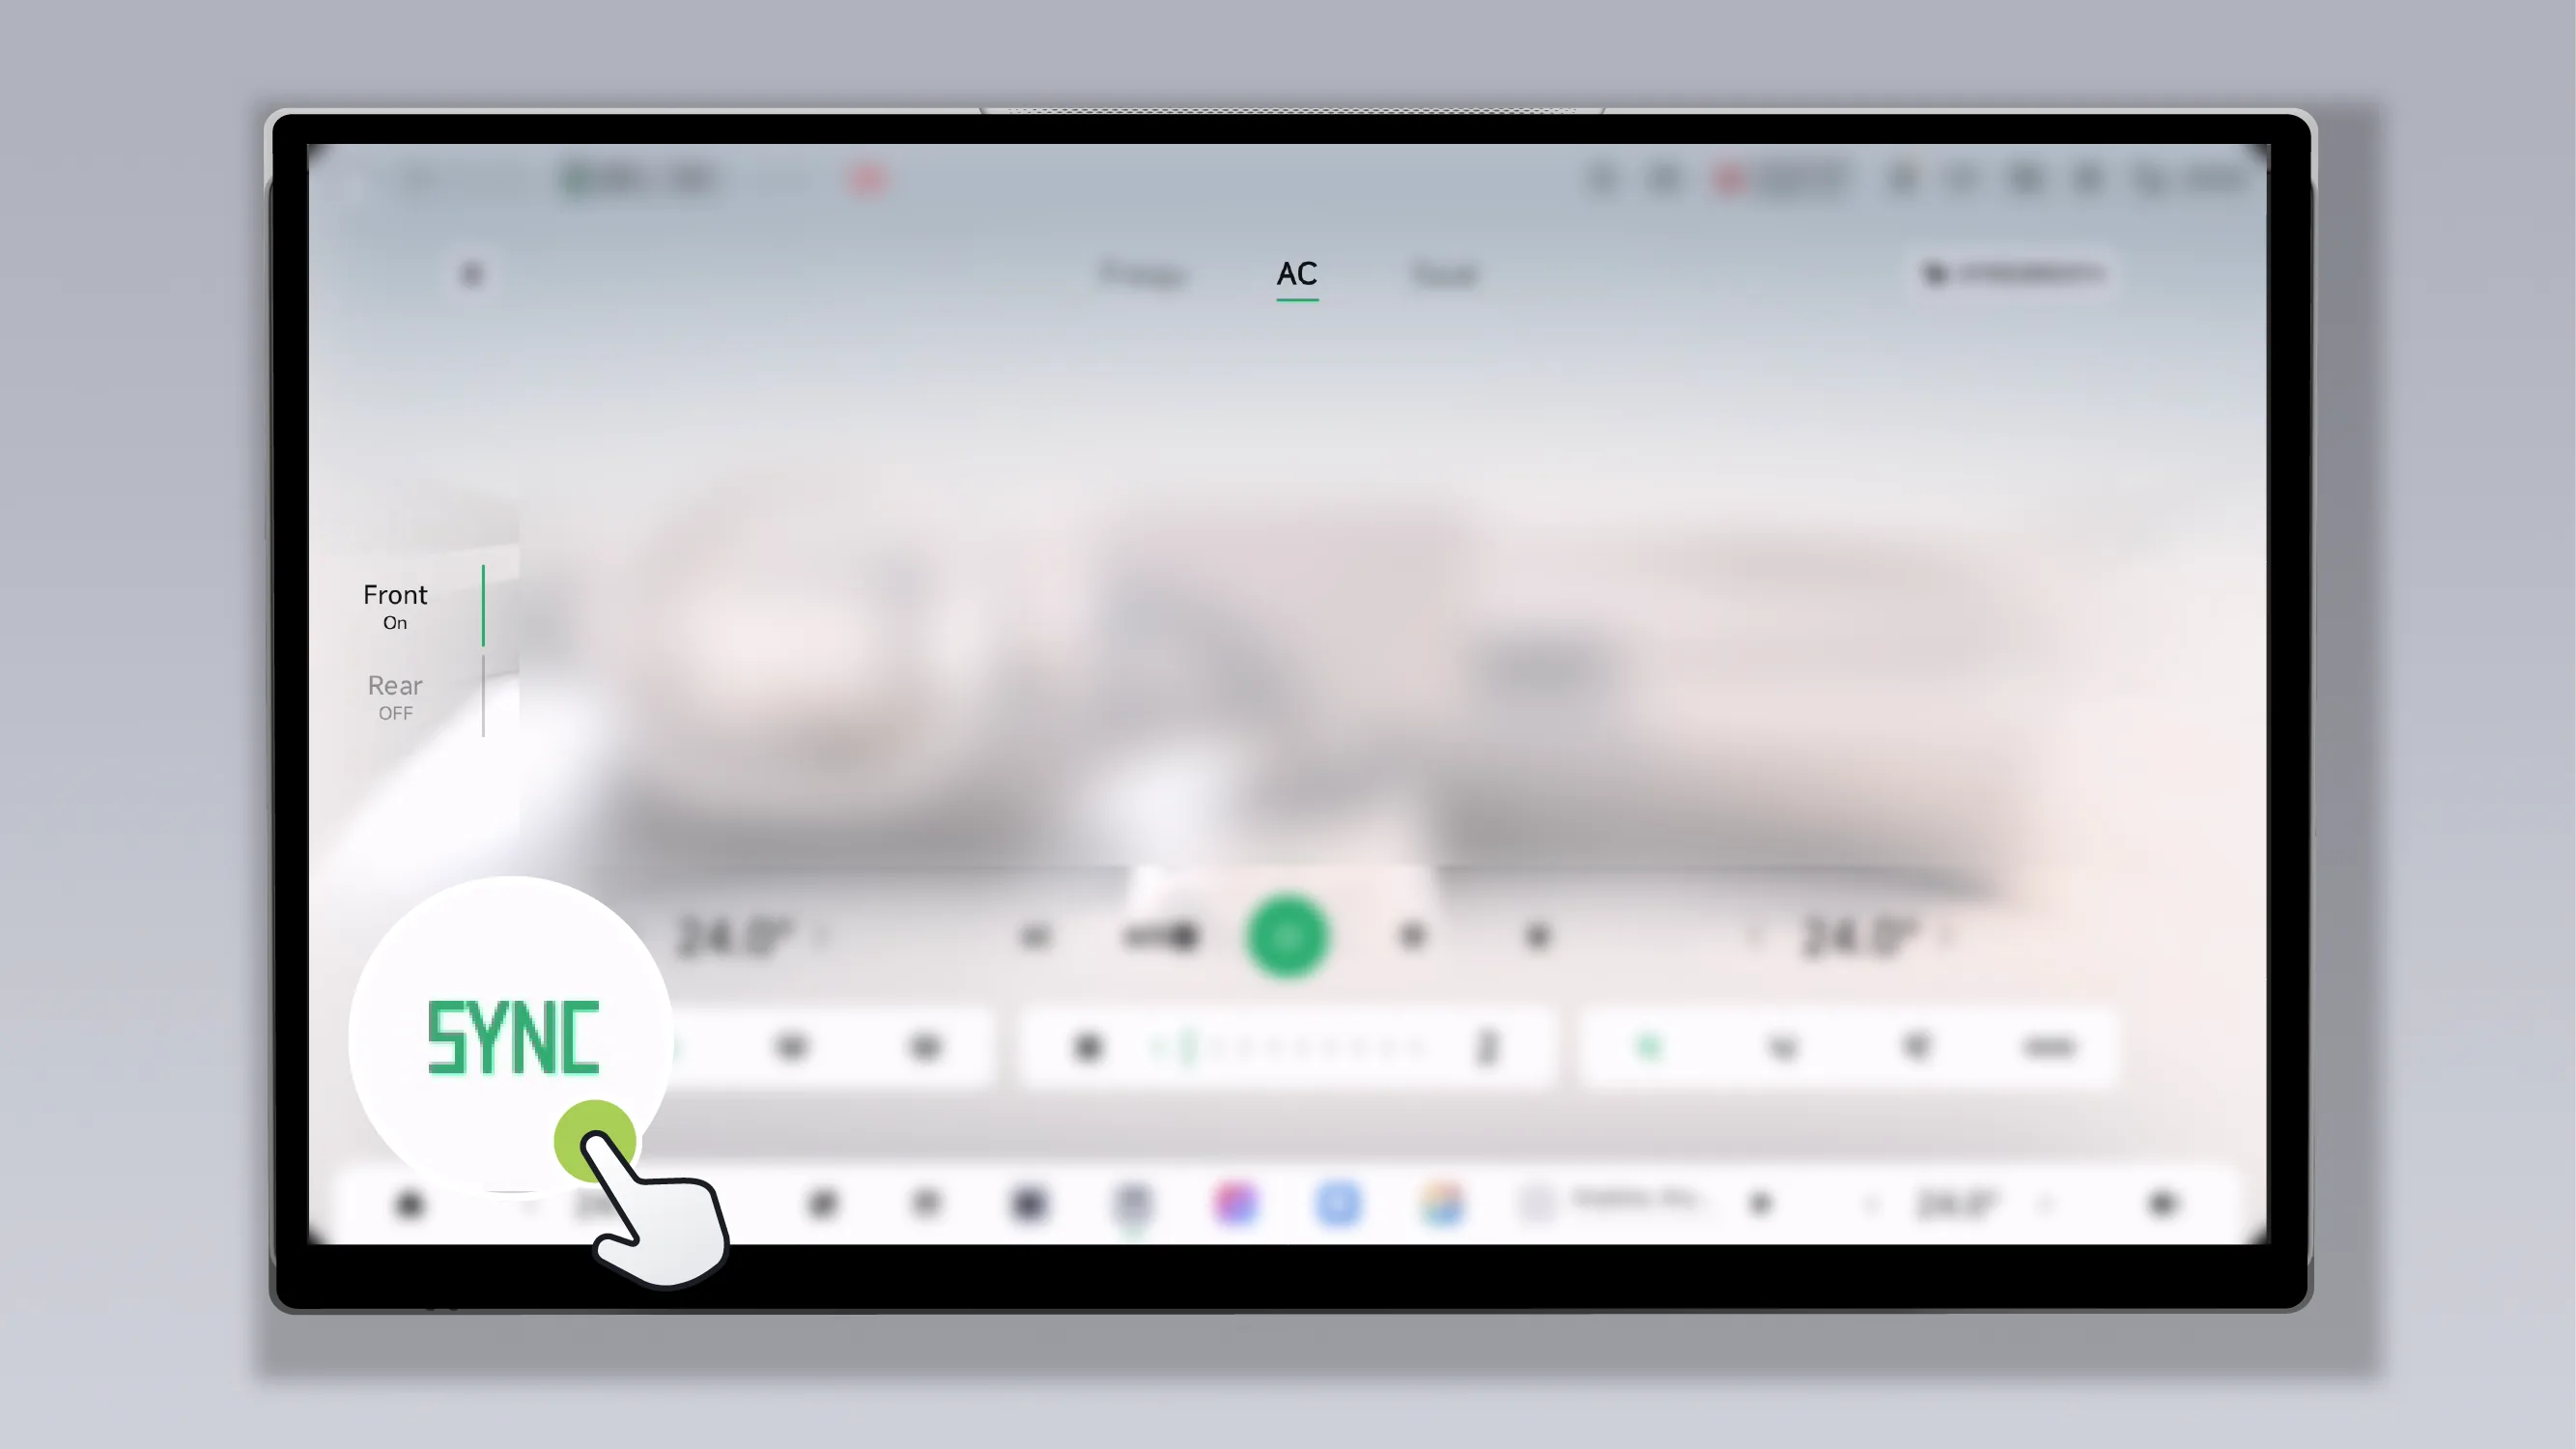
Tap “Sync” on the Air Conditioner screen to turn Temperature Sync mode on/off.
You can adjust the Air Conditioner airflow volume through the center control screen, rear control screen, steering wheel buttons, or voice commands.
You can adjust the Air Conditioner fan speed on the central control screen in the following ways:
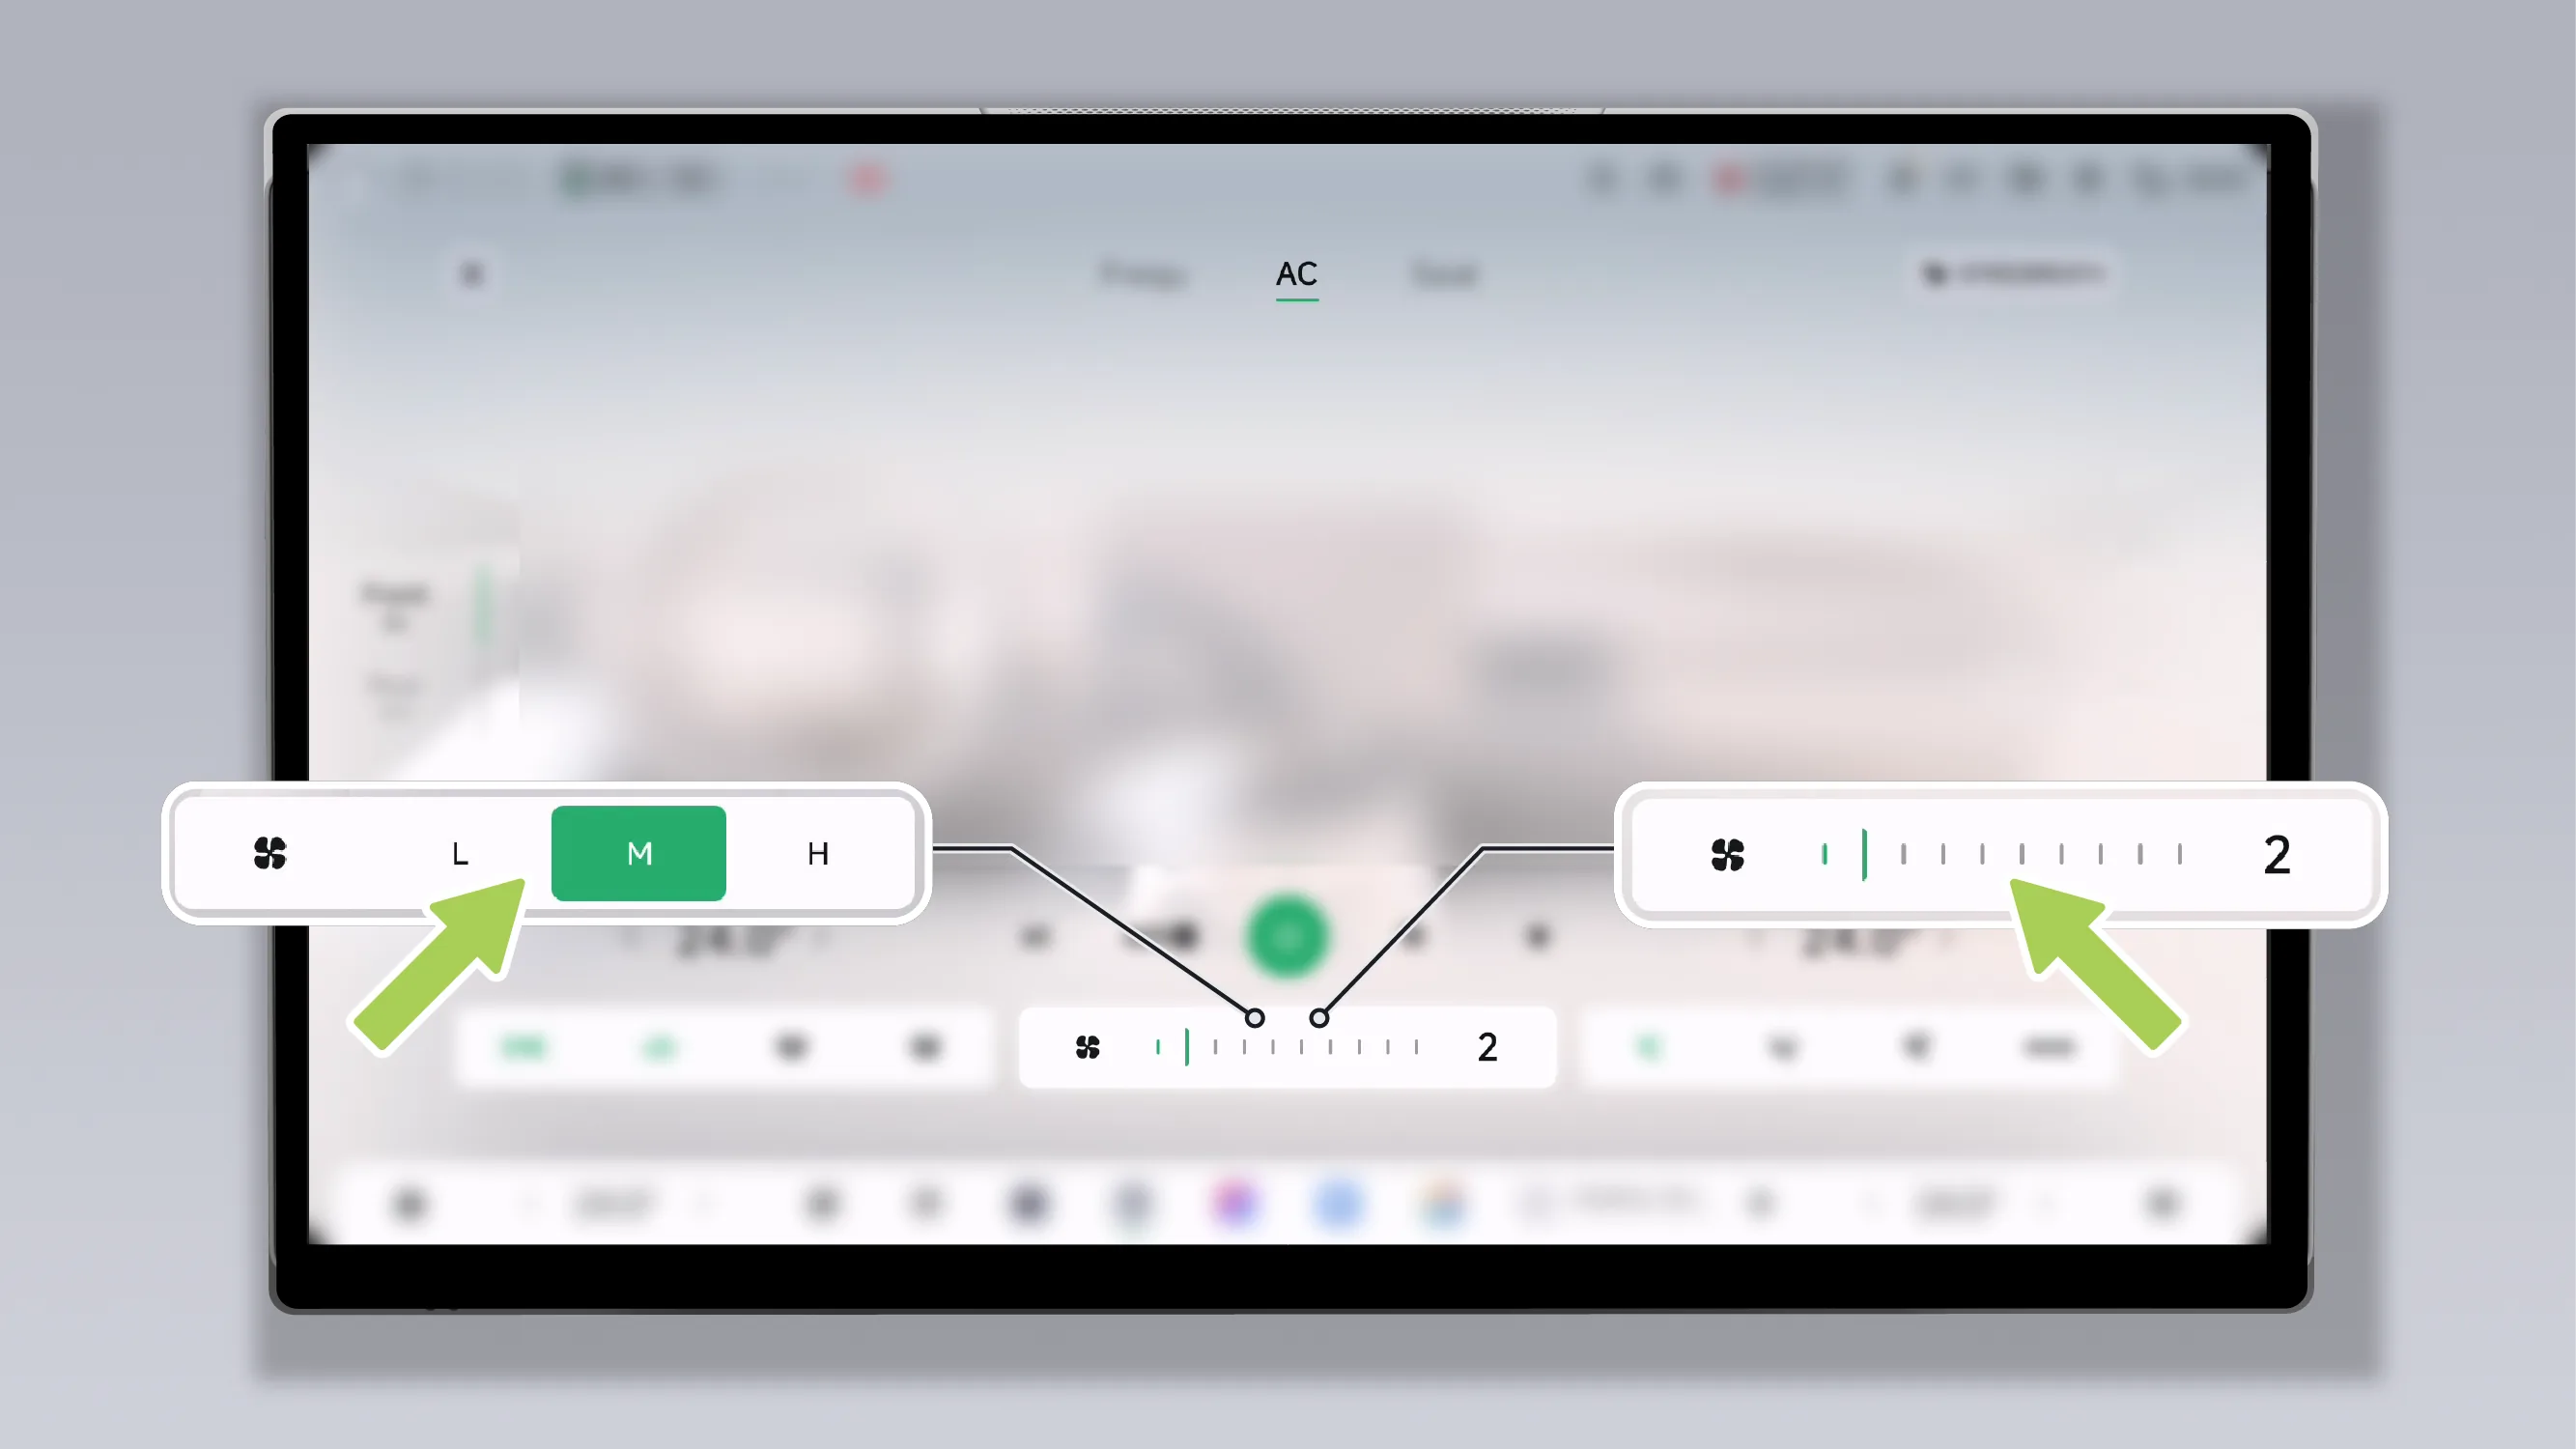
When the Air Conditioner AI-AUTO mode is enabled, "Low", "Medium", or "High" gear can be selected.
When Air Conditioner AI-AUTO mode is not enabled, swipe left or right on the fan speed level display to manually adjust the Air Conditioner fan speed (levels 1 to 10).
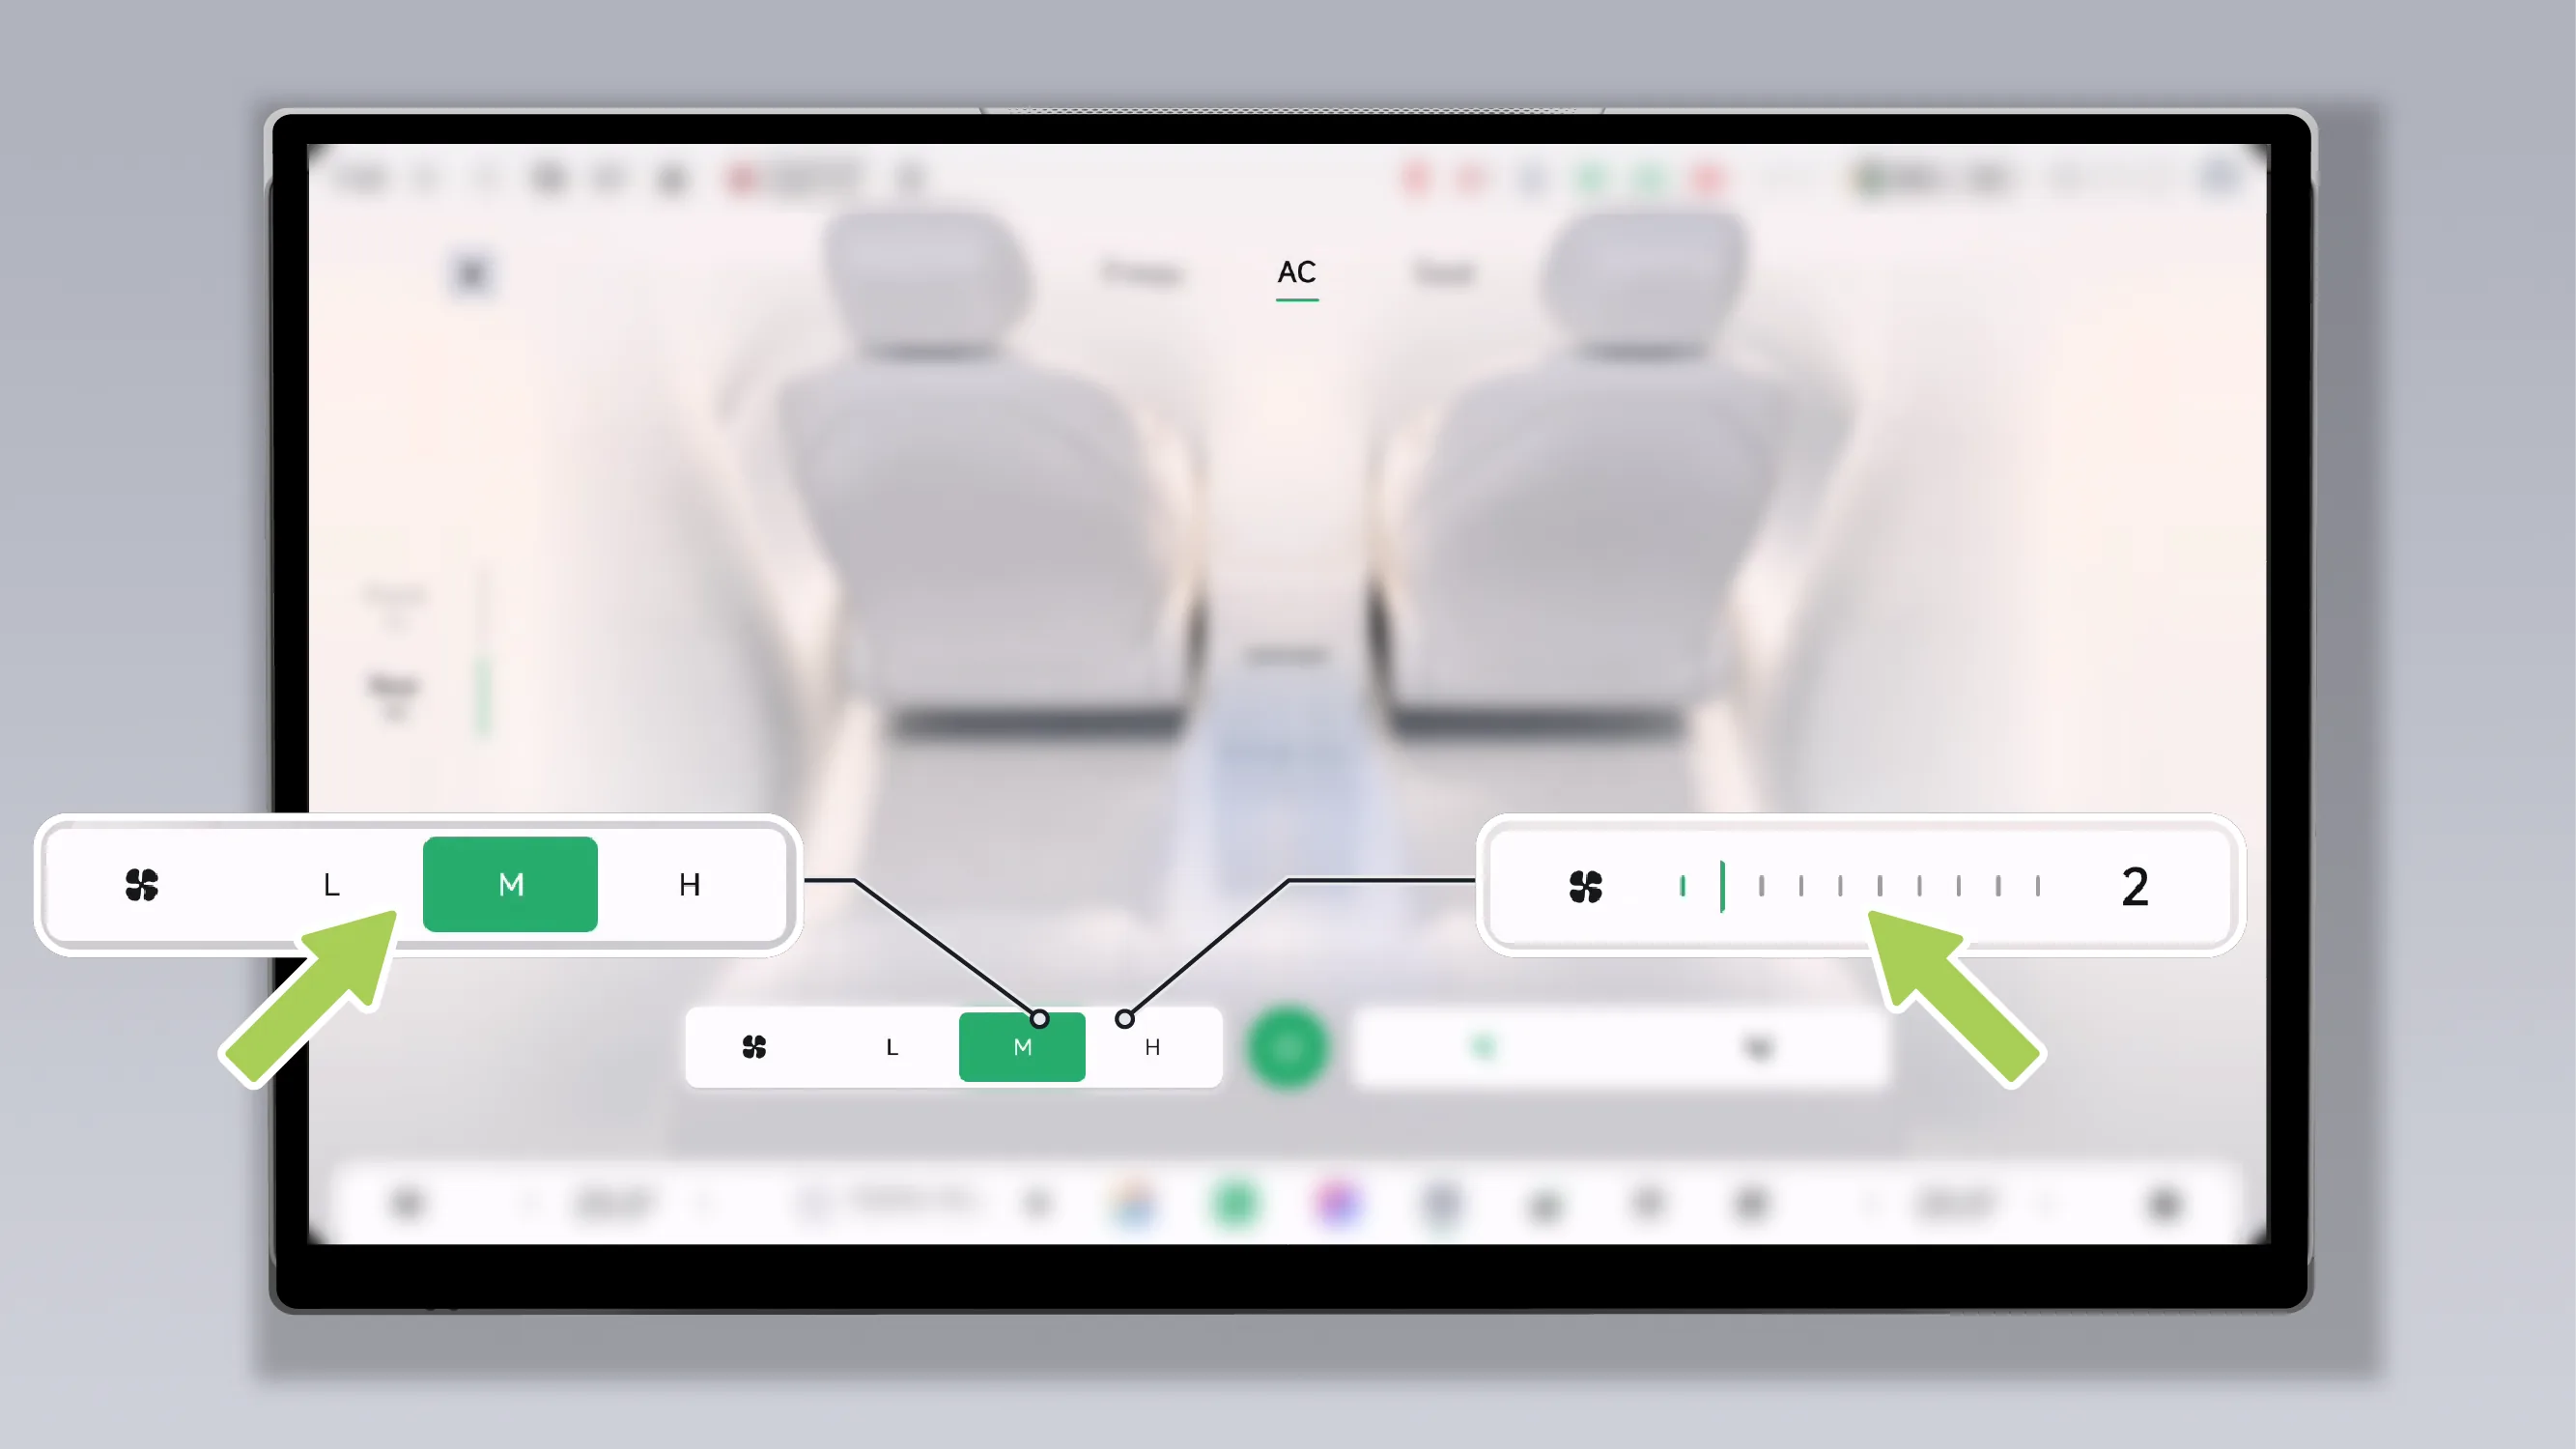
When Air Conditioner AI-AUTO mode is enabled, you can select the "Low", "Medium", or "High" gear.
When Air Conditioner AI-AUTO mode is not enabled, swipe left or right on the blower level display to manually adjust the Air Conditioner blower level (levels 1 to 7).
On the rear control screen Air Conditioner interface, tap or swipe left or right on the fan speed level display to adjust the rear Air Conditioner fan speed.
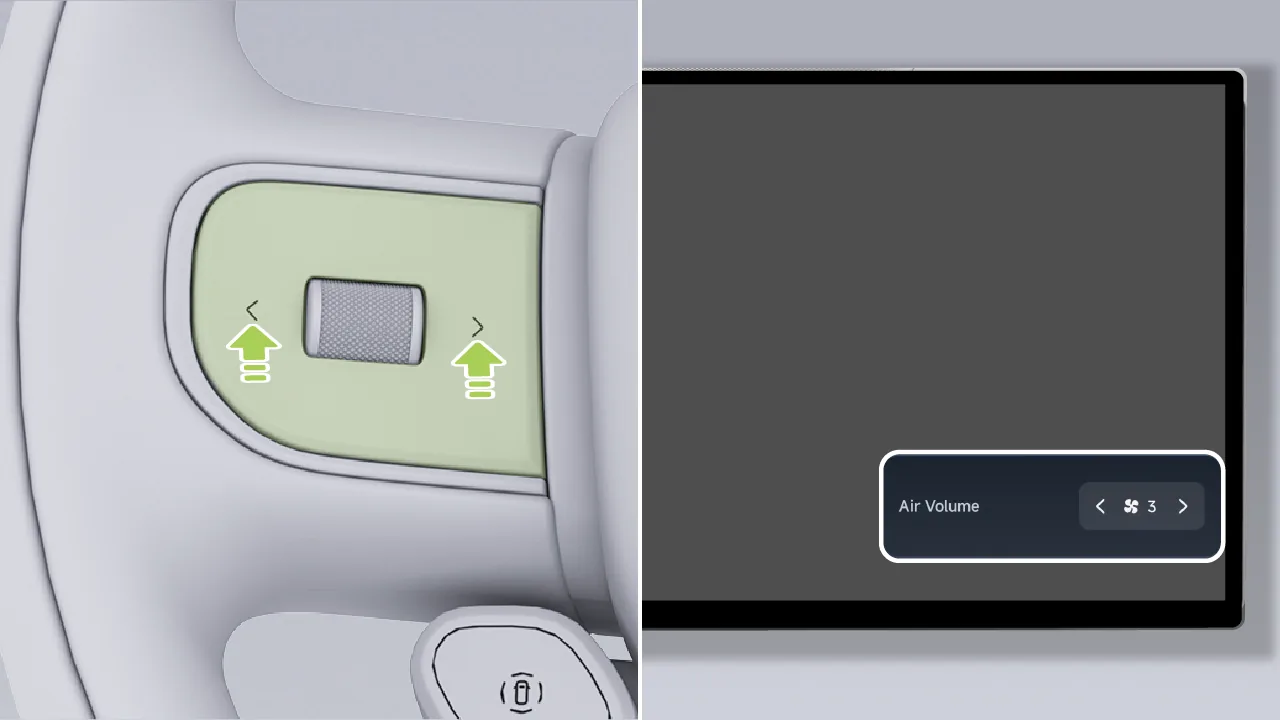
When the ACC/LCC function is not enabled, use the left and right buttons on the steering wheel to adjust the Air Conditioner fan speed.
Press the left button on the steering wheel to decrease the Air Conditioner fan speed.
Press the right button on the steering wheel to increase the Air Conditioner fan speed.
The vehicle supports the following three air outlet modes. Multiple air outlet modes can be turned on at the same time, but at least one air outlet mode must remain on:
 Window Defrost Mode: When the air conditioner airflow is directed toward the window glass, it is recommended to select the window airflow mode when defrosting or defogging the glass.
 Face-level mode: The air outlet direction of the Air Conditioner blows directly toward the face. In summer cooling, it is recommended to select face-level mode.
 Foot Ventilation Mode: The air conditioner airflow is directed toward the feet. It is recommended to select foot mode for heating in winter.
You can adjust the Air Conditioner airflow mode through the central control screen, rear control screen, or voice commands.
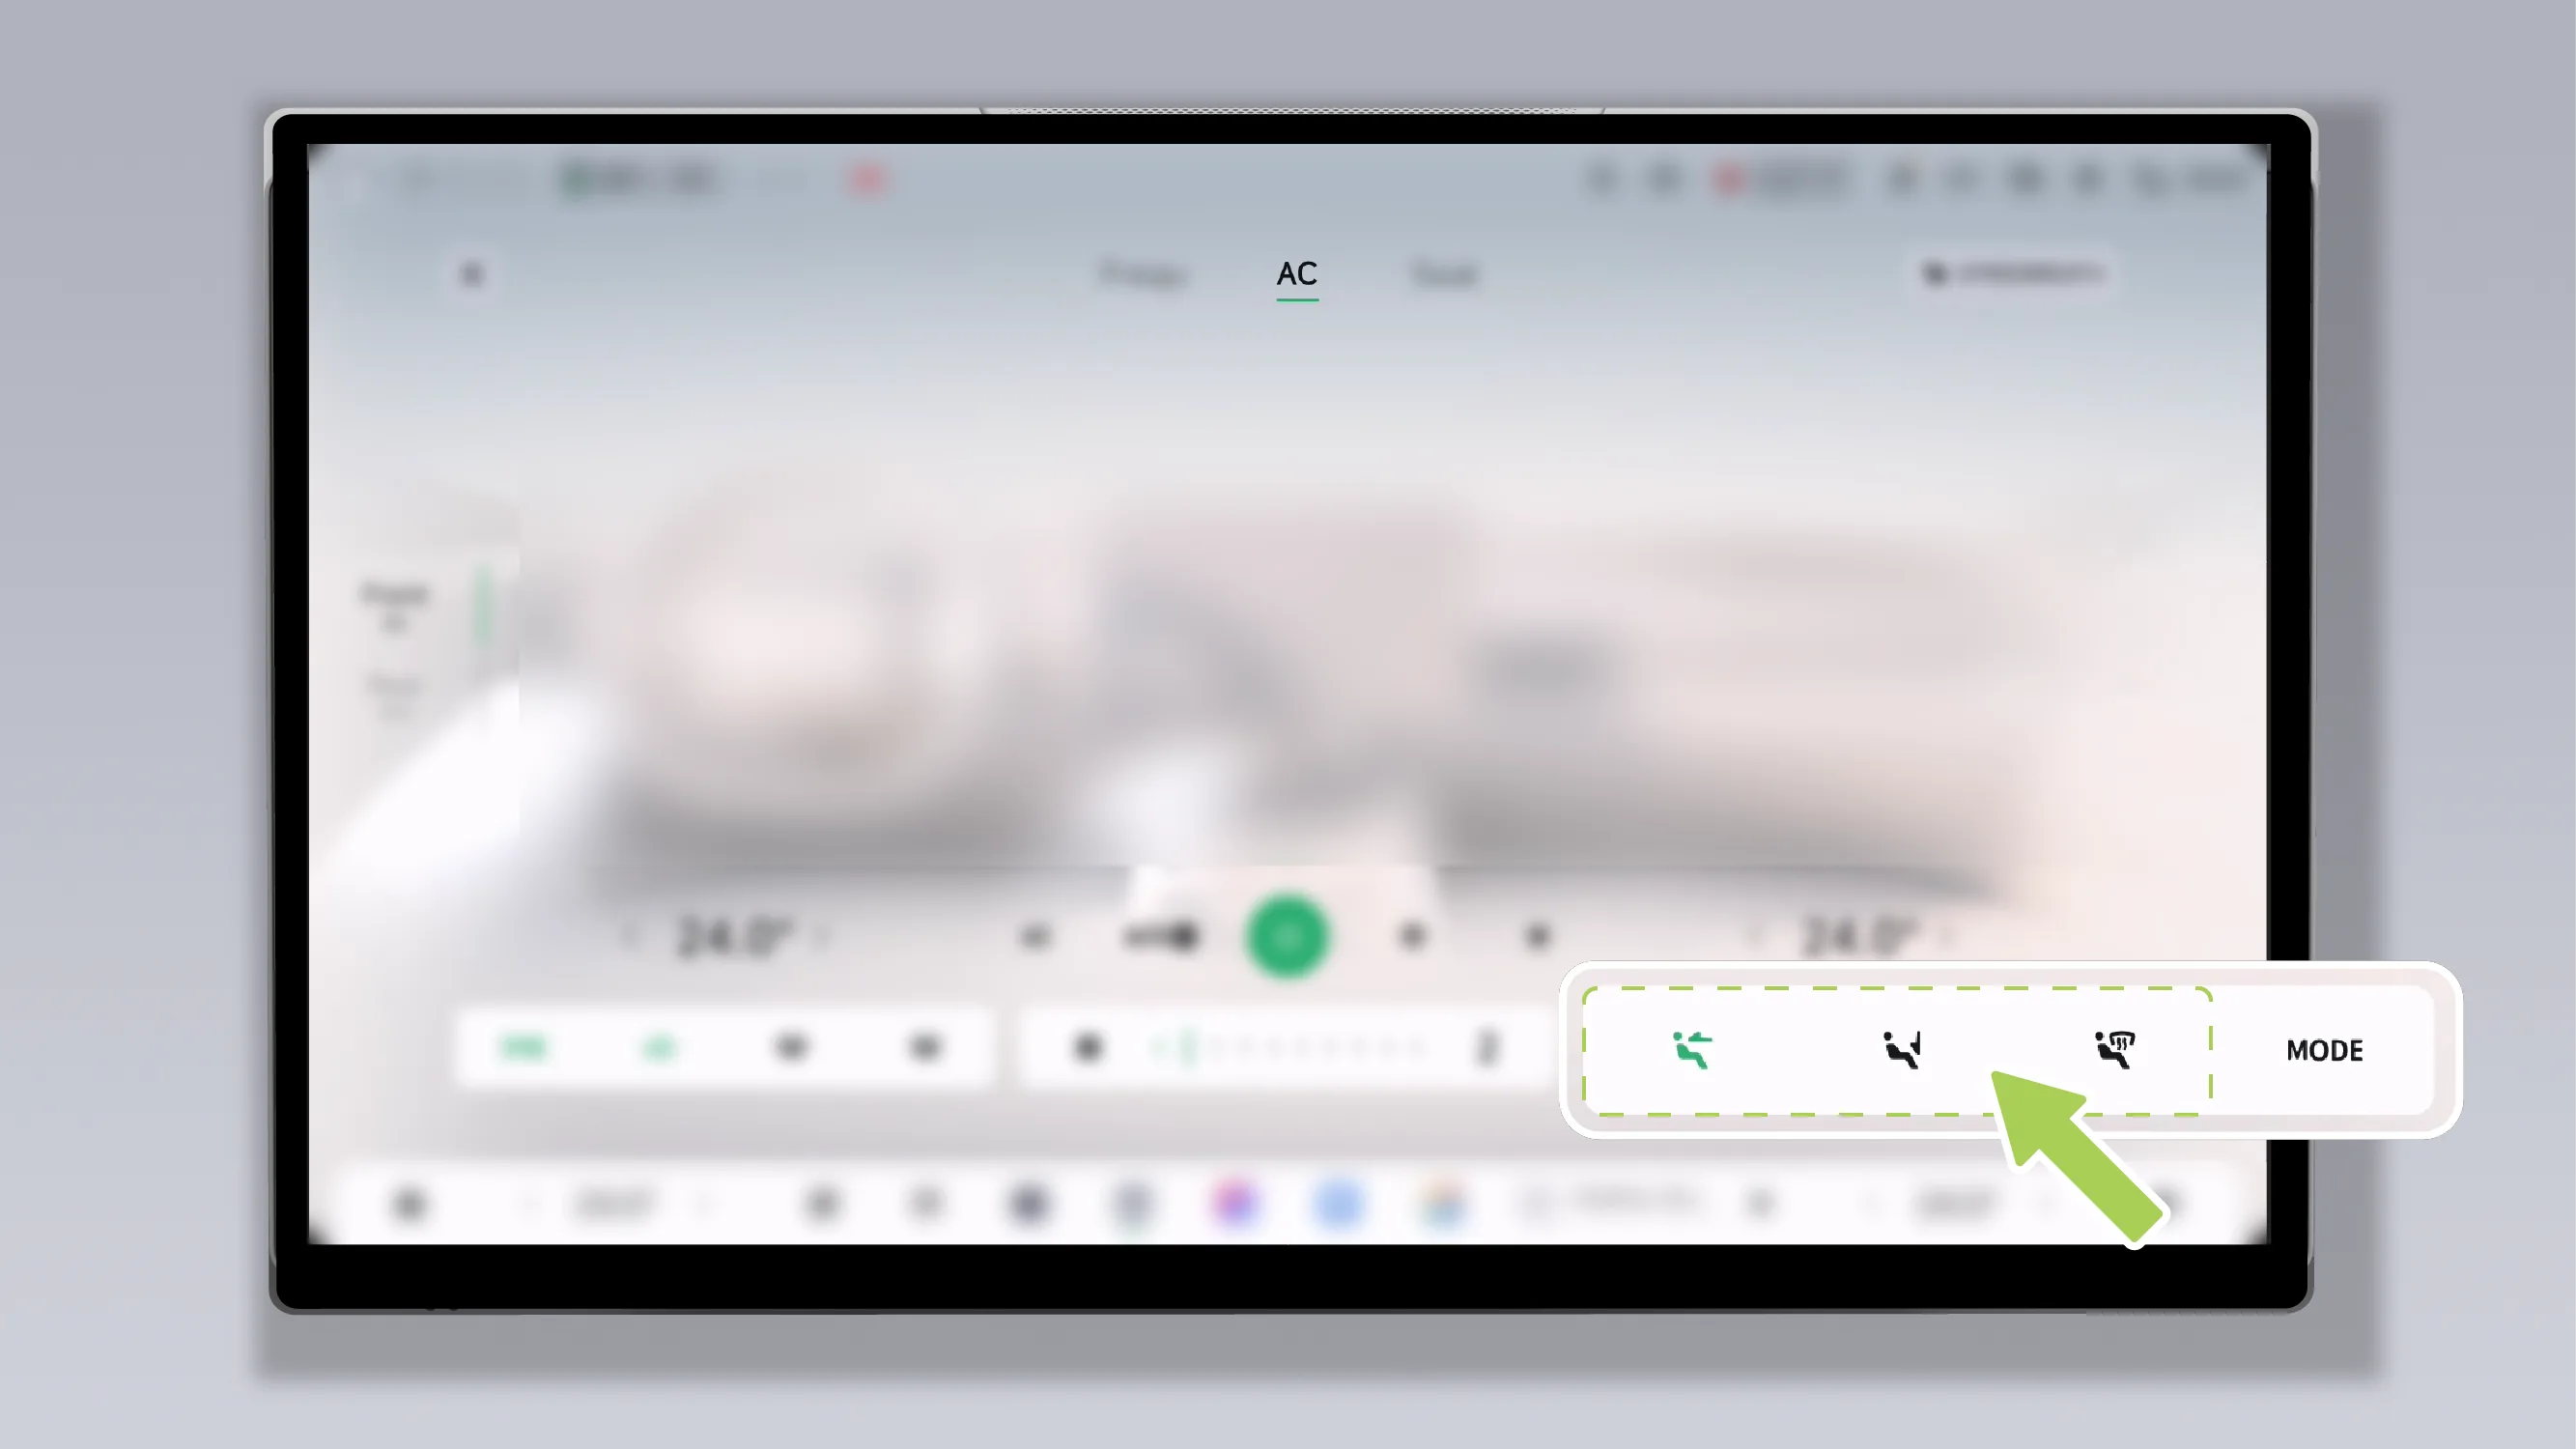
On the front row Air Conditioner interface on the central control screen, you can set the front row airflow mode.
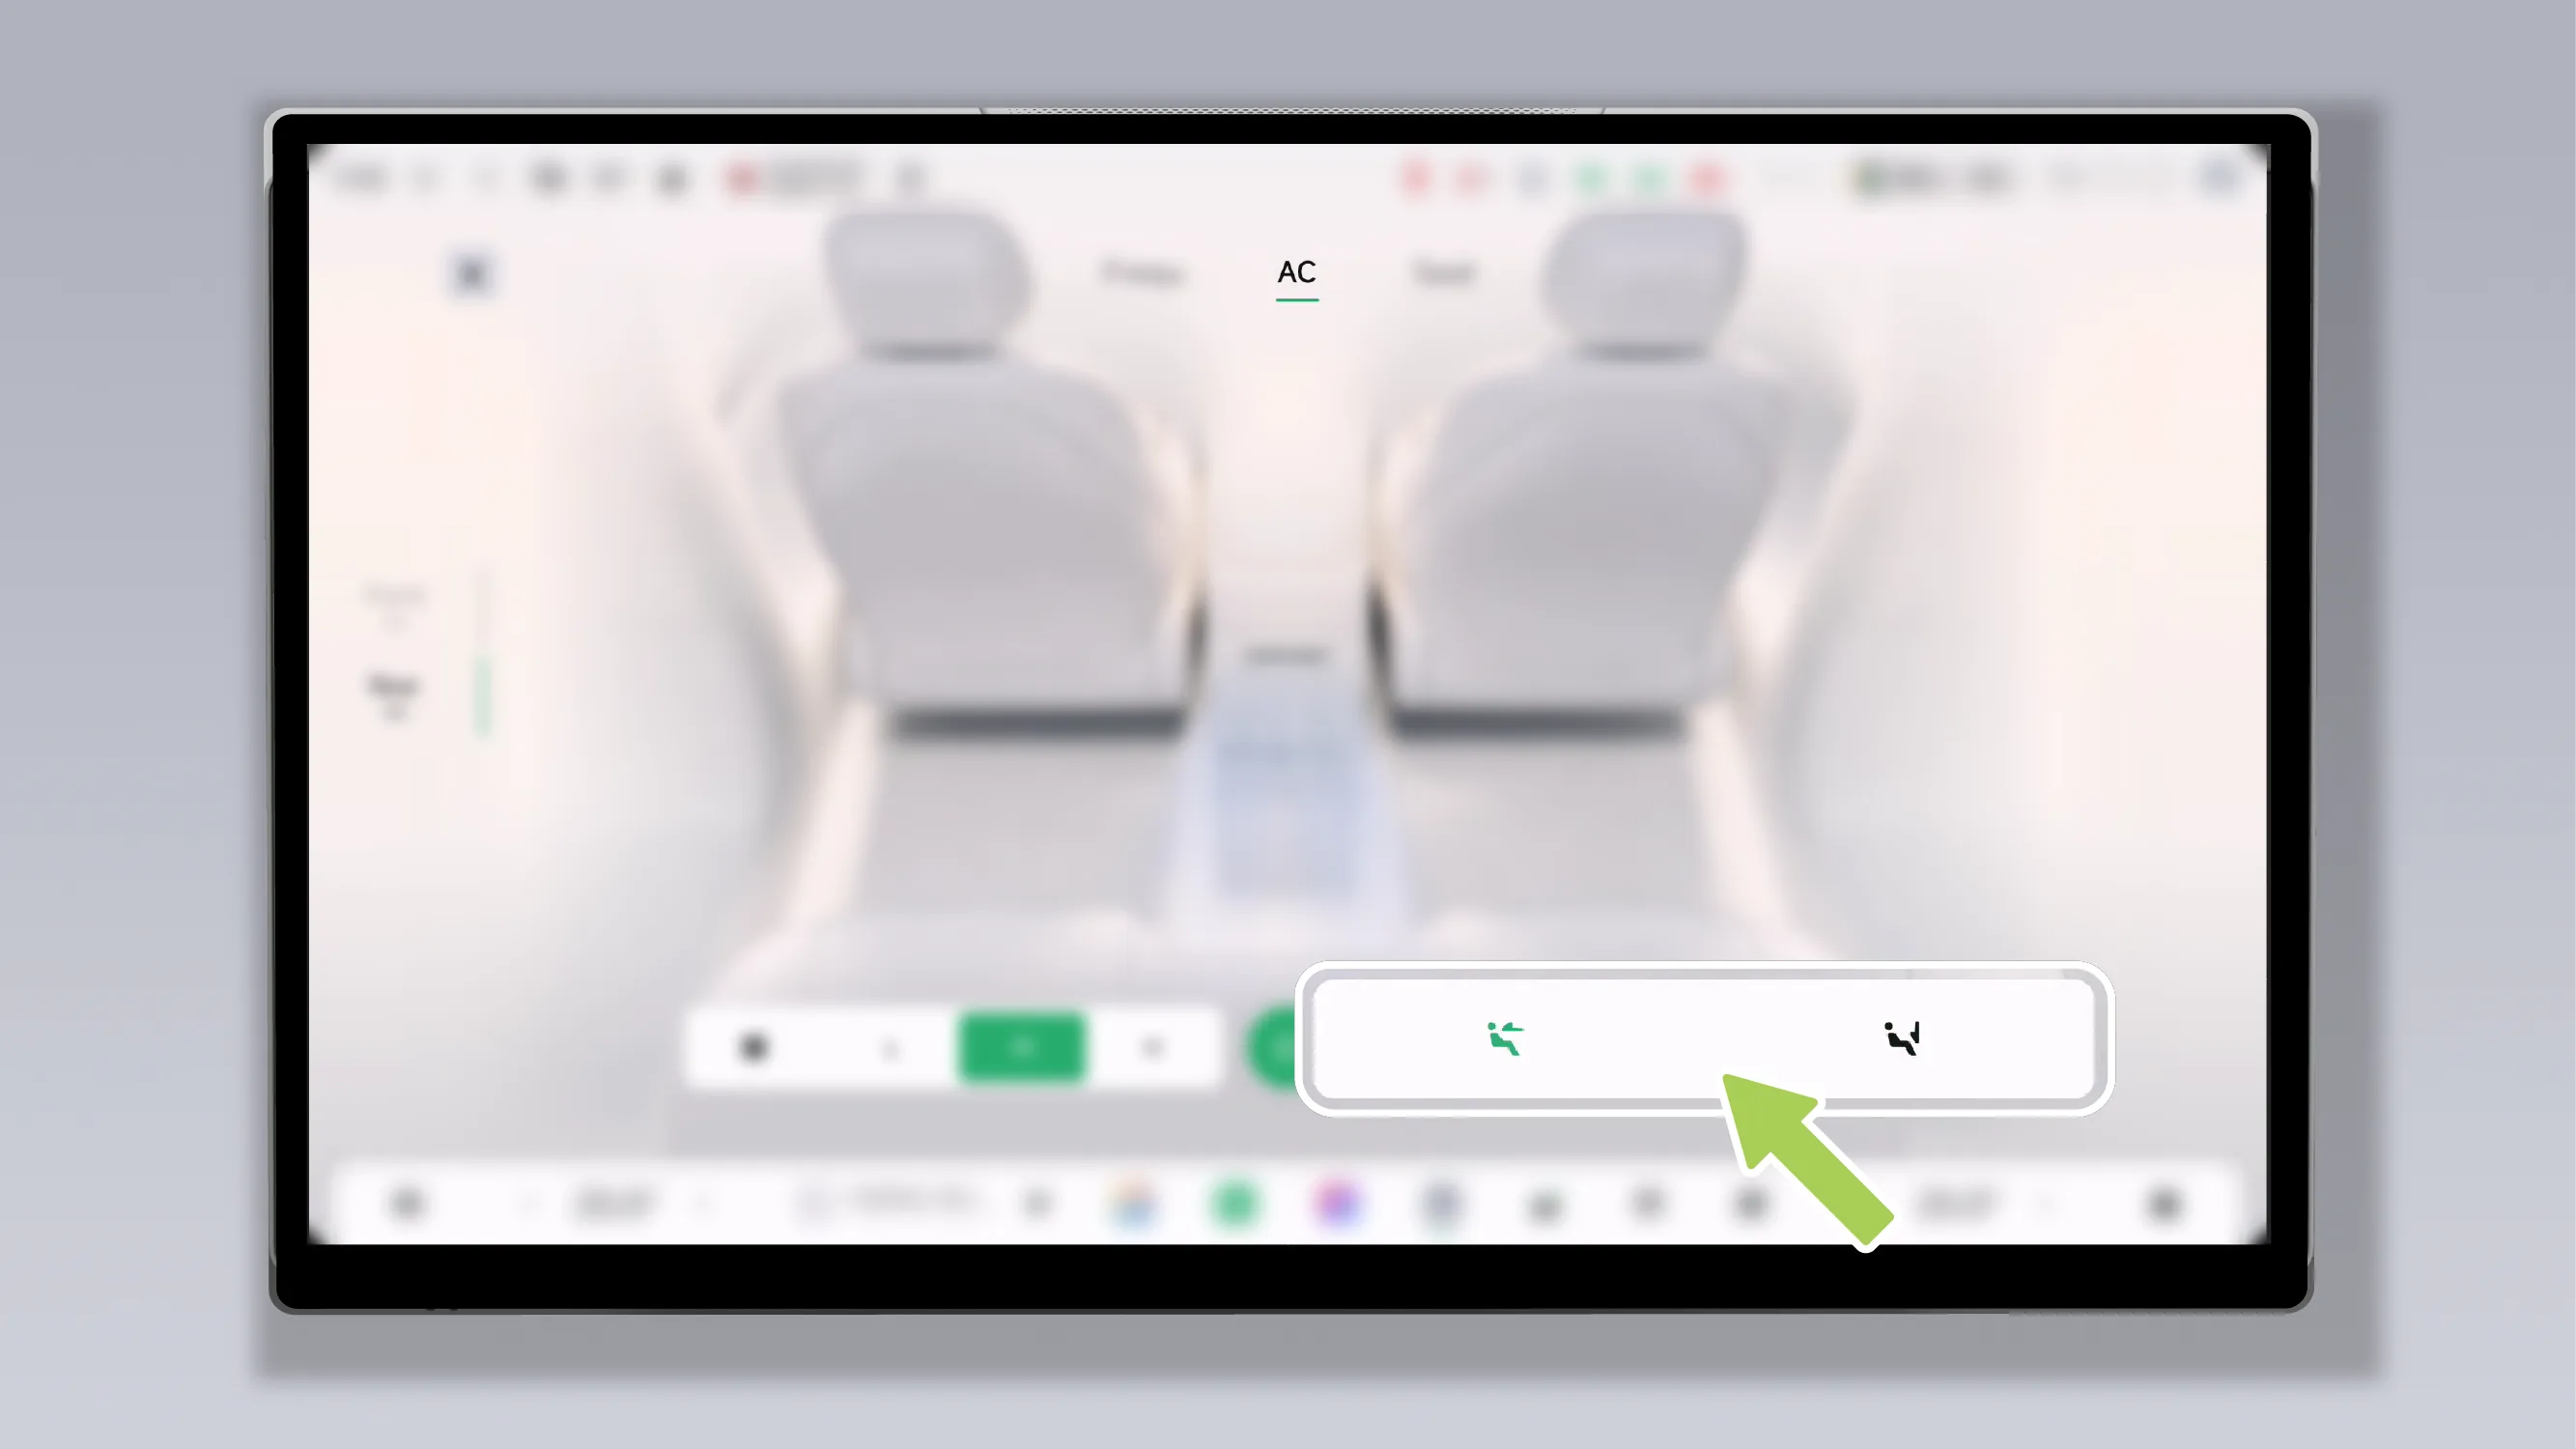
On the rear Air Conditioner interface on the central control screen, you can set the rear air outlet mode.
On the Air Conditioner interface of the rear control screen, you can set the rear air outlet mode.
The vehicle is equipped with electric air vents, and the airflow mode can be adjusted through the central control screen or voice commands.
Tips Only the front row air outlets can be adjusted.
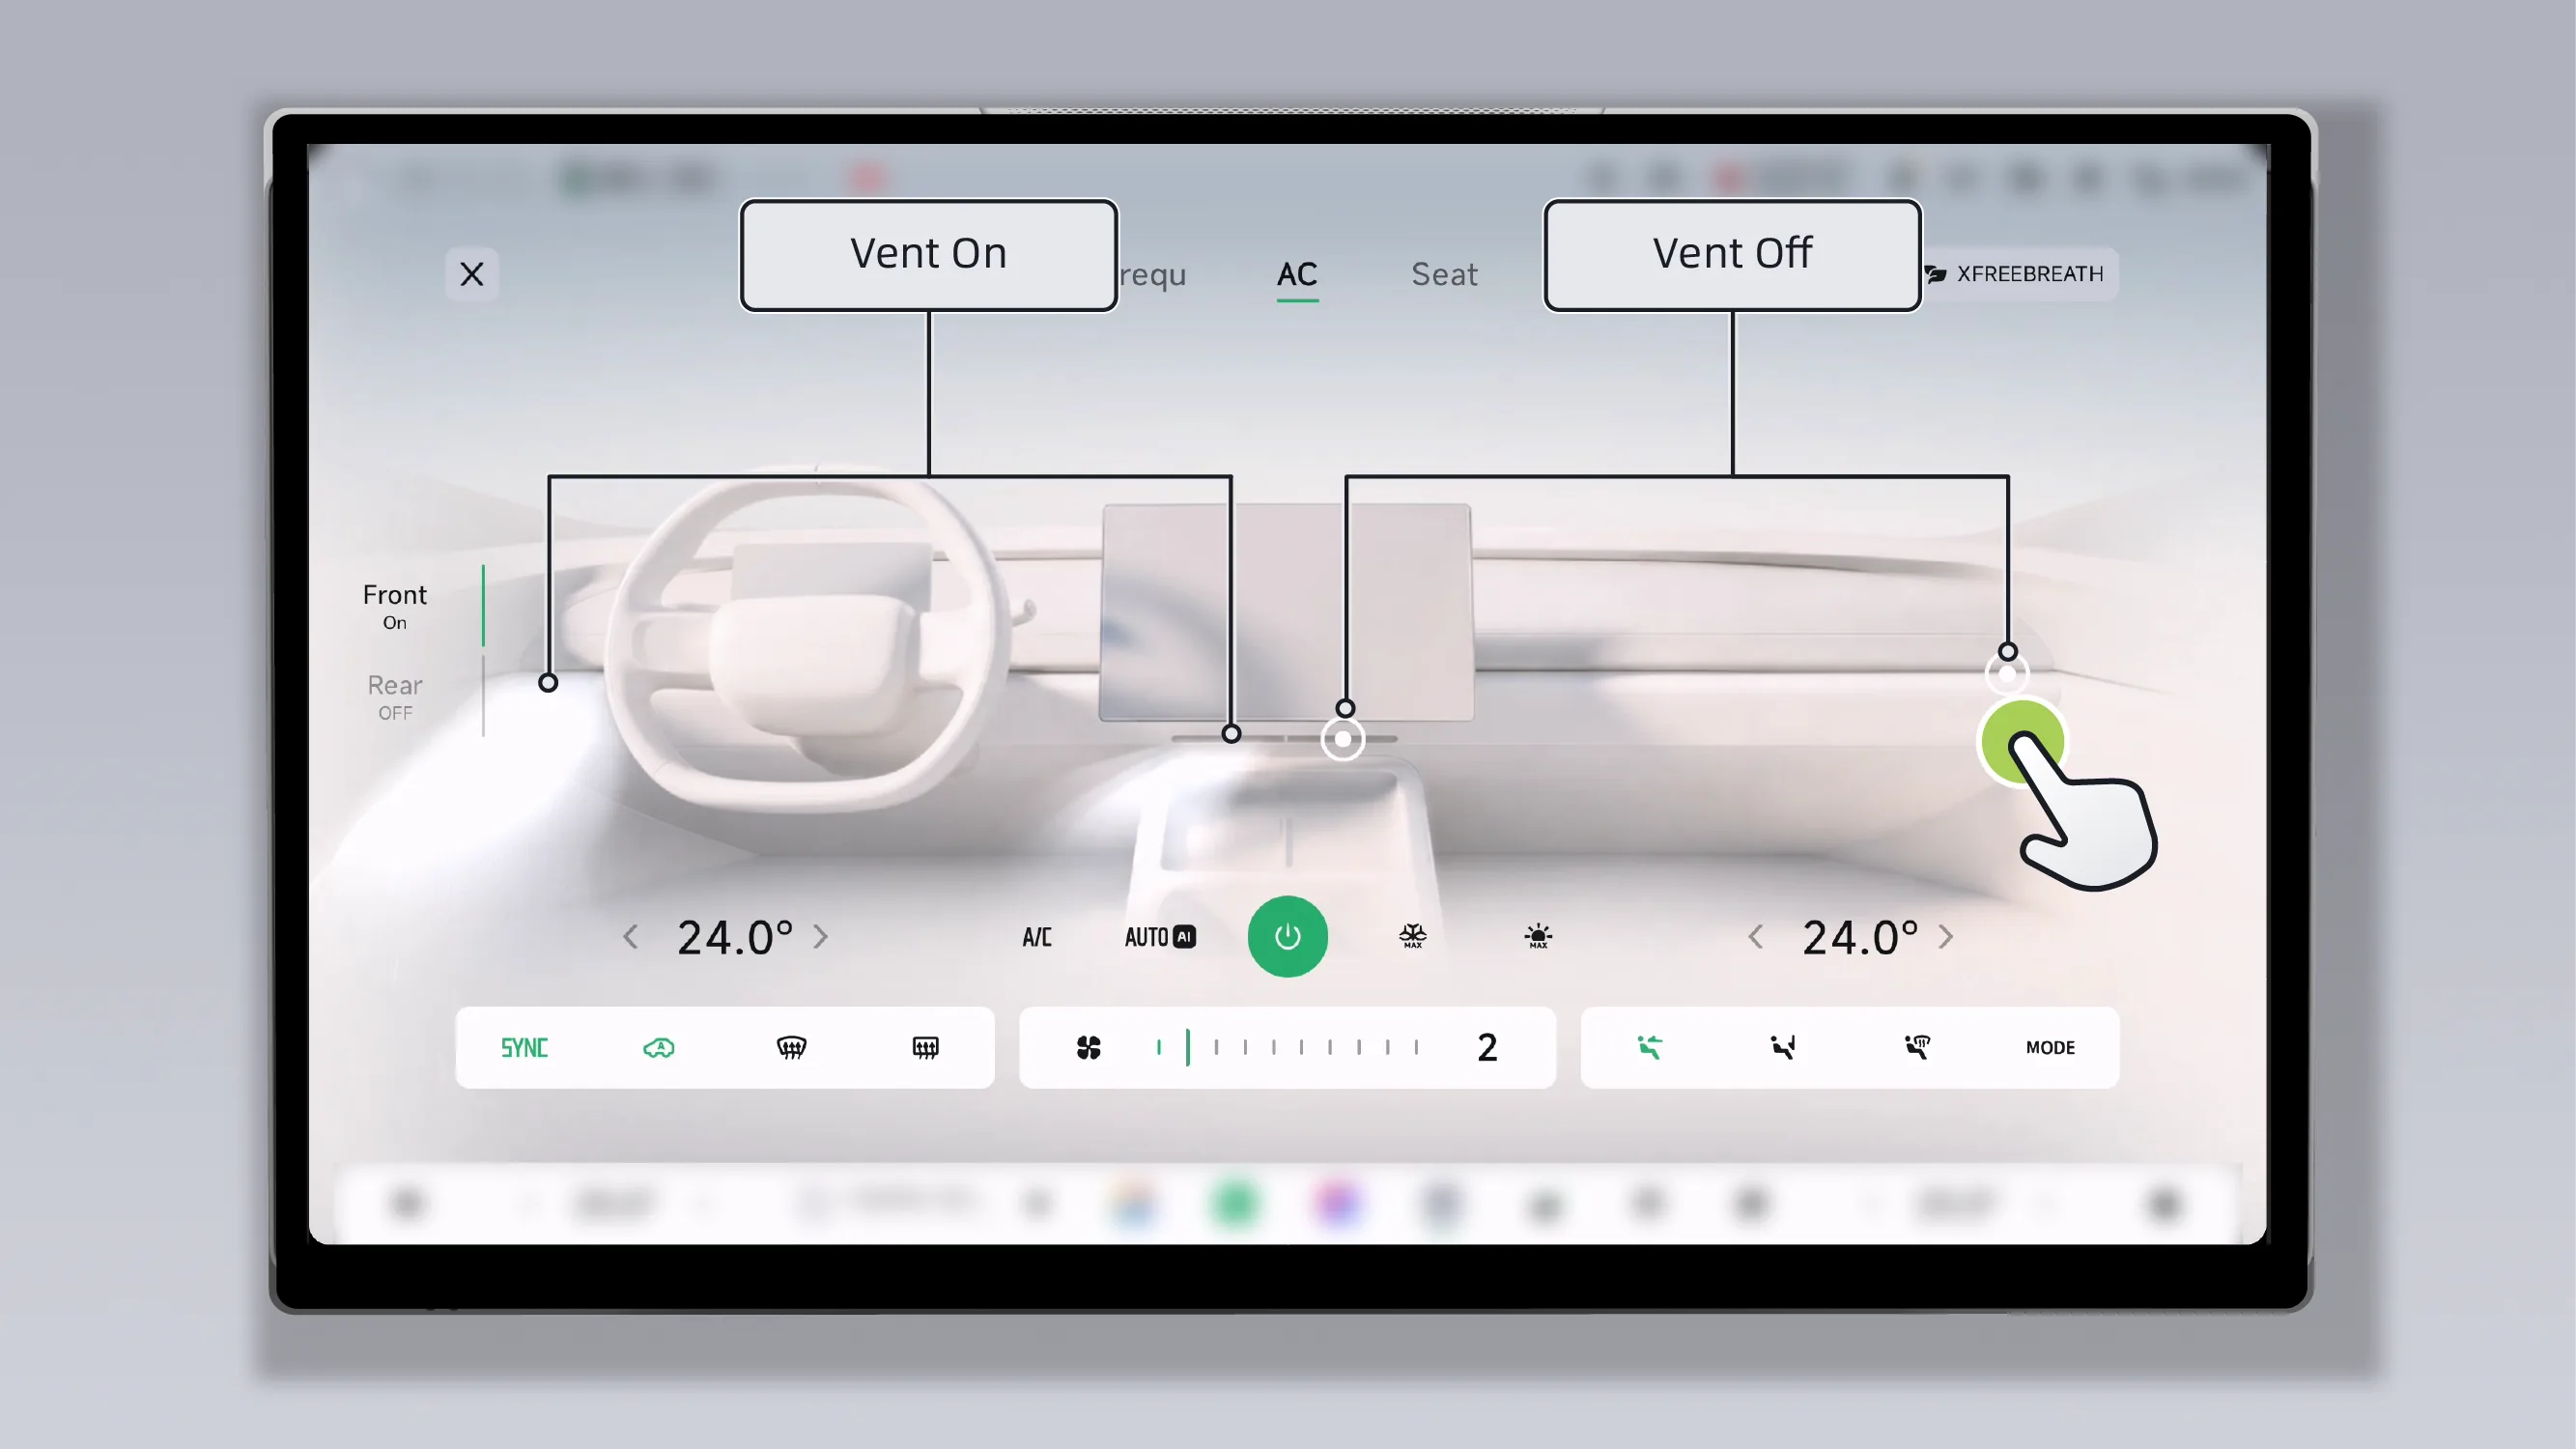
Tap the air vent to open/close the corresponding air vent.
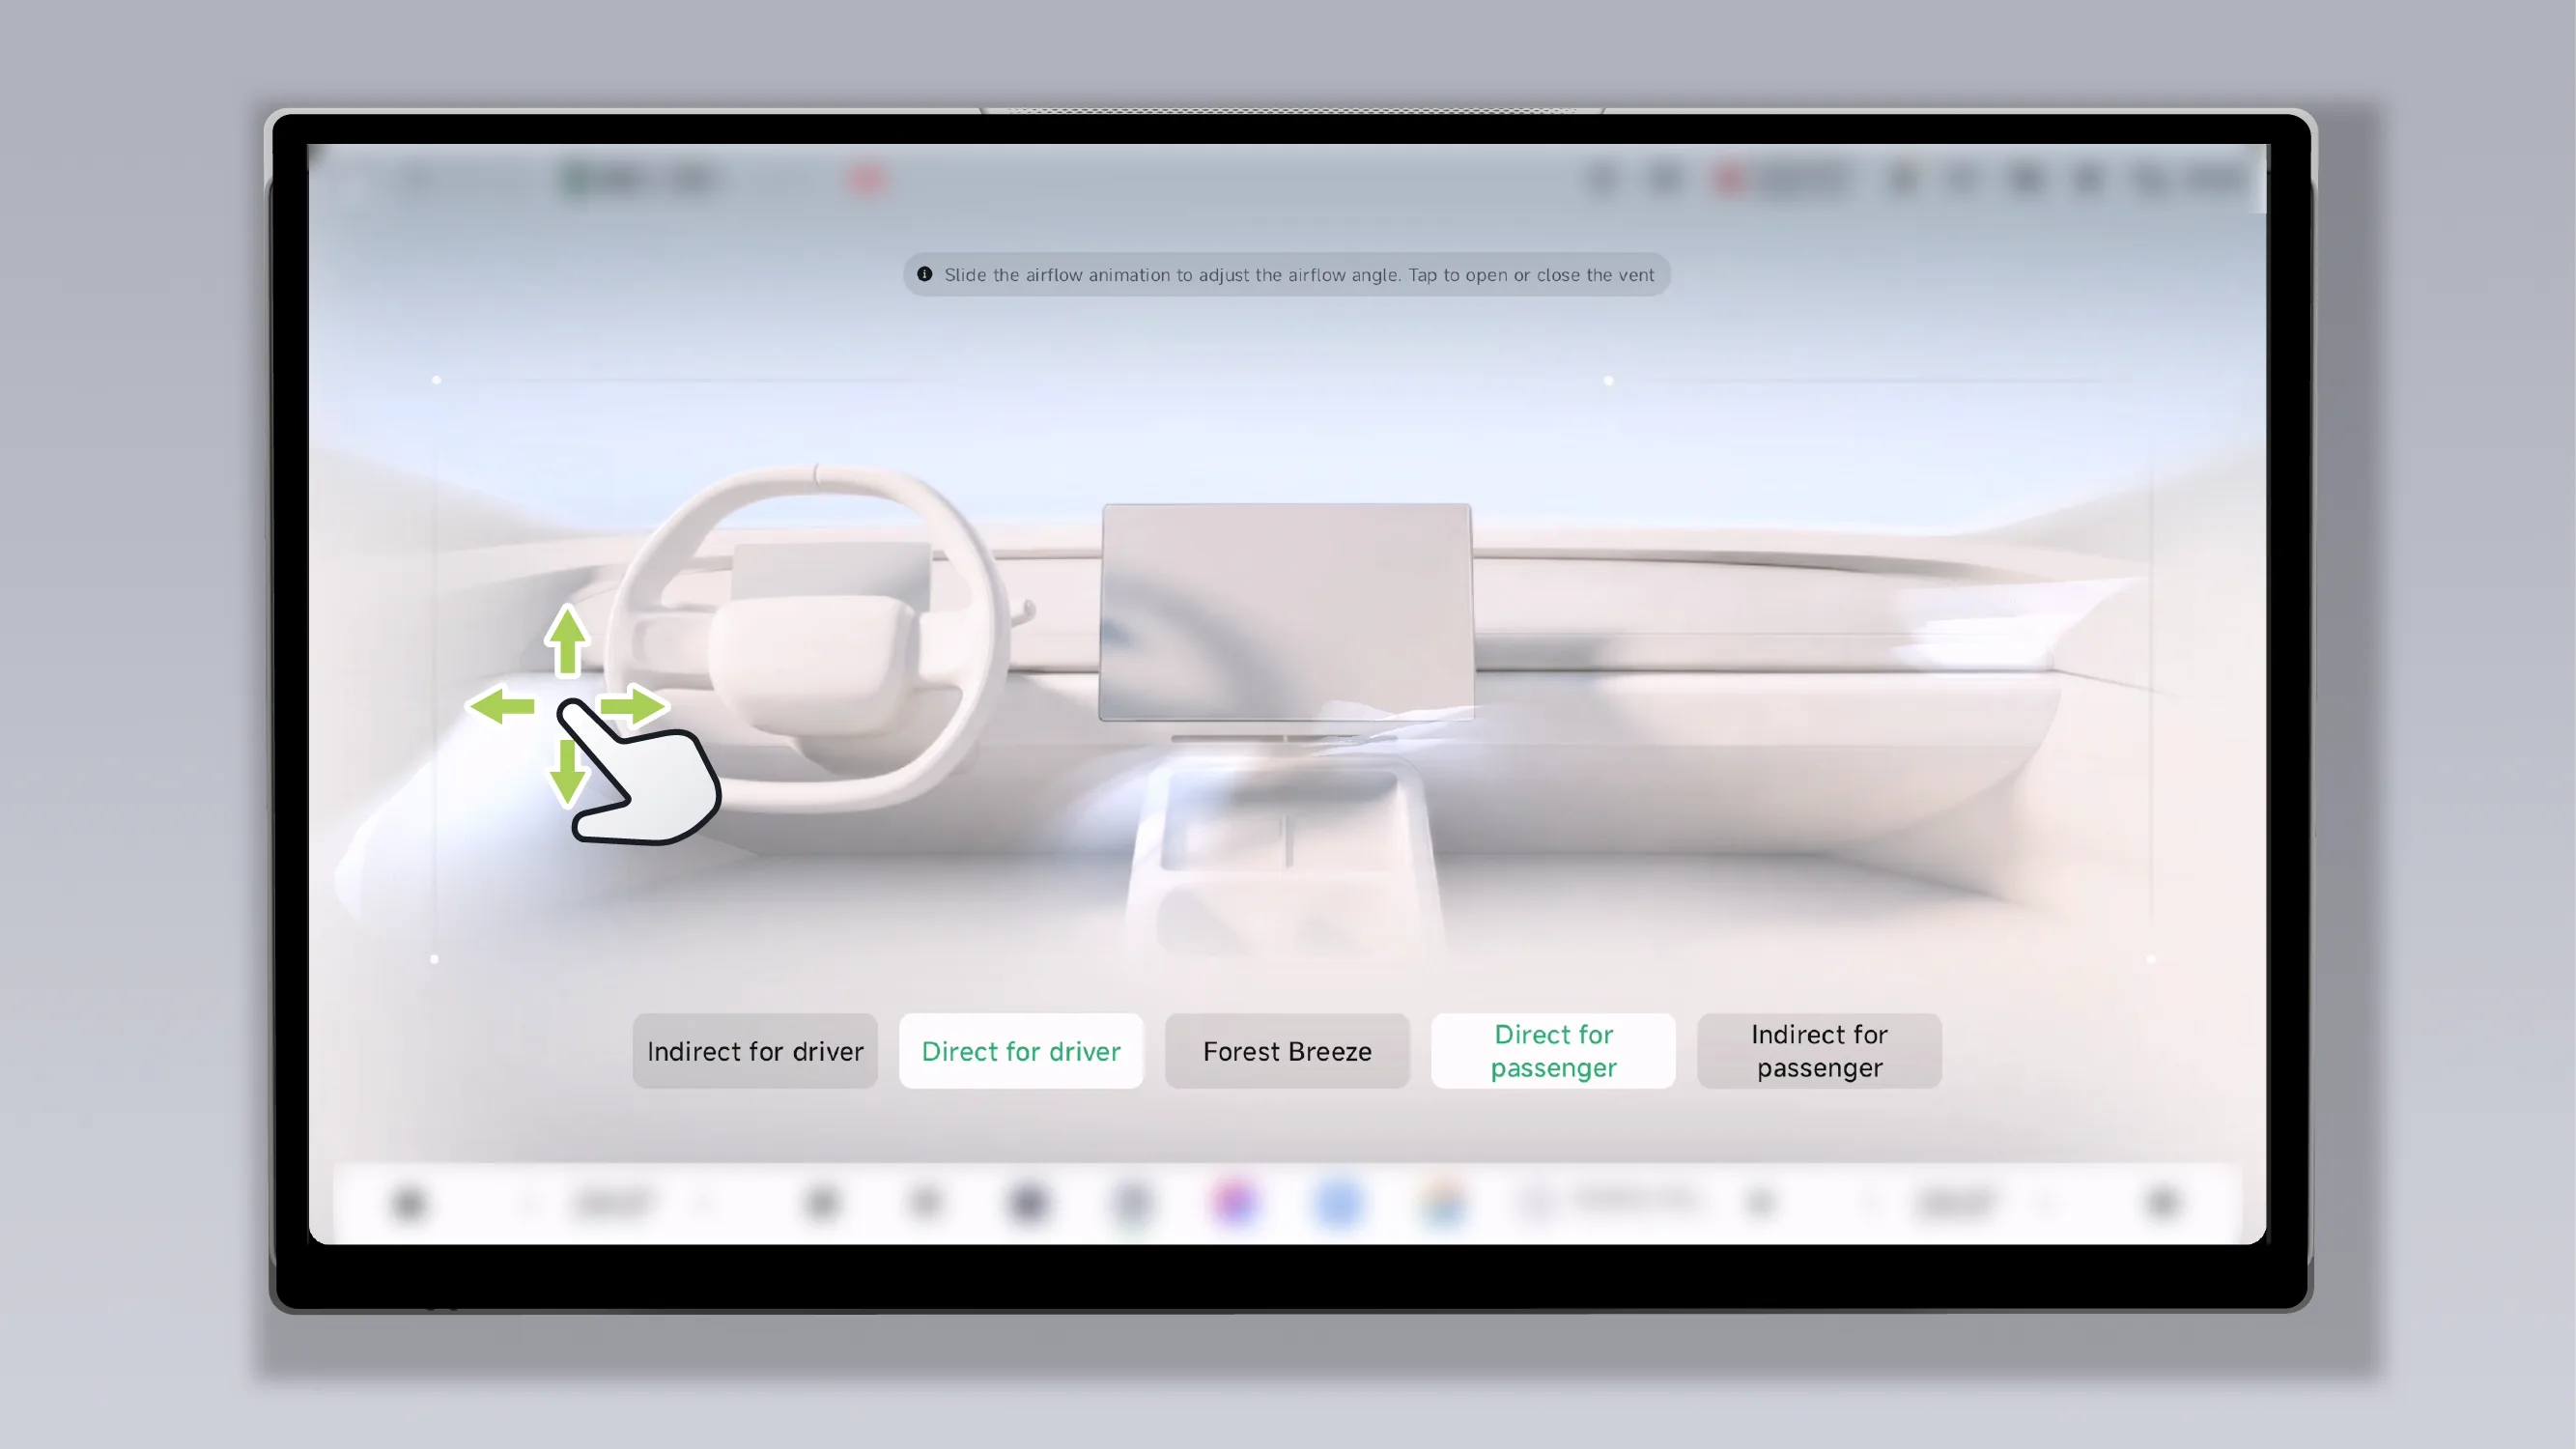
When the airflow mode is set to face-level or face-level + footwell mode, you can slide the air vent up, down, left, or right to enter the air outlet mode adjustment interface.
Adjust the air outlet airflow direction: slide the airflow animation up and down to control the vertical airflow angle, and slide the airflow animation left and right to control the horizontal airflow angle.
Avoid Driver/Passenger: The airflow direction of the air vent will avoid the core thoracic position of the driver/passenger occupant.
Direct blow to driver/passenger: The airflow direction of the air vent will blow directly toward the core chest area of the driver/passenger occupant.
Forest Breeze: The air outlet will automatically perform Auto Swing according to the settings. At this time, you can slide the airflow animation up and down to manually control the vertical airflow angle.
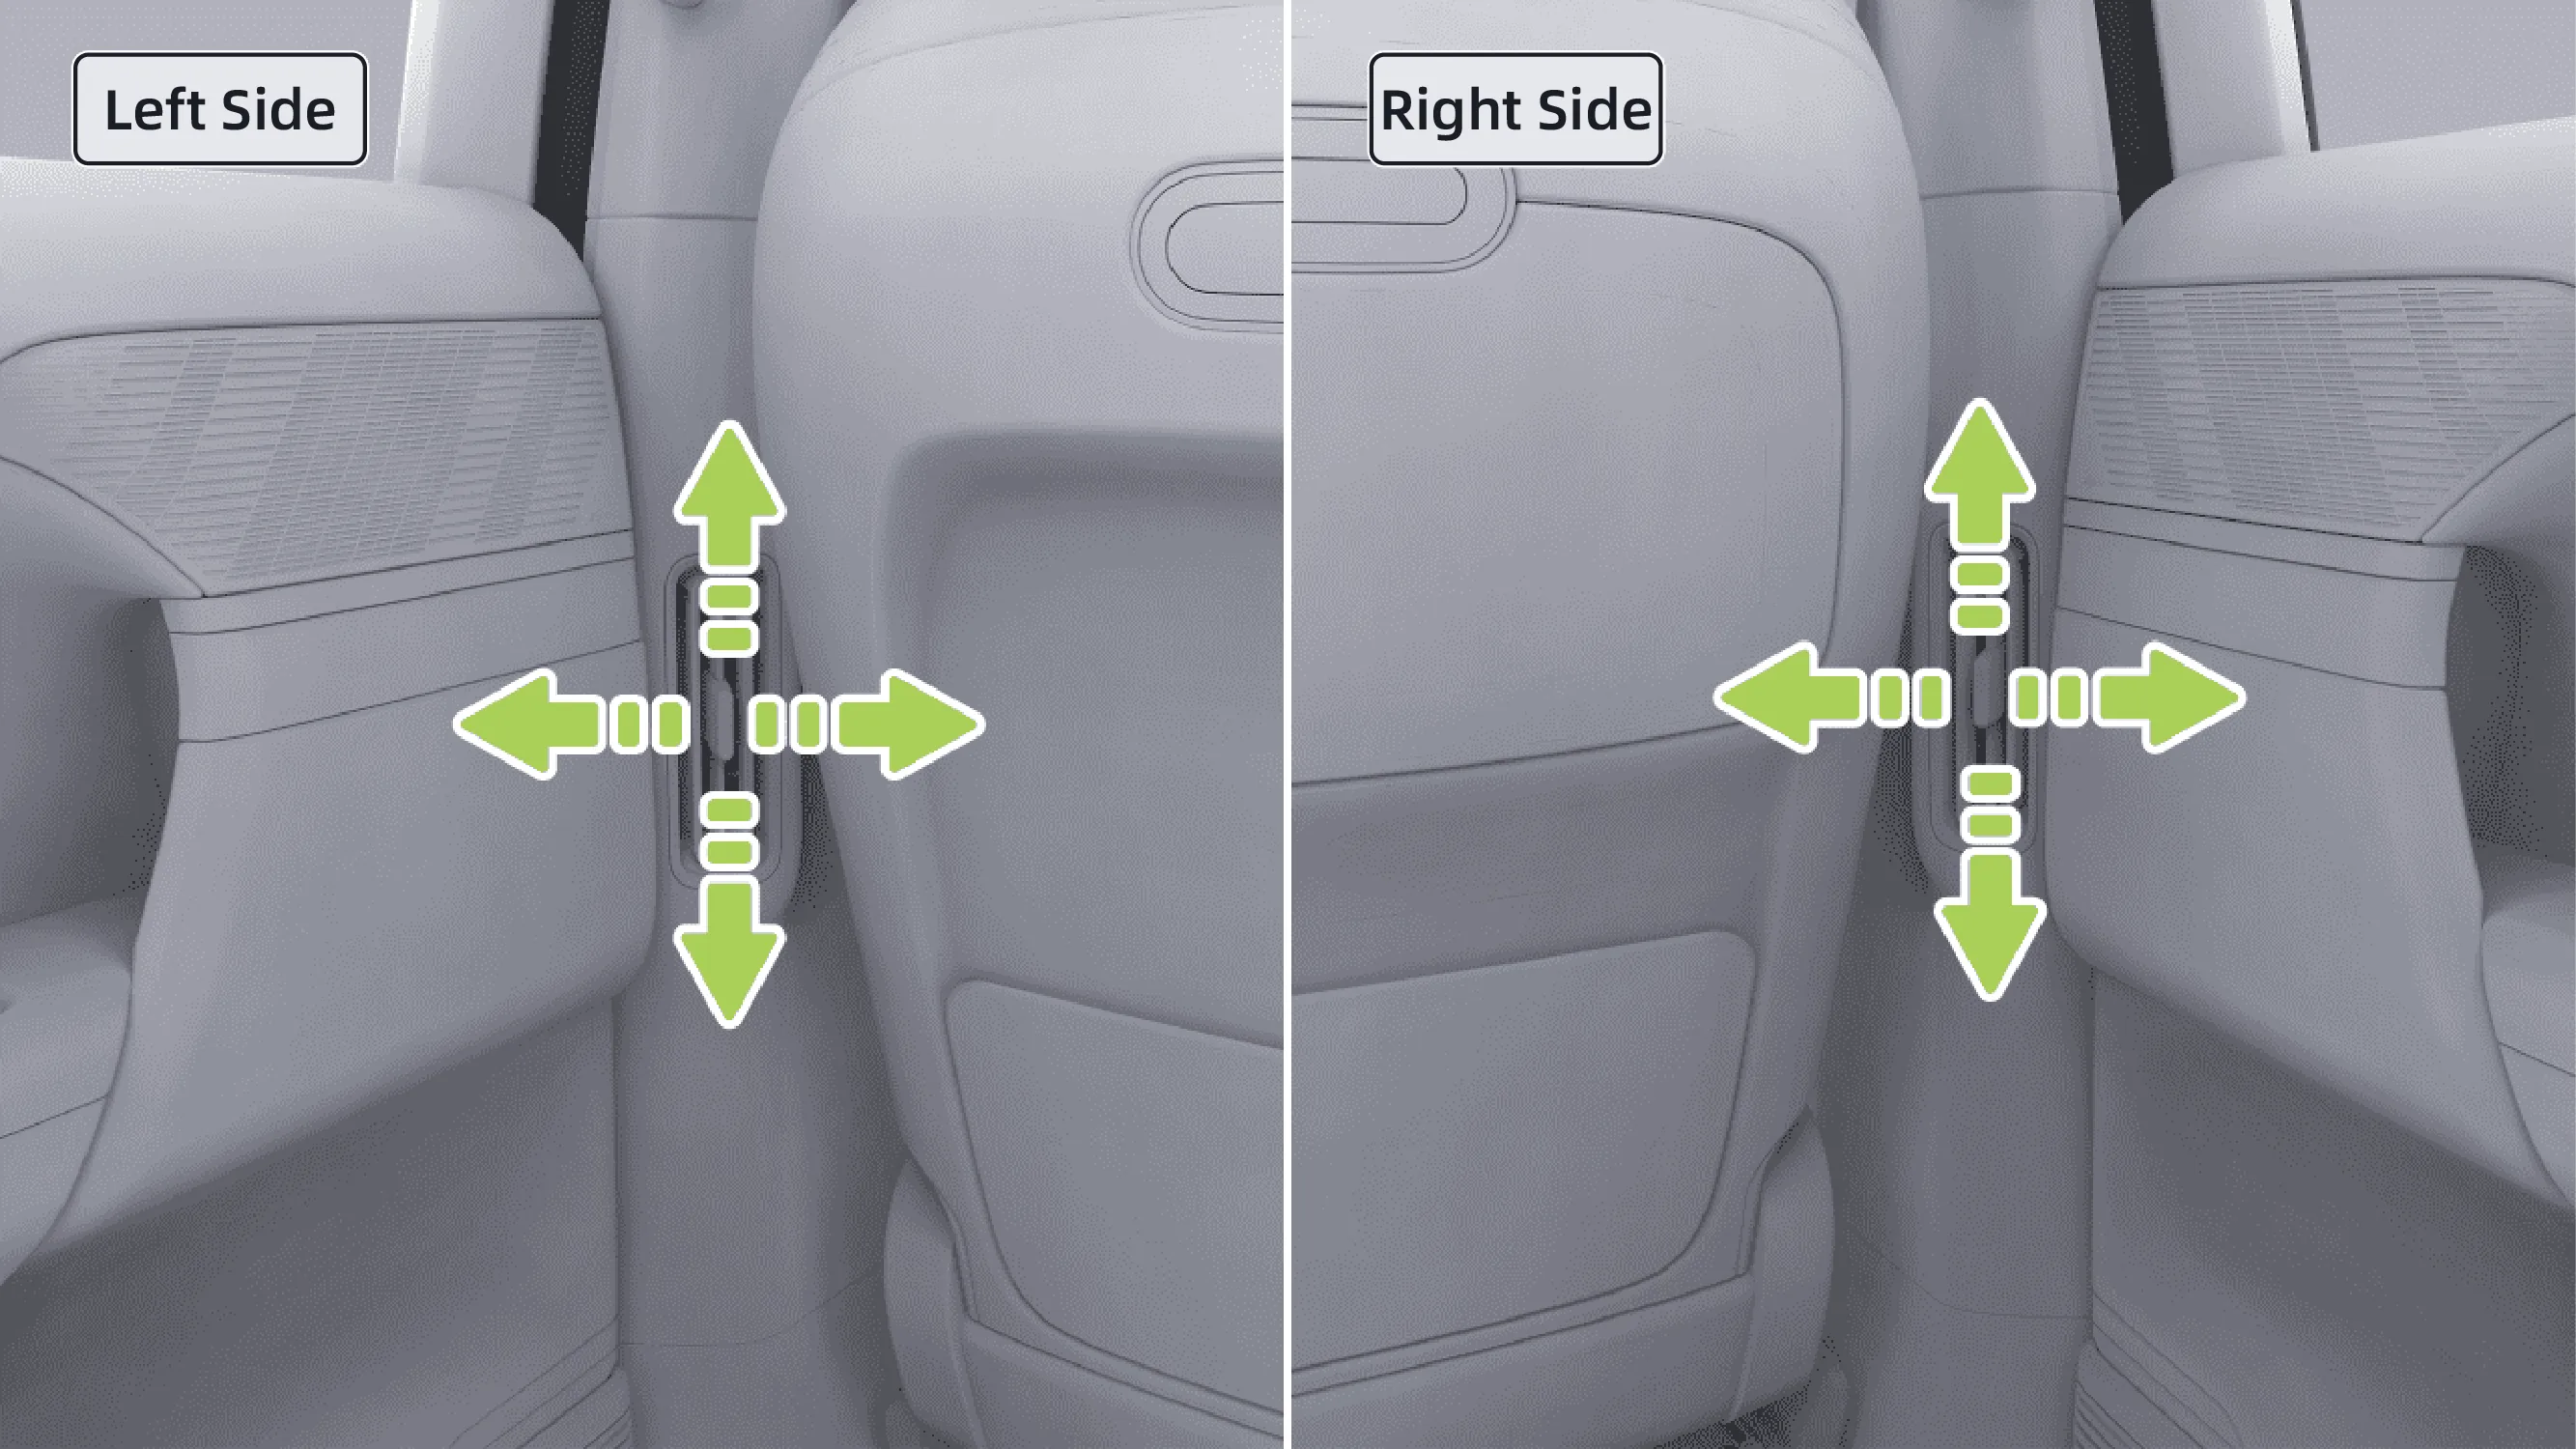
Move left or right to adjust the airflow direction of the air vent, move up or down to adjust the airflow volume, and move fully upward to close the air vent.
The air circulation mode includes three modes: Recirculate, Fresh Air, and automatic internal/external circulation. You can switch between them by either of the following methods:
Switch the air circulation mode by voice command, for example, say keywords such as "Switch to Recirculate" and "Switch to Fresh Air".
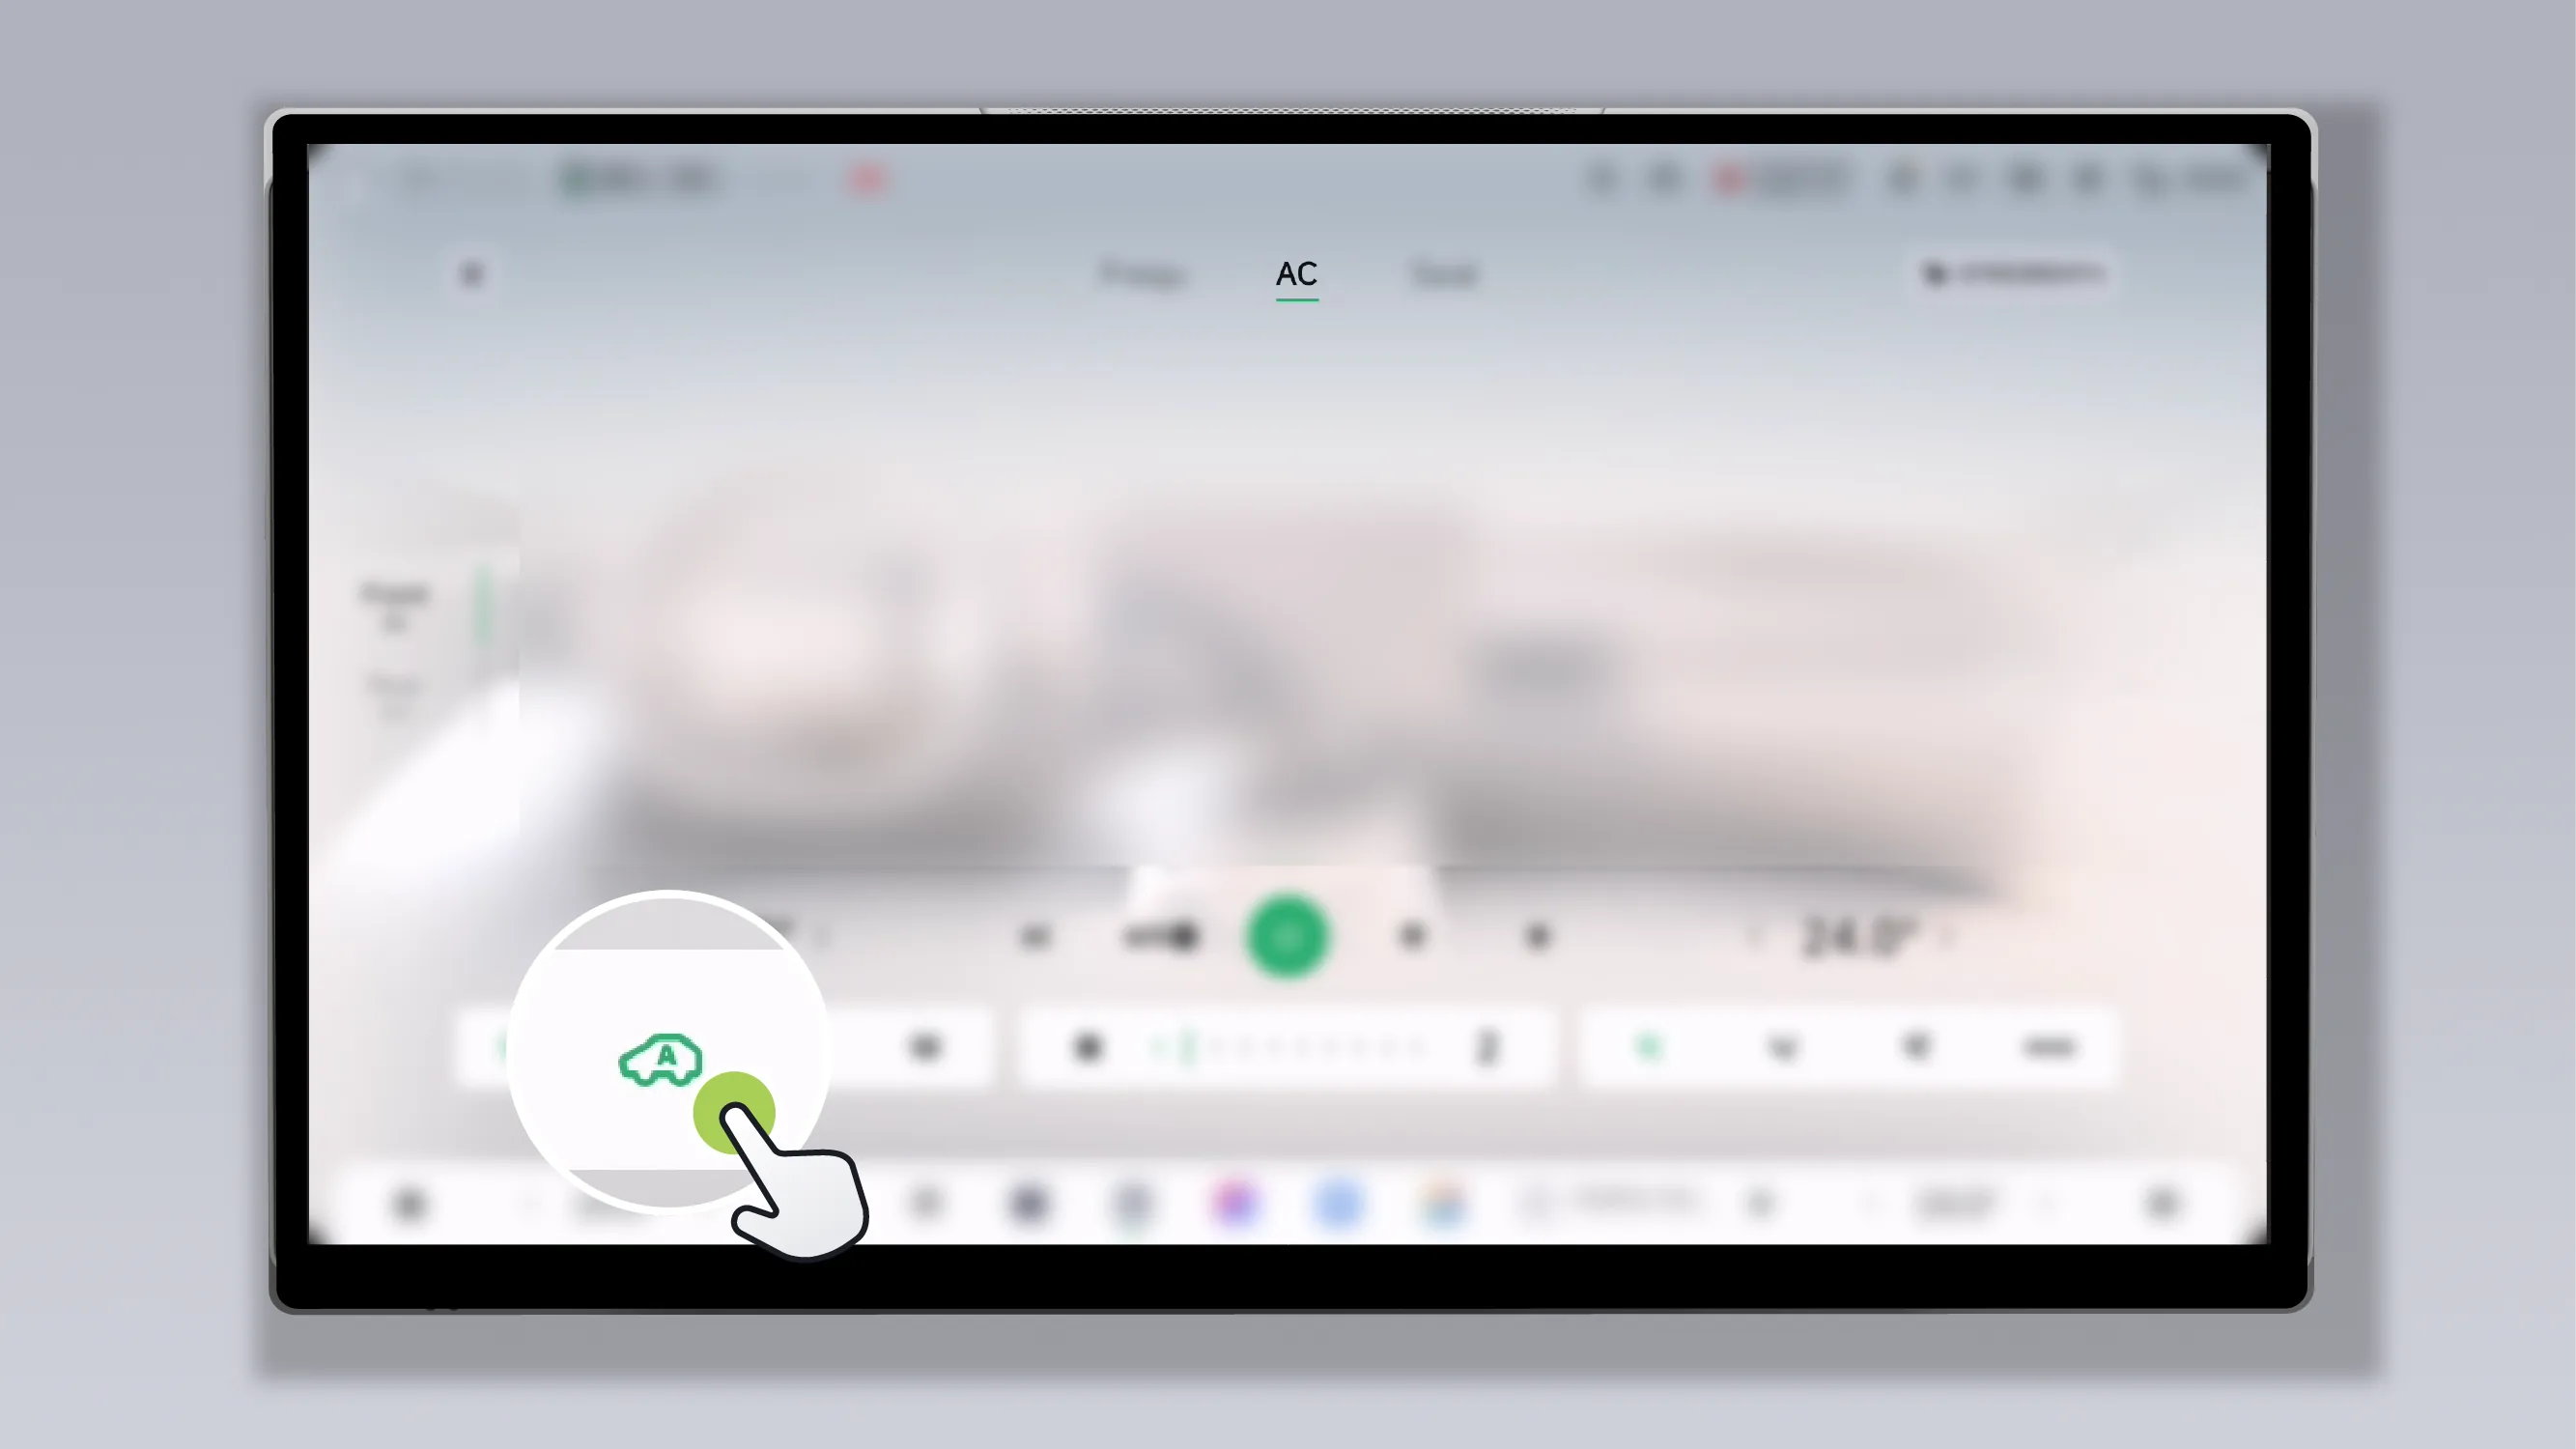
Tap on the Air Conditioner interface on the center control screen  , switch the air circulation mode.
 Recirculate: When the outside air quality is poor, it is recommended to select recirculation mode. The system prevents dust and harmful gases from entering the vehicle, improving the air quality inside the vehicle.
 Fresh Air: When the outside air is good, you can select the fresh air mode. The system will introduce fresh outside air into the vehicle to improve the air quality inside the vehicle.
Automatic Internal/External Circulation: Automatically controls Recirculate and Fresh Air according to the air outside the vehicle. When poor air quality outside the vehicle is detected, it automatically switches to Recirculate; when good air quality outside the vehicle is detected, it automatically switches to Fresh Air.
You can turn the front and rear defrost/defog functions on/off via the center display, the mobile app, or voice commands.
 Front Defrost/ Defogger: After being turned on, it can quickly clear fog from the front windshield and front side windows.
 Rear Defrost/ Defogger: After being turned on, it can quickly clear fog from the rear window glass and Side Mirrors.
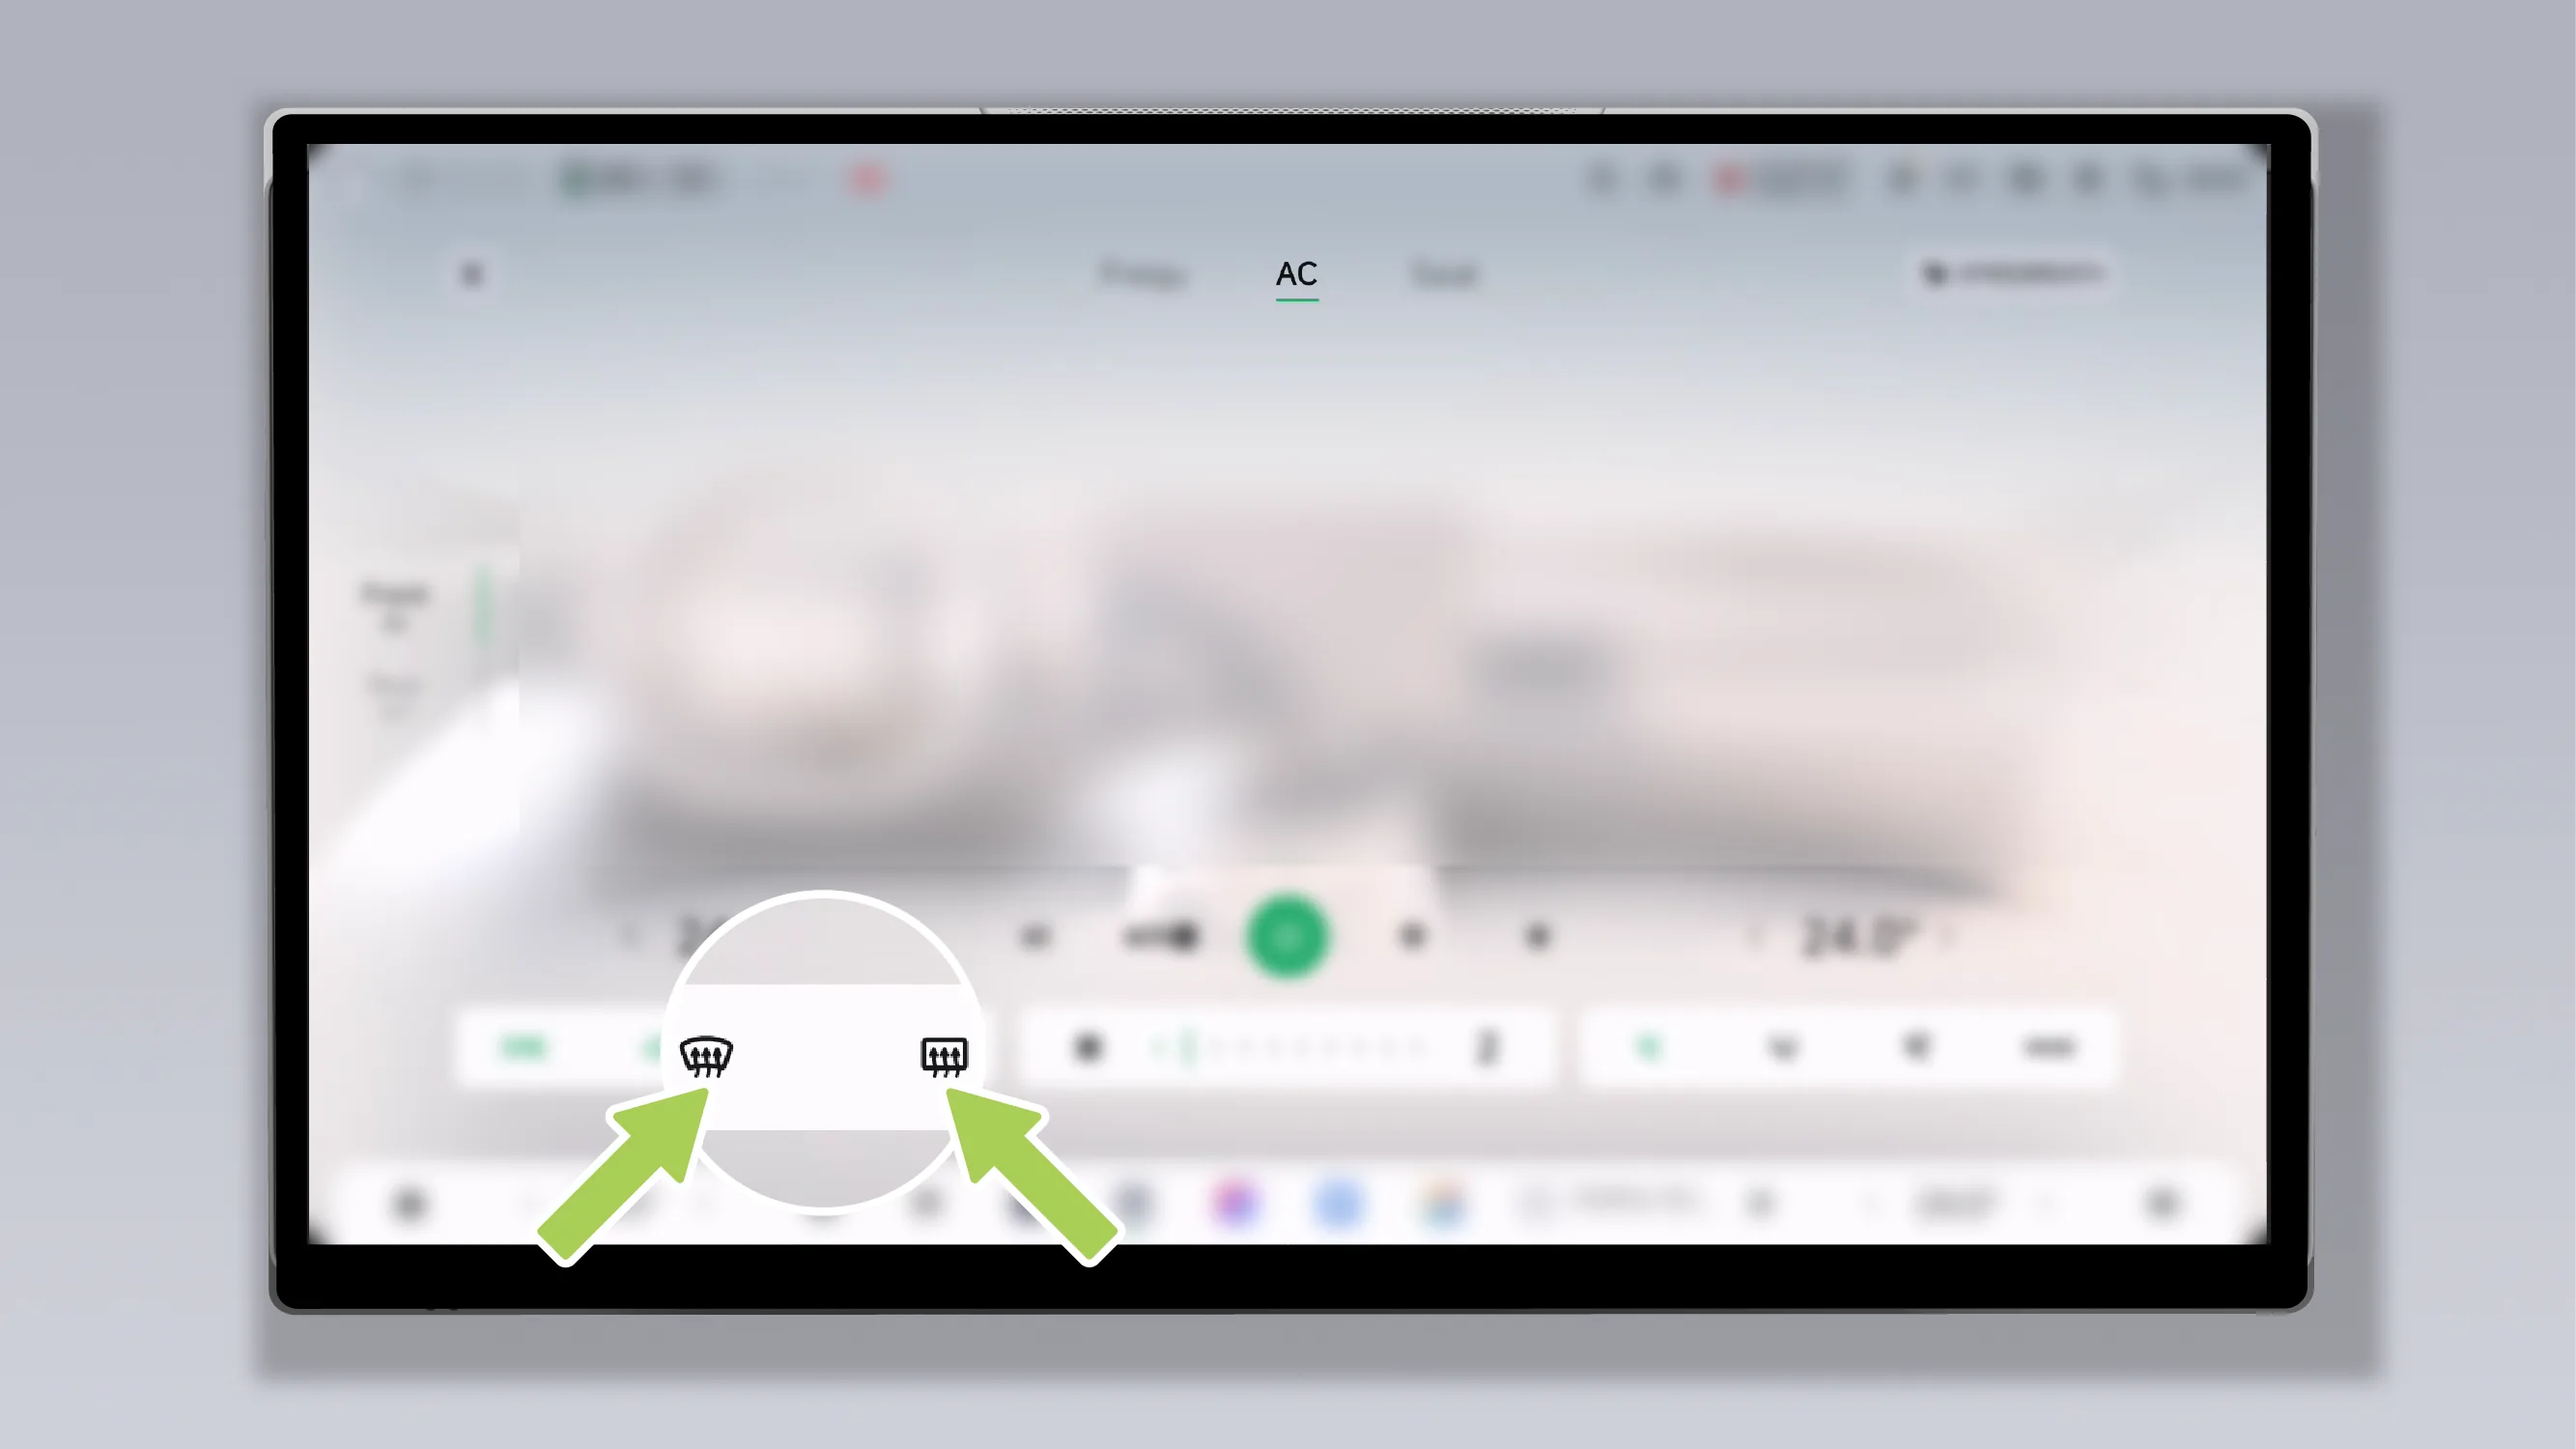
Tap on the Air Conditioner interface  or , turn the defrost/defog function on/off.
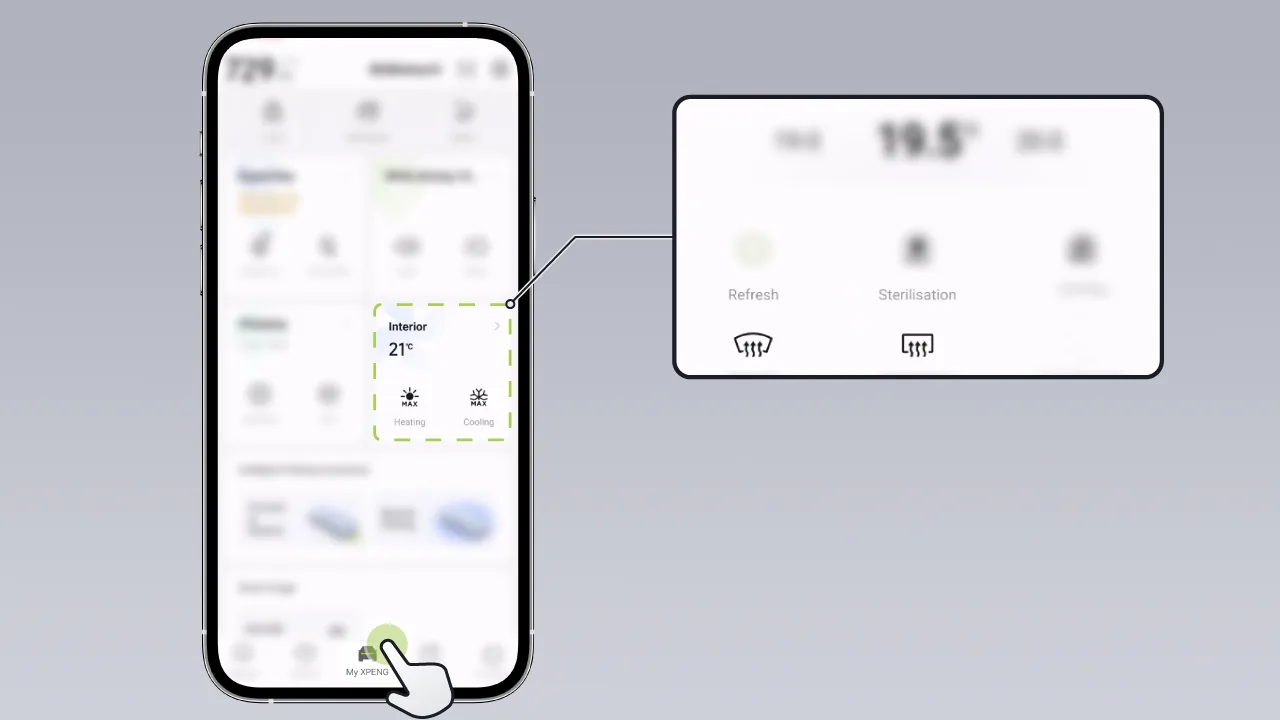
Tap in the mobile app “XPENG→Smart Air Conditioning→  ”or “
”or “  ”, turn the defrost/defog function on/off.
Tips Activating Front Defrost/Defog automatically switches Vent Mode to Windscreen Ventilation. Switching Vent Mode to Face Ventilation or Floor Ventilation automatically turns off Front Defrost/Defog.
When Front Defogging or Windshield Defrosting is activated, the system simultaneously activates windshield heating. The windshield heating will automatically switch off after a period of operation.
Rear Defogging and exterior mirror heating share the same switch; they turn on and off together. The function will automatically switch off after a period of time.
Caution Do not place any objects on the instrument panel, as they may block the vents and obstruct the air conditioner airflow, which can reduce the effectiveness of windshield defrosting and defogging.
Warning When the side mirror heating function is on, do not touch the mirror surfaces.
When the windshield heating function is on, do not touch the wiper area at the bottom of the windshield.
You can turn Rapid Heating Mode on/off via the center display, mobile app, or voice command.
After Max Heat mode is enabled, the air conditioning will be automatically set to the highest temperature, and the seat heating and steering wheel heating functions will be turned on simultaneously. When the temperature inside the vehicle rises to 24°C, the system will exit Max Heat mode and automatically set the automatic air conditioning temperature to 24°C.
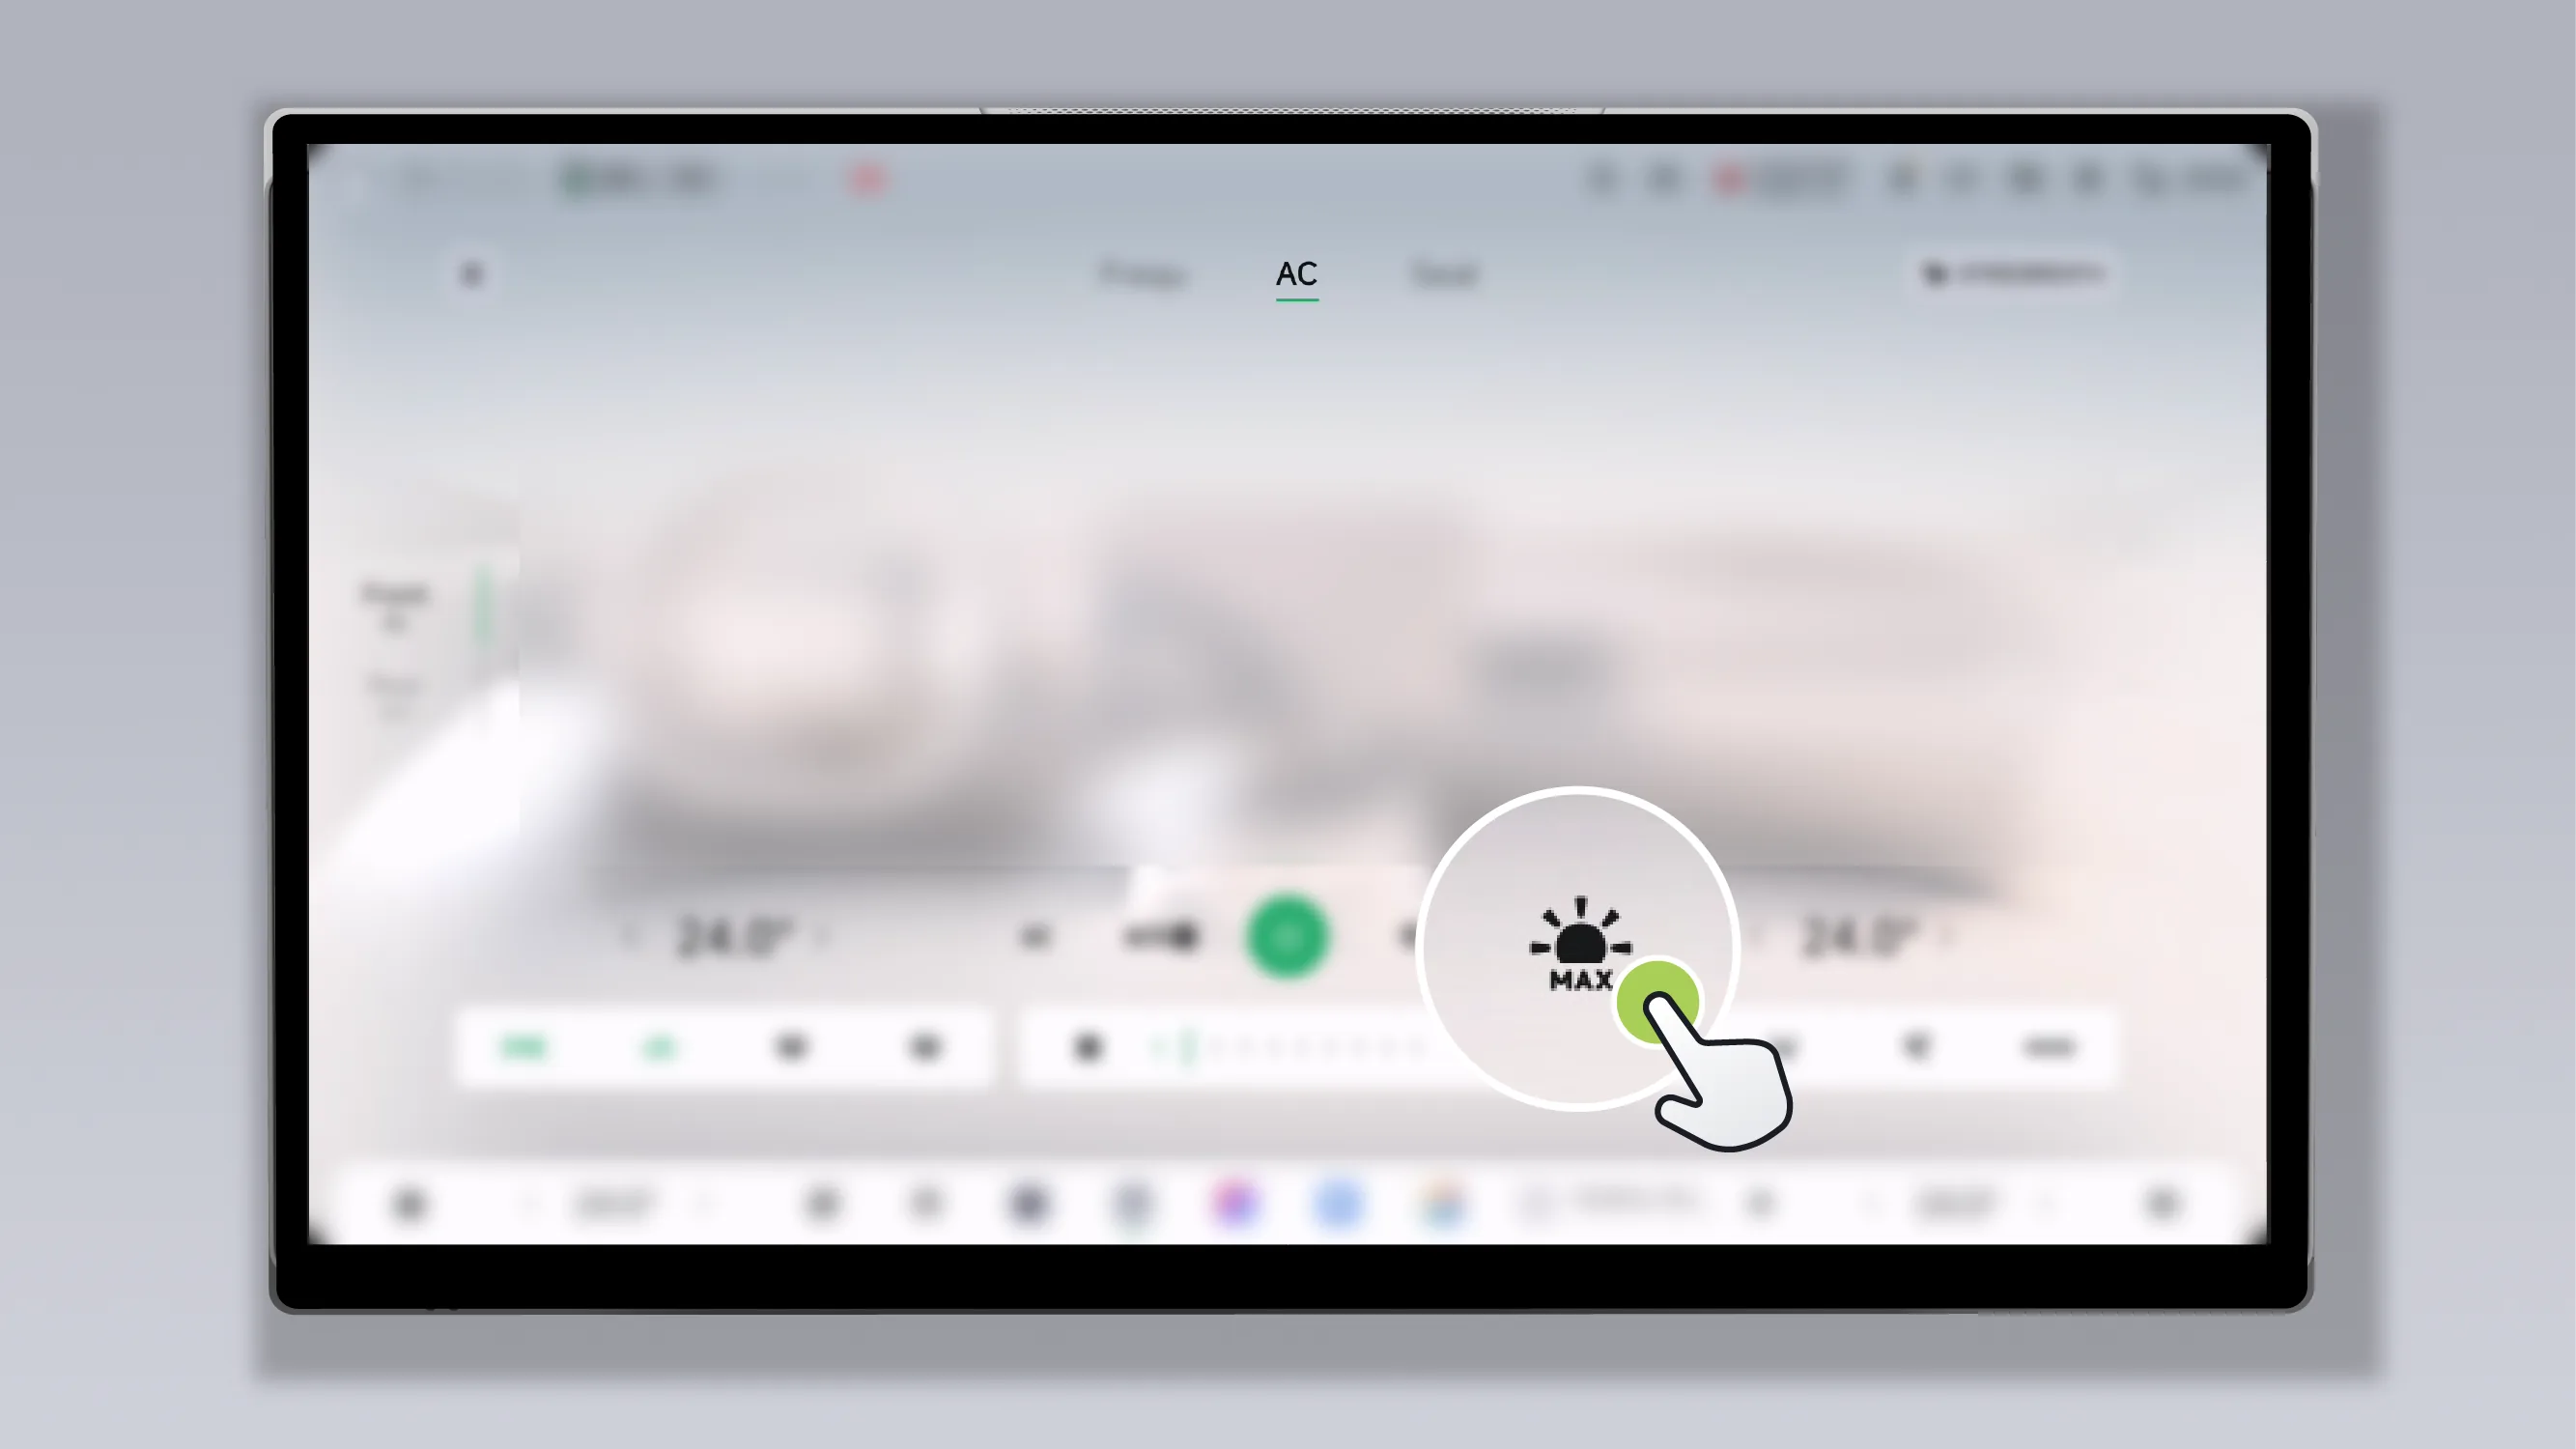
Tap on the Air Conditioner interface.  , turn the rapid heating mode on/off.
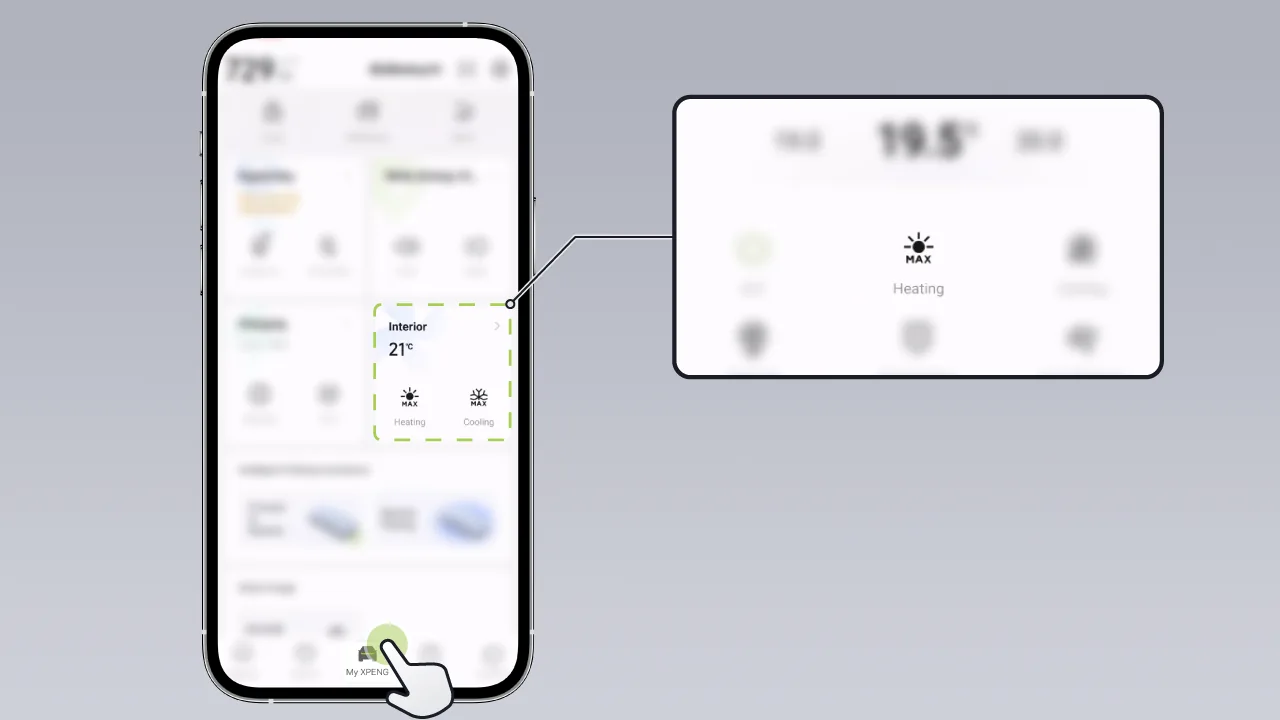
In the mobile app Page or Enter the Air Conditioner settings page, click “  ”Turn the rapid heating mode on/off.
You can enable/disable Rapid Cooling Mode via the central control screen, mobile app, or voice commands.
After Max Cool mode is enabled, the air conditioning will automatically be set to the lowest temperature and maximum airflow, and the seat ventilation function will be turned on simultaneously. When the temperature inside the vehicle drops to 20°C, the system will exit Max Cool mode and set the automatic air conditioning temperature to 24°C.
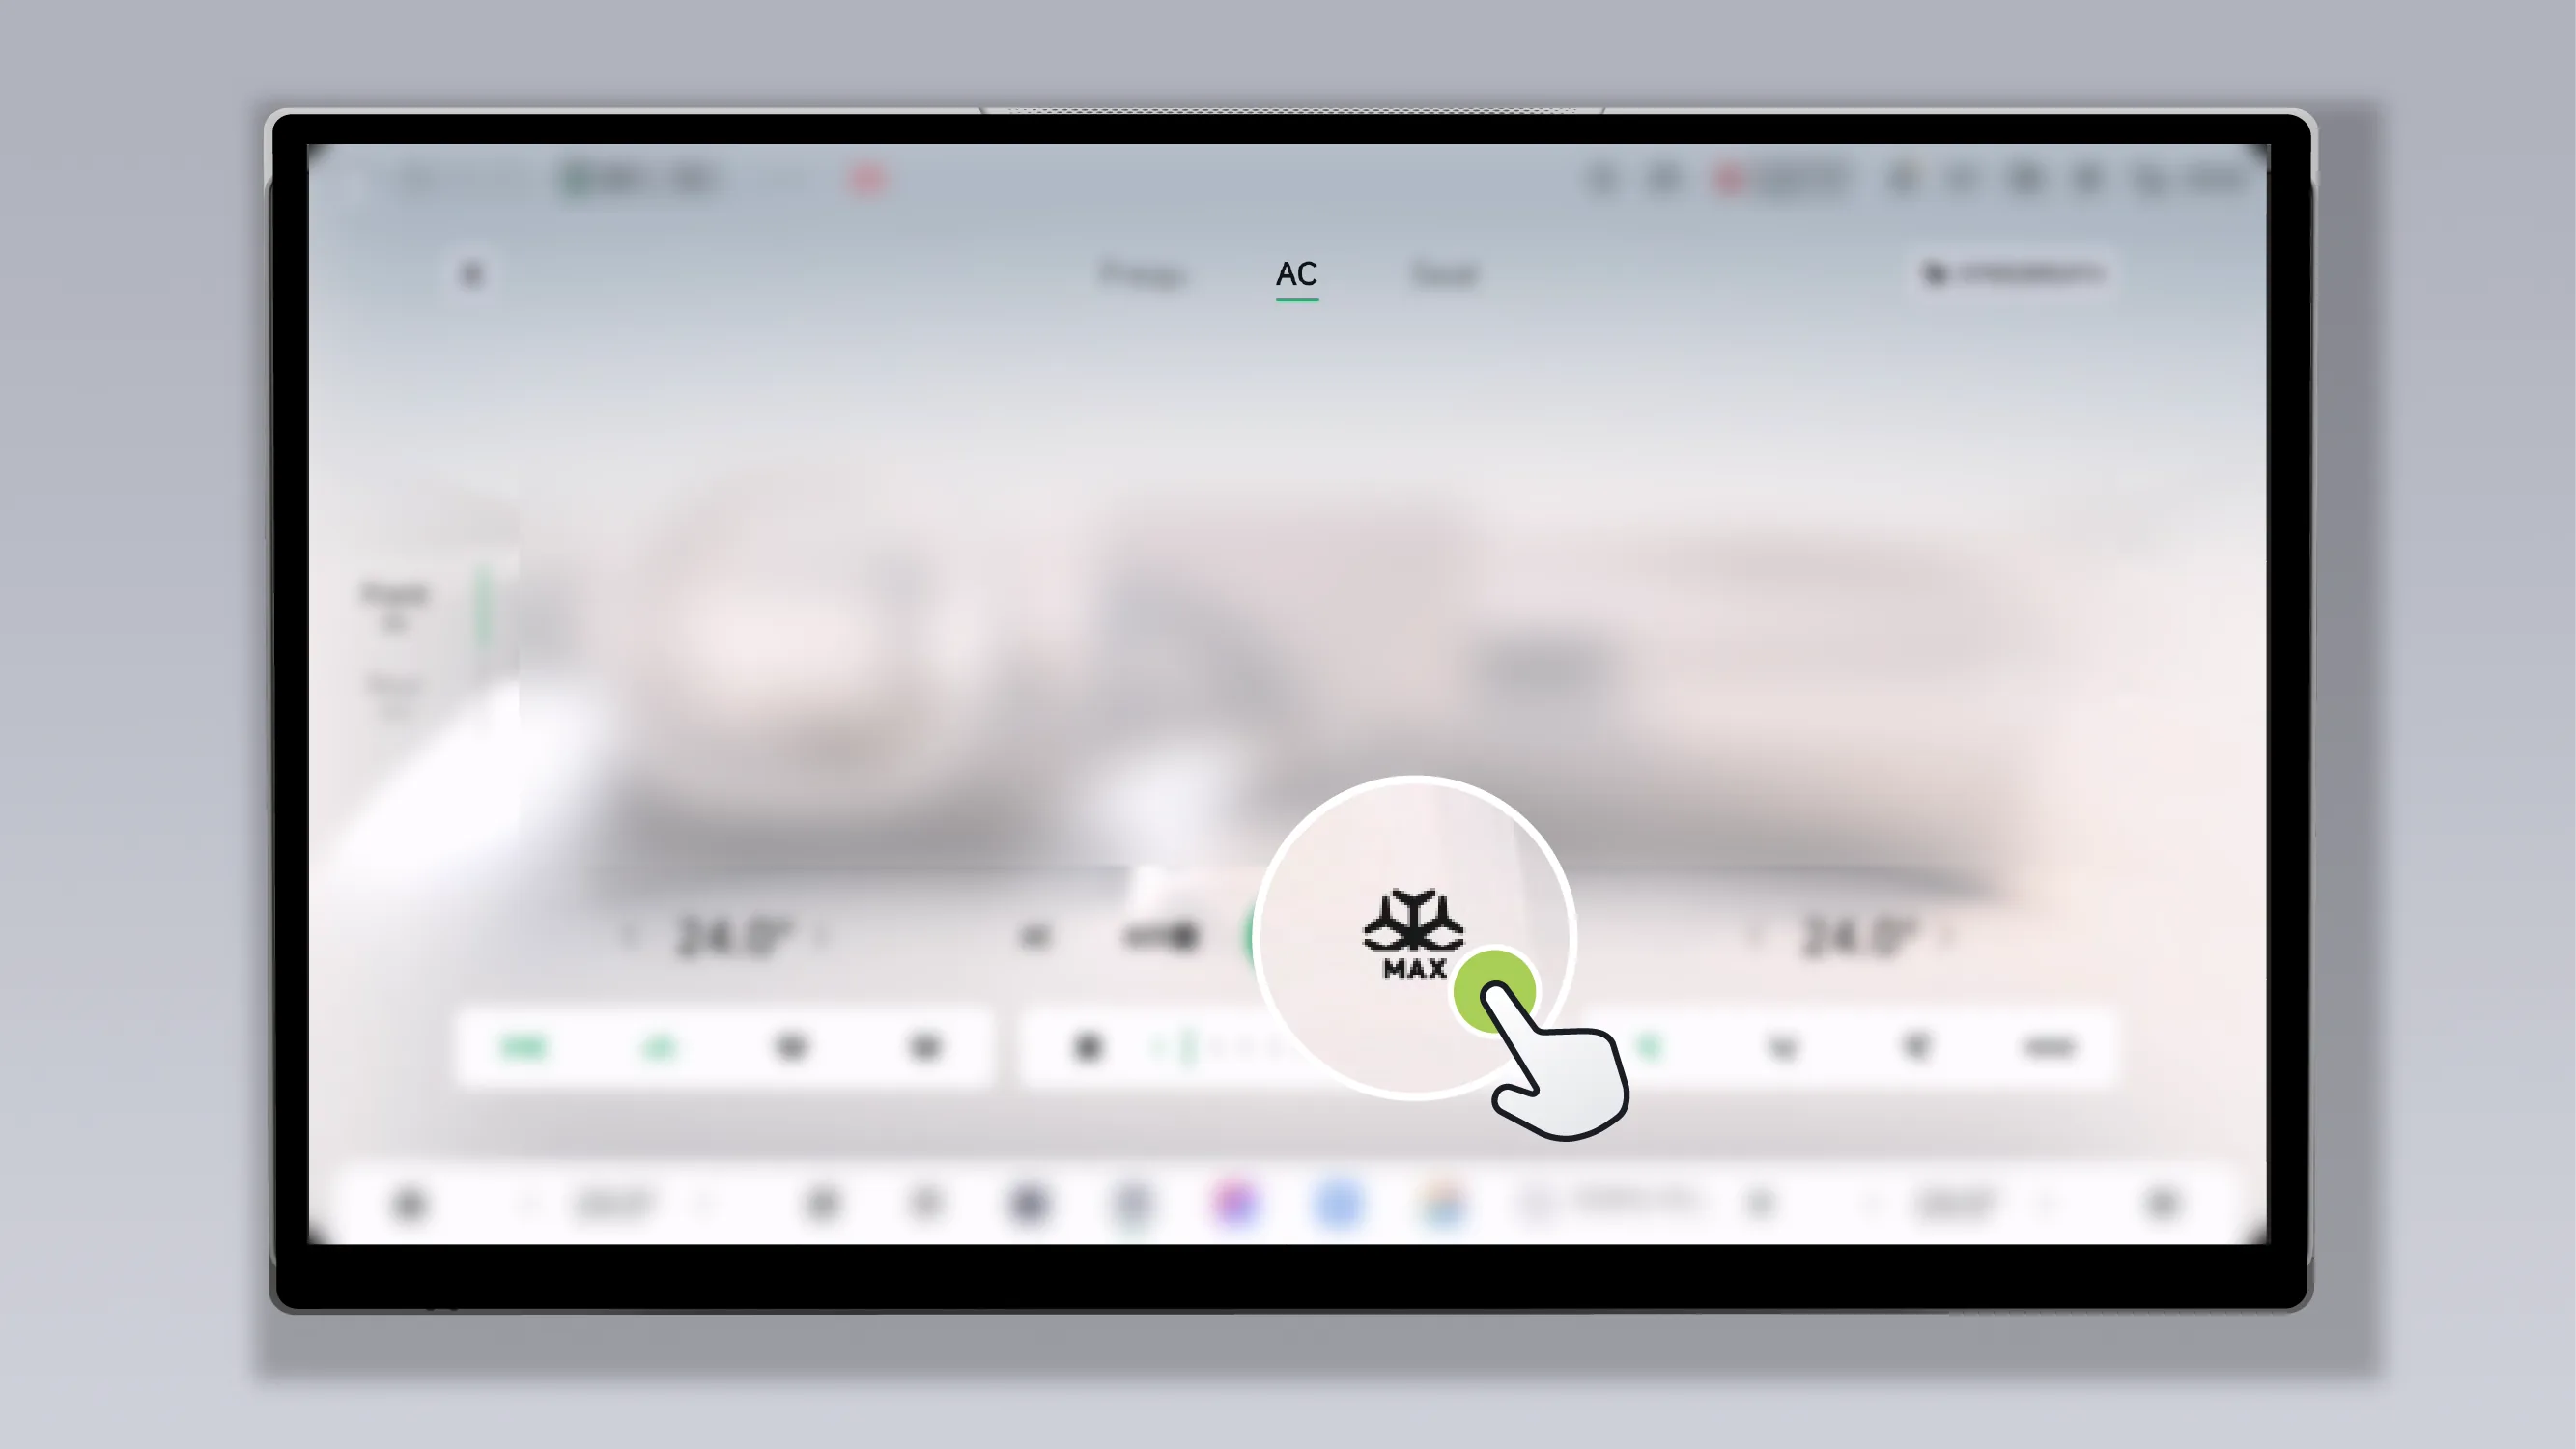
Tap on the Air Conditioner screen.  , turn the rapid cooling mode on/off.
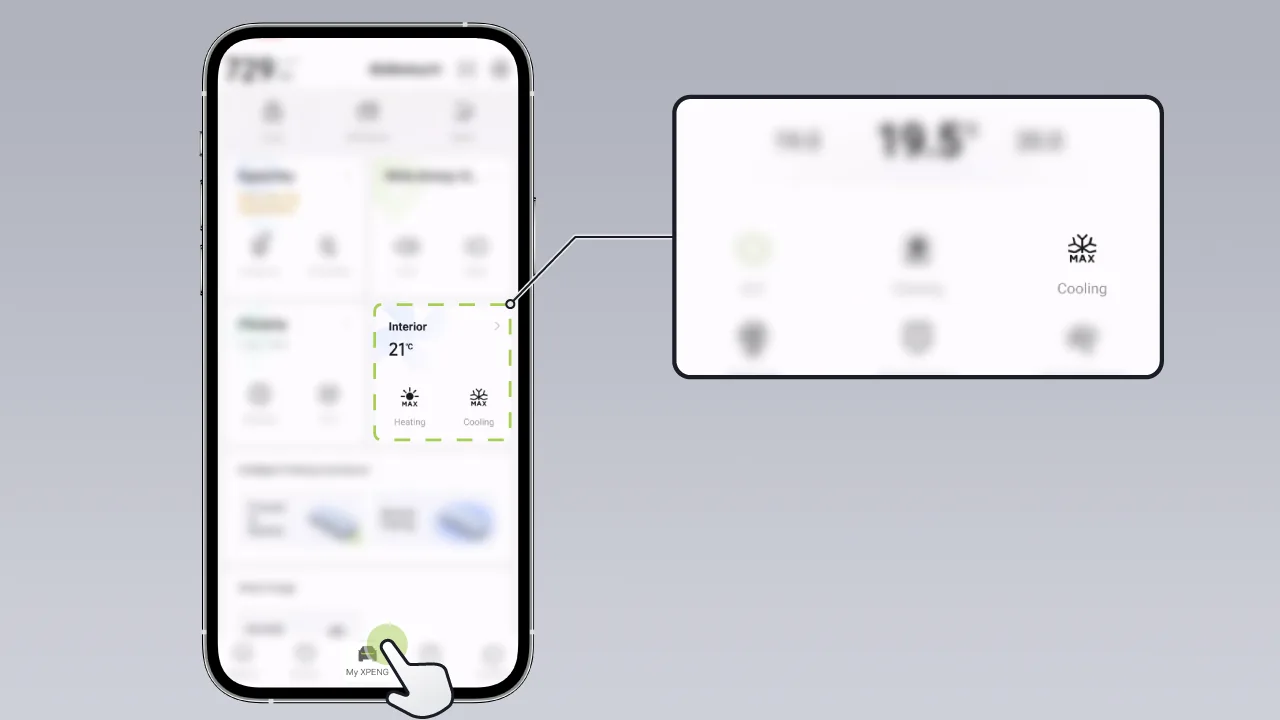
In the mobile app Page or tap Enter the Air Conditioner settings page, tap “  ”Turn Max Cooling Mode on/off.
The rear Air Conditioner supports the draft-free airflow function. After draft-free airflow is enabled, the rear Air Conditioner will automatically switch to face-level mode, and the airflow volume will enter the automatic adjustment state.
You can turn Comfort Airflow on/off via the center display, rear control screen, or voice commands.
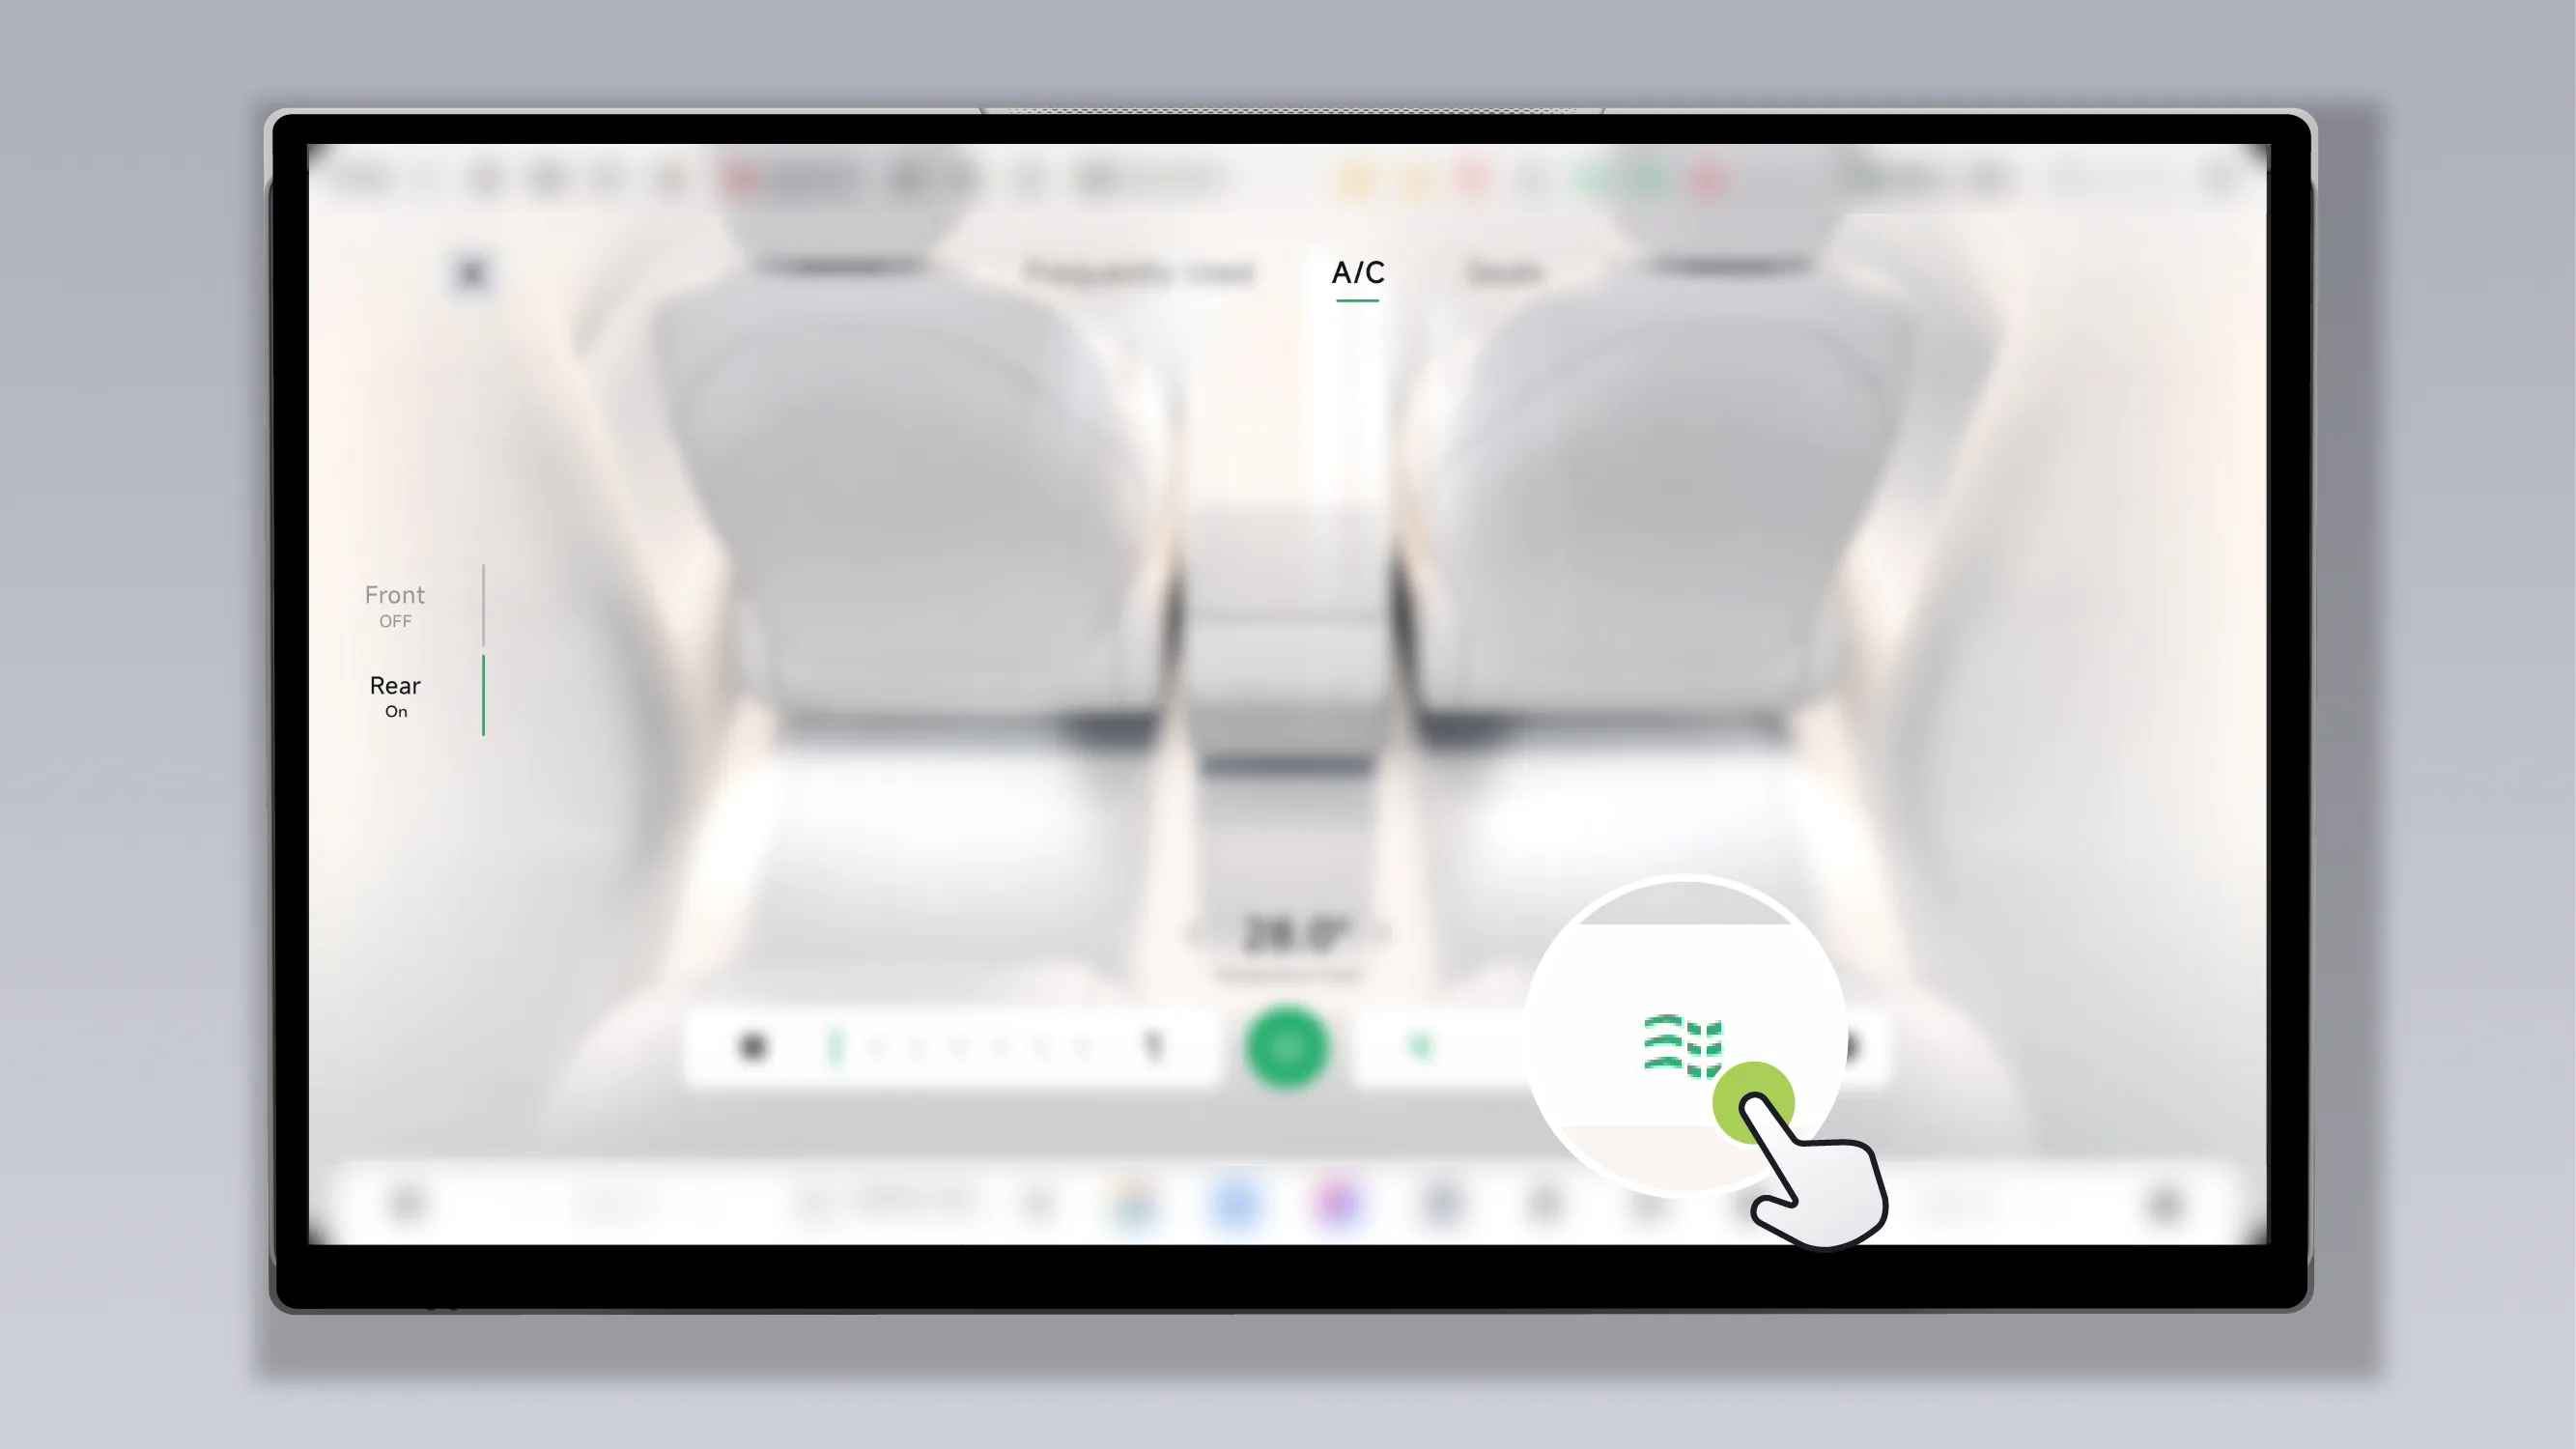
Tap on the rear Air Conditioner interface on the central control screen.  , enable/disable draft-free airflow.
Tap on the Air Conditioner interface on the rear control screen. , enable/disable draft-free airflow.
Tips After Imperceptible Airflow is enabled, manually adjusting the rear Vent Mode will automatically turn it off.
If the Air Conditioner filter element has not been replaced for a long time, if there are bacteria in the Air Conditioner air duct, or if items that can emit special gases are stored in the vehicle, an odor may be smelled after turning on the Air Conditioner. You can remove or reduce odors in the vehicle by the following methods.
When the outside air quality is poor (when the PM2.5 value is high) or when there is a relatively high concentration of inhalable particulate matter inside the vehicle (after smoking), it is recommended to turn on the air purification function. The system monitors and displays changes in the PM2.5 value in real time. When the air quality inside the vehicle is poor, the system will proactively remind you to turn on the air purification function. The system will filter air particles through a high-efficiency filter to ensure the air quality inside the vehicle.
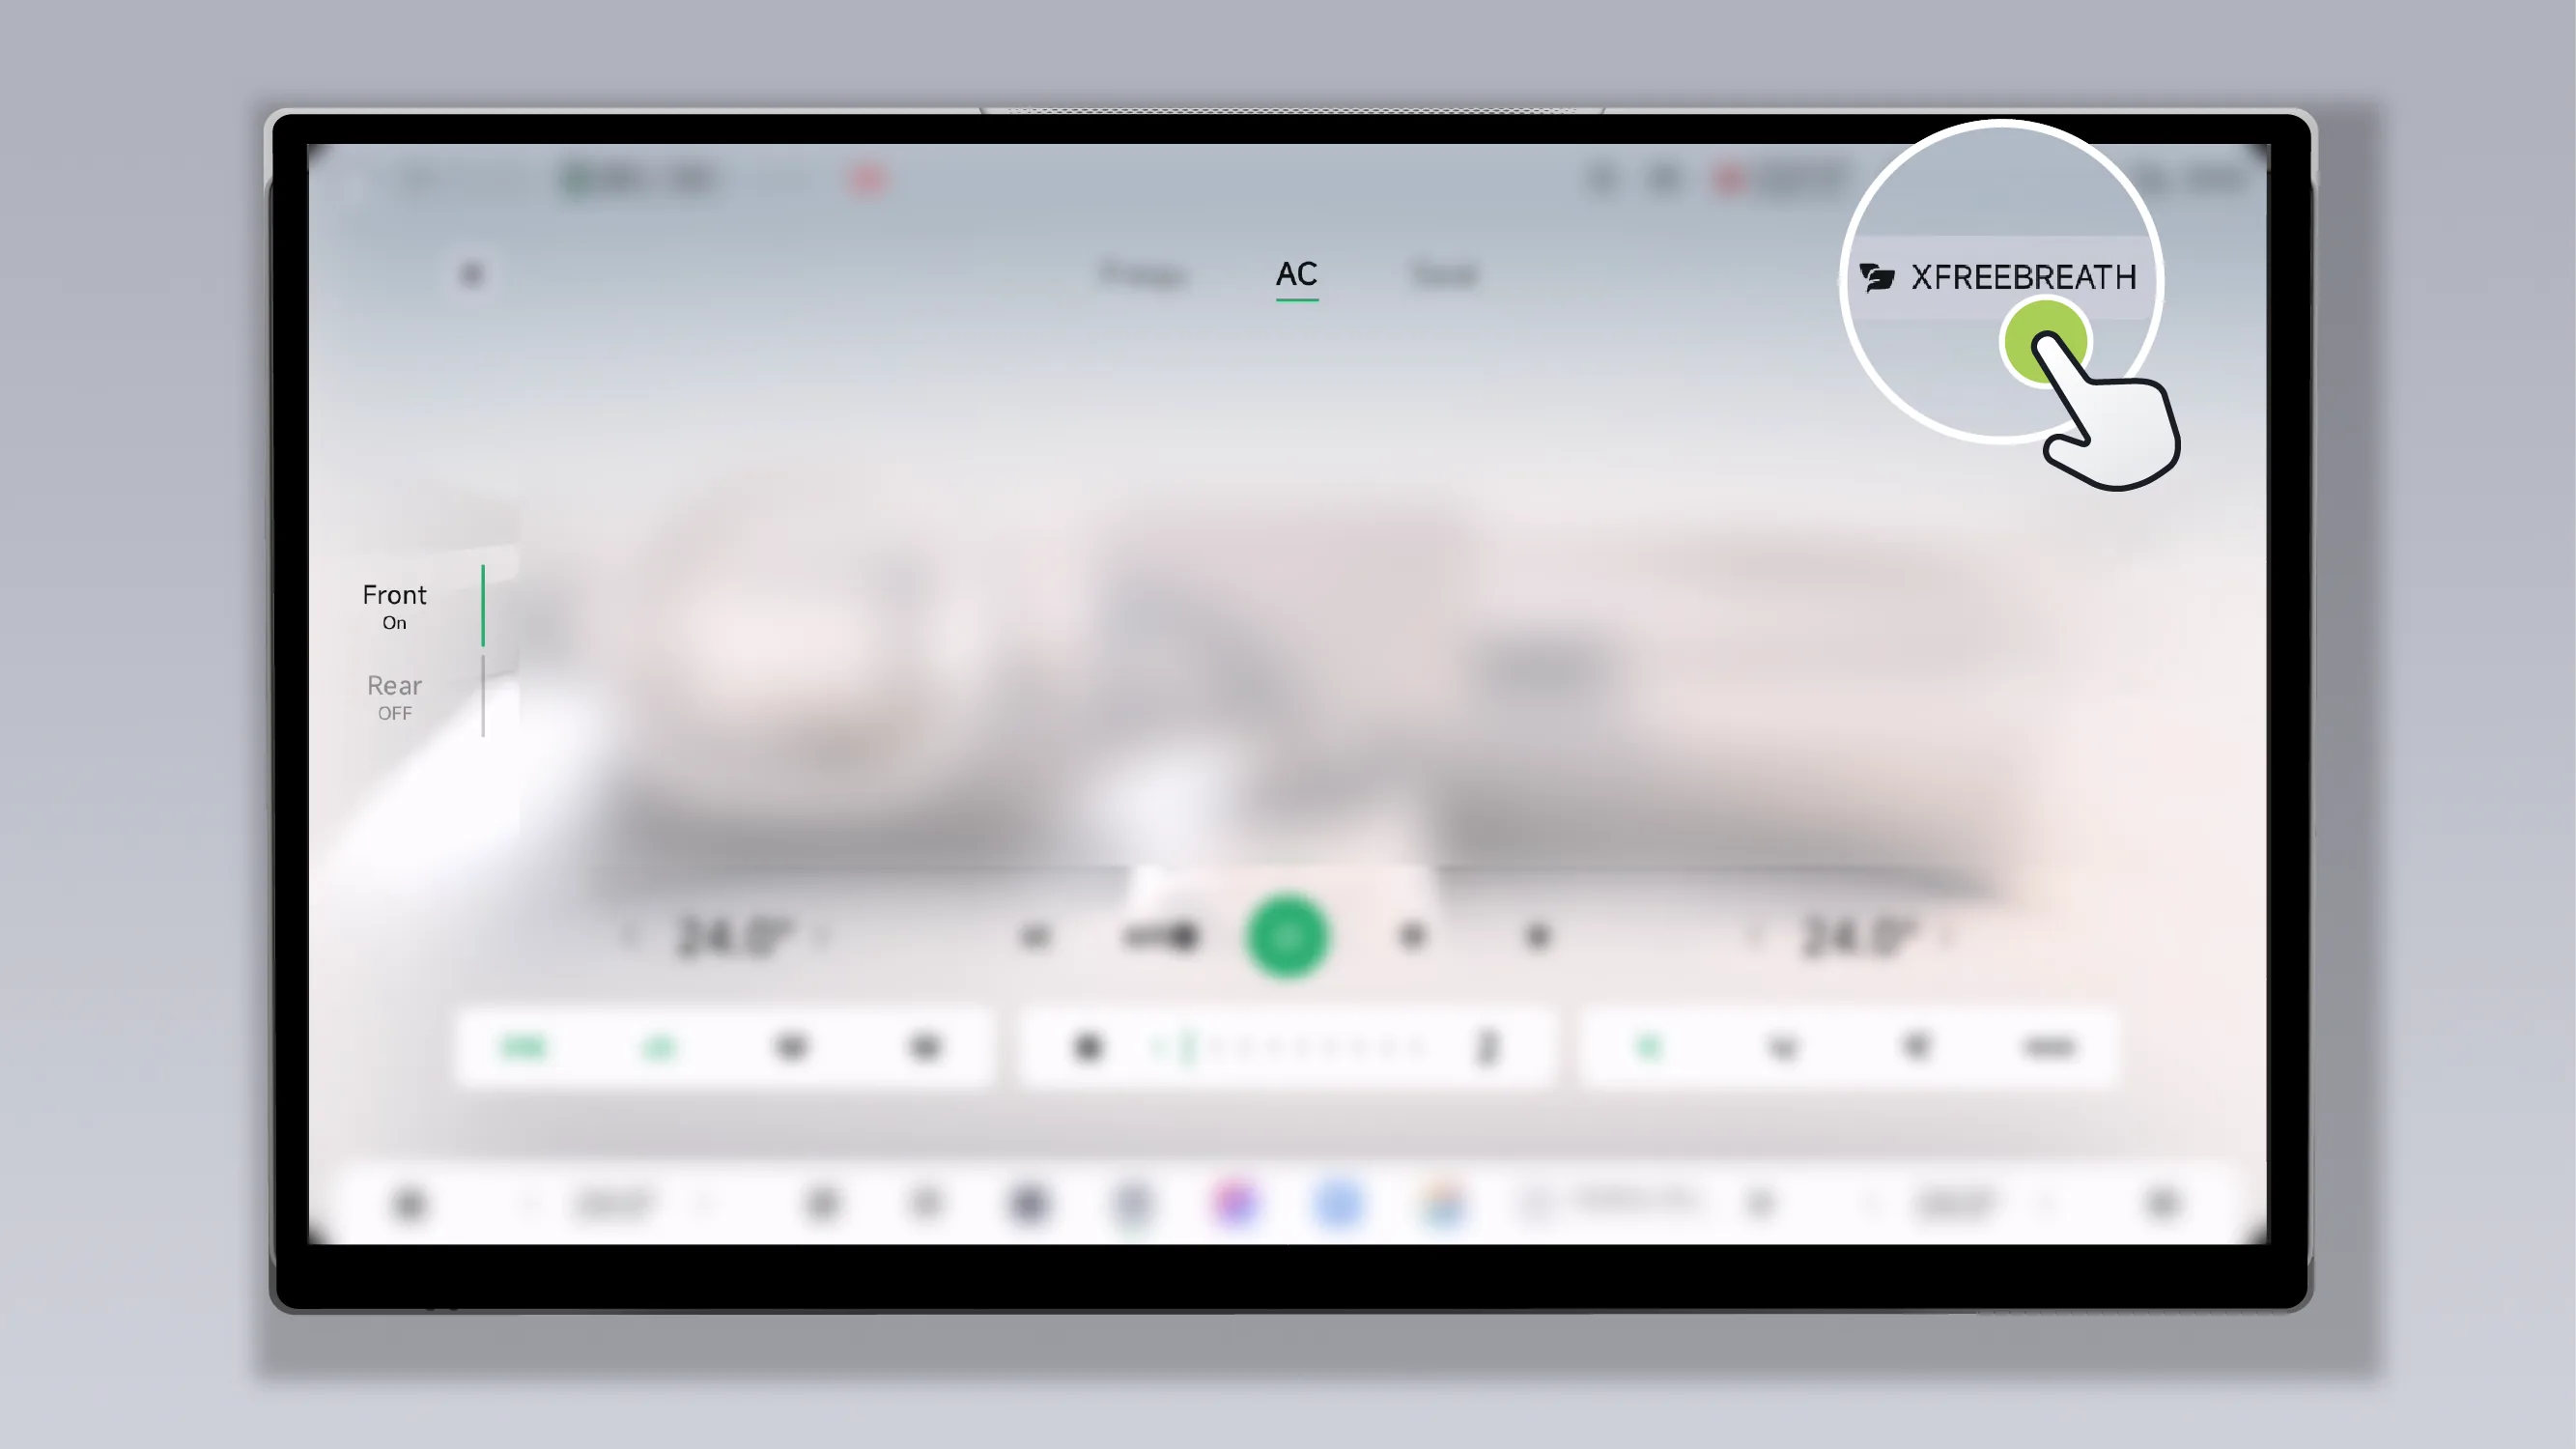
On the Air Conditioner screen, tap “  XFREEBREATH ”, turn on the air purification function.
After the intelligent fresh air function is enabled on the Air Conditioner interface, after the vehicle is locked and powered off, the system will periodically start the Air Conditioner outside air circulation and adjust the air volume to the maximum value for interior ventilation, ensuring that there is no odor in the vehicle when you get in.
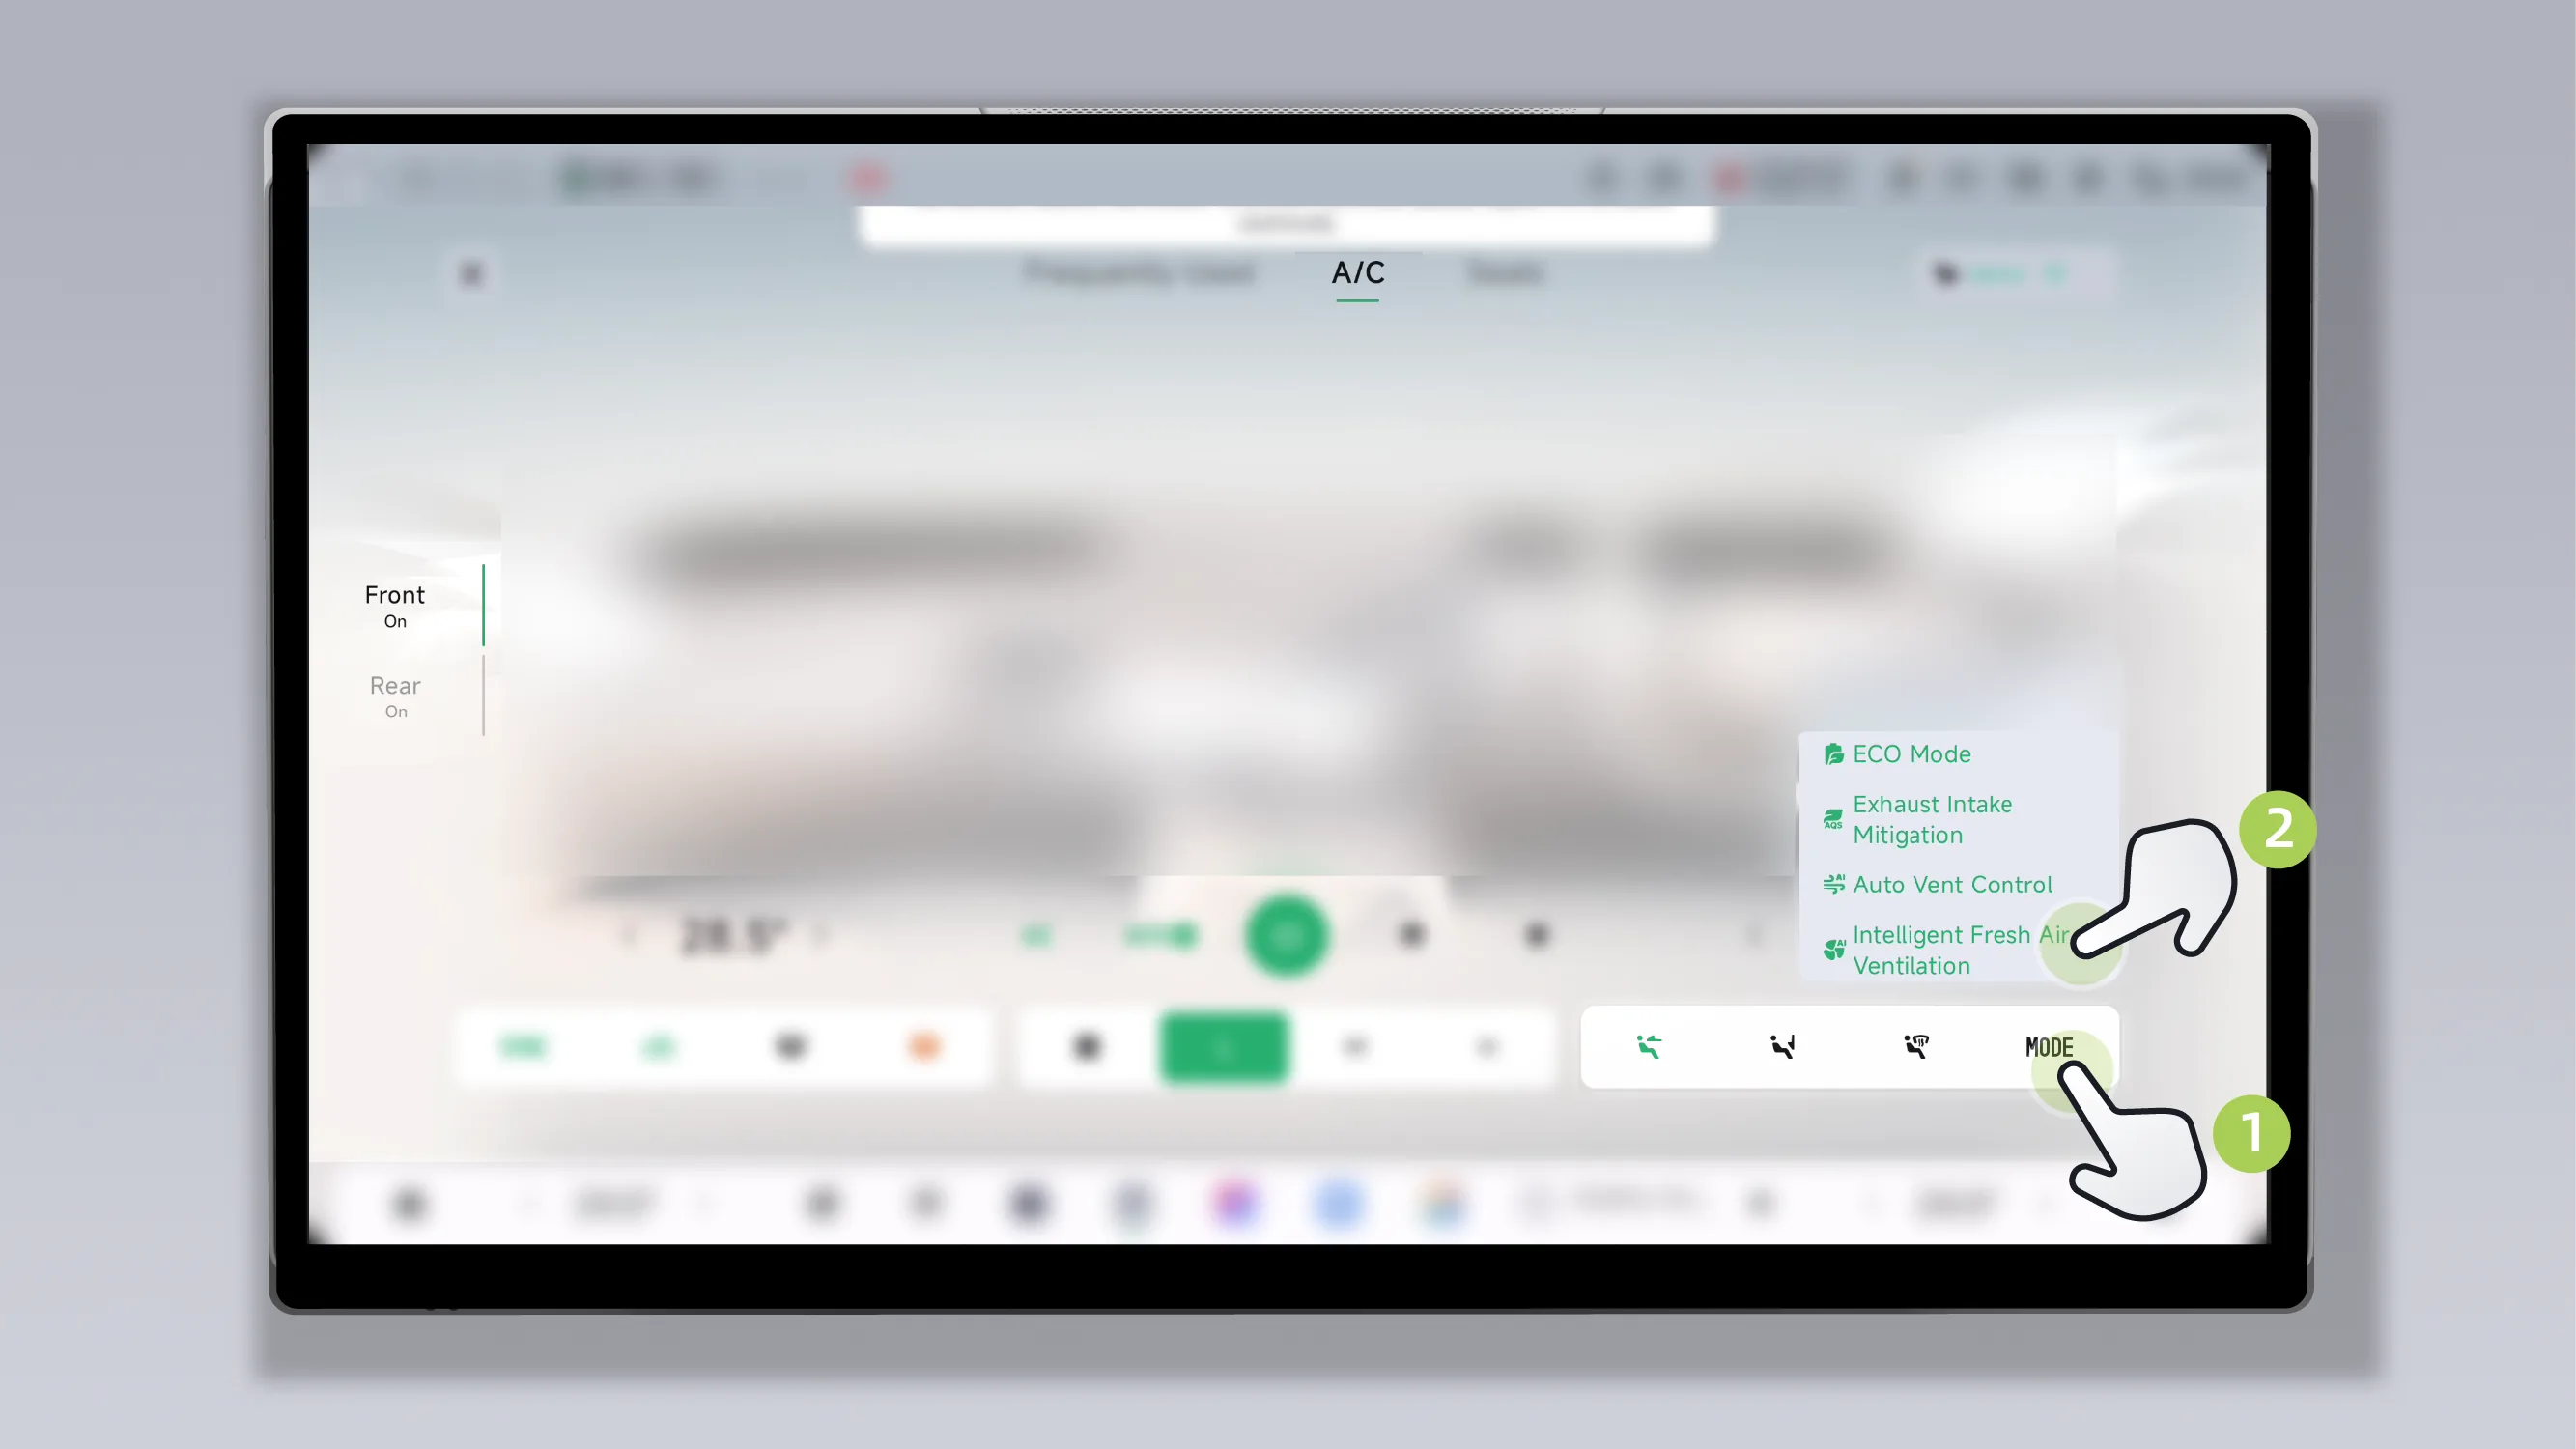
Tap on the Air Conditioner screen. , turn the intelligent fresh air function on/off.
After the exhaust protection function is enabled in the Air Conditioner interface, once the vehicle detects exhaust pollution outside the vehicle, it will automatically switch to recirculation mode to ensure the air quality inside the vehicle.
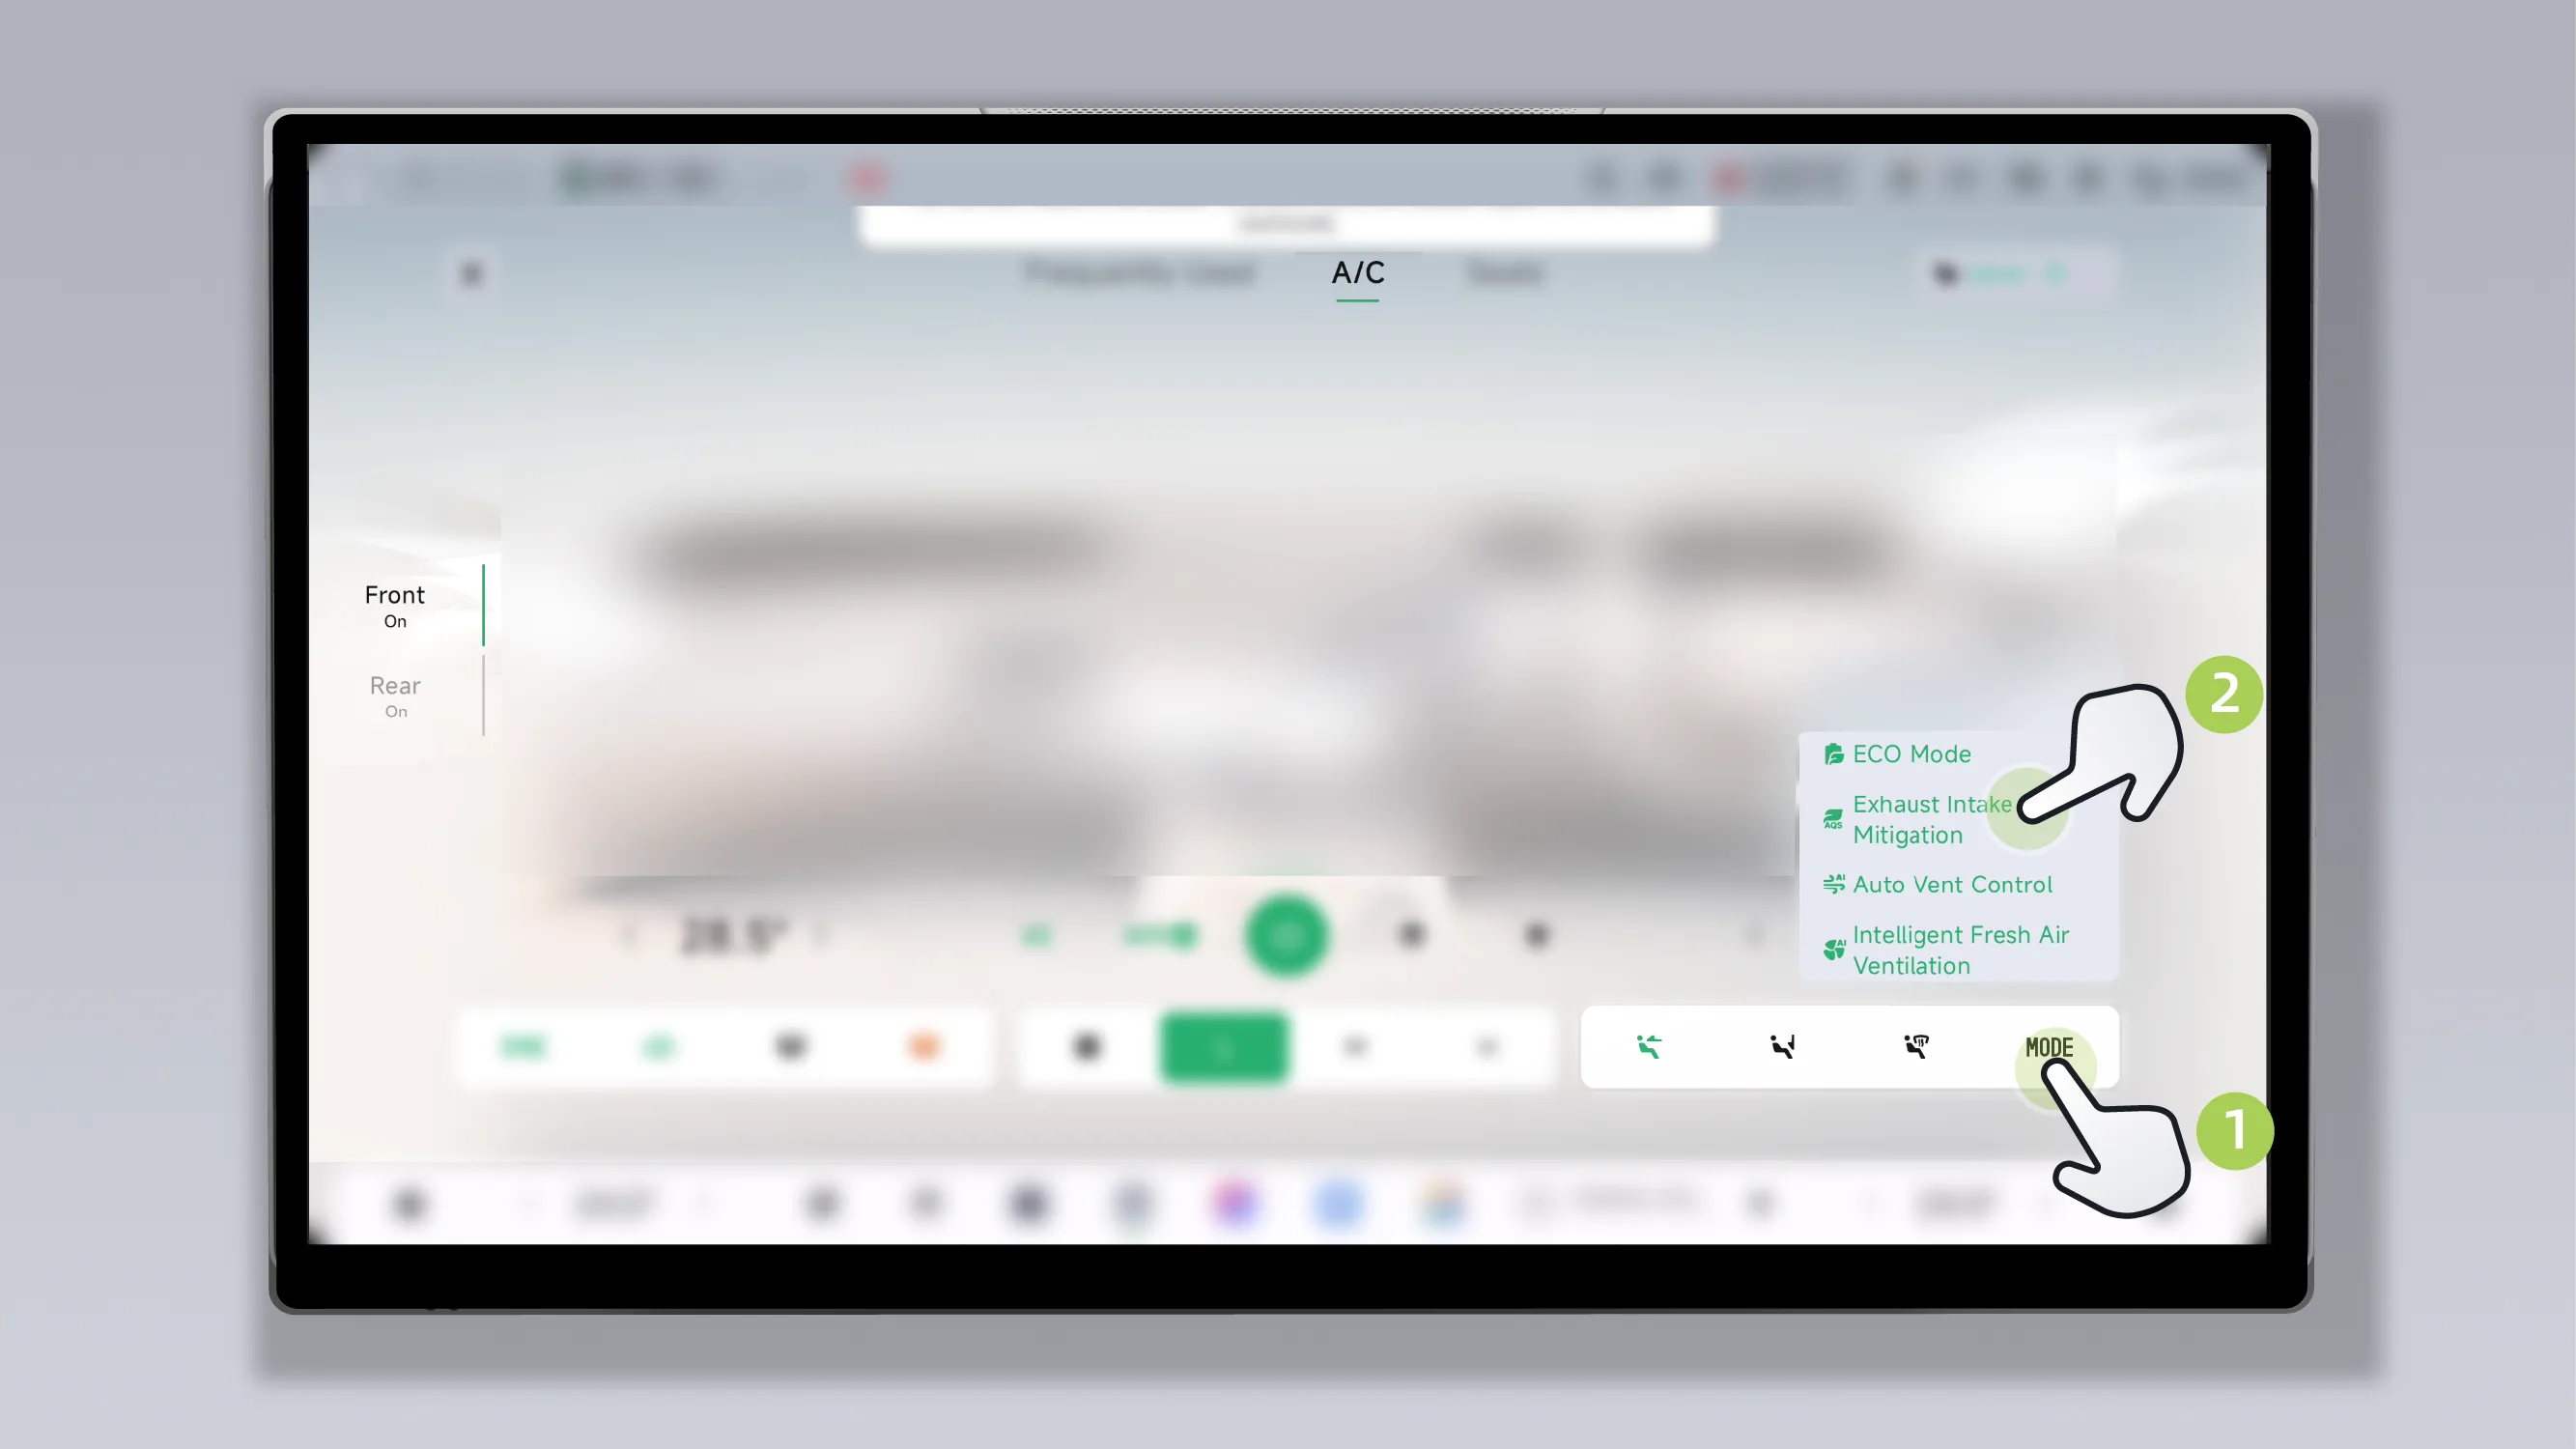
Tap on the Air Conditioner screen. , turn the exhaust protection function on/off.
Tips After the Exhaust Intake Mitigation function is turned on, if the Refresh function is manually activated, the Exhaust Protection function will automatically turn off. Once the Refresh function is turned off, the Exhaust Intake Mitigation function will return to the on state.
If the air conditioner filter element is not replaced for a long time, the vehicle may continuously emit unpleasant odors. Please go to an XPENG service center to replace the air conditioner filter element when the vehicle has been driven for one year or 20,000 km, whichever comes first.
After turning on the Air Conditioner, the power battery charge will be continuously consumed. You can reduce Air Conditioner energy consumption in the following ways.
After ECO Mode of the Air Conditioner is turned on, the vehicle's cooling or heating performance is slightly reduced, energy consumption will decrease, and the driving range will be extended. It is recommended to turn on ECO Mode when traveling alone.
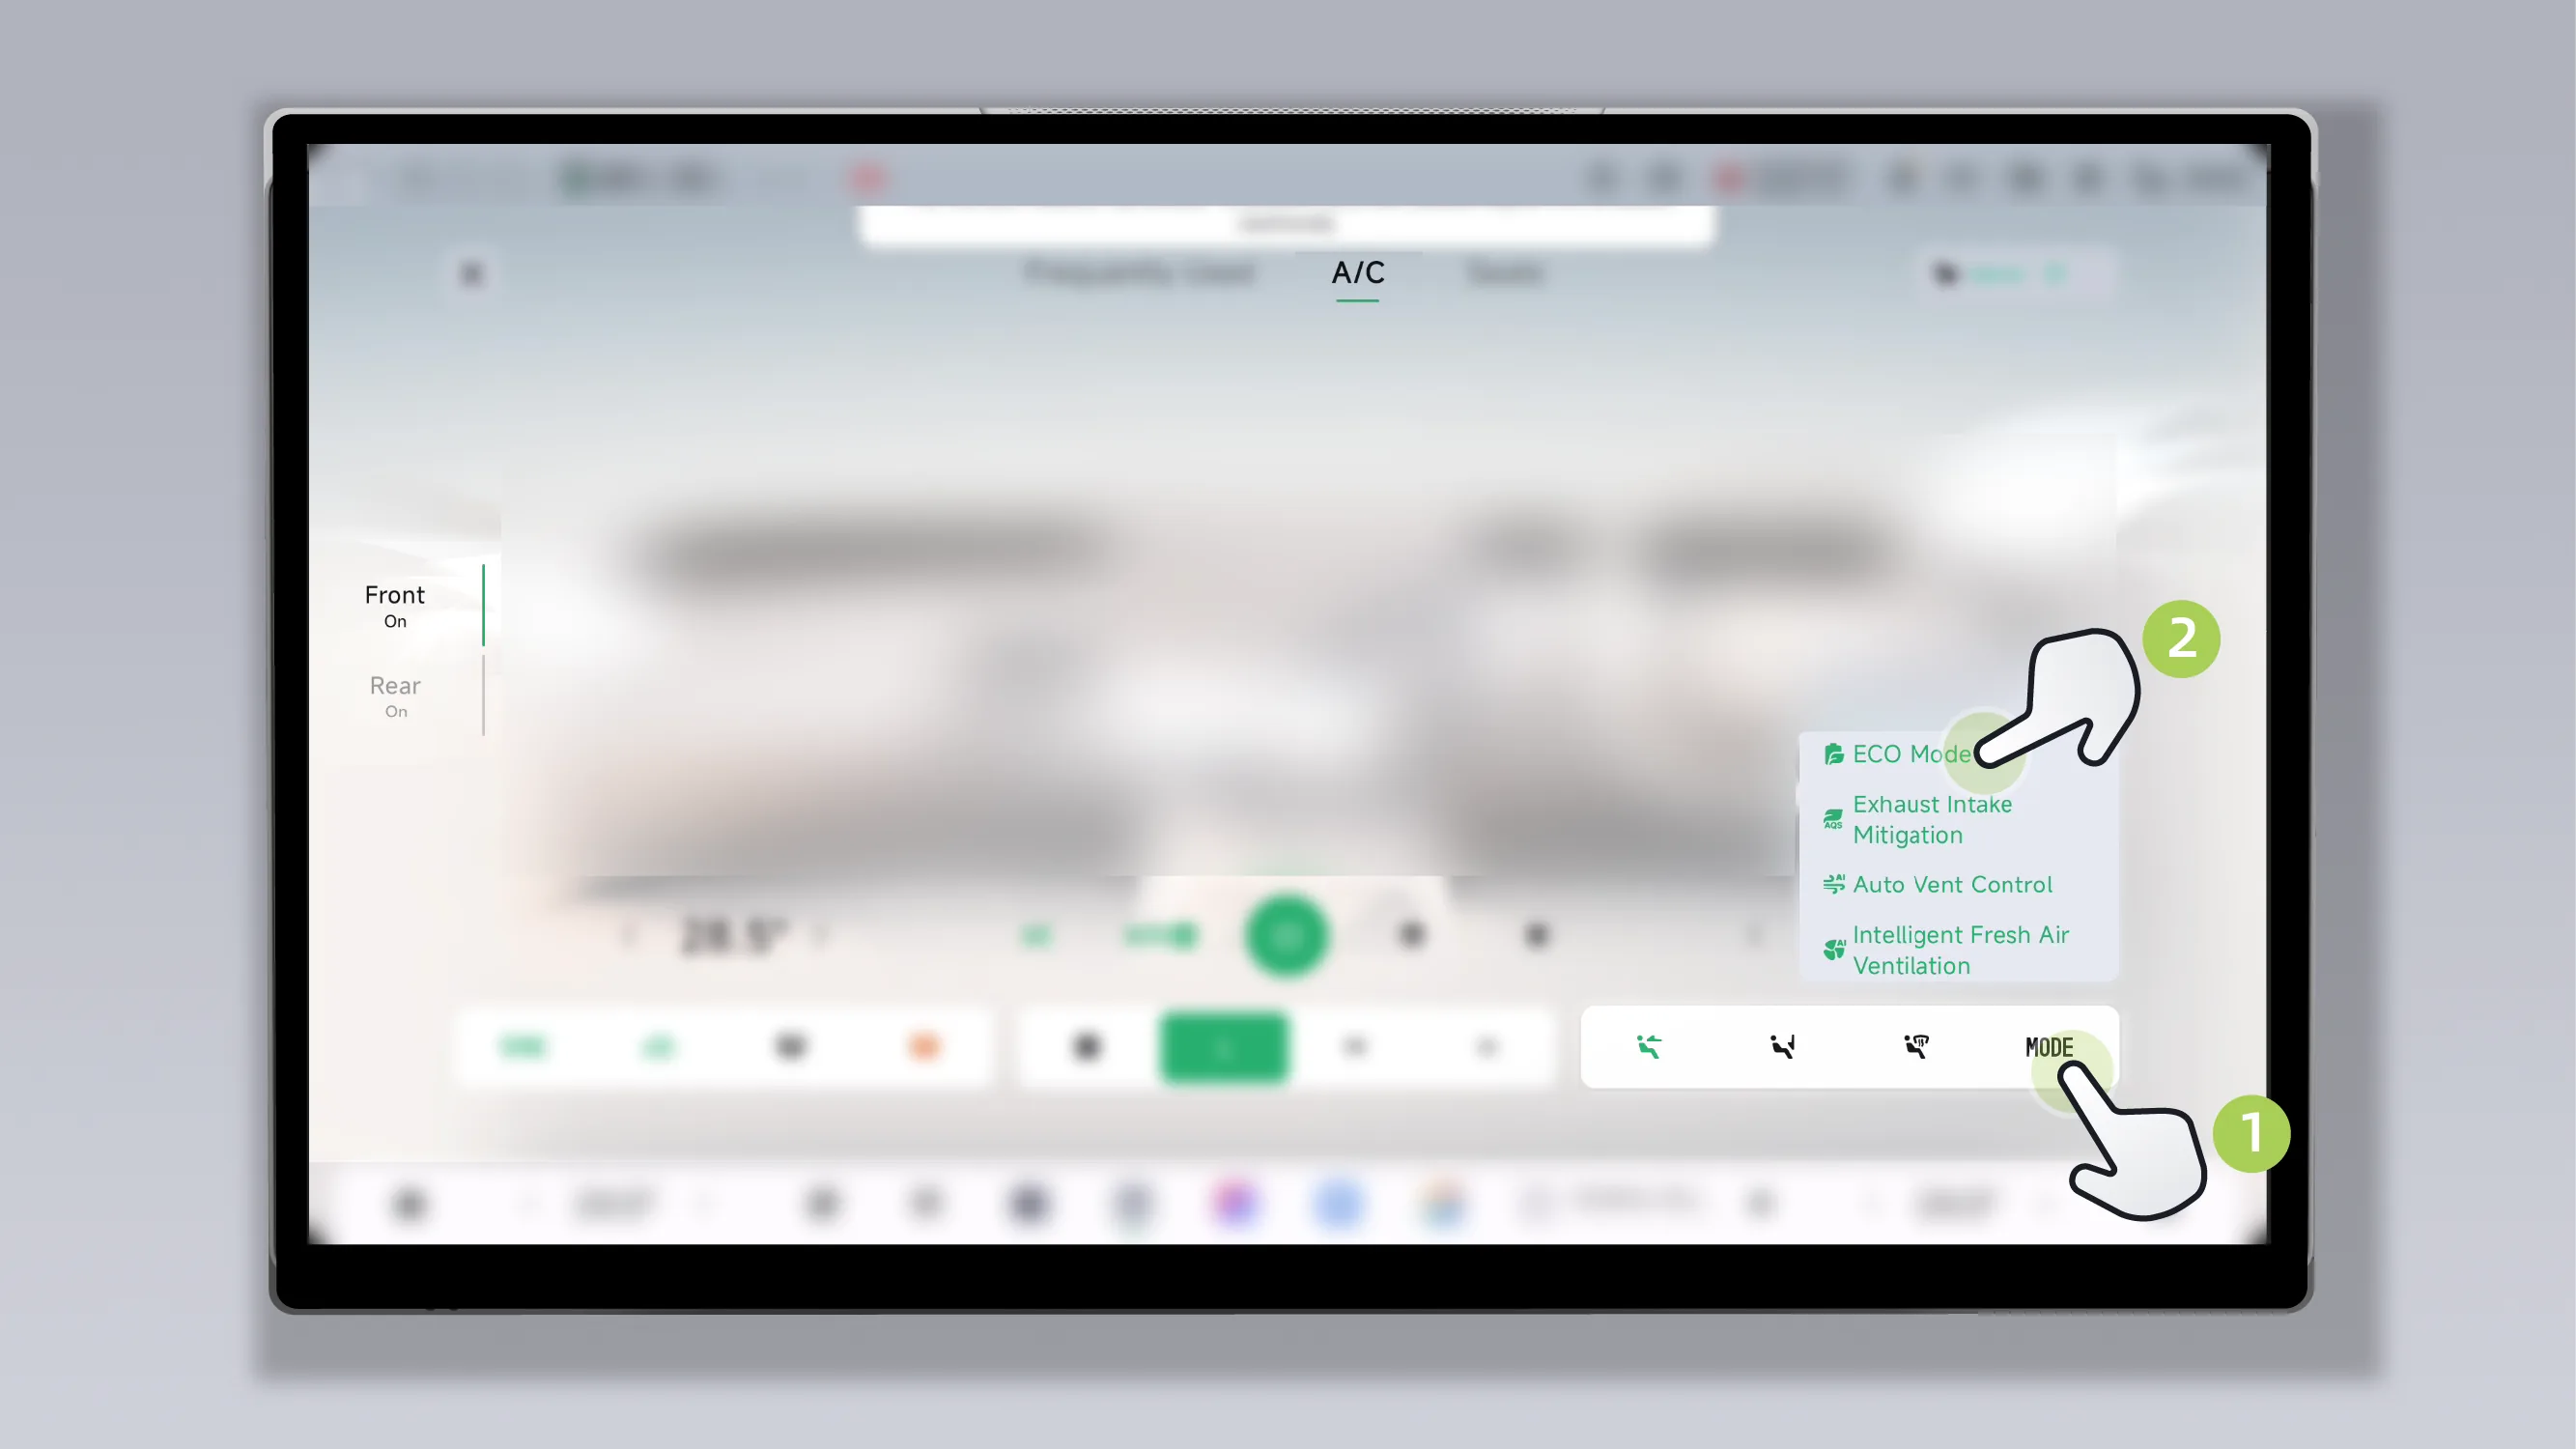
Tap on the Air Conditioner screen. , turn ECO Mode on/off.
After automatic air vent mode is enabled, the rear Air Conditioner automatically turns on or off according to whether the rear seats are occupied or unoccupied, reducing Air Conditioner power consumption and extending driving range.
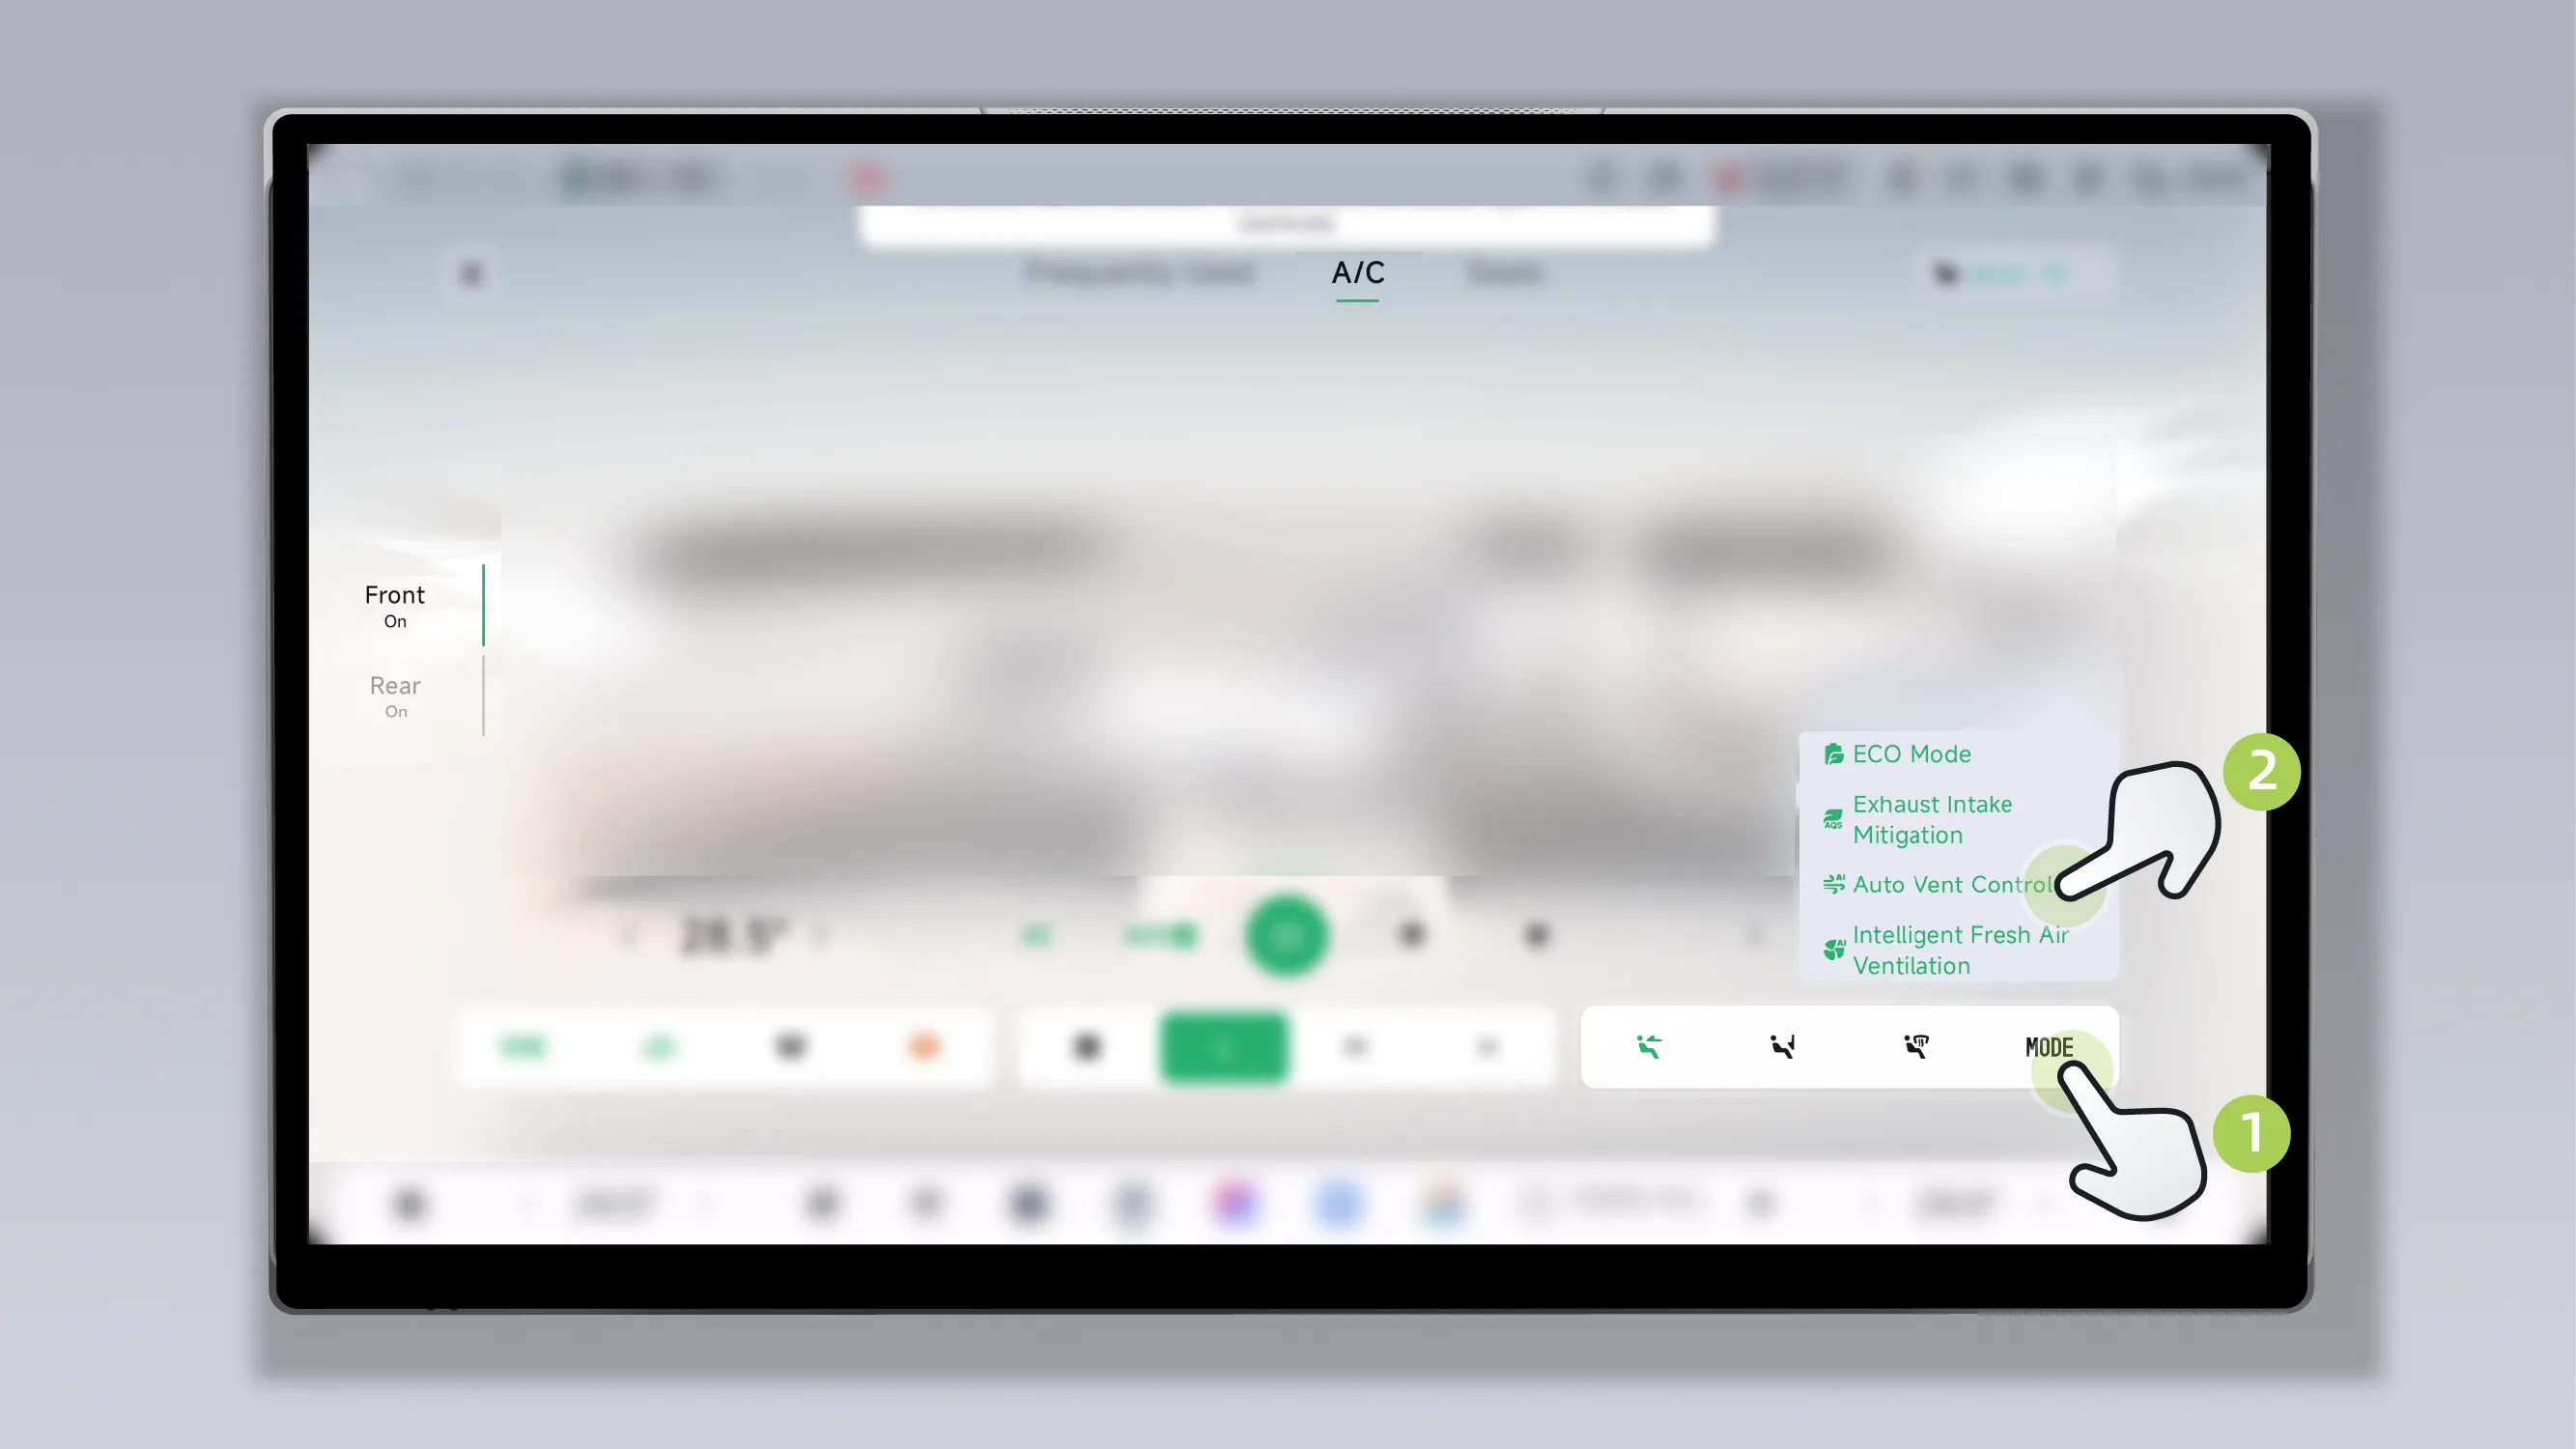
Tap on the Air Conditioner screen. , turn the automatic air vent function on/off.
You can adjust the driver's seat to a suitable position in any of the following ways:
Adjust the seat position using the seat switch.
Adjust the seat position through the center display.
Adjust the seat position by voice command.
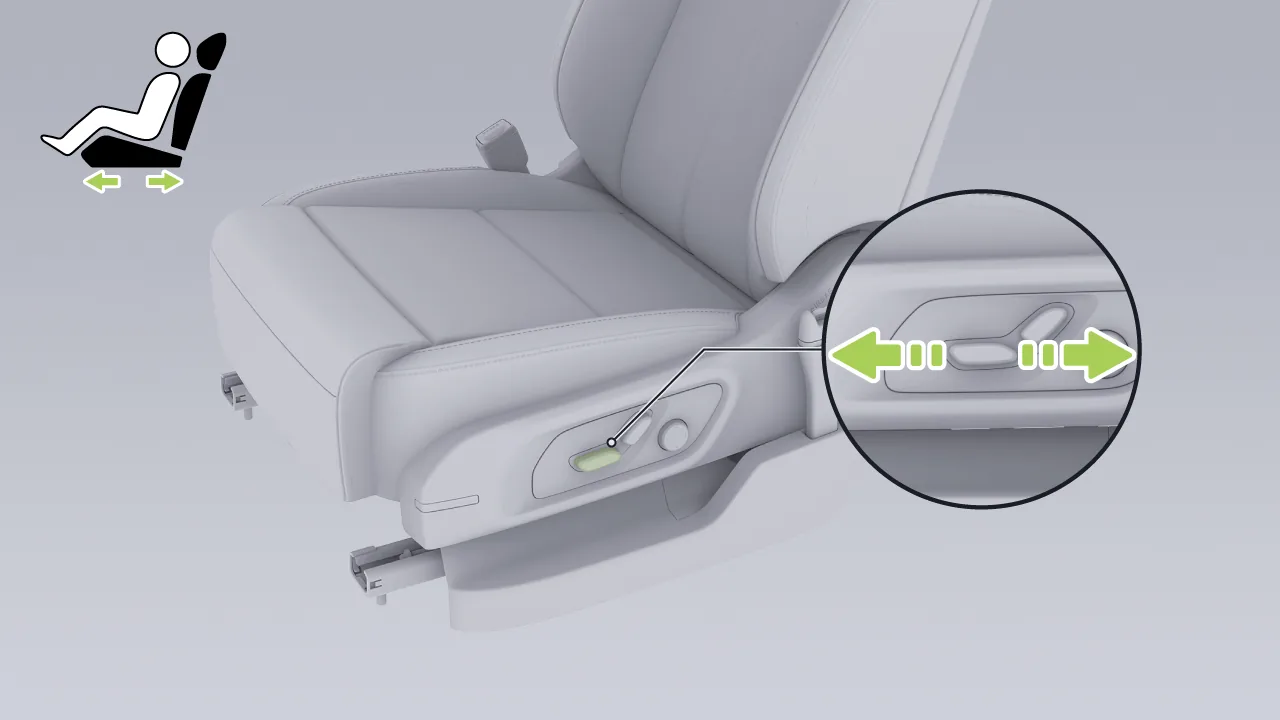
Push this adjustment switch forward or backward to adjust the fore-and-aft position of the driver's seat.
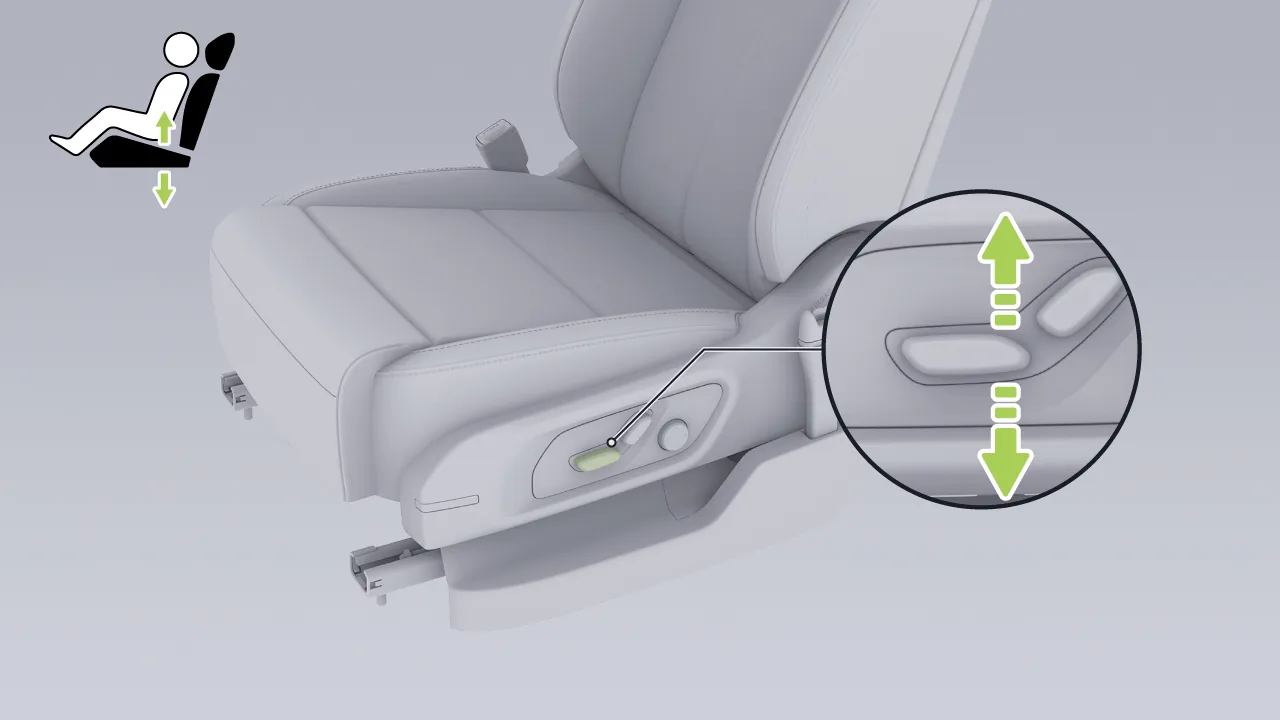
Push the rear of this adjustment switch up or down to adjust the height of the driver's seat.
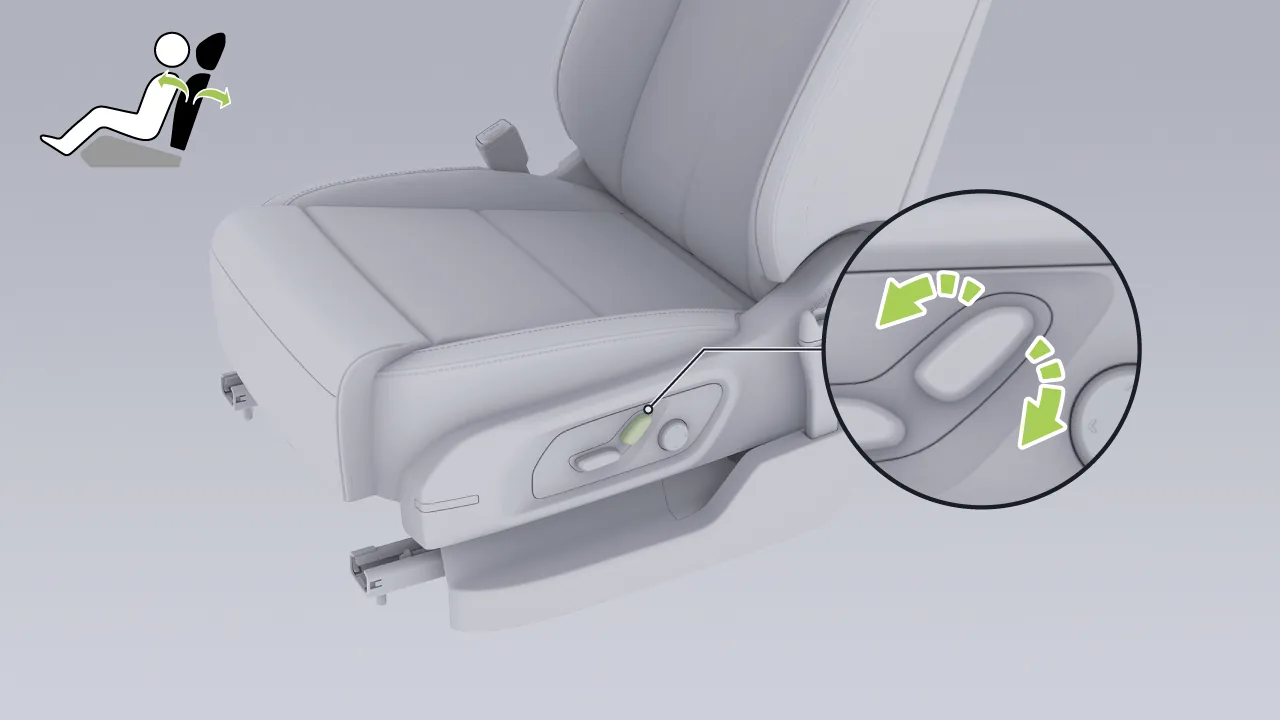
Push the top of this adjustment switch forward or backward to adjust the angle of the driver's seatback.
Tap the center display in sequence. “ →Seats→Seat Position→DS→  ”, enter the Driver Seat - Position Adjustment interface, and select 。
Height: Tap  or
or  Adjust the seat height step by step. Press and hold for continuous adjustment. You can also tap or drag the slider for quick adjustment.
Location: Click  or
or  Adjust the seat forward and backward position step by step; press and hold for continuous adjustment. You can also tap or use the slider for quick adjustment.
Angle: Tap  or
or  Gradually adjust the seatback angle level by level; press and hold for continuous adjustment. You can also tap or use the slider for quick adjustment.
Warning Before adjusting the seat, please confirm the surrounding environment of the seat. Avoid risks such as squeezing or collision with rear passengers, especially children, or pets.
During seat adjustment, ensure that hands, body parts, or objects are not in the seat movement path to avoid the risk of pinching.
Do not allow children to adjust the seat. There is a risk of pinching injury.
Do not place overly thick floor mats or other foreign objects (such as drink bottles, charcoal bags, etc.) under the seat. Otherwise, they may become trapped between the seat and the guide rails, obstructing seat adjustment and locking, thereby damaging the seat. It is recommended to use officially certified floor mat products from XPENG Motors.
Never adjust the seat while the seat belt is fastened, to avoid the seat belt departing from its normal operating condition, which may cause injury to occupants and failure of the protective function.
Warning Do not adjust the driver's seat while the vehicle is in motion, as this may cause the vehicle to go out of control and result in an accident.
You can adjust the driver's seat cushion to a suitable position in any of the following ways:
Adjust the seat cushion using the seat switch.
Adjust the seat cushion through the central control screen.
Adjust the seat cushion by voice command.
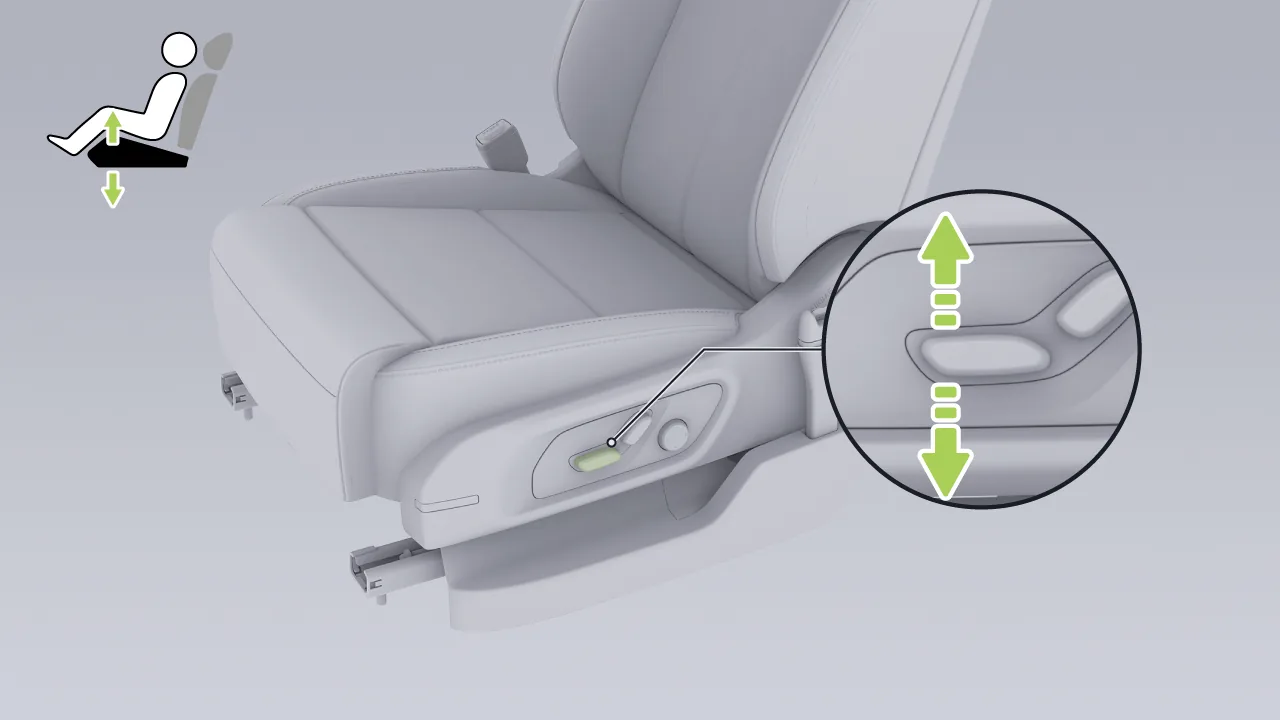
Push the front of this adjustment switch up or down to adjust the tilt angle of the driver's seat cushion.
Tap the central control screen in sequence. “ →Seats→Seat Position→DS→ ”, enter the driver's seat - Position Adjustment interface, and select 。
Tap or Adjust the seat cushion tilt angle step by step. Press and hold to continuously adjust the seat cushion tilt angle. You can also tap or drag the slider to quickly adjust the seat cushion tilt angle.
You can adjust the driver's seat lumbar support in either of the following ways:
Adjust the seat lumbar support using the seat switch.
Adjust the seat lumbar support through the central control screen.
Adjust the seat lumbar support by voice command.
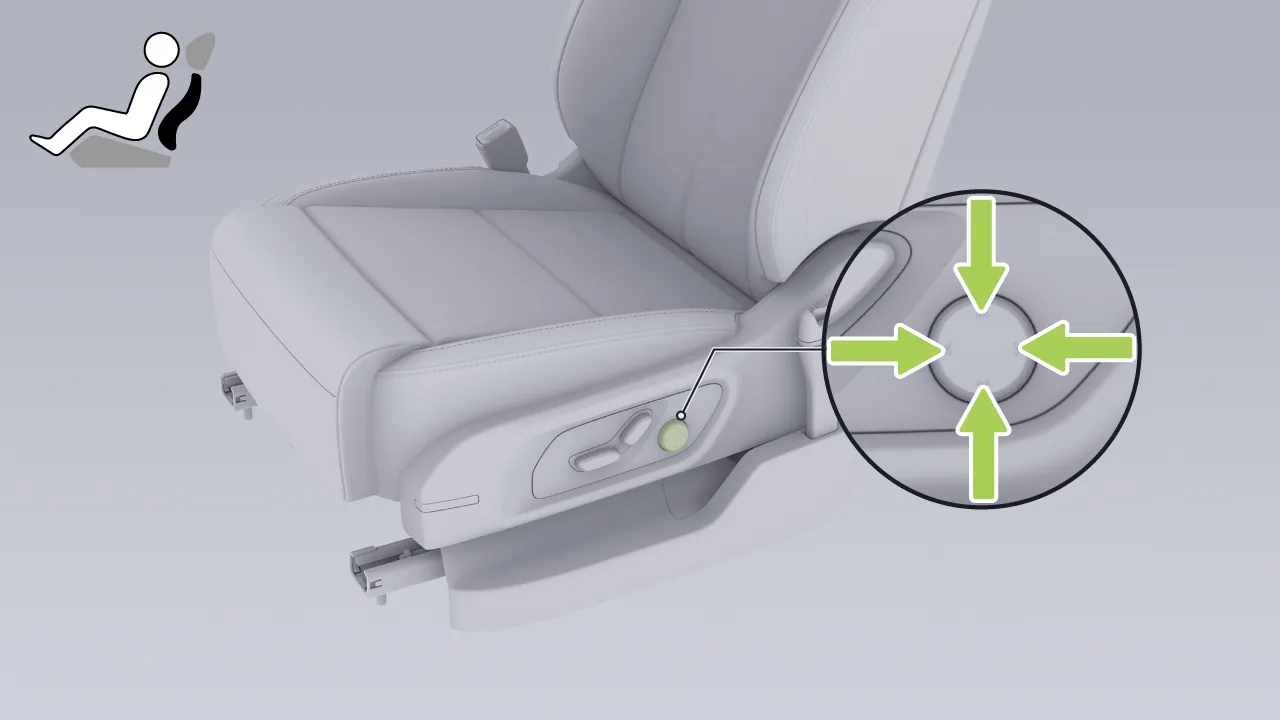
Press the up/down button to adjust the height position of the lumbar support.
Press the left/right button to adjust the lumbar support forward/backward position.
Tap the center display in sequence. “ →Seats→Seat Position→DS→ ”, enter the Driver Seat - Position Adjustment screen, and select 。
Height: Tap or Adjust the height position of the driver's seat lumbar support.
Position: Click or Adjust the front-rear position of the main driver's seat lumbar support.
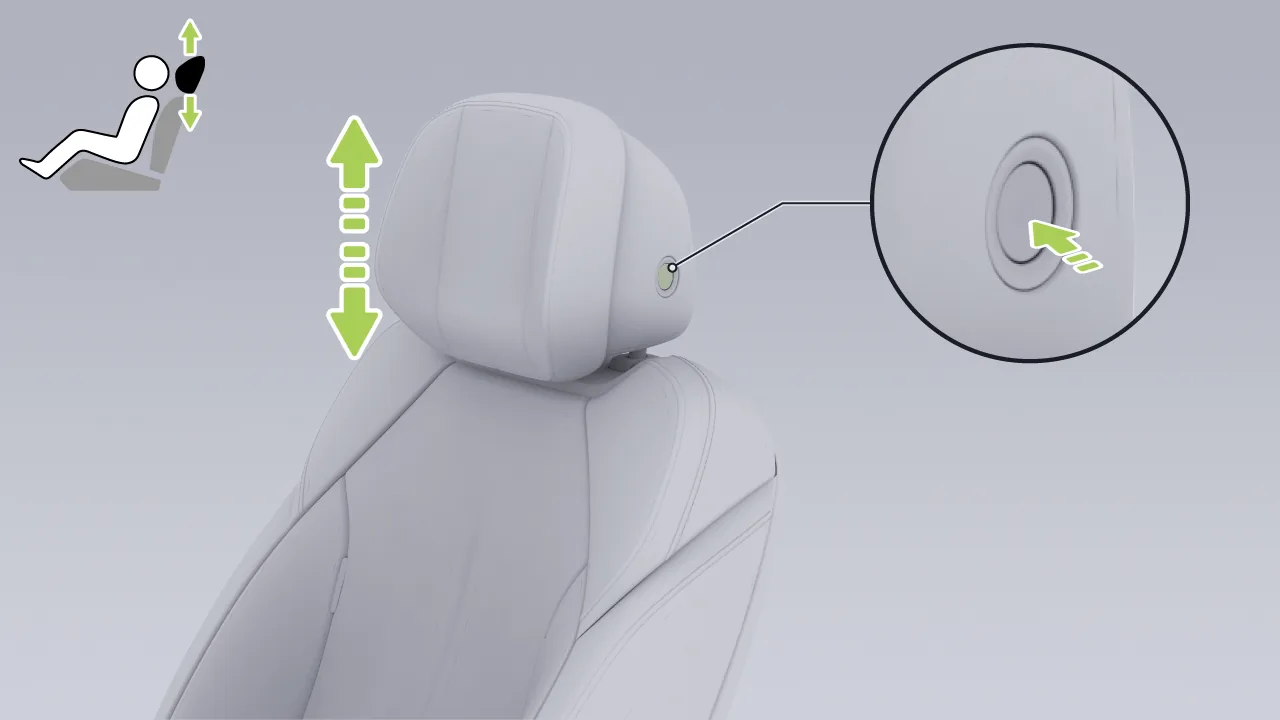
Adjust upward: Lift the head restraint upward to a suitable position until it locks.
Adjusting downward: First press the headrest adjustment button, then adjust the headrest downward to a suitable position, and finally release the adjustment button to lock it.
Tips Do not use the headrest in the lowest position. Always raise it to a locked position before use.
Adjust the head restraint to the correct position so that it can better protect the back of your neck in the event of an emergency.
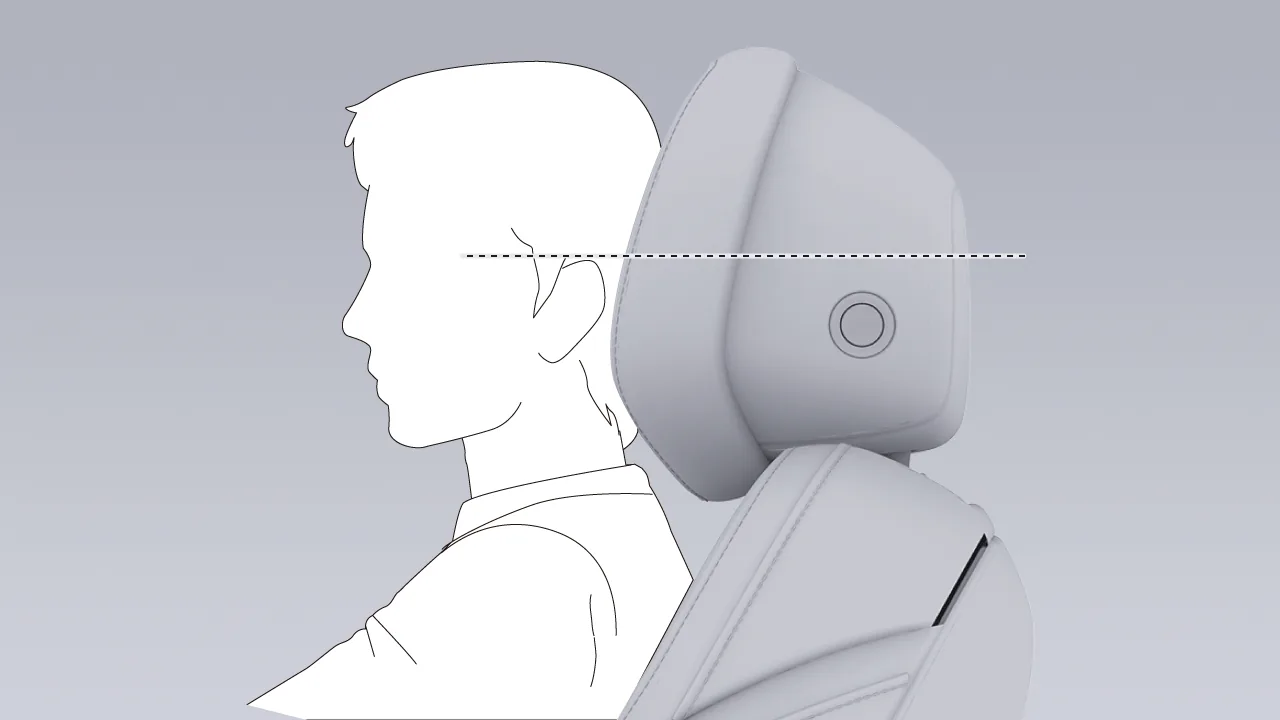
When adjusting the headrest, please meet the following requirements:
The center of the head restraint is level with the upper part of the ears.
Position the head restraint as close as possible to the back of the head.
You can remove the headrest by following these steps:
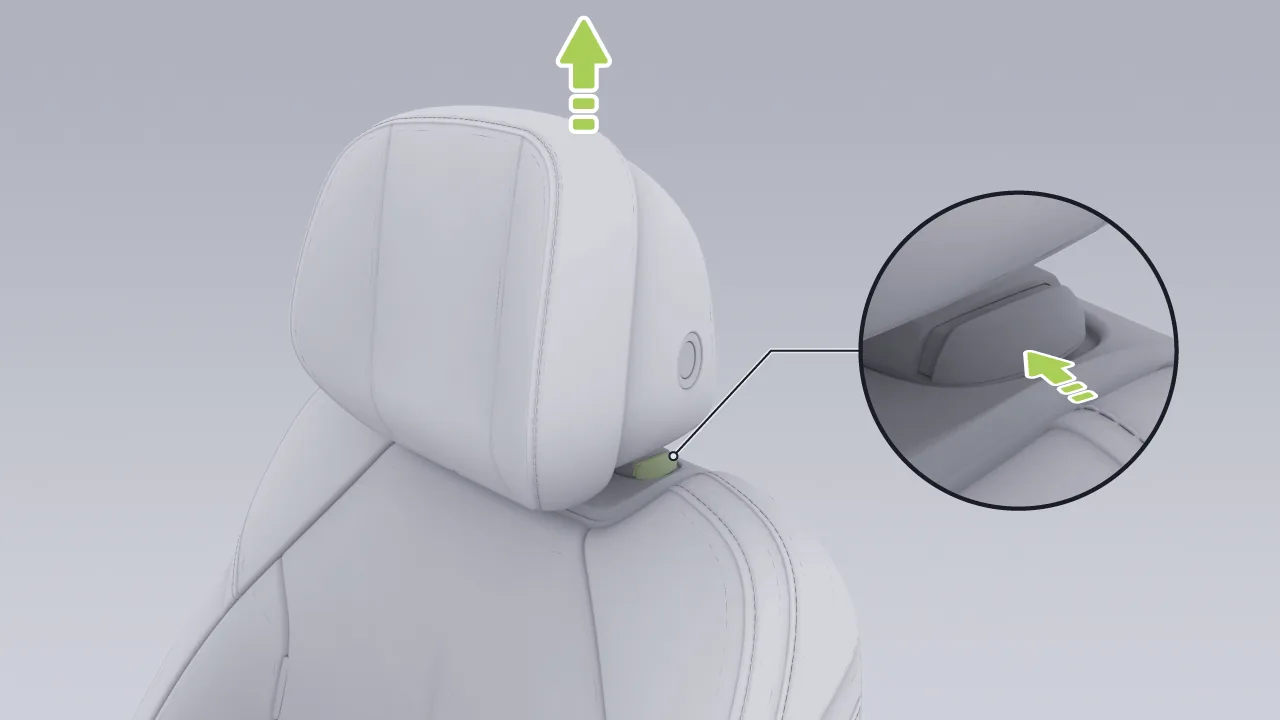
Raise the headrest upward to the highest position.
Press the headrest release button and remove the headrest upward.
Tips If removal is necessary, adjust the seat backrest rearward to allow the head restraint to be removed smoothly.
Warning Do not ride in the vehicle with the headrest removed. The headrest should be installed on the seats and adjusted to a proper position.
When installing the seat headrest, align the headrest rods with the mounting holes of the seat, and press the headrest vertically downward.
Method 1:
Adjust the seat position to a suitable state.
After the adjustment is completed, a pop-up window appears on the central control screen. Tap The current seat position can then be saved; tap , the seat position automatically returns to the last saved position.
Tips The pop-up window will disappear automatically after a period of time.
Method 2:
Tap the center display in sequence. “ →Seat→Seat Position→DS→ ”, enter the Main Driver - Position Adjustment interface, and select 。
Adjust the seat position to a suitable state.
After adjustment is completed, tap The current seat position can then be saved; tap , the seat position automatically returns to the last saved position.
Tap the center display in sequence. “ →Seats→Seat Position→Ds”, tap the seat memory button to enter the front passenger seat memory screen, where you can select a memorized seat position.
On the Main Driver - Driving Habits screen, tap  You can add, delete, or rename the saved primary driver driving habits. One account can store up to 6 driving habits.
You can adjust the driver's seat to a suitable position using any of the following methods:
Adjust with the seat switch.
Center display adjustment.
Voice command adjustment (for example, say: “Hello XPENG, adjust the driver seat forward” and other keywords).
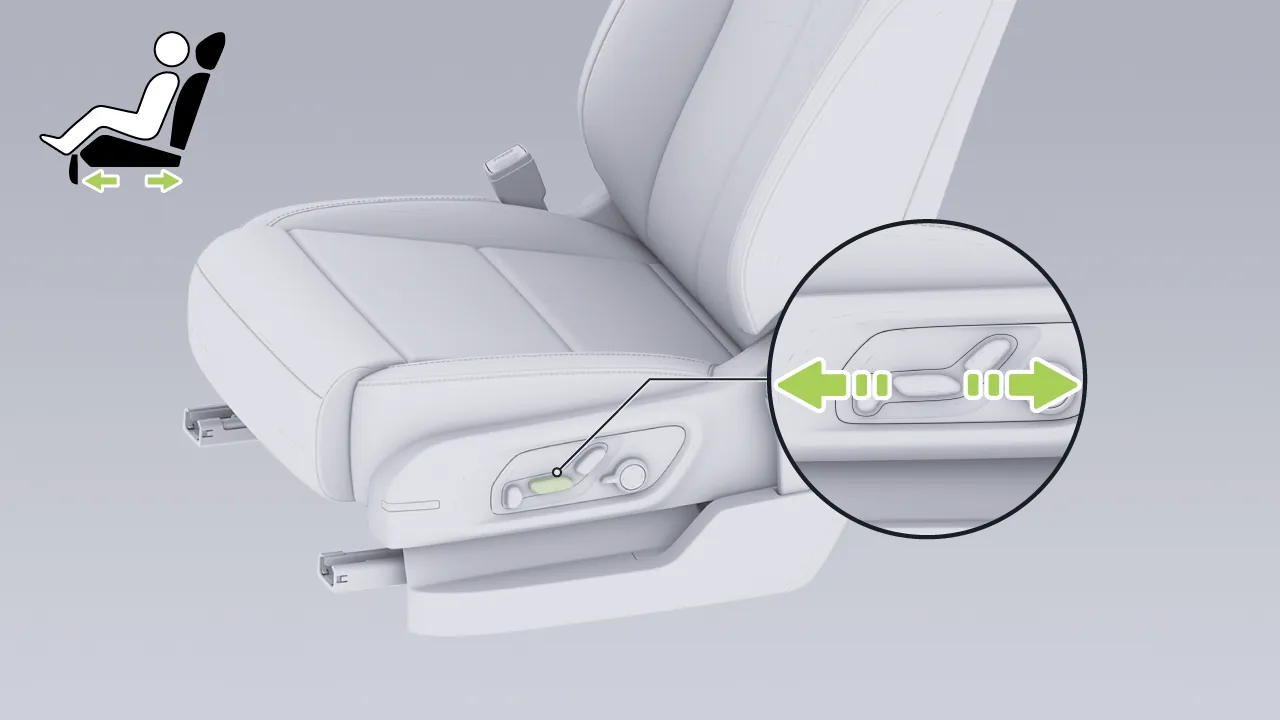
Push this adjustment switch forward or backward to adjust the fore-and-aft position of the driver's seat.
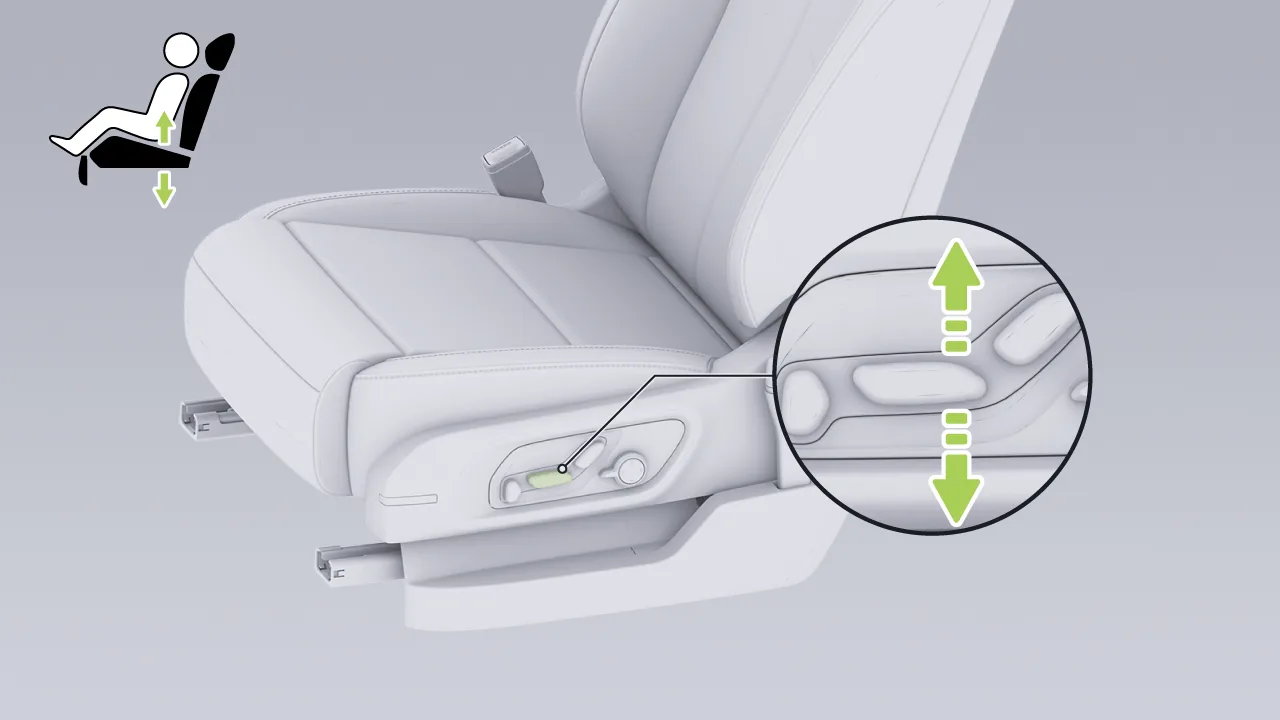
Push the rear of this adjustment switch upward or downward to adjust the height of the driver's seat.
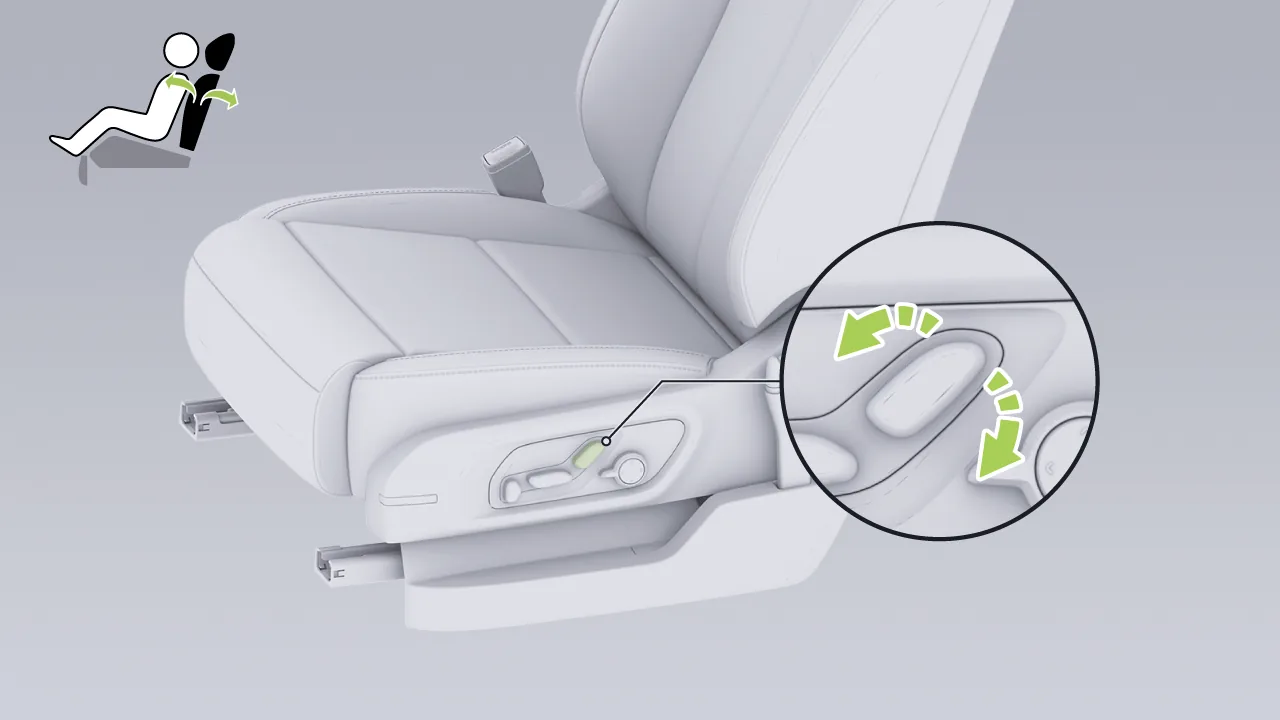
Push the top of this adjustment switch forward or backward to adjust the angle of the driver's seat seatback.
Tap in sequence on the central control screen. “ →Seats→Seat Position→DS→ ”, enter the Main Driver - Position Adjustment interface, and select 。
Height: Tap or , adjust the seat height step by step; press and hold for continuous adjustment. You can also tap or slide the slider for quick adjustment.
Position: Tap or Adjust the seat forward and backward position step by step; press and hold for continuous adjustment. You can also tap or use the slider for quick adjustment.
Angle: Tap or , adjust the seatback angle step by step; press and hold for continuous adjustment. You can also tap or use the slider for quick adjustment.
Warning Before making seat adjustments, confirm the surrounding seating environment. Avoid crushing, collision, etc. with rear row personnel (especially children) or pets.
Make sure hands, bodies or objects are not on the seat path during seat adjustment to avoid the risk of pinching.
Avoid allowing children to adjust the seat and risk being pinched.
Do not place overthick floor mats or other foreign objects (such as beverage bottles, charcoal bags, etc.) on the bottom of the seat, as they may become trapped between the seat and the guide rails, preventing seat adjustment. Locking, thus damaging the seat. It is recommended to use officially approved carpet mats from Xpeng Motors.
Do not adjust the seat with the seat belt fastened, to avoid the seat belt being taken out of normal use, injury to occupants and loss of protection.
Warning Do not adjust the driver's seat while the vehicle is in motion, as this may cause the vehicle to go out of control and result in an accident.
You can adjust the driver seat leg rest and seat cushion firmness in any of the following ways:
Adjust with the seat switch.
Center Display Adjustment.
Voice command adjustment (for example, say: “Hello XPENG, adjust the main driver’s seat leg rest forward” and other keywords).
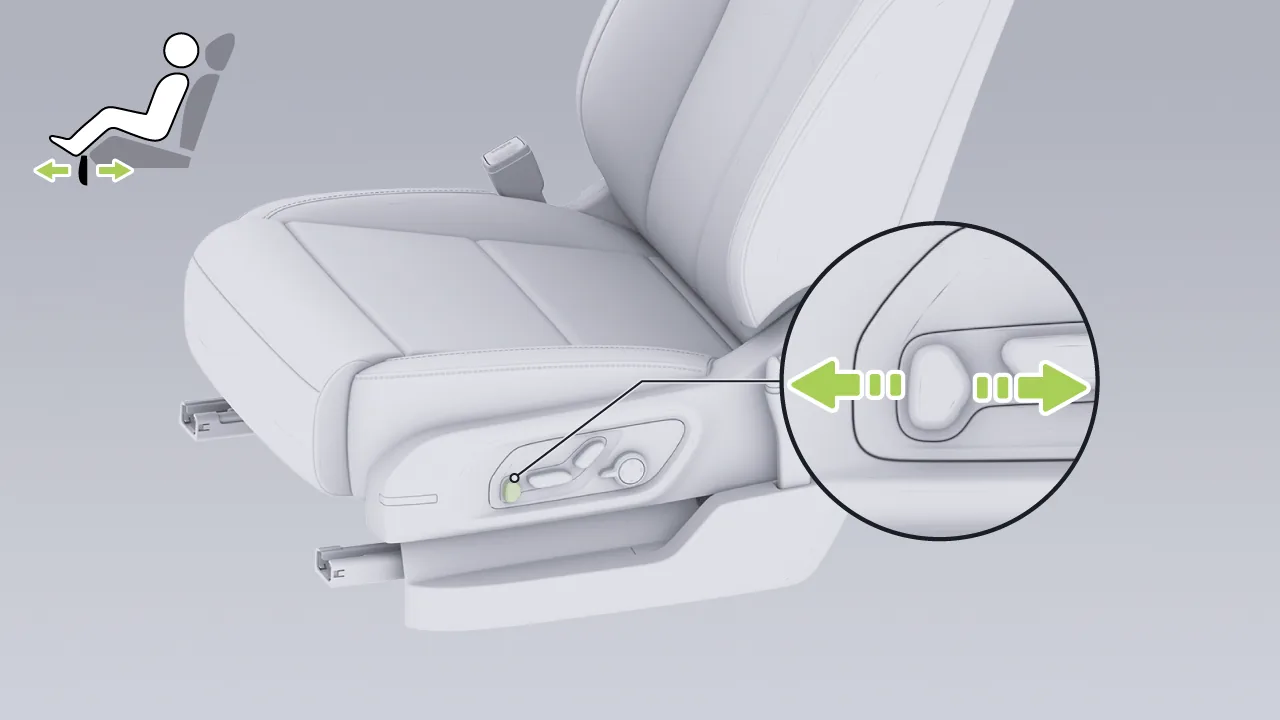
Push this adjustment switch forward or backward to adjust the seat leg rest position.
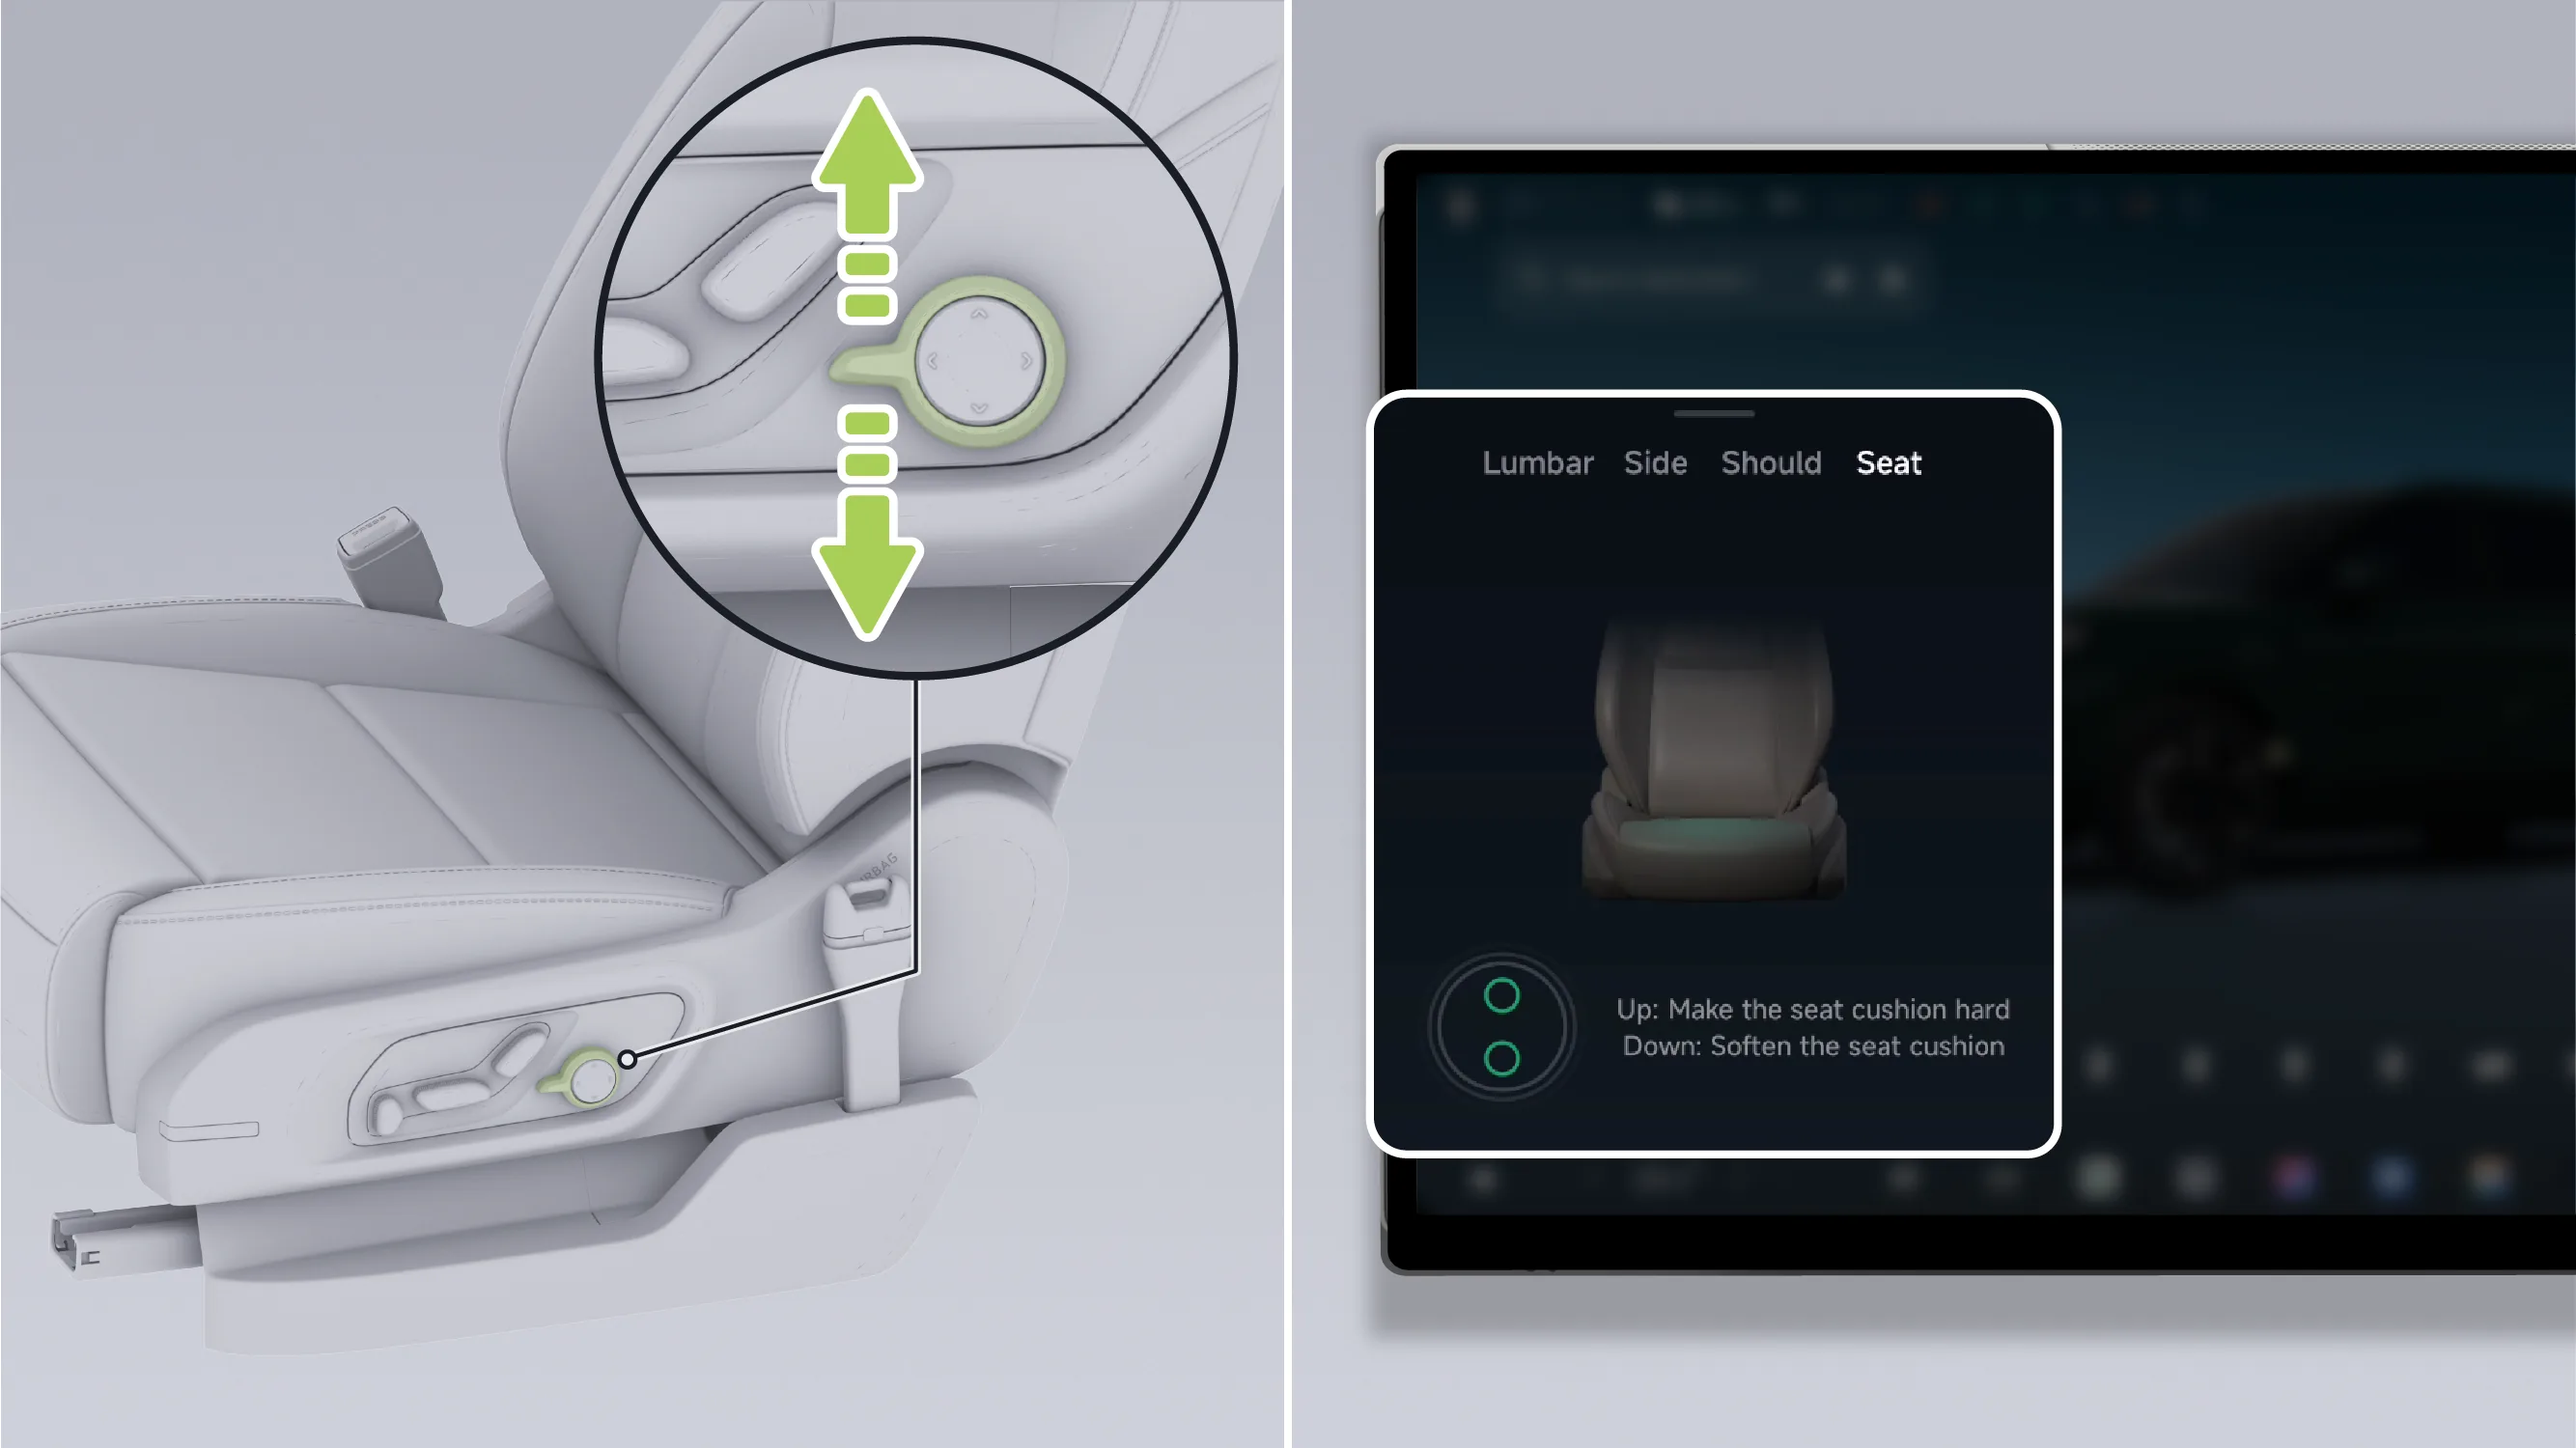
Toggle the seat function switch upward or downward to switch to the seat cushion firmness control gear.
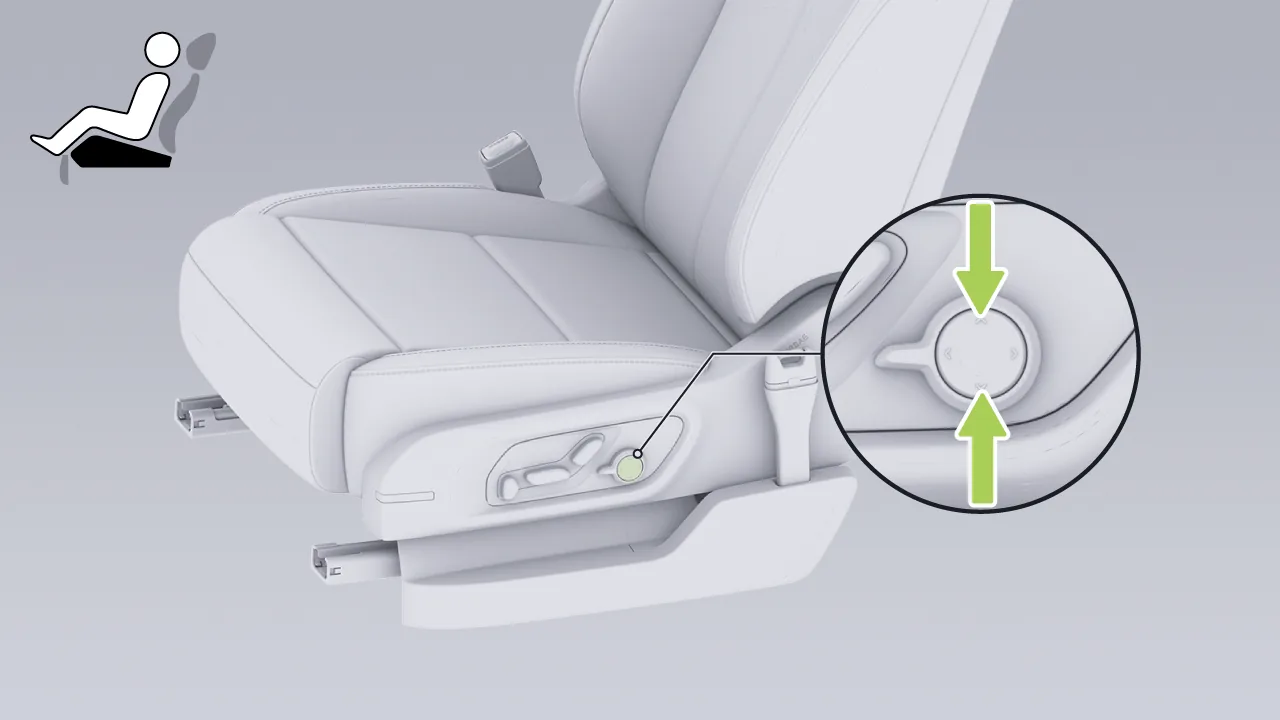
Press the upper or lower part of the switch to adjust the seat cushion firmness.
Tap the center display in sequence. “ →Seats→Seat Position→DS→ ”, enter the driver seat - Position Adjustment screen, select 。
Adjust the seat leg rest: Tap or Adjust the leg rest position step by step; press and hold for continuous adjustment.
Adjust seat cushion firmness: Tap or Adjust the seat cushion firmness level by level; press and hold for continuous adjustment.
You can adjust the driver's seat lumbar support and shoulder support in any of the following ways:
Seat switch adjustment.
Center Display Adjustment.
Voice command adjustment (for example, say: “Hello XPENG, adjust the lumbar support of the driver's seat forward” and other keywords).
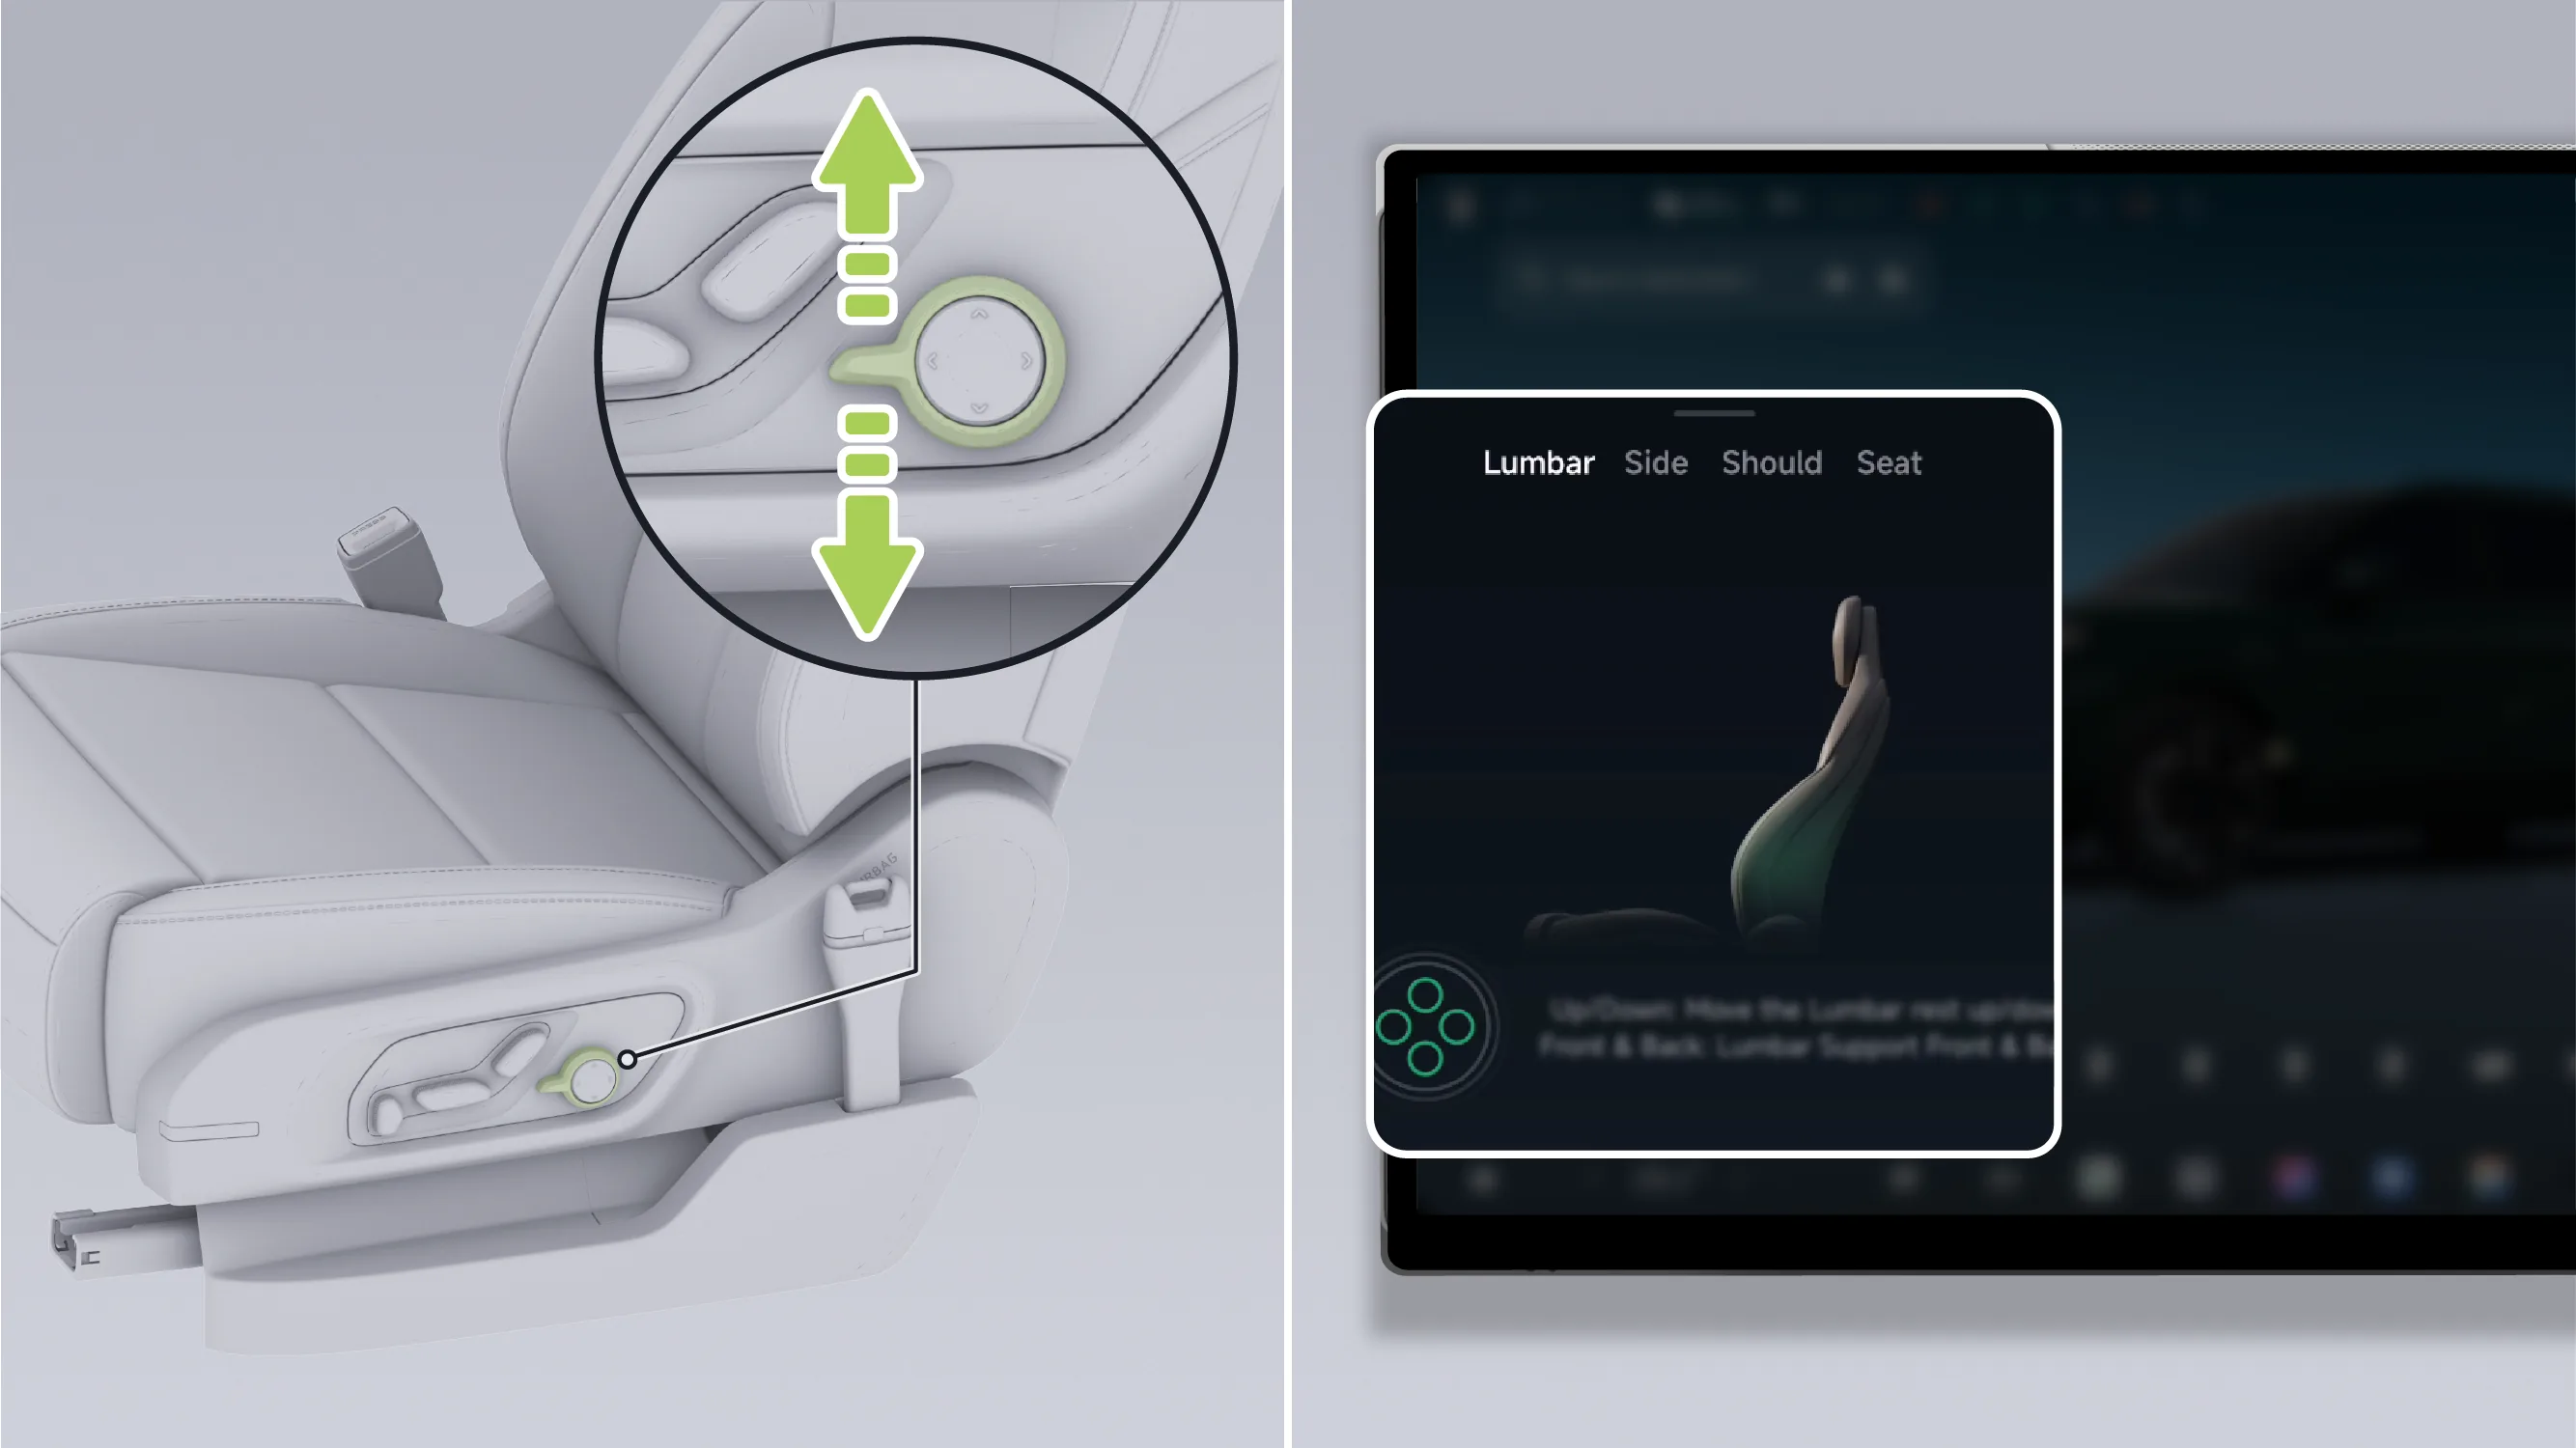
Toggle the seat function switch upward or downward to switch to the lumbar support control position.
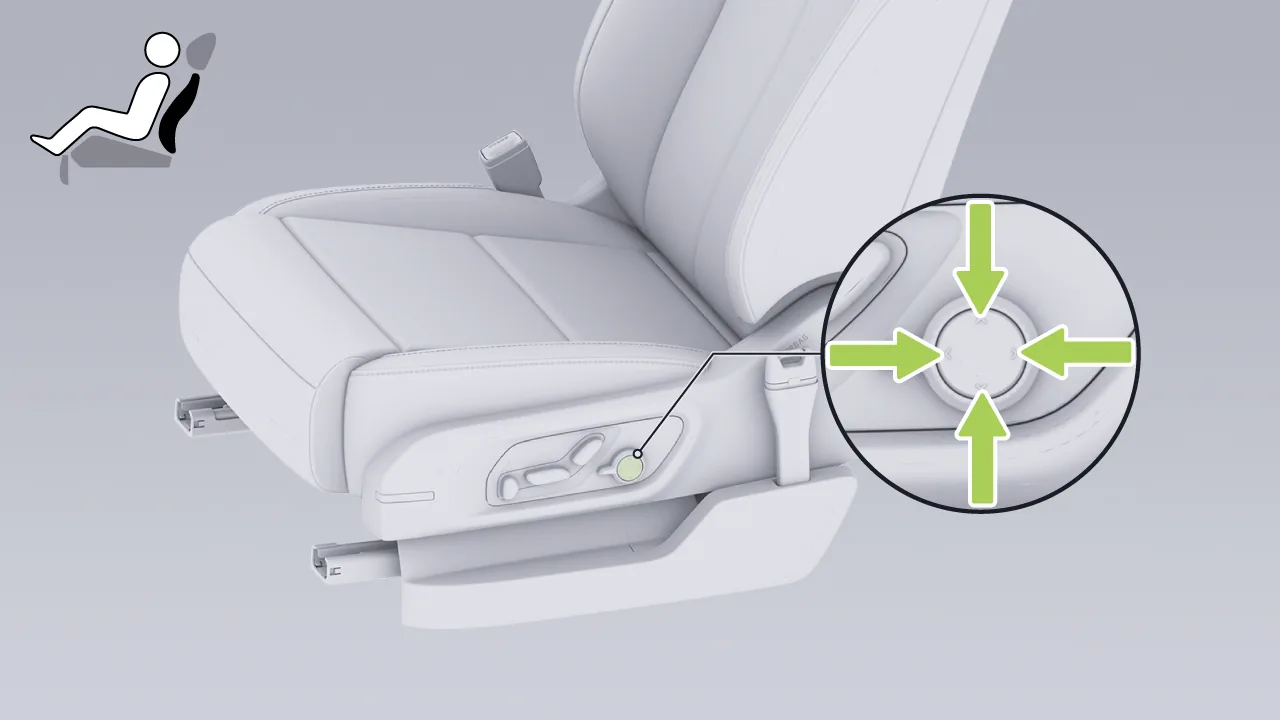
Press the upper/lower/front/rear part of the switch to adjust the lumbar support position.
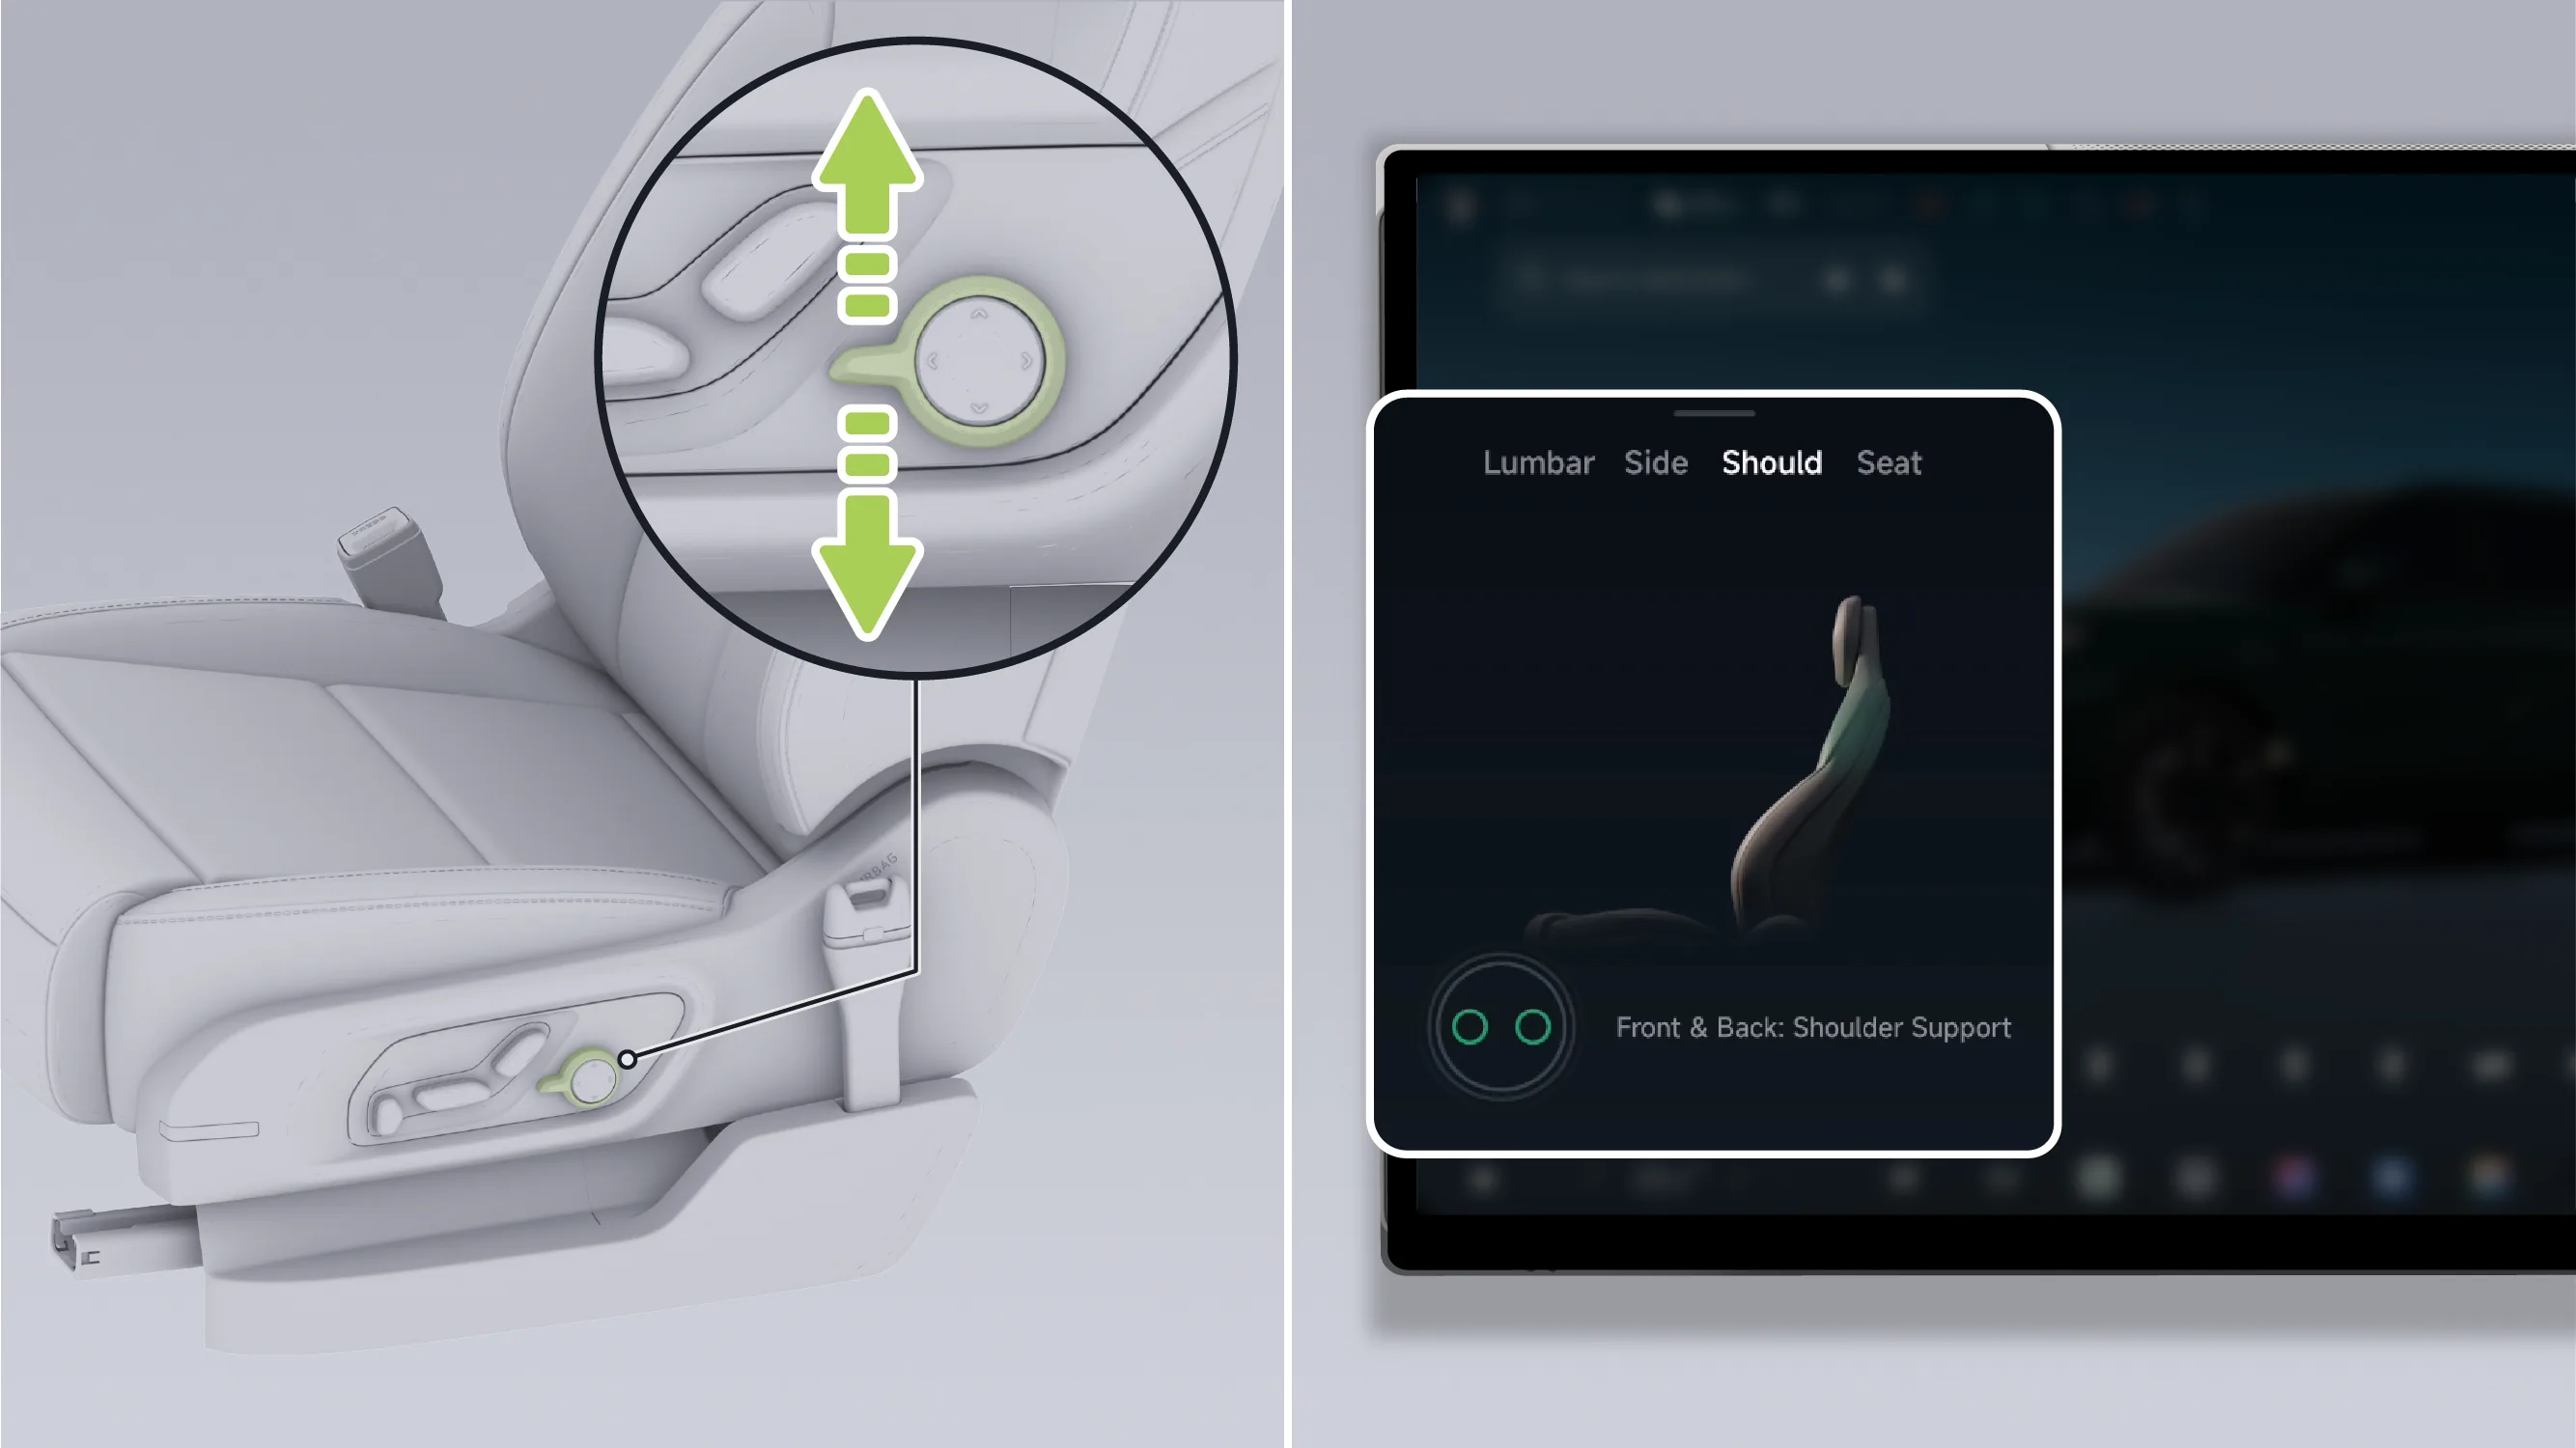
Toggle the seat function switch upward or downward to switch to the shoulder support control position.
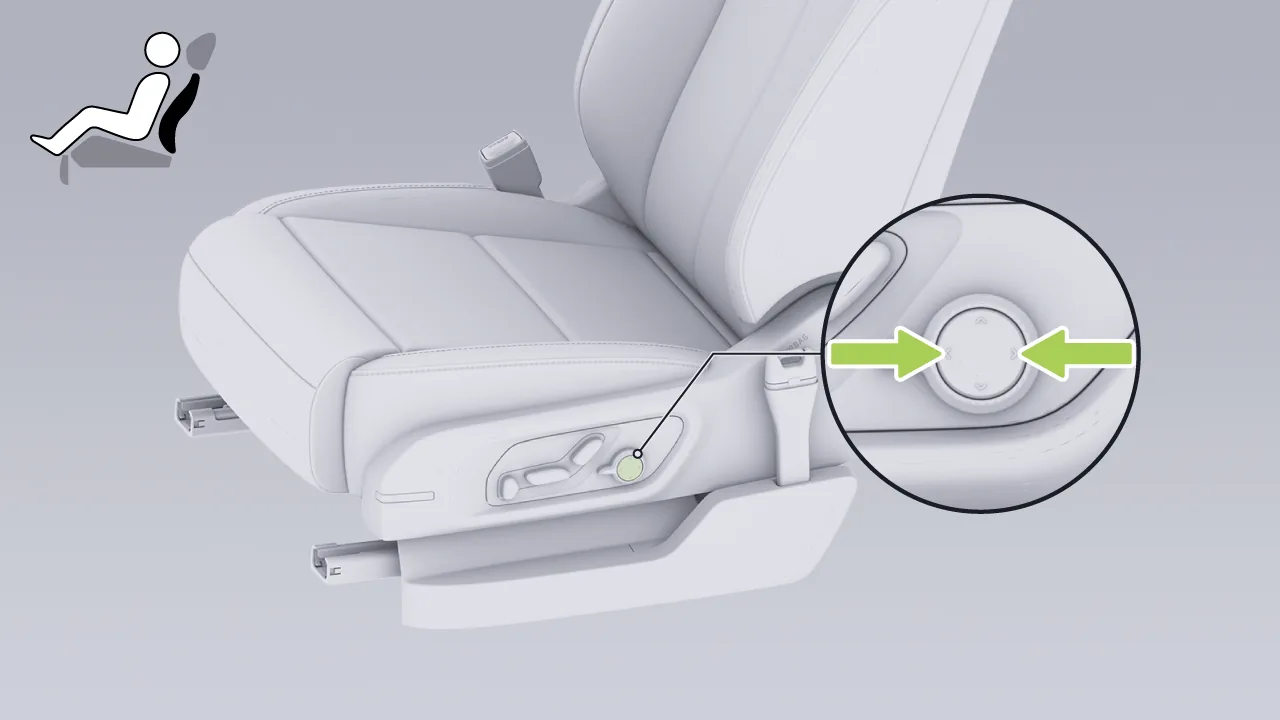
Press the front or rear of the switch to adjust the shoulder support position.
Tap the center display in sequence. “ →Seats→Seat Position→DS→ ”, enter the Driver Seat - Position Adjustment screen, and select 。
Adjust the seat lumbar support: Tap 、 、 、 Adjust the lumbar support position.
Adjust seat shoulder support: tap or , adjust the shoulder support position.
You can adjust the driver's seat side bolster support using any of the following methods:
Seat switch adjustment.
Center display adjustment.
Adjust by voice command.
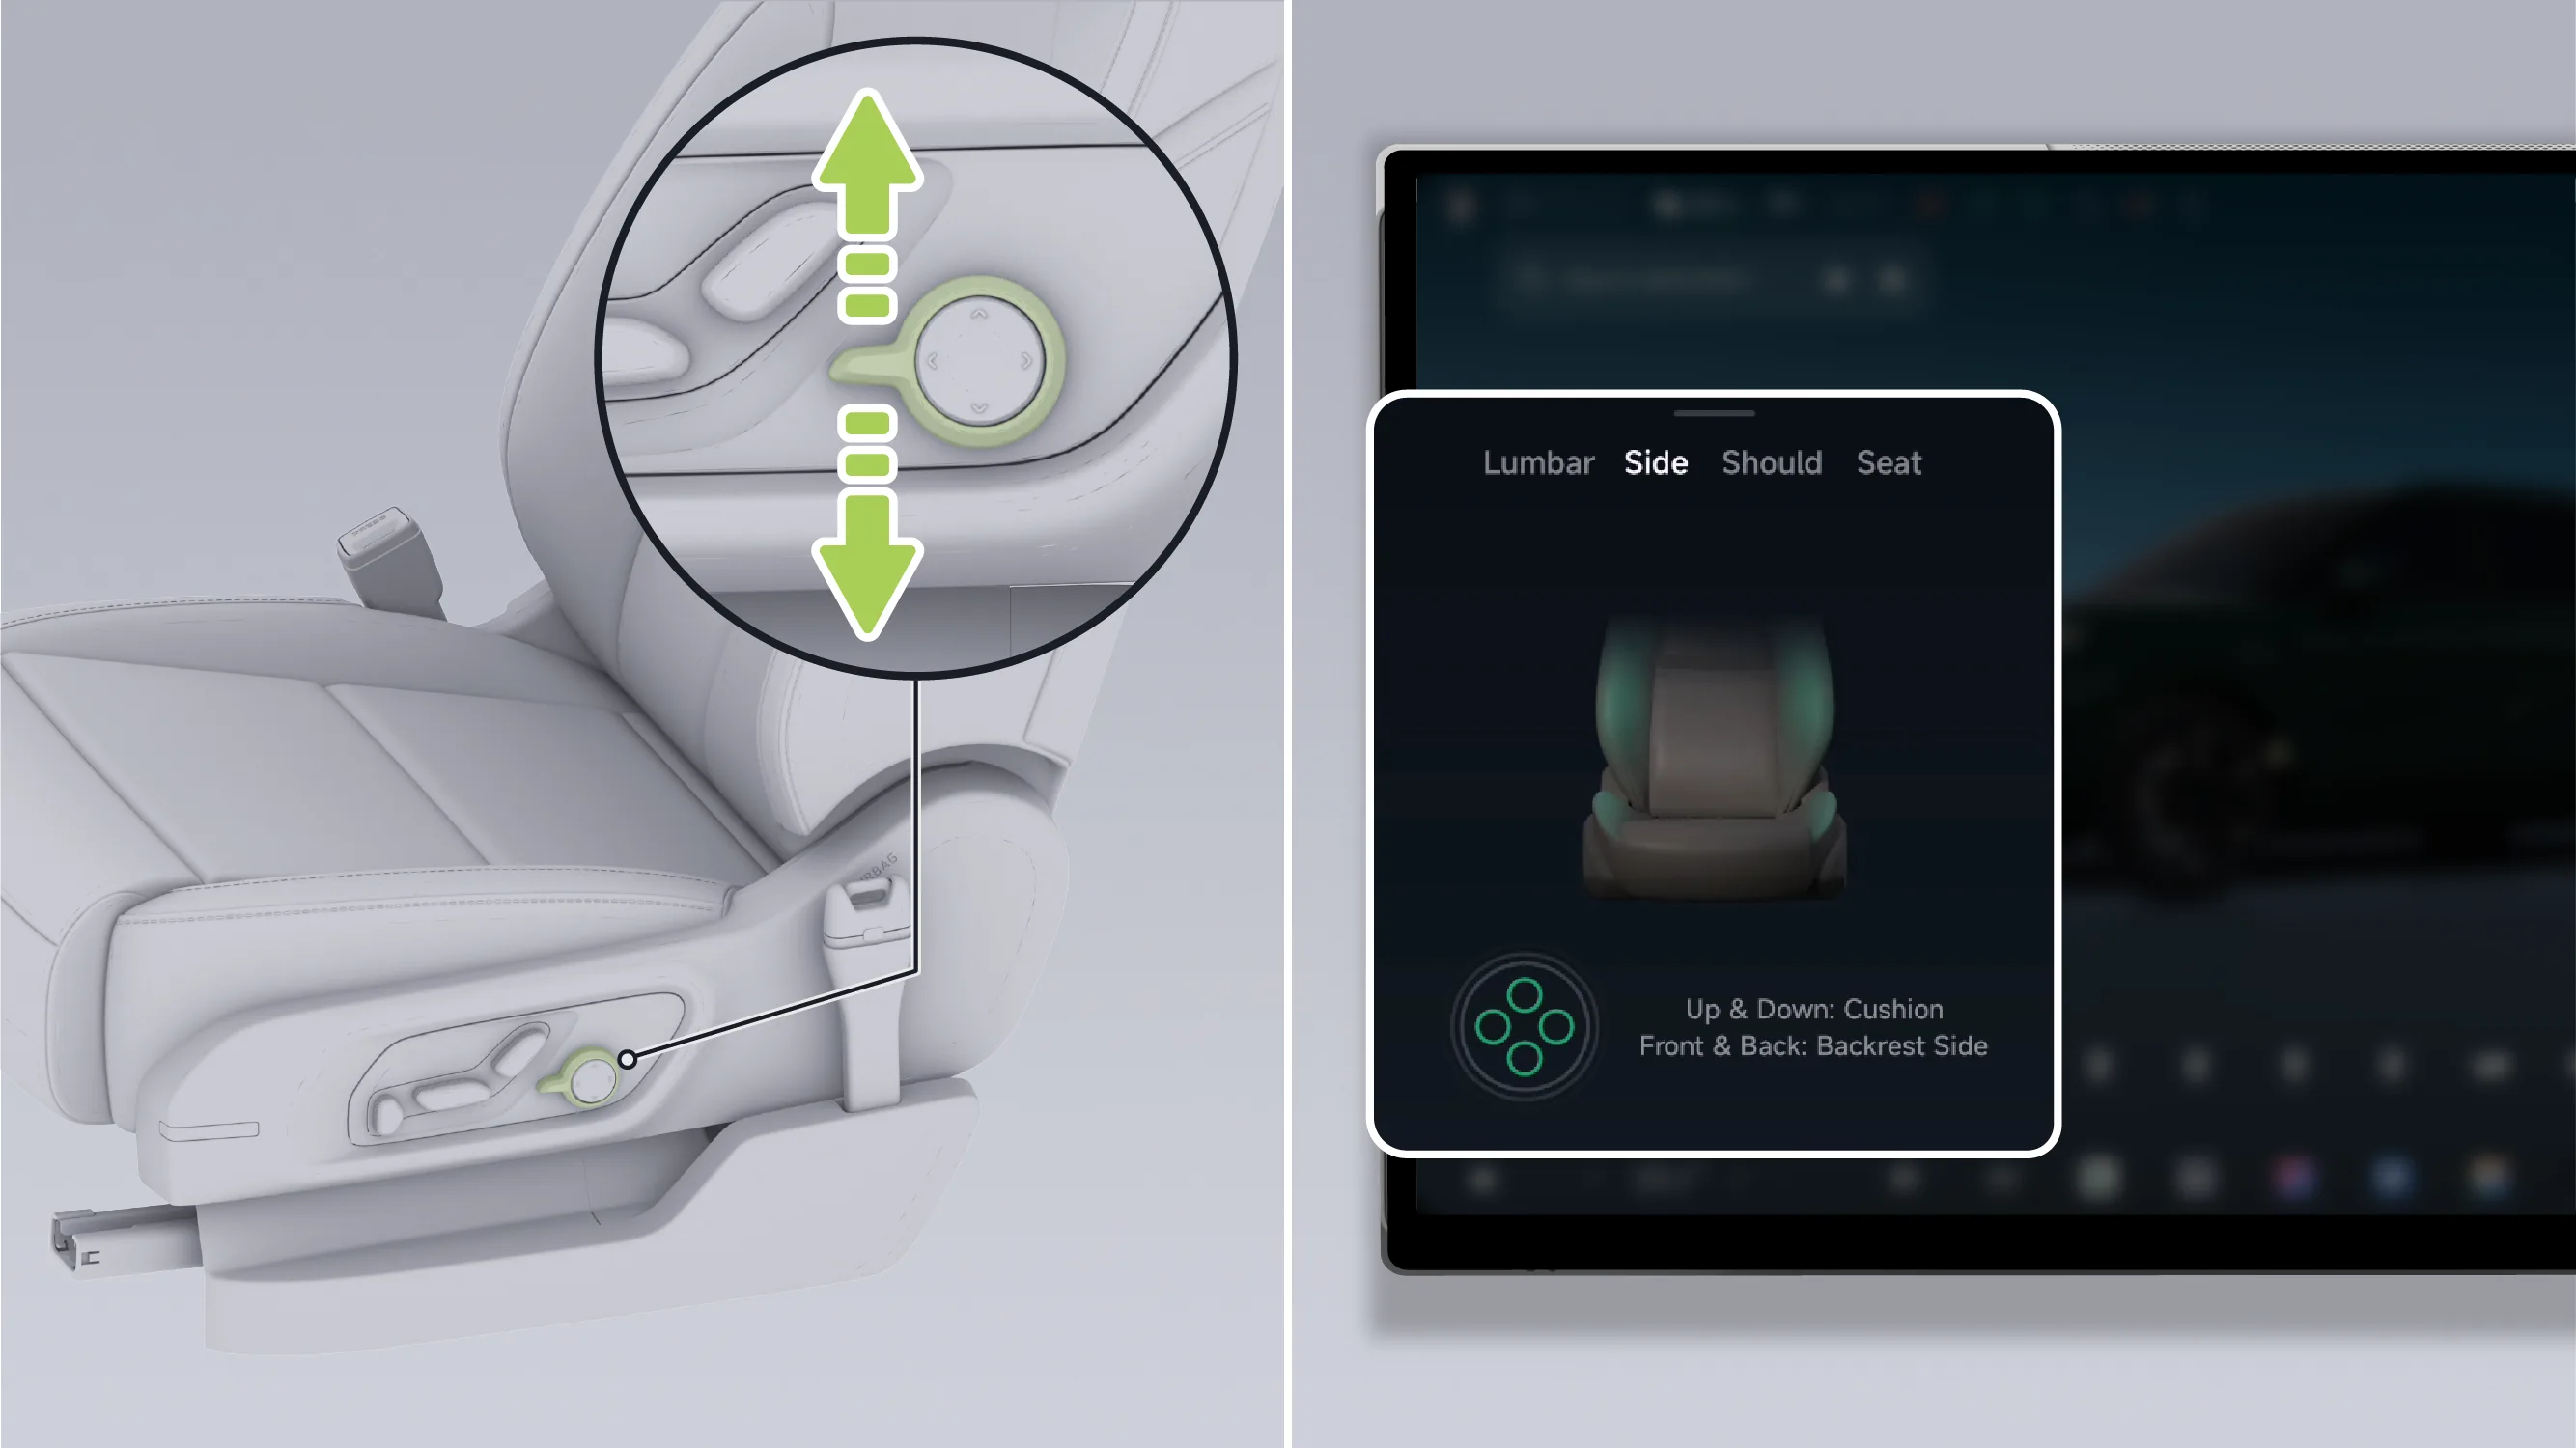
Toggle the seat function switch upward or downward to switch to the seat side bolster control position.
Press the upper or lower part of the switch to adjust the position of the seat cushion side bolster support; press the front or rear part of the switch to adjust the position of the seatback side bolster support.
Tap the center display in sequence. “ →Seats→Seat Position→DS→ ”, enter the Driver Seat - Position Adjustment screen, and select 。
Adjust seat cushion side bolster support: Tap  or
or  , adjust the position of the seat cushion side bolster support.
Adjust seatback side bolster support: tap or , adjust the seatback side bolster support position.
The driver seat supports driver AI seat adjustment, adaptive fit, driving anti-fatigue, and side bolster steering-following support functions.
The driver's AI seat adjustment function can automatically adjust the seat to a comfortable state according to the seat force condition.
When the vehicle is in P gear and the driver's seat is occupied, tap the following on the center display in sequence “ →Seats→Seat Position→DS→AI-powered Driver's Seat”, enter the main driver AI seat interface, tap Turn On Now, and the AI seat adjustment function will be activated. The seat will begin automatic adjustment after 3 seconds. Please maintain a correct sitting posture and look straight ahead until the adjustment is completed.
Tips If the current seat is being adjusted, the driver's AI seat adjustment function cannot be activated.
During activation of the driver AI seat adjustment function, if the driver seat is adjusted manually or the activation button is tapped again, this function will exit.
Warning Before using the AI seat adjustment function, ensure that hands, body parts, or objects are not in the seat movement path to avoid the risk of pinching.
After the driver is seated and has adjusted the seat, or when the sitting posture changes during driving, the adaptive fitting function can actively adjust the seat back side bolsters, the cushion firmness, and the support range for the lumbar and shoulder areas according to the current sitting posture.
When the function is triggered, the status bar will display the prompt "AI seat adjustment in progress". Tap this prompt to open the pop-up window. In the pop-up window, tap "Settings" to quickly jump to the switch settings screen.
On the center control screen “ →Settings→vehicle→Seats and Steering Wheel”On the interface, the adaptive fitting function can be turned on/off.
Tips If the function is triggered due to a change in sitting posture, the status bar will not display the prompt text "In the process of AI seat adjustment".
The driving anti-fatigue function can sense changes in seat pressure in real time while driving. When it determines that the sitting posture shows a tendency toward fatigue, it automatically adjusts the cushion firmness to relieve local pressure. If continuous driving exceeds 1 hour, it will also automatically activate 10 minutes of seat massage. After the massage ends, the system will continue to monitor the sitting posture and repeat the above process.
When the function triggers seat massage, the status bar will display the prompt "AI seat adjustment in progress". Tap this prompt to open a pop-up window. In the pop-up window, tap "Settings" to quickly go to the switch settings screen; tap "Turn off this massage" to end the current massage, and it can still be triggered normally next time.
On the center control screen “ →Settings→vehicle→Seats and Steering Wheel”On this screen, you can turn the driving anti-fatigue function on or off.
Tips During function operation, if you manually adjust the seat cushion firmness or turn on the massage function, the current anti-fatigue timing and adjustment will stop, and the system will automatically enter a new timing cycle.
The side bolster steering-linked support function can automatically adjust the seat side bolster support range when the vehicle is turning or changing lanes.
On the center control screen “ →Settings→vehicle→Seats and Steering Wheel”On the interface, the side wing steering support function can be enabled/disabled.
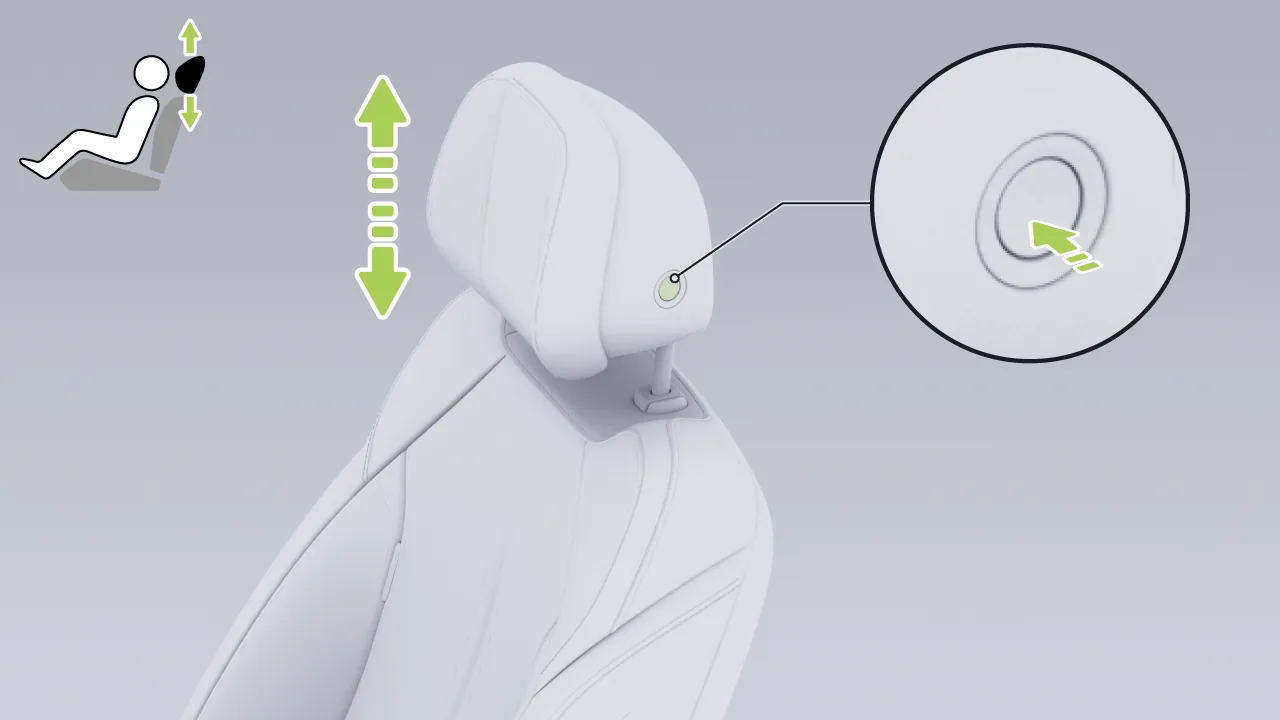
Adjust upward: Lift the head restraint upward to a suitable position until it locks.
Adjusting downward: First press the headrest adjustment button, then adjust the headrest downward to a suitable position, and finally release the adjustment button to lock it.
Tips Do not use the headrest in the lowest position. Always raise it to a locked position before use.
Adjust the head restraint to the correct position so that it can better protect the back of your neck in the event of an emergency.
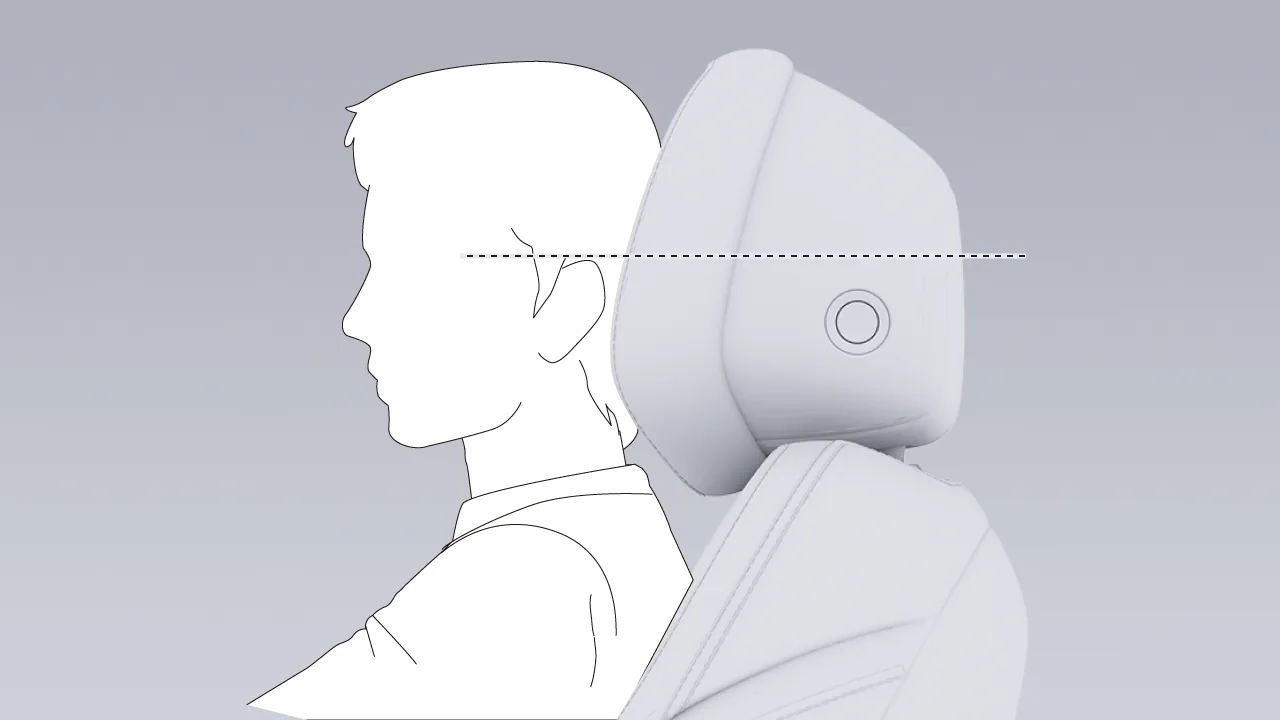
When adjusting the headrest, please meet the following requirements:
The center of the head restraint is level with the upper part of the ears.
Position the head restraint as close as possible to the back of the head.
You can remove the headrest by following these steps:
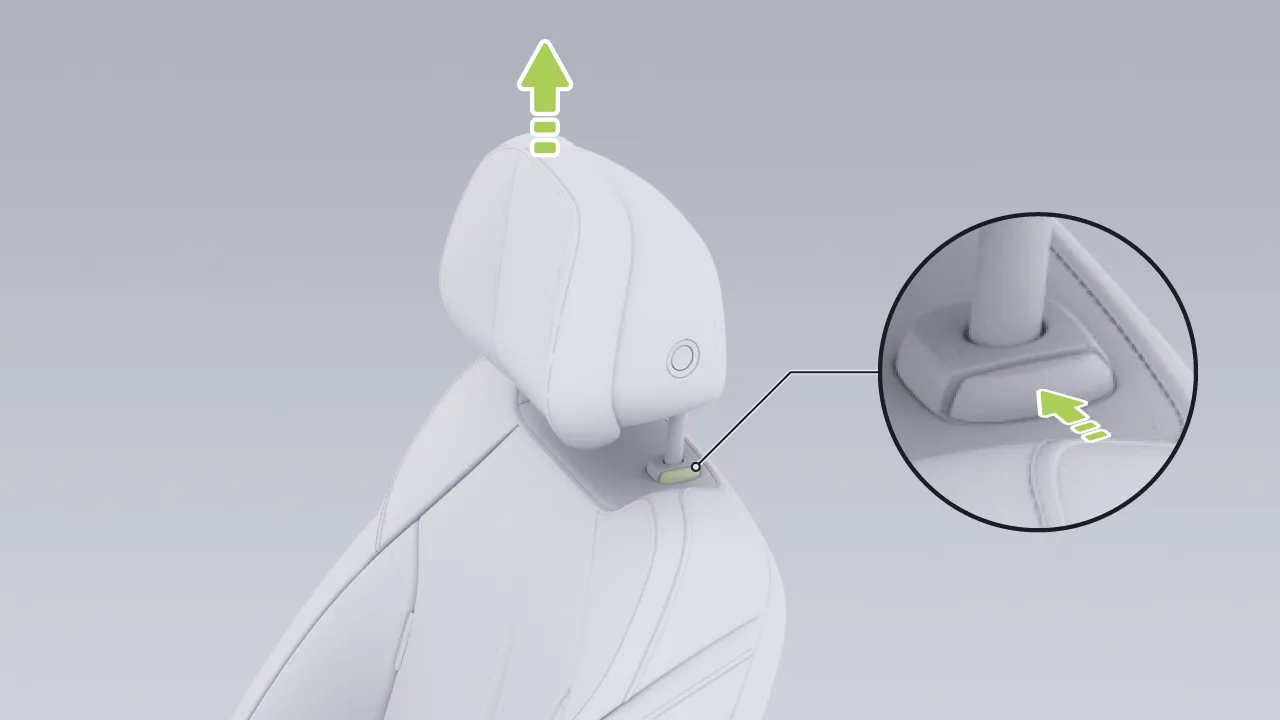
Raise the head restraint upward to the highest position.
Press the headrest release button and remove the headrest upward.
Tips If removal is necessary, adjust the seat backrest rearward to allow the head restraint to be removed smoothly.
Warning Do not ride in the vehicle with the headrest removed. The headrest should be installed on the seats and adjusted to a proper position.
When installing the seat headrest, align the headrest rods with the mounting holes of the seat, and press the headrest vertically downward.
Method 1:
Adjust the seat position to an appropriate state.
After the adjustment is completed, a pop-up window appears on the center display. Tap The current seat position can then be saved; tap , the seat position automatically returns to the last saved position.
Tips The pop-up window will disappear automatically after a period of time.
Method 2:
Tap the central control screen in sequence “ →Seat→Seat Position→Ds→ ”, enter the Main Driver - Position Adjustment interface, select 。
Adjust the seat position to an appropriate state.
After adjustment is completed, tap The current seat position can then be saved; tap , the seat position automatically returns to the last saved position.
Tap on the center display in sequence. “ →Seats→Seat Position→DS”Tap the seat memory button to enter the front passenger seat memory screen, where you can select a memorized seat position.
On the Driver's Seat - Driving Habits screen, tap You can add, delete, or rename the saved primary driver driving habits. One account can store up to 6 driving habits.
You can adjust the passenger seat to a suitable position in any of the following ways:
Seat switch adjustment.
Center display adjustment.
Voice command adjustment (for example, say: “Hello XPENG, adjust the passenger seat forward” and other keywords).
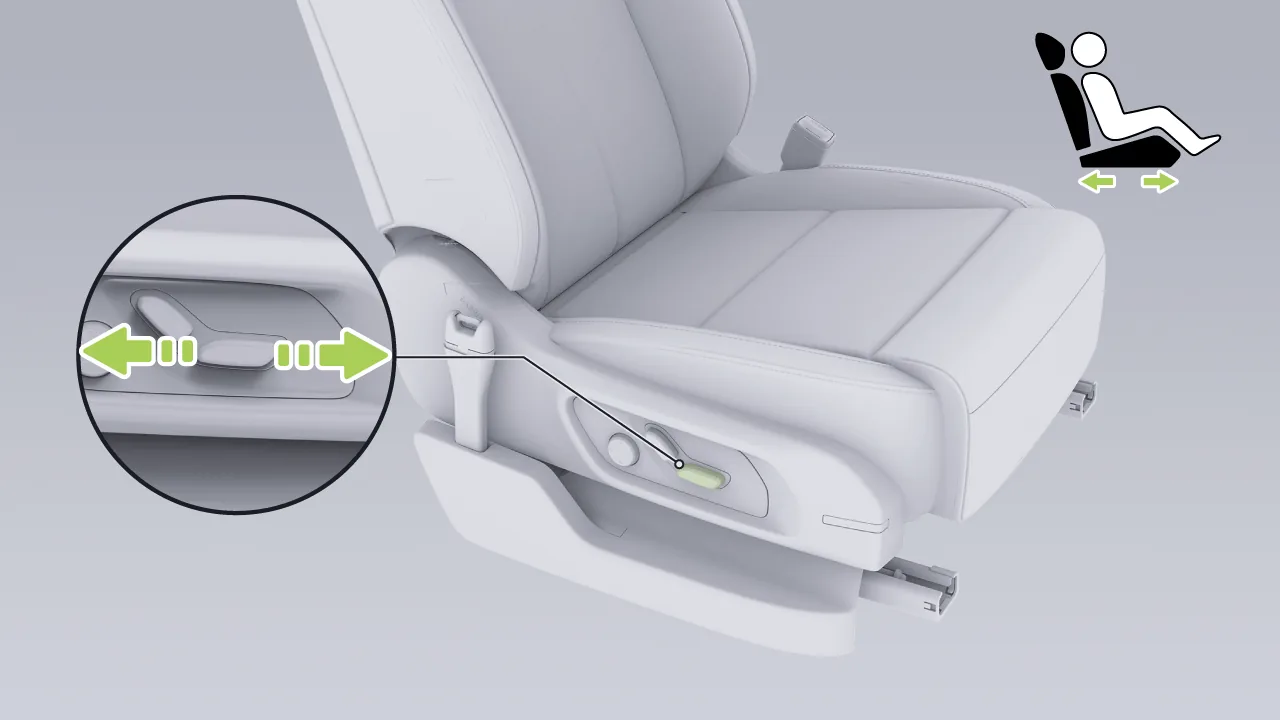
Push this adjustment switch forward or backward to adjust the fore-and-aft position of the passenger seat.
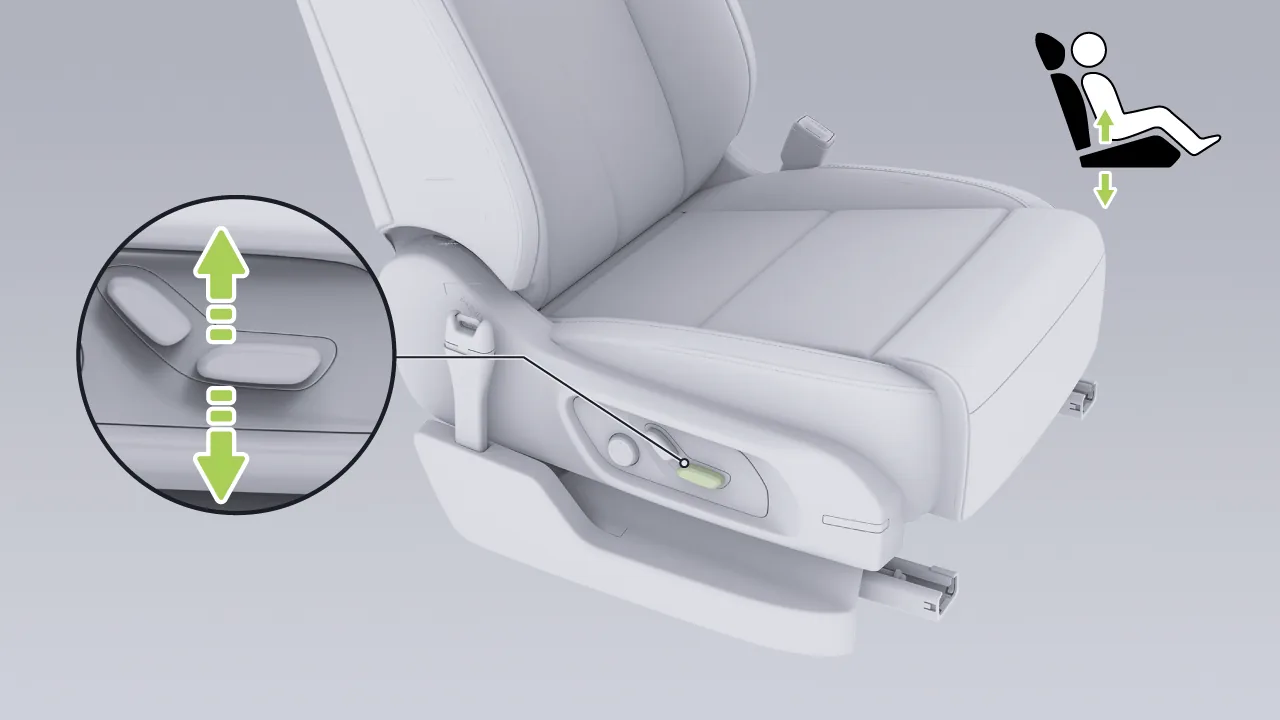
Push the rear of this adjustment switch upward or downward to adjust the height of the passenger seat.
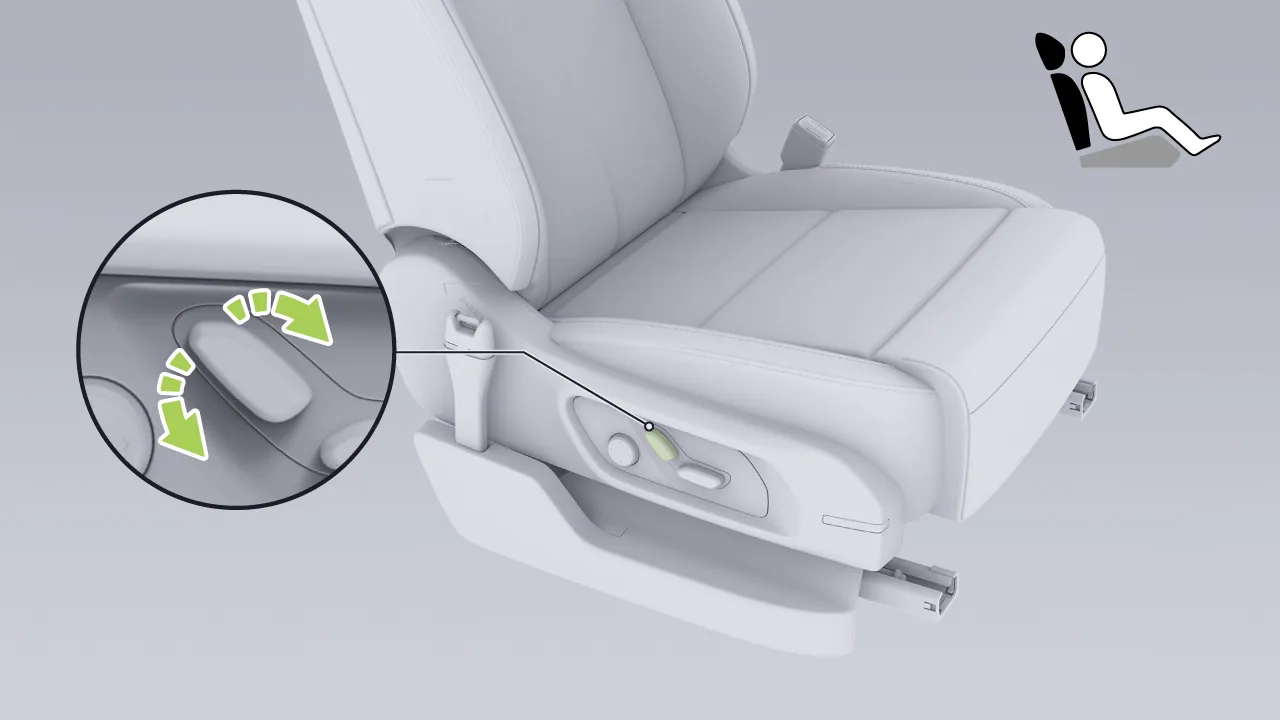
Push the top of this adjustment switch forward or backward to adjust the angle of the passenger seatback.
Tap the center display in sequence. “ →Seats→Seat Position→PS→ ”, enter the passenger - Position Adjustment interface, select 。
Height: Tap or , adjust the seat height step by step; press and hold for continuous adjustment. You can also tap or drag the slider for quick adjustment.
Position: Tap or , adjust the seat fore-aft position step by step; press and hold for continuous adjustment. You can also tap or use the slider for quick adjustment.
Angle: Tap or , adjust the seatback angle step by step; press and hold for continuous adjustment. You can also tap or use the slider for quick adjustment.
Warning Before making seat adjustments, confirm the surrounding seating environment. Avoid crushing, collision, etc. with rear row personnel (especially children) or pets.
Make sure hands, bodies or objects are not on the seat path during seat adjustment to avoid the risk of pinching.
Avoid allowing children to adjust the seat and risk being pinched.
Do not place overthick floor mats or other foreign objects (such as beverage bottles, charcoal bags, etc.) on the bottom of the seat, as they may become trapped between the seat and the guide rails, preventing seat adjustment. Locking, thus damaging the seat. It is recommended to use officially approved carpet mats from Xpeng Motors.
Do not adjust the seat with the seat belt fastened, to avoid the seat belt being taken out of normal use, injury to occupants and loss of protection.
You can adjust the passenger seat leg rest in either of the following ways:
Adjust with the seat switch.
Center display adjustment.
Voice command adjustment (for example, say: “Hello XPENG, adjust the passenger seat leg rest forward” and other keywords).
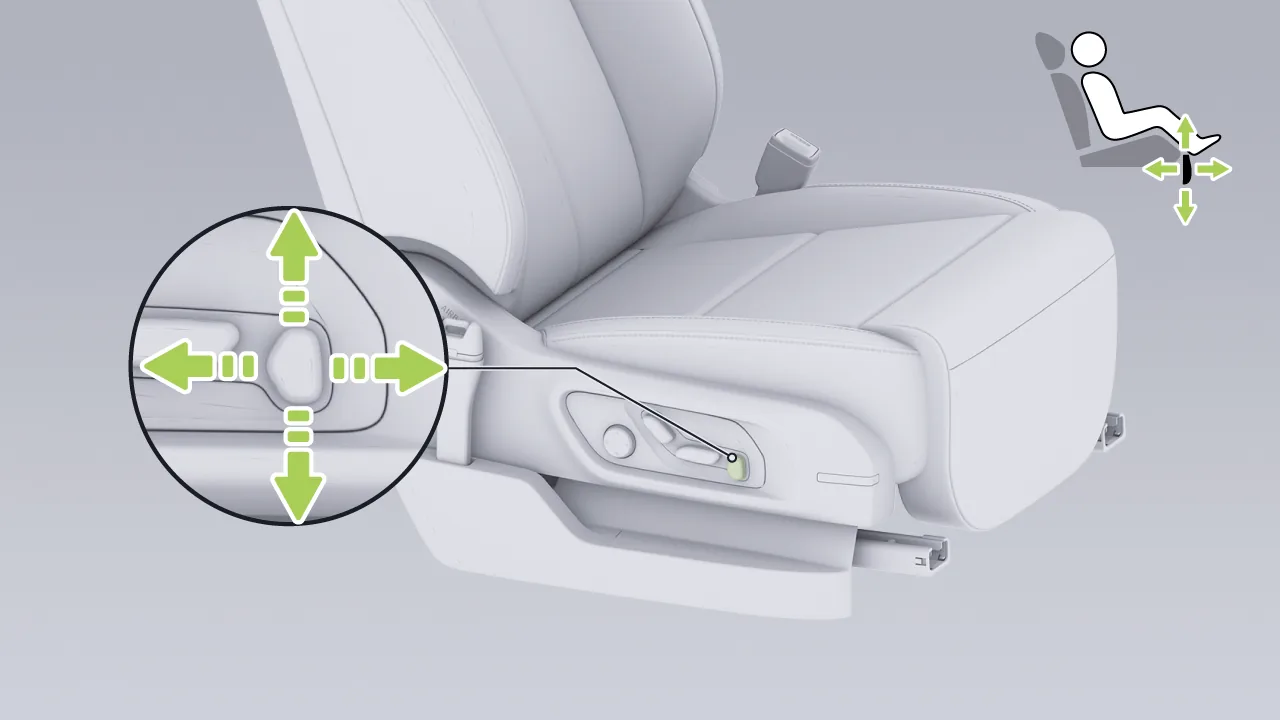
Push this adjustment switch up, down, left, or right to adjust the seat leg rest.
Tap the center control screen in sequence. “ →Seats→Seat Position→PS→ ”, enter the passenger - Position Adjustment interface, select 。
Angle: Tap  or
or  Adjust the seat leg rest angle step by step. Press and hold for continuous adjustment. You can also tap or drag the slider for quick adjustment.
Location: Tap or Adjust the seat leg rest position step by step; press and hold for continuous adjustment. You can also tap or drag the slider for quick adjustment.
You can adjust the passenger seat lumbar support in either of the following ways:
Seat switch adjustment.
Center display adjustment.
Voice command adjustment (for example, say: “Hello XPENG, adjust the passenger seat lumbar support forward” and other keywords).
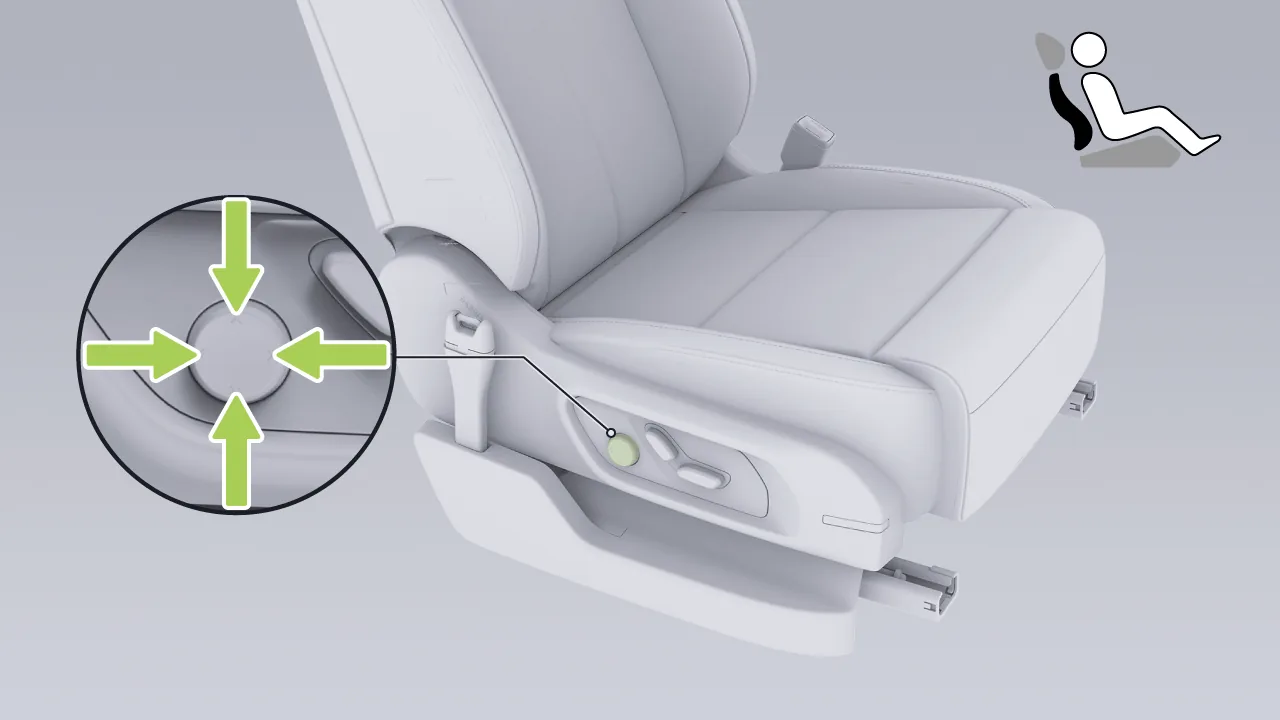
Press the upper/lower/front/rear part of the switch to adjust the lumbar support position.
Tap the center display in sequence. “ →Seats→Seat Position→PS→ ”, enter the passenger - Position Adjustment interface, select 。
Tap 、 、 、 Adjust the lumbar support position.
Rear passengers can adjust the passenger seat position through the rear control screen and the rear entertainment screen.
Tap in sequence on the rear control screen or rear entertainment screen. “  →Seat Position→PS”Enter the passenger seat adjustment screen.
Seat Fore-Aft Adjustment: Tap “  ”Corresponding to the switch “
  ”/ “
”/ “  ”, adjust the passenger seat forward and backward position.
Seat seatback adjustment: Tap “  ”Corresponding to the switch “ ”/ “ ”, adjust the angle of the passenger seatback.
Adjust upward: Lift the head restraint upward to a suitable position until it locks.
Adjusting downward: First press the headrest adjustment button, then adjust the headrest downward to a suitable position, and finally release the adjustment button to lock it in place.
Tips Do not use the headrest in the lowest position. Always raise it to a locked position before use.
Adjust the head restraint to the correct position so that it can better protect the back of your neck in the event of an emergency.
When adjusting the headrest, please meet the following requirements:
The center of the head restraint is level with the upper part of the ears.
Position the head restraint as close as possible to the back of the head.
You can remove the headrest by following these steps:
Raise the head restraint upward to the highest position.
Press the headrest release button and remove the headrest upward.
Tips If removal is necessary, adjust the seat backrest rearward to allow the head restraint to be removed smoothly.
Warning Do not ride in the vehicle with the headrest removed. The headrest should be installed on the seats and adjusted to a proper position.
When installing the seat headrest, align the headrest rods with the mounting holes of the seat, and press the headrest vertically downward. Adjust the headrest height to a suitable position.
Method 1:
Adjust the seat position to a suitable state.
After the adjustment is completed, a pop-up window appears on the central control screen. Tap The current seat position can then be saved; tap , the seat position automatically returns to the last saved position.
Tips The pop-up window will disappear automatically after a period of time.
Method 2:
Tap the center display in sequence. “ →Seat→Seat Position→PS→ ”, enter the passenger - Position Adjustment screen, select 。
Adjust the seat position to an appropriate state.
After the adjustment is completed, tap , and the current seat position will be saved; tap , the seat position automatically returns to the last saved position.
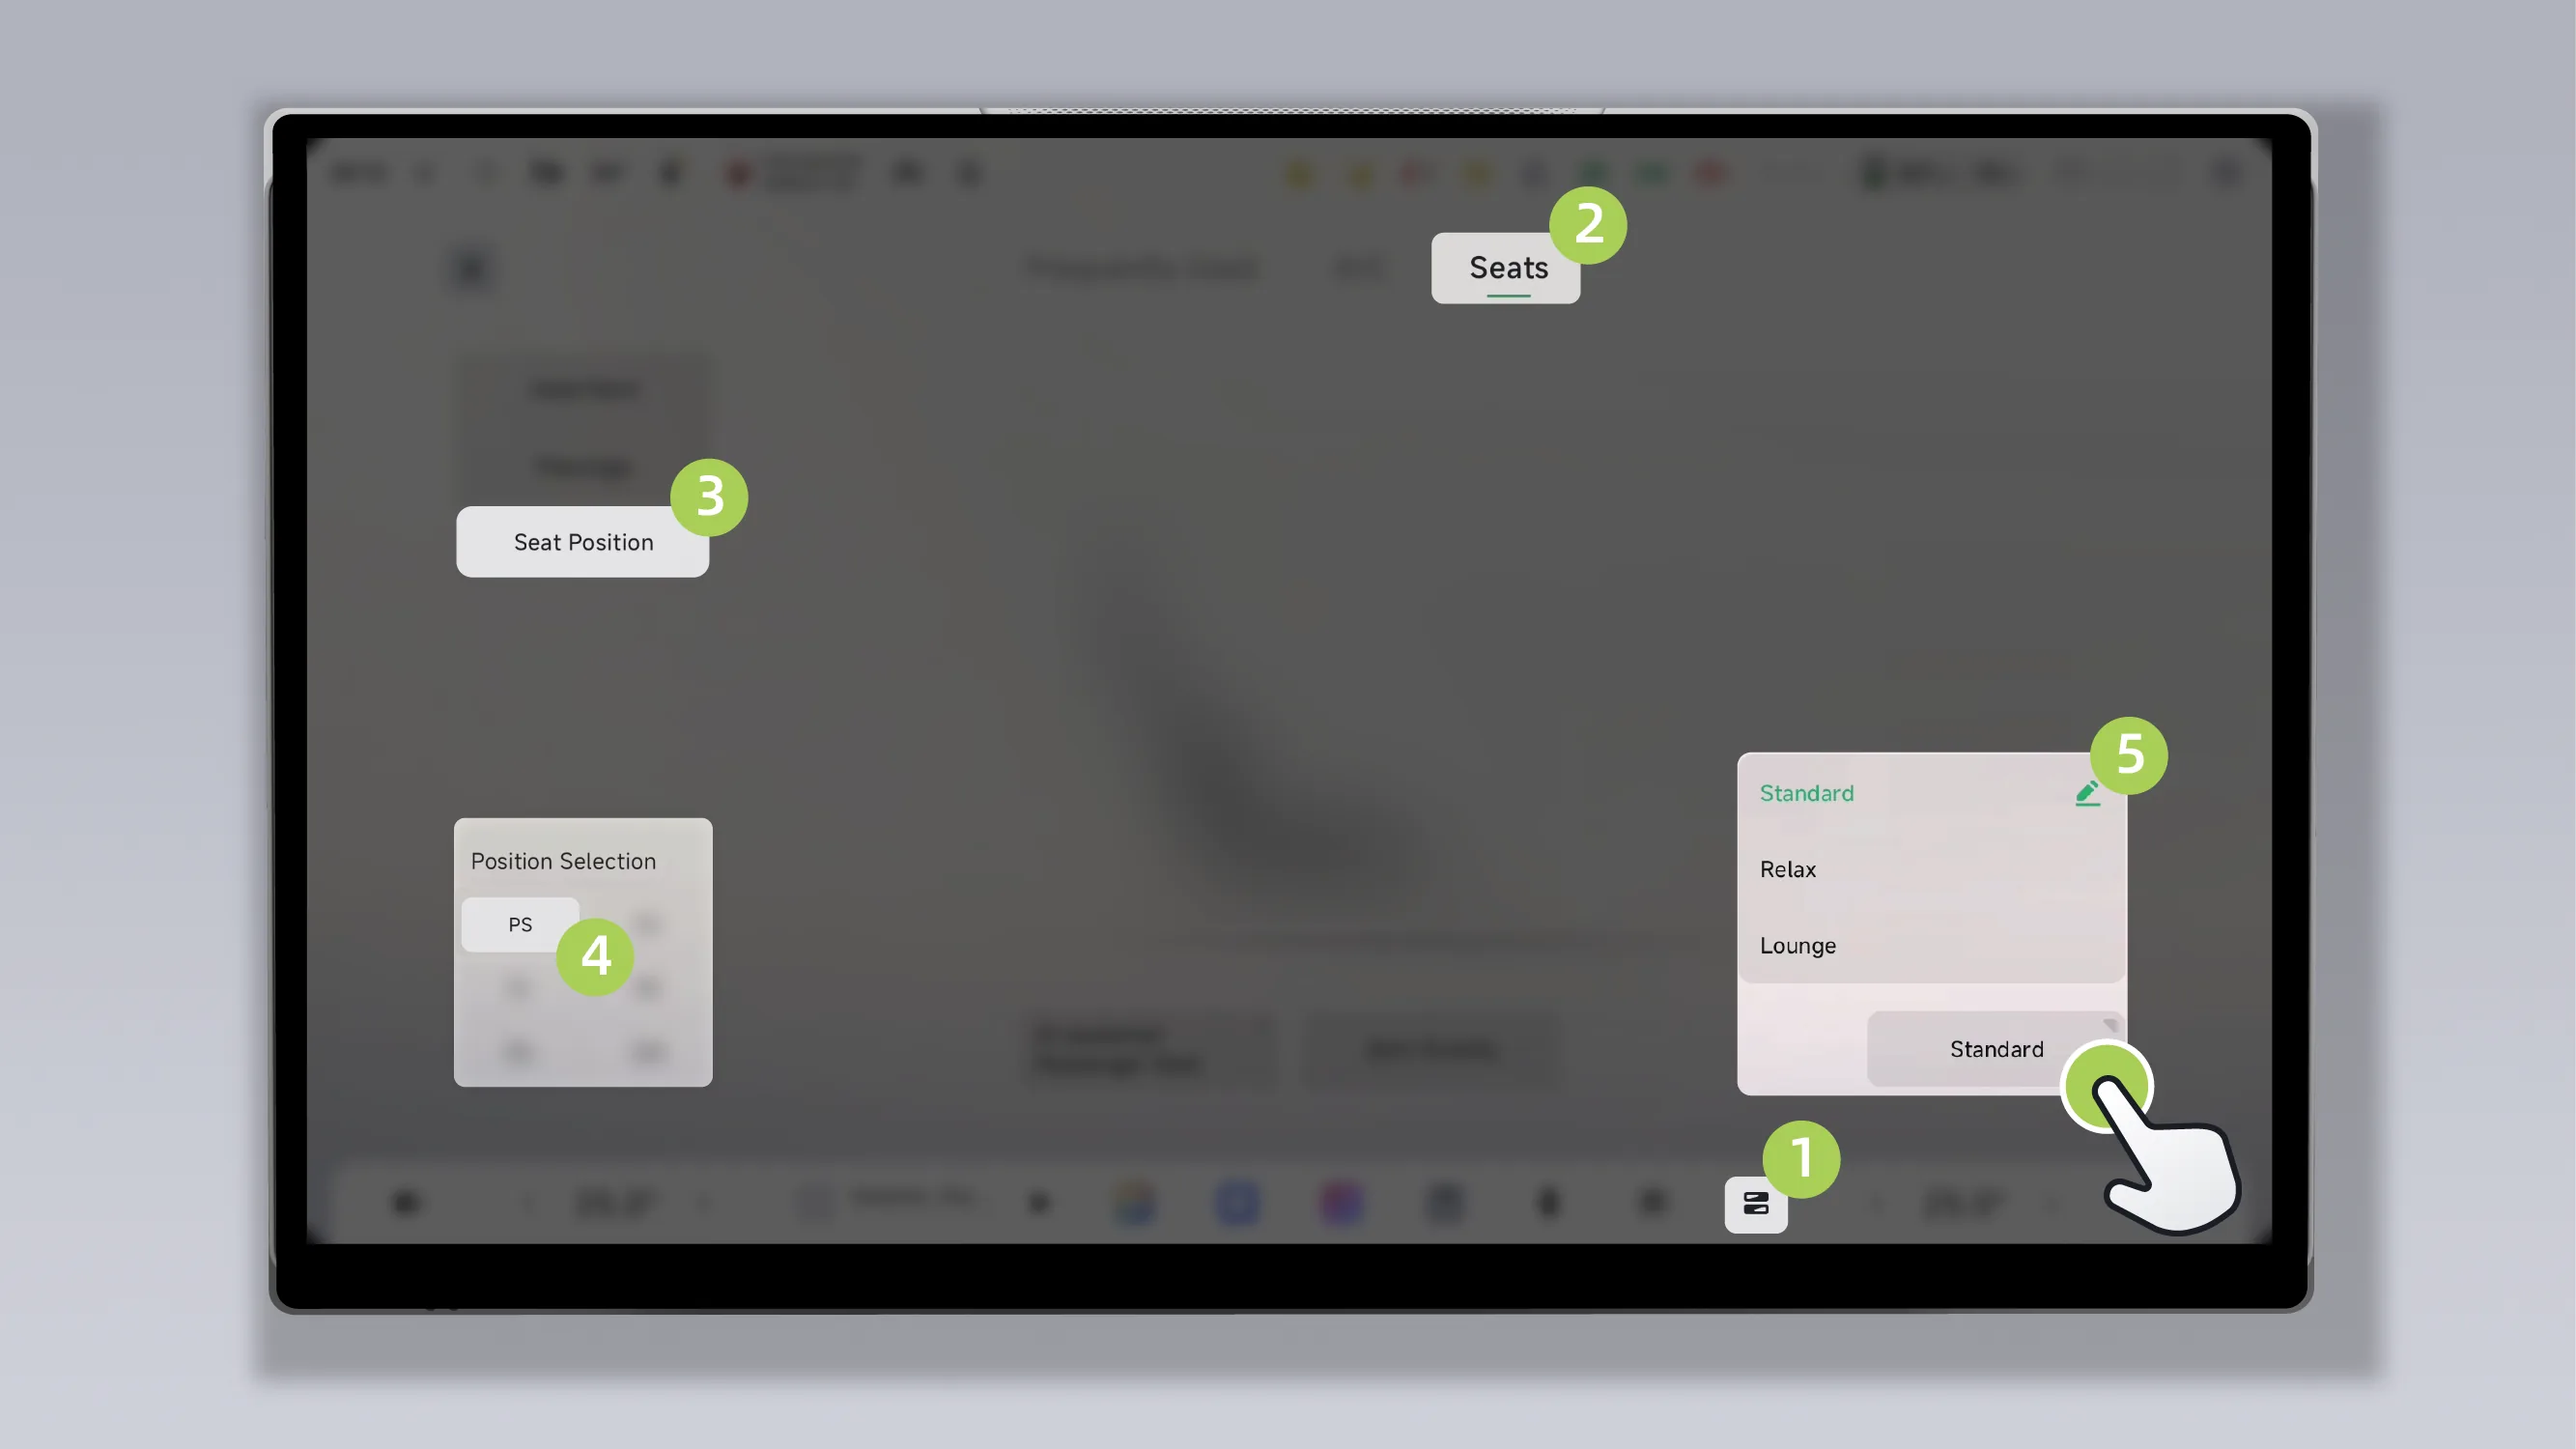
Tap the center display in sequence. “ →Seats→Seat Position→PS”Tap the seat memory button to enter the front passenger seat memory screen, where you can select a saved seat position.
On the passenger - Seat Memory screen, tap “ ”The memory name can be renamed.
You can adjust the passenger seat to a suitable position in any of the following ways:
Adjust with the seat switch.
Center display adjustment.
Voice command adjustment (for example, say: “Hello XPENG, adjust the passenger seat forward” and other keywords).
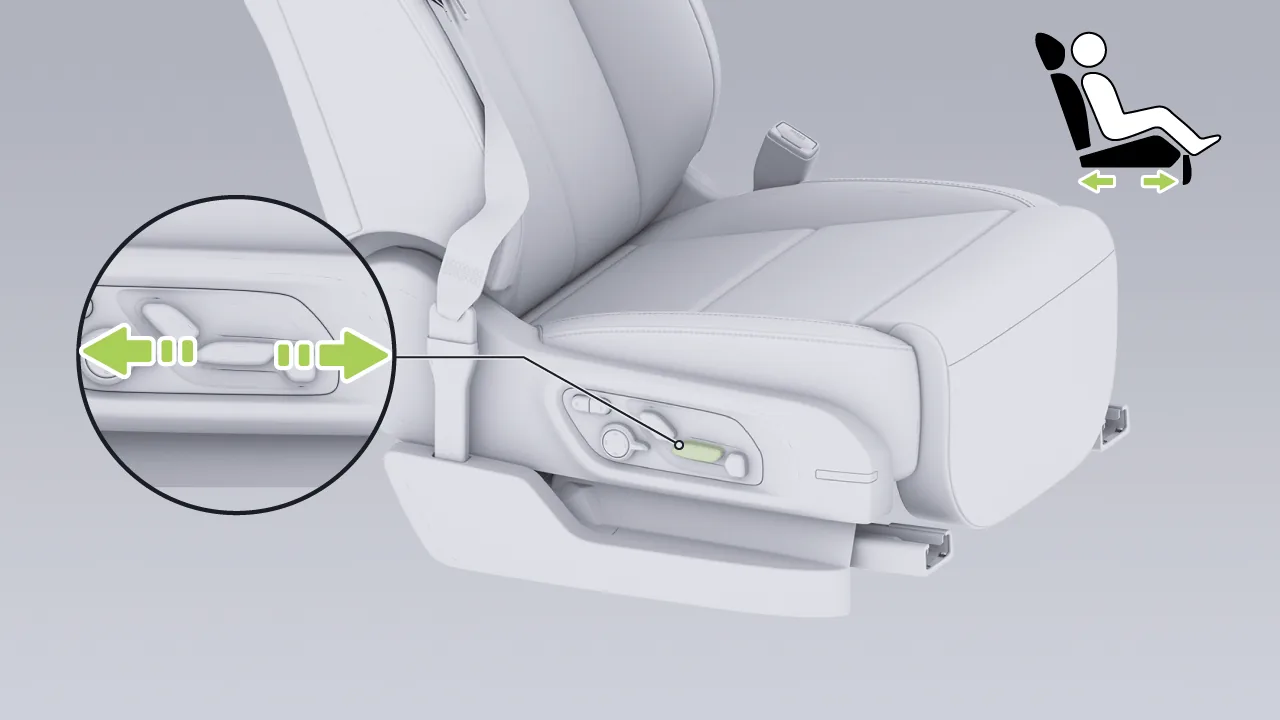
Push this adjustment switch forward or backward to adjust the passenger seat position forward or backward.
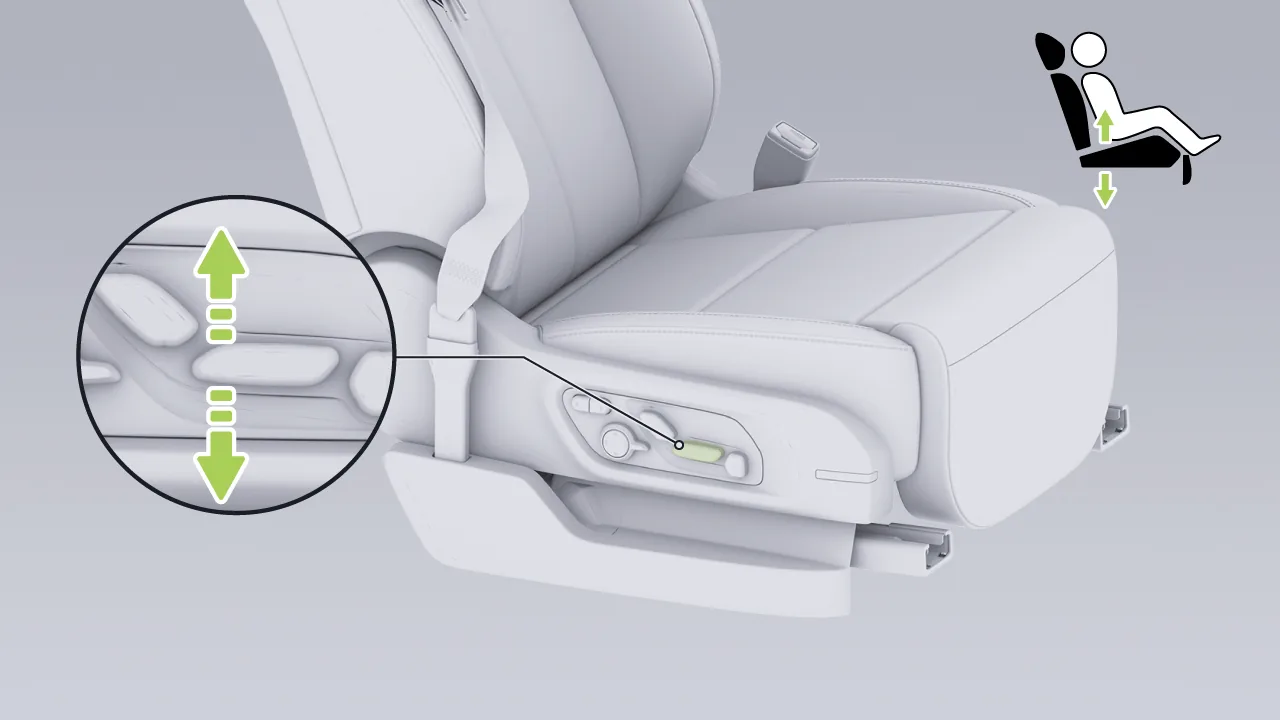
Push the rear of this adjustment switch upward or downward to adjust the height of the passenger seat.
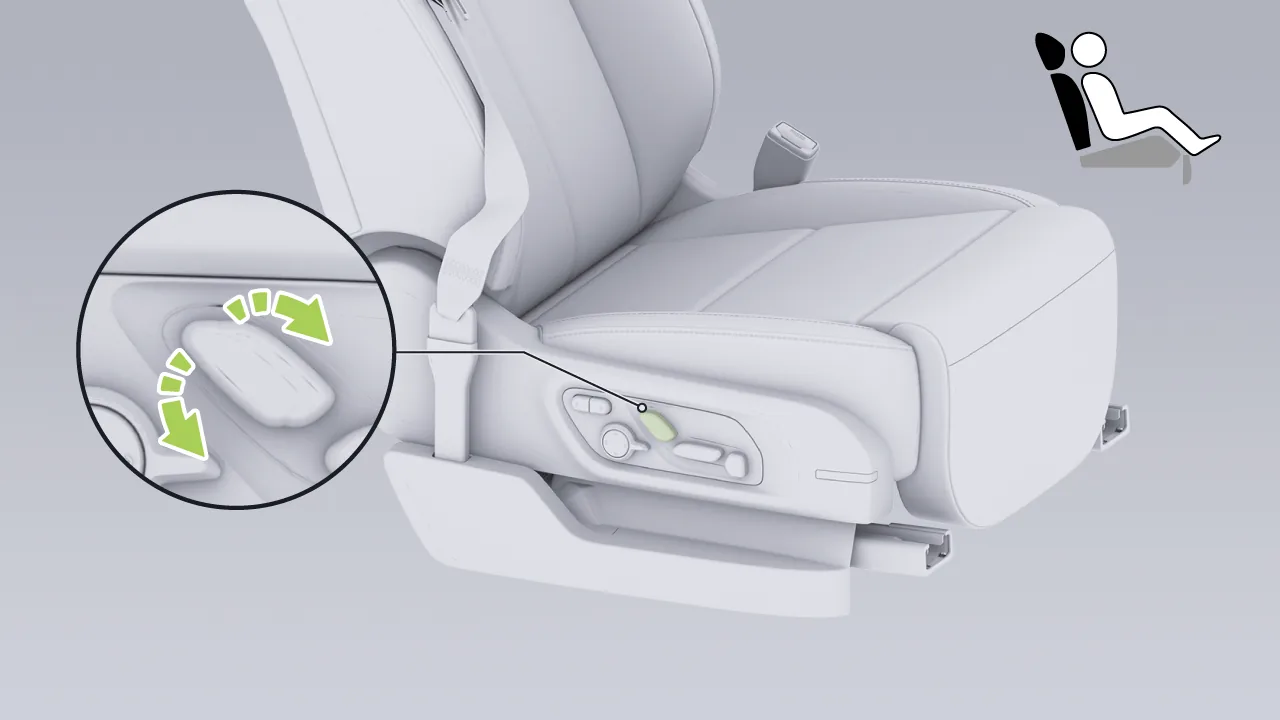
Push the top of this adjustment switch forward or backward to adjust the angle of the passenger seatback.
Tap the center display in sequence. “ →Seats→Seat Position→PS→ ”, enter the passenger - Position Adjustment interface, select 。
Height: Tap or , adjust the seat height step by step; press and hold for continuous adjustment. You can also tap or slide the slider for quick adjustment.
Location: Tap or Adjust the seat forward and backward position step by step; press and hold for continuous adjustment. You can also tap or use the slider for quick adjustment.
Angle: Tap or , adjust the seatback angle step by step; press and hold for continuous adjustment. You can also tap or use the slider for quick adjustment.
Warning Before making seat adjustments, confirm the surrounding seating environment. Avoid crushing, collision, etc. with rear row personnel (especially children) or pets.
Make sure hands, bodies or objects are not on the seat path during seat adjustment to avoid the risk of pinching.
Avoid allowing children to adjust the seat and risk being pinched.
Do not place overthick floor mats or other foreign objects (such as beverage bottles, charcoal bags, etc.) on the bottom of the seat, as they may become trapped between the seat and the guide rails, preventing seat adjustment. Locking, thus damaging the seat. It is recommended to use officially approved carpet mats from Xpeng Motors.
Do not adjust the seat with the seat belt fastened, to avoid the seat belt being taken out of normal use, injury to occupants and loss of protection.
You can adjust the passenger seat leg rest and seat cushion firmness in any of the following ways:
Adjust with the seat switch.
Center display adjustment.
Voice command adjustment (for example, say: “Hello XPENG, adjust the passenger seat leg rest forward” and other keywords).
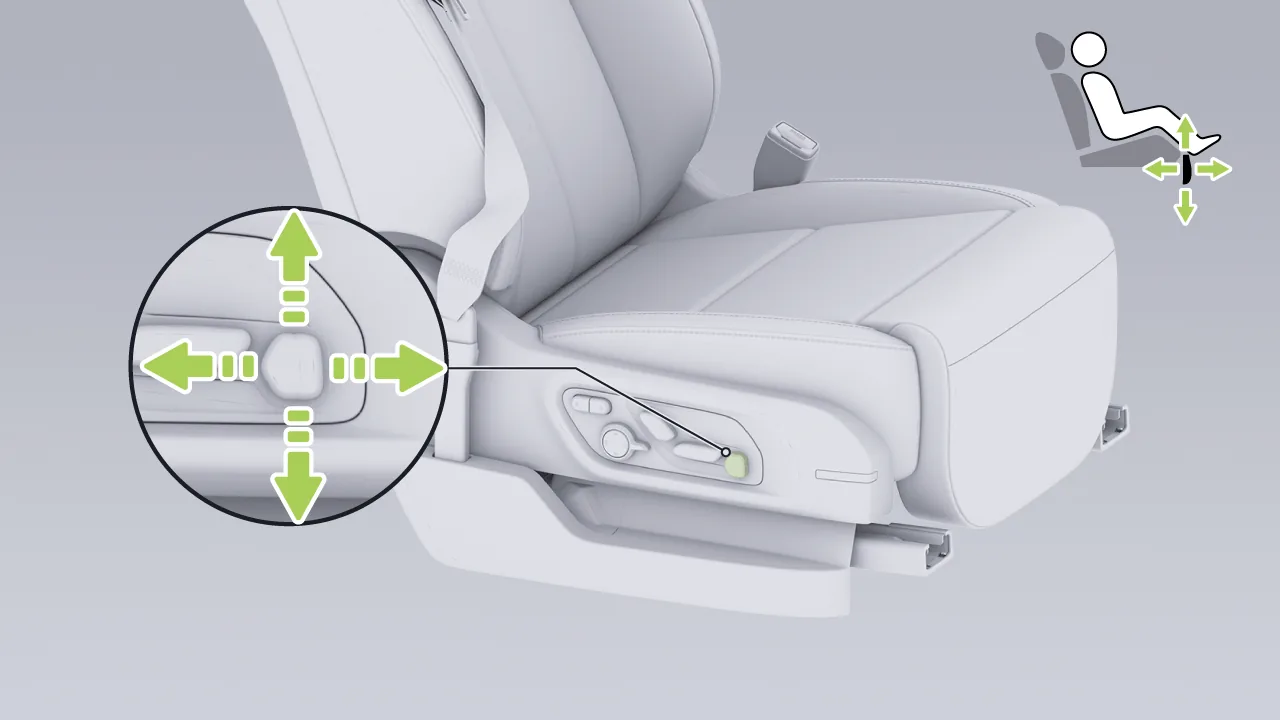
Push this adjustment switch forward or backward to adjust the seat leg rest position.
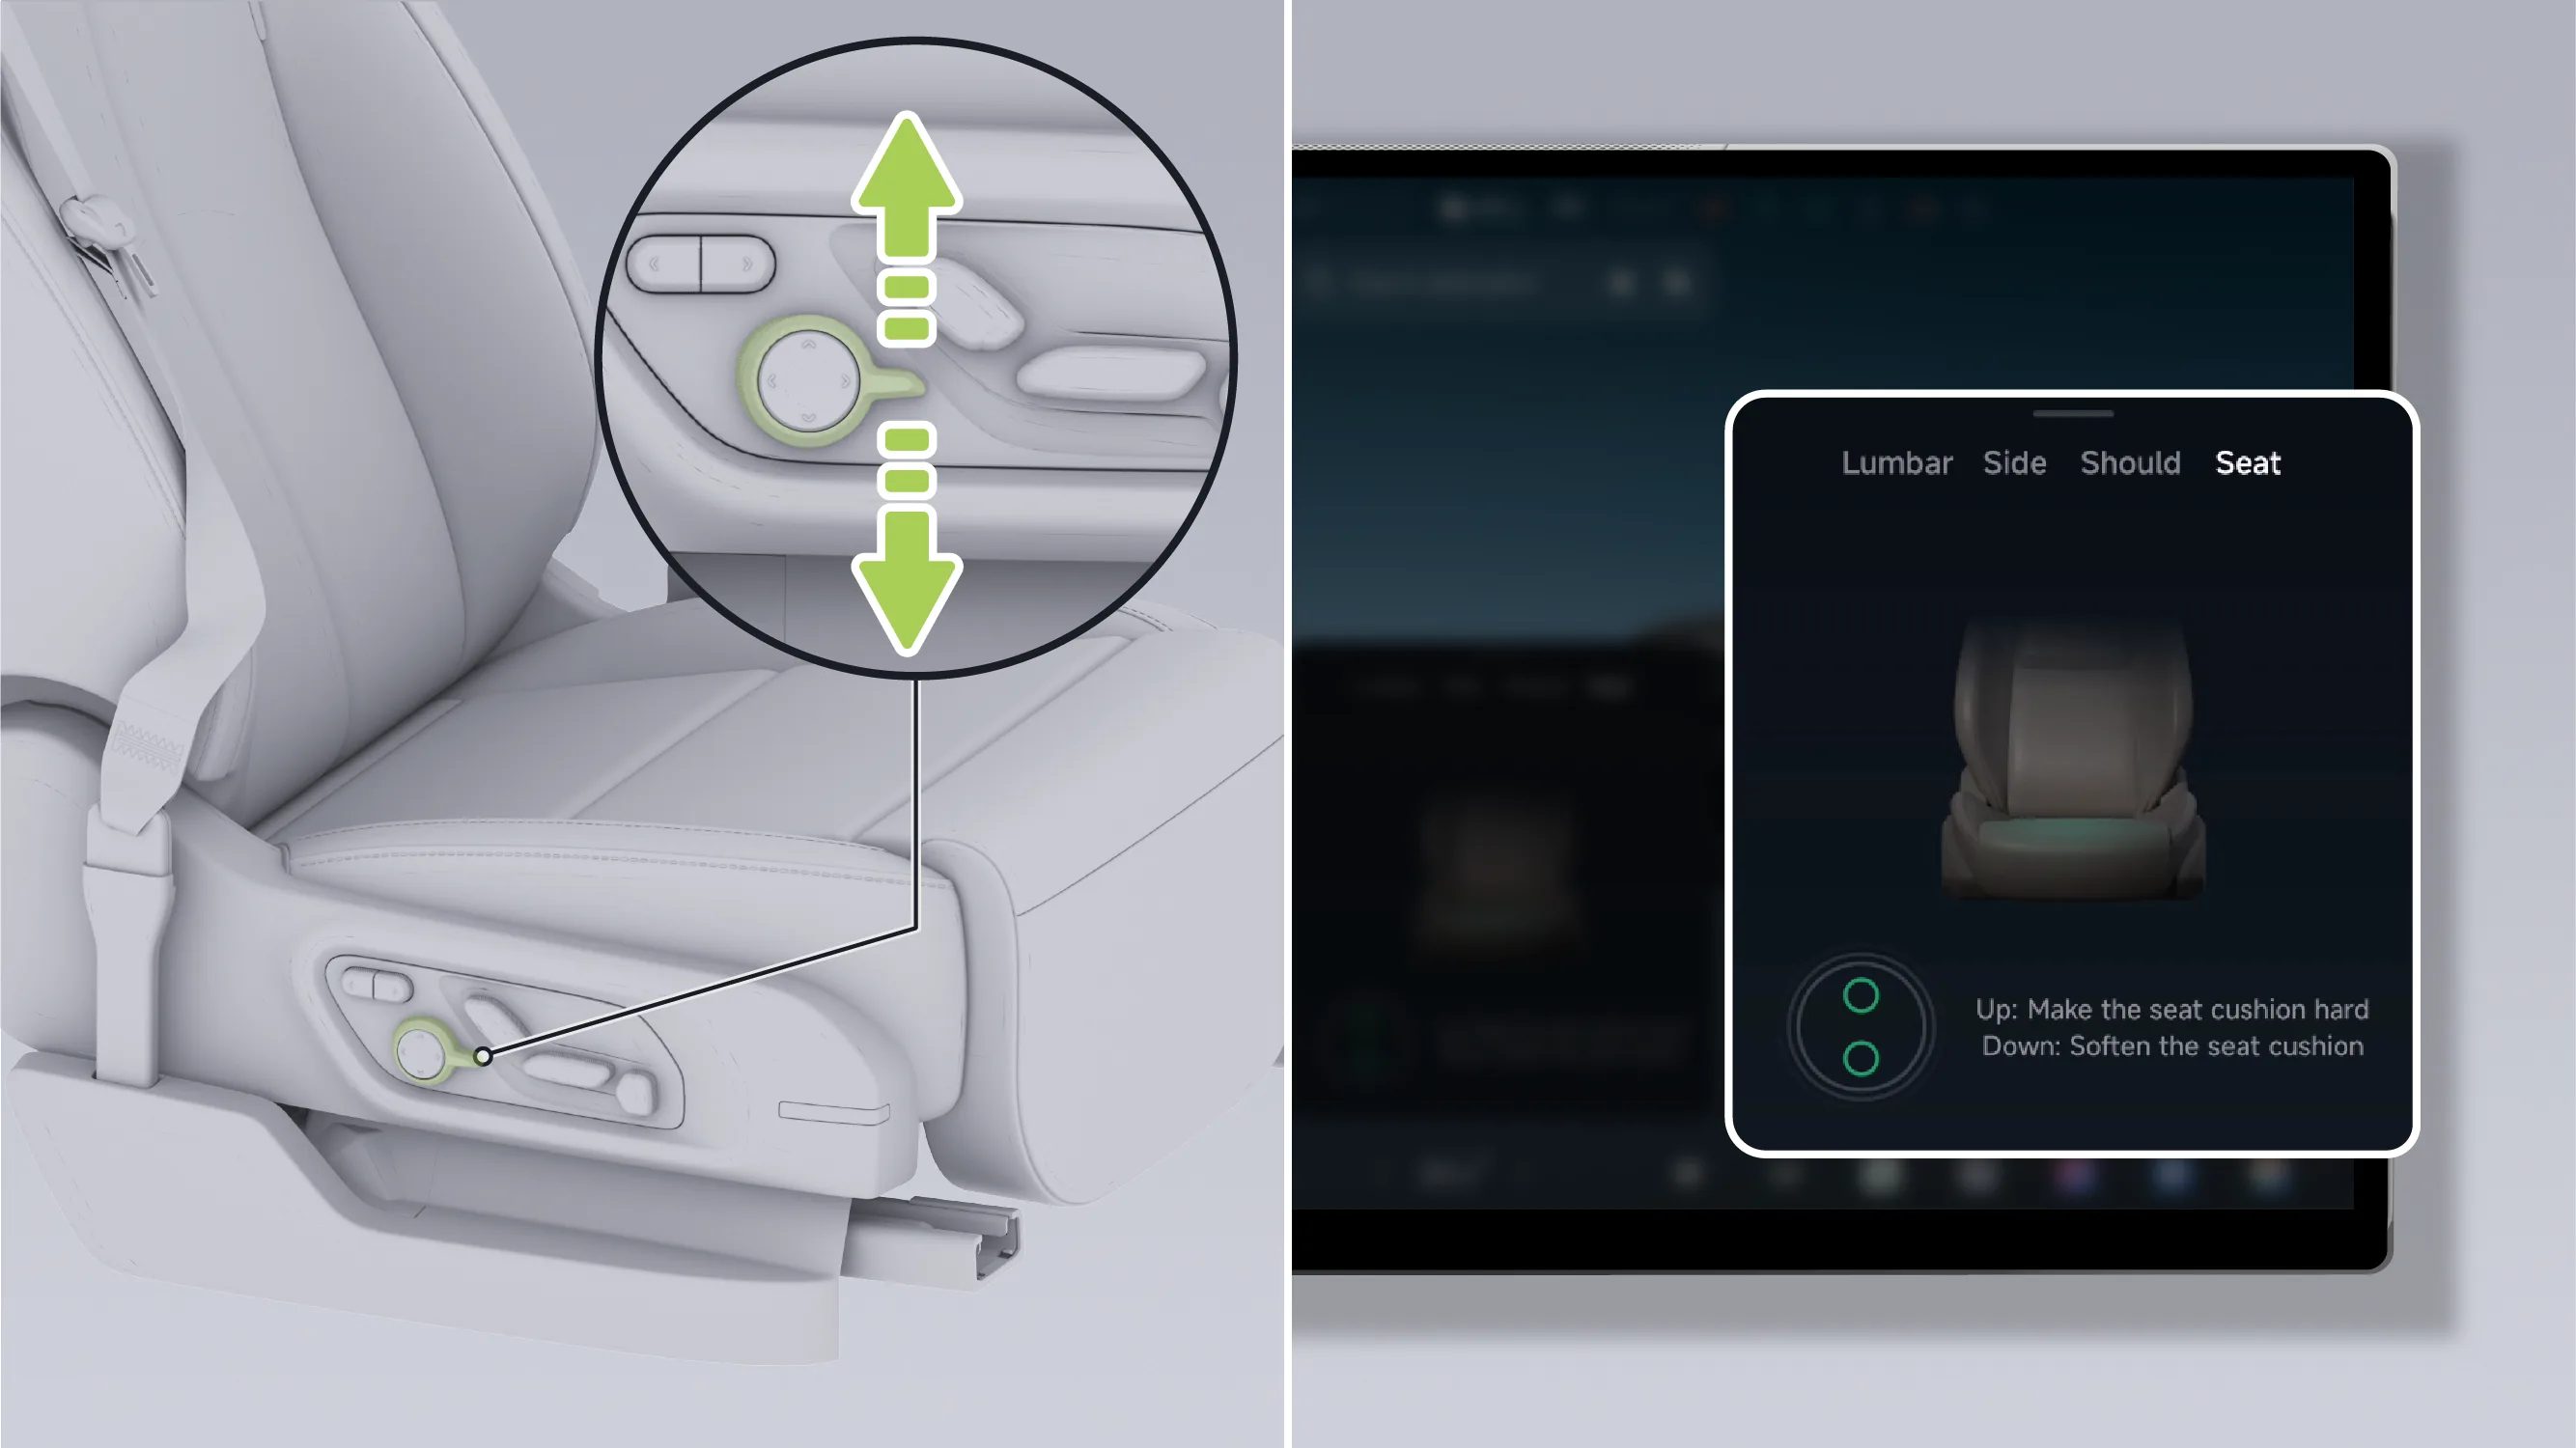
Toggle the seat function switch up or down to switch to the seat cushion firmness control gear.
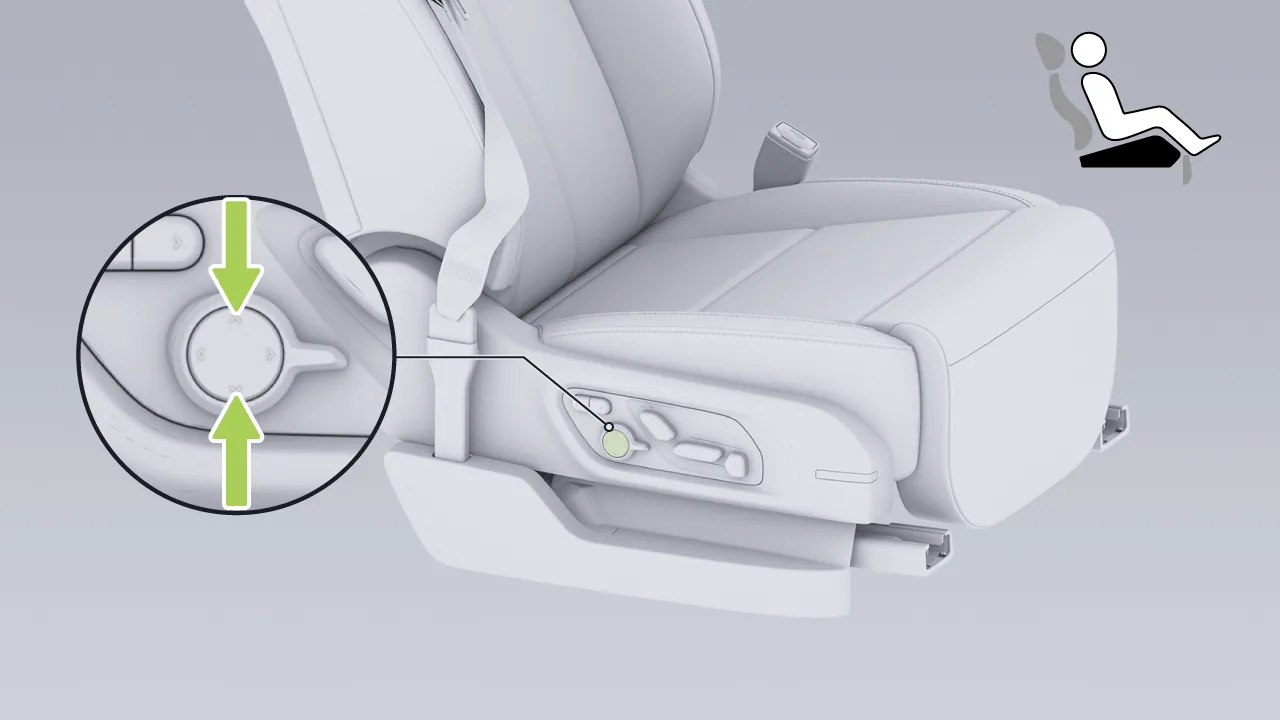
Press the upper or lower part of the switch to adjust the seat cushion firmness.
Tap the central control screen in sequence. “ →Seats→Seat Position→PS→ ”, enter the passenger-position adjustment interface, select 。
Adjust seat leg rest angle: Tap or Adjust the seat leg rest angle step by step. Press and hold for continuous adjustment. You can also tap or slide the slider for quick adjustment.
Adjust the seat leg rest position: tap or , adjust the leg rest position step by step. Press and hold for continuous adjustment. You can also tap or slide the slider for quick adjustment.
Adjust seat cushion firmness: Tap or Adjust the seat cushion firmness step by step; press and hold for continuous adjustment.
You can adjust the passenger seat lumbar support and shoulder support in either of the following ways:
Seat switch adjustment.
Center display adjustment.
Voice command adjustment (for example, say: “Hello XPENG, adjust the passenger seat lumbar support forward” and other keywords).
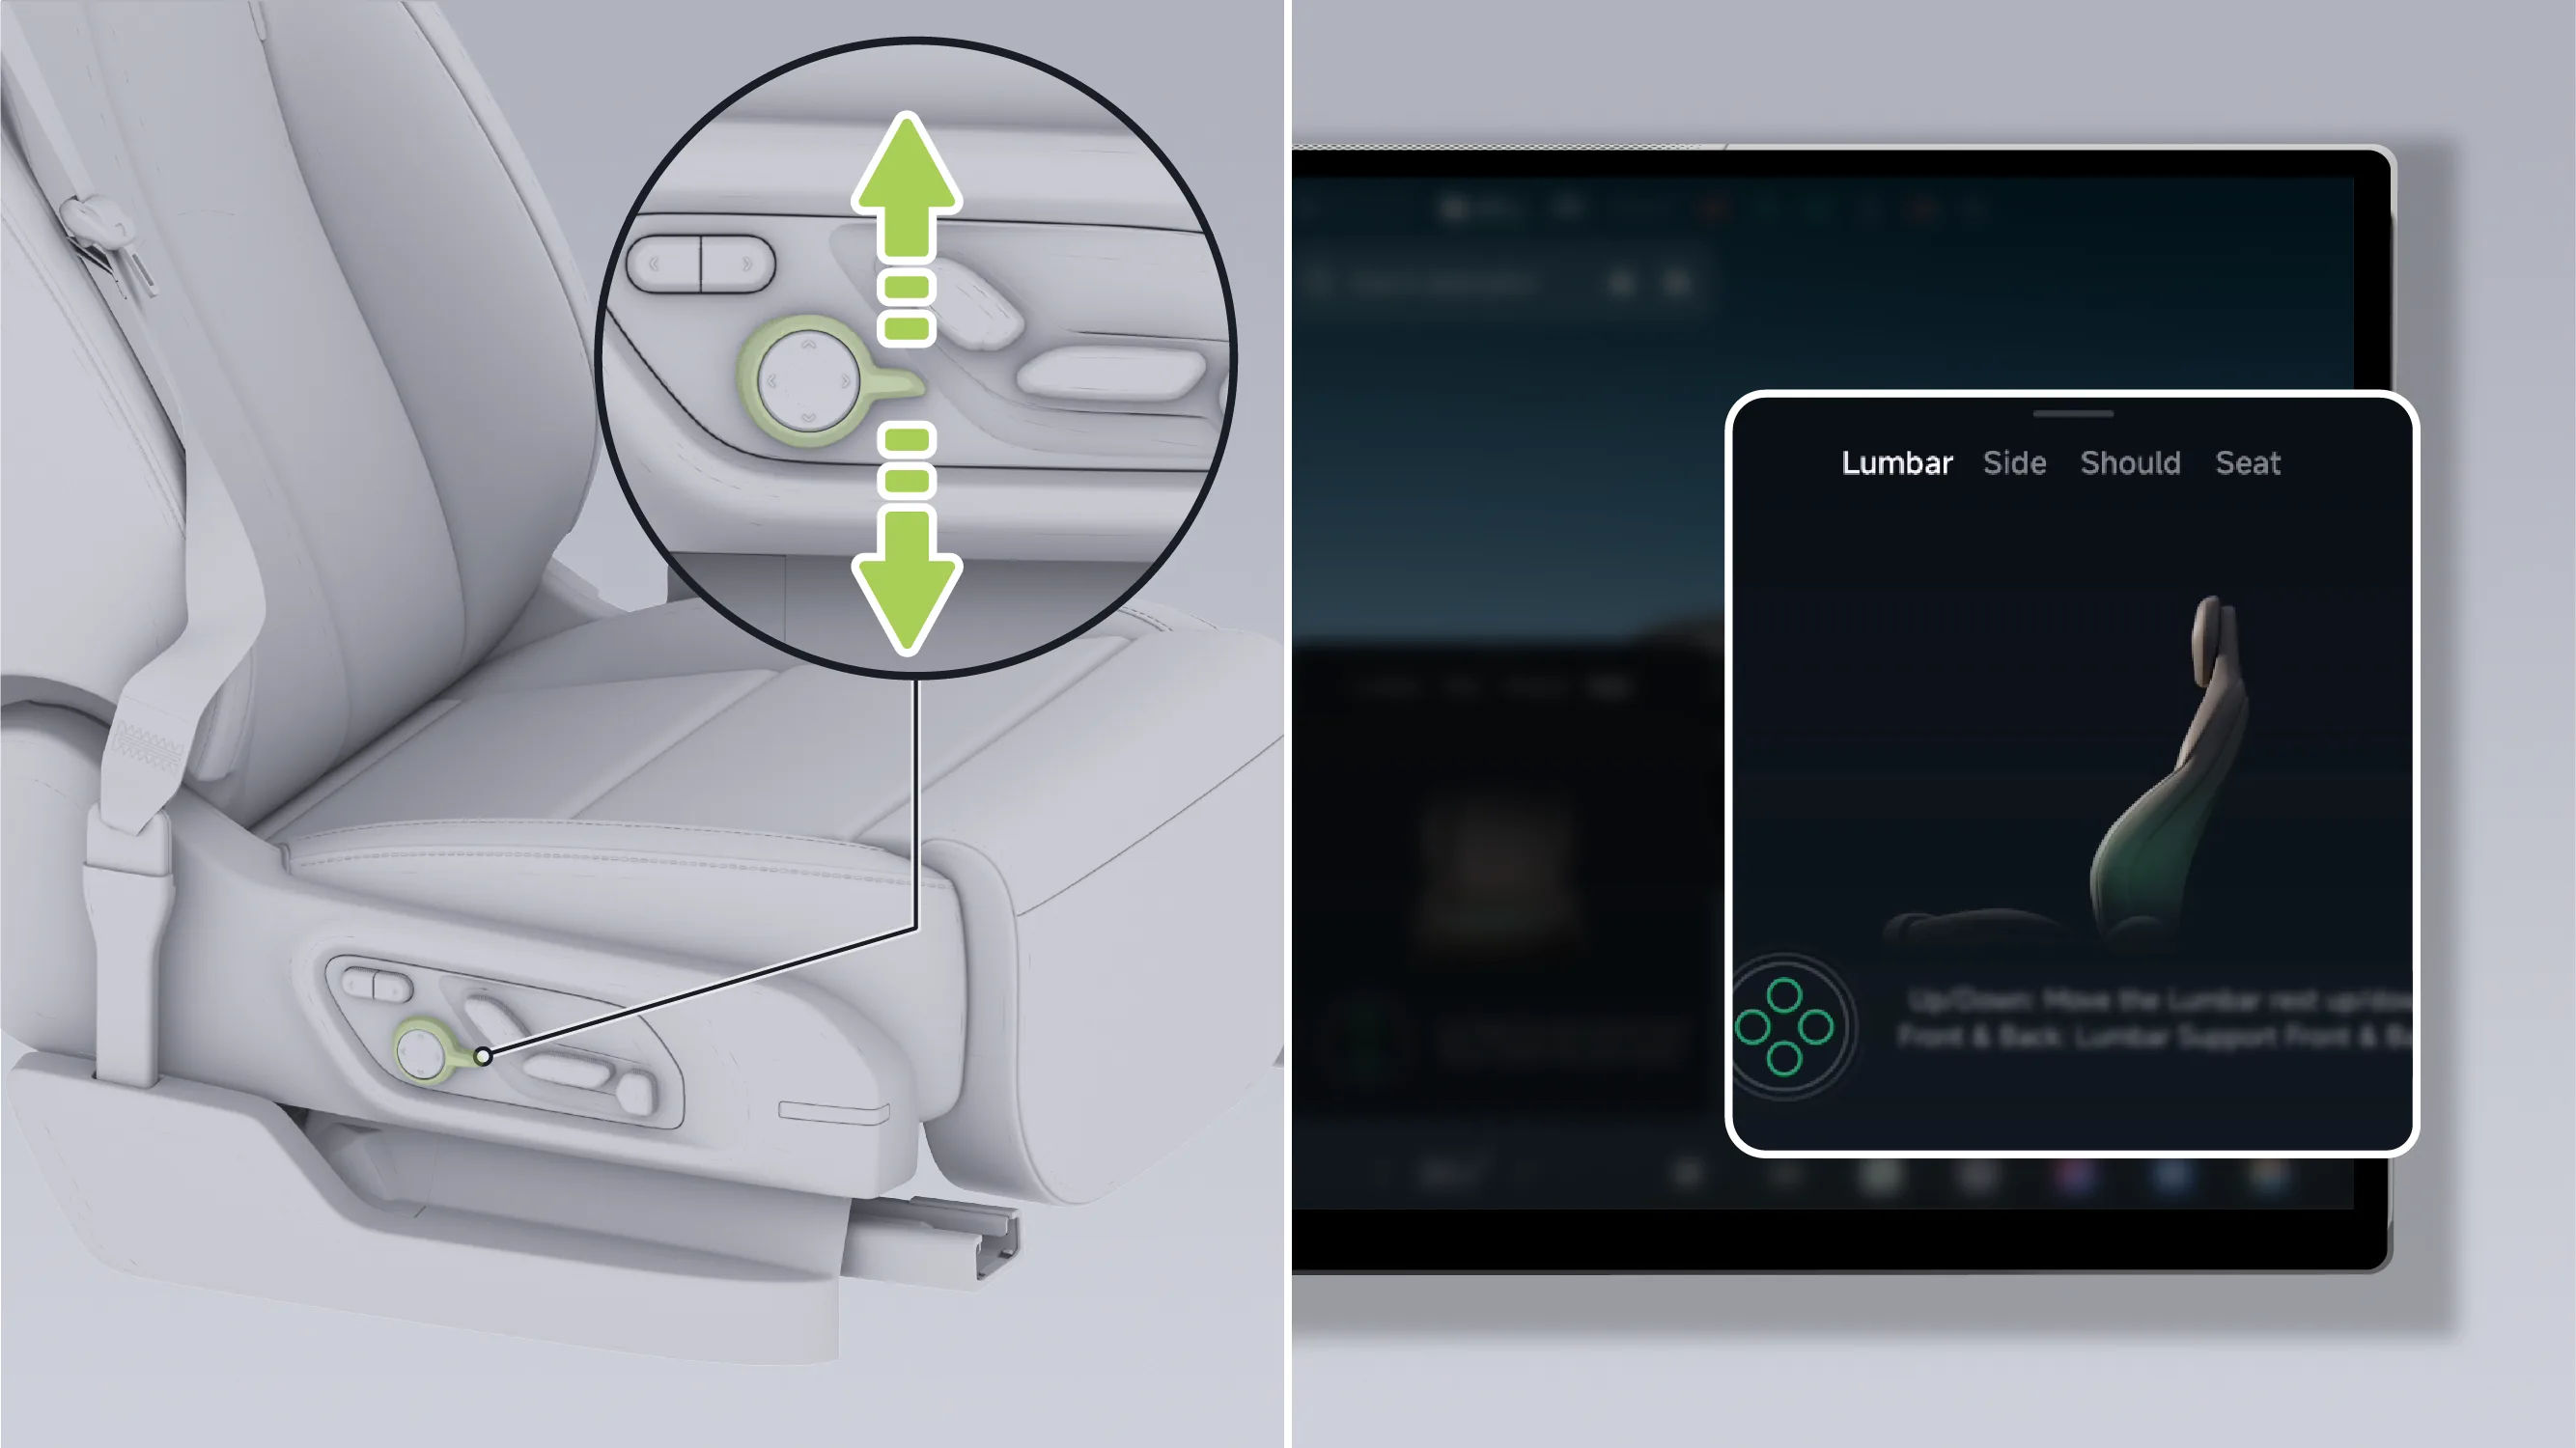
Push the seat function switch up or down to switch to lumbar support control gear.
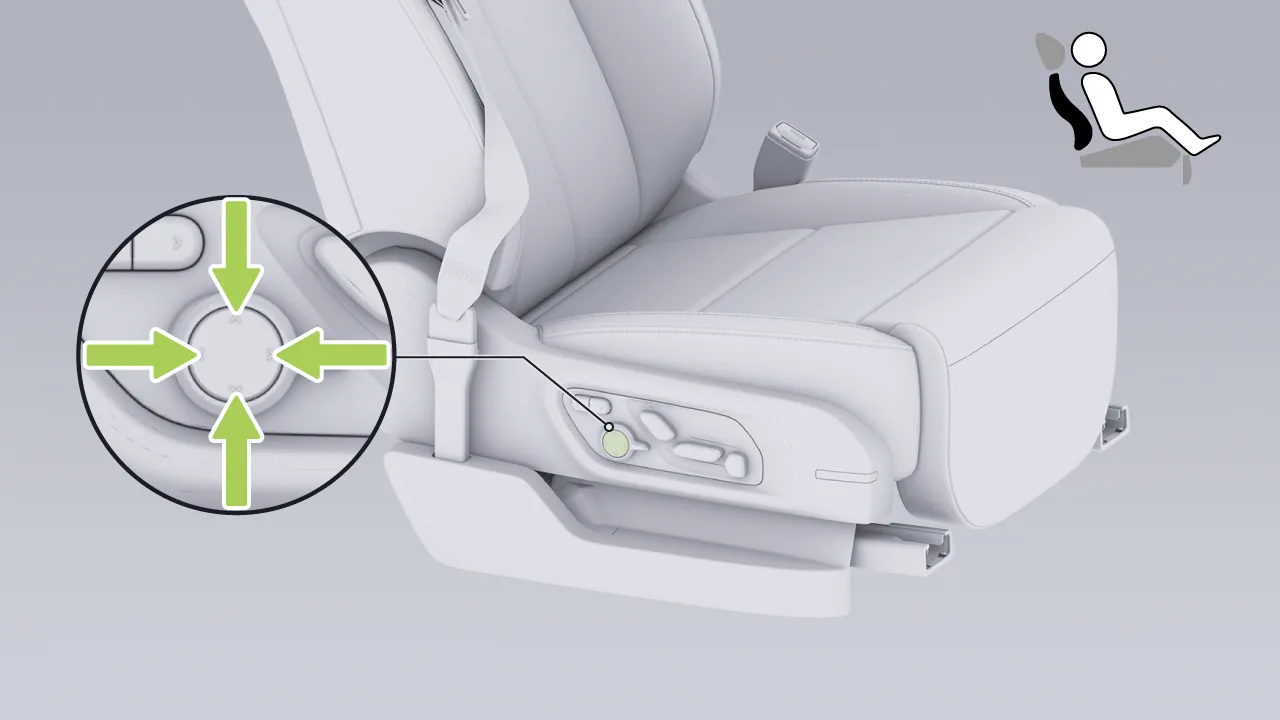
Press the upper/lower/front/rear part of the switch to adjust the lumbar support position.
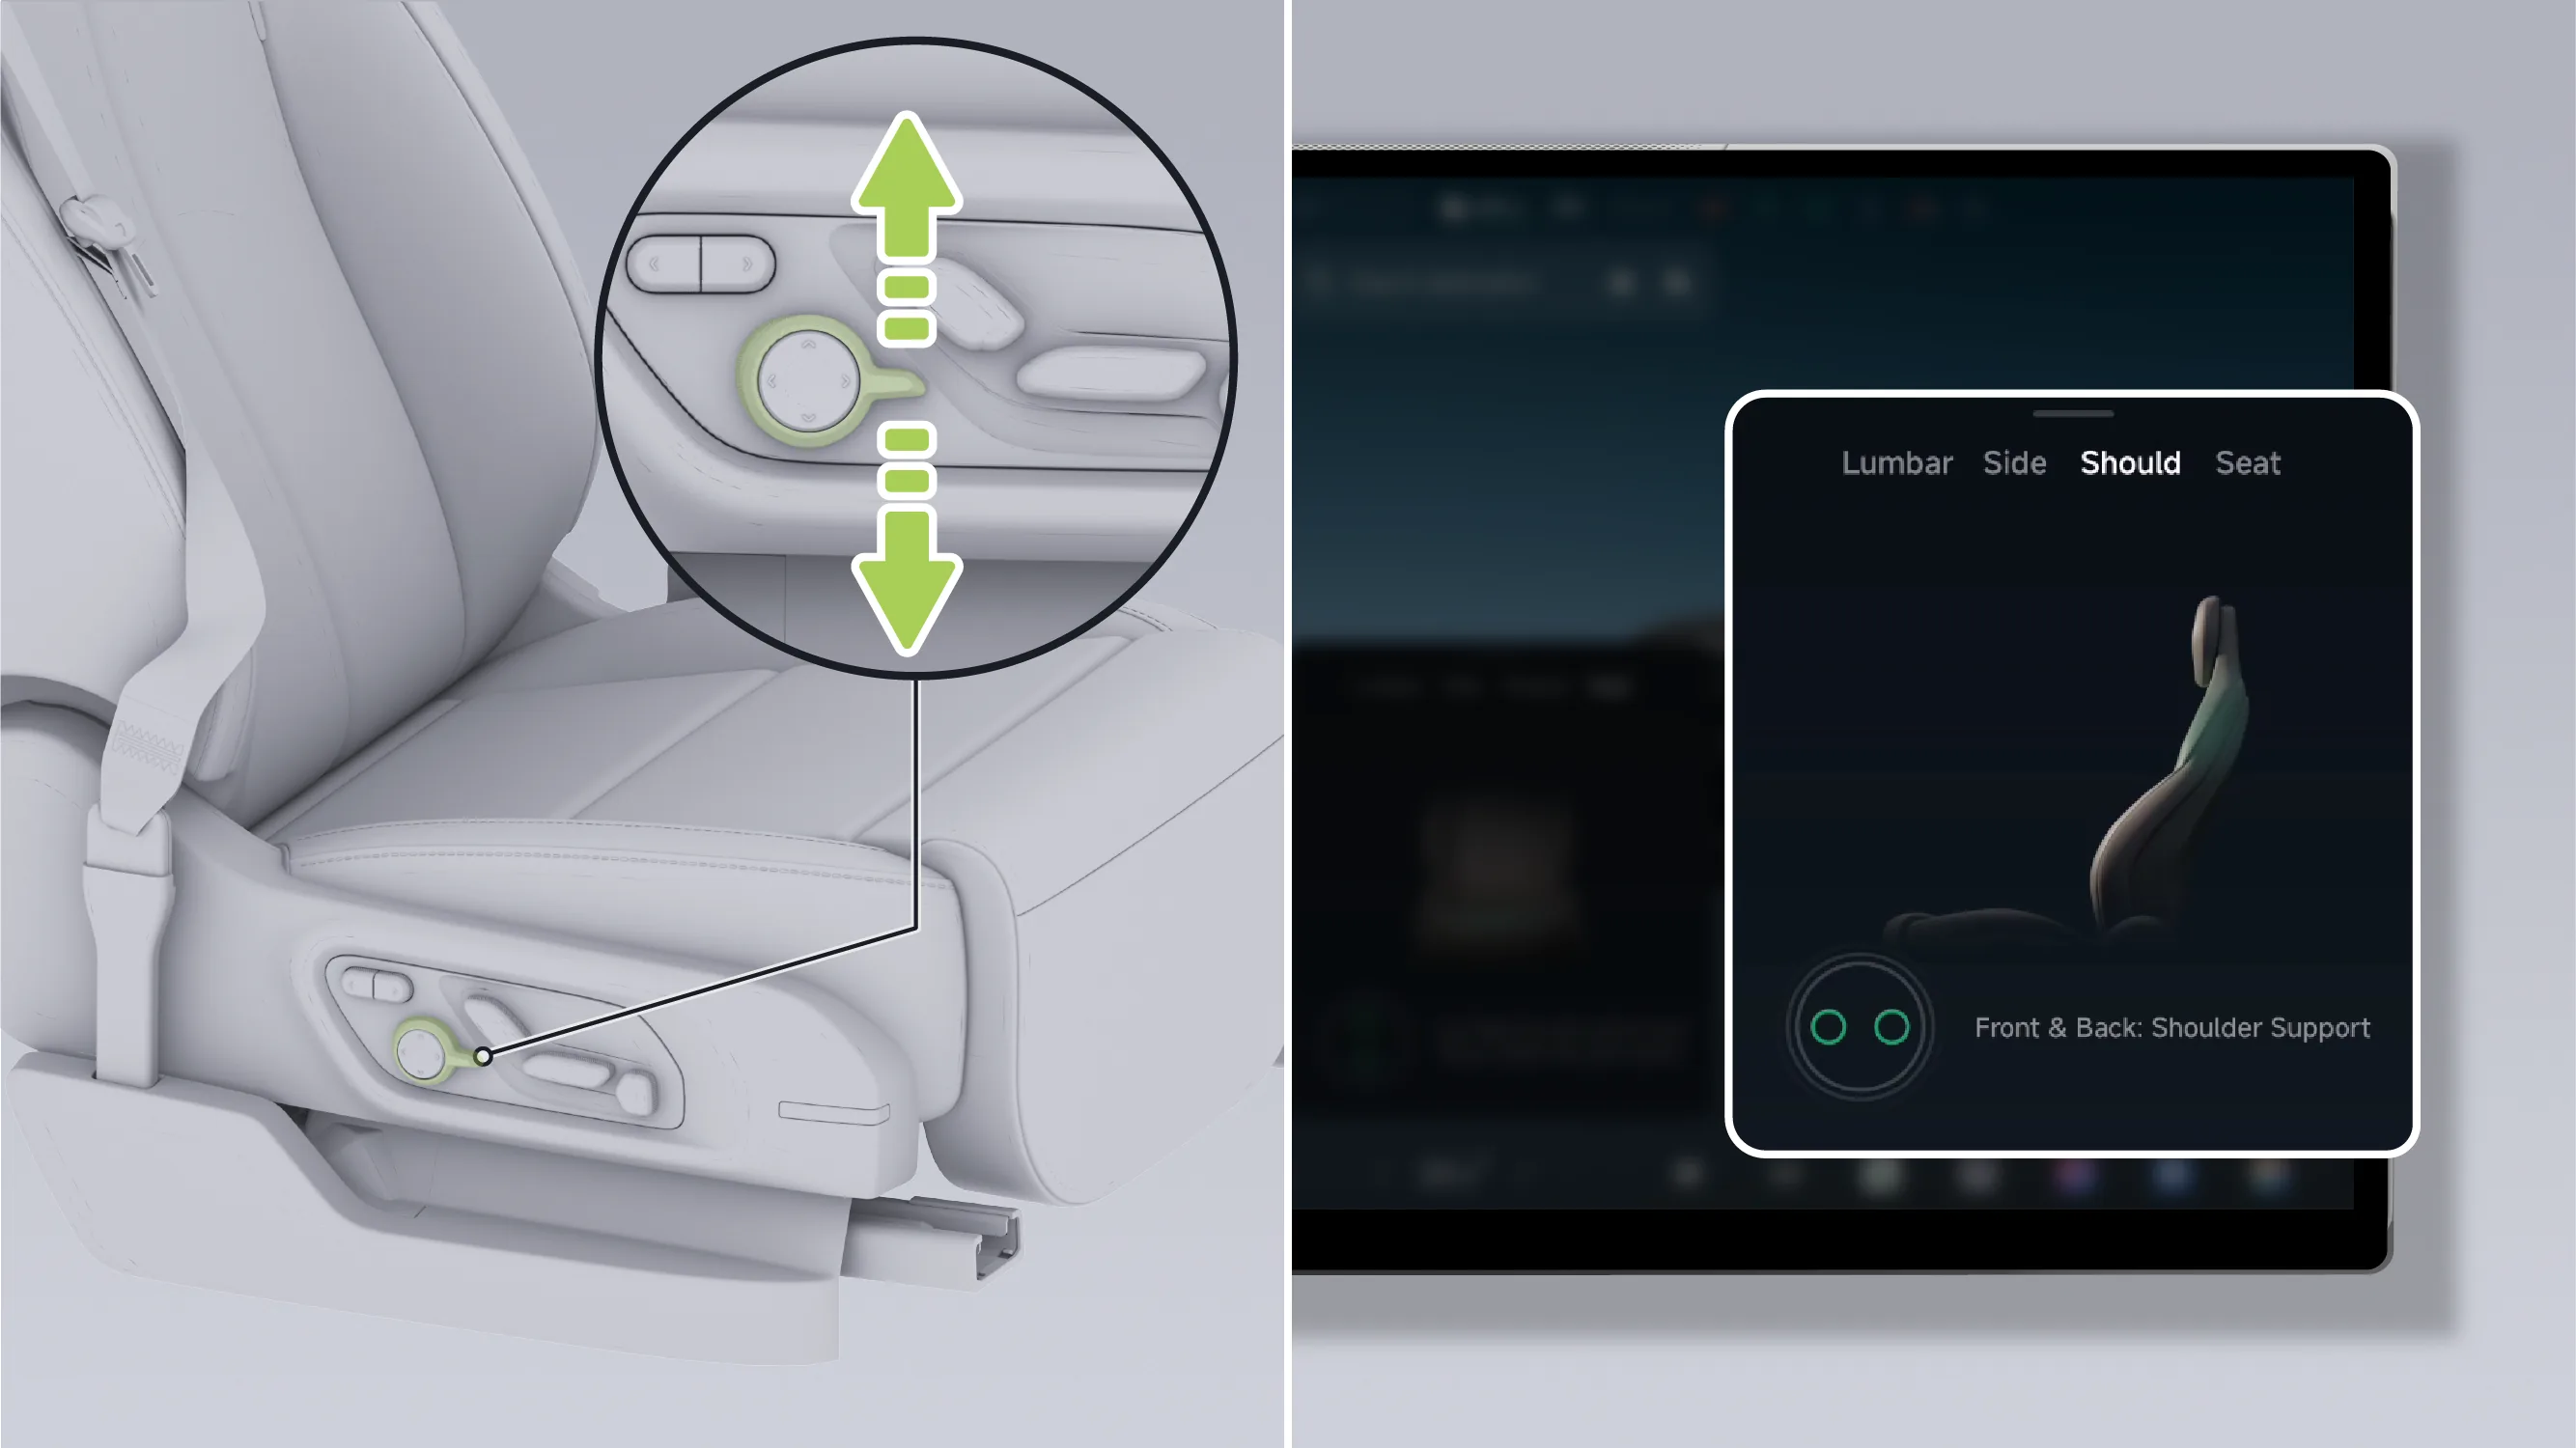
Toggle the seat function switch upward or downward to switch to the shoulder support control position.
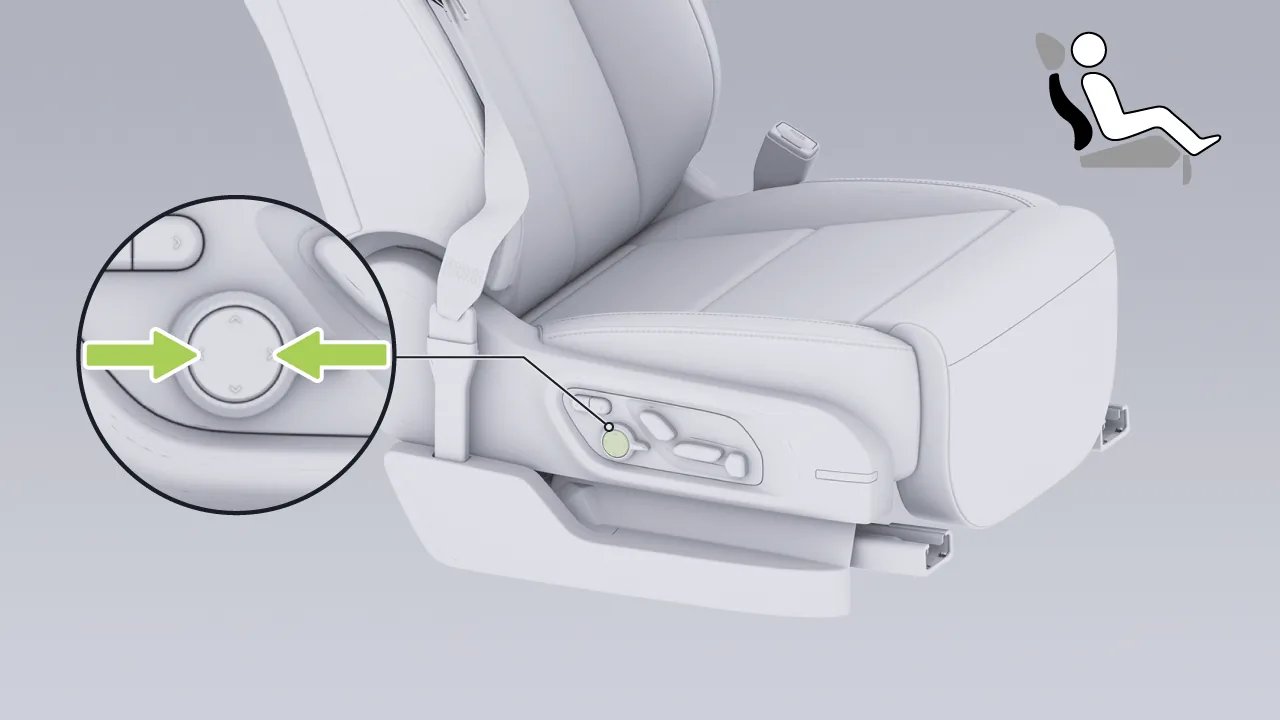
Press the front or rear of the switch to adjust the shoulder support position.
Tap the center control screen in sequence. “ →Seats→Seat Position→Ps→ ”, enter the passenger - Position Adjustment interface, select 。
Adjust seat lumbar support: Tap 、 、 、 , adjust the lumbar support position.
Adjust seat shoulder support: Tap or , adjust the shoulder support position.
You can adjust the recline angle of the passenger zero-gravity seat to a suitable position in any of the following ways:
Adjust with the seat switch.
Center display adjustment.
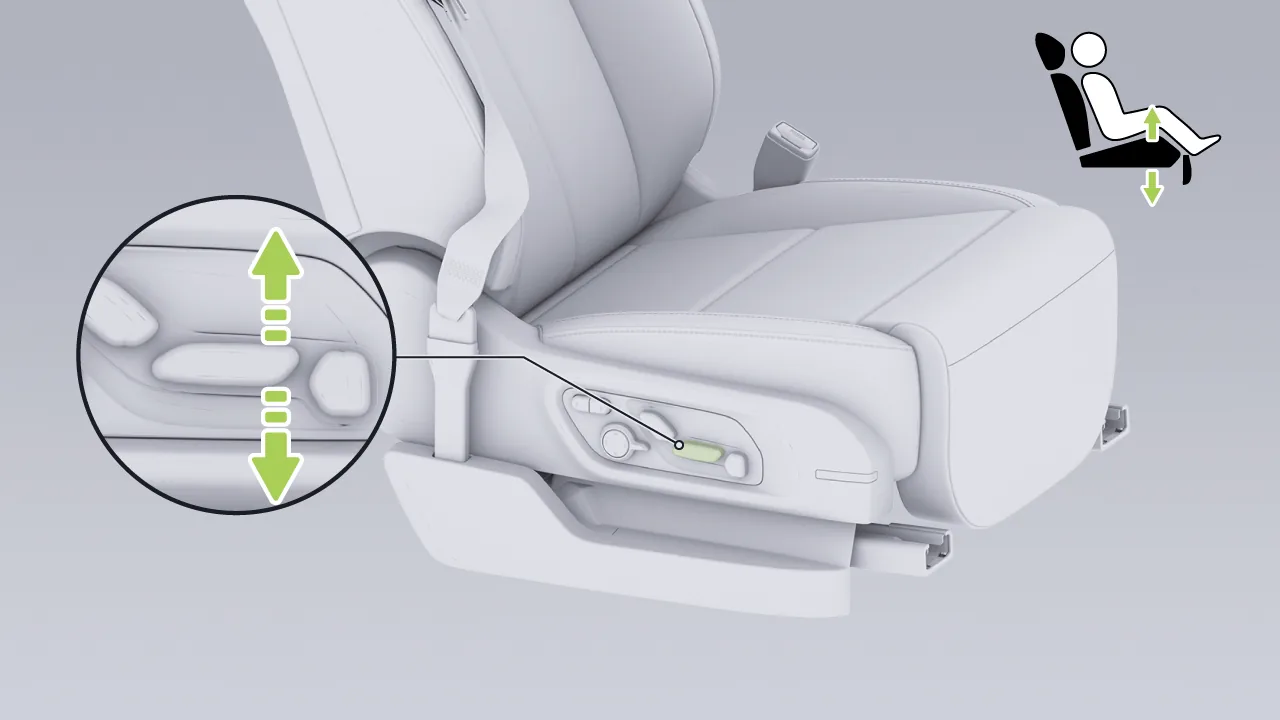
Push the front of this adjustment switch upward or downward to adjust the tilt angle of the zero-gravity seat.
Tap the center display in sequence. “ →Seats→Seat Position→PS→ ”, enter the passenger - Position Adjustment interface, select 。
Tap or , adjust the zero-gravity seat tilt angle step by step; press and hold for continuous adjustment. You can also tap or drag the slider for quick adjustment.
You can adjust the passenger seat side bolster support in either of the following ways:
Seat switch adjustment.
Center display adjustment.
Voice command adjustment.
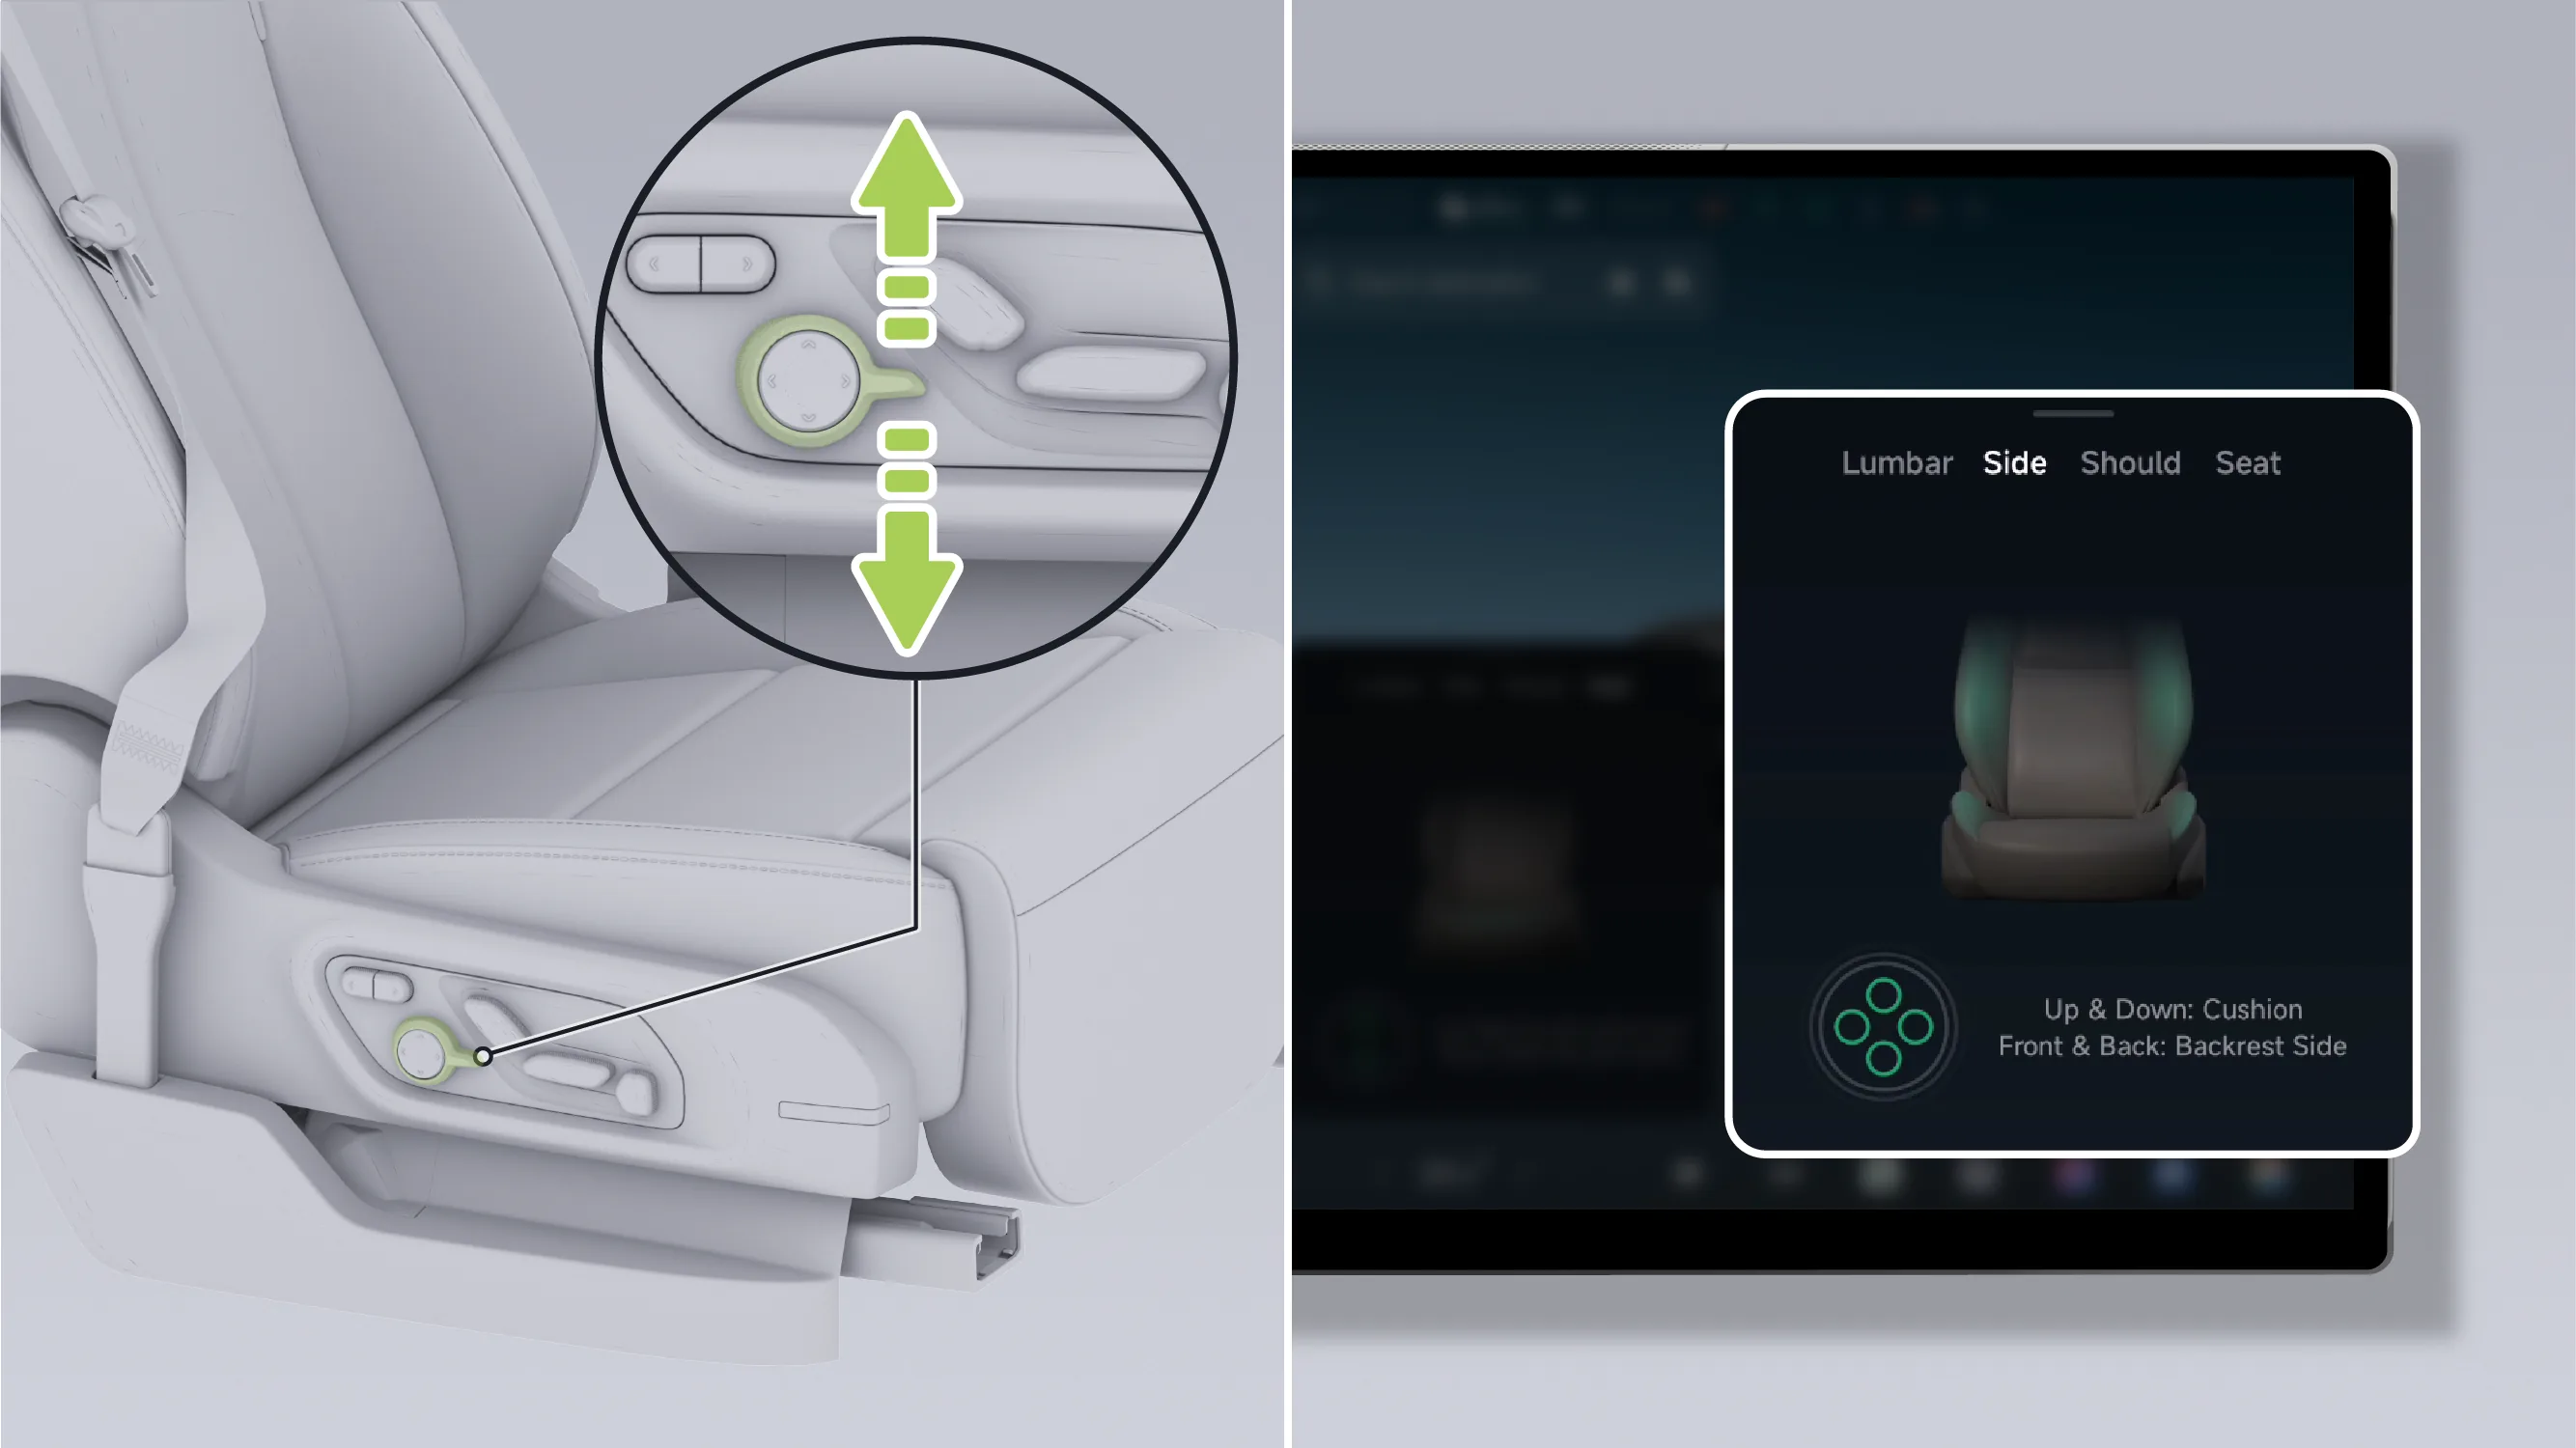
Push the seat function switch key up or down to switch to the seat side wing control position.
Press the upper or lower part of the switch to adjust the position of the seat cushion side bolster support; press the front or rear part of the switch to adjust the position of the seatback side bolster support.
Tap the central control screen in sequence. “ →Seats→Seat Position→PS→ ”, enter the driver's seat - Position Adjustment screen, select 。
Adjust seat cushion side bolster support: tap or , adjust the side bolster support position of the seat cushion.
Adjust seatback side bolster support: tap or , adjust the seatback side bolster support position.
In Zero Gravity mode, the passenger seat automatically adjusts to the most relaxed state for the human body, ensuring that the passenger's spine receives even support and enhancing ride comfort.
You can enter/exit the passenger seat zero-gravity mode in any of the following ways:
Use the seat switch to enter/exit zero-gravity mode.
The central control screen enters/exits Zero Gravity Mode.
Use voice commands to enter/exit Zero-Gravity Mode (for example, say: “Hello XPENG, turn on passenger Zero-Gravity Mode” and other keywords).
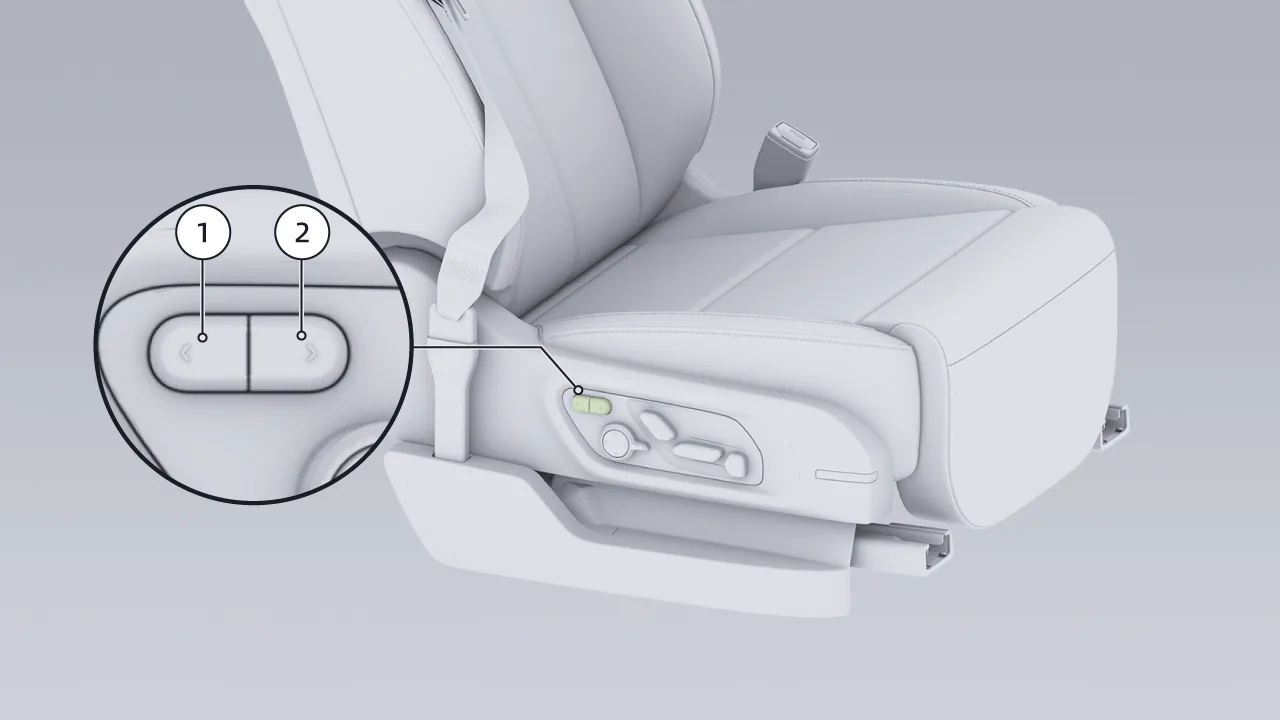
Zero-Gravity Mode Switch
Press the switch to enter zero-gravity mode, and the seat adjusts to the zero-gravity mode position.
One-Touch Reset Switch
Press the switch to exit Zero Gravity mode, and the seat will automatically return to its original position.
Tap the center display in sequence. “ →Seats→Seat Position→PS”, enter the passenger adjustment interface.
Tap , enter Zero Gravity mode, and the seat adjusts to the Zero Gravity mode position.
Tap again , exit Zero Gravity mode, and the seat automatically returns to its original position.
Rear occupants can adjust the passenger seat position through the rear control screen and the rear entertainment screen.
Tap the following on the rear entertainment screen in sequence. “ →Seat Position→PS”Enter the passenger seat adjustment screen.
Seat Fore-Aft Adjustment: Tap “  ”Corresponding to the switch “ ”/ “ ”, adjust the passenger seat forward and backward position.
Seatback Adjustment: Tap “  ”corresponding to the switch “ ”/ “ ”, adjust the angle of the passenger seatback.
Tap the rear control screen in sequence. “ →Seat Position”, tap on the passenger seat's Enter the passenger seat adjustment screen.
Seat Fore-Aft Adjustment: Tap “ ”Corresponding to the switch “ ”/ “ ”, adjust the fore-aft position of the passenger seat.
Seat seatback adjustment: Tap “ ”Corresponding to the switch “ ”/ “ ”, adjust the angle of the passenger seatback.
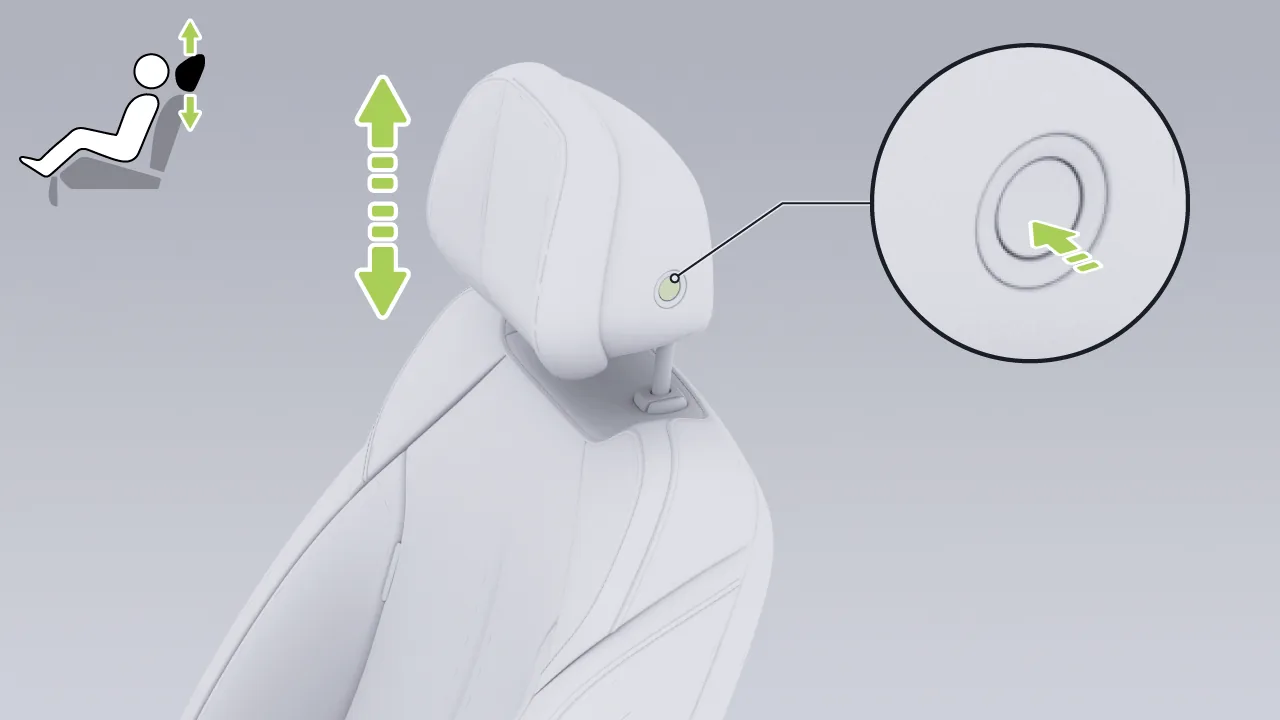
Adjust upward: Lift the head restraint upward to a suitable position until it locks.
Adjust downward: first press the headrest adjustment button, then adjust the headrest downward to a suitable position, and finally release the adjustment button to lock it.
Tips Do not use the headrest in the lowest position. Always raise it to a locked position before use.
Adjust the head restraint to the correct position so that it can better protect the back of your neck in the event of a vehicle emergency.
When adjusting the headrest, please meet the following requirements:
The center of the head restraint is level with the upper part of the ears.
Position the head restraint as close as possible to the back of the head.
You can remove the headrest by following these steps:
Raise the head restraint upward to the highest position.
Press the headrest release button and remove the headrest upward.
Tips If removal is necessary, adjust the seat backrest rearward to allow the head restraint to be removed smoothly.
Warning Do not ride in the vehicle with the headrest removed. The headrest should be installed on the seats and adjusted to a proper position.
When installing the seat headrest, align the headrest rods with the mounting holes of the seat, and press the headrest vertically downward. Adjust the headrest height to a suitable position.
Method 1:
Adjust the seat position to a suitable state.
After the adjustment is completed, a pop-up window appears on the central control screen. Tap The current seat position can then be saved; tap , the seat position automatically returns to the last saved position.
Tips The pop-up window will disappear automatically after a period of time.
Method 2:
Tap the center display in sequence. “ →Seat→Seat Position→PS→ ”, enter the passenger - Position Adjustment interface, select 。
Adjust the seat position to a suitable state.
After adjustment is completed, click , and the current seat position will be saved; tap , the seat position automatically returns to the last saved position.
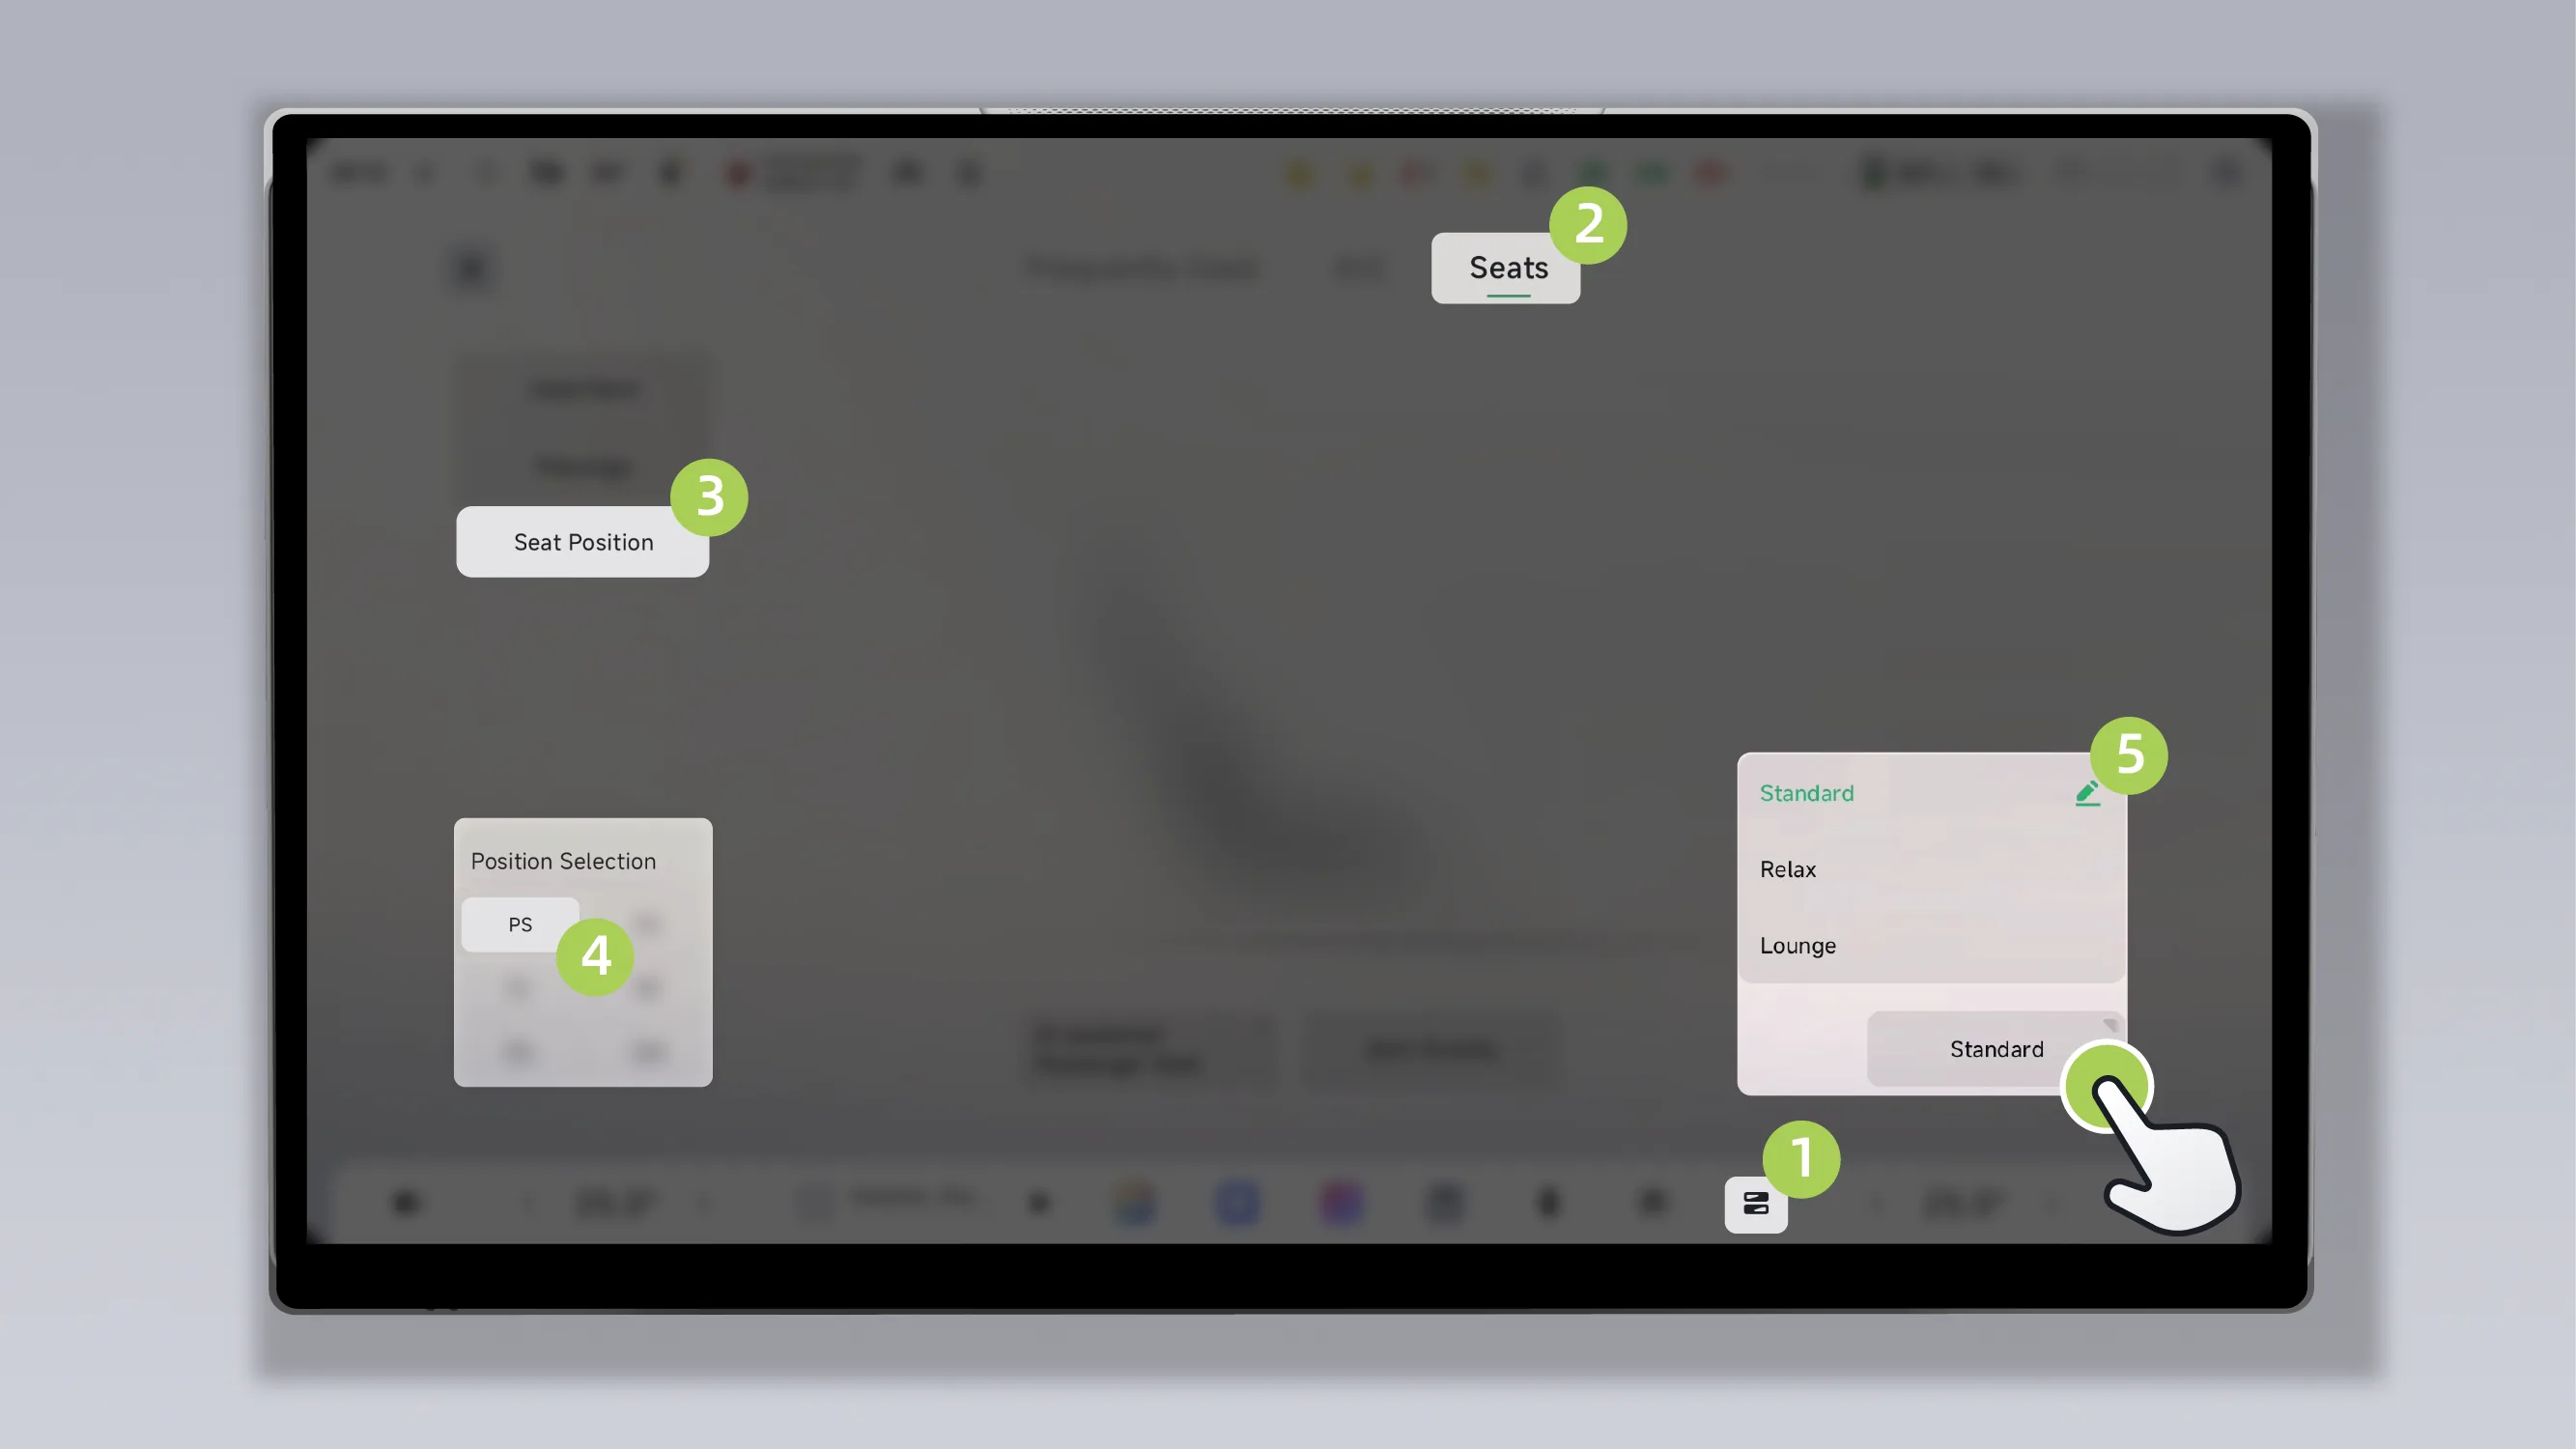
Tap the center display in sequence. “ →Seats→Seat Position→PS”Tap the seat memory button to enter the front passenger seat memory screen, where you can select a memorized seat position.
On the passenger - Seat Memory screen, tap “ ”The memory name can be renamed.
You can adjust the rear seat seatback angle using any of the following methods:
Adjust with the seat switch.
Center display adjustment.
Voice command adjustment (for example, say: “Hello XPENG, adjust the rear seat seatback forward” and other keywords).
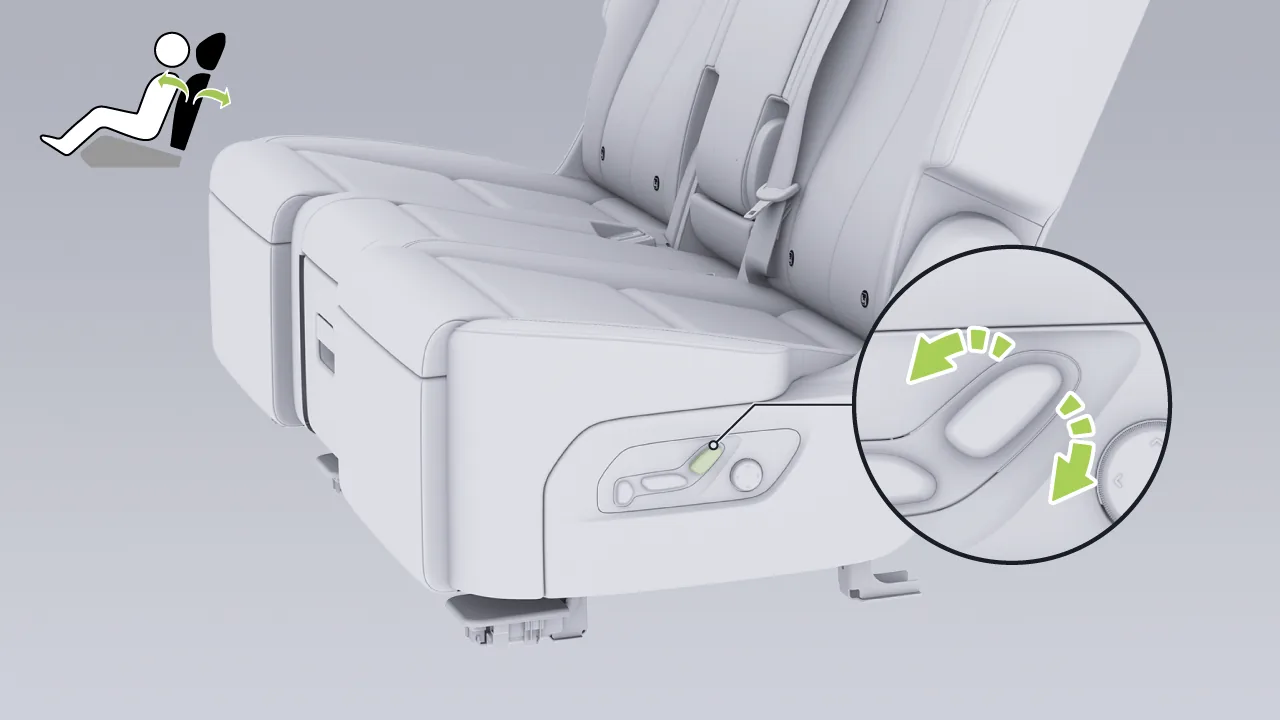
Push the top of this adjustment switch forward or backward to adjust the rear seat seatback angle.
Tap the center display in sequence. “ →Seats→Seat Position→Select “RL” or “RR”→ ”, enter the adjustment interface for the second-row left seat or the second-row right seat, and select 。
Tap or , adjust the seat seatback angle step by step. Press and hold to continuously adjust the seat seatback angle. You can also tap or drag the slider to quickly adjust the seat seatback angle.
You can adjust the rear seat leg rest using any of the following methods:
Seat switch adjustment.
Center Display Adjustment.
Voice command adjustment (for example, say: “Hello XPENG, adjust the rear seat leg rest forward” and other keywords).
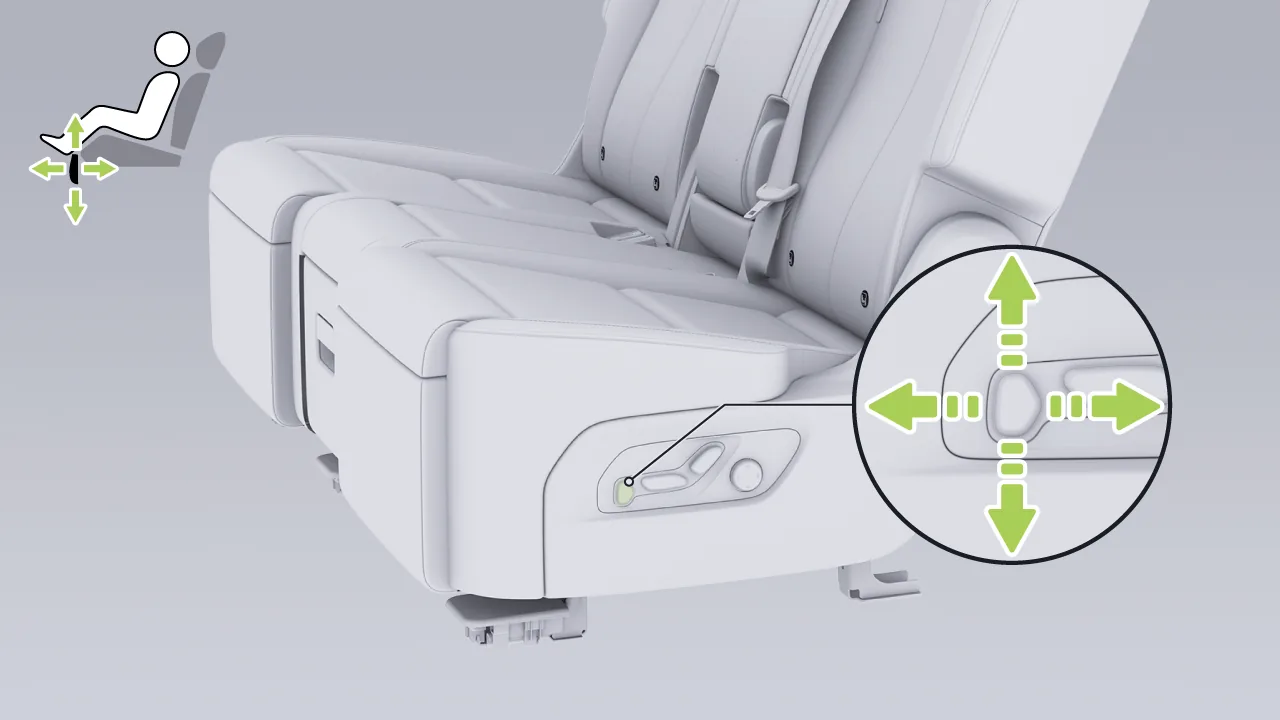
Push this adjustment switch up, down, left, or right to adjust the seat leg rest.
Tap the center display in sequence. “ →Seats→Seat Position→Select “RL” or “RR”→ ”, enter the adjustment interface for the second-row left seat or the second-row right seat, and select 。
Angle: Tap or , adjust the seat leg rest angle step by step; press and hold for continuous adjustment. You can also tap or drag the slider for quick adjustment.
Location: Click or , adjust the seat leg rest position step by step; press and hold for continuous adjustment. You can also tap or drag the slider for quick adjustment.
You can adjust the rear seat lumbar support using any of the following methods:
Seat switch adjustment.
Center display adjustment.
Voice command adjustment (for example, say keywords such as: “Hello XPENG, adjust the rear seat lumbar support forward”).
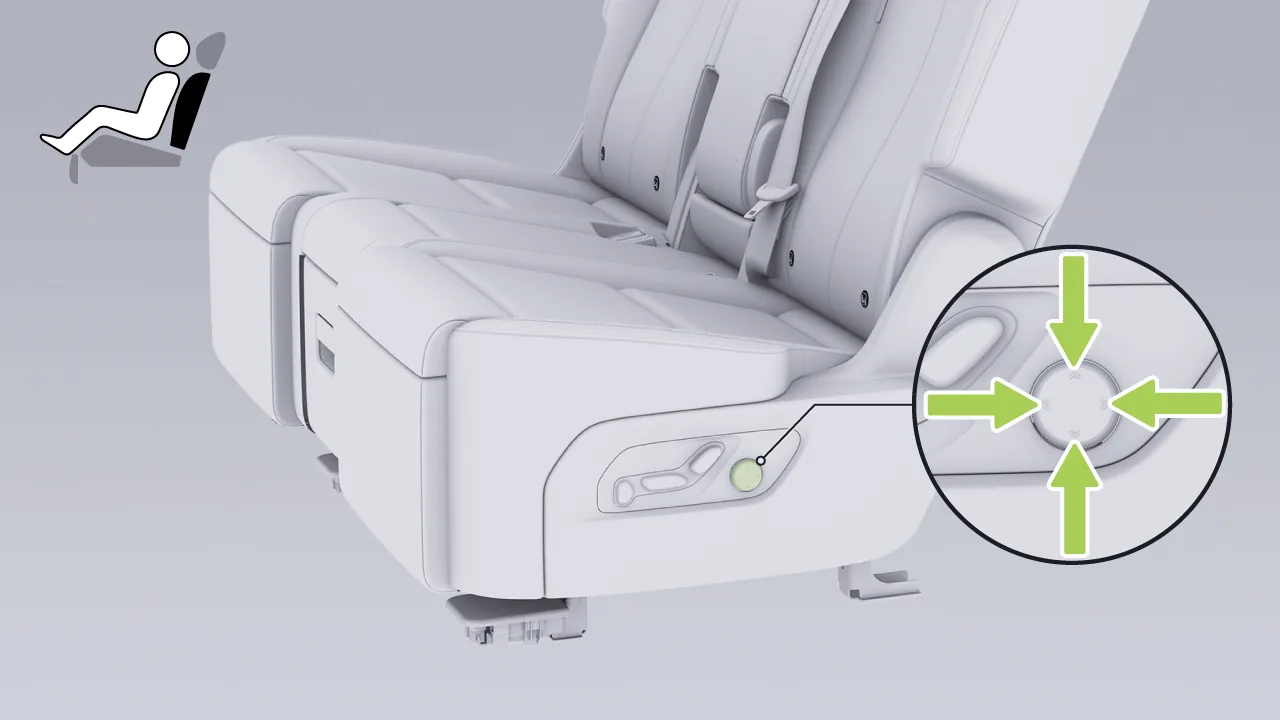
Press the upper/lower/front/rear part of the switch to adjust the support position of the rear seat lumbar support.
Tap the center display in sequence. “ →Seats→Seat Position→Select “RL” or “RR”→ ”, enter the adjustment interface for the second-row left seat or the second-row right seat, and select 。
Tap 、 、 、 Adjustable lumbar support position.
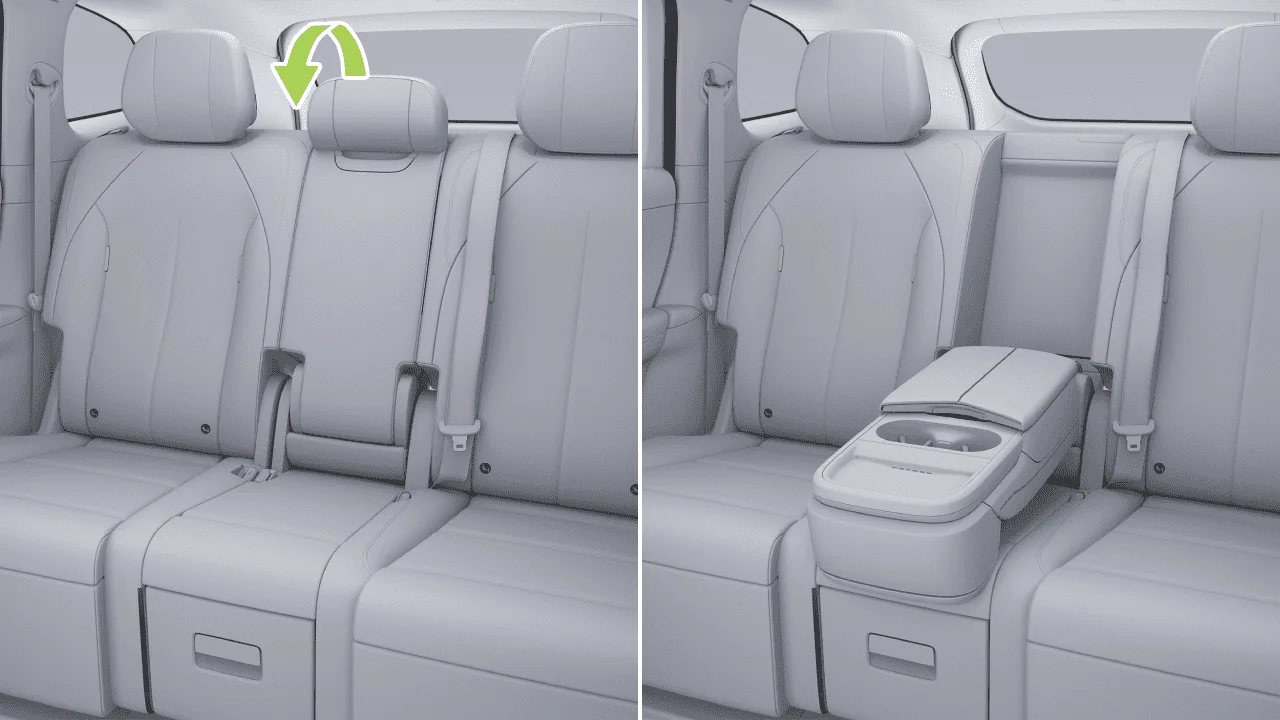
Open:Flip the armrest down.
Close:Lift the armrest upward and ensure that it fits closely against the seatback.
The outer rear head restraints support manual adjustment.
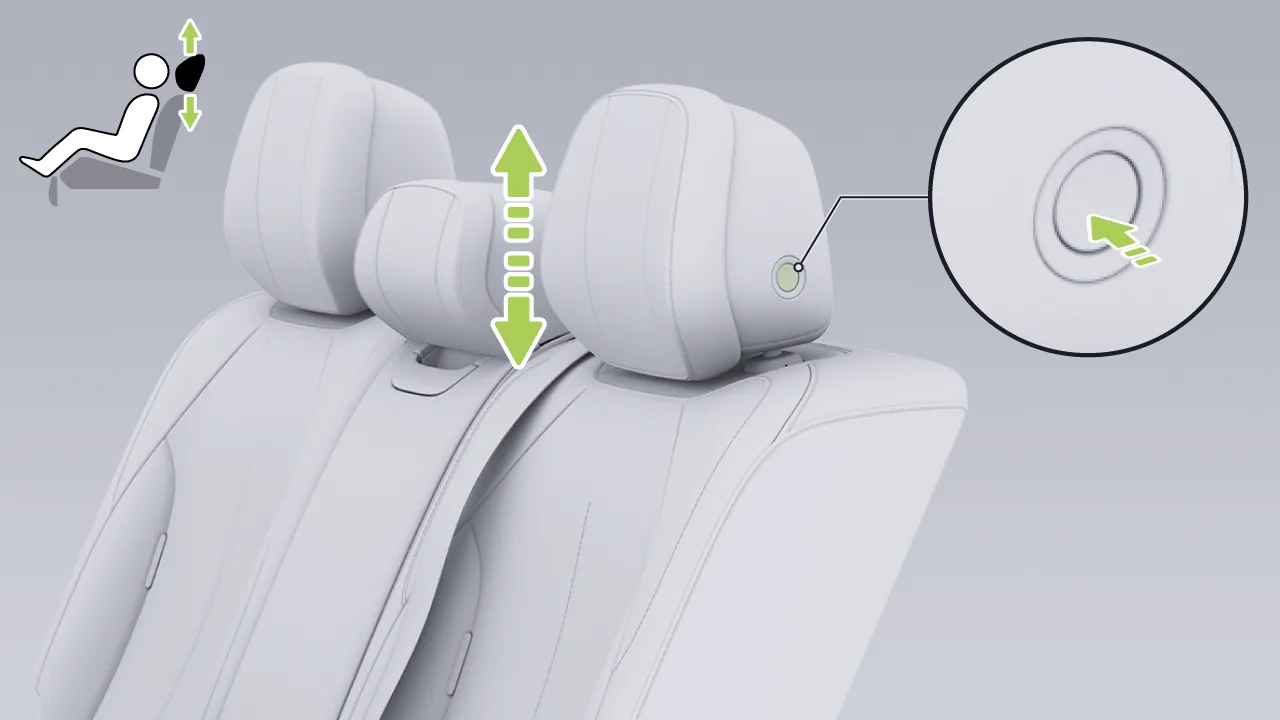
Adjust upward: Raise the head restraint upward to a suitable position, then press the head restraint downward to ensure that it is locked.
Adjust downward: Press and hold the headrest adjustment button, adjust the headrest downward to a suitable position and then release the button, then press the headrest downward again to lock it.
Tips The lowest position of the headrest is not a usable position. Always raise the headrest to a locked position before use.
Adjust the head restraint to the correct position so that it can better protect the back of your neck in the event of an emergency.
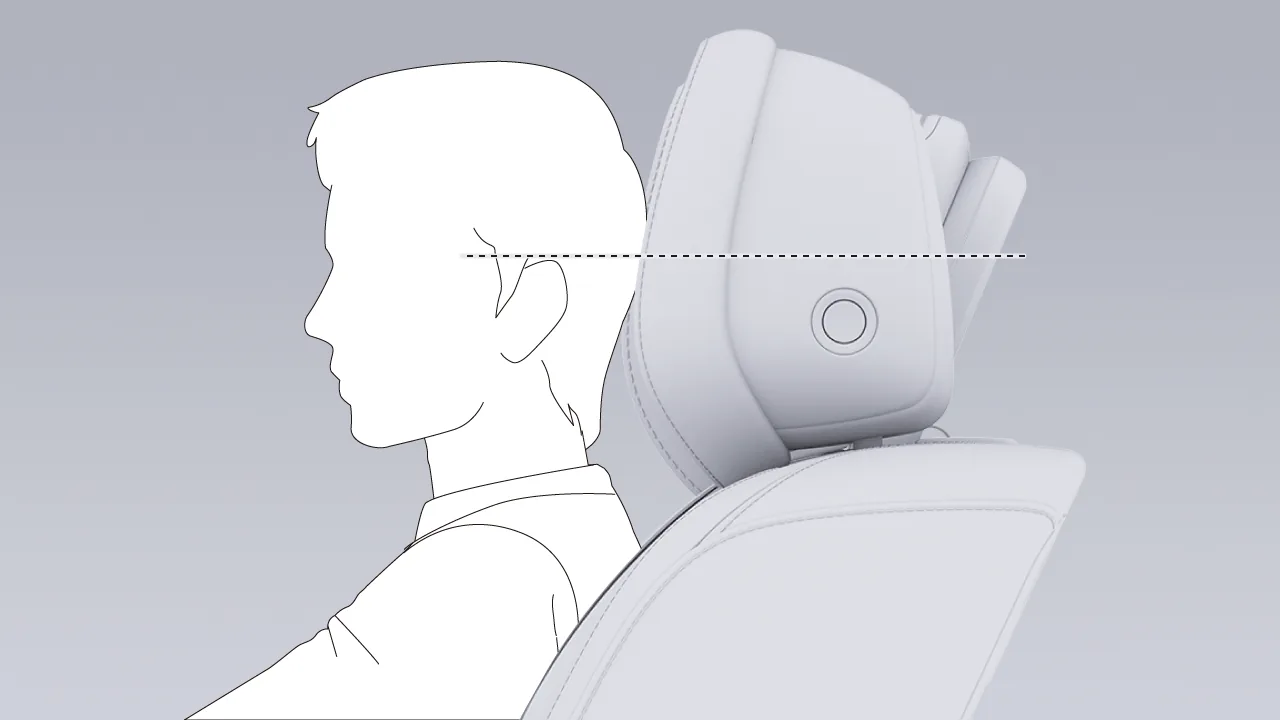
When adjusting the headrest, please meet the following requirements:
The center of the head restraint is level with the upper part of the ears.
Position the head restraint as close as possible to the back of the head.
Tips Removing the headrest requires the use of tools. If removal is necessary, please go to a XIAOPENG Motors Service Center for the operation.
Warning Do not ride in the vehicle with the headrest removed. The headrest should be installed on the seats and adjusted to a proper position.
Operate via the center display:
Tap the central control screen in sequence. “ →Seats→Seat Position→Select “RL” or “RR”→Seat”, enter the adjustment screen for the second-row left seat or the second-row right seat.
Adjust the seat position to a suitable state.
After adjustment is completed, tap The current seat position can then be saved; tap , the seat position automatically returns to the last saved position.
Operate via the rear control screen:
Adjust the seat position to an appropriate state.
After the adjustment is completed, tap the following on the rear control screen in sequence. “ →Seat Position→Select “ on the left or right second-row seat ” ”, enter the seat position adjustment interface.
Tap The current seat position can then be saved; tap , the seat position automatically returns to the last saved position.
Operate via the rear entertainment screen
Adjust the seat position to a suitable state.
After the adjustment is completed, tap in sequence on the rear entertainment screen. “ →Seat Position→Select “RL” or “RR””, enter the second-row left or second-row right seat adjustment interface.
Tap The current seat position can then be saved; tap , the seat position automatically returns to the last saved position.
You can switch the seat memory position using any of the following methods:
Center Display Operation:Tap the center display in sequence. “ →Seats→Seat Position→Select “RL” or “RR””, tap the seat memory button to enter the second-row left seat or second-row right seat memory screen. You can select a seat memory position, or tap “ ”Memory name can be renamed.
Rear Control Screen Operation:Tap the rear control screen in sequence. “ →Seat Position→Select the “ on the left or right seat in the second row ” ”, tap the seat memory button to enter the seat position adjustment screen, where you can select a memorized seat position.
Rear entertainment screen operation:Tap the rear entertainment screen in sequence. “ →Seat Position→Select “RL” or “RR””Tap the seat memory button to enter the second-row left or second-row right seat memory screen, where you can select a memorized seat position.
You can adjust the second-row seats to a suitable position in any of the following ways:
Adjust the seat position using the seat switch.
Adjust the seat position through the central control screen.
Adjust the seat position by voice command.
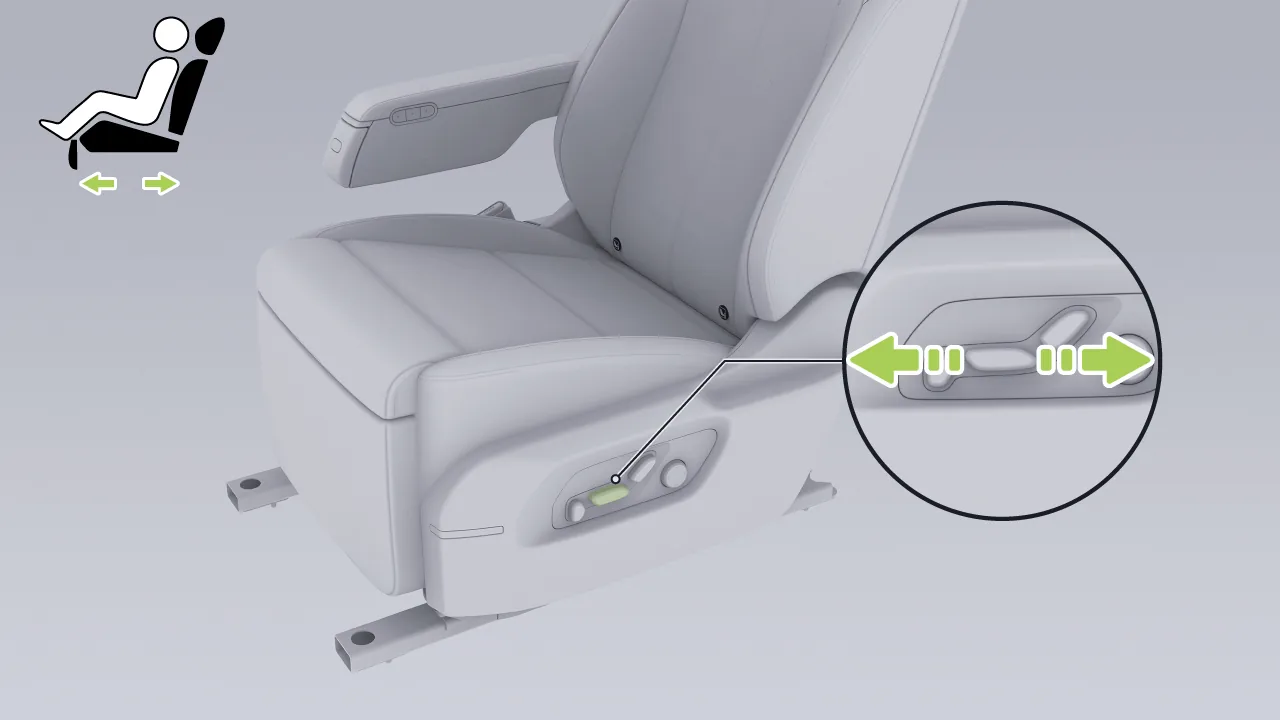
Push this adjustment switch forward or backward to adjust the fore-and-aft position of the second-row seat.
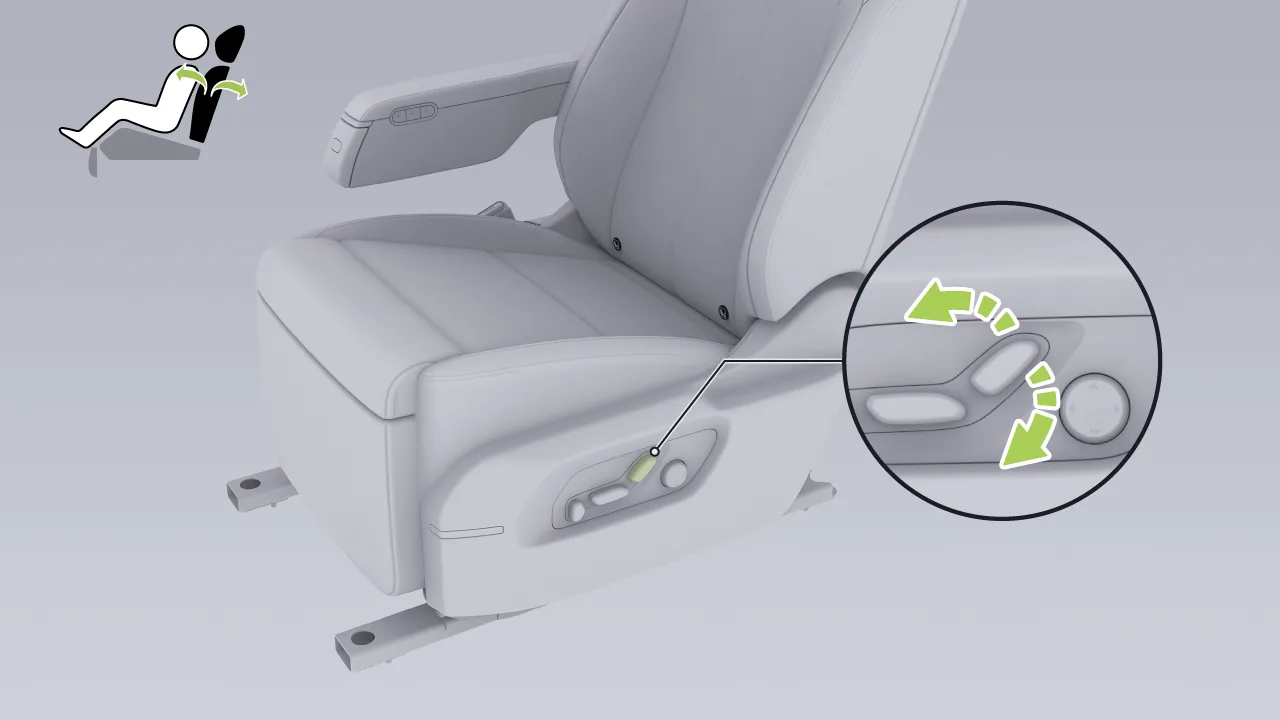
Push the top of this adjustment switch forward or backward to adjust the seatback angle of the second-row seat.
Tap the center display in sequence. “ →Seats→Seat Position→Select “RL” or “RR”→ ”, enter the adjustment interface for the second-row left seat or the second-row right seat, and select 。
Position: Tap or Adjust the seat forward and backward position step by step; press and hold to continuously adjust the seat forward and backward position. You can also tap or drag the slider to quickly adjust the seat forward and backward position.
Angle: Tap or , adjust the seat seatback angle step by step; press and hold to continuously adjust the seat seatback angle. You can also tap or drag the slider to quickly adjust the seat seatback angle.
You can adjust the second-row seat leg rest using any of the following methods:
Adjust the seat leg rest using the seat switch.
Adjust the seat leg rest through the central control screen.
Adjust the seat leg rest by voice command.
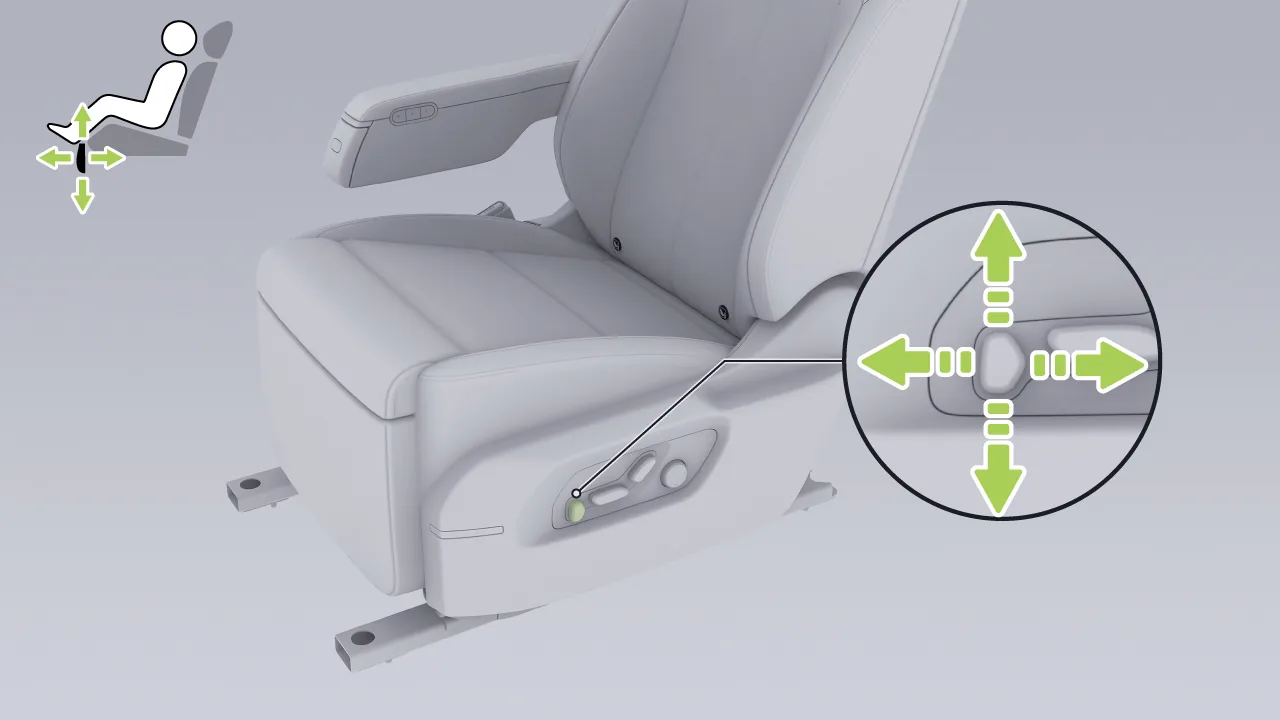
Push this adjustment switch up, down, left, or right to adjust the seat leg rest.
Tap the center display in sequence. “ →Seats→Seat Position→Select “RL” or “RR”→ ”, enter the adjustment interface for the second-row left seat or the second-row right seat, and select 。
Angle: Tap or Tap to adjust the seat leg rest angle step by step. Press and hold to continuously adjust the seat leg rest angle. You can also tap or drag the slider to quickly adjust the seat leg rest angle.
Position: Click or Adjust the seat leg rest position step by step; press and hold to continuously adjust the seat leg rest position. You can also tap or slide the slider to quickly adjust the seat leg rest position.
You can adjust the lumbar support of the second-row seats in any of the following ways:
Adjust the seat lumbar support using the seat switch.
Adjust the seat lumbar support through the center display.
Adjust the seat lumbar support by voice command.
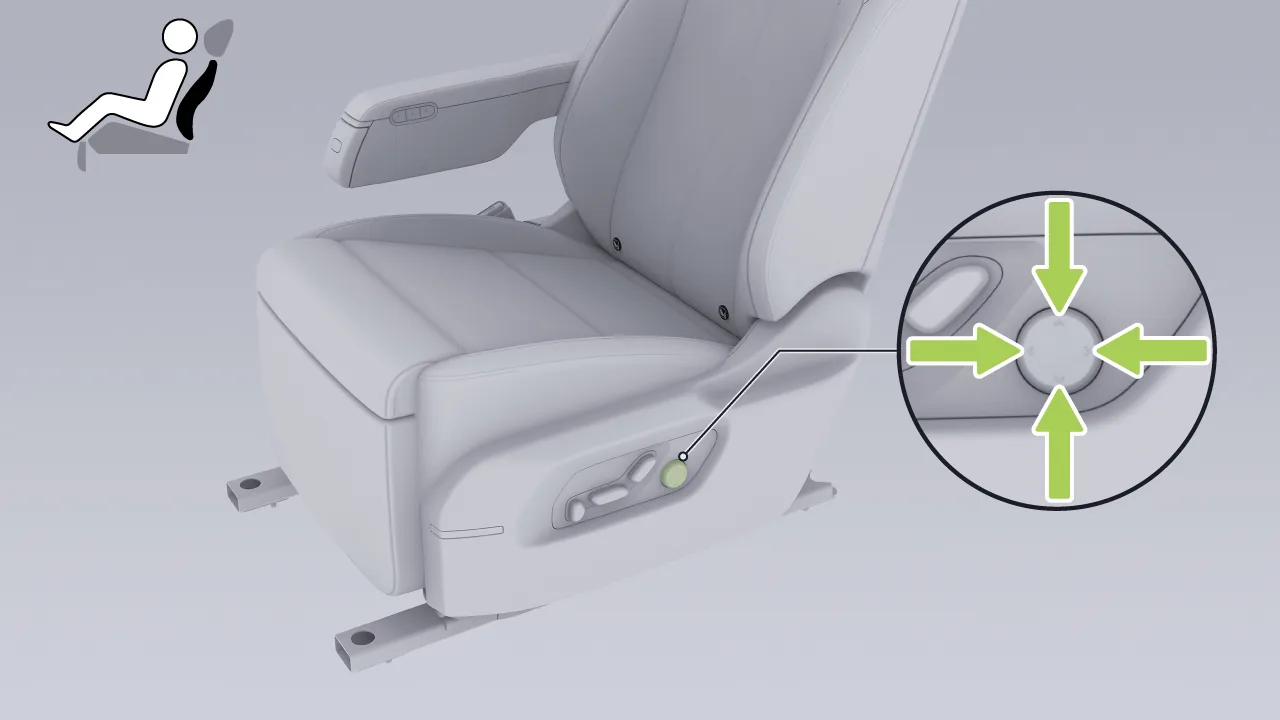
Press the up/down button to adjust the lumbar support height position.
Press the left/right button to adjust the lumbar support forward/backward position.
Tap the center display in sequence. “ →Seats→Seat Position→Select “RL” or “RR”→ ”, enter the adjustment interface for the second-row left seat or the second-row right seat, and select 。
Height: Tap or Adjust the height position of the second-row seat lumbar support.
Position: Tap or Adjust the forward and rearward position of the lumbar support for the second-row seats.
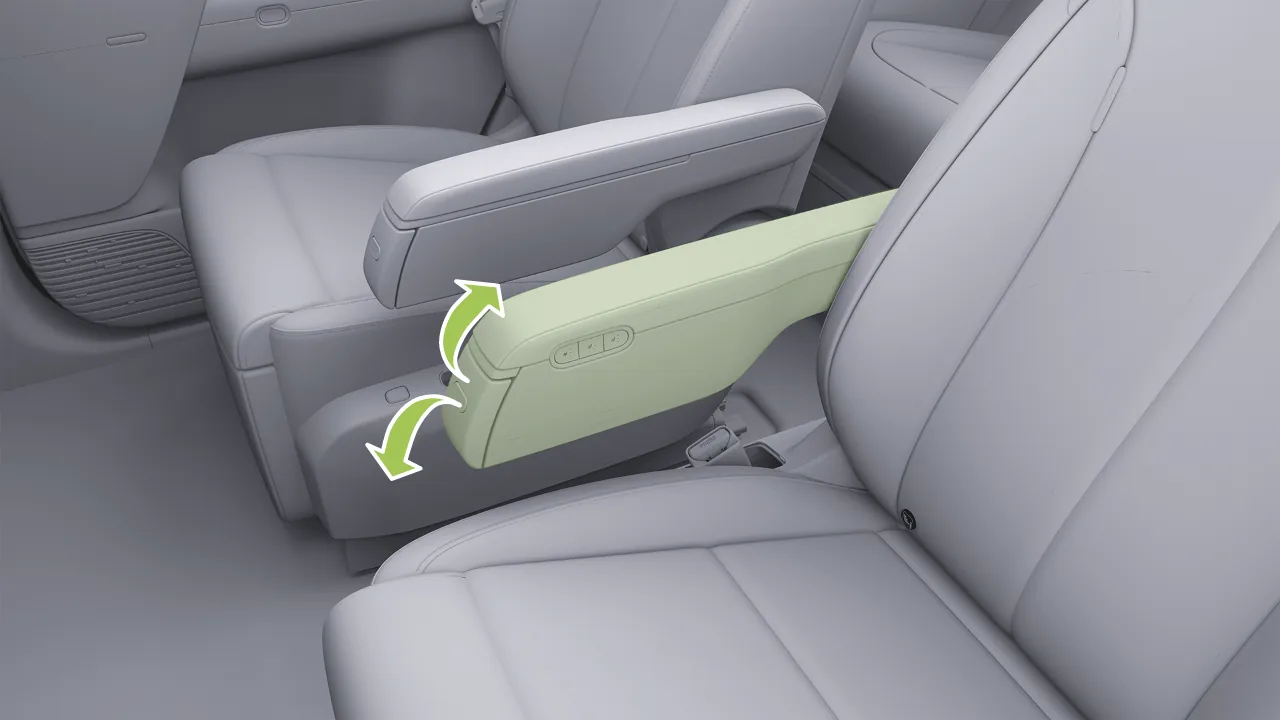
Upward: Lift the armrest to a suitable position. There are 12 adjustable positions in total.
Downward: Lift the armrest upward past the highest position, then lower it; the armrest can return to the lowest position.
Caution When adjusting the armrest, ensure beverages in the cup holder do not spill.
Do not pull on the cup holder while adjusting the armrest. Doing so may damage the cup holder.
The second-row headrests support manual adjustment and removal.
Adjust upward: Raise the head restraint upward to a suitable position, then press the head restraint downward to ensure that it is locked.
Downward adjustment: Press and hold the headrest adjustment button, adjust the headrest downward to a suitable position and release the button, then press the headrest downward again to lock it.
When adjusting the head restraint, the proper position is with the center of the head restraint level with the upper part of the ears.
Tips The lowest position of the headrest is not a usable position. Always raise the headrest to a locked position before use.
You can remove the headrest by following the steps below:
Raise the headrest upward to the highest position.
Press the headrest release button and remove the headrest upward.
Tips If removal is necessary, adjust the seat backrest rearward to allow the head restraint to be removed smoothly.
Warning Do not ride in the vehicle with the headrest removed. The headrest should be installed on the seats and adjusted to a proper position.
When installing the seat headrest, align the headrest rods with the mounting holes of the seat, and press the headrest vertically downward. Adjust the headrest height to a suitable position.
Operate via the central control screen:
Tap the center display in sequence. “ →Seats→Seat Position→Select “RL” or “RR”→Seat”, enter the adjustment interface for the second-row left seat or the second-row right seat.
Adjust the seat position to a suitable state.
After adjustment is completed, click The current seat position can then be saved; tap , the seat position automatically returns to the last saved position.
Operate via the rear control screen:
Adjust the seat position to an appropriate state.
After the adjustment is completed, tap the following on the rear control screen in sequence. “ →Seat Position→Select the “ on the left or right seat in the second row ” ”, enter the seat position adjustment interface.
Tap The current seat position can then be saved; tap , the seat position automatically returns to the last saved position.
Operate via the rear entertainment screen
Adjust the seat position to an appropriate state.
After the adjustment is completed, tap in sequence on the rear entertainment screen “ →Seat Position→Select “RL” or “RR””, enter the second-row left or second-row right seat adjustment screen.
Tap The current seat position can then be saved; tap , the seat position automatically returns to the last saved position.
You can switch the seat memory position using any of the following methods:
Center Display Operation:Tap the central control screen in sequence. “ →Seats→Seat Position→Select “RL” or “RR””, tap the seat memory button to enter the second-row left seat or second-row right seat memory screen. You can select a seat memory position, or tap “ ”The memory name can be renamed.
Rear Control Screen Operation:Tap the rear control screen in sequence. “ →Seat Position→Select the “ on the left or right seat in the second row ” ”Tap the seat memory button to enter the seat position adjustment screen, where you can select a memorized seat position.
Rear entertainment screen operation:Tap the rear entertainment screen in sequence. “ →Seat Position→Select “RL” or “RR””Tap the seat memory button to enter the second-row left or second-row right seat memory screen, where you can select a memorized seat position.
You can adjust the second-row seats to a suitable position in any of the following ways:
Adjust the seat position using the seat switch.
Adjust the seat position through the center display.
Adjust the seat position by voice command.
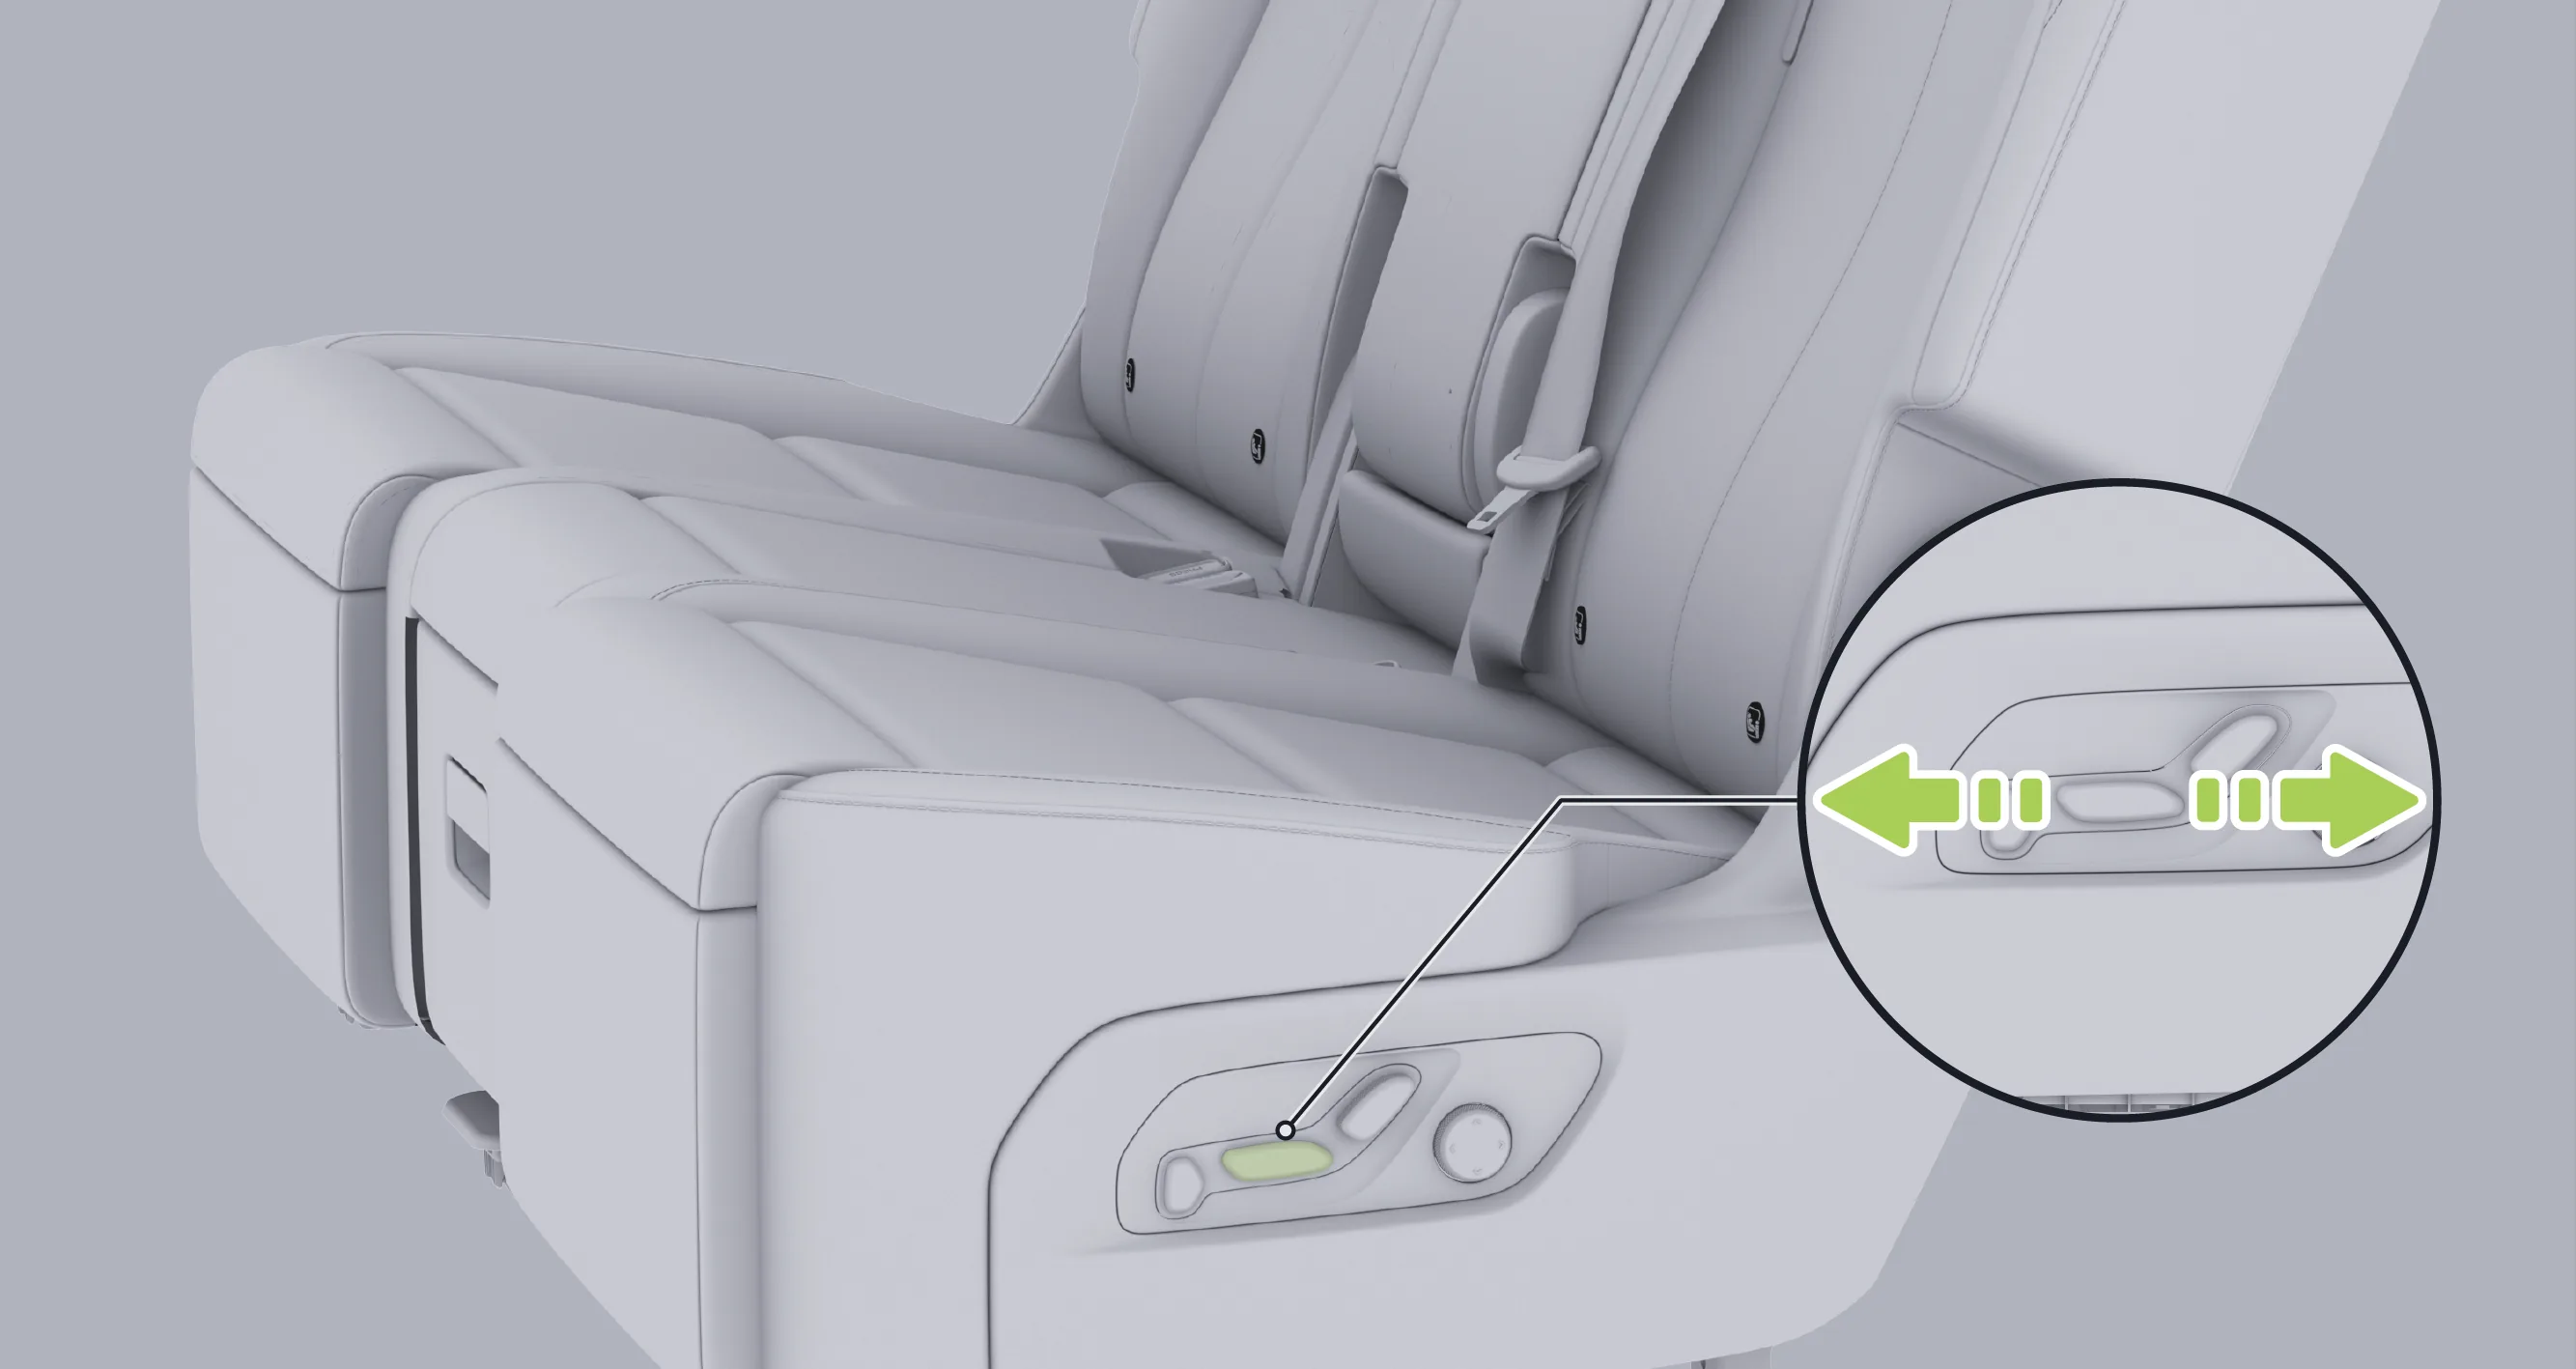
Push this adjustment switch forward or backward to adjust the fore-and-aft position of the second-row seat.
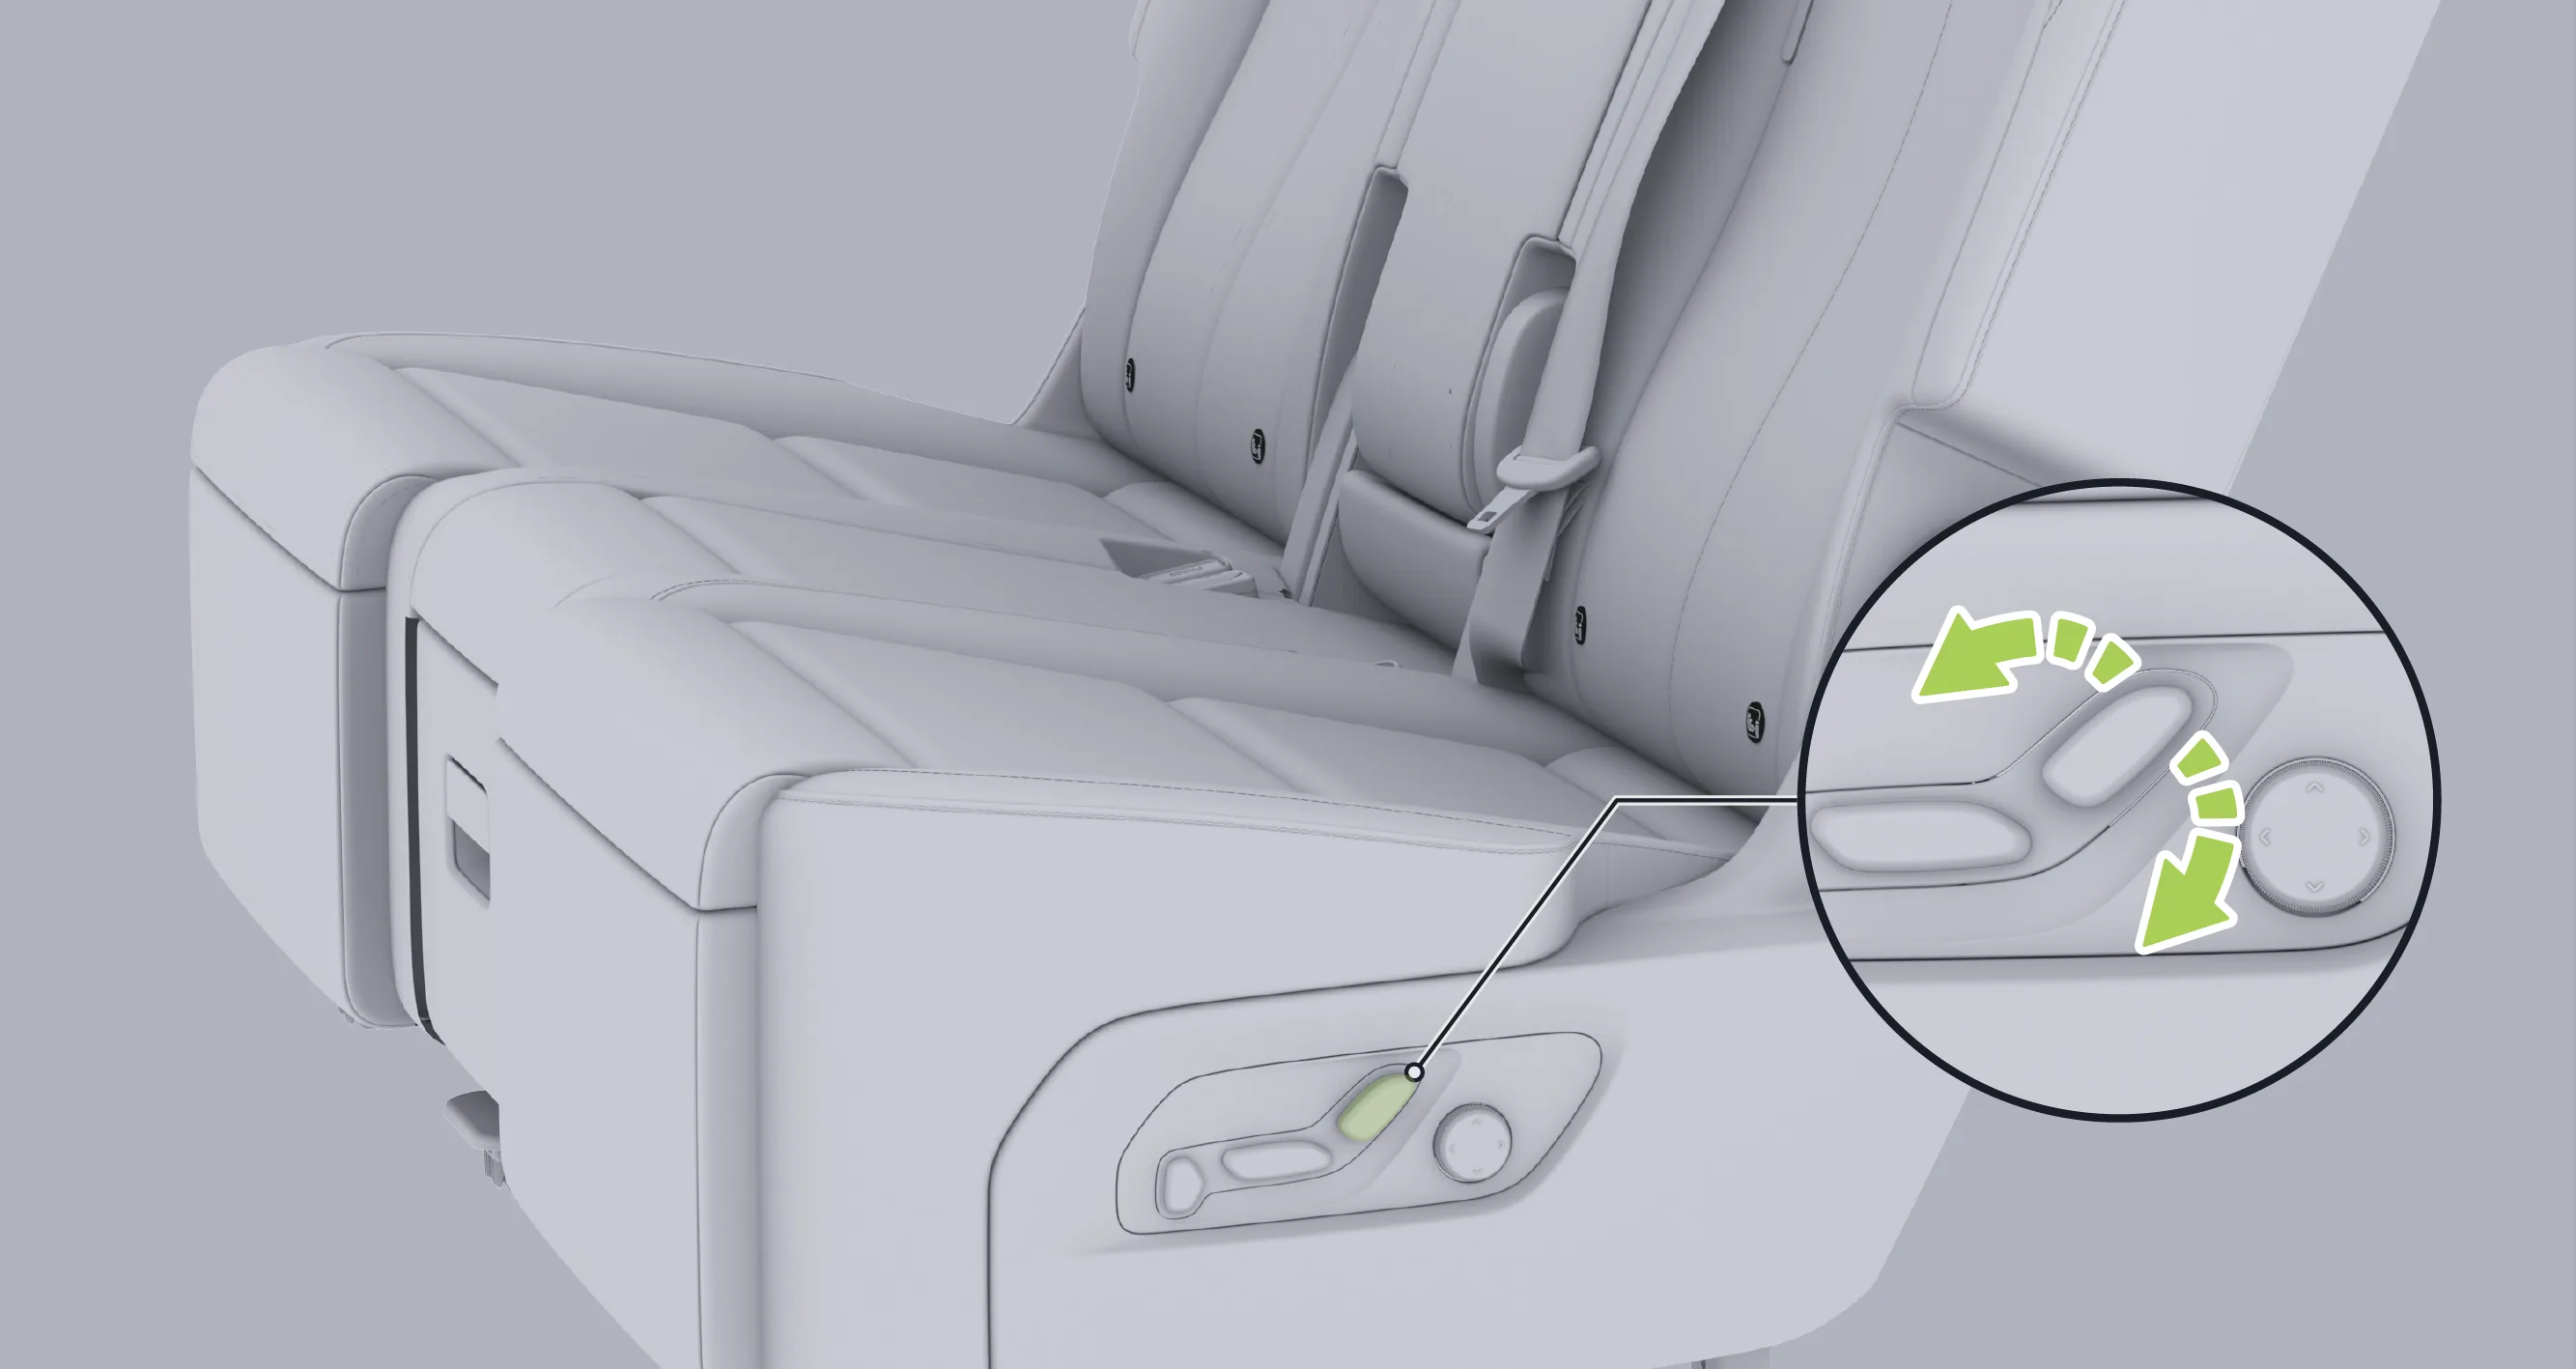
Push the top of this adjustment switch forward or backward to adjust the seatback angle of the second-row seat.
Tap the center display in sequence. “ →Seats→Seat Position→Select “RL” or “RR”→ ”, enter the adjustment interface for the second-row left seat or the second-row right seat, and select 。
Position: Tap or Adjust the seat forward and backward position step by step. Press and hold to continuously adjust the seat forward and backward position. You can also tap or slide the slider to quickly adjust the seat forward and backward position.
Angle: Tap or , adjust the seat seatback angle step by step; press and hold to continuously adjust the seat seatback angle. You can also tap or drag the slider to quickly adjust the seat seatback angle.
You can adjust the second-row seat leg rest using any of the following methods:
Adjust with the seat switch.
Center display adjustment.
Voice command adjustment (for example, say: “Hello XPENG, second-row seat leg rest adjust forward” and other keywords).
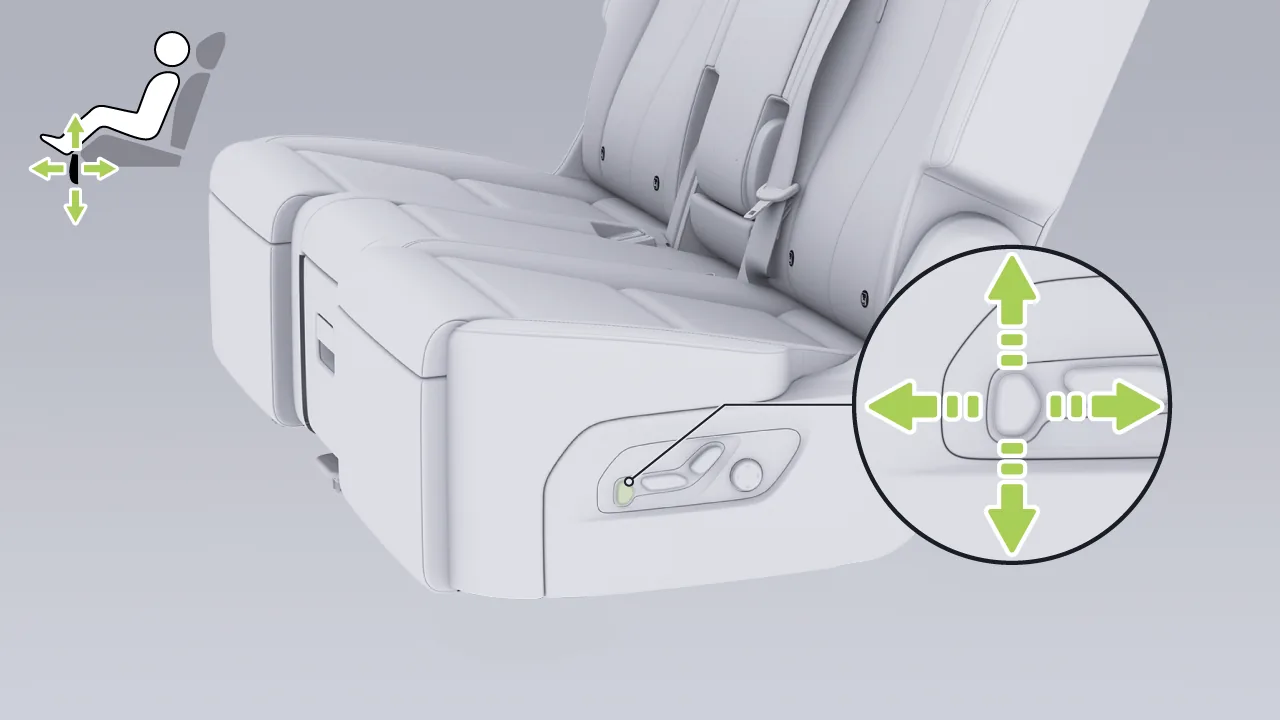
Push this adjustment switch up, down, left, or right to adjust the seat leg rest.
Tap the center display in sequence. “ →Seats→Seat Position→Select “RL” or “RR”→ ”, enter the adjustment interface for the second-row left seat or the second-row right seat, and select 。
Angle: Tap or Tap to adjust the seat leg rest angle step by step. Press and hold to continuously adjust the seat leg rest angle. You can also tap or drag the slider to quickly adjust the seat leg rest angle.
Position: Tap or Tap to adjust the seat leg rest position step by step. Press and hold to continuously adjust the seat leg rest position. You can also tap or drag the slider to quickly adjust the seat leg rest position.
You can adjust the second-row seat lumbar support using any of the following methods:
Seat switch adjustment.
Center Display Adjustment.
Voice command adjustment (for example, say: “Hello XPENG, adjust the second-row seat lumbar support forward” and other keywords).
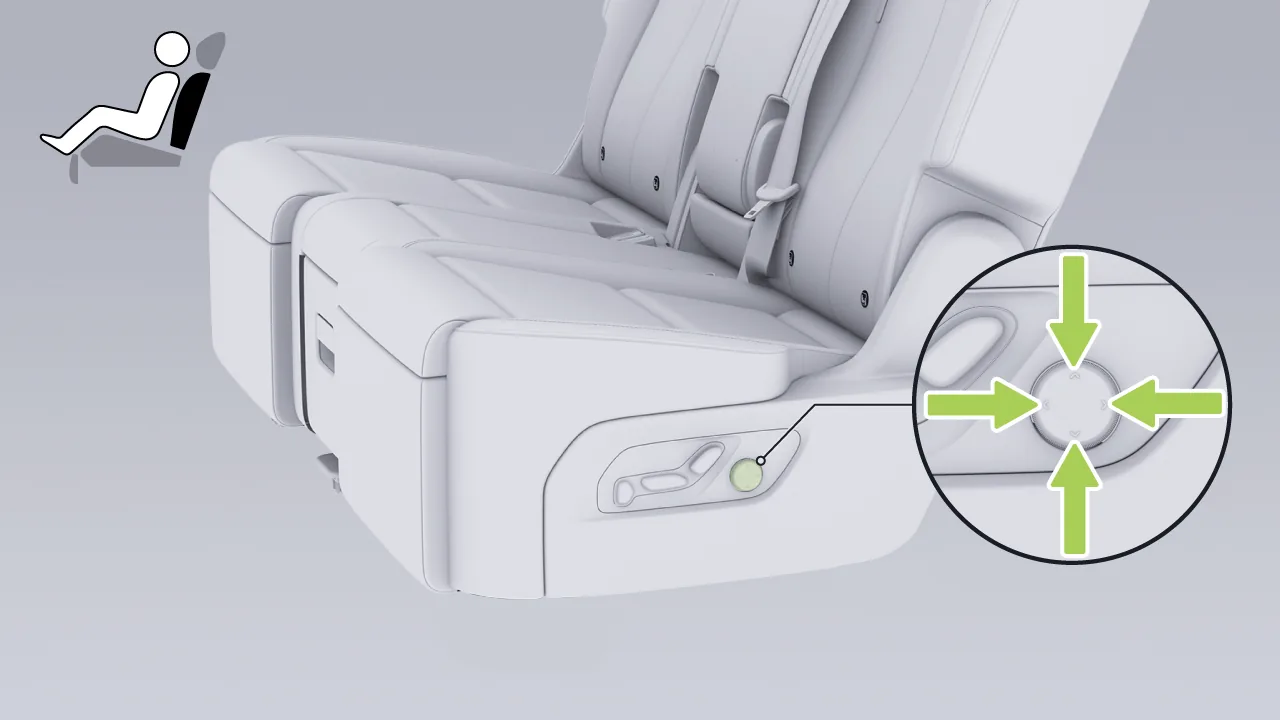
Press the upper/lower/front/rear part of the switch to adjust the lumbar support position of the second-row seat.
Tap on the center control screen in sequence. “ →Seats→Seat Position→Select “RL” or “RR”→ ”, enter the adjustment interface for the second-row left seat or the second-row right seat, and select 。
Height: Tap or Adjust the height position of the lumbar support for the second-row seats.
Position: Click or Adjust the forward and rearward position of the second-row seat lumbar support.
Open:Flip the armrest downward.
Off:Lift the armrest upward and ensure that it fits closely against the seatback.
The outer head restraints in the second row support manual adjustment.
Adjust upward: Raise the head restraint upward to a suitable position, then press the head restraint downward to ensure that it is locked.
Downward adjustment: Press and hold the headrest adjustment button, adjust the headrest downward to a suitable position and then release the button, then press the headrest downward again to lock it.
Tips The lowest position of the headrest is not a usable position. Always raise the headrest to a locked position before use.
Adjust the head restraint to the correct position so that it can better protect the back of your neck in the event of an emergency.
When adjusting the headrest, please meet the following requirements:
The center of the head restraint is level with the upper part of the ears.
Position the head restraint as close as possible to the back of the head.
Tips Removing the headrest requires the use of tools. If removal is necessary, please go to a XPENG service center for the operation.
Warning Do not ride in the vehicle with the headrest removed. The headrest should be installed on the seats and adjusted to a proper position.
Operate via the center display:
Tap the center display in sequence. “ →Seats→Seat Position→Select “RL” or “RR”→Seat”, enter the adjustment screen for the second-row left seat or the second-row right seat.
Adjust the seat position to a suitable state.
After adjustment is completed, tap The current seat position can then be saved; tap , the seat position automatically returns to the last saved position.
Operate via the rear control screen:
Adjust the seat position to an appropriate state.
After the adjustment is completed, tap the following on the rear control screen in sequence. “ →Seat Position→Select the “ on the left or right seat in the second row ” ”, enter the seat position adjustment interface.
Tap The current seat position can then be saved; tap , the seat position automatically returns to the last saved position.
Operate via the rear entertainment screen
Adjust the seat position to an appropriate state.
After the adjustment is completed, tap in sequence on the rear entertainment screen. “ →Seat Position→Select “RL” or “RR””, enter the second-row left or second-row right seat adjustment interface.
Tap The current seat position can then be saved; tap , the seat position automatically returns to the last saved position.
You can switch the seat memory position in any of the following ways:
Center Display Operation:Tap the central control screen in sequence. “ →Seats→Seat Position→Select “RL” or “RR””, tap the seat memory button to enter the second-row left seat or second-row right seat memory screen. You can select a seat memory position, or tap “ ”The memory name can be renamed.
Rear Control Screen Operation:Tap the rear control screen in sequence. “ →Seat Position→Select the “ on the left or right second-row seat ” ”, tap the seat memory button to enter the seat position adjustment screen, where you can select a memorized seat position.
Rear entertainment screen operation:Tap the entertainment screen in the rear row in sequence. “ →Seat Position→Select “RL” or “RR””Tap the seat memory button to enter the second-row left or second-row right seat memory screen, where you can select a memorized seat position.
You can turn it on or off in any of the following ways.
Turn on or off using the seat switch.
Turn on or off via the central control screen.
Turn on or off via the rear control screen.
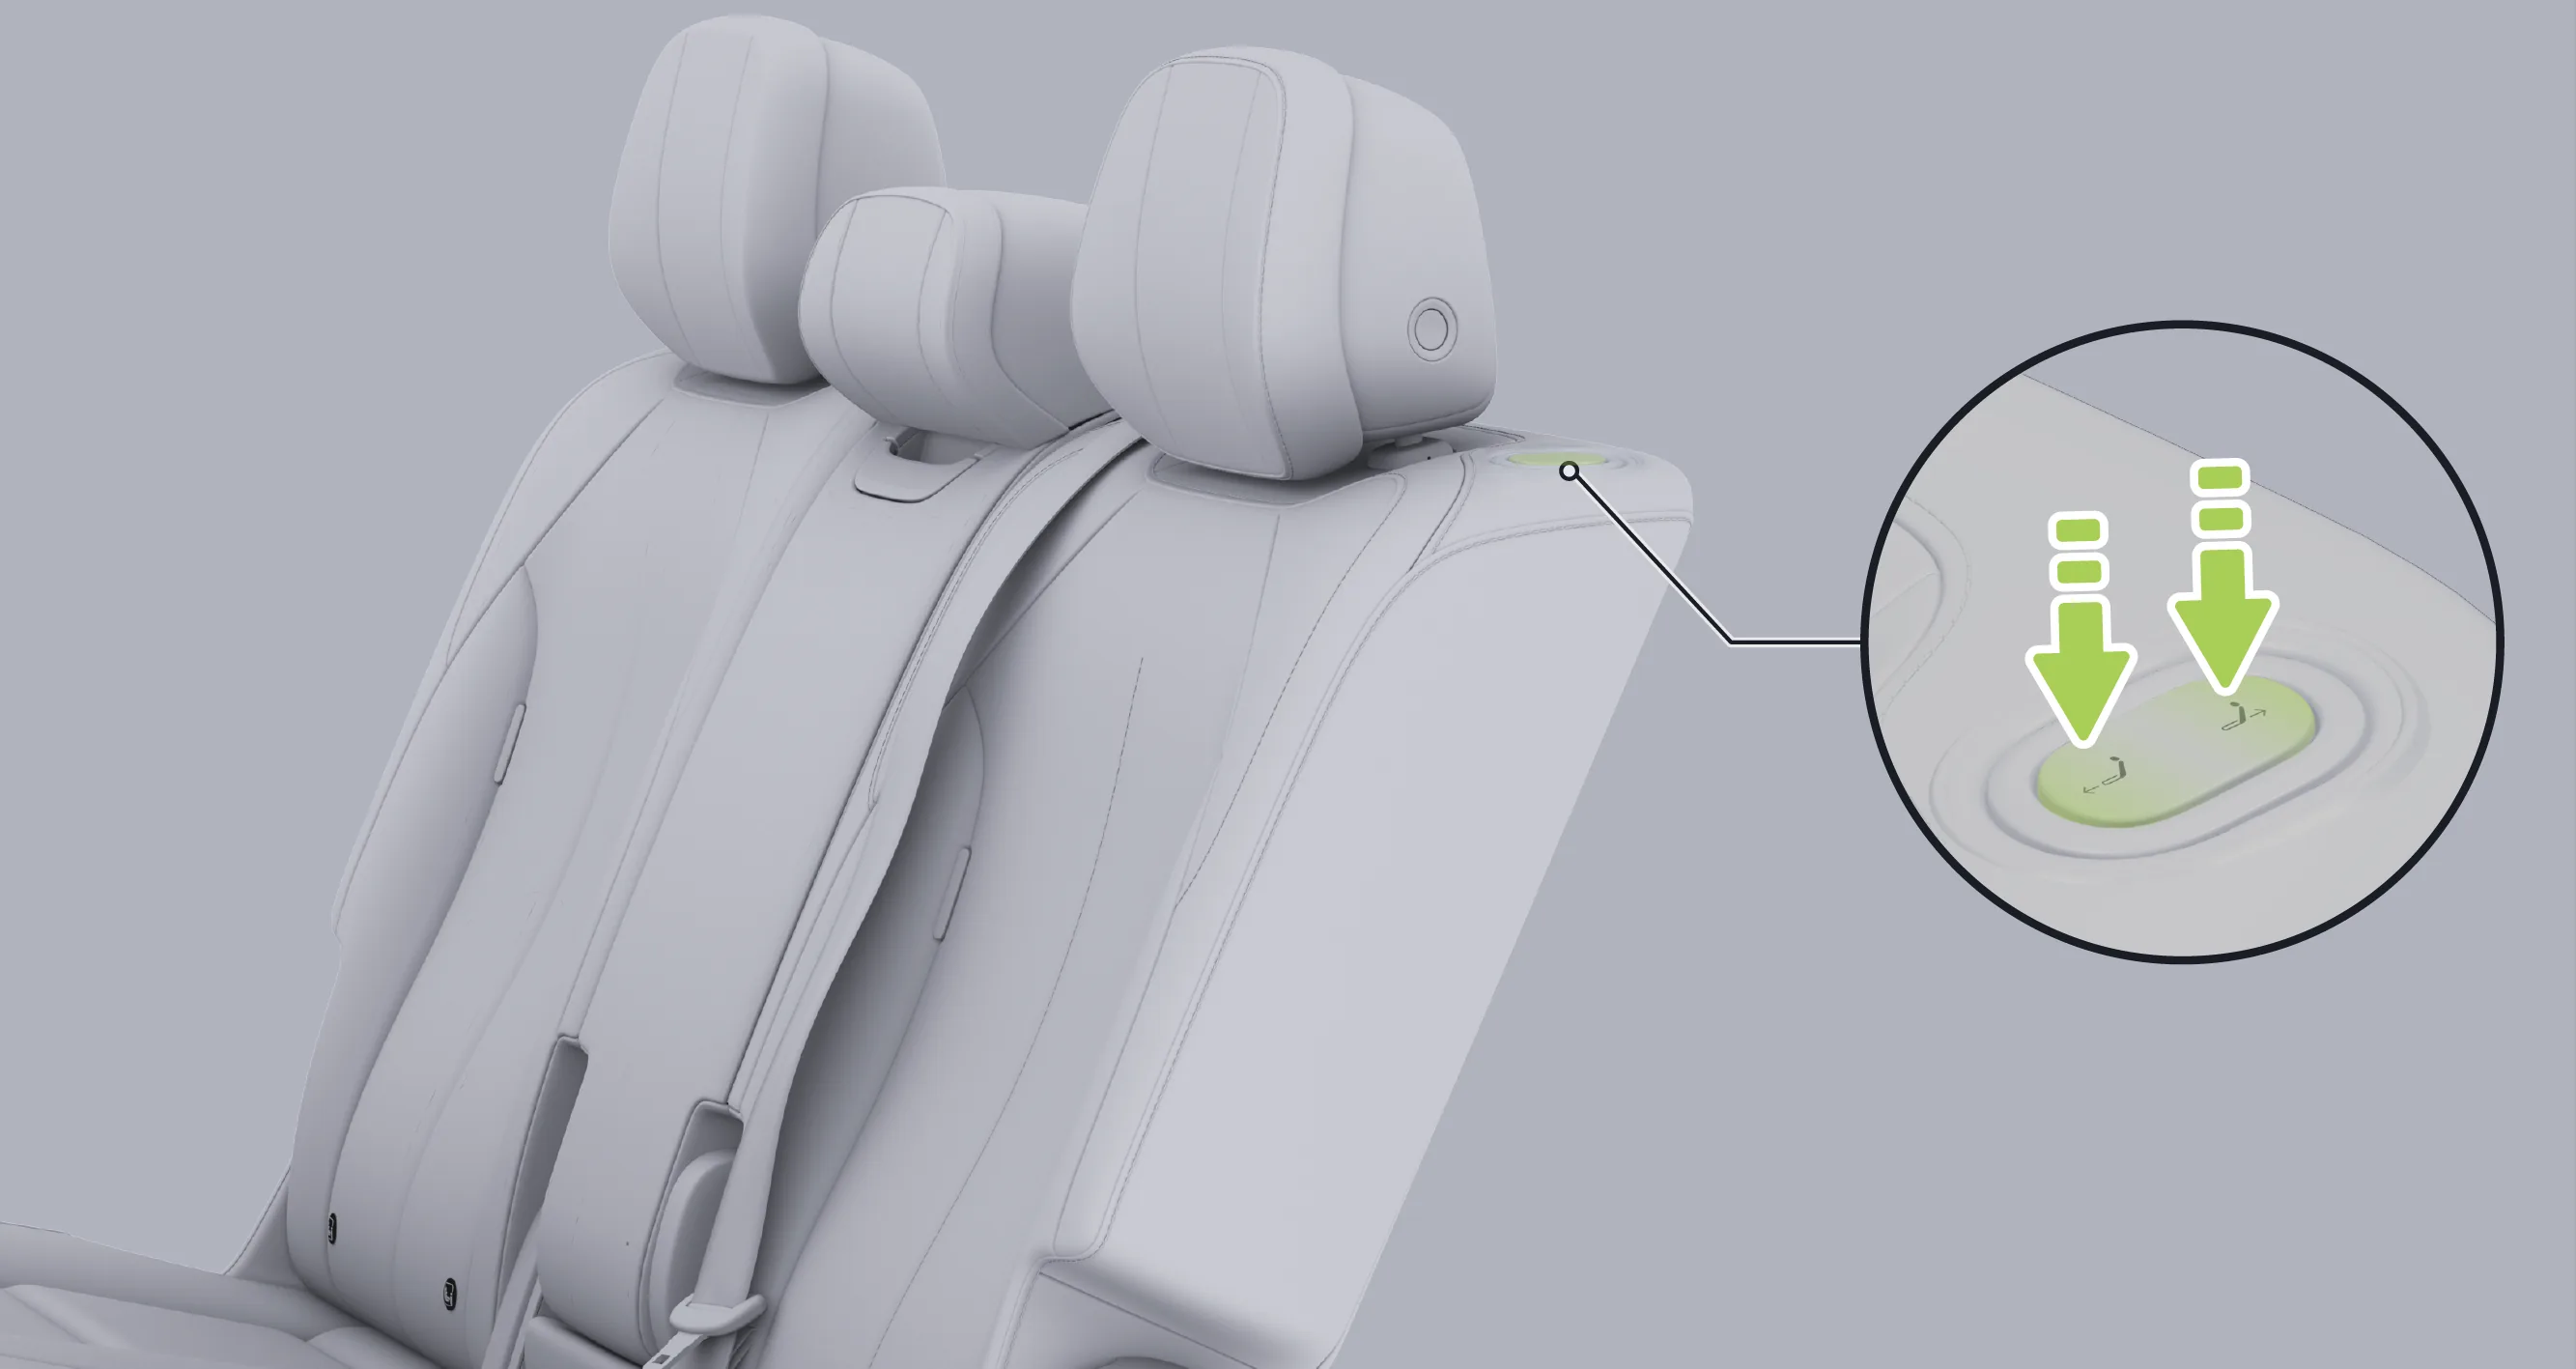
The button is located on the outer shoulder area of the second-row seat. Press the front end of the button, and the left or right second-row seat will move forward to facilitate entry and exit for third-row occupants. Press the rear end of the button, and the seat will return to the seating position.
Tap in sequence on the rear control screen “ →Seat Position→Select the second-row left seat or the second-row right seat. ”Enter the adjustment screen for the second-row left seat or the second-row right seat. Tap You can enter or exit the easy access mode for third-row occupants.
Tap the rear entertainment screen in sequence. “ →Seat Position→Select “RL” or “RR””Enter the adjustment screen for the second-row left seat or second-row right seat. Tap Easy Entry/ExitYou can enter or exit the easy access mode for third-row occupants.
Tips If the rear left or middle seat in the second row is occupied, the rear left seat occupant entry and exit function in the second row will be unavailable.
If the rear right seat in the second row is occupied, the rear right seat occupant entry and exit function in the second row will be unavailable.
Warning Before operating the easy entry and exit function, confirm the environment around the seat. Avoid risks such as squeezing or collision with rear occupants, especially children, or pets.
During seat movement, ensure that hands, body parts, or objects are not in the seat movement path to avoid the risk of pinching.
Avoid allowing children to operate the Easy Entry/Exit function, as there is a risk of pinching injury.
Do not place overly thick floor mats or other foreign objects (such as drink bottles, charcoal bags, etc.) under the seat. Otherwise, they may become trapped between the seat and the guide rail, obstruct seat movement, and thereby damage the seat. It is recommended to use officially certified floor mat products from XPENG Motors.
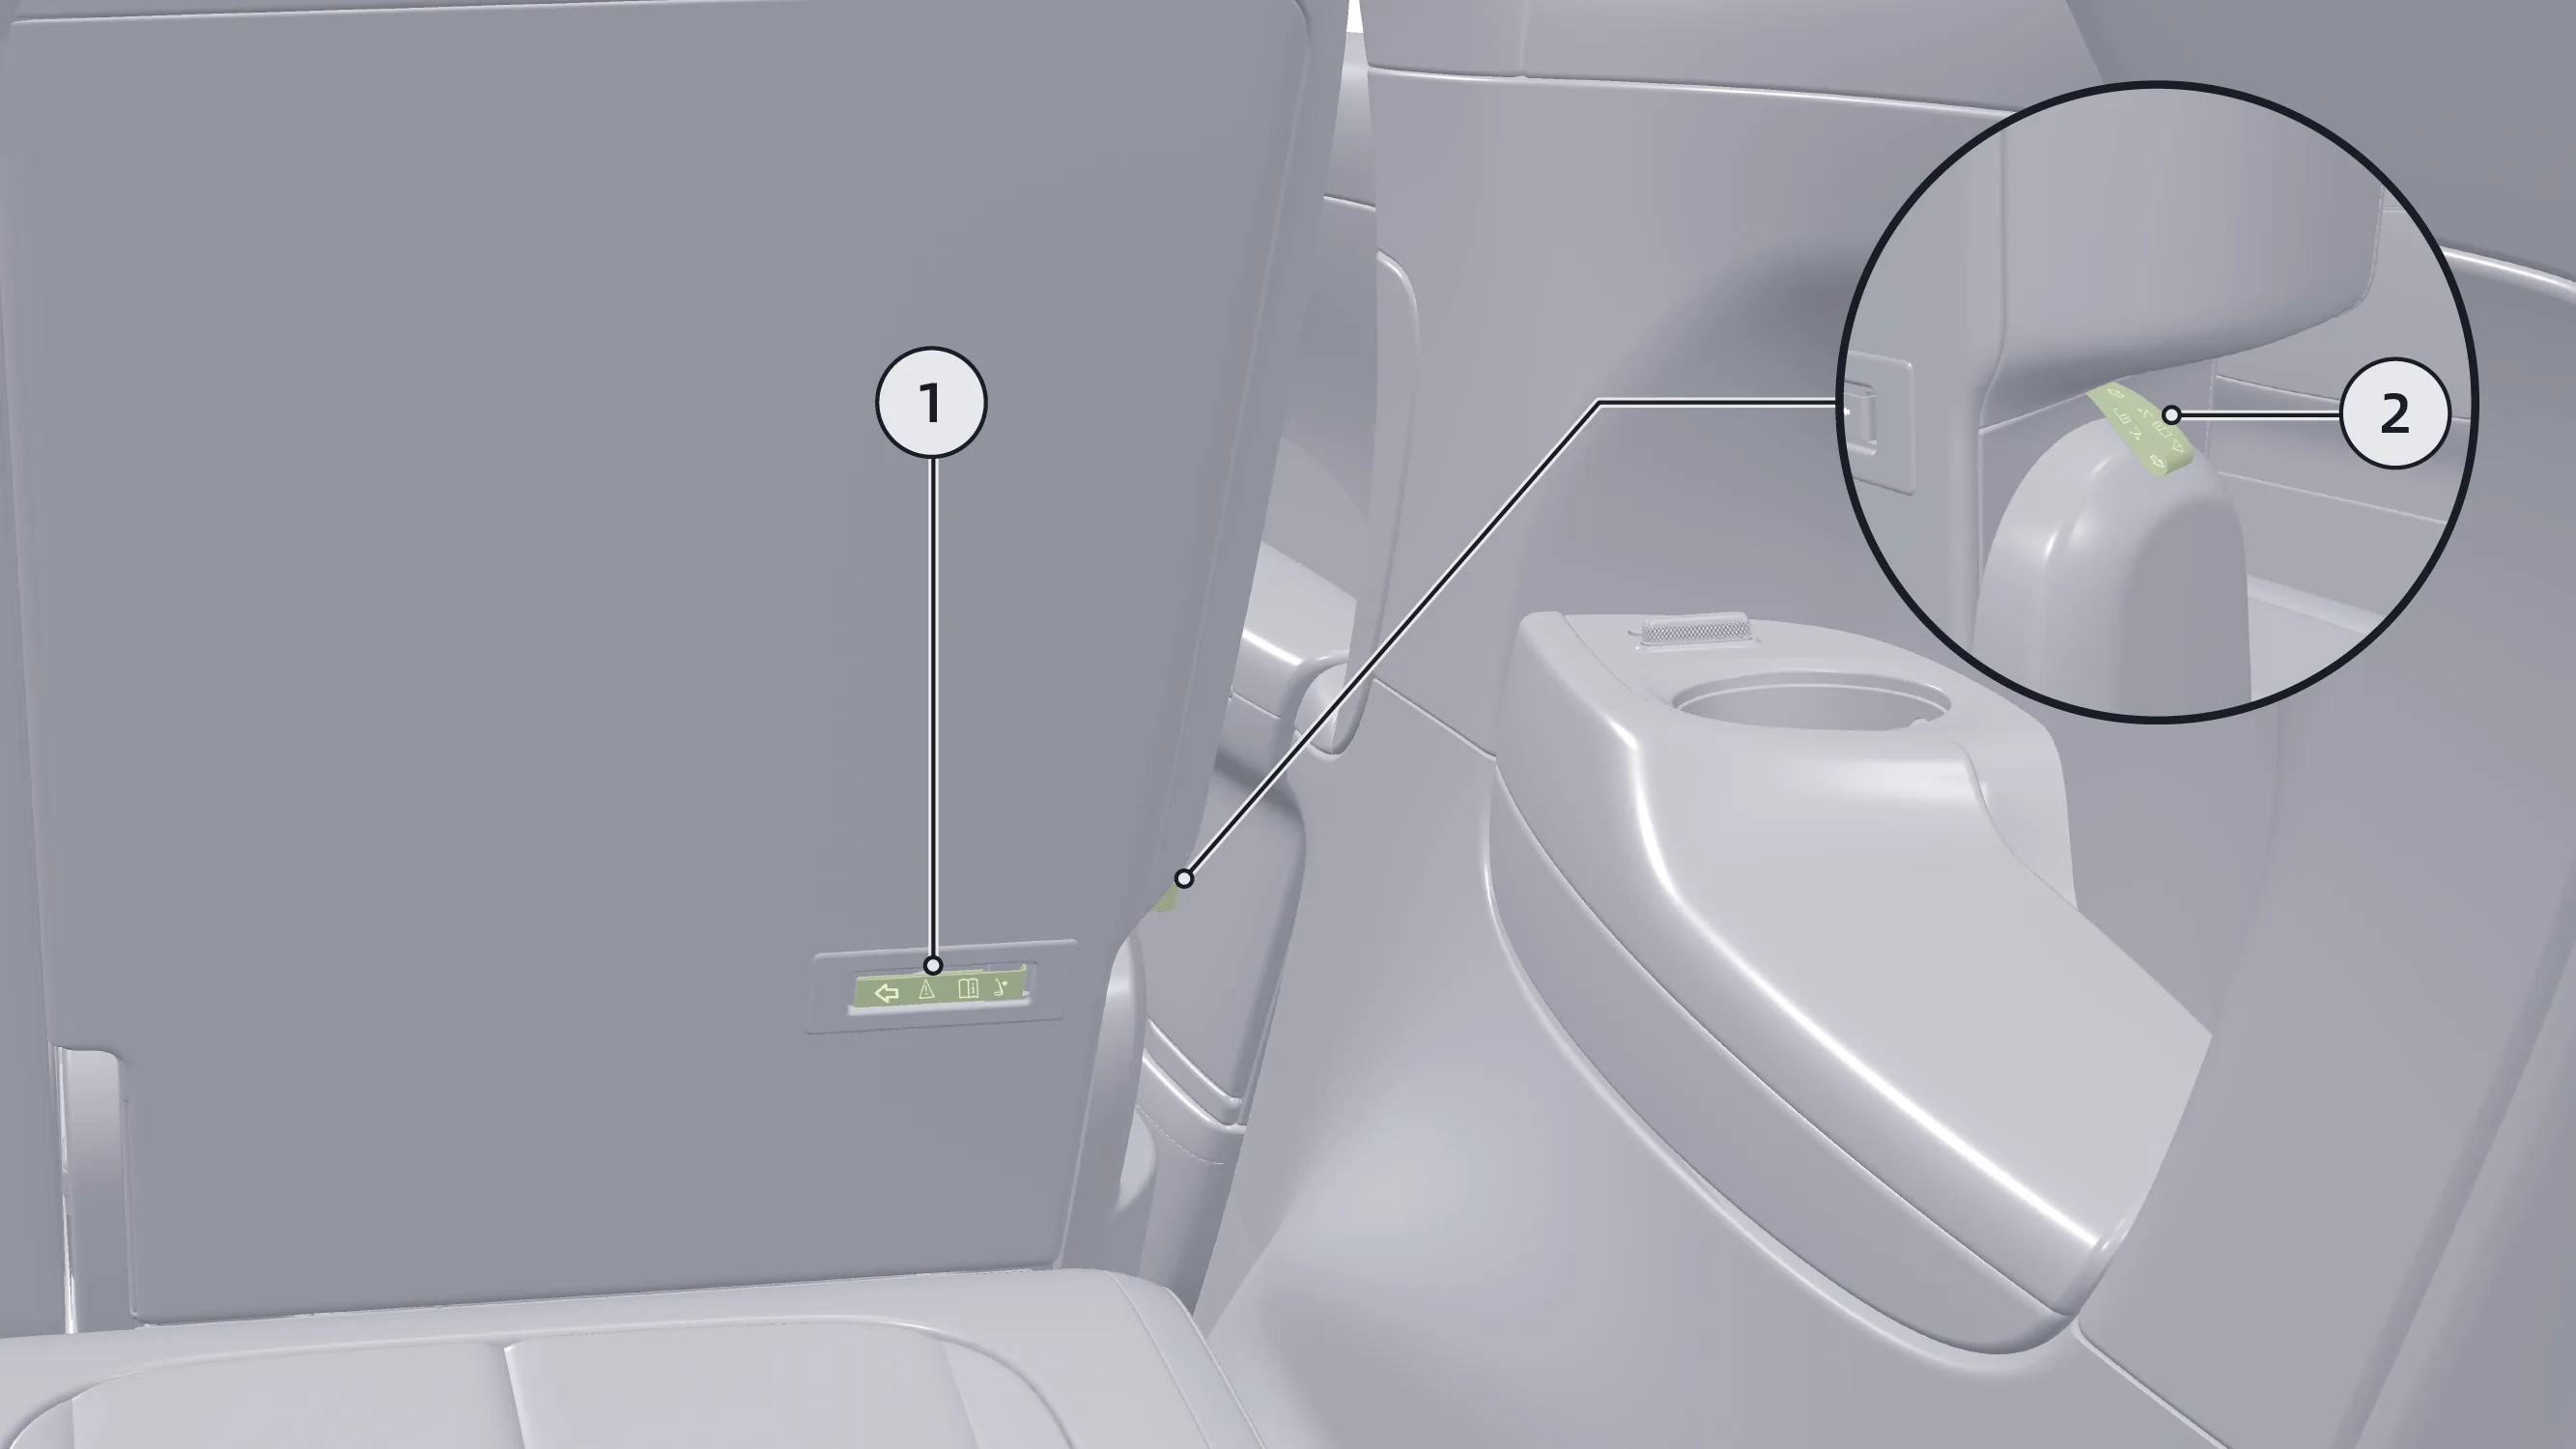
In an emergency, the right seat seatback can be manually folded by using pull strap ① on the seatback of the second-row right seat or pull strap ② on the side, to facilitate entry and exit for third-row occupants. To restore the seat seatback, pull the strap and then manually unfold the seatback. When a “click” sound is heard, it indicates that the seatback has been adjusted to the fixed position.
You can adjust the angle of the third-row seatback using any of the following methods:
Adjust the seatback angle using the seat switch.
Adjust the seatback angle via the central control screen.
Adjust the seatback angle by voice command.
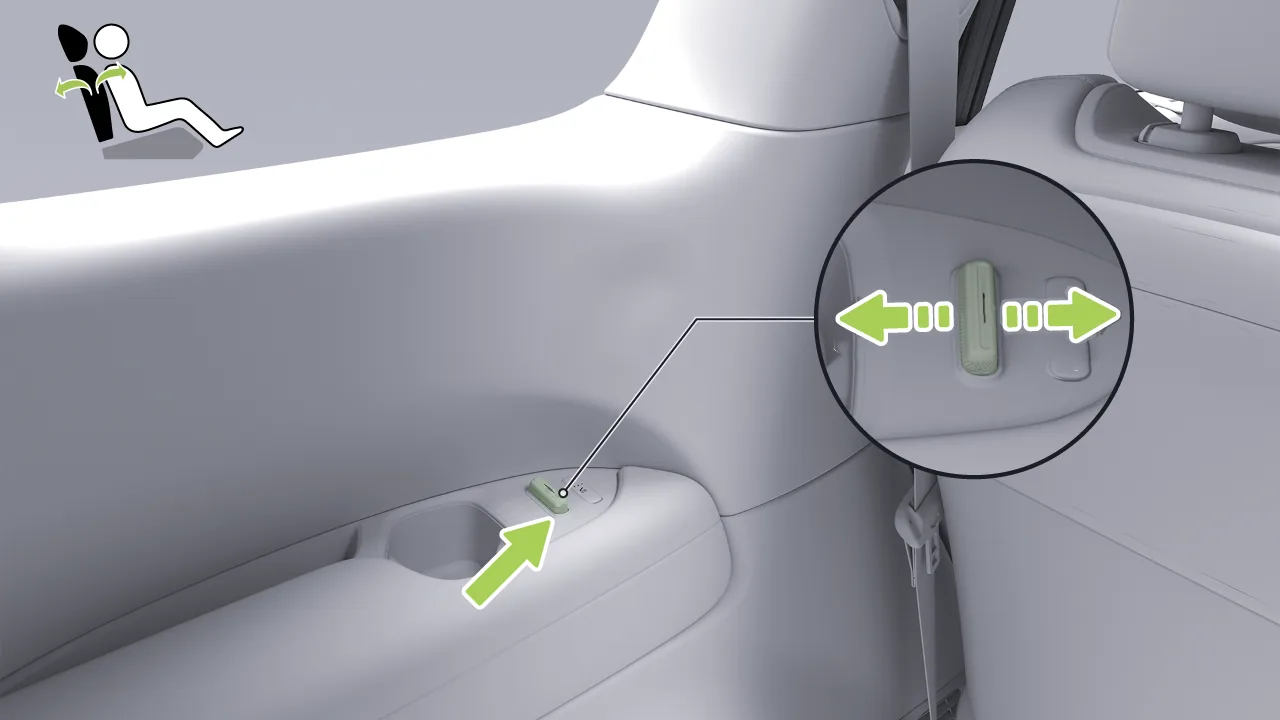
The third-row seat seatback angle adjustment switch is located on the third-row armrest. Toggle this adjustment switch forward or backward to adjust the third-row seat seatback angle.
Tap the center display in sequence. “ →Seats→Seat Position→Select “3RL” or “3RR”→ ”, enter the adjustment interface for the third-row left seat or the third-row right seat.
Tap  or Adjust the angle of the third-row seat seatback step by step; press and hold to continuously adjust the angle of the third-row seat seatback. You can also tap or slide the slider to quickly adjust the angle of the third-row seat seatback.
The third-row seats support one-touch folding, which can effectively expand the vehicle's cargo space and significantly improve space utilization.
You can fold the third-row seats with one touch using any of the following methods:
Operate using the folding switch.
Operate via the central control screen.
Operate via the rear control screen.
Operate via the rear entertainment screen.
Operate through voice commands.
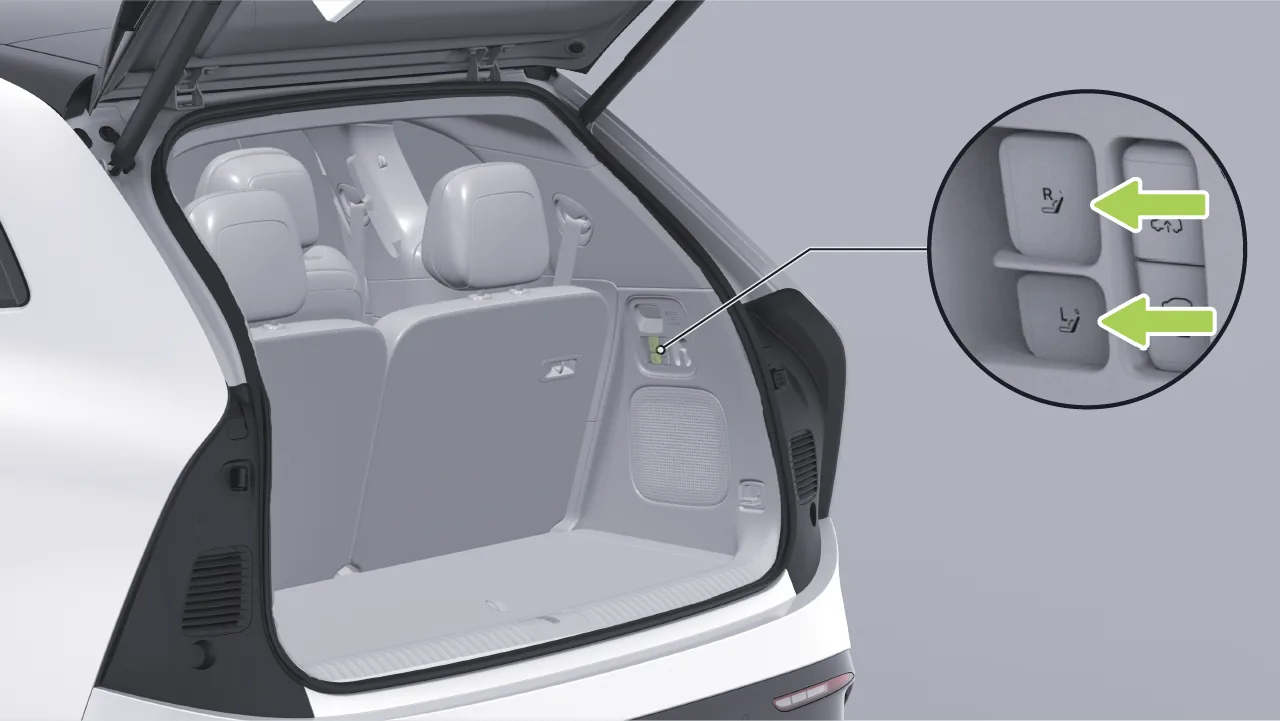
The folding switches are located on the right side of the trunk. The upper switch controls the right seat, and the lower switch controls the left seat.
One-touch fold: Press the switch briefly, and the third-row seatbacks and head restraints will fold forward.
One-touch unfold: briefly pull the switch. After the seatback gradually returns to its original position, manually lift the headrest to the locked position.
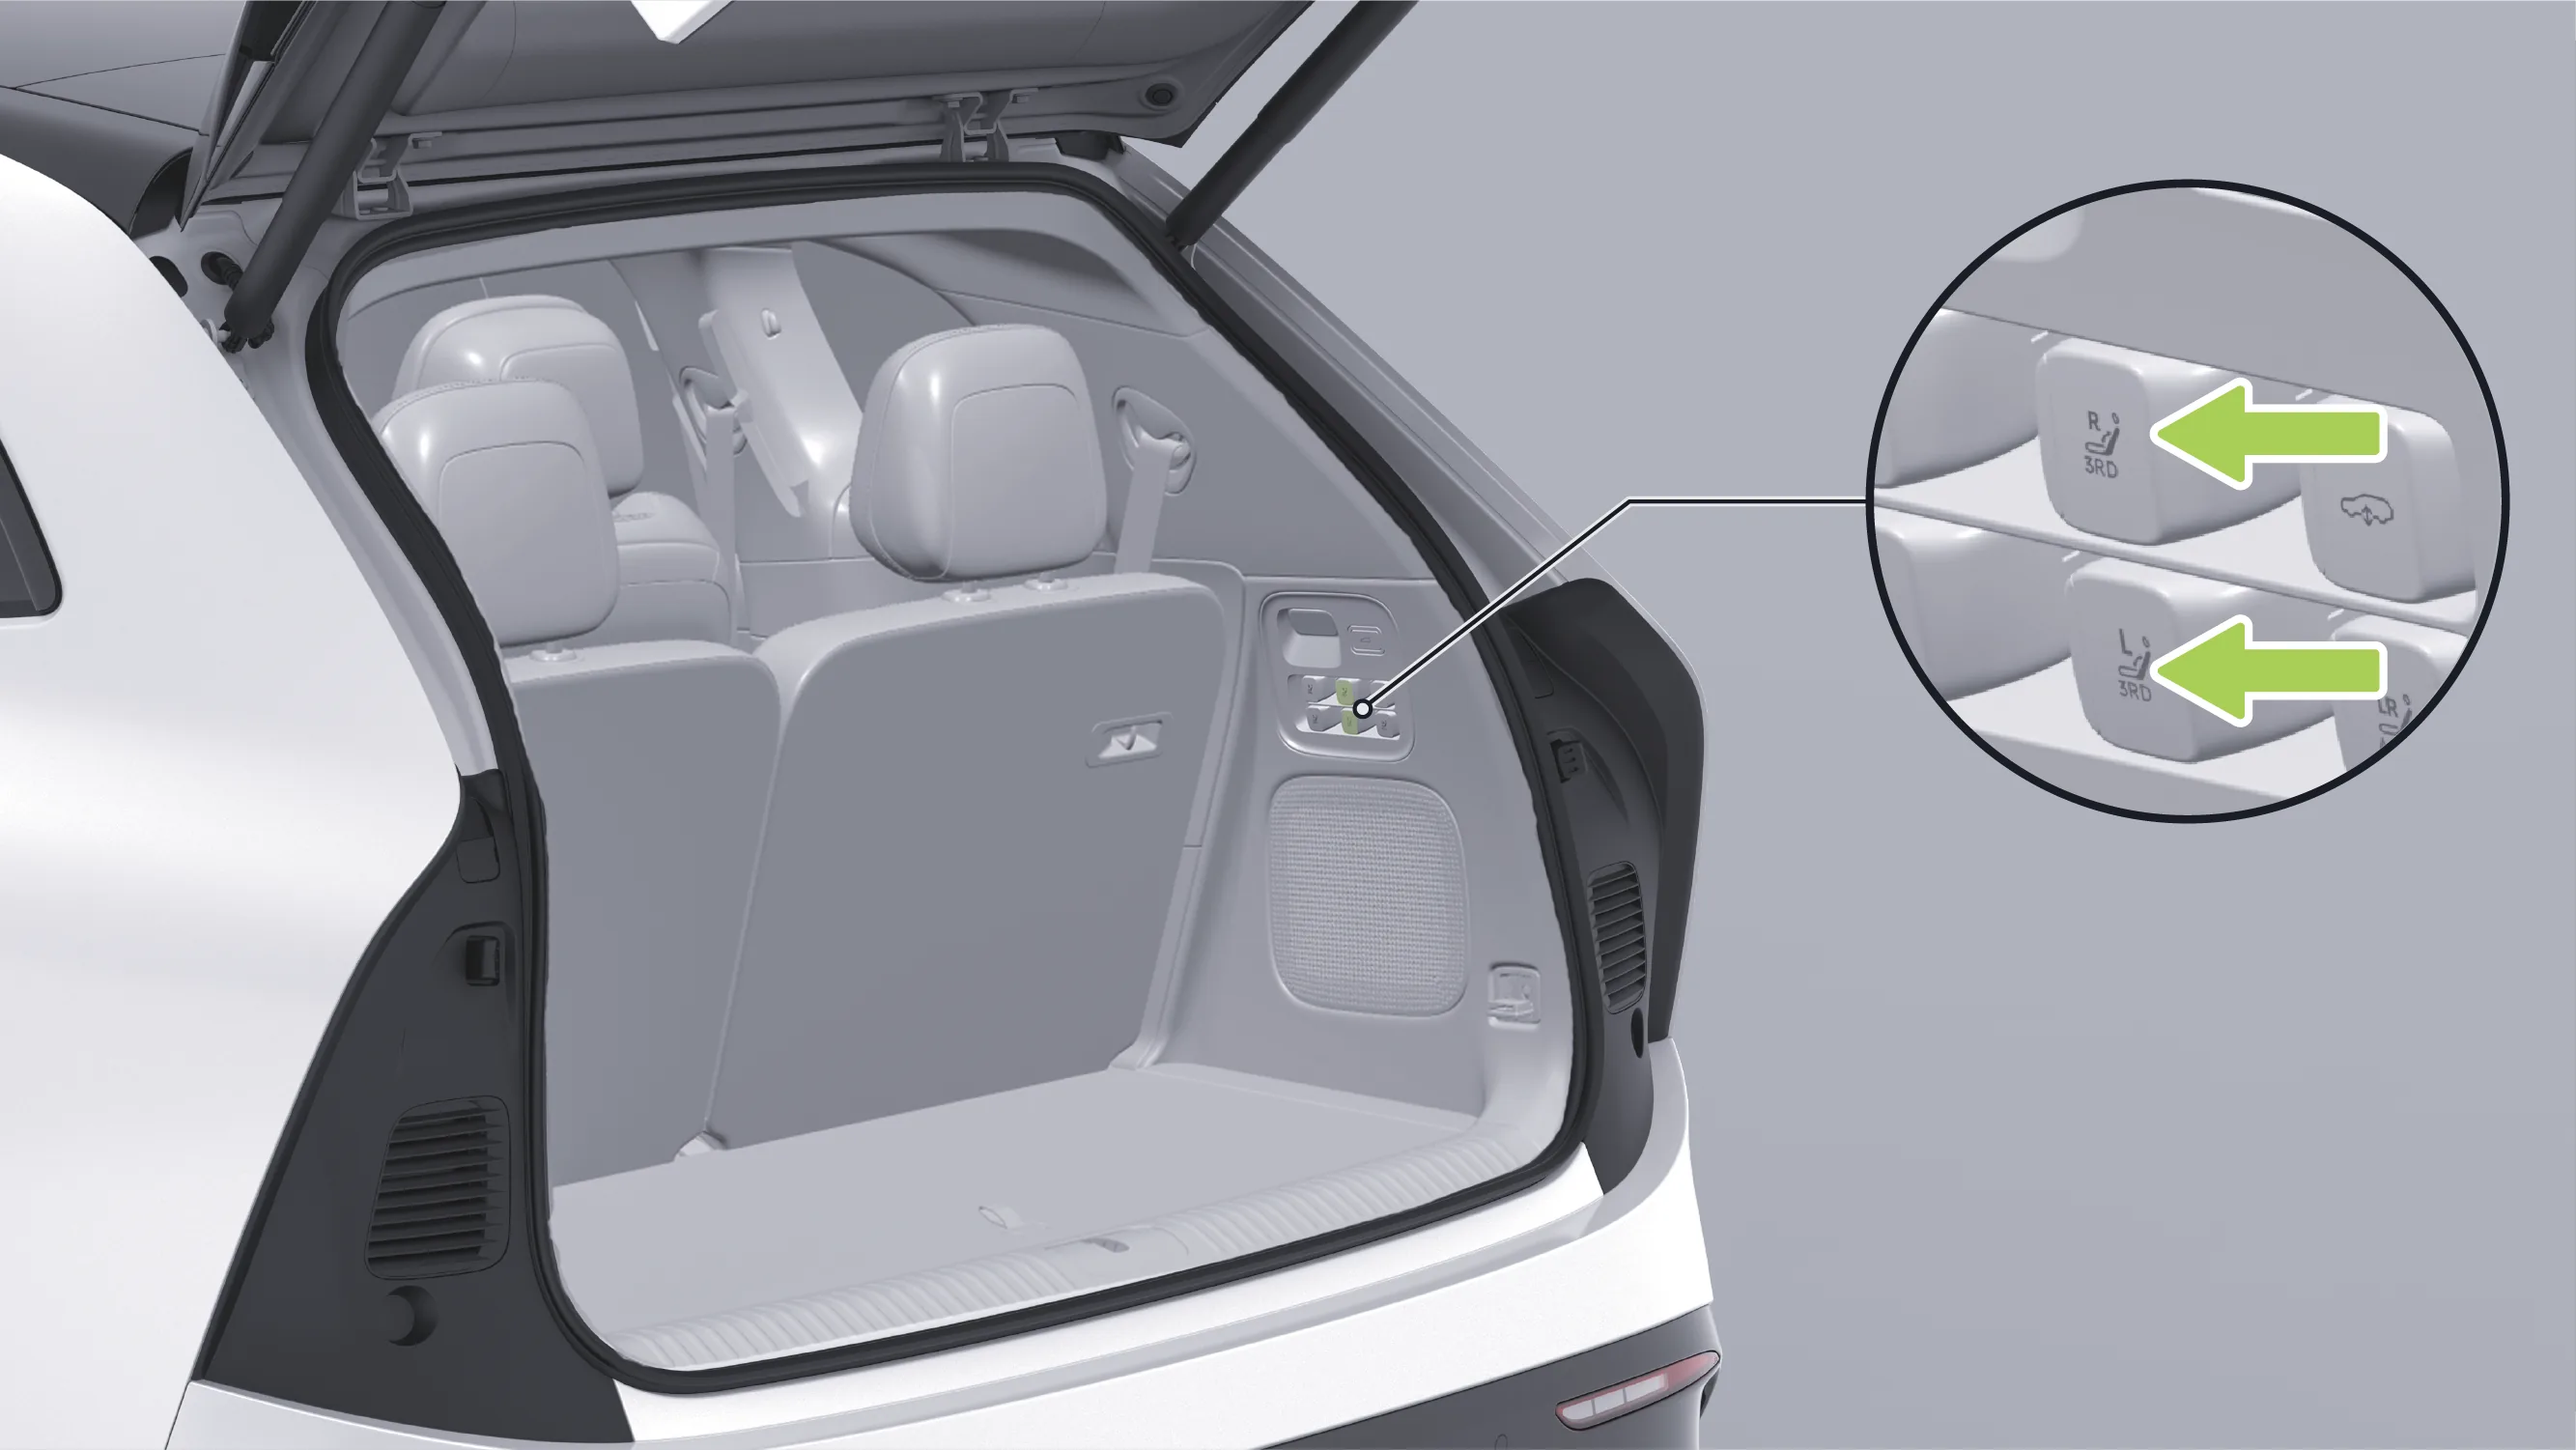
The folding switches are located on the right side of the trunk. The upper switch controls the right seat, and the lower switch controls the left seat.
One-touch fold: Press the switch briefly, and the third-row seatbacks and head restraints will fold forward.
One-touch unfold: briefly pull the switch. After the seatback gradually returns to its original position, manually raise the headrest to the locked position.
Tap the central control screen in sequence. “ →Seats→Seat Position→Select “3RL” or “3RR””, enter the adjustment interface for the third-row left seat or the third-row right seat.
Tap , one-touch fold/unfold the left third-row seat backrest or the right third-row seat backrest.
Tap the rear control screen in sequence. “ →Seat Position→Select on the third-row seats ”, enter the third row left seat or third row right seat adjustment screen.
Tap , one-touch fold/unfold the left third-row seat backrest or the right third-row seat backrest.
Tap the central control screen in sequence. “ →Seat Position→Select “3RL” or “3RR””, enter the third row left seat or third row right seat adjustment screen.
Tap , one-touch fold/unfold the left third-row seat backrest or the right third-row seat backrest.
Caution One-touch folding requires certain conditions to be met, such as: the vehicle is in P gear, no one is seated in the third row seats, the seats have been initialized, the second row seat position is appropriate, and the third row seat belts are all unfastened.
Automatic forward avoidance will occur only when no one is seated in the second-row seats, so as to meet the space requirements for the one-touch folding action.
To avoid damage to the seat, before one-touch folding, clear items above the seat cushion and inside the trunk. If an obstacle is detected during the one-touch folding process, the seat will stop moving.
You can turn the seat heating function on/off in the following ways:
Control via the central display.
Controlled via the rear control screen.
Controlled via the rear entertainment screen.
Controlled by the second-row seat heating switch.
Controlled by the third-row seat heating switch*.
Controlled via the mobile app.
Control via voice commands.
Tap the center display in sequence. “ →seat→Heating/Ventilation”, enter Settings screen.
Tap “  ”Turn on the corresponding seat heating function. When the level is at 3, repeated taps cycle through level 2, level 1, off, and level 3.
Tap The vehicle system automatically adjusts the seat heating or ventilation intensity based on the interior and exterior ambient temperatures, the air conditioning settings, and the status of the seat sensors, without requiring manual switching of levels.
Tips After Smart Cooling/Heating is enabled, if the seat ventilation or seat heating switch is operated manually, the Smart Cooling/Heating function will automatically exit.
Tap , all seat heating, seat ventilation, and steering wheel heating functions can be turned off.
Tap on the rear control screen. “ →Heating/Ventilation”Enter Settings screen.
Tap “  ”Turn on the heating function for the corresponding second-row seat. The level is at 3. Repeatedly tap to cycle through level 2, level 1, off, and level 3.
Tap *, switch to the third row Settings screen.
Tap on the rear entertainment screen. “ →Heating/Ventilation”Enter Settings screen.
Tap “ ”Turn on the heating function for the corresponding second-row seat. The level is at 3. Repeatedly tap to cycle through level 2, level 1, off, and level 3.
Tap *, switch to the third row Settings screen.
Tips The seat heating and ventilation functions cannot be turned on at the same time.
The rear control screen and rear entertainment screen only support controlling the second-row and third-row *seat heating function.
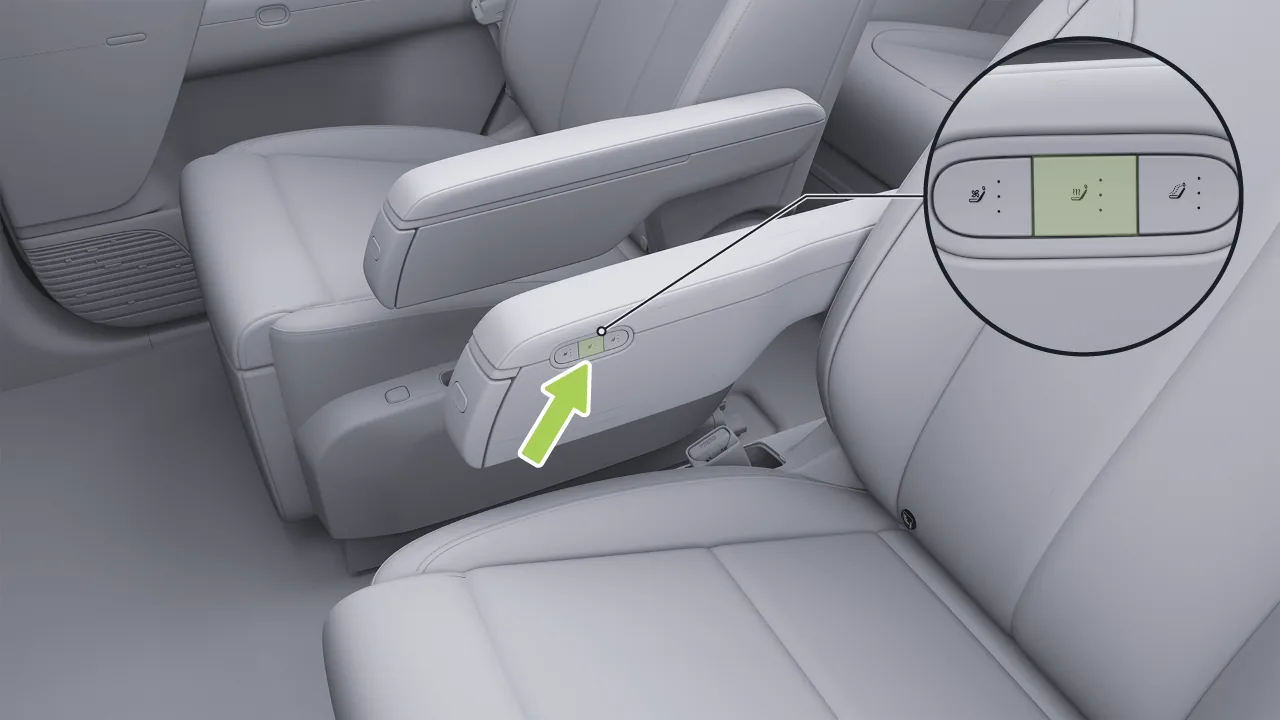
Press the second-row seat heating switch to turn on the seat heating function. The level is at 3. Press repeatedly to cycle through level 2, level 1, Off, and level 3 in sequence. The switch indicator light will display accordingly with the level.
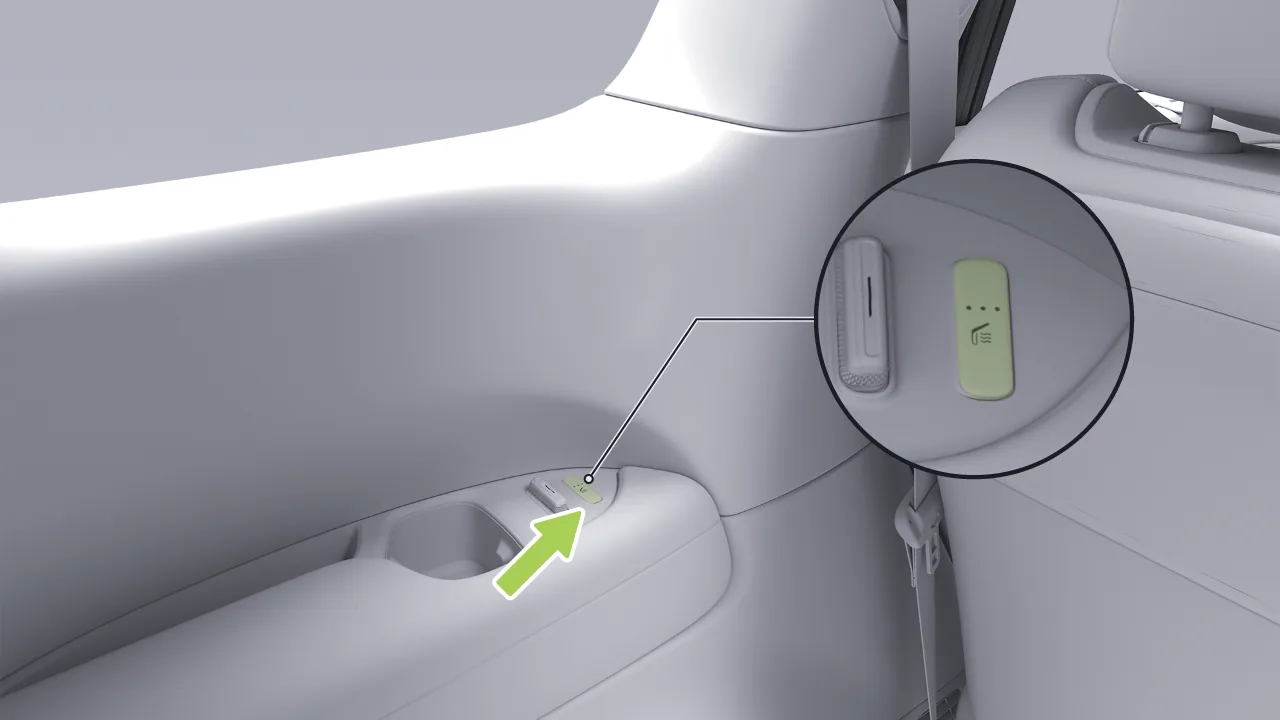
Press the third-row seat heating switch to turn on the seat heating function. The level is at 3. Press repeatedly to cycle through level 2, level 1, Off, and level 3 in sequence. The switch indicator light will display accordingly with the level.
In the mobile app Tap the corresponding seat  Turn on the seat heating function. When the level is at 3, repeated taps cycle through level 2, level 1, off, and level 3.
Caution It is recommended not to turn on the seat heating function for unoccupied seats, so as to avoid energy waste or other losses.
When using the seat heating function, do not place items such as blankets or seat cushions on the seat. Otherwise, the seat temperature may become too high, which may cause a malfunction of the heating function or damage the seat.
If a child restraint system is installed on the second-row/third-row* seat, do not turn on the seat heating function.
Warning Do not use the seat heating function if the person in contact with the seat does not feel pain, as personal injury may result.
Extended use of a high-speed heated seat can cause cold burns.
Using the host seat heating for extended periods of time may cause distress and affect safety.
You can turn the seat ventilation function on/off in the following ways:
Control via the central control screen.
Controlled via the rear control screen.
Controlled via the rear entertainment screen.
Controlled via the second-row seat ventilation switch.
Controlled via the mobile app.
Control via voice commands.
Tap the center display in sequence. “ →seat→Heating/Ventilation”, enter Settings screen.
Tap “  ”Turn on the ventilation function for the corresponding seat. When the level is at 3, repeated taps cycle through level 2, level 1, off, and level 3.
Tap , the vehicle system will automatically adjust the seat heating or ventilation intensity according to the ambient temperature inside and outside the vehicle, the air conditioning settings, and the status of the seat sensors, without the need to manually switch levels.
Tips After Smart Cooling/Heating is enabled, if the seat ventilation or seat heating switch is operated manually, the Smart Cooling/Heating function will automatically exit.
Tap , can turn off all seat heating, seat ventilation, and steering wheel heating functions.
Tap on the rear control screen. “ →Heating/Ventilation”Enter Settings screen.
Tap “ ”Turn on the ventilation function for the corresponding second-row seat. The level is at 3. Repeatedly tap to cycle through level 2, level 1, off, and level 3.
Tap on the rear entertainment screen. “ →Heating/Ventilation”Enter Settings screen.
Tap “ ”Turn on the ventilation function for the corresponding second-row seat. The level is at 3. Repeatedly tap to cycle through level 2, level 1, Off, and level 3.
Tips The seat heating and ventilation functions cannot be turned on at the same time.
The rear control screen and the rear entertainment screen only support controlling the second-row seat ventilation function.
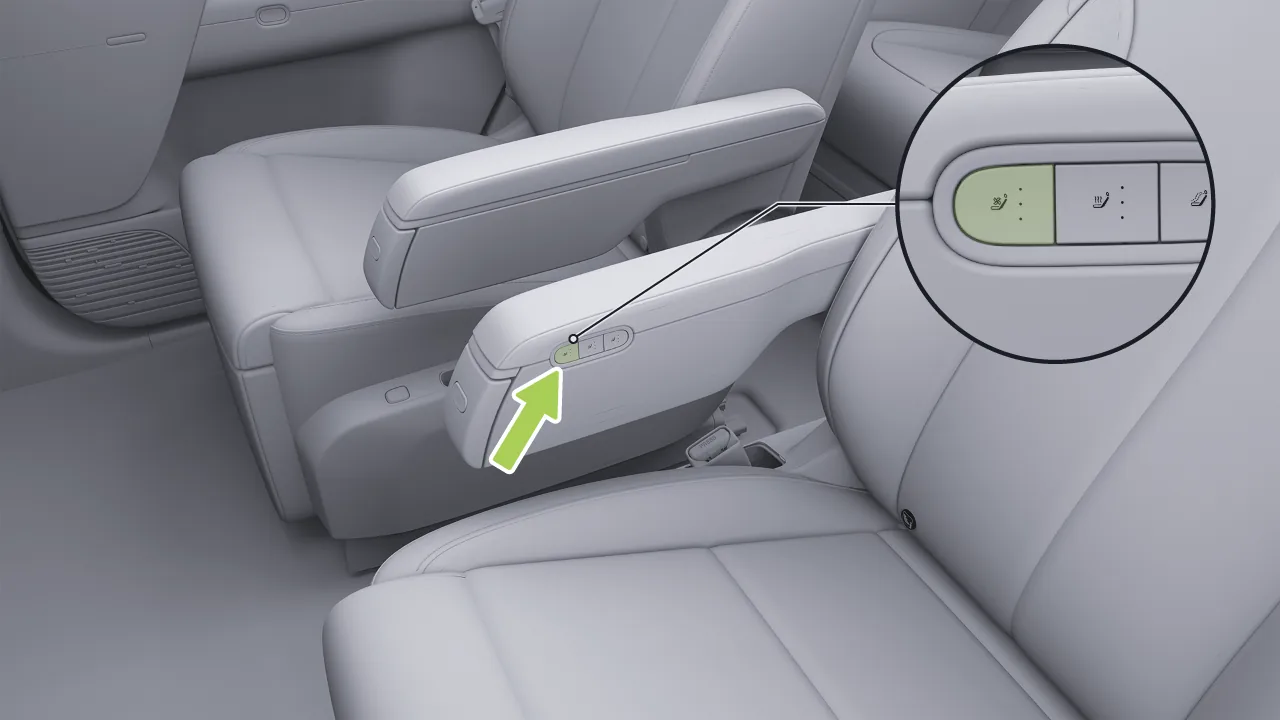
Press the second-row seat ventilation switch to turn on the seat ventilation function. The level is at 3. Press repeatedly to cycle through level 2, level 1, off, and level 3 in sequence. The switch indicator light will display accordingly with the level.
In the mobile app Tap the corresponding seat  Turn on the seat ventilation function. When the level is at 3, repeated taps cycle through level 2, level 1, off, and level 3.
Tips The seat heating and ventilation functions cannot be turned on at the same time.
Only the first- and second-row seats support the Seat Ventilation function.
Caution It is recommended not to turn on the Seat Ventilation function for unoccupied seats to avoid wasting energy or causing other loss or damage.
If a child safety seat is installed on a second-row seat, do not turn on the Seat Ventilation function.
You can turn the seat massage function on/off in the following ways:
Controlled via the second-row seat massage switch*.
Control via the center display.
Controlled via the rear control screen.
Controlled via the rear entertainment screen.
Controlled by voice commands.
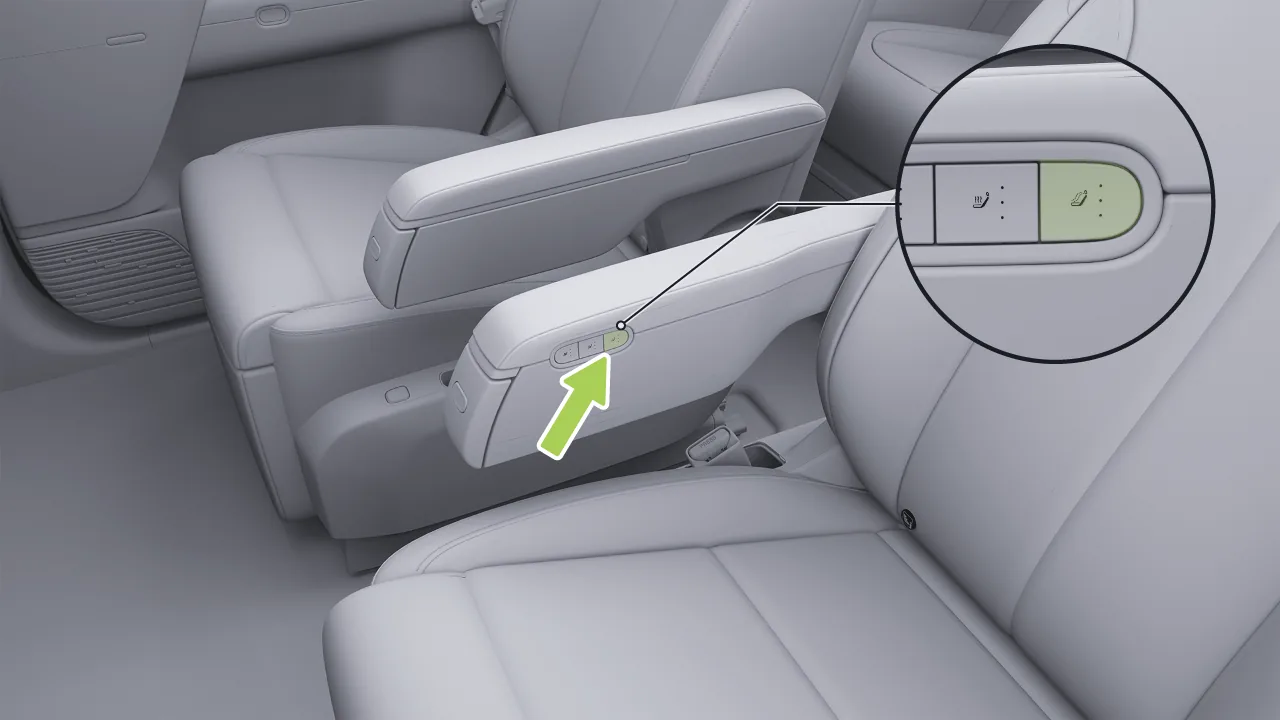
Press to turn on the seat massage function. The level is at Level 3. Press repeatedly to cycle through Level 2, Level 1, Off, and Level 3 in sequence. The switch indicator light will display together with the level.
Tap the center display in sequence. “ →seat→Seat Massage”, enter Settings screen.
Tap “  ”Turn on the corresponding seat massage function. When the massage intensity level is at level 3, repeated tapping cycles through level 2, level 1, off, and level 3.
Tap , all seat massage functions can be turned off.
After tapping the name of the corresponding seat massage mode, you will enter the corresponding seat massage settings screen, where the following personalized settings are supported:
You can select the massage mode according to your personal preference.
Tap to turn the seat massage function on or off.
Tap to select the massage intensity.
Tap to select the massage area.
Tap on the rear control screen. “ →Seat Massage”Enter Settings screen.
Tap “ ”Turn on the corresponding seat massage function. When the massage intensity level is at level 3, repeated tapping cycles through level 2, level 1, off, and level 3.
Tap to turn the seat massage function on or off.
Tap to select the massage intensity.
You can select the massage mode according to your personal preference.
Tap on the rear entertainment screen. “ →Seat Massage”Enter Settings screen.
Tap “ ”Turn on the massage function for the corresponding seat. When the massage intensity level is at level 3, repeated tapping cycles through level 2, level 1, off, and level 3.
Tap to turn the seat massage function on or off.
Tap to select the massage intensity.
Tap to select the massage area.
You can select the massage mode according to your personal preference.
Tips Only the front row and second-row seats support the seat massage function.
The rear control screen and the rear entertainment screen only support controlling the second-row seat massage function.
After the seat massage function is turned on, even if you do not turn it off manually, it will automatically turn off after running for a certain period of time.
Caution If a child safety seat is installed on a second-row seat, do not turn on the Seat Massage function.
After seat Welcome is enabled, when you get in or out of the vehicle, the seat will automatically adjust to the Welcome position, making it easier for you to enter and exit the vehicle.
Tap the center display in sequence. “ →Settings→vehicle→Unlocking and Welcome→Driver Welcome”, turn the driver's seat welcome function on or off.
Tap the center display in sequence. “ →Settings→vehicle→Unlocking and Welcome→passenger Welcome”, turn passenger welcome on or off.
Tips If the backrest angle of the driver/passenger seat is relatively large, moving the seat rearward may affect second-row passengers. In this case, the welcome function will not be activated.
If the driver/passenger seat position is relatively far back and the occupants can already exit the vehicle conveniently, the welcome function will not be activated.
Caution Even if the seat has an anti-pinch function, before adjustment ensure that no persons or objects are obstructing the movement range of the seat and track; otherwise, personal injury or vehicle damage may result.
When performing the following operations, if the resistance is too great, the anti-pinch function will be triggered:
Adjust the fore-aft position of the driver/passenger seat and recline the seatback rearward.
Adjust the fore-aft position* of the second-row seat, the rearward angle of the seatback, and the leg rest angle (excluding leg rest length).
Adjust the third-row seat* seatback angle and fold and flip the seatback for stowage.
Tips After the seat cushion and floor are unlocked, during the initial stage of flip-fold stowage and the stage when stowage is about to end, if the third-row seats* trigger anti-pinch protection, movement will stop.
When the anti-pinch function is triggered for the driver/passenger seat or the second-row seat, the seat will stop moving and move back a certain distance. When the anti-pinch function is triggered for the third-row seat*, the seat will stop moving.
When using the front-row/second-row seat, if the function is abnormal (for example, the buttons, center control screen, or voice cannot adjust the seat), you can try manually initializing the seat before using it again.
Push the seatback angle adjustment switch forward, and release the switch after the seatback moves to the fully forward position and stops;
Toggle the switch forward again to confirm it is in the fully forward position, then release the switch;
Within 5 seconds, push the seatback angle adjustment switch forward again and hold it for more than 5 seconds, and the seat will automatically start initialization learning; at this time, release the adjustment switch.
Wait until the seat has come to a complete stop before using the seat.
When using the third-row seat, if the function is abnormal (for example, the button, center control screen, or voice cannot adjust the seat backrest), you can try manually initializing the seat before using it again.
Push the third-row seat seatback angle adjustment switch forward, and release the switch after the seatback is fully folded and stops;
Within 5 seconds, push the seatback angle adjustment switch forward again and hold it for more than 5 seconds, and the seat will automatically start initialization learning; at this time, release the adjustment switch.
Wait until the seat has come to a complete stop before using the seat.
Caution During initialization, the seat will automatically move to its limit positions in all directions. Before initialization, adjust the front and rear seats to a forward/rearward position to provide sufficient space for the seat being initialized to move, so as to avoid collision.
If the seat switch (including via the touchscreen) is pressed during initialization, the initialization will pause.
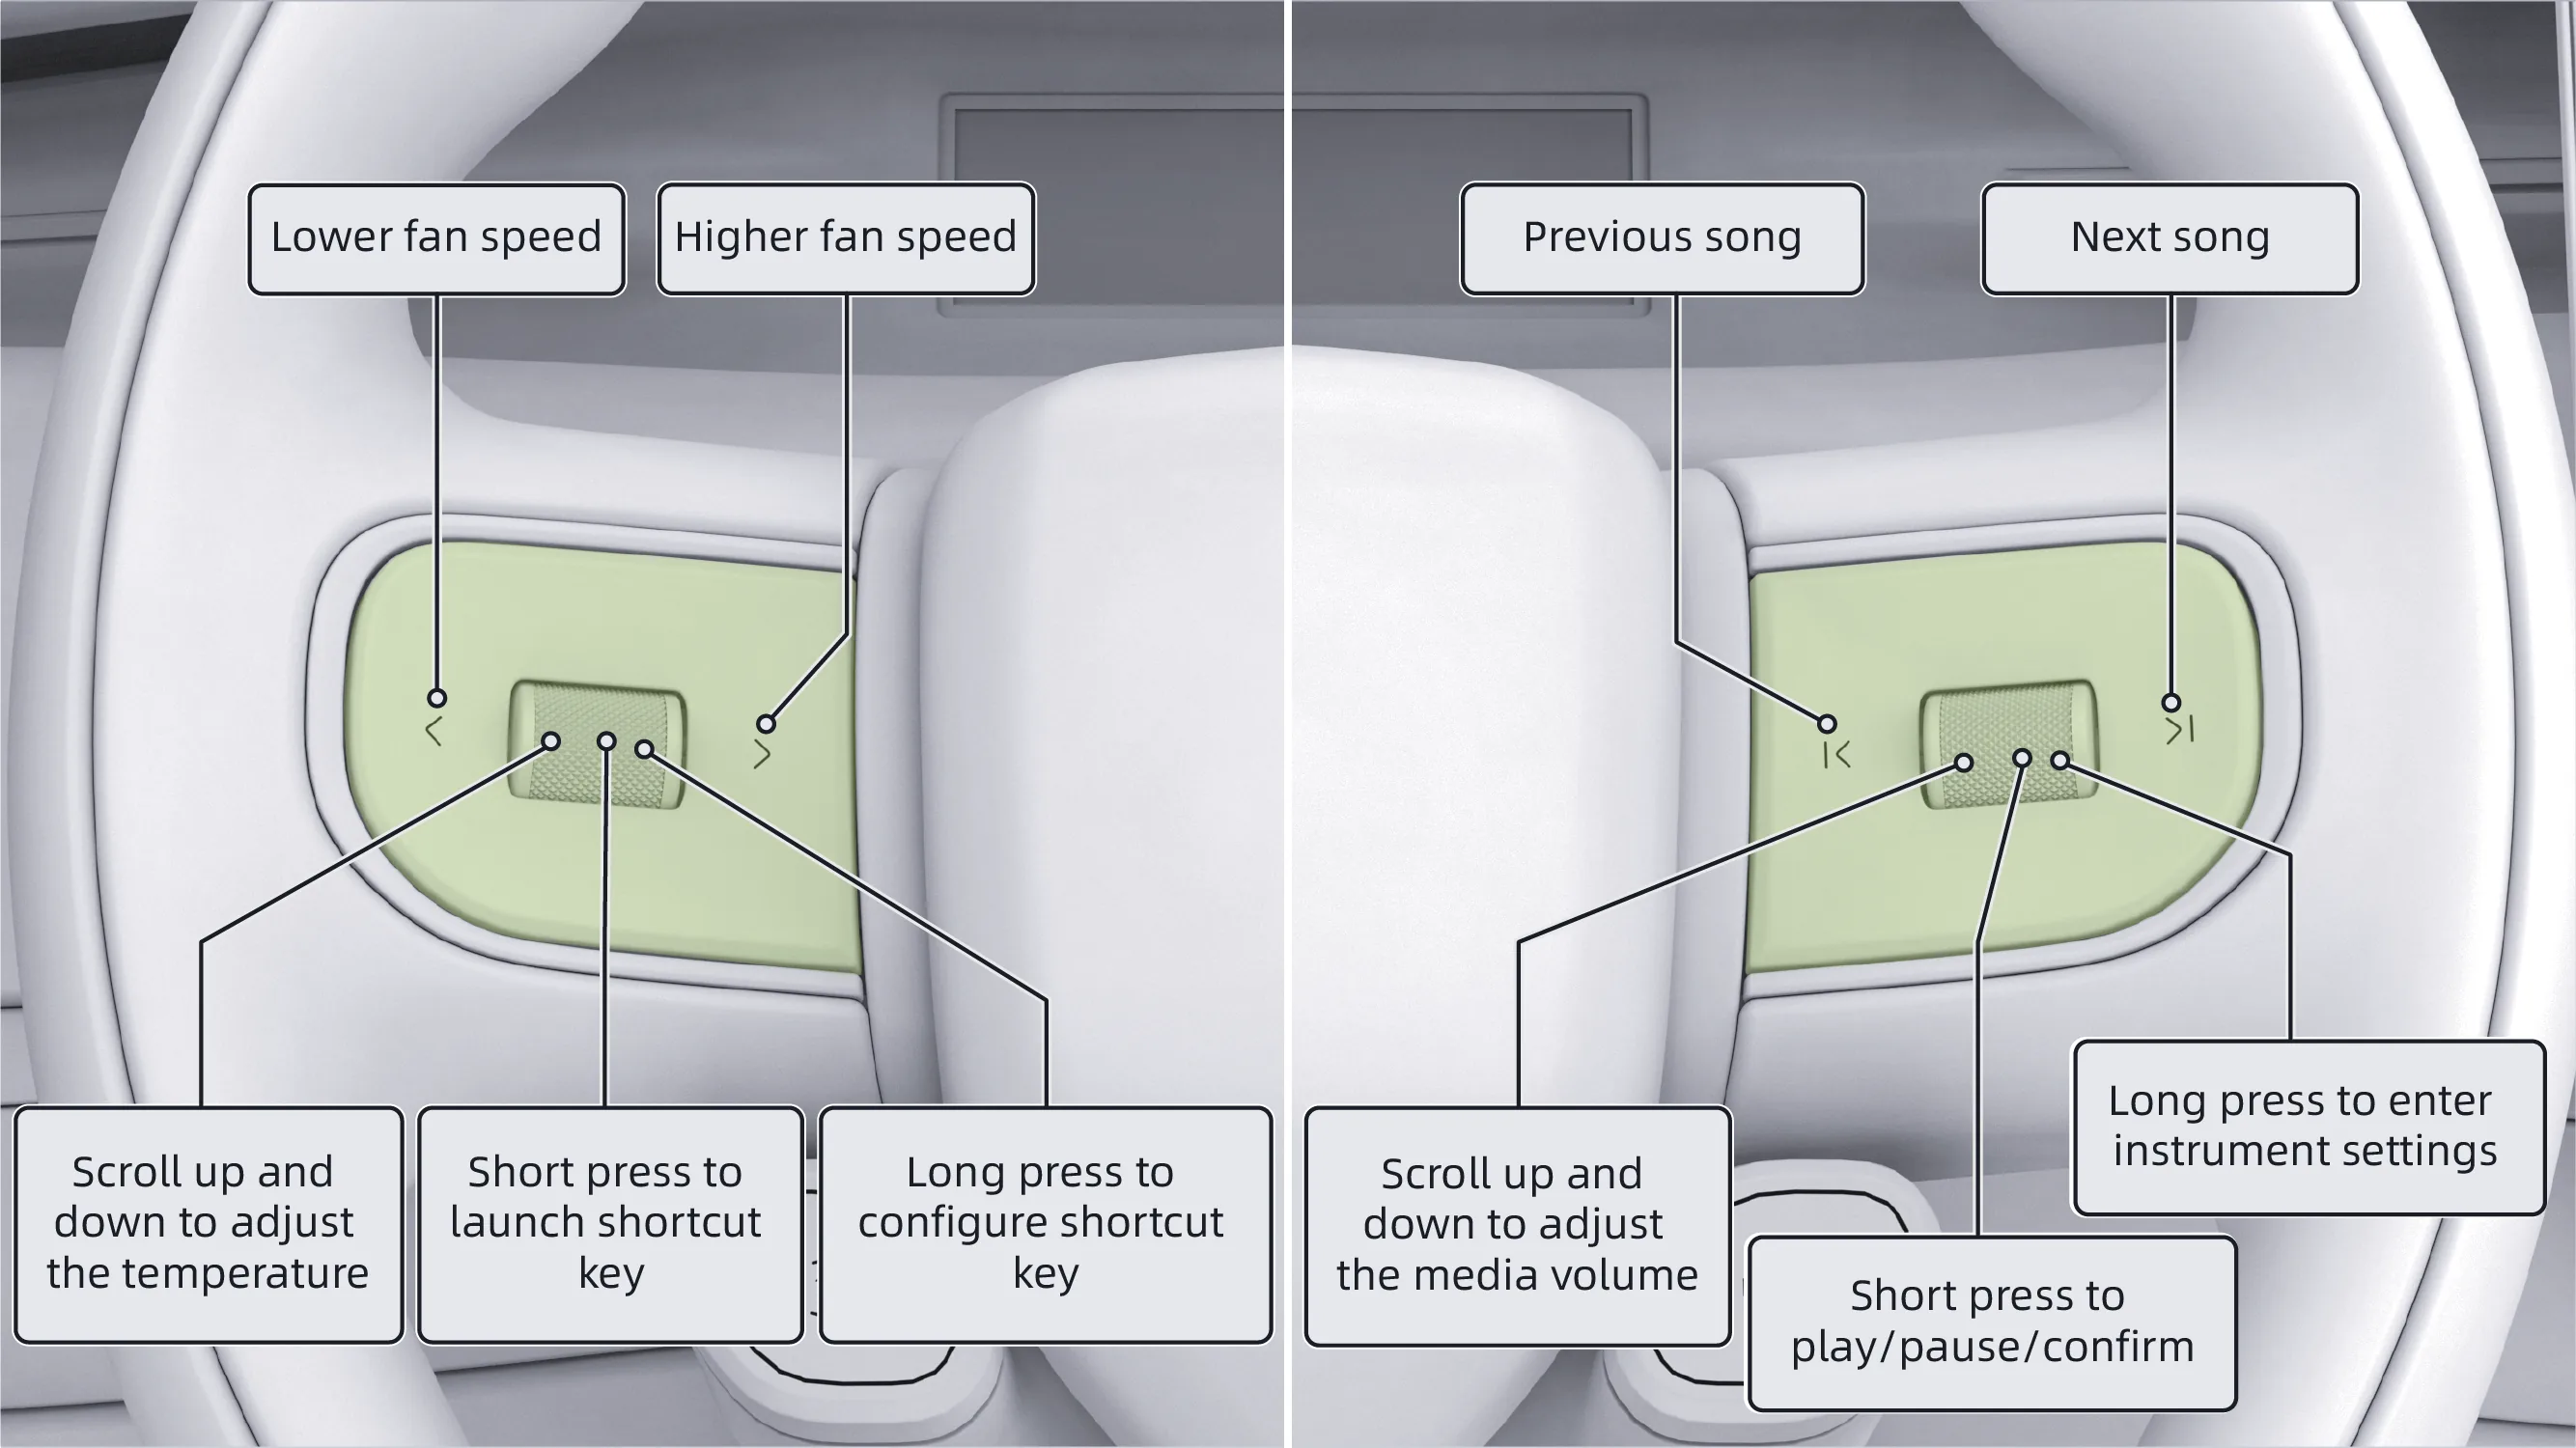 Tips
Tips After pressing and holding the scroll wheel to enter the instrument cluster screen editing interface, you can use the left and right buttons and the scroll wheel to adjust related functions of the instrument cluster screen. For detailed operations, please refer to the instrument cluster screen section.
On the Side Mirrors adjustment interface, you can use the left and right buttons and the scroll wheel to adjust Side Mirrors-related functions. For detailed operations, please refer to the Side Mirrors chapter.
On the AR-HUD adjustment interface, you can use the left and right buttons and the scroll wheel to adjust AR-HUD-related functions. For detailed operations, please refer to the HUD AR-HUD section.
In the streaming media Rearview Mirror adjustment interface, you can use the scroll wheel to adjust related functions of the streaming media Rearview Mirror. For detailed operations, please refer to the streaming media Rearview Mirror section.
When there is an incoming call, scroll the right roller up/down to select answer/reject, and press the roller briefly to confirm. During a call, press briefly to hang up.
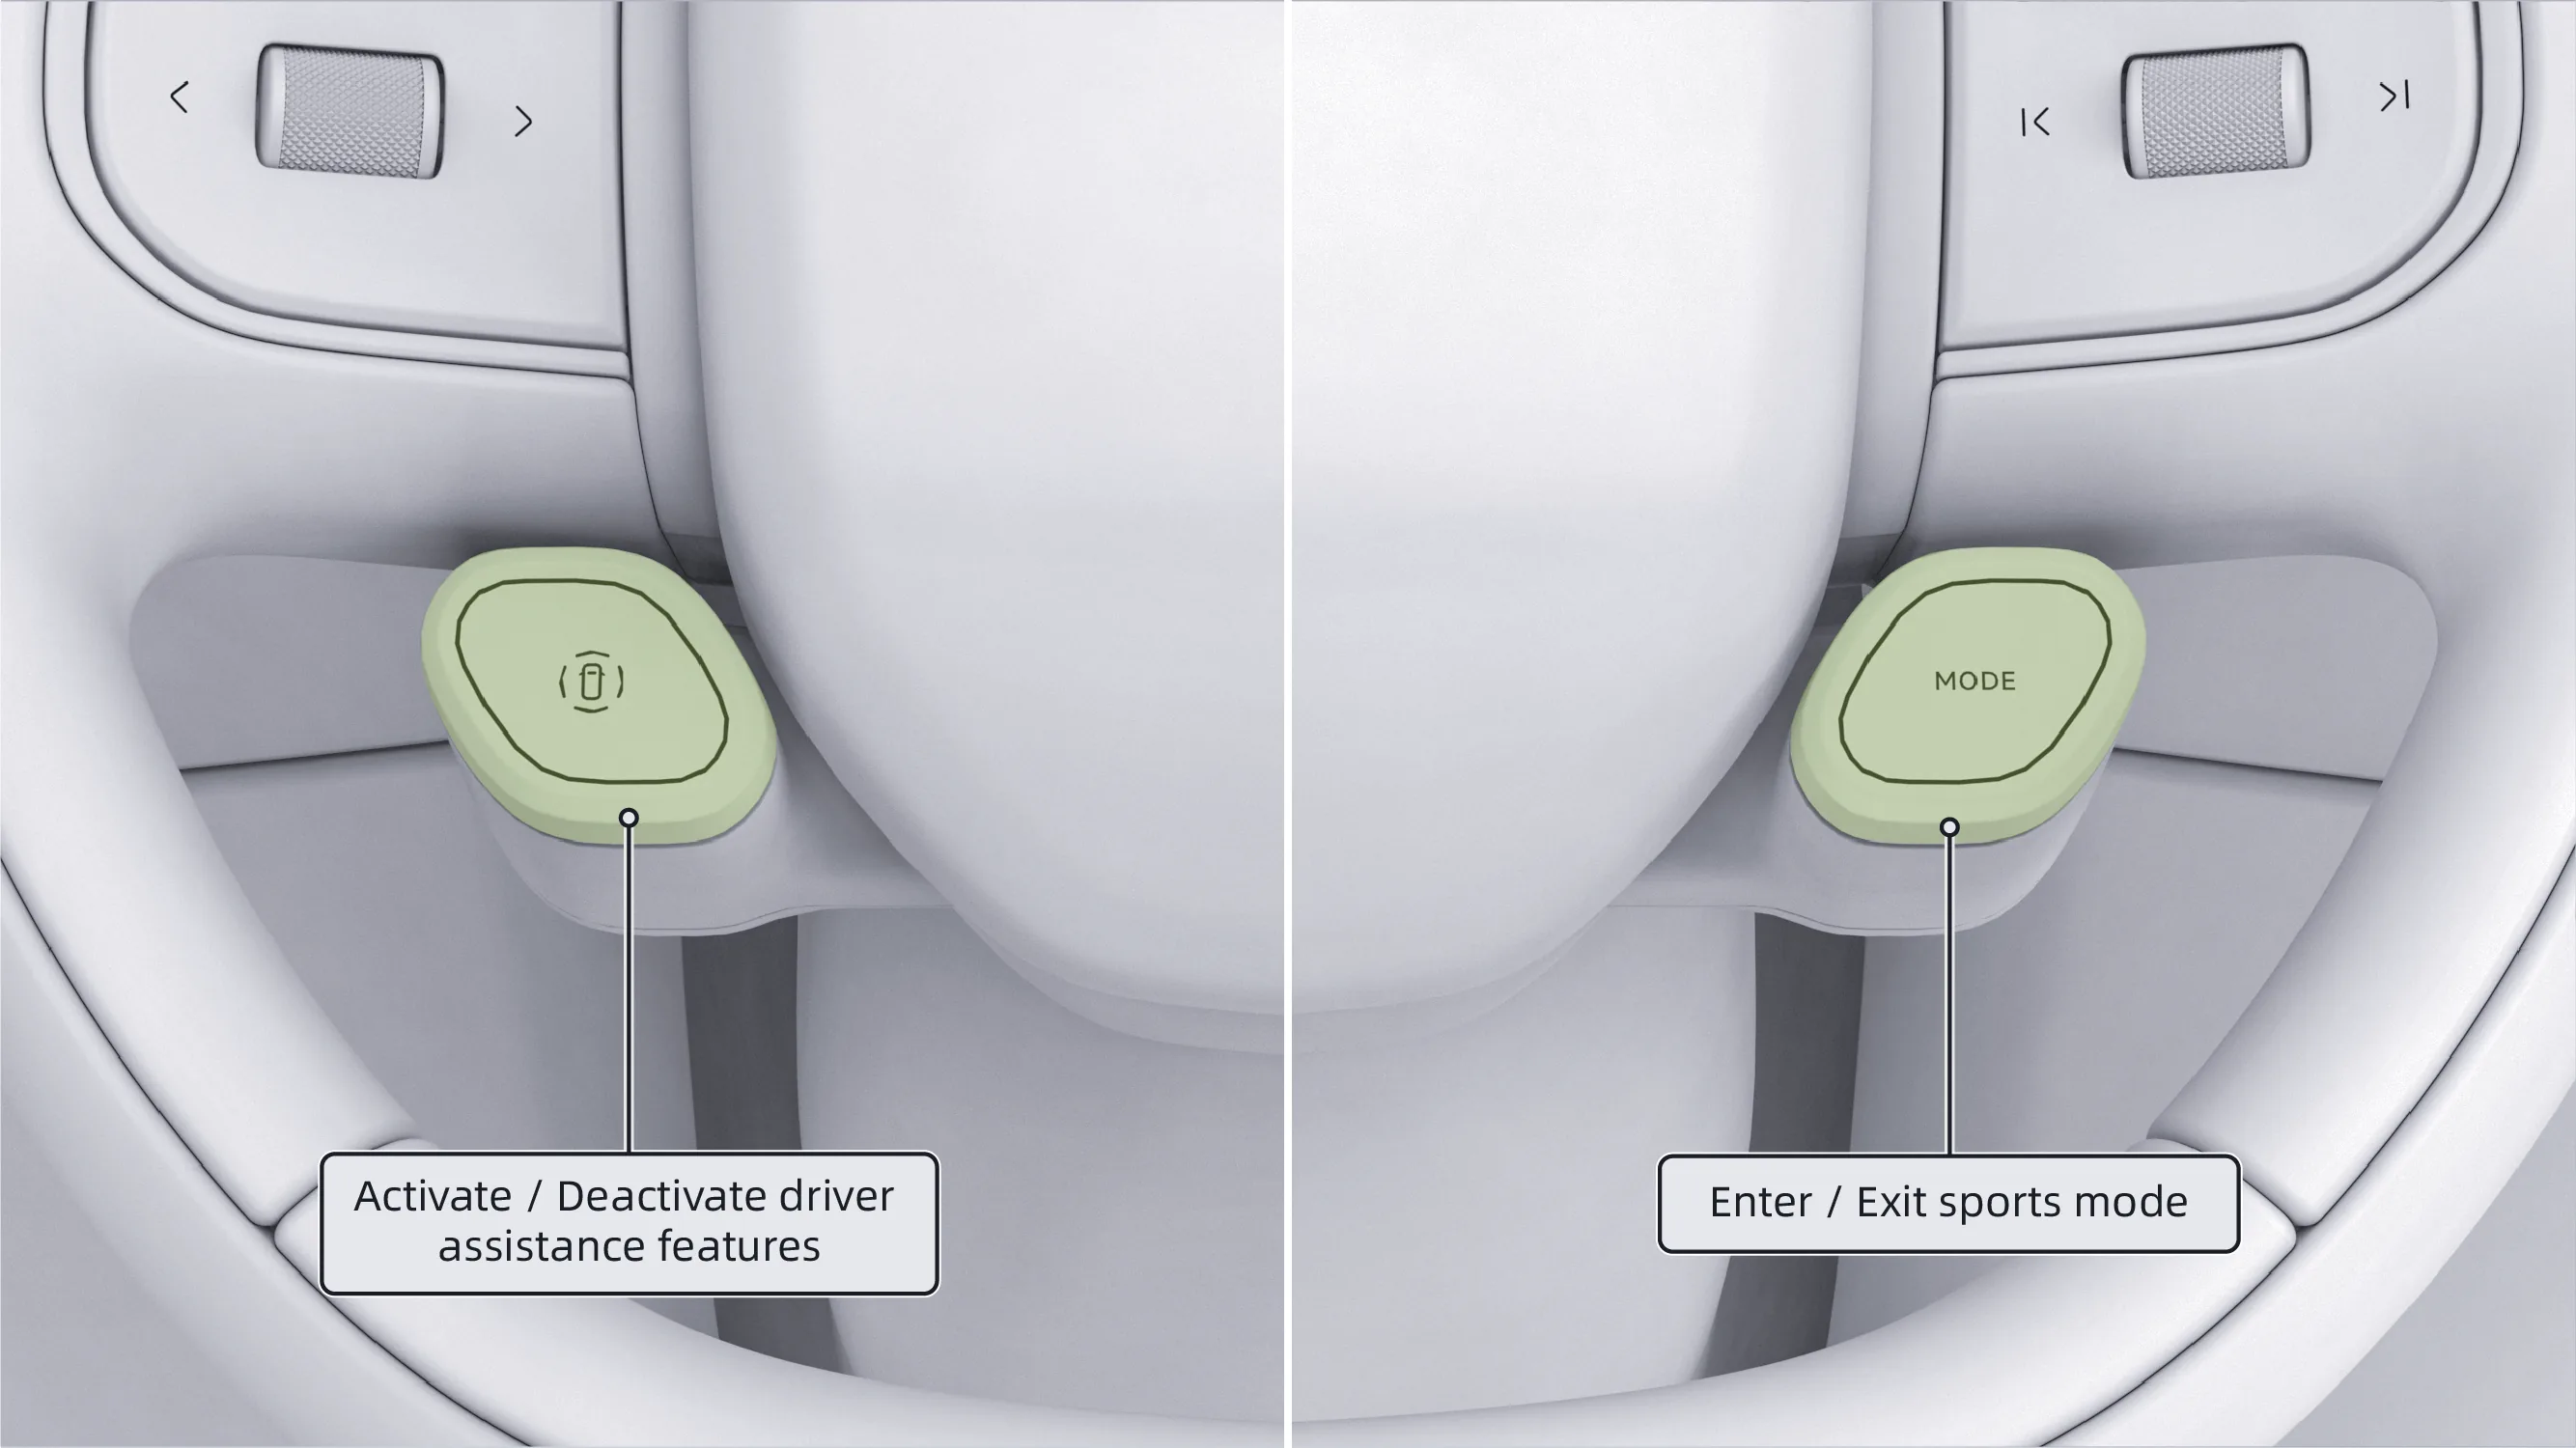 Tips
Tips Only after the conditions for activating the driver assistance system are met can you briefly press the left intelligent drive control button to activate the driver assistance function. For detailed operation and instructions, refer to the relevant Driver Assistance sections.
Before enabling the Driver Assistance function, read the relevant sections of this manual carefully to ensure you understand the operating instructions and all warnings and precautions for this function.
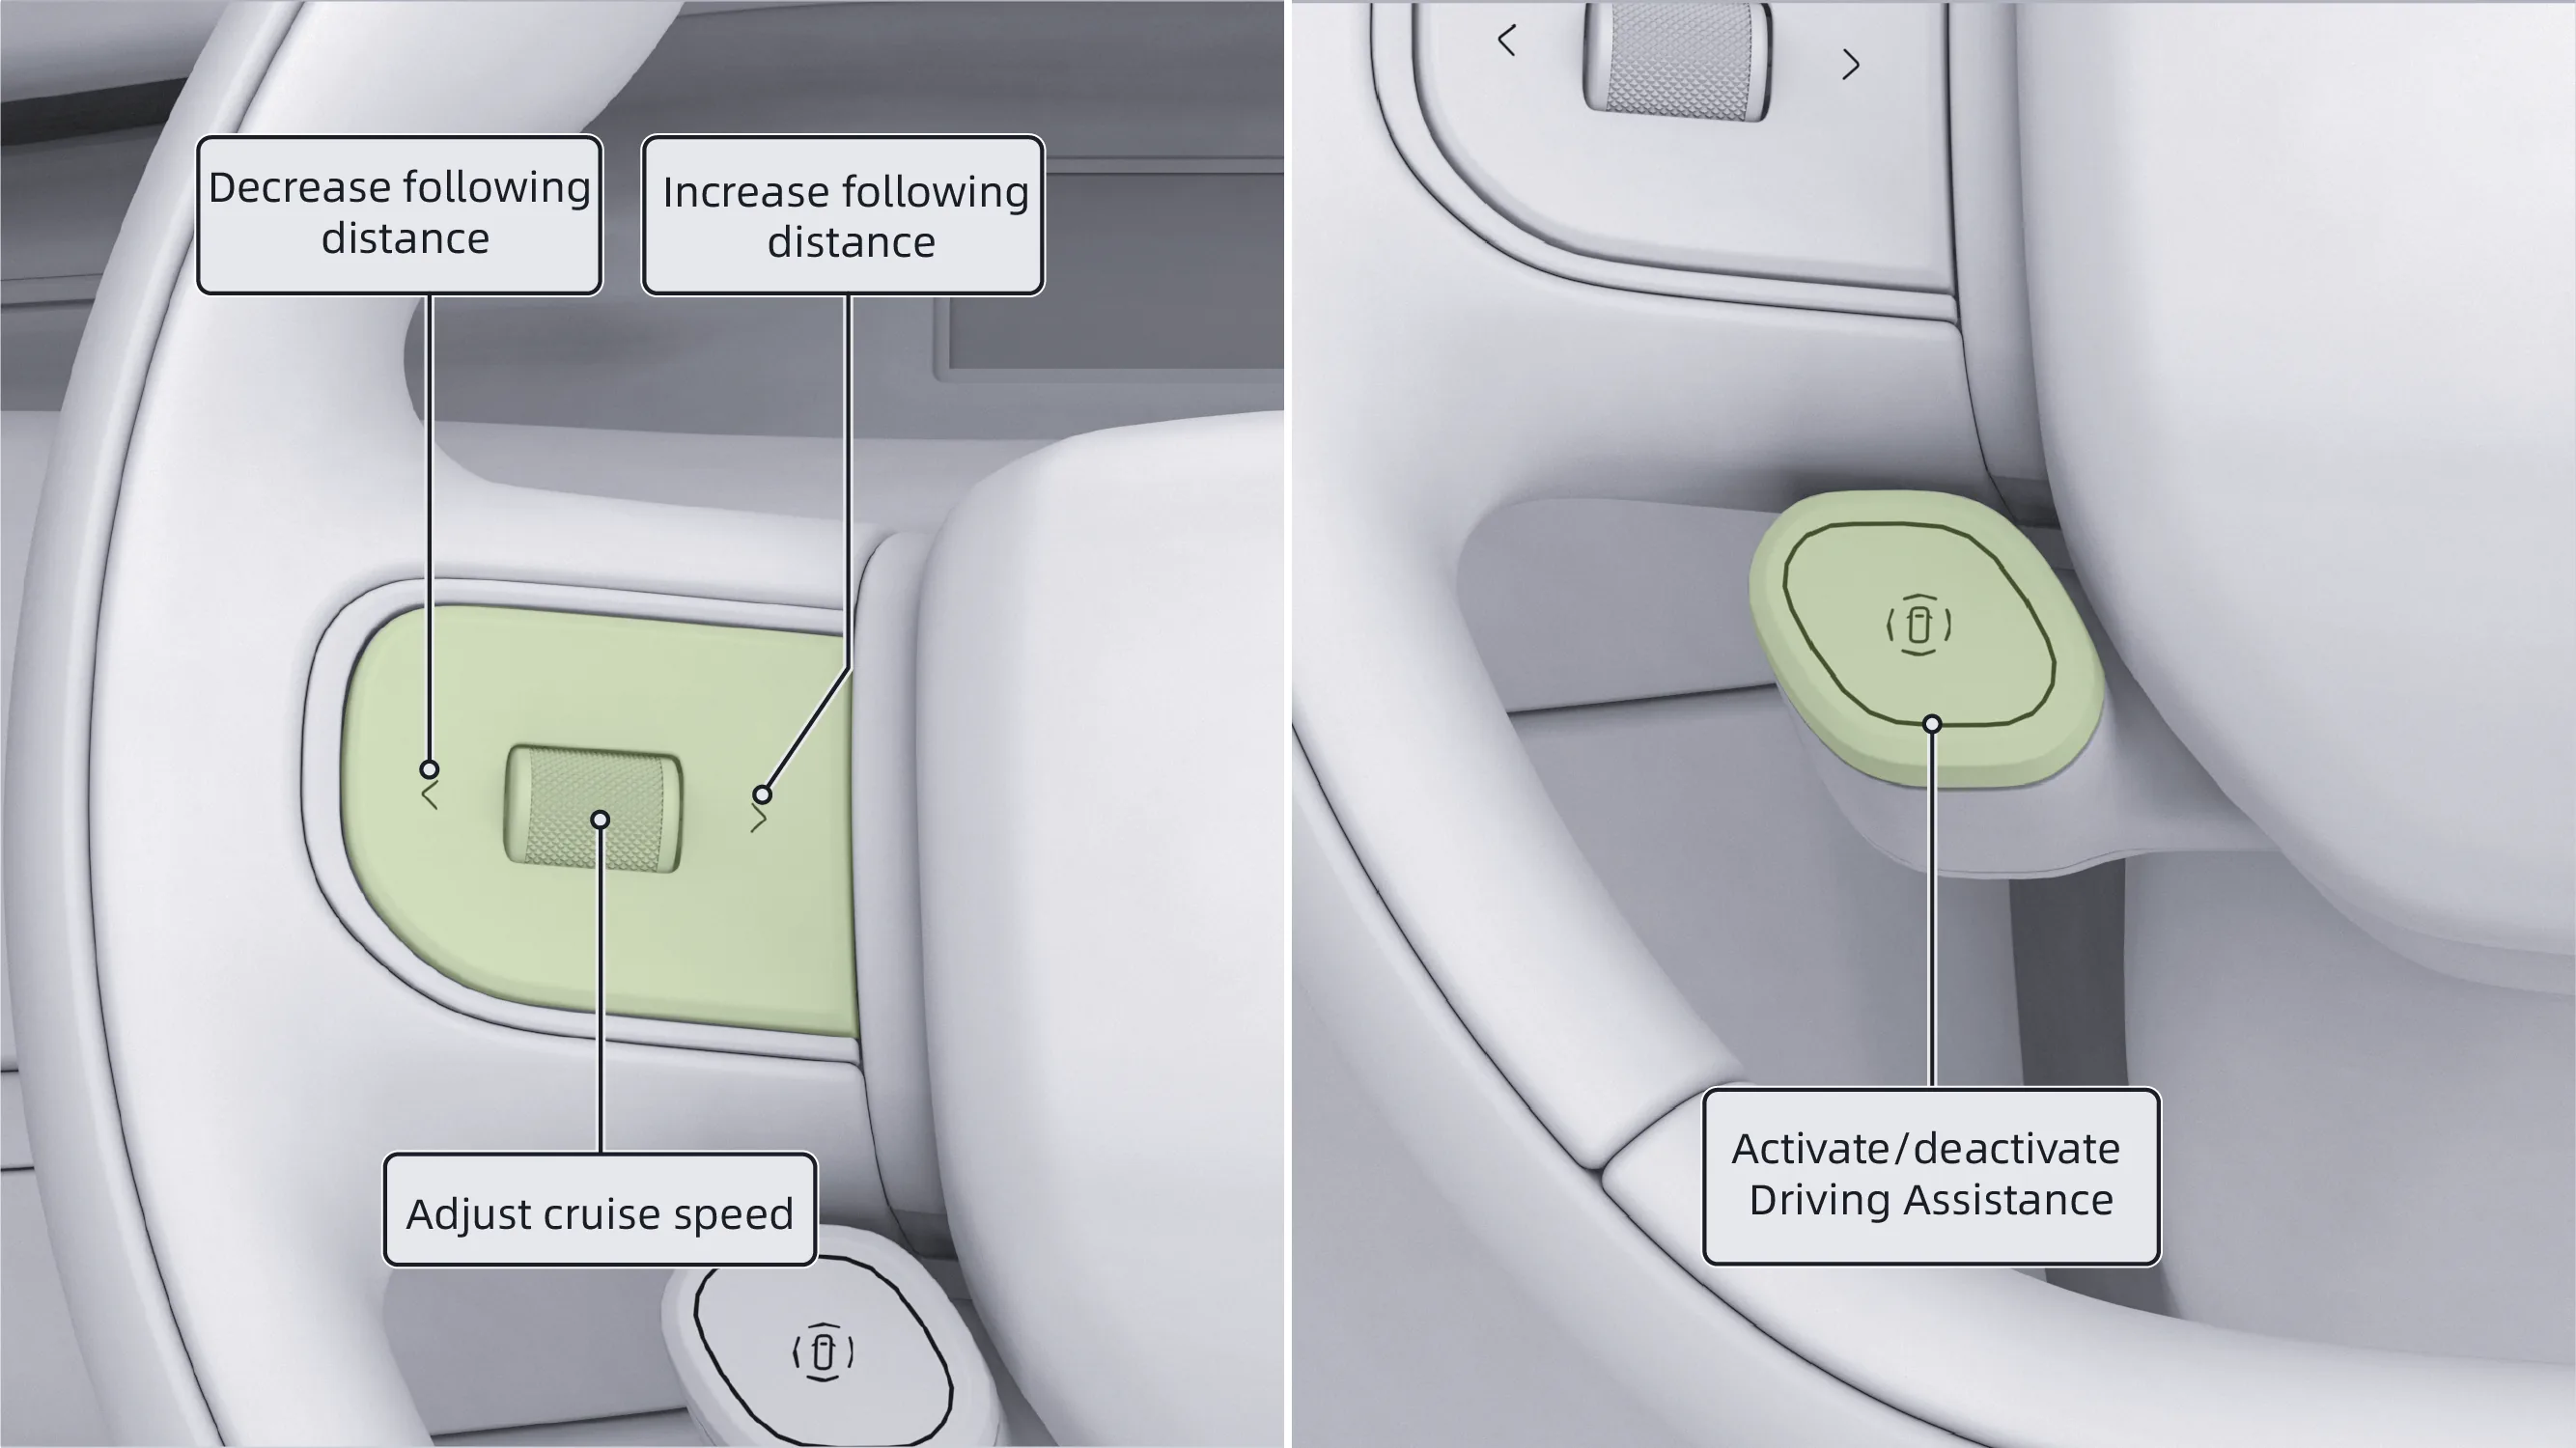 Tips
Tips The steering wheel buttons can be used to adjust the following distance and cruising speed only when the LCC function is enabled.
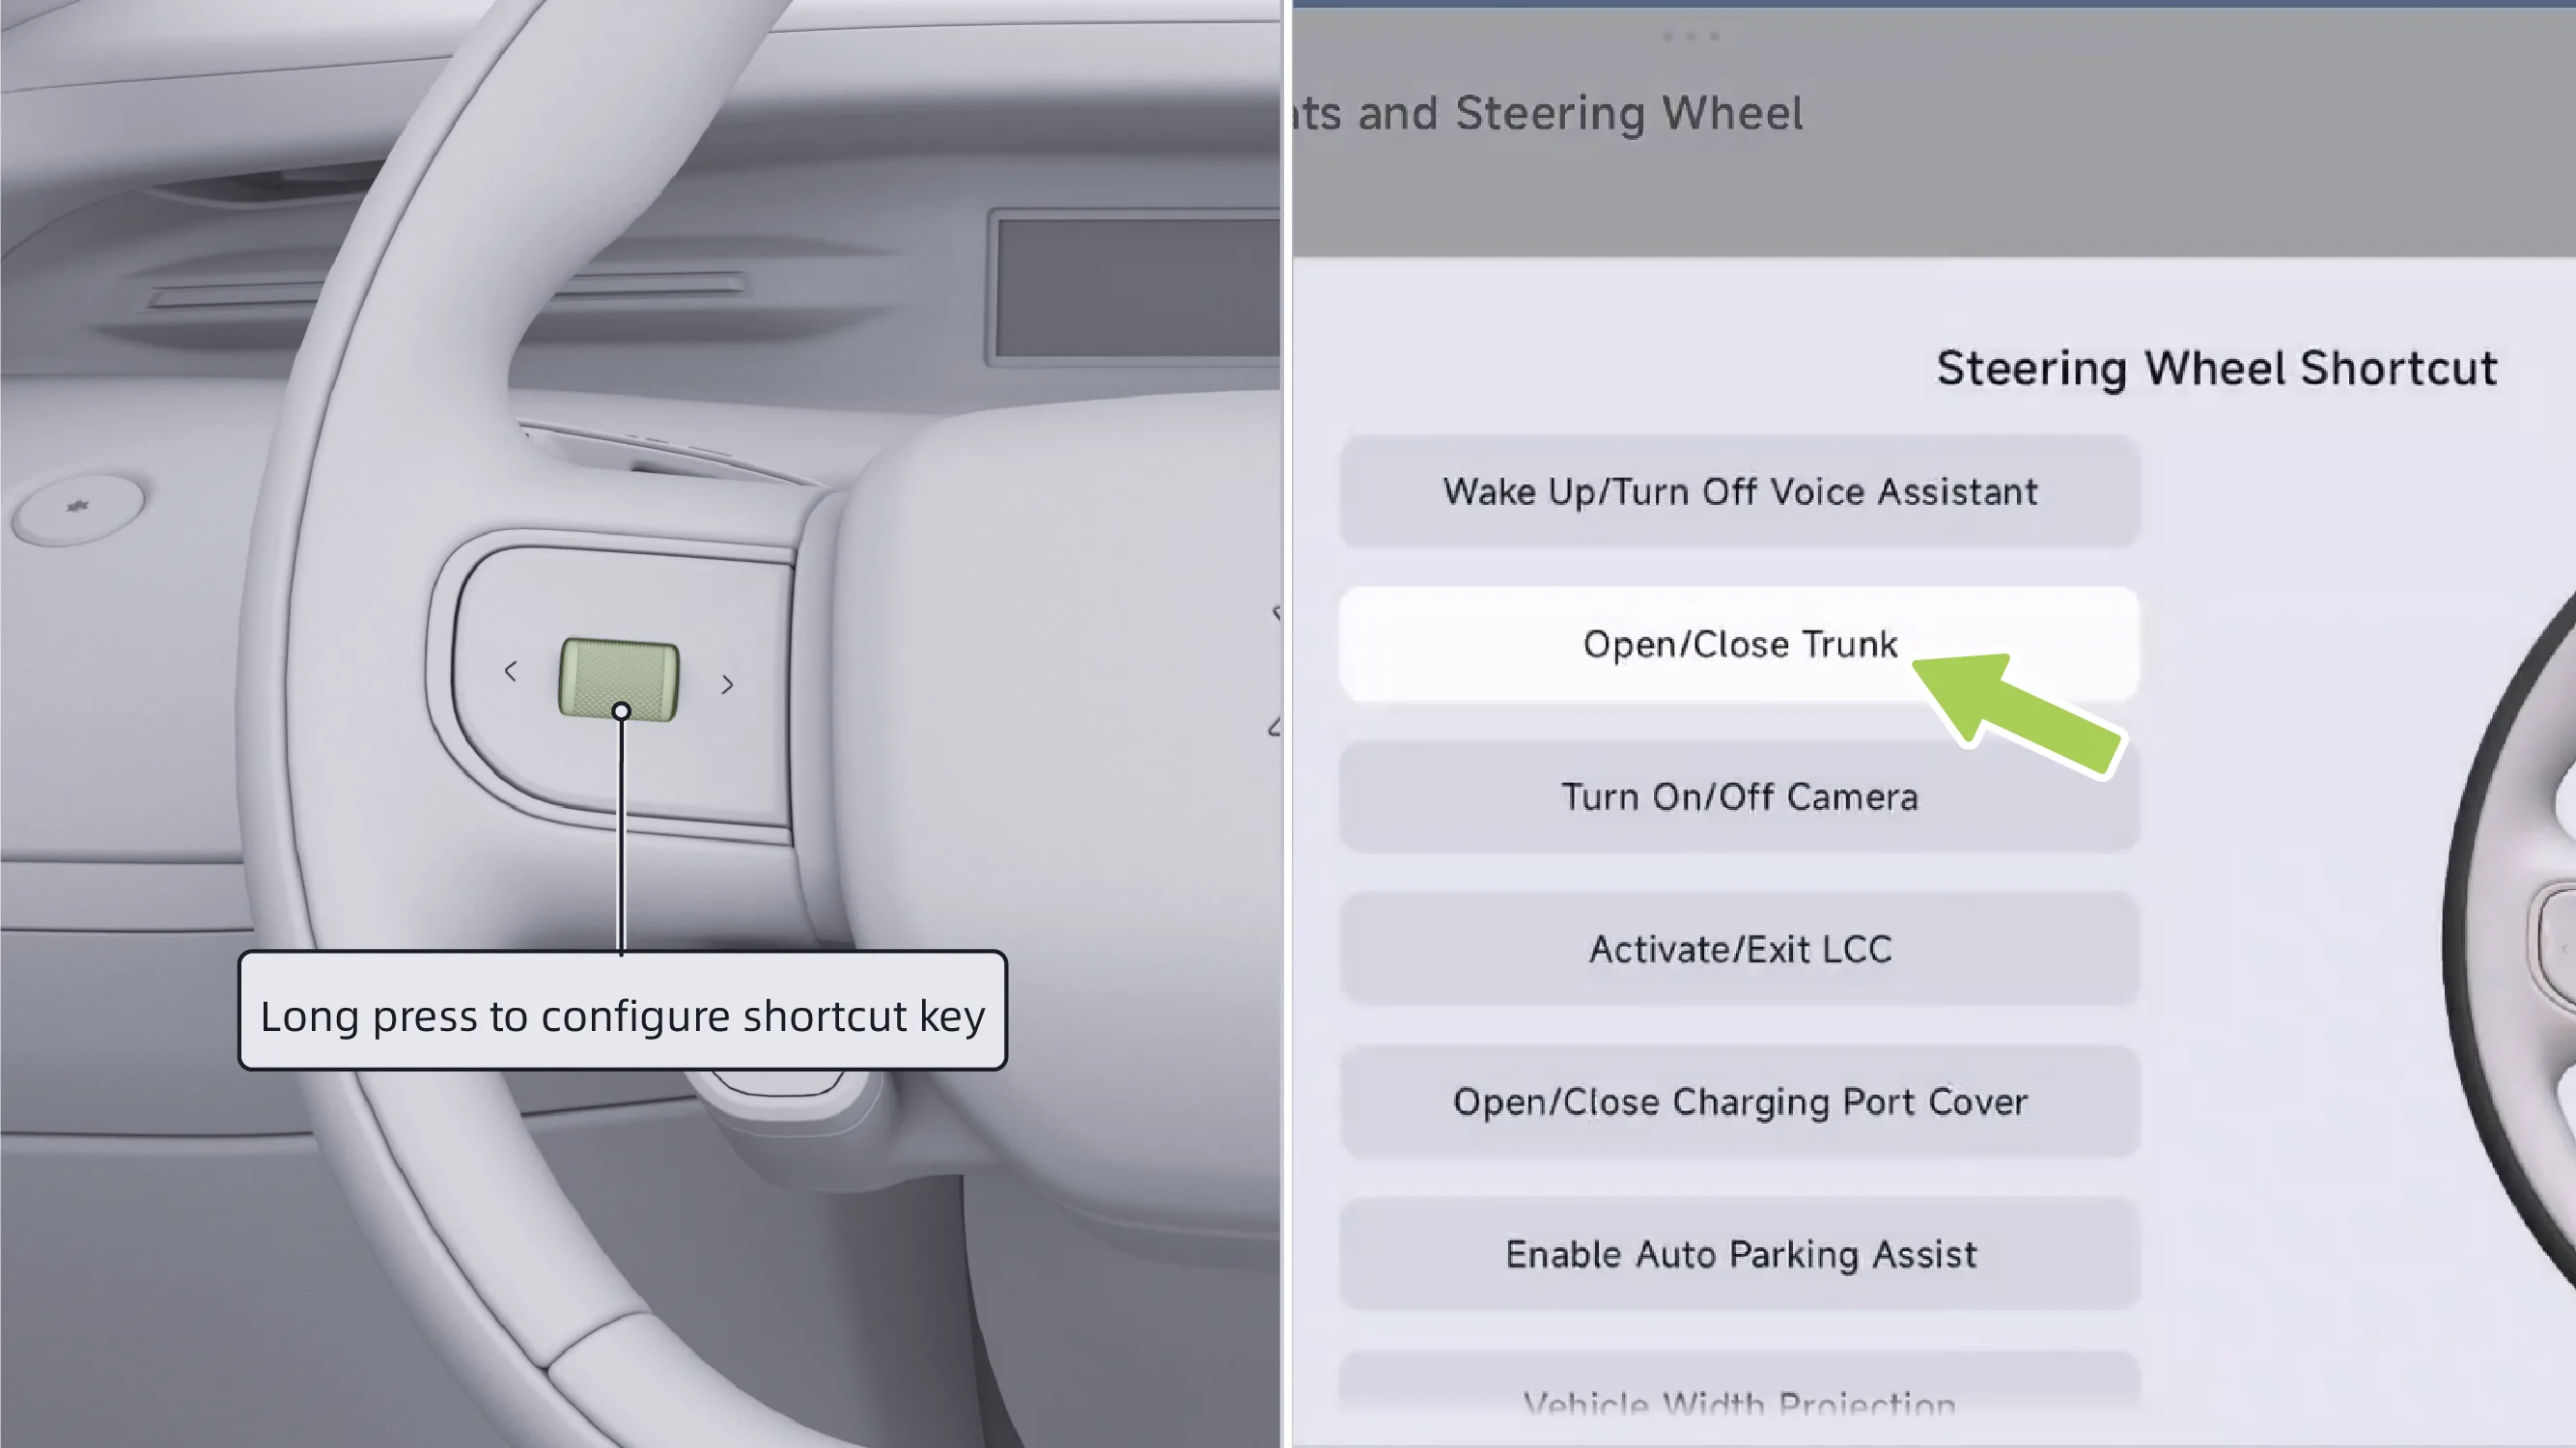
Press and hold the steering wheel shortcut button or on the central control screen “ →Settings→vehicle→Seats and Steering Wheel→Steering Wheel Shortcut Buttons”You can set the steering wheel shortcut button function.
Press the steering wheel shortcut button briefly to execute the configured function.
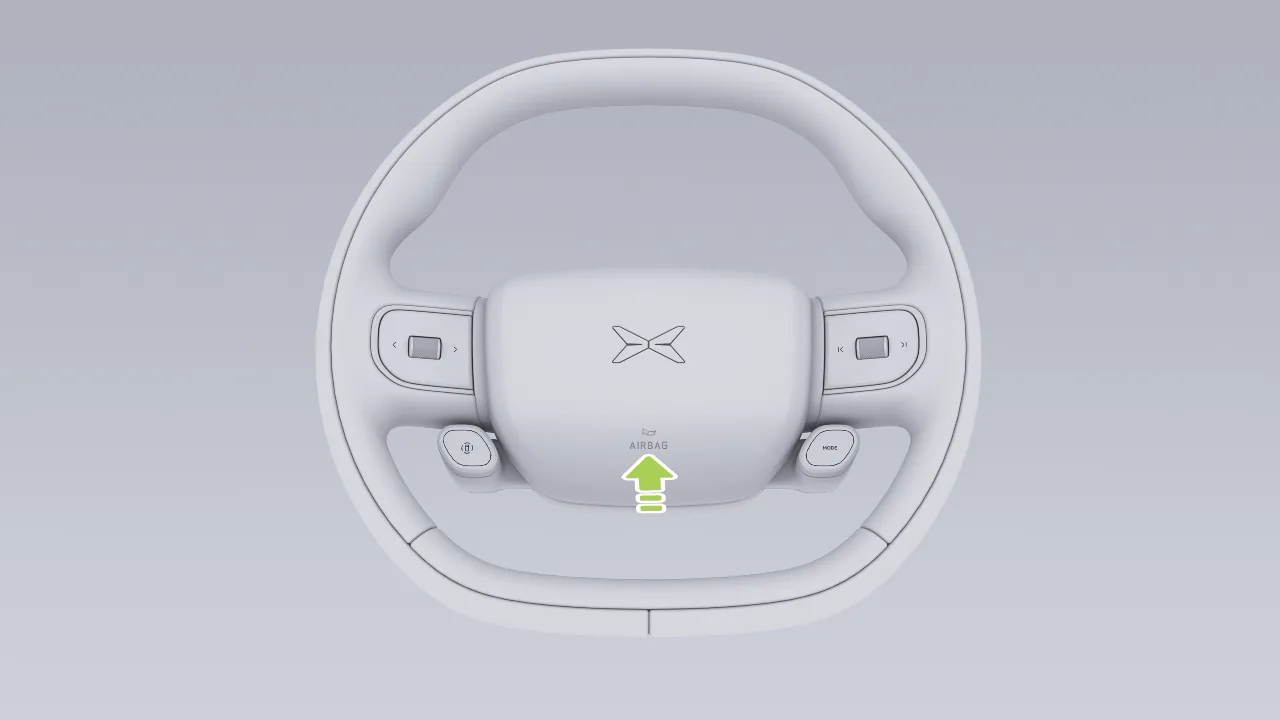
Press the horn symbol area, and the horn will sound.
Caution Do not press and hold the horn symbol area for a long time, otherwise the horn can be easily damaged.
Before driving the vehicle, you can adjust the height of the steering wheel and the distance between the steering wheel and your body so that you can comfortably grip the steering wheel in a suitable driving posture.
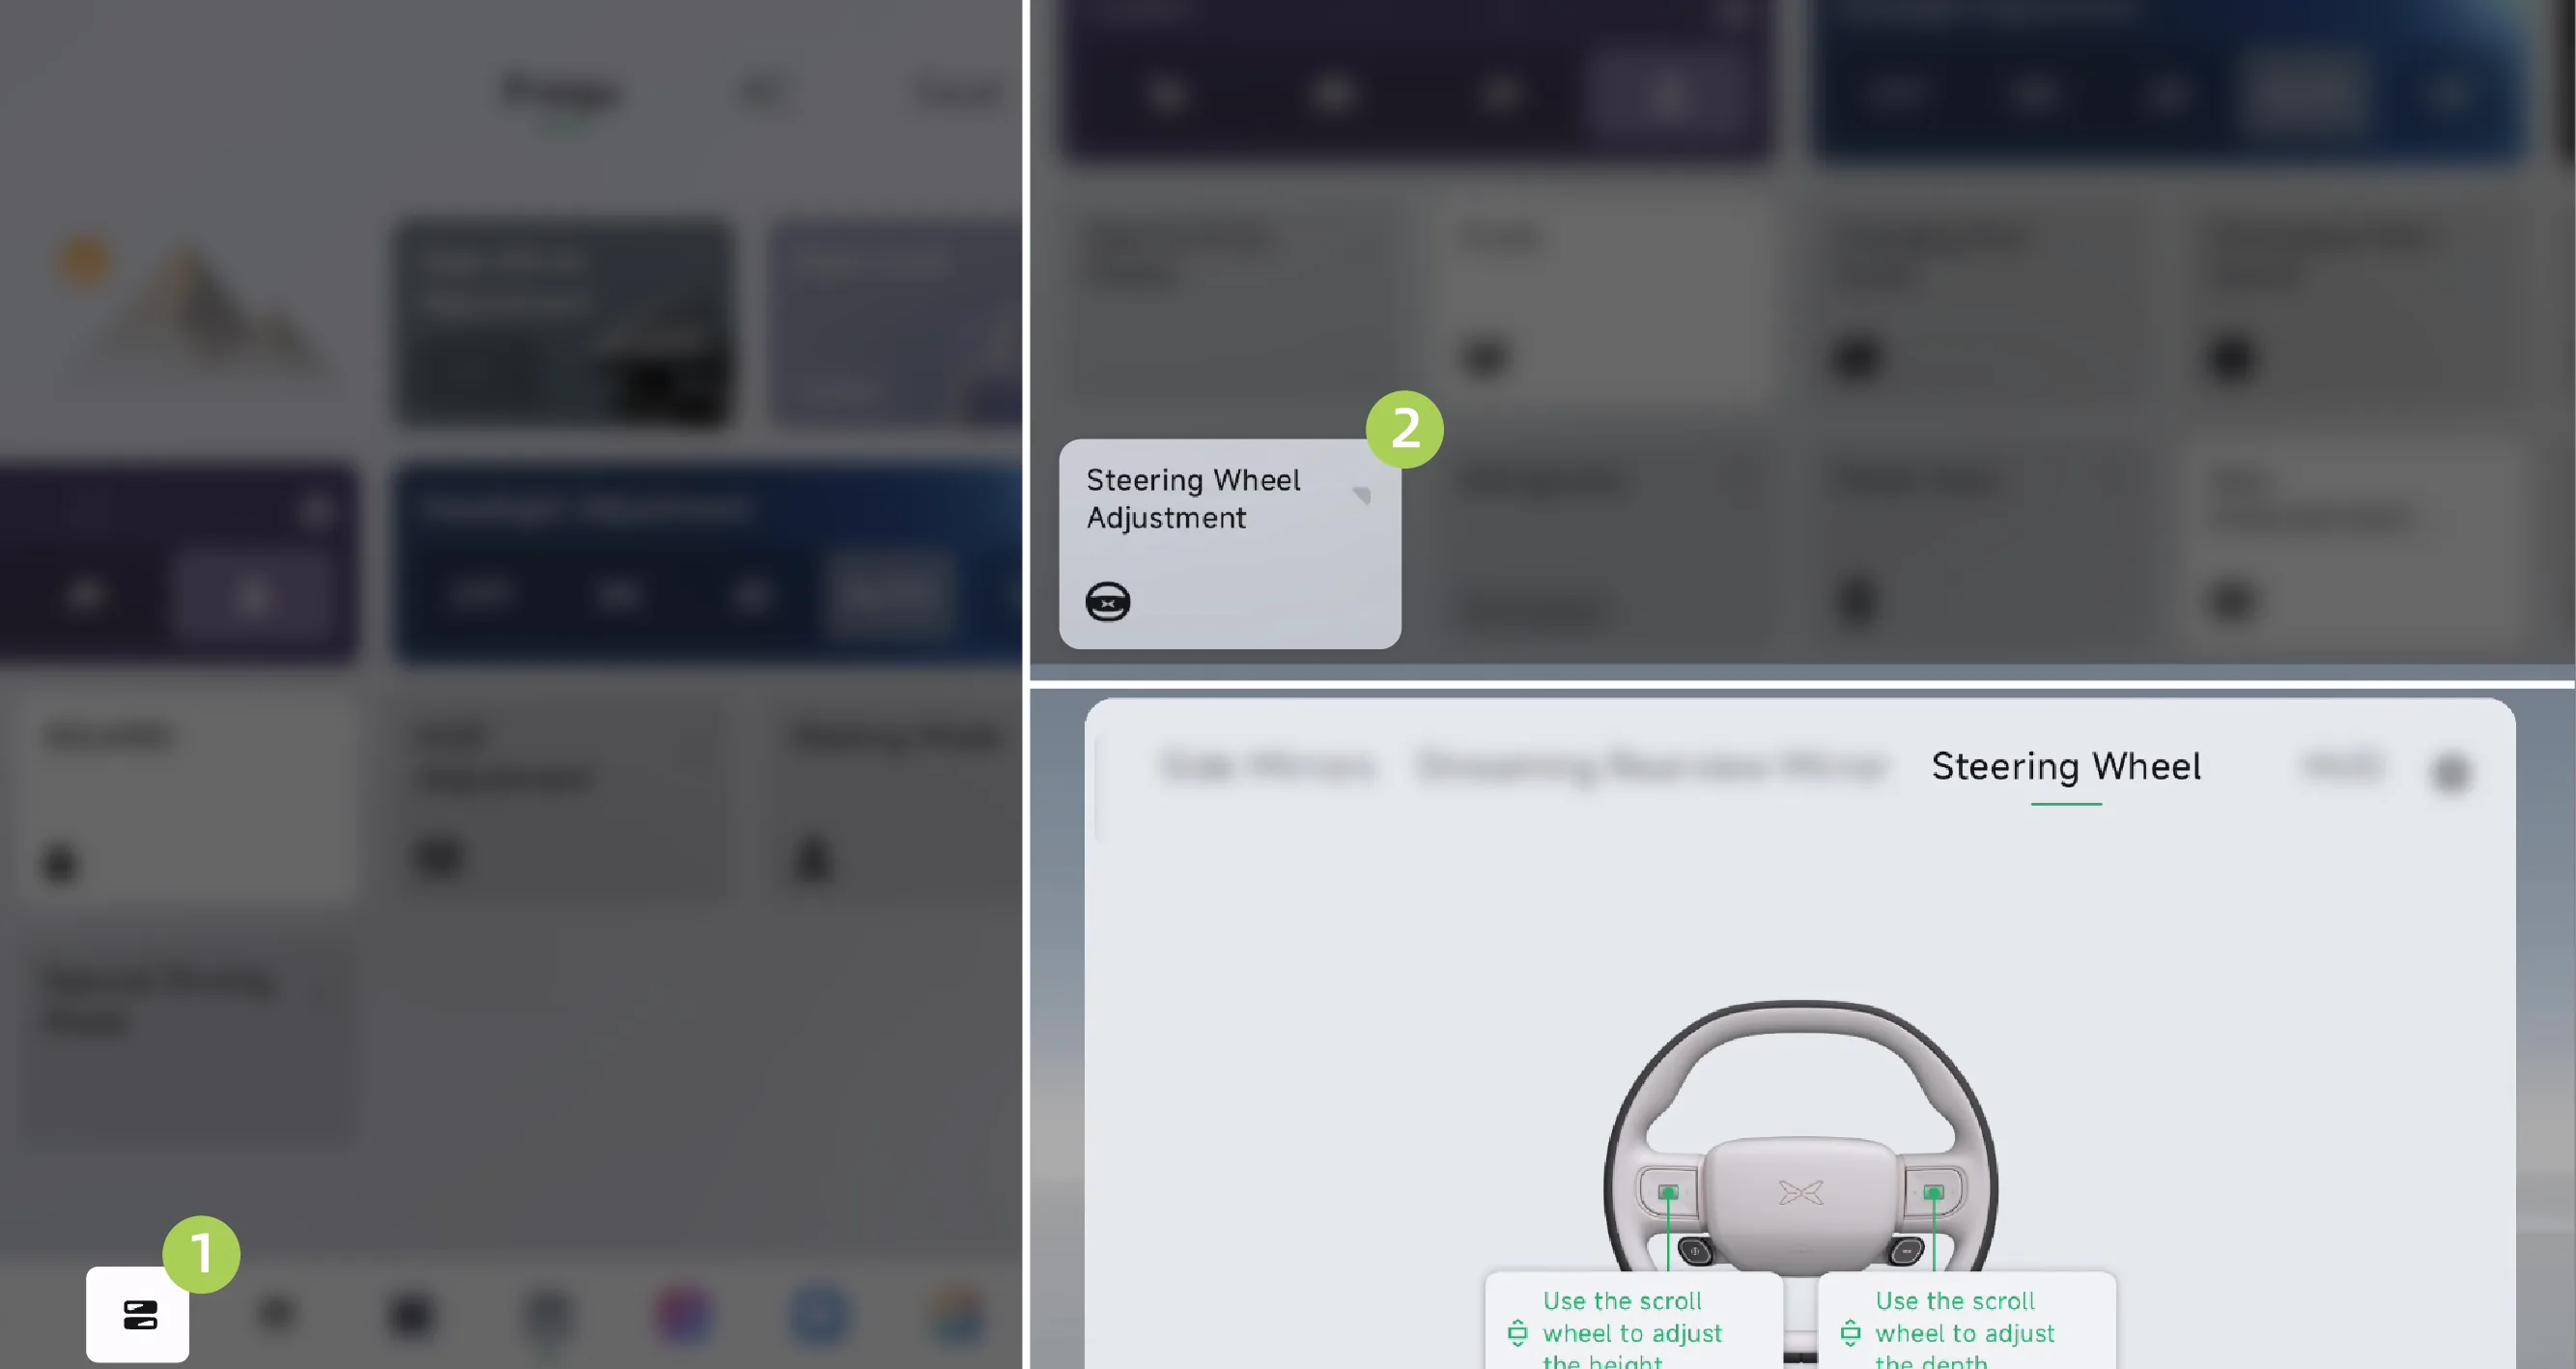
On the central control screen “ →Settings→vehicle→Seats and Steering Wheel→SW Adjustment”Enter the steering wheel adjustment screen.
Tips You can also tap on the central control screen. “ →Steering Wheel Adjustment”Enter the steering wheel adjustment screen. (For information about custom control center, refer to the custom control center section).
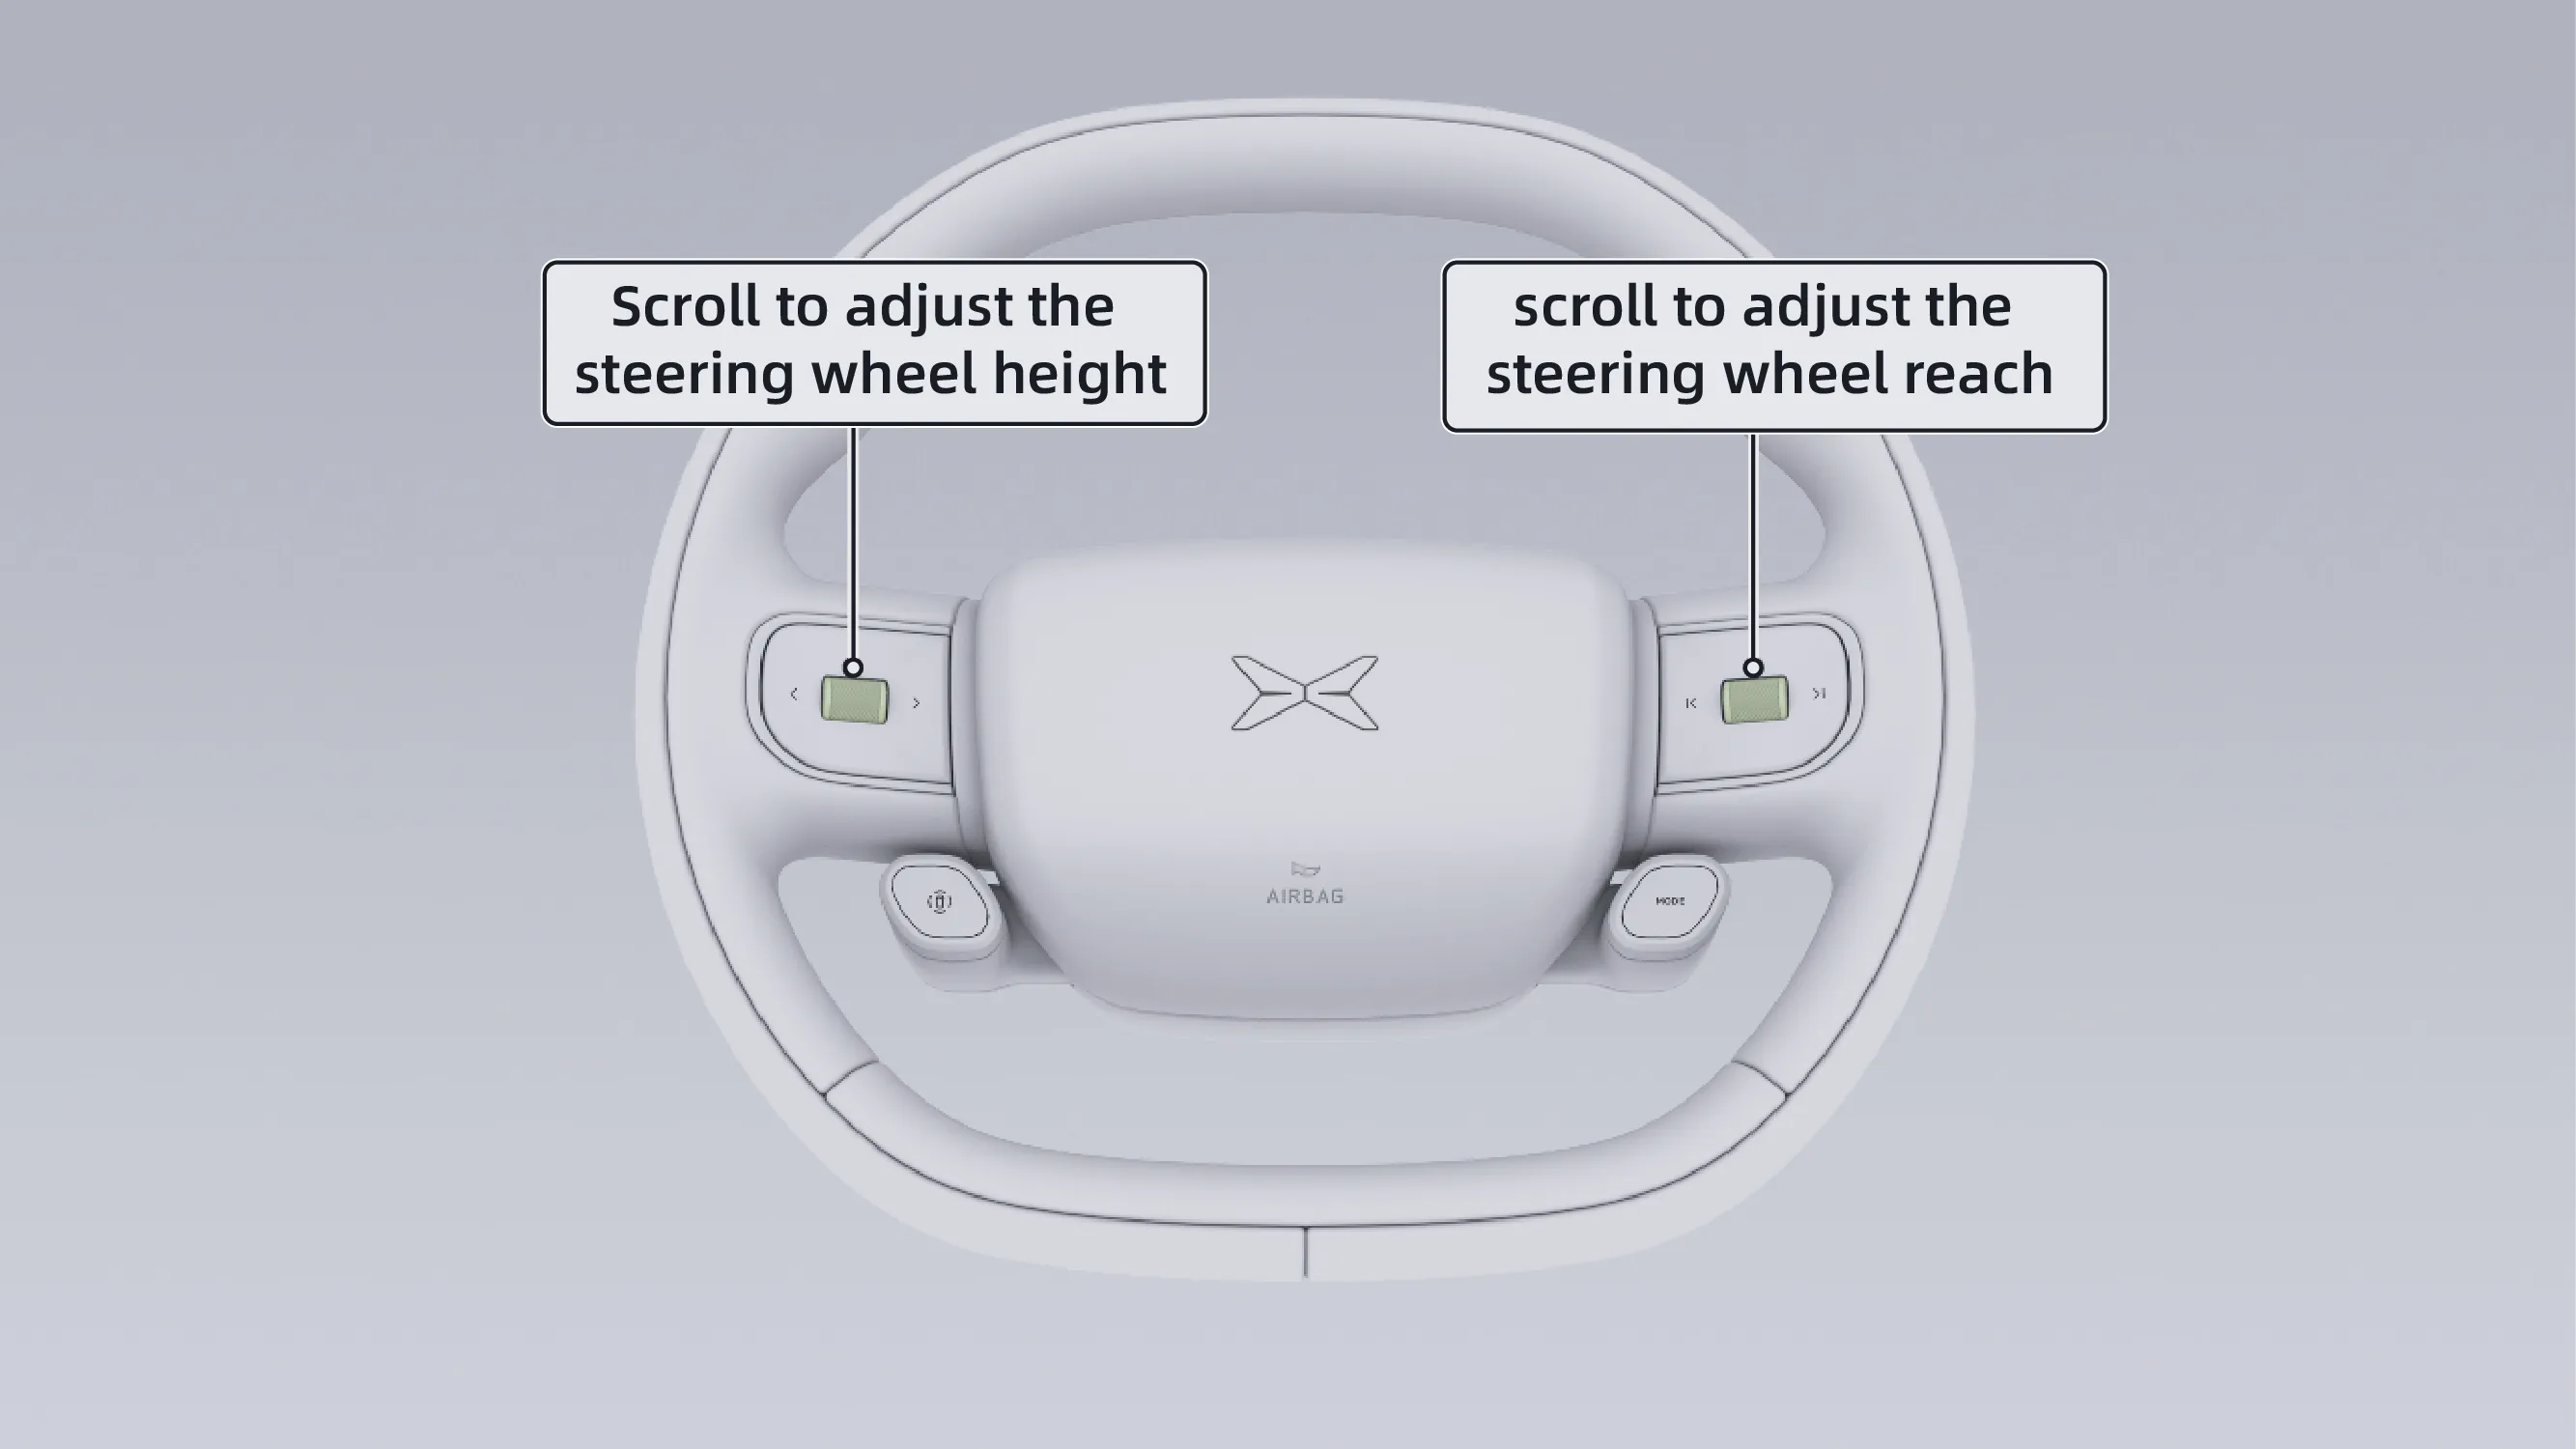
After enabling the steering wheel adjustment function, use the left and right scroll wheels on the steering wheel to adjust the steering wheel height and fore-aft position to a suitable position.
Tips Adjust the steering wheel position only when the gear is in Park (P).
After adjusting the steering wheel position, try moving it up and down and forward and backward to ensure it is securely locked in place.
Caution By rolling the right and left wheels simultaneously, the system gives priority to the fastest direction adjustment before performing the other direction adjustment.
It is prohibited to use the wheels continuously for long periods of time to adjust the steering wheel position, long periods of continuous operation will cause the electric adjustment to enter an overheat protection condition and will require a period of time before it can be used again.
The adjustment tone that is emitted during adjustment is a normal sound. If something is unusual, please contact the XPENG Vehicle Service Center.
Warning Do not adjust the steering wheel while the vehicle is in motion to avoid accidents.
Improper steering wheel position adjustment can cause personal injury, at least 25cm from the steering wheel to the driver's chest.
You can turn the steering wheel heating function on/off in the following ways:
Control steering wheel heating through the center display.
Control the steering wheel heating via the mobile app.
Control steering wheel heating through voice commands.
On the central control screen “ →seat→Heating/Ventilation”Interface, tap “  ”Turn on the steering wheel heating function. When the gear is at level 3, repeated tapping cycles through level 2, level 1, off, and level 3.
In the mobile app Tap “ ”Turn on the steering wheel heating function. When the gear is at level 3, repeated tapping cycles through level 2, level 1, off, and level 3.
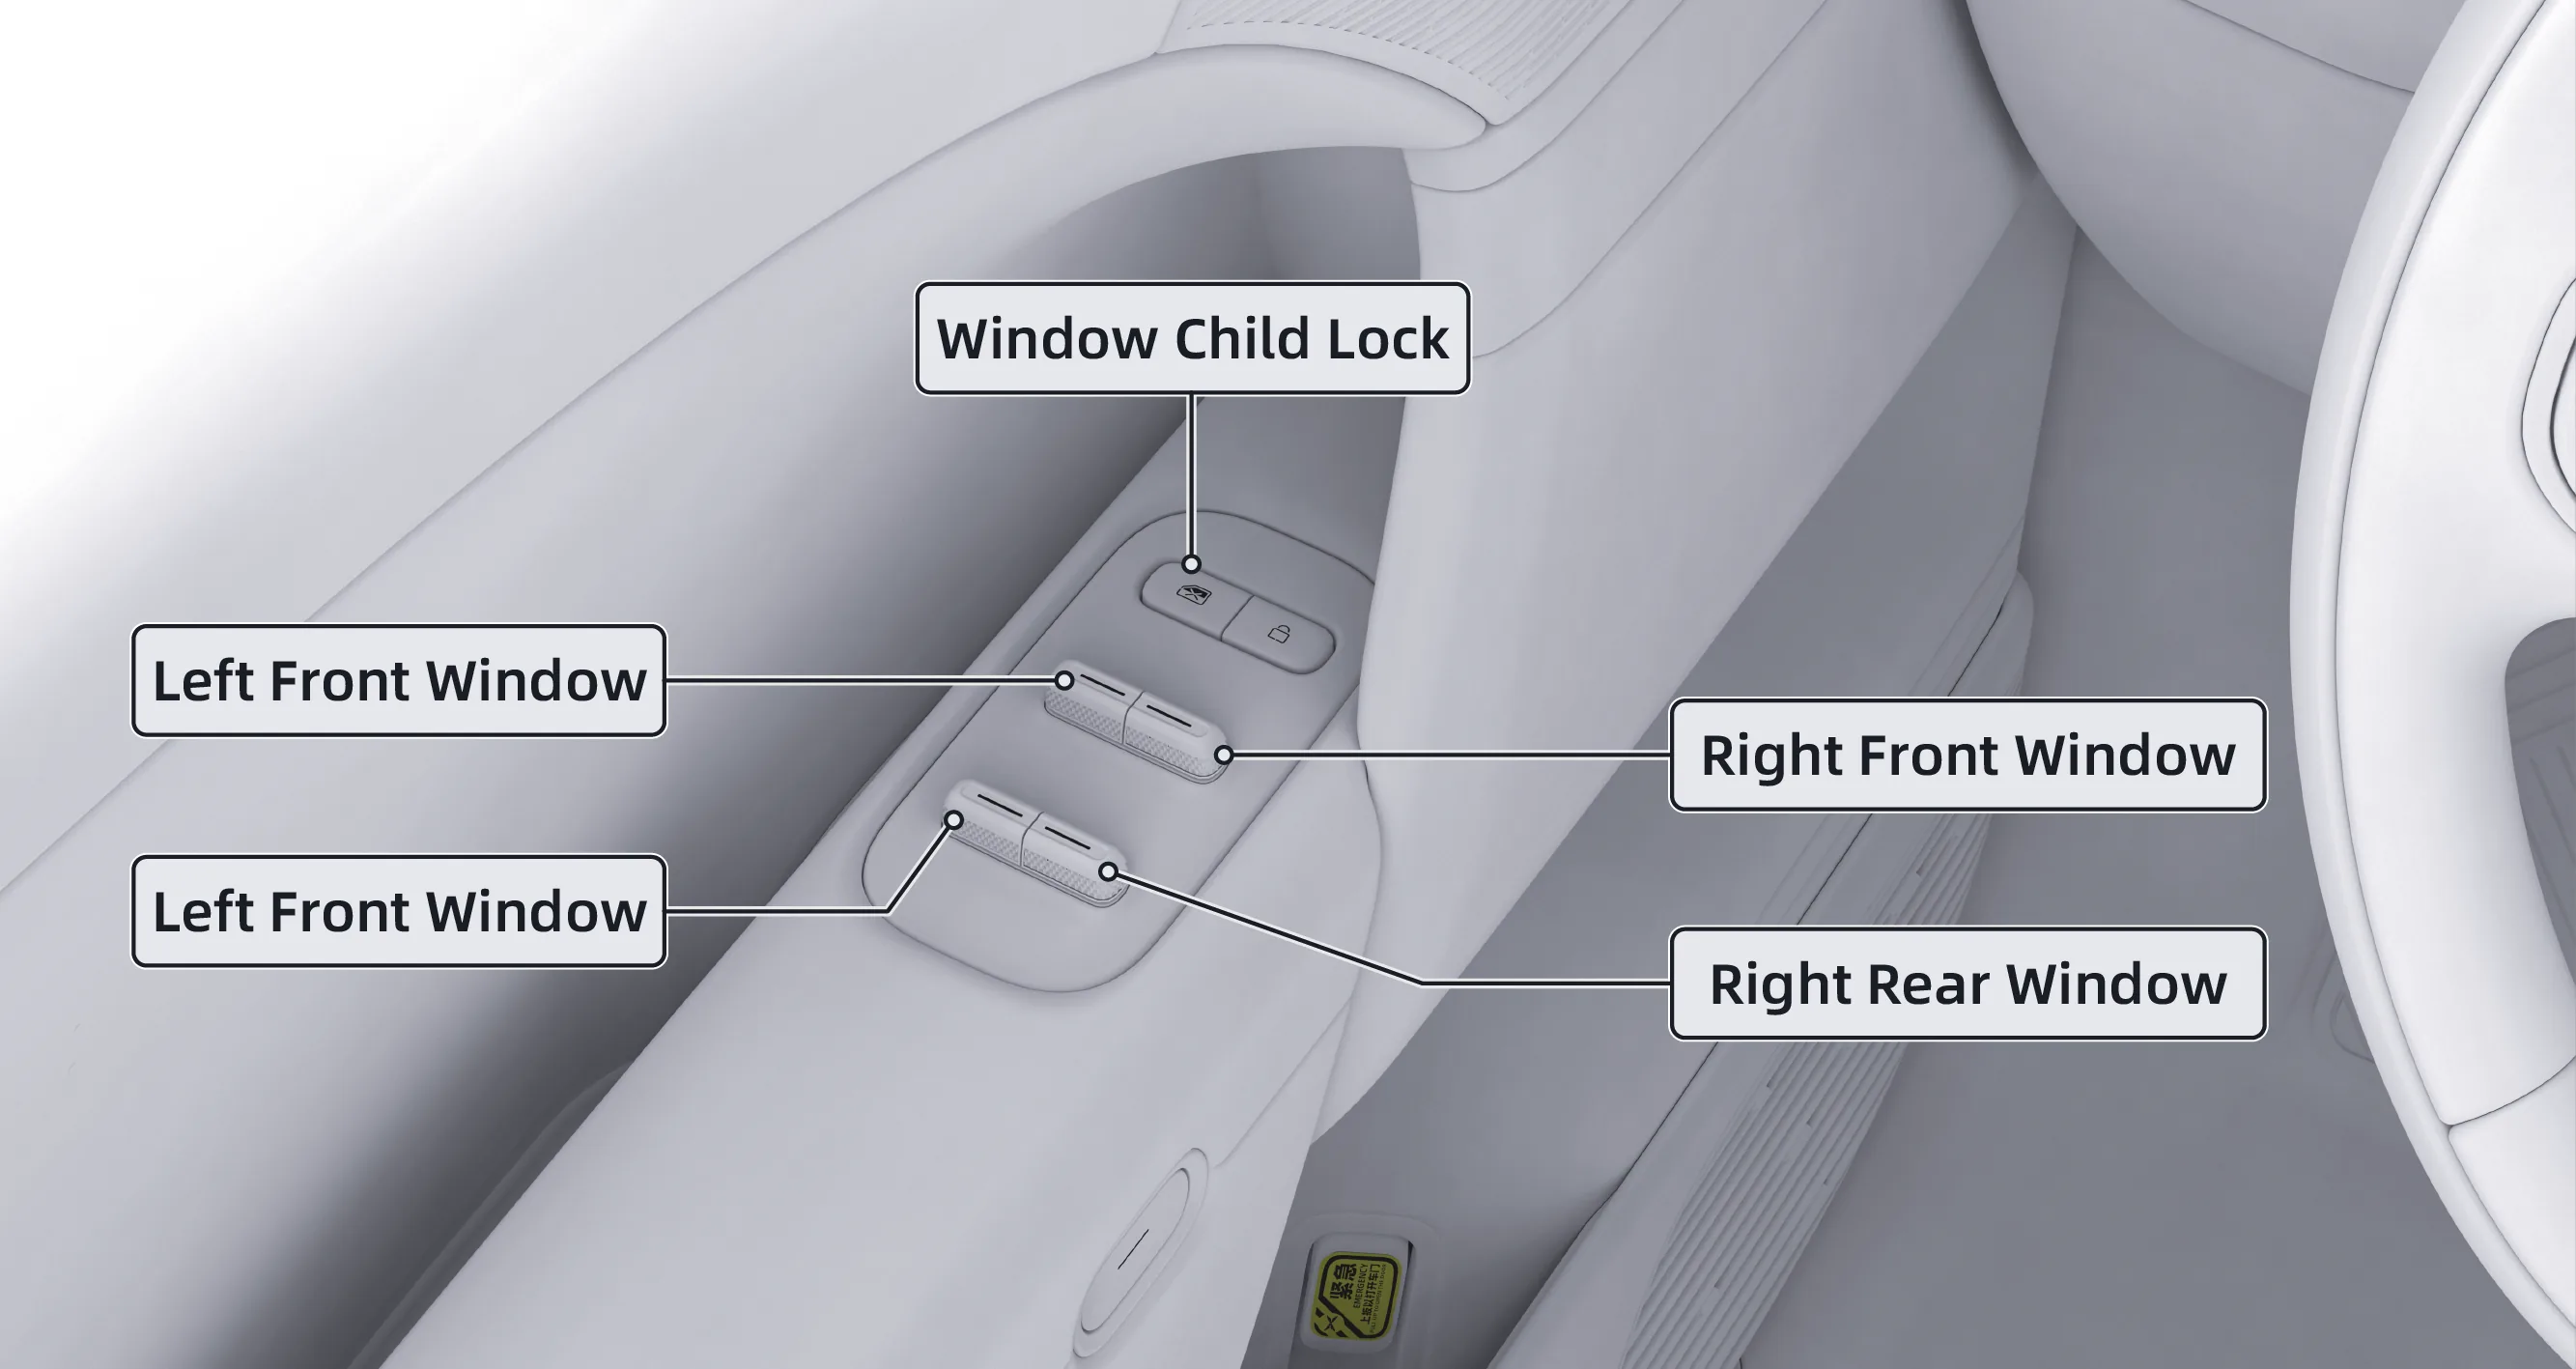
The driver's side window switches can control the raising and lowering of all four windows, and the passenger side window switch can control the raising and lowering of the window on one side.
When the window lever control mode is set to “Front opens, rear closes”h Center Control Screen Settings Items, the window operation is as follows:
Short pull backward: one-touch closing, the window moves to the fully closed position.
Push briefly forward: one-touch open; the window moves to the fully open position.
Press and hold backward: the window rises slowly; release to stop.
Push and hold forward: the window lowers slowly and stops when released.
When the window lever control mode is set to “Front closed, rear open”h Center Display Settings Items, the window operations are as follows:
Push briefly forward: one-touch closing; the window moves to the fully closed position.
Briefly push backward: one-touch opening, the window moves to the fully open position.
Push and hold forward: the window rises slowly and stops when released.
Long pull backward: the window lowers slowly; release to stop.
Press the window child lock button briefly to enable/disable the window child lock. After it is enabled, the passenger-side window switch cannot control window raising and lowering.
Tips For models equipped with rear window sunshades: when the rear window sunshade is raised, the rear window can be operated only after lowering the window sunshade first.
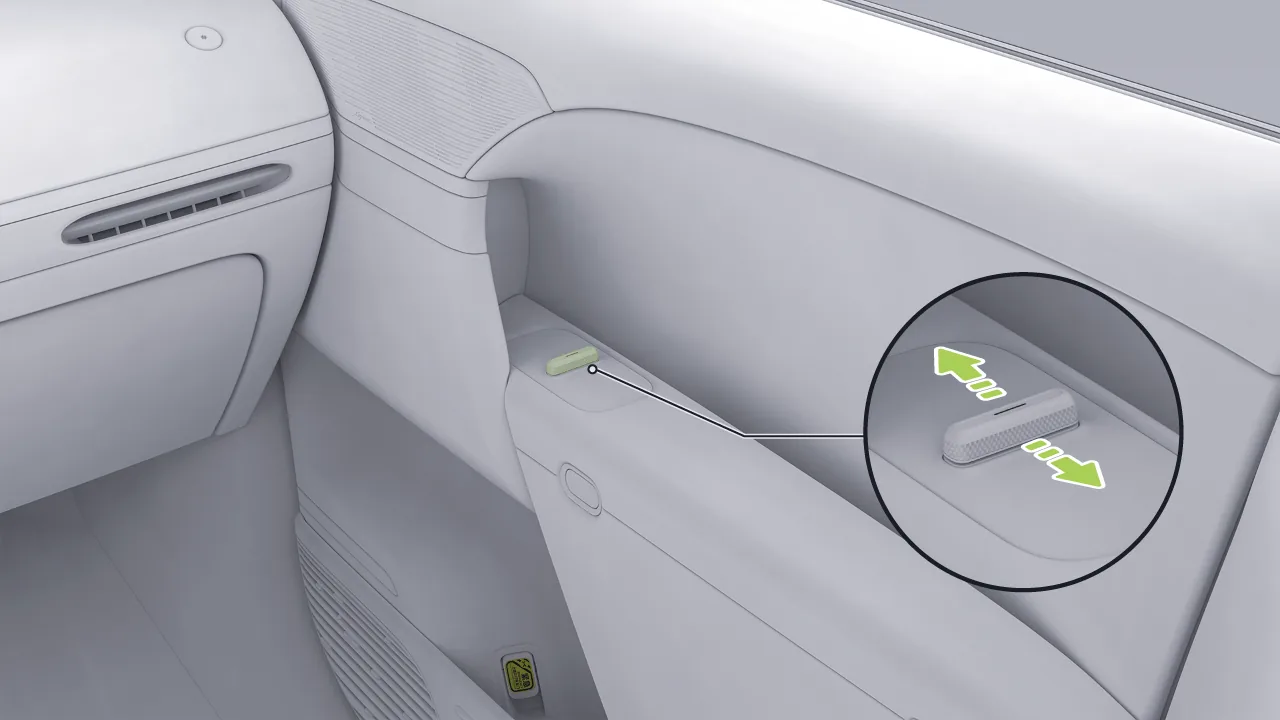
The passenger-side window switch can adjust the raising and lowering of a single window.
When the window lever control mode is set to “Open at the front, close at the rear”h See Center Display Settings Items, the window operations are as follows:
Briefly press the window switch backward to close it with one touch, and the window will move to the fully closed position.
Briefly press the window switch forward to open it with one touch, and the window moves to the fully open position.
Press and hold the window switch backward, and the window will rise slowly; release to stop.
Push and hold the window switch forward, and the window will slowly lower; release to stop.
When the window lever control mode is set to “Front closed, rear open”h See Center Display Settings Items, the window operations are as follows:
Briefly push the window button forward to close it with one touch, and the window will move to the fully closed position.
Briefly press the window switch backward to fully open the window in one touch, and the window will move to the fully open position.
Press and hold the window switch forward, and the window will rise slowly; release to stop.
Press and hold the window switch backward, and the window will slowly lower; release to stop.
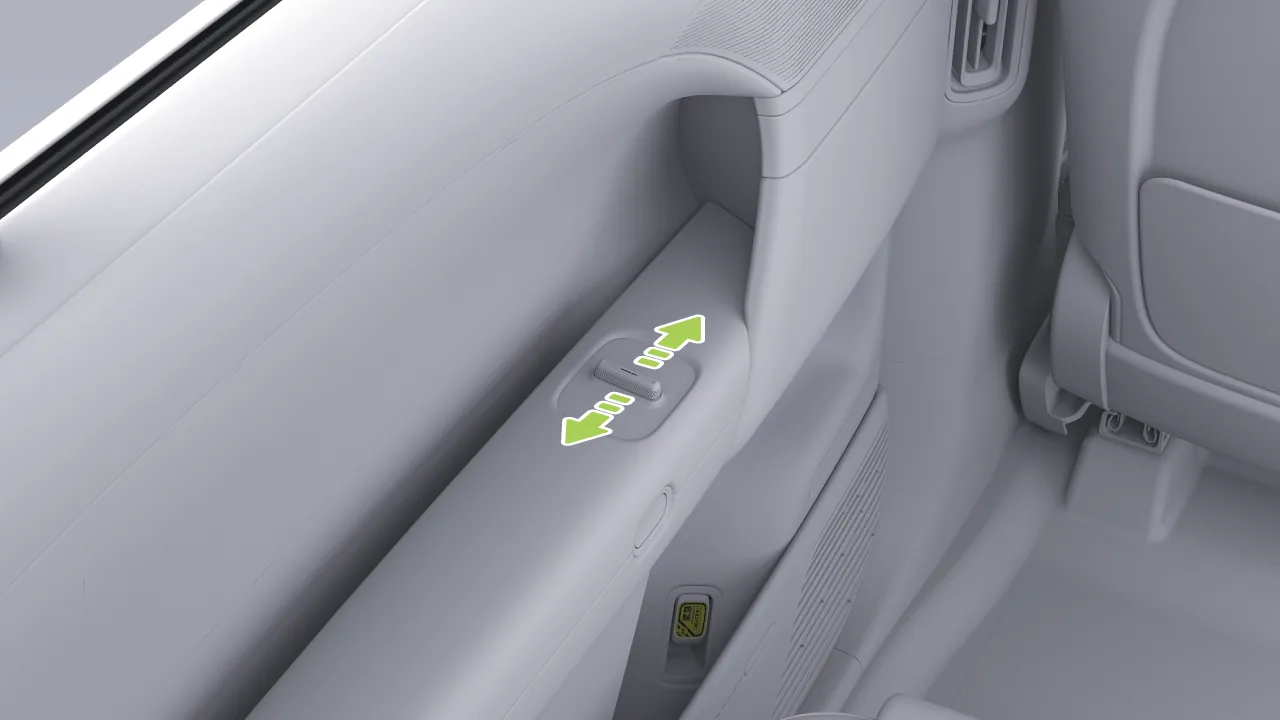
When the window lever control mode is set to “Open at the front, close at the rear”, the window operation is as follows:
Short pull backward: one-touch closing; the window moves to the fully closed position.
Short push forward: one-touch open; the window moves to the fully open position.
Long pull backward: the window rises slowly; release to stop.
Push and hold forward: the window slowly lowers; release to stop.
When the window lever control mode is set to “Front-Hinged, Rear-Opening”, the window operation is as follows:
Short push forward: one-touch close; the window moves to the fully closed position.
Short pull backward: one-touch open; the window moves to the fully open position.
Push and hold forward: the window rises slowly and stops when released.
Press and hold backward: the window slowly lowers and stops when released.
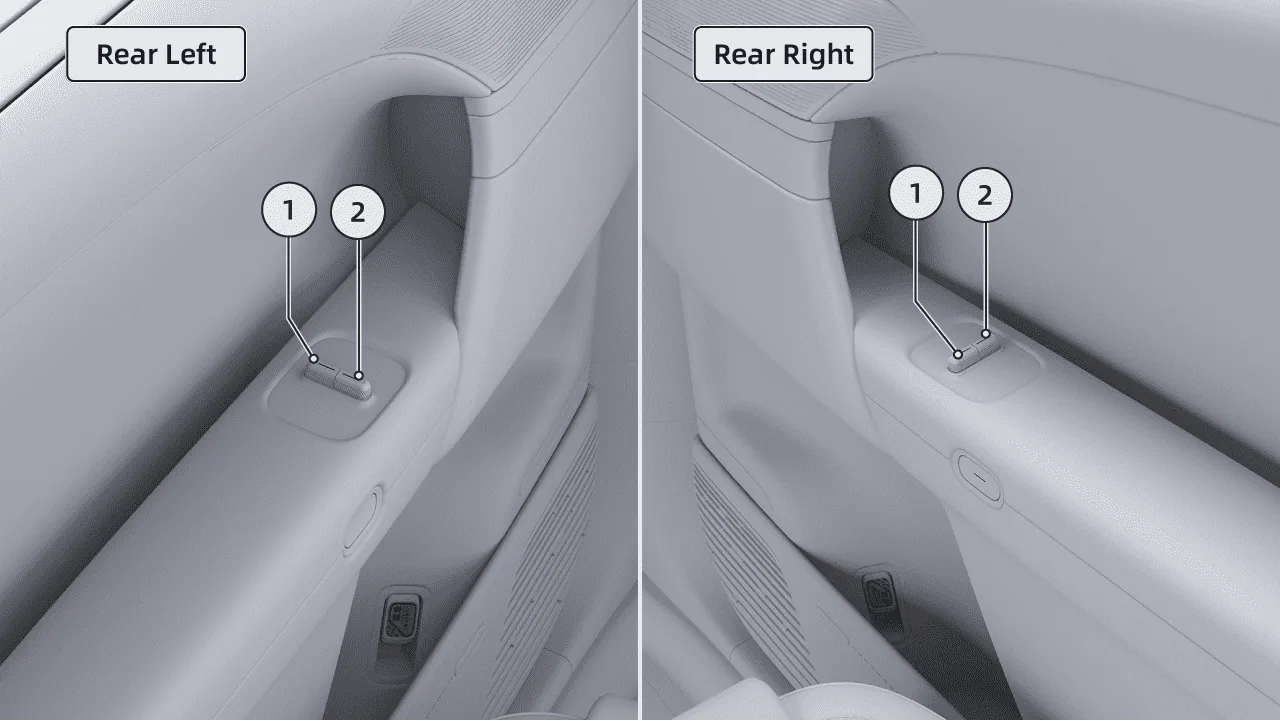
Left Rear Window Switch
Right Rear Window Switch
When the window lever control mode is set to “Open front, close rear”, the window operation is as follows:
Push backward briefly: one-touch closing; the window moves to the fully closed position.
Push briefly forward: one-touch open; the window moves to the fully open position.
Push and hold backward: the window rises slowly and stops when released.
Push and hold forward: the window lowers slowly and stops when released.
When the window lever control mode is set to “Front closed, rear open”, the window operations are as follows:
Short push forward: one-touch closing; the window moves to the fully closed position.
Short pull backward: one-touch open; the window moves to the fully open position.
Push and hold forward: the window rises slowly; release to stop.
Press and hold backward: the window lowers slowly and stops when released.
Tips When the rear window sunshade is raised, you must first lower the window sunshade before operating the rear window.
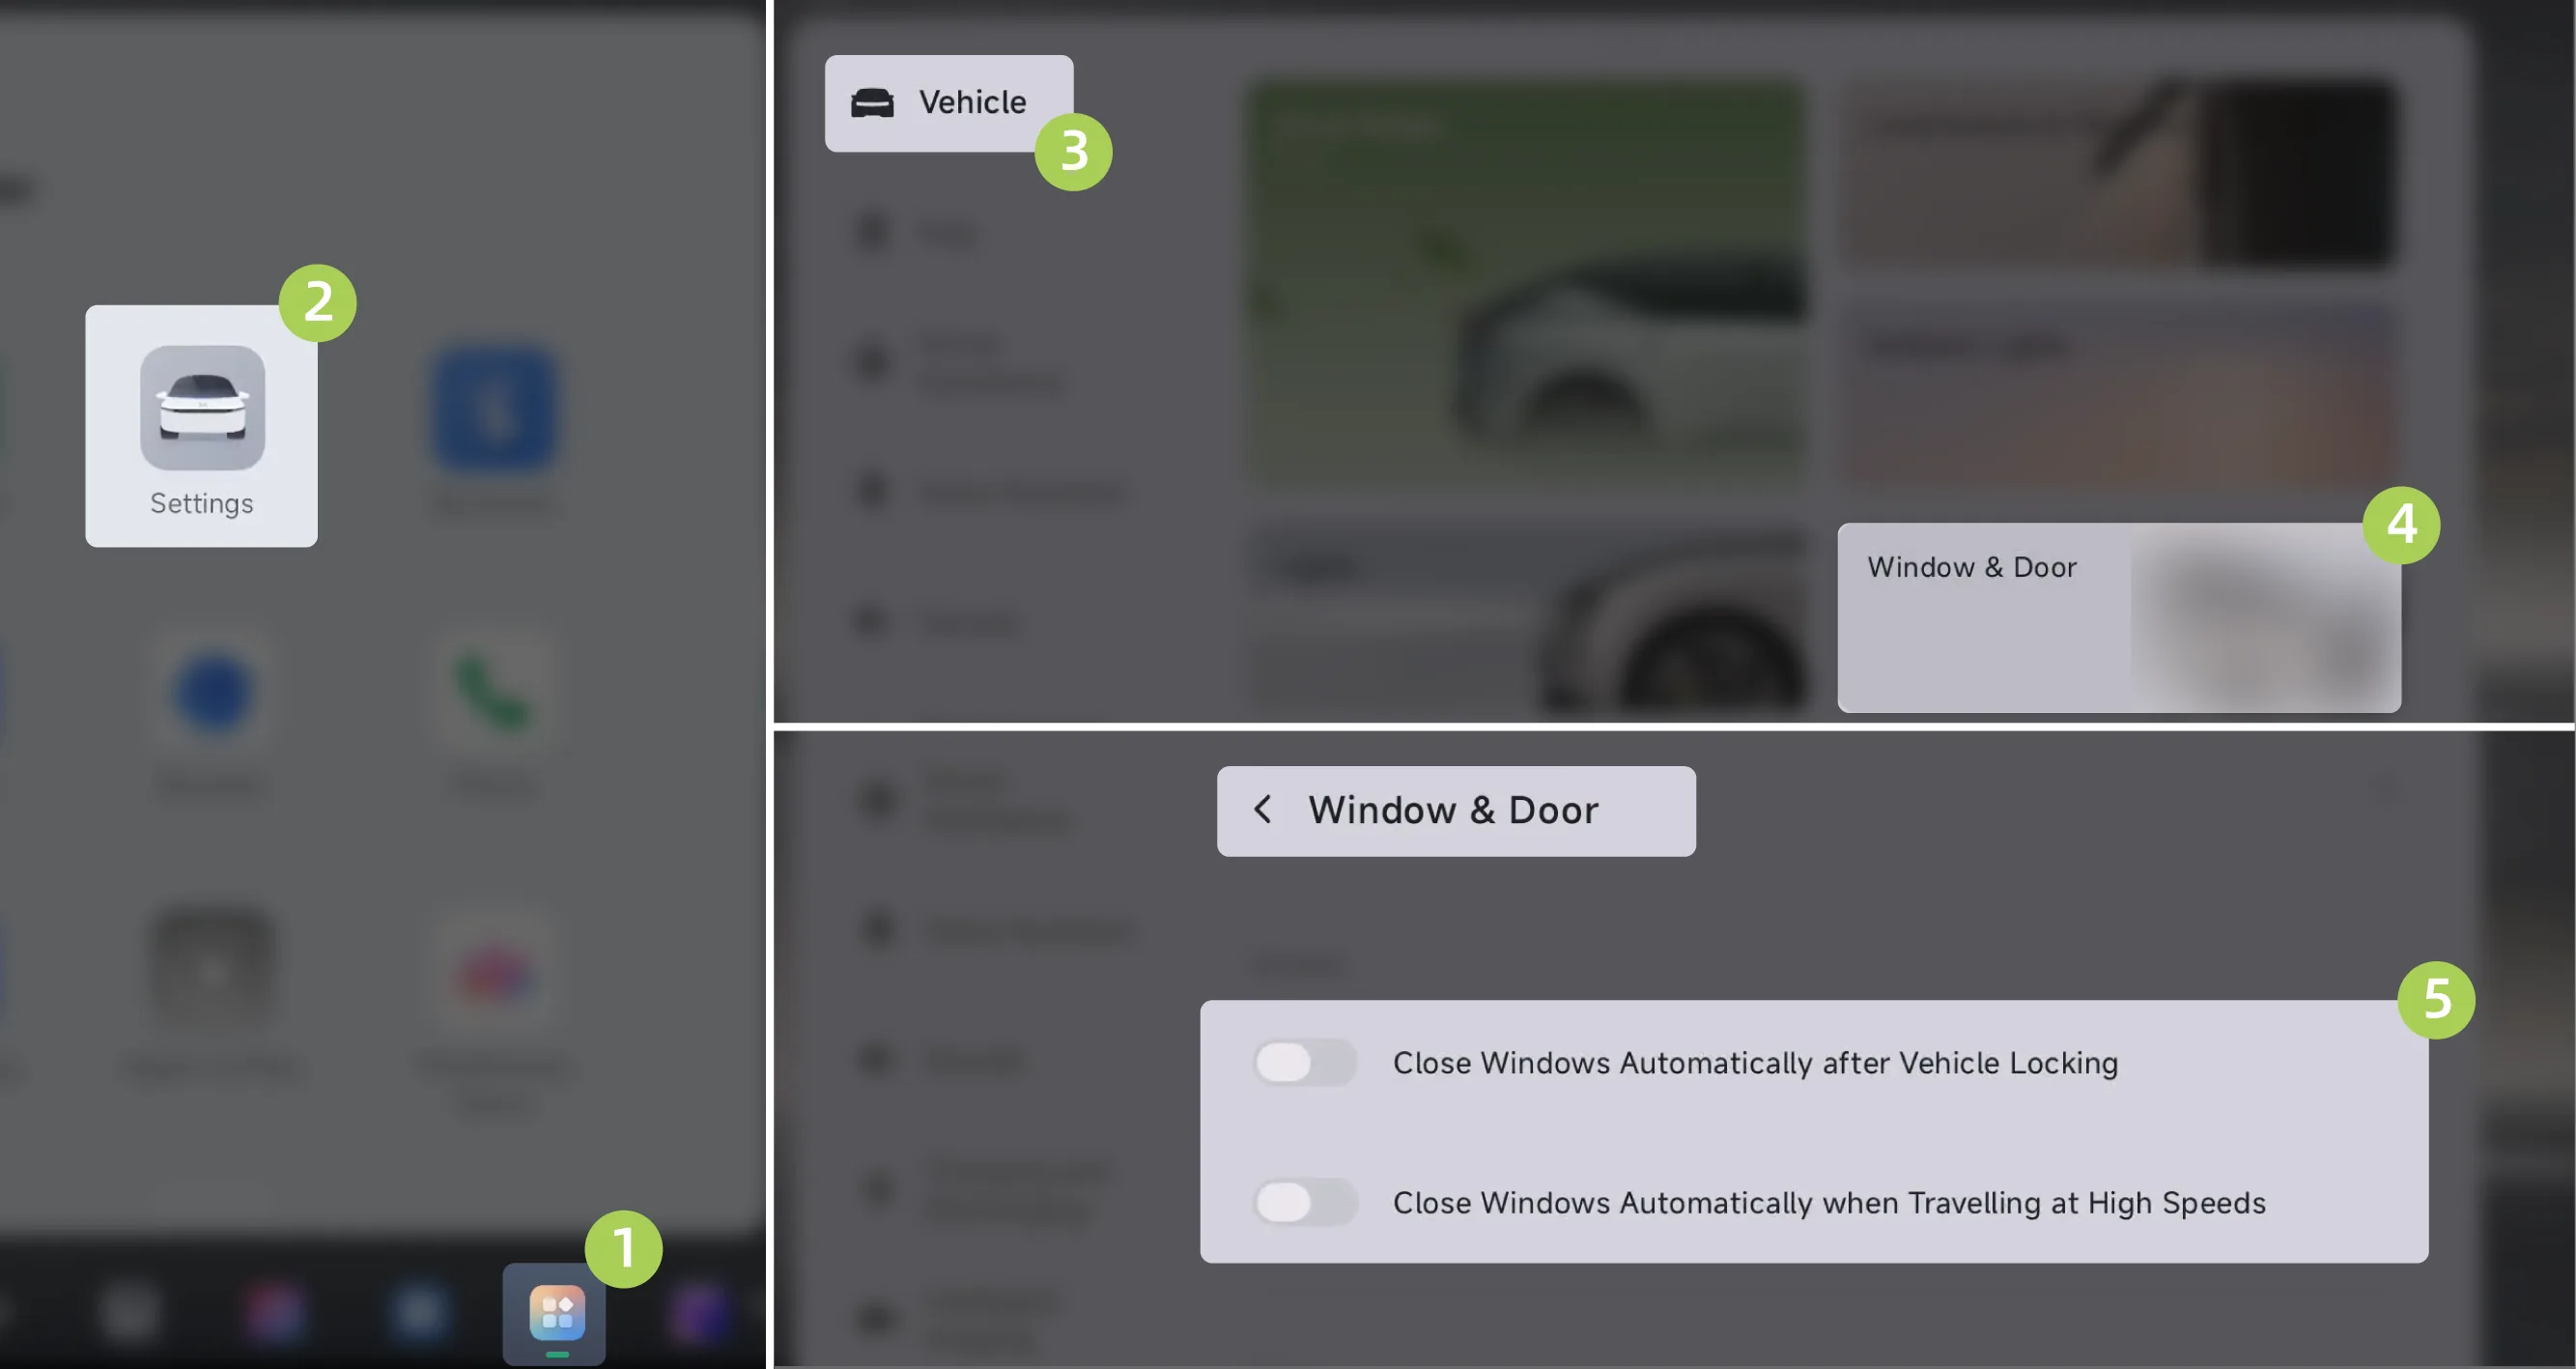
On the center control screen “ →Settings→vehicle→Doors and Windows”Interface, can be opened/closed and Function.
Tips After enabling automatic window closing at high speed, it is recommended to enable the fresh air mode when driving at high speed.
Warning After the automatic window closing upon locking function is enabled, when the vehicle is locked, the window will close automatically. Ensure that the window will not trap occupants or obstacles and that there are no passengers in the vehicle (especially children) before locking.
On the center control screen “ →Settings→vehicle→Doors and Windows”On the interface, you can set the control mode of the window lever.
Open Front, Close Rear:Push the window switch forward to control the window opening; pull the window switch backward to control the window closing.
Front Hinged, Rear Opening:Push the window switch forward to control window closing; pull the window switch backward to control window opening.
This vehicle is equipped with a window anti-pinch function. When an obstacle is encountered during automatic window closing, the window anti-pinch function will be triggered, and the window will immediately stop closing and move downward a certain distance.
Tips If the anti-pinch function of the window fails, the window can be initialized.
Warning Even if the windows are equipped with anti-trap function, do not reach or extend any part of the body or other object into the window during the window closing process, as this may cause injury to members or damage to the vehicle.
Under special circumstances, such as thin or soft obstructions, the window anti-trap function will not be guaranteed to be triggered.
If the function is abnormal when operating the window (for example, the anti-pinch function fails, one-touch up/down fails, and neither the central control screen nor voice can adjust it), window initialization can be performed:
With the vehicle powered on and the doors closed. Pull up and hold the window switch to raise the window to the fully closed position and keep holding for 2 seconds, then release.
Briefly push the window switch forward, and the window will automatically lower to the fully open position and remain there for 2 seconds.
Briefly push the window switch backward. The window will automatically rise to the fully closed position and remain there for 2 seconds, and then the window initialization is completed.
The following operation can be used to check whether initialization is complete:
Briefly push the window switch forward and release it, and the window can automatically lower to the fully open position.
Briefly pull the window switch backward and release it, and the window can automatically rise to the fully closed position.
Tips The above initialization steps are based on the Lever Control for Car Windows set to 'Push Forward for Down and Pull Back for Up.' If the Lever Control for Car Windows is set to 'Push Forward for Up and Pull Back for Down,' the lever actuation direction is reversed. Refer to the actual operation.
The vehicle is equipped with a front row panoramic roof power sunshade and a rear panoramic roof power sunshade. You can open/close the power sunshade in the following ways.
Open/close the power sunshade through the central control screen.
Open/close the power sunshade via the rear control screen.
Open/close the power sunshade via the mobile app.
Open/close the power sunshade by voice command.
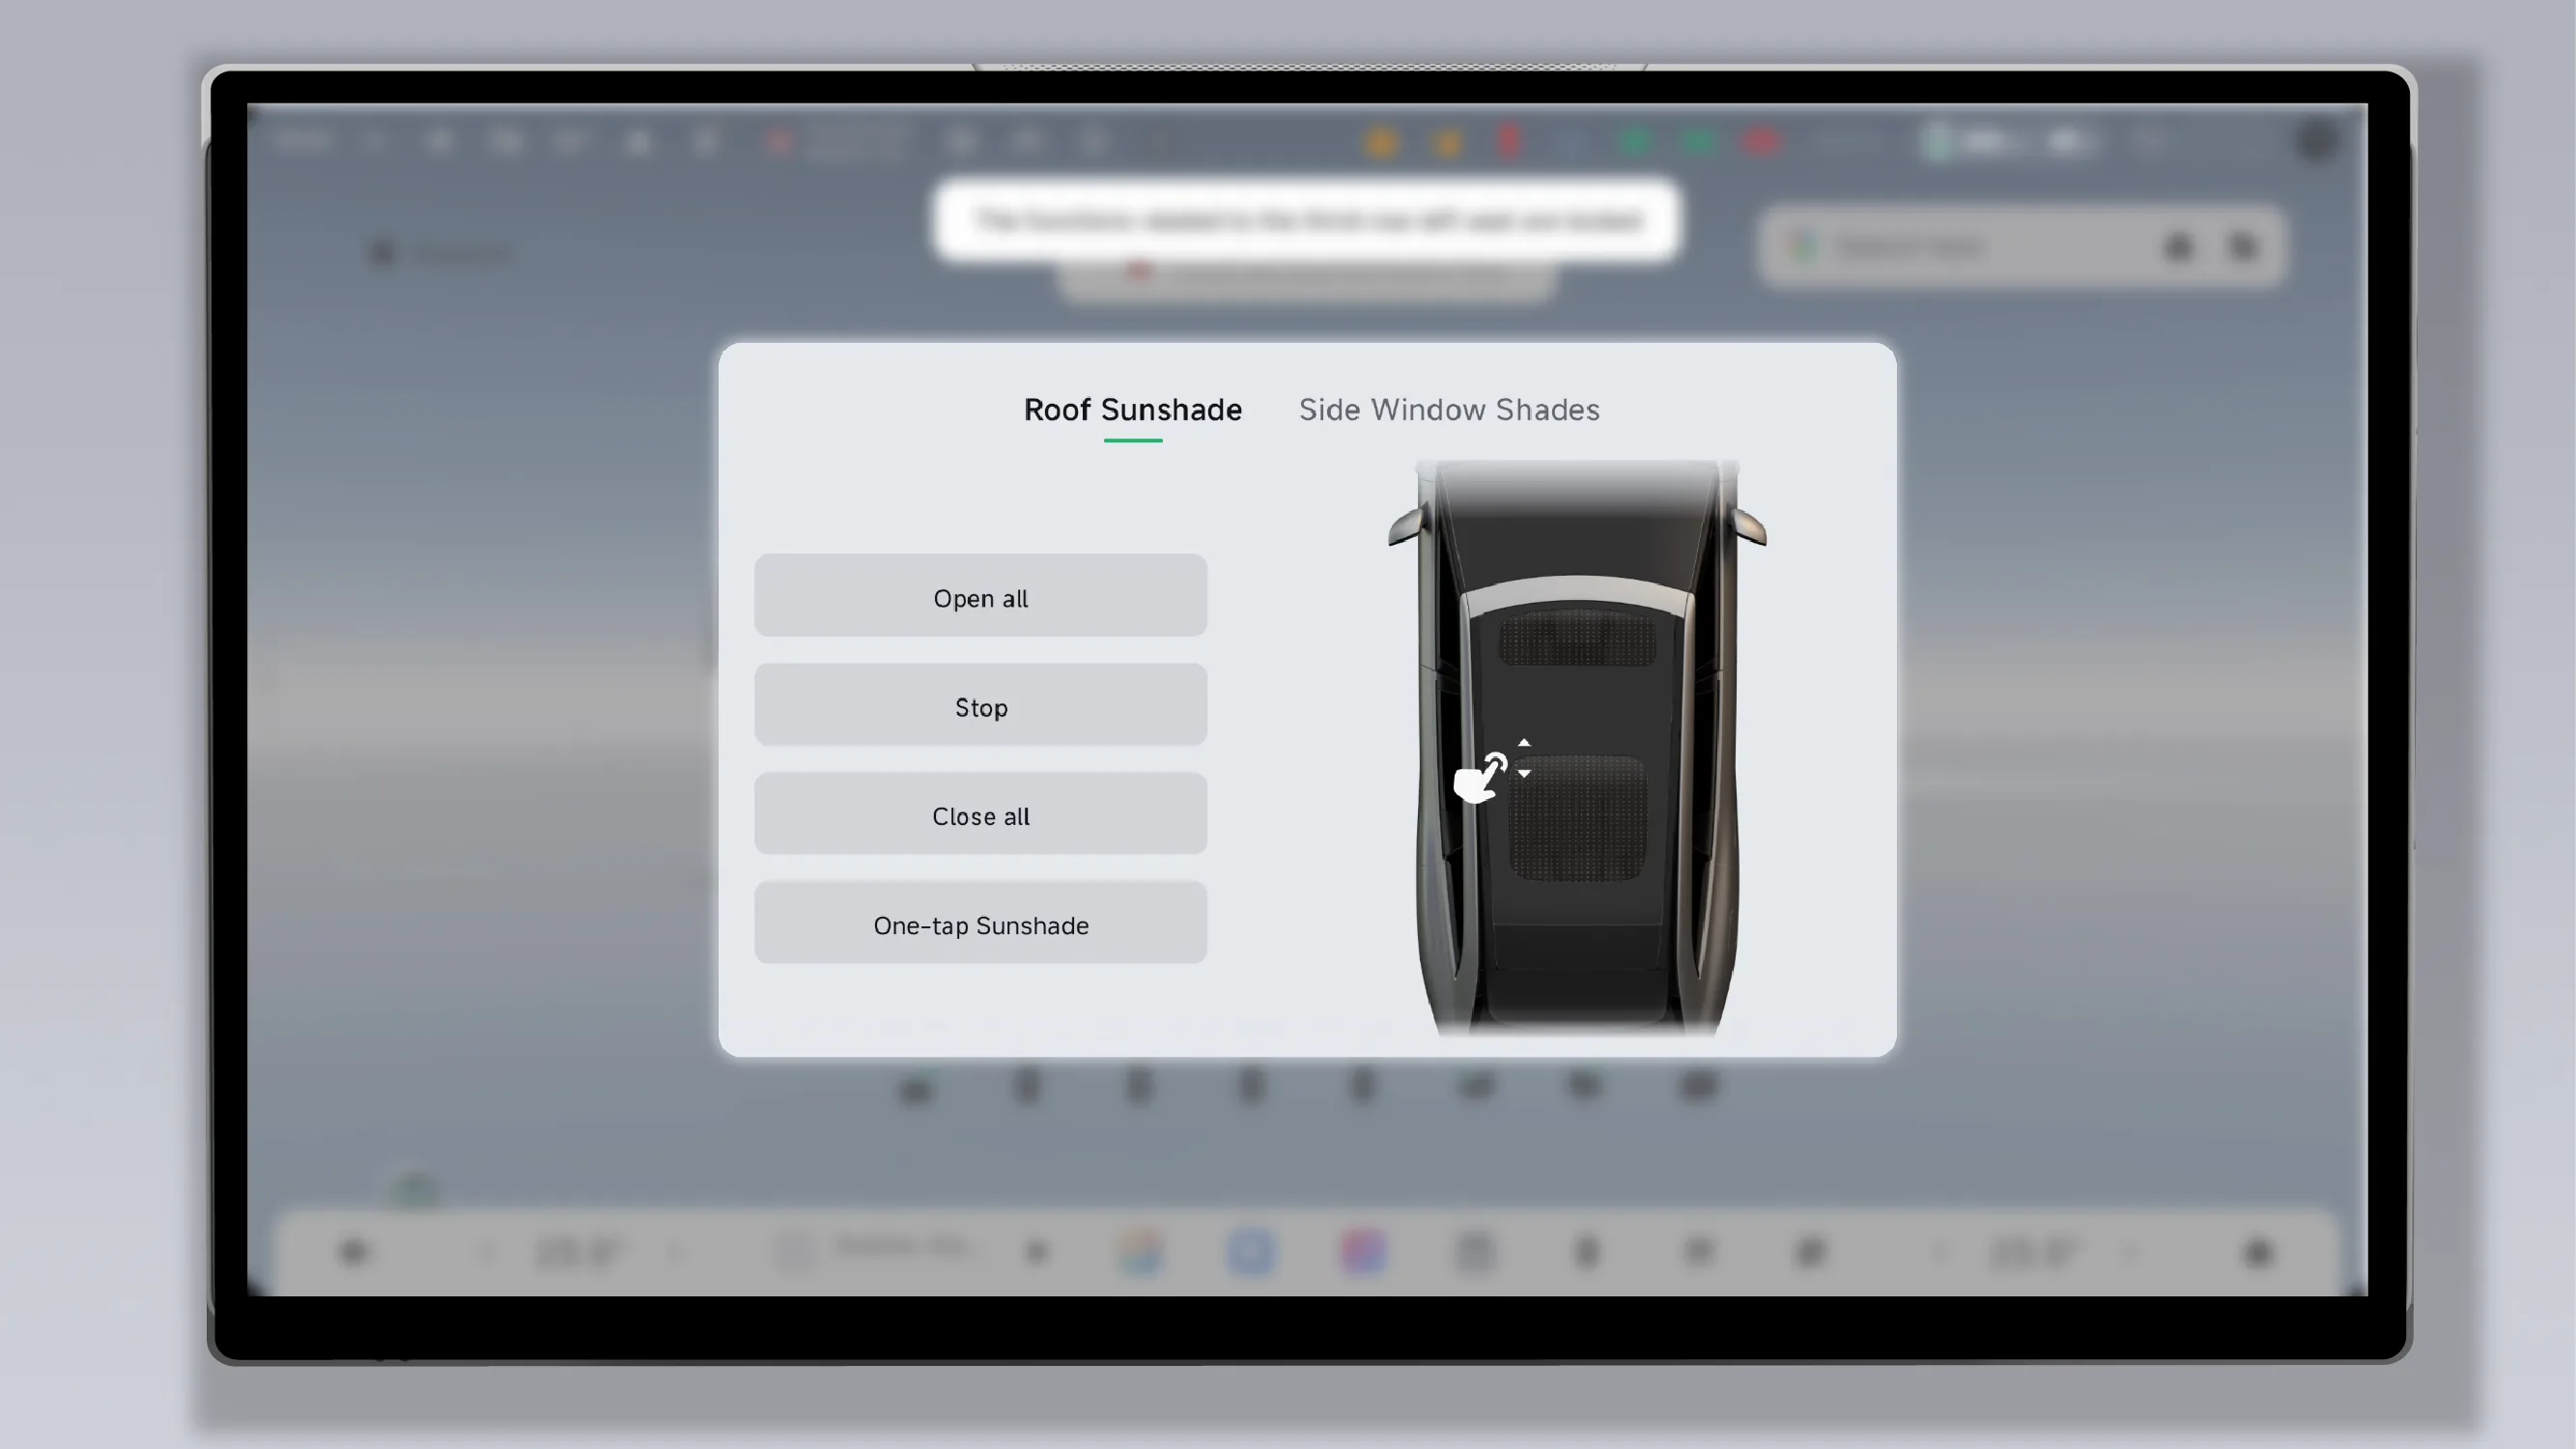
Tap on the center display. “ →Settings→Vehicle→Window&Door→Sunshade”Enter the Roof Sunshade adjustment screen.
Fully Open:Tap to fully open the electric sunshades in the front row and rear row.
Stop:Tap to pause the current opening or closing action of the power sunshade.
Close All:Tap to fully close the electric sunshades in the front row and rear row.
One-tap Sunshade:Tap to close the Roof Sunshade and Side Window Shades with one touch.
Slide Adjustment:Swipe up or down in the front row sunshade area to adjust the front row power sunshade separately; swipe up or down in the rear sunshade area to adjust the rear power sunshade separately.
Tips You can also tap on the center display or the rear control display. Enter the Control Center to operate the power sunshade.
In the mobile app Page:
Tap , open/close the front row power sunshade.
Tap , simultaneously open/close the front row and rear electric sunshades.
The vehicle is equipped with the sunshade anti-pinch function. When the sunshade is automatically closing and encounters an obstacle, the sunshade anti-pinch function will be triggered, and the sunshade will immediately stop closing and move back a certain distance.
Tips If the sunshade anti-pinch function fails, you can perform sunshade initialization.
Warning Even though the sunshade is equipped with an anti-pinch function, there is still a risk of pinching when closing it. Do not use any part of your body to block the sunshade in an attempt to trigger the anti-pinch function.
If the function malfunctions when operating the sunshade (for example, the center control screen, rear control screen, and voice control cannot adjust it), the sunshade can be initialized:
Press and hold on the sunshade adjustment interface After 3 seconds, the sunshade begins initialization.
Sunshade adjusts position automatically, prompt after successful reset , initialization complete.
You can open/close the window power sunshade in the following ways.
window switch opens/closes the power sunshade.
Open/close the power sunshade of the window on the central control screen.
Use voice commands to open/close the window power sunshade (for example, say keywords such as: “Hello XPENG, open the side window sunshade”).
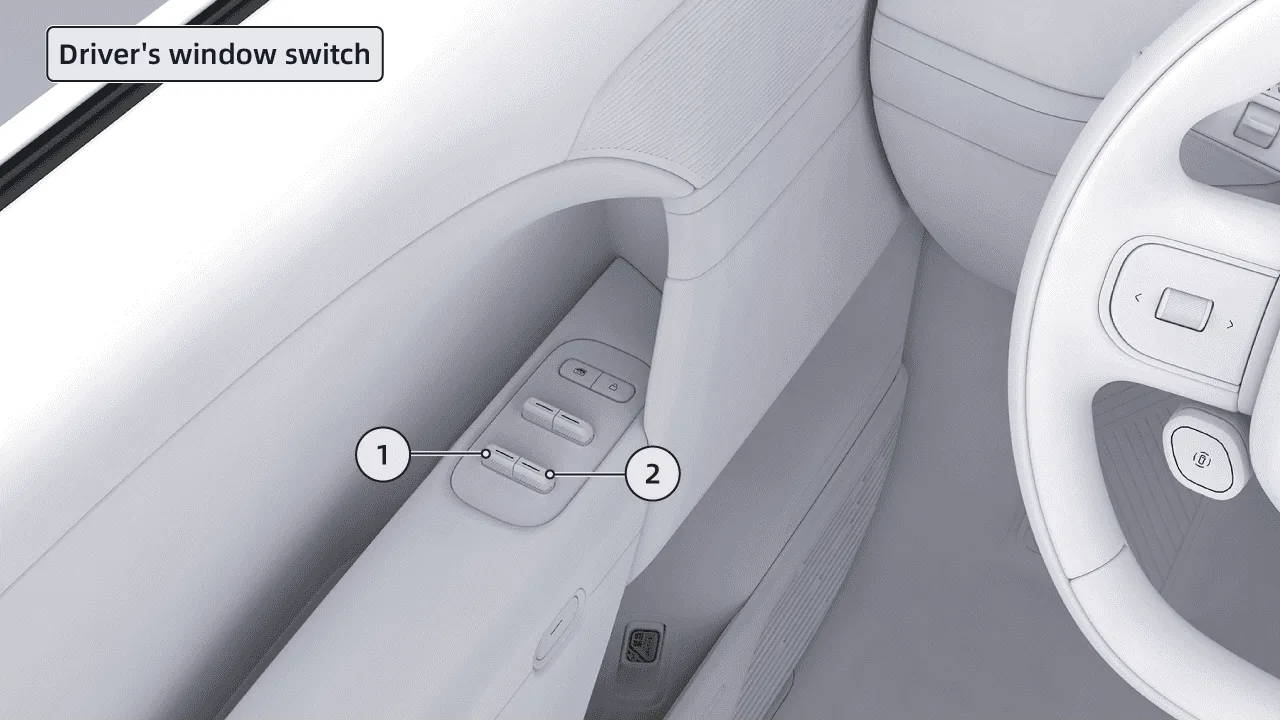
Left Rear Window Switch
Right Rear Window Switch
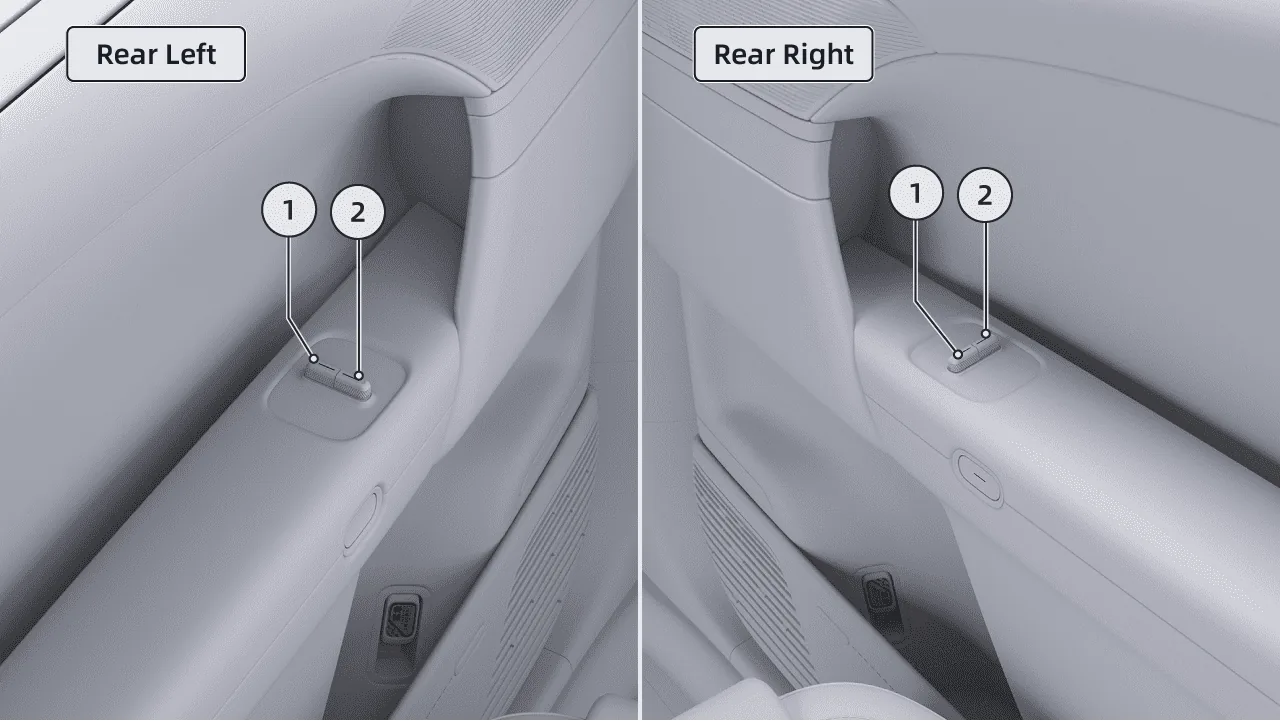
Left Rear Window Switch
Right Rear Window Switch
When the window lever control mode is set to “Open at the front, close at the rear”, the sunshade operation is as follows:
Open the sunshade:Briefly push the rear window switch forward, and the sunshade on the corresponding side will automatically lower.
Close Sunshade:When the window is closed, briefly push the rear window switch backward, and the sunshade on the corresponding side will automatically rise.
When the window lever control mode is set to “Front-hinged, rear-opening”, the sunshade operation is as follows:
Open the sunshade:Briefly push the rear window switch backward, and the sunshade on the corresponding side will automatically lower.
Close the sunshade:When the window is closed, briefly push the rear window switch forward, and the sunshade on the corresponding side will automatically rise.
Tips When the rear window is open, you need to close the window first before operating the window sunshade.
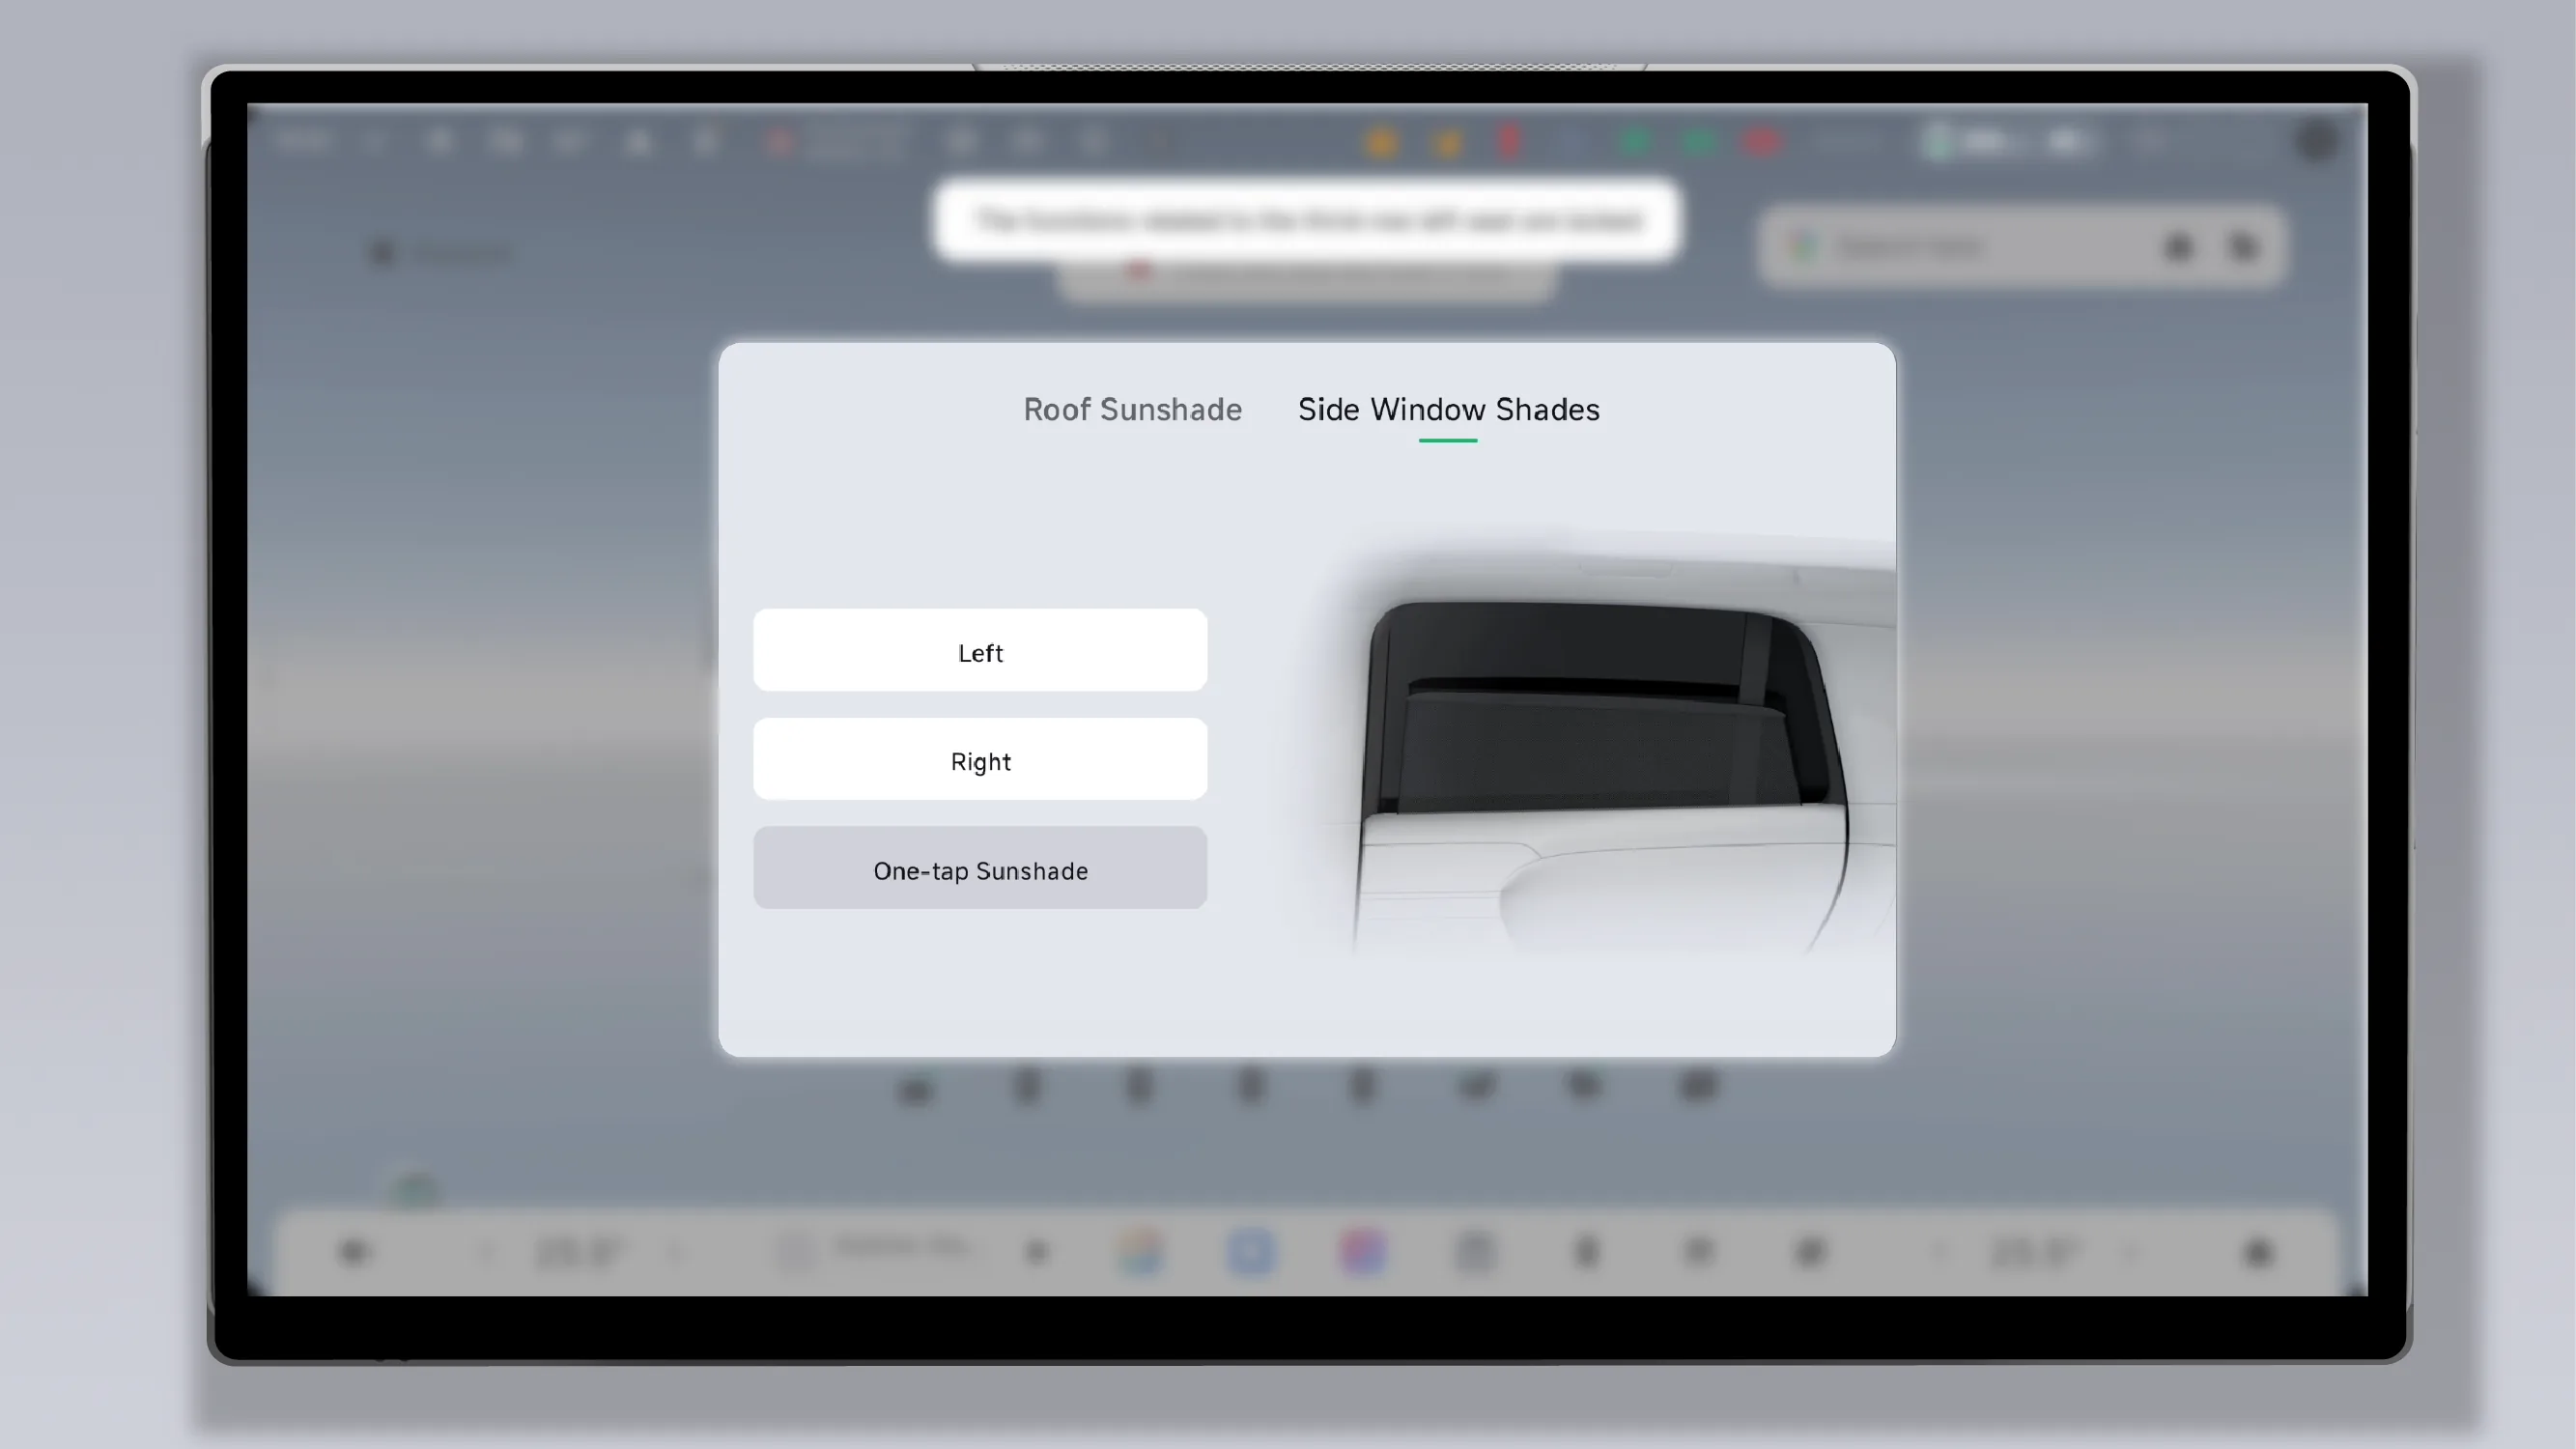
Tap on the center display screen. “ →Settings→Vehicle→Window&Door→Sunshade→Side Window Shades”Enter the side window shades adjustment screen.
Left:Tap to open/close the left side window shades.
Right:Tap to open/close the right-side side window shades.
One-tap Sunshade:Tap to close the Roof Sunshade and Side Window Shades with one touch.
Tips You can also tap on the central control screen. Enter the control center to operate the side window shades.
Tips When the vehicle is involved in a collision or an emergency such as thermal runaway occurs, the electric sunshade will automatically open.
Repeated raising and lowering within a short period may trigger the motor overheat protection, causing the sunshade to temporarily stop working. Normal operation can resume after cooling down.
The sunshade is equipped with an anti-pinch function. If the sunshade encounters an obstacle during automatic raising, the sunshade anti-pinch function will be triggered, and the sunshade will immediately stop raising and move back a certain distance.
Warning Even if the sunshade is equipped with an anti-pinch function, there is still a possibility of pinching injury when closing the sunshade. Do not use any part of the body to obstruct the closing of the sunshade to activate the anti-pinch function.
If the function is abnormal when operating the window power sunshade (for example, the anti-pinch function fails, the automatic raising/lowering fails, and neither the central control screen nor voice can adjust it), the window power sunshade can be initialized:
Push and hold the window button forward. After the sunshade rises to the top, continue holding for 2 seconds to complete initialization.
The following operations can be used to check whether initialization is complete:
Briefly pull the window button backward and release it, and the sunshade can automatically lower.
Briefly push the window button forward and release it, and the sunshade can automatically rise.
Tips The above initialization procedure is based on the window switch control method of “front close, rear open”. If the window switch control method is “front open, rear close”, the toggle direction is reversed. Please refer to the actual operation.
If the sunshade function still cannot be used after performing the initialization operation, contact a XIAOPENG service center for inspection and repair.
Caution Avoid forcibly pushing or pulling the sunshade by hand, otherwise there may be risks such as jamming or motor damage.
Do not place coins, marbles, candies, or other foreign objects in the outer tube groove of the sunshade, otherwise the sunshade may not retract properly.
When the sunshade is raised, do not forcibly press down the flip cover, as this may cause the flip cover pivot shaft to break and result in abnormal noise during raising.
Keep the window glass as clean as possible, as dirt may cause abnormal friction noise when the sunshade moves.
Warning When operating, ensure that children's heads and hands do not extend into the movement area of the sunshade to prevent pinching injury when the sunshade rises. It is recommended to enable the child lock for the windows when children are seated in the rear row.
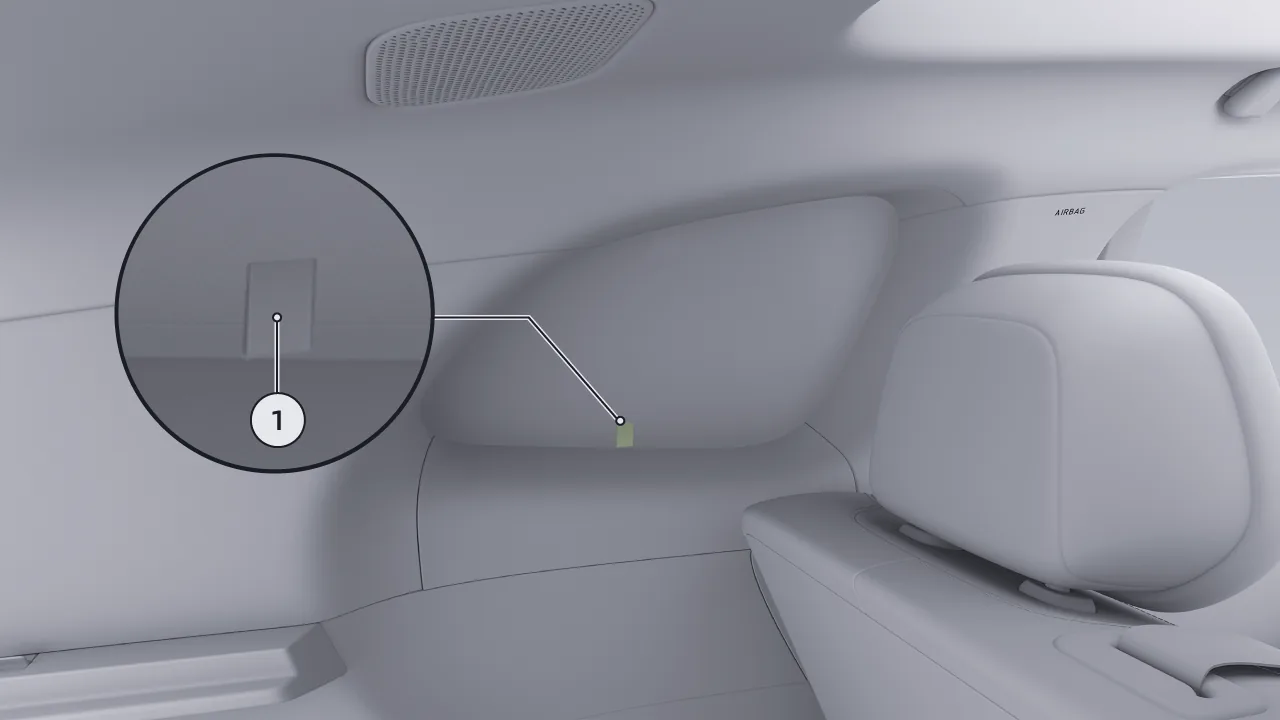
Installation:The manual sunshade for the rear quarter window adopts an elastic frame snap-fit structure. Simply fully insert the frame of the sunshade into the gap between the rear quarter window glass and the trim panel to complete the installation.
Removal:Pinch the handle position ① with your fingers and pull outward gently to remove it.
Caution When the sunshade is not in use, it is recommended to store it properly to prevent loss or damage.
When in an environment with insufficient light or low visibility, turning on the position lamps can allow other road users to notice the presence of your vehicle.
You can turn on the position lamps in the following ways. After they are turned on, the central control screen displays  Indicator Light:
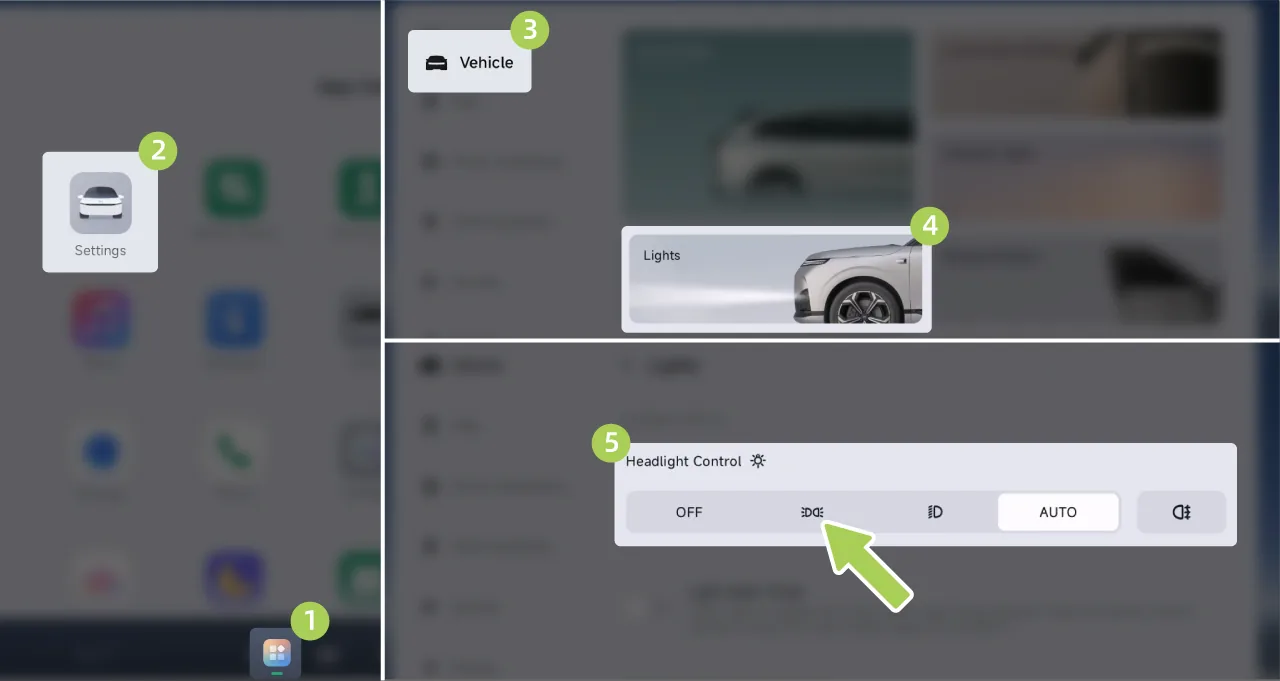
On the center display “ →Settings→vehicle→Lights”Interface, turn on the position lights.
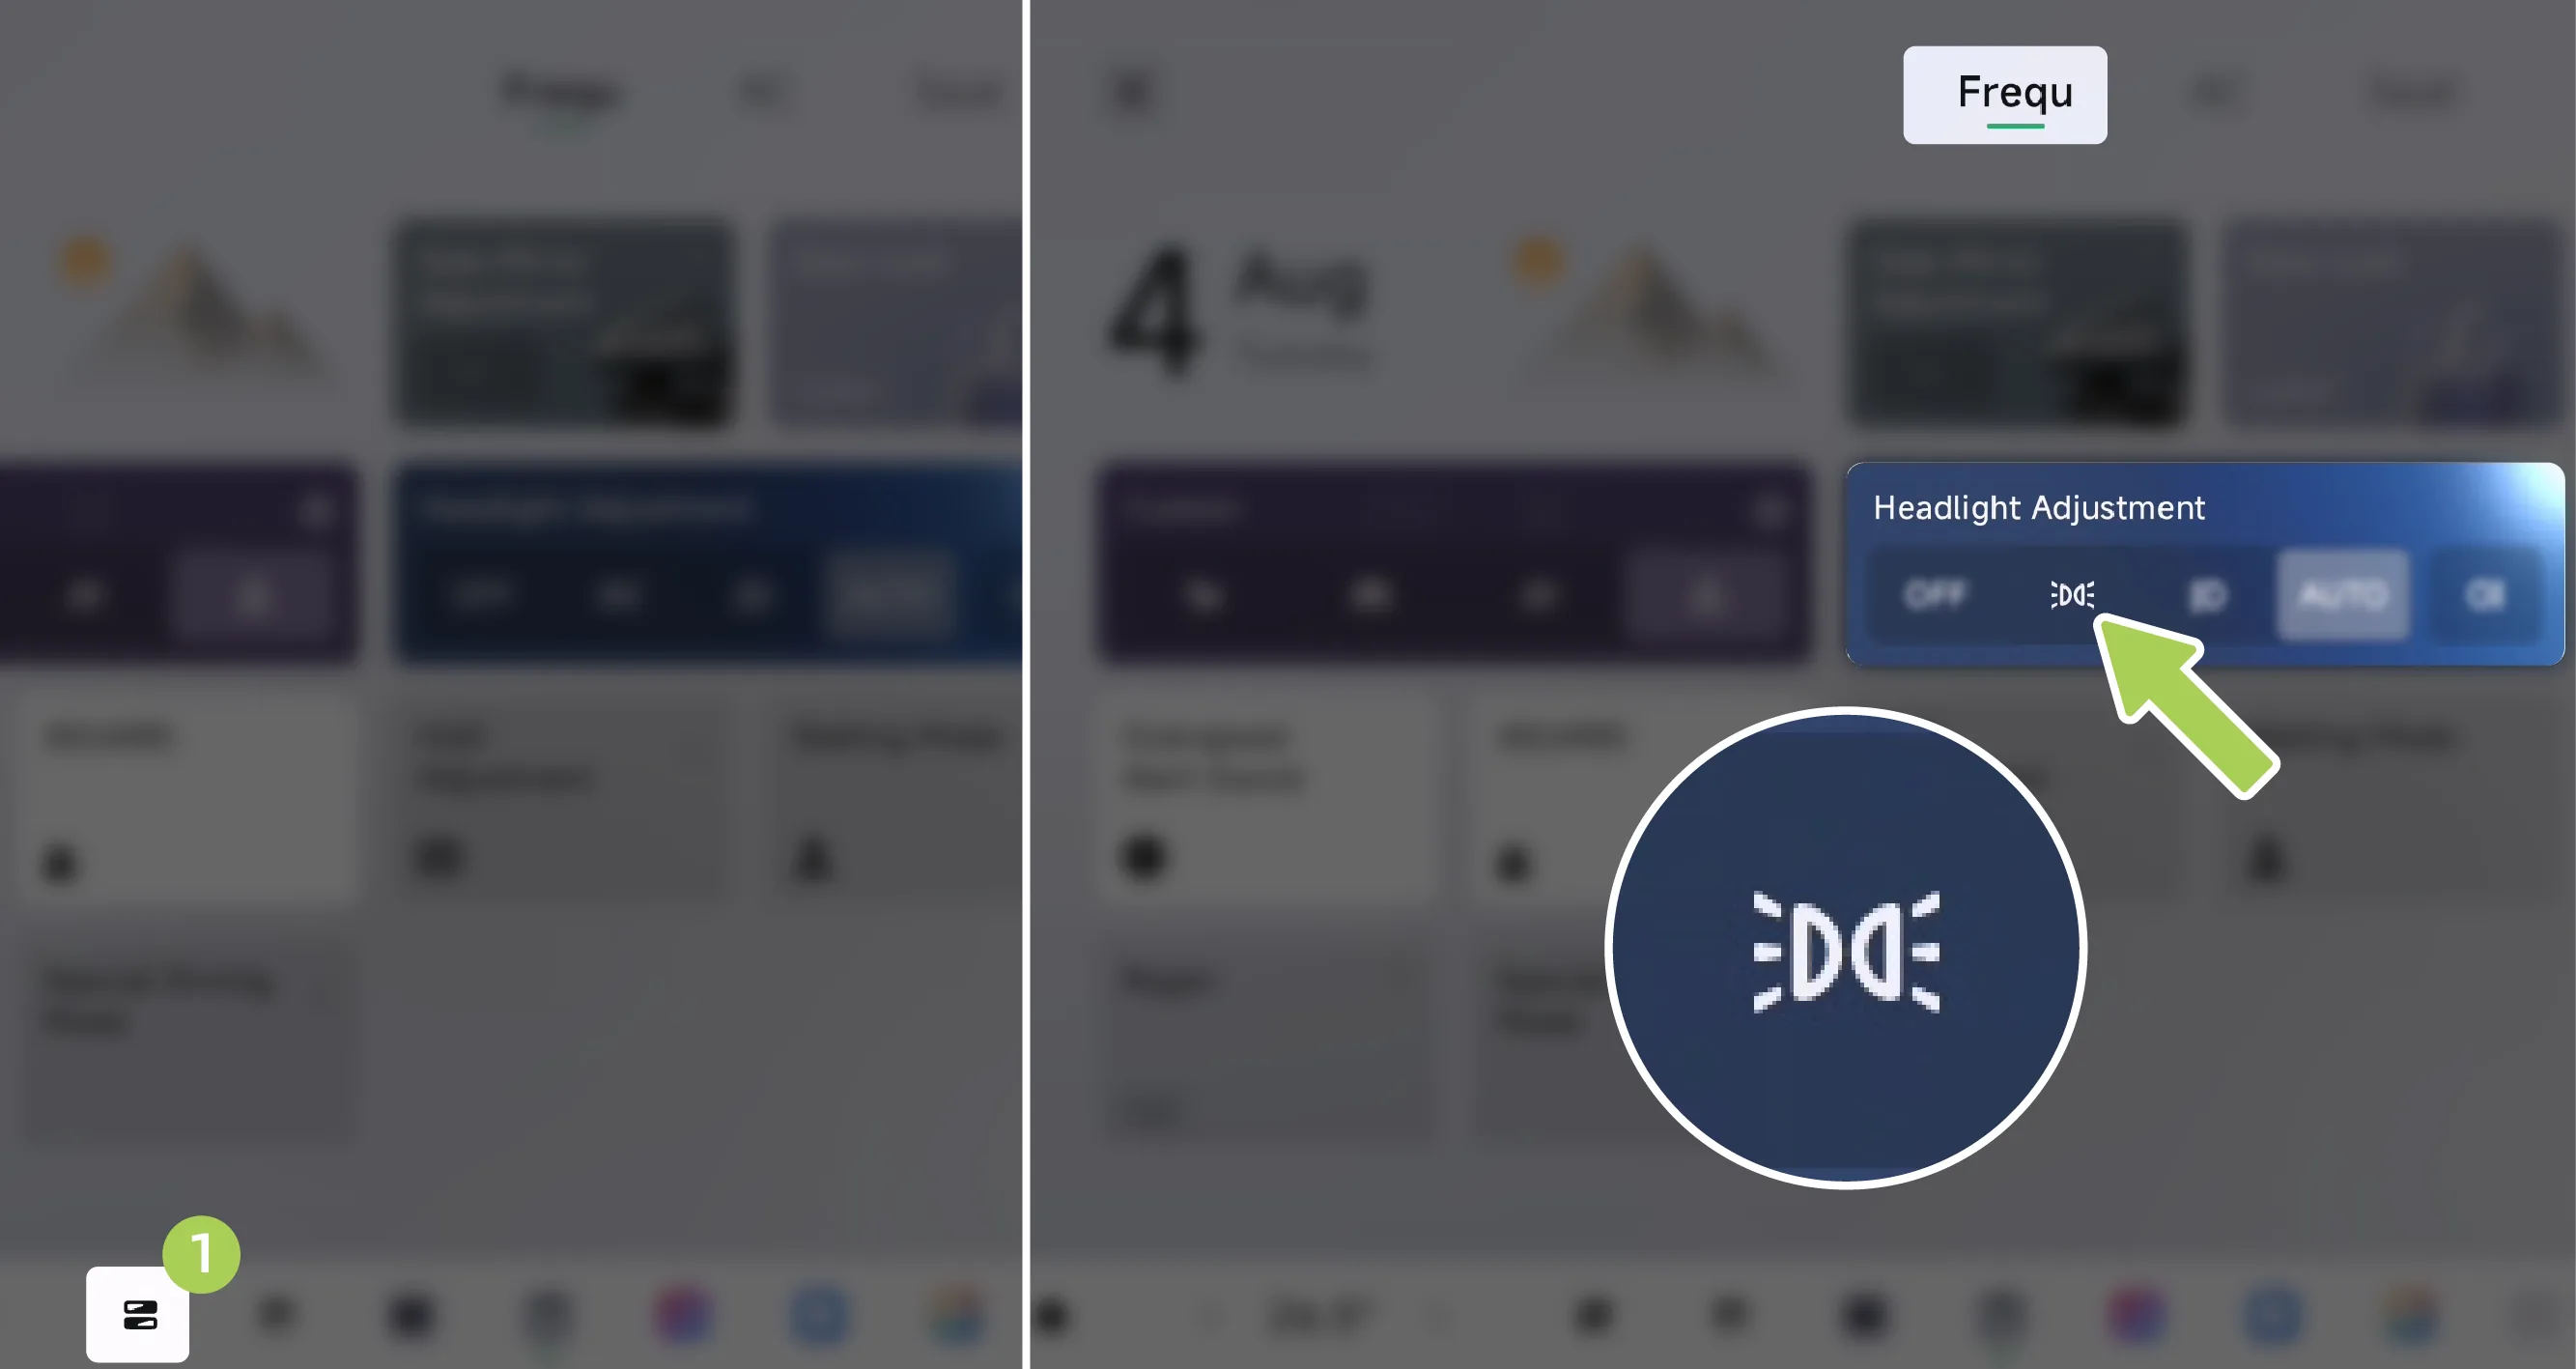
Tap on the center control screen. Enter the Control Center screen and turn on the position lamps.
You can turn on the low beam headlights in the following ways. After they are turned on, the central control screen displays  Indicator Light:
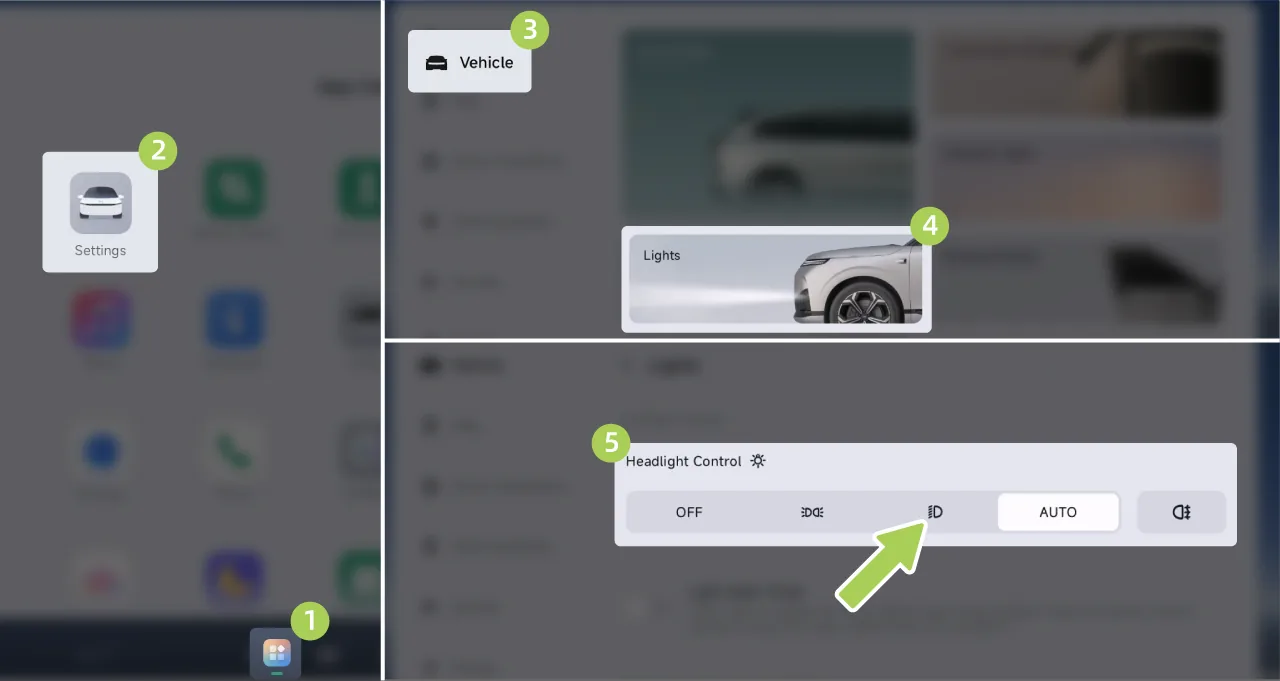
On the center control screen “ →Settings→vehicle→Lights”On the screen, turn on the low beam headlights.
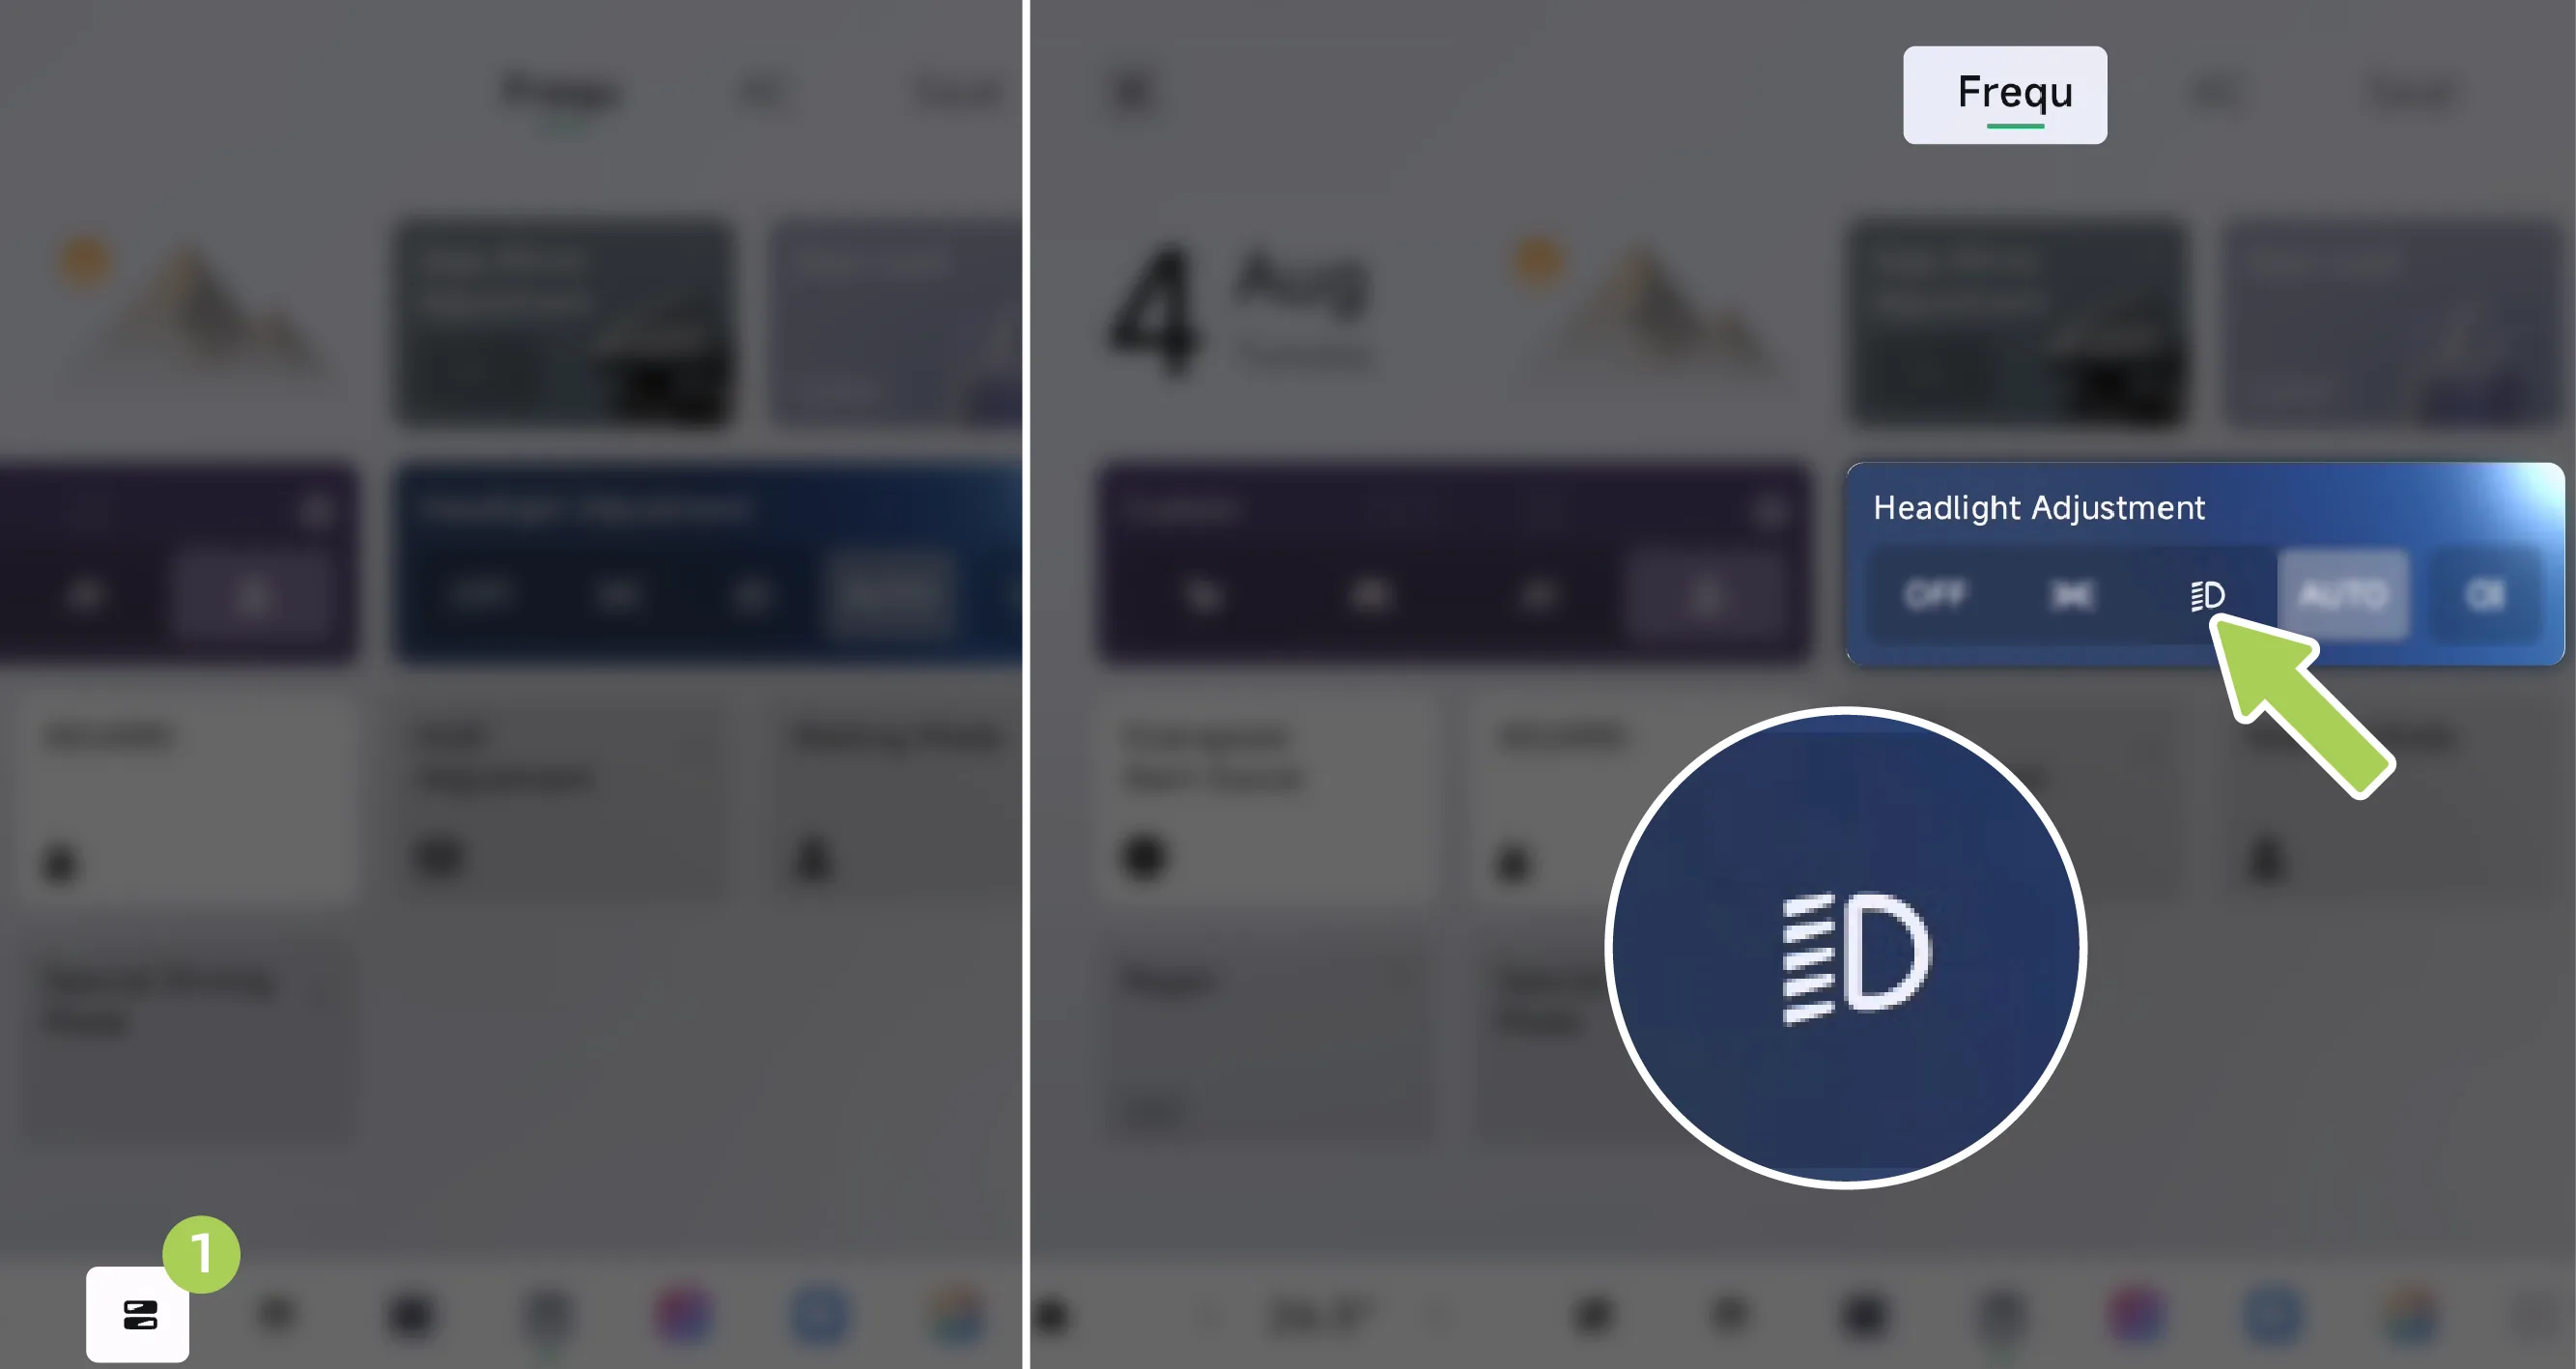
Tap on the center control screen. Enter the Control Center screen and turn on the low beam headlights.
Caution Do not switch on the low beam when the headlamp is covered by any obstruction (such as towels, gloves, clothing, or other objects), otherwise the lamp cover may overheat and deform. If you find that the headlamp is obstructed while driving at night, pull over safely when conditions permit and remove the obstruction promptly to avoid affecting lighting performance and driving safety.
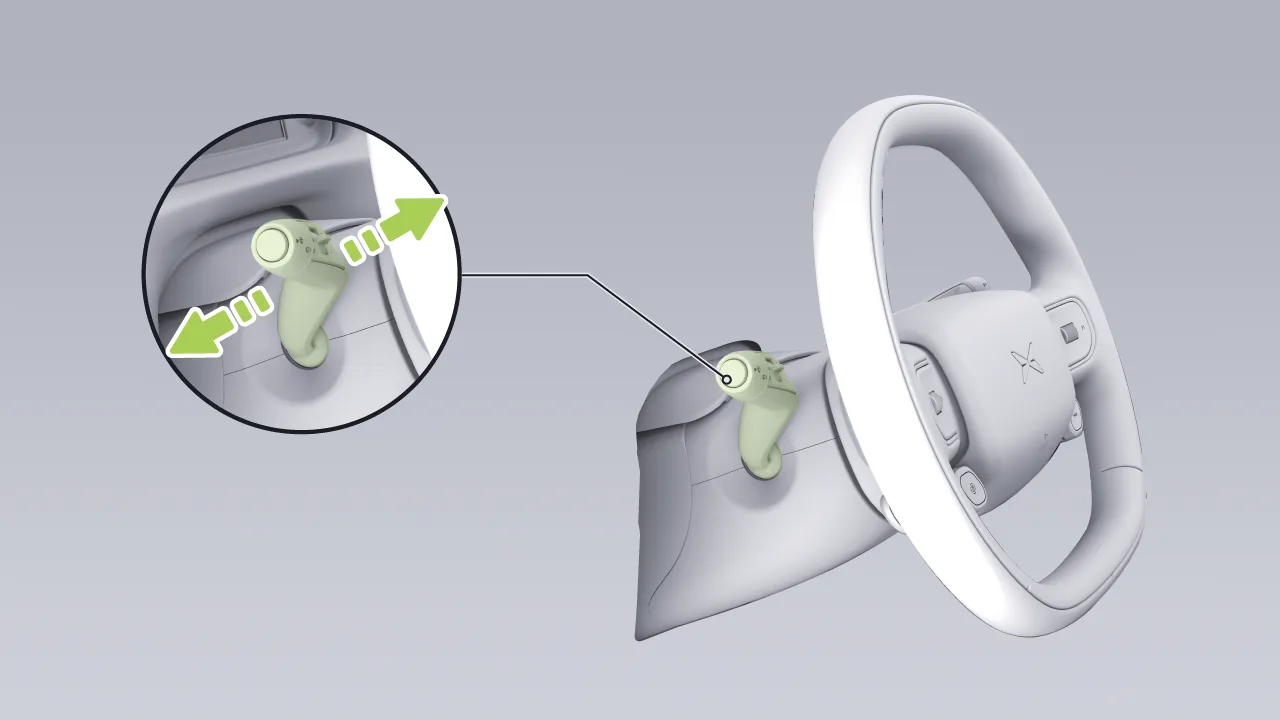
Turn on the high beam: When the low beam is on, push the lever on the left side of the steering wheel forward to turn on the high beam. At this time, the central control screen displays Indicator light.
Turn off the high beam headlights: When the high beam is on, push the lever on the left side of the steering wheel forward or backward to turn off the high beam.
Passing Light: Pull the lever on the left side of the steering wheel backward and release it, and the high beam flashes once.
Caution For your safety and the safety of others, please use the high beam properly.
You can enable the auto headlights function in the following ways:
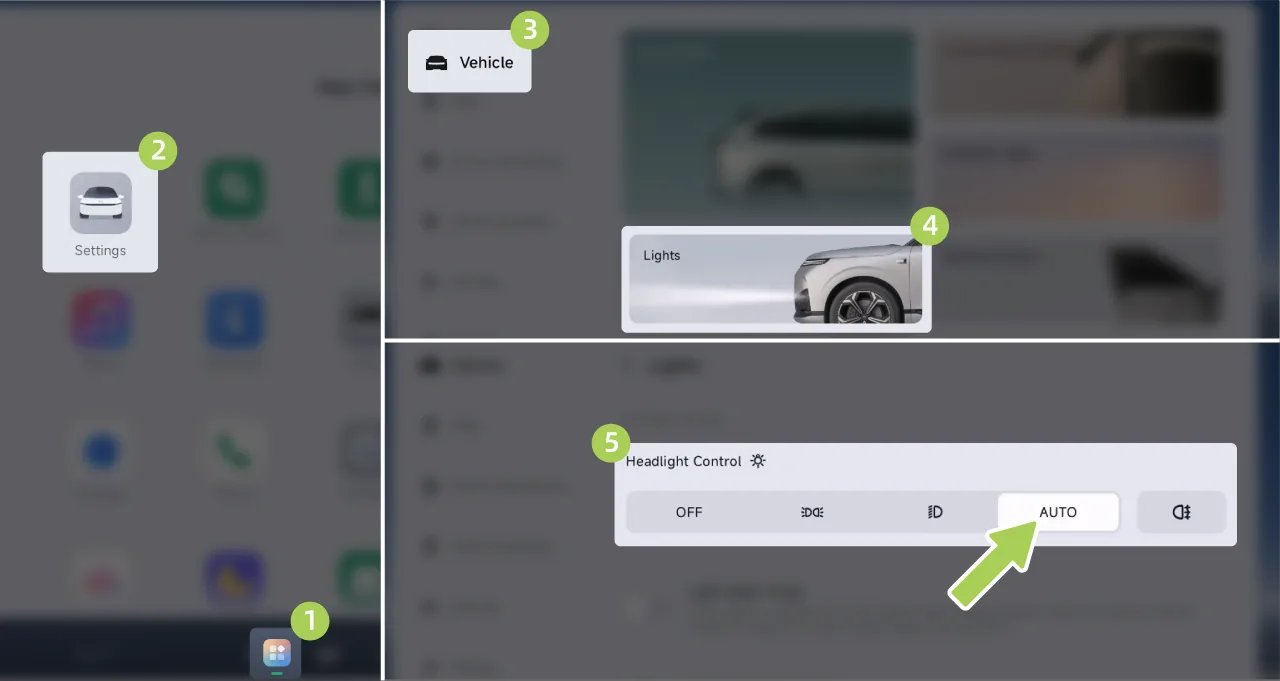
On the center control screen “ →Settings→vehicle→Lights”Interface, enable the auto headlights function.
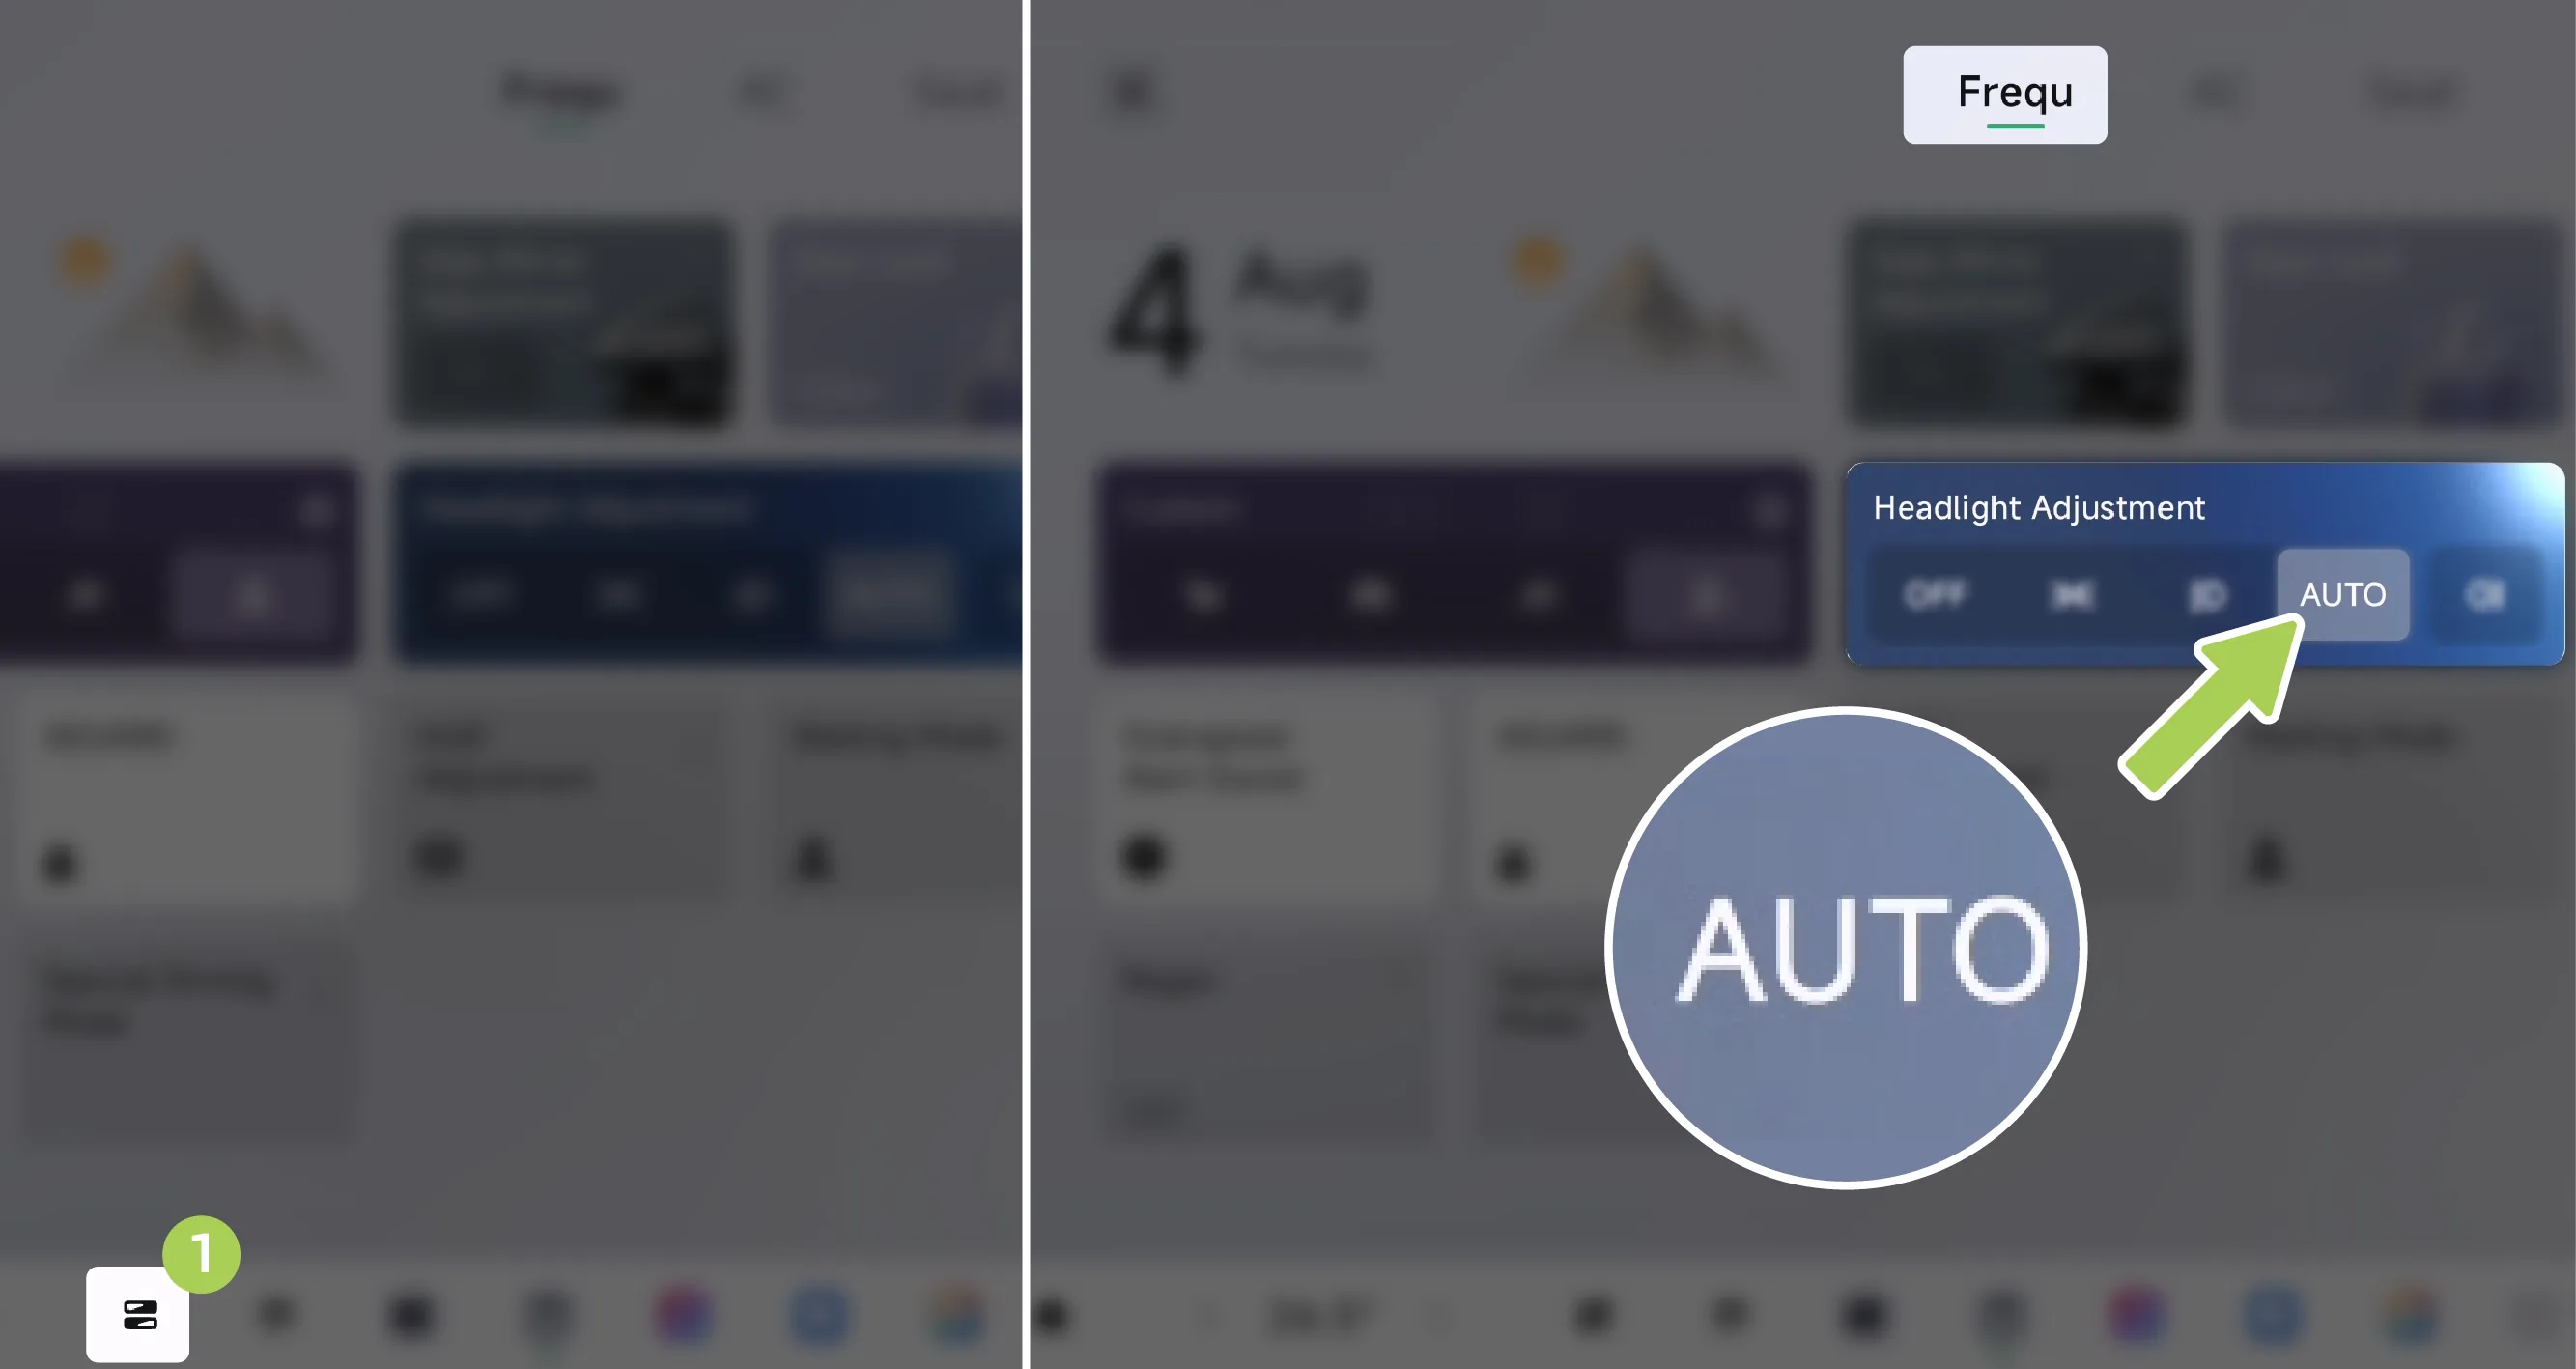
Tap on the center display screen. Enter the Control Center screen and enable the auto headlights function.
After the auto headlights function is enabled, the system will automatically turn the low beam headlights and position lights on/off according to the ambient brightness.
When the auto headlights function is enabled and the low beam headlights are on, the central control screen displays  Indicator light.
You can turn on the rear fog light in the following ways. After it is turned on, the central control screen displays  Indicator lamp:
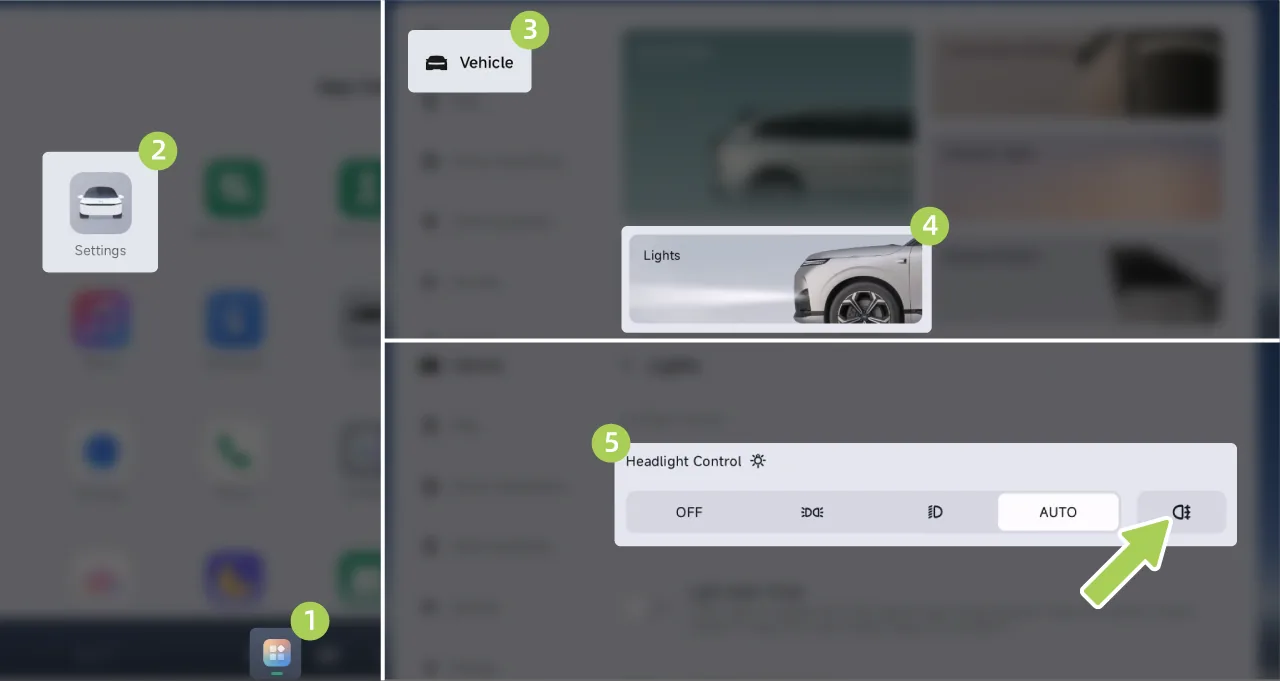
On the central control screen “ →Settings→vehicle→Lights”Interface, turn on the rear fog light.
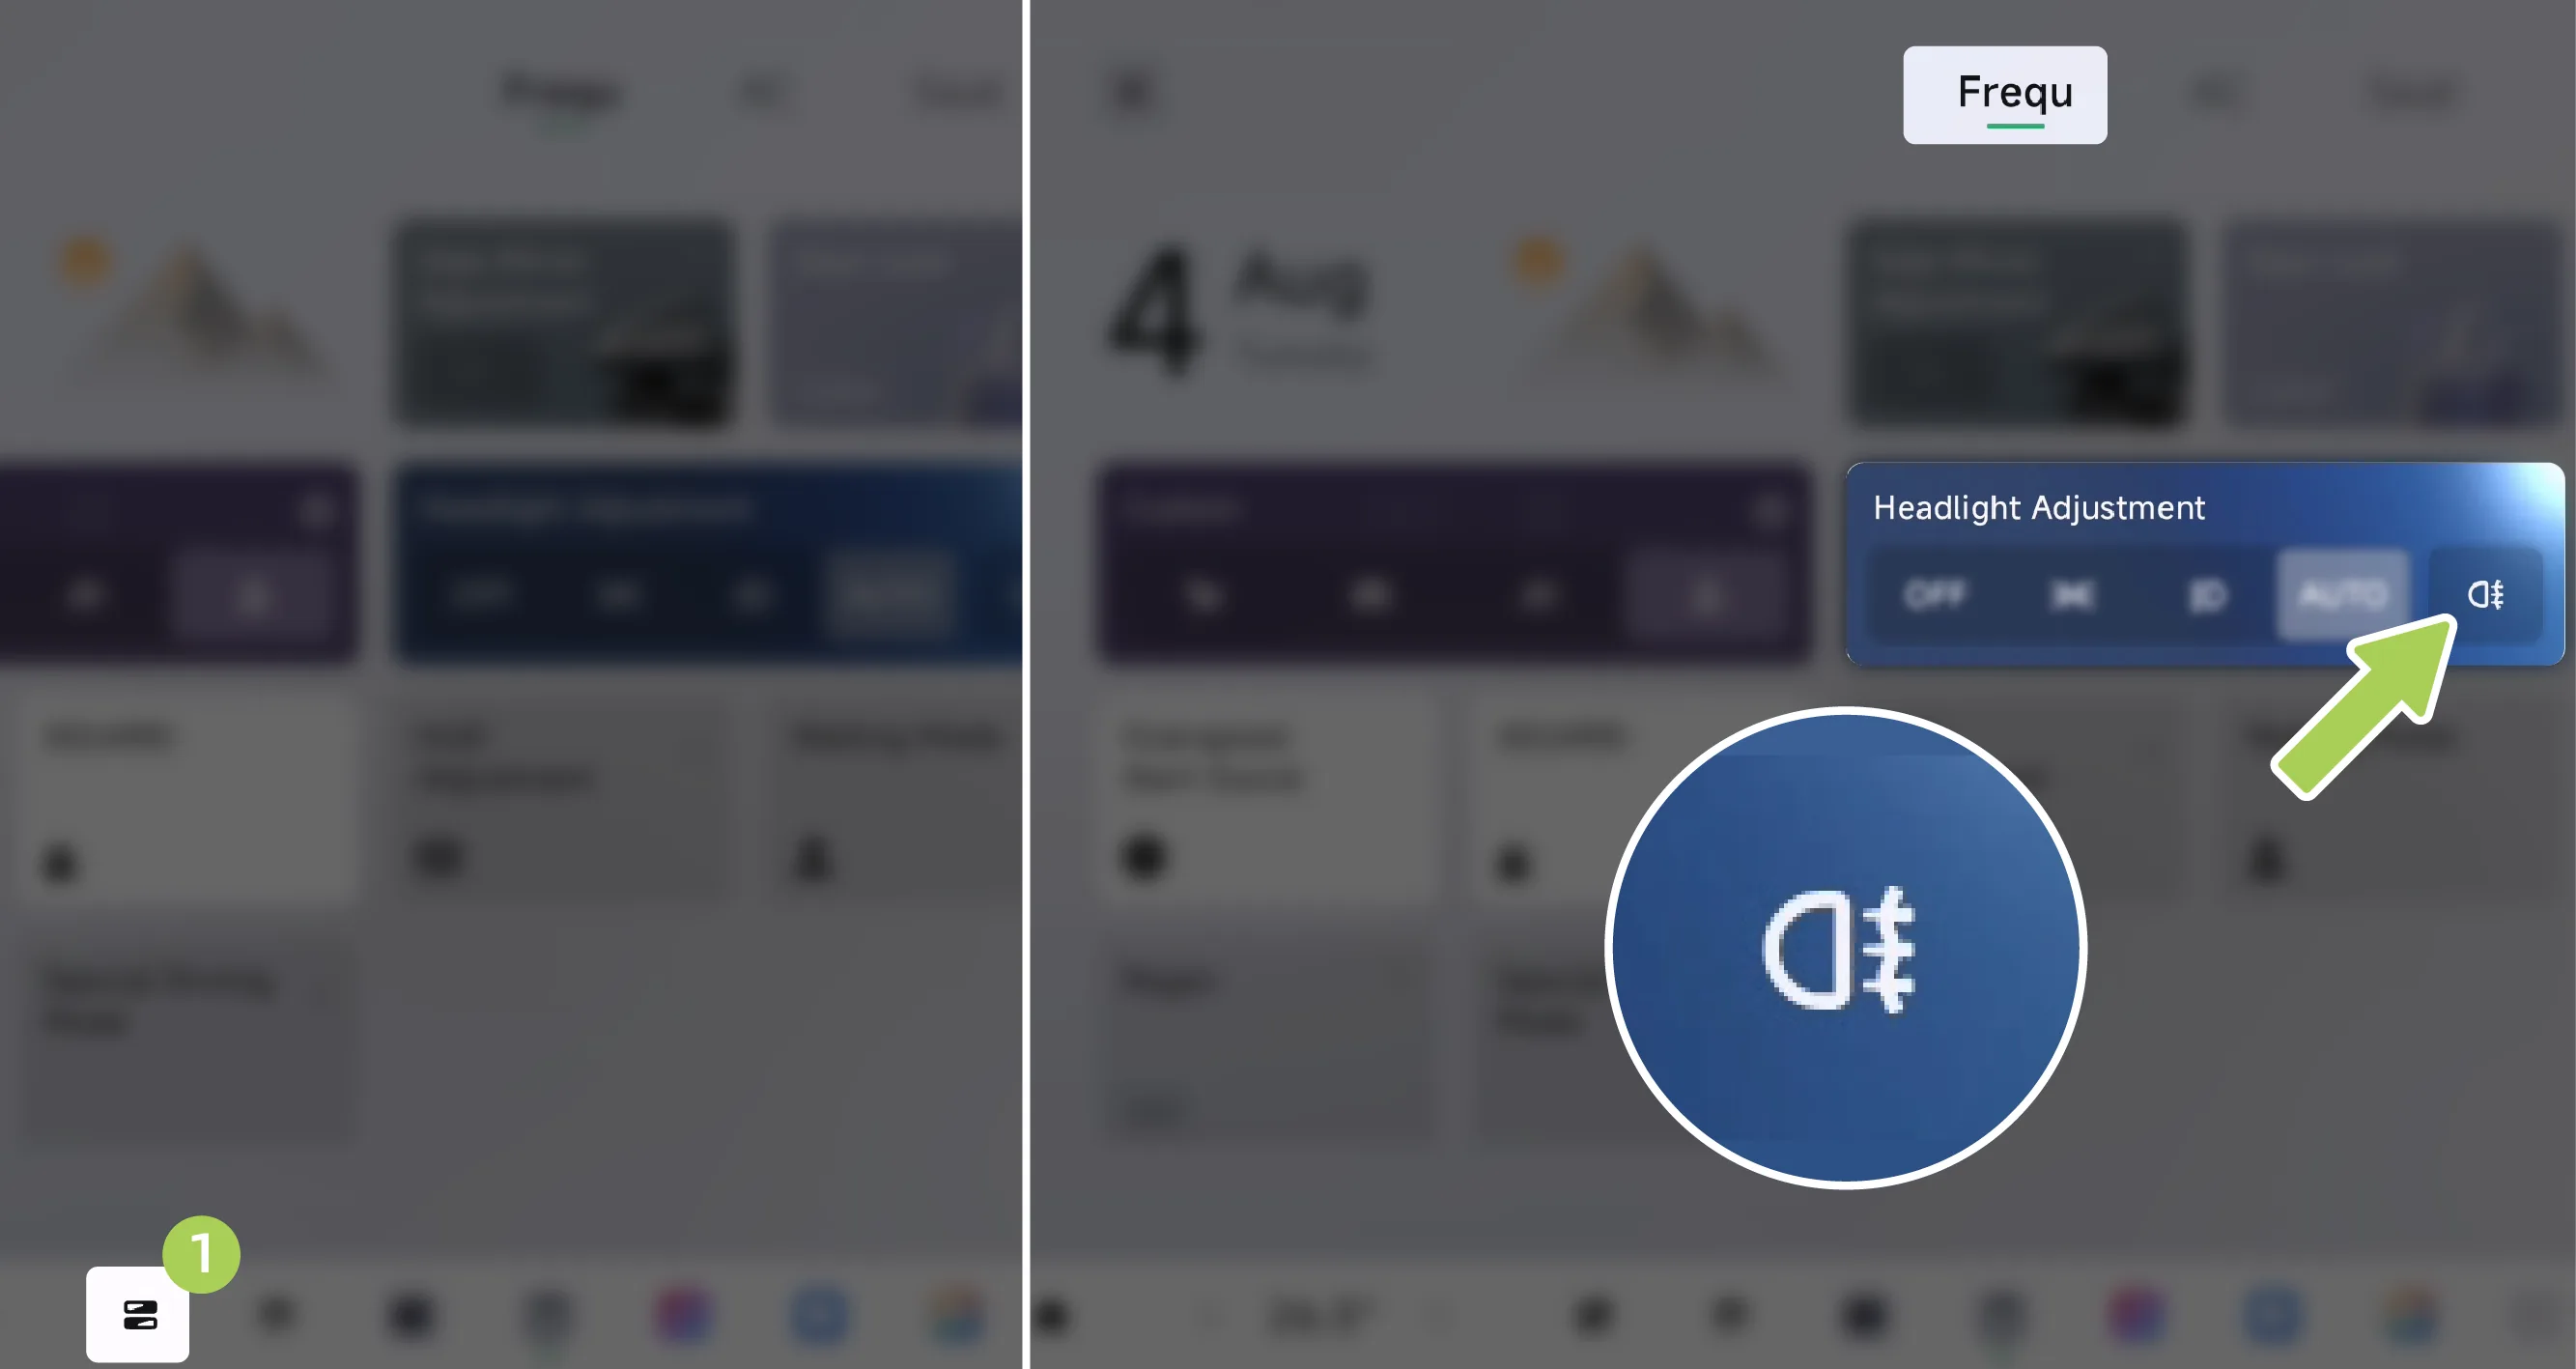
Tap on the center display. Enter the Control Center screen and turn on the rear fog light.
Tips If the low beam headlights are off and the rear fog lights are turned on, the low beam headlights will turn on simultaneously.
The vehicle is equipped with an automatic headlight height adjustment function. When the low beam is turned on, the vehicle will automatically adjust the headlight height according to the load condition.
When the position lights, low beam headlights, high beam headlights, rear fog light, or auto headlights are turned on, you can turn off all lights in the following ways:
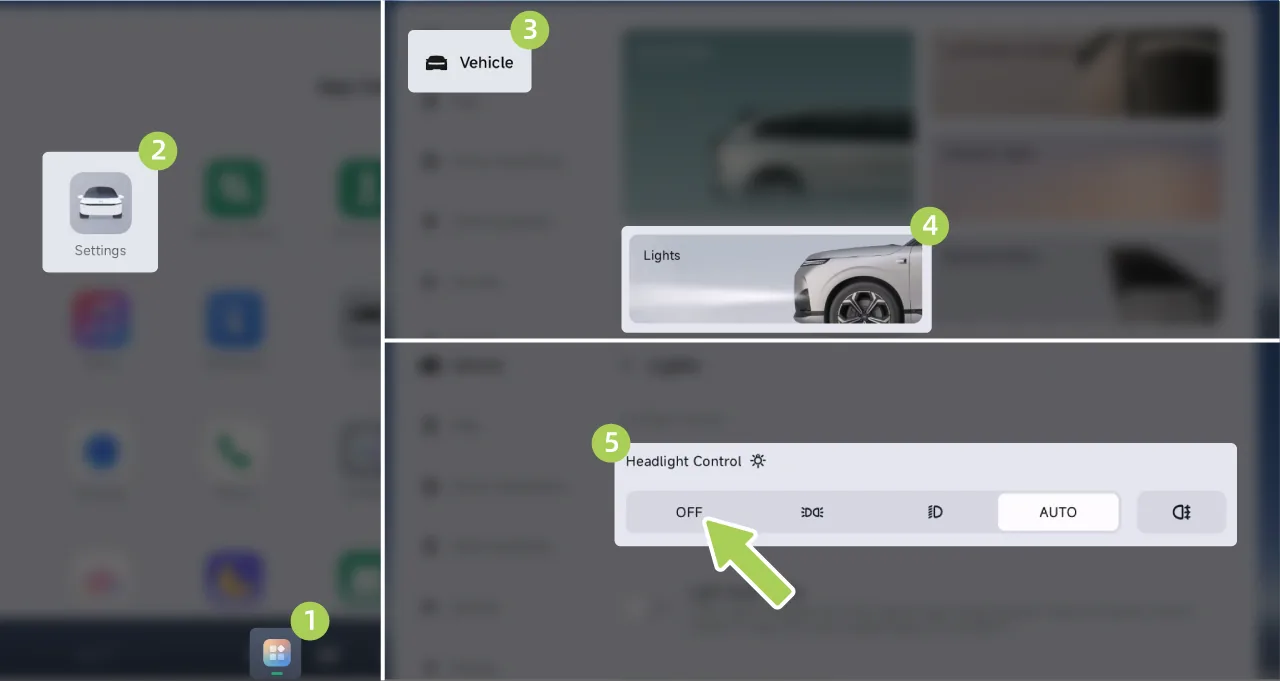
On the center control screen “ →Settings→vehicle→Lights”Interface, turn off all vehicle lights.
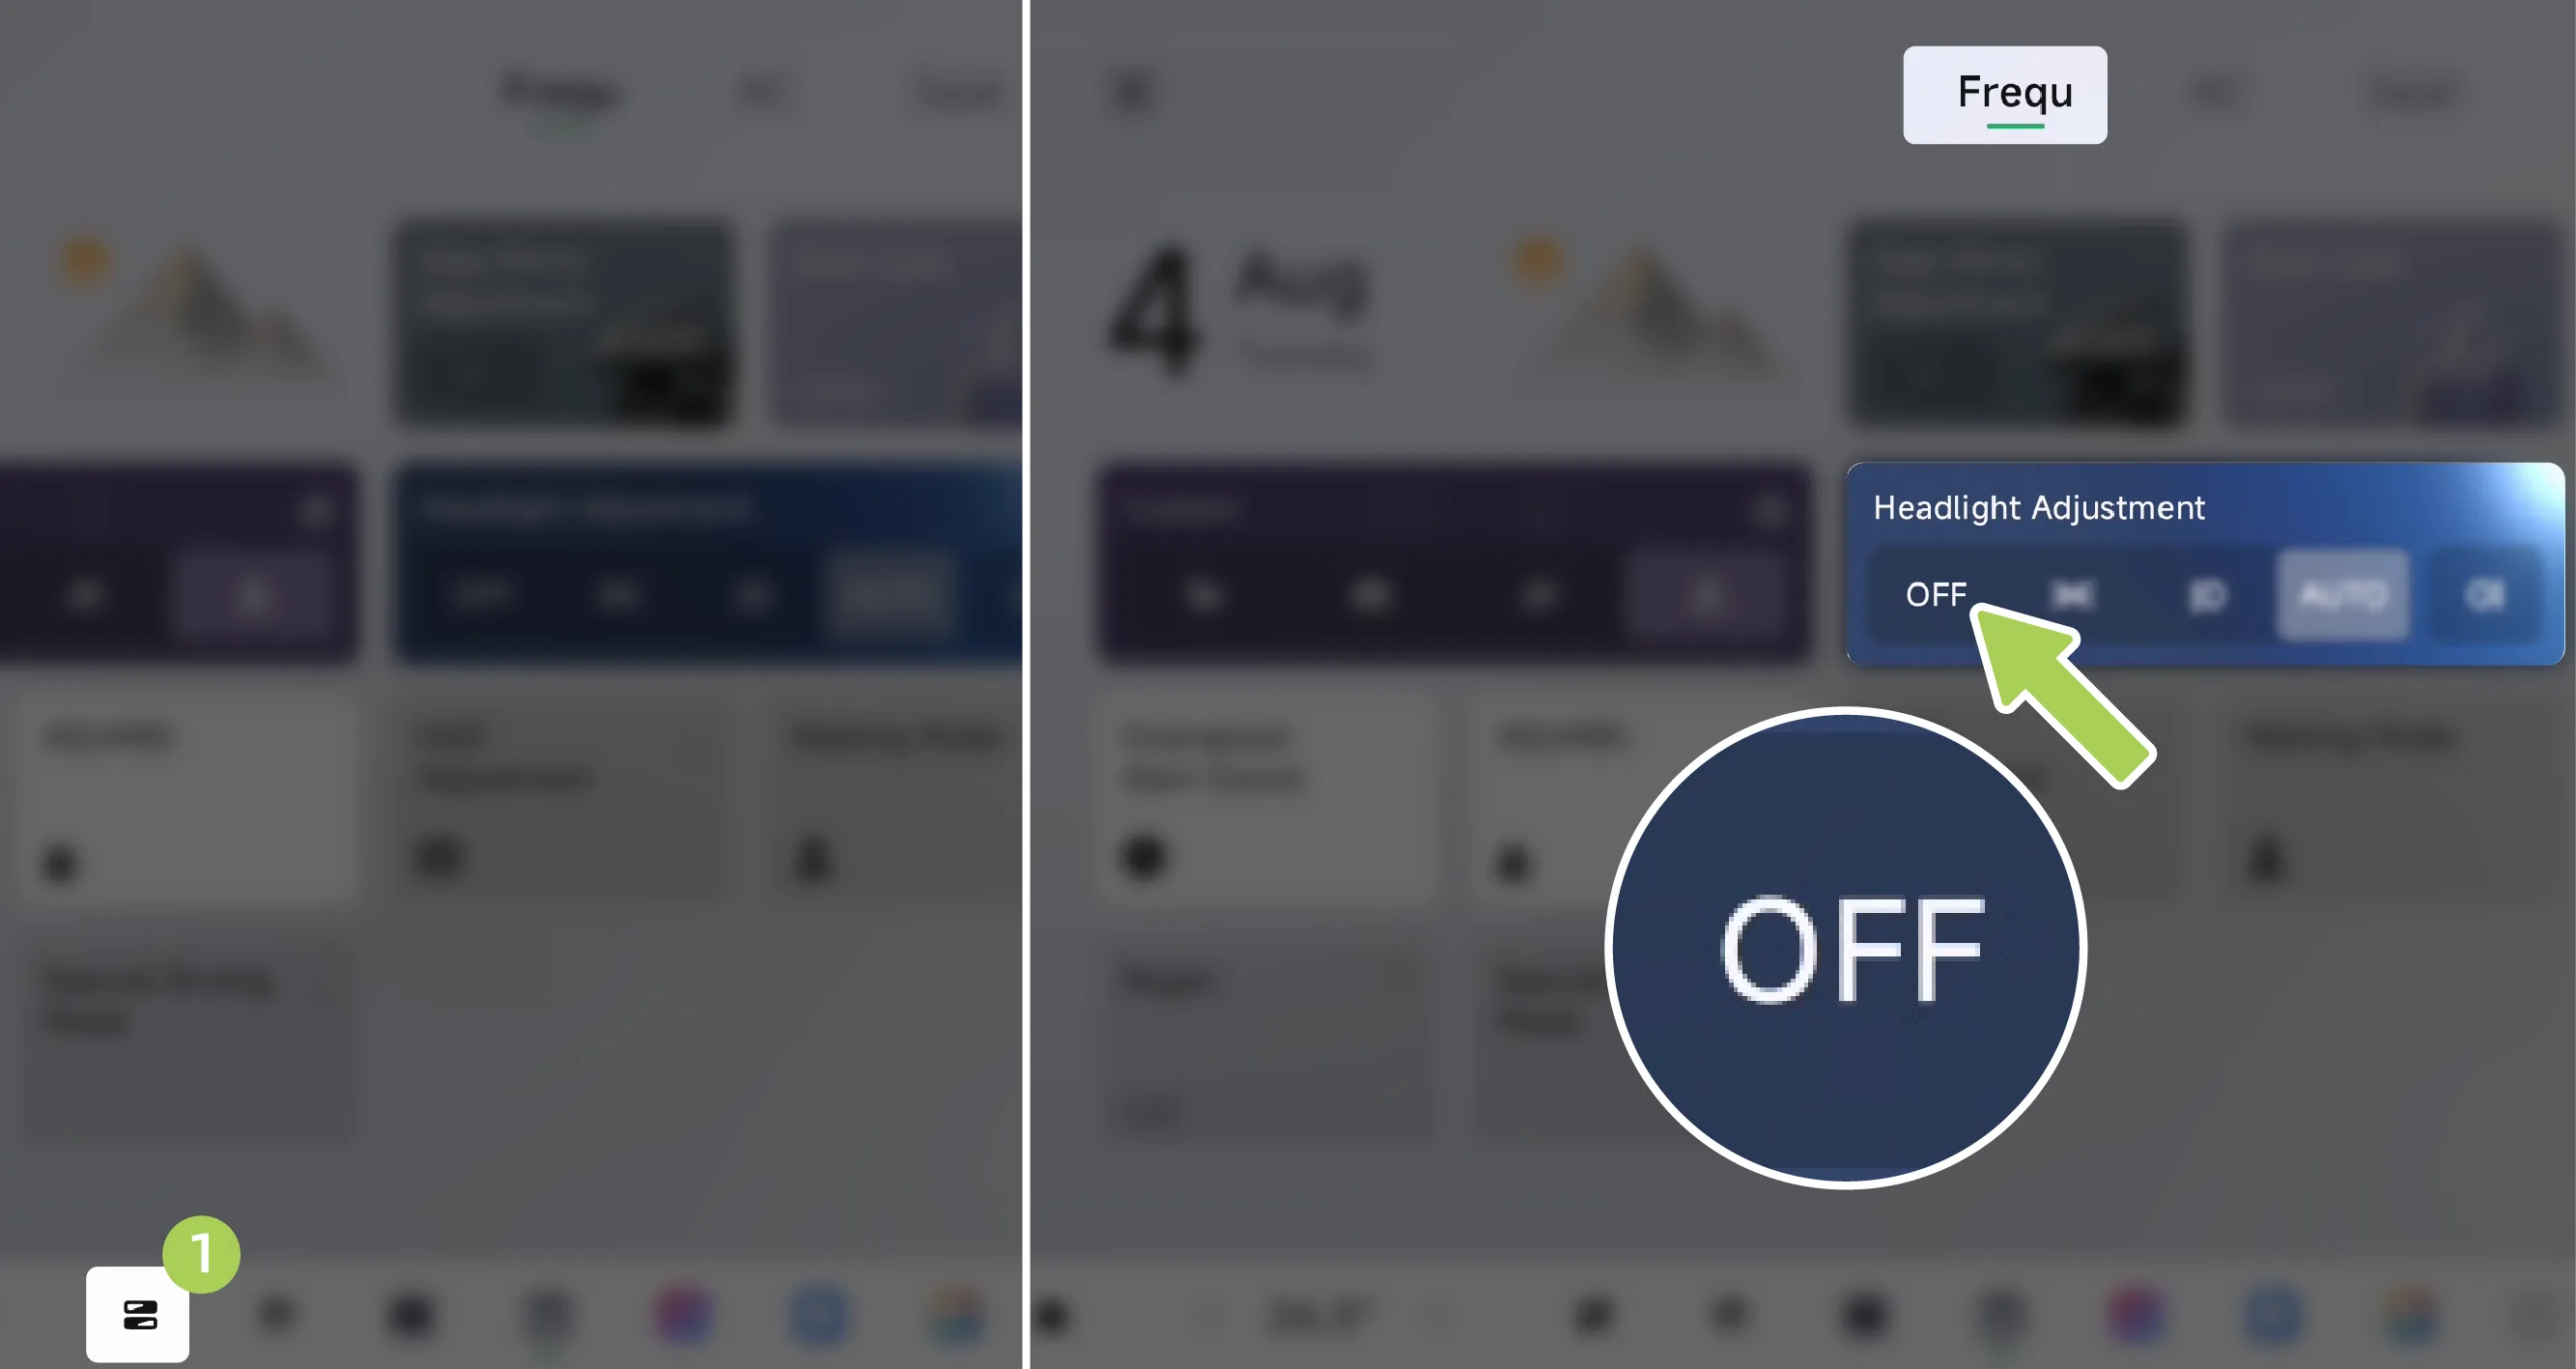
Tap on the center display. Enter the Control Center screen and turn off all vehicle lights.
Caution When the vehicle is not in P gear, the vehicle speed exceeds 3 km/h, and ambient light is low, voice commands cannot be used to turn off the automatic headlights or the low-beam headlights.
When the vehicle is in P gear, you can use voice commands to turn Automatic Headlights or the low beams on or off.
You can use voice to turn the interior lights on or off.
High beams cannot be turned on or off via voice control. Operate them manually.
The turn signal is used to alert other road users that the vehicle is about to change its direction of travel.
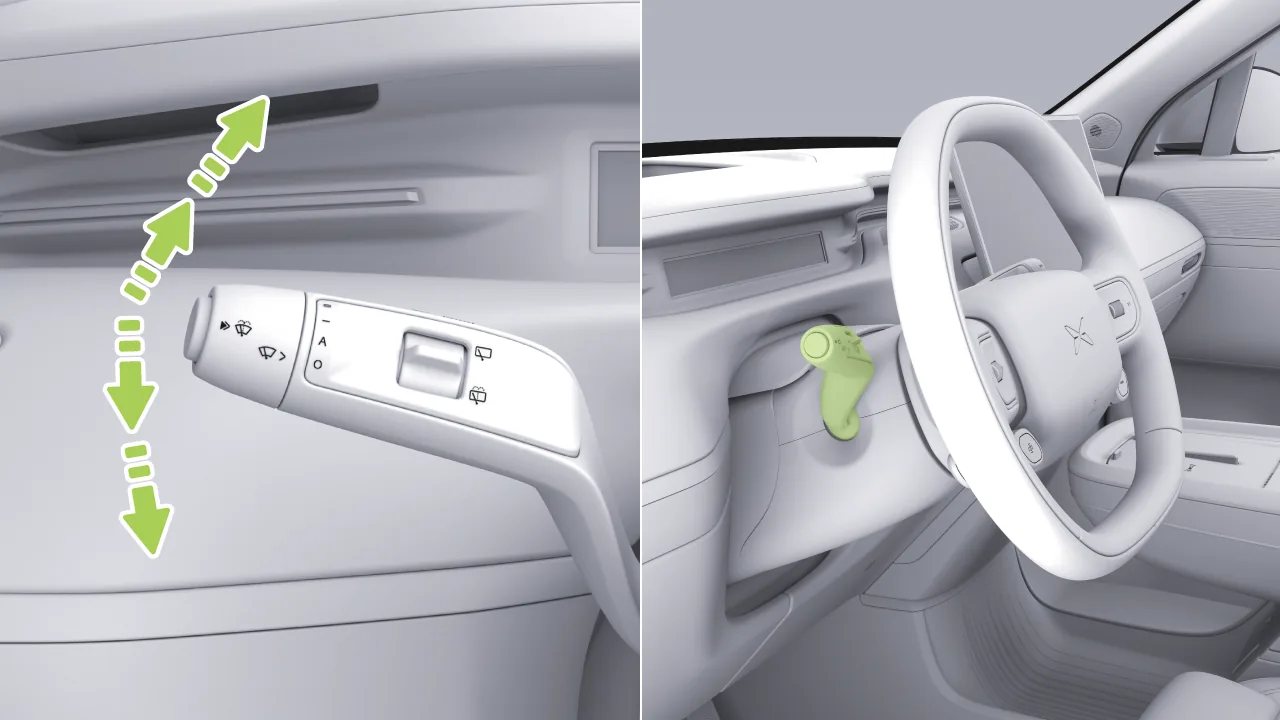
Lightly push the stalk downward and then release it. The stalk automatically returns to its original position, and the left turn signal flashes three times.
Push the stalk downward again to the limit position and then release it. The stalk automatically returns to its original position, and the left turn signal continues flashing.
After lightly pushing the stalk upward and releasing it, the stalk automatically returns to its original position, and the right turn signal flashes three times.
Push the stalk upward again to its limit position and then release it. The stalk automatically returns to its original position, and the right turn signal continues flashing.
To turn off the turn signal, lightly push the stalk upward/downward, or return the steering wheel to the straight-ahead position.
Tips When the turn signal lights up, the corresponding turn indicator is displayed on the instrument cluster screen and the AR-HUD, accompanied by a “click-click” sound.
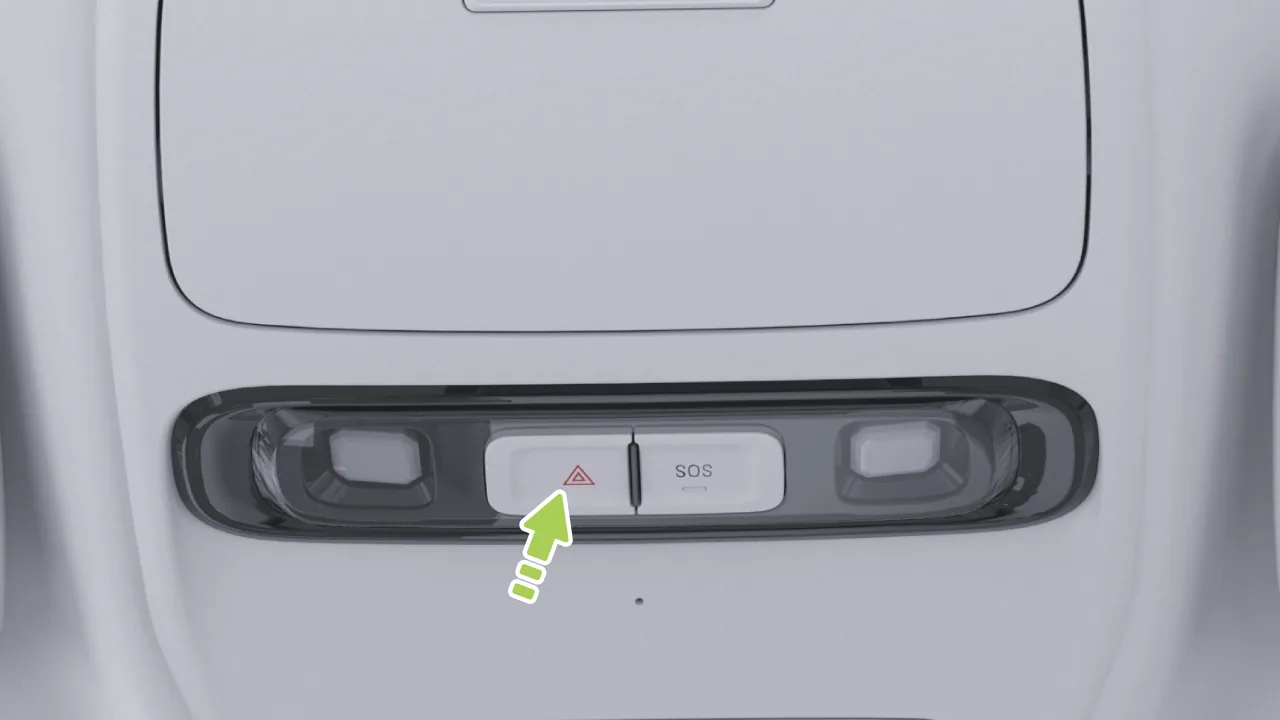
In the event of an emergency while driving, press the hazard warning light switch to turn on the hazard warning lights. At this time, the turn signal lights flash. Press the switch again to turn off the hazard warning lights.
Tips The hazard warning lights can be turned on whether the vehicle is powered on or powered off.
The vehicle is equipped with a rich and diverse scene-based Light Signals system, and you can choose to enable the Light Signals according to actual needs.
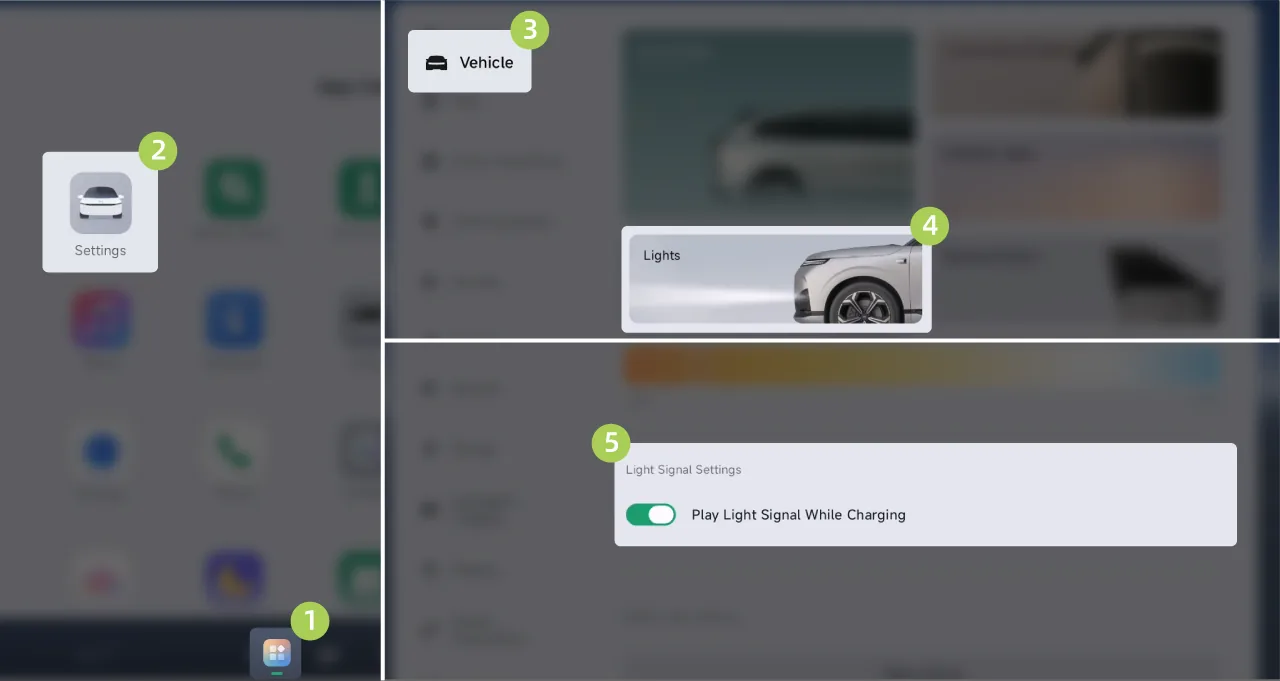
On the central control screen “ →Settings→vehicle→Lights”Interface, tap to enable Play Light Signals During ChargingWhen the vehicle is charging, the charging light effect is displayed outside the vehicle.
AFS can adjust the low beam illumination angle up and down according to the current vehicle speed.
On the central control screen “ →Settings→vehicle→Lights”On the interface, after the auto headlights function is enabled, AFS will be activated automatically.
After AFS is activated, the vehicle's dipped beam headlights will adjust the dipped beam illumination angle up and down according to vehicle speed, including but not limited to the following scenarios:
When the vehicle speed is low, the low beam illumination range is adjusted downward to enhance illumination in the nearer area.
After the vehicle speed increases, the low beam illumination range returns to its original lighting height.
When the vehicle is driving on a highway section, the low beam illumination range is adjusted upward to increase the low beam illumination distance.
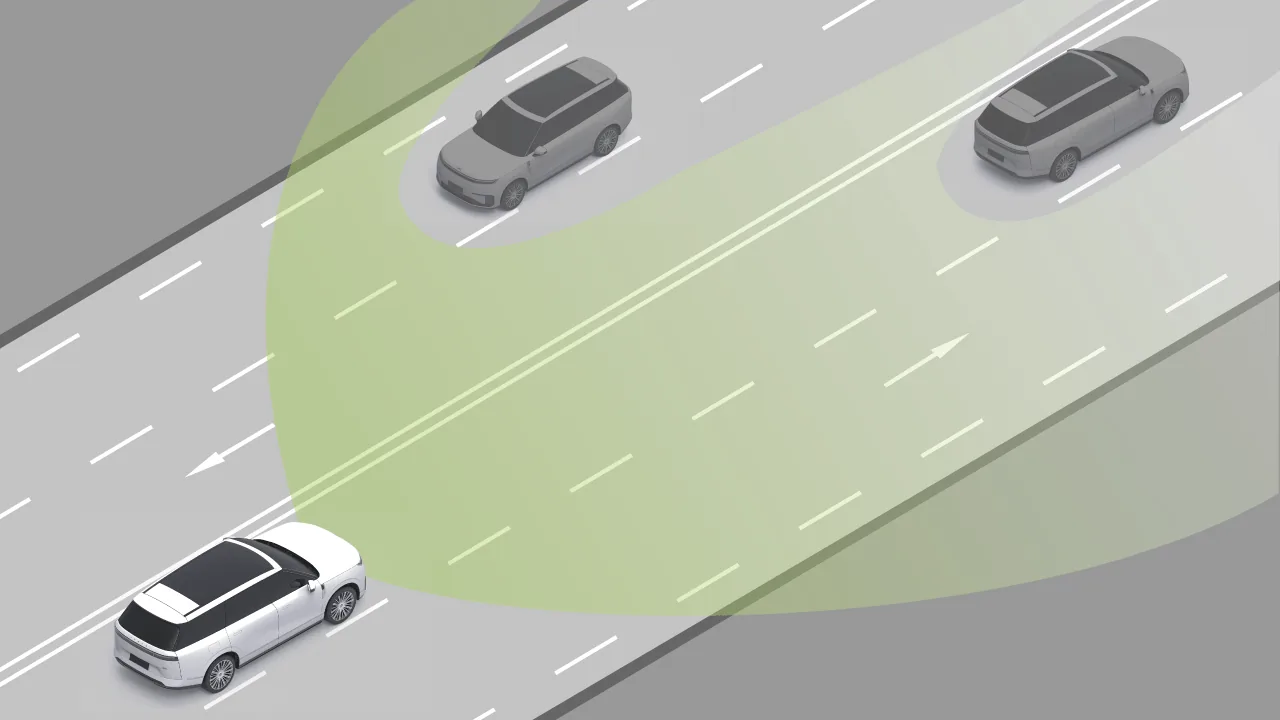
Adaptive high beam can automatically adjust the headlamp illumination area according to the current road environment and driving status, ensuring maximum illumination of the area ahead while avoiding glare to other road users.
| | Adaptive high beam is enabled and the high beam is not illuminated. |
| | Adaptive high beam is enabled and the high beam is on. |
| | There is a fault with the adaptive high beam. |
On the central control screen “ →Settings→vehicle→Lights”On the interface, Adaptive High Beam can be turned on/off.
When the following conditions are met simultaneously, the adaptive high beam is activated, and the vehicle automatically adjusts the high beam illumination area or turns off the high beam according to vehicles, pedestrians, etc. ahead:
The manual high beam is not turned on.
The central control screen lighting switch is in automatic mode.
The vehicle speed is greater than 30 km/h.
The ambient brightness is low.
Tips When adaptive high beam is activated, in the following scenarios, adaptive high beam will exit:
Turn on the high beam using the left stalk on the steering wheel.
Switch the central control screen lighting switch to a non-automatic mode, or turn off the adaptive high beam switch.
The vehicle speed is less than 15 km/h or greater than 145 km/h.
The wiper gear is in high-speed gear.
Adaptive high beam system fault.
In the following situations, the high beam/ADB headlights will not turn on automatically:
Heavy rain, dense fog conditions.
When ambient light is relatively sufficient, in a bright environment with streetlights.
Low-speed driving speed < 25 km/h.
Tips When the adaptive high beam is just activated, an obvious animation effect will be displayed to indicate that the adaptive high beam has been activated.
Warning Adaptive high beam is an assistance function and cannot handle all traffic, weather, and road conditions. As the driver of the vehicle, you are responsible for driving safety. You must remain attentive while driving, constantly pay attention to traffic, road, and vehicle conditions, use the lights properly, and ensure safe driving.
In the following scenarios, Adaptive High Beam may not function properly:
Camera limited.
After the Accompany Me Home function is enabled, at night or in environments with insufficient light, when you lock the vehicle, the vehicle automatically turns on the low beam headlights to illuminate the road ahead for you.
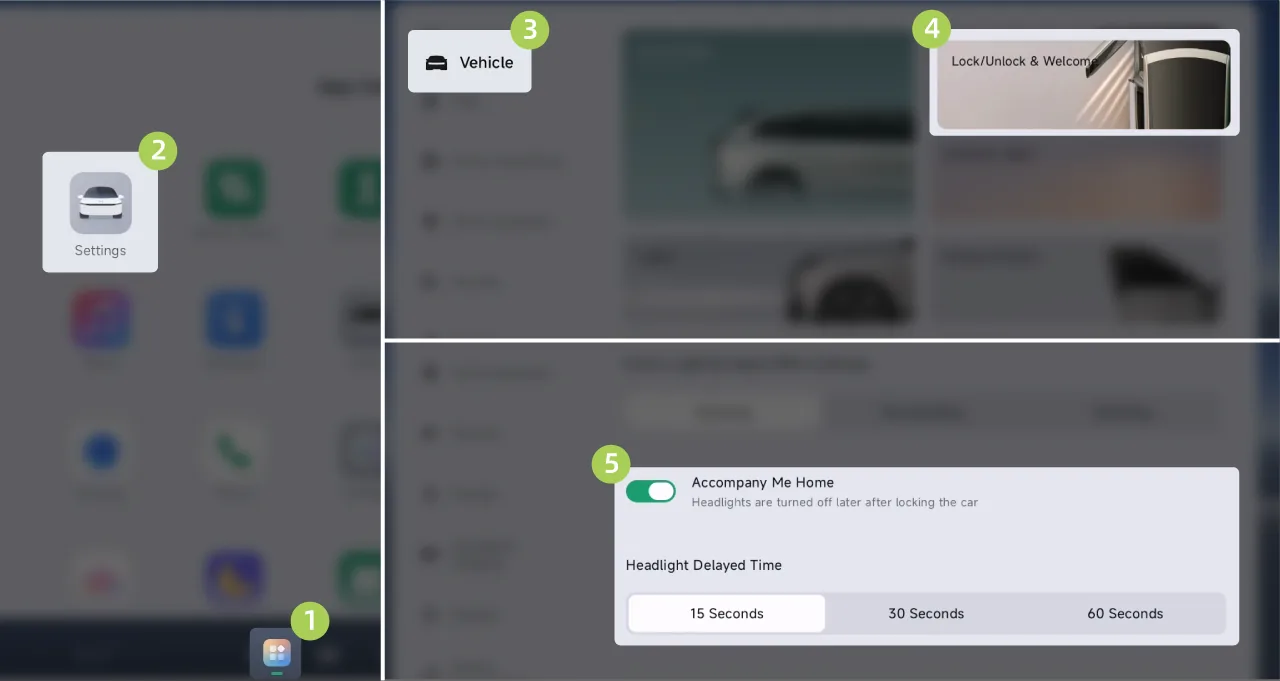
On the central control screen “ →Settings→vehicle→Unlocking and Welcome”Interface for turning the Accompany Me Home function on/off and setting the headlight delayed switch-off time.
After the Light Welcome function is enabled, when approaching the vehicle, the system will automatically turn on the position lamps, headlights, light carpet*, and dynamic theme projection* to create a welcoming sense of ceremony.
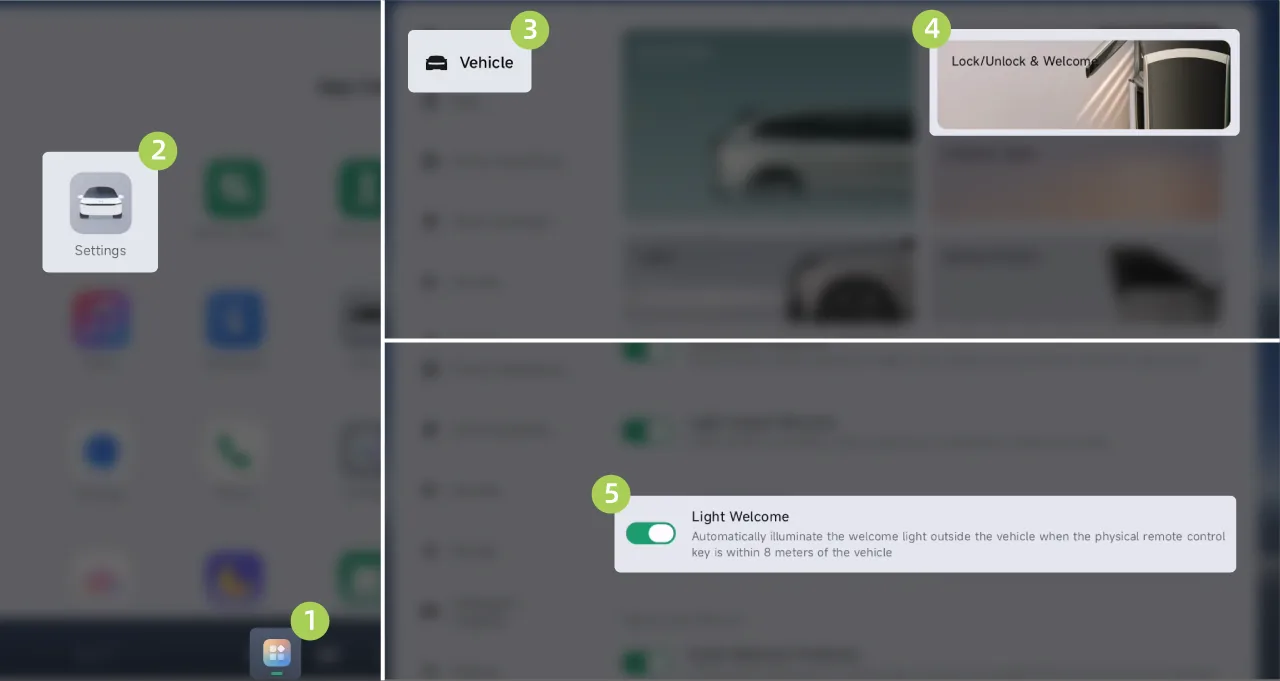
On the center display screen “ →Settings→vehicle→Unlocking and Welcome”Interface, can be opened/closed 。
After the light carpet welcome function is enabled, when the vehicle is unlocked or a door is opened, the welcome light carpet will automatically illuminate, creating a sense of welcome ceremony.
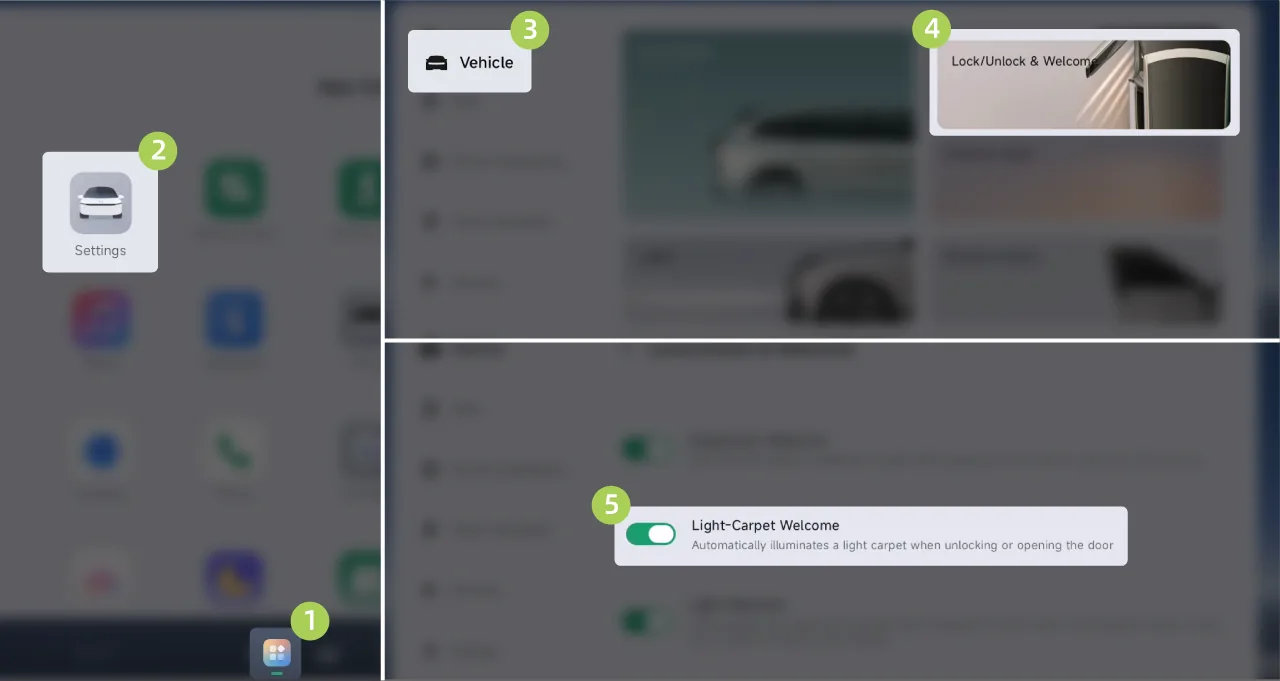
On the central control screen “ →Settings→vehicle→Unlocking and Welcome”Interface, can be opened/closed 。
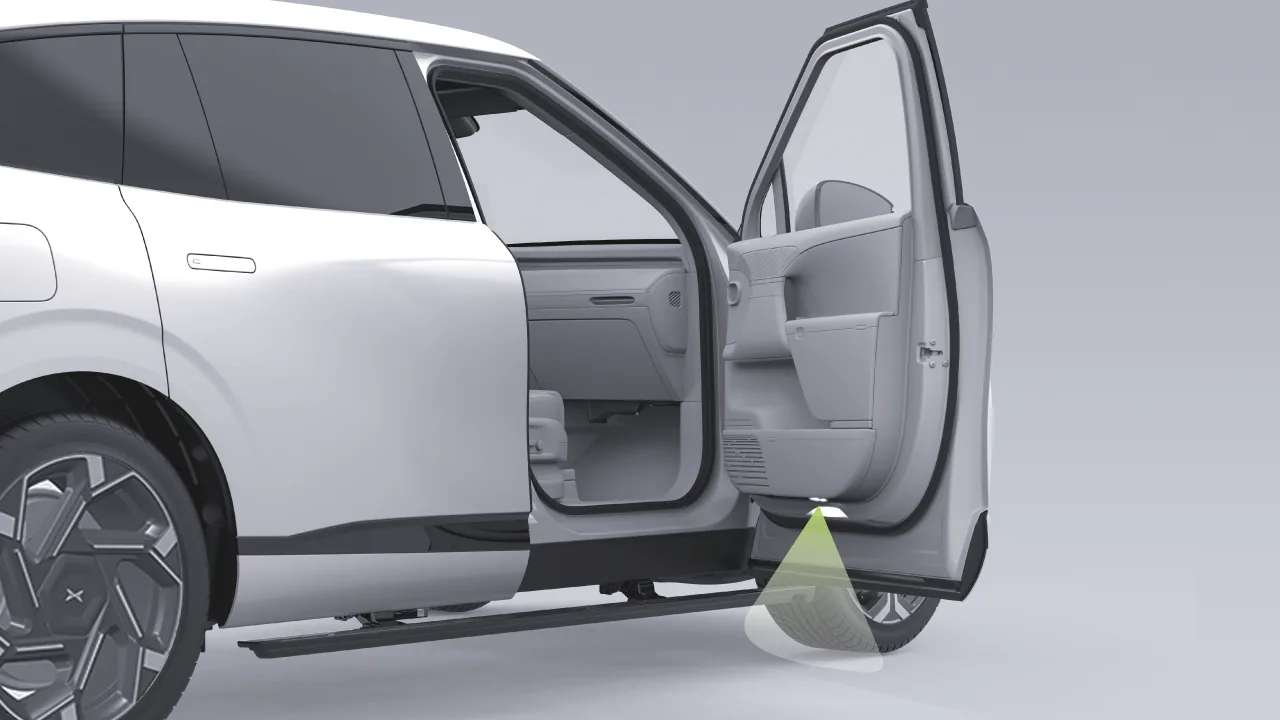
The front row doors are equipped with welcome puddle lamps. When a front row door is opened, the welcome puddle lamp on the corresponding side illuminates; when a front row door is closed, the welcome puddle lamp on the corresponding side turns off.
Caution Under certain conditions of use (such as high air humidity or car washing), fogging may occur inside the lamps, which is a normal phenomenon.
Parking the vehicle in a dry environment, turning on the lights, or driving the vehicle for a period of time will all help the fog inside the lights dissipate. However, due to environmental influences, fogging may reoccur later.
If a large amount of water droplets or water accumulation appears inside the lamp, please contact a XIAOPENG service center.
The AI digital projection headlamps feature multiple functions such as digital lighting, intelligent interaction, and personalized entertainment. This function can significantly improve driving safety at night and also enable interaction between the vehicle and people, adding enjoyment and a sense of ceremony to travel. Its specific functions include:
Digital Lighting:Low beam enhancement, high beam enhancement.
Smart Interaction:Position light carpet.
Personalized Entertainment:Welcome Theme Projection.
Tips The projection effect is affected by factors such as ambient brightness and road surface material. Please refer to the actual projection effect.
When the vehicle low beam is turned on, the digital projection headlamp projects a specific light pattern to enhance the low-beam illumination area, making the low-beam field of view brighter. The low-beam enhancement turns on or off together with the vehicle low beam.
When the vehicle high beam is turned on, the digital projection headlamp projects a specific light pattern to enhance the illumination areas of the high beam and low beam, making the high-beam field of view brighter. High beam enhancement turns on or off together with the vehicle high beam.
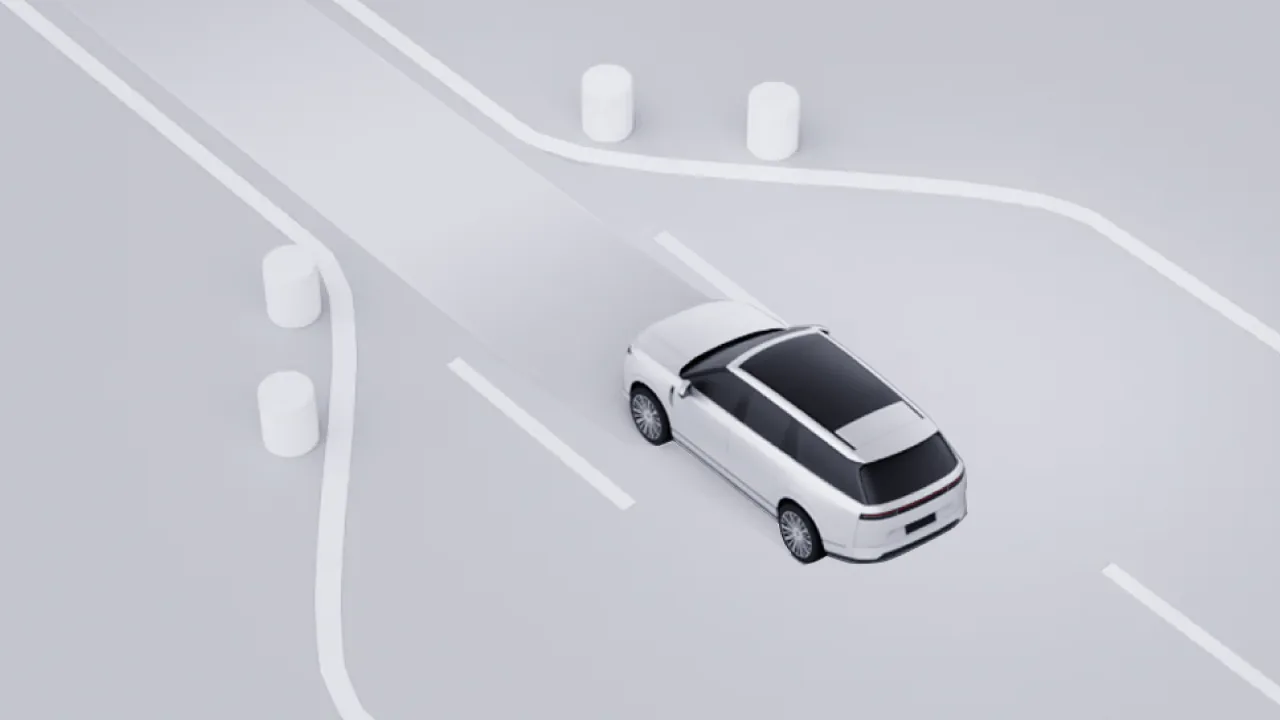
When encountering driving scenarios such as narrow roads at night, you can enable the Alley Assist function. The vehicle will project Alley Assist in front to assist the driver in judging the passable width.
Alley Assist can be turned on/off in any of the following ways:
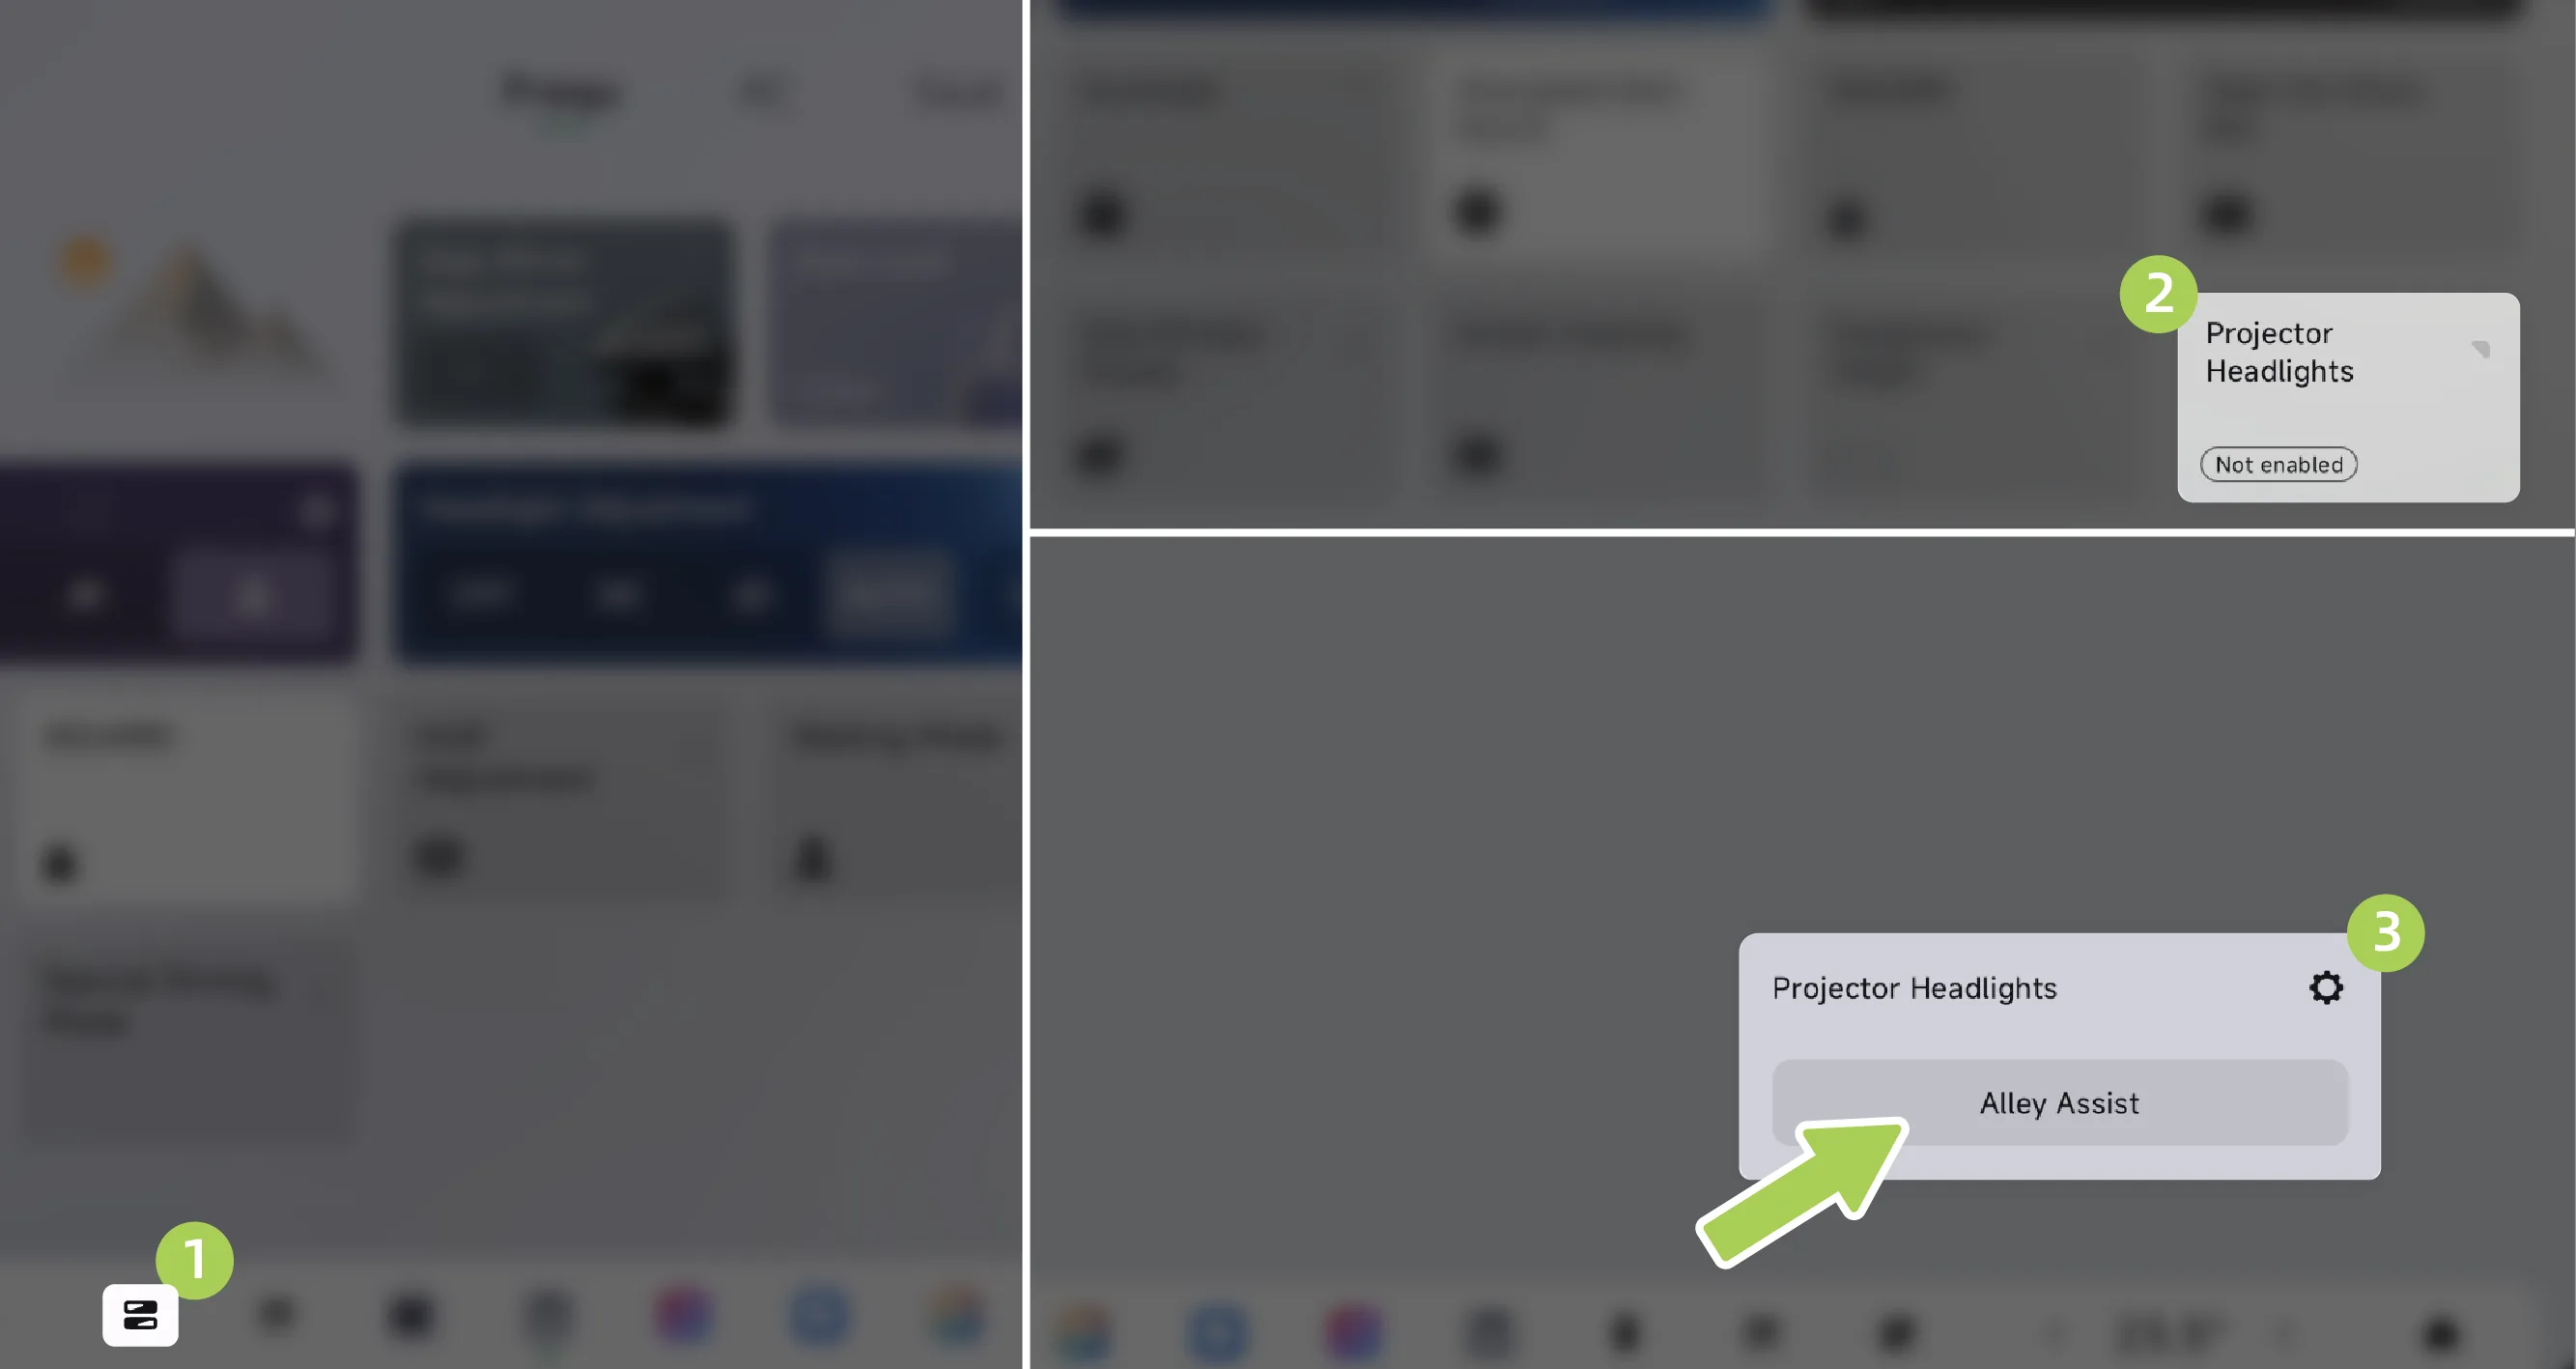
Tap on the center display. “ →Projector Headlights”, tap on the pop-up interface , the Alley Assist function can be enabled/disabled. (To learn about custom Control Center, please refer to the custom Control Center chapter).
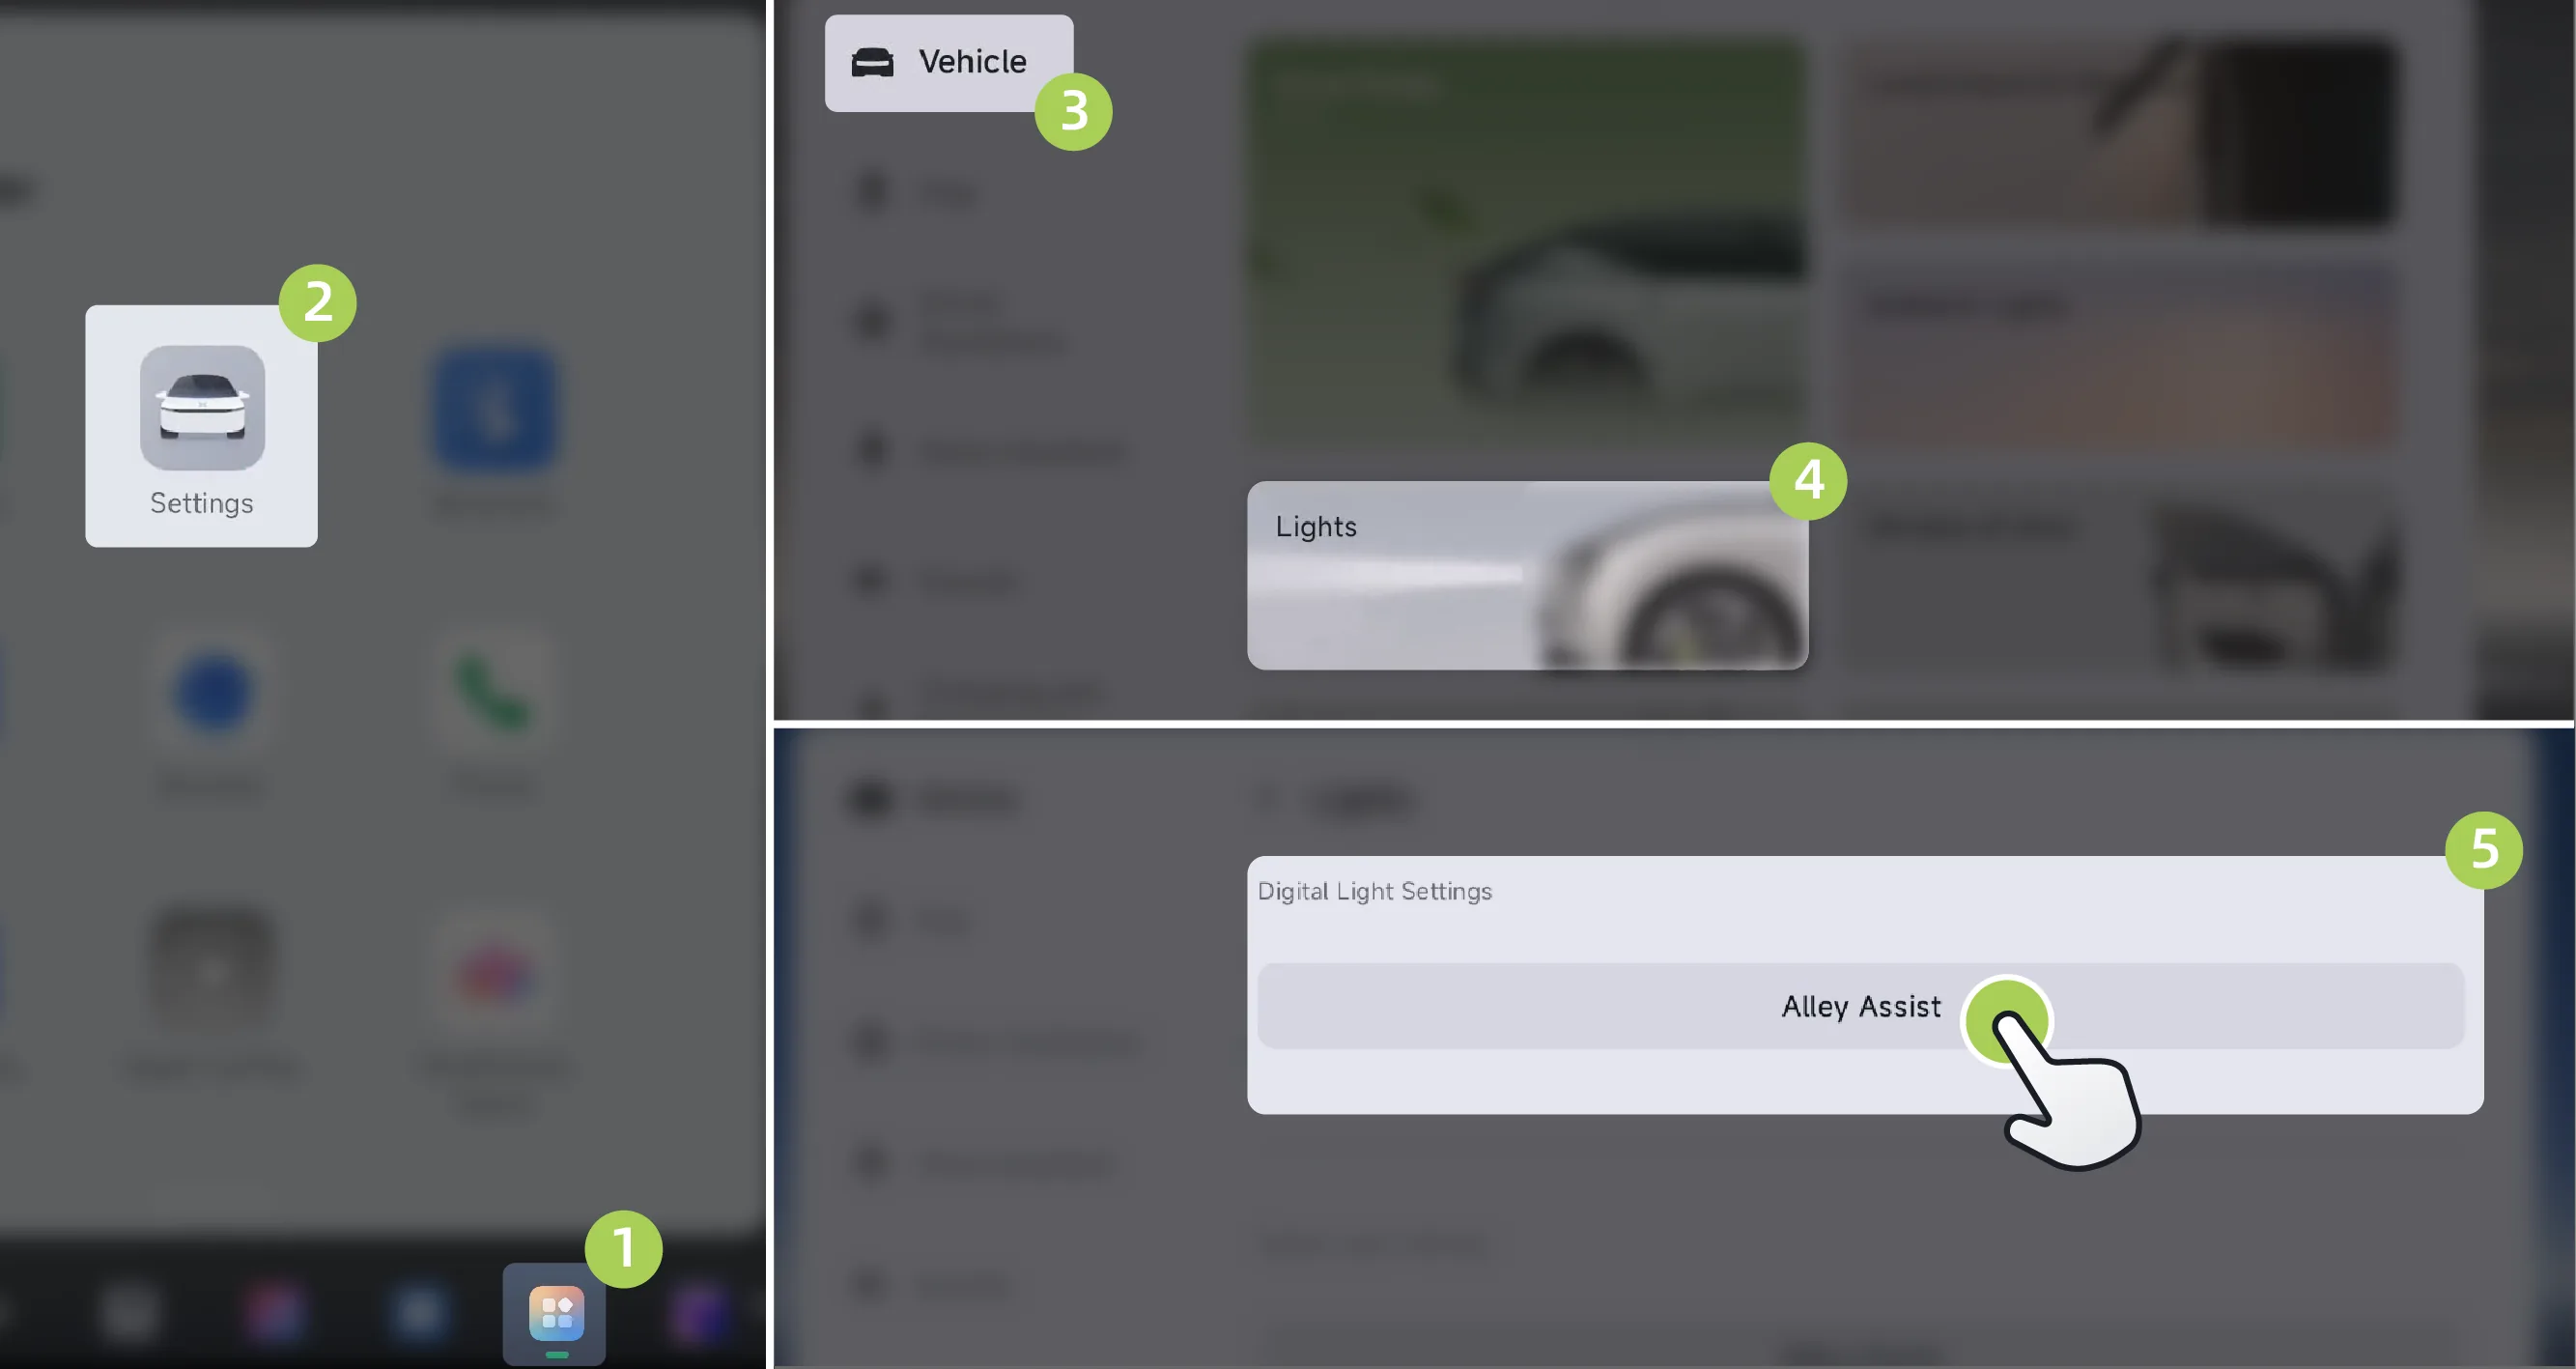
On the central control screen “ →Settings→vehicle→Lights”On the interface, Alley Assist can be turned on/off.
Tips To enable Alley Assist, the following conditions must be met:
The low beam headlights are on.
The vehicle speed is less than or equal to 20 km/h.
The parking assist function is not activated.
In the following situations, Alley Assist will automatically turn off:
The vehicle speed is greater than 25 km/h.
Low beam headlights off.
Activate the assisted parking function.
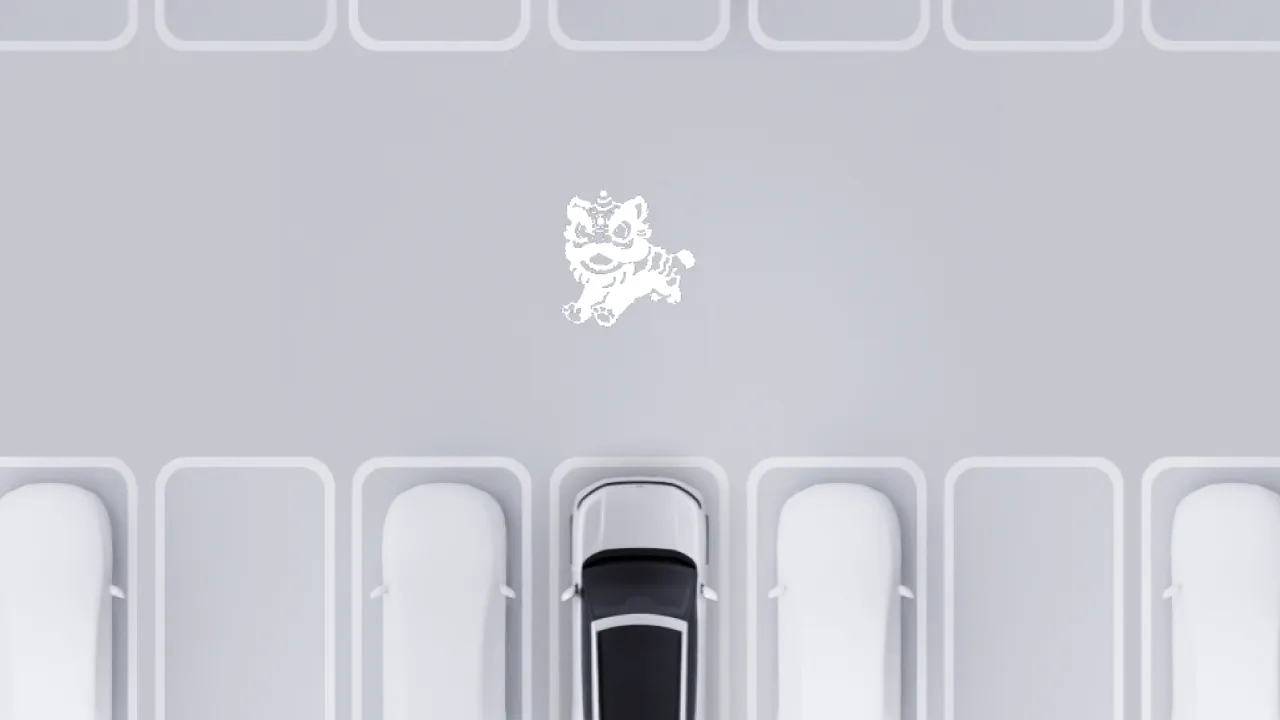
After the digital headlight welcome projection function is enabled, when the welcome scenario is triggered (such as vehicle unlocking, locking the vehicle when leaving, etc.), the digital headlights will project a more ceremonial dynamic theme.
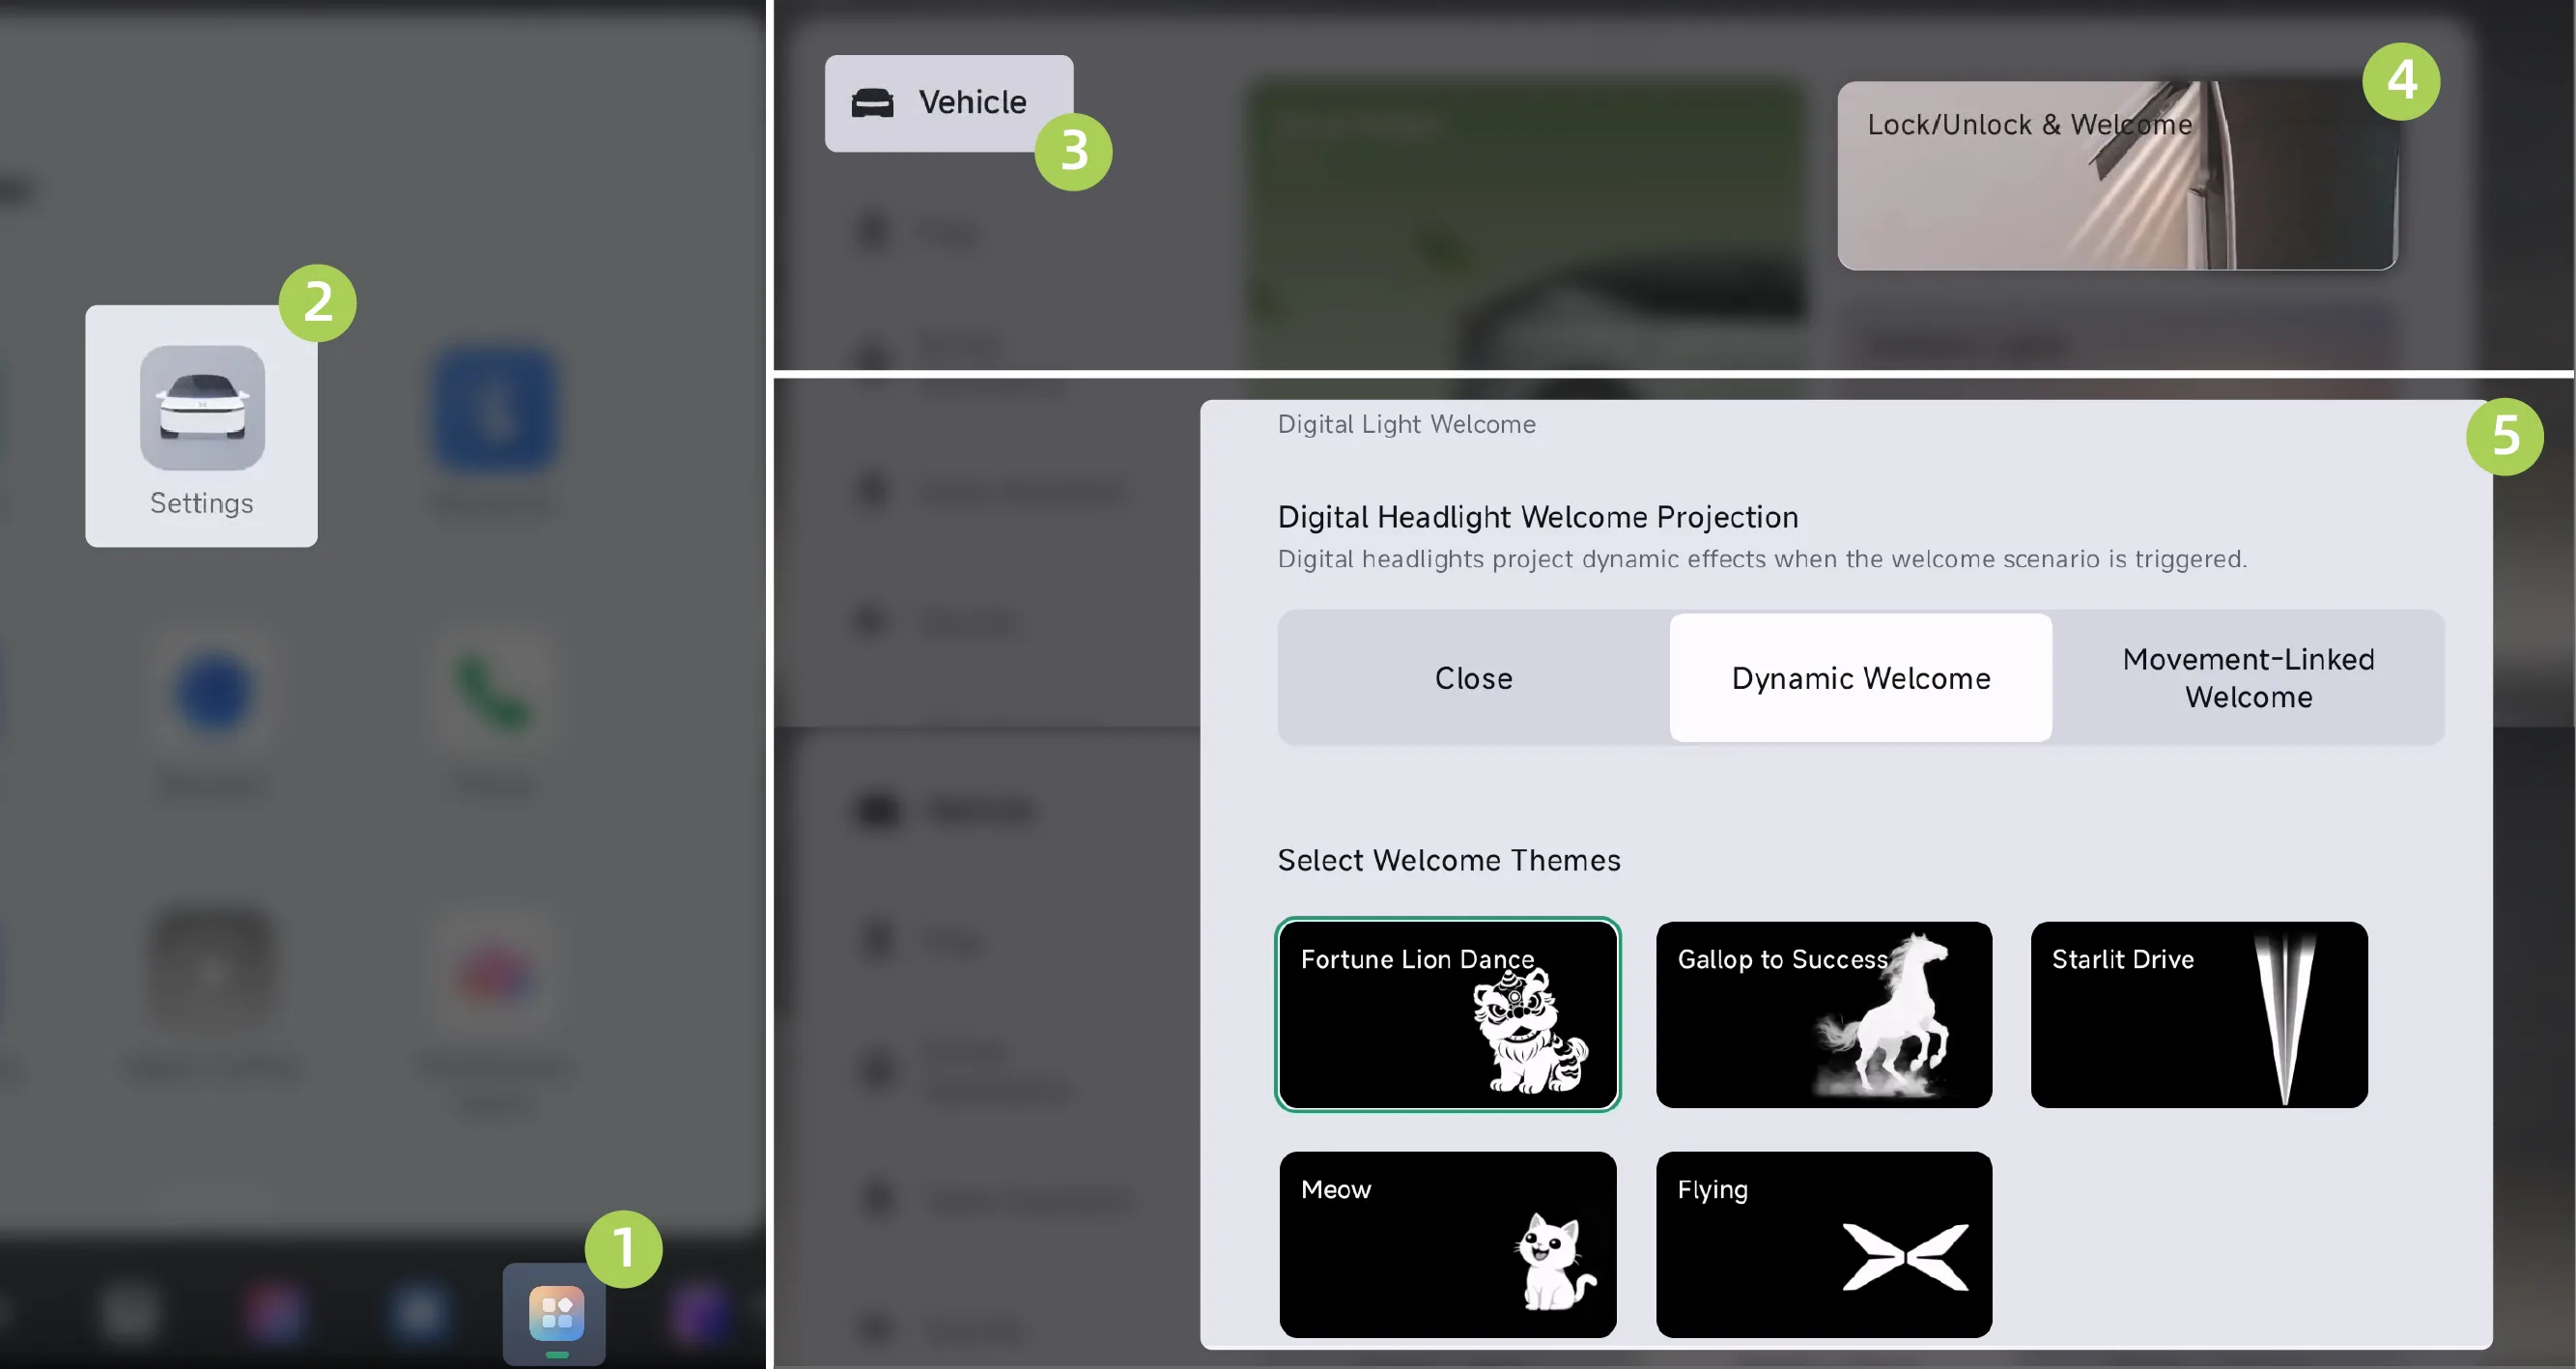
On the central control screen “ →Settings→vehicle→Unlocking and Welcome”On the interface, you can set the digital headlight welcome projection function:
Close:Turn off the Digital Headlight Welcome Projection function.
Dynamic Welcome:When the welcome scenario is triggered, the digital headlamp projects dynamic effects.
Movement-Linked Welcome:When the welcome scenario is triggered, if the system detects a person within the projection range, the digital headlight projection will dynamically interact by following the person.
Select Welcome Themes:The welcome theme can be set according to personal needs.
The vehicle is equipped with Ambient Lights, which can change color with variations in the music rhythm, adding warmth to your journey home as night falls.
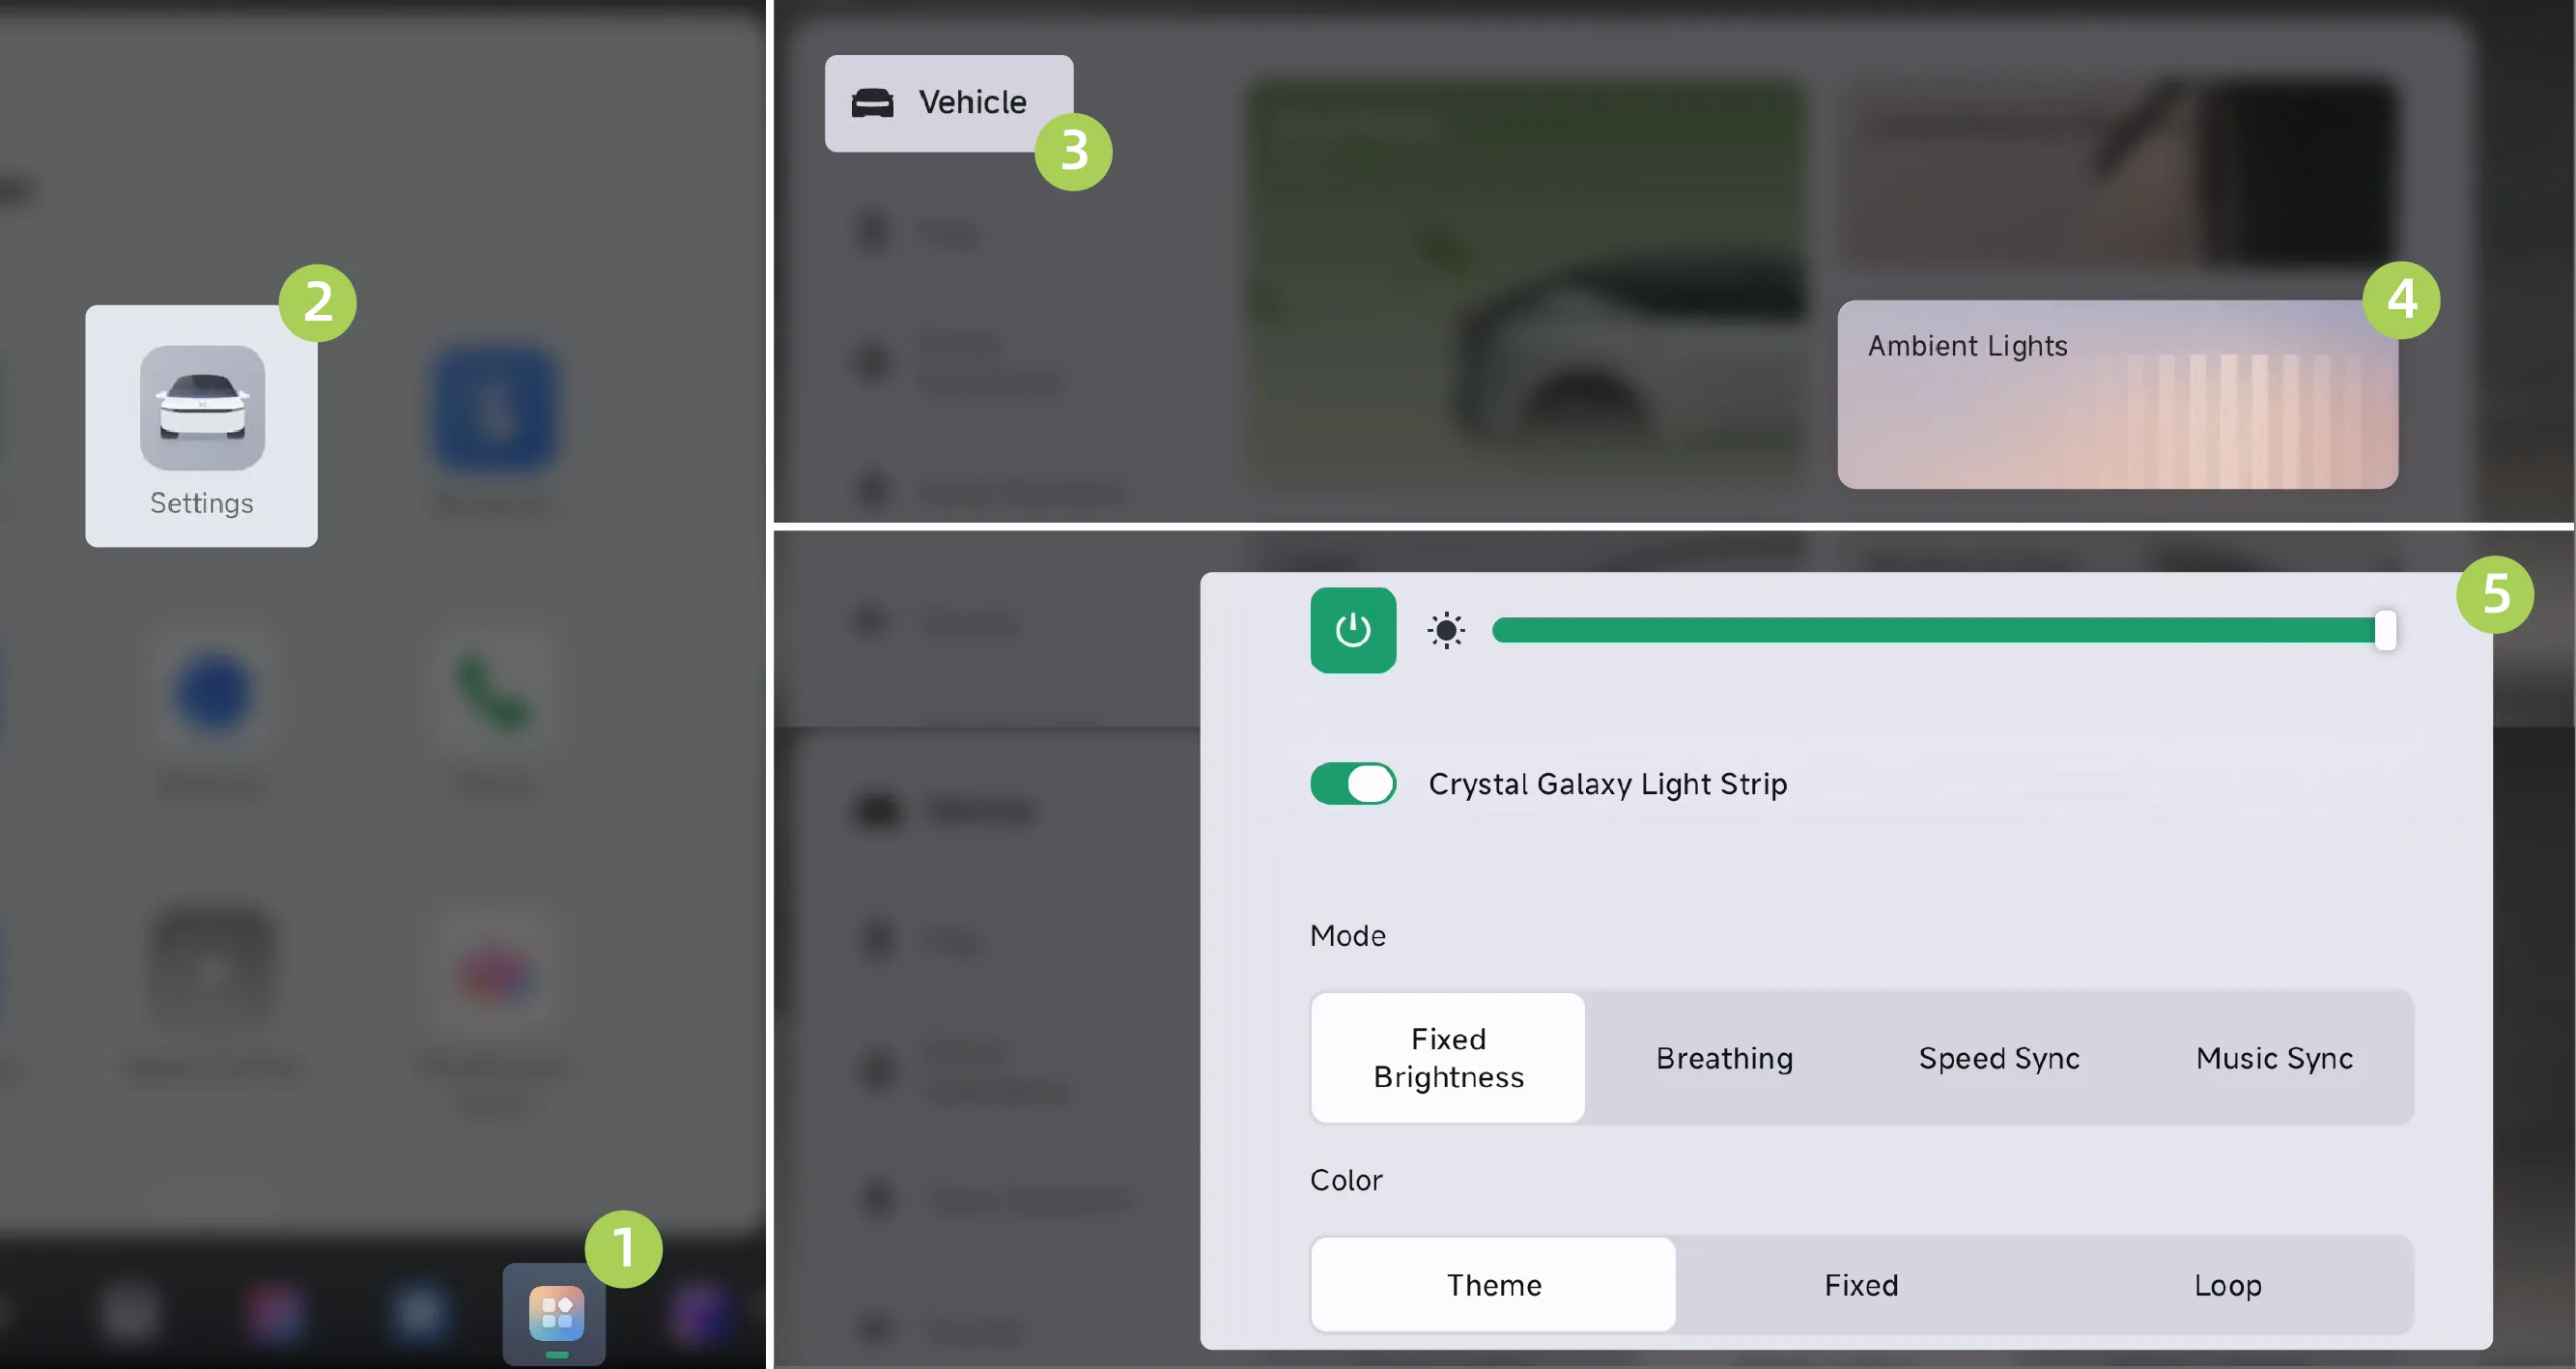
On the central control screen “ →Settings→vehicle→Ambient Lights”Interface, where the ambient light can be set.
After Ambient Lights are turned on, the Crystal Galaxy Ambient Lights in the instrument panel and door trim panel areas can be individually turned on and off:
On:Turn on the Crystal Galaxy light strip switch, and the Crystal Galaxy ambient lights in the instrument panel and door trim panel areas will illuminate.
Close:Turn off the Crystal Galaxy light strip switch, and the Crystal Galaxy ambient lights in the instrument panel and door trim panel areas will turn off.
Tips After the Ambient Lights master switch is turned off, the Crystal Galaxy Light Strip setting item will be hidden, the switch status will remain memorized, and all Ambient Lights in the vehicle will turn off. When the master switch is turned on again, the setting item will be displayed again and the previous switch status will be restored.
After Ambient Lights are turned on, the brightness of the Ambient Lights can be adjusted manually. Depending on the mode, the color of the Ambient Lights can be set to theme color, fixed color, or cycle color.
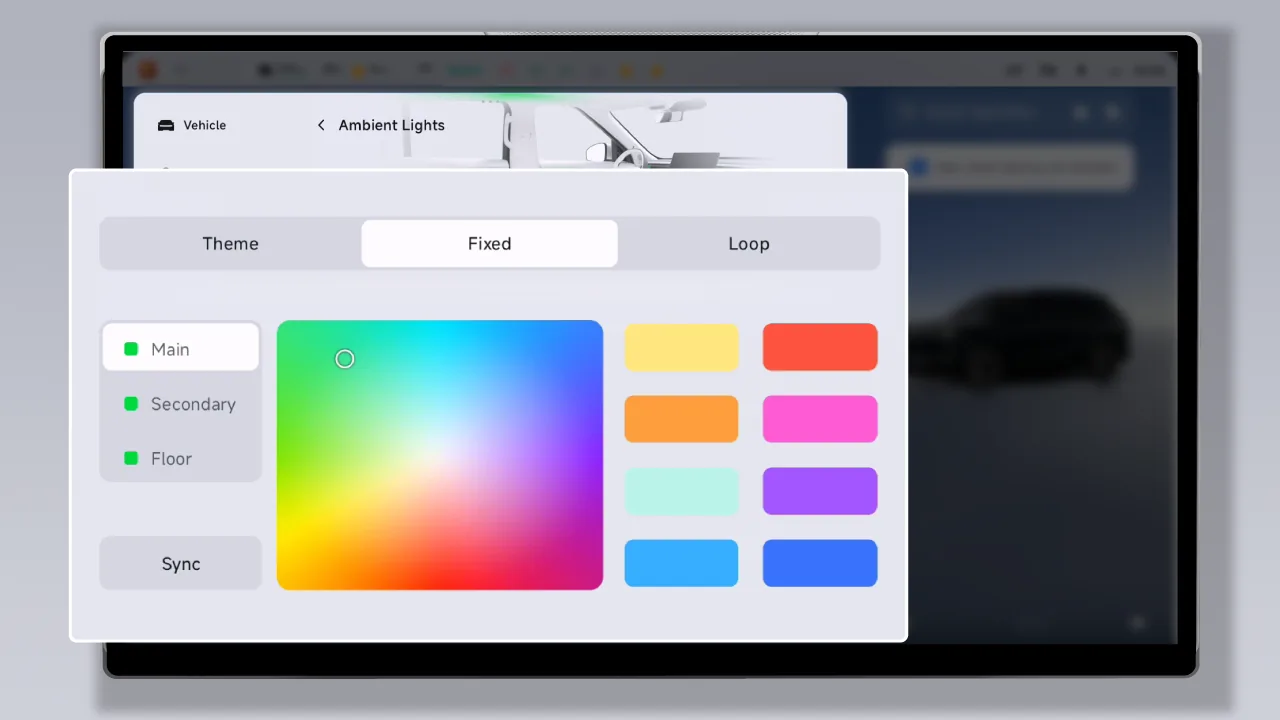
Under the fixed color option, you can separately select the main area color, auxiliary area color, and floor color, or synchronously select one color for the whole vehicle.
Ambient Lights has four mode settings: fixed brightness, steady breathing, vehicle speed following, and music rhythm, which can be selected on the Ambient Lights control interface.
When the light inside the vehicle is insufficient, the interior reading lamp can provide appropriate illumination for the occupants inside the vehicle without affecting the driver's normal driving.
You can turn the reading light on/off in any of the following ways:
Turn the reading light on/off by touching the reading light.
Turn the reading light on/off via the central control screen.
Turn the reading light on/off via the rear control screen.
Turn the reading light on/off via the rear entertainment screen.
Turn the reading light on/off by voice command.
front row reading light
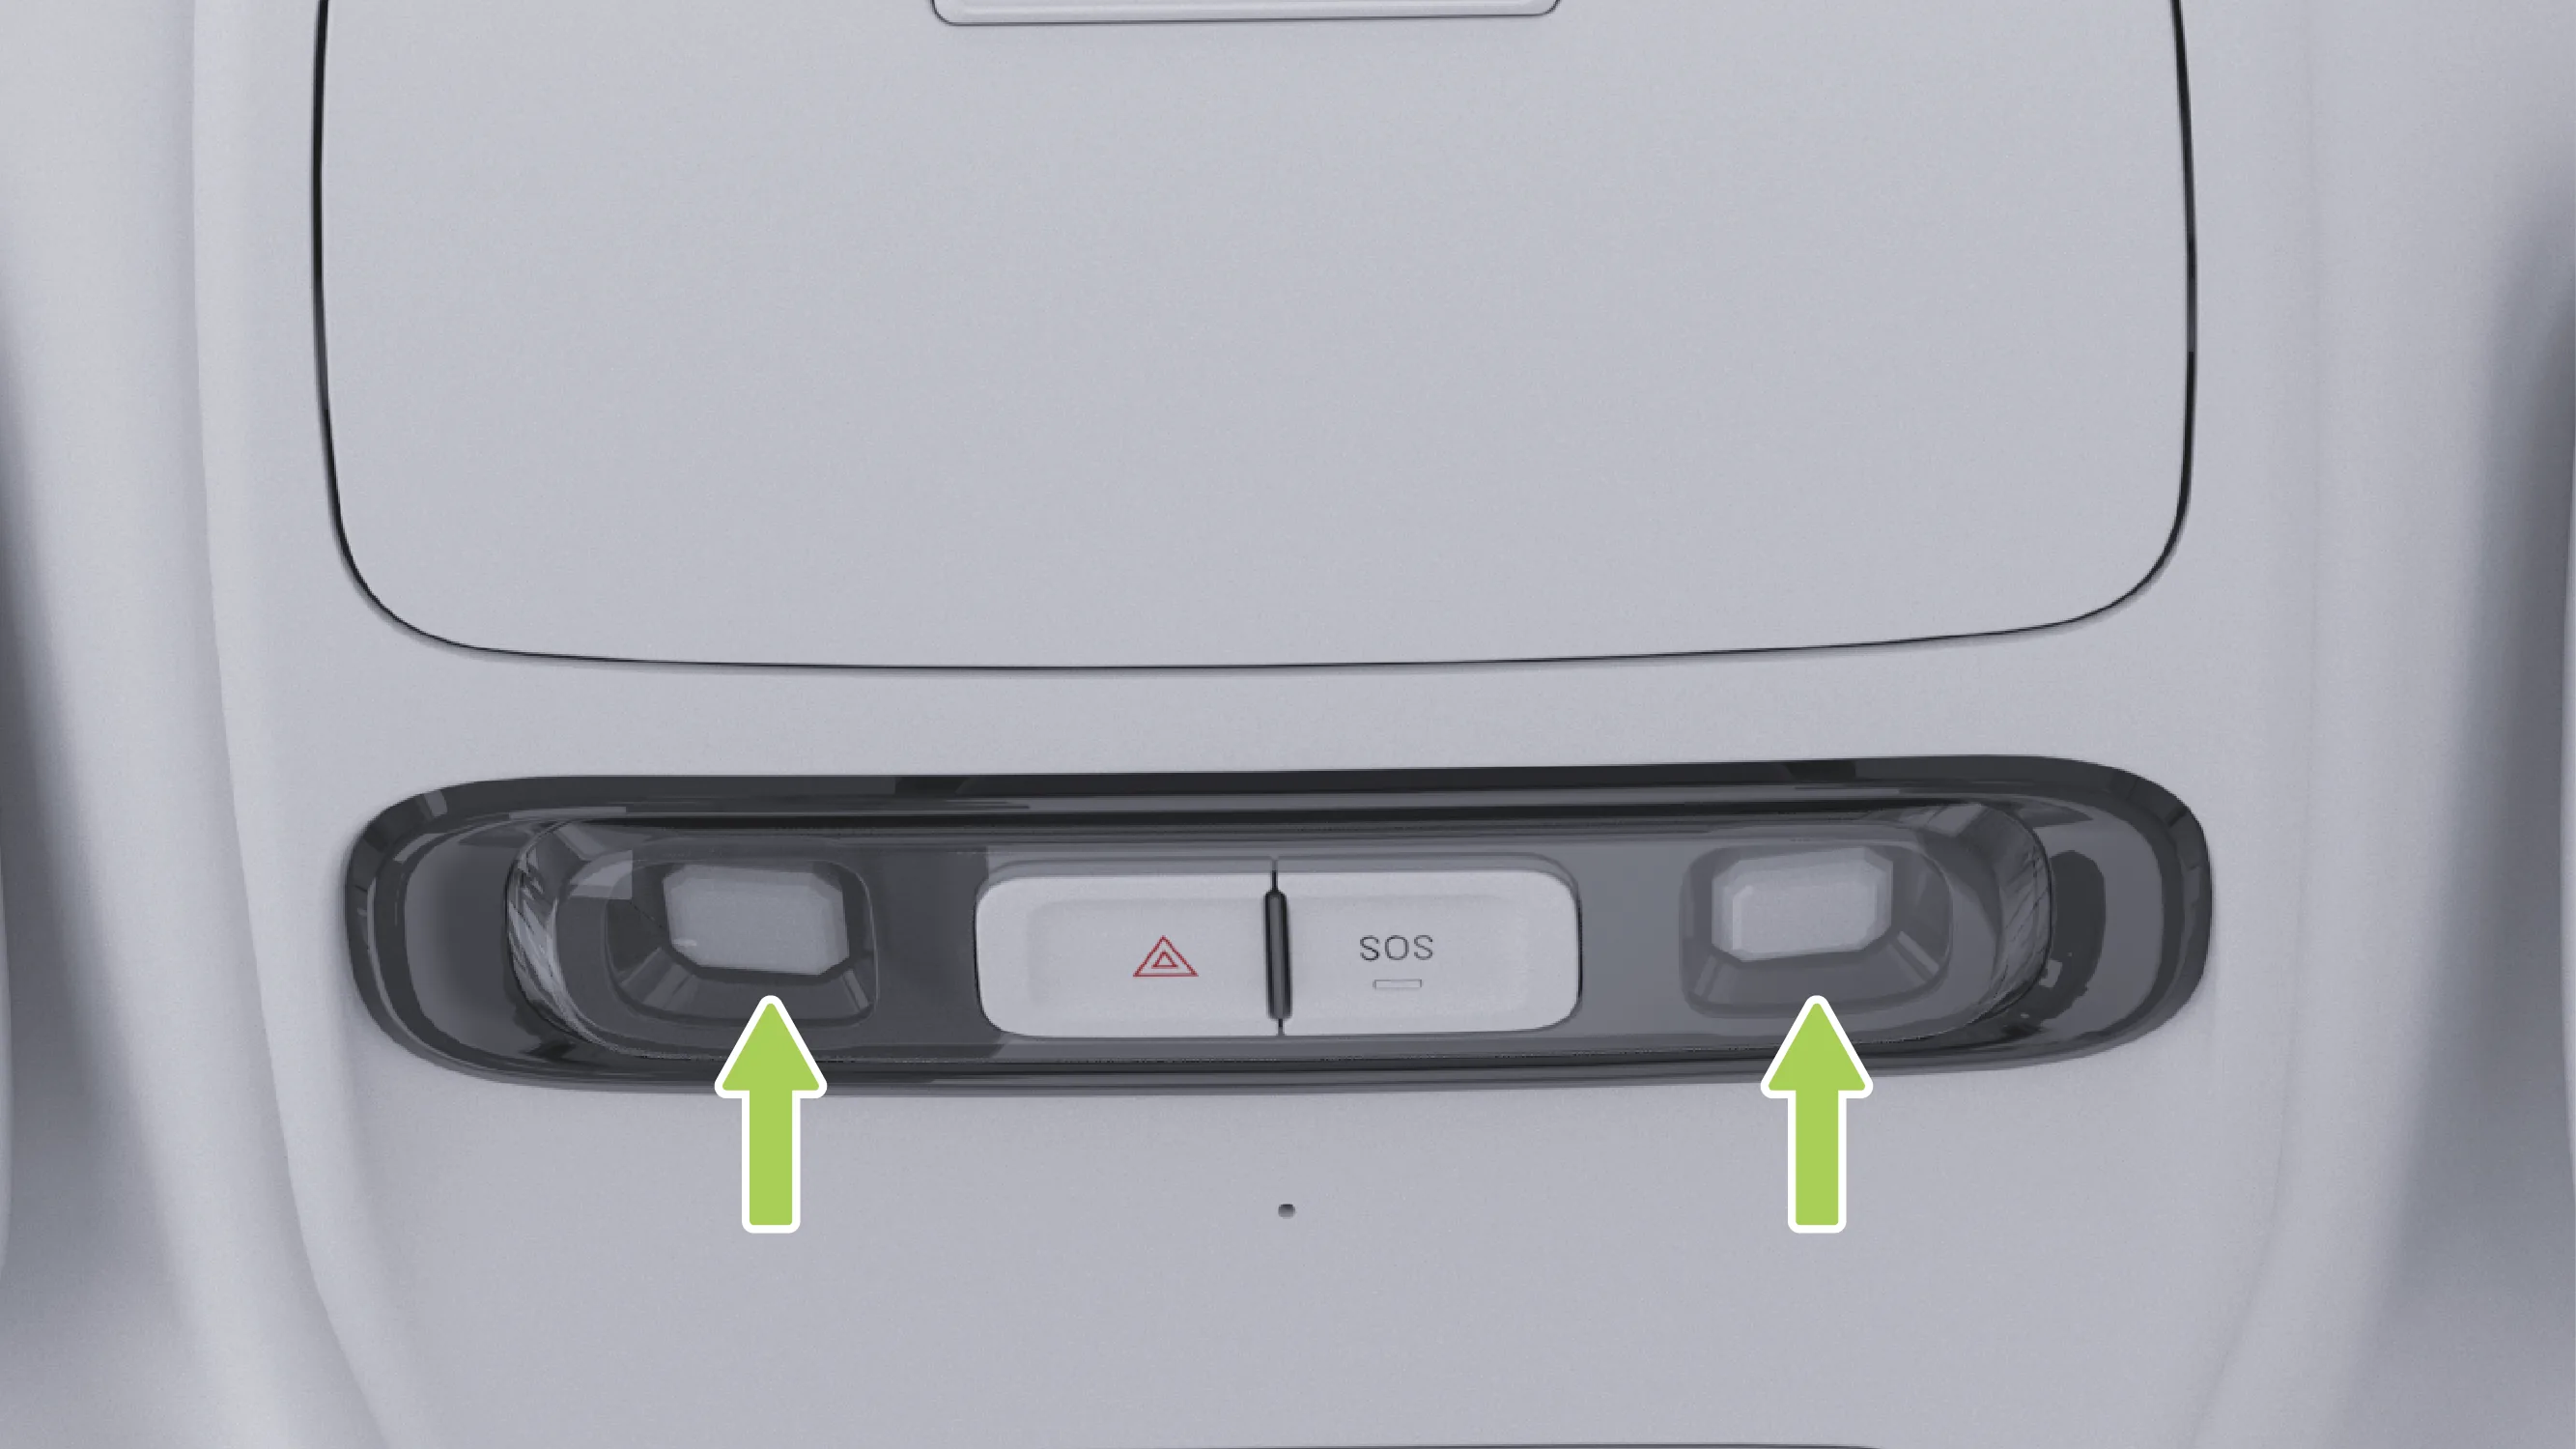
The front row reading light is installed in the front roof lamp assembly. Touch the reading light lens to turn on the reading light, and touch it again to turn off the reading light.
Second-Row Reading Lamp (Five-Seat)
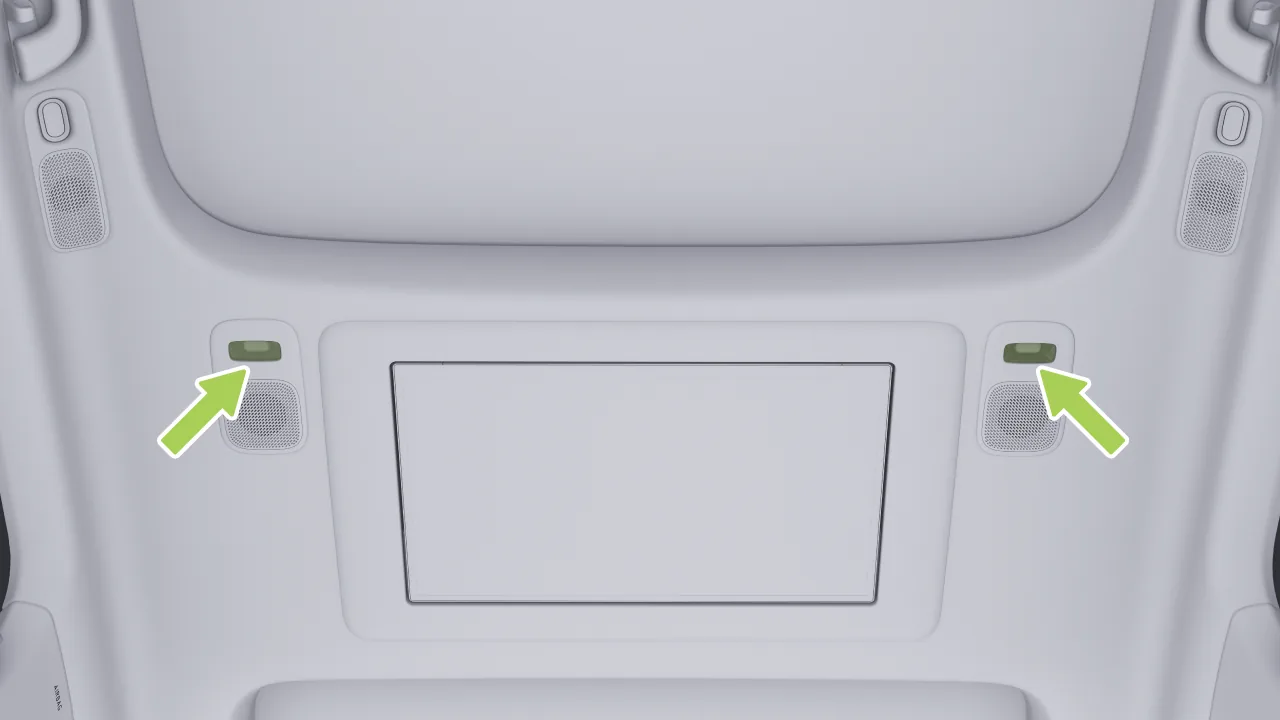
Second-Row Reading Light (Six- and Seven-Seat)
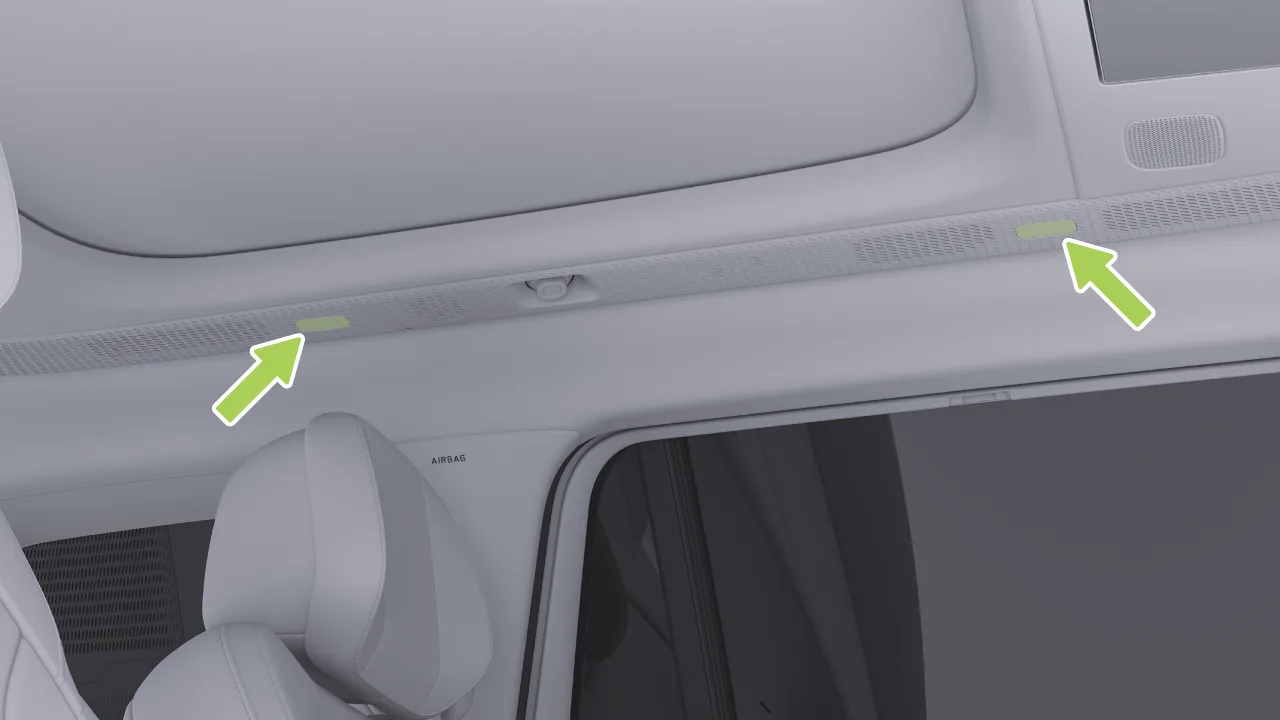
Touch the second-row reading light cover, and the reading light turns on; touch it again, and the reading light turns off.
Overhead Reading Lights (Six- and Seven-Seat Models)
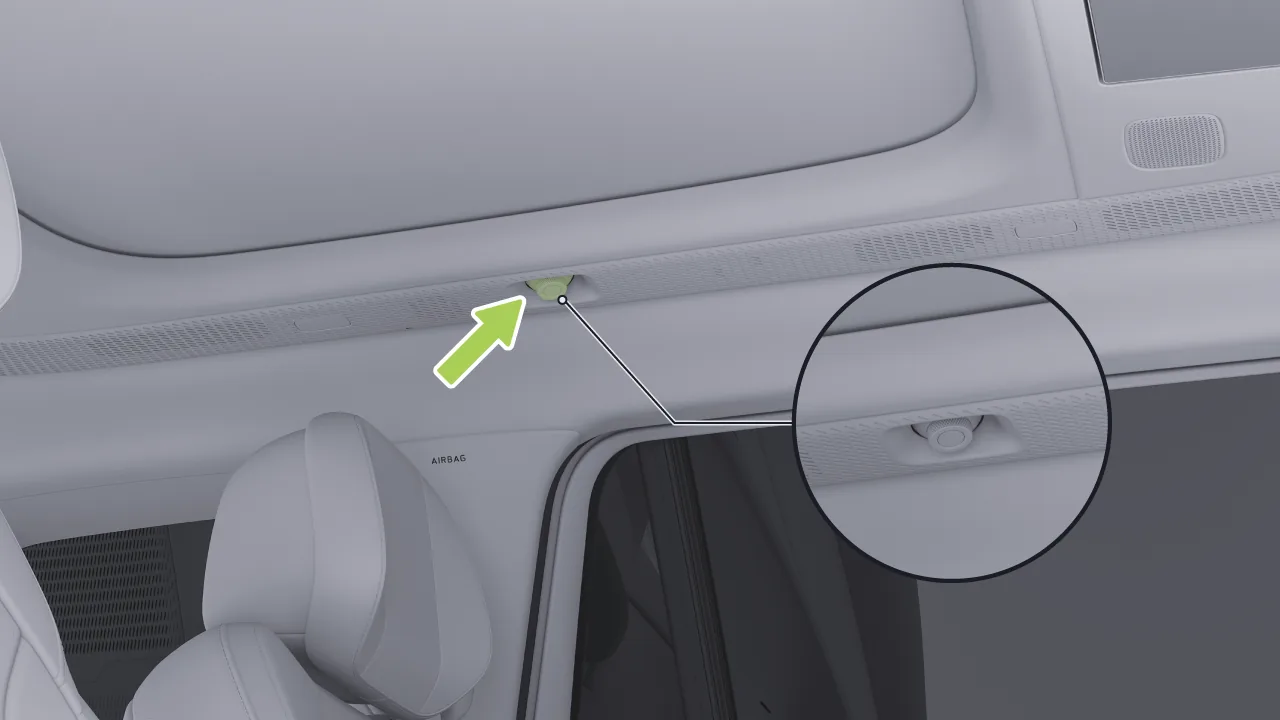
The second row is also equipped with Overhead Reading Lights, supporting touch on/off and angle adjustment:
With the door closed:Touch the reading light lens cover. The reading light turns on at low brightness; each subsequent touch cycles the brightness in the order of “medium brightness → high brightness → off → low brightness.”
When the door is opened and then closed:Touch the reading light lens cover, and the reading light turns on; touch it again to turn it off.
Angle Adjustment:Move the reading light forward and backward to adjust its angle.
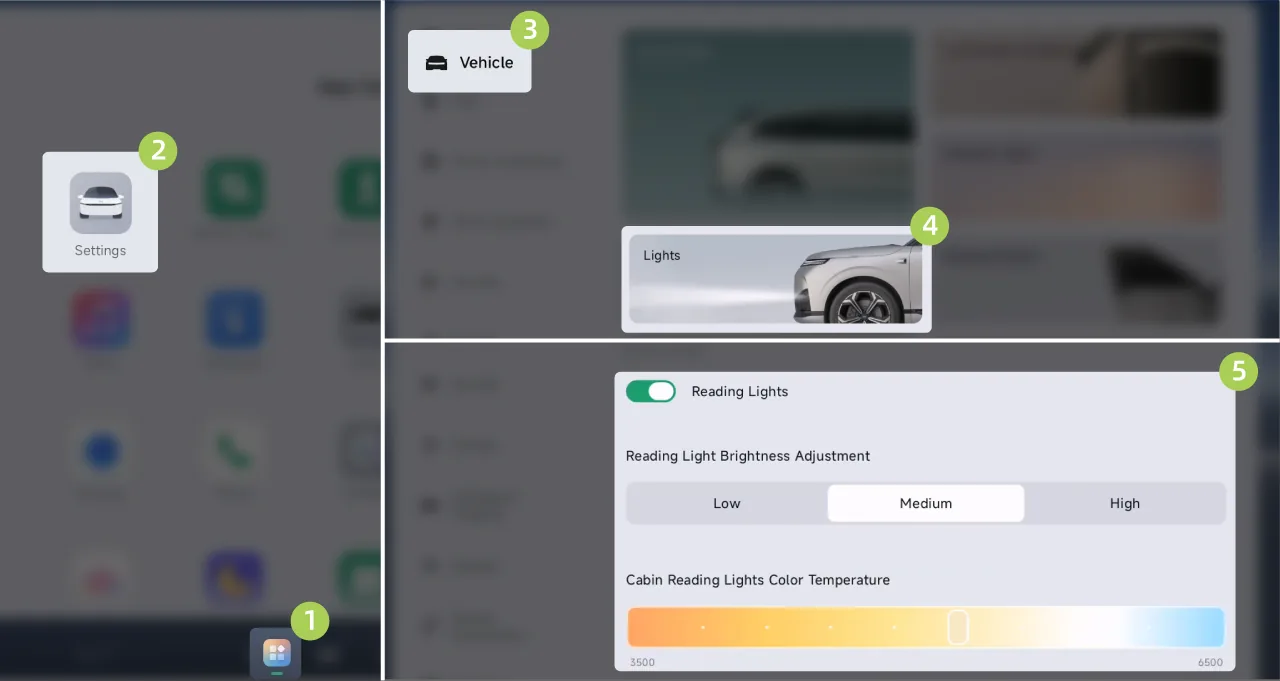
On the center control screen “ →Settings→vehicle→Lights”On the interface, you can configure the following settings for the reading light:
Tap , turn the reading light on/off.
Select Use the options below to adjust the reading light brightness.
Swipe Use the options below to adjust the color temperature of the aircraft reading light*.
Tips The reading light automatically illuminates when the door is opened, and the reading light automatically extinguishes when the door is closed.
Tap on the rear control screen “ ”Enter the Control Center and tap The left or right switch on the card can control the on/off of the corresponding side overhead reading light. For more settings, tap this card to enter the overhead reading lights settings screen:
Tap Switch to turn the corresponding side overhead reading light on/off.
Select Use the options below to adjust the overhead reading light brightness.
Swipe Use the options below to adjust the color temperature of the overhead reading light.
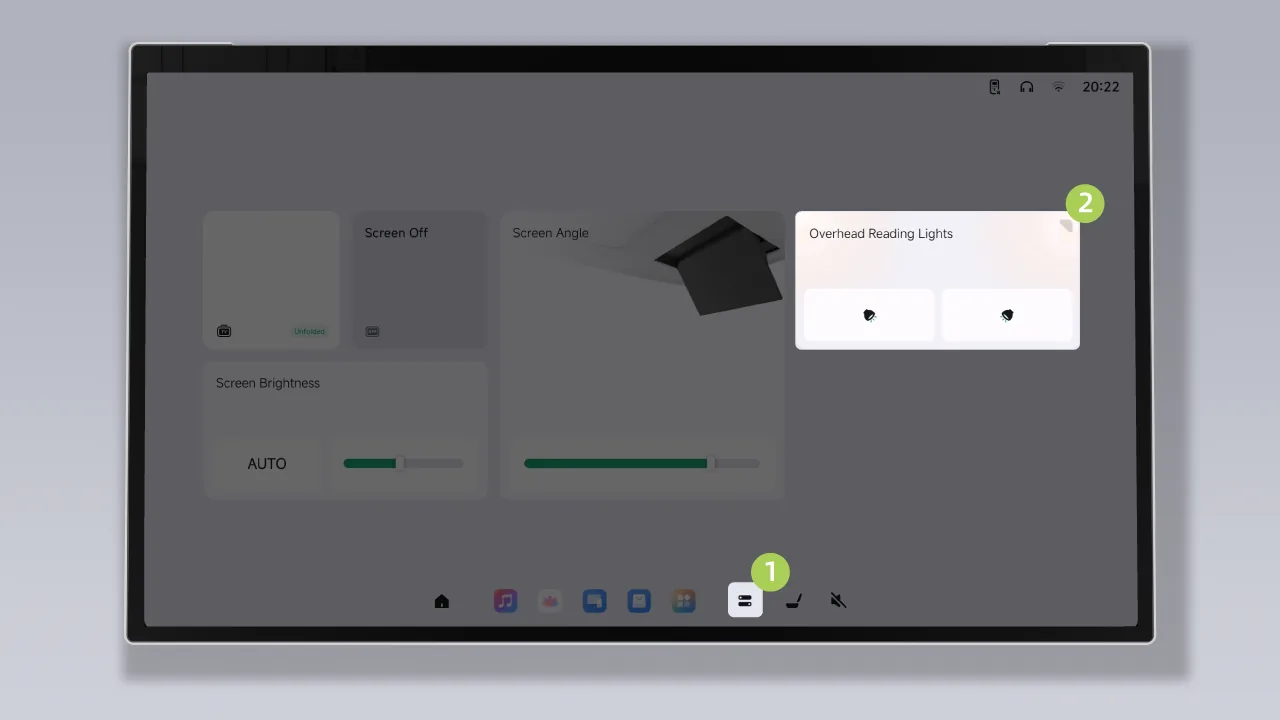
Tap on the rear entertainment screen. “ ”Open the quick panel and tap The left or right switch on the card can control the on/off of the overhead reading light on the corresponding side. For more settings, tap this card to enter the aircraft reading light settings screen:
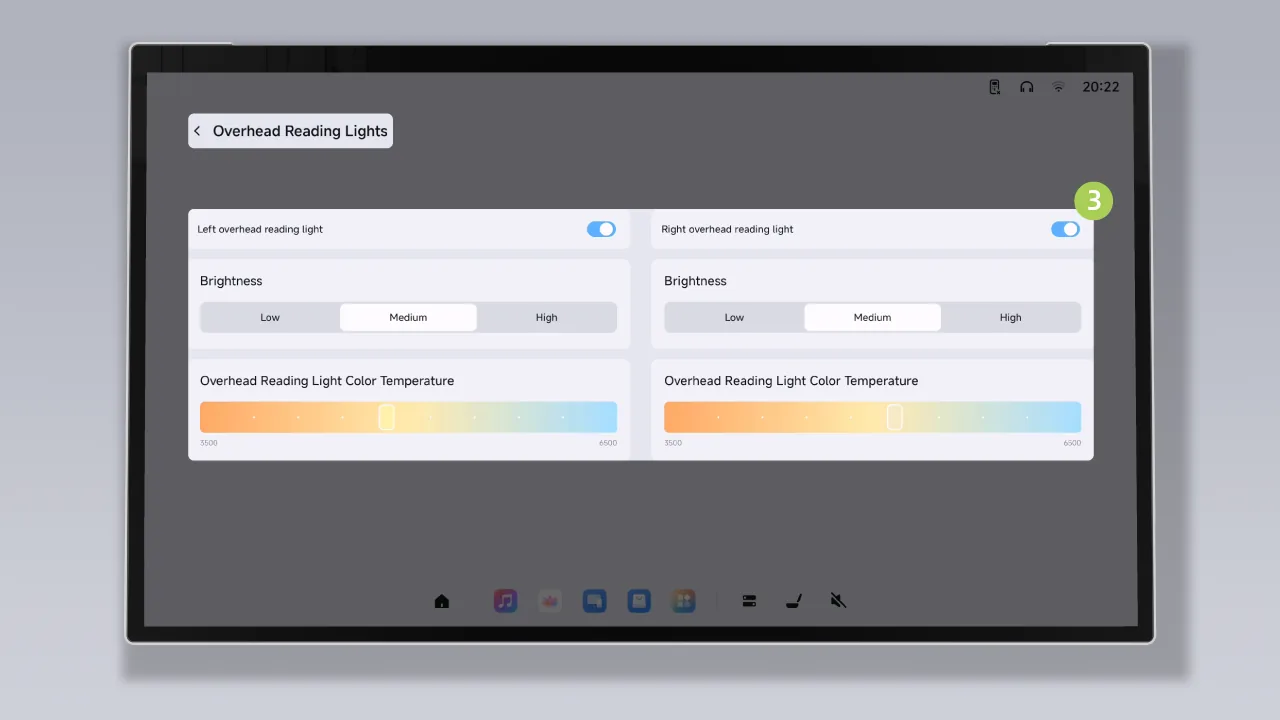
Tap Switch to turn the corresponding overhead reading light on/off.
Select Use the options below to adjust the brightness of the overhead reading light.
Swipe Use the options below to adjust the color temperature of the overhead reading light.
You can turn the wiper function on or off by rotating the wiper switch.
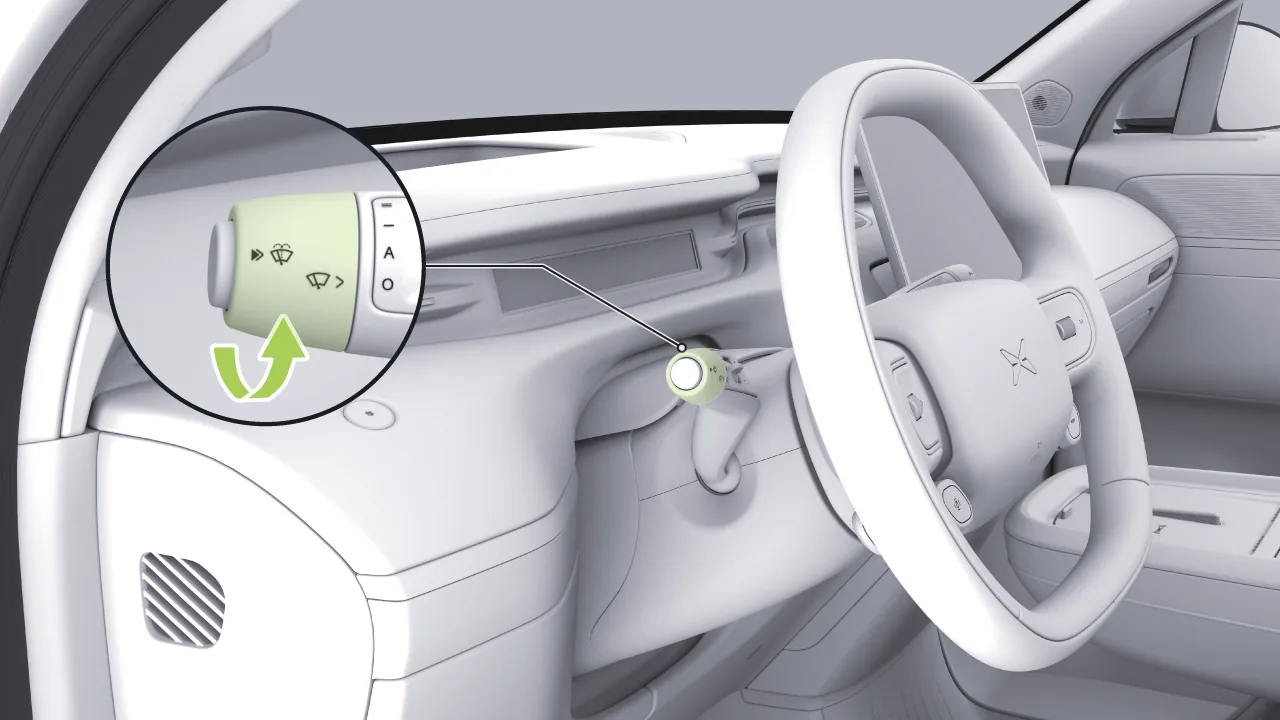
 : The front wipers wipe continuously at high speed.
 : The front windshield wipers wipe continuously at low speed.
 : Enable the automatic wiper or intermittent wipe function.
 : Turn off the front wiper.
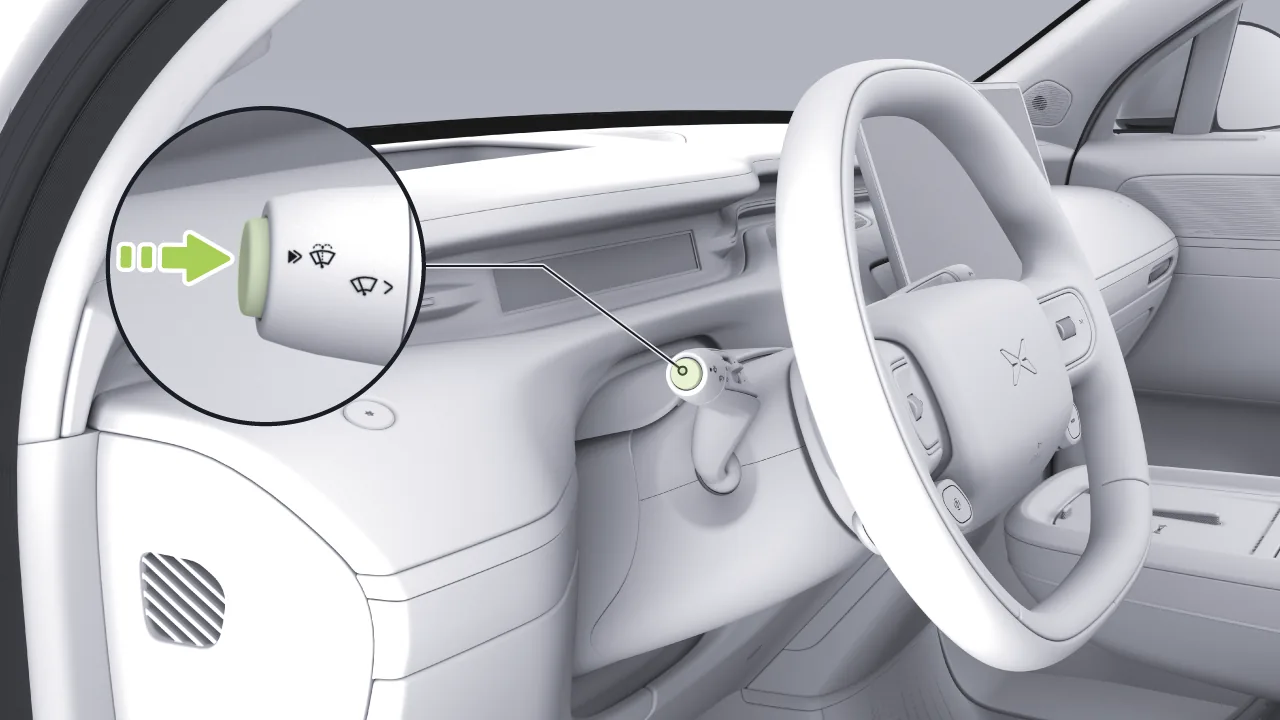
Scratch Point: Briefly press the wash switch, and the front wiper wipes once.
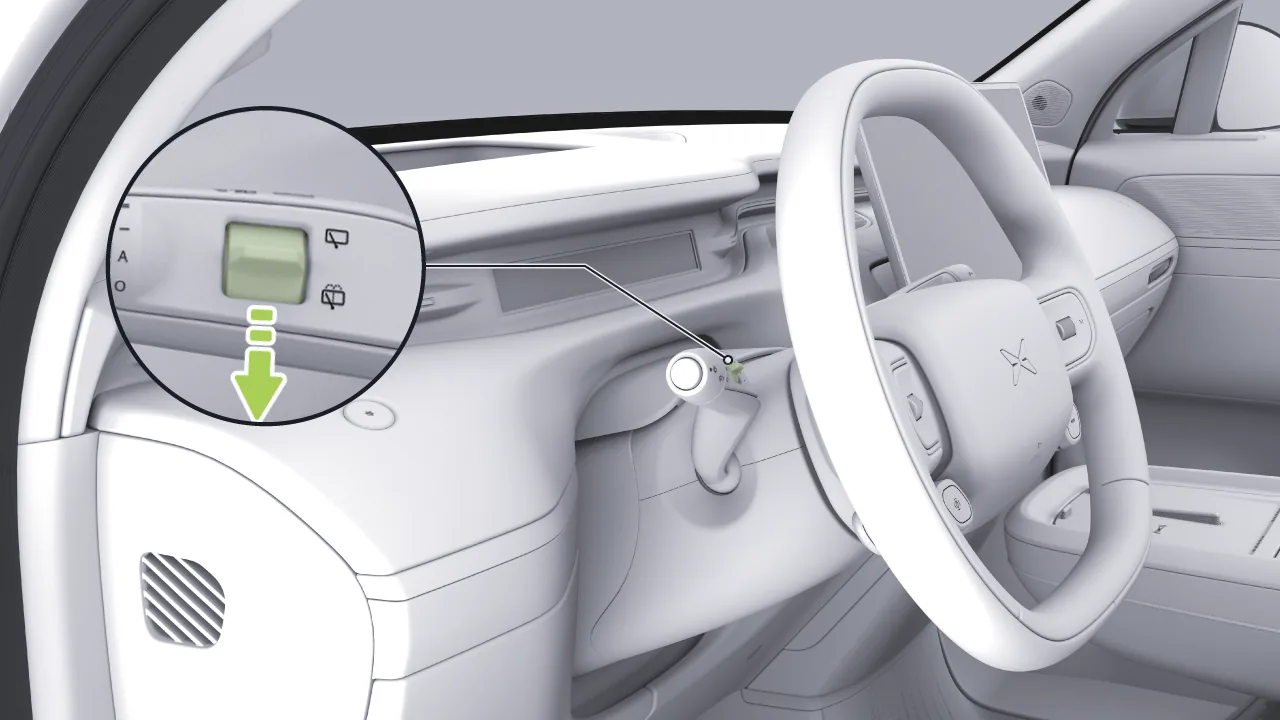
On/Off: Push the wiper switch upward.
Scratch and chip: Briefly push the rear wiper switch downward, and the rear wiper wipes once.
Tips Operate the rear wiper switch; upon release, the switch automatically returns to its original position.
The rear wiper and the front wiper have a linked function. After the rear wiper is turned on, if the front wiper is on, the wiping speed of the rear wiper will automatically adjust according to the front wiper setting:
The current wiper is set to “ ”When in gear, the rear wiper wipes continuously at low speed.
Current wiper is set to “ ”When in gear, the rear wiper wipes continuously at high speed.
When the AUTO wiper mode is set to , and the front wiper is set to “ ”When in gear, the rear wiper simultaneously enters automatic mode and automatically adjusts the wiping frequency according to the amount of rainfall or the intermittent wiping sensitivity.
When the AUTO wiper mode is set to , and the front wiper is set to “ ”When in gear, the rear wiper simultaneously enters intermittent wipe mode and wipes at fixed time intervals.
Tips To ensure safety, when the vehicle is reversing, the linked function will be temporarily disabled, and the rear wiper will switch to continuous wiping at a constant frequency.
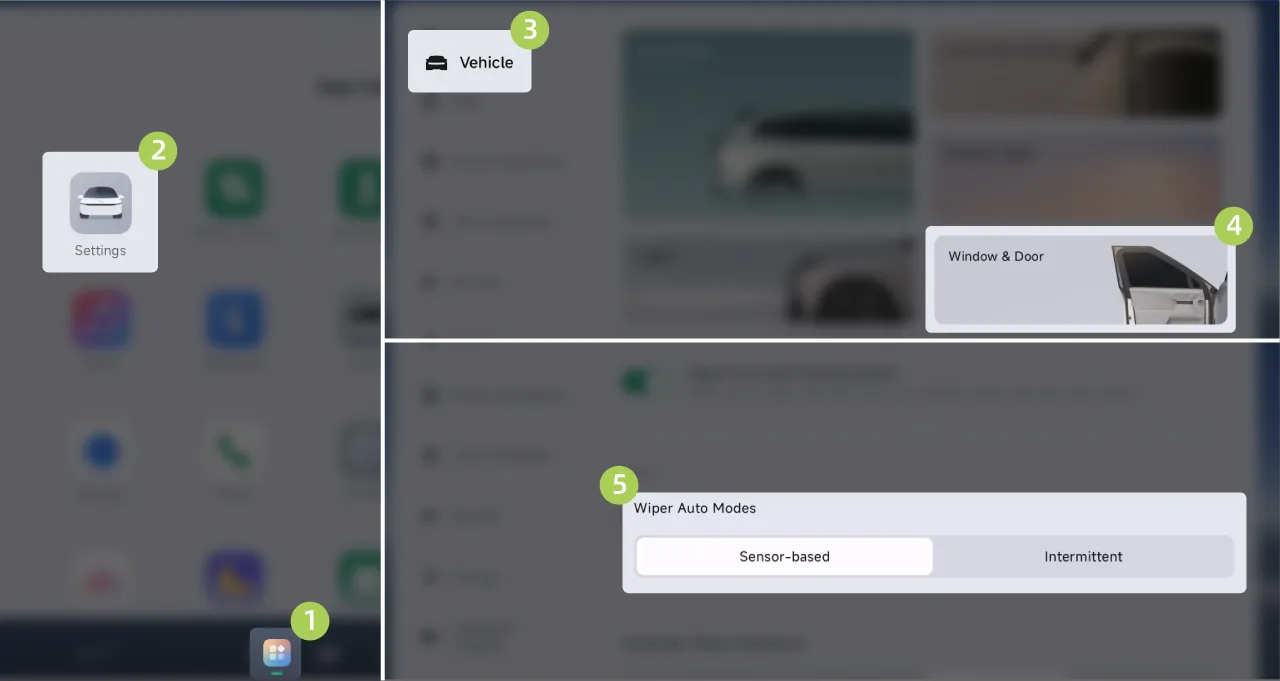
On the central control screen “ →Settings→vehicle→Doors and Windows”interface, AUTO wiper mode can be set to 。
Rain-Sensing Automatic Wiping: Front Wiper Switch Position “ ”It is in automatic wiper mode.
Intermittent Wiping: Front Wiper Switch Position “ ”Intermittent wiping.
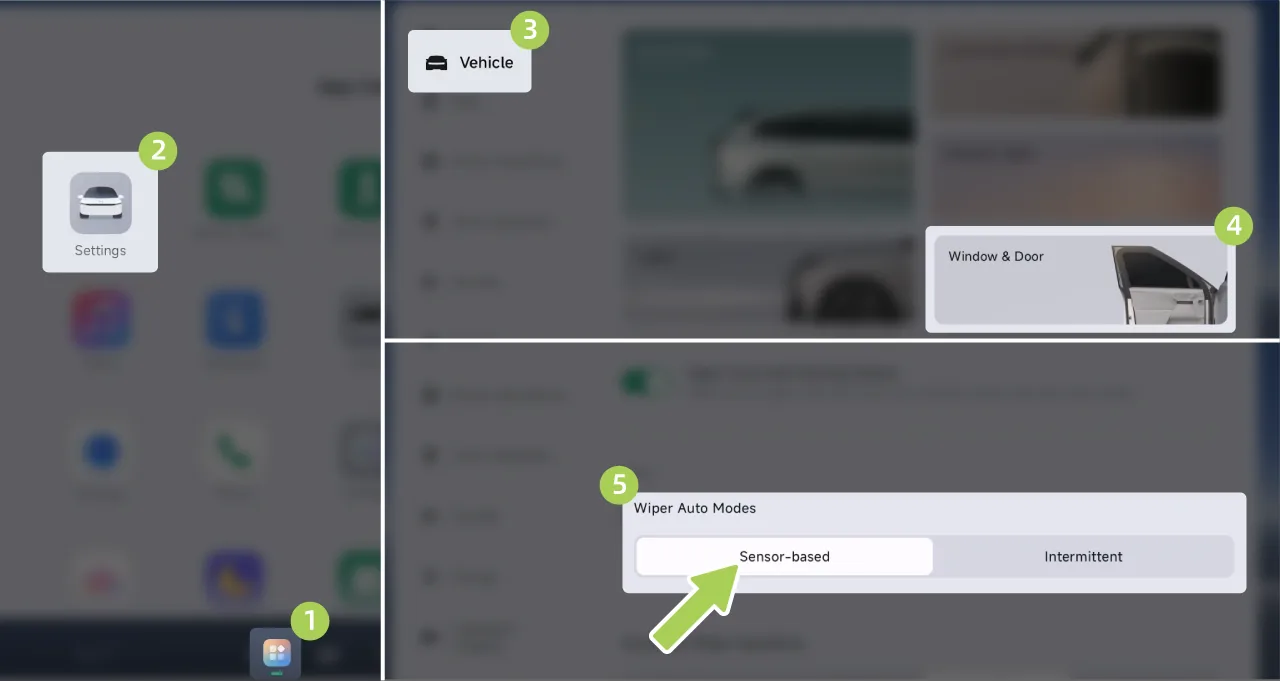
On the center control screen “ →Settings→vehicle→Doors and Windows”Interface, set AUTO wiper mode to 。
Rotate the front wiper switch to “ ” gear to enable the automatic wiper function. After it is enabled, when the vehicle rain sensor detects rain, the system will activate the wipers and adjust the wiping speed according to the set sensitivity.
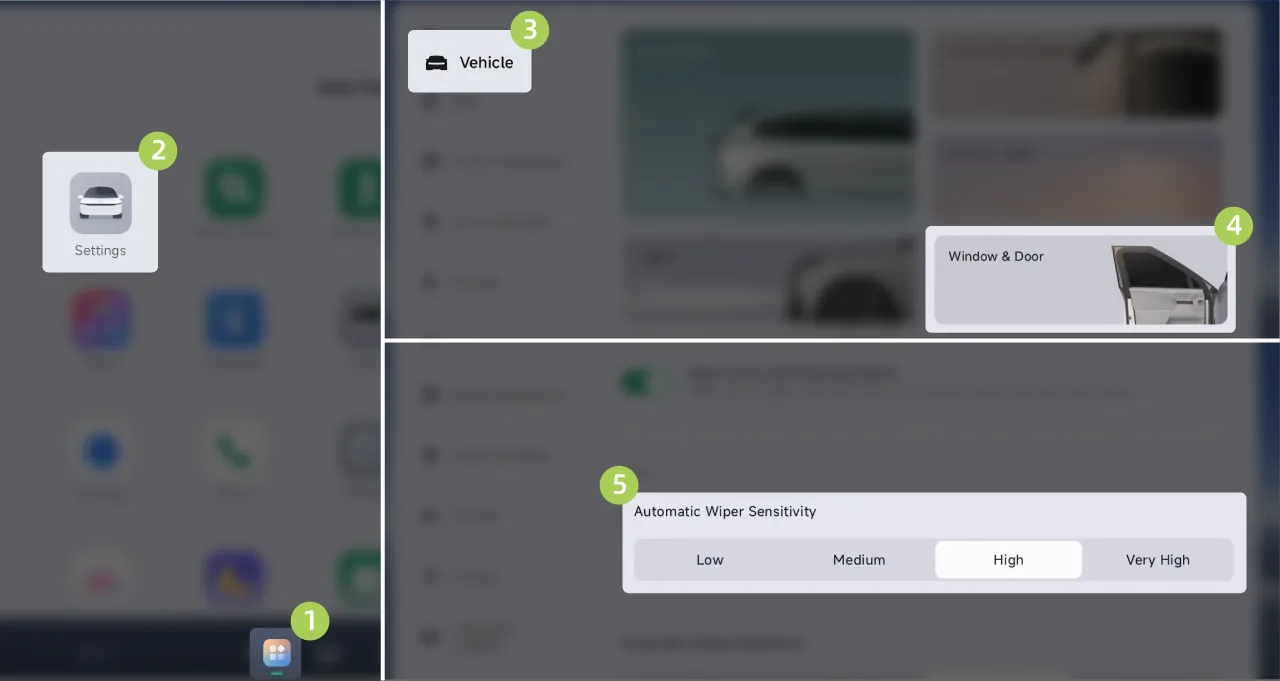
On the center control screen “ →Settings→vehicle→Doors and Windows”On the interface, you can set the automatic wiper sensitivity to Gear. The higher the gear, the higher the wiper sensitivity.
Caution Make sure that the front compartment lid, boot and main drive door are latched before operating the wipers.
When washing the vehicle, switch off the automatic wipers function to avoid personal injury or damage to the wipers.
When using the wipers in adverse weather conditions, make sure the blades are not frozen/stuck to the windshield.
For example, if there are foreign objects (snow, leaves, etc.) on the wipers or windscreen, park the vehicle in a safe area and remove it.
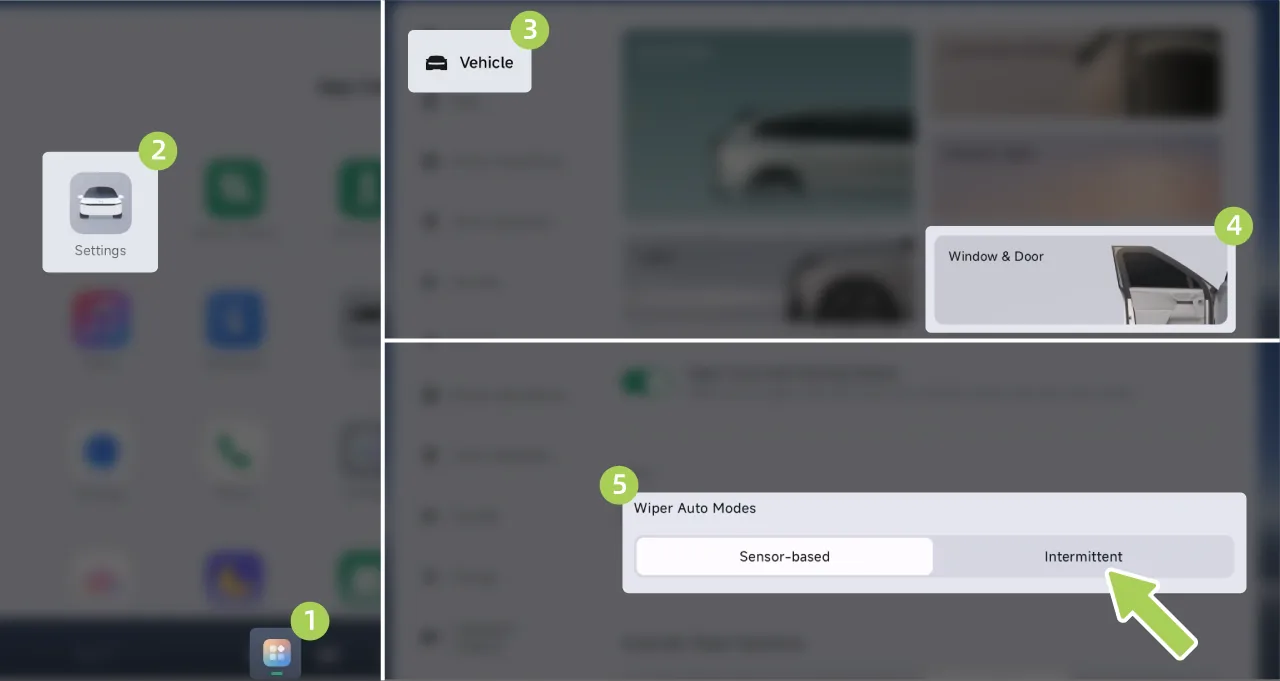
On the center display “ →Settings→vehicle→Doors and Windows”interface, set AUTO wiper mode to 。
Rotate the front wiper switch to “ ” position to enable the intermittent wiping function. After activation, the wiper will perform intermittent wiping according to the set sensitivity.
On the center control screen “ →Settings→vehicle→Doors and Windows”On this screen, you can set the intermittent wiping sensitivity to Gear. The higher the gear, the shorter the wiper sweep interval.
Caution Before operating the windshield wipers, ensure that the front hood, trunk, and driver door are in the locked state.
Before using the wipers in severe weather conditions, make sure that the wiper blades are not frozen to/stuck to the windshield.
If there is any foreign matter on the wiper or windshield (such as accumulated snow, leaves, etc.), park the vehicle in a safe area and then remove it.
Windshield washing uses washer fluid to remove dirt from the front windshield, prevent the driver's vision from being affected, and improve driving safety.
When the vehicle is low on windshield washer fluid, replenish the washer fluid promptly. Add windshield washer fluid。
Press and hold the front wiper washer switch. The front washer sprays water, and the front wiper wipes at the same time. After releasing this switch, the washer stops spraying water, and the wiper continues wiping.
Push the rear wiper switch downward and hold it; the washer sprays water, while the rear wiper wipes at the same time. After releasing this switch, the washer stops spraying water, and the wiper will continue wiping.
Tips Do not operate the windshield washer for extended periods; doing so may damage the front washer motor.
Do not operate the washer when the washer fluid level in the reservoir is low; otherwise, the front washer motor may be damaged.
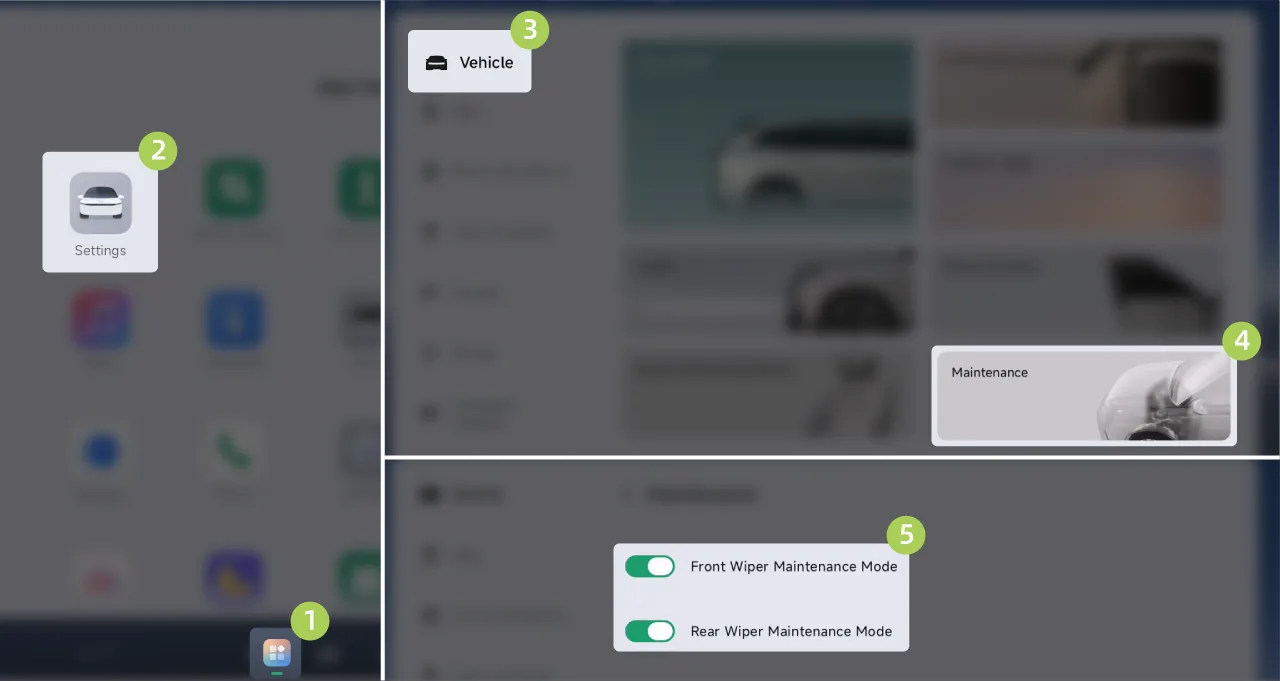
Shift the vehicle gear to P gear and keep the wipers off. On the central control screen “ →Settings→vehicle→Maintenance”On the interface, the front/rear Wiper Maintenance Mode can be turned on/off. The wiper arms will move to the maintenance position. After Wiper Maintenance Mode is turned off, the wiper arms automatically return to their original position.
Open on the center display , the wiper arm will move to the maintenance position.
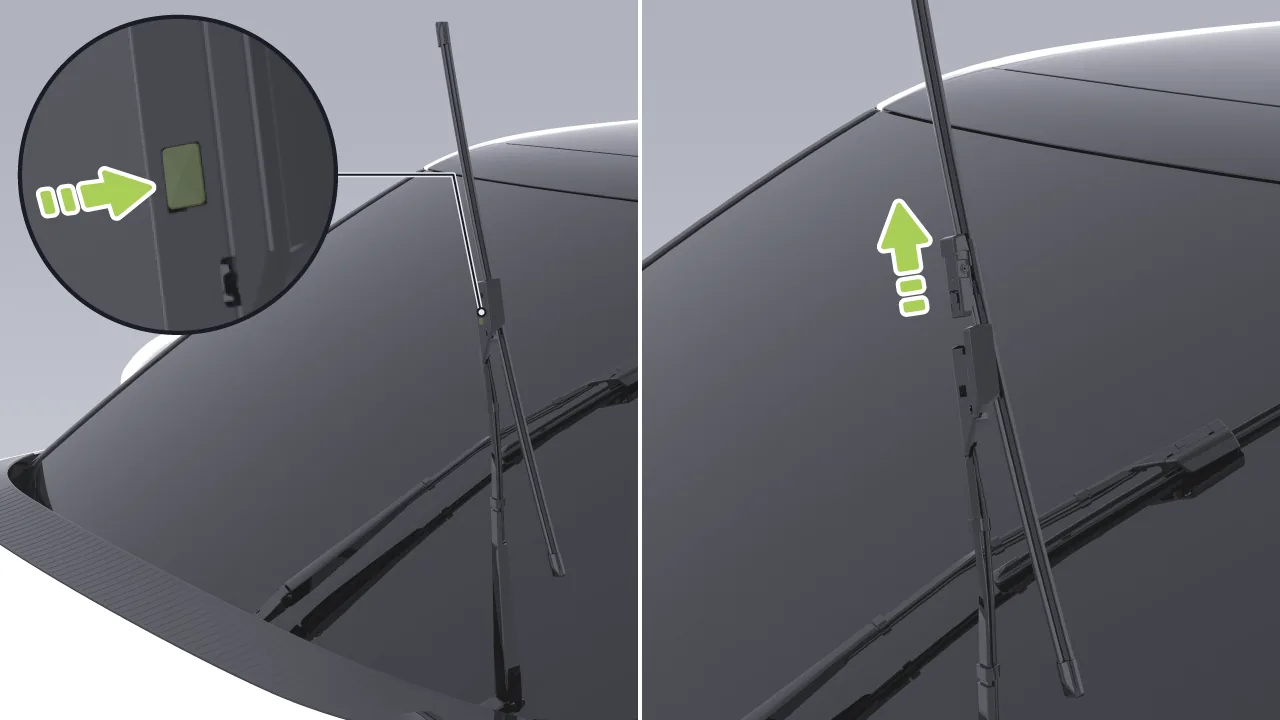
Lift the wiper arm, press the locking button, and pull out the wiper blade to remove the wiper blade.
Reinstall the new wiper blade onto the wiper arm in the reverse order of the steps, until you hear A sound indicates that it is installed in place.
Gently place the wiper arm back onto the windshield.
Turn off front wiper maintenance mode.
Open on the center control screen , the wiper arm will move to the maintenance position.
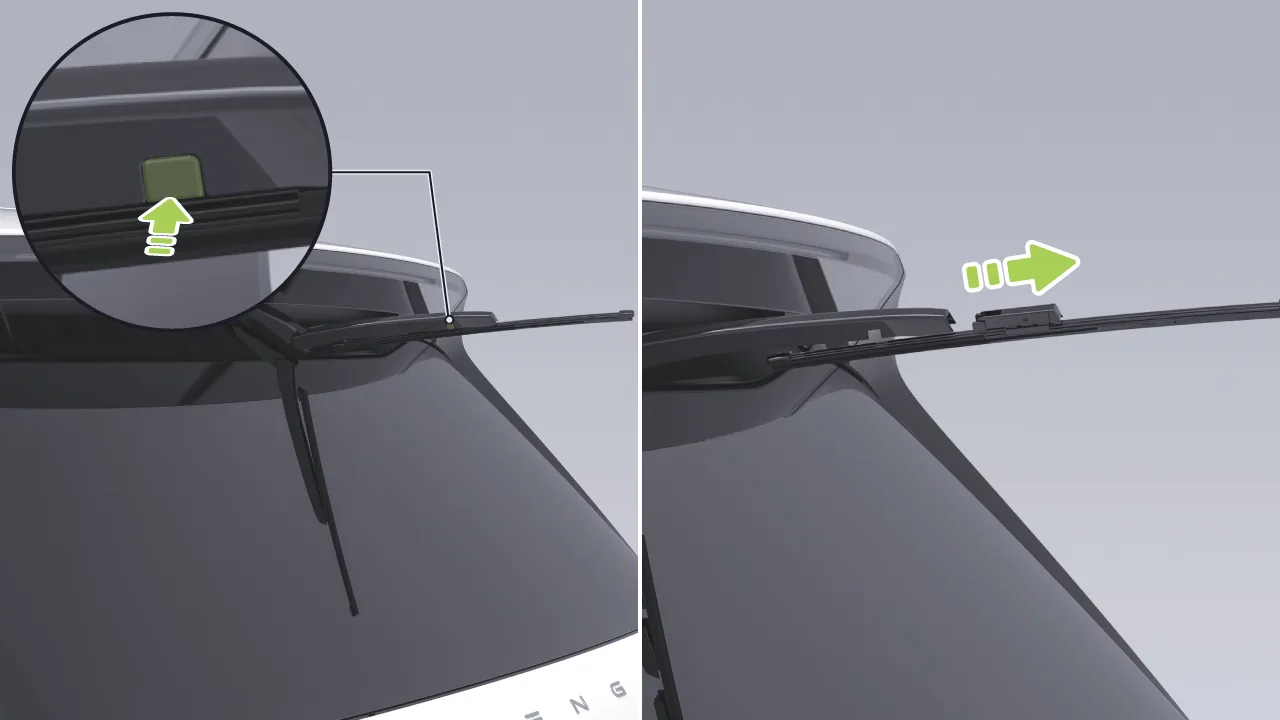
Lift the wiper arm, press the locking buttons on both sides, and pull the wiper blade backward to remove the wiper blade.
When installing, lift the wiper arm and snap the protruding position on the new wiper blade into the slot on the wiper arm until you hear A sound indicates that it is installed in place.
Gently place the wiper arm back onto the windshield.
Turn off rear wiper maintenance mode.
Caution Before replacing the wiper blades, switch on the wiper service mode with the front compartment lid, main driver door fully closed, damage to the vehicle may occur.
Place a thick soft towel between the wiper blade and the windscreen before removing the wiper blade to prevent accidental scratching of the windshield when removing the blade.
In the case of cleaning the glass, wiper blades or replacing the blades, raise the wiper arms when lifting the wipers, do not grab the blades directly. Avoid deformation of the wiper blades, which can affect the abnormal noise and the performance of the wiper blades.
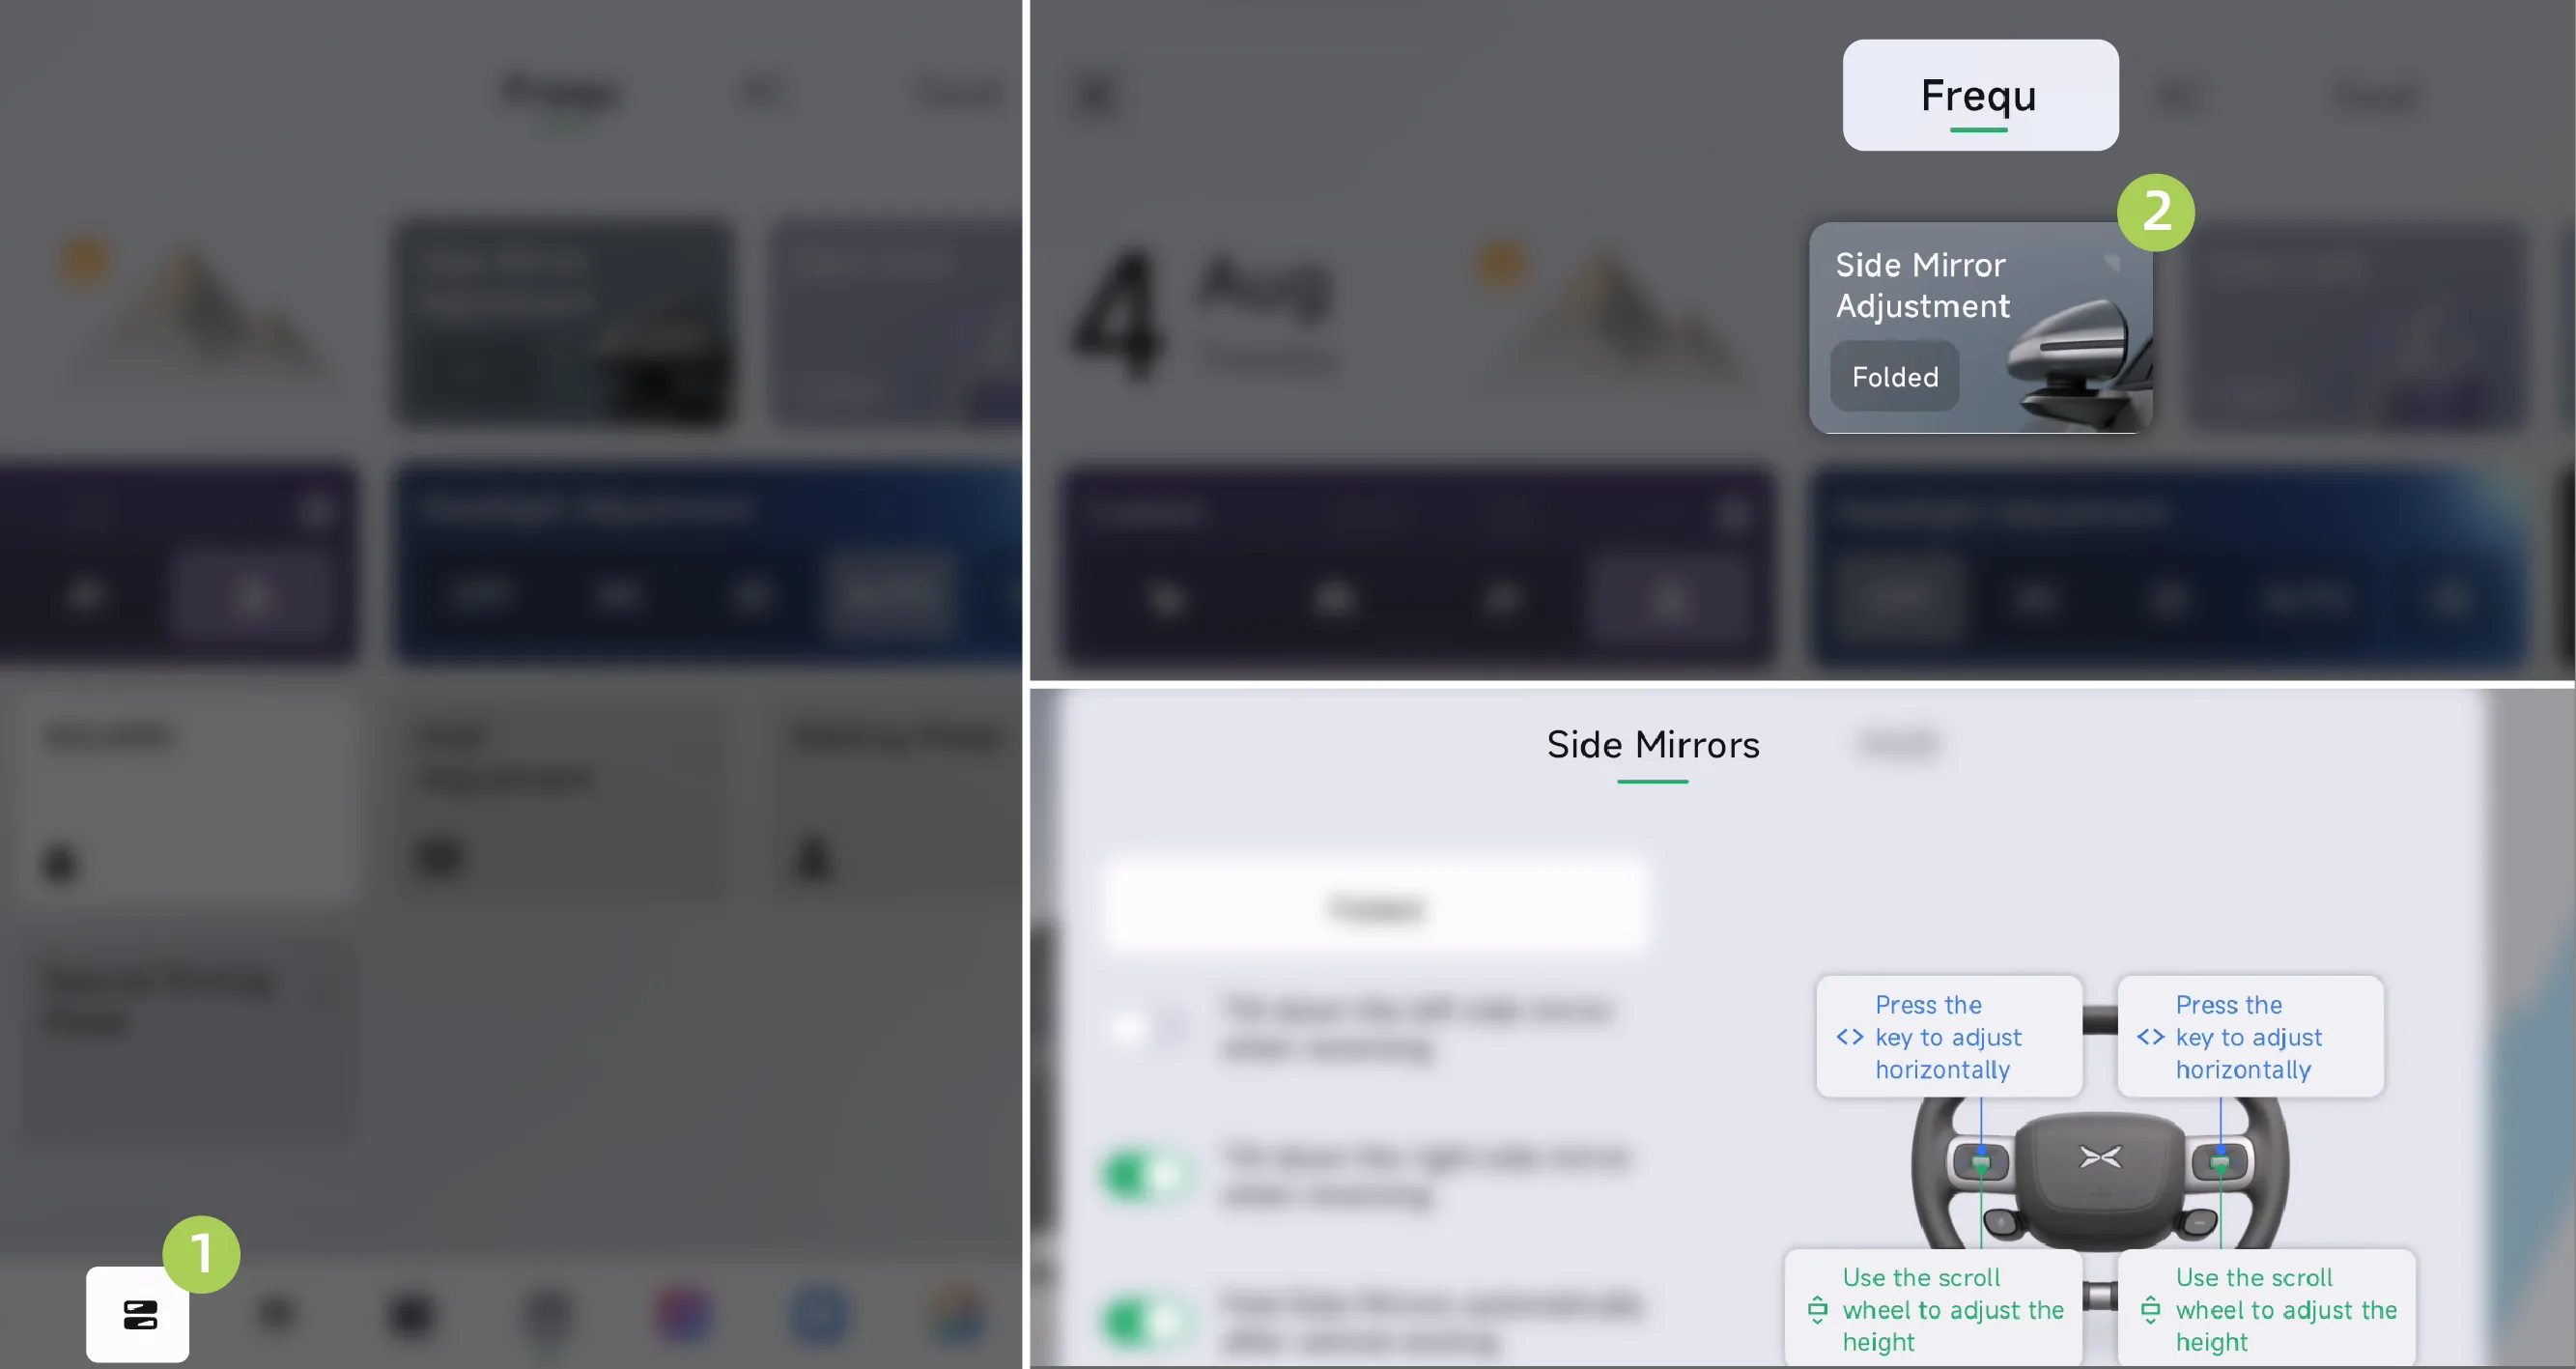
Tap on the center display. “ ”Enter the Control Center screen and tap Side Mirror AjustmentAfter the card is displayed, the Side Mirrors adjustment interface can be brought up.
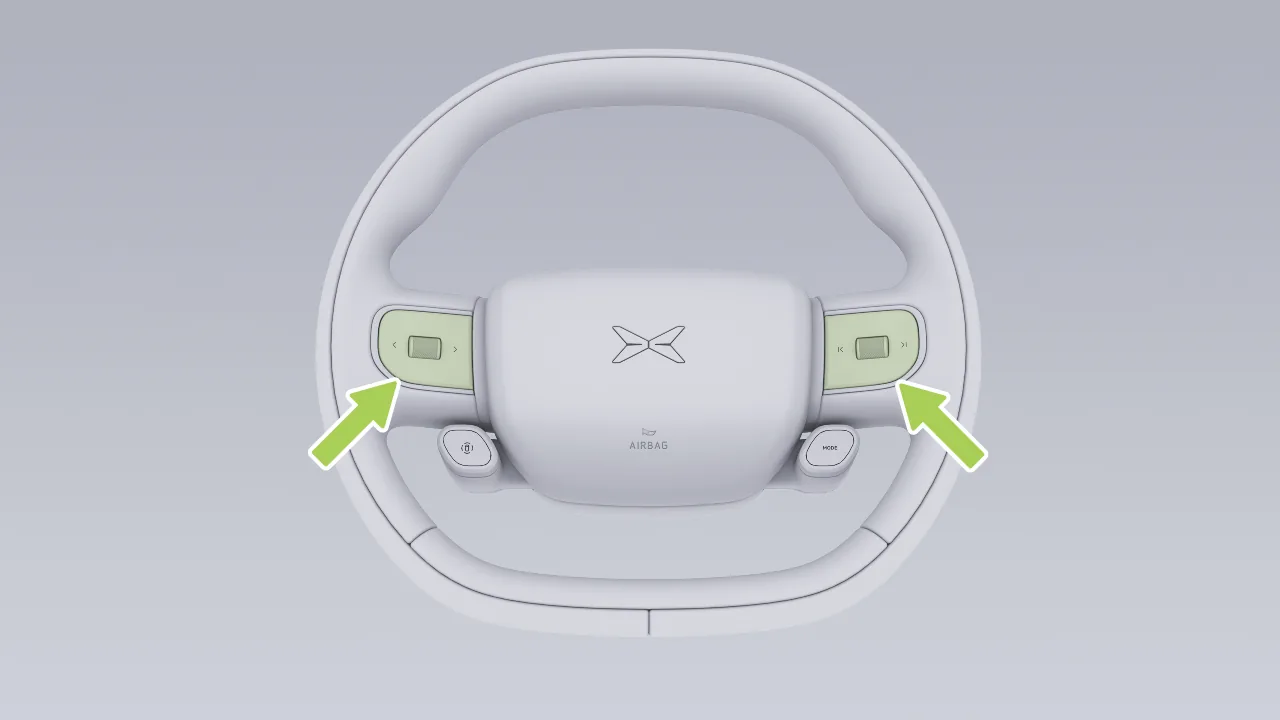
After opening the Side Mirrors adjustment interface on the central control screen, use the scroll wheels on both sides of the steering wheel and the left and right buttons to adjust the angle of the Side Mirrors.
Warning Do not adjust the exterior mirrors while the vehicle is in motion to prevent accidents.
Do not manually press the exterior mirrors to adjust the tilt angle.
Do not make private modifications to the exterior mirrors.
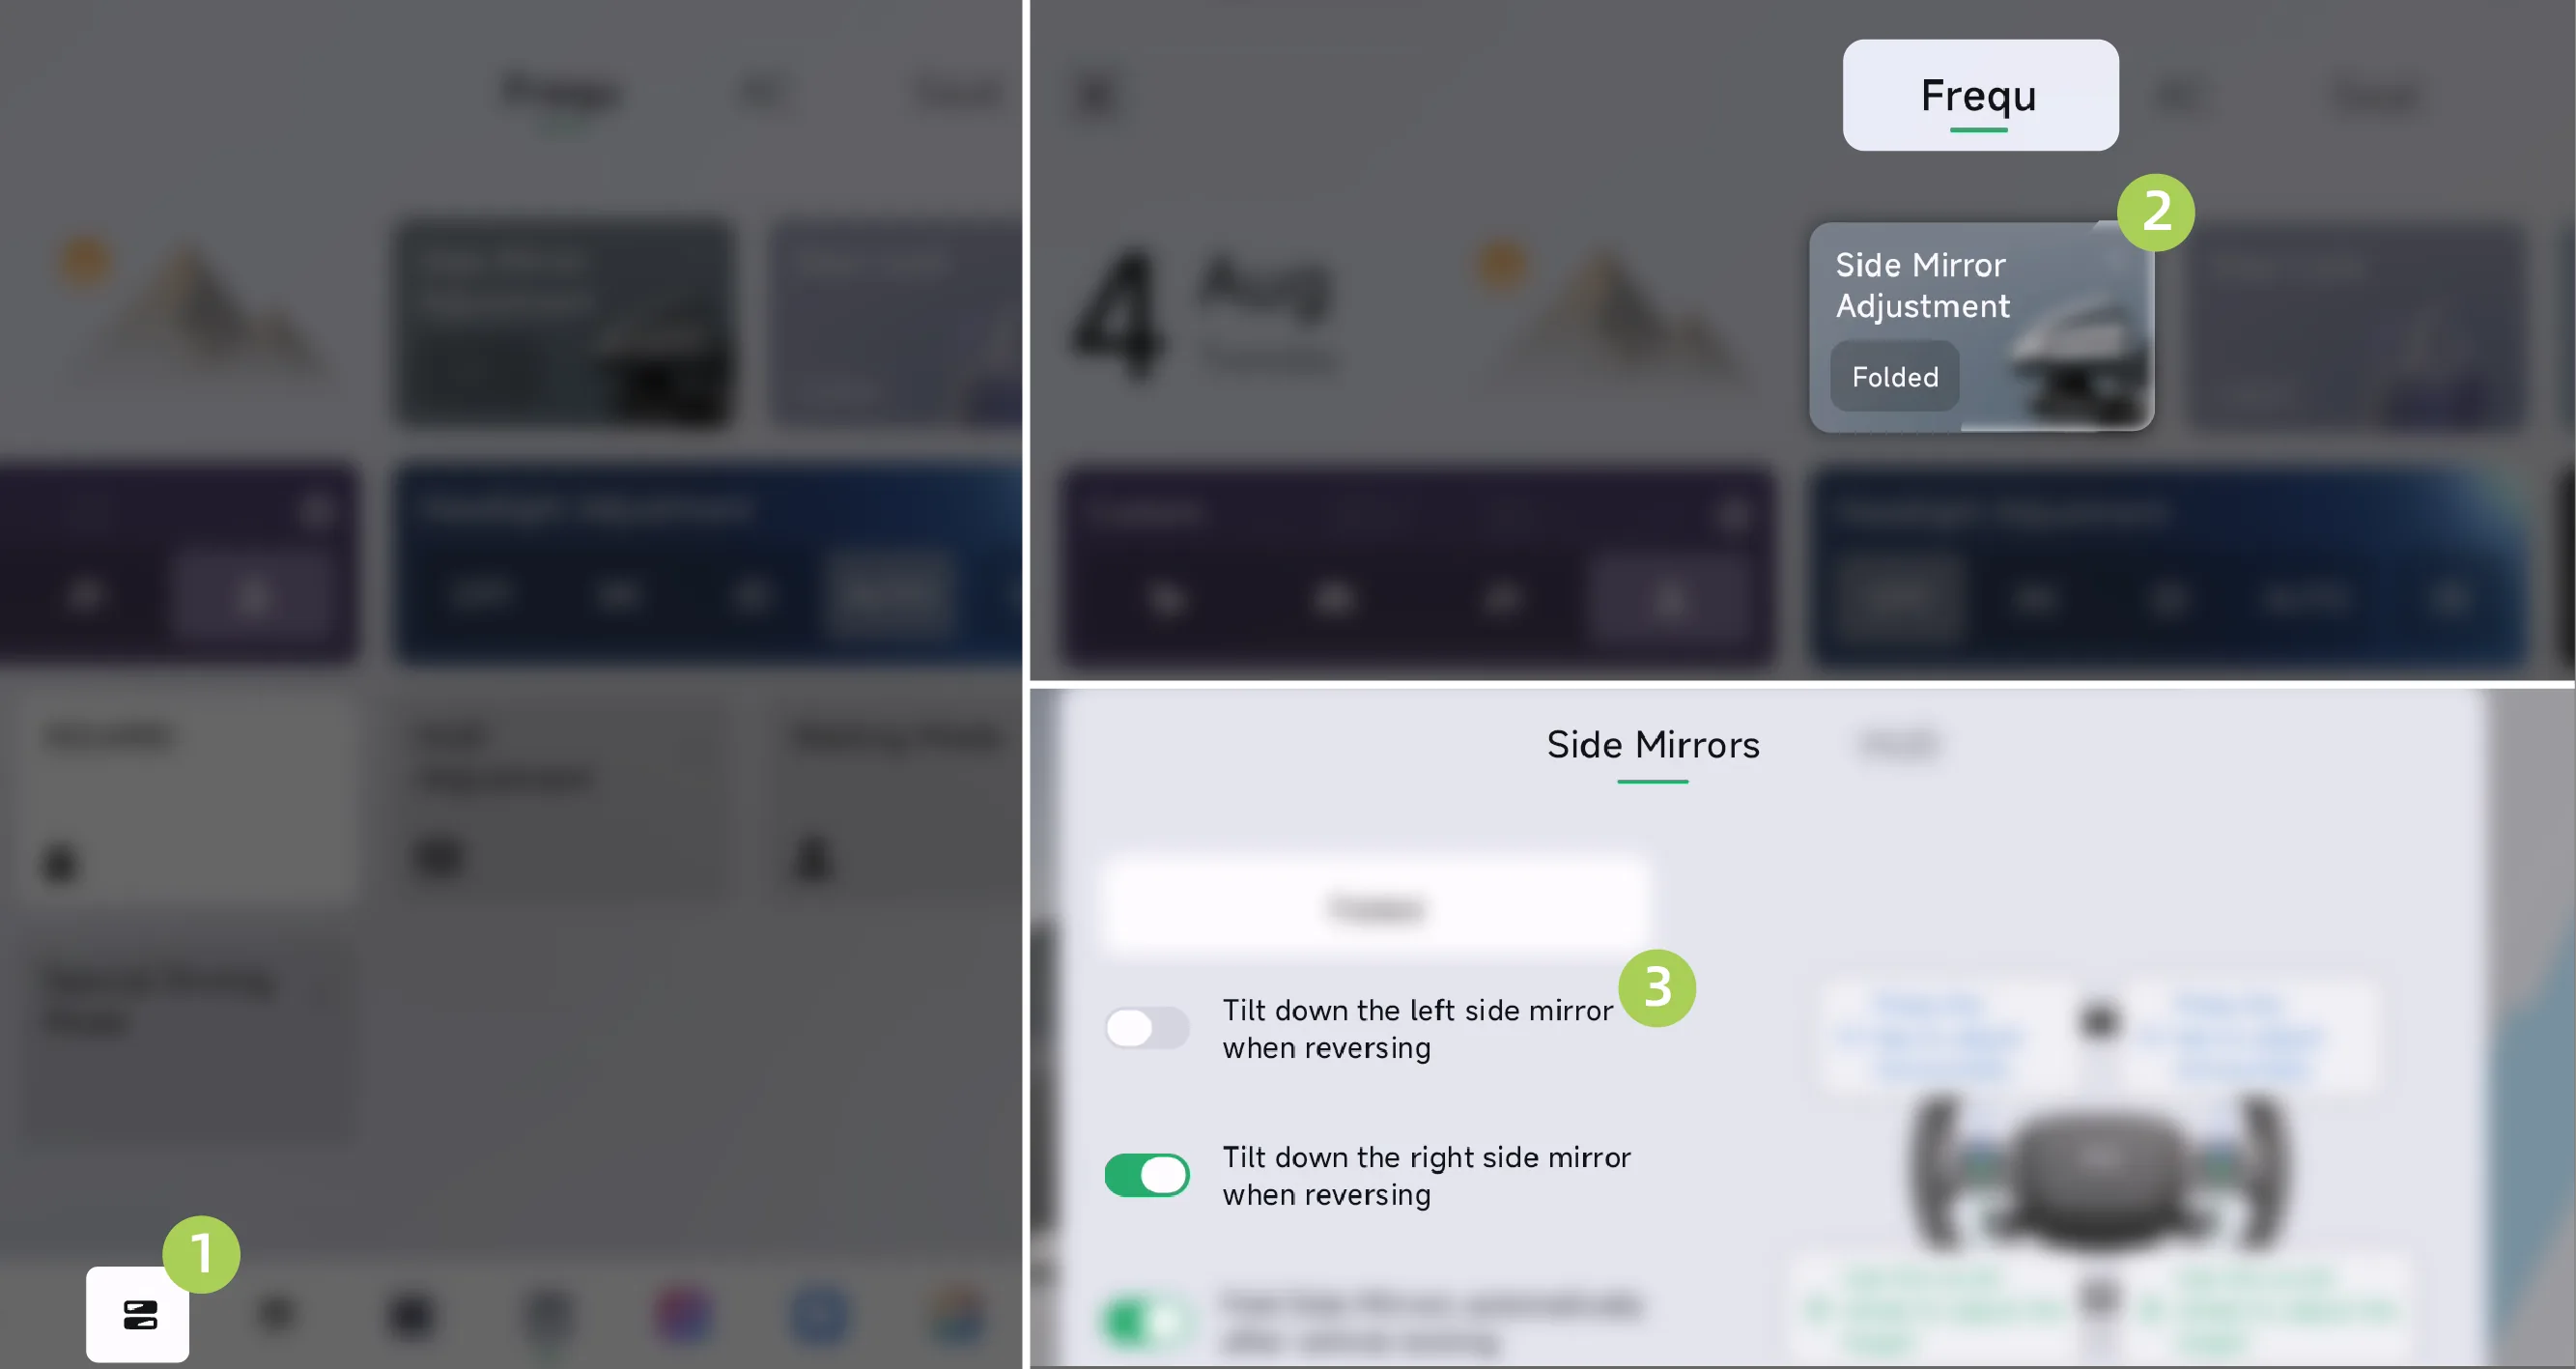
Tap on the center control screen. “ ”Enter the Control Center screen and tap Side Mirror AjustmentTap the card to bring up the Side Mirrors adjustment interface, where you can enable/disable the automatic tilt-down function of the rearview mirrors when reversing.
After this function is enabled, when the vehicle is in R gear, the Side Mirrors automatically tilt downward to a certain angle to assist with reversing.
Tips You can also use voice commands (for example, say "Turn on Mirror Tilt in Reverse" or "Turn off Mirror Tilt in Reverse") to enable or disable the Automatic Mirror Tilt in Reverse function.
The downward tilt angle of the Side Mirrors supports manual setting. The specific operation method is as follows:
Enable the automatic reverse rearview mirror tilt-down function on the central control screen.
Depress the brake pedal and shift the vehicle into R gear.
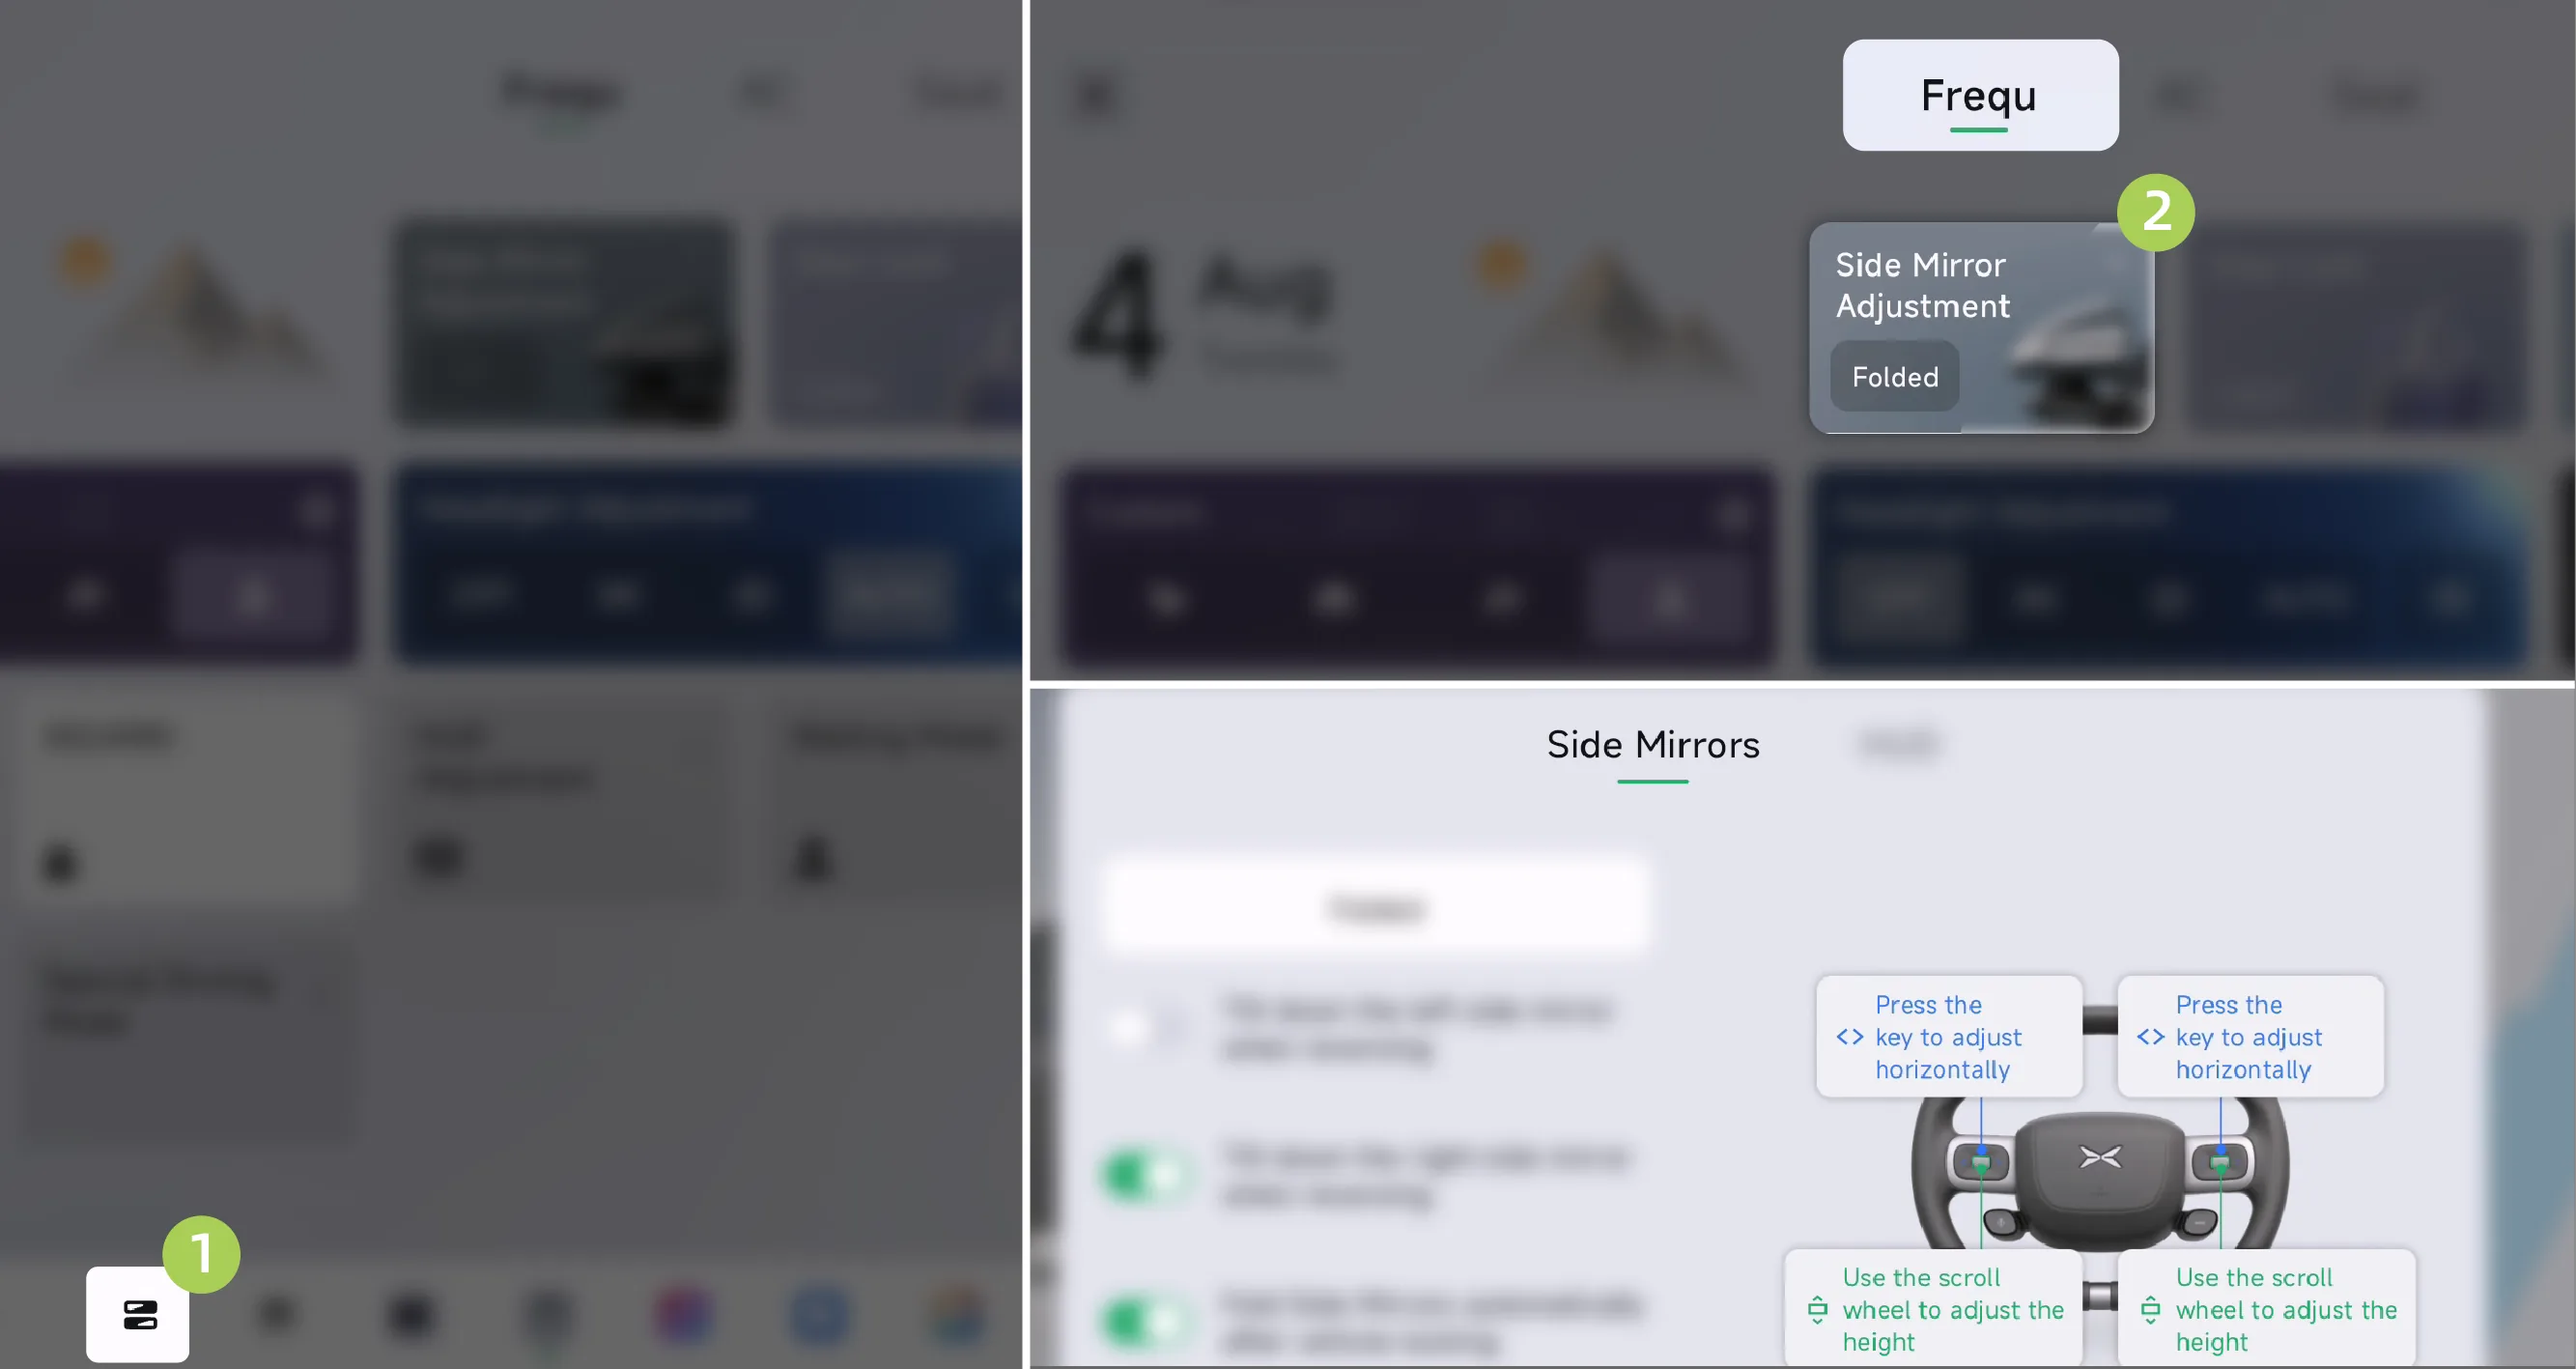
After the exterior mirrors automatically tilt downward, tap on the central control screen. “ ”Enter the Control Center screen and tap Side Mirror AjustmentTap the card to open the Side Mirrors adjustment screen.
Adjust the mirror angle using the steering wheel scroll wheel and the left and right buttons.
After adjustment is completed, shift the vehicle out of R gear to complete the setting.
Warning Keep the brake pedal fully depressed during adjustment to avoid the danger of the vehicle rolling backward.
You can unfold/fold the Side Mirrors in either of the following ways:
Use voice commands to unfold/fold the Side Mirrors, for example, say keywords such as “unfold the mirrors” and “fold the mirrors”.
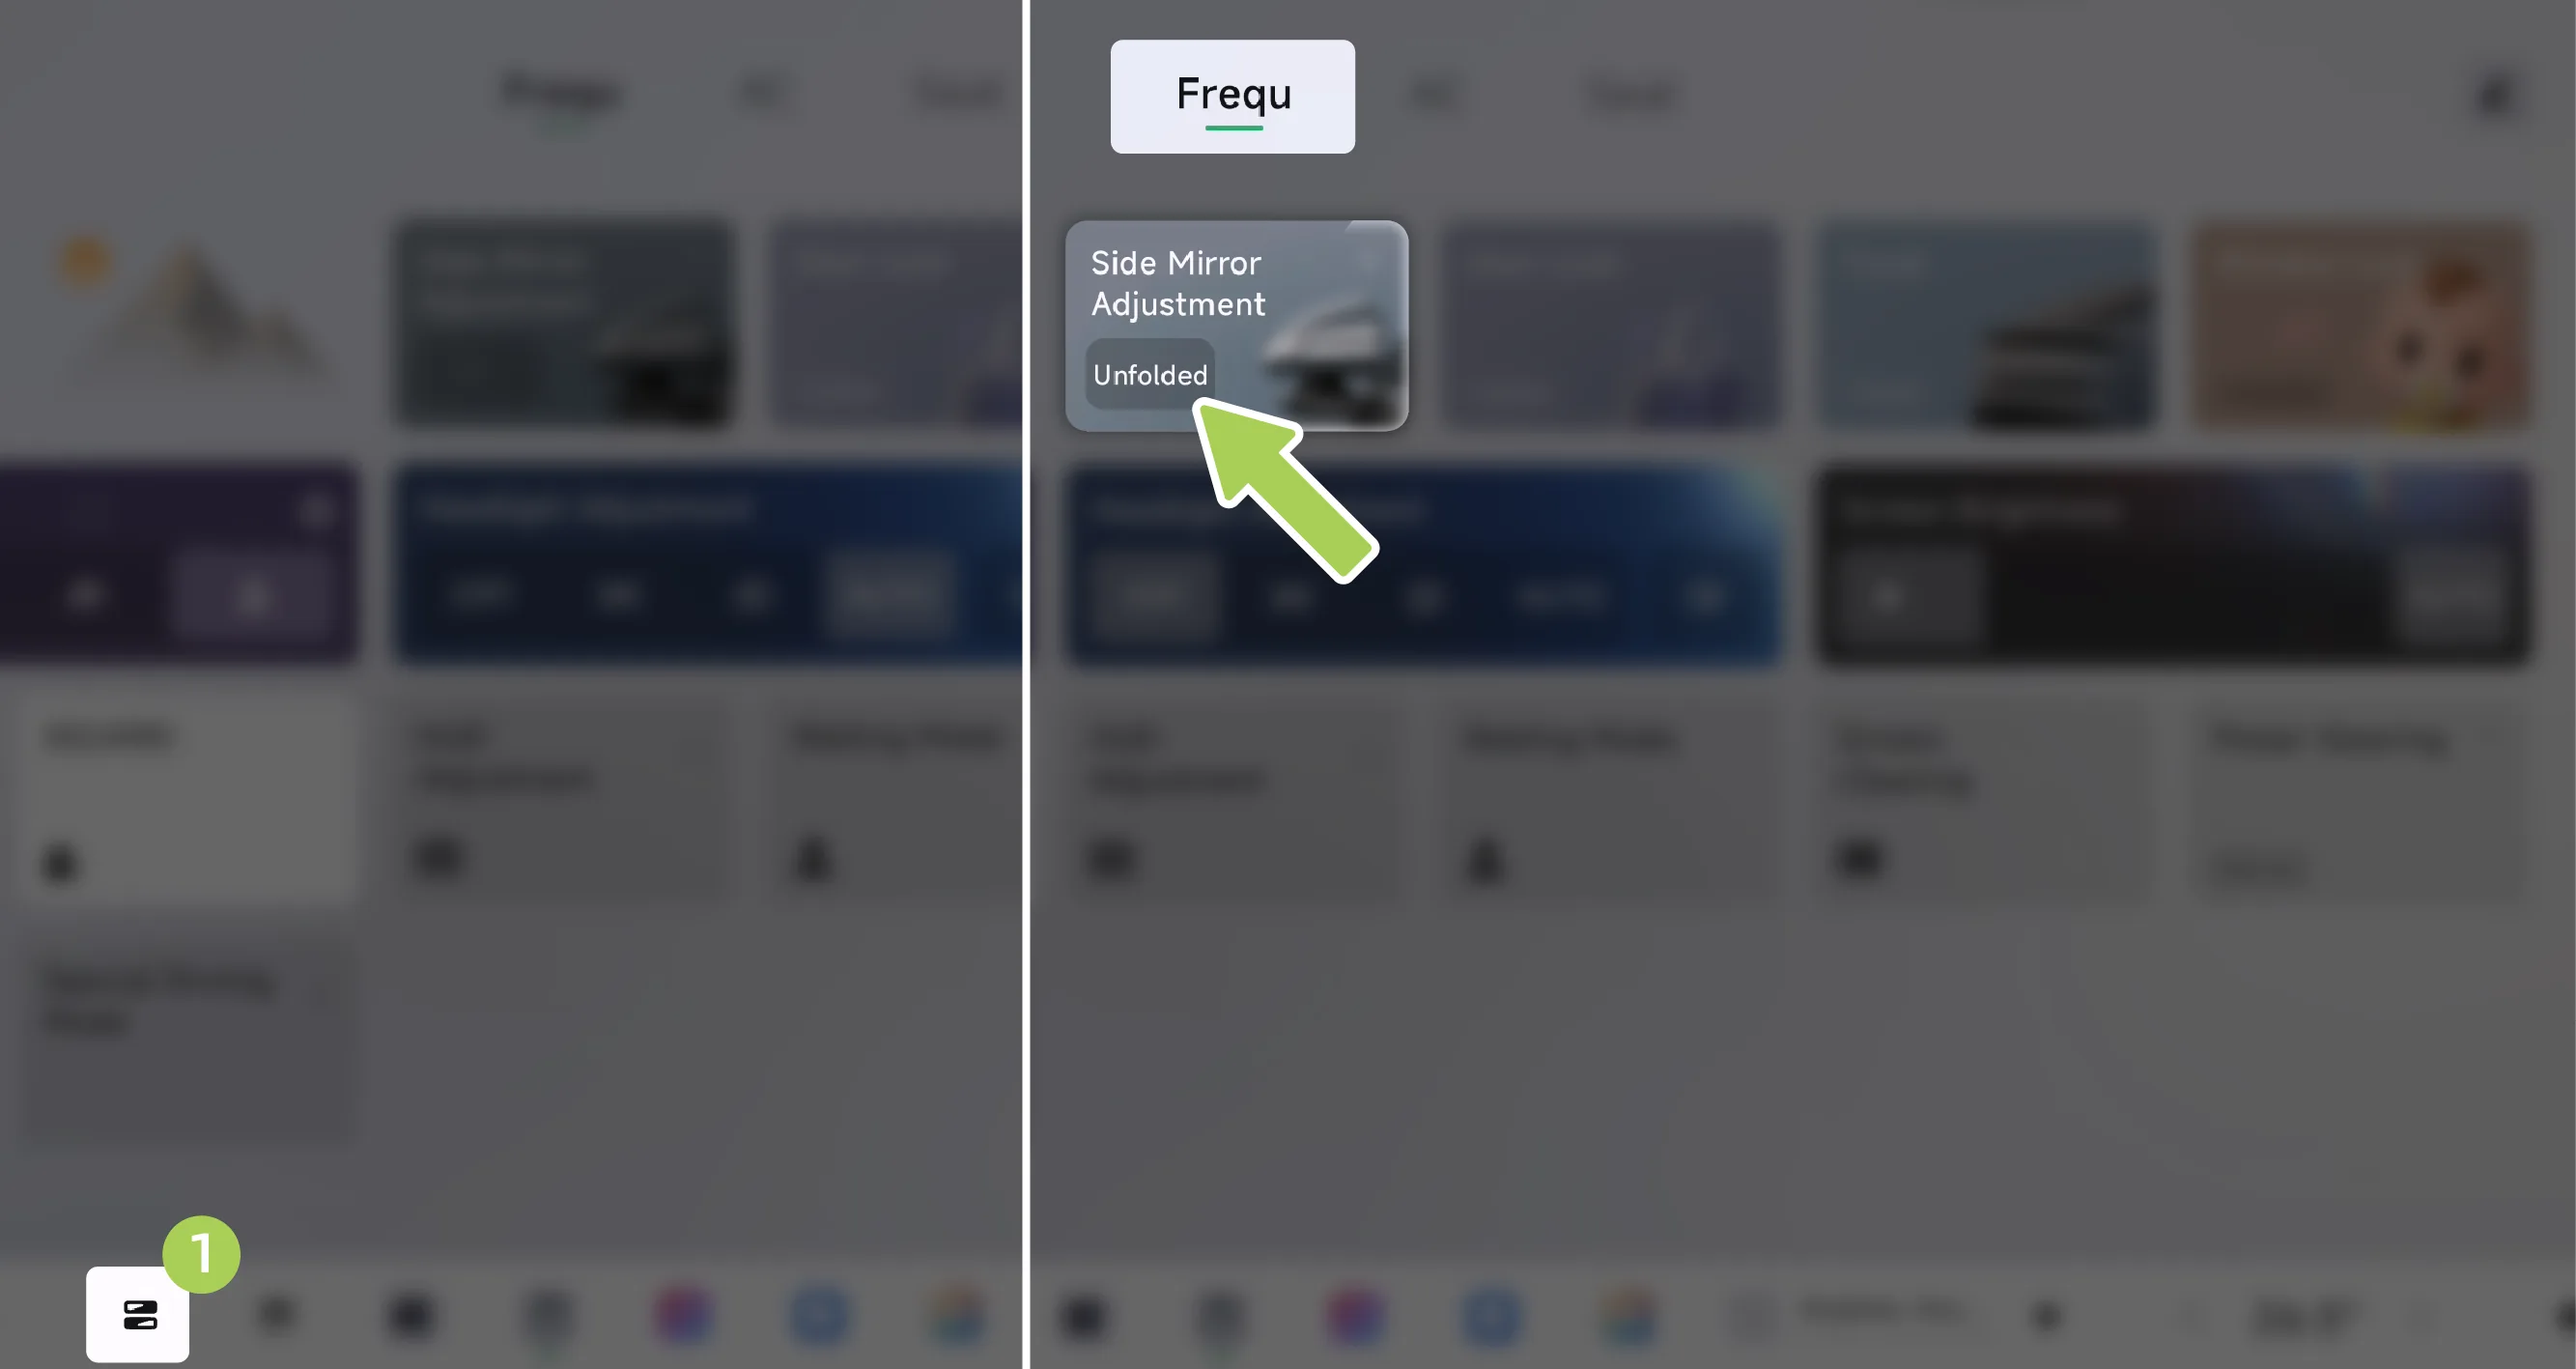
Tap on the center display. Enter the control center screen and tap within the Side Mirror Ajustment card. Folded/UnfoldedButton to unfold/fold the Side Mirrors.
Due to accidental impact or manual pushing, the Side Mirrors may be in the forward-folded or rearward-folded position. Restore them to the normal position according to the following method.
Tap on the center display. Enter the Control Center screen, and tap within the Side Mirror Ajustment card. Folded/UnfoldedPress the button, wait for the motor to automatically reset and complete folding, then press the button again to unfold.
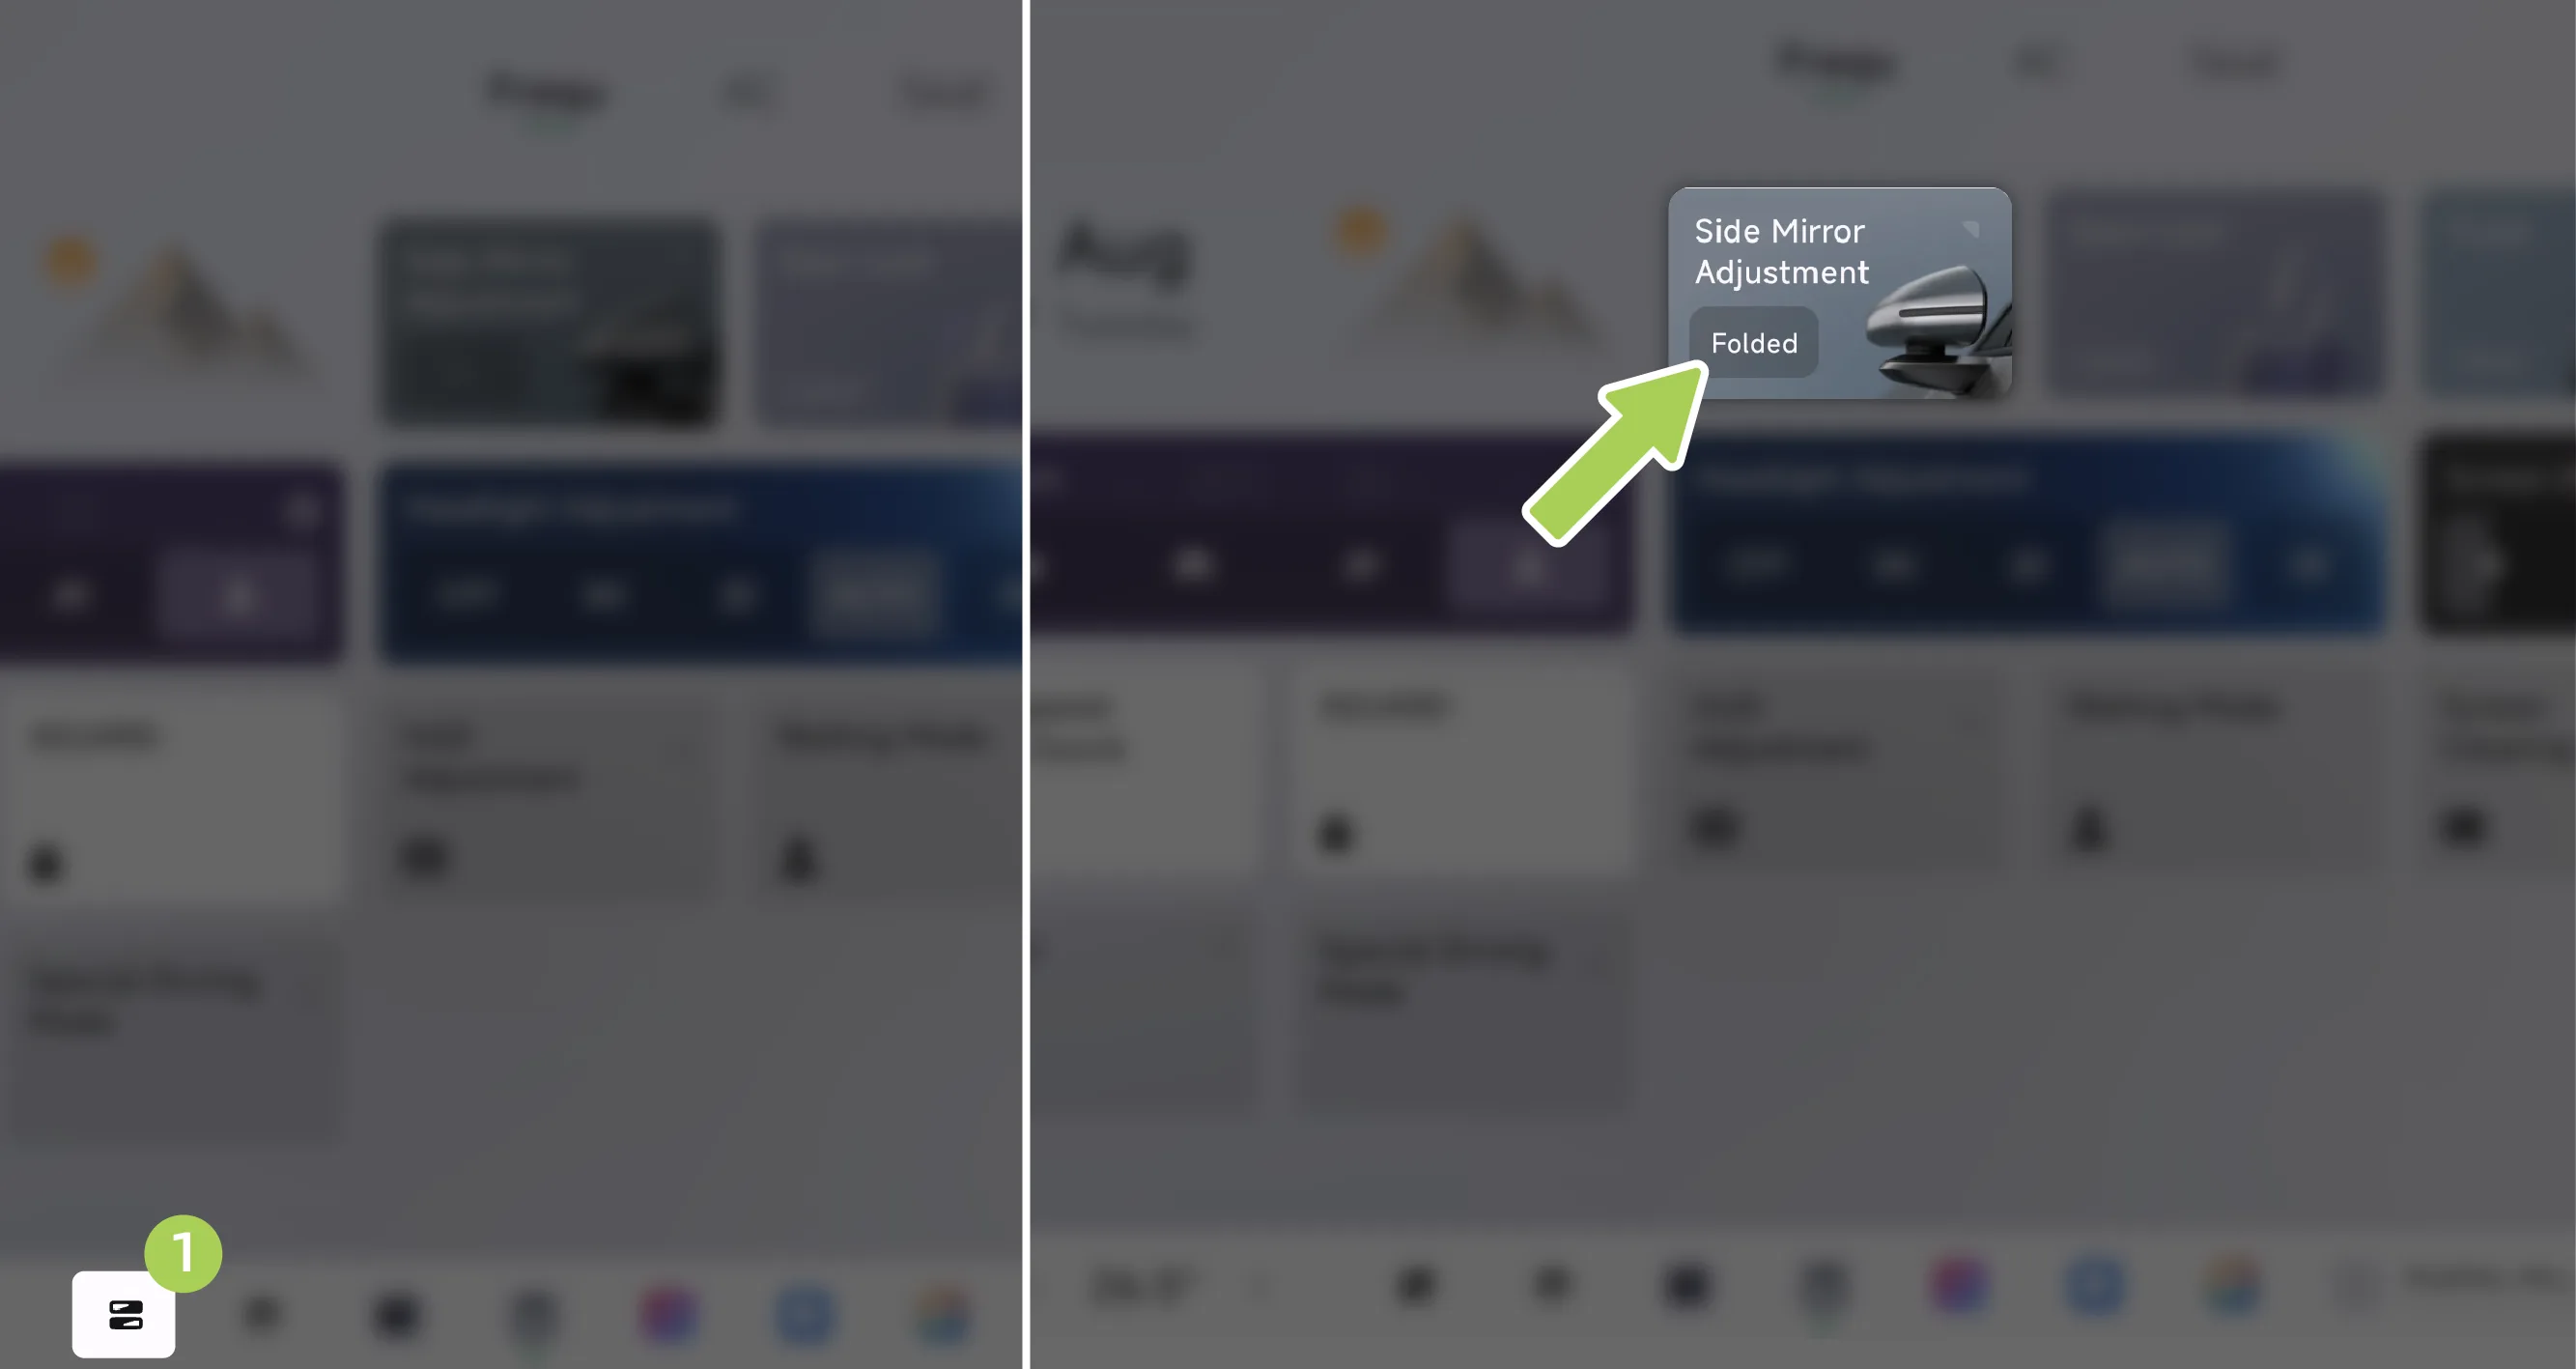
Manually push the Side Mirrors to the normal position.
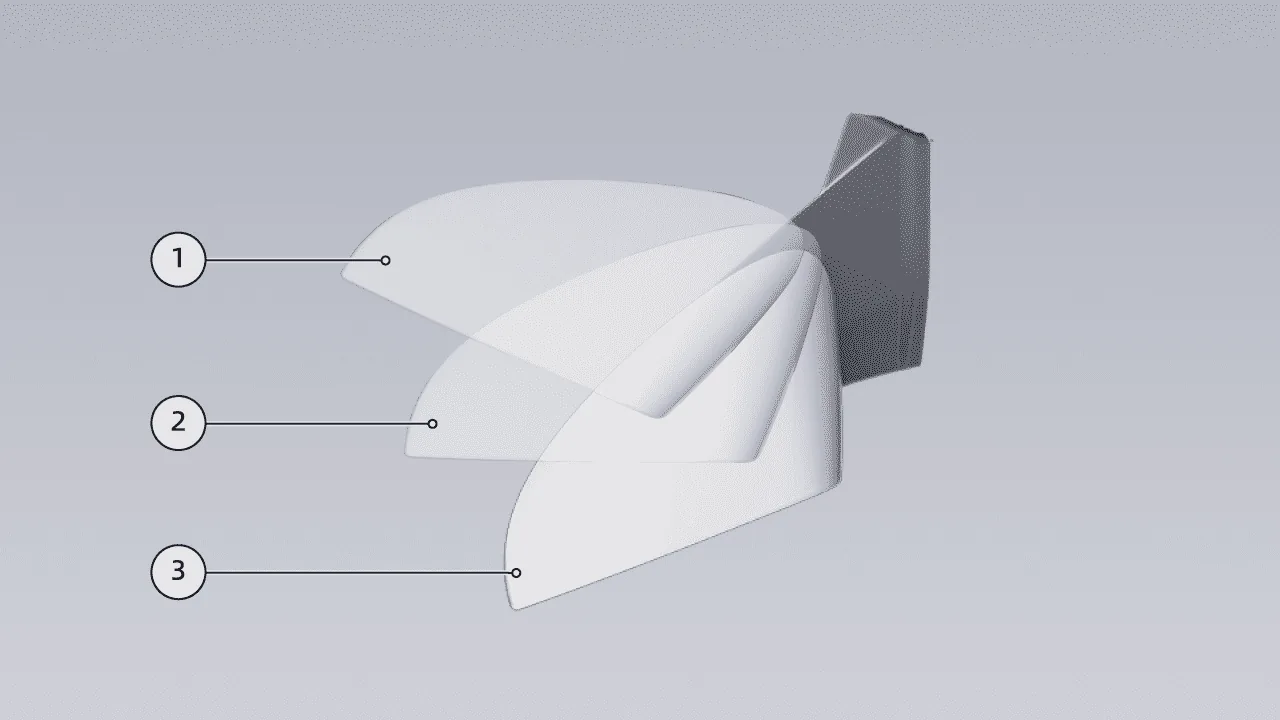
Forward Folded State
Standard Status
Rear Folded State
Tips Before manual reset, check whether there are foreign objects such as ice or snow on the folding surface. Remove the foreign objects before resetting; otherwise, the folding structure of the Side Mirrors may be easily damaged.
Using the Side Mirrors heating function, fog or water stains on the Side Mirrors glass can be quickly removed, improving rear visibility and enhancing driving safety.
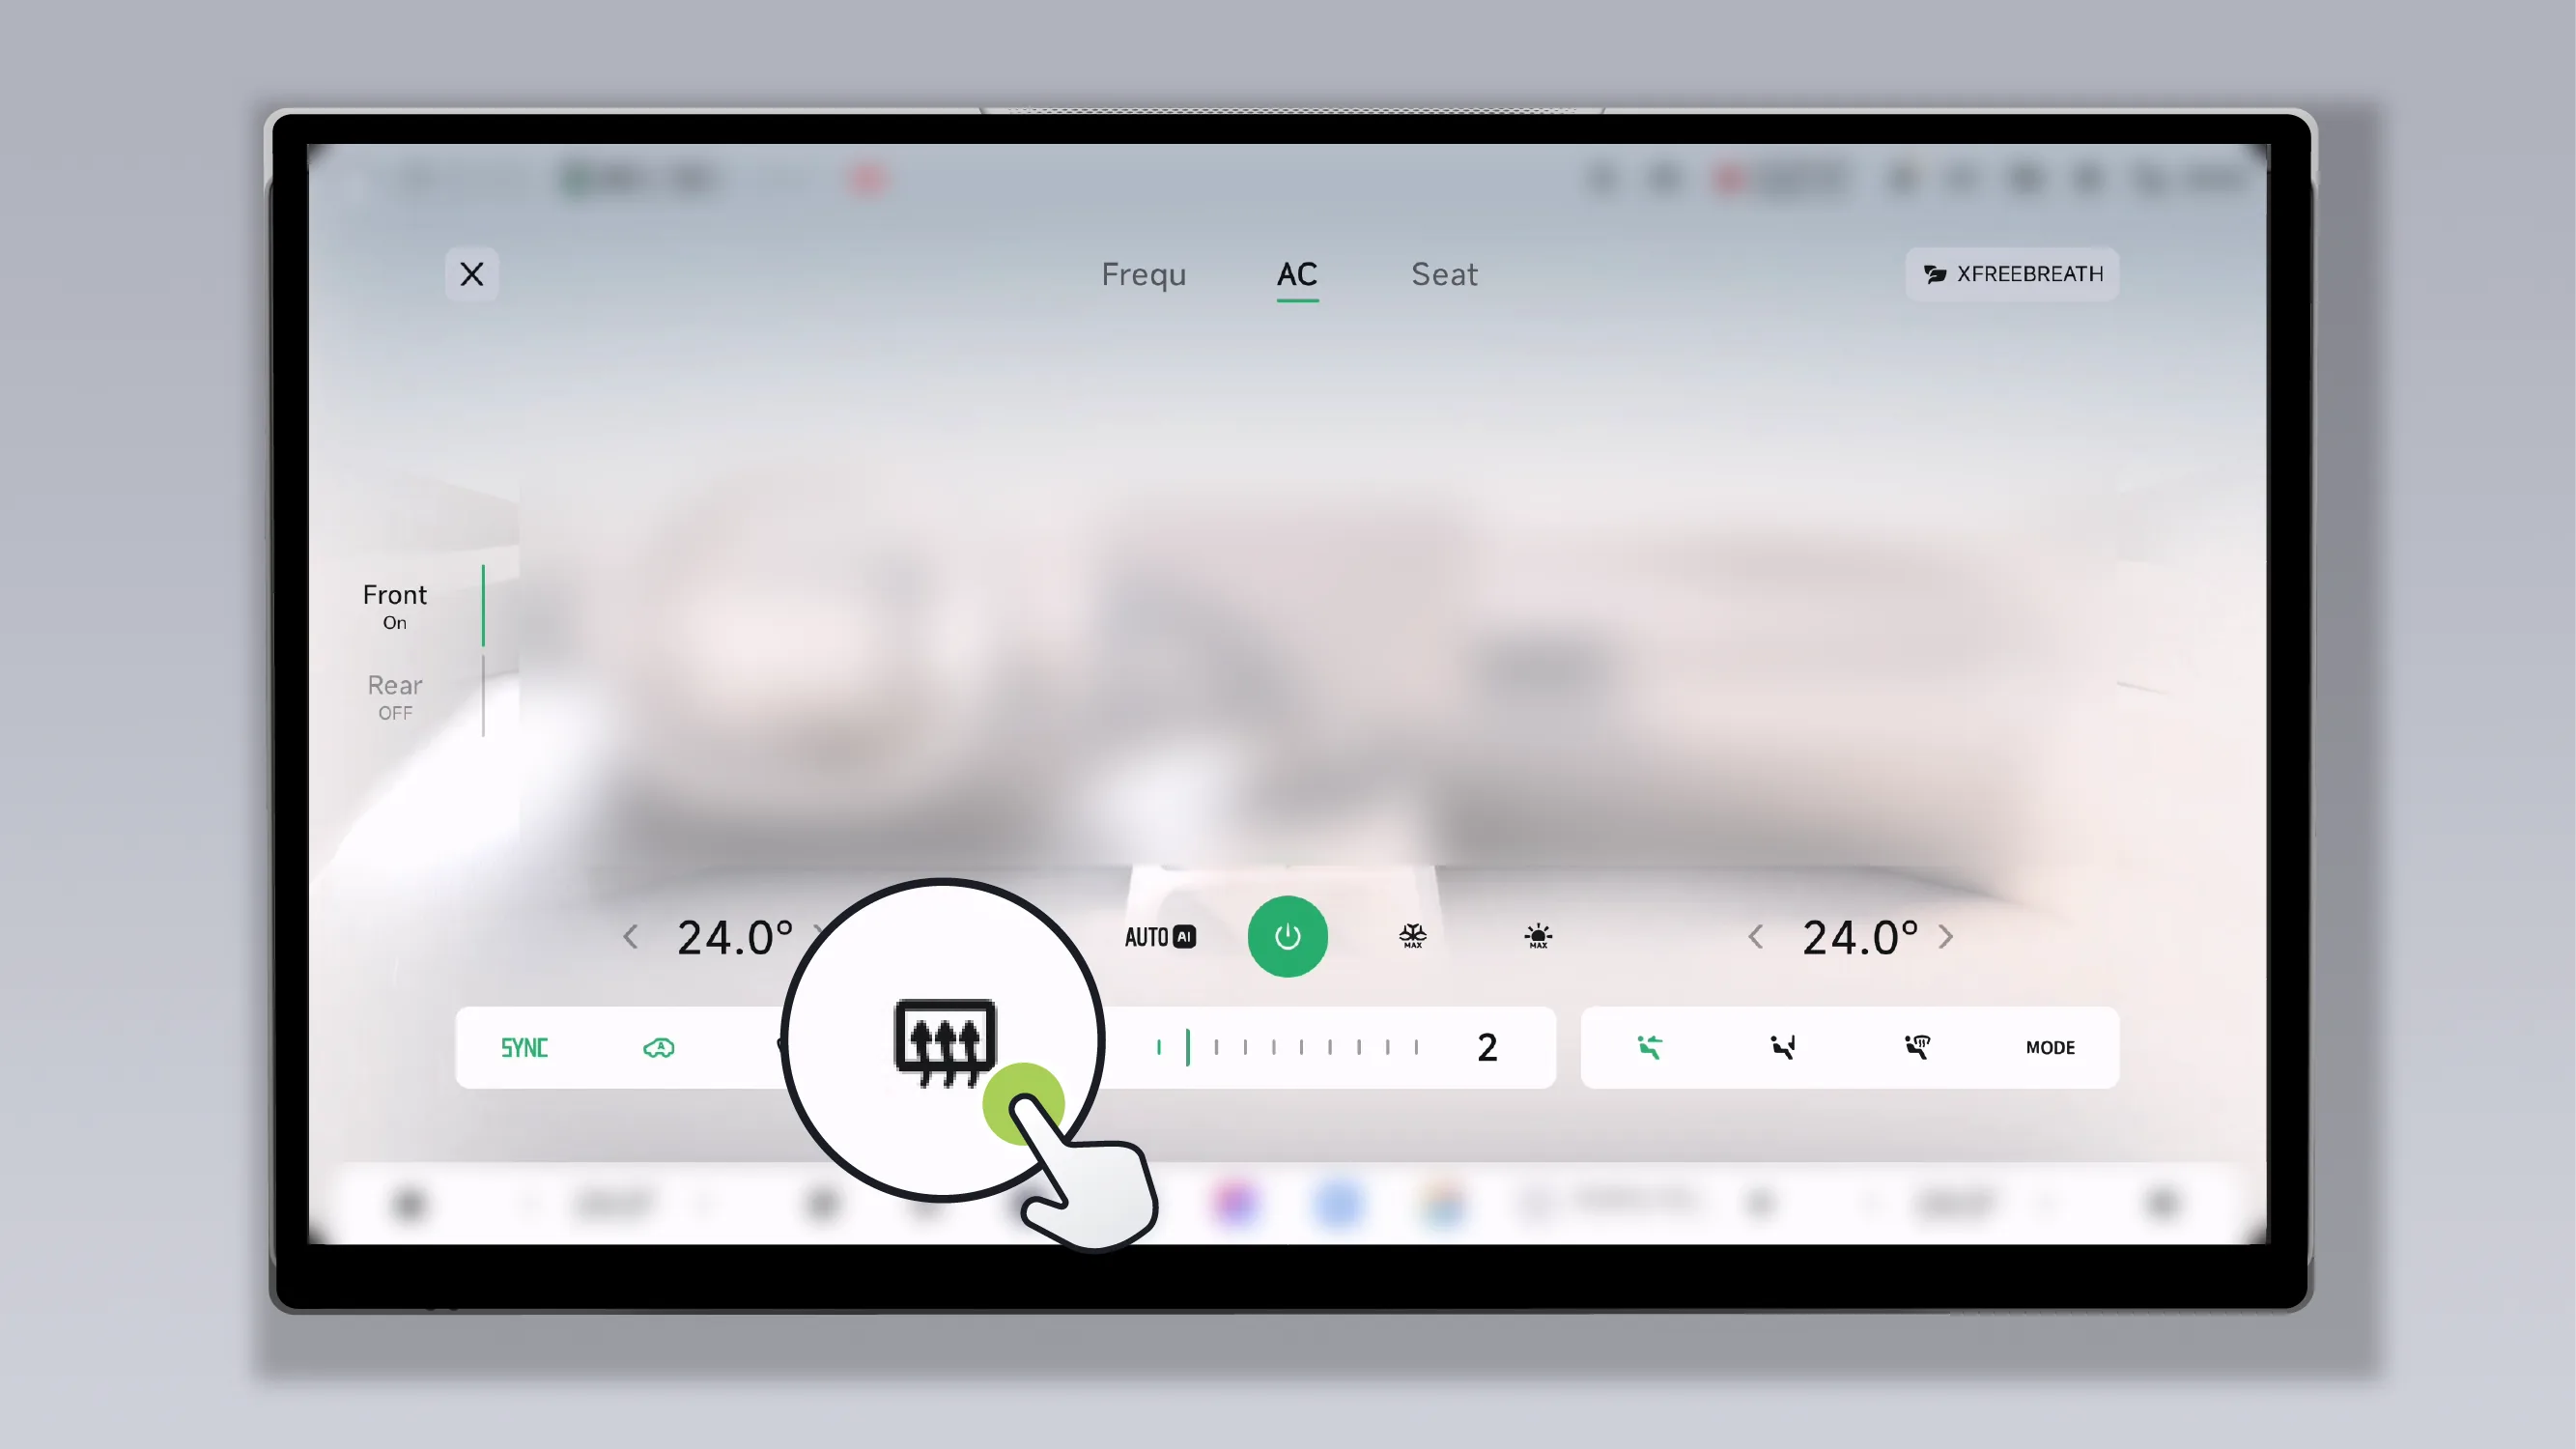
On the Air Conditioner interface, you can turn on the rear defrost and Side Mirrors heating functions with one tap.
Tips You can also use voice commands to turn the rear defrost and side mirror heating functions on or off.
Caution When the Side Mirrors heating function is enabled, do not touch it with your hand to avoid burns.
After adjusting the angle of the Side Mirrors mirror glass, it will be automatically saved to the current vehicle usage habit.
The streaming Rearview Mirror has both the function of an ordinary mirror surface and the function of a display screen. After switching to streaming mode, it captures and displays the image behind the vehicle through the camera at the rear of the vehicle, and can still provide a better field of view in daytime, at night, and in severe weather such as rain, snow, and frost.
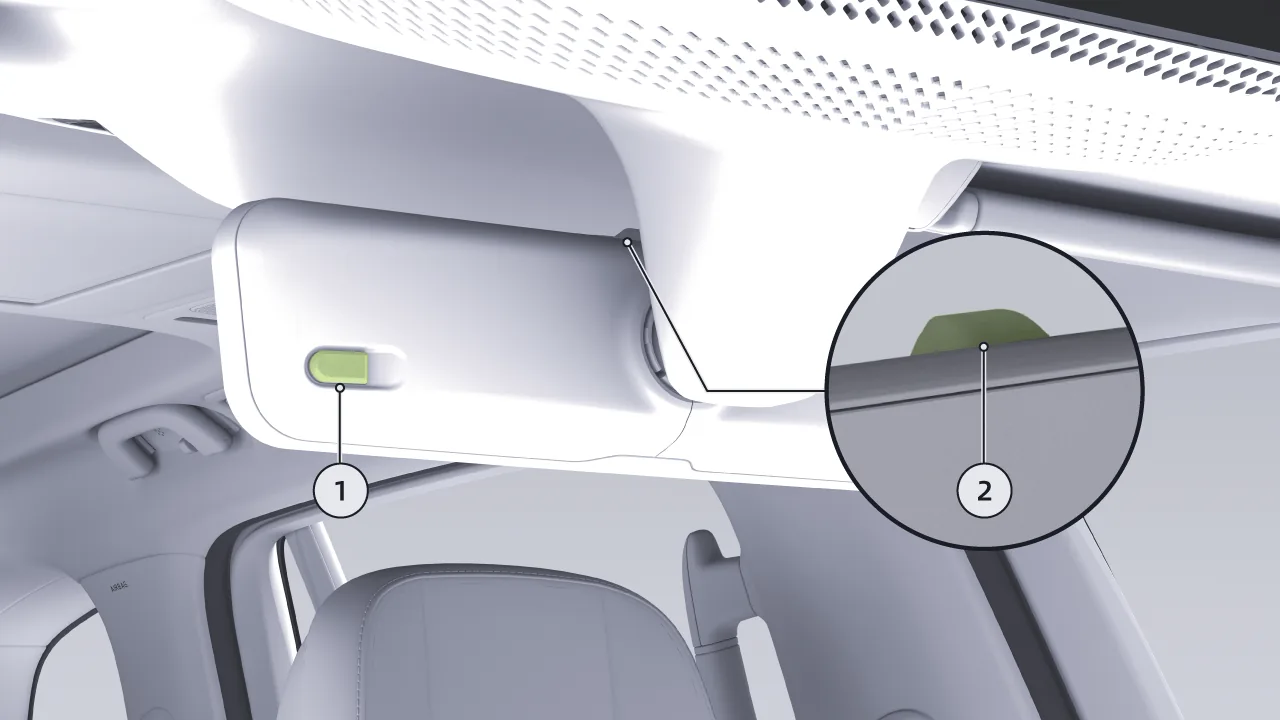
Rear photosensitive element
Streaming Media Rearview Mirror Toggle Switch
Caution To ensure proper brightness adjustment:
Do not obscure or cover the rear photoconductor unit.
Keep the rear photoconductor unit clean.
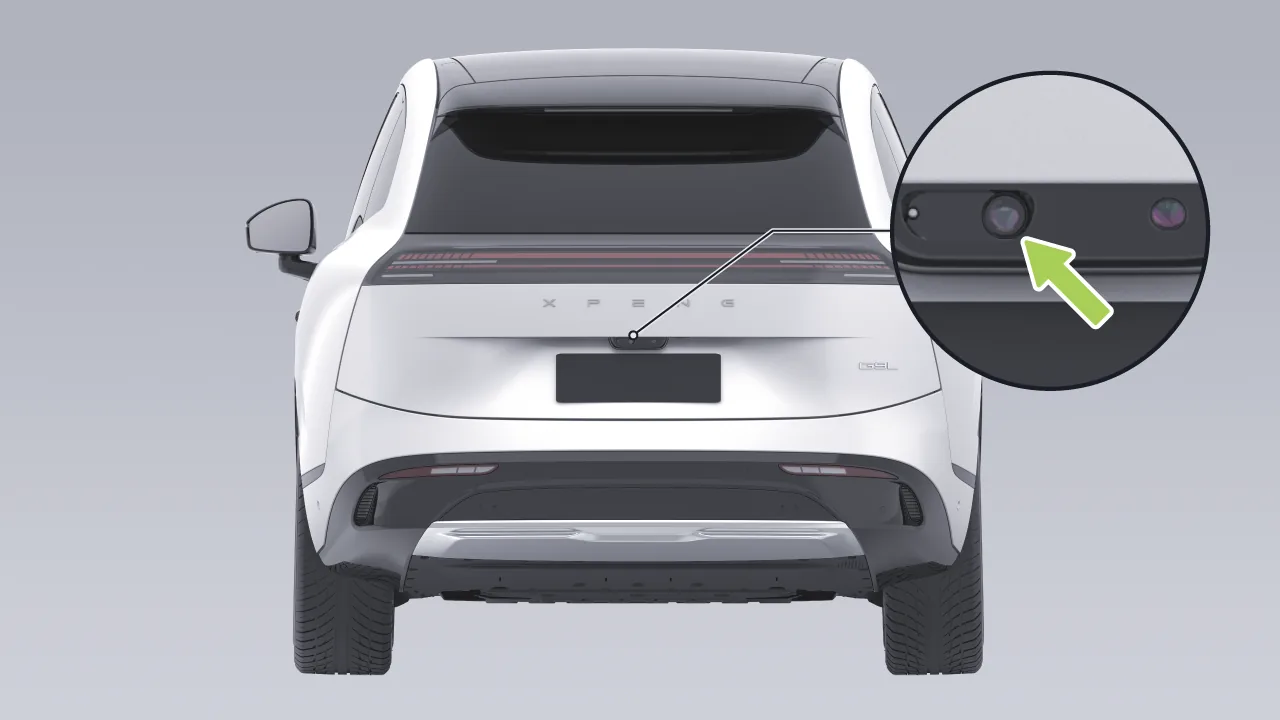
The streaming media Rearview Mirror camera is located above the rear license plate panel. Do not block or cover the camera. Keep the camera clean. If there is dirt, clean it promptly.
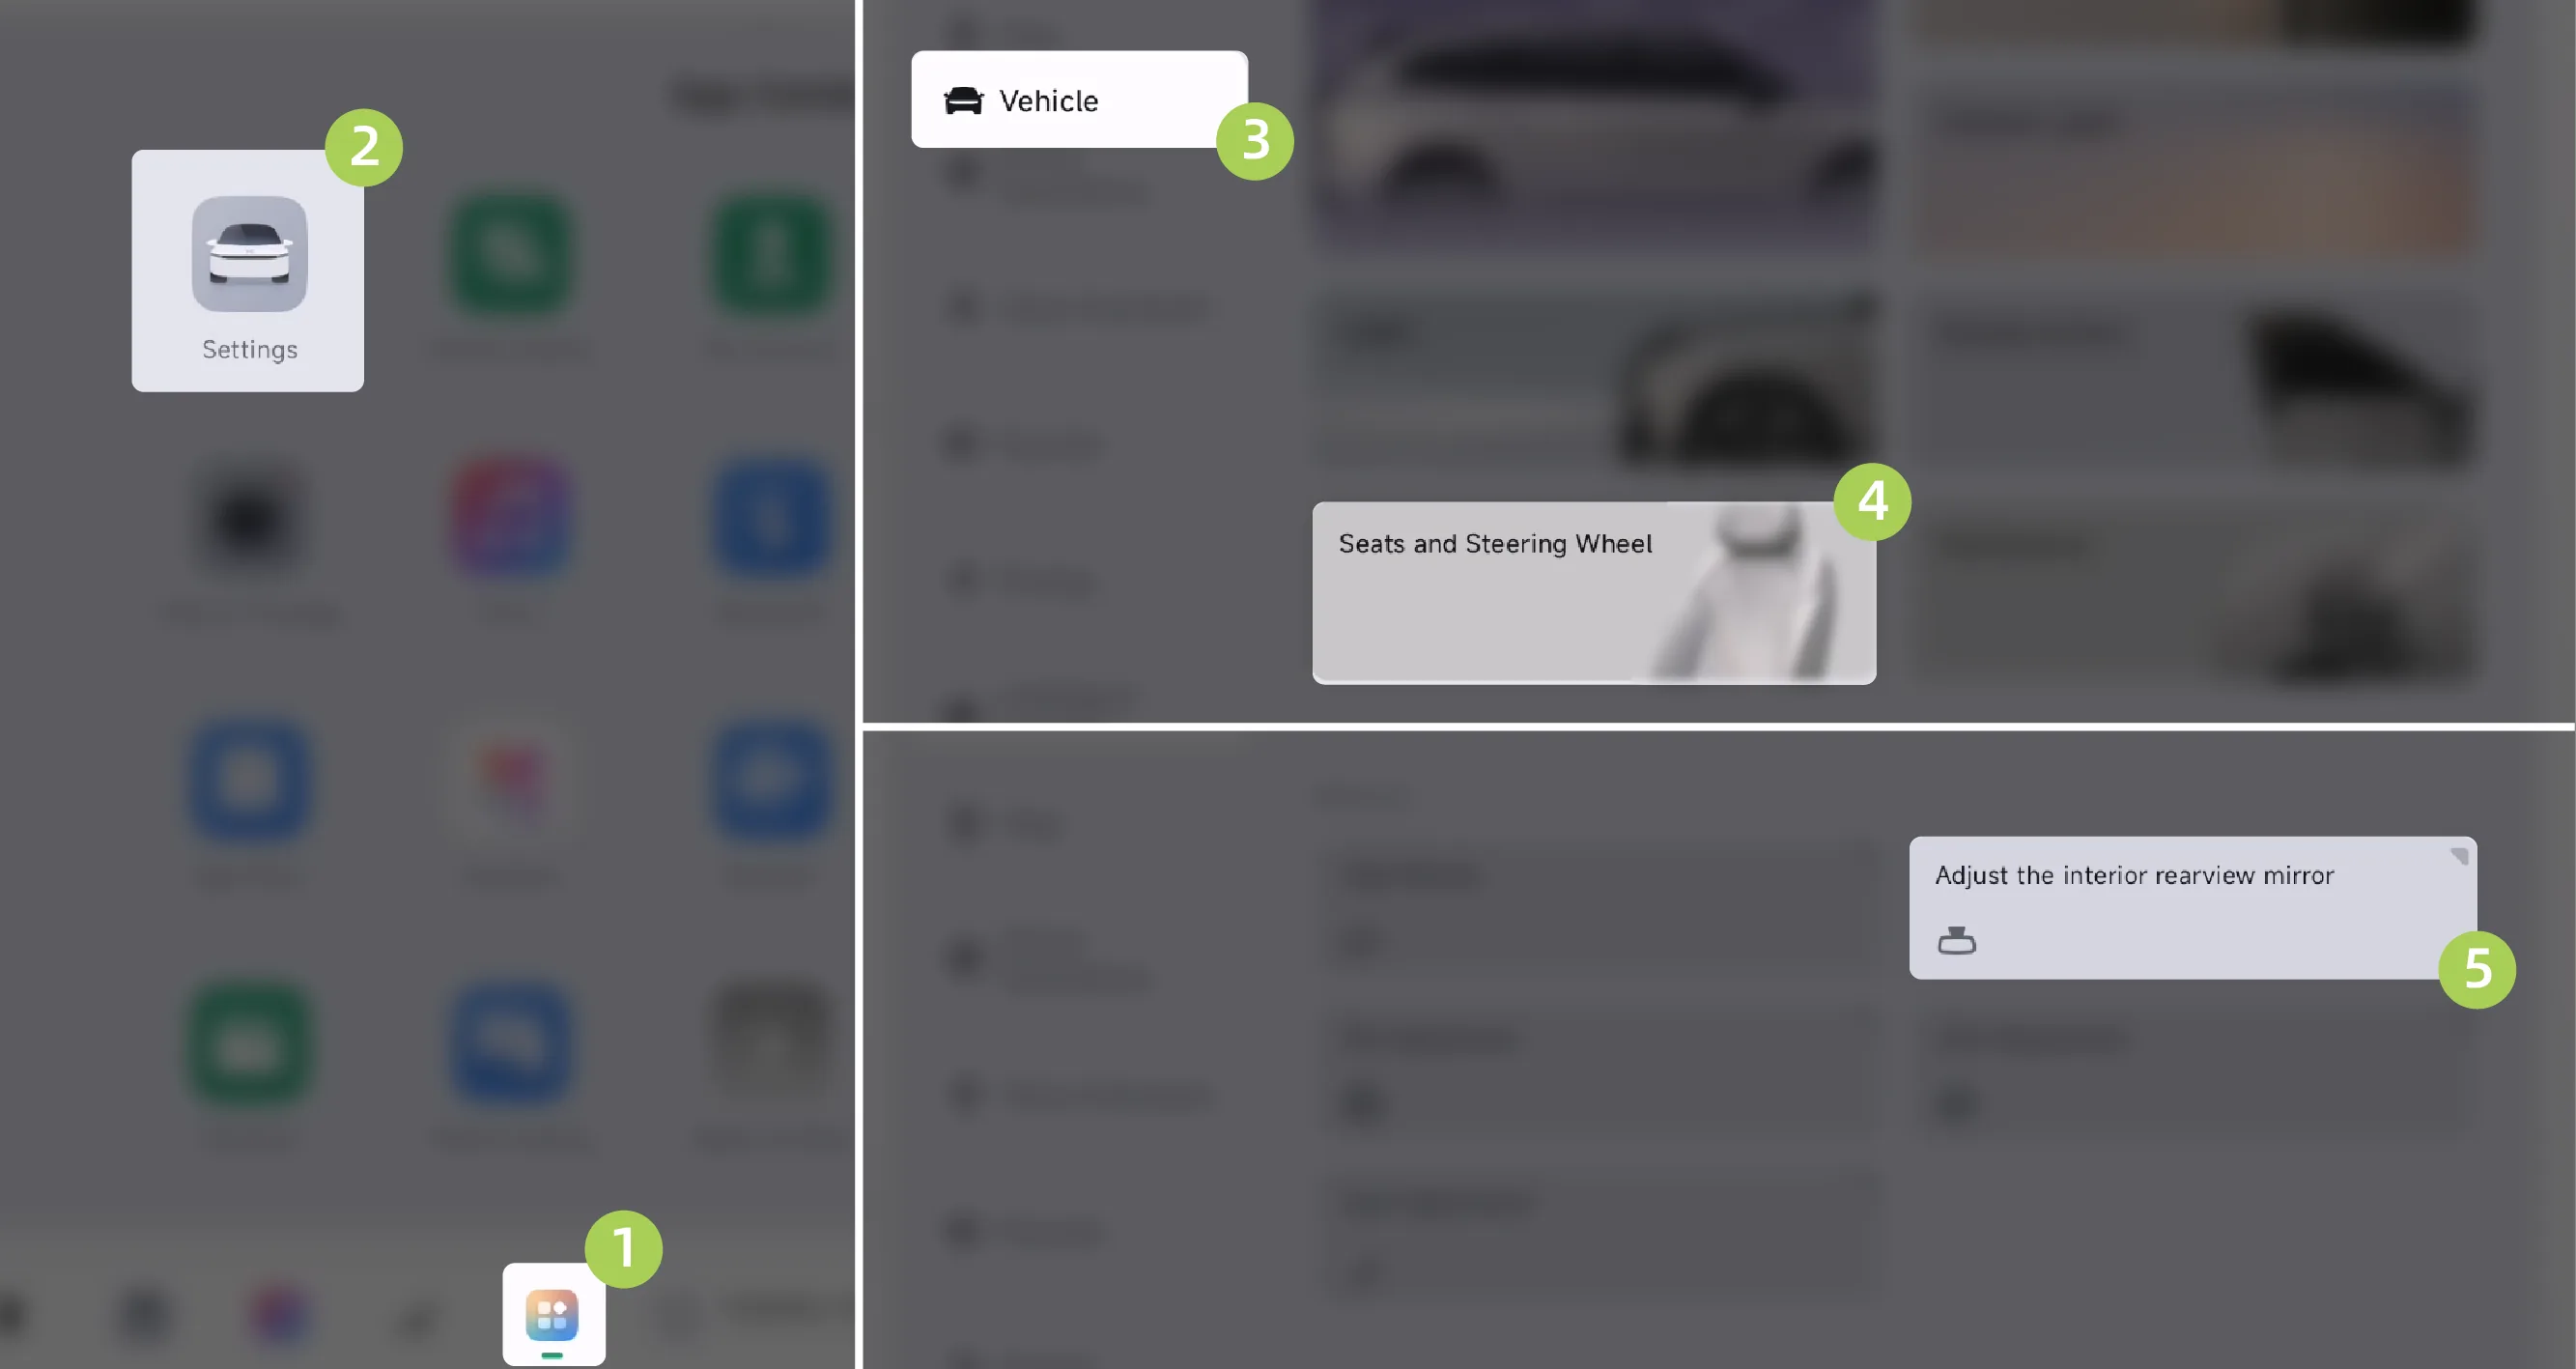
On the central control screen “ →Settings→vehicle→Seats and Steering Wheel”On the interface, you can turn the streaming media display function on or off.
Tips You can also on the central control screen “ →Rearview Mirror”On the interface, you can turn the streaming media display function on or off. (To learn about the custom control center, please refer to the Control Center chapter.)
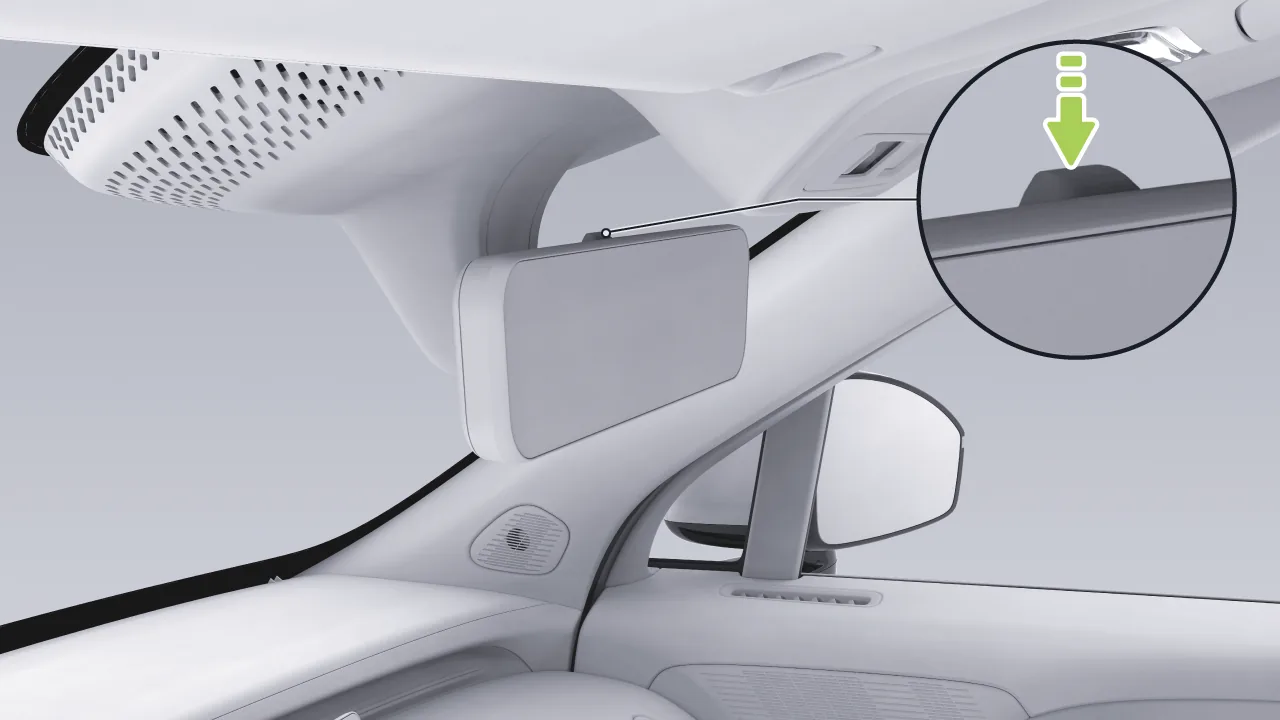
Press the switch to enable the streaming media display function. Press the switch again to switch to normal mirror mode.
Tips You can also use voice commands to turn the streaming media display function on/off.
When the trunk is opened, the streaming media display function will automatically turn off.
When the streaming media display function is turned off, turning on the rear entertainment screen will automatically turn on the streaming media display function.
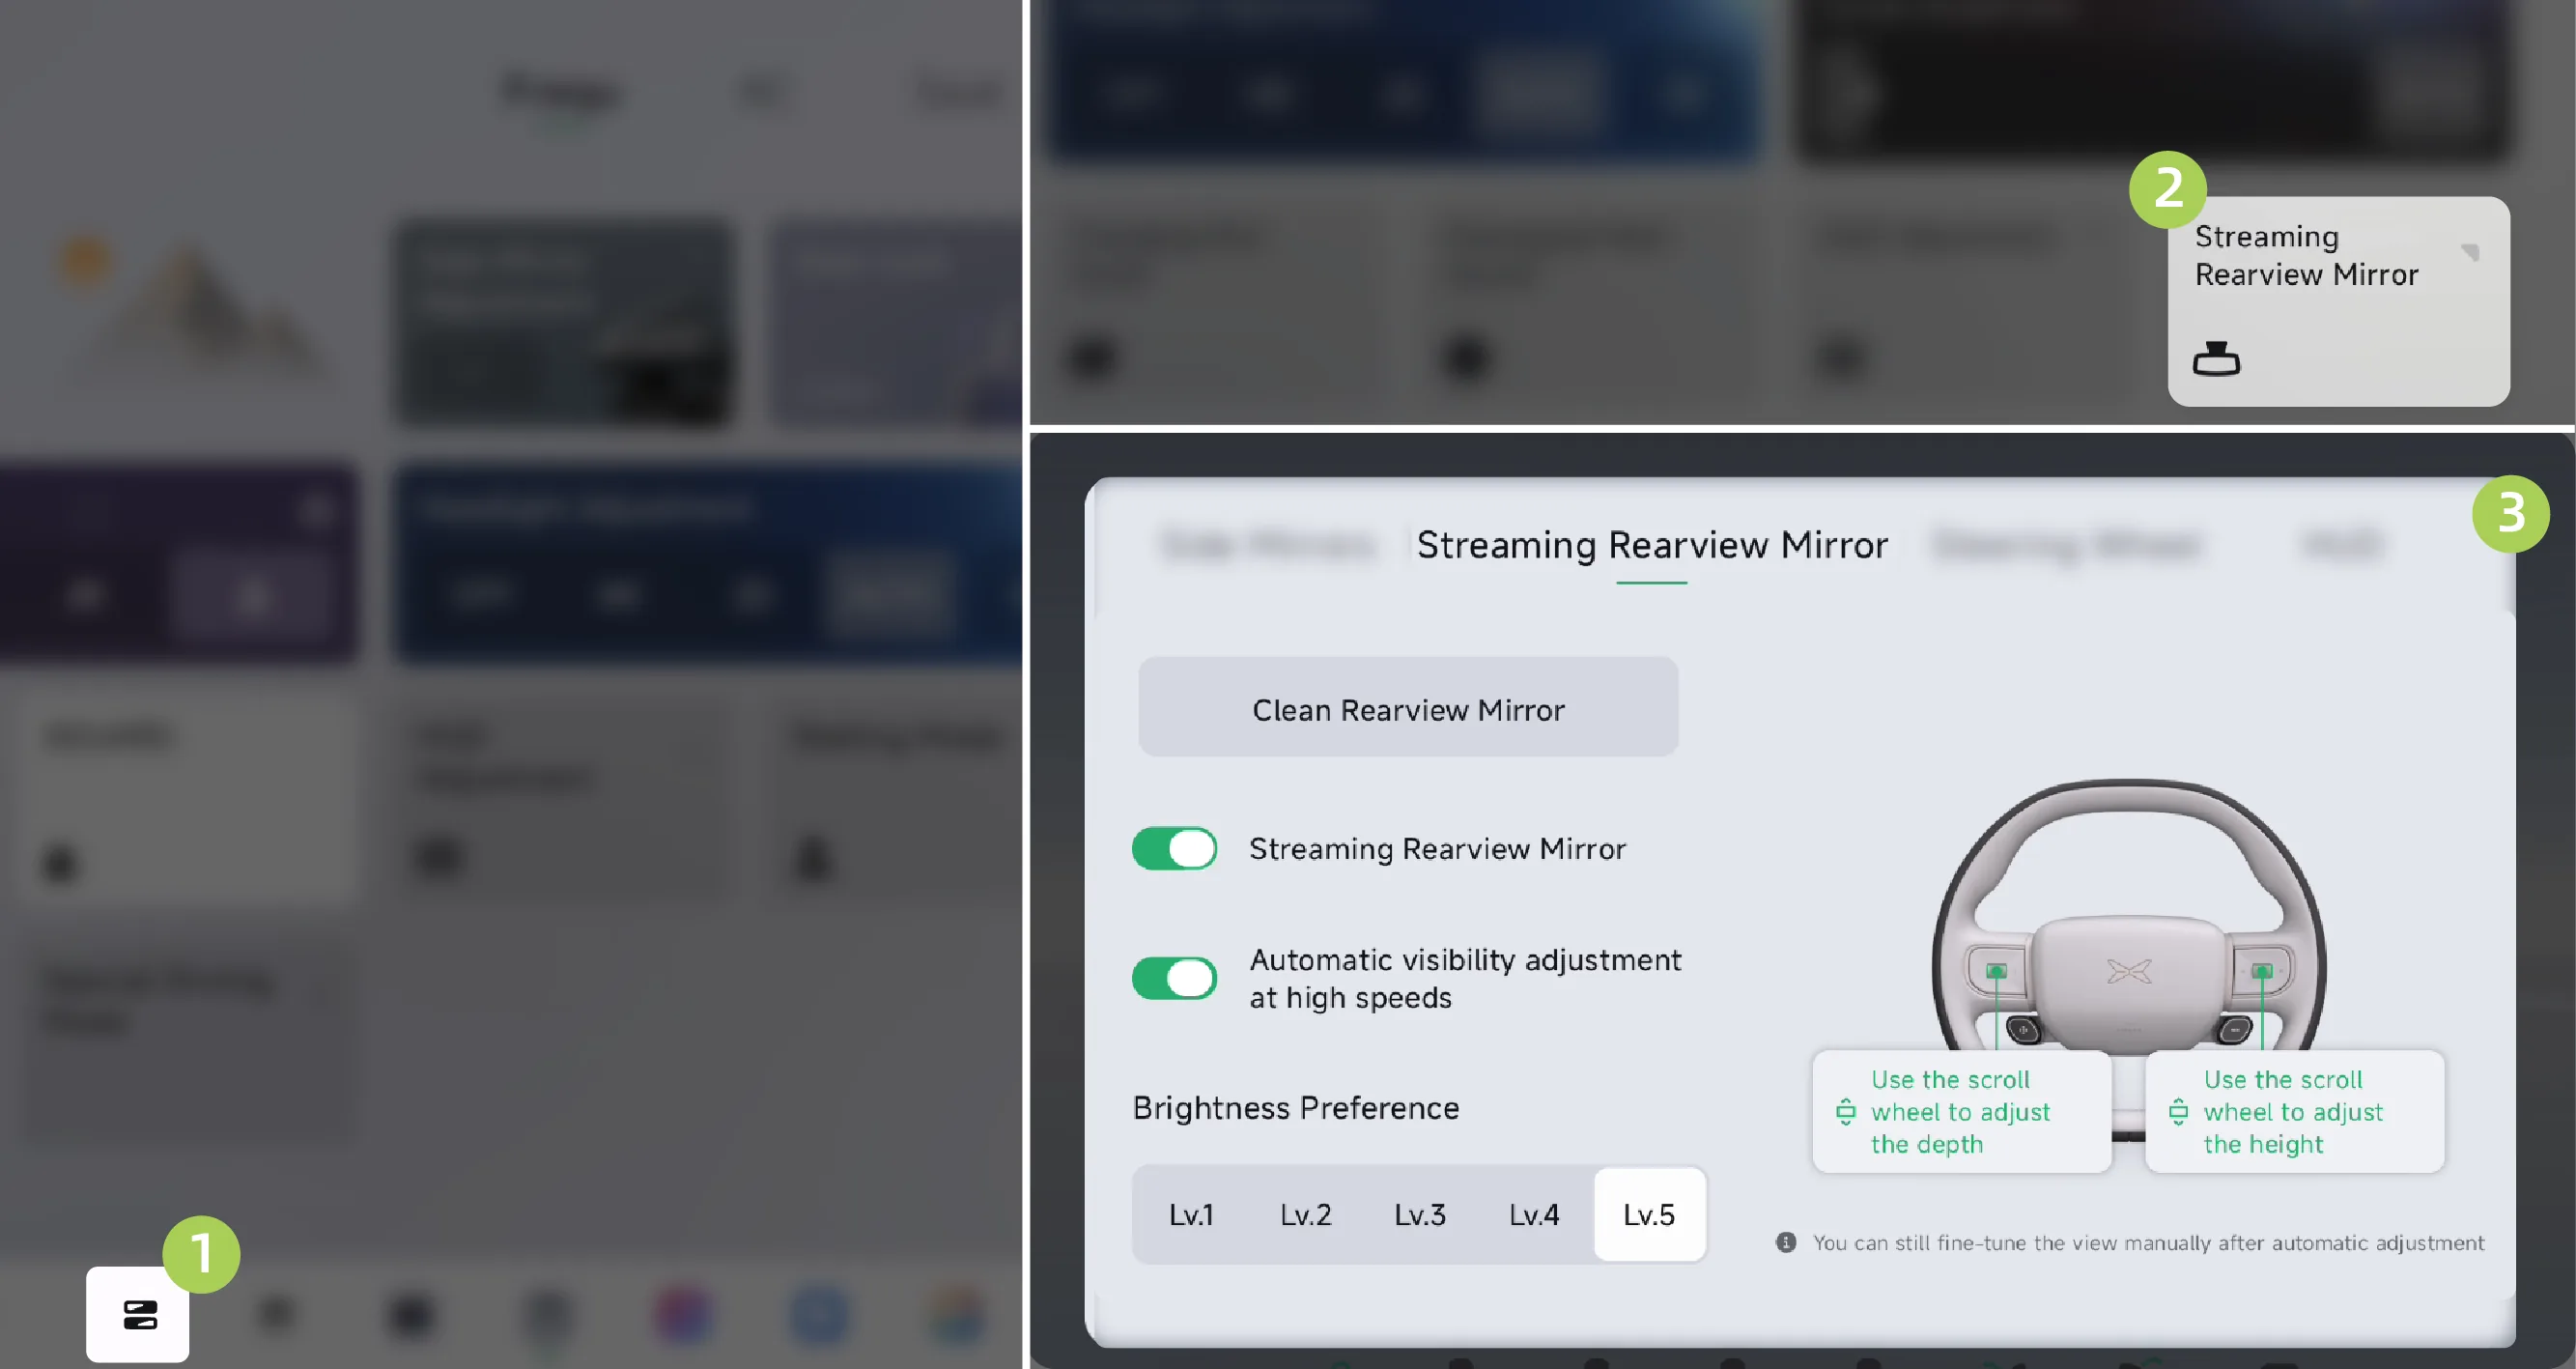
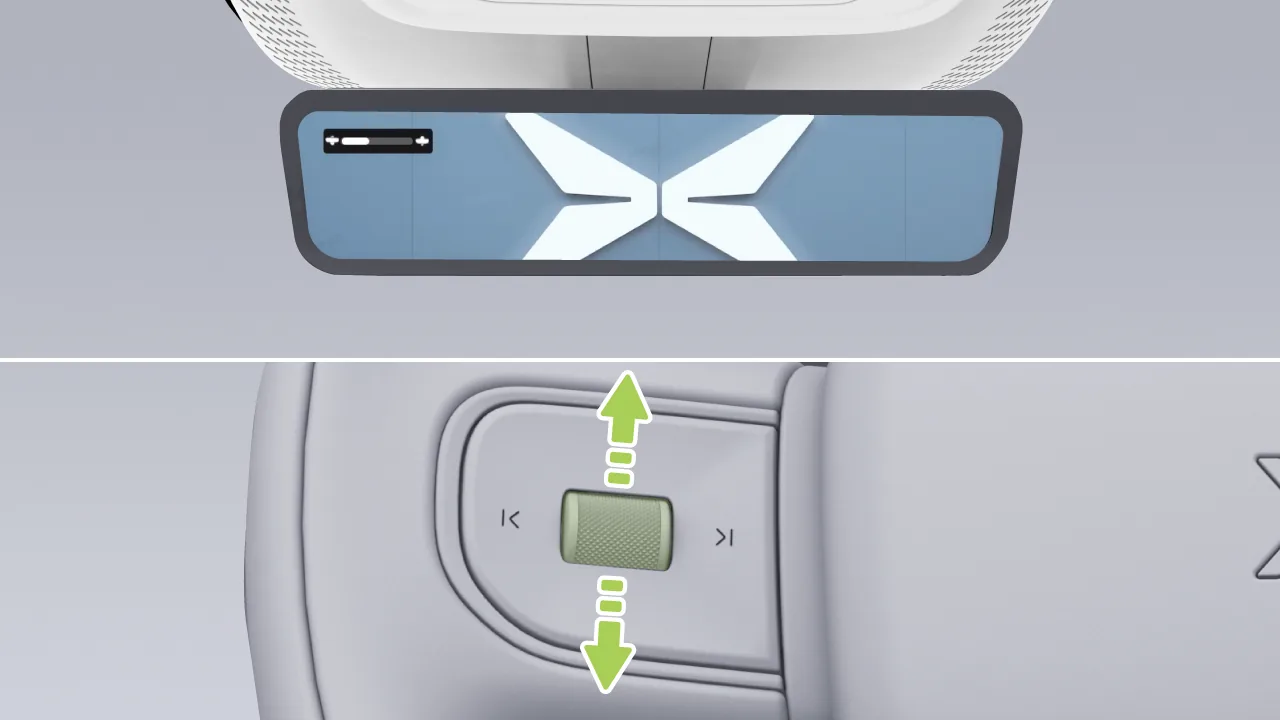
The left scroll wheel can zoom the display range of the streaming media.
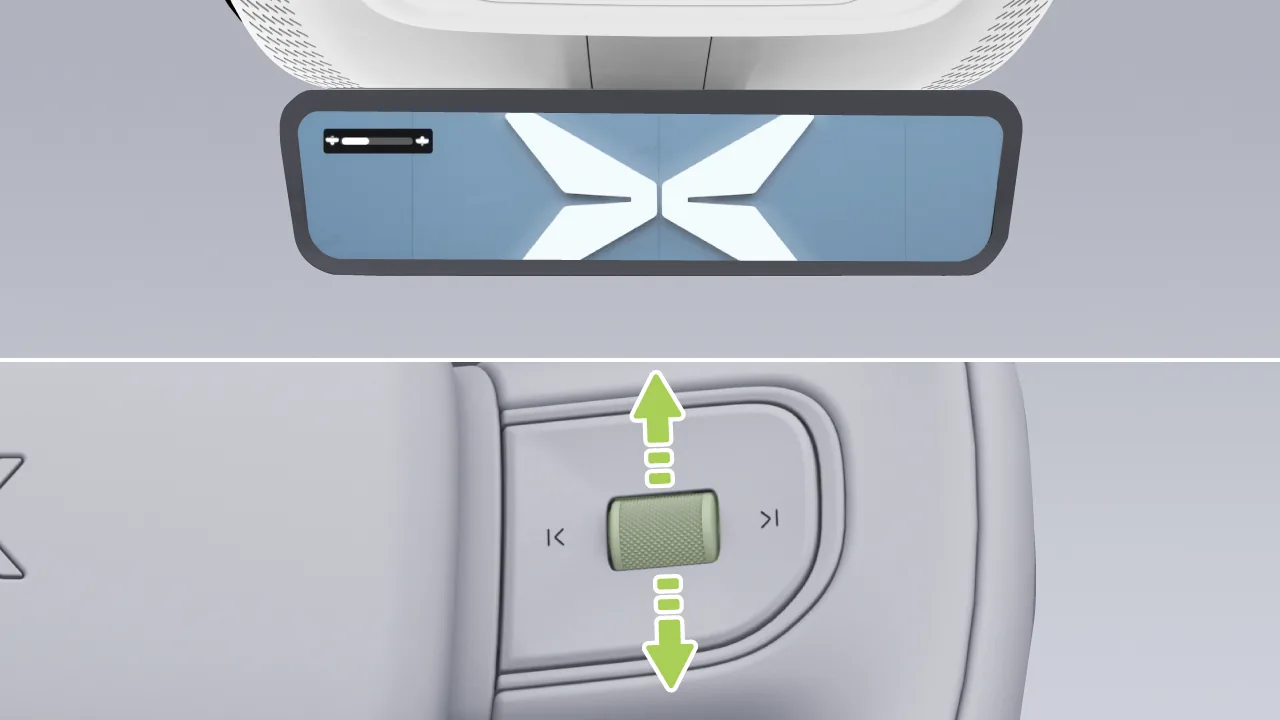
The right scroll wheel can adjust the vertical position of the field of view.
Automatic field-of-view adjustment at high speed: When the vehicle is in D gear and the vehicle speed is greater than 80 km/h, the system automatically adjusts the streaming media display range.
On the Rearview Mirror adjustment interface on the center control screen, in Select from , at each brightness level, automatic adjustment within a certain range will be performed according to the ambient light.
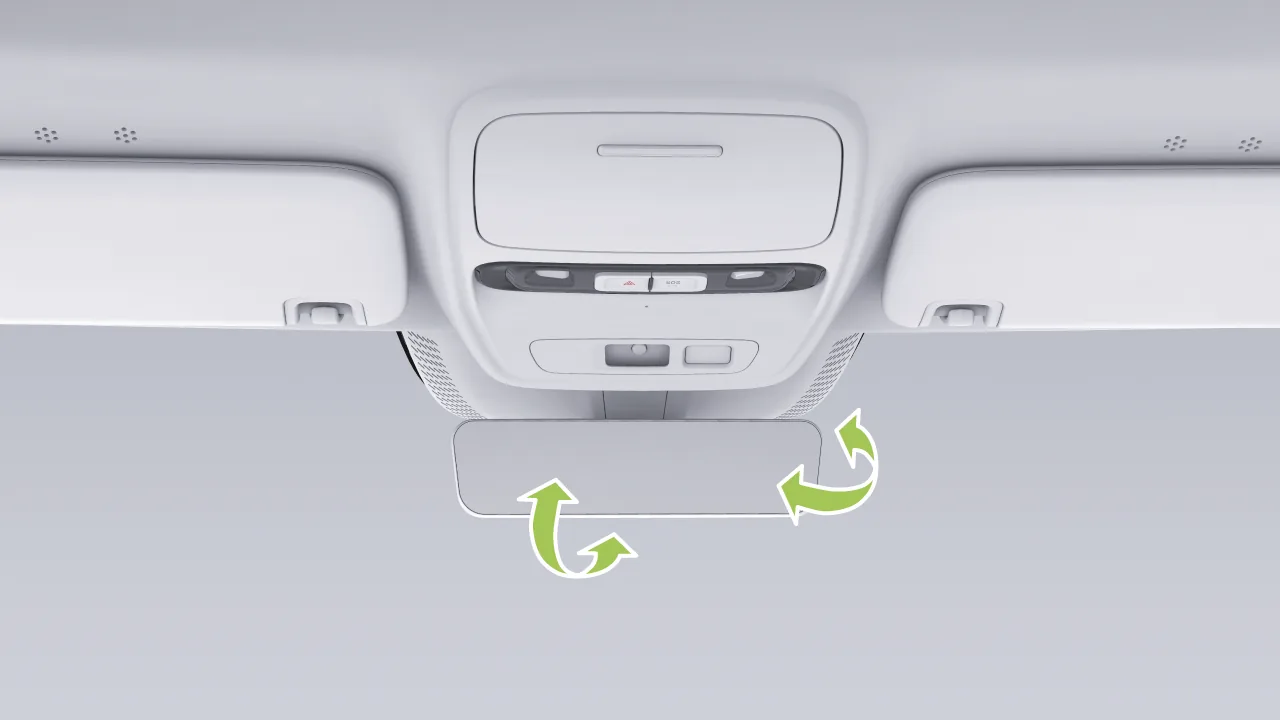
Adjust the driver's seat to a suitable position.
Hold the Rearview Mirror inside the vehicle and adjust it up and down, left and right to set the angle of the Rearview Mirror to a position where you can observe the conditions behind the vehicle through the Rearview Mirror.
Tips When adjusting the angle of the Rearview Mirror lens, it is recommended to use both hands.
Warning The streaming interior rear view mirror is an aid only and is not a substitute for the driver's judgment of the outside world. Do not rely solely on the internal mirrors when driving or parking, in all circumstances the driver is responsible for the safety of the vehicle and is always aware of the surroundings.
Do not install anything around the interior rear view mirror to prevent the driver from observing the road.
Do not adjust the streaming interior mirror while the vehicle is in motion, as injury, death, and property damage may occur.
Do not use the streaming interior mirror in the following scenarios:
Camera restricted.
Poor weather conditions (e.g. heavy rain, heavy snow, heavy fog, etc.).
Tips At night or in dim environments such as tunnels, the lights of vehicles behind shown on the display may exhibit some scattering and halos, causing slight obstruction in the field of view. The driver must pay attention and drive with caution.
If the streaming display image shows missing pixels or cannot display properly in part or in whole, switch to using the conventional mirrored interior rearview mirror and promptly contact an XPENG service center for inspection and repair.
When washing the vehicle with a high-pressure water gun, do not spray the cameras, as water ingress may cause camera damage and system malfunction.
If the rear of the vehicle is damaged, the camera may not be able to capture an accurate view. In this case, it is recommended to switch to using the conventional mirrored interior rearview mirror.
Before driving, check the position of the interior rearview mirror and adjust it if necessary.
You can open the glove box in any of the following ways:
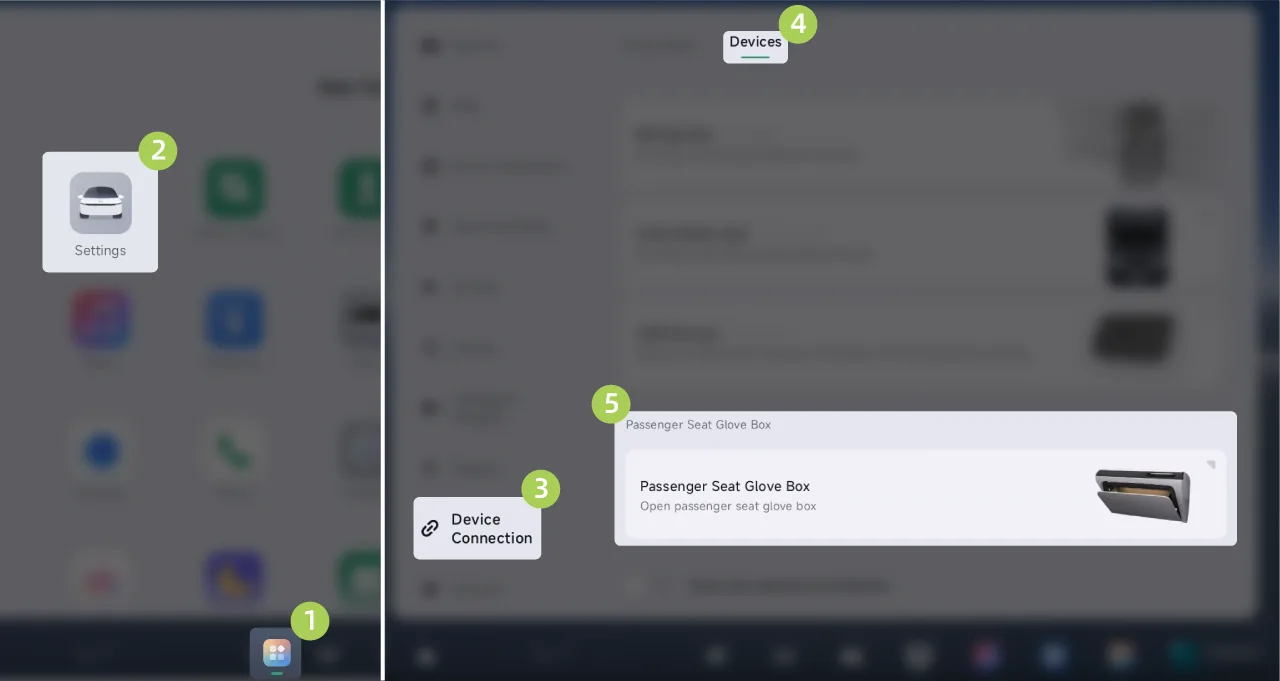
On the center control screen “ →Settings→Device Connection→Equipment”On the interface, you can open the passenger glove box.
Tap on the center control screen. Enter the Control Center screen and tap . (To learn about the custom Control Center, please refer to the custom Control Center section).
Open the glove box by voice command, for example, say keywords such as “open the glove box.”
On the center control screen “ →Settings→Device Connection→Device”On the interface, you can open the passenger glove box.
Tap on the center display screen. Enter the Control Center screen and tap . (To learn about the custom Control Center, please refer to the custom Control Center section).
Open the glove box by voice command, for example, say keywords such as "Open the glove box".
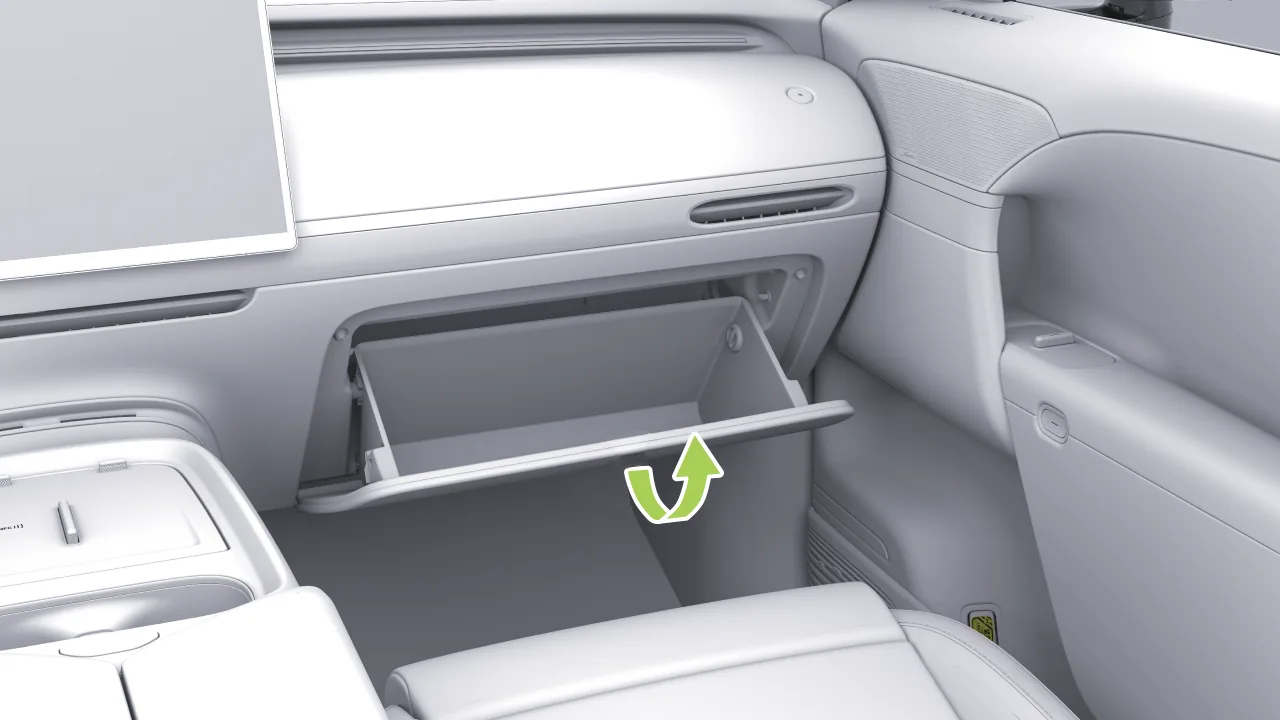
When the glove box is not in use, push the glove box until it locks into place, and the glove box is closed.
Caution When not in use, ensure that the glove box is closed. Otherwise, in the event of an accident or emergency braking, items in the glove box may be thrown out, causing injury to occupants.
You can use the glove box passcode protection function to lock the glove box. When your vehicle is parked at a repair shop, this function can prevent the glove box from being opened.
On the center control screen “ →Settings→Device Connection→Equipment”Interface, where the glove box password protection can be enabled/disabled.
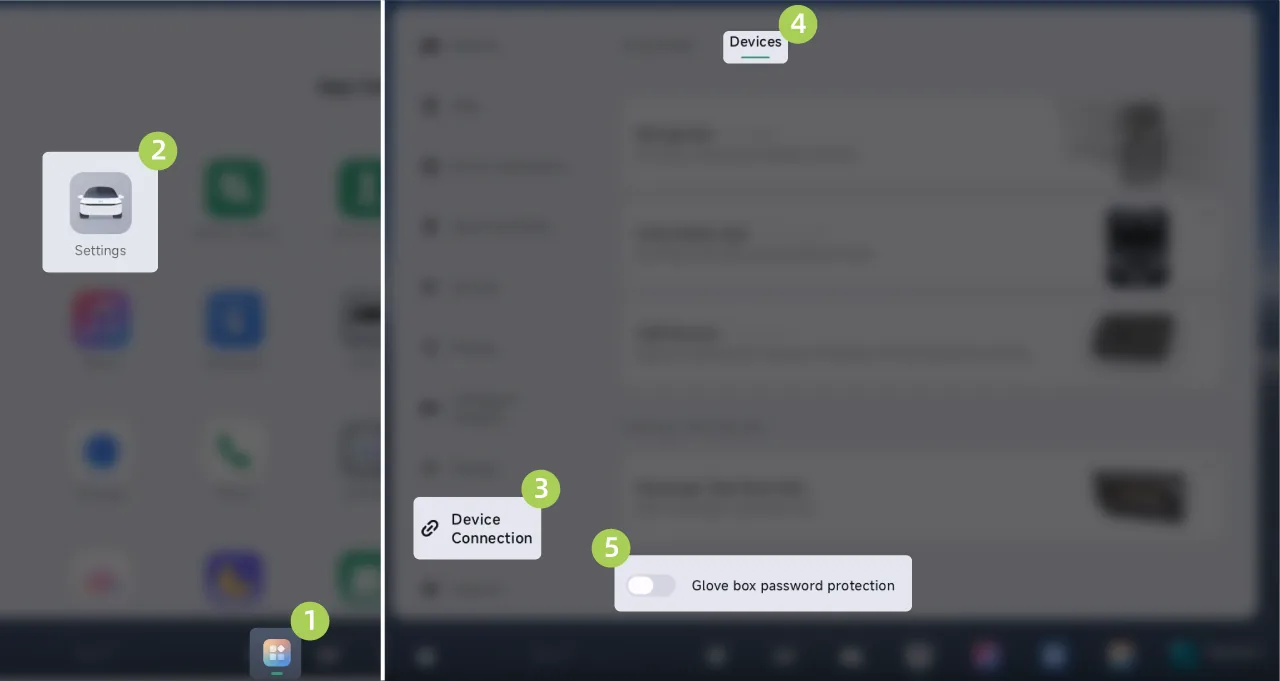
Set password: When the glove box password protection function is enabled, a pop-up window will prompt you to set a password. After the setting is completed, as long as the glove box password protection function switch is not turned off, the password will remain valid.
Tips Only the owner account can set the glove box password.
Password Unlock: Tap on the central control screen , enter the password in the pop-up interface to unlock the glove box.
Reset Password
If you enter the wrong password multiple times in succession or forget the glove box password, you can reset the password in the following ways:
Tap on the center display. , tap in the pop-up screen 。
After reading the prompt and confirming, an SMS verification code will be sent to the vehicle owner's mobile phone.
After entering the correct verification code, complete owner authentication.
Follow the prompts to set the password to complete the password reset.
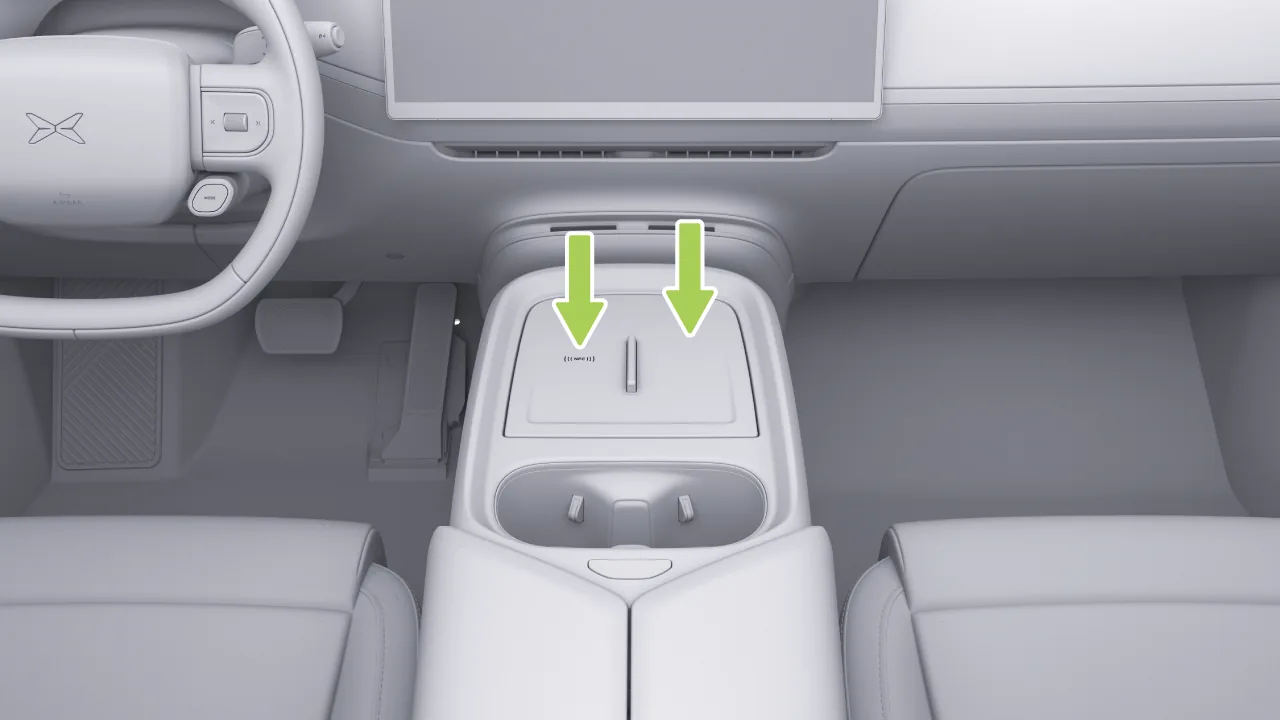
The front wireless charging area is located at the front of the center console. During charging, place the phone with the screen facing upward, and slide the phone along the retaining strip to the bottom of the charging area. This helps the phone detect charging and is beneficial for heat dissipation. During charging, the central control screen will display an icon. “  ”。
”。
Tips Immediately upon placing your phone on the charging area, the ambient light along the edge animates to indicate that charging has started.
The mobile phone wireless charging power supports up to 50 W and is equipped with air-cooling capability. The air cooling cools the mobile phone and improves charging efficiency.
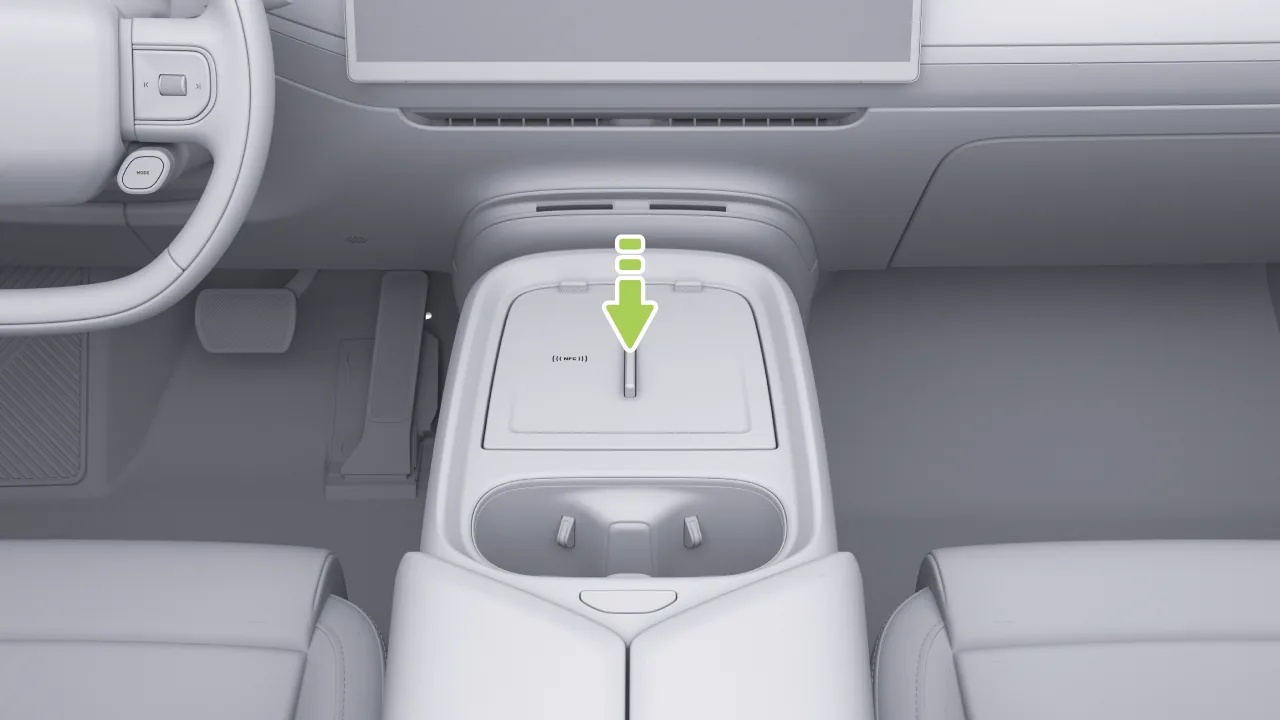
The center structure of the wireless charging panel supports press-down movement, making it convenient to place foldable-screen phones in the unfolded position. Press again to reset.
Caution The wireless charging function is only applicable to mainstream brand mobile phones that comply with the international wireless charging Qi Alliance standard, or that support private wireless charging protocols.
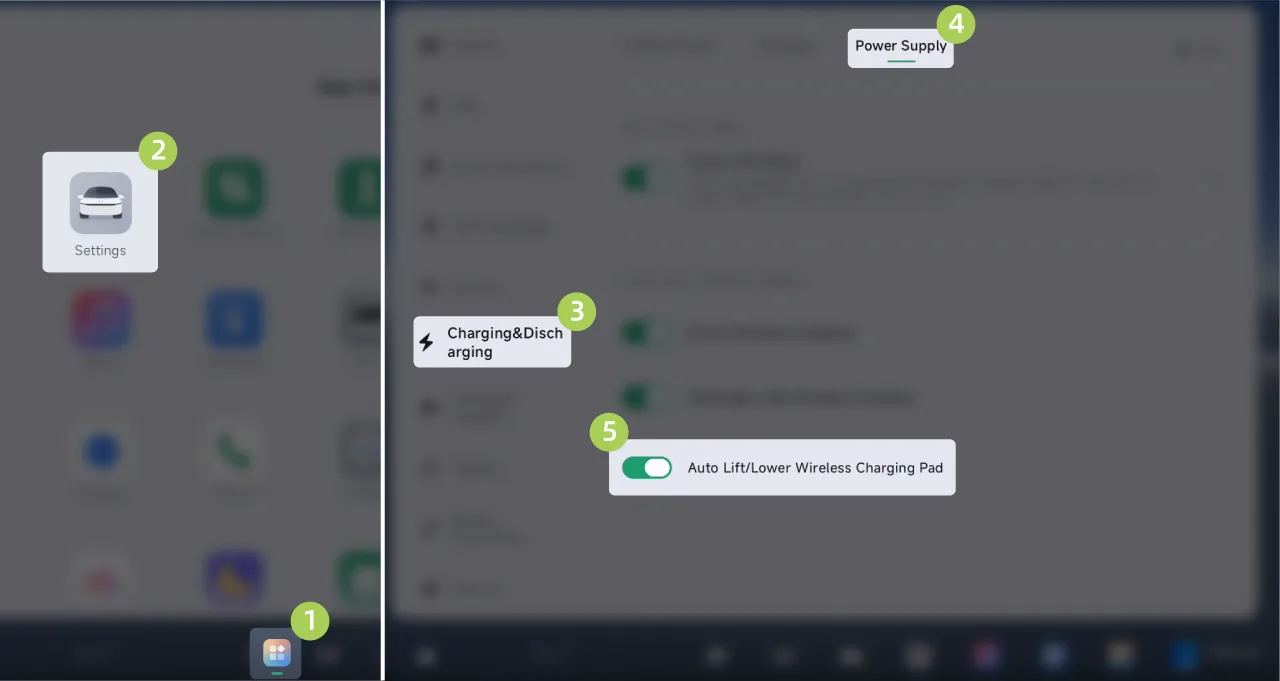
On the center control screen “ →Settings→Charging/Discharging→Power Supply”On this screen, you can enable/disable the automatic raising/lowering function of the charging panel.
After enabling the automatic lifting/lowering function of the charging panel, perform the following operations to raise/lower the charging panel:
Lowering: Place the phone on the wireless panel, and the wireless panel lowers automatically.
Rise: Remove the mobile device from the wireless panel, and if no mobile device is placed again within 5 seconds, the wireless panel rises automatically.
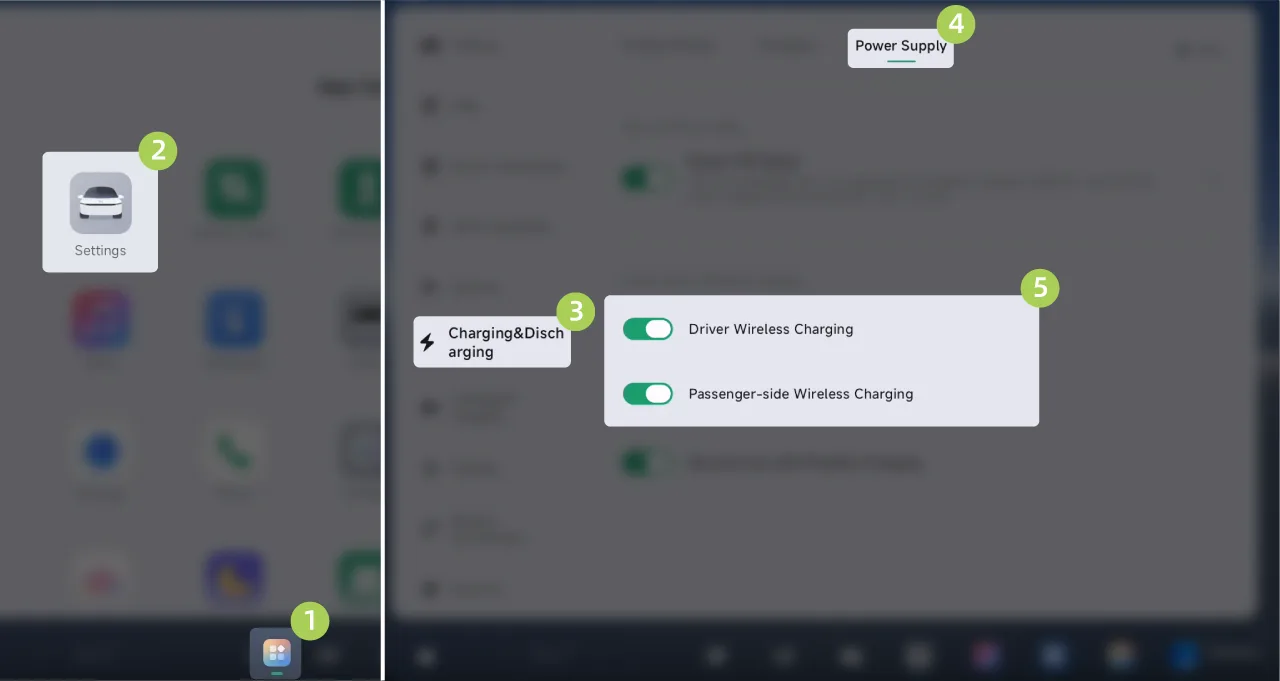
On the central control screen “ →Settings→Charging/Discharging→Power Supply”Interface, where the driver/passenger wireless charging can be turned on/off.
Caution Some mobile phones do not have wireless charging. Placing the phone on the wireless charging panel may cause screen flickering, jumping, or similar conditions. If necessary, it is recommended to turn off the wireless charging switch on the center display.
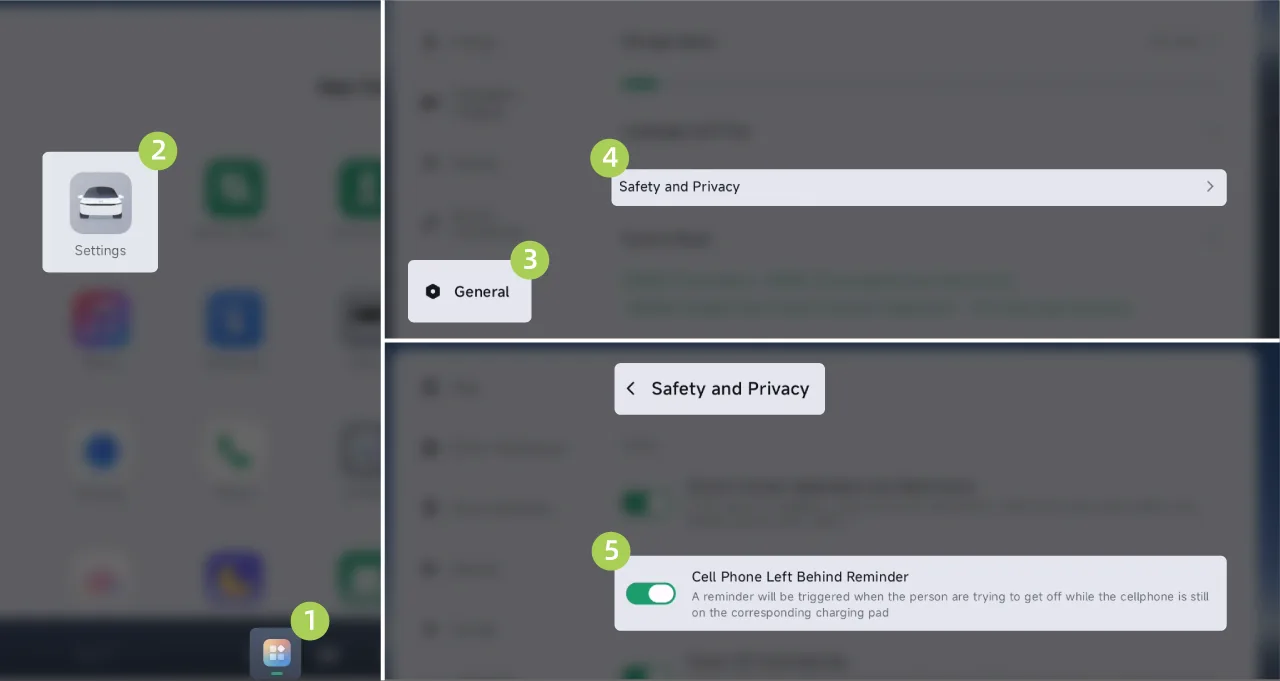
On the center control screen “ →Settings→General→Safety and Privacy”Interface, where you can turn the mobile phone forgotten reminder on/off. After the function is enabled, when the mobile phone is wirelessly charged, after the driver opens the door and gets out of the vehicle, a voice prompt reminds you to take your mobile phone with you when getting out.
Wireless charging will stop in the following situations:
When the phone is placed at the uppermost end of the charging area, charging may be interrupted or may not be detected.
Warning To avoid interference between medical or implantable electronic devices and the wireless charging system for mobile phones, personnel using medical or implantable electronic devices should maintain an appropriate distance from the wireless charging area of the mobile phone.
Wireless phone charging function has a heating effect on metal, please make sure that there are no metal objects in the back of the phone and in the charging area before starting charging, this may cause metal objects to be heated or damaged, or even cause safety incidents. Metal foreign objects here refer to other objects with metal components, including but not limited to chips, magnetic cards, etc.
For phones that do not have wireless charging, it is recommended to manually tap the center screen setting to turn off wireless charging in the corresponding area to avoid affecting the normal use of the phone.
For mobile phones with 50W power wireless fast charging, the phone must be placed along the limit bar at the bottom of the charging area, and the bottom of the phone should be fully covered to avoid overheating problems.
The wireless charging cooling fan outlet is located at the lower end of the wireless charging, be aware that foreign objects and liquids enter the outlet and affect the operation of the fan.
Do not spill water in the wireless charging area to prevent damage to the electronics when water enters the wireless charging module.
External wireless charging coils can cause accidents and should be used with caution.
Do not place your phone in the vehicle to charge when the driver is not in the vehicle, as this may cause a safety hazard.
Do not place heavy objects in the charging area to avoid damaging the wireless charging module.
If the wireless charging function does not work or does not work properly, stop using it and contact the Xpeng Automobile Service Center for service.
It is normal for the phone to get warm after a long charge. Do not leave the charging device in the charging area after it is fully charged, as this may cause overheating problems.
Do not use a metallic phone case, such as a phone case that supports magnetic charging (MagSafe).
The vehicle is equipped with a sterile air-cooled in-vehicle refrigerator with double doors and dual temperature zones, providing passengers with refrigeration, freezing, and heat preservation functions, meeting diversified beverage and food storage needs, and enhancing convenience for long-distance travel or daily use.
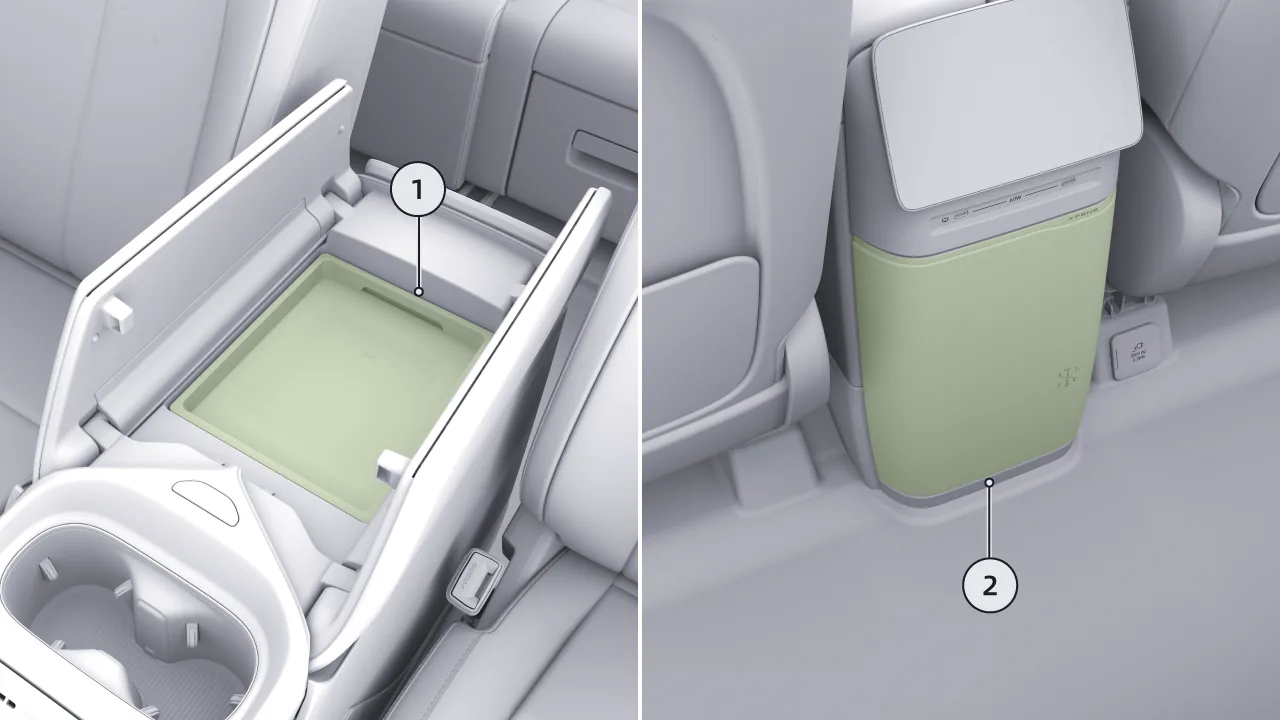
The in-vehicle refrigerator adopts a dual-door design:
Built-in refrigerator door in the center armrest box: opened and closed manually.
Rear sliding-rail refrigerator door: opened and closed electrically.
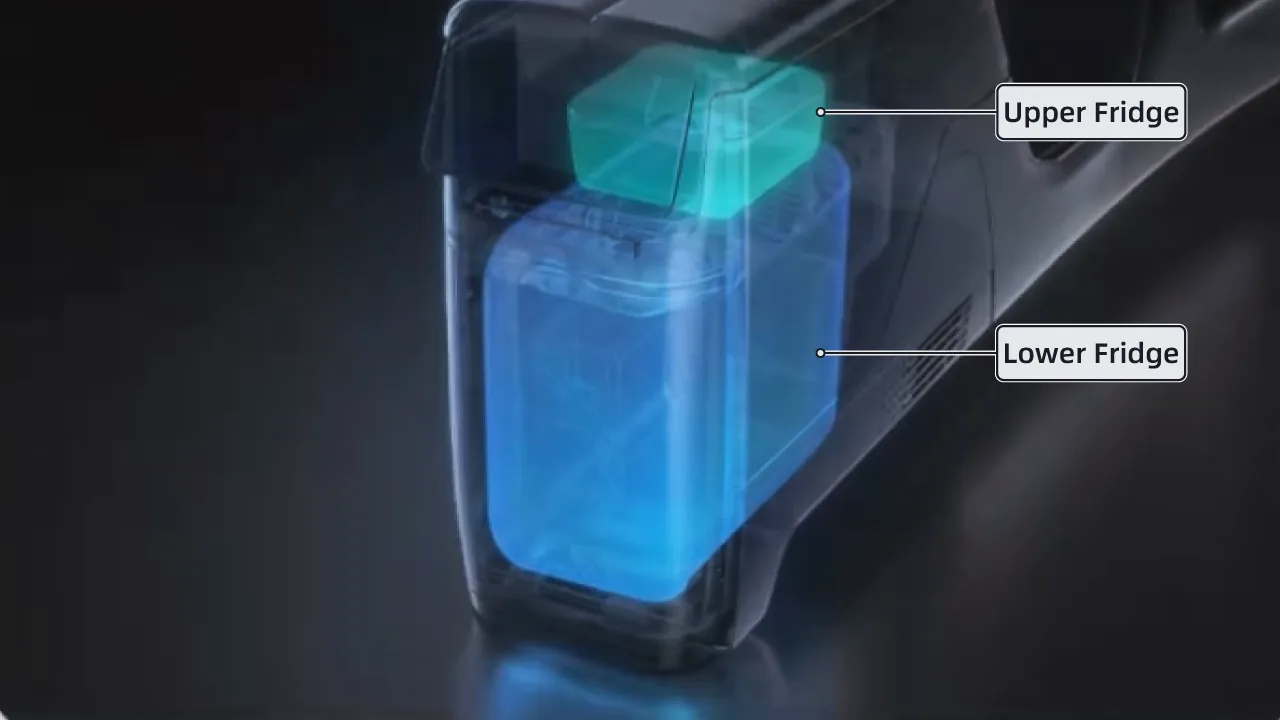
The vehicle-mounted refrigerator adopts a natural dual-temperature-zone design. When the refrigerator is in freezing or refrigerating mode, the temperature difference between the upper temperature zone and the lower temperature zone will be controlled within 6–8°C.
The vehicle refrigerator can be controlled in the following ways:
Control via the center display
Controlled via the rear control screen
Control via Mobile App
Control via Voice Commands
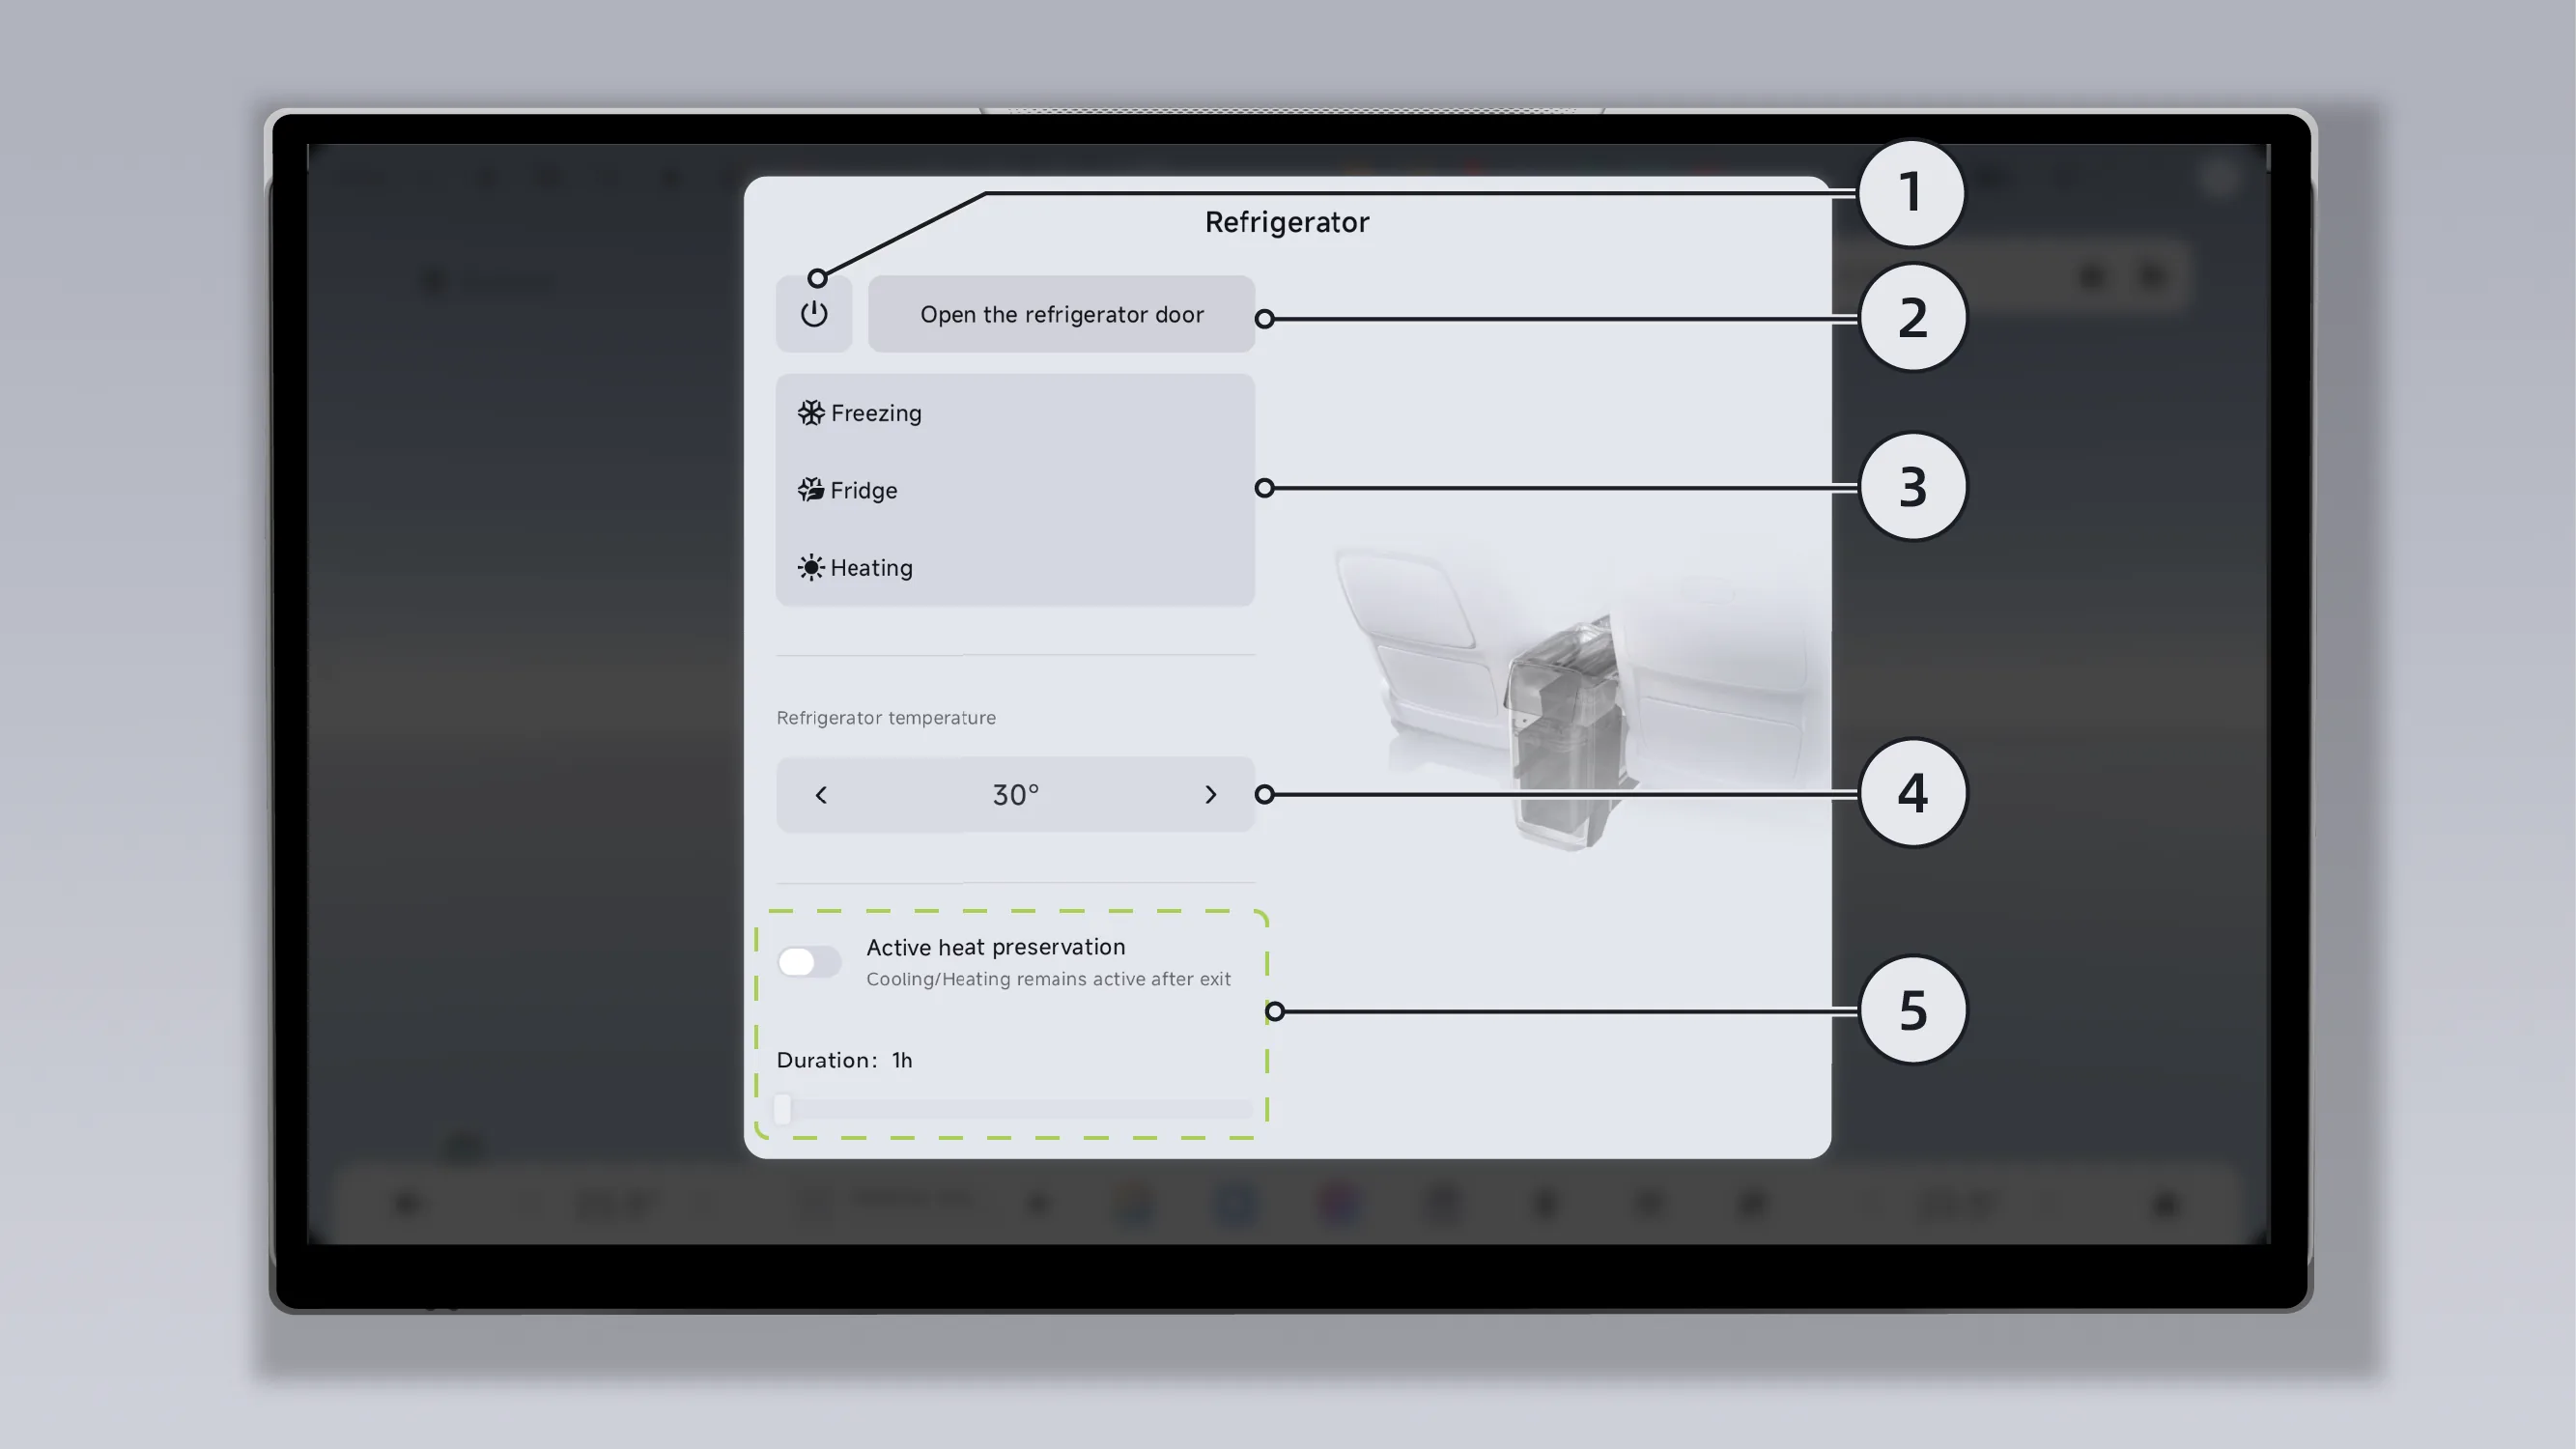
Turn the refrigerator power on/off.
Tips After the function is enabled, the refrigerator retains the setting status from before the last Power Off.
Open/close the refrigerator sliding rail door.
refrigerator mode.
Freezing mode: The temperature setting range is -6°C to -1°C.
Refrigeration mode: The temperature setting range is 0°C to 20°C.
Heating mode: The temperature setting range is 30°C–50°C.
Adjust the refrigerator temperature.
Set the heat retention time after locking the vehicle.
You can enter the settings screen in the following ways:
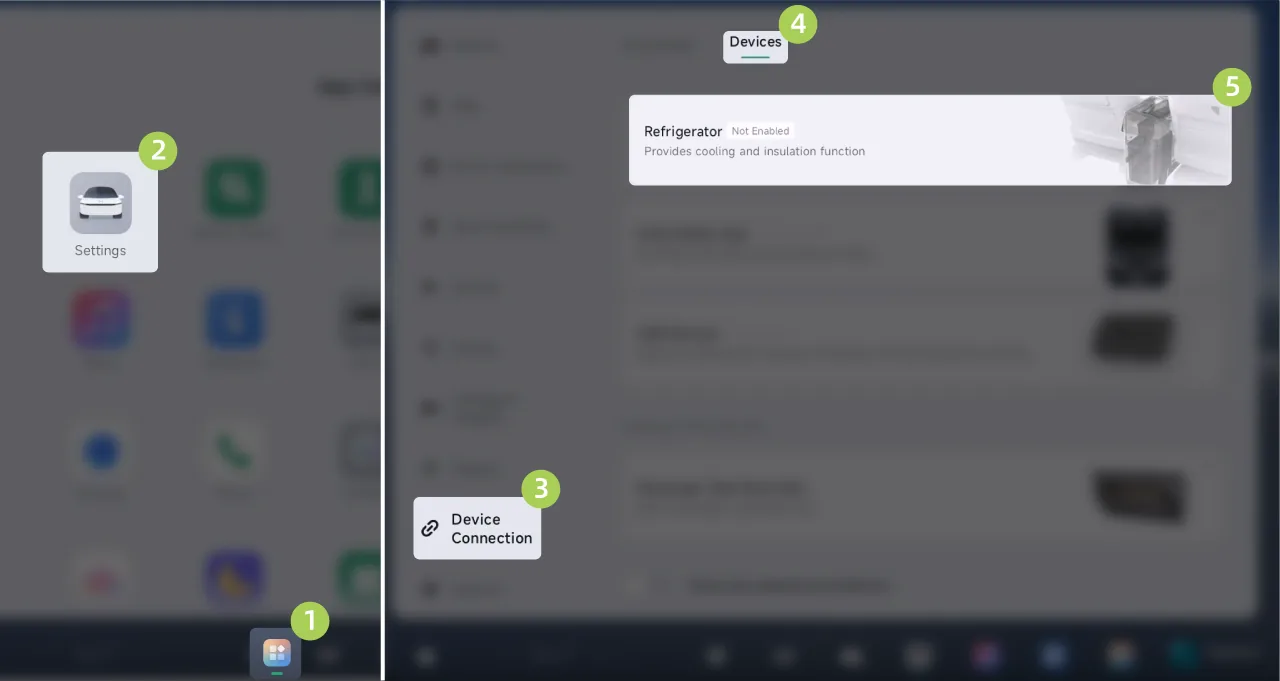
Tap the center display in sequence. “ →Settings→Device Connection→Equipment→refrigerator”, you can enter the vehicle refrigerator control interface.
Tap on the center display. “ →Refrigerator”You can also enter the vehicle refrigerator control interface. (To learn about the custom control center, please refer to the Custom Control Center section).
Caution If the refrigerator sliding rail door remains open for a long time, the central control screen and XPENG voice will issue a reminder.
The refrigerator sliding rail door opens/closes electrically. Do not forcibly open/close it manually with external force, otherwise damage may be caused.
When the refrigerator sliding rail door is open, do not adjust the second-row seat, to avoid a collision between the seat and the refrigerator, which may cause hardware damage.
On the rear control screen “ ”Interface, tap Open the refrigerator door, open/close the refrigerator sliding rail door. Tap refrigeratorCard, enter the vehicle-mounted refrigerator control interface, where you can perform the same refrigerator function settings as on the central control screen.
On the rear control screen interface, tap the bottom status bar  Switch to open/close the refrigerator sliding rail door.
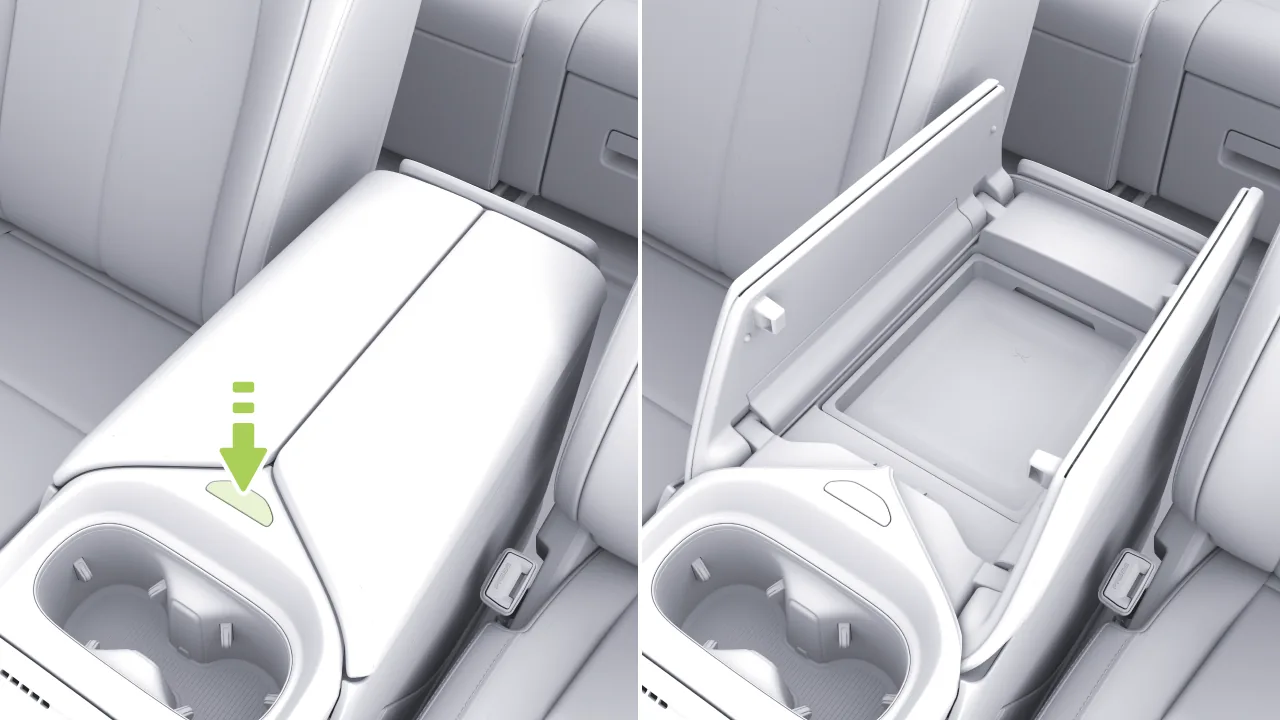
Press the center armrest box switch to open the center armrest box.
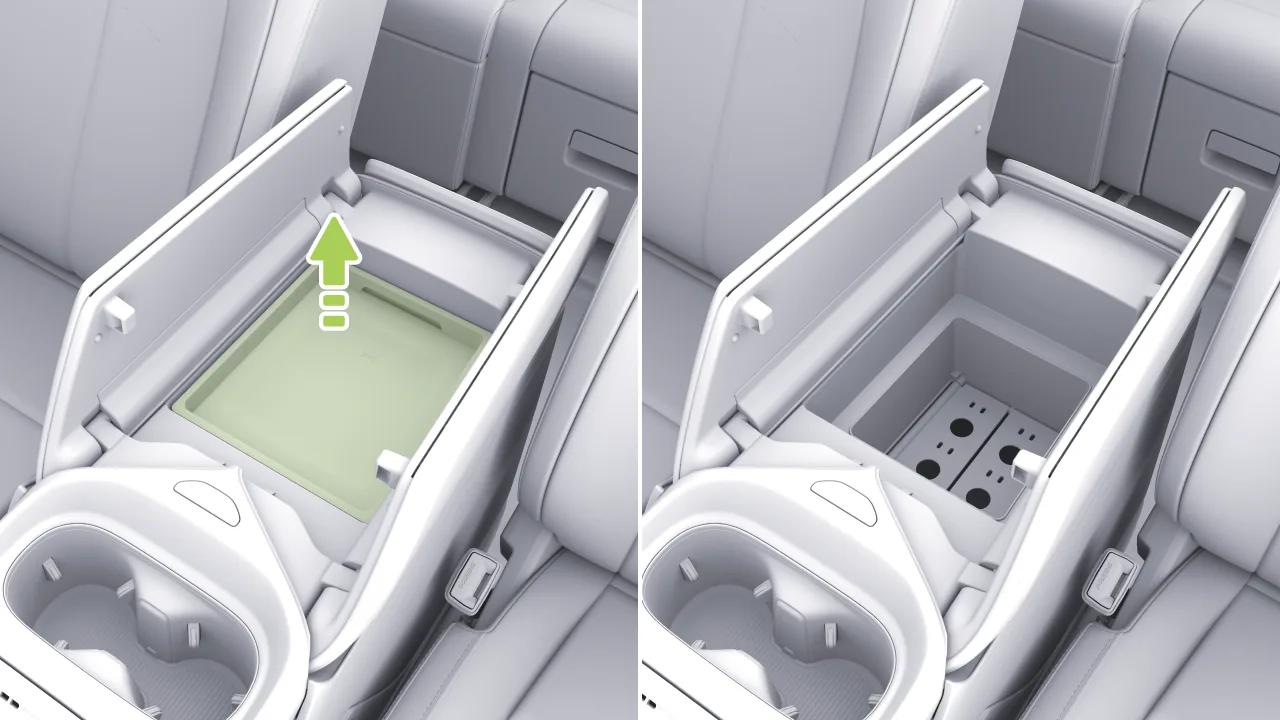
Lift upward to open the refrigerator door.
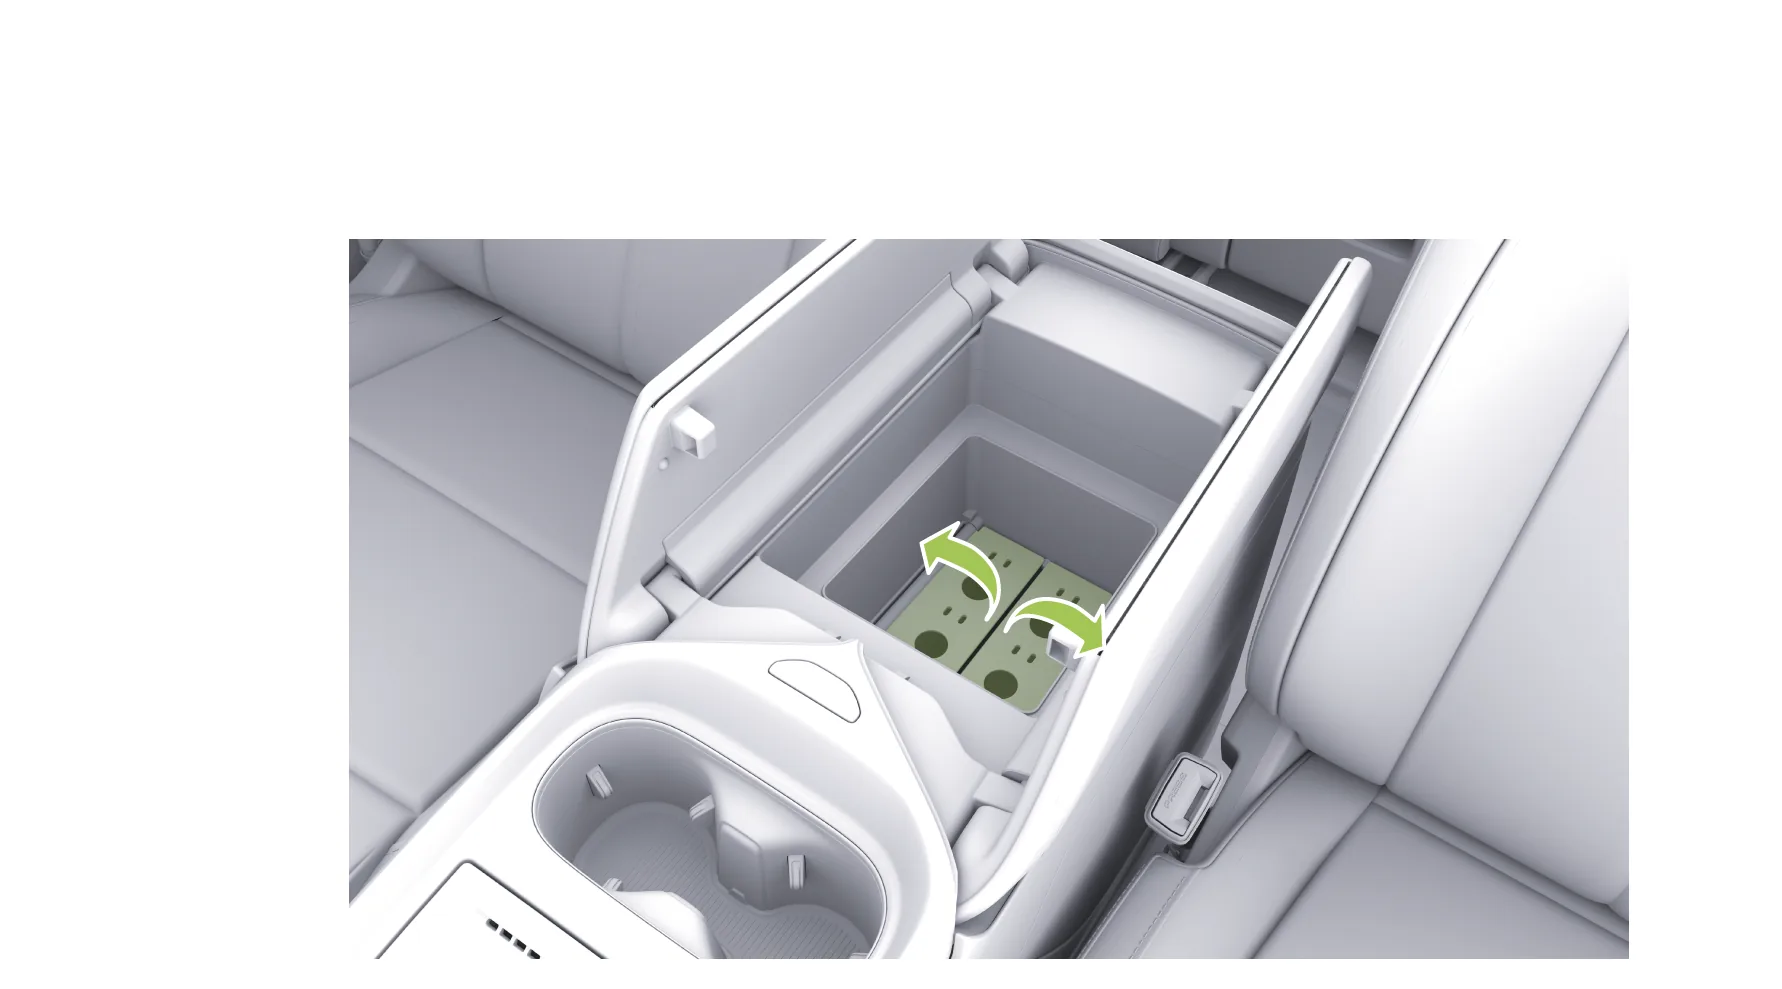
Lift gently to open the refrigerator partition.
To close, follow the reverse order of operations.
Caution When installing the refrigerator door, ensure it is oriented correctly; do not install it backwards. Incorrect orientation can compromise sealing and cooling performance and may cause the vehicle to issue a false warning that the refrigerator door is open.
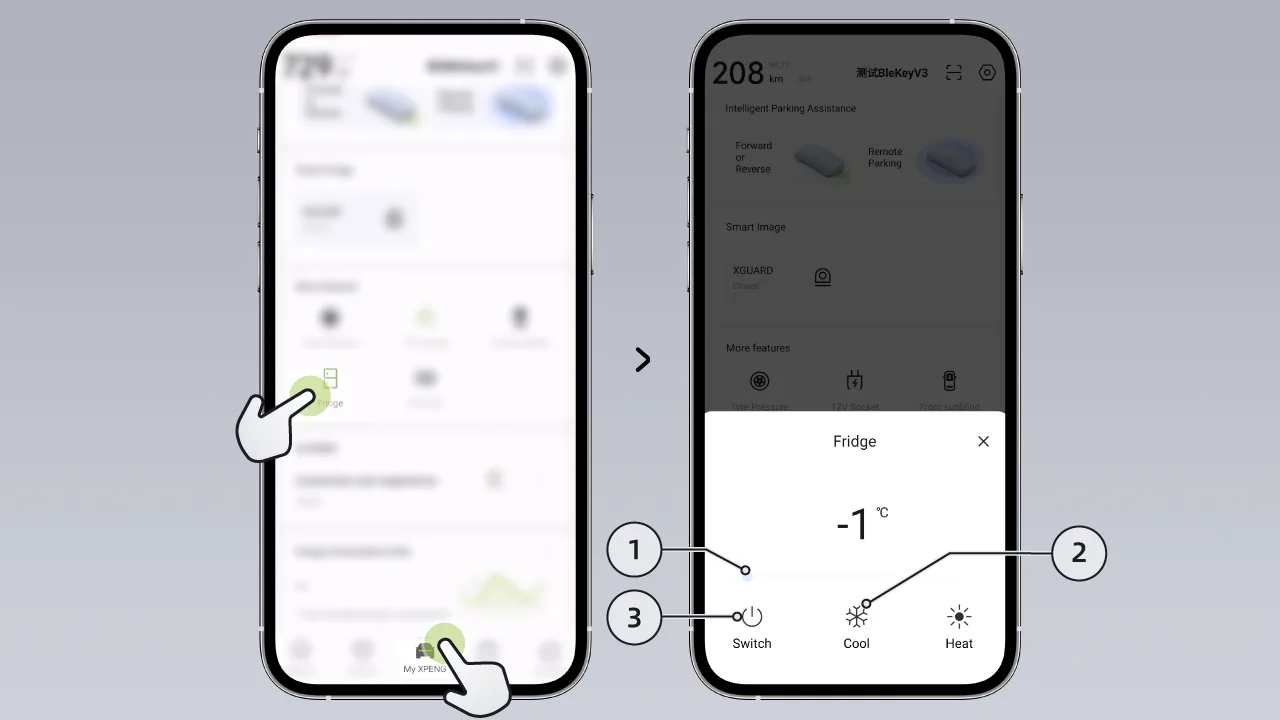
In the mobile app The interface allows you to set the commonly used functions of the vehicle-mounted refrigerator.
Adjust the refrigerator temperature.
refrigerator mode.
Freezing mode: The temperature setting range is -6°C to -1°C.
Refrigeration mode: The temperature setting range is 0°C–20°C.
Heating mode: The temperature setting range is 30°C to 50°C.
Turn the refrigerator power on/off.
Tap on the center control screen. “ →vehicle→Window&Door→Child Lock”, tap in the pop-up window RefrigeratorThe switch can enable/disable the refrigerator child lock.
After the refrigerator child lock is enabled, the rear control screen will be unable to control the refrigerator functions.
Caution When there are children in the vehicle, it is recommended to turn on the refrigerator child lock to prevent children from operating the refrigerator and changing its settings.
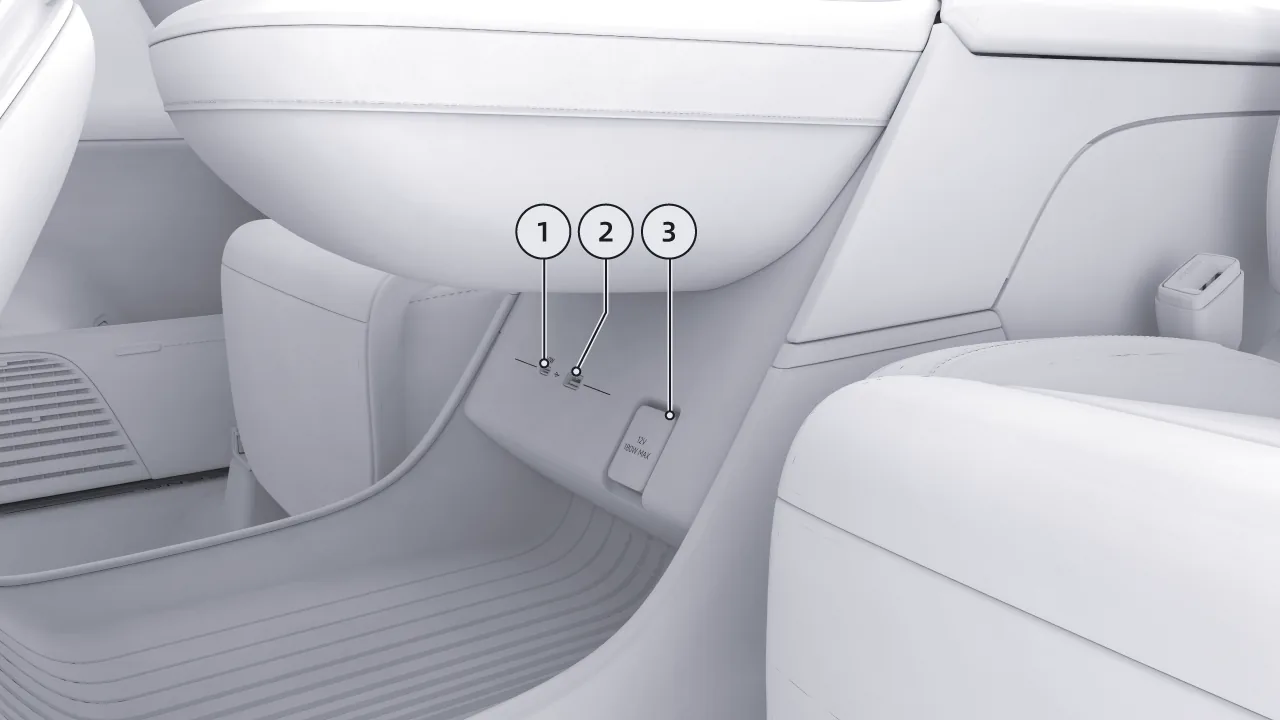
USB Type-C port: used for Driving Recorder USB flash drive data transmission, charging electronic devices, connecting microphones and game controllers, etc., supports standard charging protocols, with a maximum power of 60W.
USB Type-A port: used for Driving Recorder USB flash drive data transmission, and for connecting a microphone and game controller, etc.
12V low-voltage power outlet: the maximum supported power is 180 W.
Caution Do not use the USB Type-A interface for charging, as charging may cause the central control screen to restart or display a black screen.
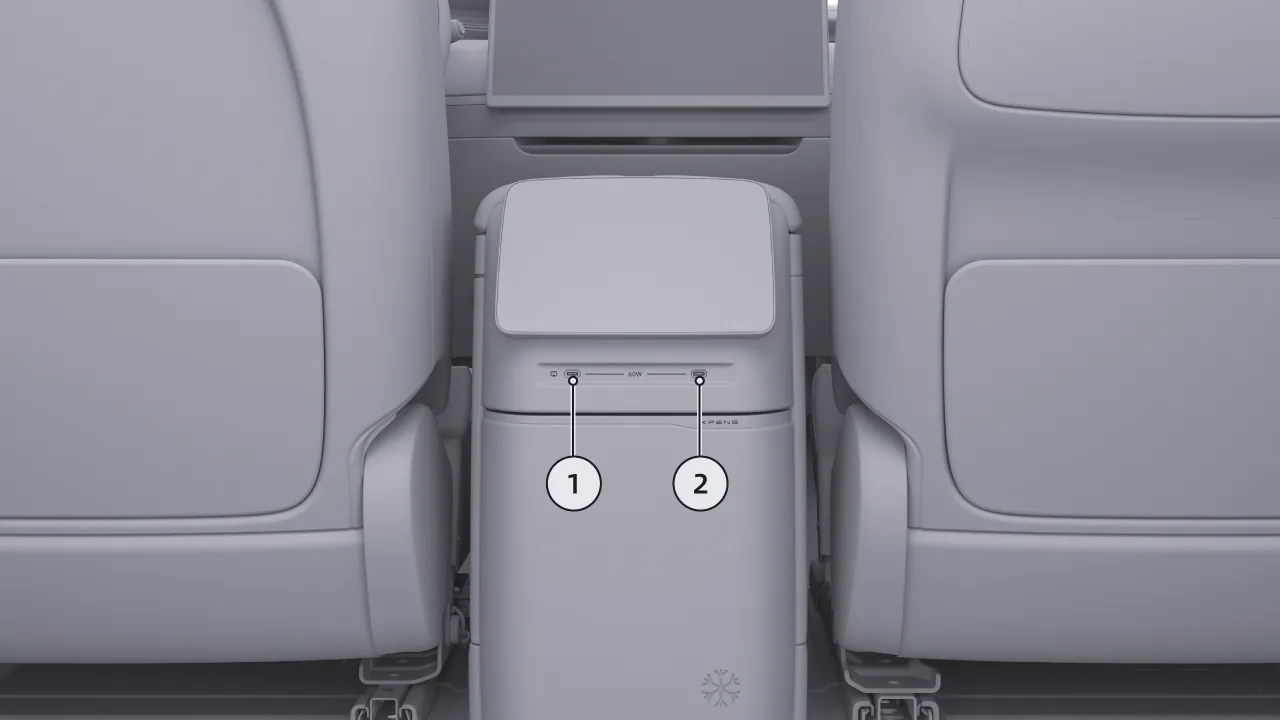
USB Type-C port: supports charging electronic devices, with a maximum supported power of 60W. This port can also be used for Wired Projection. See Function Overview。
USB Type-C port: only supports charging electronic devices, with a maximum supported power of 60W.
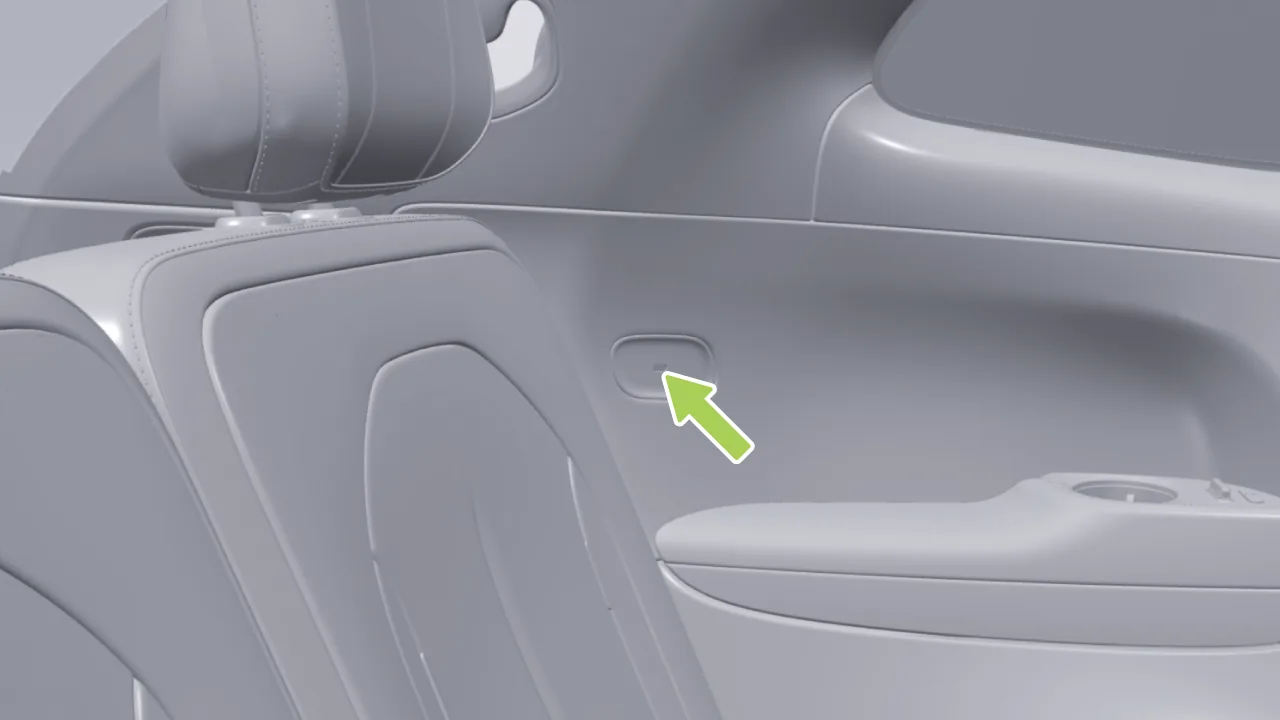
There is one USB Type-C port on each of the left and right side trim panels of the third row, with a maximum supported power of 27 W.
Warning Do not modify the USB Type-C port without authorization.
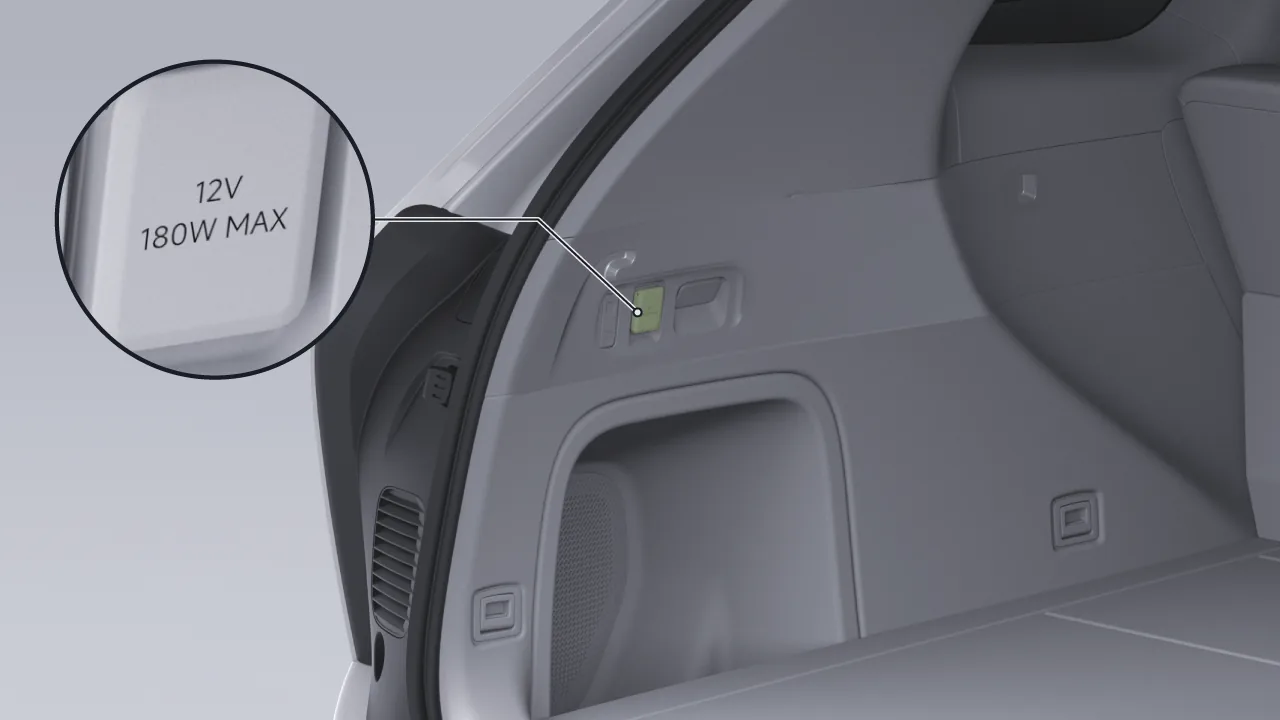
12V low-voltage power outlet: The maximum supported power is 180 W.
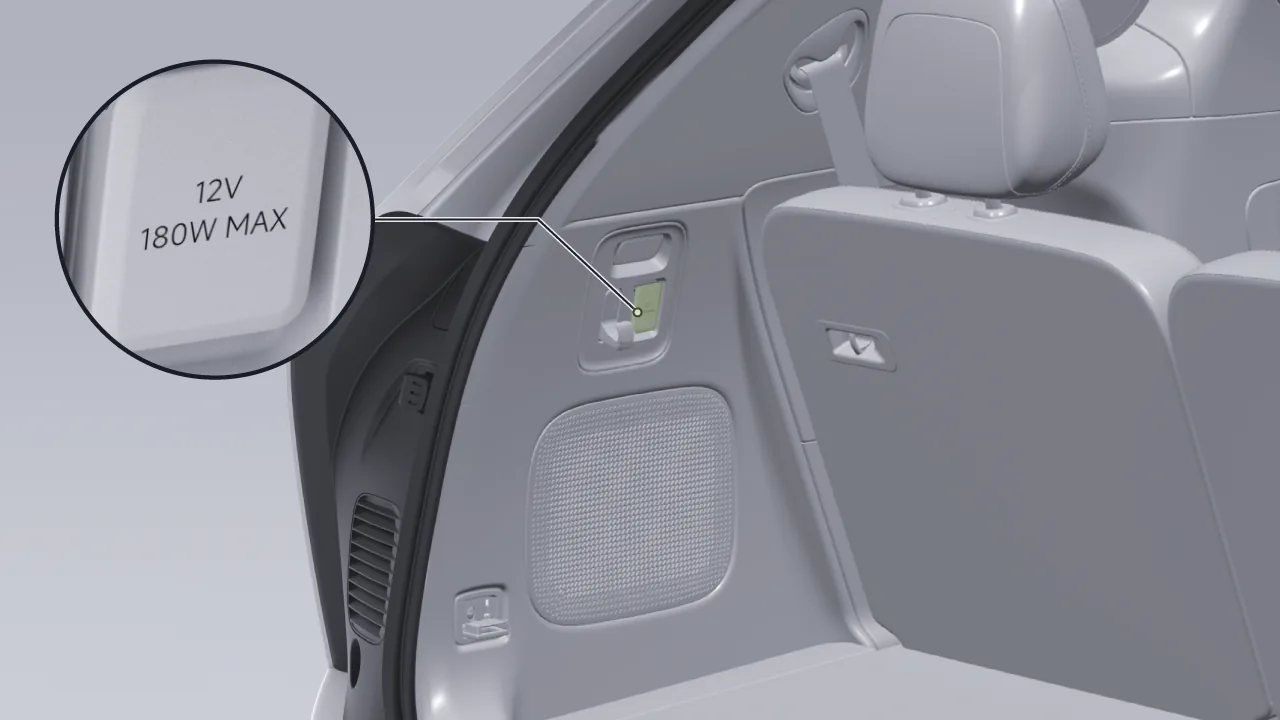
12V low-voltage power outlet: The maximum supported power is 180W.
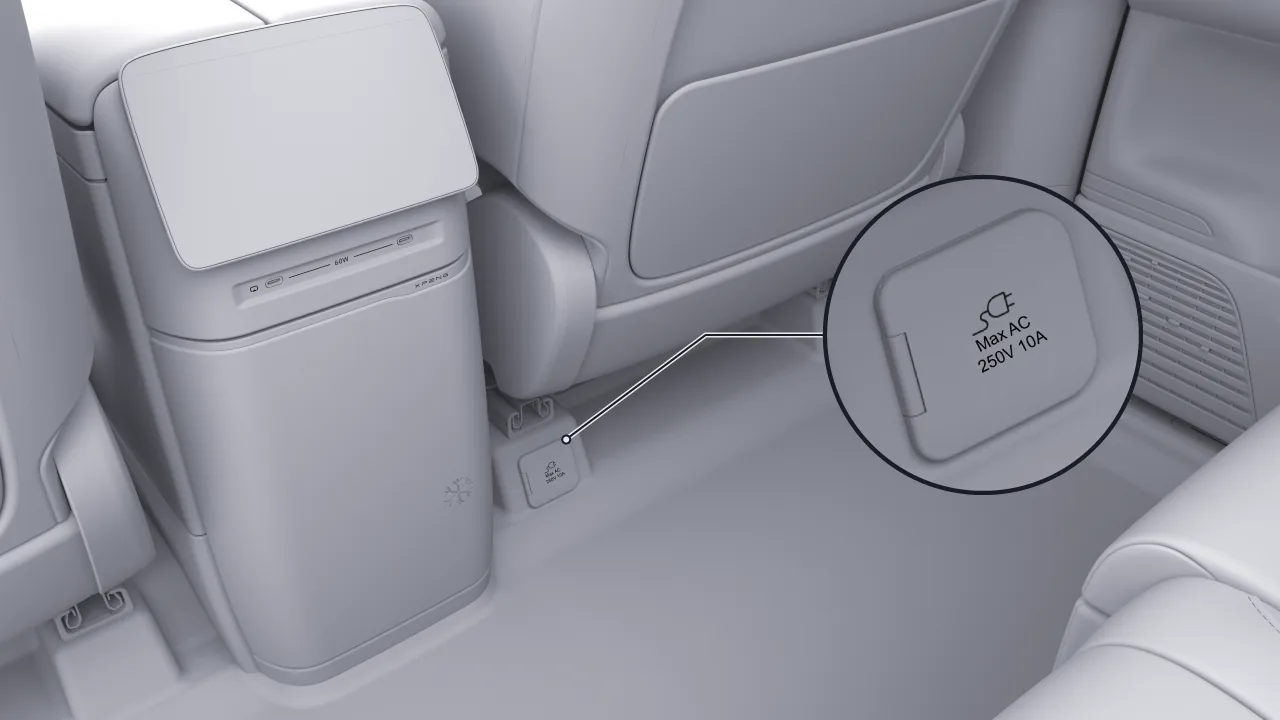
The AC power outlet is located under the passenger seat and supports a maximum power of 2.2 kW.
Caution After use, check whether the lid is fully closed.
Do not allow beverages or other liquids or foreign objects to enter the AC power outlet, otherwise malfunctions such as short circuits may easily occur.
Warning Do not allow children to operate the power socket.
Do not insert conductive objects, such as sewing needles or iron wire, into the power socket.
After the delay power-off function is enabled, after the vehicle Power Off, the in-vehicle wireless charging, USB ports, and 12V low-voltage power outlets will delay Power Off according to the set duration.
You can turn the delayed power-off function on/off and set it through the central control screen or the mobile app.
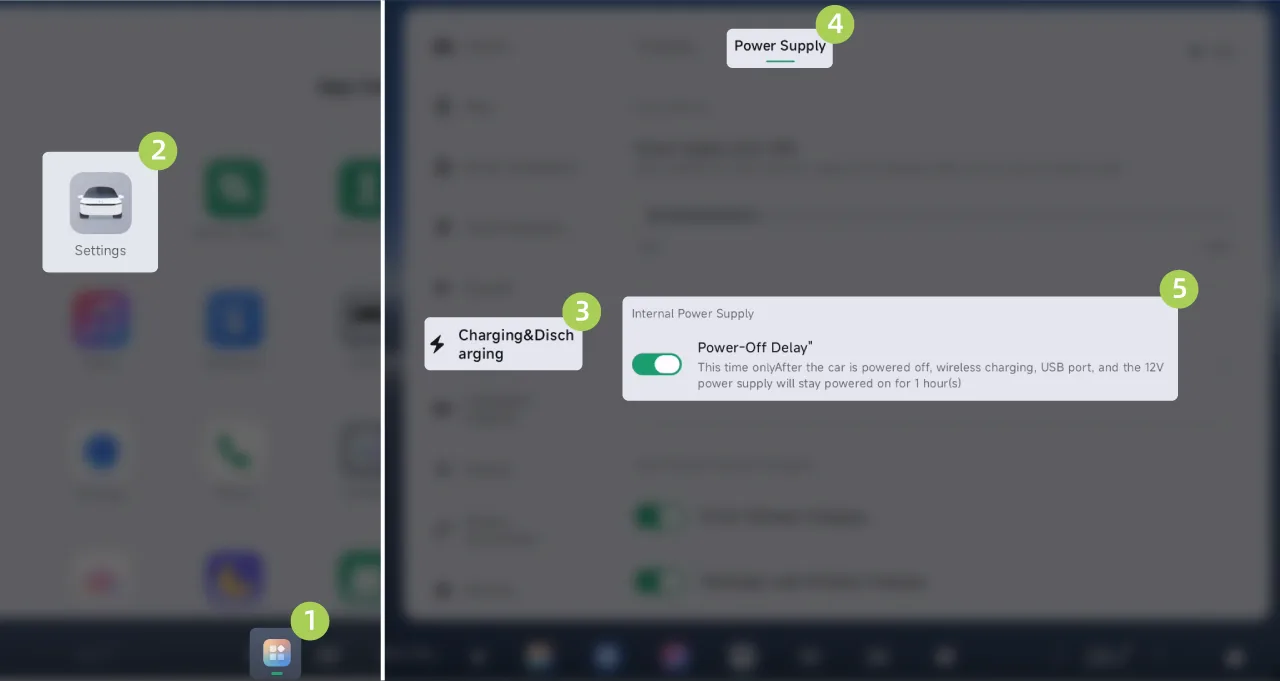
Center Control Screen: on the central control screen “ →Settings→Charging and Discharging→Power Supply”On the interface, you can enable/disable the delayed power-off function. Tap The delayed power-off function can be set.
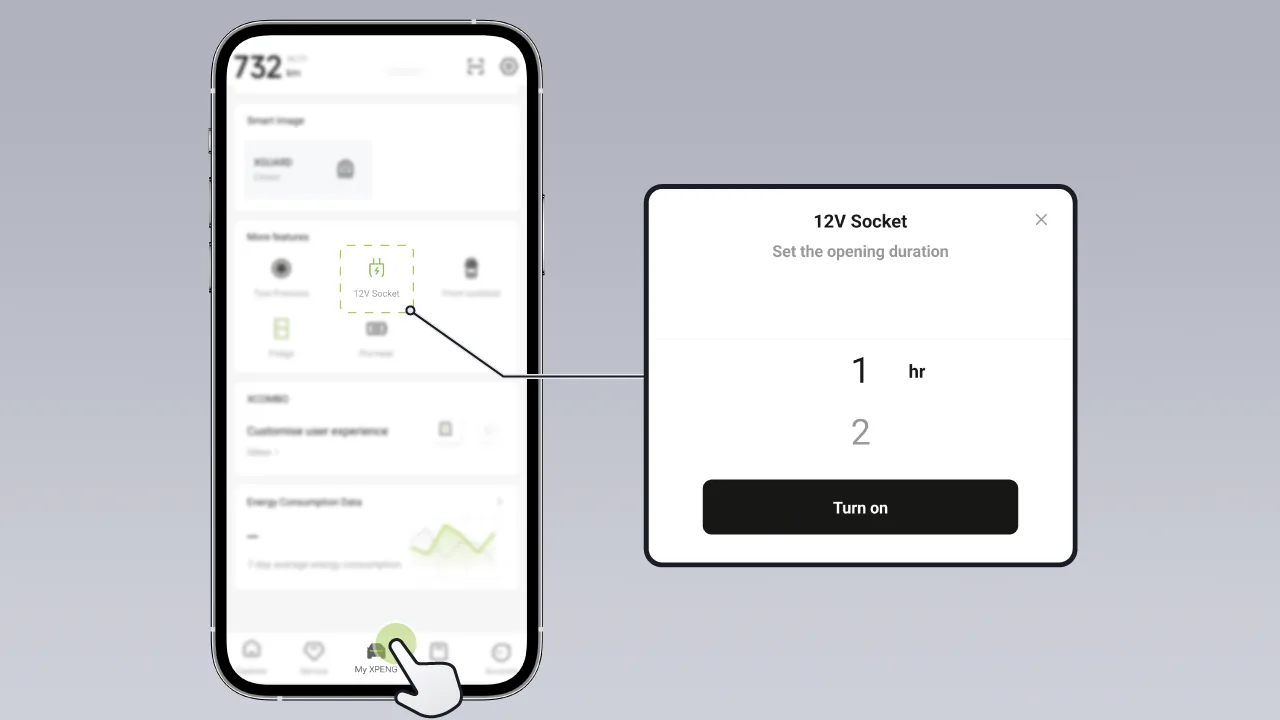
Mobile App: In the mobile app Tap the screen Tap the icon to enter the delayed power-off settings screen.
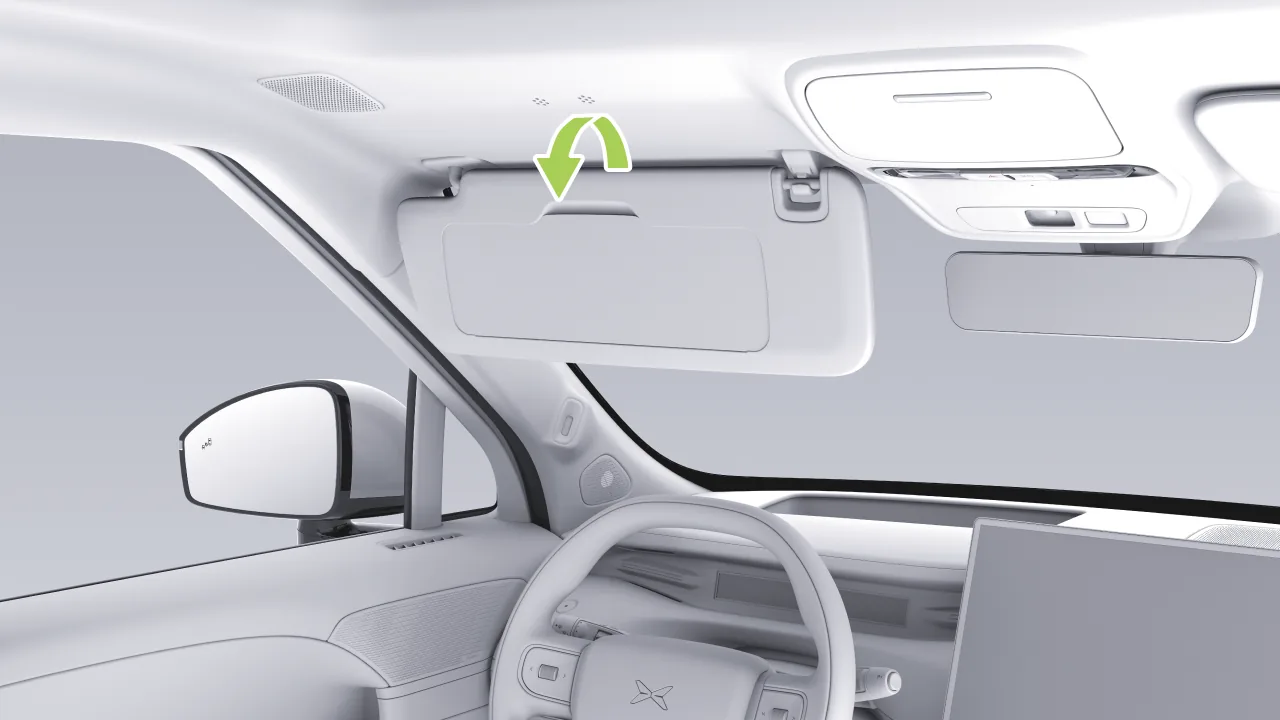
Flip the sun visor downward in the direction of the arrow to block sunlight entering through the front windshield.
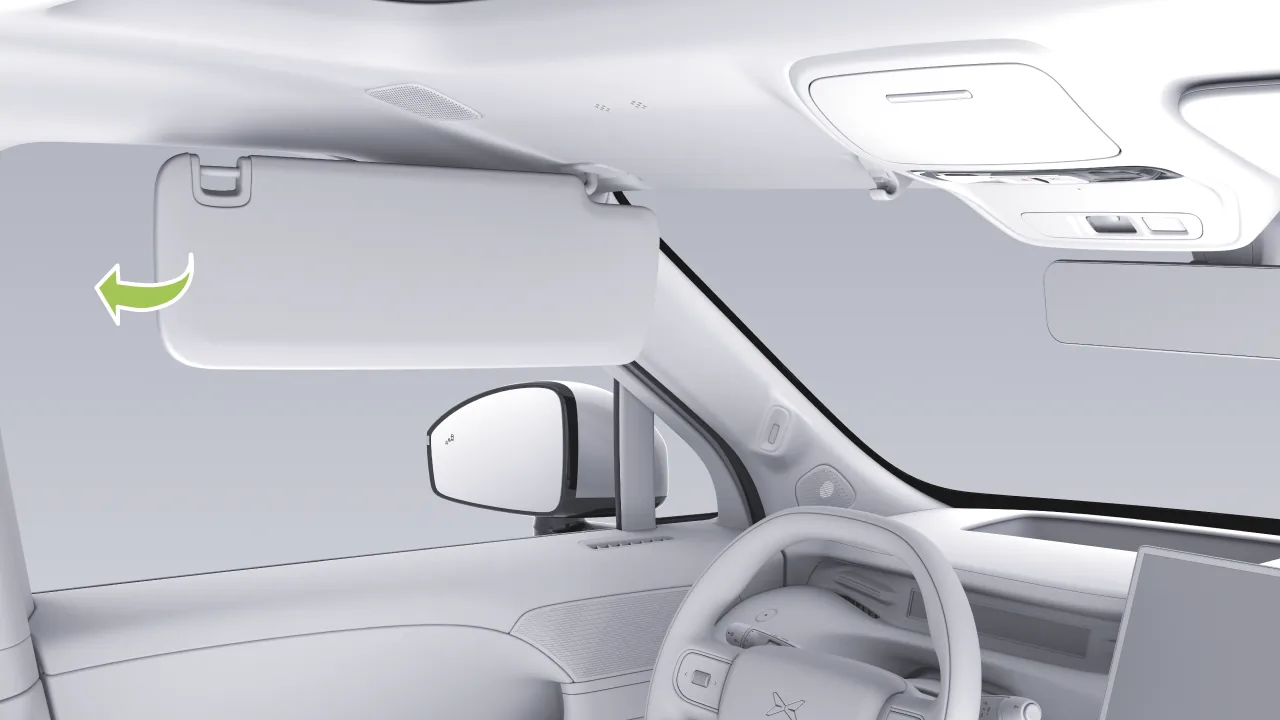
After folding down the sun visor, remove the end of the sun visor near the Rearview Mirror from the bracket, and turn the sun visor toward the window to block sunlight shining in through the window glass.
Warning A lowered sun visor may affect the forward field of vision. If the sun visor is no longer needed, be sure to return it to the bracket.
Both the driver and passenger sun visors are equipped with vanity mirrors, which you can use for grooming.
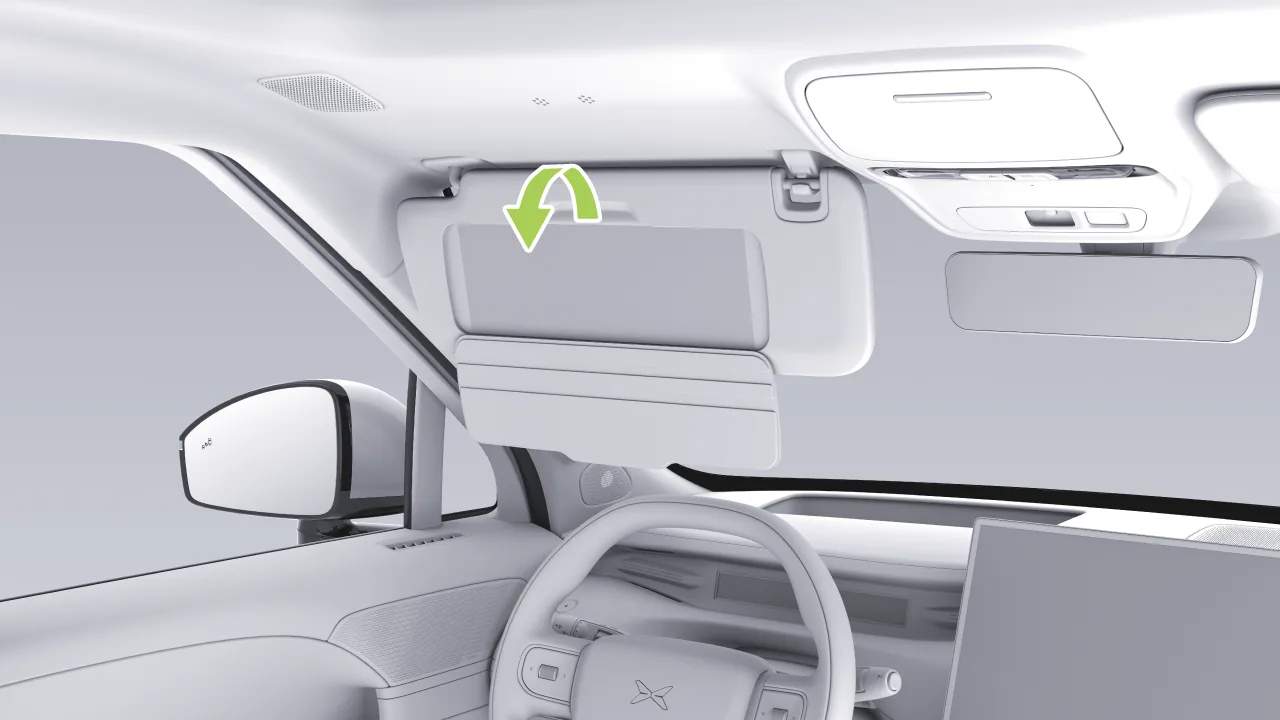
Move the sun visor to a suitable position, flip down the vanity mirror cover panel (the vanity mirror cover panel can also be magnetically attached to the back of the sun visor), and turn on the vanity mirror light.
After closing the vanity mirror cover, the vanity mirror light turns off, and fold the sun visor.
Tips When the vanity mirror is not in use, please close the vanity mirror cover.
Even if the vanity mirror cover is not closed (for example, the cover is magnetically attached to the back of the sun visor), the vanity mirror light will automatically turn off when the sun visor is moved to its non-use position.
Warning Do not use the vanity mirror while driving the vehicle.
Multiple cup holders are provided in the vehicle for placing beverages or cups.
The auxiliary instrument panel is equipped with two cup holders.
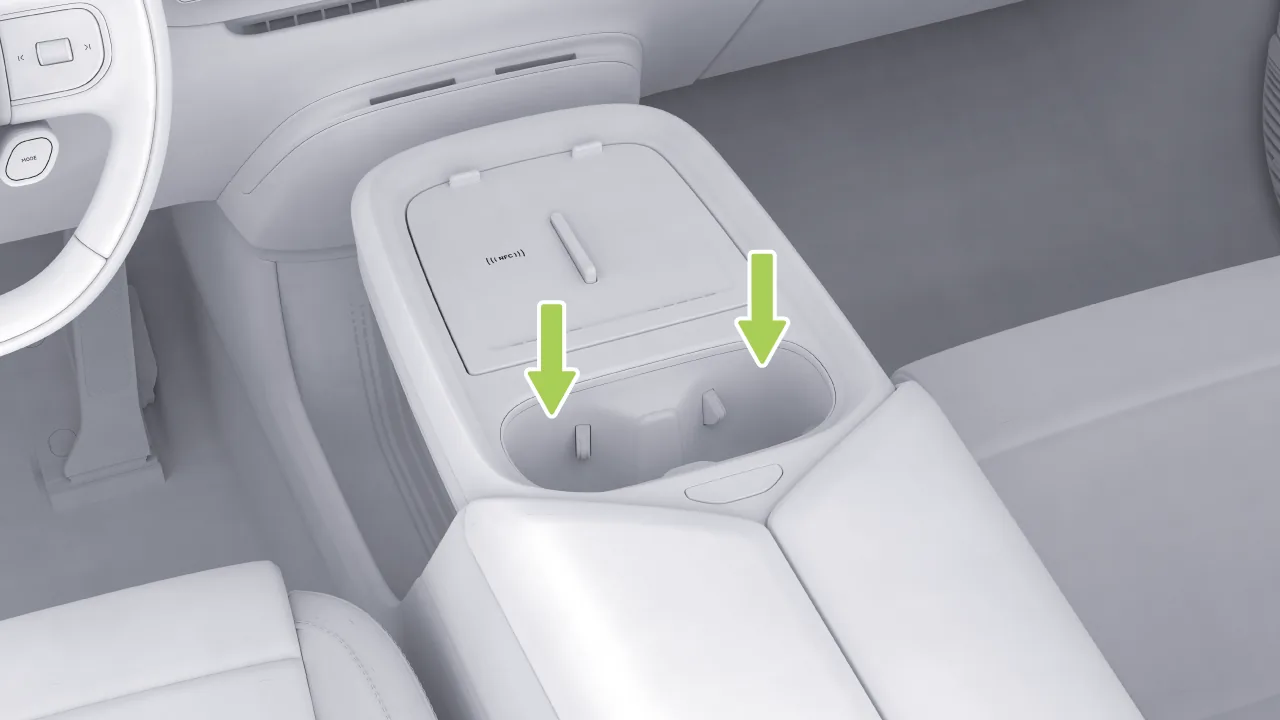
Using the Cup Holder:Push the cup holder downward until it locks into place.
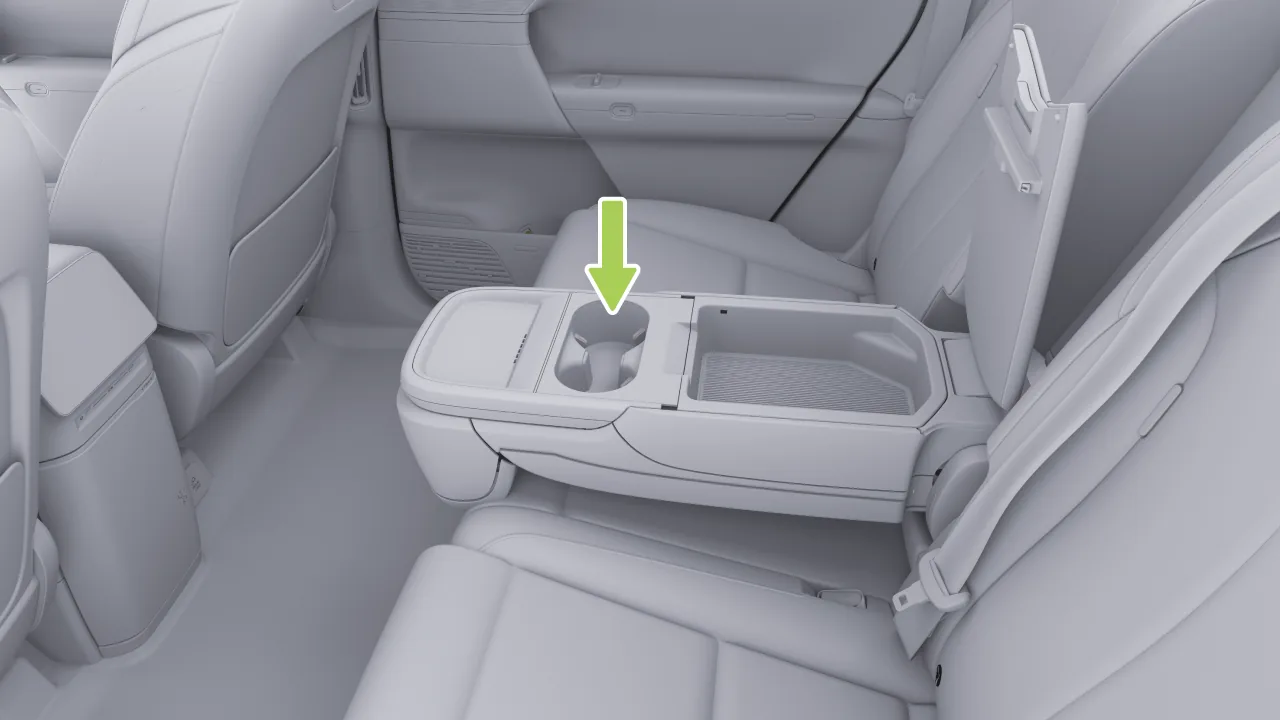
The center armrest of the second-row seats is equipped with two cup holders. Open it to use them.
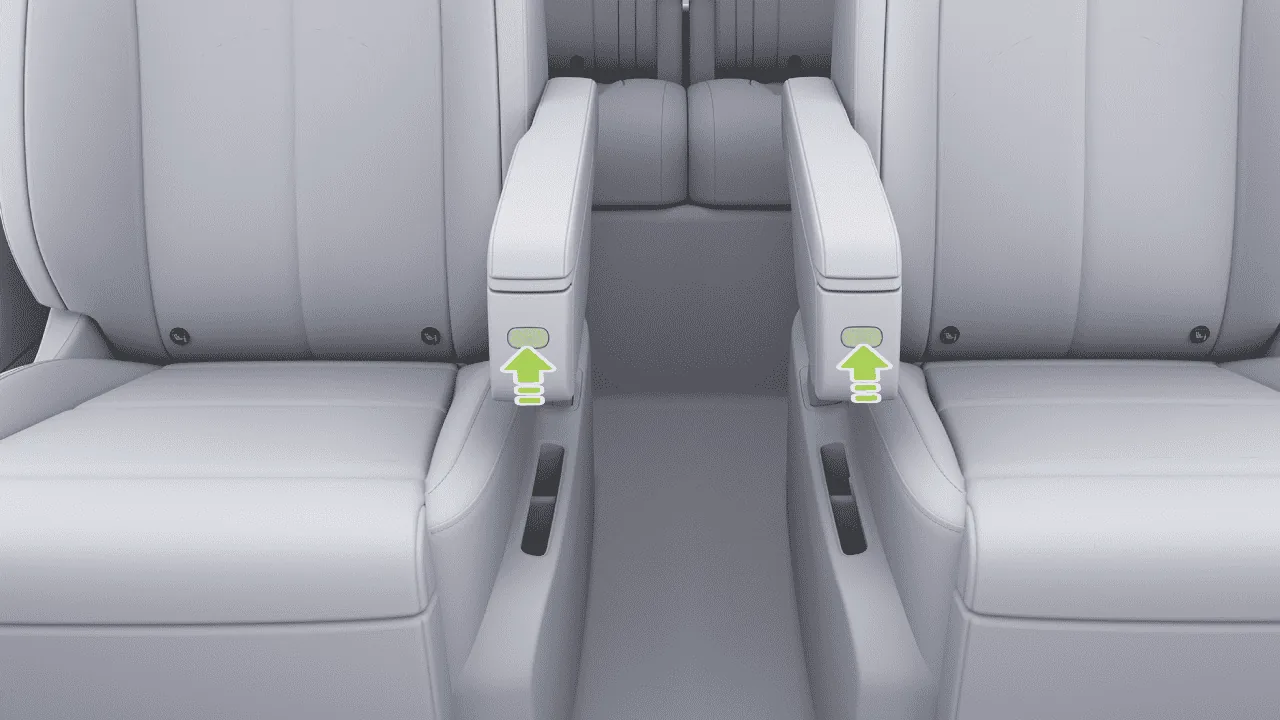
Each armrest of the second-row seats is equipped with a pop-out cup holder. Press the cup holder switch to open it for use.
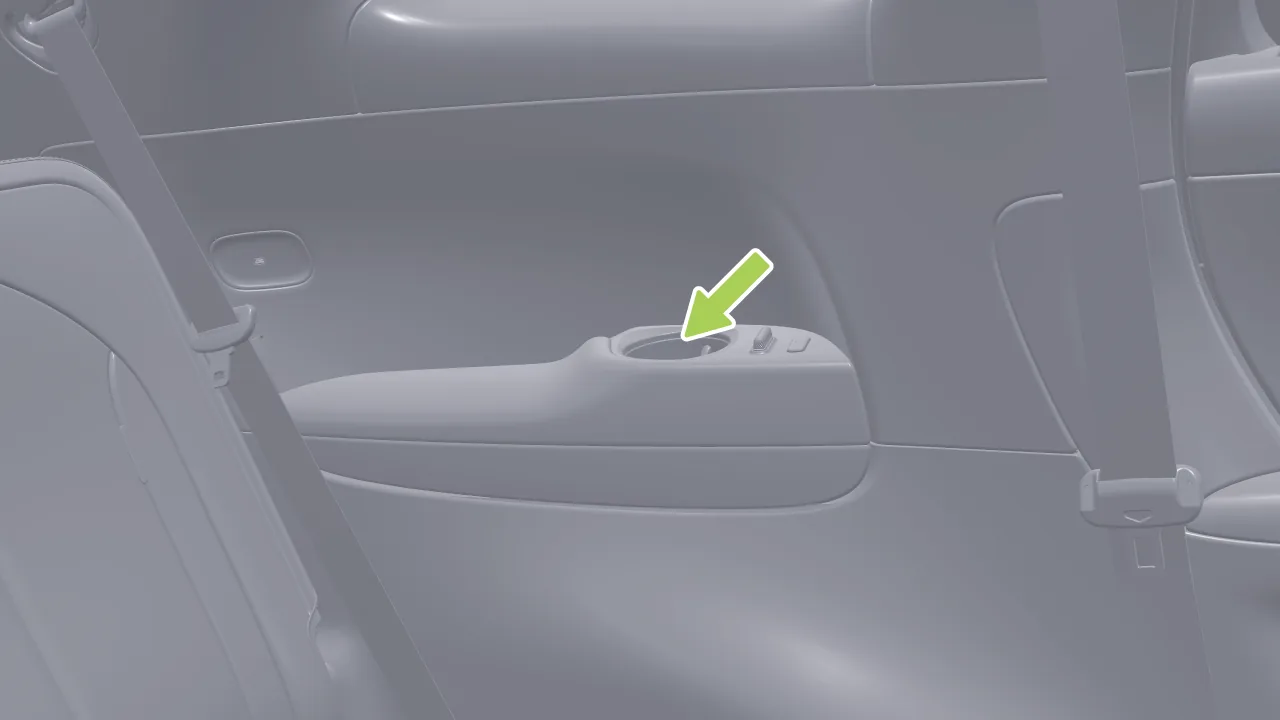
The third-row cup holders are located on the armrests on the left and right sides.
Caution When using the cup holder, avoid placing small loose items or other debris in it to prevent the cup holder from jamming.
Warning Do not place open beverages or cups of water in the cup holder while the vehicle is in motion. Hot liquids may splash out and scald occupants or damage the vehicle or its in‑vehicle electrical equipment.
The vehicle interior is equipped with abundant expandable magnetic attachment interfaces, which can be used with a variety of magnetic accessories.
Tips Magnetic accessories need to be purchased by you at a XPENG Motors Service Center.
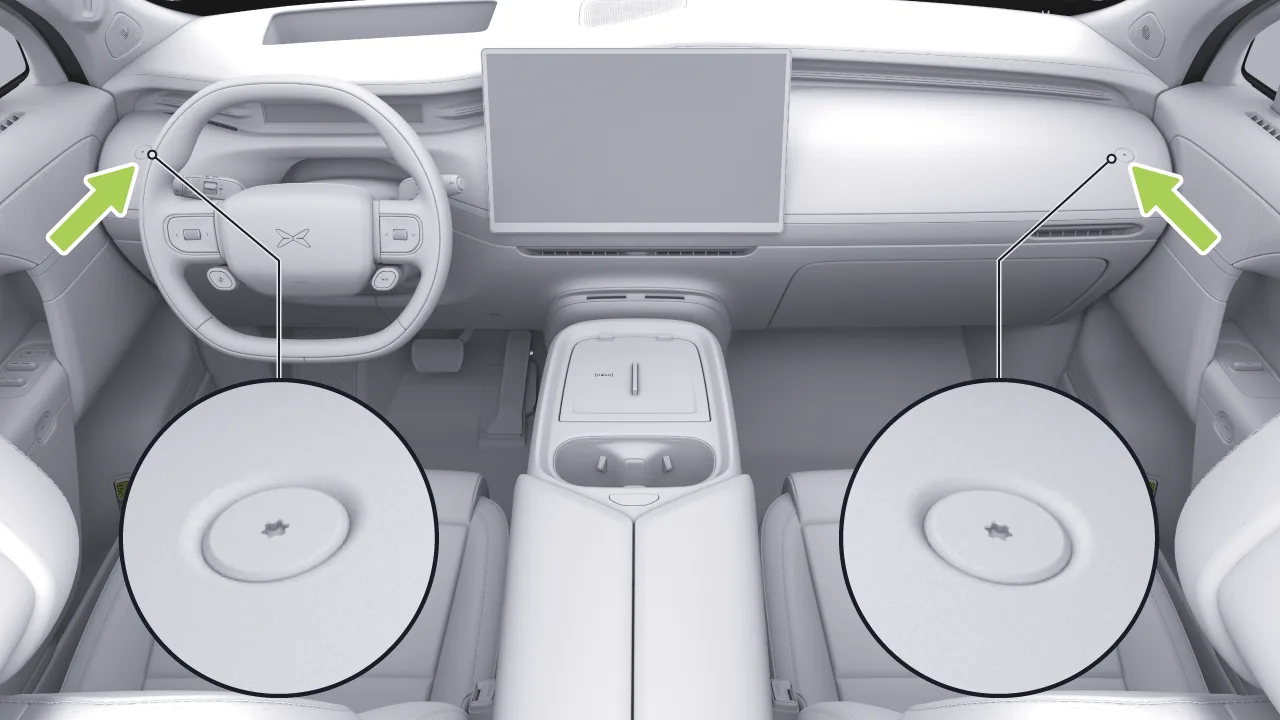
A threaded interface is provided on each side of the instrument panel. The threaded interfaces support power supply, with a maximum supported power of 50 W, and can be used with accessories such as magnetic phone wireless charging mounts.
Tips Before installing the magnetic accessory, fully unscrew and remove the bolt from the port.
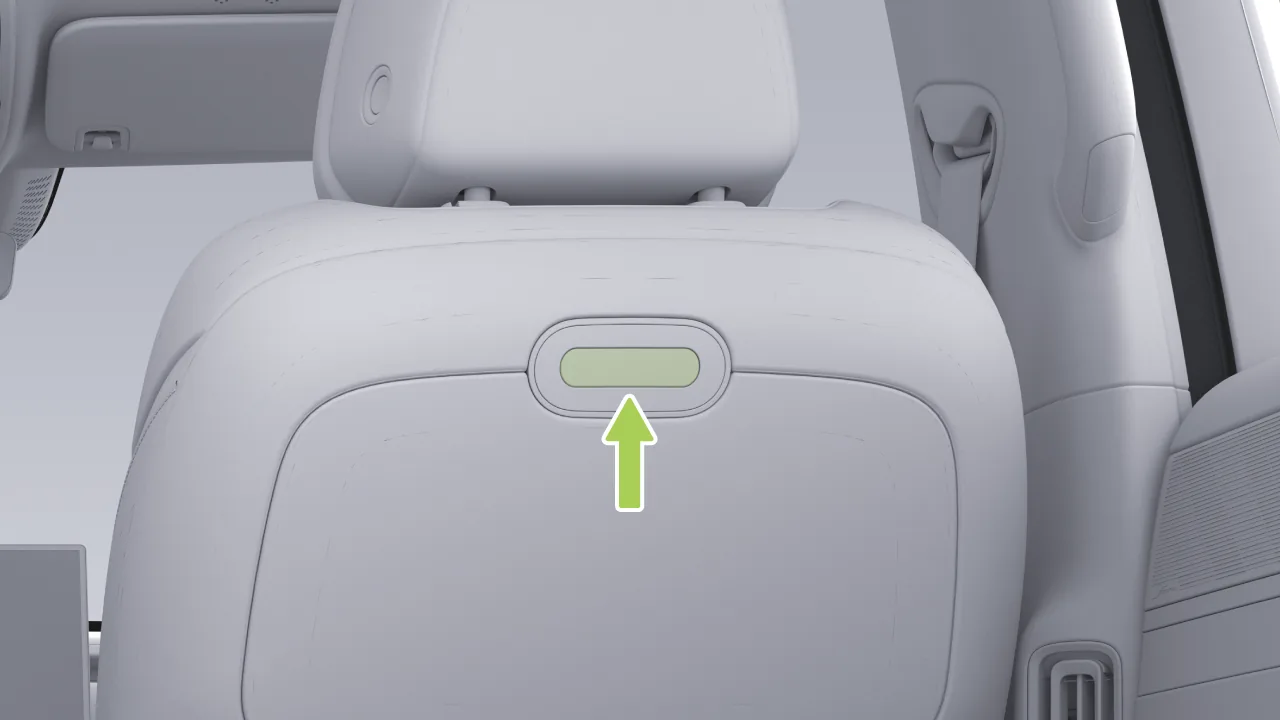
The driver or passenger seatback is equipped with an electromagnetic multi-function interface, which supports power supply with a maximum supported power of 50 W, and can be used with accessories such as the X-Link tray table and tablet holder. When using it, align the expansion accessory with the interface and push it in until you hear a "click".
Caution The port cover can be unlocked and opened only when the dedicated extension accessory is in close proximity; otherwise, it cannot be opened. Do not force it open to prevent damage.
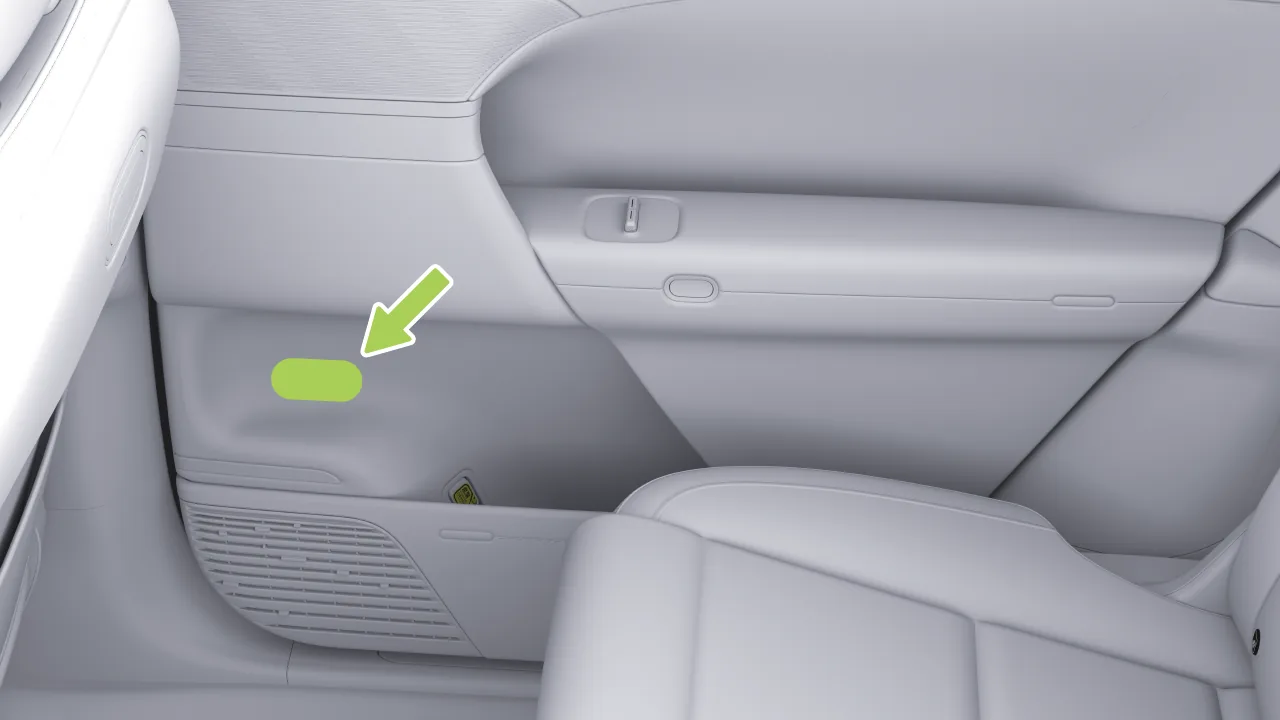
The left and right magnetic attachment points on the second-row doors can be used with accessories such as a magnetic tissue box and a small storage box.
Five seats
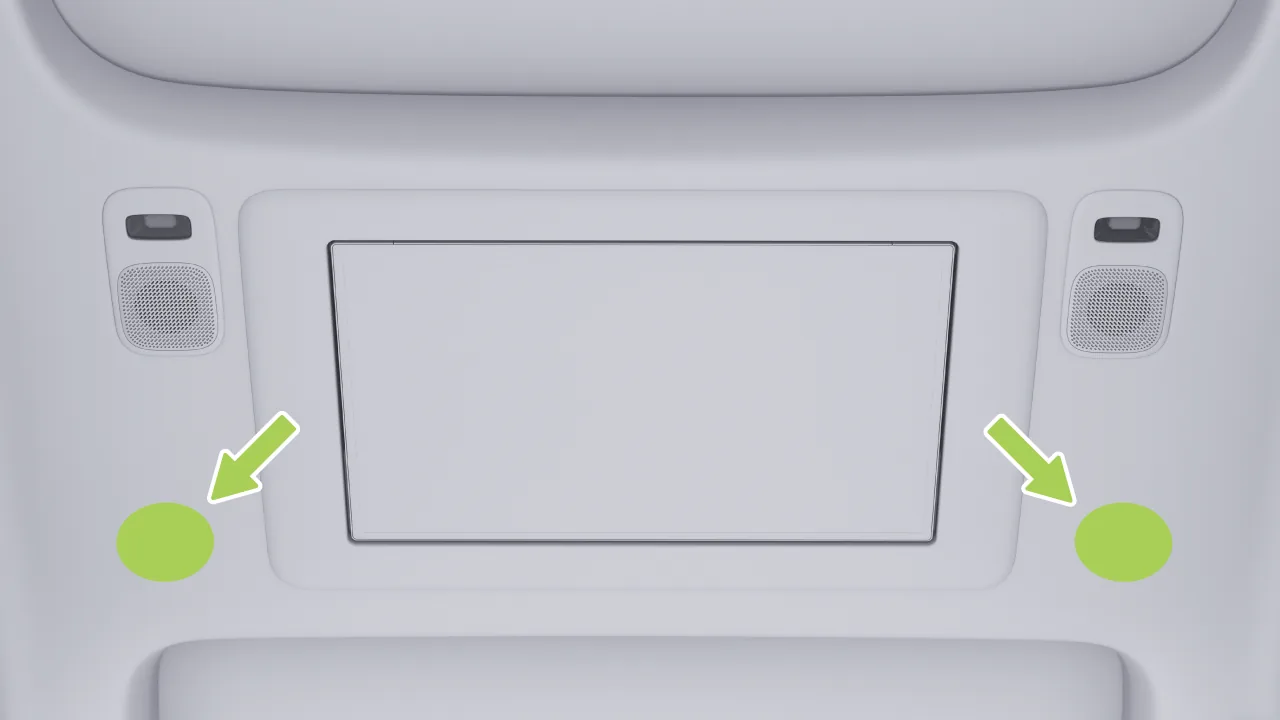
Six and Seven Seats
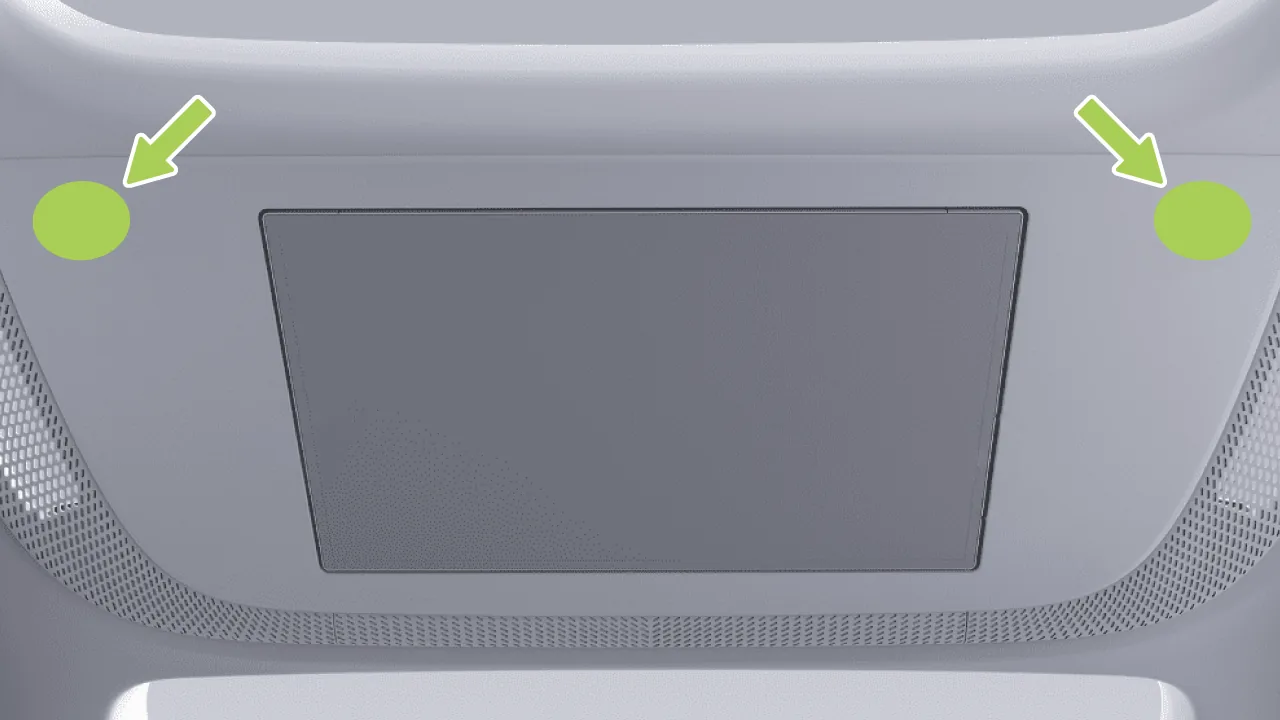
Magnetic attachment points are provided on both sides of the second-row entertainment screen, and can be used with accessories such as magnetic reading lights and ambient lights.
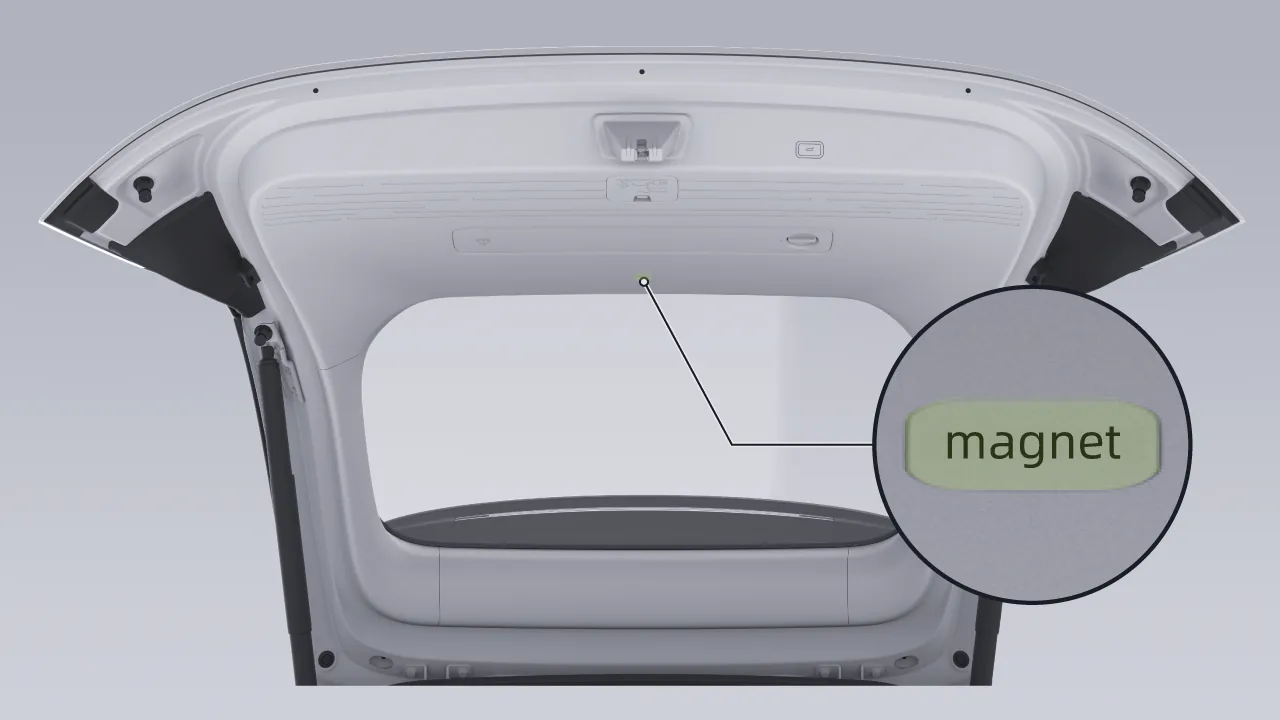
The tailgate trim panel is equipped with magnetic attachment points, which can be used with accessories such as magnetic camping lights.
Tips When not using magnetic accessories, remove the accessories and store them properly.
Caution When using magnetic accessories, keep them away from objects sensitive to magnetic fields, such as disks, magnetic cards, magnetic tapes, computer monitors, and watches.
When using magnetic accessories, pay attention to the method of operation to avoid causing injury to the human body.
The vehicle is equipped with multiple convenient storage spaces for storing daily items.
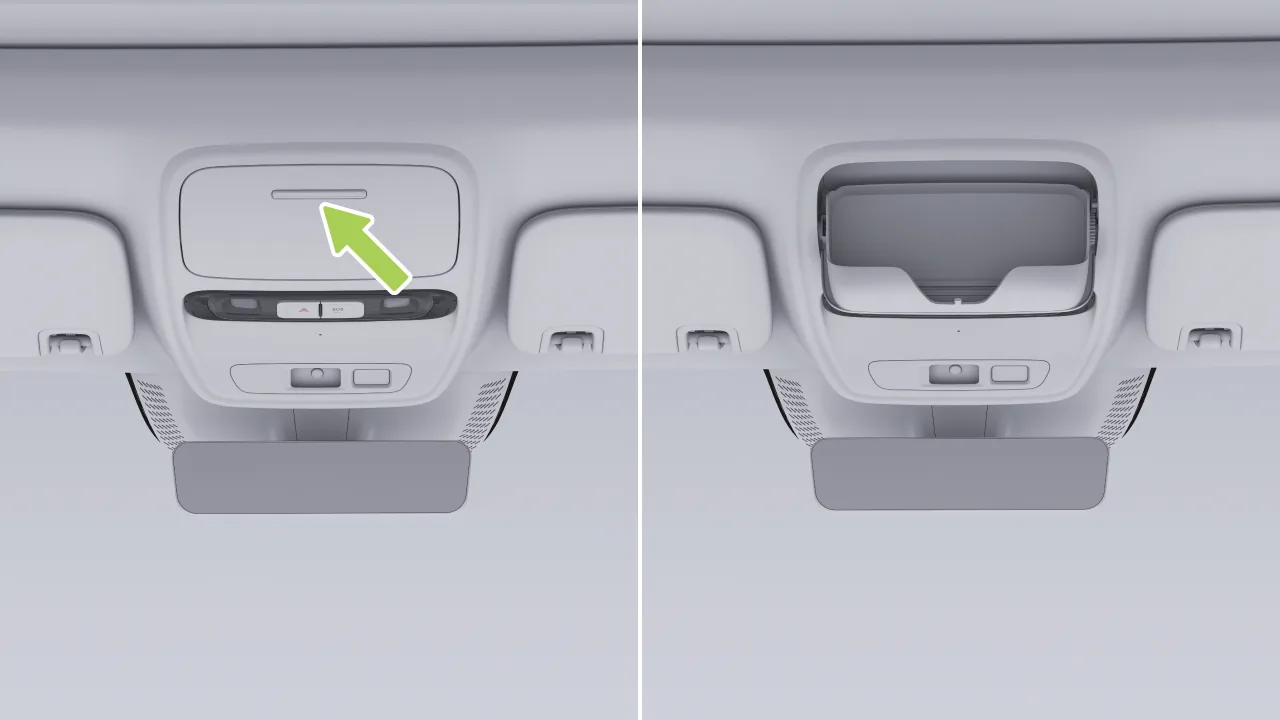
Press the sunglasses holder cover to open the sunglasses holder.
When closing, push the sunglasses holder cover upward until you hear a "click" indicating it is closed.
Press the center armrest box switch to open the center armrest box.
When closing, push the left and right armrest box covers inward until they are fully closed.
Caution Items placed in the center armrest compartment must not be too large, or the armrest cannot be closed. An open center armrest compartment may interfere with the driver.
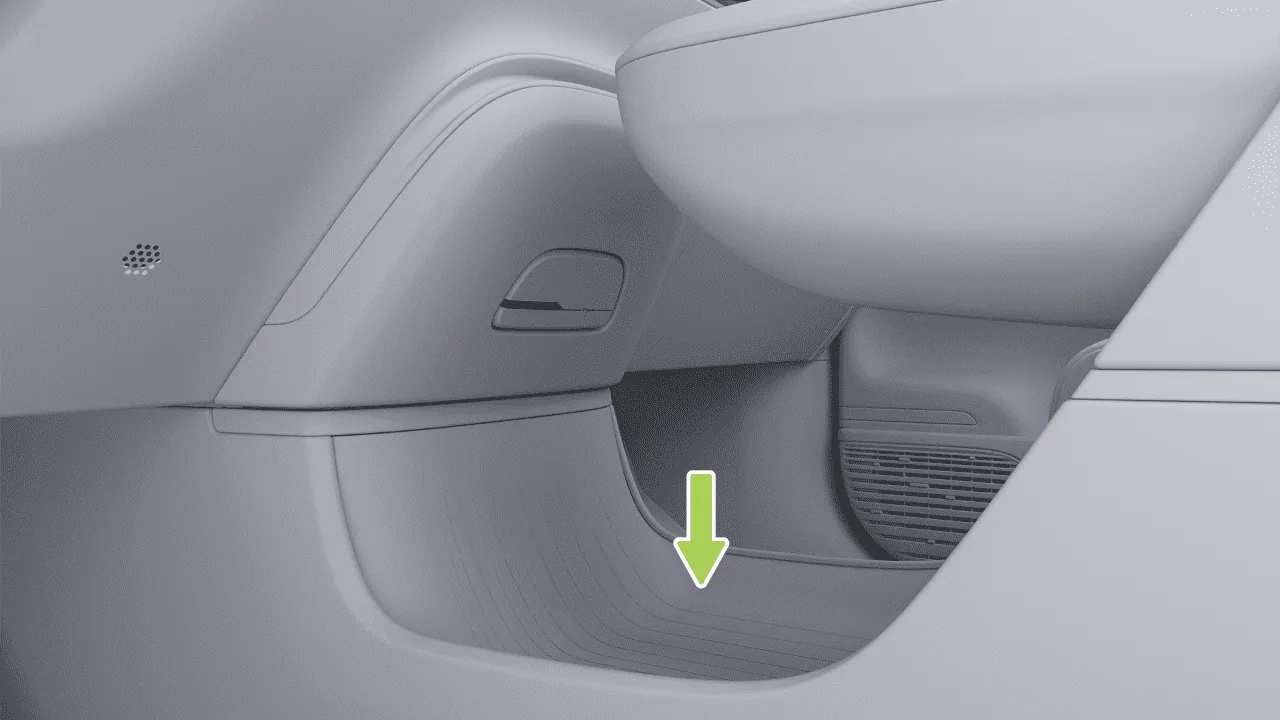
The pass-through storage compartment is located below the front of the sub-instrument panel.
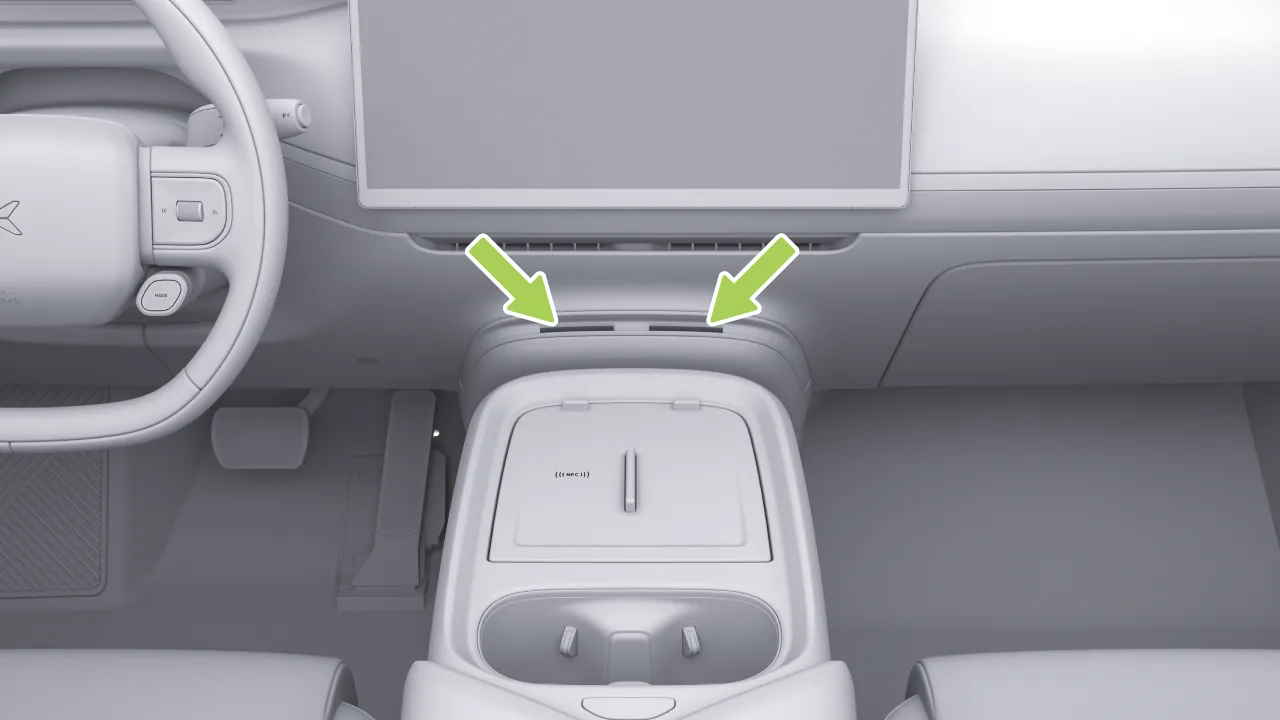
The card slot on the instrument panel is located in front of the wireless charging panel and can hold items such as NFC cards.
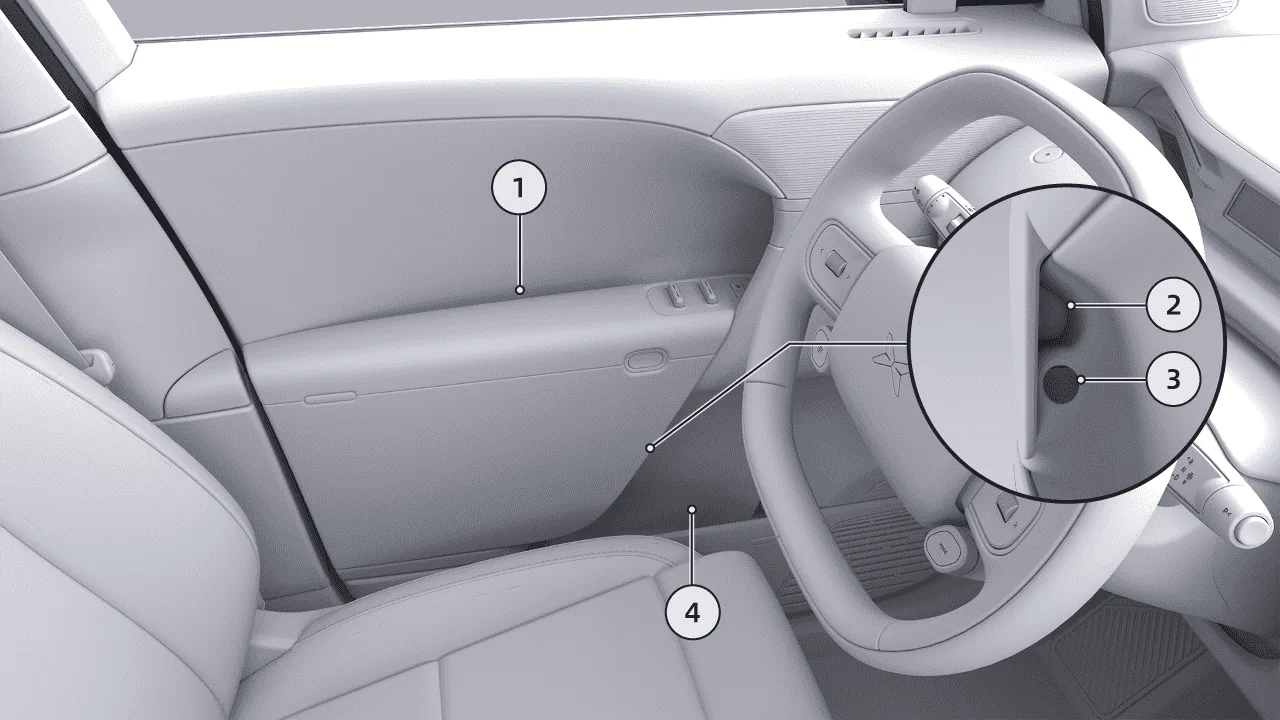
Phone Slot
Concealed Umbrella Slot
Concealed Window-Breaking Hammer Slot (Driver Side)
Storage Box
Caution The umbrella slot is intended for storing folding umbrellas. Before placing a folding umbrella inside, drain as much rainwater as possible to prevent Water Accumulation from soaking the lining for an extended period.
Do not place sharp‑tipped or overly long umbrellas, or items the slot cannot secure, in the umbrella slot. Doing so may scratch the door trim panel.
Ensure the emergency hammer is fully inserted into the slot and securely fastened to prevent rattling or detachment while driving.
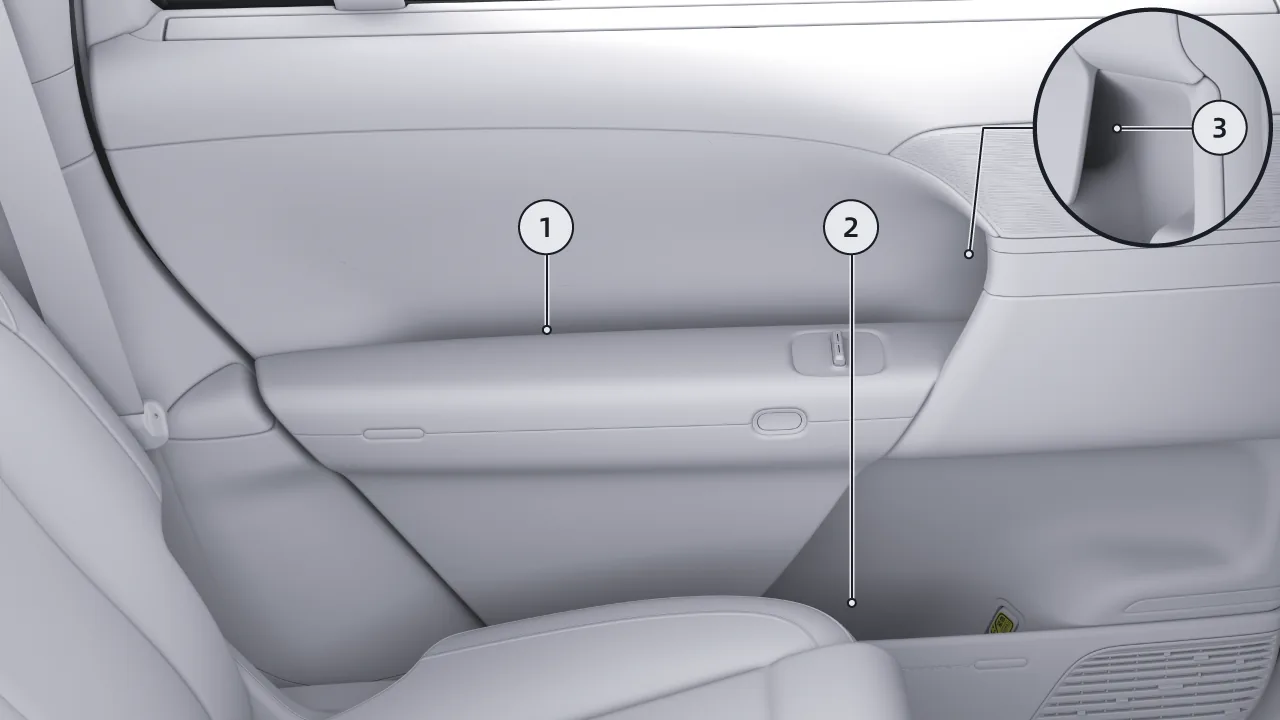
Phone Slot
Storage Box
Concealed Storage Compartment
Caution Do not block the emergency door unlocking mechanism when placing objects in the door stowage space, as this will not work in an emergency.
Do not place glasses, lighters or spray tanks in the storage device to avoid damage caused by jagging.
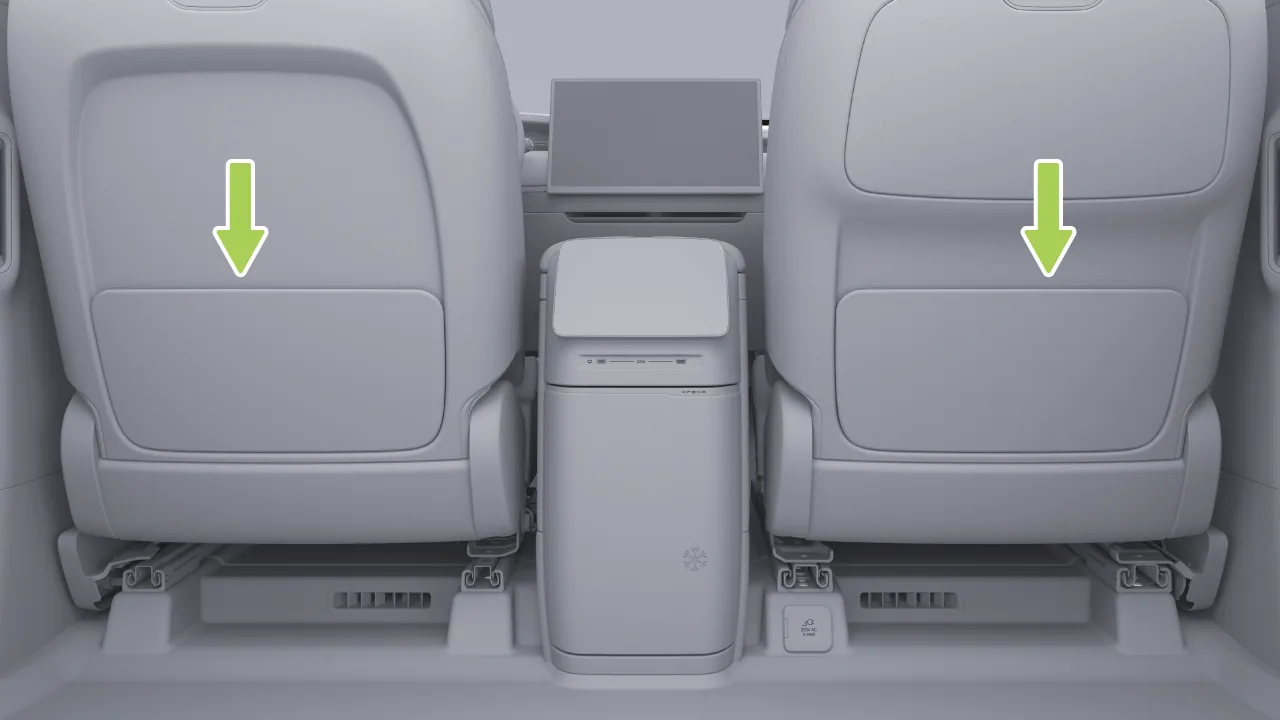
A literature pocket is provided below the front row seatback for storing items such as receipts and magazines.
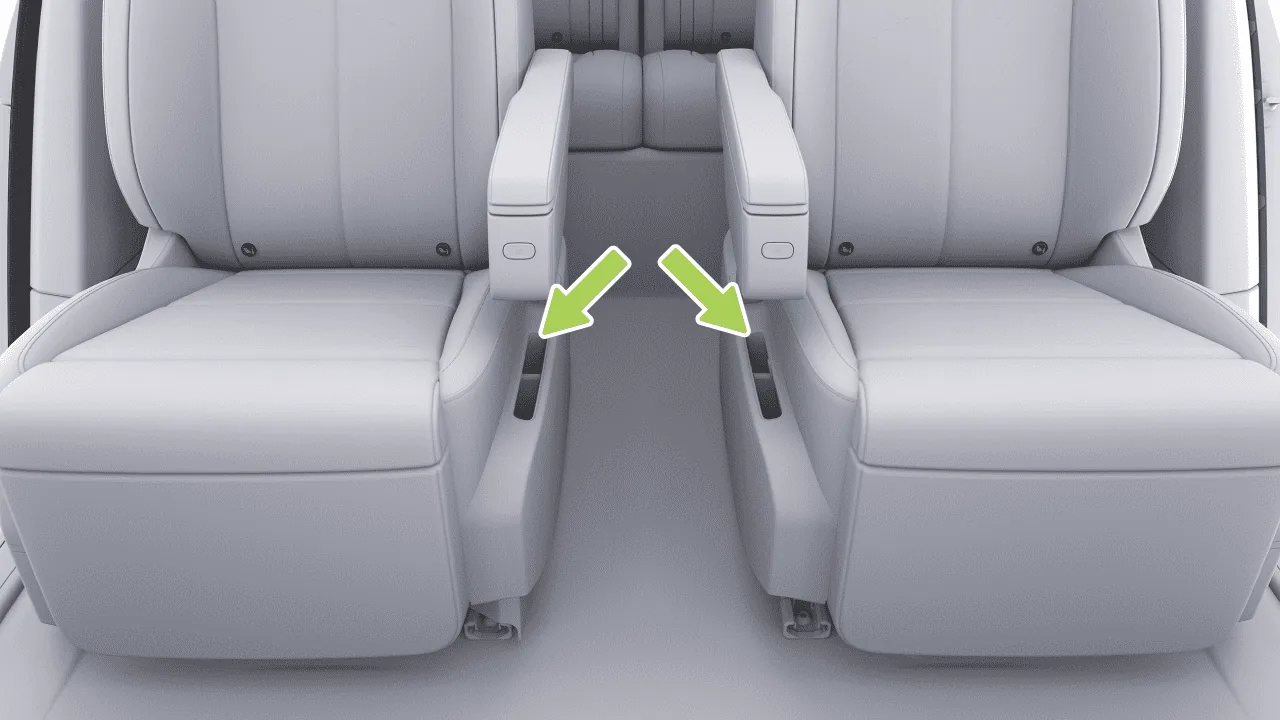
A phone slot and a remote control slot are provided on the inner side of the second-row seats, which can be used to place items such as mobile phones and entertainment screen remote controls.
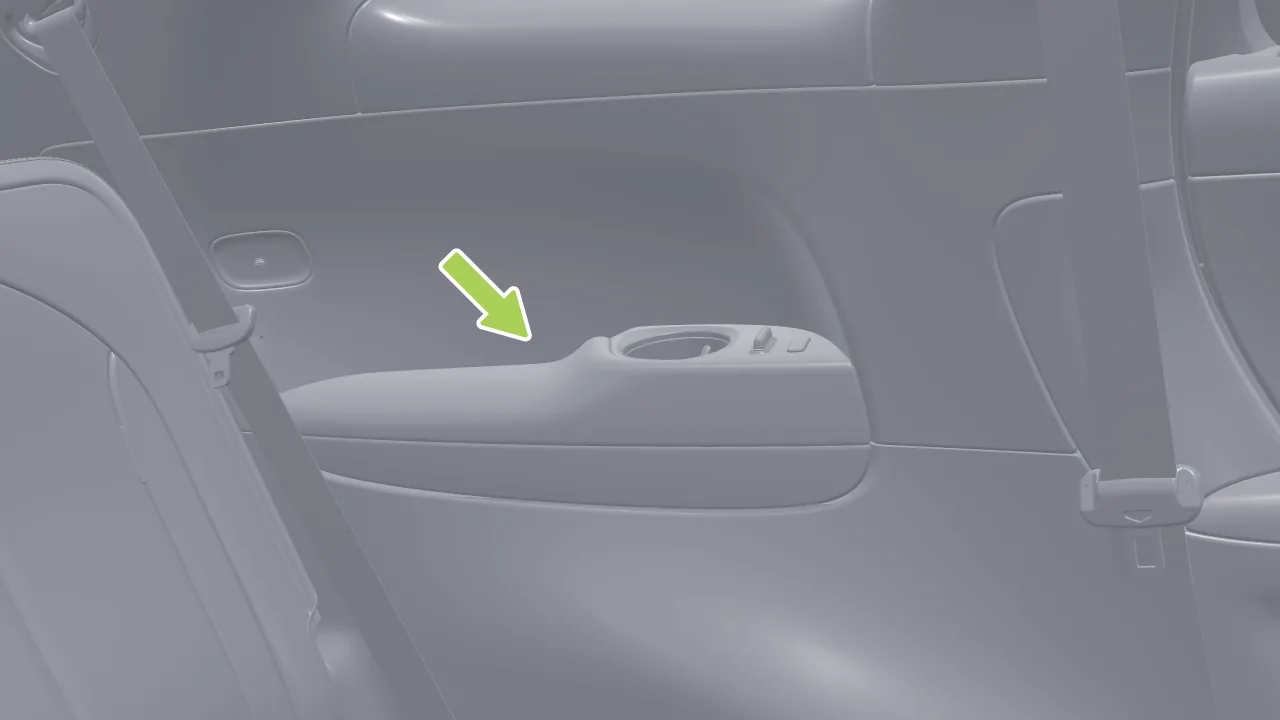
A phone slot is provided on the side of the third-row armrest, which can be used to place a mobile phone and other items.
Roof Hook (Five-Seat)
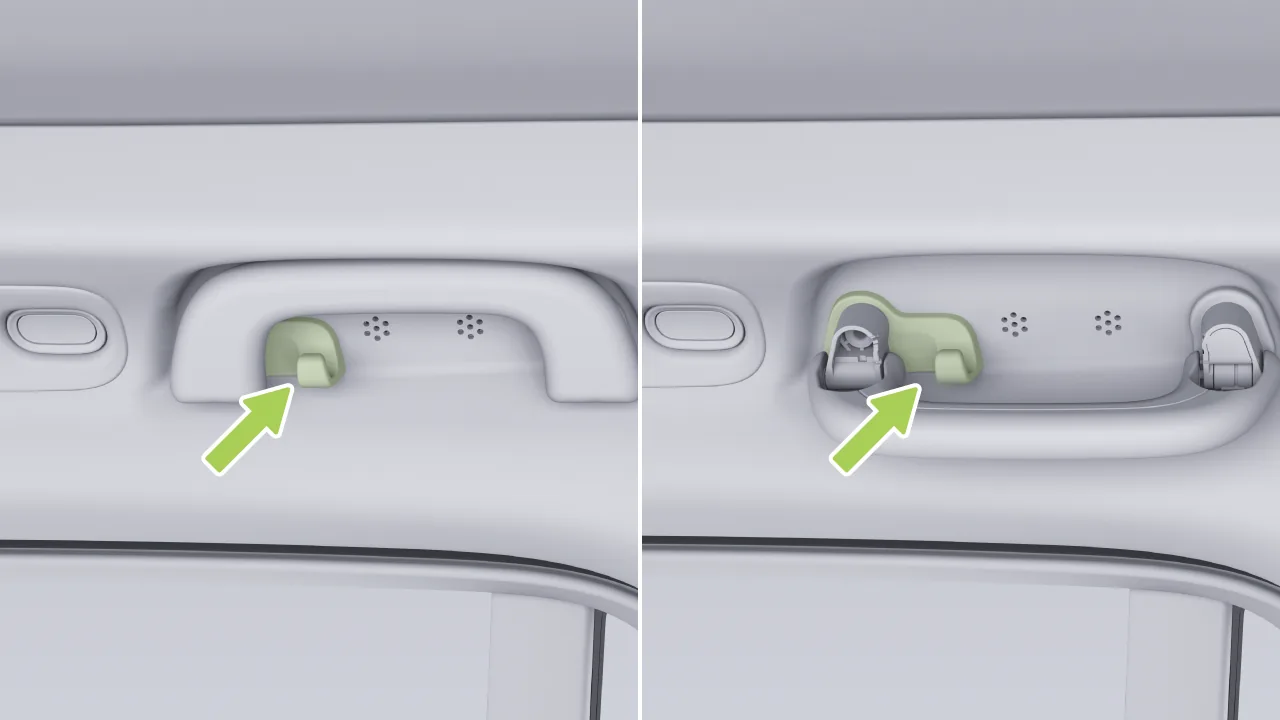
Hooks are provided above the left and right B-pillars inside the vehicle for hanging clothing and other items.
Trunk Hook (Five-Seat)
Trunk Hook (Six- and Seven-Seat Models)
The trunk is equipped with a hook. Press the upper part of the hook to use it.
Caution Do not hang items greater than 3 kg to avoid damaging the hook.
Warning Do not hang any hard objects (e.g. hangers, fruits, glass bottles, etc.) to prevent injury if the side curtain is detonated.
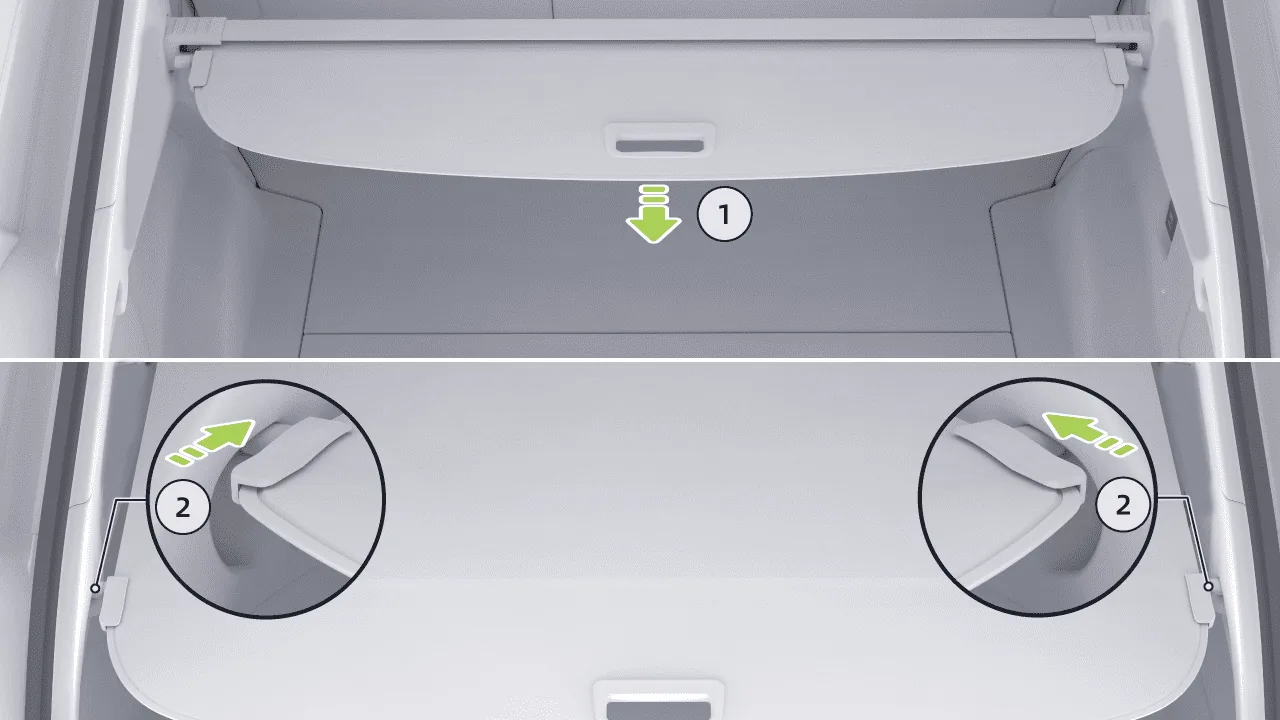
Pull out the cargo shade.
Insert both ends of the cargo shade into the fixing grooves on each side of the trunk.
Warning Do not place any objects on the cargo shade when it is deployed, as this will damage the cargo shade or cause injury to the occupants of the vehicle in the event of a collision.
Children are forbidden from climbing or sitting on the shade curtain, since this could not only cause damage to it but also result in children falling and sustaining injuries.
Retract either end of the cargo shade and remove it.
To install, first secure one end of the cargo shade into the fixing groove, retract the other end, and then lock it into place.
Warning When installing the cargo shade, it is essential to ensure that both ends are fully engaged in the fixing slot or clip groove. Otherwise, in the event of emergency braking or collision, the loose cargo shade may cause personal injury.
The removed cargo shade should be properly placed and secured to prevent it from rolling around inside the car, which could pose a hazard in an emergency situation.
During operation, keep your hands away from the telescopic mechanism of the cargo shade to prevent getting pinched.
If the cargo shade is damaged, please promptly contact the Xpeng Service Center for a replacement.
This vehicle is equipped with an alcohol interlock interface, and a LIN interface alcohol interlock can be installed (the interface must comply with the specifications of version 50436-4 2022).
Unlock the vehicle from outside and open the door, and the vehicle will automatically power on. At this time, the instrument cluster screen and the central control screen light up, and you can use some comfort functions such as the Air Conditioner and multimedia.
When the vehicle is in the Power Off state (that is, the central control screen is off), if the NFC card key, remote key, or mobile phone Bluetooth key is placed inside the vehicle, depress the brake pedal, and the vehicle will power on.
The vehicle is equipped with a keyless entry system. You only need to carry a valid key with you to enter the vehicle before you can operate and start the vehicle.
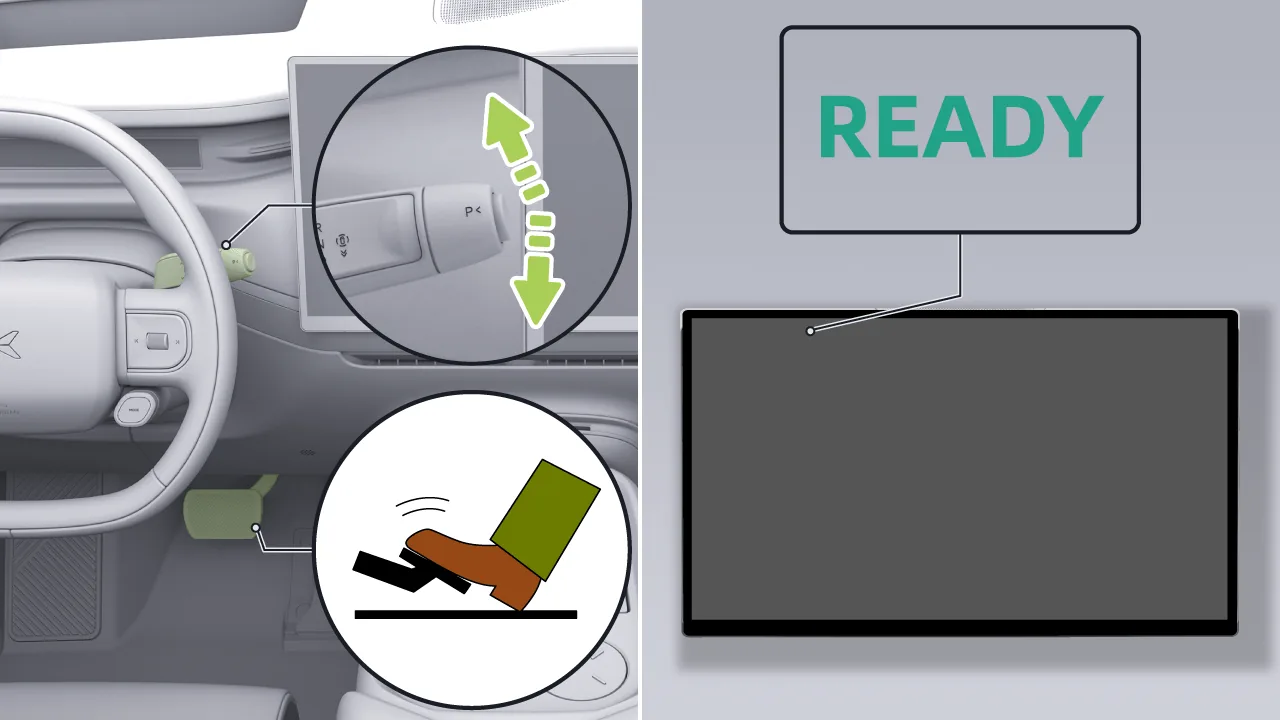
After the vehicle is powered on, ensure that the vehicle is in P gear, then depress the brake pedal. At this time, the vehicle enters the READY state, the central control screen  When the indicator illuminates, it indicates that the vehicle has started.
Caution Before starting the vehicle, properly adjust the seat, steering wheel, and interior and exterior mirrors, and make sure you can operate the brake pedal and accelerator pedal normally.
When the driver's seat is unoccupied, after locking the vehicle from outside, the vehicle powers off automatically, and the central control screen slowly turns off.
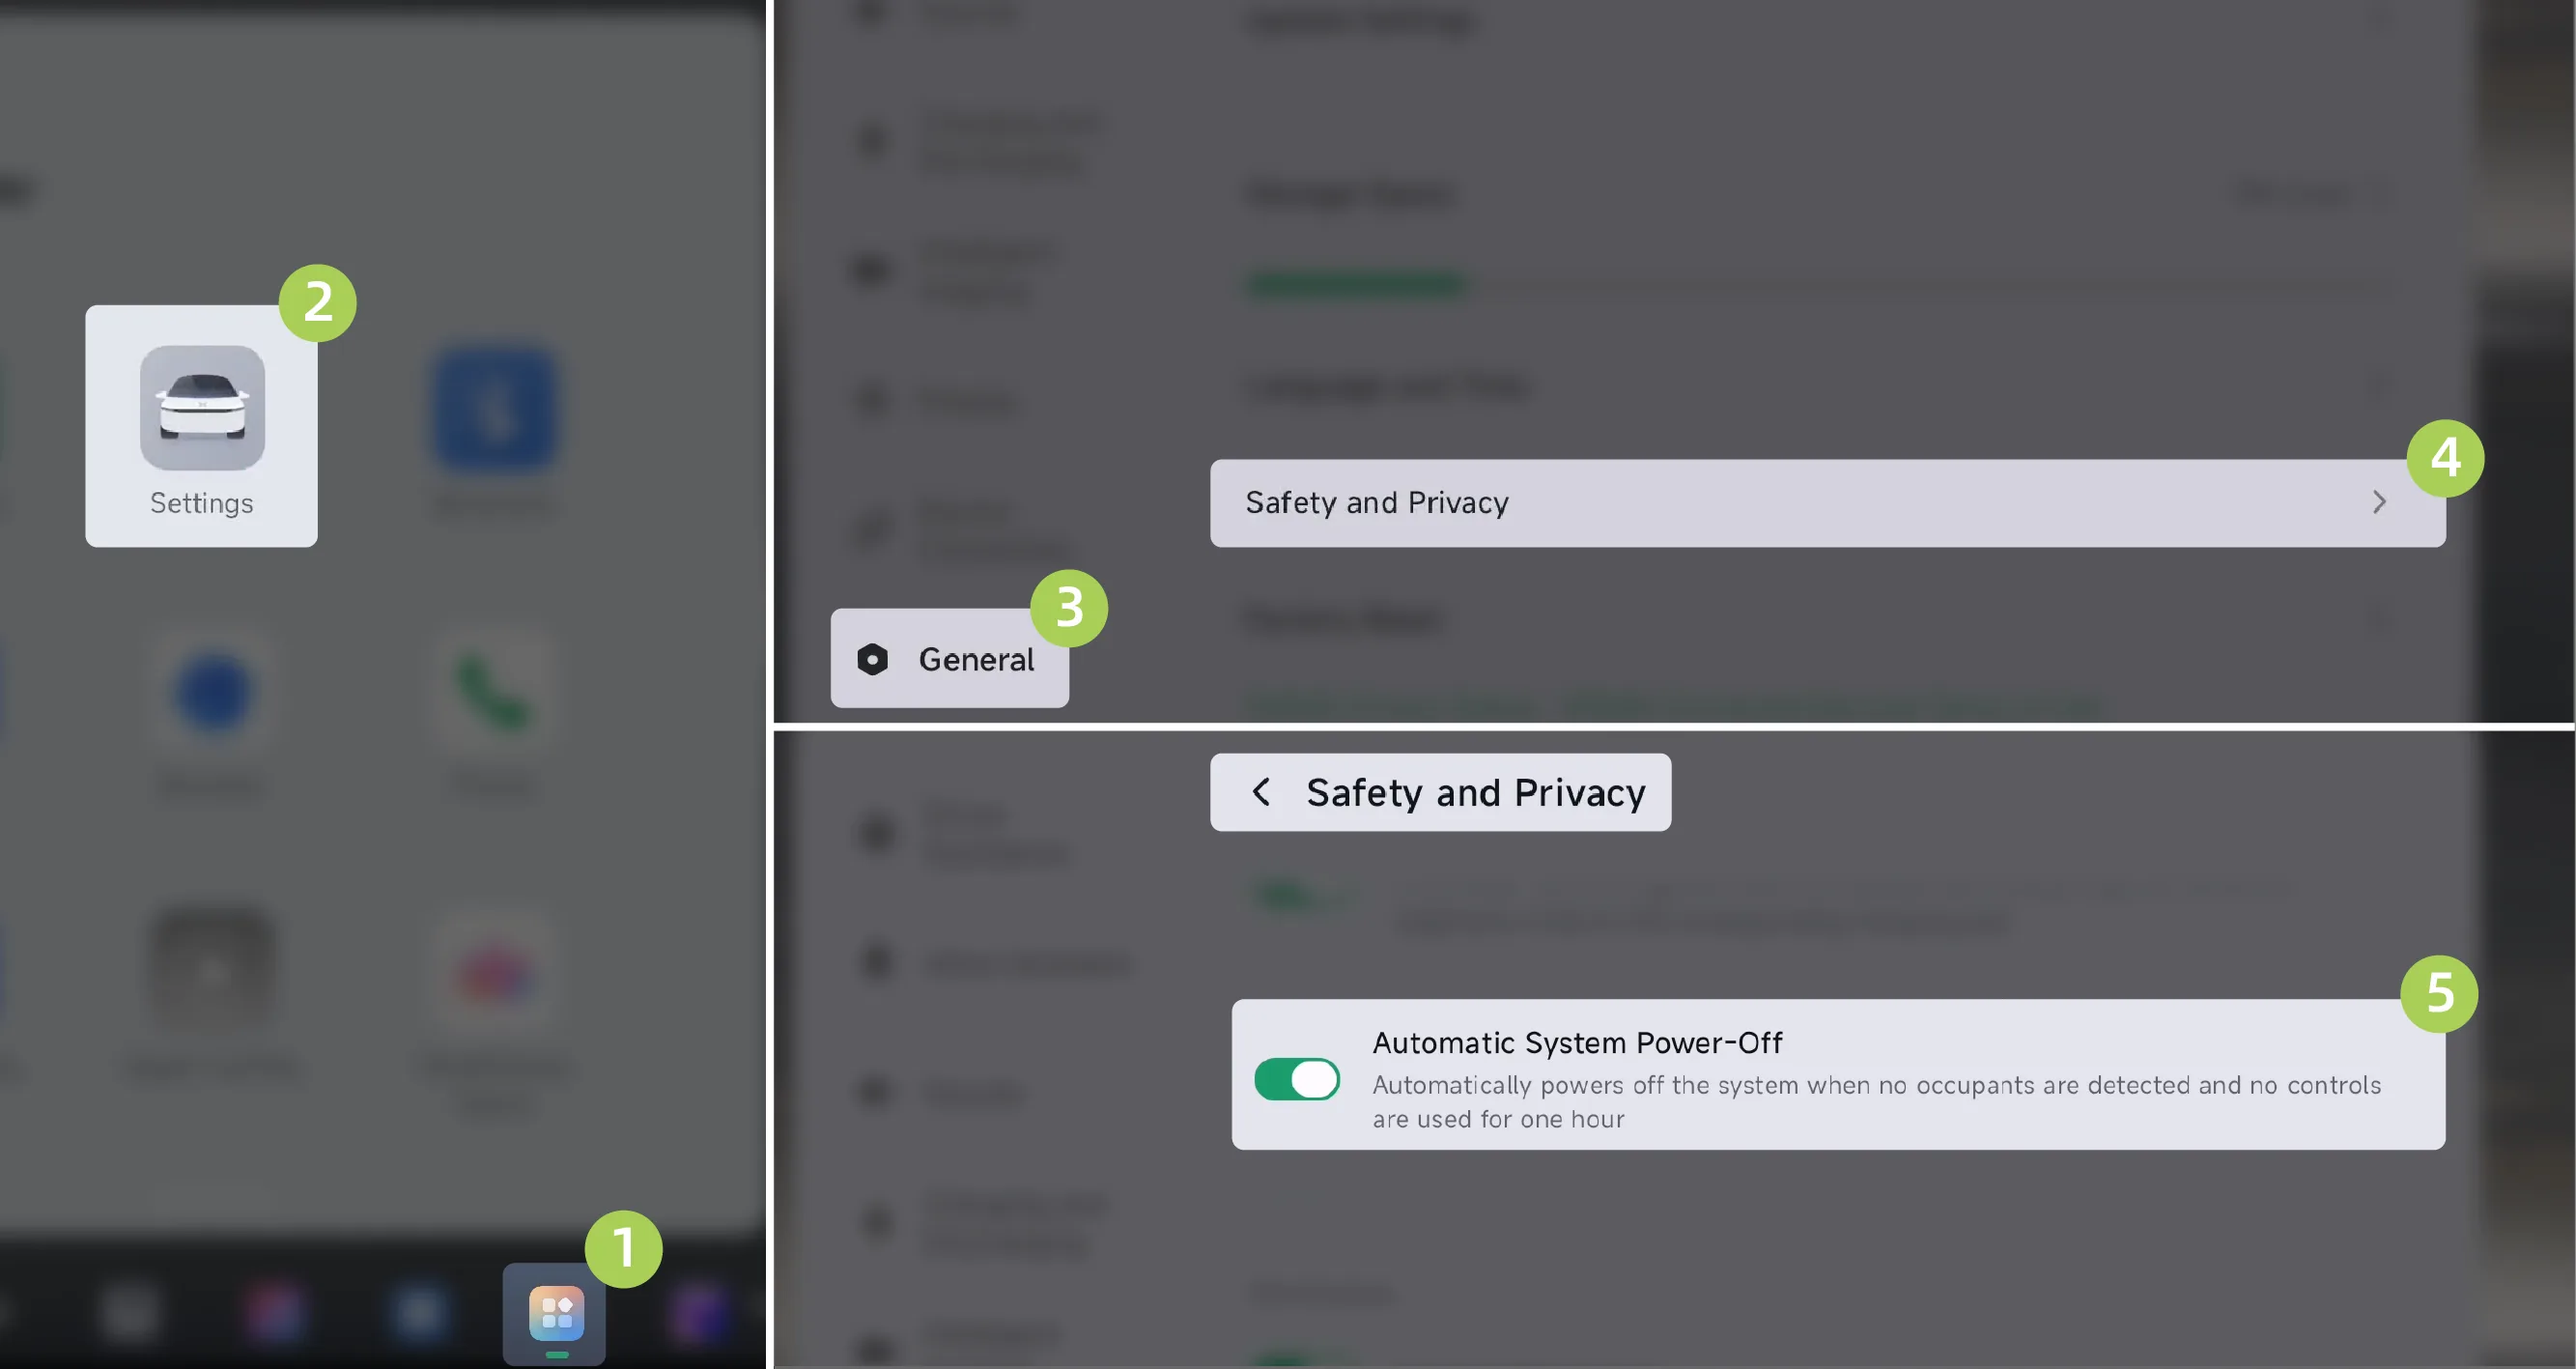
On the central control screen “ →Settings→General→Safety and Privacy”Interface, can be opened/closed Function.
After the function is enabled, if the system detects that there is no one in the vehicle and no operation is performed within 1 hour, the vehicle will Power Off Automatically.
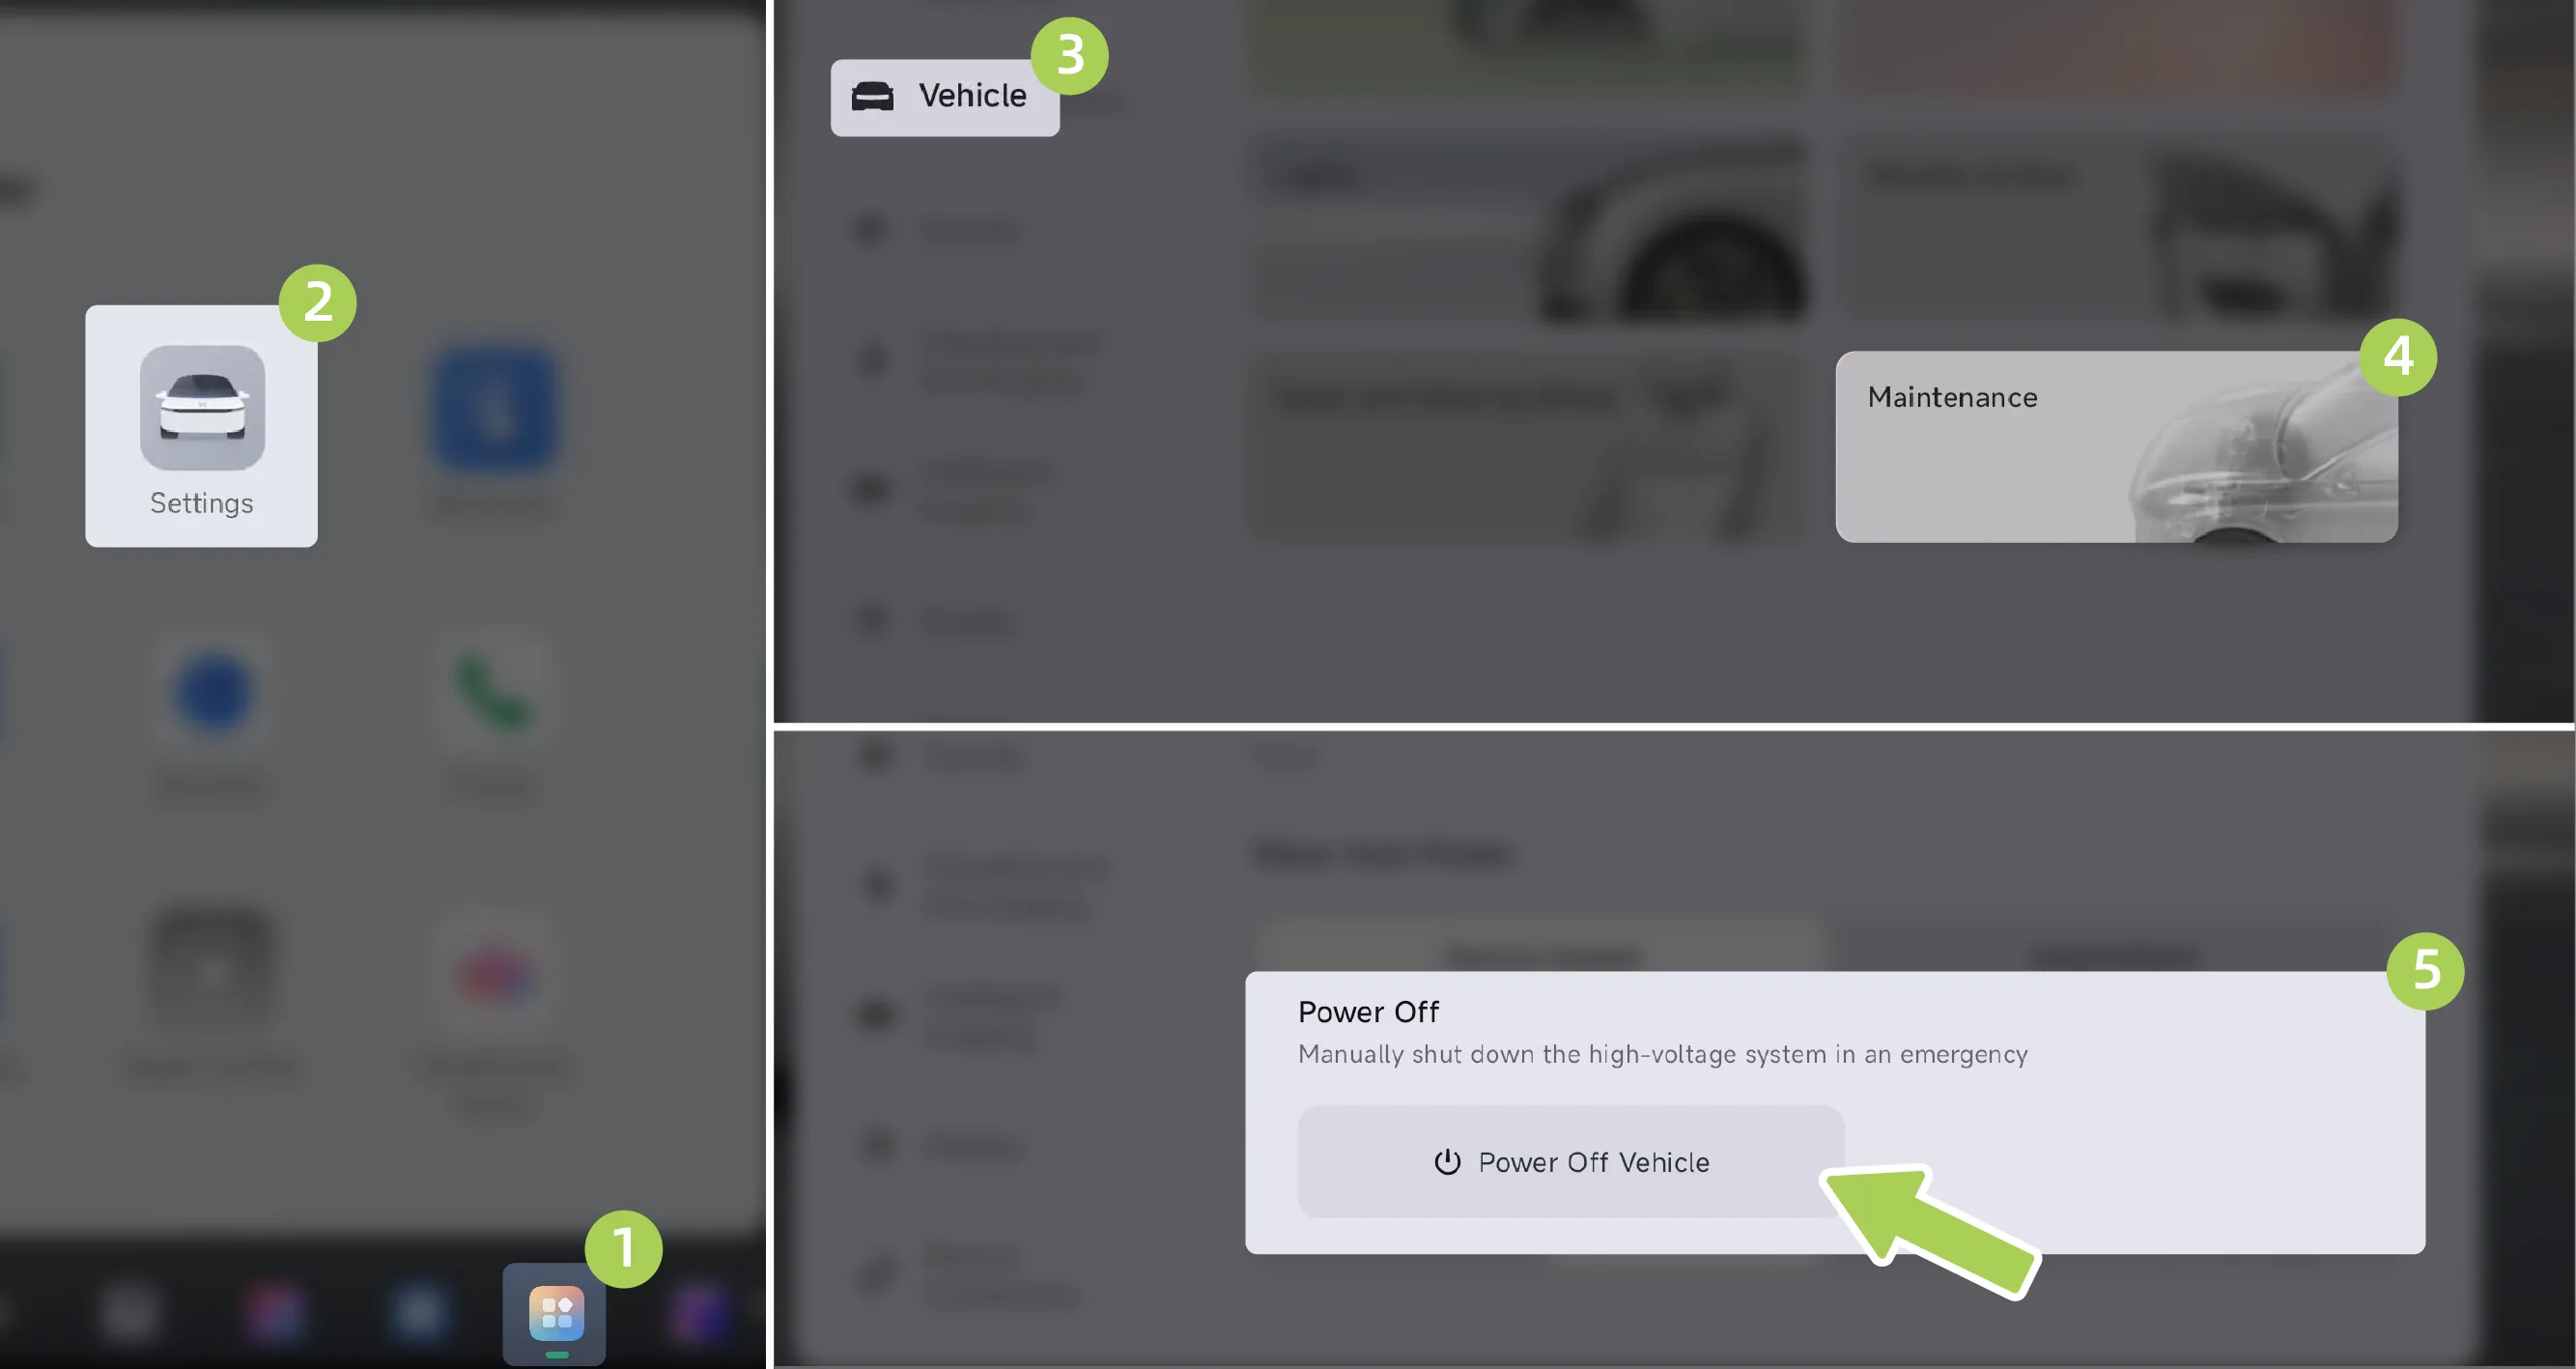
When the vehicle is stationary and emergency power-off is required, on the central control screen “ →Settings→vehicle→Maintenance”Interface, tap , the high-voltage power supply can be turned off, and the vehicle will power down directly.
Caution It is recommended that you use this function when the vehicle cannot be powered off.
The vehicle uses a column-mounted electronic shift lever with 4 gears: Park (P gear), Reverse (R gear), Neutral (N gear), and Drive (D Gear).
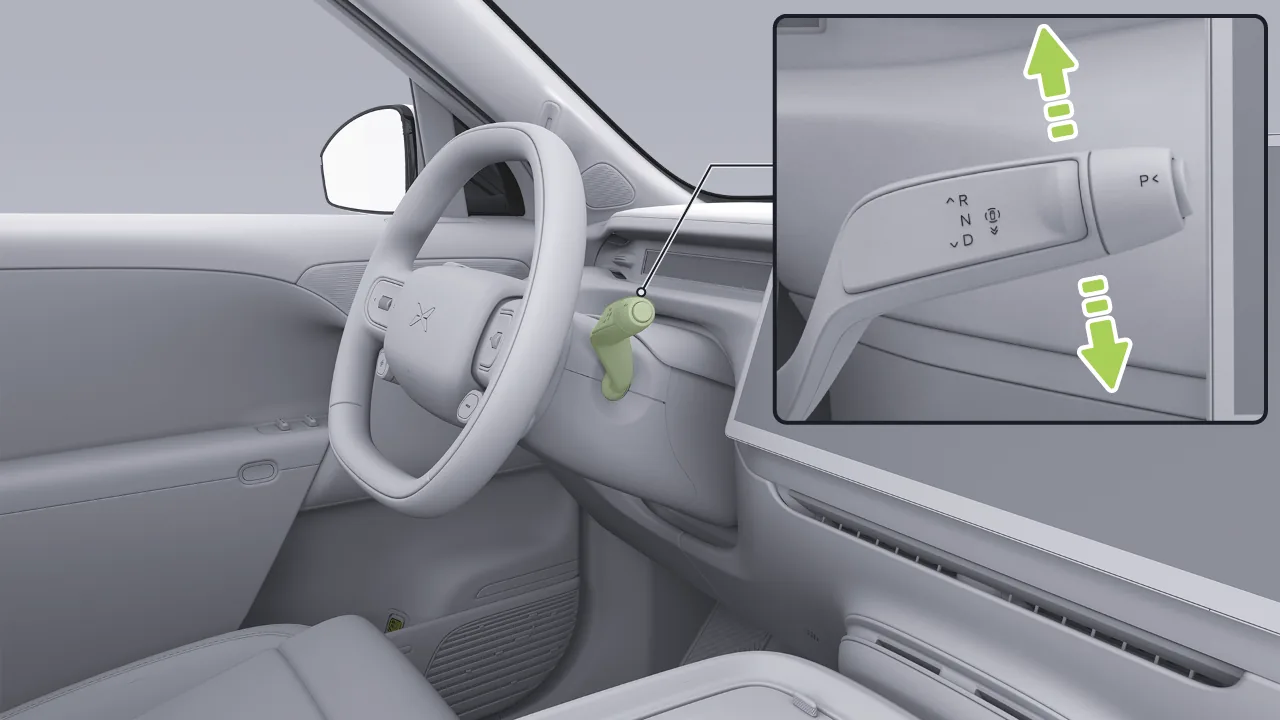
You can switch the vehicle gear by the following method:
Reverse Gear (R Gear): Press the brake pedal and push the shift lever upward to the top position. The vehicle shifts to R gear, and the reverse light illuminates.
Neutral (N Gear): Press the brake pedal, lightly push the shift lever up/down and hold it (for about 1 second) until the gear display area on the instrument cluster shows N. The gear shifts to Neutral (N), allowing temporary parking.
Drive Gear (D Gear): Depress the brake pedal and push the shift lever downward to the bottom position. The gear shifts to drive (D), and the vehicle moves forward.
When the vehicle is stationary, press the P gear button to its end position to engage Park.
When the vehicle is in P gear, you must depress the brake pedal before pushing the shift lever upward or downward to change gears.
Tips When the vehicle is in D gear or R gear and the vehicle speed is less than 3 km/h, opening the driver's door will cause the vehicle to automatically shift to P gear.
You can on the central control screen “ →Settings→vehicle→Doors and Windows”Interface, On . After the function is enabled, when the vehicle is shifted from D/R/N gear to P gear, a pop-up window will temporarily appear at the bottom of the center control screen, allowing quick operation of functions such as the Frunk, trunk, charge port cover, left front door*, and right front door*.
Caution Before leaving the vehicle or on a ramp, make sure the vehicle is in P to prevent the vehicle from moving without cause.
When the vehicle is at high speed, pressing and holding the P key will trigger the emergency braking function.
If you are unable to shift gears properly, you should contact the Xpeng Automobile Service Center for service.
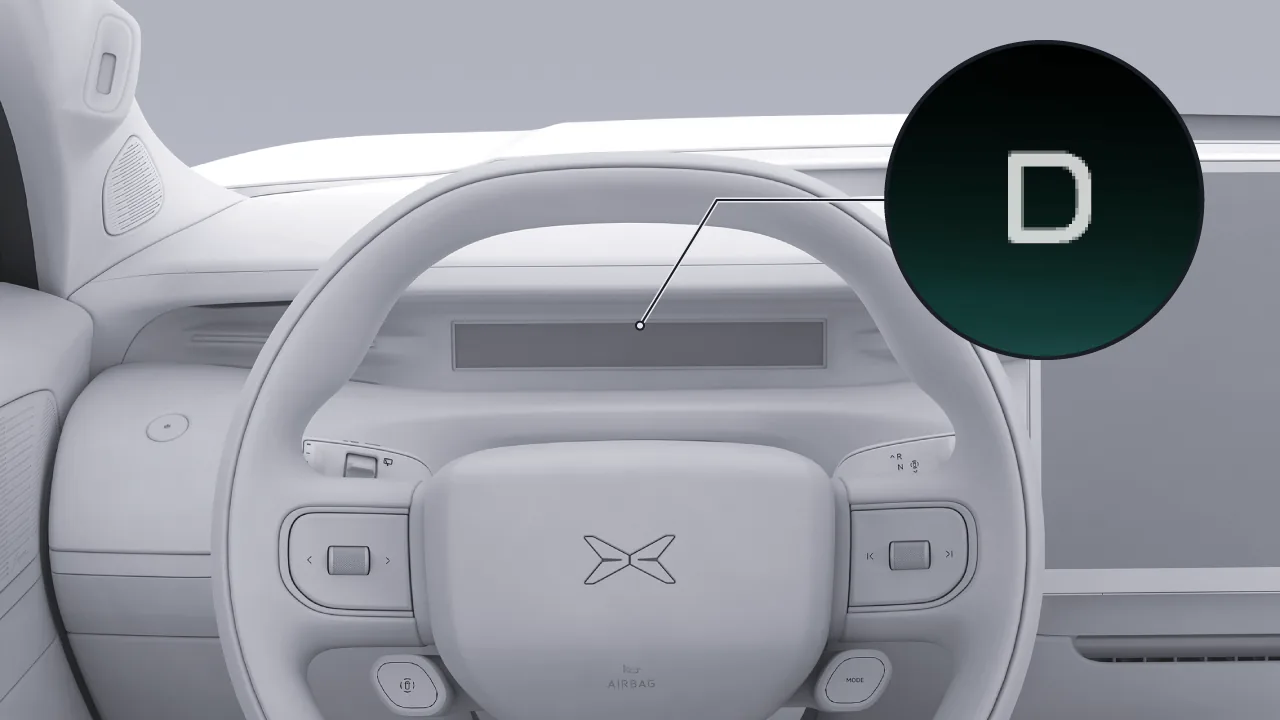
When shifting gears, the instrument cluster displays the current gear information.
Tips After shifting gears, always check the gear position on the instrument panel. If the displayed gear position does not match your intended selection, shift again and confirm the gear position once more.
If the conditions for shifting are not met, a message will appear on the instrument panel. Follow the instructions shown and shift only after the conditions are satisfied.
The vehicle provides four standard driving modes: “Energy Saving, Comfort, Sport, and Personalized”:
Energy Saving:Slow Power Response can extend driving range.
Comfort:Power response is smooth, and the ride experience is more comfortable.
Sport:Fast power response, experience exceptionally strong driving pleasure.
Personalization:Freely adjust multiple function parameters and enjoy personalized driving pleasure.
You can switch driving modes in the following ways:
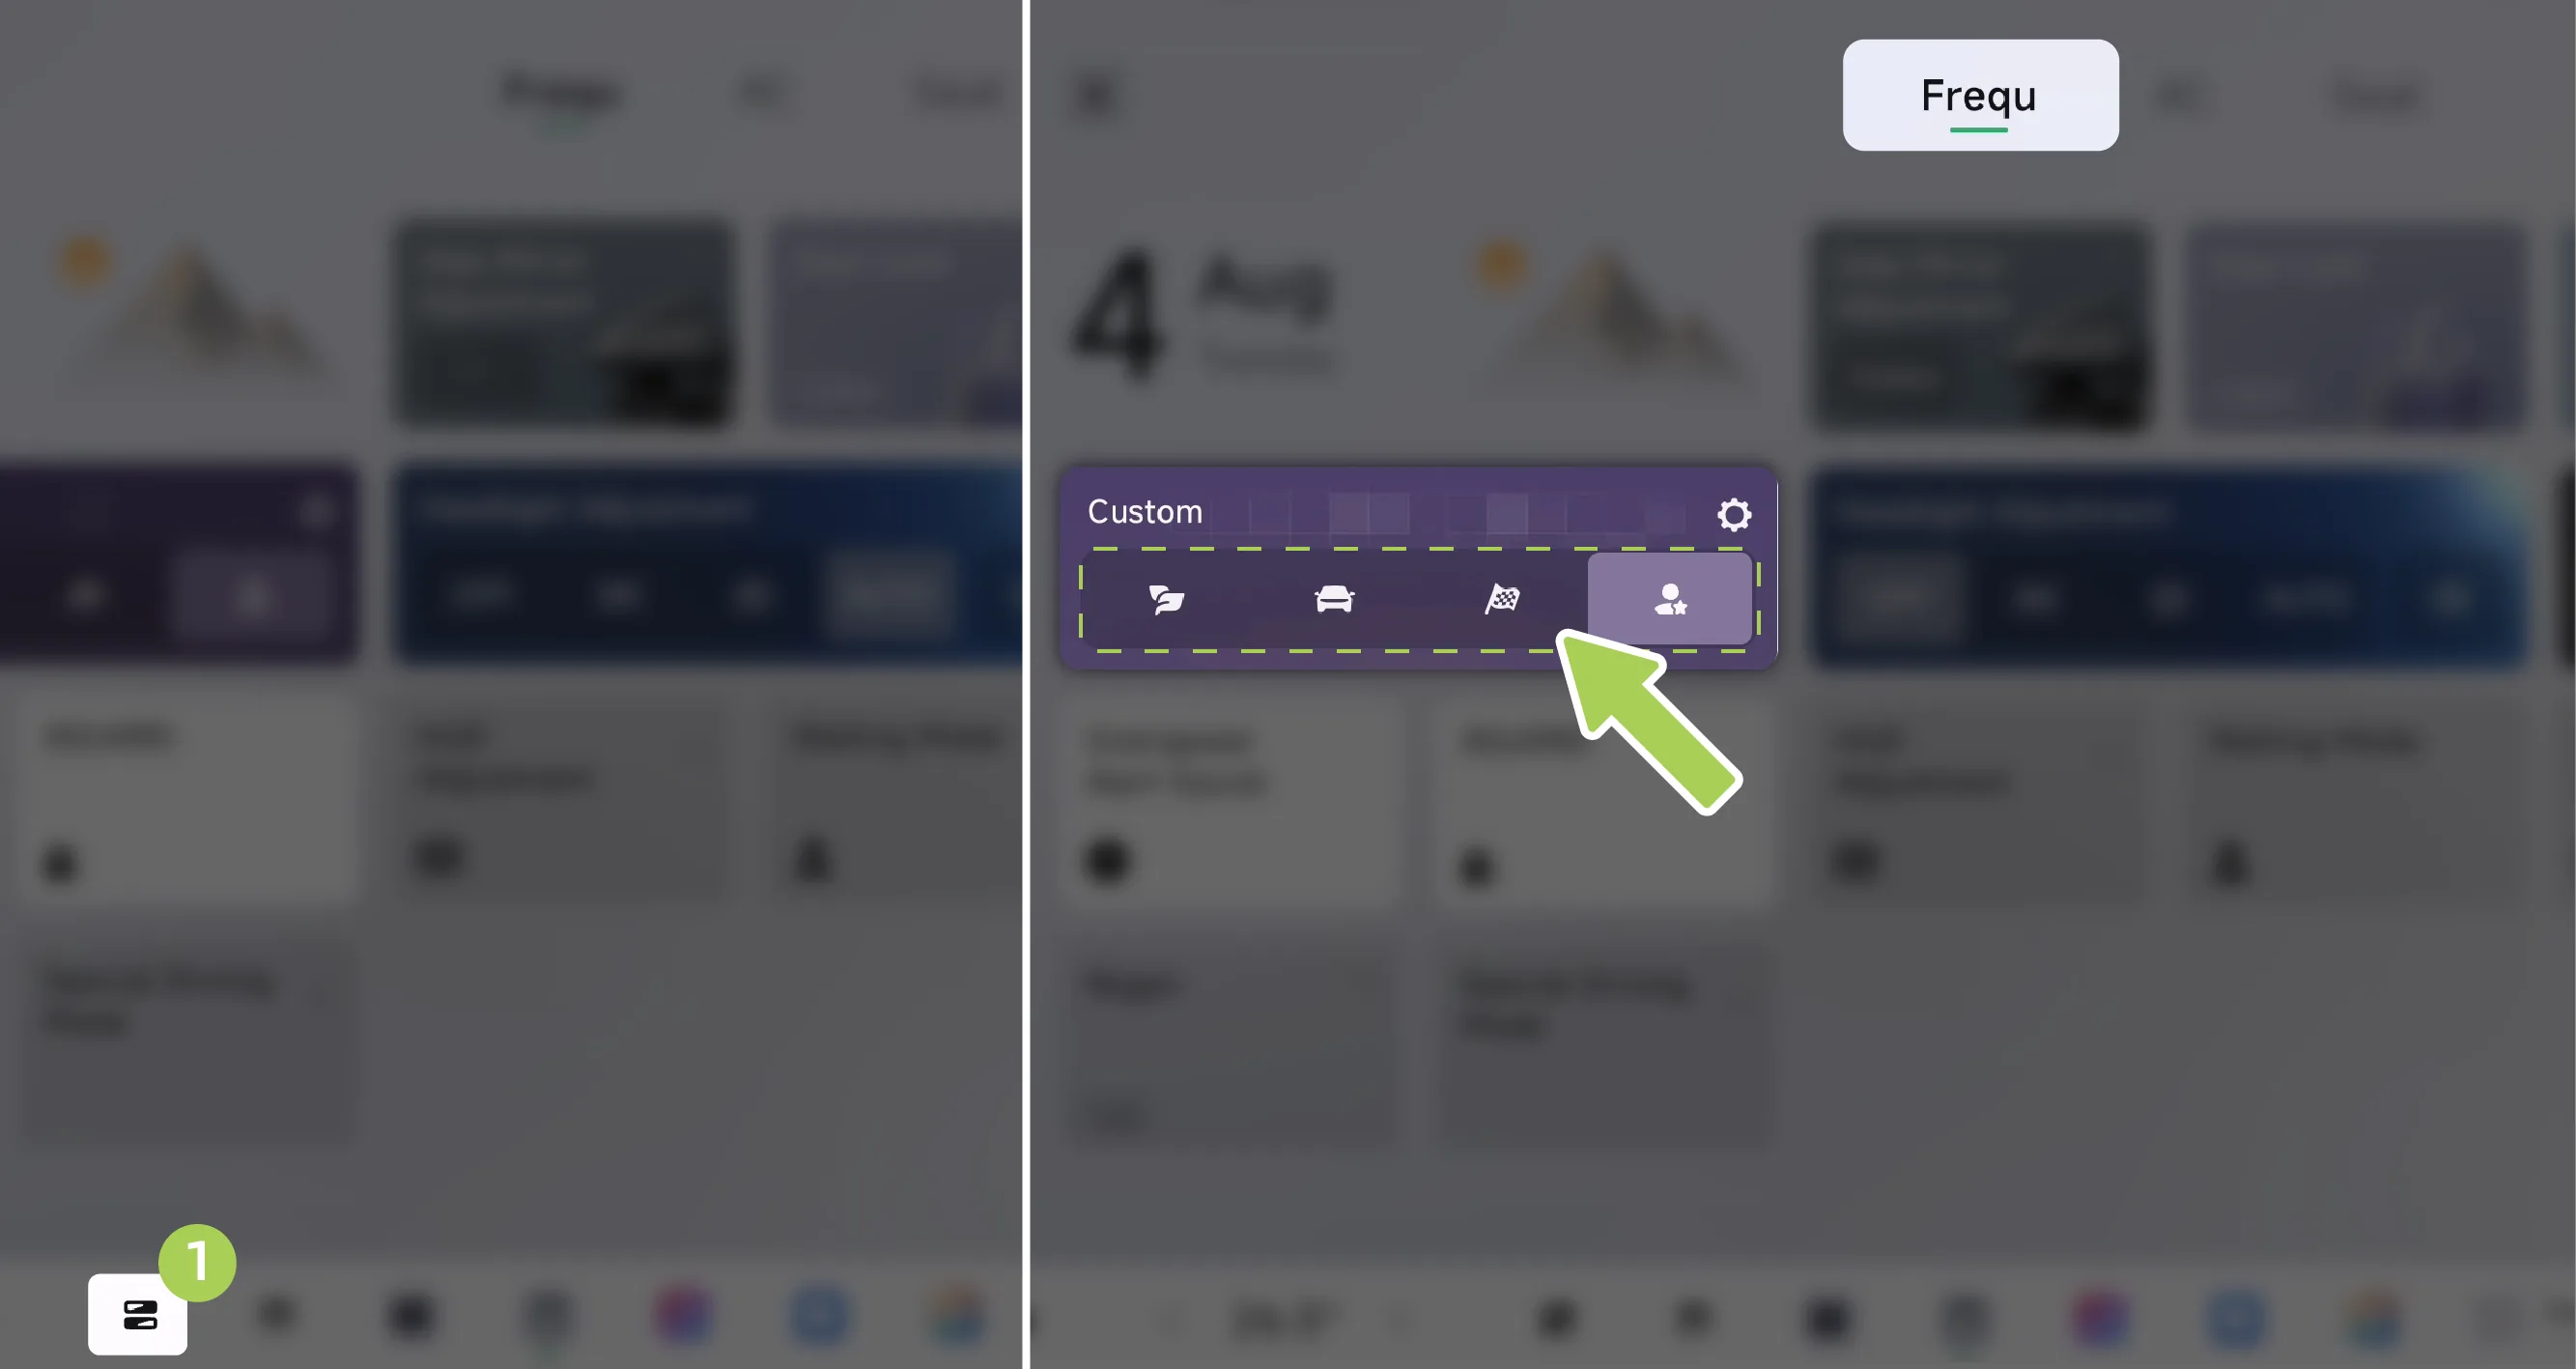
Tap on the center display. “ ”Enter the Control Center screen and switch the driving mode.
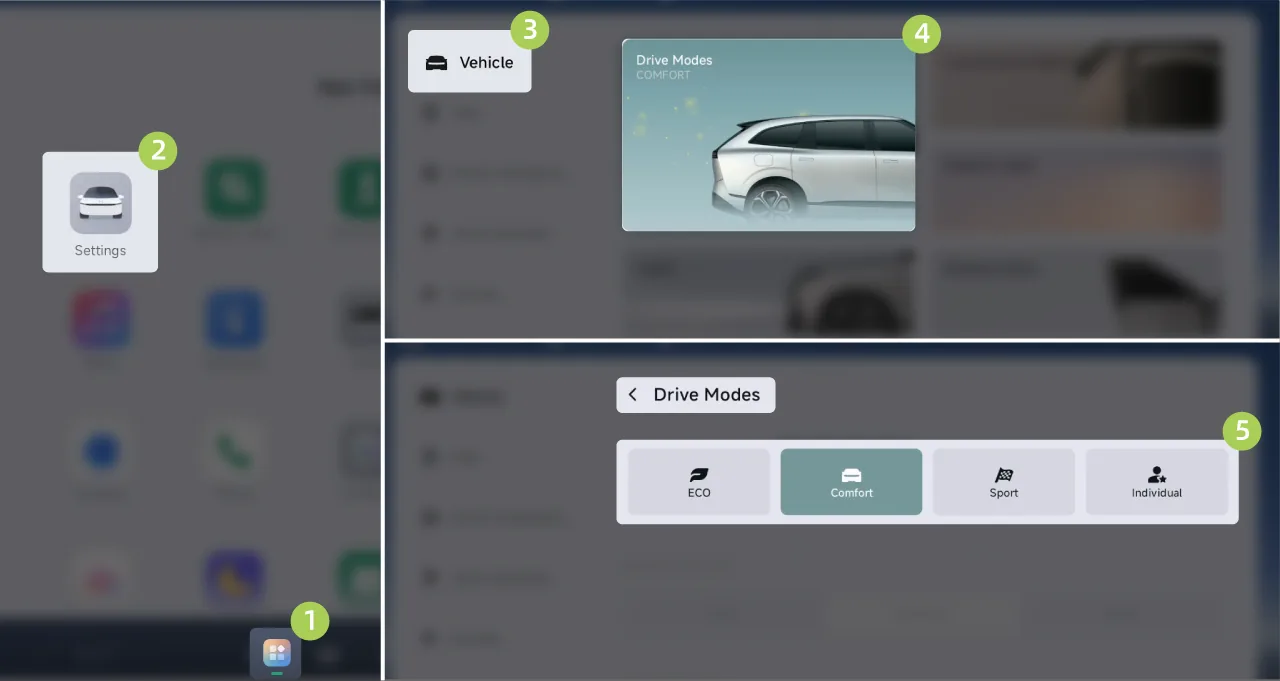
On the central control screen “ →Settings→vehicle→driving mode”Interface, switch driving modes.
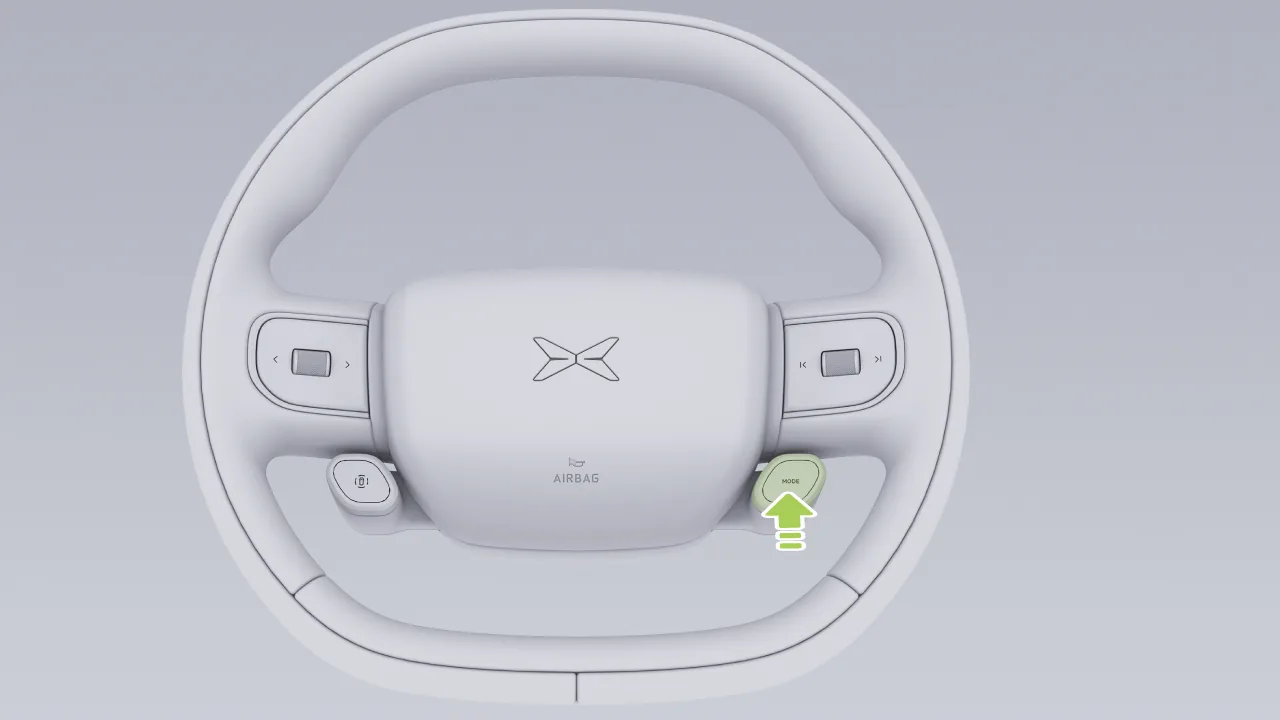
Press the MODE button on the steering wheel to enter/exit Sport Mode.
Directly through voice commands (for example, say out etc.).
Snow mode is suitable for roads covered with ice and snow, and also for wet and slippery muddy roads, grassland, and similar surfaces. After the mode is enabled, the driving stability of the vehicle is improved, and vehicle skidding is reduced.
You can turn Snow Mode on/off in the following ways:
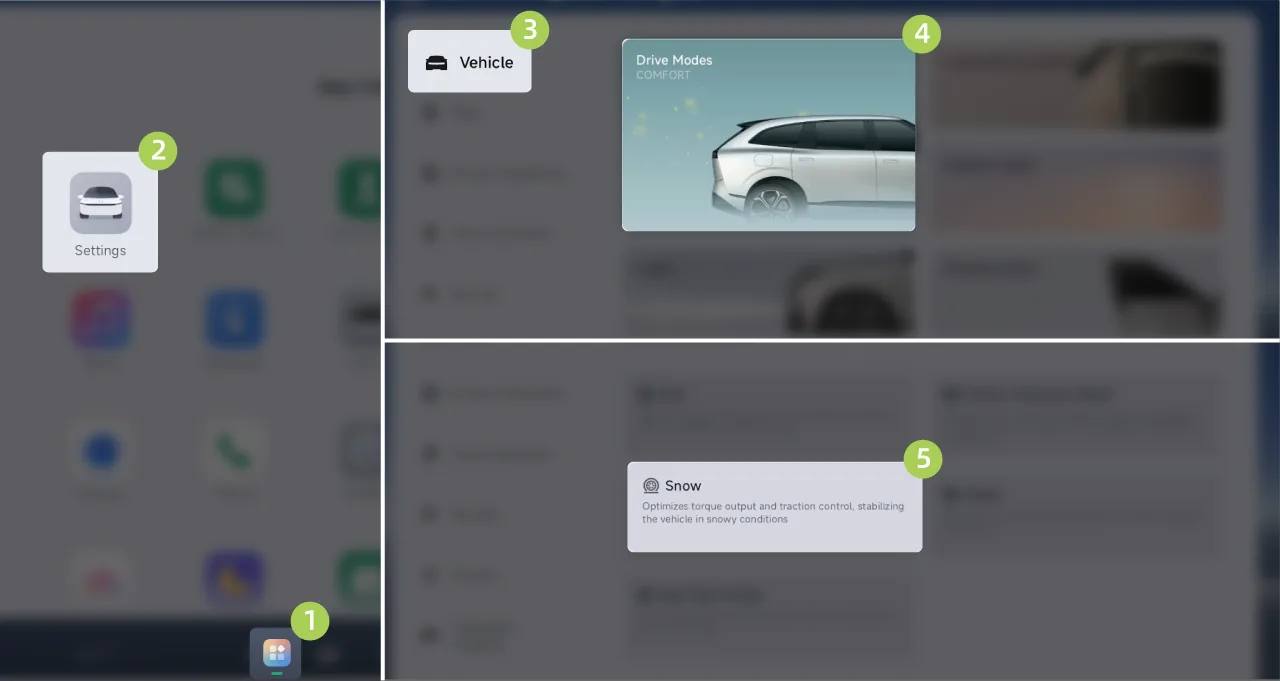
On the center control screen “ →Settings→vehicle→driving mode→Special Scenario Assistance”Interface, turn Snow mode on/off.
Tap on the center display. “ →Special Drive Modes”Enter the special driving mode screen and tap  Snow Button to turn Snow mode on/off. (To learn about the custom Control Center, please refer to the Custom Control Center section).
Directly through voice commands (for example, say out such keywords).
Tips After driving on special road surfaces, turn off Snow Mode.
When this mode is enabled, Drive Mode settings cannot be adjusted. After exiting this mode, Drive Mode reverts to the Drive Mode that was active before entry.
The next time the vehicle is powered on, Snow Mode is off by default.
Caution Snow Mode can improve the vehicle's driving stability. Even so, please drive carefully and avoid rapidly accelerating or decelerating.
Pay attention to the vehicle's surroundings. Otherwise, vehicle damage may occur.
Wet mode is suitable for road surfaces such as waterlogged roads, wet and slippery asphalt roads, and underground garages. After the mode is enabled, it improves the driving stability of the vehicle and reduces vehicle skidding.
You can turn Wetland Mode on/off in the following ways:
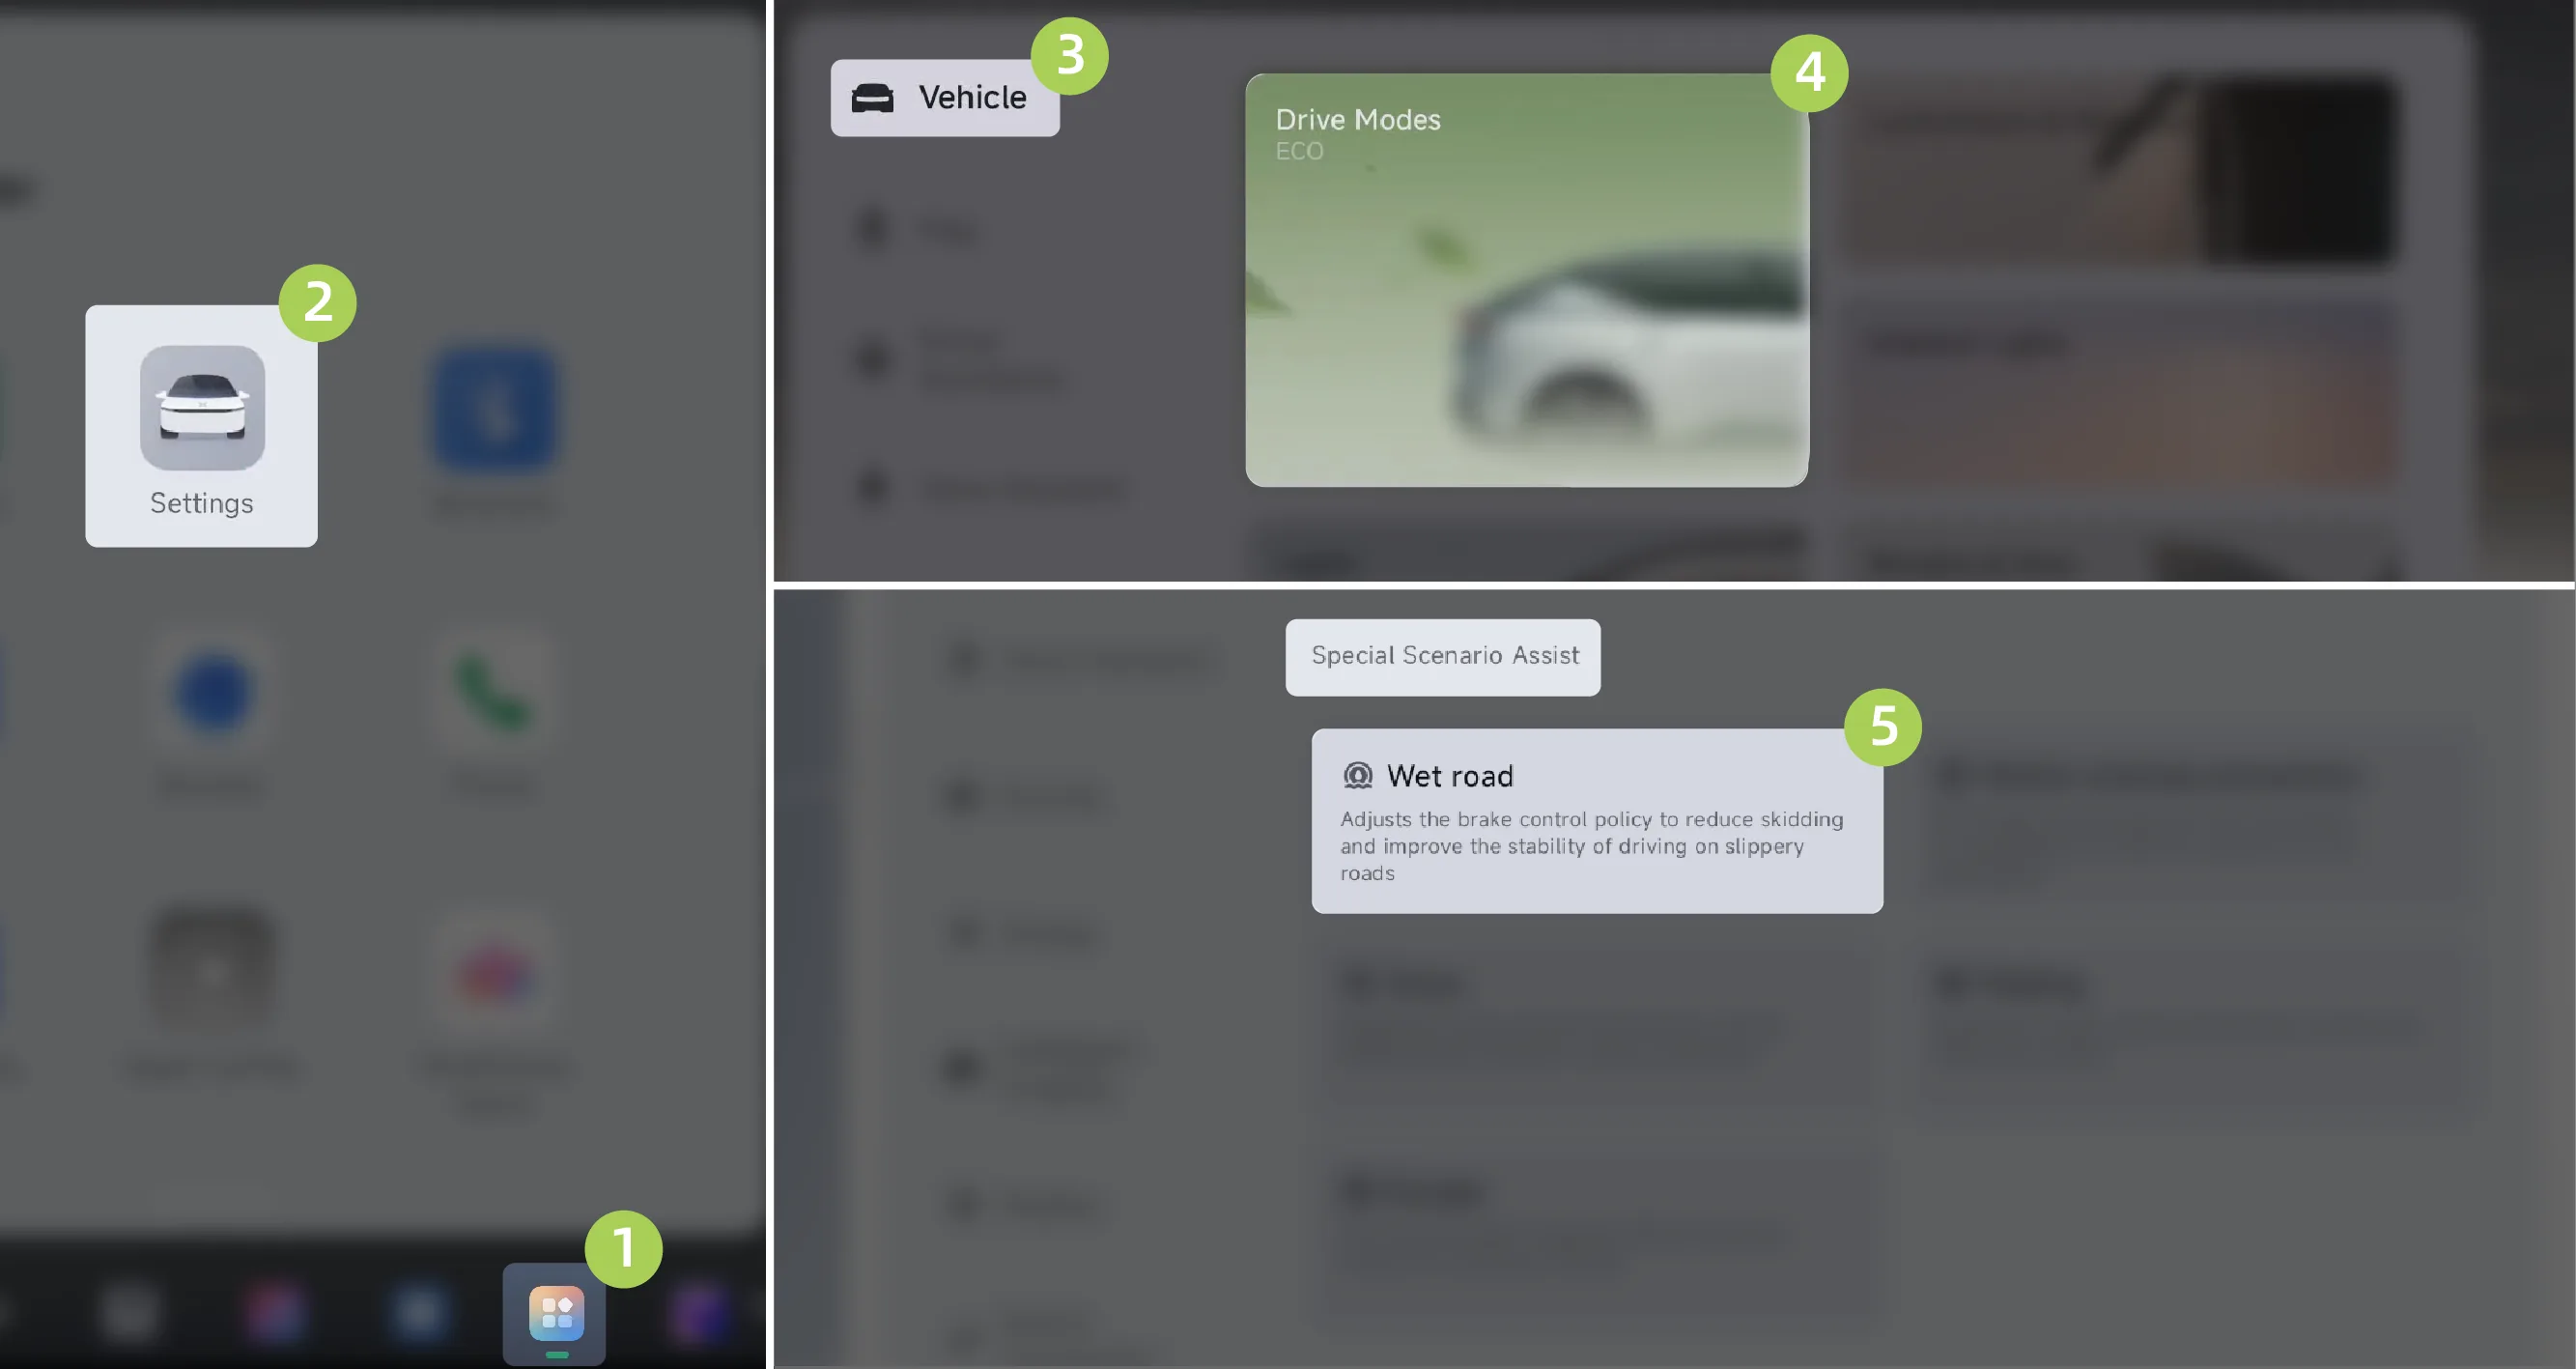
On the central control screen “ →Settings→vehicle→driving mode→Special Scenario Assistance”Interface, turn Wetland Mode on/off.
Tap on the central control screen. “ →Special Drive Modes”Enter the special driving mode interface and tap  Wet road Button to turn Wetland Mode on/off. (To learn about the custom control center, please refer to the custom control center chapter).
Directly through voice commands (for example, say out and other keywords).
Tips After the vehicle has passed over special road surfaces, turn Wet off.
When this mode is enabled, Drive Mode settings cannot be adjusted. After exiting this mode, Drive Mode reverts to the Drive Mode that was active before entry.
Wet defaults to off the next time the vehicle is powered on.
Caution Wet Mode can improve driving stability. Even so, please drive carefully and avoid rapidly accelerating or decelerating.
Pay attention to the vehicle's surroundings. Otherwise, vehicle damage may occur.
The vehicle Slip-Start Mode is a special driving mode designed for the vehicle to cope with becoming trapped under complex road conditions. When the vehicle encounters road conditions such as mud, snow, sand, potholes, and other conditions that are likely to cause wheel slip or immobilization, enabling this mode can obtain maximum torque by adjusting power output or applying braking to slipping wheels, so as to improve the ability to get unstuck, help the vehicle get out of trouble, and improve the vehicle's passability under extreme road conditions.
You can turn Slip-Start Mode on/off in the following way:
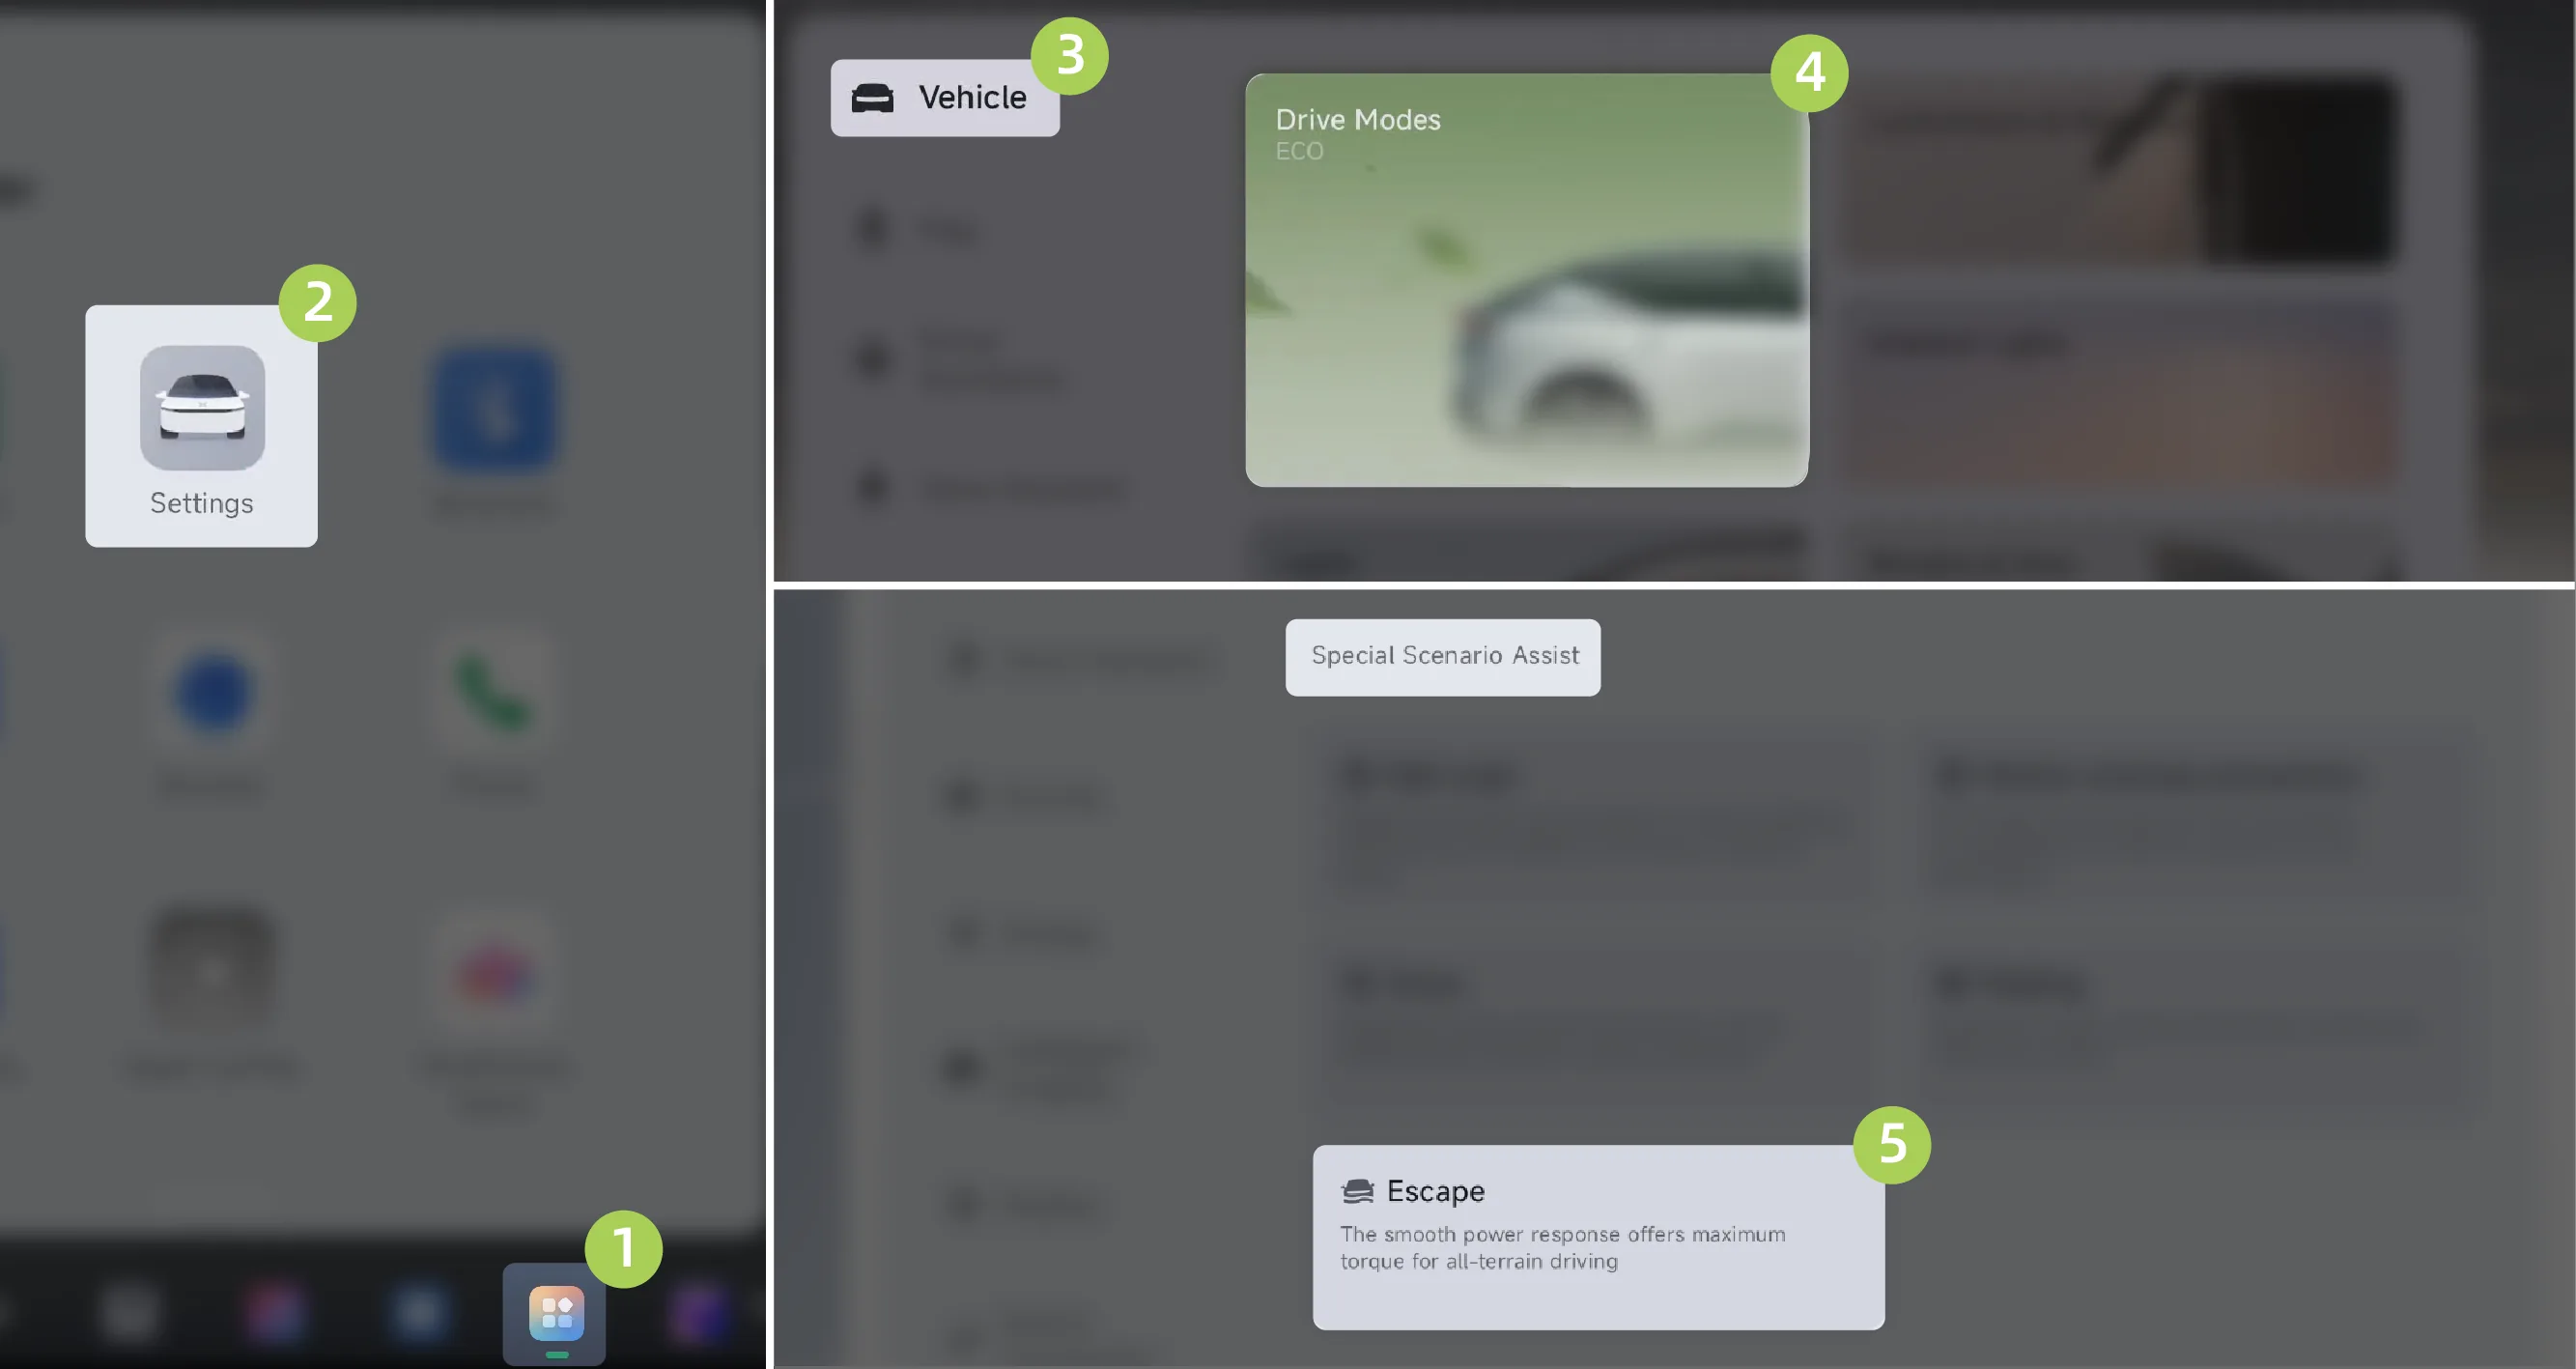
On the center control screen “ →Settings→vehicle→driving mode→Special Scenario Assistance”Interface, turn Slip-Start Mode on/off.
Tap on the center display. “ →Special Drive Modes”Enter the special driving mode screen and tap  Escape Button, turn Slip-Start Mode on/off. (For information about custom Control Center, refer to the custom Control Center section).
Directly through voice commands (for example, say out such keywords).
Tips After the vehicle is freed, turn off Slip-Start Mode promptly.
If the vehicle speed exceeds 40 km/h, the system will automatically exit Slip-Start Mode.
After the mode is activated, the functions in the driving mode cannot be adjusted. After the mode is exited, it returns to the driving mode from before entry.
Tips After the vehicle is freed, promptly turn off Slip-Start Mode.
If the vehicle speed exceeds 40 km/h, the system will automatically exit Slip-Start Mode.
After the mode is enabled, the functions in the driving mode cannot be adjusted. After the mode is exited, it returns to the driving mode before entry.
Caution If the vehicle remains in a trapped state (e.g. chassis fully under, wheels without any adhesion), repeated attempts to get rid of it may result in tire wear and chassis damage. External assistance, such as towing or stoning, should be sought at this point.
Anti-motion sickness mode is suitable for scenarios that easily cause motion sickness, such as sudden acceleration/deceleration. By adjusting power output, braking response, and vehicle body posture, it can reduce the fluctuations caused when the vehicle starts, accelerates, brakes, and turns, making vehicle driving smoother and alleviating motion sickness.
You can enable/disable Motion Sickness Prevention Mode in the following ways:
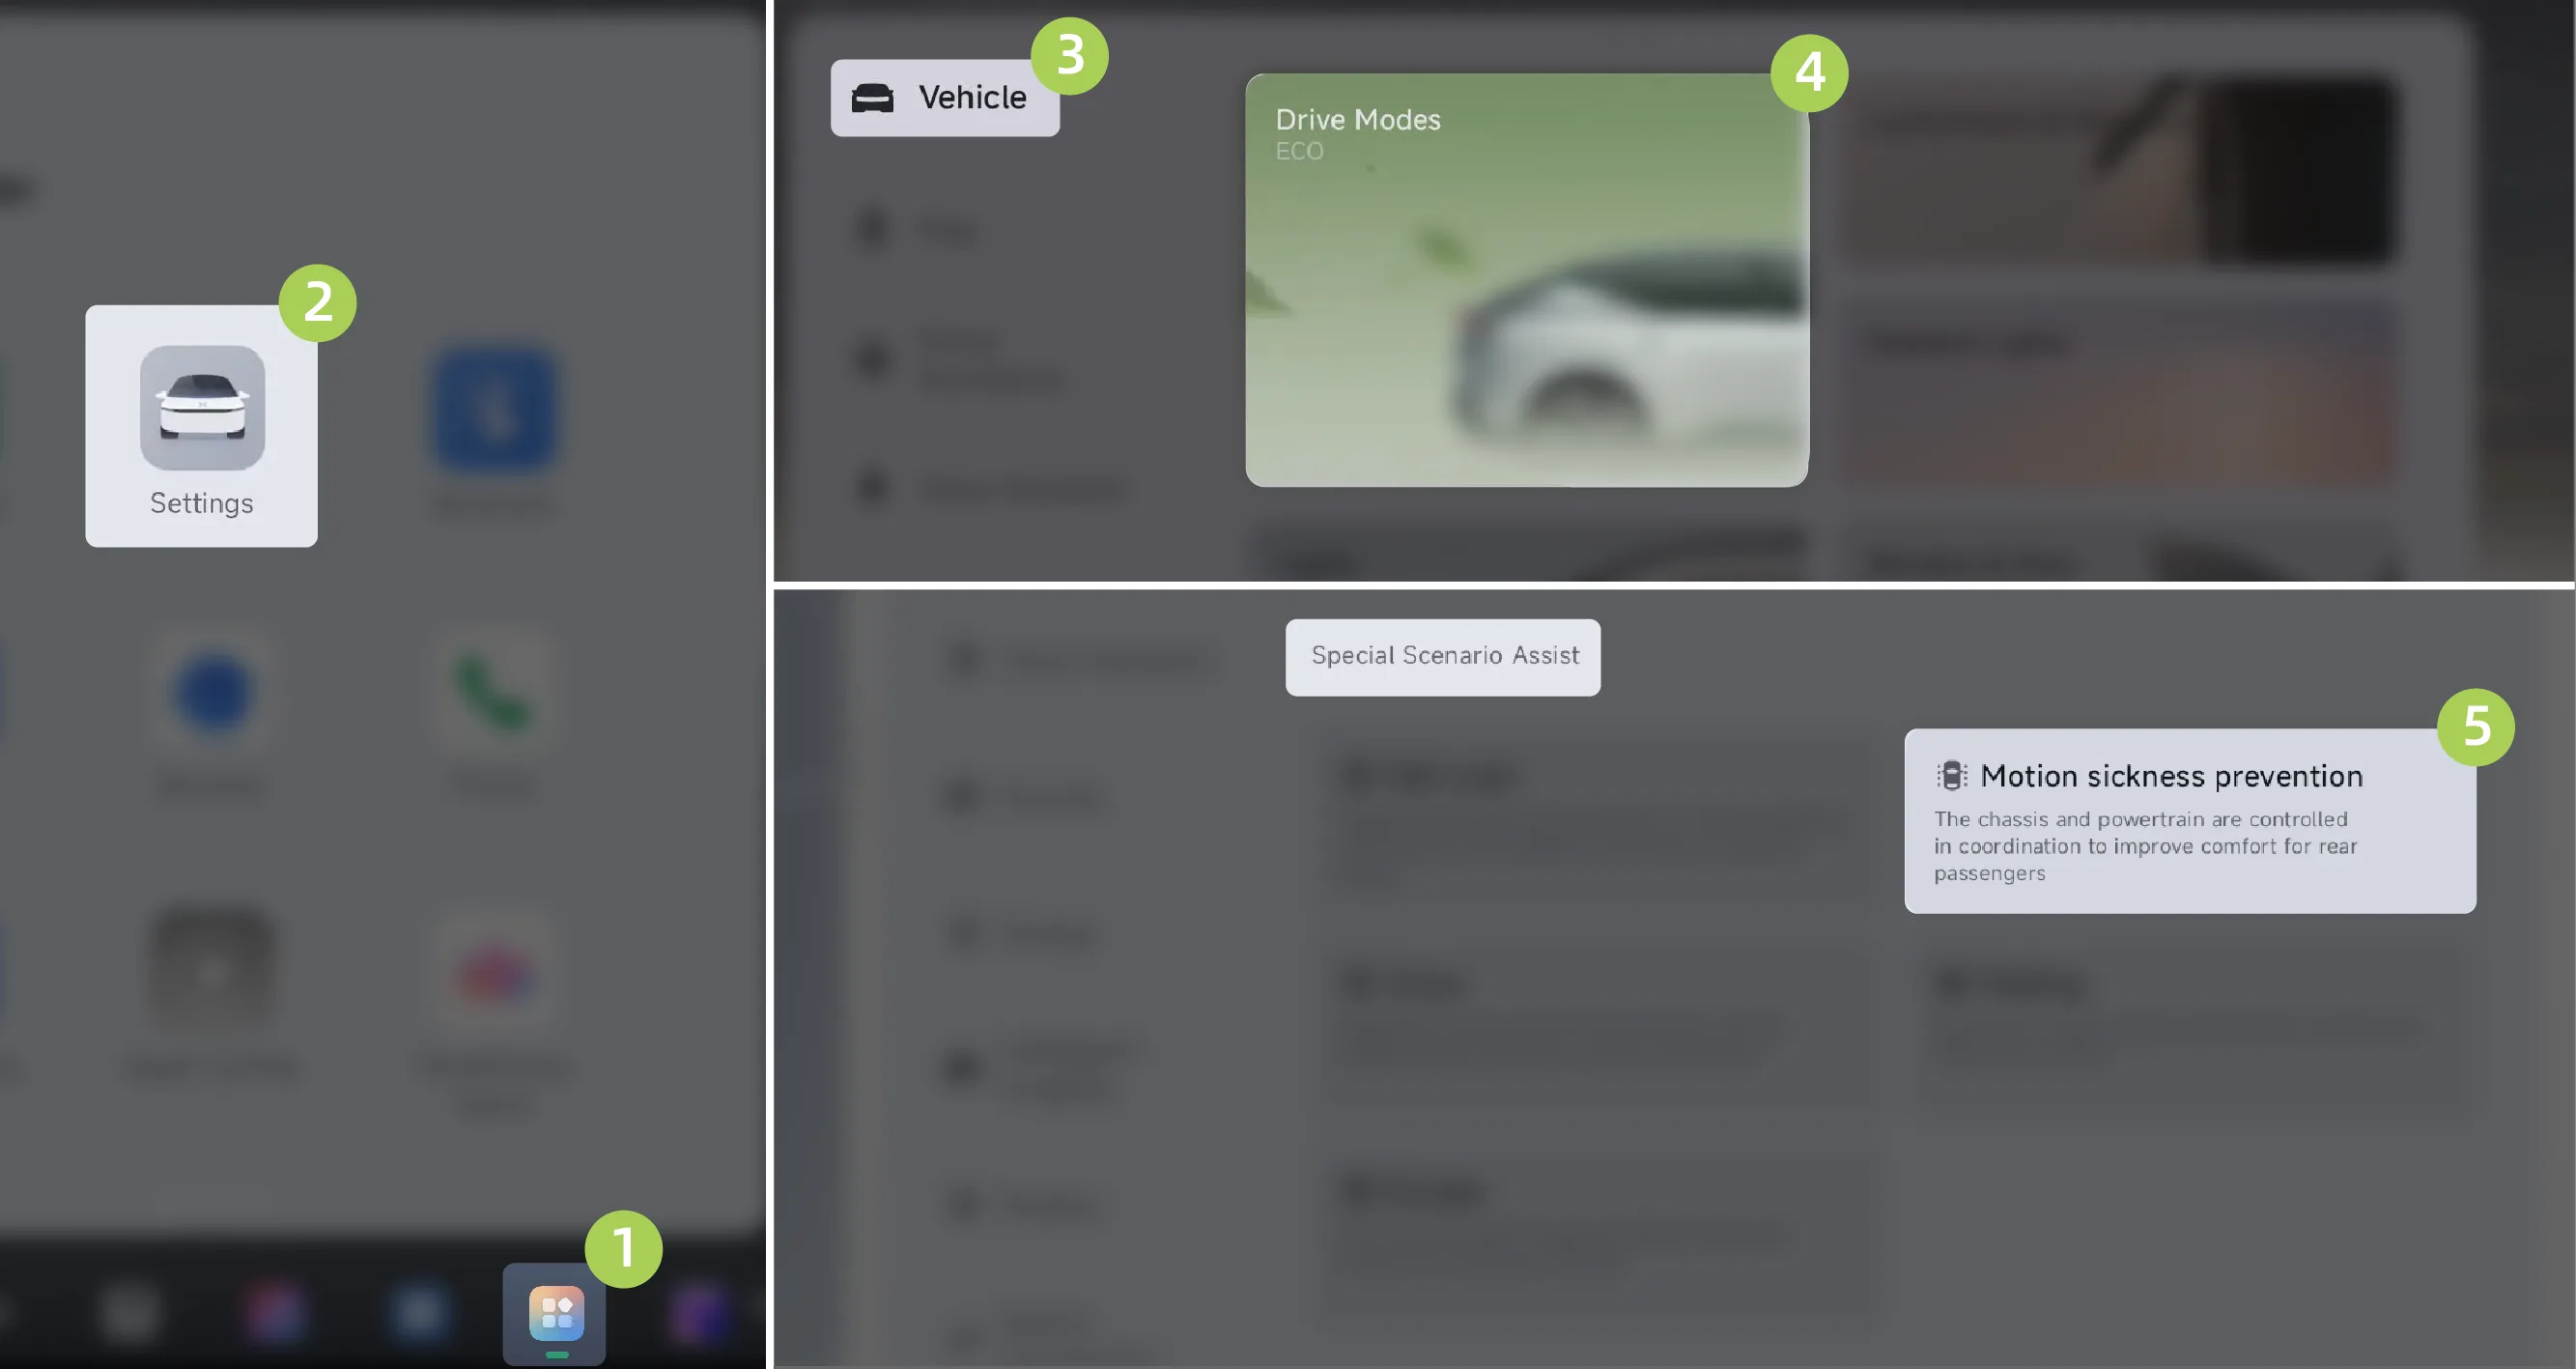
On the central control screen “ →Settings→vehicle→driving mode”Interface, turn Motion Sickness Prevention Mode on/off.
Tap on the center display. “ →Special Drive Modes”Enter the special driving mode interface and tap  Motion sickness prevention Button to turn Motion Sickness Relief Mode on/off. (To learn about custom Control Center, please refer to the custom Control Center section).
Directly via voice commands (for example, say out and other keywords).
Tips After anti-motion sickness mode is enabled, the Comfortable Braking function will be turned on, and energy recovery, stop mode, and smart chassis functions will be turned off.
After the mode is enabled, the functions in the driving mode cannot be adjusted. After exiting the mode, it returns to the driving mode before entry.
The anti-motion sickness mode is off by default the next time the vehicle is powered on.
Caution Anti-Motion Sickness Mode only helps alleviate motion sickness symptoms and does not completely resolve motion sickness. If any passenger experiences severe motion sickness, park in a safe location and rest.
In Anti-Motion Sickness Mode, power output is reduced and acceleration time increases. Drive with caution on steep grades or during rapid overtaking maneuvers.
Wading mode is suitable for roads with standing water, and the maximum wading depth is 70 cm. After wading mode is enabled, the vehicle will adjust the power output and chassis height to improve the vehicle's driving safety and passability on waterlogged road sections.
After wading mode is enabled, the vehicle will automatically perform the following operations:
Power Response is adjusted to wading gear.
The suspension height is adjusted to the highest level.
When the vehicle speed is less than 15 km/h and the assisted driving function is not enabled, you can turn Water Wading Mode on/off in the following ways:
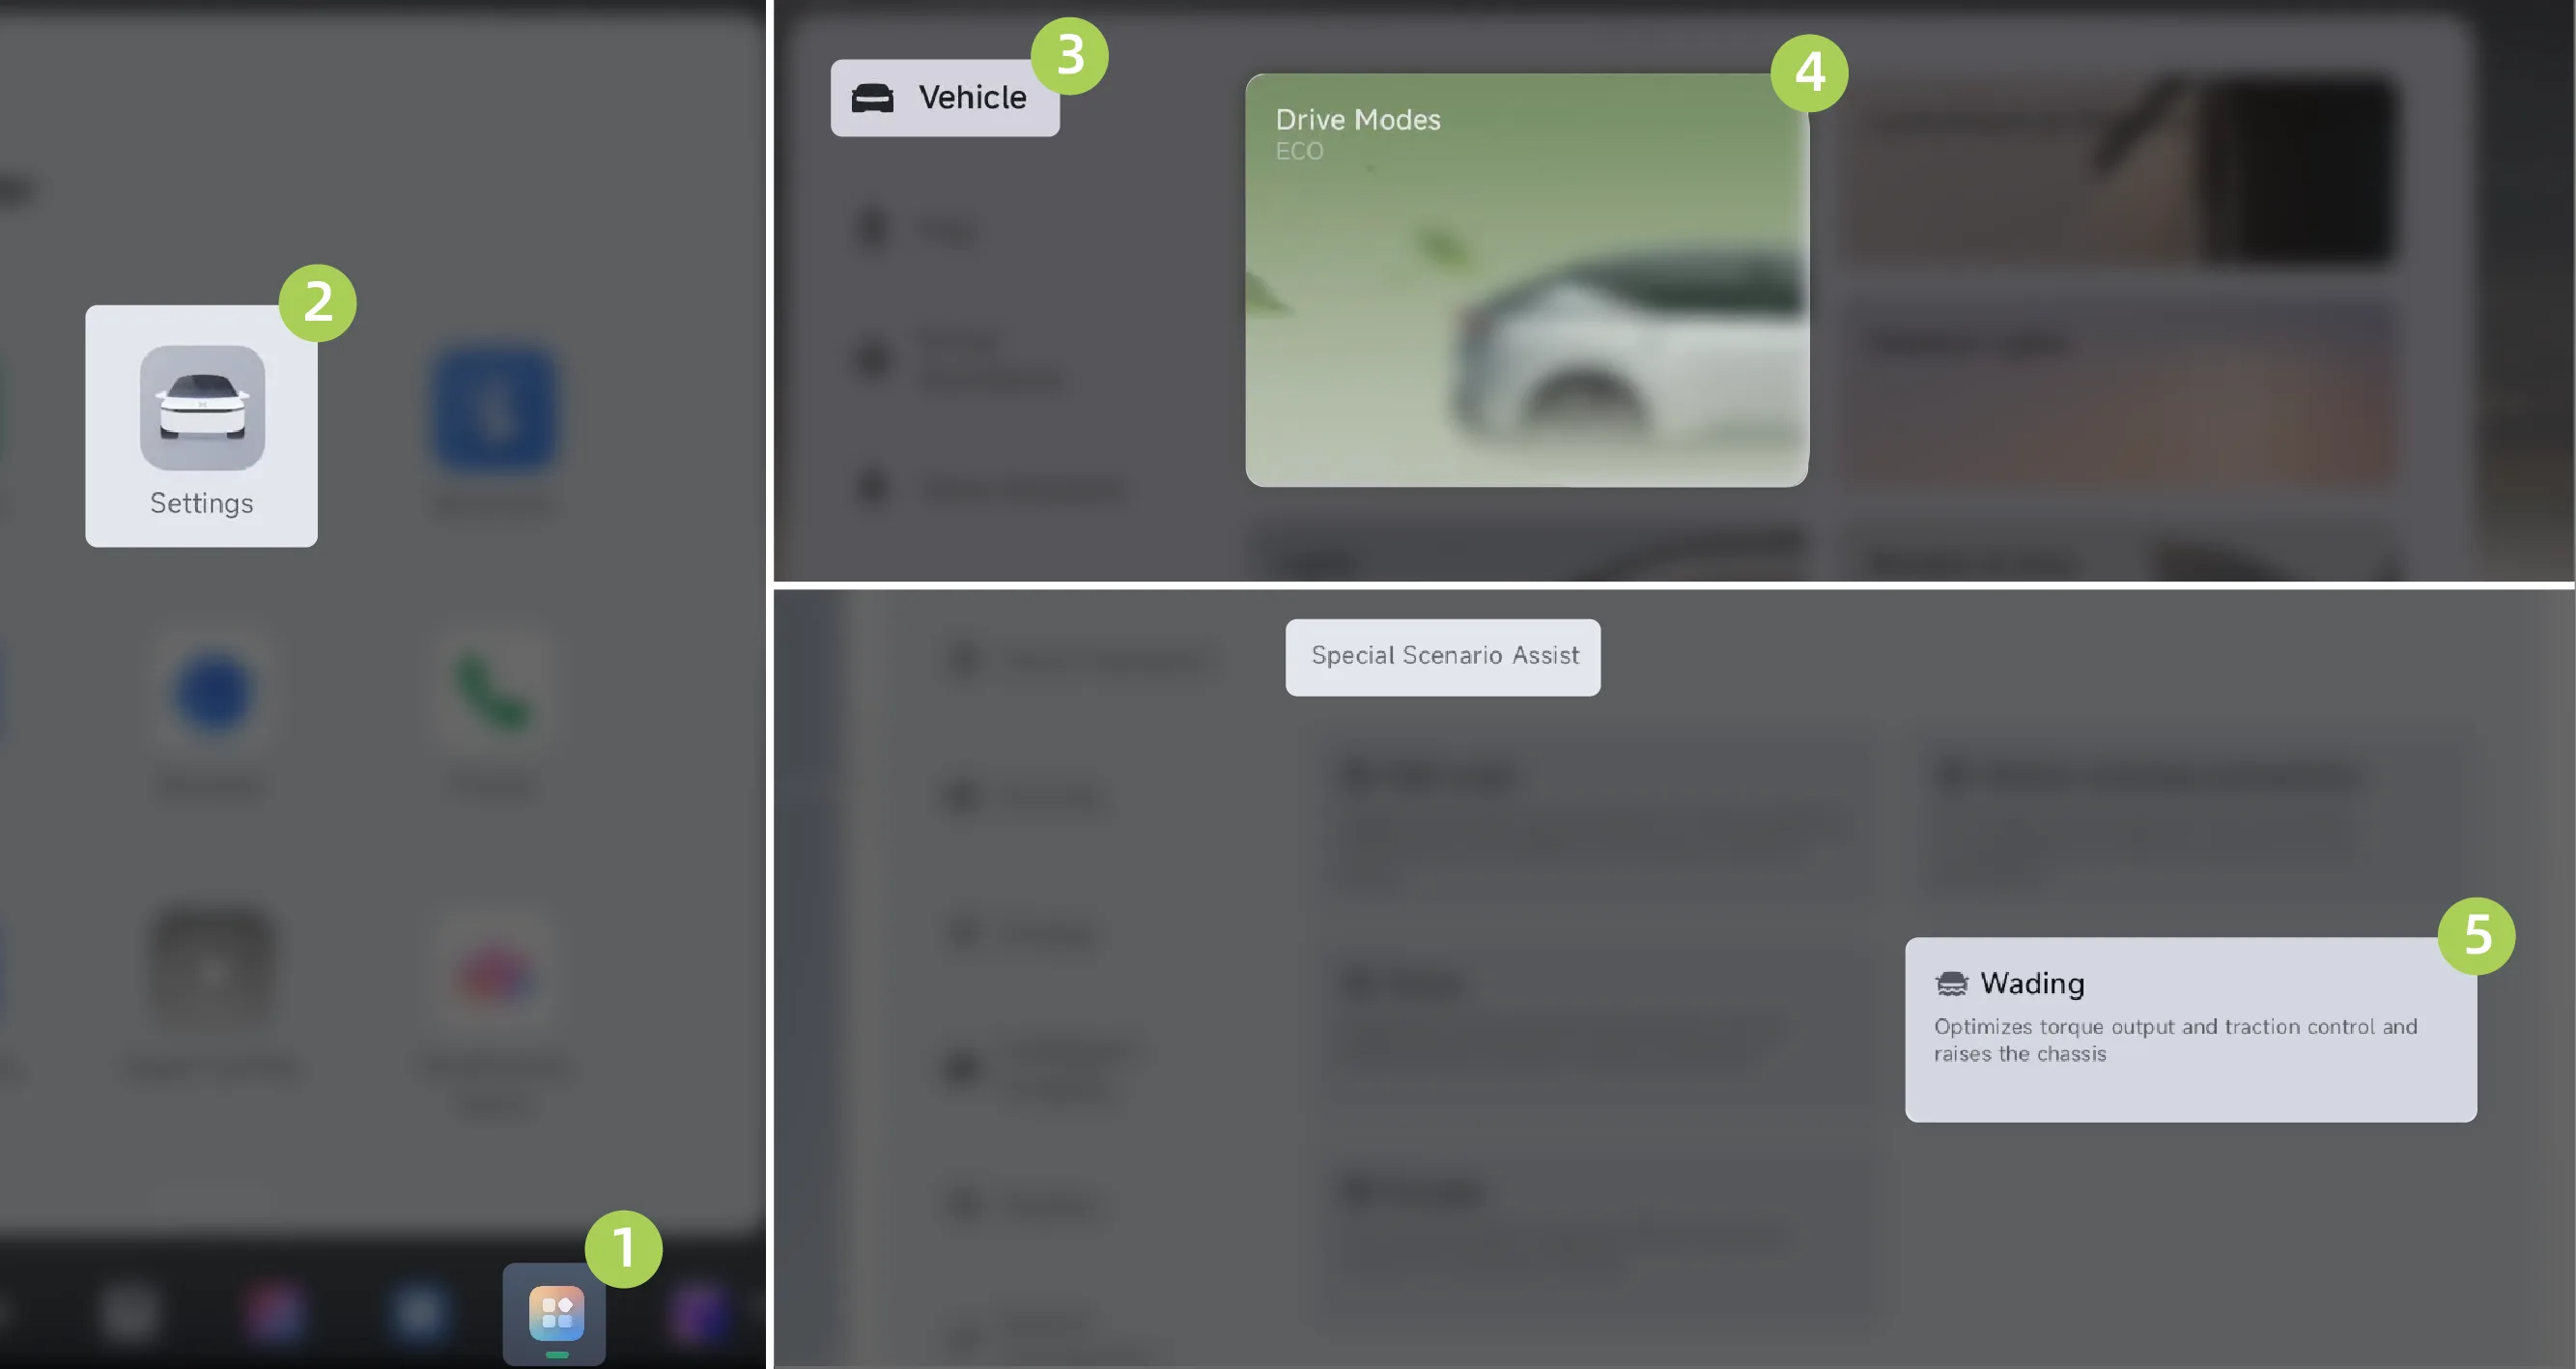
On the center display screen “ →Settings→vehicle→driving mode→Special Scenario Assistance”Interface, turn the wading mode on/off.
Tap on the center display. “ →Special Drive Modes”Enter the special driving mode screen and tap  Wading Button to turn Wading Mode on/off. (To learn about the custom Control Center, please refer to the custom Control Center section).
On the center control screen status bar Interface, tap Exit Wading, exit Wading Mode.
Directly through voice commands (for example, say out etc.).
The following conditions will automatically exit Wading Mode:
The vehicle speed is greater than 40 km/h.
Switch driving modes.
Tips After the vehicle passes through a waterlogged road section, promptly turn off Wading Mode.
After the mode is enabled, the functions in the driving mode cannot be adjusted. After exiting the mode, it returns to the driving mode before entry.
The wading mode is off by default the next time the vehicle is powered on.
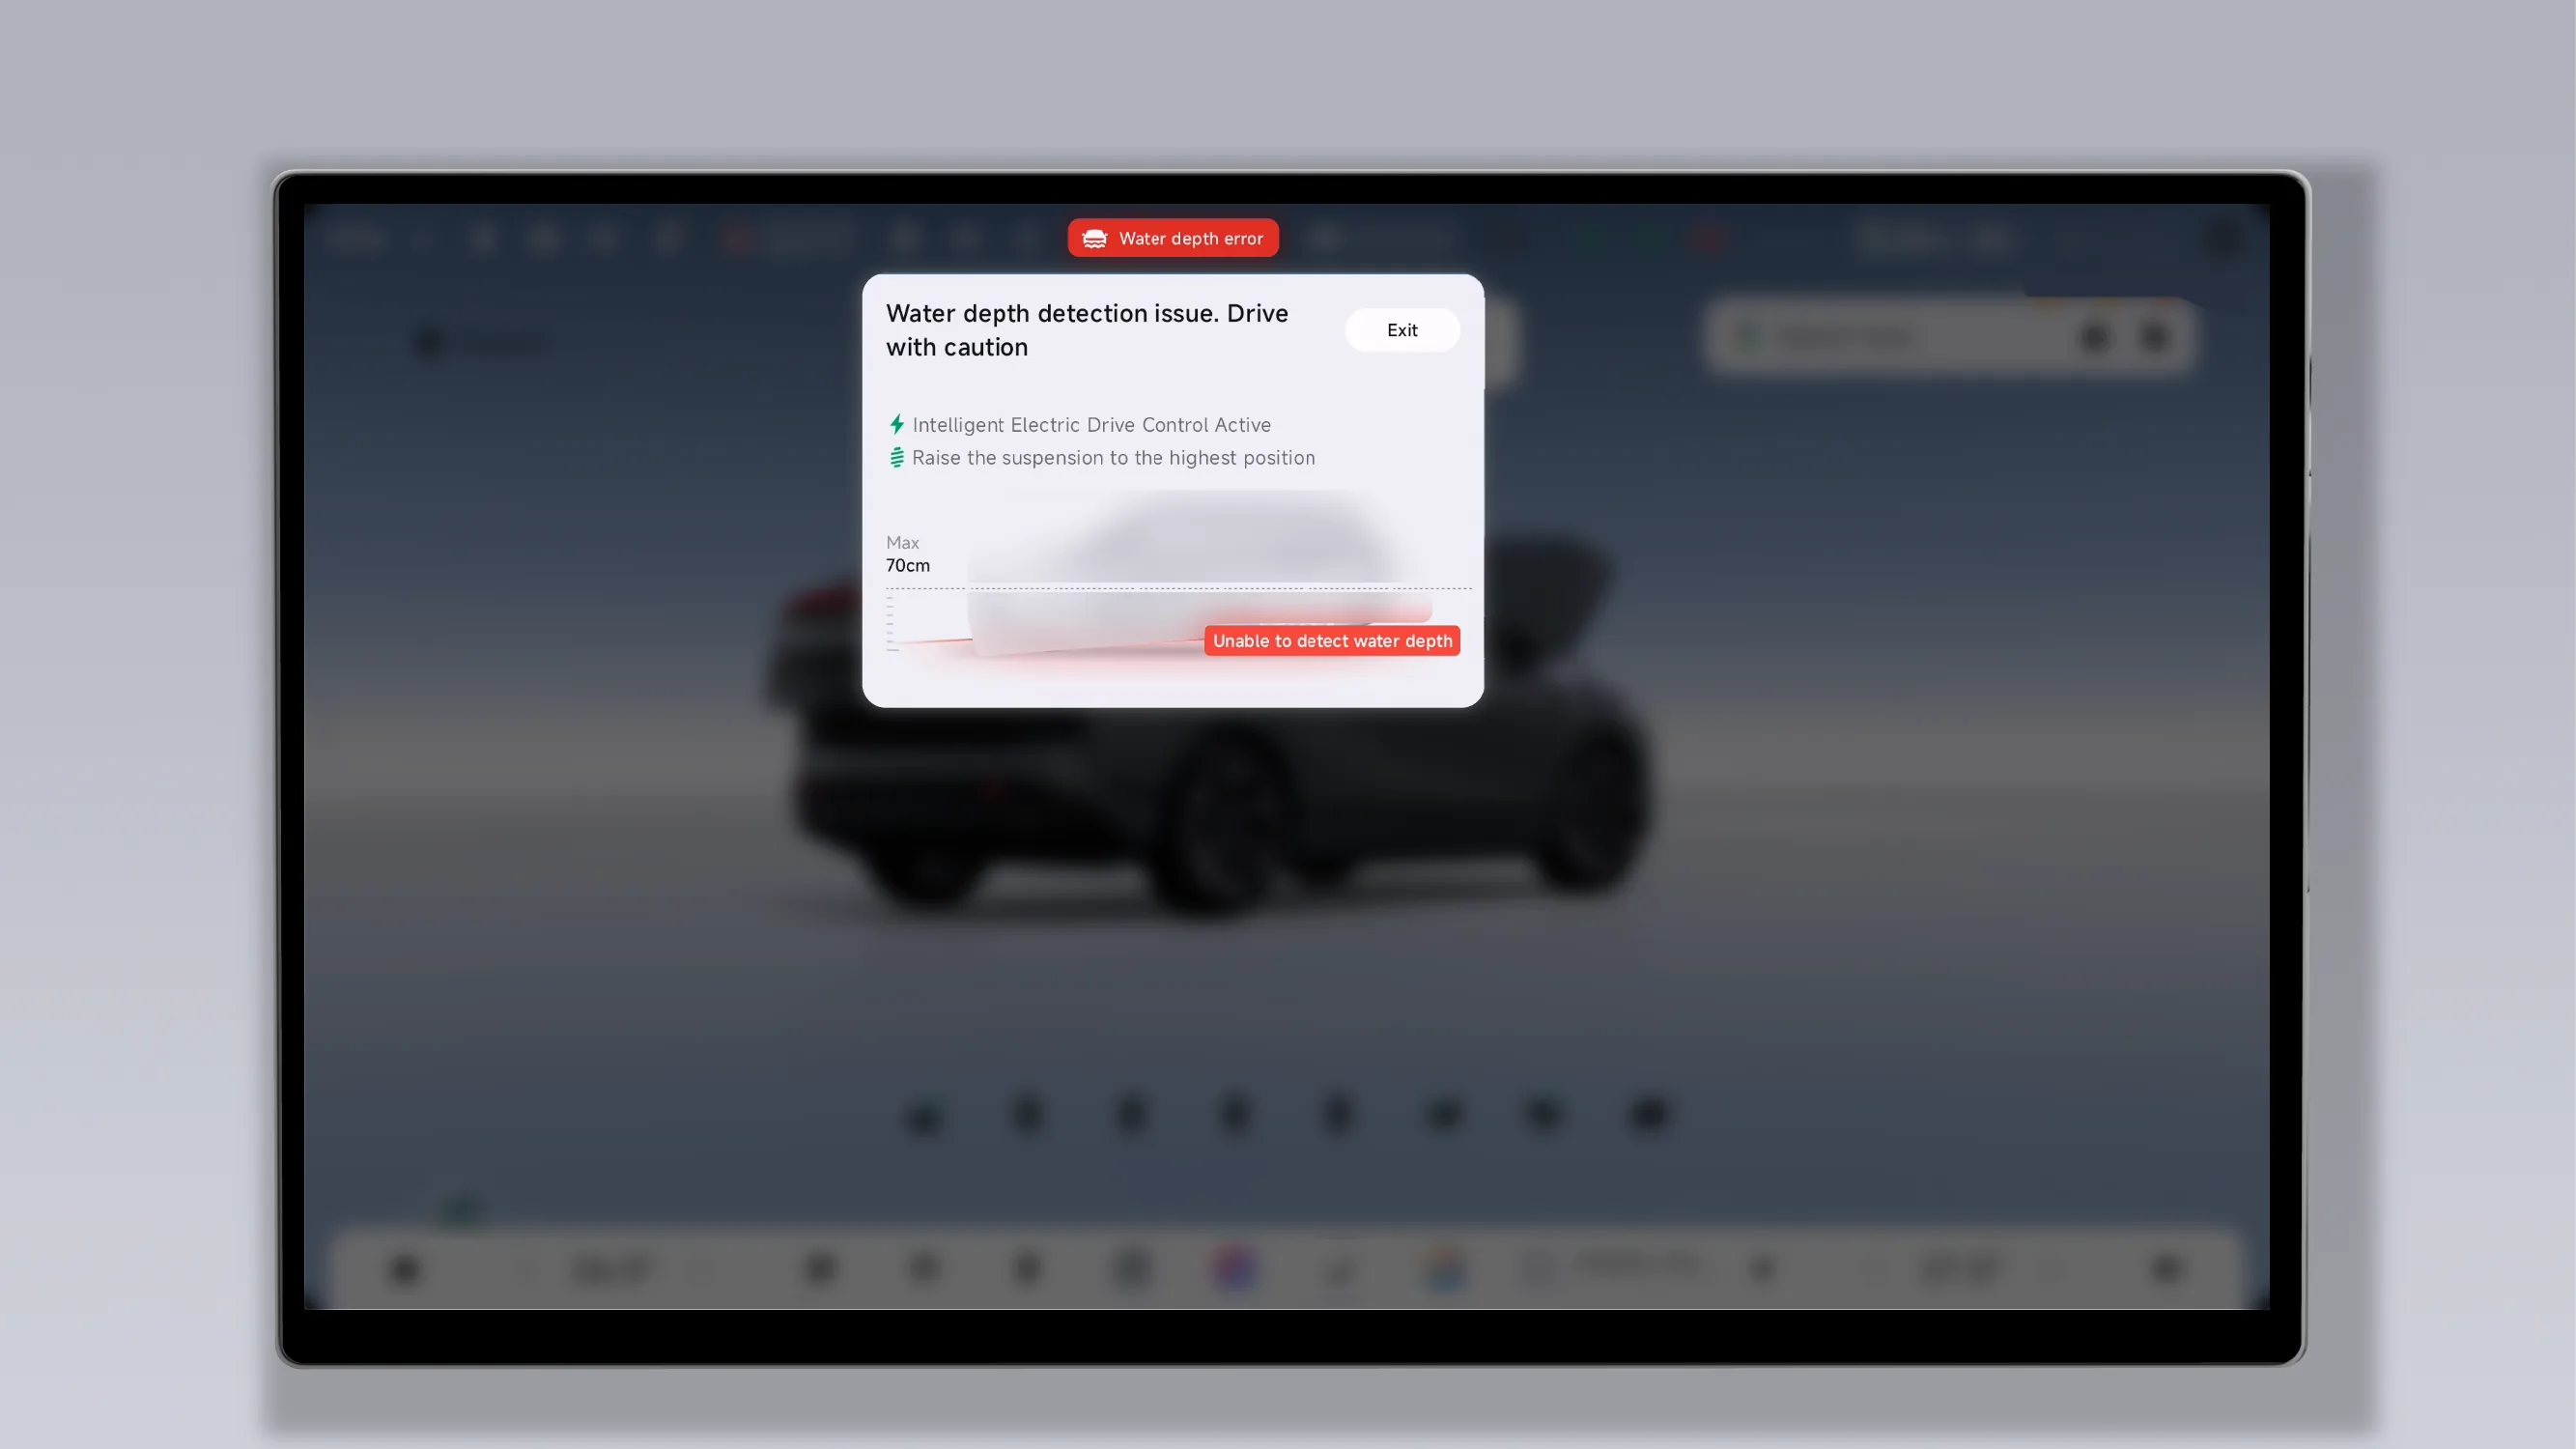
After enabling Wading Mode, you can view wading information on the center display:
Status bar display:After wading mode is enabled, the top status bar of the central control screen will display real-time water level information.
For details, see:Tap the water level information icon in the status bar to enter the wading information screen and view related information such as the specific wading depth and alarm prompts.
Tips Although the vehicle’s maximum wading depth is 70 cm, for your safety and the vehicle’s safety, the status bar will prompt you to drive away soon when the water depth reaches 60 cm.
Abnormal Prompt:If the rearview mirror angle is too high, the door is not properly closed, the power running board* is deployed, or other conditions cause the wading radar position to shift or become obstructed, prompt text will be displayed in the status bar. Please adjust the vehicle component status according to the prompt.
The water depth data measured by the vehicle is automatically synchronized to the cloud, and road water accumulation conditions can also be automatically downloaded from the cloud. On road sections with wading risk, the vehicle proactively reminds the driver.
For safe operating procedures for driving through water, please refer to the “Vehicle Use in Special Scenarios” section. See Vehicle Use in Special Scenarios
For warnings and precautions related to the wading radar, please refer to the "AI Wading Monitoring" section. See AI Wading Monitoring
Warning Wading mode is only an auxiliary function and cannot be used as a regular driving mode. Wading mode cannot monitor the actual water conditions around the vehicle, the water flow speed, or predict whether the surrounding water depth is rising rapidly; it cannot identify the current waterproof sealing condition of the vehicle, nor can it predict whether it is safe to continue driving.
During wading, do not exit Wading Mode.
Caution Wade Mode does not reduce the risk of wading. Use with caution.
The maximum permissible static wading depth (not exceeding 70 cm) is defined as the water level through which the vehicle may be driven slowly in still water. In flowing water, the maximum permissible wading depth is reduced.
While wading, pay attention to waves generated by the vehicle, as they may cause the Water Depth to exceed the Max.
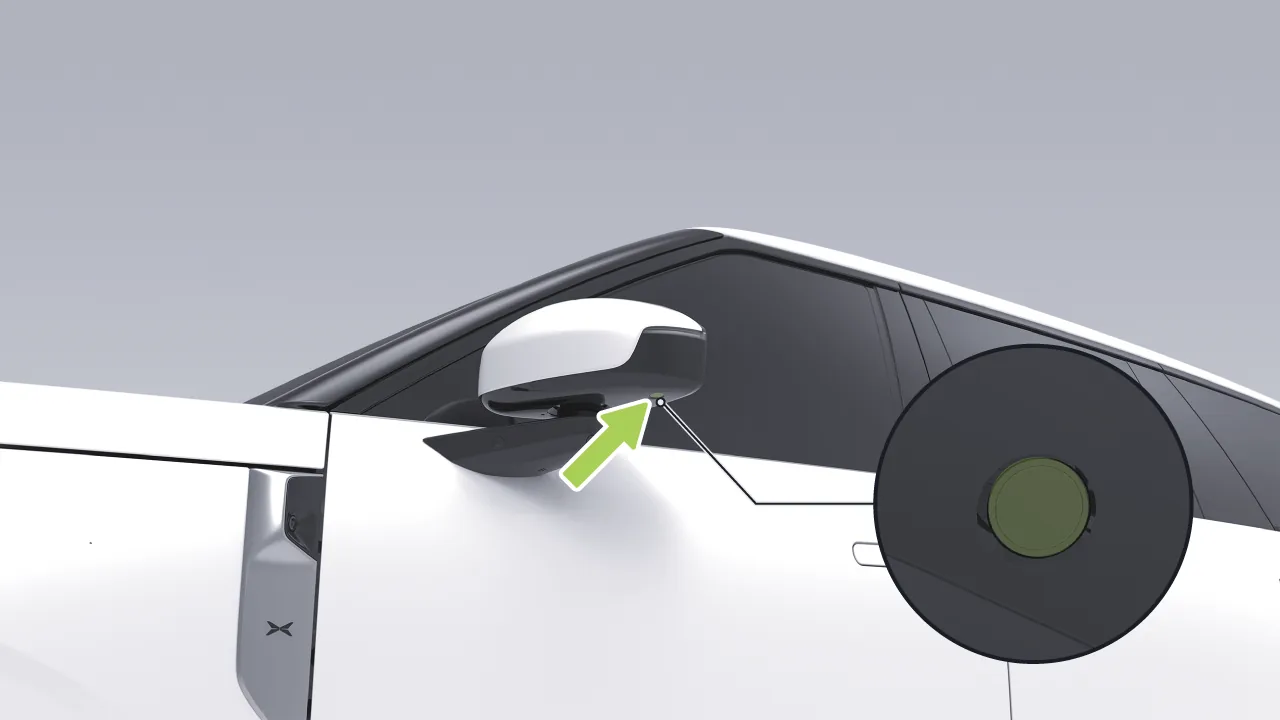
The AI wading monitoring function is a system that assists the driver in safely passing through wading road sections. This function detects the water depth near the vehicle through the wading radar on the Side Mirrors and displays it on the wading information interface. When the current water depth reaches a certain limit, the center control screen will display a corresponding warning message.
The AI wading monitoring function is enabled simultaneously when Wading Mode is turned on, and can also be enabled or disabled separately through the central control screen:
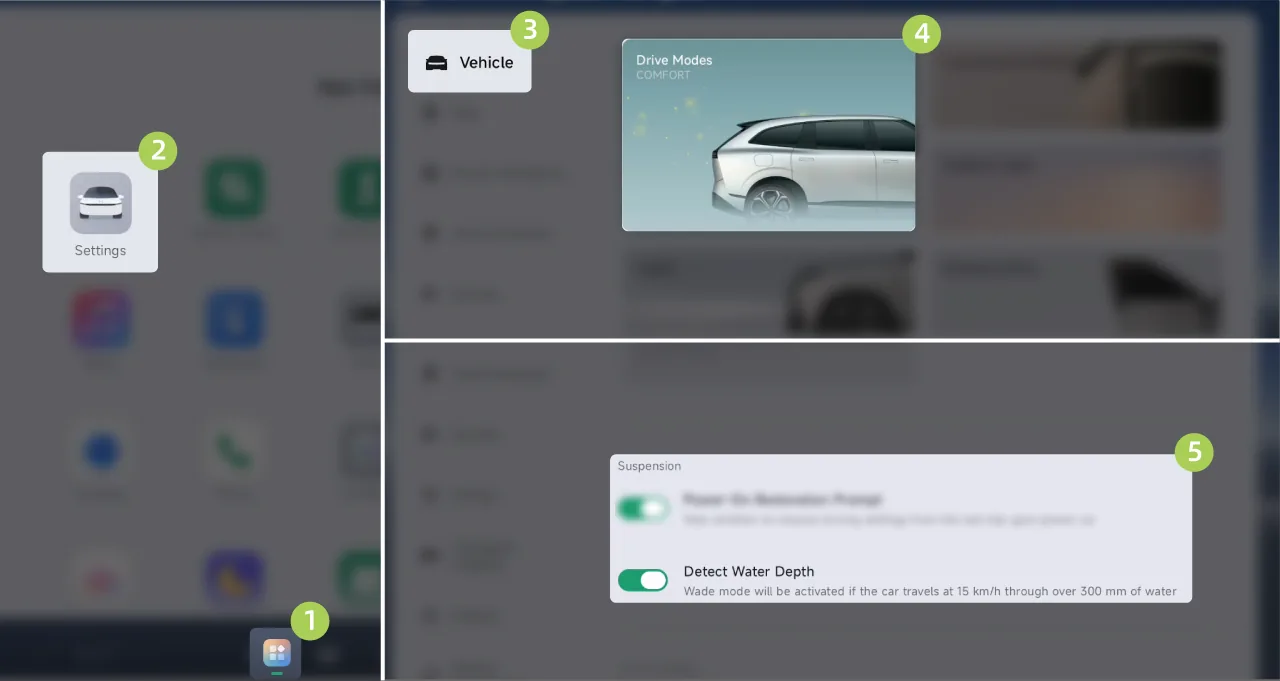
On the central control screen “ →Settings→vehicle→driving mode”Interface, turn AI wading monitoring on/off.
When Wading Mode is not enabled but AI wading monitoring is enabled, if the vehicle speed is lower than 15 km/h and the wading depth exceeds 30 cm, a pop-up window will appear on the central control screen suggesting that you enable Wading Mode.
In the following situations, the wading radar will suspend operation or exit, including but not limited to:
Any door is not closed;
Power running board* extends;
The vehicle Side Mirrors are not unfolded or are adjusted at too high an angle;
Vehicle speed exceeds 15 km/h;
The vehicle is traveling on a slope exceeding 10°;
Enable Battery Saver Mode or Extreme Battery Saver Mode;
The sensor is blocked;
Wading radar fault;
Air Suspension Fault;
Air suspension height value invalid;
Electronic Stability Program or braking system failure.
In some cases, the wading radar may produce inaccurate detection or false detection, including but not limited to:
Detection Limitations:The wading radar can only detect the water level at the position of the Side Mirrors and, based on this, predict the depth of standing water in front and on the sides. In the following scenarios (including but not limited to), the system may have inaccurate detection or false detection:
On uphill or downhill roads where the road surface has raised or depressed sections, the system may be unable to accurately detect the current water depth or may perform false detection.
When driving on a level road surface, if low obstacles that protrude above the water surface are present on both sides of a narrow road surface, the system may generate false detections.
While driving on normal roads, if there are obstacles close to both sides of the vehicle body (such as dense grass, large rocks, etc.), the system may not be able to accurately detect the current water depth.
While driving on normal road surfaces, if an obstacle with sound-absorbing material appears or floats on the water surface, the system may be unable to accurately detect the current water depth or may detect it incorrectly.
Environmental Interference:Heavy rain, strong winds, or turbulent water flow may interfere with the radar ultrasonic signals, resulting in inaccurate measurement data; when the radar is covered by mud, dirt, ice, or snow, the function will fail;
Modification Effects:Installing accessories such as foam, brackets, aftermarket running boards, etc. below the ultrasonic radar of the Side Mirrors will obstruct the radar and cause detection abnormalities. Such modifications are strictly prohibited;
Special Scenario Failure:When the vehicle passes quickly through accumulated water, the vehicle experiences severe jolting, or enters water on a slope greater than 10°, the system will suspend operation. In such cases, the driver must observe and judge the safety of wading.
Warning The AI wading monitoring function is only an auxiliary function and cannot replace the driver's judgment of external conditions. Under any circumstances, the driver shall be responsible for the safety of the vehicle and, when driving through water, shall observe the surroundings of the vehicle at all times and drive cautiously. The Company shall not be liable for vehicle damage (such as water ingress or engine stalling) caused by reliance on the system.
The AI wading monitoring function cannot ensure the safe driving of the vehicle under complex driving conditions such as floods, deep water, rivers, and heavy rain.
When entering water from a steep slope, the water level may rise rapidly, and the AI wading monitoring function may not be able to accurately detect the current water depth.
Unauthorized modification or removal of the radar sensor will cause the function to fail and will void the vehicle warranty.
When the vehicle brakes or coasts, the Regeneration system starts working, converting kinetic energy into electrical energy and storing it in the power battery to extend the vehicle driving range.
You can set the regenerative braking level in either of the following ways:
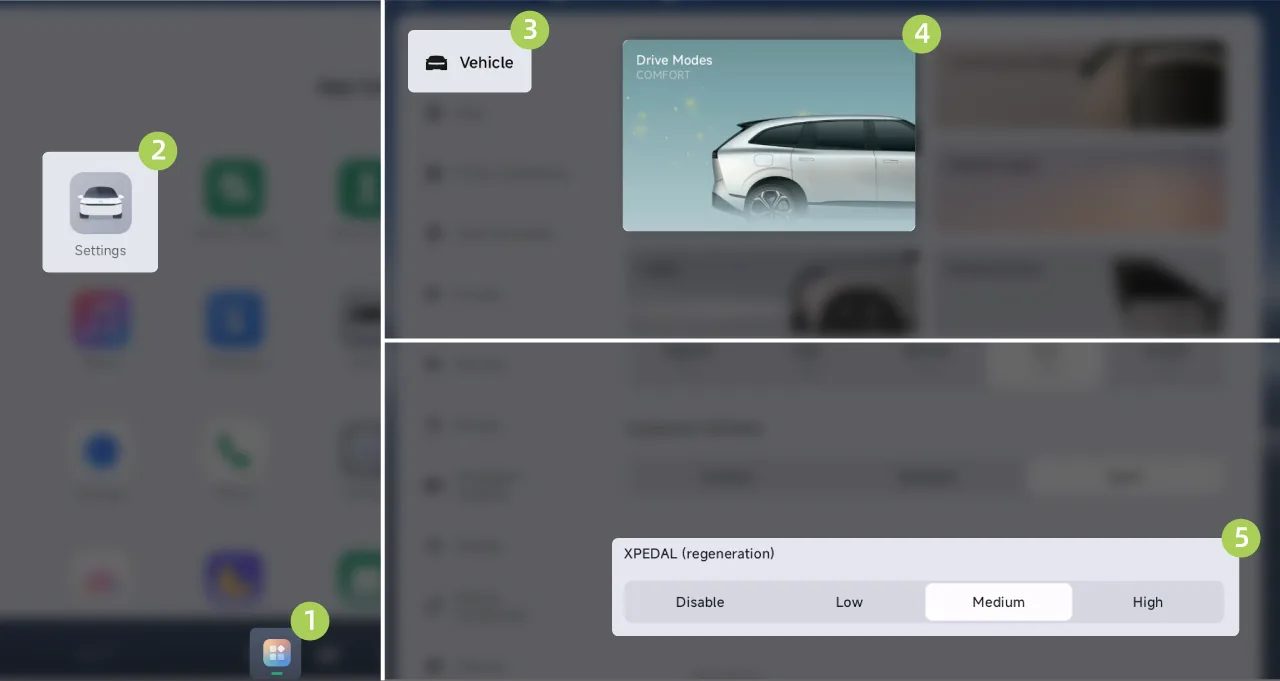
On the center control screen “ →Settings→vehicle→driving mode”Interface, set regenerative braking level.
Tap on the center display. “ →Regen”, set the regenerative braking level in the pop-up interface. (To learn about the custom control center, please refer to the Custom Control Center section).
Directly use a voice command (for example, say: “Hello XPENG, set energy recovery to high”).
Off: The energy recovery function is off.
Low: After the accelerator pedal is released, the vehicle speed decreases relatively slowly, providing better ride comfort.
Balanced deceleration and comfort, preferred for daily use.
High: After the accelerator pedal is released, the vehicle speed decreases relatively quickly, and the deceleration feel is relatively obvious.
Tips Different regenerative braking levels correspond to different driving experiences.
If regenerative braking significantly reduces the vehicle speed, the brake lights will illuminate (for example, when driving on a steep slope) to alert drivers of vehicles behind you that you are decelerating.
The amount of Regeneration depends on factors such as the current power battery status, the set regenerative braking level, and vehicle speed. When the battery level is 100%, Regeneration cannot be performed; when the battery is in a high state of charge, Regeneration will be reduced.
When the vehicle decelerates, a slight braking sensation and motor noise are normal phenomena.
The vehicle provides three Power Steering modes: “Light, Standard, and Steady”:
Light:The vehicle provides greater steering assist, requiring less torque from the driver to turn the steering wheel.
Moderate:The vehicle provides moderate steering assist, preferred for daily use.
Steady:The vehicle provides less steering assist, requiring the driver to apply greater torque to turn the steering wheel.
You can set the Power Steering mode in the following ways:
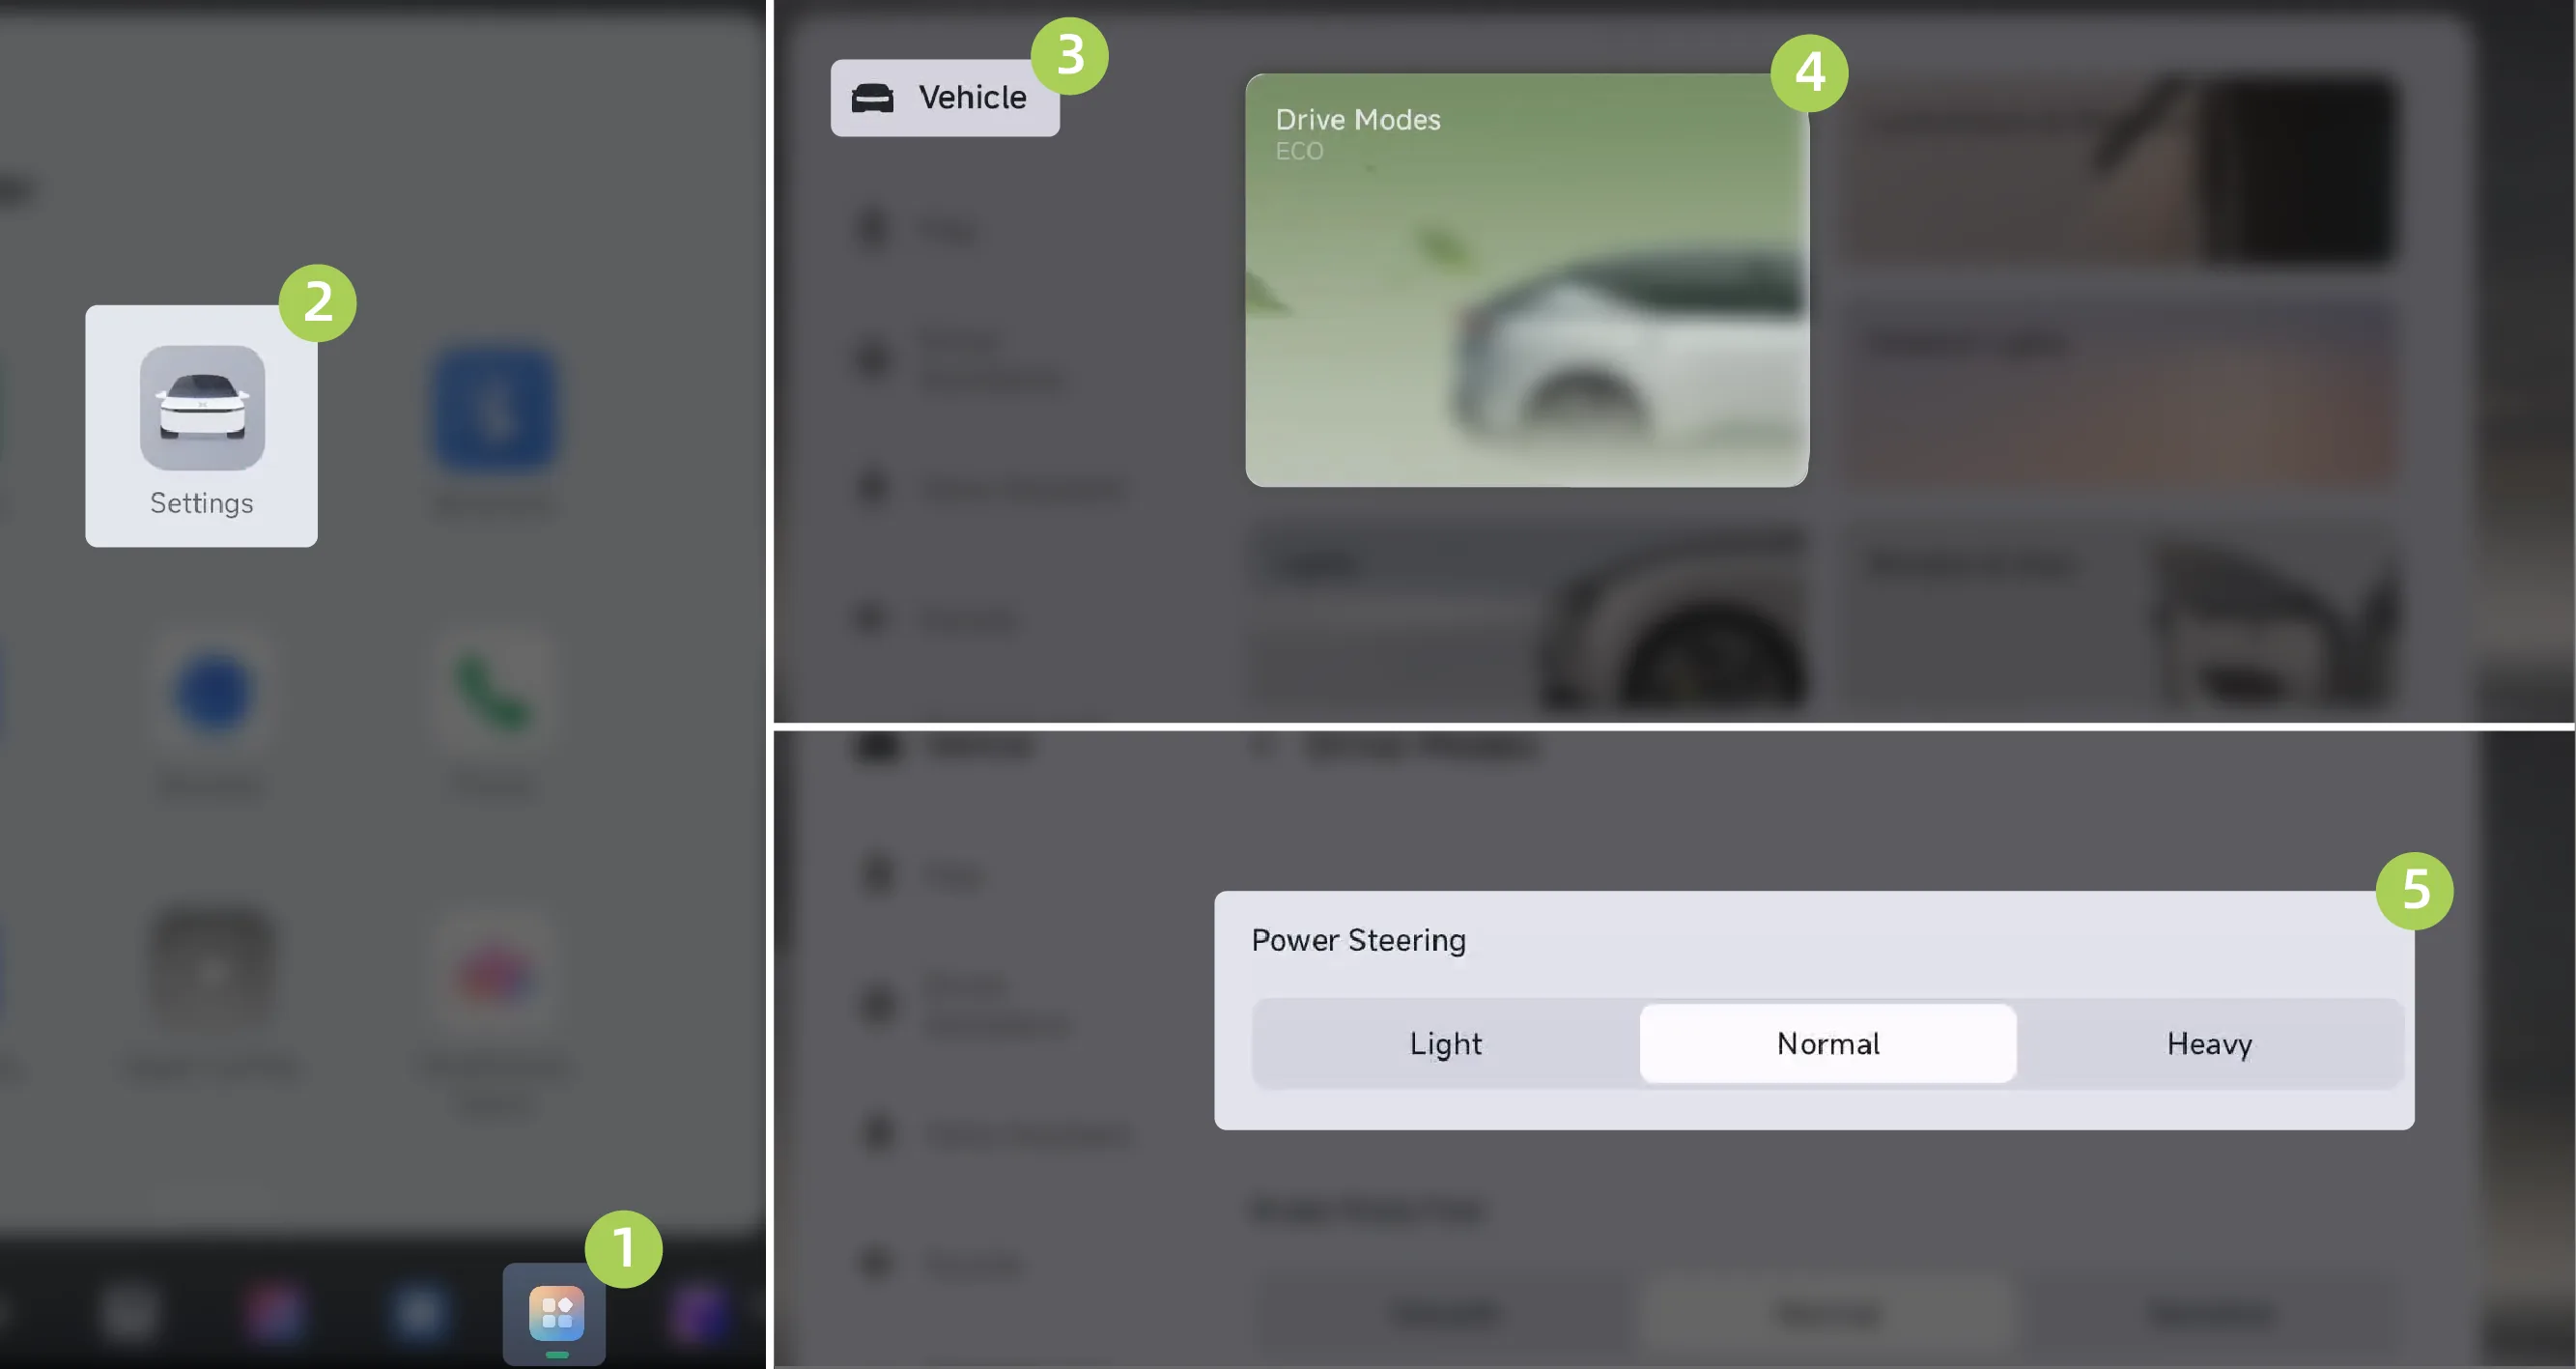
On the central control screen “ →Settings→vehicle→driving mode”Interface for setting the Power Steering mode.
Tap on the center display screen. “ →Power Steering”Enter the pop-up window to set the Power Steering mode. (To learn about the custom control center, please refer to the custom control center section).
Directly through voice commands (for example, say out and other keywords).
Tips When changing the Power Steering mode while driving, hold the steering wheel firmly to prevent the change in steering feel from affecting vehicle control.
For safety reasons, switching Power Steering modes is not supported in the following situations:
When the driver is making aggressive steering maneuvers;
When the vehicle speed is above 150 km/h;
When the vehicle is in driver assistance mode.
The maximum supported steering angle of the vehicle's rear-wheel steering varies depending on tire size: ±7.5° for 21-inch tires and ±5° for 22-inch tires.
At high speeds, the rear wheels steer in the same direction as the front wheels, improving steering response and vehicle stability; at medium and low speeds, the rear wheels steer in the opposite direction to the front wheels, improving vehicle agility, achieving a smaller overall vehicle turning radius, and making parking or urban driving conditions easier to handle.
Tips If the vehicle is not driven after being powered on, turning the steering wheel while stationary will not cause the rear wheels to steer.
After the vehicle is powered on and driven, when braking to a stop with the gear position in D/R gear, turning the steering wheel while the vehicle is stationary will cause the rear wheels to steer. Excessive steering while stationary should be avoided as much as possible, otherwise overtemperature protection will be triggered.
During overtemperature protection, the rear-wheel steering automatically returns to center and temporarily stops responding. The vehicle can be driven normally, and control can be automatically restored after 6 minutes.
When over-temperature protection is triggered, the instrument cluster will issue a reminder.
Warning Never replace the factory‑equipped 21‑inch tires with 22‑inch tires without authorization. Due to differences in Rear‑wheel Steering angles between tire sizes, forcing this change may cause mechanical interference during Rear‑wheel Steering, potentially damaging the vehicle and endangering driving safety.
The air suspension supports the following operations:
Set Height
Set Stiffness
Suspension Welcome
Easy Loading
The air suspension height adjustment range is -30 mm to 40 mm. While driving, the vehicle will intelligently adjust the suspension height according to the height set by the driver, combined with information such as vehicle speed and driving mode.
You can set the suspension height in any of the following ways:
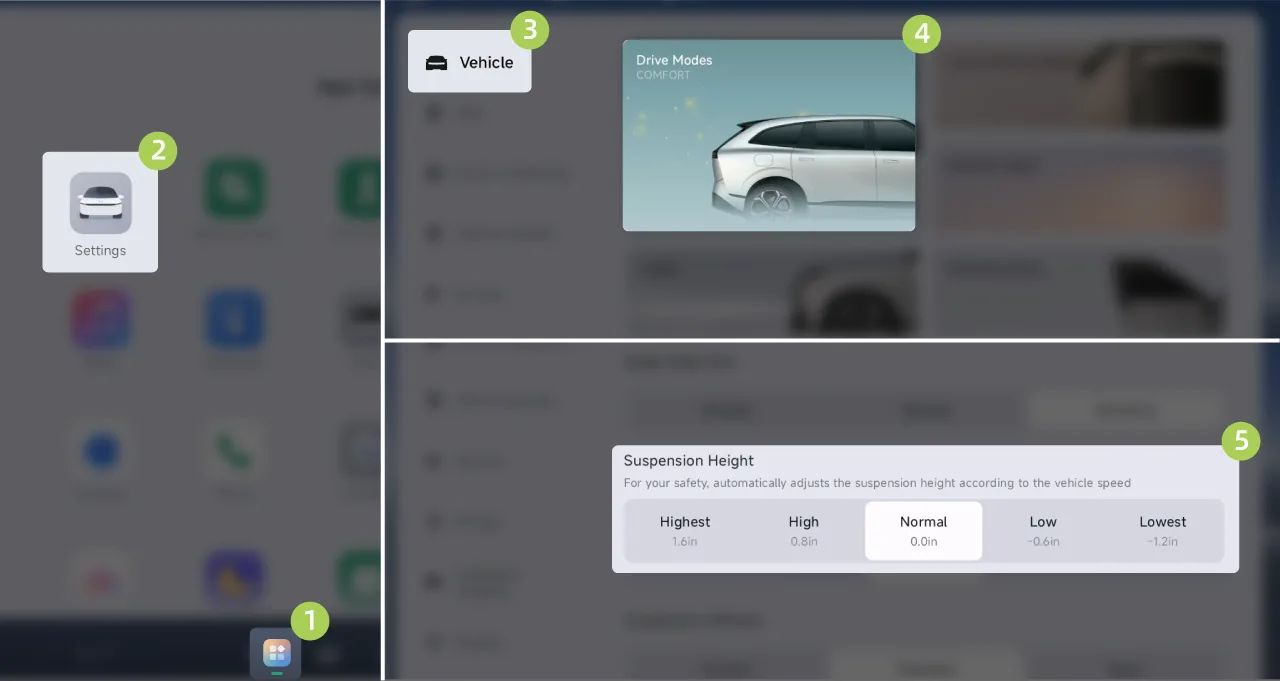
On the center control screen “ →Settings→vehicle→driving mode”Interface, can be set 。
Tap on the center display screen. “ →Suspension Height”Enter the pop-up window to set the suspension height. (For information about custom Control Center, please refer to the custom Control Center section).
Directly through voice commands (for example, say out and other keywords).
| High Gear Position | Suspension Height | Recommended Usage Scenarios |
| Maximum | +40 mm | Poor unpaved road surfaces such as pothole roads, gravel roads, and muddy roads |
| Higher | +20 mm | |
| Normal | 0 mm | Daily Driving |
| Lower | -15 mm | Viaducts, expressways, and other road sections for high-speed driving |
| Minimum | -30 mm | When entering and exiting the vehicle |
Tips If you frequently adjust the suspension height, the system will enter thermal protection mode. Wait until the system has cooled down before adjusting again.
With different Suspension stiffness settings, the vehicle can provide different driving comfort experiences and cornering handling experiences.
You can set the suspension stiffness in any of the following ways:
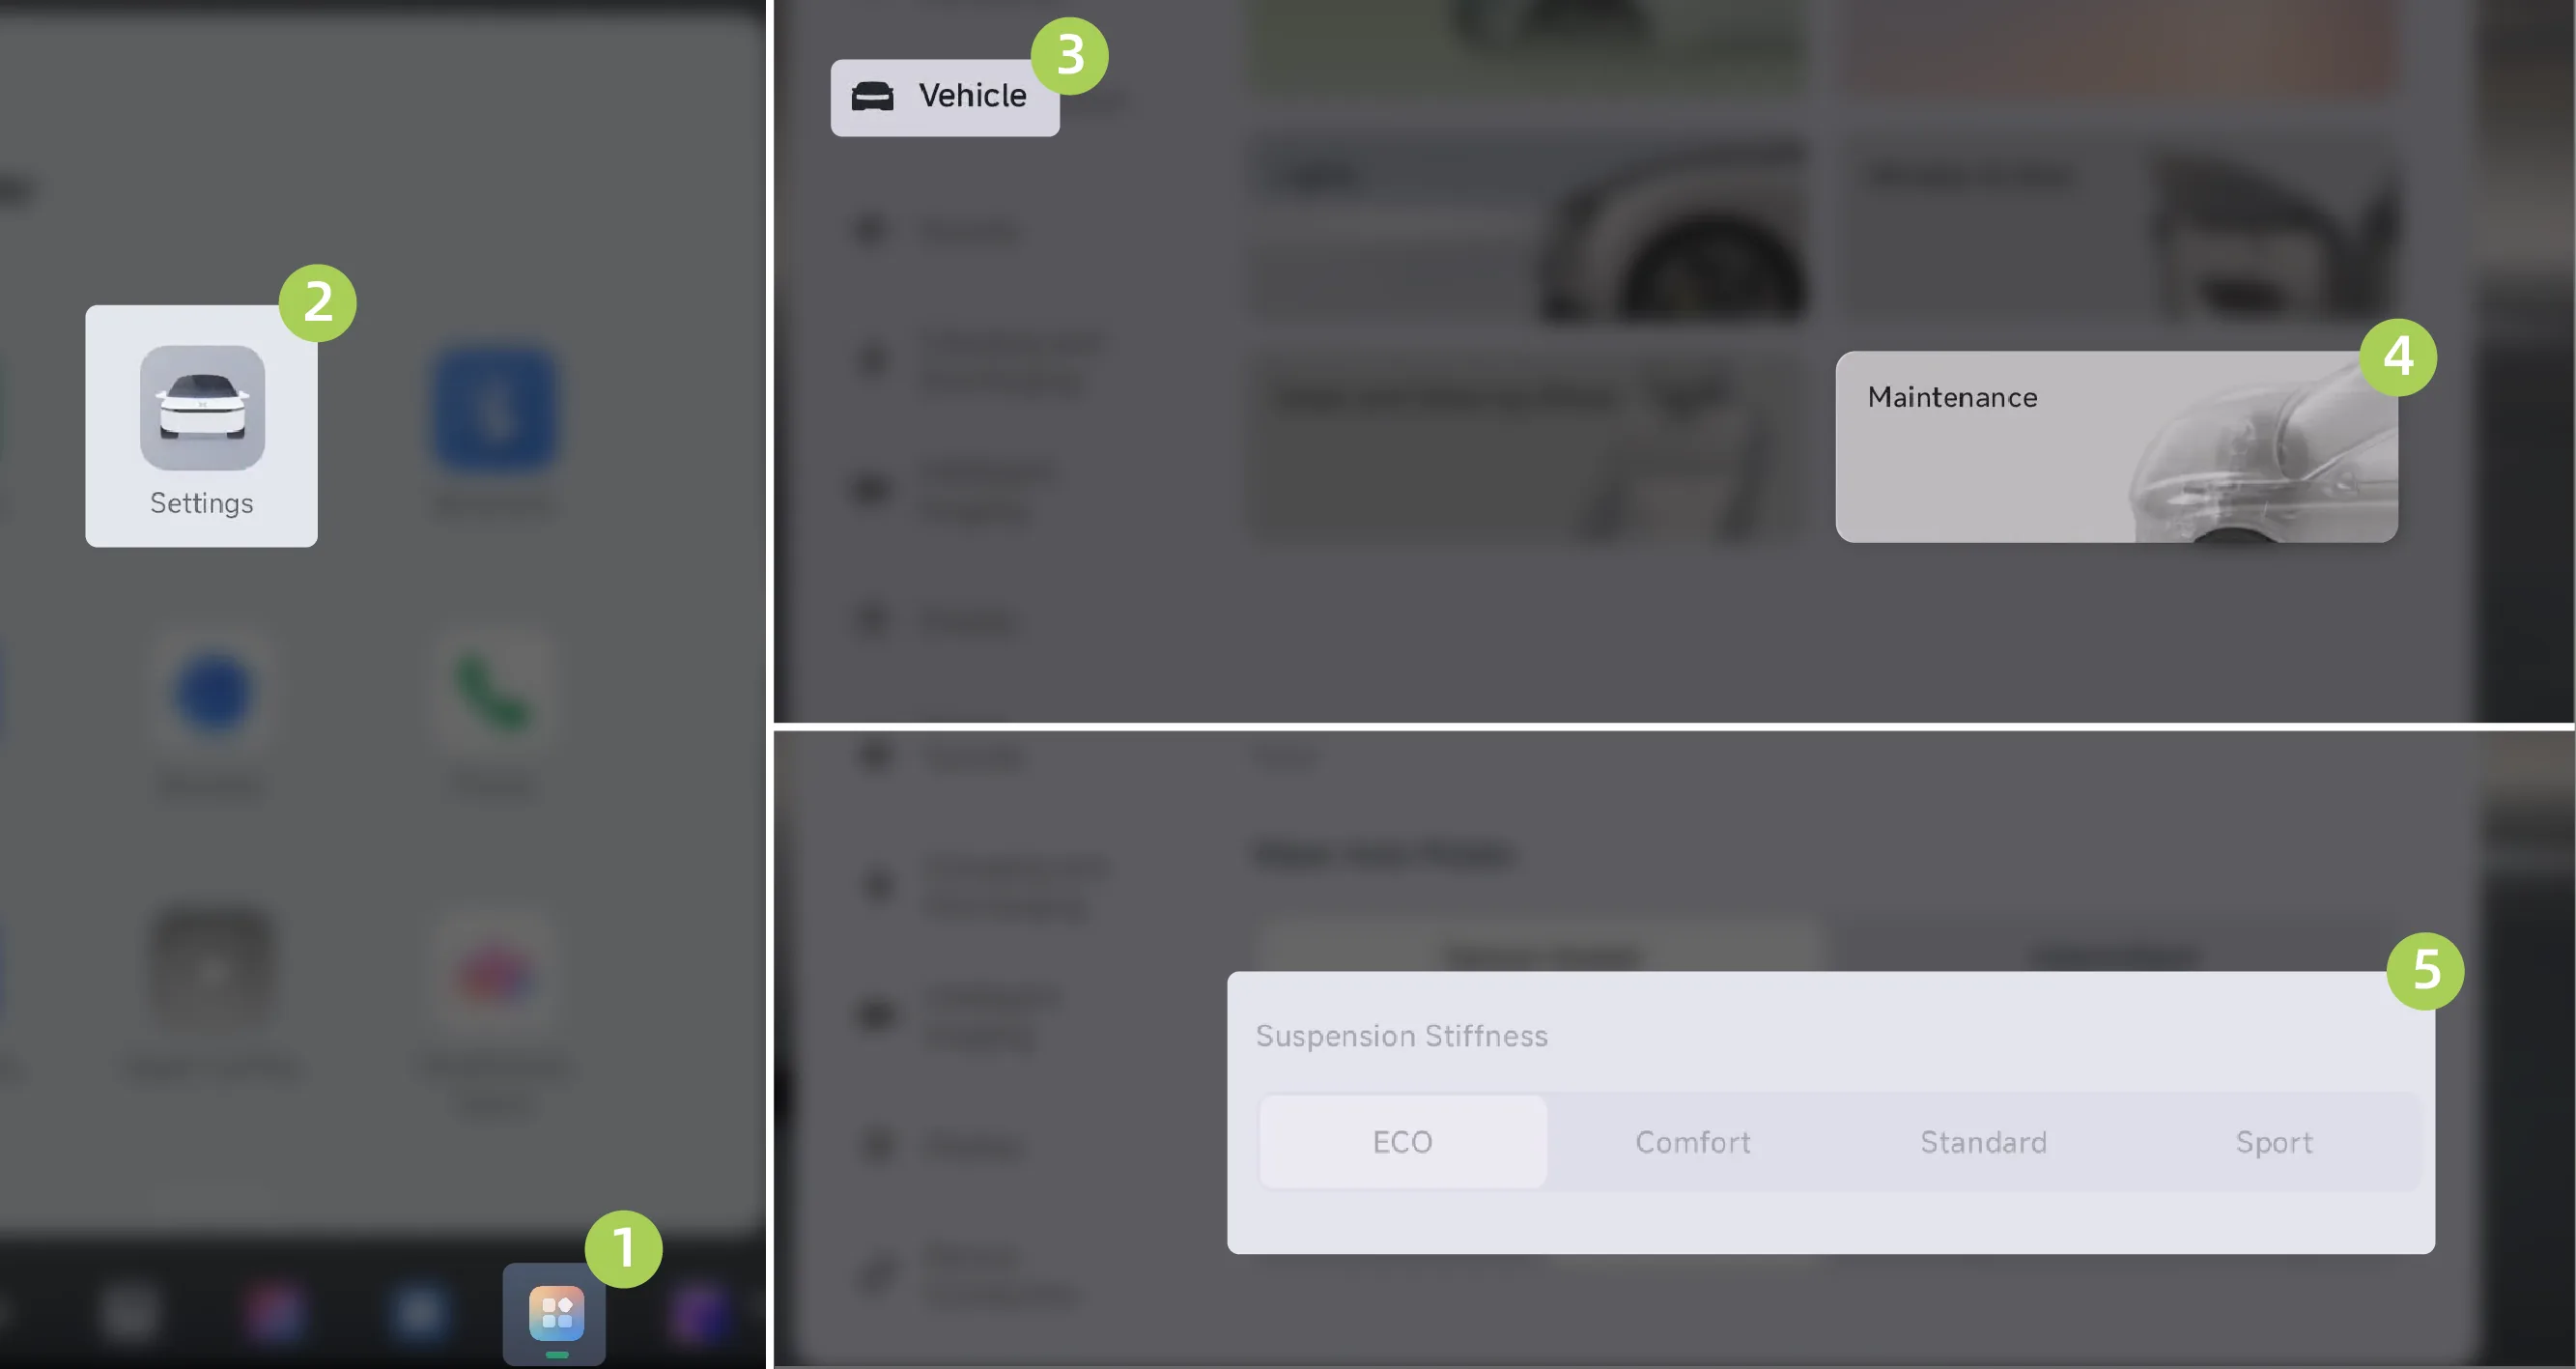
On the center control screen “ →Settings→vehicle→driving mode”On the interface, you can set Suspension Stiffness to “ECO, Comfort, Standard, Sport”.
Tap on the center display. “ →Suspension Stiffness”Enter the pop-up window to set suspension stiffness. (To learn about the custom Control Center, refer to the custom Control Center section.)
Directly via voice commands (for example, say out and other keywords).
Tips The ECO switch is displayed only when the driving mode is set to “ECO”. At this time, the suspension stiffness is automatically set to ECO mode and cannot be switched.
During the process of suppressing the vehicle body pitch angle during acceleration and deceleration and roll during steering, the air suspension will make a “click” sound, which is the normal operating sound of the dual-chamber air valve.
After the suspension welcome function is enabled, the air suspension will automatically adjust the suspension height when you get in and out of the vehicle to facilitate entering and exiting the vehicle.
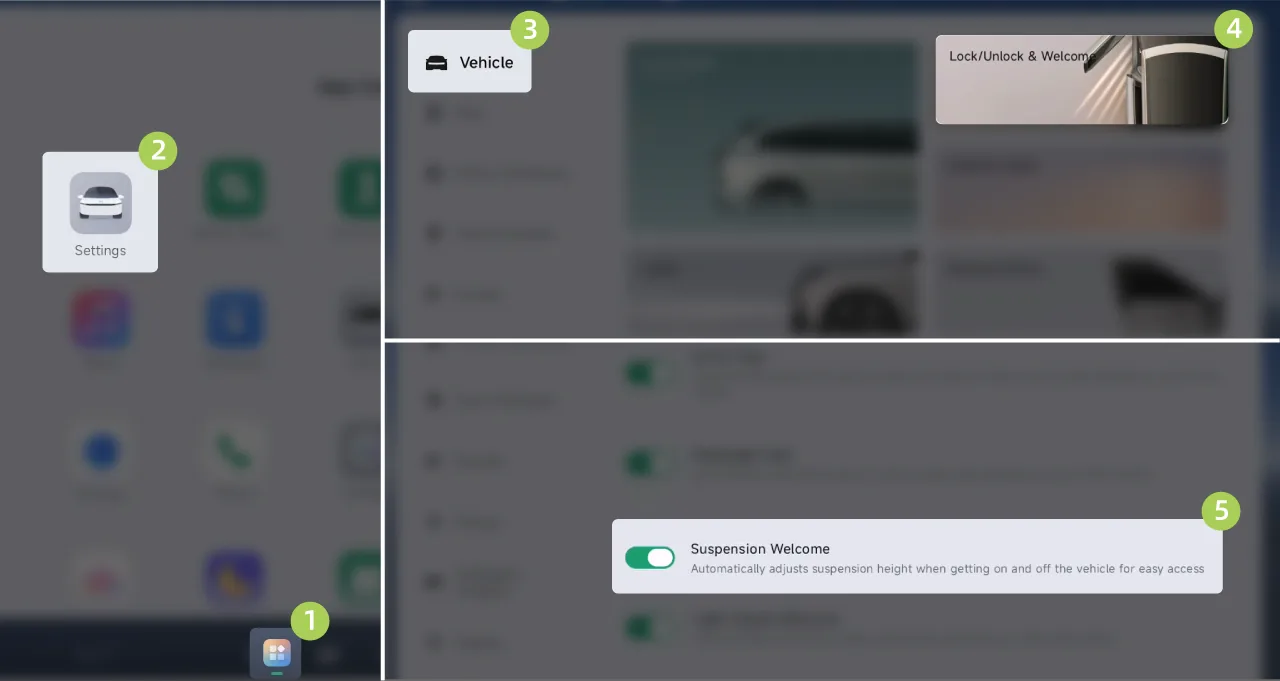 →Settings→vehicle→Unlocking/Locking and Welcome”Interface, can be opened/closed . When the suspension welcome function is enabled, the system will automatically perform the following adjustments according to the current suspension height gear:
 Currently in When in gear, the suspension height will automatically lower to Gear.
Currently in When in gear, the suspension height will automatically lower to Gear position.
Currently in progress When in gear, the suspension height will automatically lower to Gear.
Currently in When in gear, the Suspension height will remain unchanged.
Caution After Suspension Welcome is enabled, the suspension will automatically lower when the vehicle is parked. This may cause wear and tear as the vehicle bottom and doors can get scratched due to complex road conditions when the suspension is lowered. Pay attention to the parking environment to avoid vehicle damage.
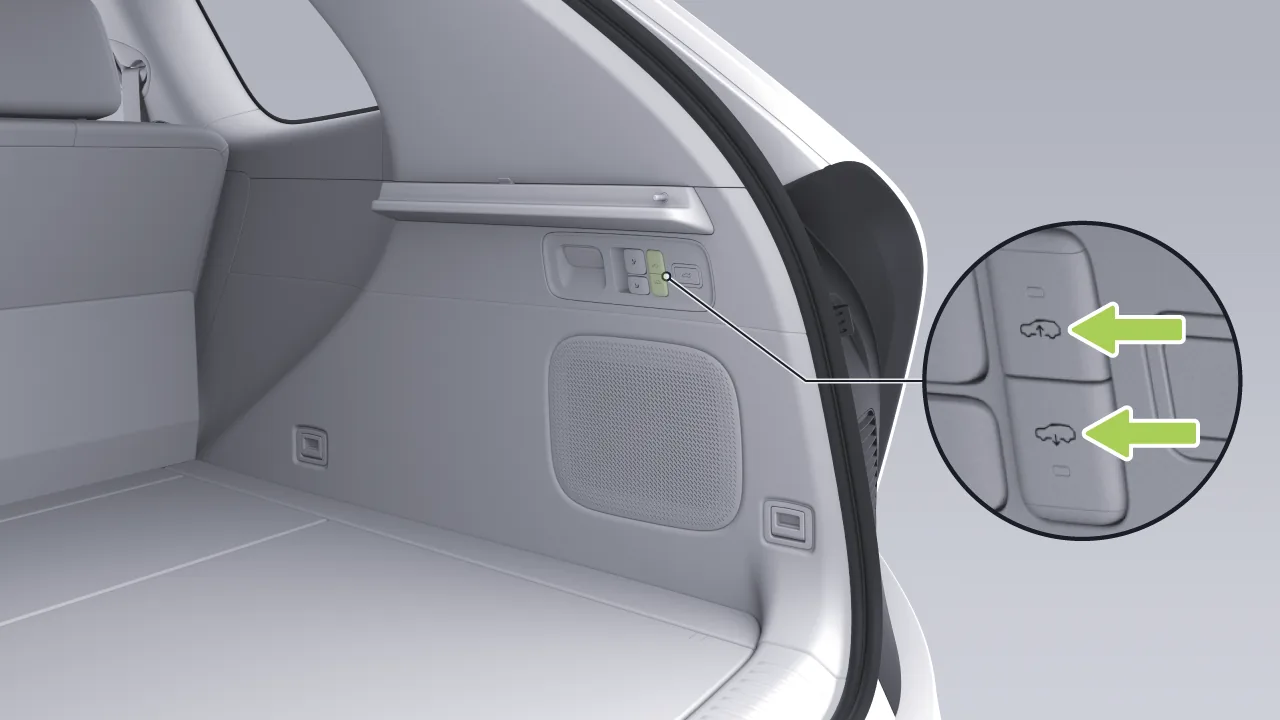
You can turn the Easy Load function on/off using the Easy Load switch in the trunk.
Press  When the Easy Load Function is enabled, the suspension lowers to the lowest position.
Press  When the Easy Loading function is turned off, the suspension returns to its previous height.
When lifting the vehicle, Suspension Maintenance Mode must be enabled. When towing, Rescue Mode must be enabled. Otherwise, the air suspension may be damaged.
For maintenance involving the disassembly and installation of the air suspension, the operation must be performed at a XPENG service center; otherwise, the air suspension may be damaged.
If the central control screen  、
、  If the indicator lights up, do not continue driving. Park the vehicle in a safe area and contact a XPENG service center for inspection and repair; otherwise, the air suspension may be damaged.
After the vehicle has been parked for a long time, the suspension height will decrease to a certain extent, which is normal. The suspension will automatically detect the height and replenish air.
Before the vehicle is parked for a long time, turn off the Suspension welcome function, and adjust the Suspension height to normal or above. At the same time, do not disconnect the battery, otherwise the Suspension air replenishment function will be affected, causing damage to the vehicle.
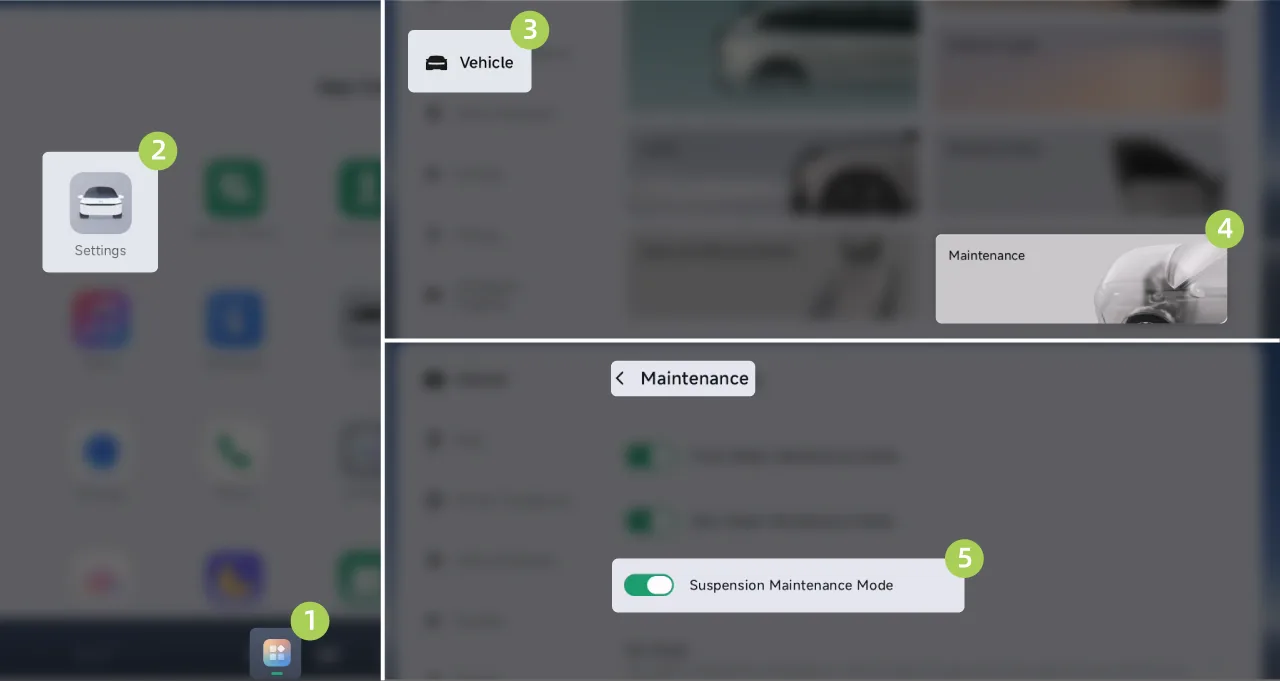
On the center control screen “ →Settings→vehicle→Maintenance”Interface, can be opened/closed 。
The vehicle drive system is Timely Four-wheel Drive and does not require manual operation. The system will intelligently switch between two-wheel drive mode and four-wheel drive mode according to vehicle operating conditions.
When the vehicle is driving on a good road surface, in order to ensure the comfort and economy of vehicle driving, the vehicle will preferentially use two-wheel drive mode, and switch to four-wheel drive mode when the driver has a high power demand; when the vehicle is driving on wet roads, muddy roads, icy and snowy roads, sandy roads, and complex off-road surfaces, as well as during medium- and high-speed acceleration, high-dynamic cornering, and other conditions, the Timely Four-wheel Drive system can intervene in time and, through intelligent torque distribution, ensure the traction of all four wheels, achieve optimal passability and safety, and ensure the stability and comfort of vehicle driving.
The all-scenario tire blowout stability function applies to scenarios in which, while the vehicle is traveling at high speed, a blowout occurs in a single front wheel on one side or simultaneously in the front and rear wheels on the same side.
When a tire blowout occurs while the vehicle is traveling at high speed, the system will quickly respond to changes in vehicle posture, automatically activate the hazard warning lamps, and reduce the vehicle speed to a safe speed, so as to assist the driver in maintaining stable vehicle driving and prompt the vehicle to pull over safely.
All vehicle components are operating normally.
During straight-line driving, the vehicle's maximum speed must not exceed 180 km/h.
When driving through a curve, the vehicle's maximum speed must not exceed 80 km/h.
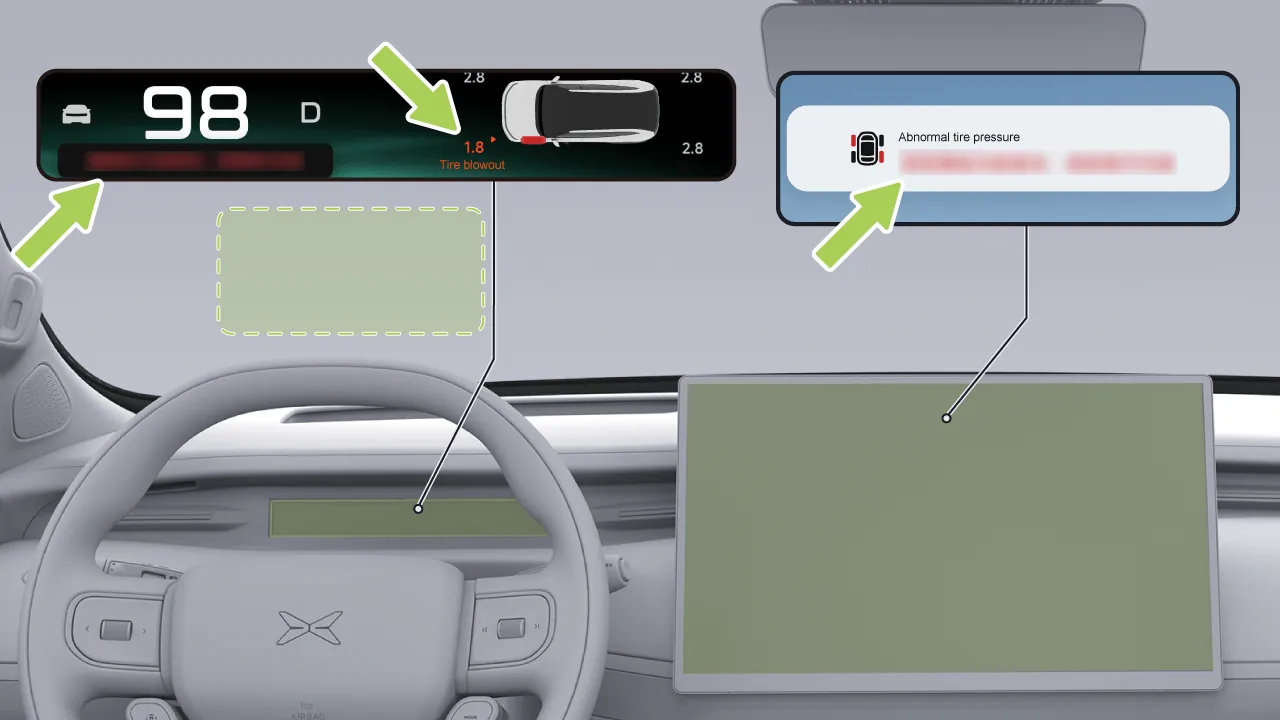
When a tire blowout occurs and the vehicle speed exceeds 60 km/h, the system will limit the vehicle's maximum speed to 60 km/h.
When a tire blowout occurs and the vehicle speed is below 60 km/h, the system will limit the vehicle's maximum speed to 25 km/h.
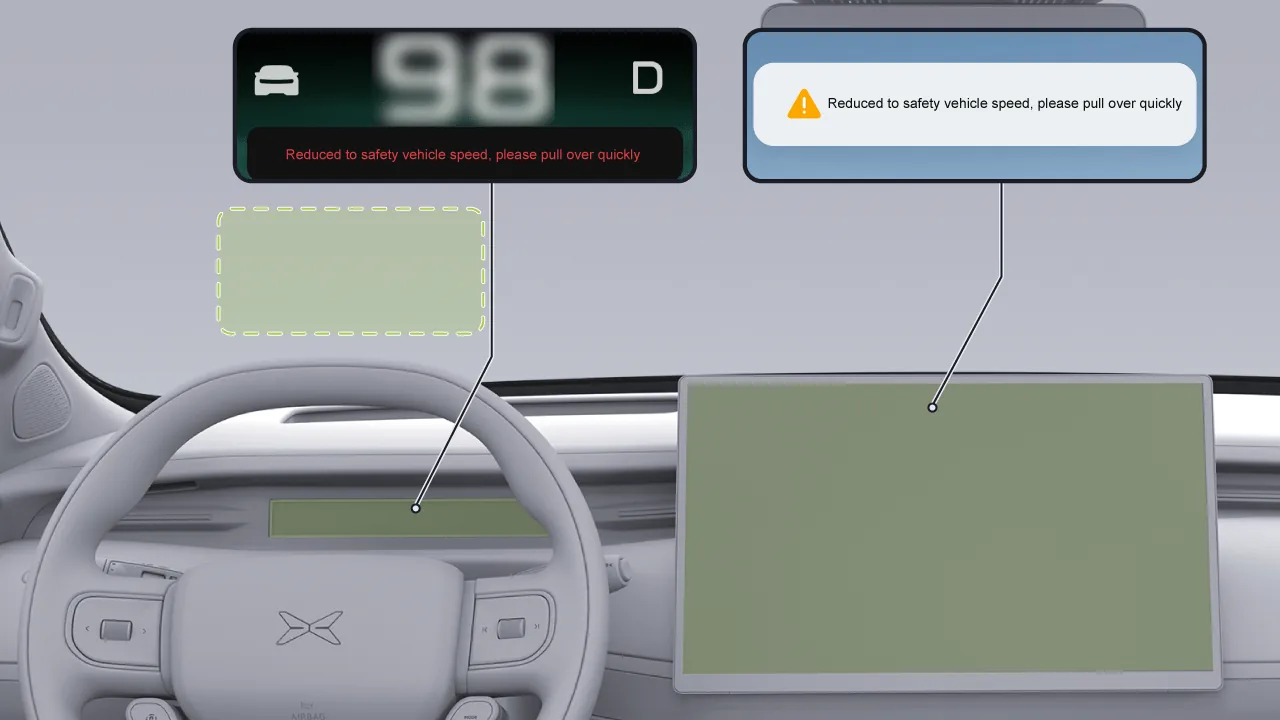
Please hold the steering wheel firmly. After the vehicle speed decreases to a safe speed, the instrument cluster screen, center display, and AR-HUD will remind you through text prompts and voice prompts to safely pull over and park the vehicle. After stopping, shift into P.
After observing the surrounding environment and confirming that there is no risk, transfer the driver and passengers inside the vehicle to a safe location outside the vehicle, place a warning triangle behind the vehicle in accordance with regulatory requirements to prevent secondary accidents, and contact XPENG to request roadside assistance service.
Tips After a tire blowout, when the vehicle speed drops to a safe speed, the vehicle will be unable to accelerate beyond that safe speed. To remove the safe speed limit, the vehicle can be powered off and then powered on again to lift the restriction.
After the all-scenario blowout stability function is triggered, the hazard warning lights will automatically turn on. After confirming that there is no risk in the surrounding environment, you may manually turn off the hazard warning lights.
After the full-scenario tire blowout stability driving function is triggered, the steering wheel will become heavier, and the driver must apply greater force to turn the steering wheel, so as to assist the driver in keeping the vehicle driving stably before stopping safely. If the steering feel of the steering wheel is to be restored to the state before the tire blowout, the vehicle can be powered off and then powered on again to restore it.
The all-scenario tire blowout stability function is a driving assistance function. It cannot handle all traffic, weather, and road conditions, and it may not function properly in all situations. Affected by various factors, this function may fail, the vehicle may exhibit behavior that does not meet expectations in some situations, or the response may be untimely.
After a tire blowout, the driver should firmly hold the steering wheel and properly control the driving direction of the vehicle. It is strictly prohibited to turn the steering wheel sharply, because sharply turning the steering wheel may cause the vehicle to lose control.
Please remain attentive at all times while driving. You always bear the ultimate responsibility for safe driving and must comply with the applicable traffic laws and regulations.
The Electronic Parking Brake (EPB) can apply braking force to the vehicle's rear wheels to keep the vehicle stationary.
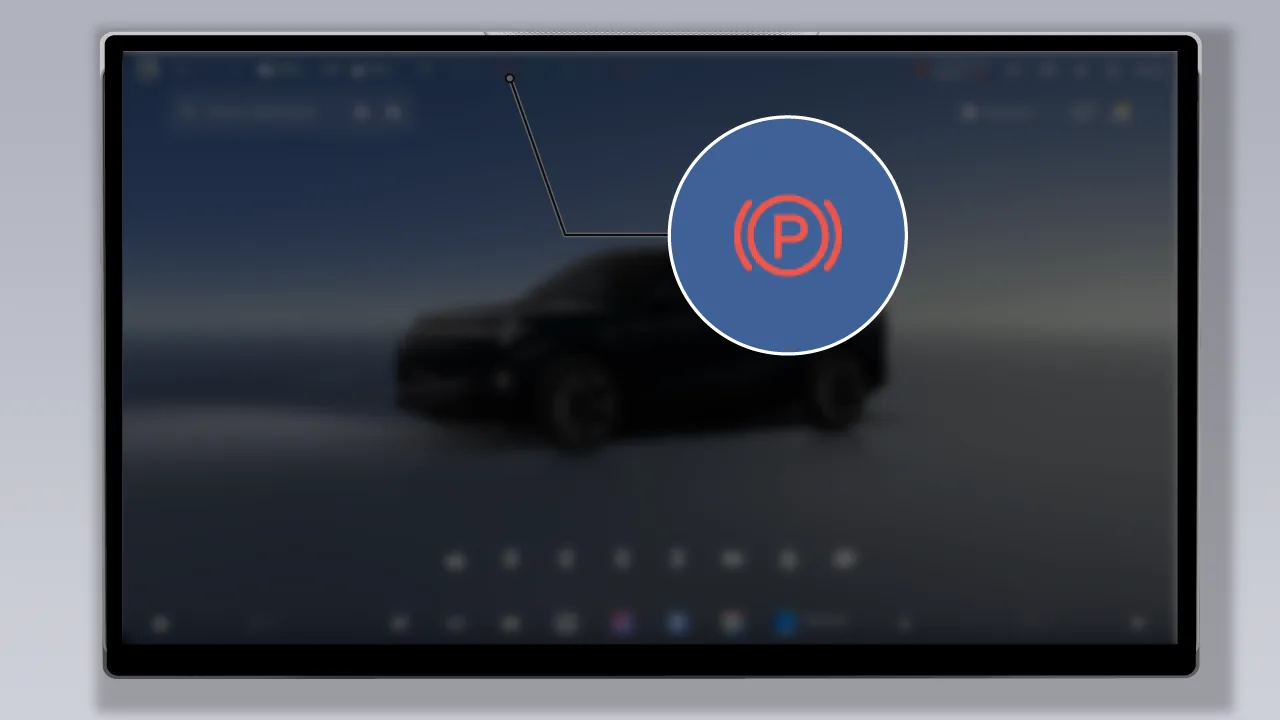
After the vehicle comes to a stop, press the P gear switch, and the vehicle activates the Electronic Parking Brake. At this time, the central control screen displays  Indicator light.
Close the driver's side door, depress the brake pedal, and move the shift lever up or down to switch the gear from Park (P) to Reverse (R) or D Gear (D), and the vehicle automatically releases the EPB. This The indicator light turns off.
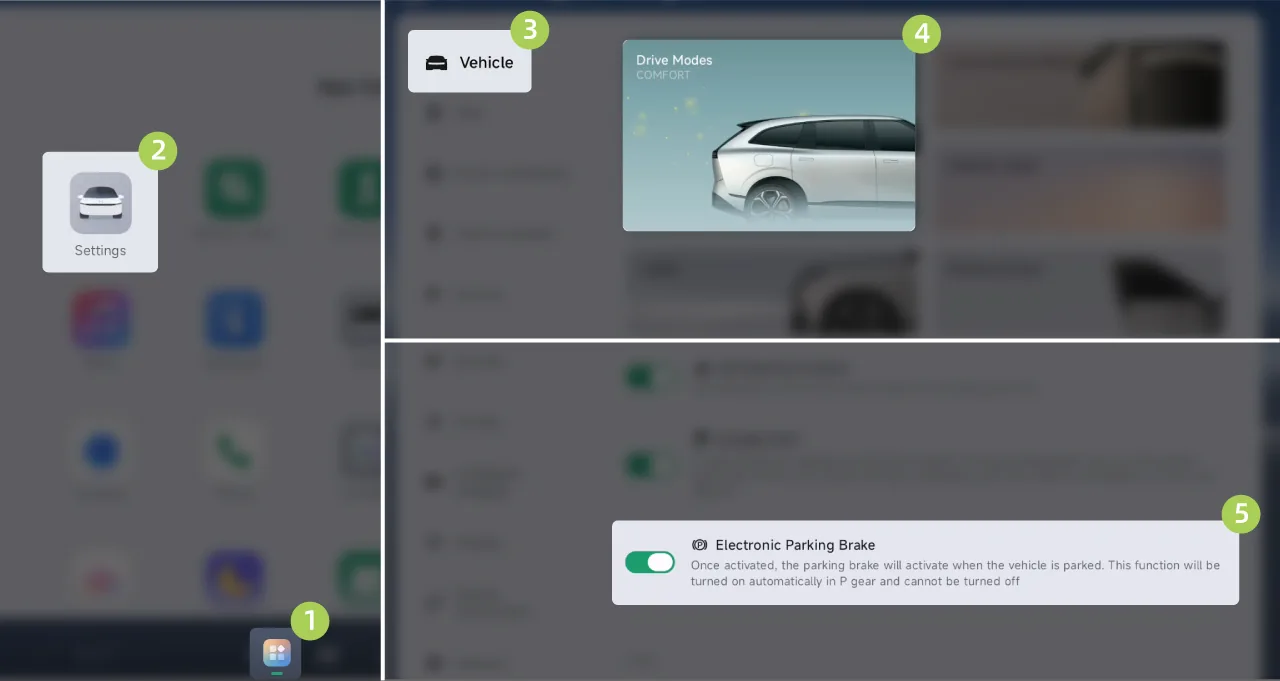
On the central control screen “ →Settings→vehicle→driving mode”Interface, engage or release the EPB.
Tips When the vehicle is in Park (P), the EPB cannot be released by turning off the .
The system will emit operating noise when the EPB is applied or released; this is normal.
Caution If the vehicle does not operate/close the EPB correctly, contact your Xpeng Vehicle Service Centre for service immediately.
The EPB may not be able to hold the vehicle stationary on excessive gradients, which require the brake pedal to be pressed to prevent drifting.
Never drive the vehicle without the EPB off, as damage to the vehicle may result.
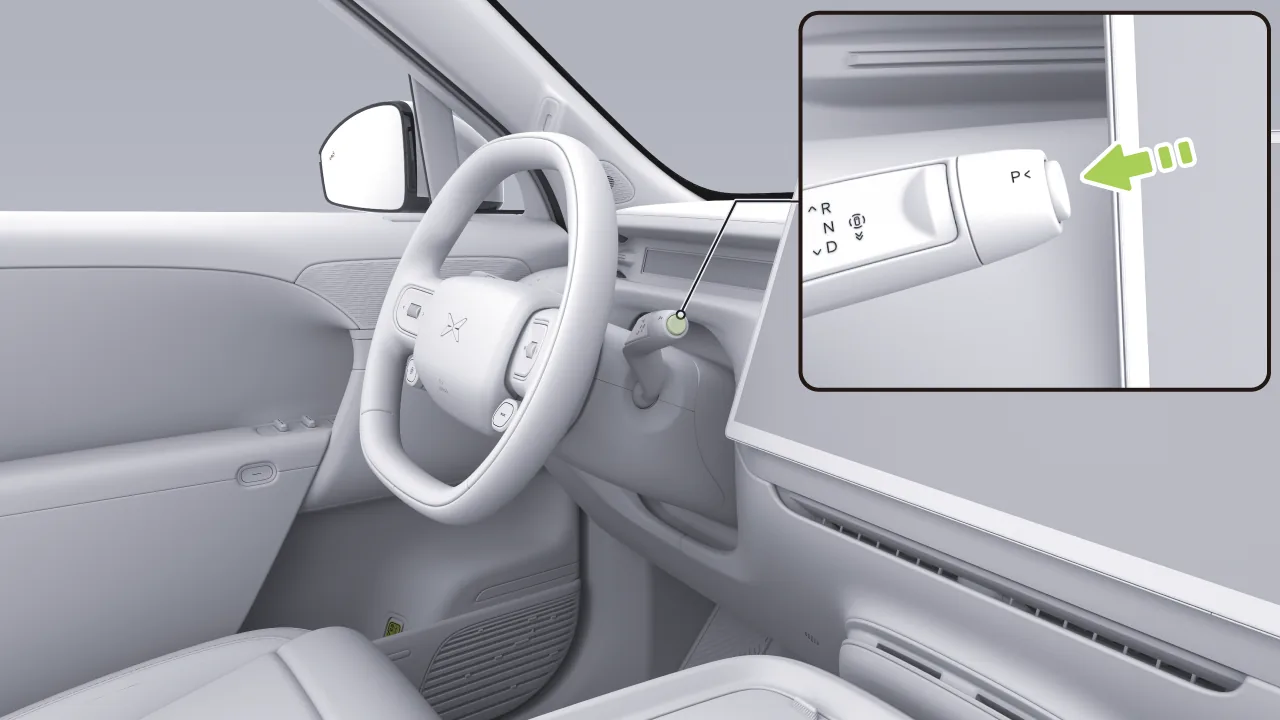
While the vehicle is in motion, in the event of a sudden emergency (such as brake pedal failure or sticking), press and hold the P gear button continuously to activate the emergency braking function. At this time, the Electronic Parking Brake system will apply braking force to the rear wheels.
If the P gear button is released or the accelerator pedal is depressed before the vehicle comes to a complete stop, emergency braking will exit immediately. To activate it again, press and hold the P gear button again.
Warning Never activate the emergency braking function in non-emergency situations. Doing so may lead to a traffic accident and result in injury or death.
When driving through sharp turns, on bumpy roads, or on icy, snowy, or otherwise slippery road surfaces, activation of the Emergency Braking function may cause the vehicle to fishtail or skid. Drive with caution.
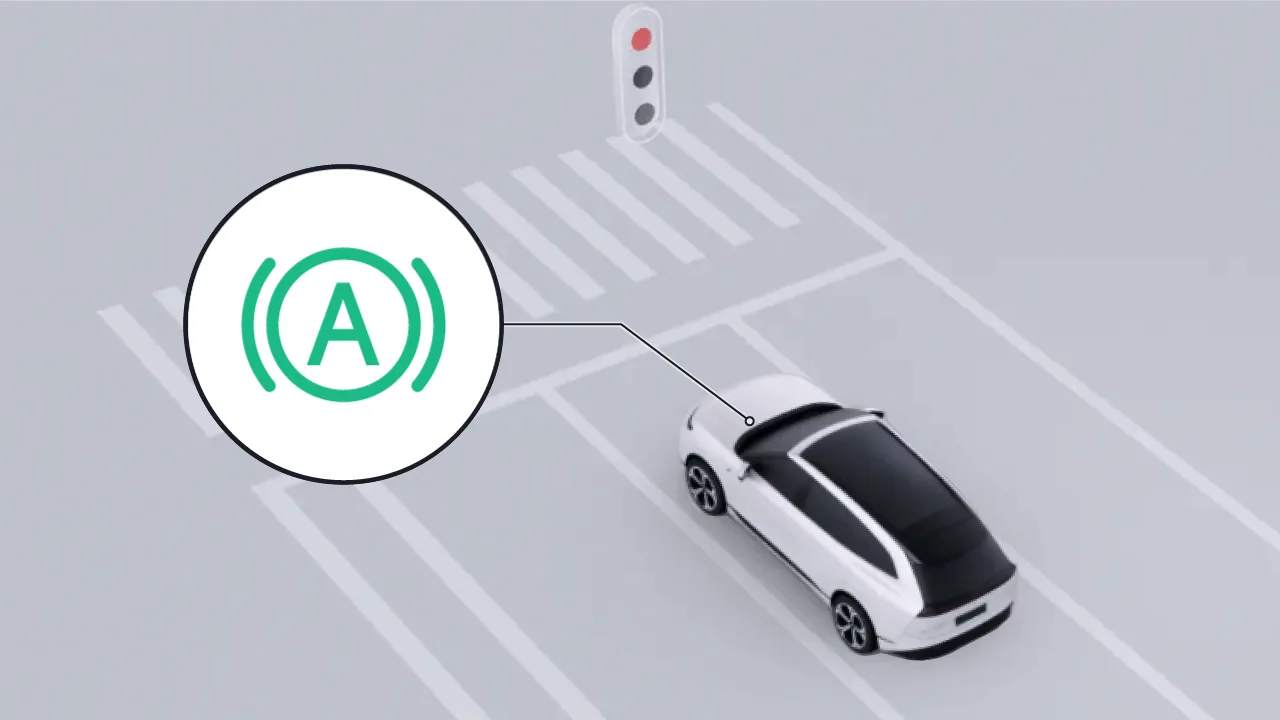
Auto Hold can brake all four wheels and keep the vehicle stationary in scenarios requiring a short stop, such as waiting at a red light, and the driver does not need to keep the brake pedal depressed for a long time or frequently apply the Electronic Parking Brake.
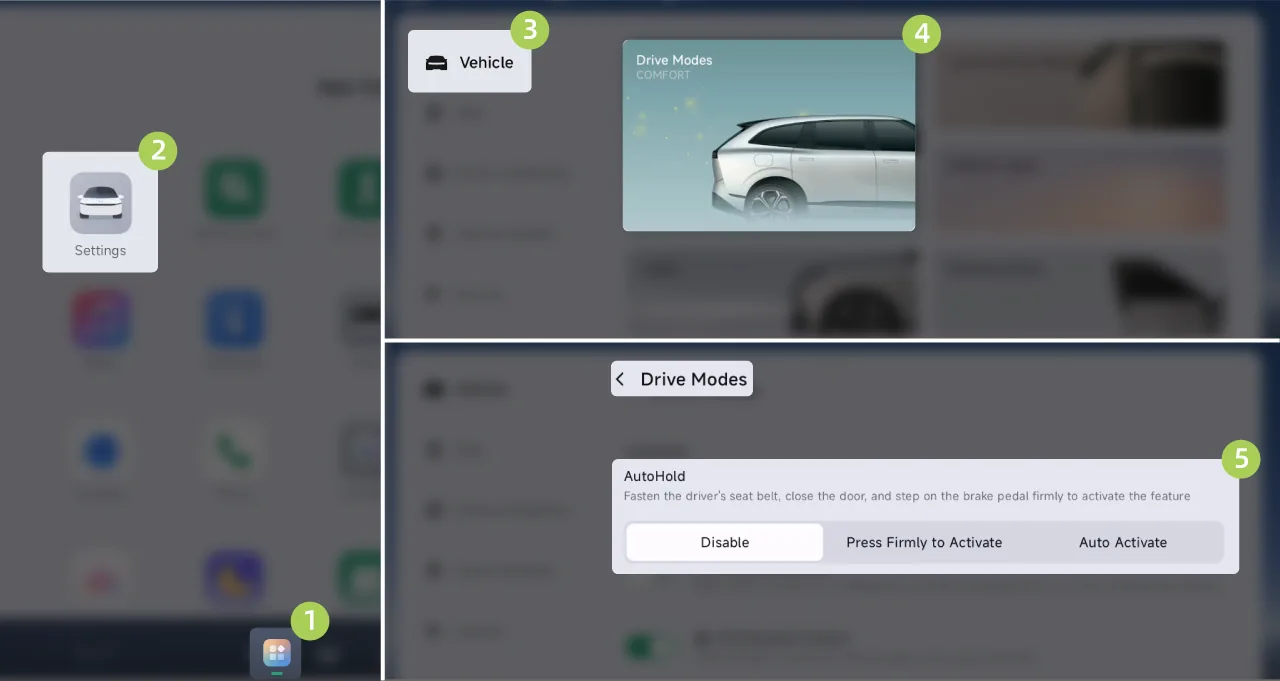
On the center control screen “ →Settings→vehicle→driving mode”Interface, can be opened/closed Auto HoldFunction.
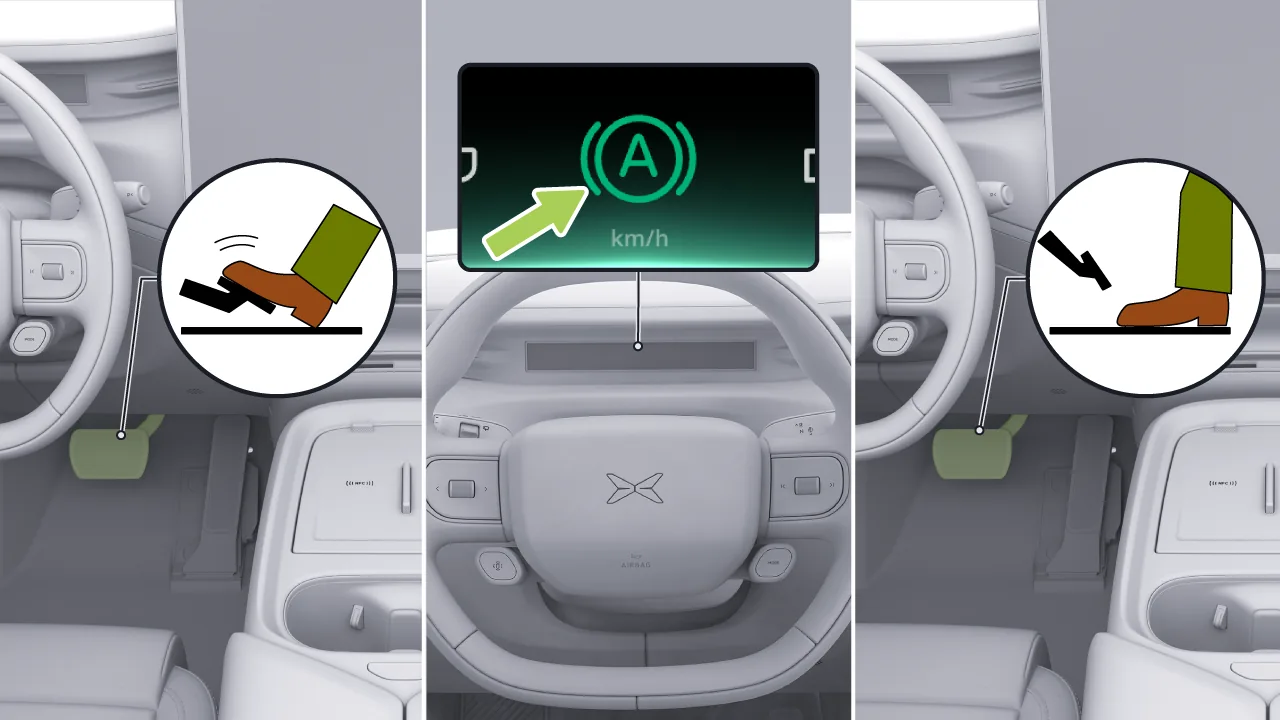
After Auto Hold is enabled, depress the brake pedal. When the vehicle decelerates to a standstill, the Auto Hold function is automatically activated, and the instrument cluster display shows  Indicator light.
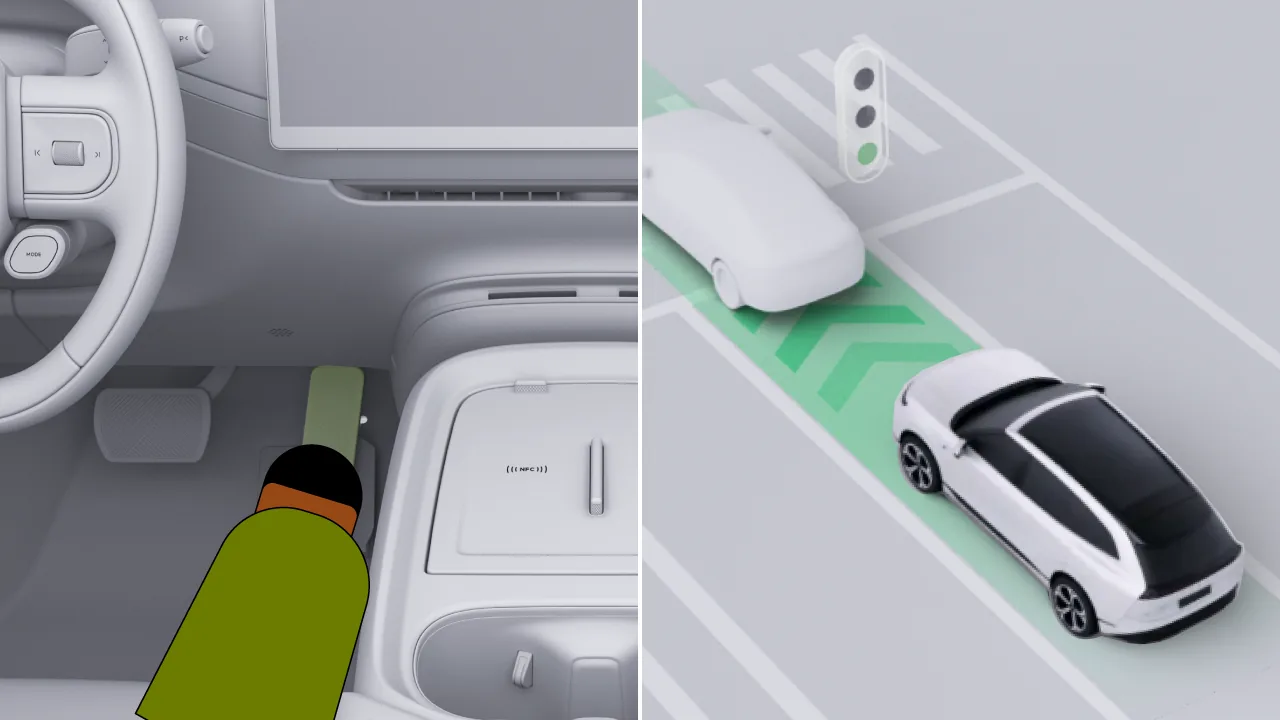
When the vehicle needs to start moving, simply depress the accelerator pedal to release Auto Hold.
The driver unfastens the seat belt and leaves the seat.
Open the driver's side door.
Auto Hold operating time exceeded.
Shift the gear to Park (P gear).
Tips AUTOHOLD can only be activated when the driver’s door is closed, the driver’s seat belt is fastened, and the gear is in D or R.
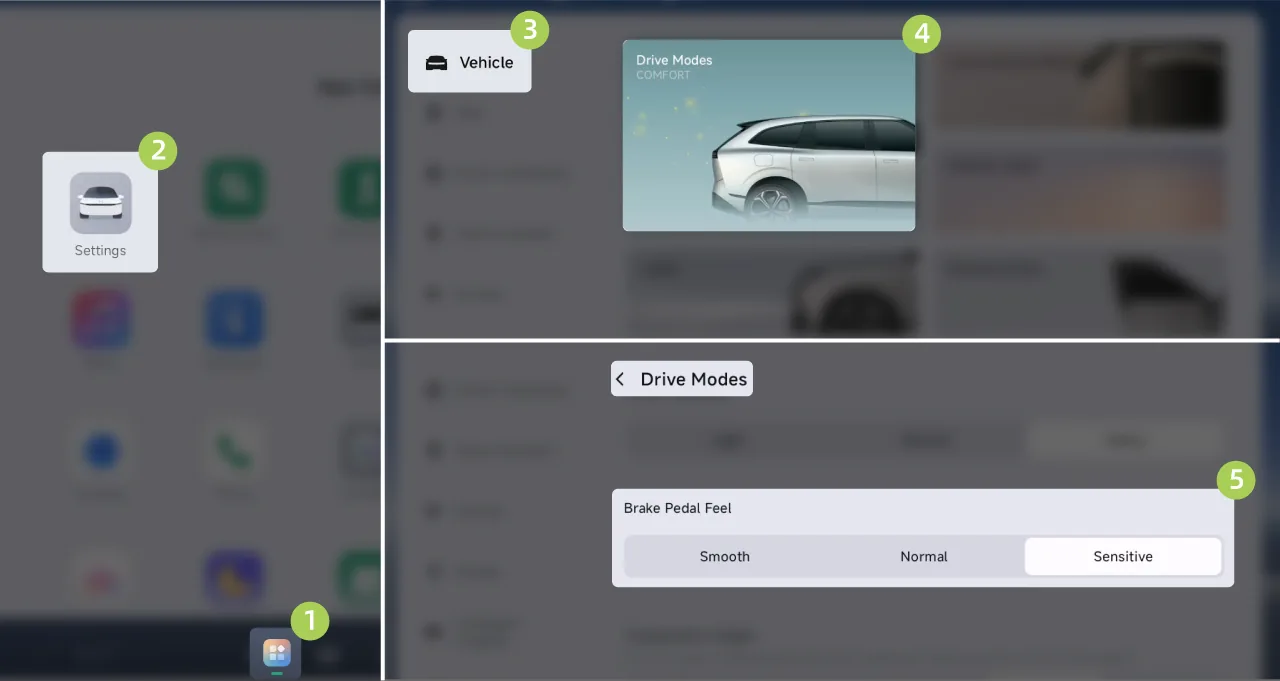
On the center control screen “ →Settings→vehicle→driving mode”Interface, where Brake Pedal Feel can be set.
Smooth:Braking response is smooth, and the ride experience is more comfortable.
Moderate:Brake response is moderate, balancing driving pleasure and ride comfort.
Sensitive:Braking response is rapid, making driving and control more confident and intuitive.
When the driver brakes, the vehicle may pitch forward (brake nod). Comfortable Braking can intelligently and smoothly adjust the braking force when the vehicle is about to come to a stop, alleviating the vehicle forward-pitching condition and providing the driver and passengers with a more comfortable driving and riding experience.
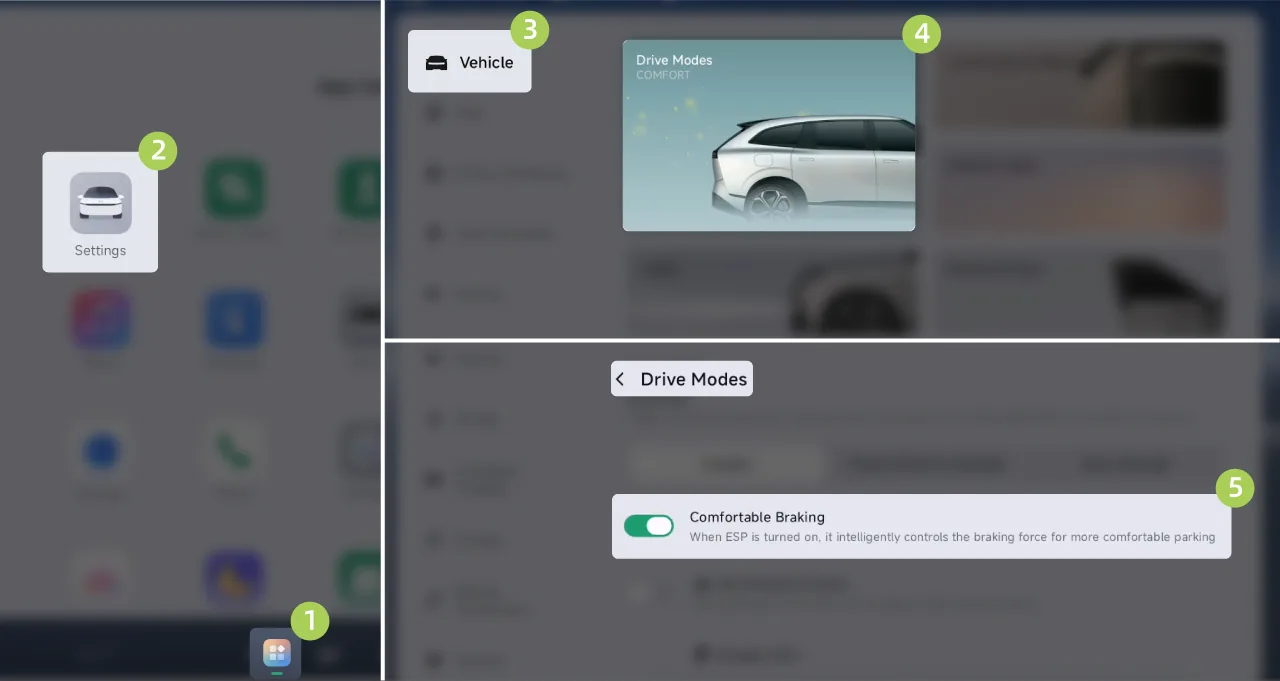
On the center control screen “ →Settings→vehicle→driving mode”Interface, turn Comfortable Braking on/off.
The Electronic Stability Program ESC can effectively reduce the risk of vehicle skidding or fishtailing and ensure vehicle driving stability by applying braking to one or more wheels.
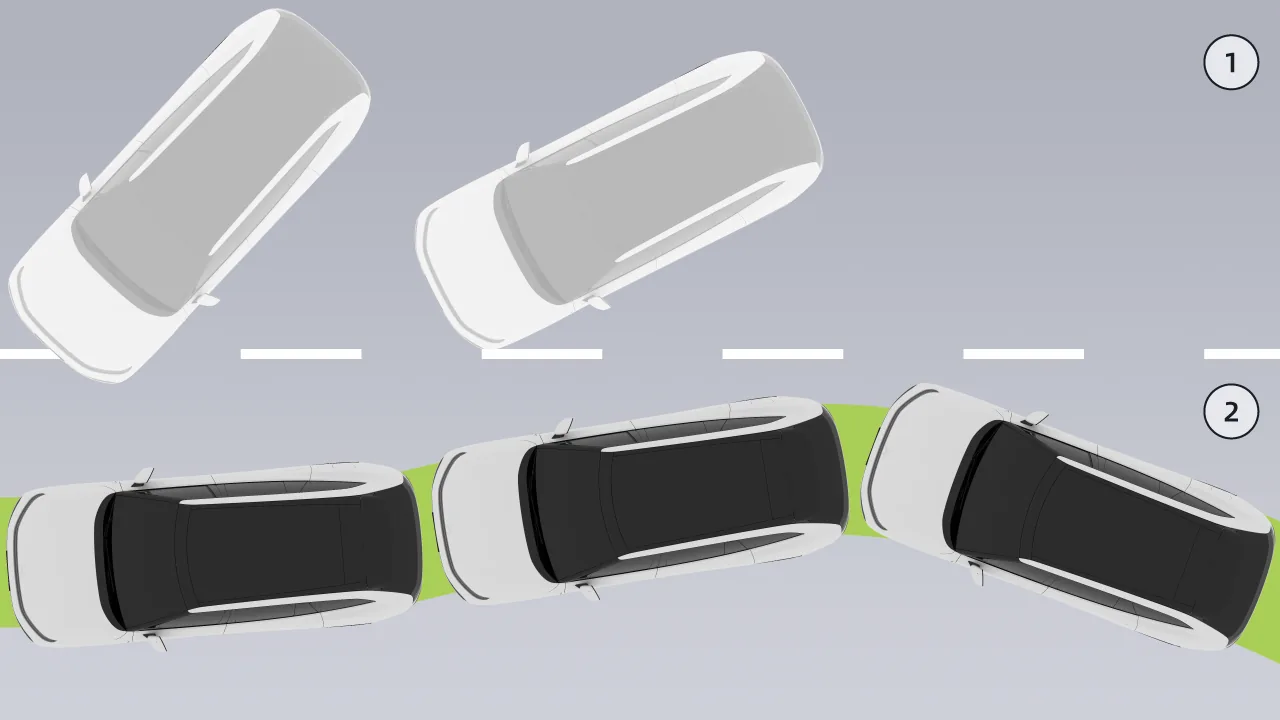
Turning off the ESC function: the vehicle is more likely to experience sliding door or fishtailing.
Enable the ESC function: This can reduce the risk of vehicle skidding or fishtailing.
During daily driving, it is recommended that you keep the ESC function enabled at all times.
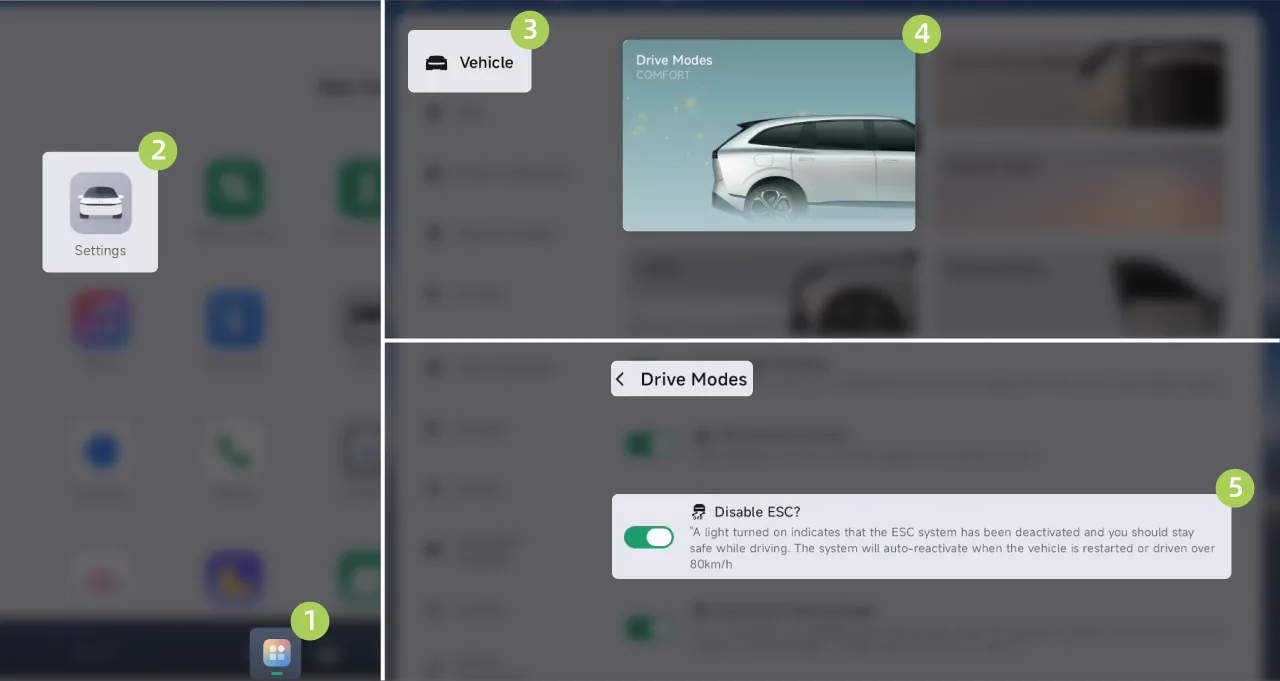
On the central control screen “ →Settings→vehicle→driving mode”On the interface, the ESC function can be turned on/off.
Tips The ESC function is automatically enabled by default when the vehicle powers on.
When the vehicle speed exceeds 80 km/h, the ESC system will automatically reactivate if it is off.
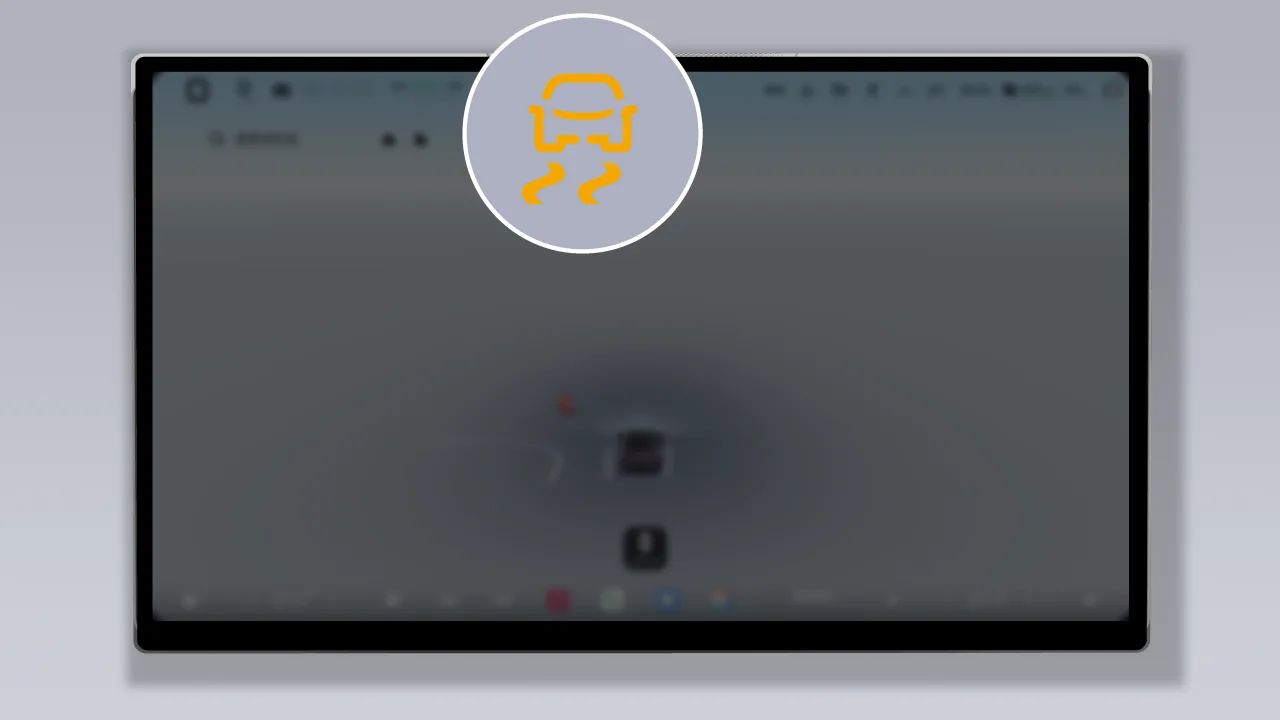
When the ESC function intervenes, the central control screen flashes continuously.  Indicator light. This indicator light remains on continuously when the ESC has a fault.
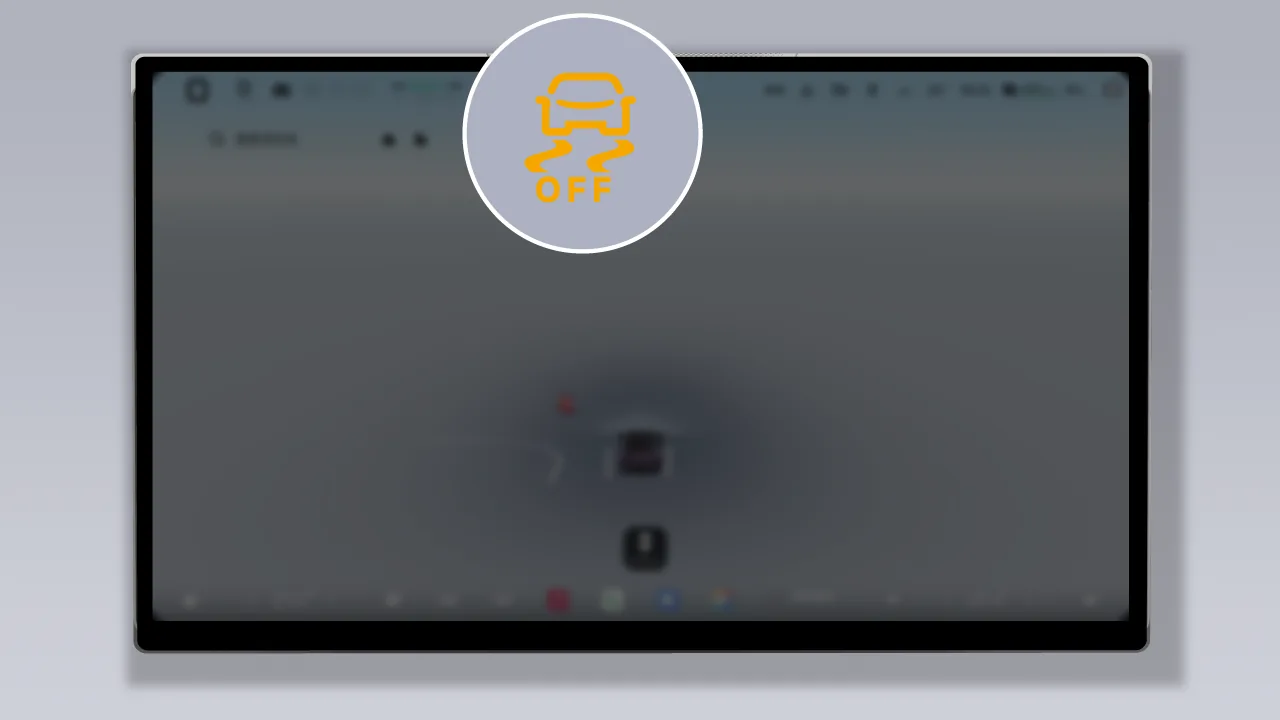
When the ESC function is turned off, the central control screen displays  Indicator light.
Warning The Electronic Stability Control is a safety assist function. When the Electronic Stability Program is turned off, the stability control applied to the vehicle will be reduced. Do not turn off the Electronic Stability Control except in special situations (such as freeing a stuck vehicle).
The Electronic Stability Control cannot handle all situations or road conditions. The driver is always responsible for operating the vehicle safely and prudently, and for complying with applicable laws and traffic regulations.
If the ESC malfunctions, immediately contact an XPENG service center for inspection and repair.
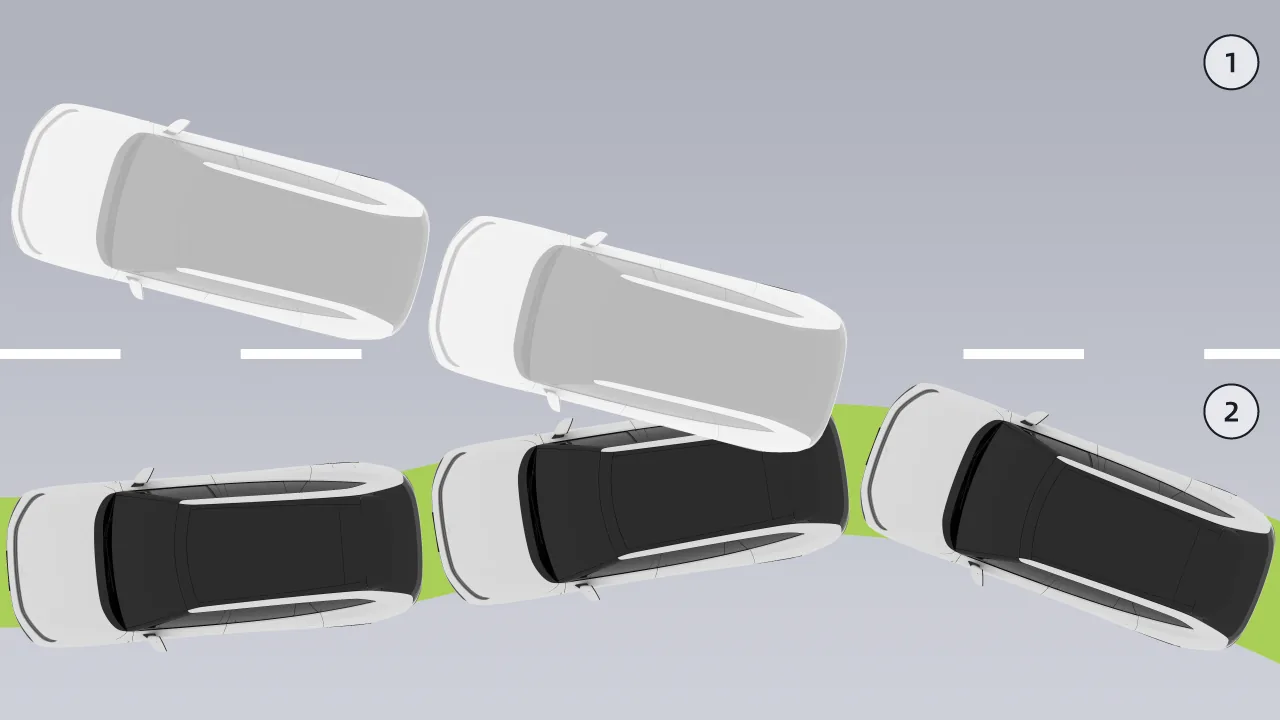
For vehicles not equipped with ABS, if the front wheels lock, the vehicle may lose steering capability. If the rear wheels lock, the vehicle may fishtail.
For vehicles equipped with ABS, ABS prevents wheel lockup when maximum braking force is applied. Under most road conditions, it can improve the vehicle's steering control performance during emergency braking. During emergency braking, ABS continuously monitors the speed of each wheel and adjusts brake pressure according to the lockup condition.
Tips When ABS intervenes, vibration of the brake pedal may be felt. There is no need to panic; drive subjectively according to the road conditions.
If ABS has a malfunction, the basic braking function remains normal and is not affected by the ABS malfunction, but the braking distance will increase.
Warning The driver should always maintain a safe distance from the vehicle in front and be aware of dangerous driving conditions. Although ABS can improve the braking distance, it does not go beyond the laws of physics, nor does it prevent the danger of tire slippage (e.g. when there is a layer of water between the road and the tire that prevents the tire from contacting the road directly).
In an emergency, fully depress the brake pedal and maintain steady pressure. ABS varies the brake pressure applied to each wheel according to the available braking force to prevent wheel lockup and ensure a safe stop.
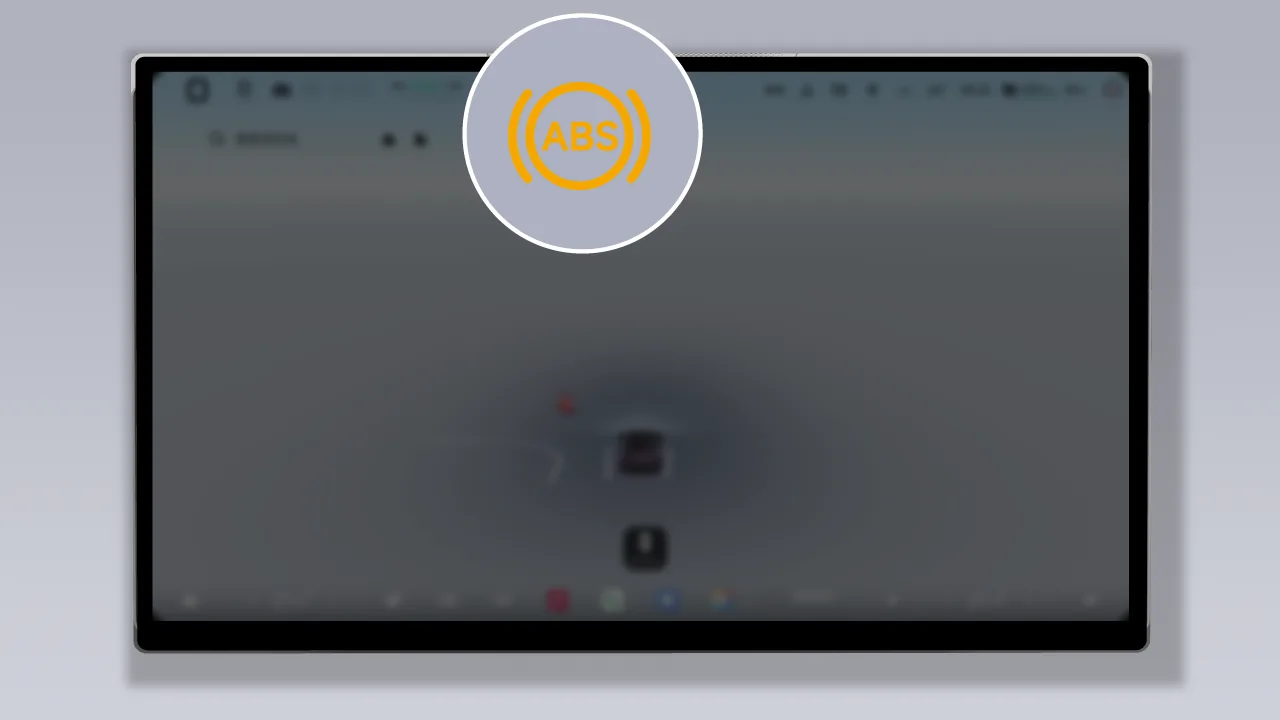
Observe the top area of the central control screen  Indicator Light:
After the vehicle is powered on, the ABS indicator lights up for a few seconds and then goes out, indicating that the system is normal. If the ABS indicator lights up and does not go out, it indicates that the Anti-lock Braking System is faulty. Please drive with caution and contact a XIAOPENG Motors Service Center for inspection and repair.
If the ABS indicator remains on while the vehicle is driving, it indicates that the Anti-lock Braking System has a fault. Please drive with caution and contact a XPENG service center for inspection and repair.
EBD is a part of ABS. During normal braking of the vehicle, EBD balances the distribution of braking force between the front and rear wheels according to the load condition on the vehicle.
For vehicle not equipped with EBD, braking stability is poor, and the braking distance during vehicle braking is longer, especially when driving on poor or slippery road surfaces.
For vehicles equipped with EBD, EBD appropriately distributes the force generated by the braking system to the four wheels according to the adhesion conditions between each wheel and the ground, so that the braking force can achieve optimum efficiency, significantly shorten the braking distance, maintain vehicle stability during braking, and improve driving safety.
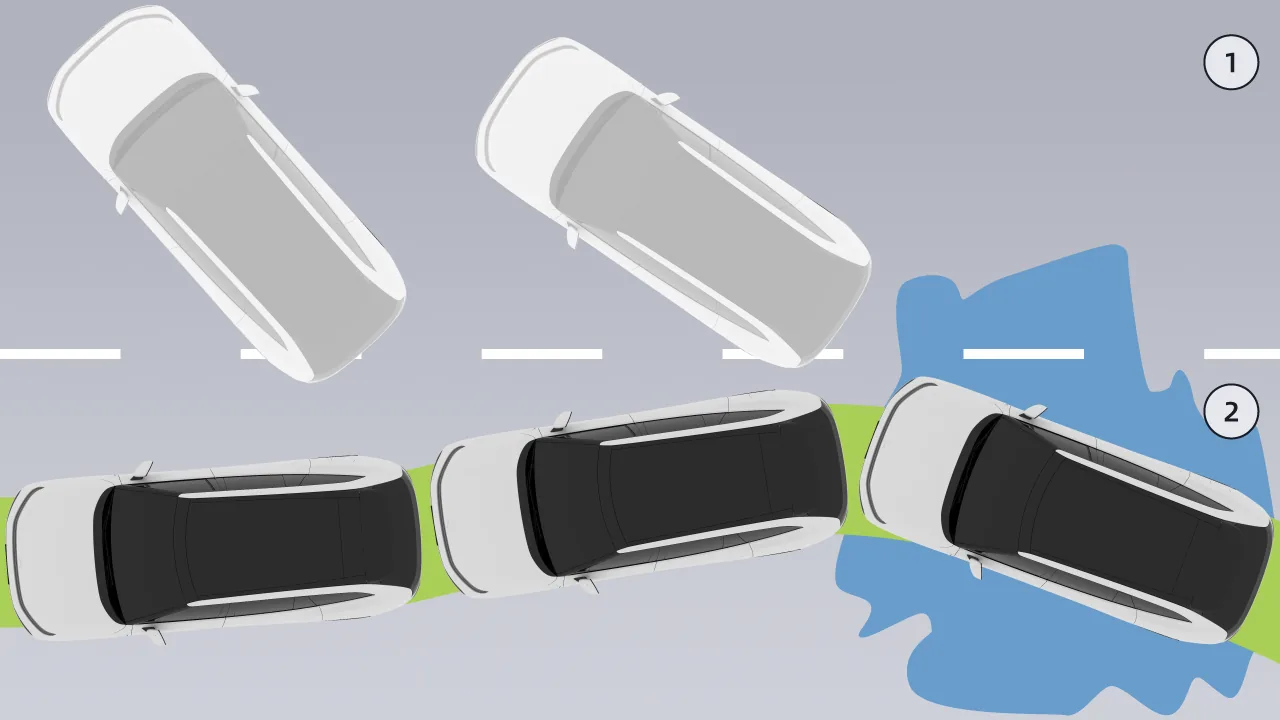
For vehicles not equipped with dTCS, the drive wheels will slip when the vehicle starts off or accelerates rapidly on slippery road surfaces such as ice and snow.
For vehicles equipped with dTCS, dTCS controls brake pressure and total vehicle torque output to minimize wheel spin as much as possible.
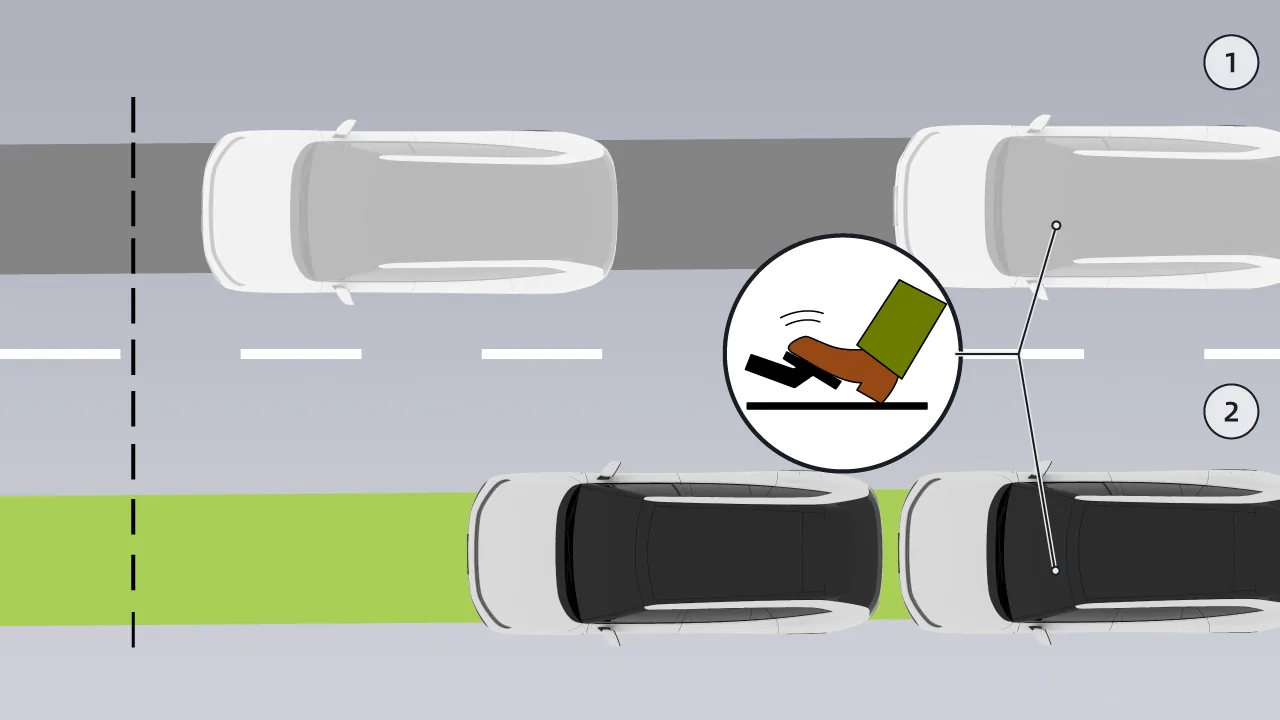
For vehicles not equipped with EBA, during emergency braking, it is not possible to depress the brake pedal with sufficient force in a short period of time, and the braking system does not generate the maximum braking force, resulting in an increased braking distance and a higher risk of accidents.
For vehicles equipped with EBA, in an emergency, quickly depress and hold the brake pedal, and EBA will generate a braking pressure greater than that during normal braking, enabling the braking system to produce, in the shortest time, the pressure required for the vehicle's maximum deceleration, thereby obtaining the shortest braking distance.
Warning EBA can improve driving safety, but it cannot exceed the laws of kinematics. Please adjust the vehicle speed according to road conditions and traffic regulations.
After the vehicle experiences the first collision (triggering airbag deployment), the MCB actively applies braking to the vehicle to reduce the vehicle speed or stop the vehicle, thereby reducing the probability and severity of secondary collision accidents.
HBC is a safety redundancy function of the braking system. If the primary brake assist system completely fails, when the driver depresses the brake pedal, the HBC function is activated and intervenes to provide brake assist for the vehicle, ensuring that the vehicle can still achieve a certain level of deceleration.
HDC can actively brake the vehicle when the vehicle is descending a slope, ensuring that the driver can safely drive down a steep slope at a constant speed.
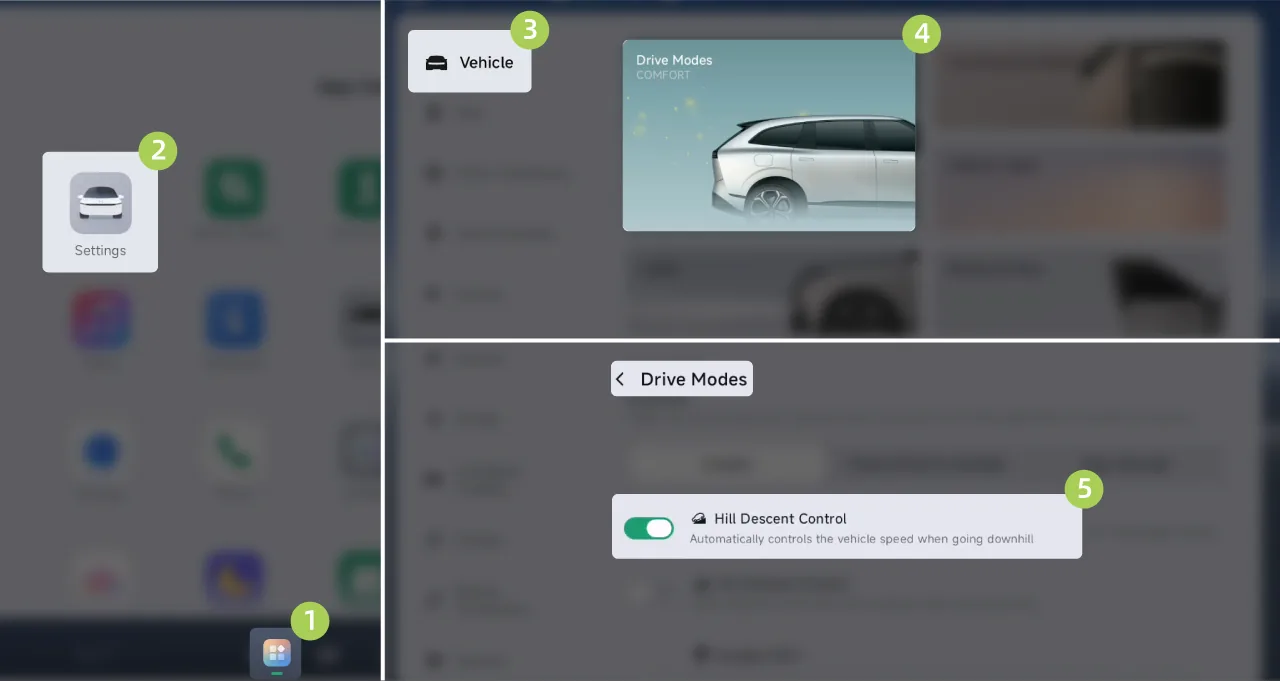
On the center control screen “ →Settings→vehicle→driving mode”On the interface, you can turn the HDC function on/off.
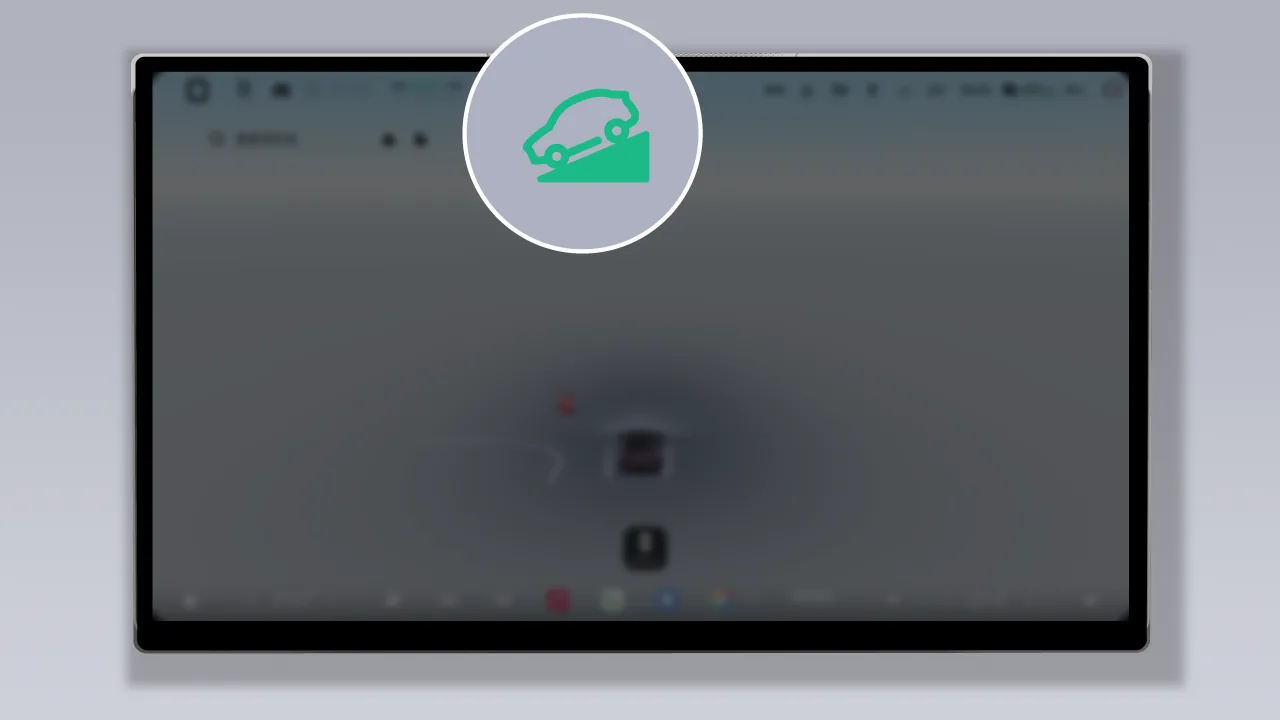
After the HDC function is enabled, when driving on a downhill road section, the HDC function is automatically activated, and the central control screen displays  Indicator light. At this time, the system will automatically control the downhill speed.
The vehicle speed is greater than 8 km/h but does not exceed 35 km/h.
A slope with a gradient greater than or equal to 5%.
Brake disc temperature is normal.
ESC system is normal.
Tips When HDC is active, if the driver presses the brake pedal or accelerator pedal, the function will exit and the driver must then take control of the vehicle.
Warning HDC can actively keep the vehicle's speed down, but not beyond the dynamics, and for safety reasons, the driver should follow the actual conditions of the vehicle. Apply the brakes in a timely manner to avoid an accident when the vehicle is downhill too quickly.
Hill start assist can help you automatically maintain brake pressure for a short time (about 2 seconds) between releasing the brake pedal and pressing the accelerator pedal when starting on a slope greater than 5%, preventing the vehicle from rolling backward.
Warning The HHC is capable of providing brake assistance, but not exceeding the rules of kinematics, and for safety reasons, the driver should, depending on the vehicle, Apply the brakes in a timely manner to avoid an accident when the vehicle is rolling off a slope.
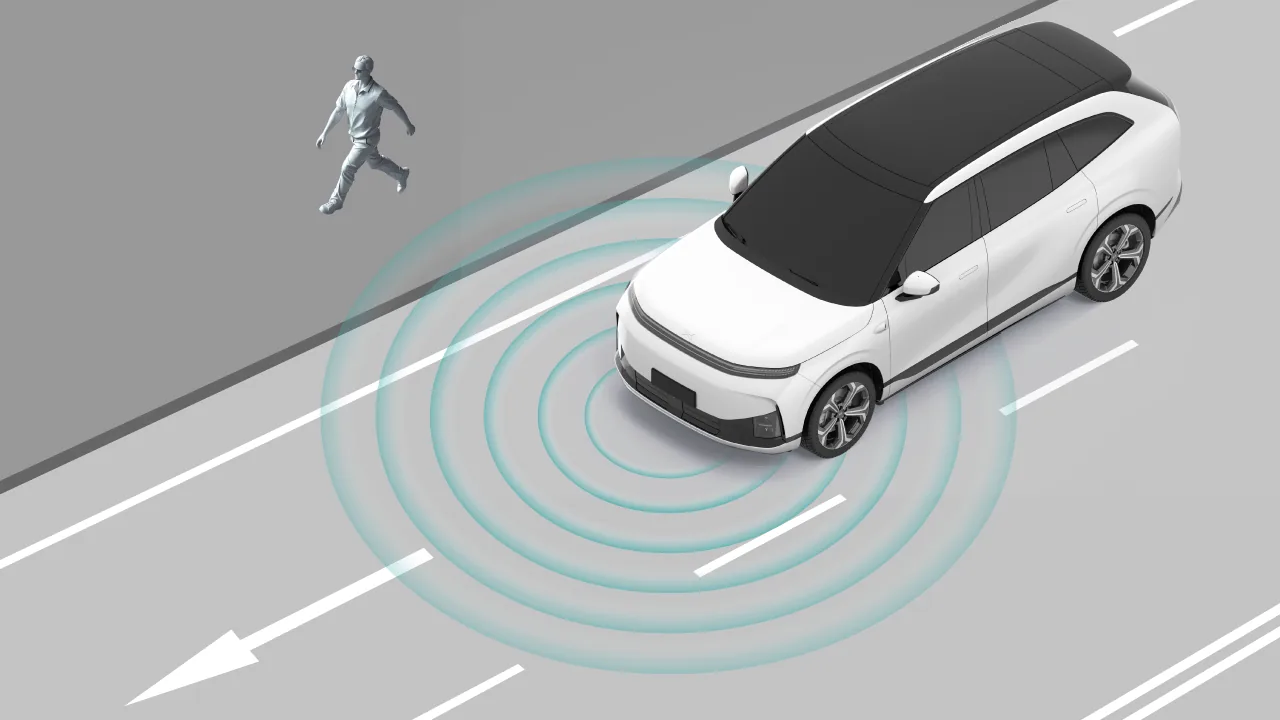
When the vehicle is in motion and the speed is less than 30 km/h, a simulated sound will be emitted to remind nearby pedestrians and vehicles to pay attention to safety.
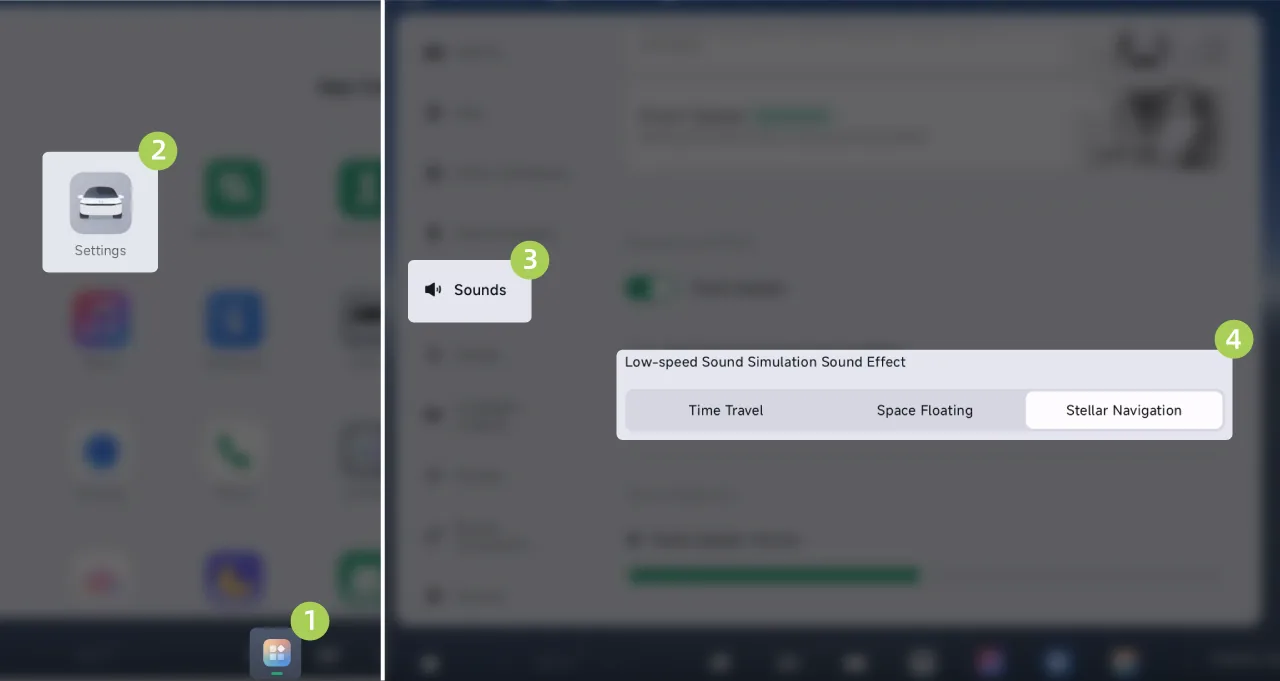
On the center control screen “ →Settings→Sound”On the interface, you can set the exterior low-speed simulated sound effect.
For your safety and that of your passengers, perform the following checks on the vehicle before each trip:
Check whether there are obstacles around the vehicle.
Check whether there is any abnormal fluid accumulation under the vehicle (air conditioner water is normal).
Check whether each tire has abnormal wear and whether the tire pressure is normal.
Check whether the shipped items are securely loaded.
Check whether the vehicle tool kit is carried.
Check whether the wiper system is operating normally.
Check whether the vehicle lighting system is functioning properly.
Check whether the window is clear and whether the rearview mirrors provide a good field of view.
Check whether the seats and seat belts are functioning properly.
Check the vehicle driving range and whether there is warning information in the instrument cluster indicator lights.
Check whether there is any debris interfering with the brake pedal and accelerator pedal area.
Please ensure that all of the above aspects meet the requirements; otherwise, your driving safety will be affected. If you need assistance, please promptly contact a XIAOPENG service center.
Warning Do not drive the vehicle while wearing high heels or slippers.
Before a long-distance drive, please be sure to note the following:
To ensure your travel safety, please check the vehicle condition before long-distance driving.
Plan your travel route in advance to ensure that the vehicle has sufficient driving range.
Observe traffic rules, take regular breaks, and do not drive distracted.
Bring sufficient water and necessary food to replenish energy in a timely manner.
At night, visibility is shorter. When you drive the vehicle at night, be sure to pay attention to the following:
Do not drive while fatigued.
Before driving, check whether the horn and the vehicle lighting system are functioning properly.
Pay attention to the road conditions within the headlamp illumination range.
Use the high and low beam headlights correctly.
Do not look directly at the headlamps of oncoming vehicles.
To avoid a collision with the vehicle ahead due to an untimely response in an emergency, appropriately increase the following distance.
Avoid overtaking at night as much as possible. If overtaking is necessary, please overtake only after confirming that the surrounding and road conditions permit it.
When visibility is affected, drive cautiously at low speed, pay attention to the surroundings and road environment, and be prepared to brake at any time in an emergency.
When traveling with children, to ensure children's riding safety, please be sure to pay attention to the following items:
Never allow children to ride in the vehicle without protection.
Do not leave children alone in the vehicle.
Do not ride with a child in your arms.
Do not allow children to stand inside the vehicle, kneel on the seats, or extend any part of their body out of the window.
When children are seated in the rear row, it is recommended to enable the child lock for the doors to prevent children from opening the doors by mistake.
Children under 12 years old (or shorter than 1.5 m) should not ride in the front passenger seat.
Children under 12 years old (or shorter than 1.5 m) must use a suitable child safety seat when riding in the vehicle, maintain a correct sitting posture, and fasten the seat belt.
If a rear-facing child restraint system is installed on the rear seat of the vehicle, it is necessary to adjust the corresponding front-row/second-row seat moderately forward; if a forward-facing child restraint system is installed on the rear seat of the vehicle, it may be necessary to adjust the height position of the seat head restraint.
If your vehicle is equipped with the driver's audio system, you can enable Private Mode while the child is resting to prevent music, navigation announcements, etc. from waking the child.
When traveling with elderly passengers, to ensure their safety while riding, please be sure to pay attention to the following items:
Please ensure that elderly passengers maintain a correct sitting posture and fasten their seat belts.
Do not leave elderly people alone in the vehicle.
Open the window or Air Conditioner moderately to keep the air inside the vehicle fresh, which can prevent elderly people from experiencing symptoms such as headache and dizziness.
When the vehicle encounters potholes or bends, please slow down and pass through slowly to avoid large swaying movements that may cause the elderly to experience symptoms such as dizziness and palpitations.
When elderly passengers are seated in the rear row, it is recommended to enable the child lock to prevent them from opening the door by mistake.
If your vehicle is equipped with the driver's audio system, you can enable Private Mode while the elderly person is resting to prevent music, navigation broadcasts, etc. from waking the elderly person.
When traveling with pets, to ensure their safety while riding in the vehicle, please be sure to note the following:
Do not leave pets alone in the vehicle.
Do not allow pets to sit in the front row, so as not to obstruct the line of sight.
Properly secure pets while driving, for example by using an appropriate pet carrier.
Secure your pet before opening the door to avoid accidents involving the pet.
Avoid fully opening the window for ventilation as much as possible, and close the window near the pet to prevent the pet from sticking its head out of the window and causing an accident.
When driving in rainy weather, your visibility may be impaired. Be sure to pay attention to the following:
Ensure that the vehicle's wiper function and wiper blades operate properly.
Ensure that the vehicle lighting system is functioning properly.
Ensure that the tire pressure is normal.
Ensure that the vehicle braking system is functioning properly.
Turn on the rear fog light to alert road users behind you.
When driving the vehicle through water, to avoid vehicle damage or functional failure, be sure to pay attention to the following:
Preparations Before Driving Through Water:
Check the water accumulation depth on the road section in advance and confirm that the maximum wading depth does not exceed 70 cm;
Check that the surface of the Side Mirrors wading radar is free of mud, ice, snow, and obstructions, and ensure that the sensor is clean;
Ensure that the rearview mirrors are in the unfolded position.
Before driving through water, enable Water Wading Mode and the AI Water Wading Monitoring function in advance.
Driving Through Water:
It is recommended to maintain a low, constant speed of 3~5 km/h. Avoid sudden acceleration that may create waves; excessively high waves may cause abnormal wading radar readings.
Drive in a straight line as much as possible, and avoid entering the water at an angle or making sharp turns.
During water wading, it is strictly prohibited to stop midway or repeatedly move forward and backward, to prevent accumulated water from flowing back into the air intake system.
When driving through water, do not remain in the water for an extended period; pass through as quickly as possible at the recommended vehicle speed.
Post-Wading Inspection:
After driving through water, immediately perform the following inspections and operations in a safe environment. If any abnormality is found in the vehicle, please contact a XPENG service center:
Turn off Wading Mode to restore the vehicle's normal driving mode.
Lightly depress the brake pedal, use friction heat to restore the brake pads to a dry condition, and check whether the brakes are operating properly.
Turn the steering wheel to check whether the Power Steering is functioning properly.
Clean the wading radar on the Side Mirrors and the lower body, and check whether the sensors are damaged or blocked.
Check whether there is abnormal water ingress inside the vehicle.
Check whether there are any abnormal warnings on the instrument cluster or the central control screen.
Check whether the vehicle’s exterior lights are functioning properly.
Caution After driving through water 15–70 cm deep, promptly visit an XPENG Service Center for a comprehensive inspection.
Do not drive in Wade Mode for extended periods to prevent vehicle damage.
Warning Before wading, the driver must verify the water depth on the roadway. If the water depth exceeds 70 cm or cannot be determined, take an alternate route. Do not attempt to drive through, as this may result in vehicle damage or personal injury.
Avoid driving through flowing water. Drive slowly. Do not accelerate or drive into flooded roadways. Doing so may result in vehicle damage or serious injury or death.
If water ingress or any other abnormal condition is detected after driving through water, do not continue to use the vehicle. Immediately contact an XPENG Service Center for inspection to prevent personal injury or vehicle damage resulting from mechanical damage to the traction battery or high‑voltage hazards.
When traveling in cold weather, to avoid traffic accidents and ensure your riding comfort, please be sure to pay attention to the following:
In cold weather, you can turn on the in-vehicle Air Conditioner heating function in advance through the mobile app.
Turn on the front/rear windshield defrosting (Mirror Heat) function in time while the vehicle is driving.
If driving on icy, rainy, or snowy roads, anti-skid chains must also be installed.
When driving the vehicle on icy or snowy roads, be sure to reduce speed and drive carefully. Avoid operations such as emergency braking, rapid acceleration, or sudden steering as much as possible, otherwise it may cause the vehicle to go out of control and lead to a traffic accident.
When driving on roads in winter, replace all four wheels with winter tires at the same time, and all four wheels must use winter tires of the same diameter, brand, construction, and tread pattern.
If the road surface is icy, snow-covered, or in weather such as low-temperature rain or snow, it is recommended to park the vehicle on a gentle road section and shift the gear to P gear. If necessary, place wheel chocks.
When traveling in hot weather, to ensure passenger comfort, you can perform the following operations:
In hot weather, you can turn on the vehicle Air Conditioner cooling function in advance through the mobile app.
Before entering the vehicle, please open the windows for ventilation to release the hot air inside the vehicle.
When a passenger is seated, promptly turn on the seat ventilation function.
Turn on the Air Conditioner. When the Air Conditioner is just turned on, switch to outside air circulation first to allow the hot air inside the vehicle to dissipate fully, then switch to inside air circulation to retain the cool air and reduce the temperature quickly.
When driving in plateau and mountainous areas, due to environmental influences such as geographical conditions and different altitudes, vehicle performance will vary greatly. Please pay attention to the following:
Prepare oxygen, medications, and other equipment needed for altitude sickness.
Before driving up or down a long slope, check the condition of the brakes, steering, drivetrain, and wheels.
After entering high-altitude areas, check the tire pressure frequently, and appropriately reduce the tire pressure when necessary.
Frequent braking by repeatedly depressing the brake pedal will cause the temperature of the brake fluid, brake disc, and brake pads to rise, reducing braking performance and, in severe cases, may lead to brake failure.
Due to the impact of plateau environments, the vehicle driving range may be reduced. Pay timely attention to the vehicle status.
On smooth road surfaces such as epoxy flooring, emery flooring, and tiled roads, the coefficient of adhesion is extremely low, especially when there are water stains, in which case the coefficient of adhesion is even lower or even close to that of an icy surface. When driving on smooth or slippery road surfaces, please pay attention to the following:
The vehicle is prone to skidding. Reduce speed and drive slowly, and avoid operations such as sudden acceleration, sudden braking, or sharply turning the steering wheel.
Braking distance becomes longer; maintain a sufficient following distance and pay attention to road conditions at all times to avoid rear-end collisions or other accidents.
The vehicle can easily go out of control. Overtake with caution, and do not overtake blindly or accelerate sharply during overtaking.
Your vehicle is capable of towing a caravan and can be used only after Trailer Mode is enabled on the center control screen. When towing a caravan, the driver must possess the corresponding driving qualifications.
Before deciding to tow a caravan, you should first check the regulations on motor vehicles in your area. As regulations vary by region, you need to select a caravan of appropriate specifications and consult your local service provider before towing.
Caution When towing a caravan, comply with the relevant local laws and regulations. Unauthorized modifications are strictly prohibited.
During the new vehicle break-in period, do not tow a caravan.
When not towing a caravan, retract the towing device.
Towing a caravan equipped with an electric service brake is not permitted.
Towing a caravan will affect your vehicle's handling performance, braking performance, etc. For your safety and that of your passengers, to ensure safe caravan towing, please follow the driving recommendations below:
Start smoothly and avoid rapid acceleration and emergency braking, especially when driving on slippery road surfaces, as skidding may cause the vehicle to go out of control. Crosswinds and rough roads may cause the vehicle to sway, seriously affecting vehicle control. Under any circumstances, as soon as you notice even slight signs of vehicle sway, hold the steering wheel firmly with both hands and immediately reduce the vehicle speed slowly. Do not attempt to eliminate the sway by increasing speed.
Avoid a tractor without load while the trailer is loaded as much as possible. If this cannot be avoided, drive at low speed due to unreasonable load distribution.
When towing a caravan, the vehicle's braking distance will increase. Therefore, increase the driving distance from the vehicle ahead.
| | The trailer wiring harness is normal, and the ESP function is normal. |
| | The trailer wiring harness is normal, but the Electronic Stability Program may malfunction, making Trailer Mode unavailable for normal use. |
| | Trailer wiring harness malfunction, trailer turn signal malfunction, Electronic Stability Program malfunction, unable to use Trailer Mode normally. |
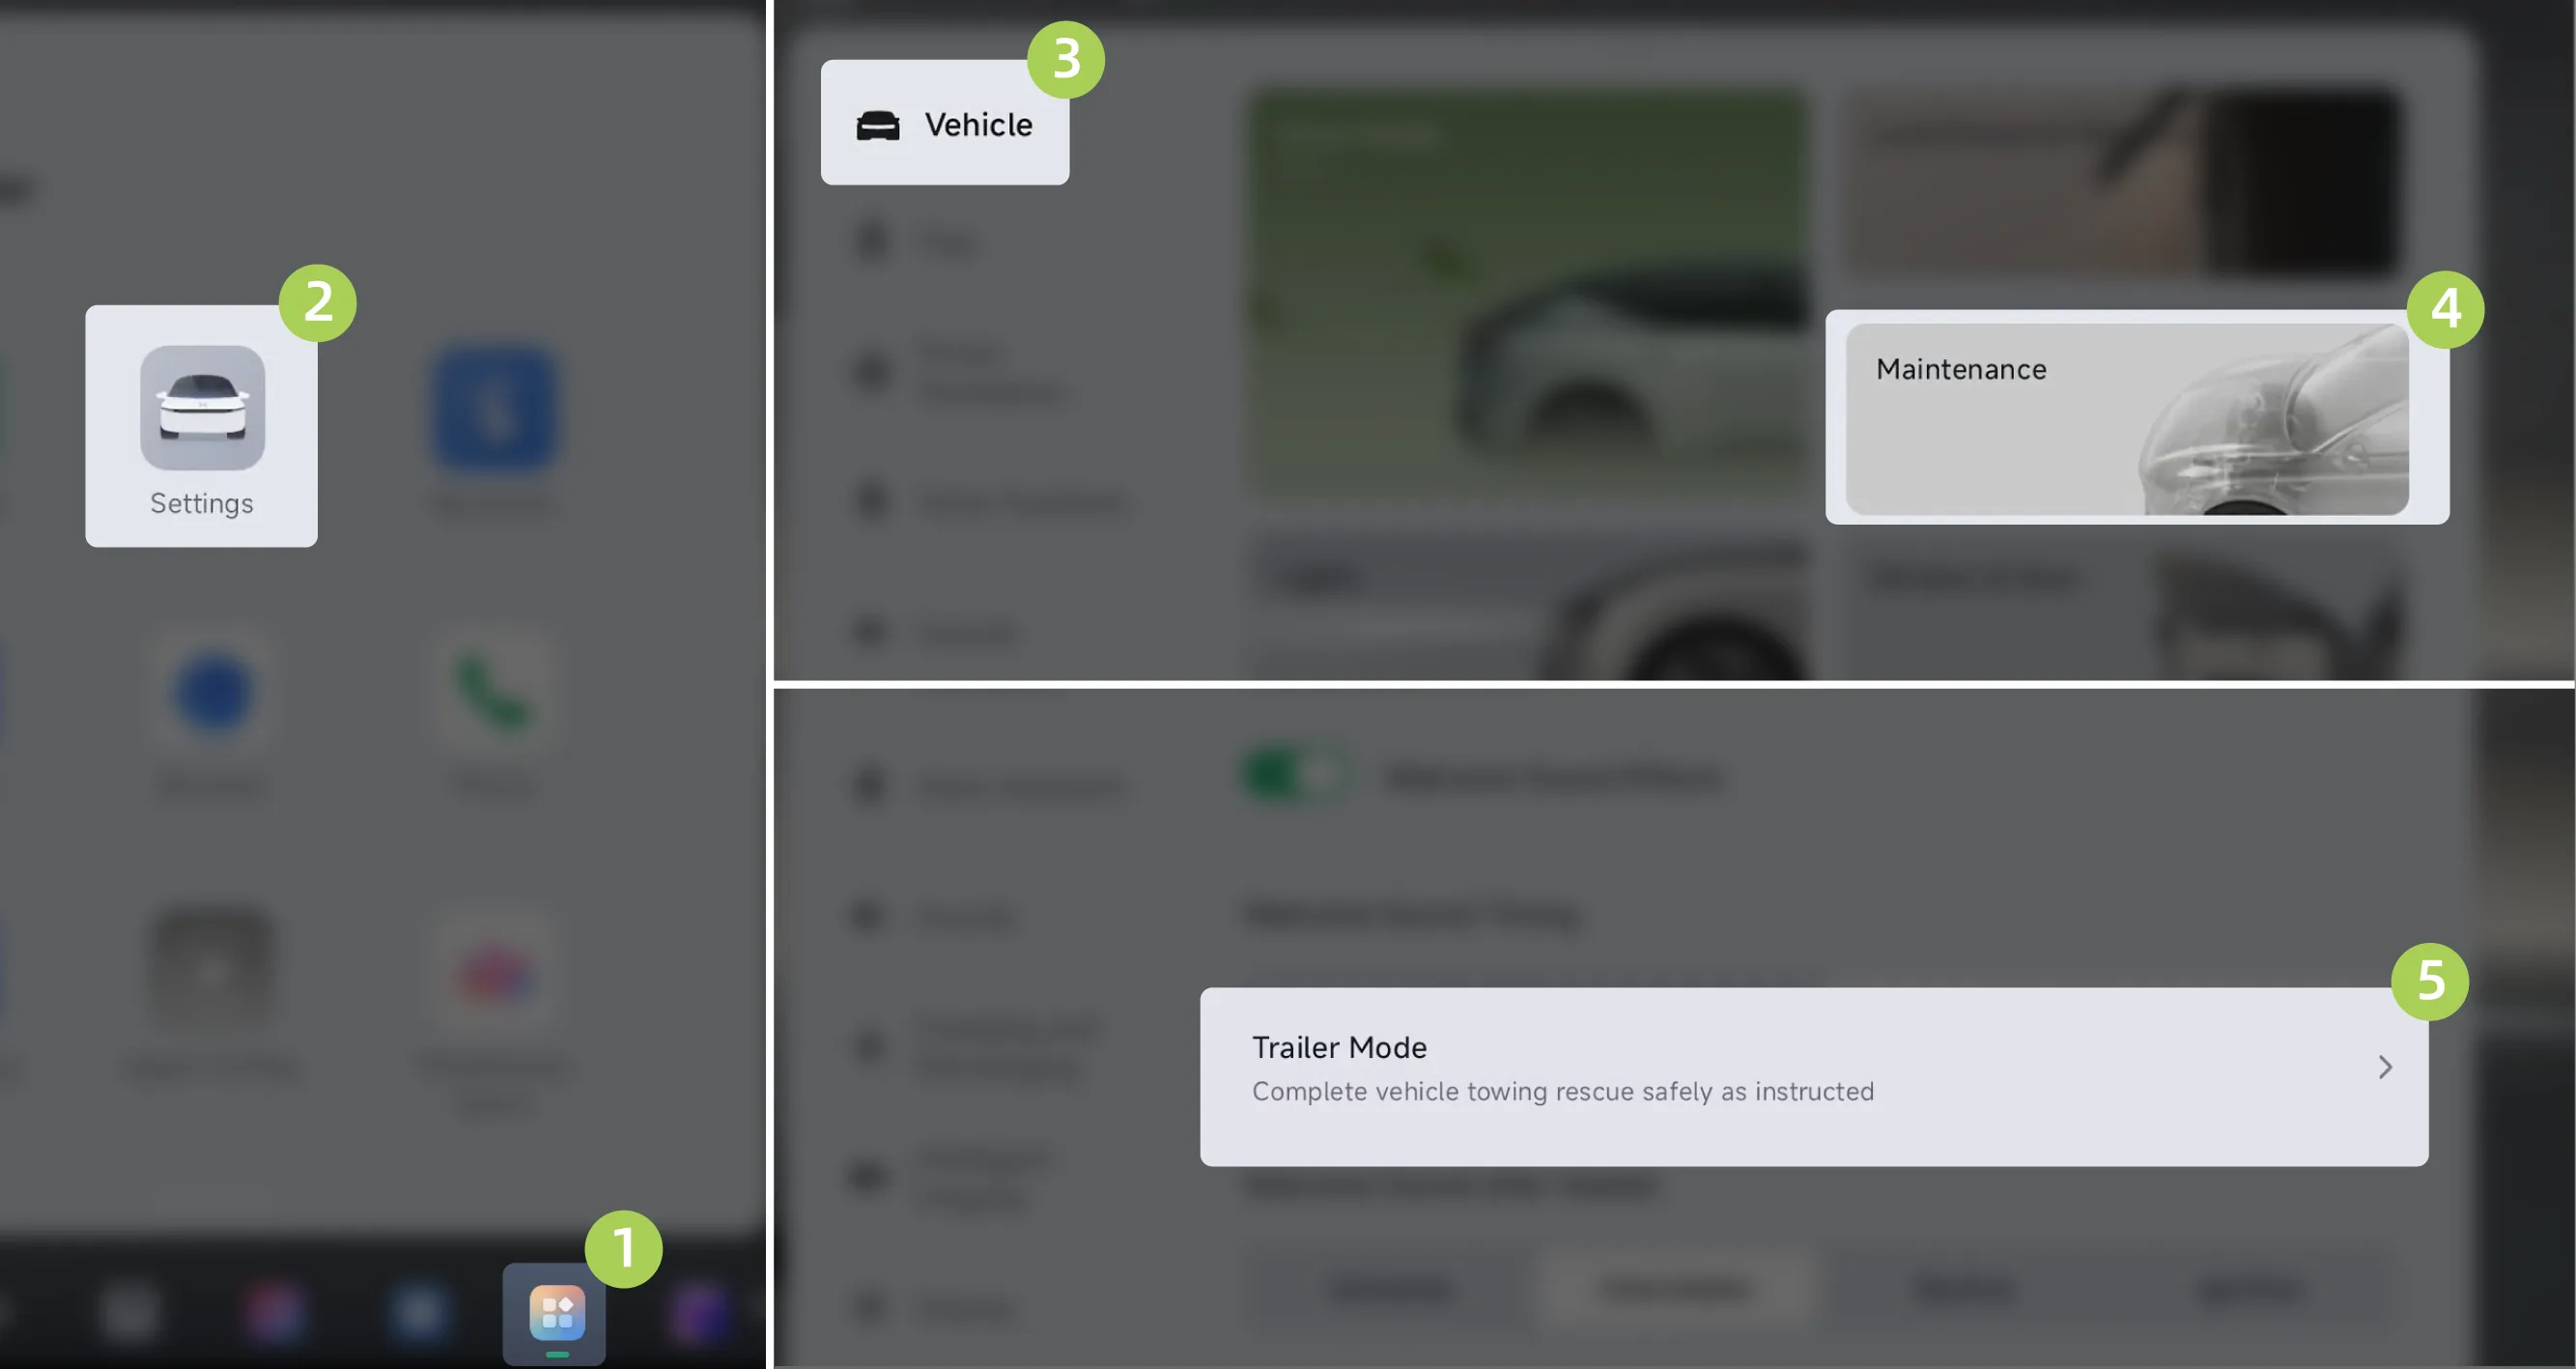
When the vehicle is in P gear, on the central control screen “ →Settings→vehicle→Maintenance”Interface, can be opened/closed 。
Caution When enabling caravan towing mode, secondary confirmation is required, and it must be performed in P gear.
After Trailer Mode for caravans is enabled, all other assisted driving functions cannot be enabled except the AEB and FCW functions.
The caravan towing mode cannot be enabled under the following circumstances:
The vehicle is not in P gear.
Electronic Stability Program malfunction.
Lock mode during after-sales sensor calibration.
When Lift Mode or Shipping Mode is enabled.
Caution Towing mode must be switched on when towing, otherwise damage to the vehicle may occur.
After disconnecting the connection between the caravan and the tow hook, and disconnecting the power take-off connector for the towed caravan, tap the central control screen to exit caravan towing mode.
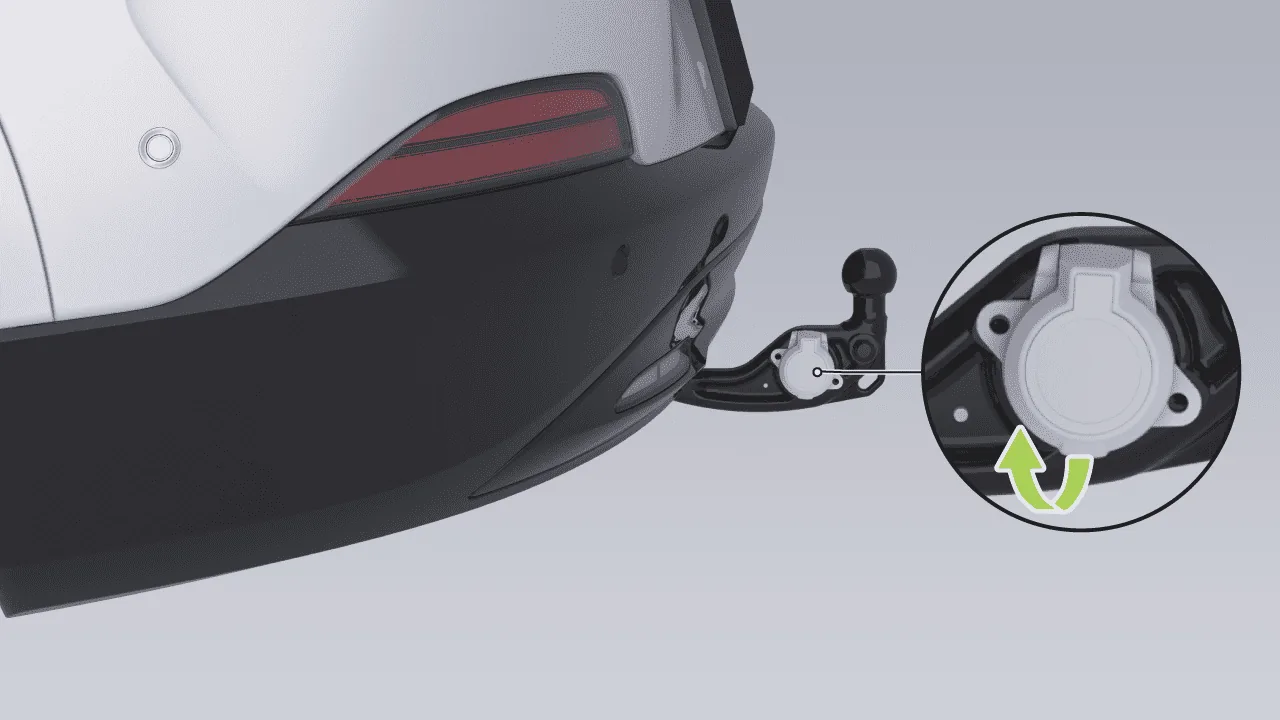
The caravan power take-off connector is installed on the tow hook. After turning on the tow hook switch on the central control screen, the connector will extend together with the tow hook. After opening the protective cover, it can be used.
Caution When the power take-off connector is not connected to the trailer caravan interface, do not use a high-pressure water gun to clean the electrical connector directly, as water may enter the connector and cause damage.
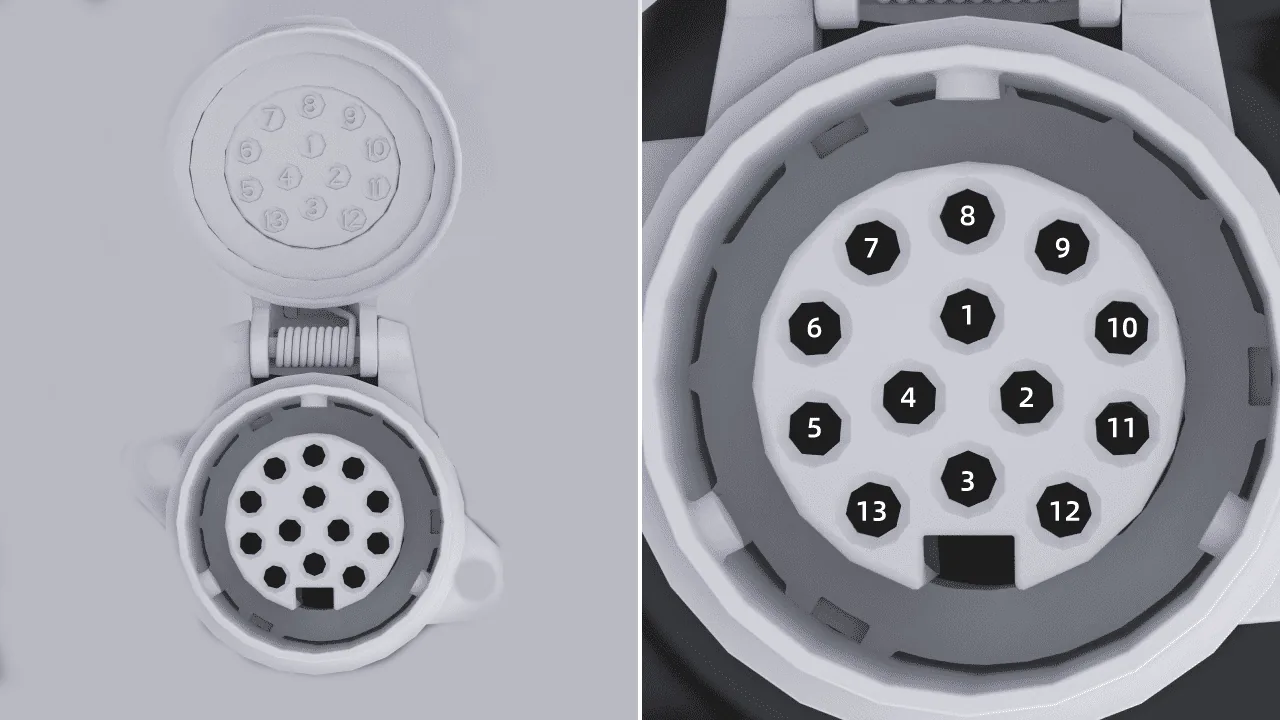
The electrical connector equipped on this vehicle is a 13-pin wiring socket, and the corresponding standard for the power outlet is ISO 11446:2004. The specific pin functions are as follows:
| Pin Number | Color | Function |
| 1 | Light Green | Left Turn Signal |
| 2 | white | rear fog light |
| 3 | black | Ground wire |
| 4 | green black | Right Turn Signal |
| 5 | green yellow | Right Rear Position Lamp |
| 6 | yellow black | Brake Light |
| 7 | Green/White | Left Rear Position Lamp |
| 8 | Yellow-white | Reverse Lamp |
| 9 | Red and green | Power |
| 10 | red and blue | Power |
| 11 | black | Ground Wire |
| 12 | / | Spare |
| 13 | black | Ground wire |
The tractor's Side Mirrors shall comply with regulatory requirements. If they do not, install suitable trailer rearview mirrors.
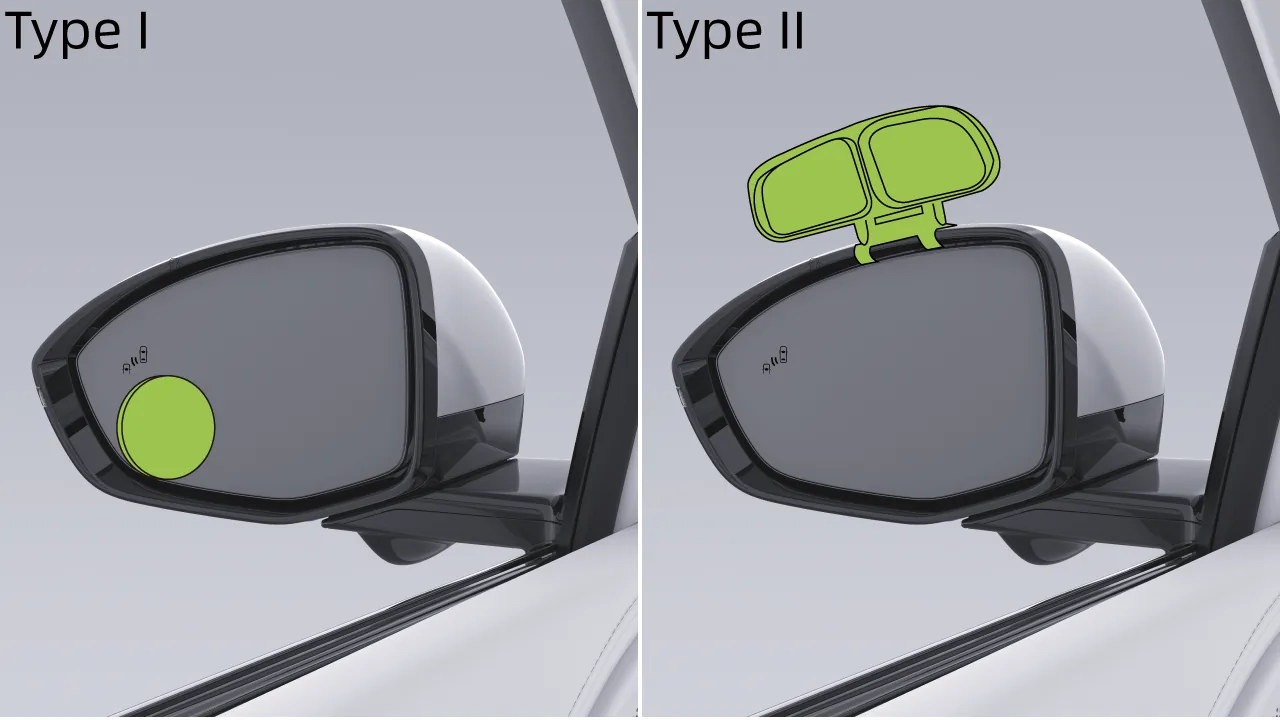
Type 1
Adhere it to the surface of the exterior rearview mirror;
Type 2
Install the bracket clamp on the mirror frame.
The vehicle's towing capacity will depend on vehicle specifications, load, road conditions, trailer specifications, etc. To ensure driving safety, do not drive at excessive speed or with overload. For specific parameters, please refer to the table below.
| Item | Data |
| Maximum Permissible Towing Mass (Braked) [kg] | 2000 |
| Maximum permissible towing mass (unbraked) [kg] | 750 |
| Maximum Tongue Load [kg] | 100 |
| Maximum Overall Dimensions of Passenger Vehicle Combination (Length, Width, Height) [mm] | 14500*2550*4000 |
| Dimensional Limits for Permitted Center-Axle Trailers (Length Width Height) [mm] | 12000*2550*4000 |
| Maximum Dimensional Limit for Trailer Rear Overhang [mm] | 3500 |
| Electrical Connector | 13-pin standard connector compliant with ISO11446:2004 |
| Ball Joint Connection | Complies with the dimensional requirements for ECE R55 A CLASS tow ball heads |
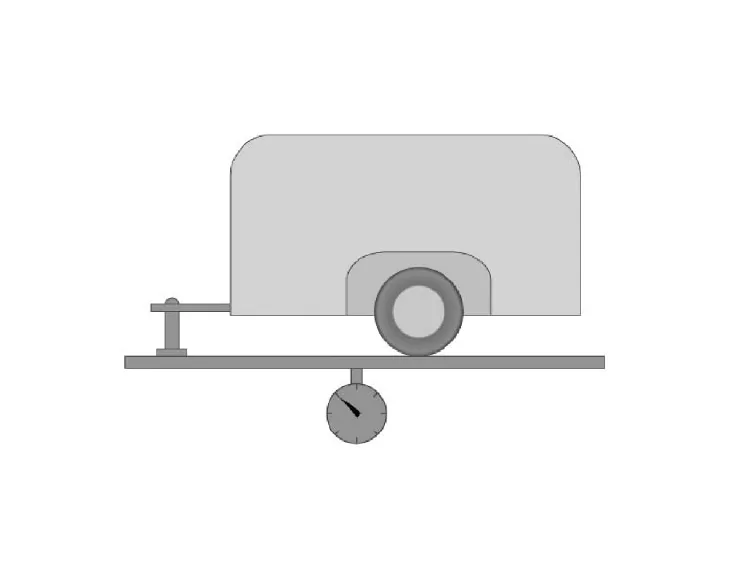
Towing mass refers to the sum of the weight of the trailer and the cargo in the trailer.
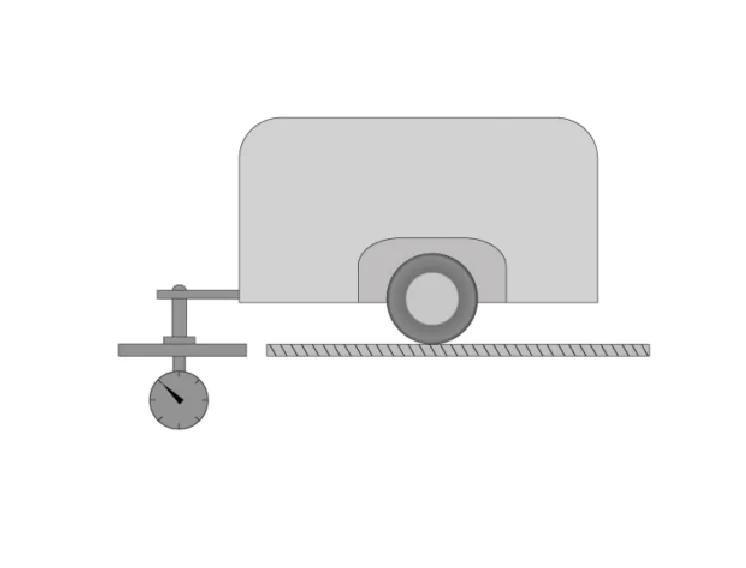
The maximum tongue load refers to the maximum vertical load that can be borne at the connection between the trailer and the tow hitch.
The power of the trailer tail lamps does not exceed the values specified below:
Left/right position lamp: 24 W.
Left/right turn signal lamp: 24 W.
rear fog light: 42W.
Reverse lamp: 42 W.
Brake light: 42 W.
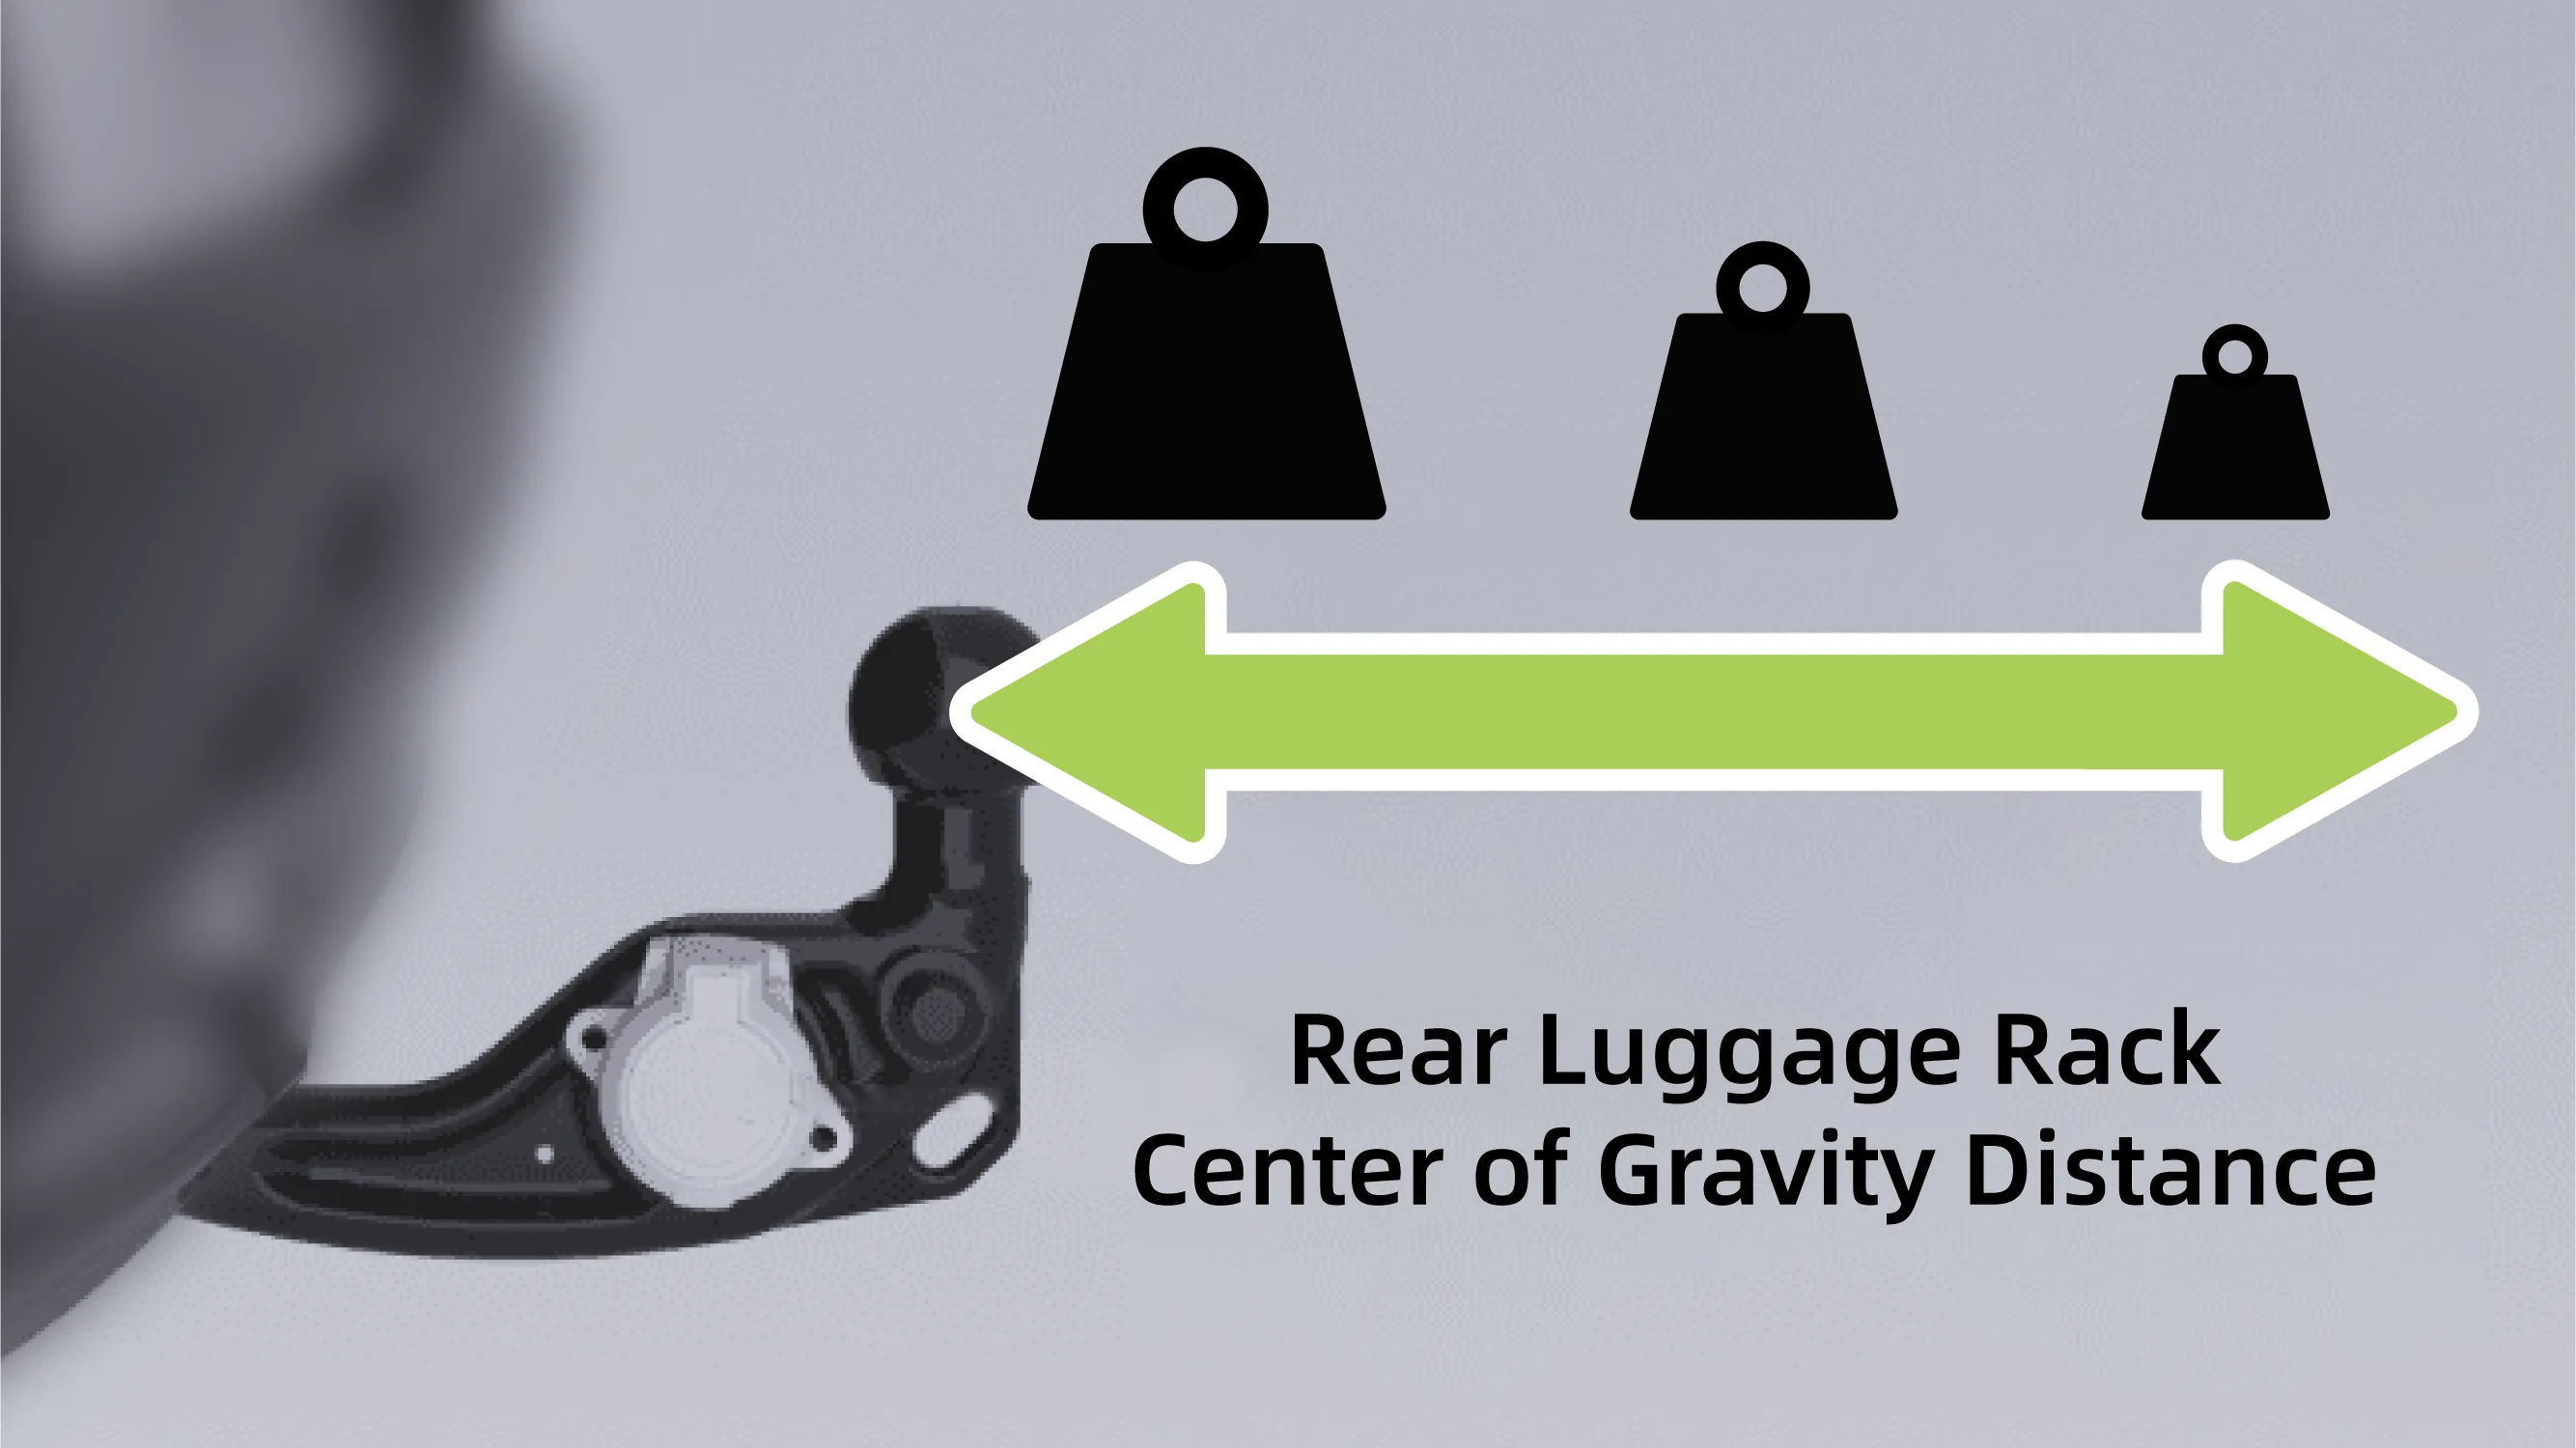
If the center of gravity is less than 30 cm from the center of the tow ball, the total weight of the luggage and carrier must not exceed 75 kg.
If the center of gravity is less than 60 cm from the center of the tow ball, the total weight of the luggage and carrier must not exceed 35 kg.
If the center of gravity is 60 cm - 70 cm from the center of the tow ball, the total weight of the luggage and carrier must not exceed 10 kg.
If the center of gravity is greater than 70 cm from the center of the tow ball, the use of a tow bar for luggage and carriers is strictly prohibited.
Before driving, ensure that the tire pressure, lights, and connection devices of the tractor and trailer are normal. After connecting the trailer, please enable it on the central control screen. 。
Please load the trailer cargo safely, ensure that the cargo is securely fixed on the trailer, and ensure that the trailer remains level; otherwise, do not drive the vehicle.
Start smoothly and avoid sudden acceleration and emergency braking, especially when driving on slippery road surfaces, as skidding may cause the vehicle to go out of control.
Crosswinds and rough roads may cause the vehicle to sway, seriously affecting vehicle control. In any situation, as soon as you notice even slight signs of vehicle sway, hold the steering wheel firmly with both hands and immediately reduce the vehicle speed slowly. Do not attempt to eliminate the swaying by increasing the vehicle speed.
Avoid operating the tractor unloaded while the trailer is loaded whenever possible. If this cannot be avoided, drive at low speed due to improper load distribution.
When towing a trailer, the vehicle's braking distance will increase. Therefore, increase the distance from the vehicle ahead.
When towing a trailer, the vehicle length plus the trailer becomes longer, so when overtaking, a longer overtaking distance is required before returning to the original driving lane.
Reversing while towing a trailer is different from normal reversing, is relatively difficult, and requires special caution and additional practice.
When reversing, hold the bottom of the steering wheel with one hand. Turn your hand to the left to steer the trailer to the left; turn it to the right to steer the trailer to the right. Be sure to reverse at a low speed, and if possible, ask another person to assist.
When towing a trailer, make turns smoothly, avoid bumps or sudden maneuvers as much as possible, and activate the turn signal in advance. When turning, the turning radius must be larger than when not towing a trailer. This ensures that the trailer will not hit curbs, road signs, trees, or other objects.
When driving with a trailer on a relatively steep or long slope, reduce speed in advance. Determine the driving speed according to the trailer weight and the slope gradient.
Try to avoid parking on a slope. If it cannot be avoided, place wheel chocks under the tires of the tractor and trailer, and apply the parking brake.
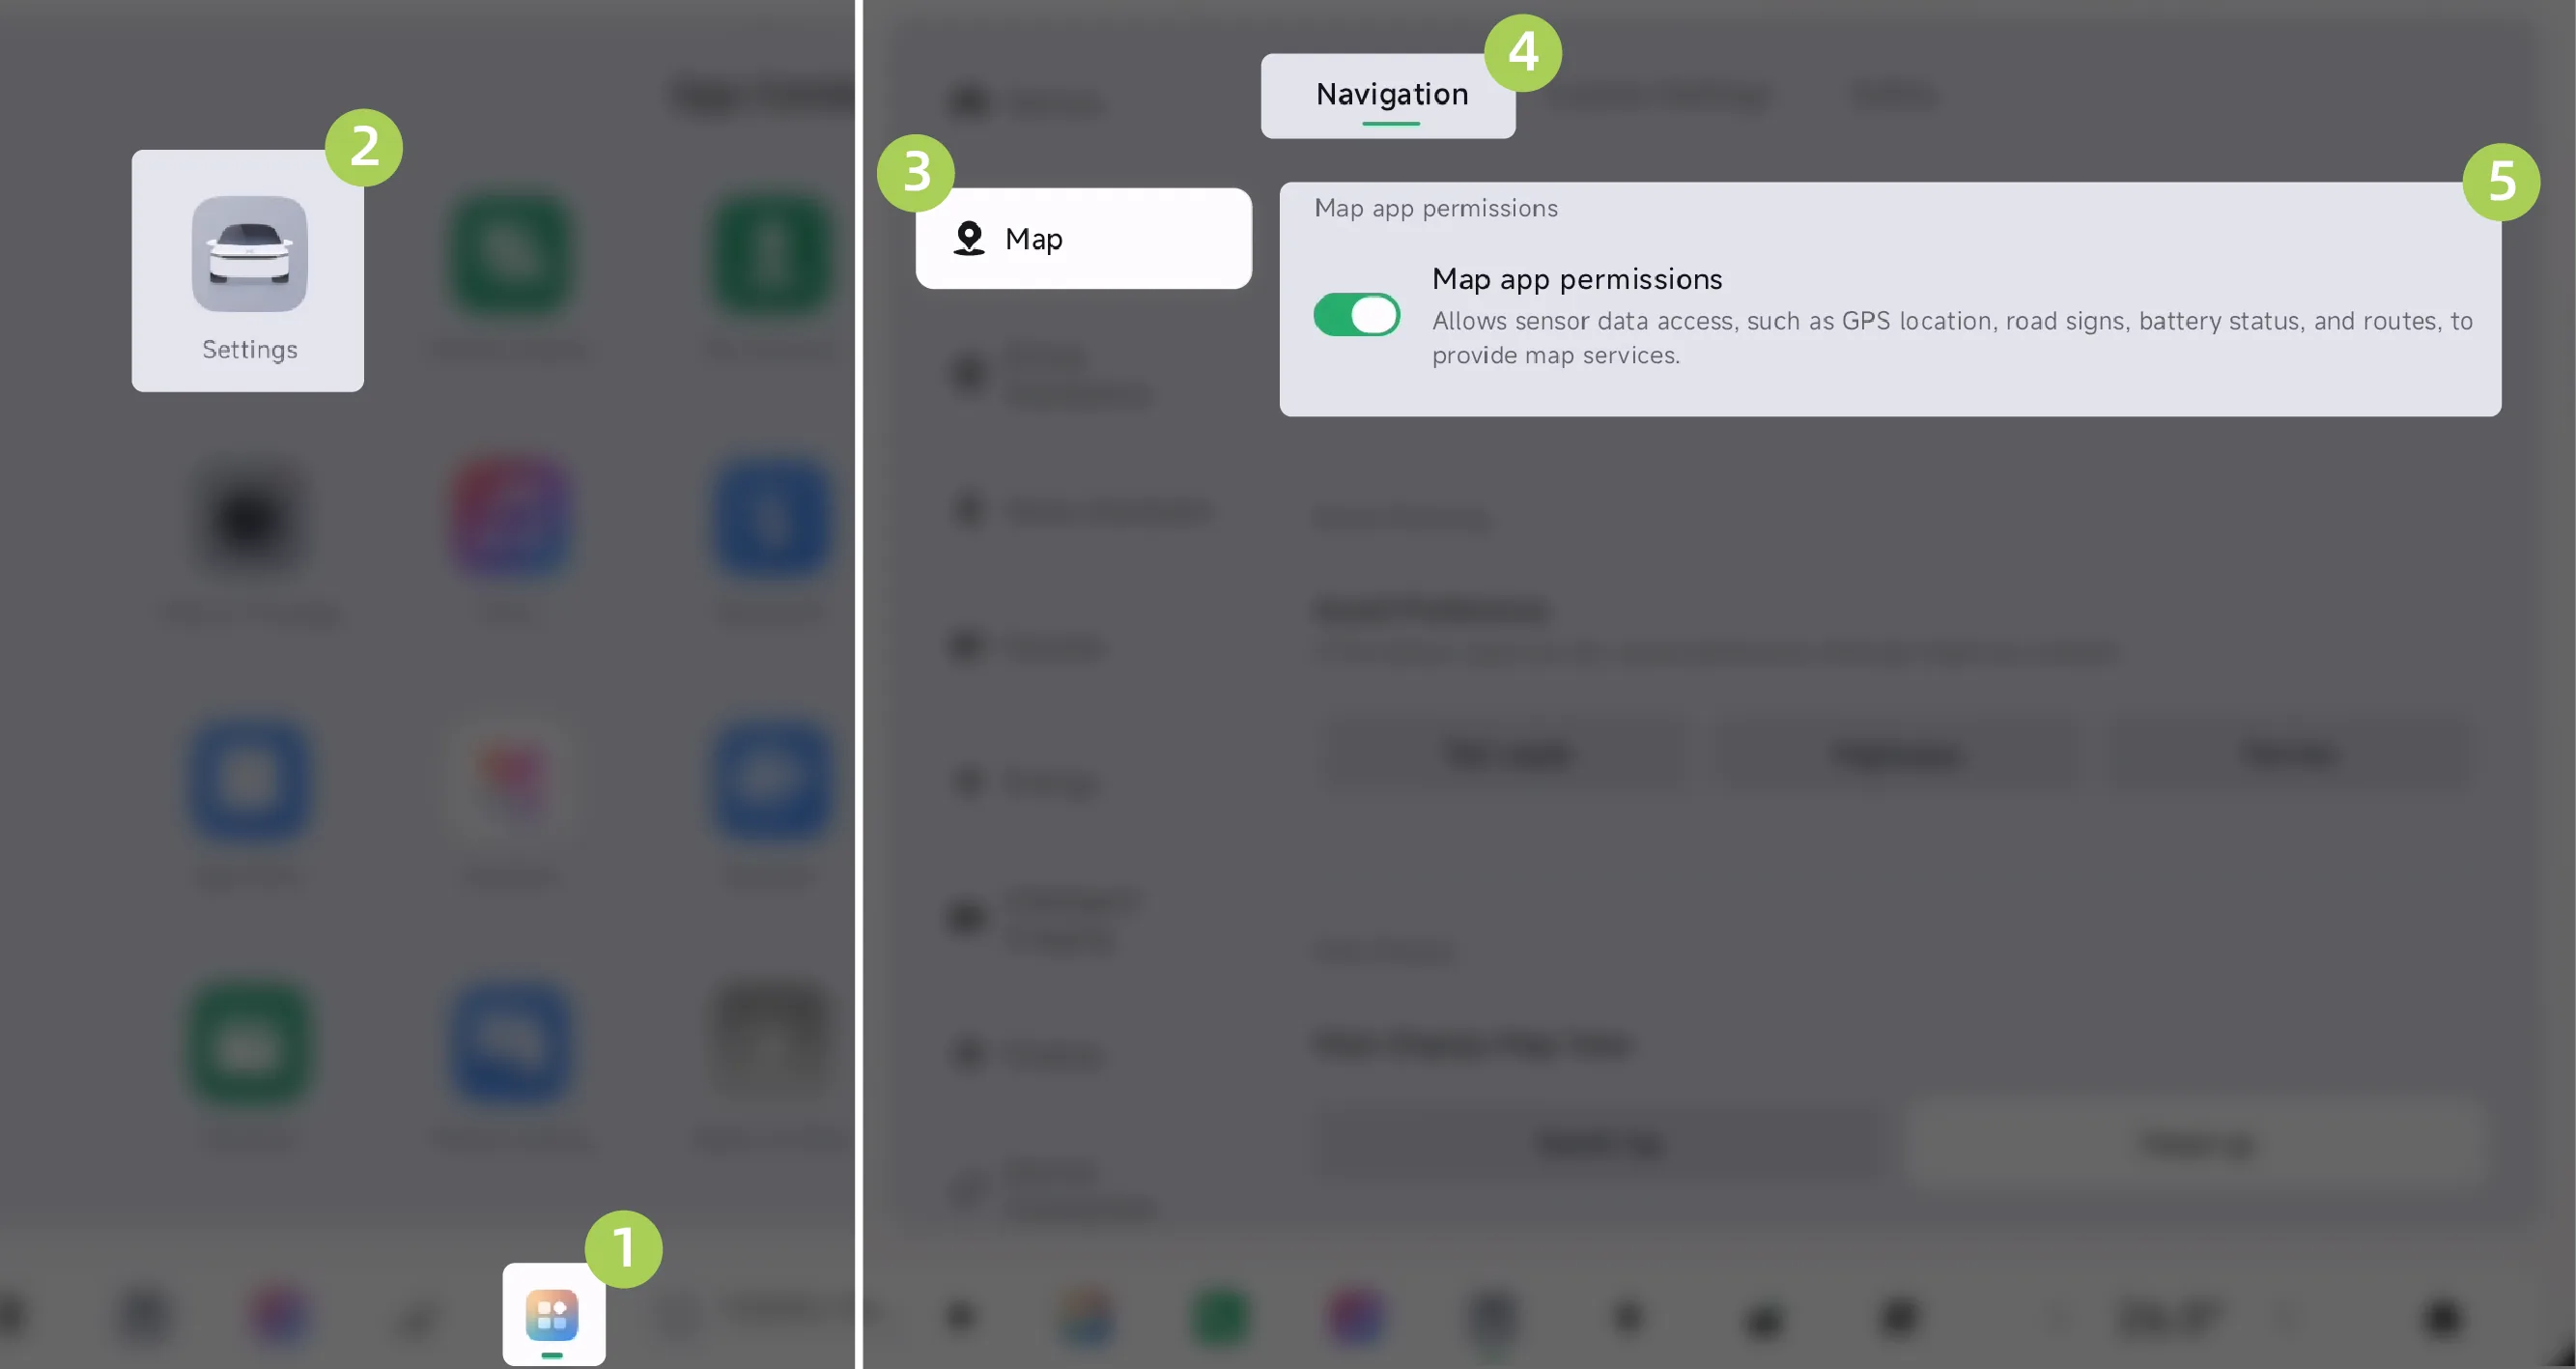
On the central control screen “ →Settings→Map→Navigation”On this screen, you can enable or disable permissions for the map application.
Enable permissions:When the switch is in the unauthorized off state, tap the switch and read the content in the "Google Maps Data Privacy Notice and Terms" pop-up window. Tap "Accept" to enable the map application permission, and all map settings will return to an operable state; tap "Decline" to keep the permission disabled, and all map settings will be reset.
Disable Permissions:When the switch is in the authorized on state, tap the switch and read the content in the pop-up window. Tap "Keep On" to keep the permission enabled; tap "Revoke" to disable the map application permission, and all map settings will be reset.
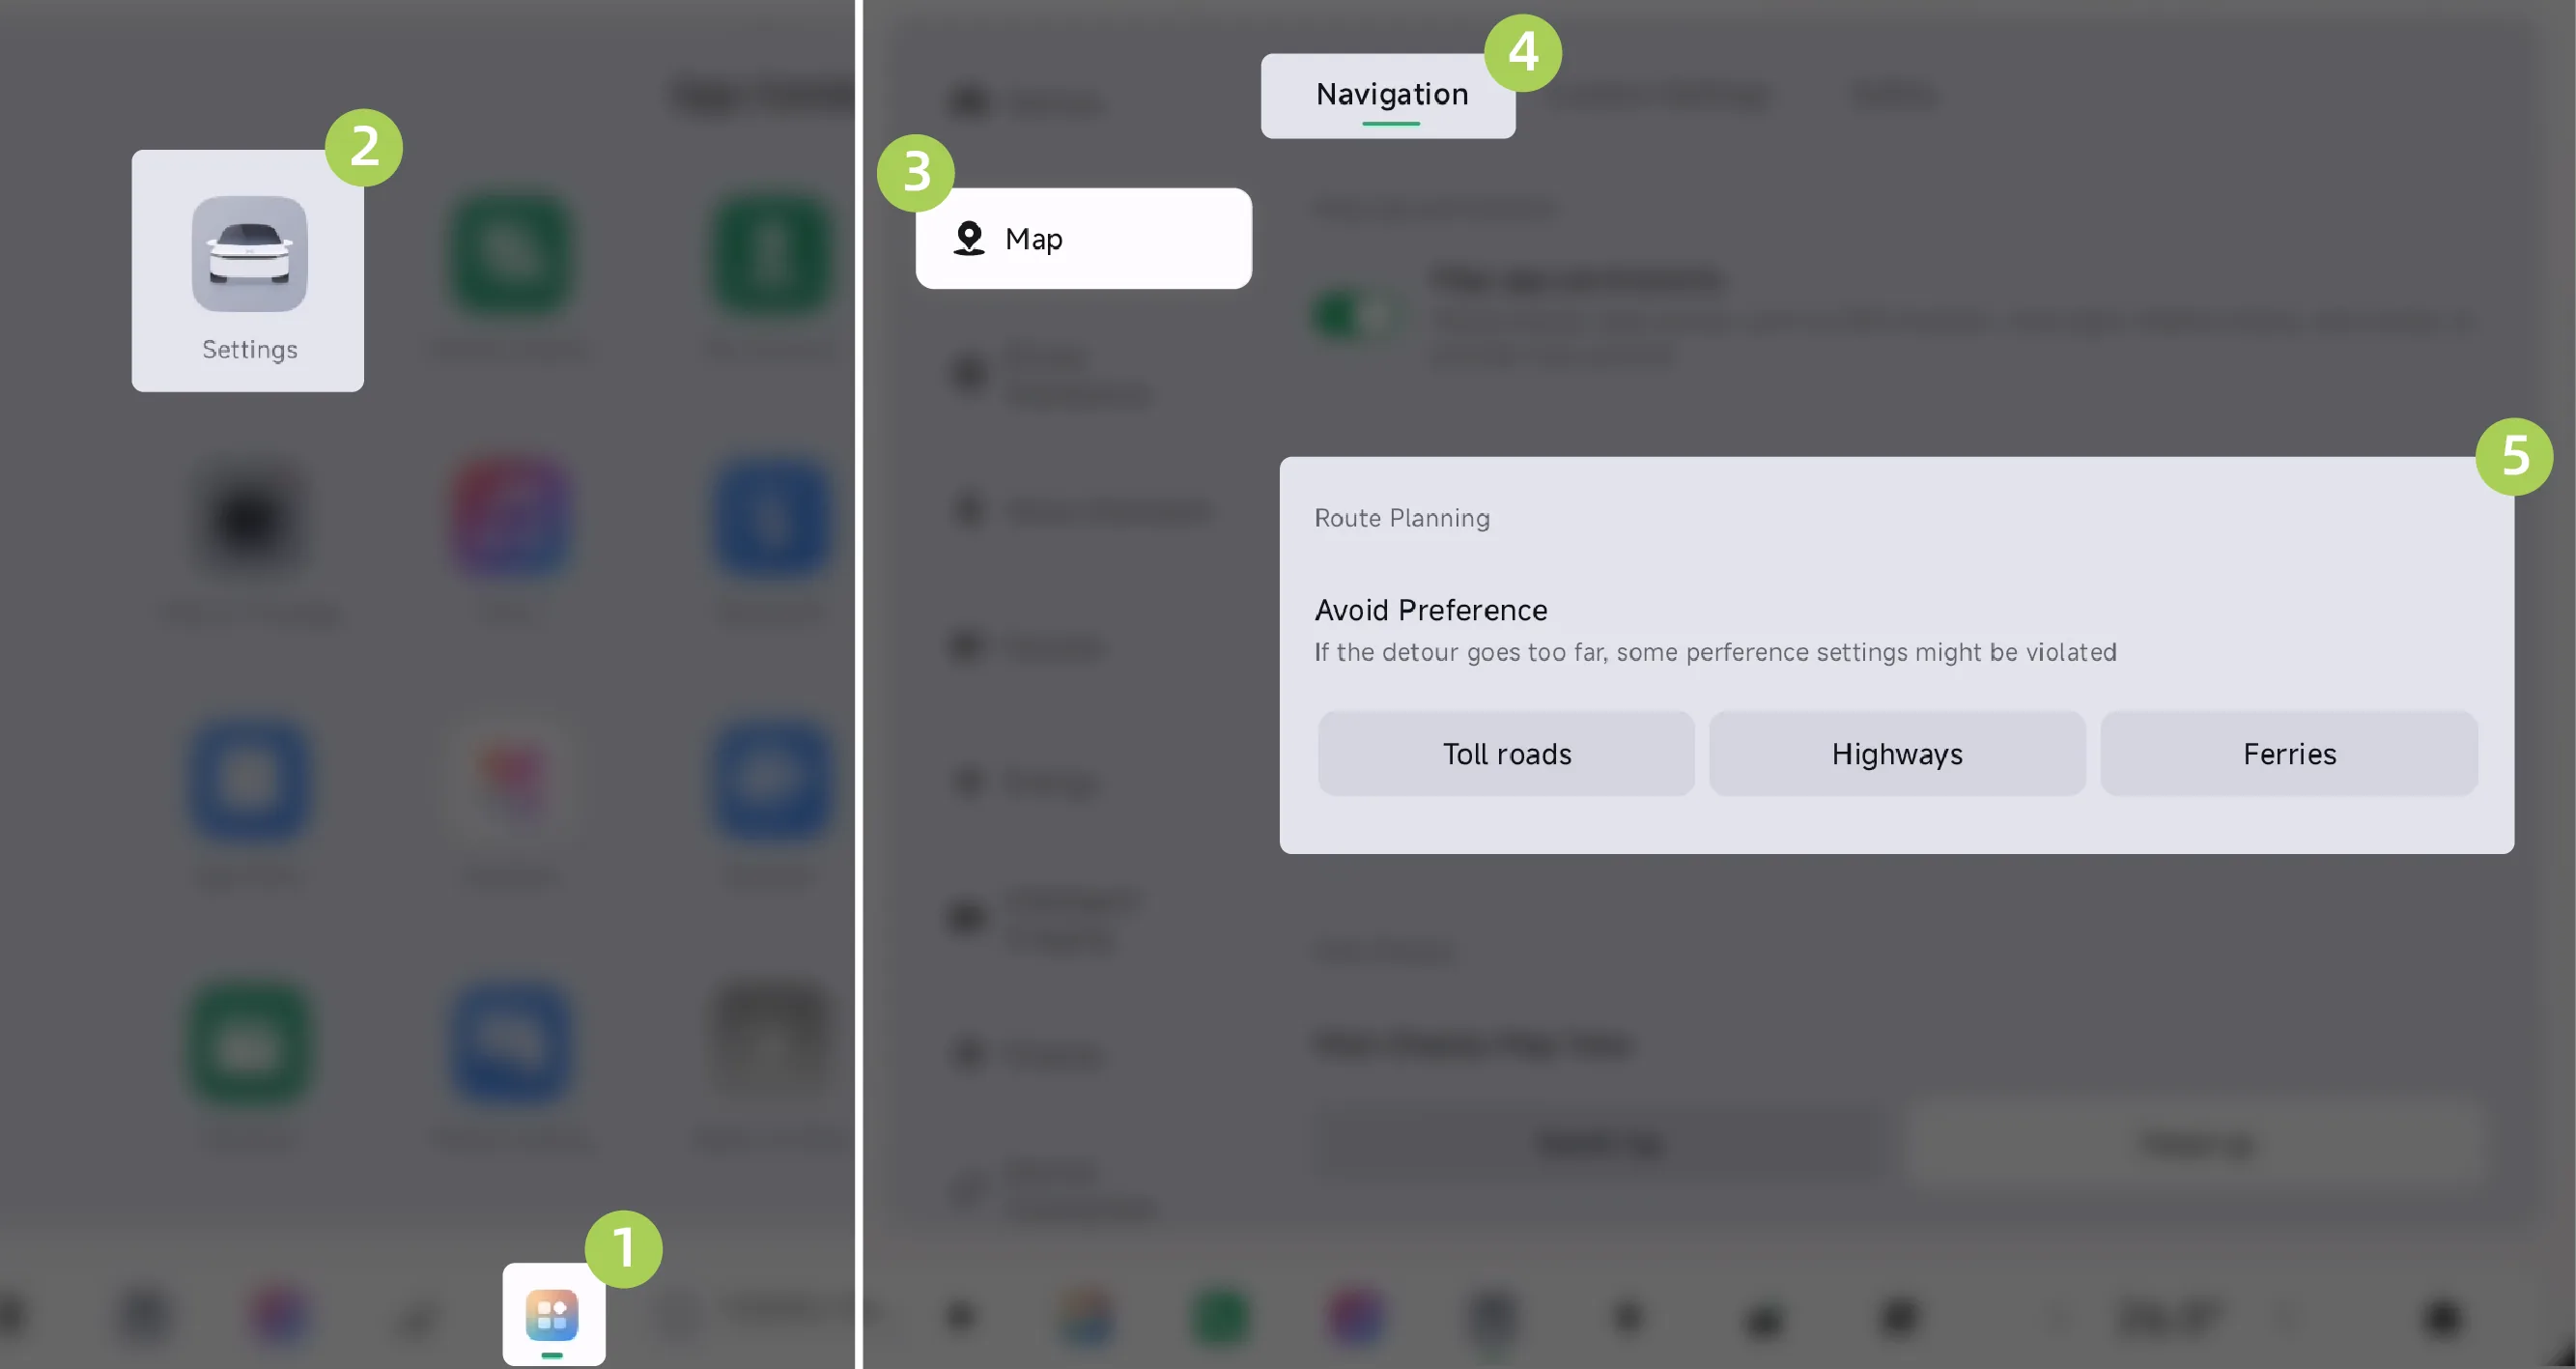
On the central control screen “ →Settings→Map→Navigation”On this screen, you can set route planning as needed.
Avoid Preference:The buttons support multiple selection. Click to select; by default, none are selected. In preferences such as “Toll Roads,” “Highways,” and “Ferries,” you can select one or more avoidance preferences.
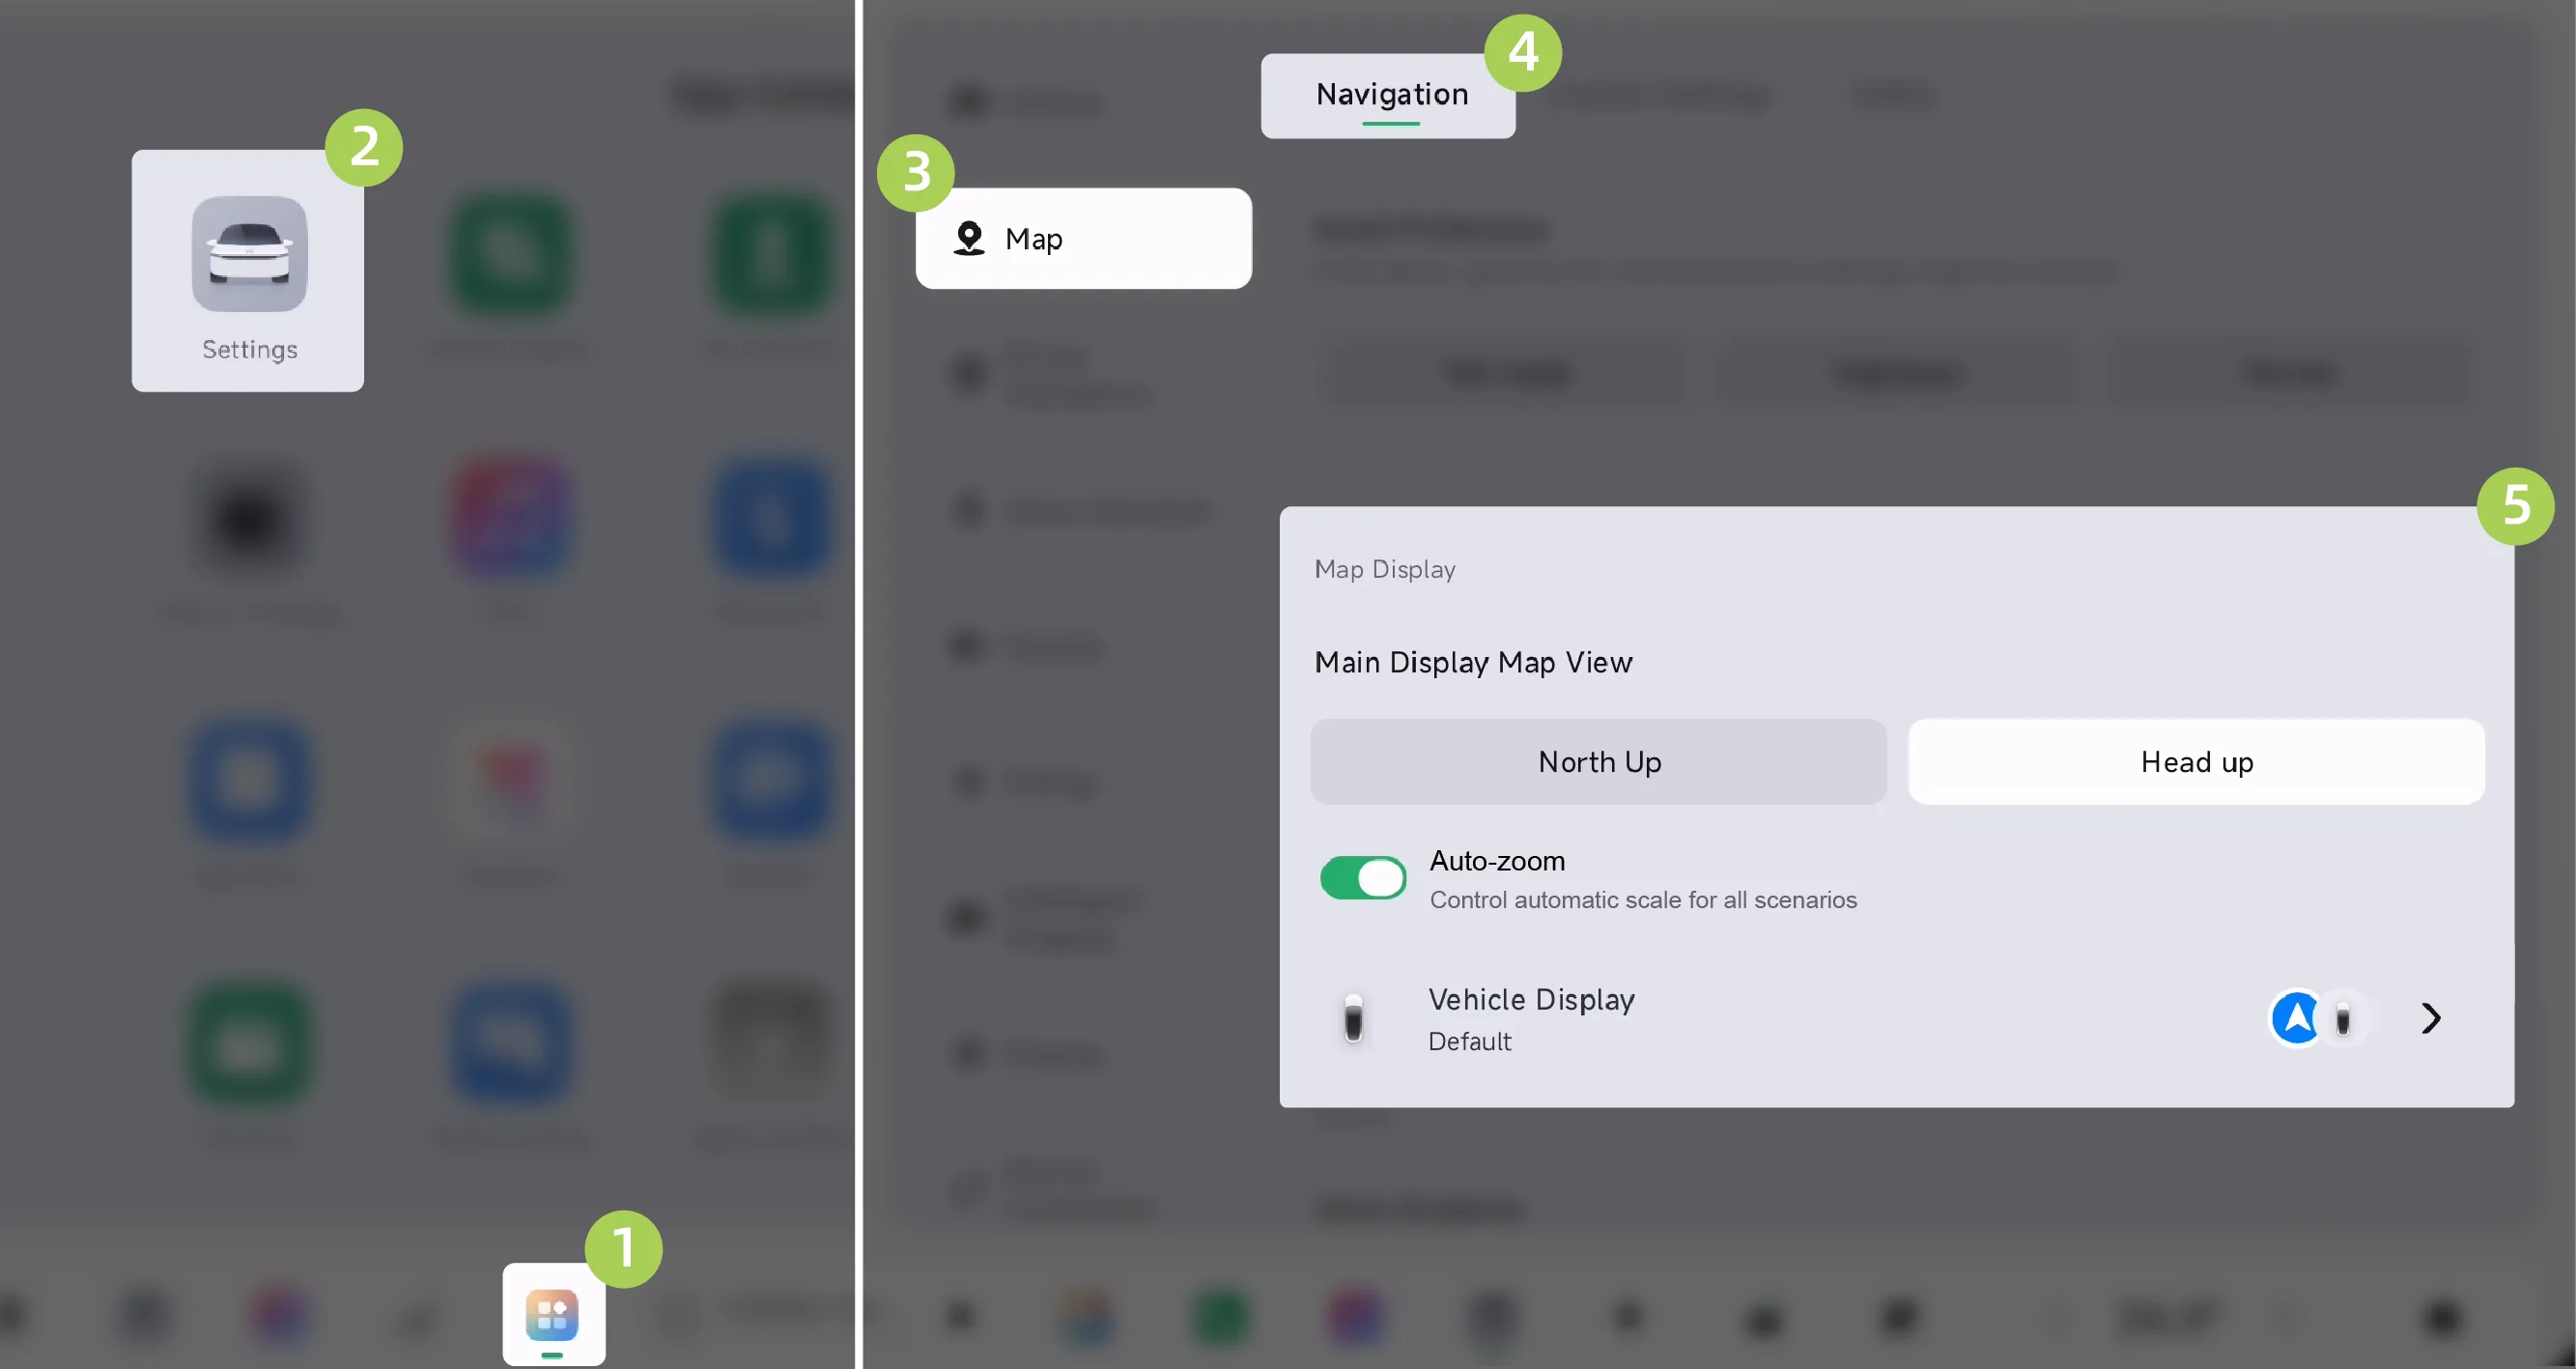
On the central control screen “ →Settings→Map→Navigation”On this screen, you can set the map display mode as needed.
Main Display Map View:You can select the map display orientation on the center display.
Head up:The vehicle’s current driving direction always faces the top of the screen. This option is the default setting.
North up:The map always remains oriented with true north toward the top of the screen.
Auto zoom:When enabled, the system automatically adjusts the map scale according to different usage scenarios to display an appropriate map range. This function is enabled by default.
Vehicle Display:You can set the vehicle display style on the map. Tap Vehicle Displayand, after entering the settings screen, select any of the following options:
Default:Display the default vehicle icon on the map.
Arrow:The vehicle is indicated on the map by an arrow icon.
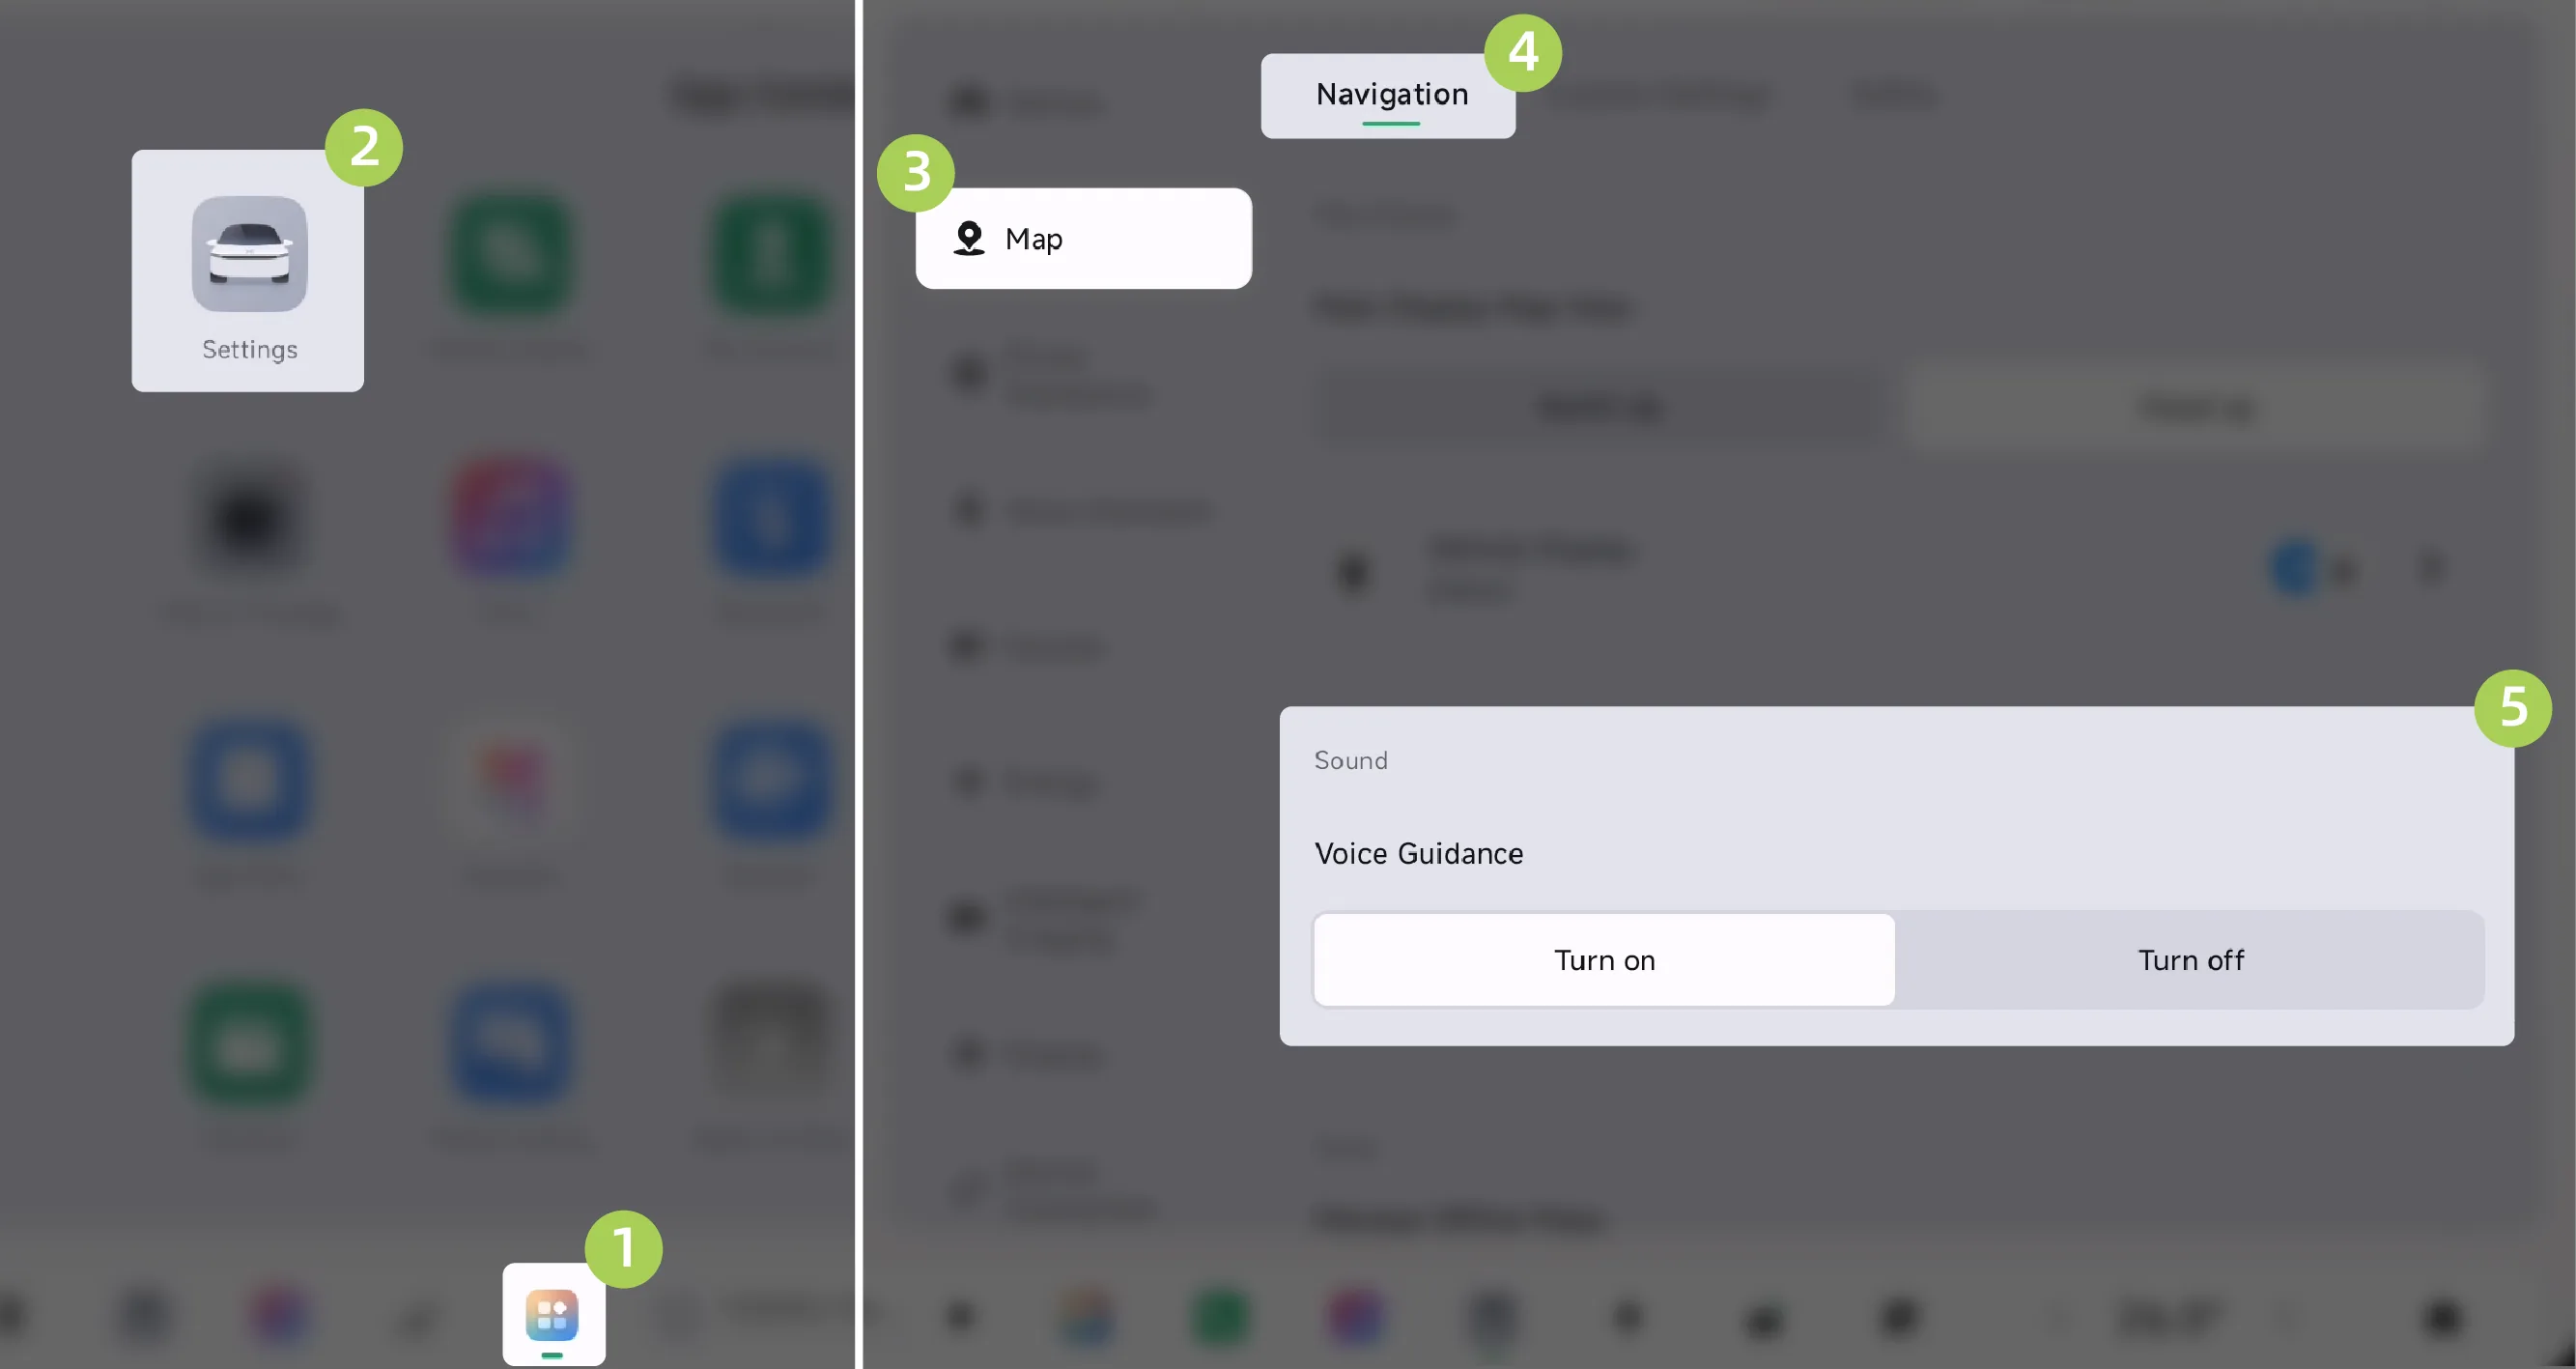
Tap the central control screen in sequence. “ →Settings→Map→Navigation”, you can set navigation voice Guidance as needed.
Voice Guidance:You can choose whether to play voice guidance during navigation.
Turn on: Play voice guidance during navigation. This option is the default setting.
Turn off: Voice guidance is not played during navigation.
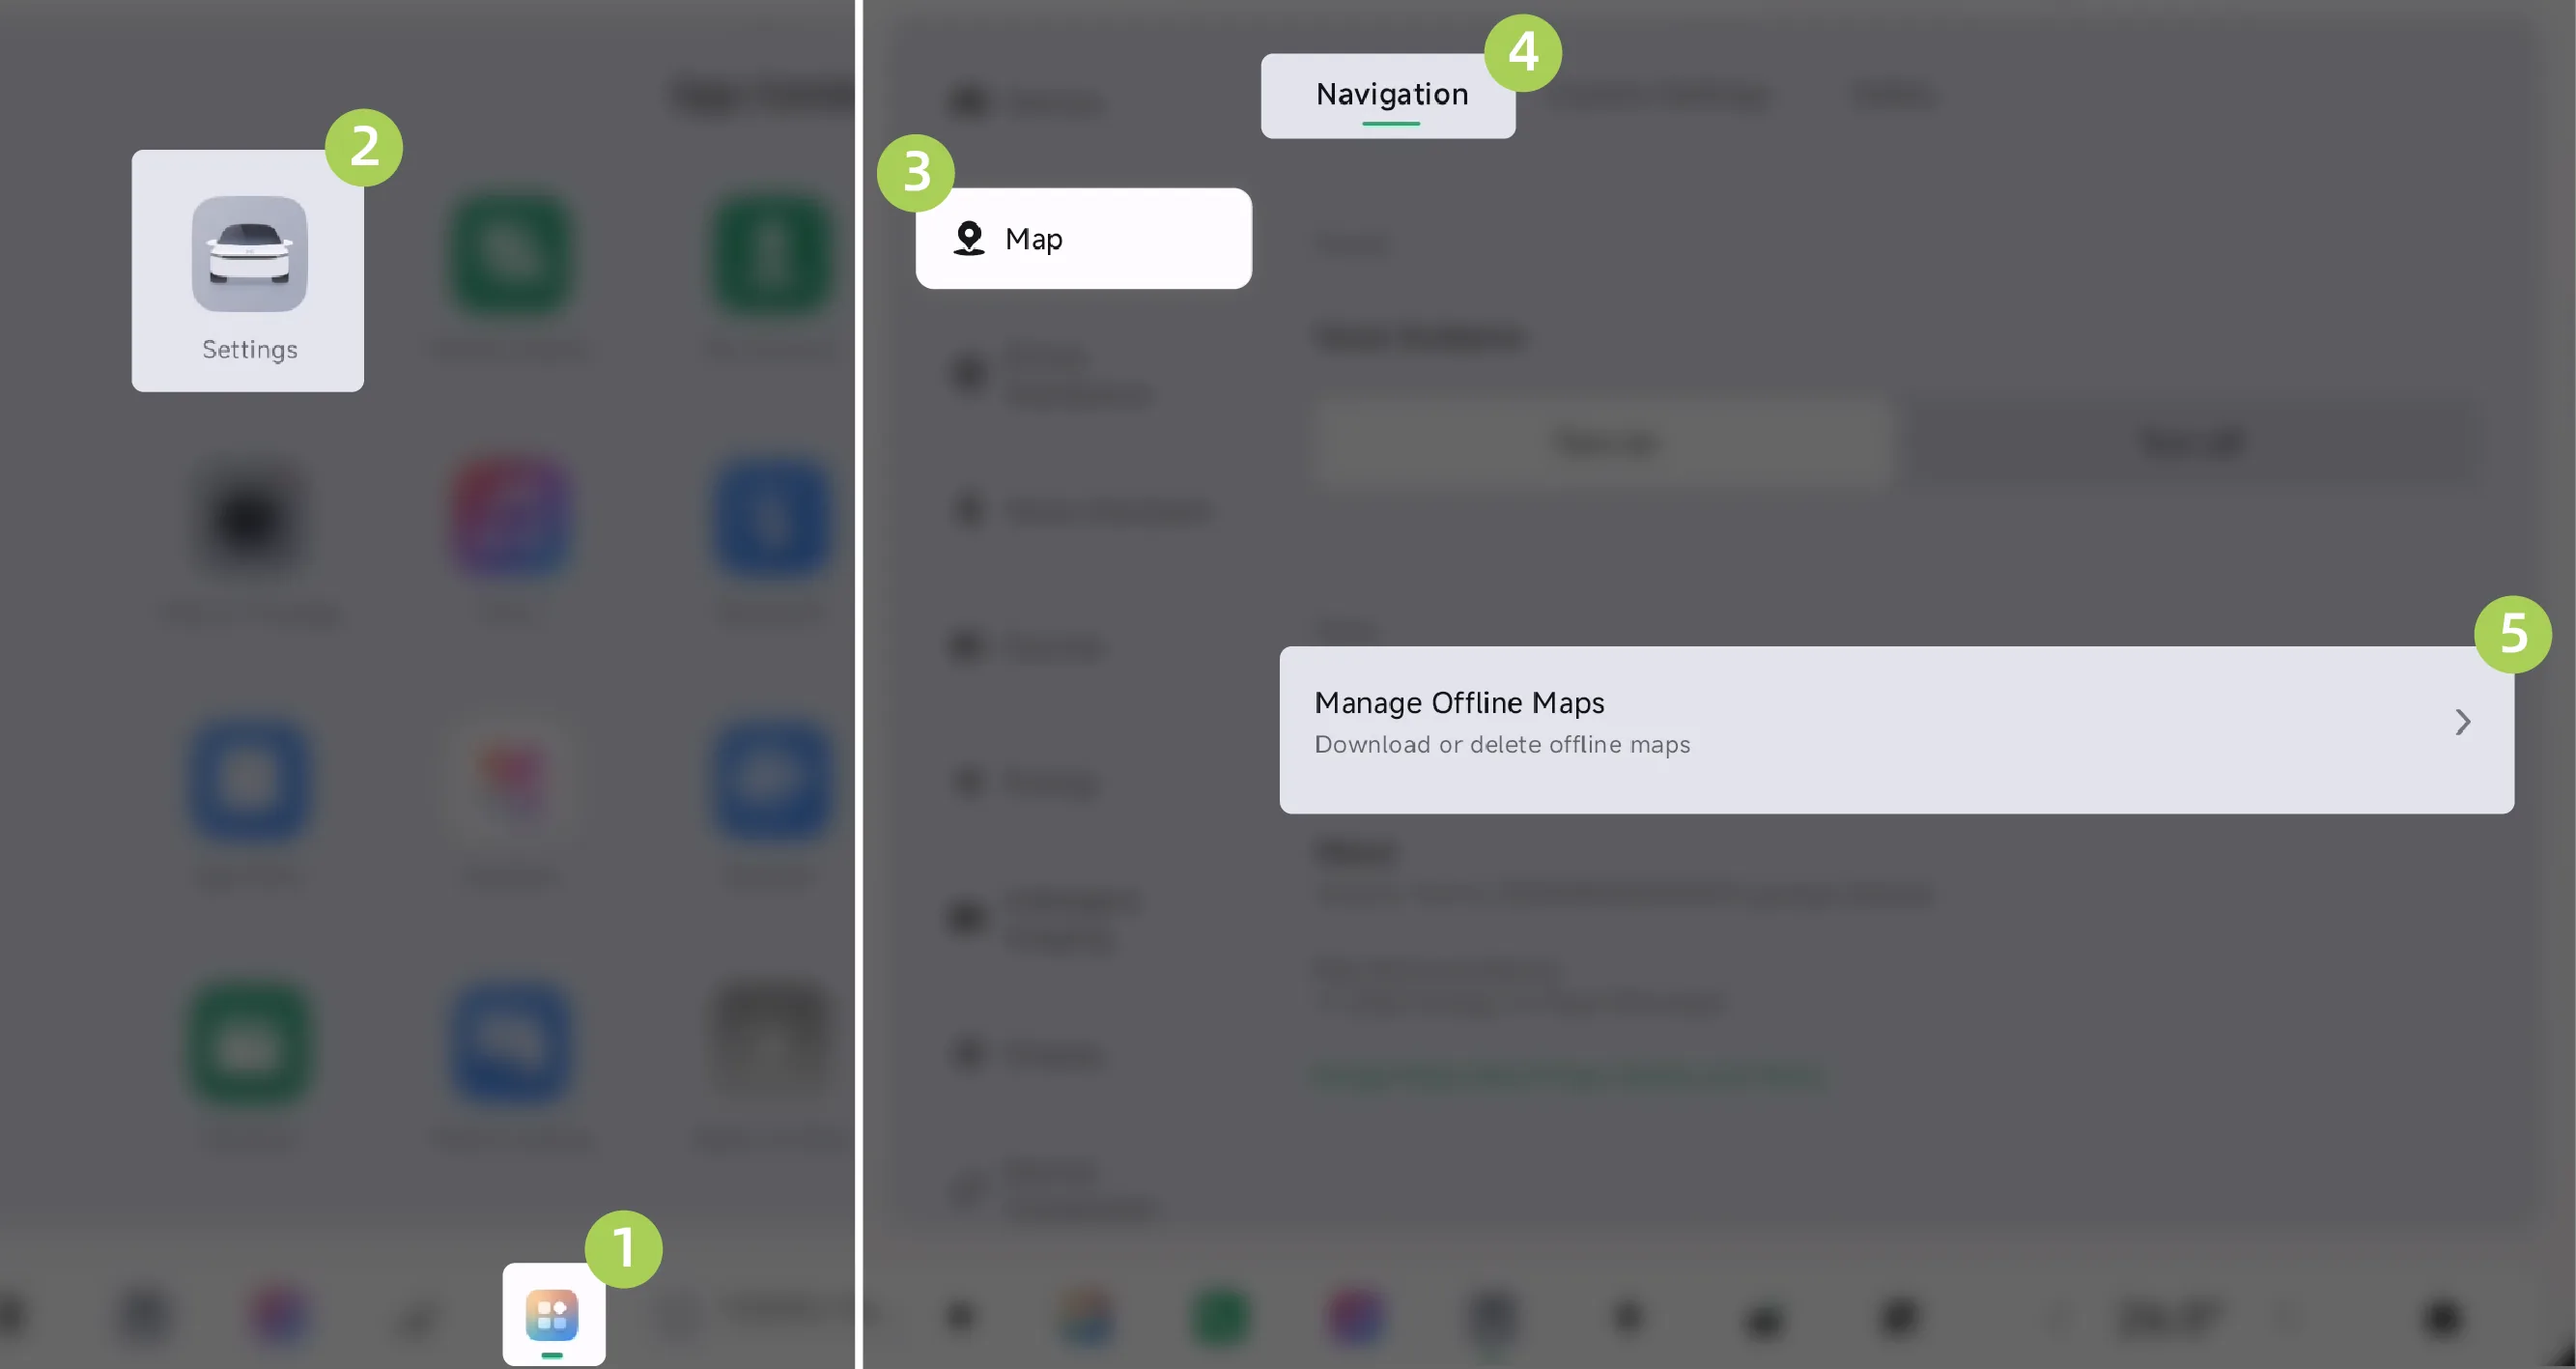
Tap the central control screen in sequence. “ →Settings→Map→Navigation”, tap Manage Offline Mapsto enter the offline map management screen.
Offline Maps Manage:Offline maps can be downloaded or deleted as needed.
Download: Select the desired region and download the corresponding offline map.
Delete: You can delete offline maps that are no longer needed to free up storage space.

On the central control screen “ →Settings→Map→Custom Settings”On the interface, you can set the home address, company address, and commuting function as needed.
Home: You can view, add, and manage (edit and delete) home addresses.
Add home address: Tap “  Home ”Enter your home address on the map to search for and add your home address.
Edit Home Address: After successfully setting the home address, tap the existing home address.Tap the “  ”icon. In the pop-up window, tap Edit to search again and add a new home address.
Delete Home Address: After successfully setting the home address, click the existing home address's “ ”Icon. In the pop-up window, tap Delete. After reading and acknowledging the content of the pop-up window, the existing home address can be deleted.
Work: You can view, add, and manage (edit and delete) company addresses.
Add company address: Click “  Work ”Enter the company address on the map to search for and add the company address.
Edit company address: After successfully setting the company address, click the existing company address's “ ”Icon. In the pop-up window, tap Edit to search again and add a new company address.
Delete company address: After successfully setting the company address, click the existing company address's “ ”Icon. In the pop-up window, tap Delete. After reading and acknowledging the content of the pop-up window, the existing company address can be deleted.
Commuting advice:After it is enabled, during the set time period, the desktop automatically displays the commuting card to prompt departure.
Go-to-work time: You can set the Go-to-work time period as needed.
Back-to-home time: You can set the Back-to-home time period as needed.
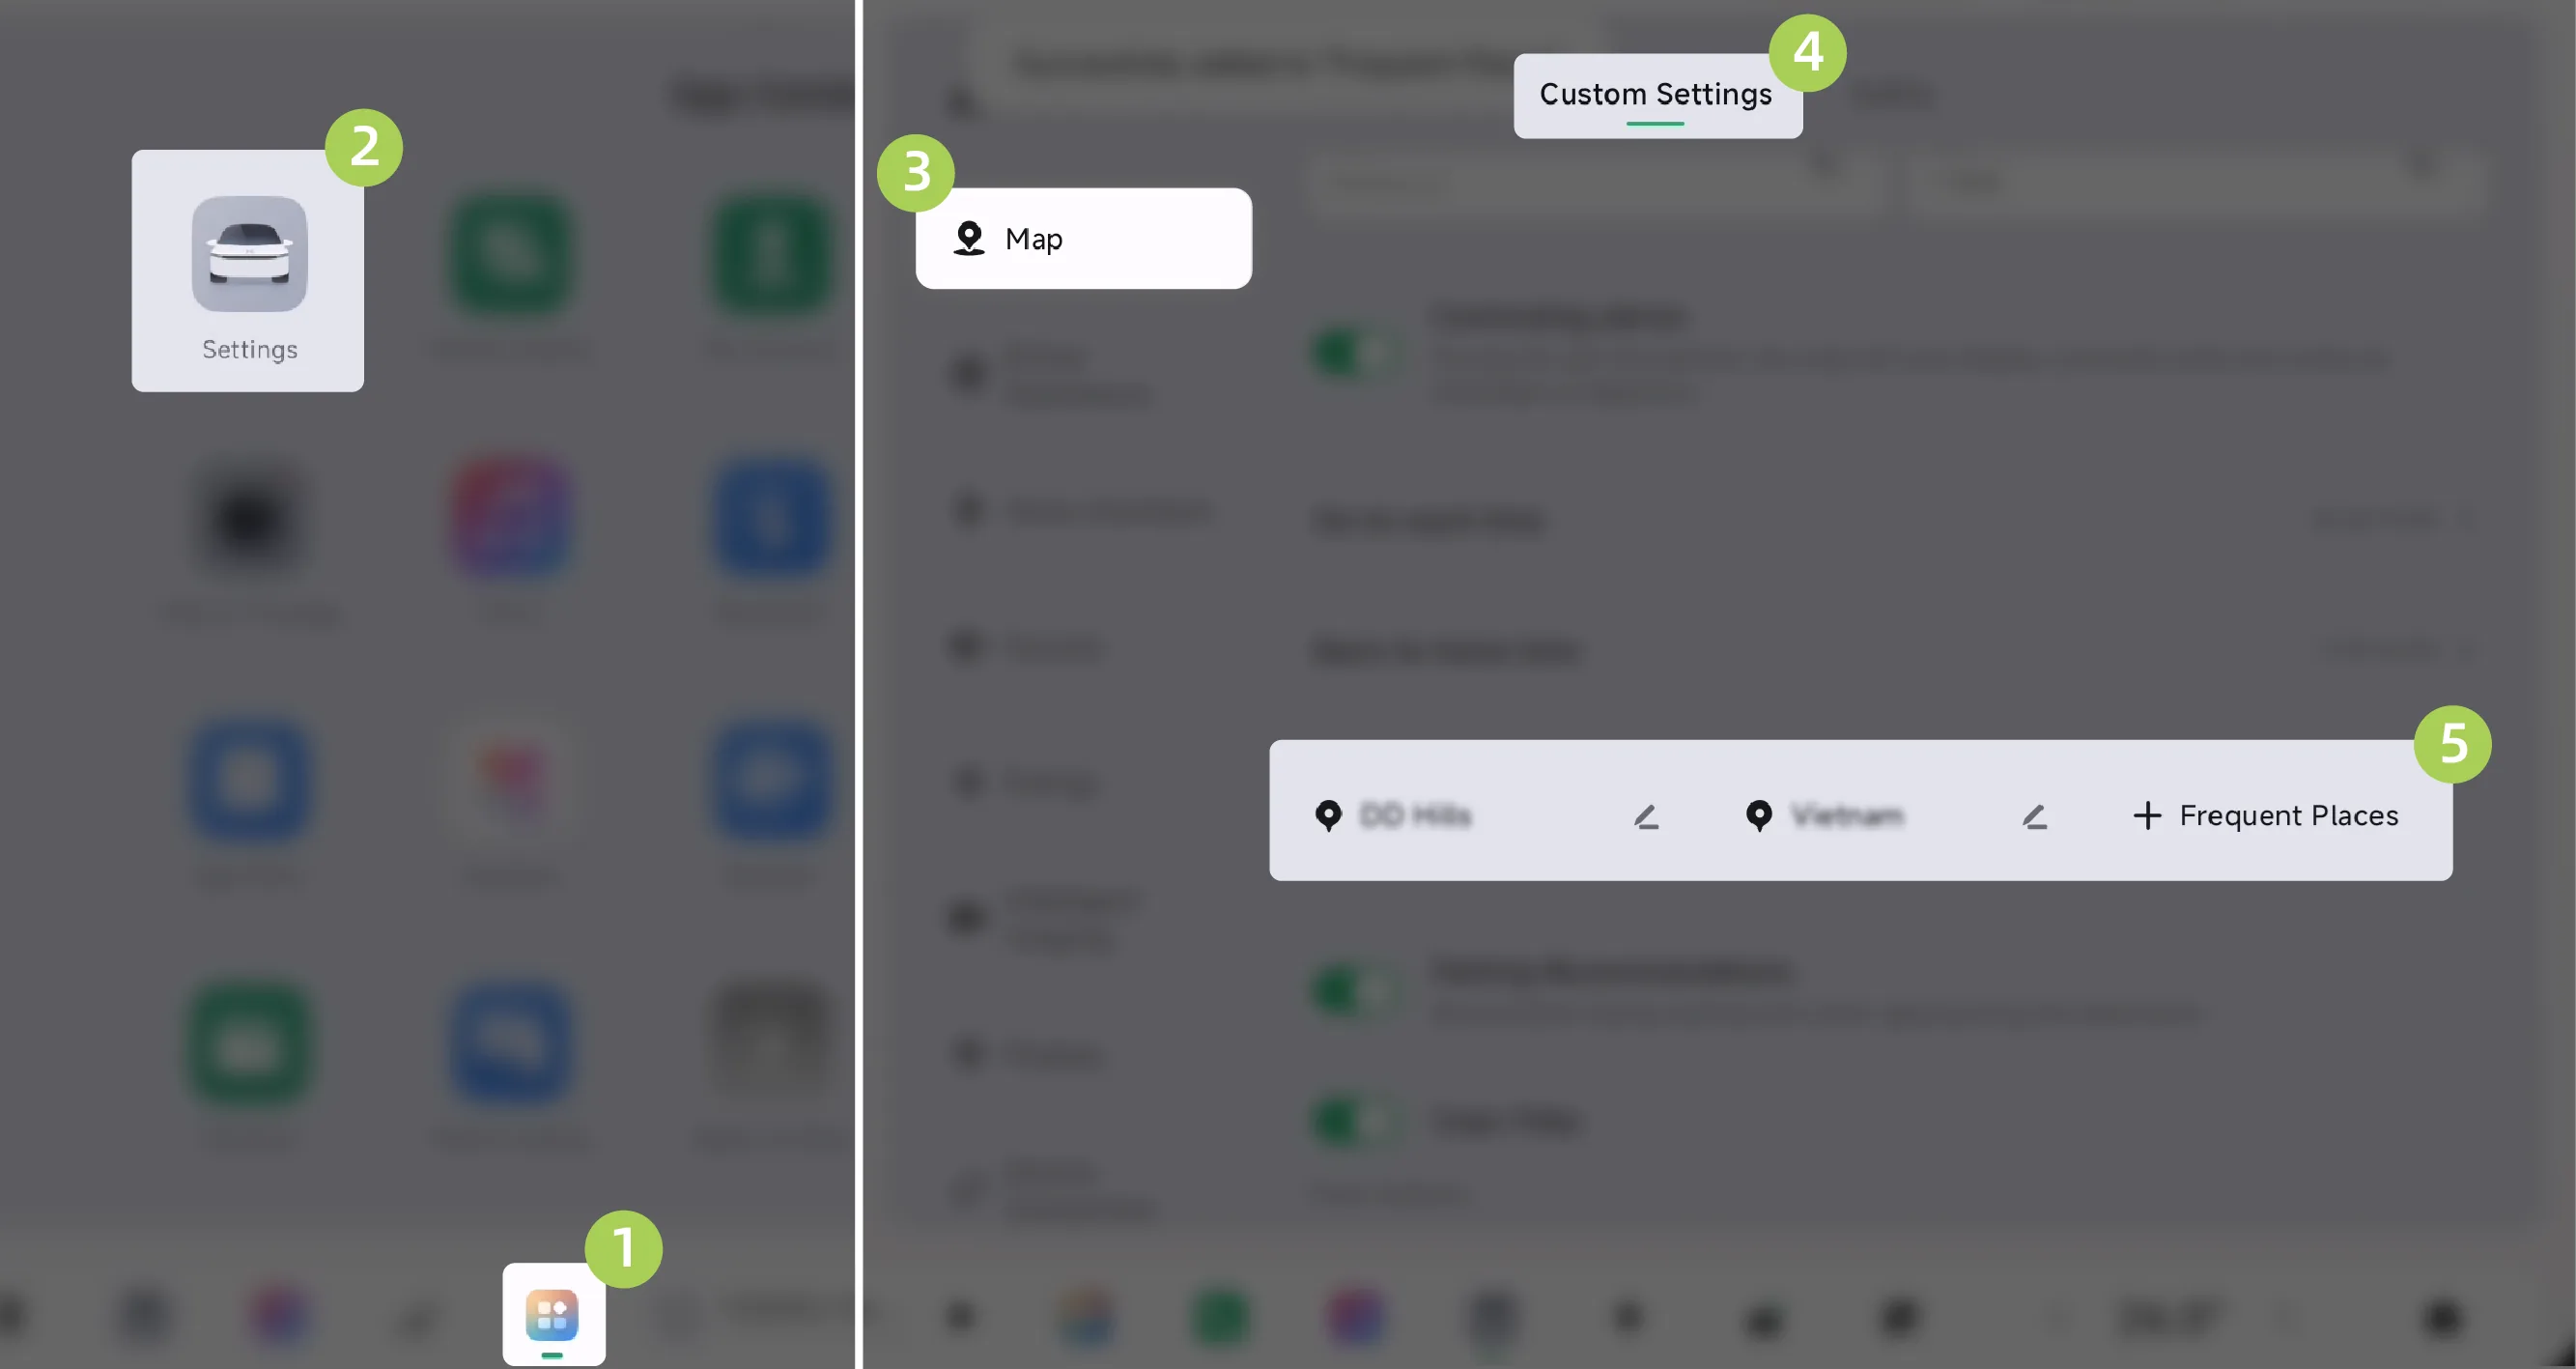
On the center control screen “ →Settings→Map→Custom Settings”On this screen, you can manage frequently visited places.
Add Frequent Destinations: Tap Enter an address on the map to search for and add the address of a frequently visited location.
Edit frequent locations: Select the frequent location to be updated. “ ”Icon. In the pop-up window, tap Edit to search again and add a new frequently visited location.
Delete frequent place: Select the frequent place that needs to be updated. “ ”Icon. In the pop-up window, tap Delete. After reading and acknowledging the content of the pop-up window, the selected frequently visited location can be deleted.
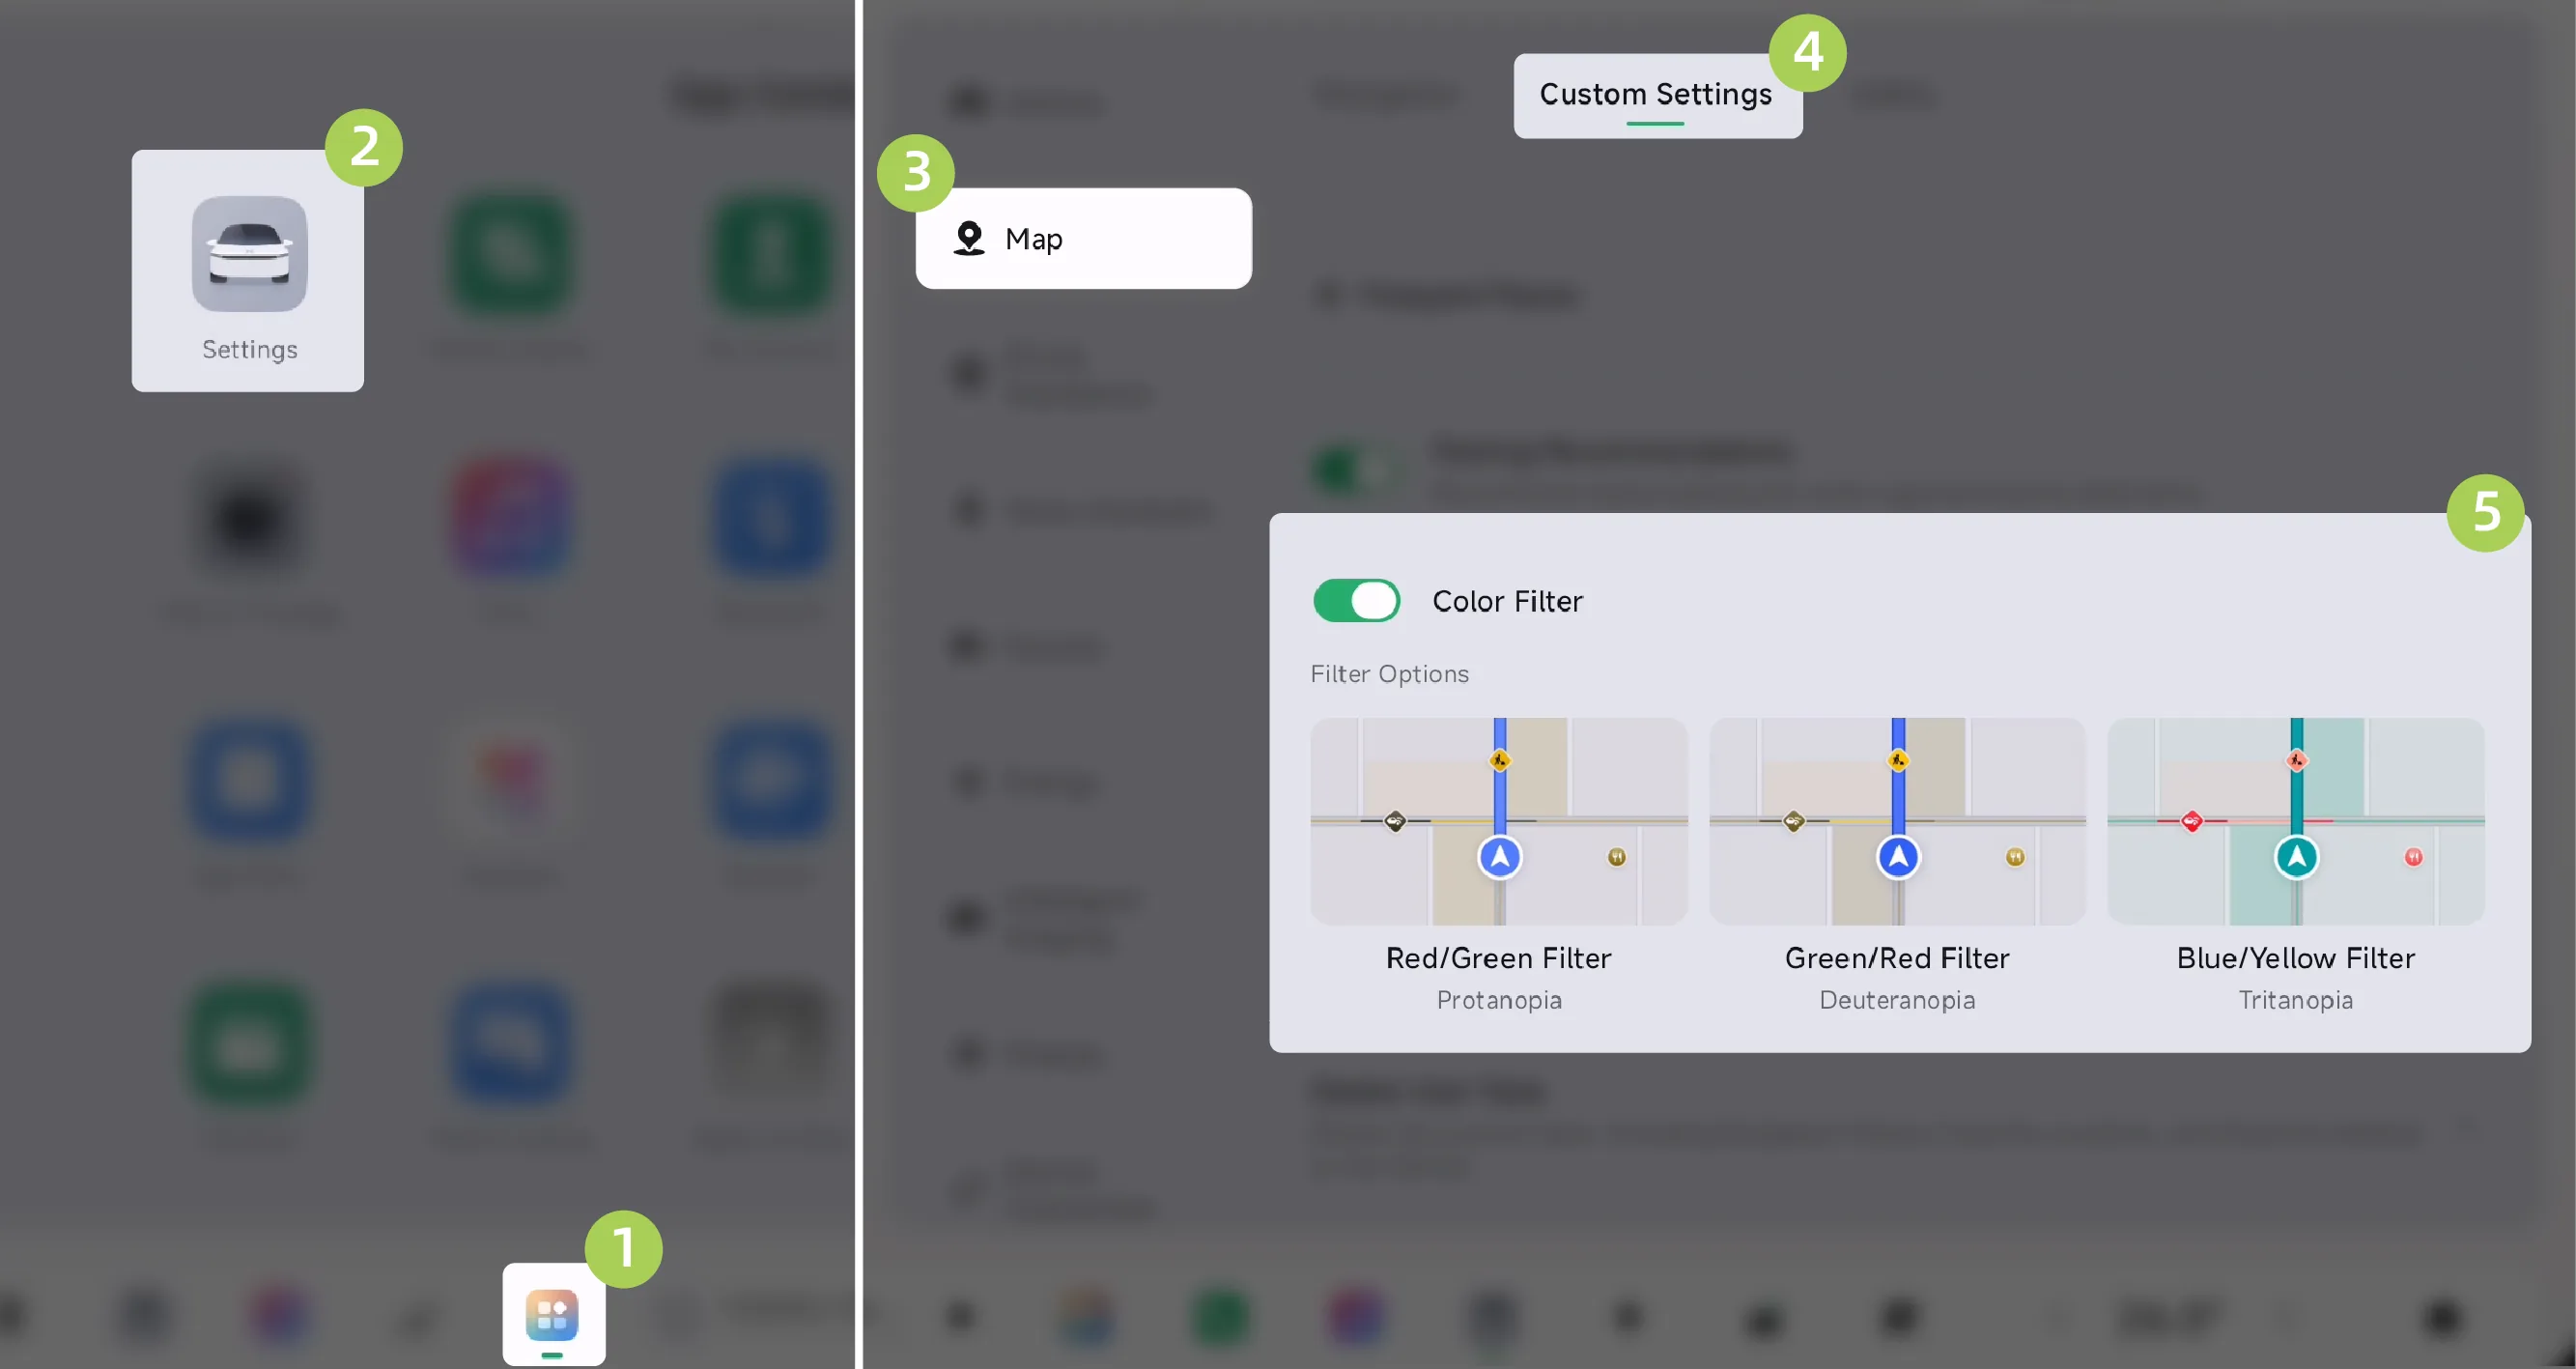
On the central control screen “ →Settings→Map→Custom Settings→Color Filter”Interface, where you can enable the color filter and select the filter mode.
The color filter helps users with different color vision needs distinguish map elements more clearly by adjusting the color display of the map interface. After enabling, you can in Filter OptionsSelect one of the following modes:
Red/Green Filter(Protanopia):Suitable for users with limited ability to distinguish red.
Green/Red Filter(Deuteranopia): Suitable for users with limited ability to distinguish green.
Blue/Yellow Filter(Tritanopia):Suitable for users with limited ability to distinguish blue and yellow.
Tips Color FilterThe switch is off by default, and no filter mode is selected by default. After this function is turned off, the map will return to Standard color display.
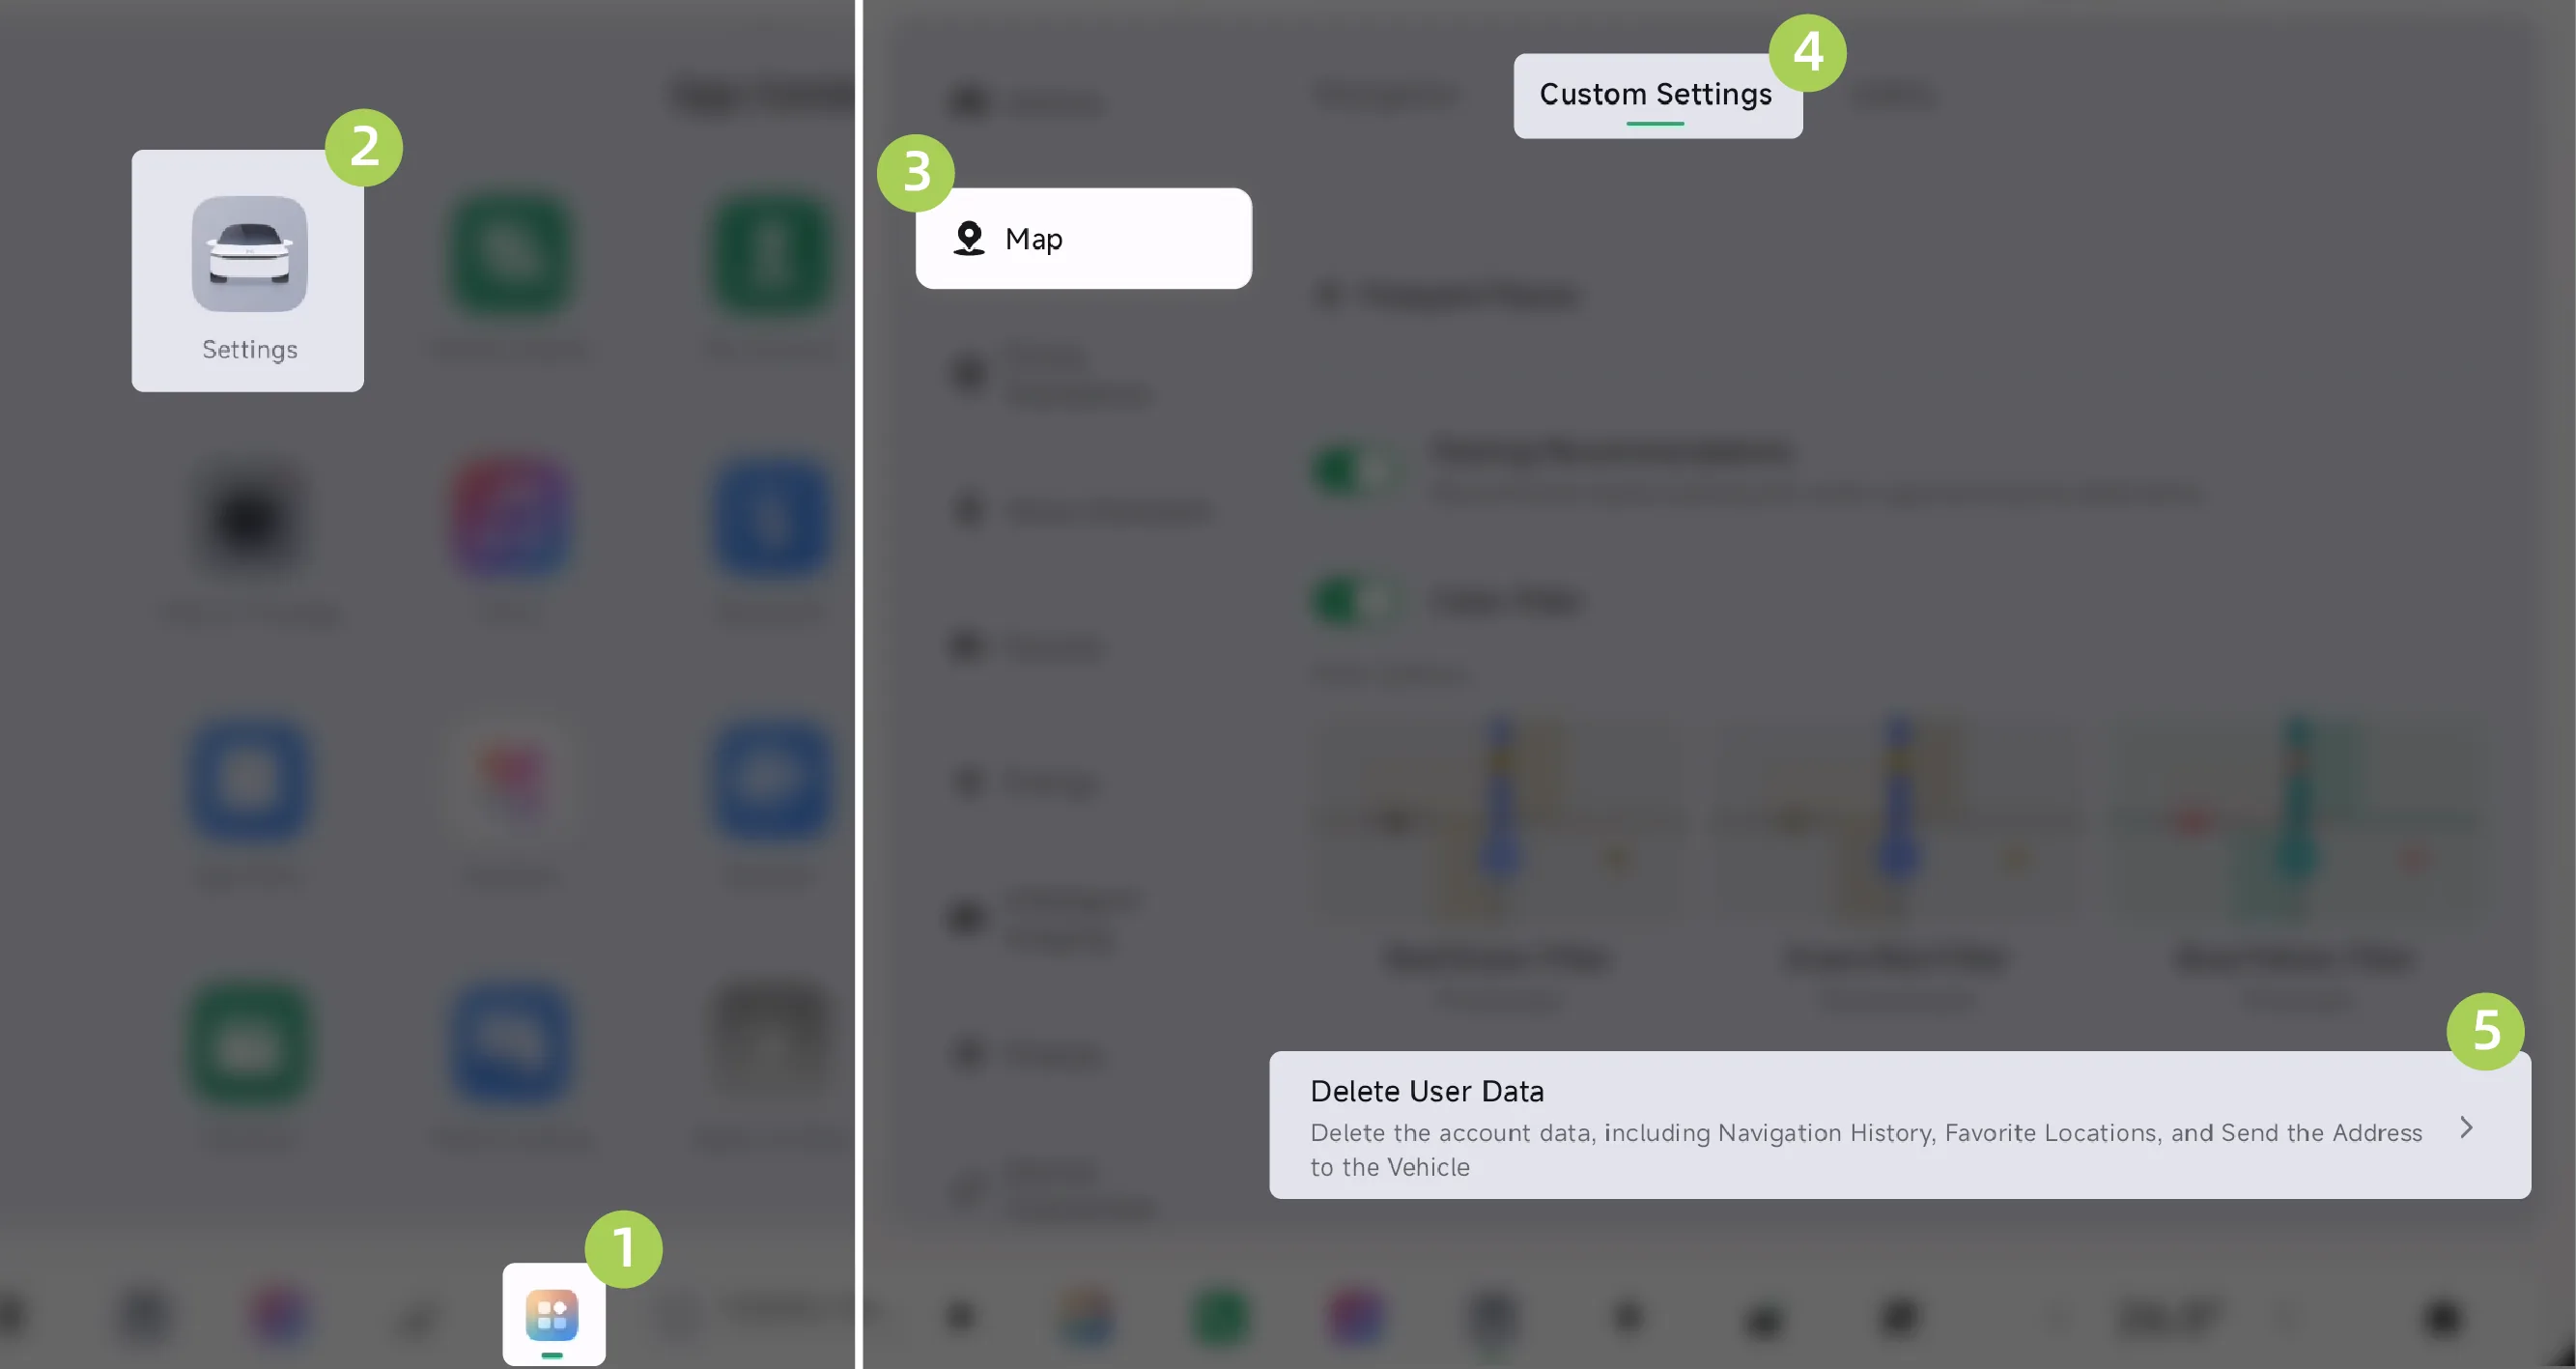
Tap on the center control screen in sequence. “ →Settins→Map→Custom Settings→Delete User Data”After reading and acknowledging the pop-up content, you can delete data on the account such as navigation history, favorite locations, and addresses sent to the vehicle.
When the vehicle is in P gear, the vehicle can monitor common vehicle body malfunctions in real time (such as abnormal tire pressure), and mark the specific malfunction location on the 3D vehicle body with a red indicator on the SR interface.
Warning The vehicle fault display only supports monitoring some common basic faults of the vehicle. Please do not rely on this function to monitor vehicle faults. If you discover any abnormalities in the vehicle, please contact the Xpeng Motors Service Center in a timely manner for resolution.
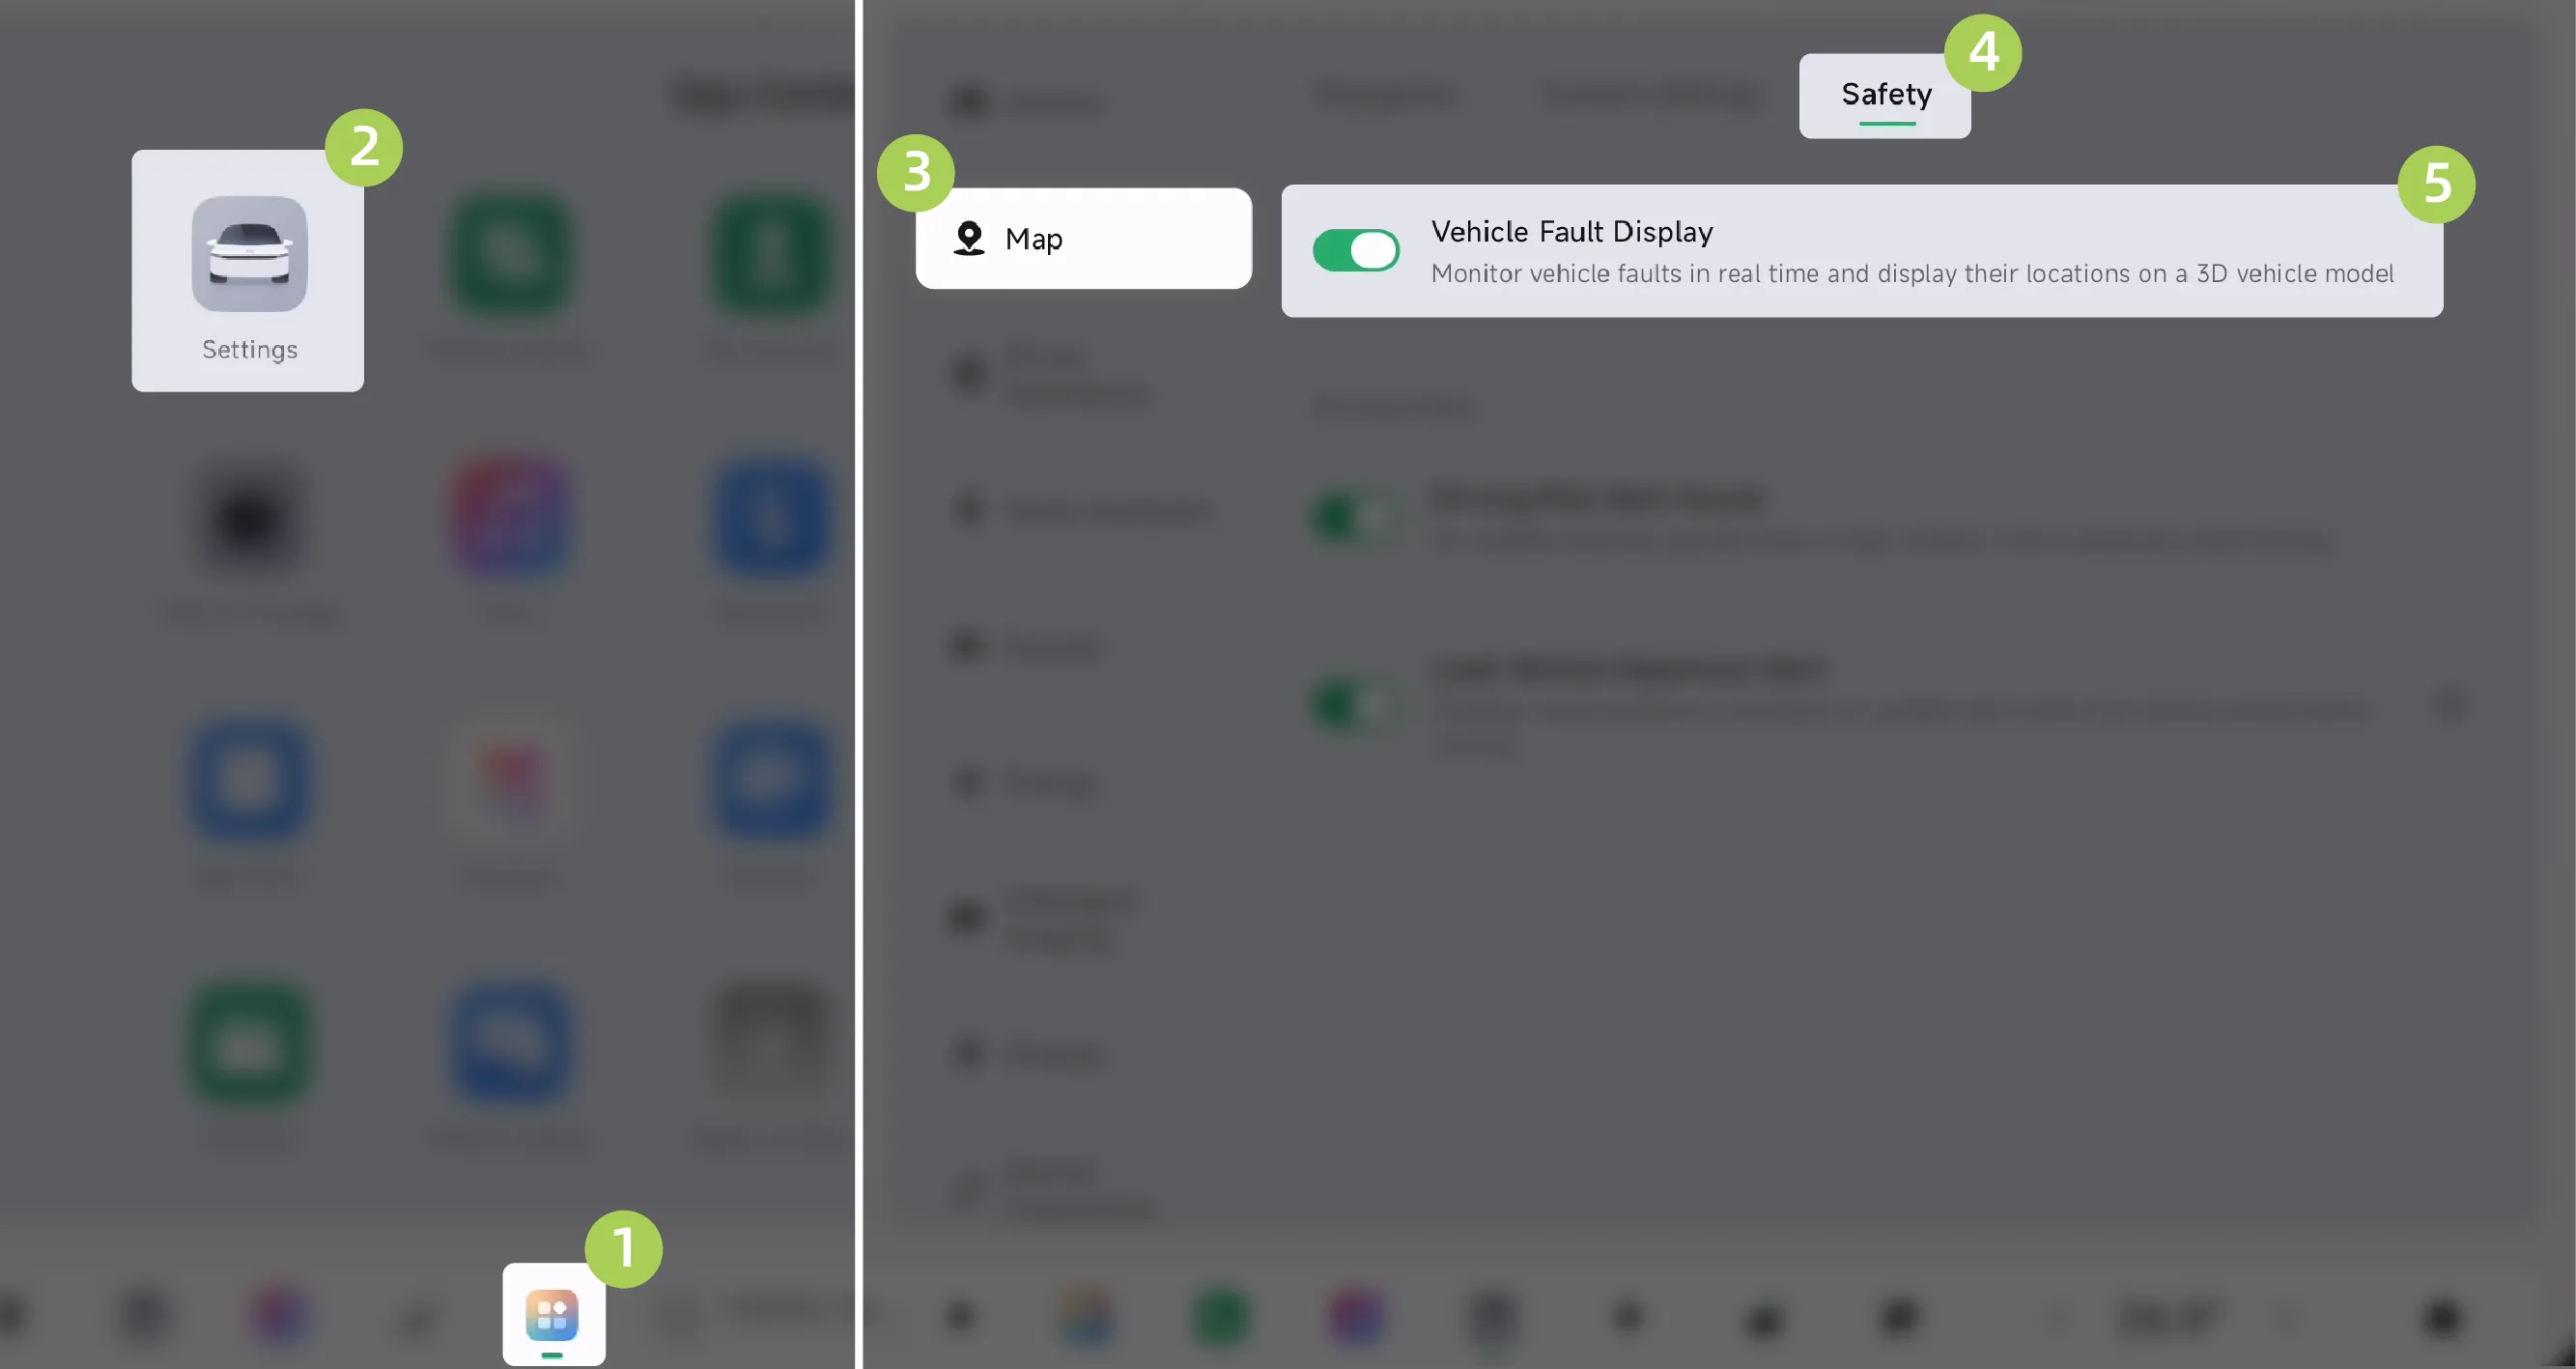
On the center control screen “ →Settings→Map→Safety”The interface can turn Vehicle Fault Display on/off.
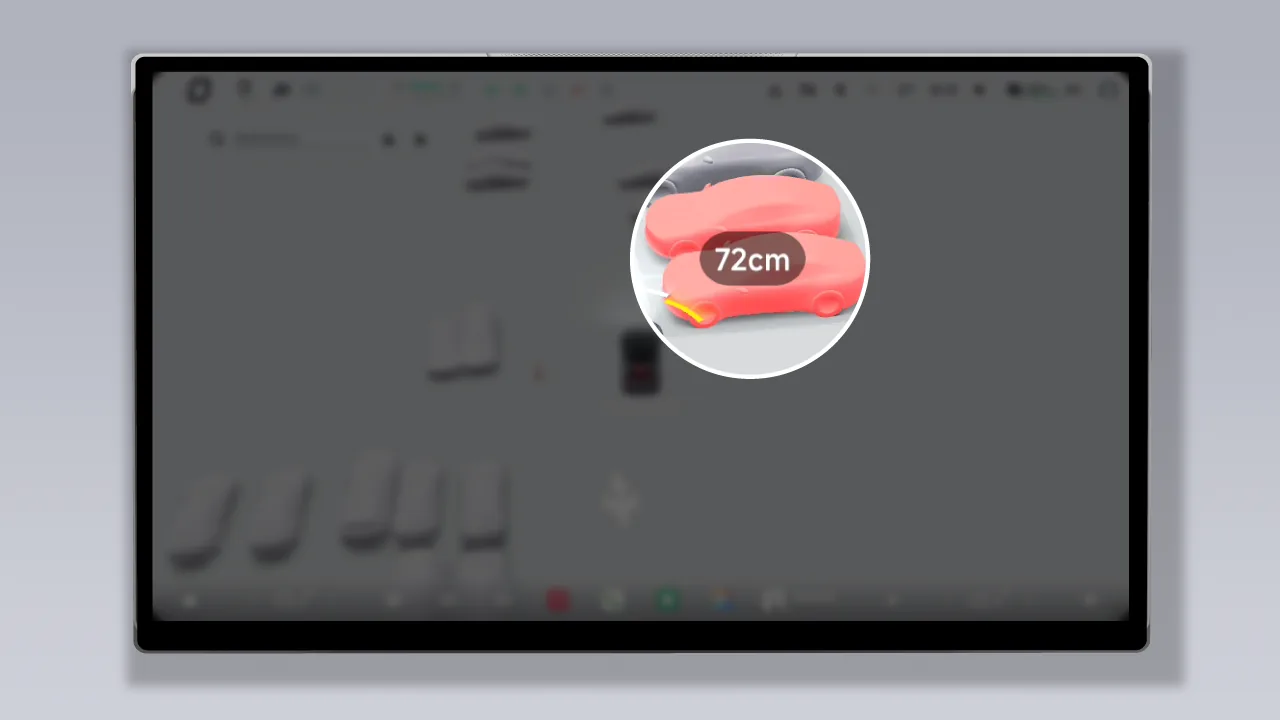
When assisted driving is not enabled and the vehicle is being driven in D Gear, if surrounding dynamic obstacles are relatively close to the vehicle or there is a potential safety risk, the SR interface will provide a warning alert.
Medium-risk alert obstacles will turn red, and high-risk alert obstacles will turn red and be accompanied by an alert sound.
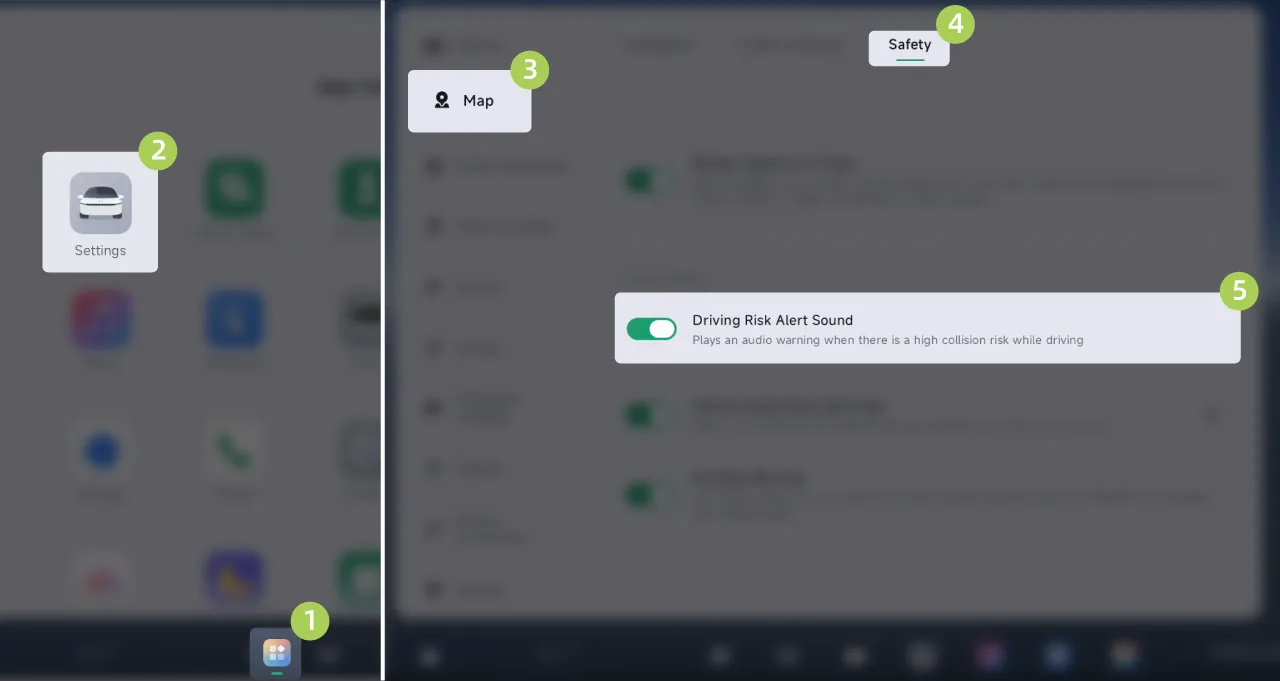
On the central control screen “ →Settings→Map→Safety”On the interface, you can turn Driving Risk Alert Sound on/off.
The Driving Risk Alert Sound is intended only as a warning reminder. The driver is responsible for observing the surrounding environment and making decisions accordingly.
Warning The Driving Risk Alert Sound may not be triggered under the following conditions, including but not limited to:
Radar or camera restricted.
On roads with sharp curves.
When driving on roads with poor road conditions.
The above warnings, cautions, and limitations do not describe all situations that may affect the normal operation of the Driving Risk Alert Sound.
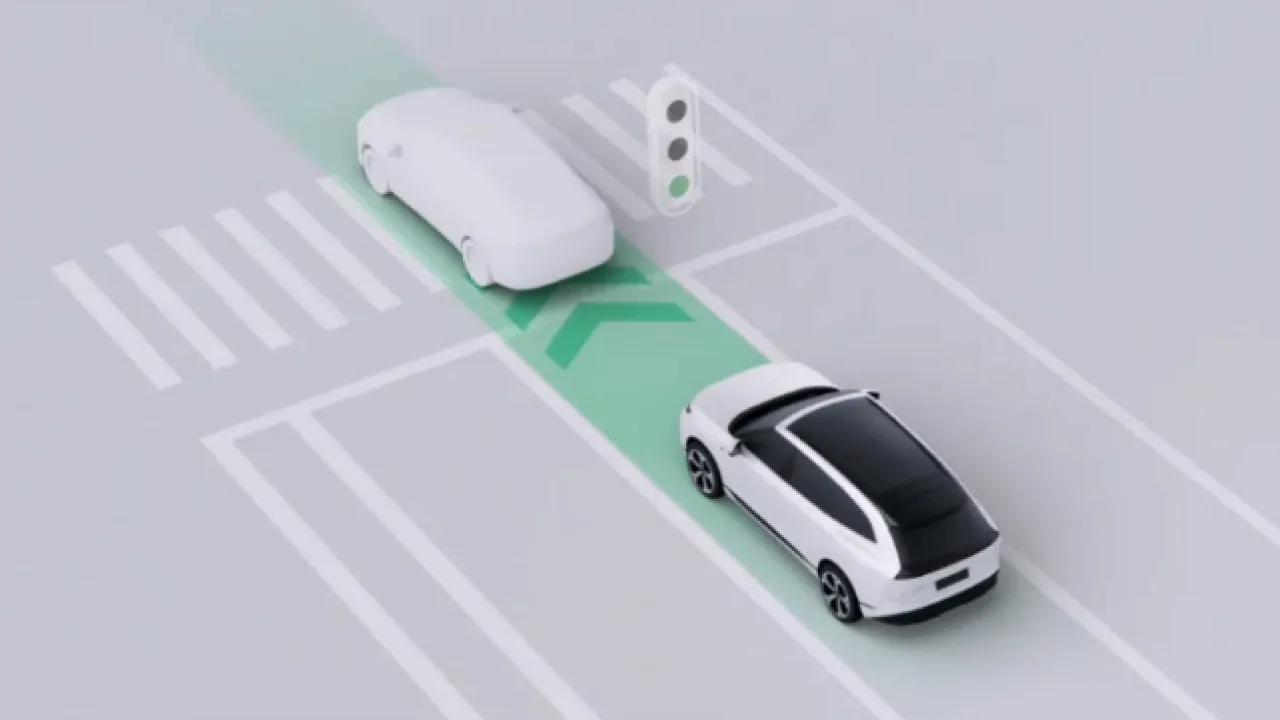
When driving assistance is not enabled and the vehicle is being driven in D Gear, if on a congested road section, after the preceding vehicle moves ahead a certain distance, the SR interface will display an animation effect and emit a prompt tone to remind the driver to start driving.
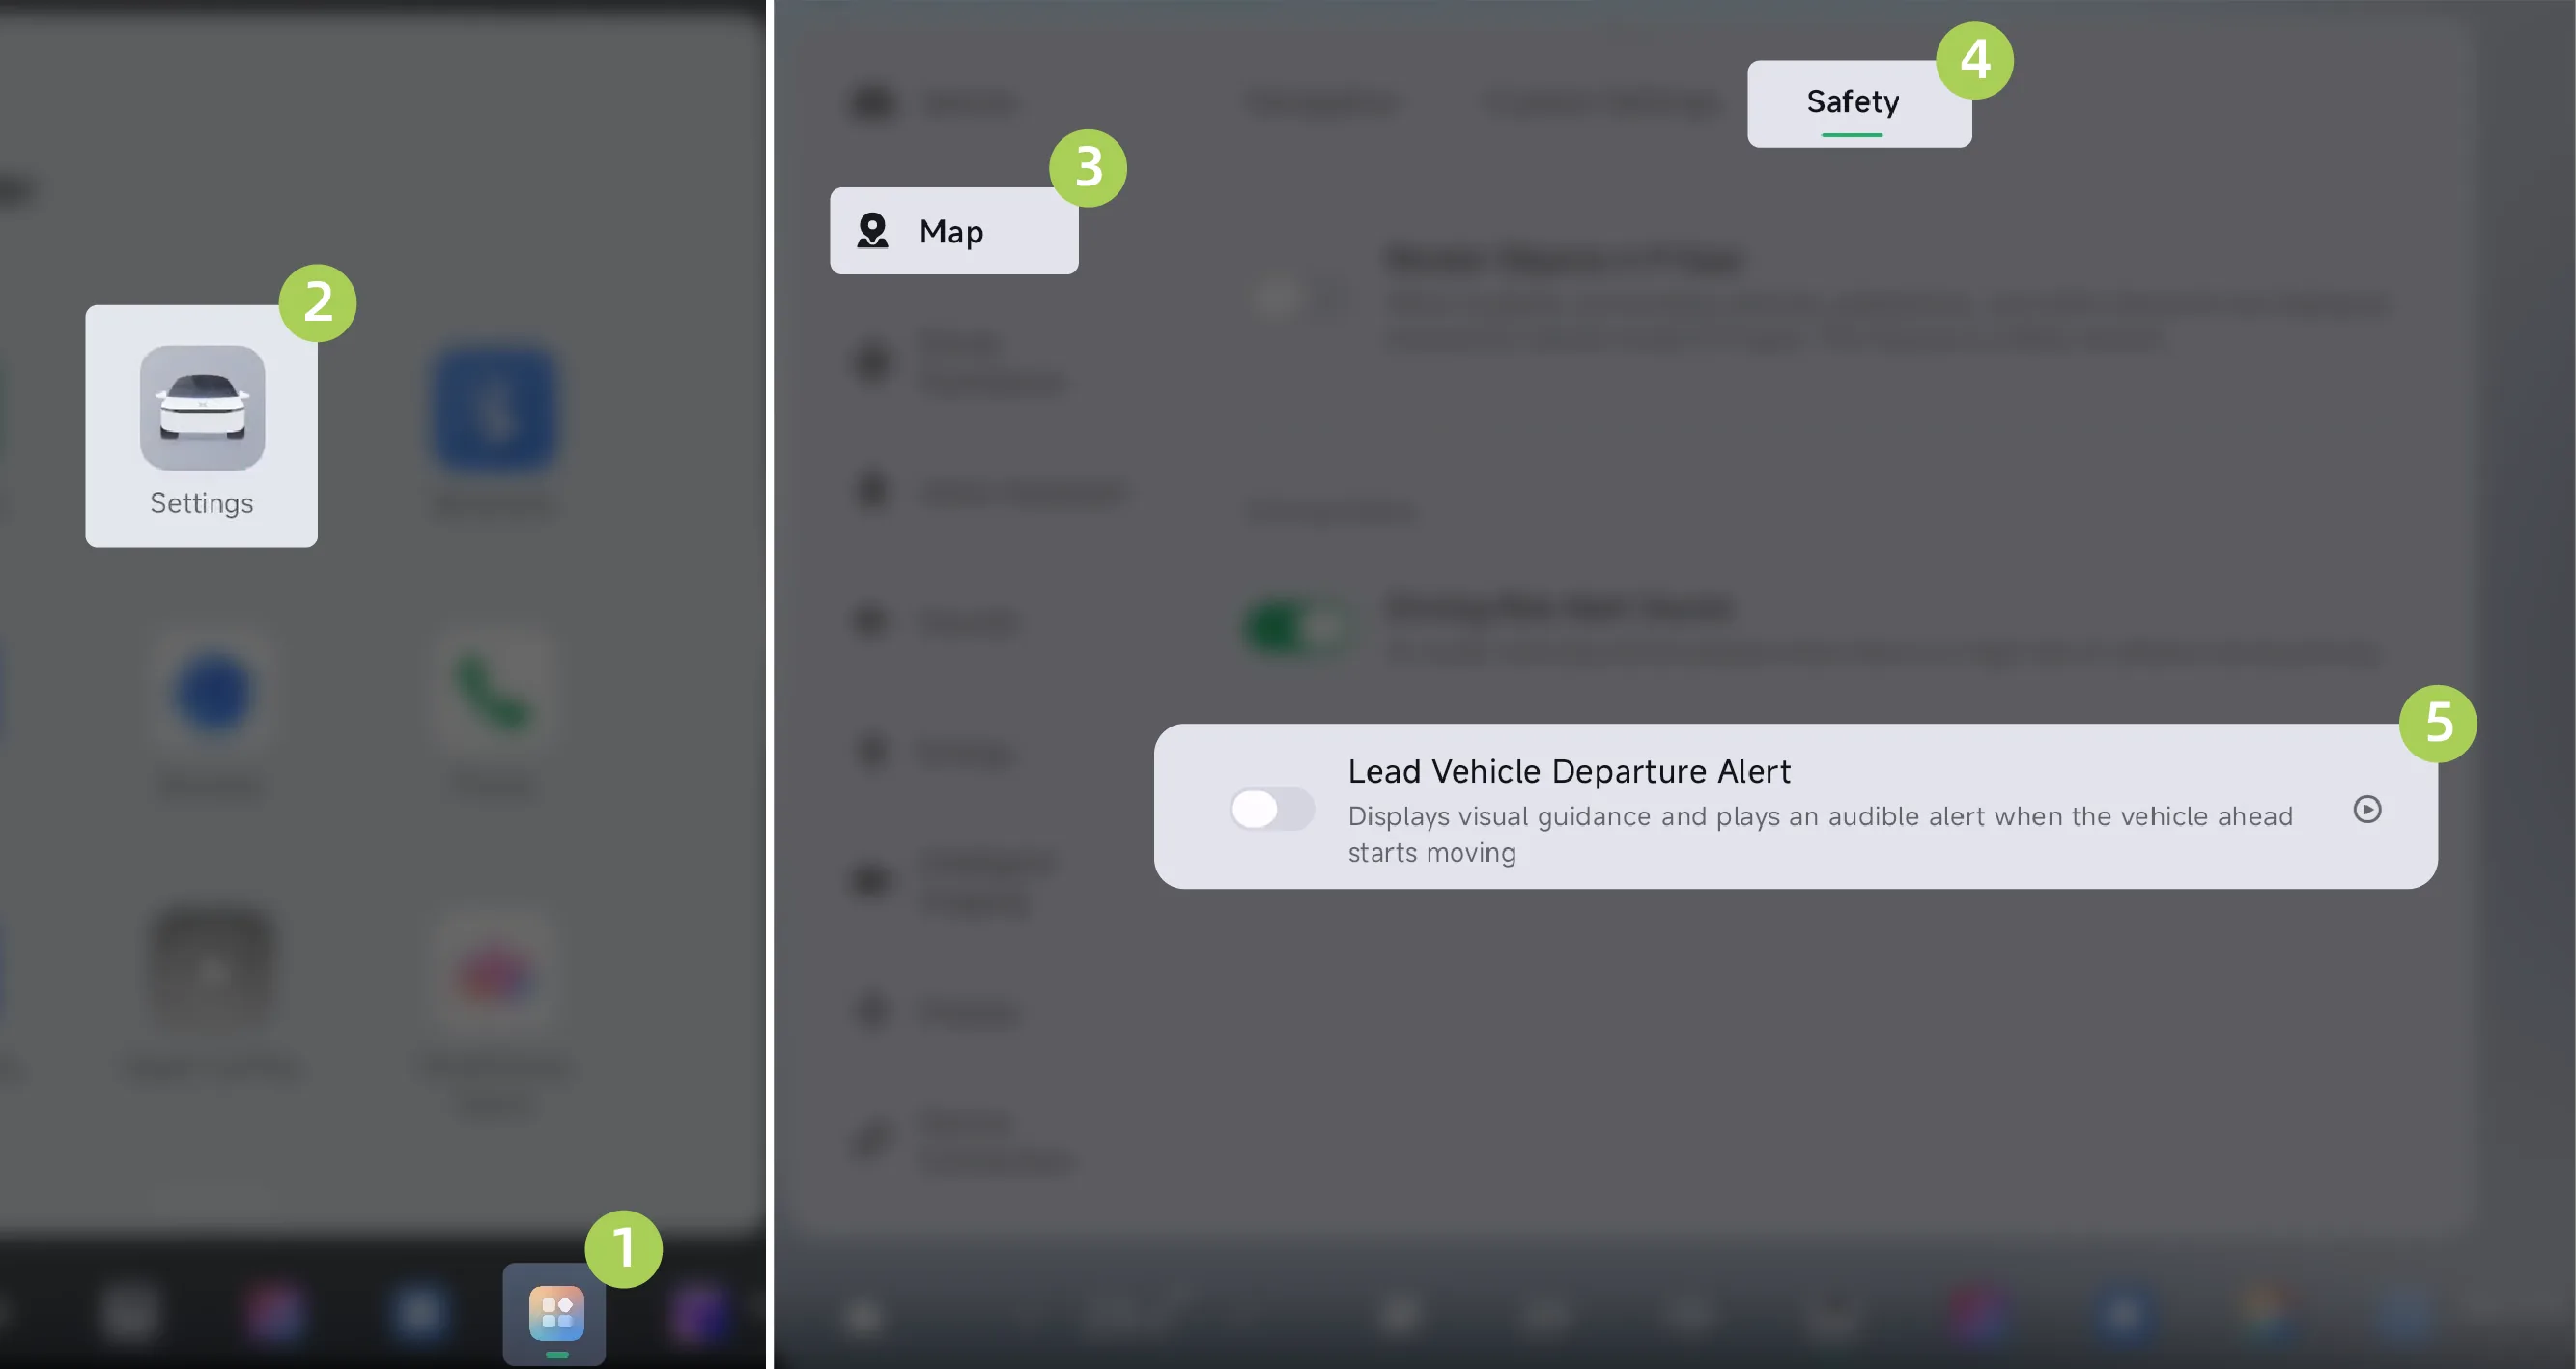
On the center control screen “ →Settings→Map→Safety”On the interface, you can turn Lead Vehicle Departure Alert on/off.
Warning There are pedestrians, bicycles, motorcycles, etc. in front of you.
No vehicles ahead.
The vehicle is in gear other than D.
The vehicle speed is greater than 0 km/h.
The vehicle in front is a long distance from the vehicle in front.
The front and rear vehicle are stationary for a short period of time.
Warning Poor visibility at night.
Poor visibility due to bad weather such as heavy rain, heavy snow, fog, sand, etc.
Intense light, back lighting, water reflective, extreme light contrast.
Camera restricted.
The above warnings, cautions, and limitations do not describe all situations that may affect the normal operation of Preceding Vehicle Starting Reminder.
When navigation is enabled, if the vehicle detects a water accumulation point on the road section ahead, the system will proactively remind you through the SR interface and recommend that you slow down or choose a detour.
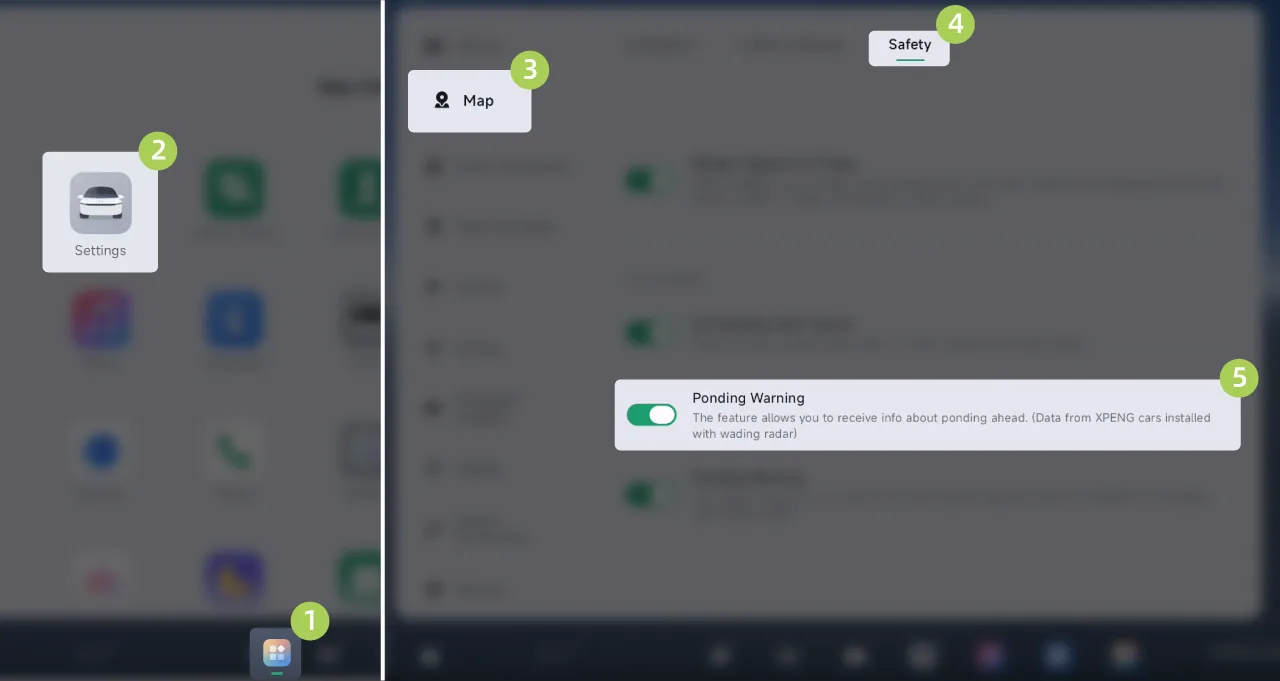
On the center control screen “ →Settings→Map→Safety”On the interface, you can turn ponding warning on/off.
Water accumulation point data comes from XPENG vehicles equipped with wading radar. If no XPENG vehicle has recently passed through the relevant road section and uploaded data, the system may be unable to provide water accumulation point alerts.
Warning Ponding warning is an auxiliary function and cannot replace the driver's observation and judgment of road conditions. The real-time performance and completeness of the data are affected by the coverage of reporting vehicles. The system cannot guarantee identification of all waterlogged road sections. Please always remain attentive while driving.
The above warnings, cautions, and limitations do not exhaustively describe all situations that affect the normal operation of the ponding warning.
360 Camera (AVM) captures the surroundings of the vehicle through the surround view cameras around the vehicle and displays them on the central control screen.
The surround view cameras are installed above the front and rear license plates and below the left and right Side Mirrors.
Warning AVM is an auxiliary function and can only provide reference information; it cannot replace the driver's observation of the surrounding environment. AVM cannot handle all traffic, weather, and road conditions. You, as the driver of the vehicle, are responsible for driving safety. Do not rely on this function to control the vehicle, otherwise injury may result.
 | Startup Safety Assist Fault |
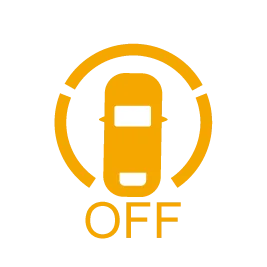 | Startup Safety Assist Off |
When reversing to start, if the ultrasonic radar malfunctions, the central control screen will light up Indicator light, please contact XPENG Service Center.
When reversing to start, when the ultrasonic radar is not enabled, the central control screen will light up Indicator light, please contact a XIAOPENG Service Center.
You can turn on the AVM function in any of the following ways:
When the vehicle gear is shifted to reverse gear (R gear), AVM turns on automatically.
Tap the bottom taskbar on the center display.  Icon (such as Settings).
Open AVM by voice command, for example, say keywords such as “Open 360 Camera”.
When the steering wheel shortcut button has been set to When, it can be opened using the steering wheel shortcut button.
You can turn off the AVM function in any of the following ways:
On the 360 Camera screen, tap on the center display screen. , can turn off 360 Camera.
Turn off AVM by voice command, for example by saying keywords such as “关闭 360 影像”.
When the steering wheel shortcut button has been set to When active, it can be turned off using the steering wheel shortcut button.
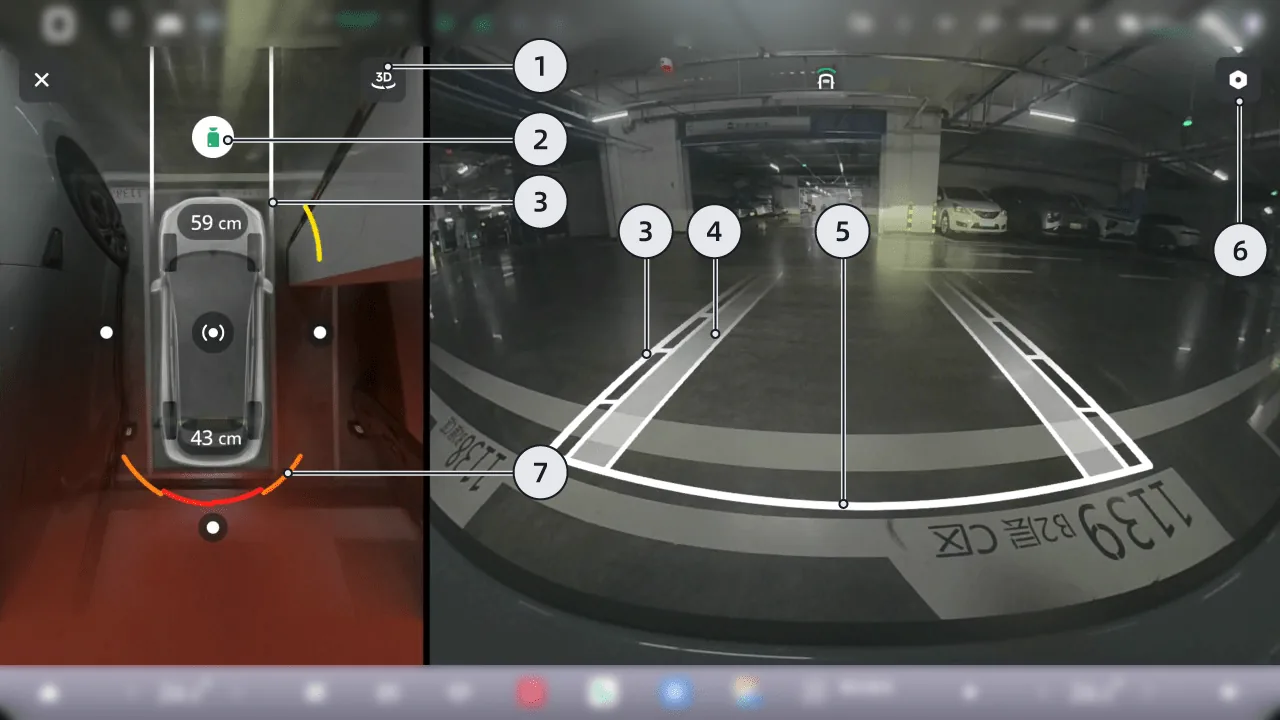
3D/2D mode switching.
View switching icon.
In 2D mode, through the vehicle model,  Switch to the front, rear, left, right, and wheel hub views.
If there is no operation on the screen within 5 seconds, the icon will automatically hide. Tap the view area to display it again.
Dynamic Guide Lines
Two thin white lines indicate the vehicle width.
In the front/rear view, segmented scale lines indicate the distance between the vehicle and the object.
The distances indicated by each scale line, from near to far, are approximately: 0.6 m, 1 m, and 1.5 m, respectively.
Tire Contact Patch
Indicates the wheel travel path.
Safety Stop Line
Indicates a position approximately 0.3 m from the vehicle.
Warning When the safety stop line comes into contact with an obstacle, stop the vehicle.
Image Settings
Tap  Will jump to Intelligent ImagingOn this page, settings related to image functions can be configured.
Radar Warning
Simulated display based on the distance and direction of obstacles.
When displayed in white, the distance is relatively far.
When displayed in red, the distance is already very close.
The distance between the vehicle and the nearest obstacle will also be displayed numerically at the front and rear of the vehicle, respectively.
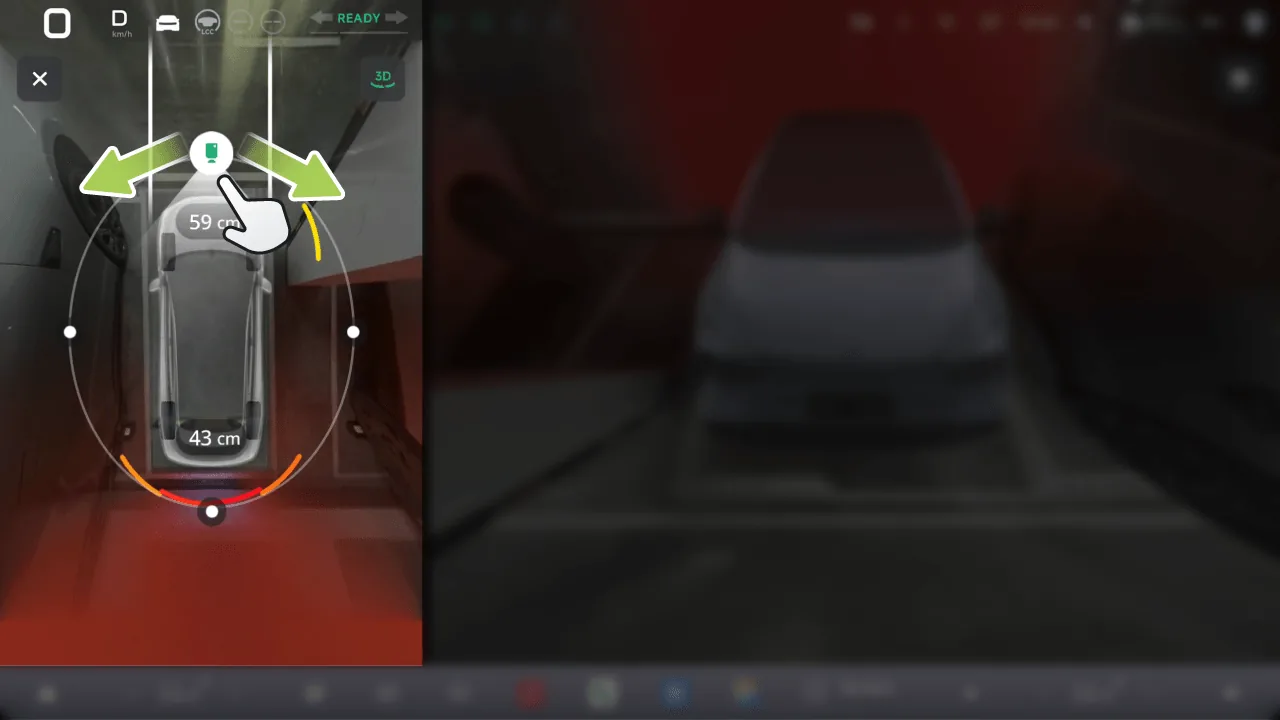
After switching to 3D mode, the system will integrate the 3D virtual vehicle model into the real environmental image.
Slide around the circular ring on the left-side vehicle model Or directly rotate the vehicle model on the right to achieve 360° free rotation.
If there is no operation on the screen within 5 seconds, the ring and icons will be automatically hidden. Tap the top view area to display the ring and icons again.
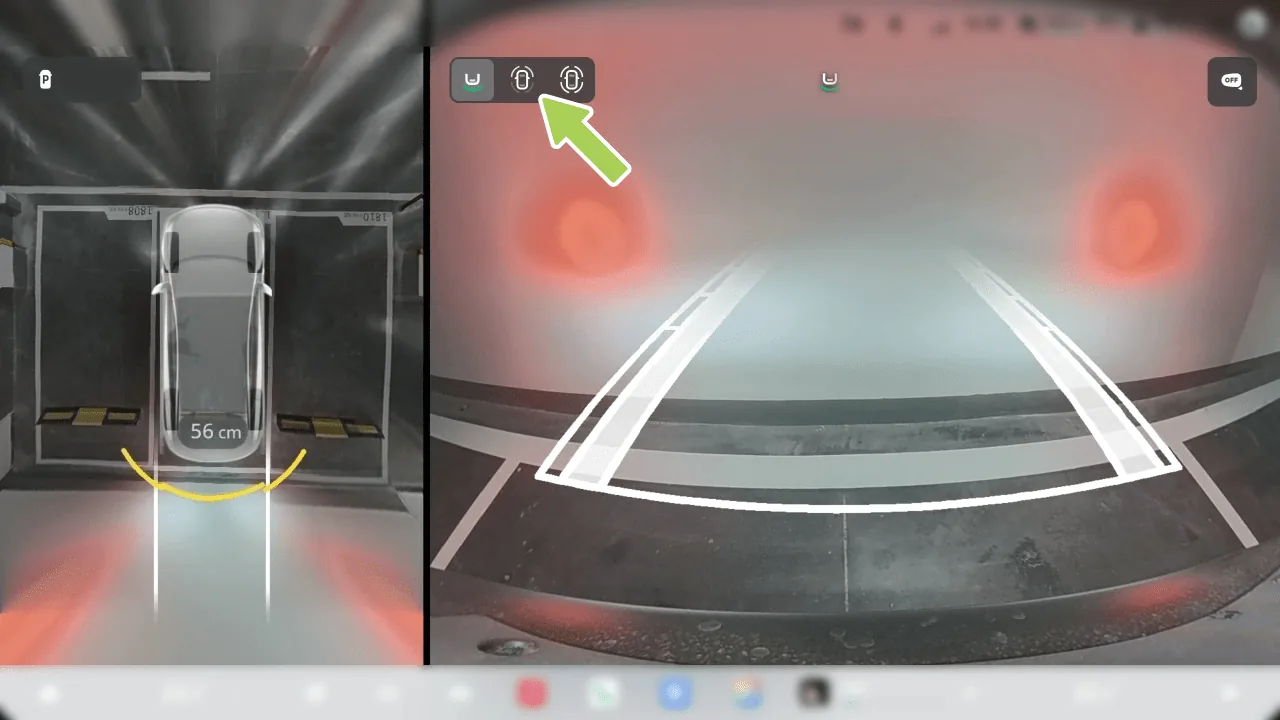
When reversing, you can tap the wheel hub view switch icon on the center display to switch between the rear view, front wheel hub view, and front and rear wheel hub view.
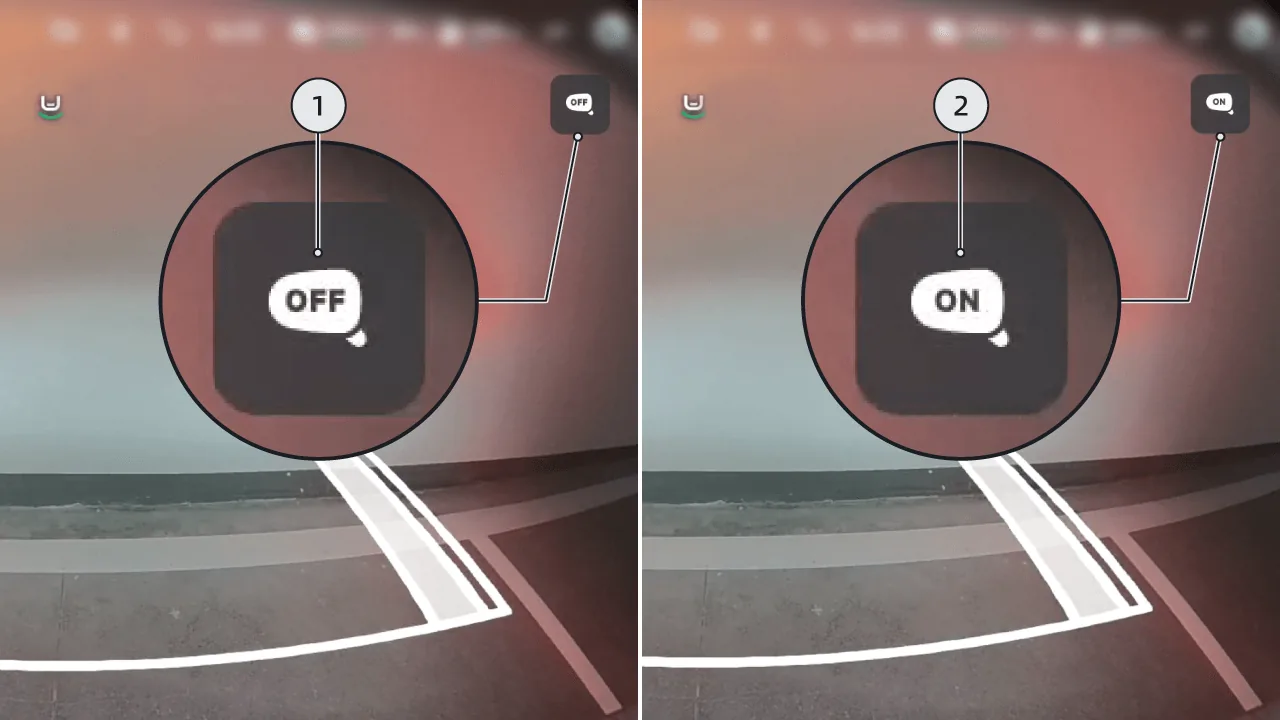
 : Indicates that the Side Mirrors are in the unfolded state.
 : Indicates that the Side Mirrors are in the folded state.
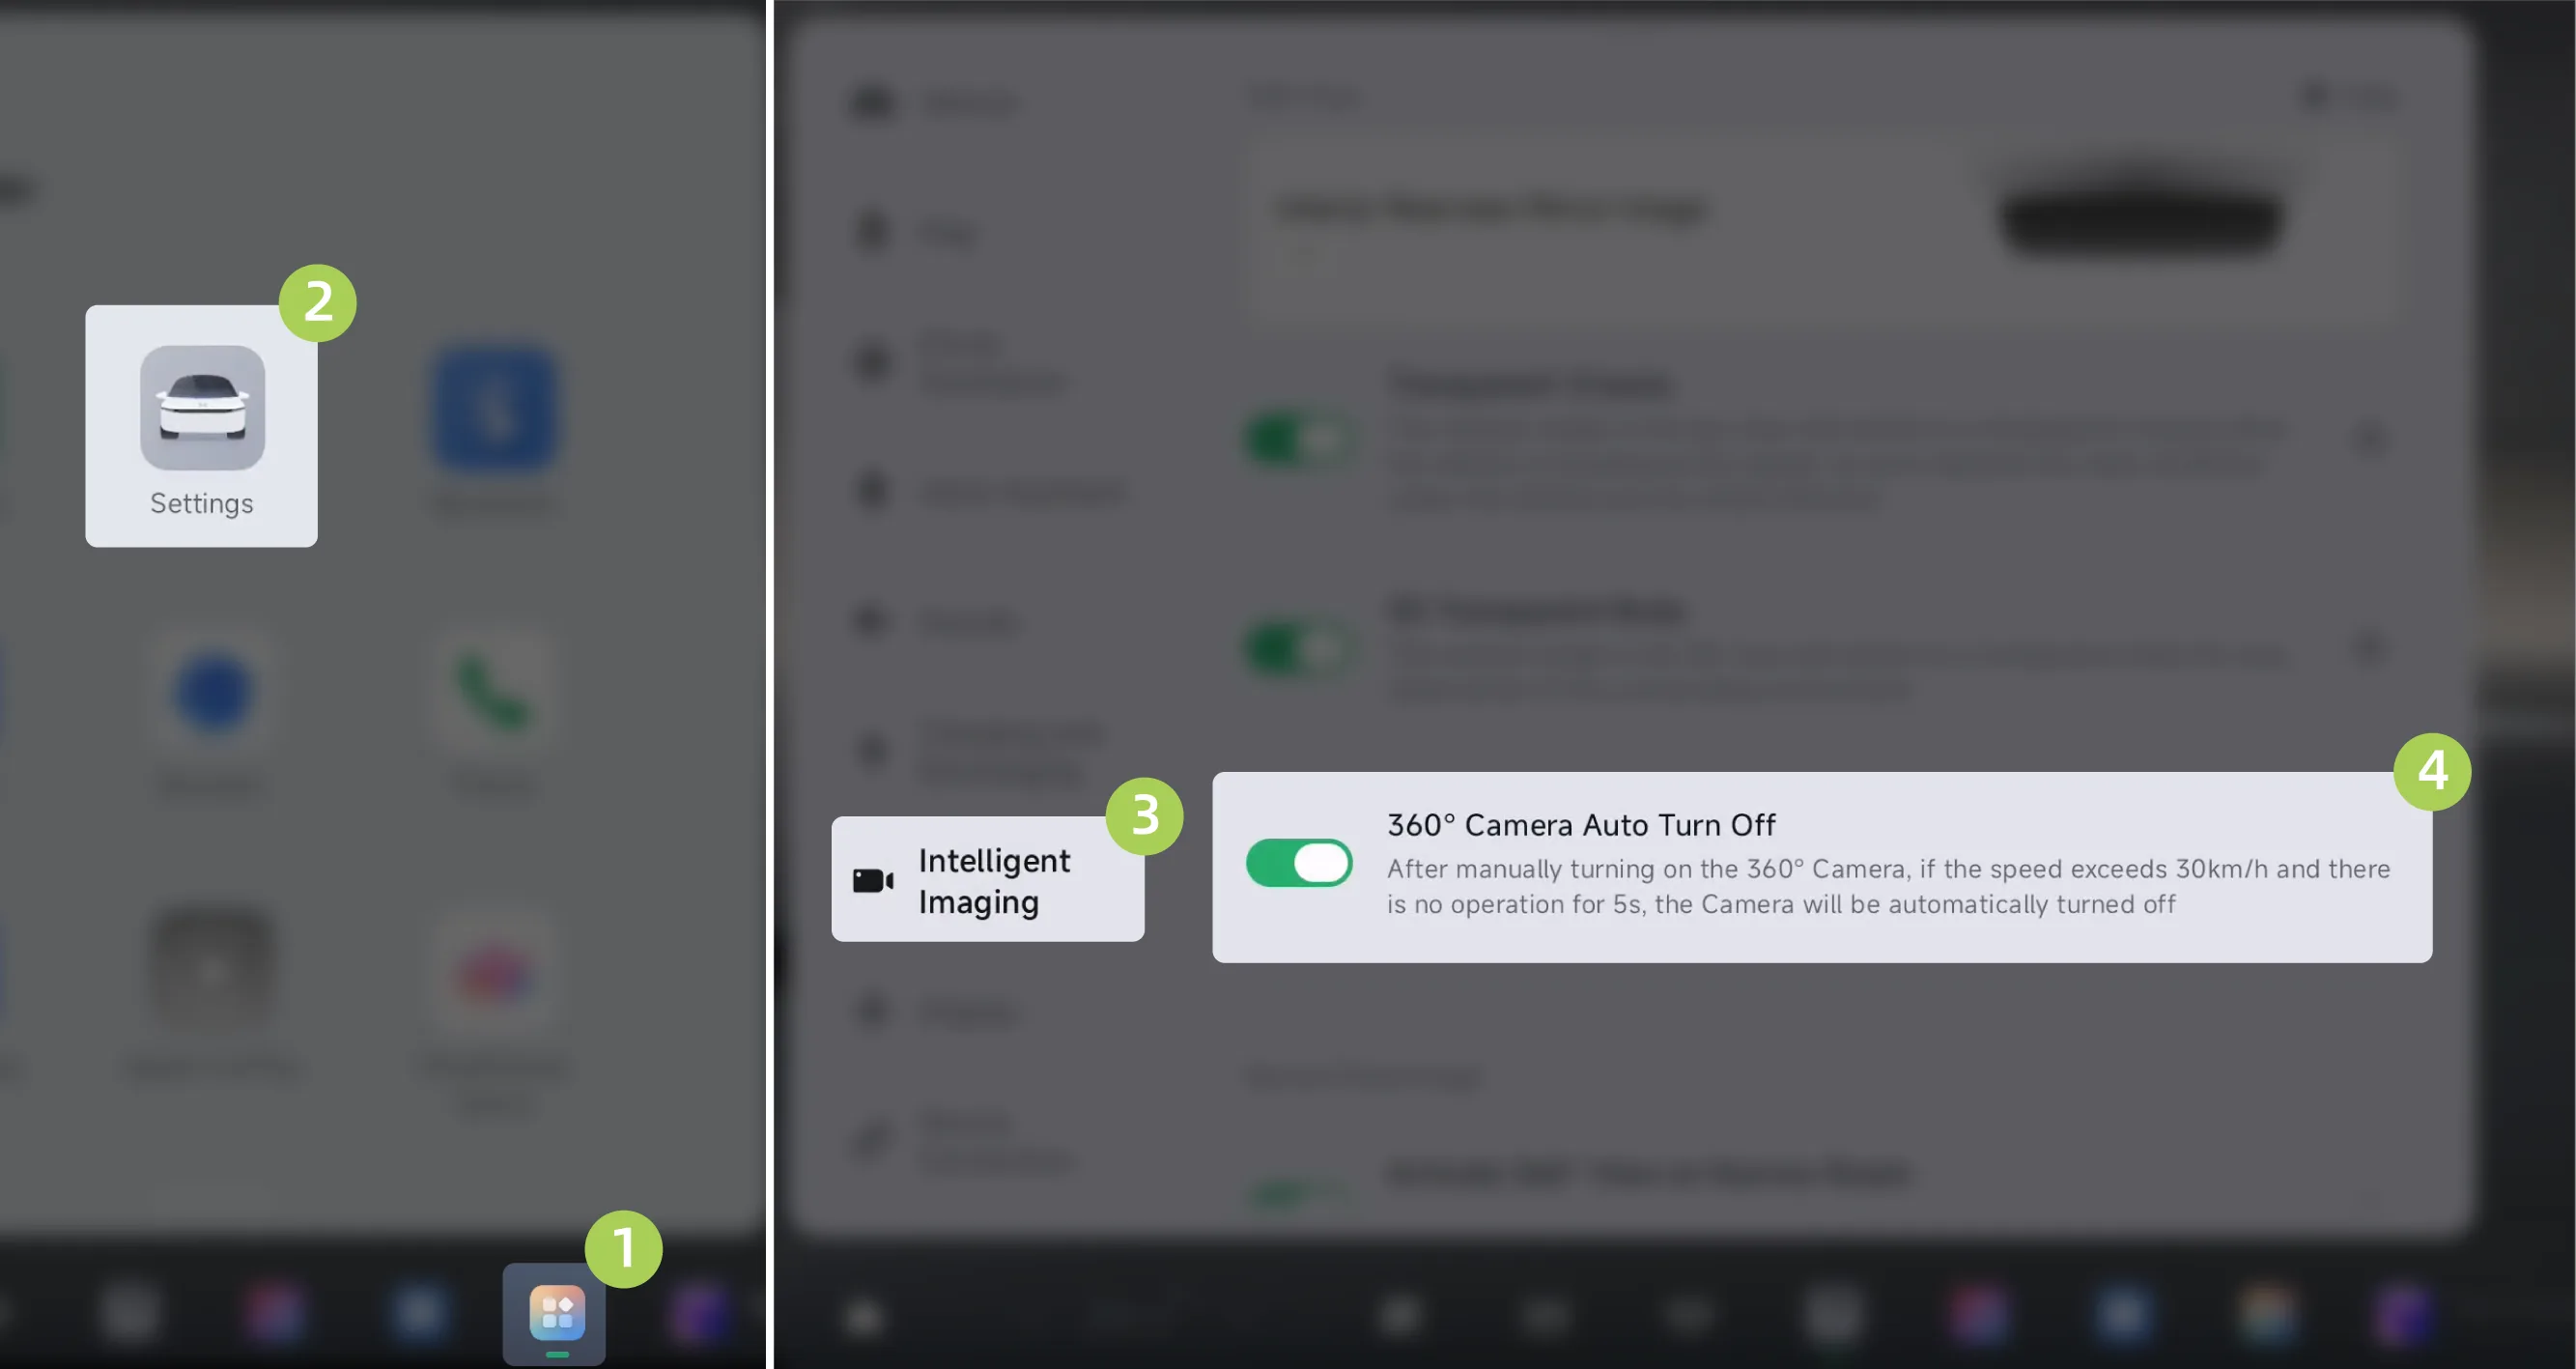
On the center control screen “ →Settings→Intelligent Imaging”Interface, can be opened/closed 。
After the function is enabled, manually turn on 360 Camera. If the speed exceeds 30 km/h and there is no operation for 5 seconds, 360 Camera will automatically turn off.
Caution If the ultrasonic radar malfunctions while reversing, the central control screen will display a text prompt: “xx sensor malfunction, Please drive with caution and contact customer service”。
Caution If the camera malfunctions while reversing, the AVM screen will display the following conditions:
Single camera malfunction; the corresponding display turns green.
When multiple cameras malfunction or the system malfunctions, the entire screen turns green.
Warning Camera restricted.
Camera blocked (dust, cover, etc.) or poor weather conditions (e.g. heavy rain, heavy snow, heavy fog).
The above warnings, cautions, and limitations do not describe all situations that affect the normal operation of AVM.
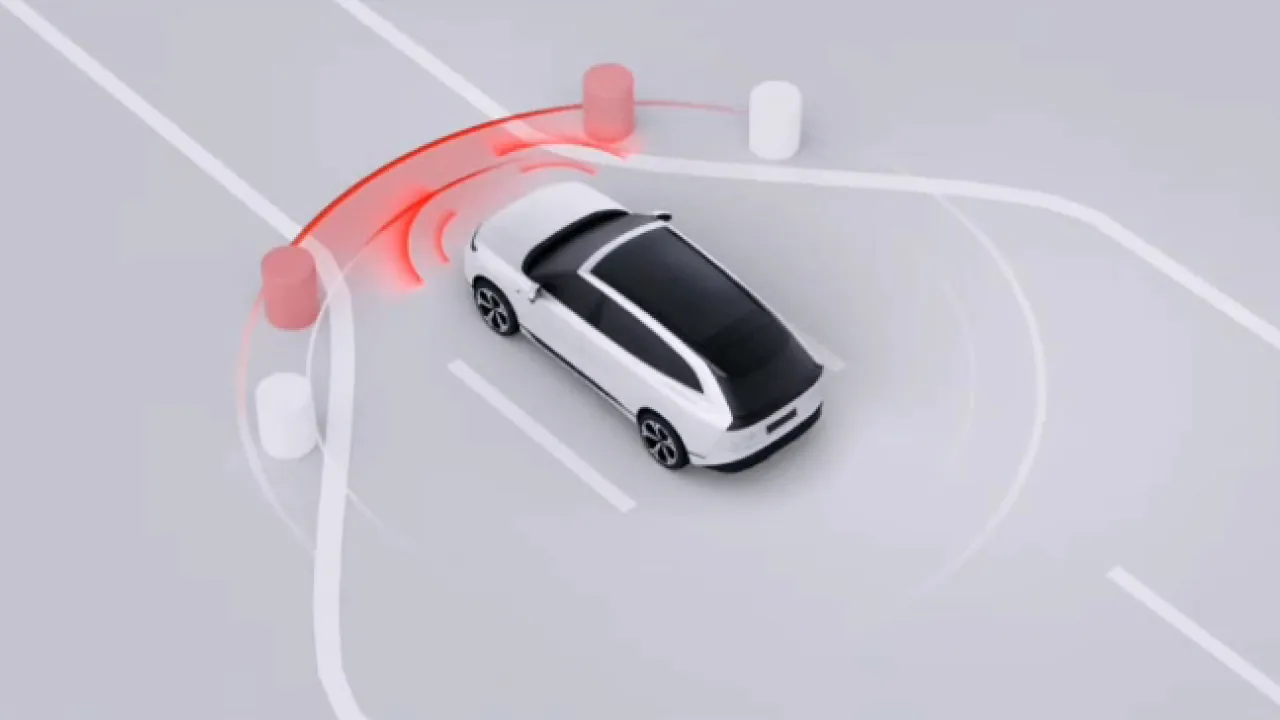
When the vehicle is in D Gear and the vehicle speed is less than 15 km/h, if obstacles are detected on both sides at the front or rear of the vehicle, the vehicle will activate Activate Panoramic Image on Narrow Roads to assist driving.
Warning Activate Panoramic Image on Narrow Roads is an assistance function and can only provide reference; it cannot replace the driver's observation of the surrounding environment. Activate Panoramic Image on Narrow Roads cannot handle all traffic, weather, and road conditions. As the driver of the vehicle, you are responsible for driving safety. Do not rely on this function to control the vehicle, otherwise injury may result.
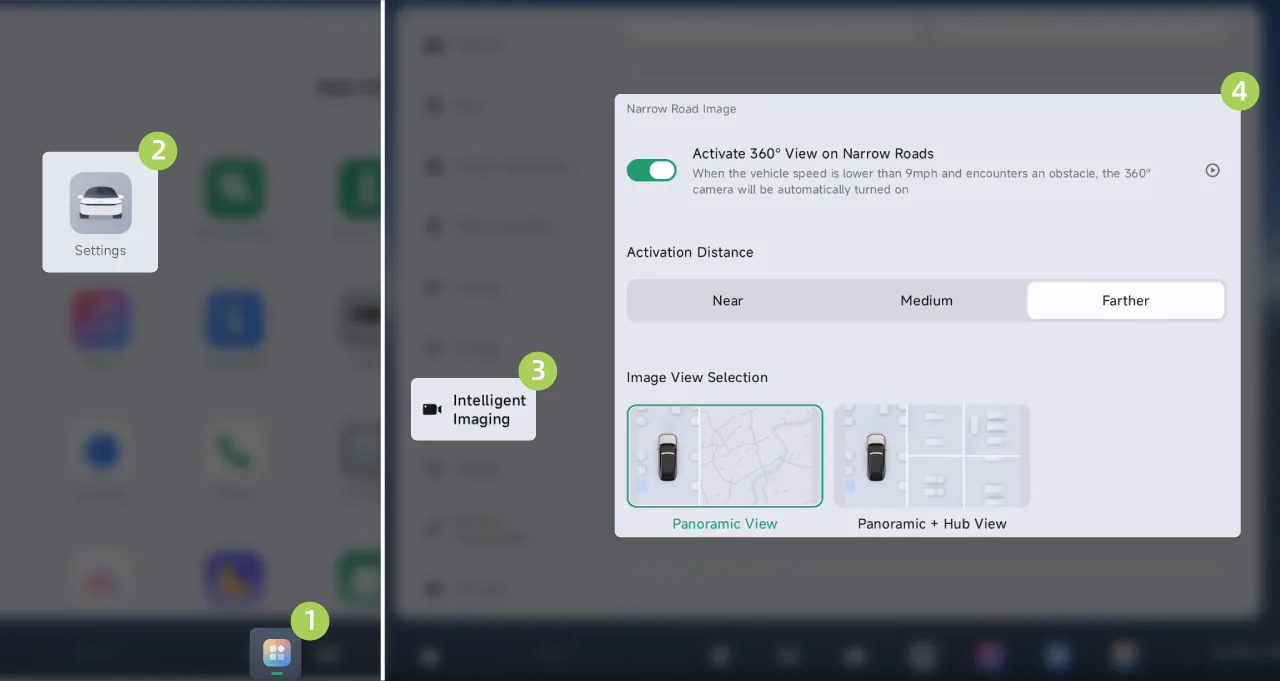
Tap the center control screen in sequence. “ →Settings→Intelligent Imaging”Interface, can be opened/closed You can also select the activation distance and image view angle according to your driving habits.
The activation distance options are Short, approximately 50 cm; Medium, approximately 60 cm; and Long, approximately 75 cm.
Selectable Image View Angles or 。
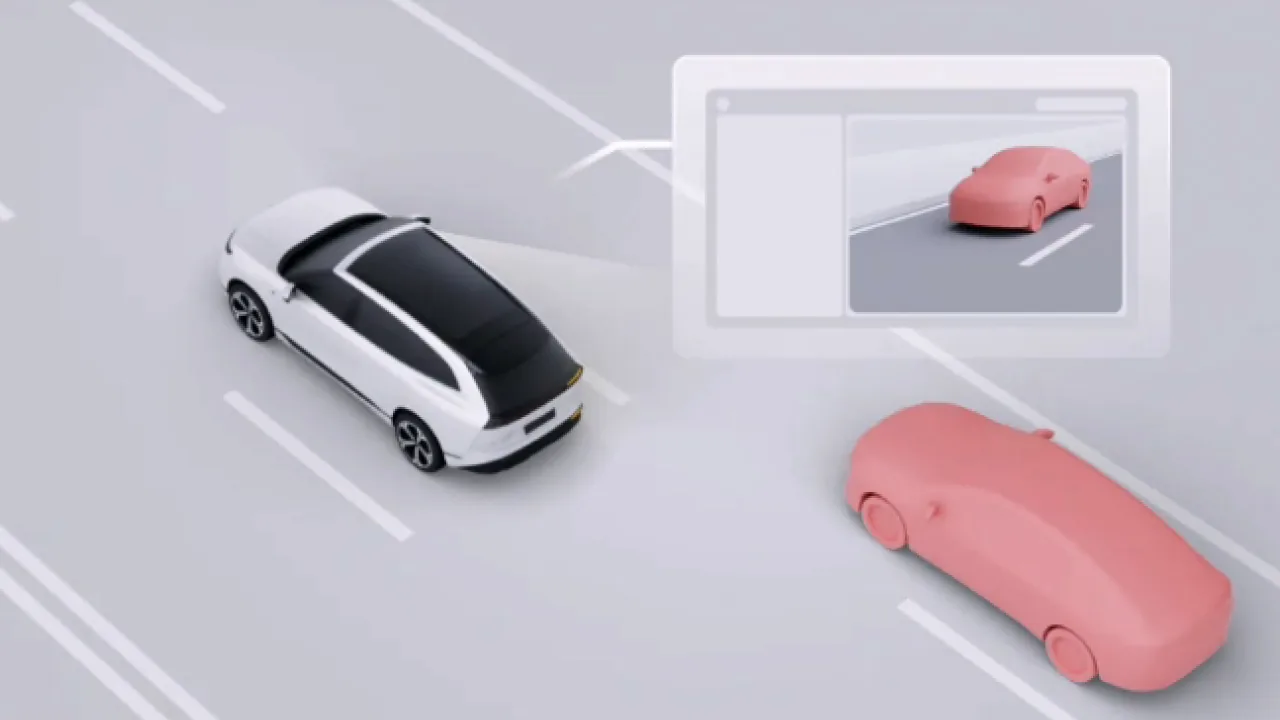
When the vehicle is in D Gear and the turn signal is turned on, the vehicle automatically displays the corresponding side rear image, making it convenient to view the side rear blind spot and assisting driving.
Warning Rear View on the steering active side is an assistance function for reference only and does not replace the driver's view of the surrounding environment. You are responsible for driving safely as the driver of the vehicle, and do not rely on this feature to control the vehicle. Failure to do so could result in injury.
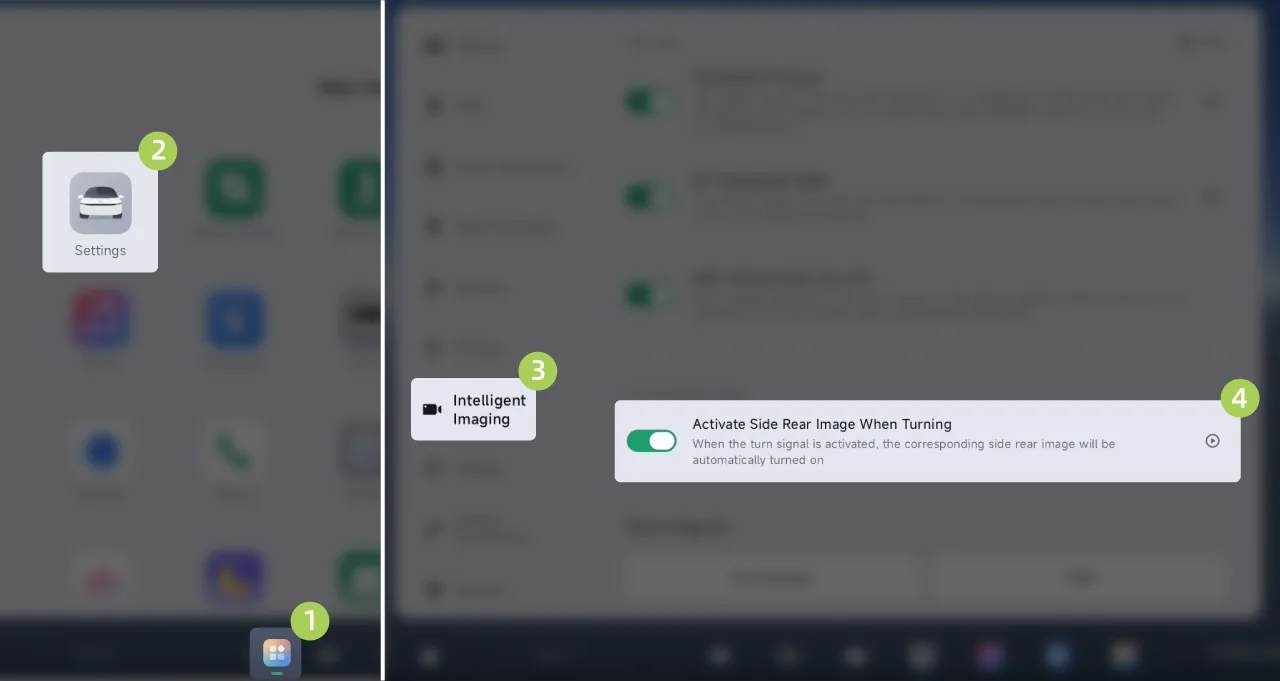
Tap the center display in sequence. “ →Settings→Intelligent Imaging”Interface, can be opened/closed , and the turning image position can be selected.
Tips The steering image position is displayed on the central display by default. If it needs to be displayed on the HUD, select the steering image position as HUD.
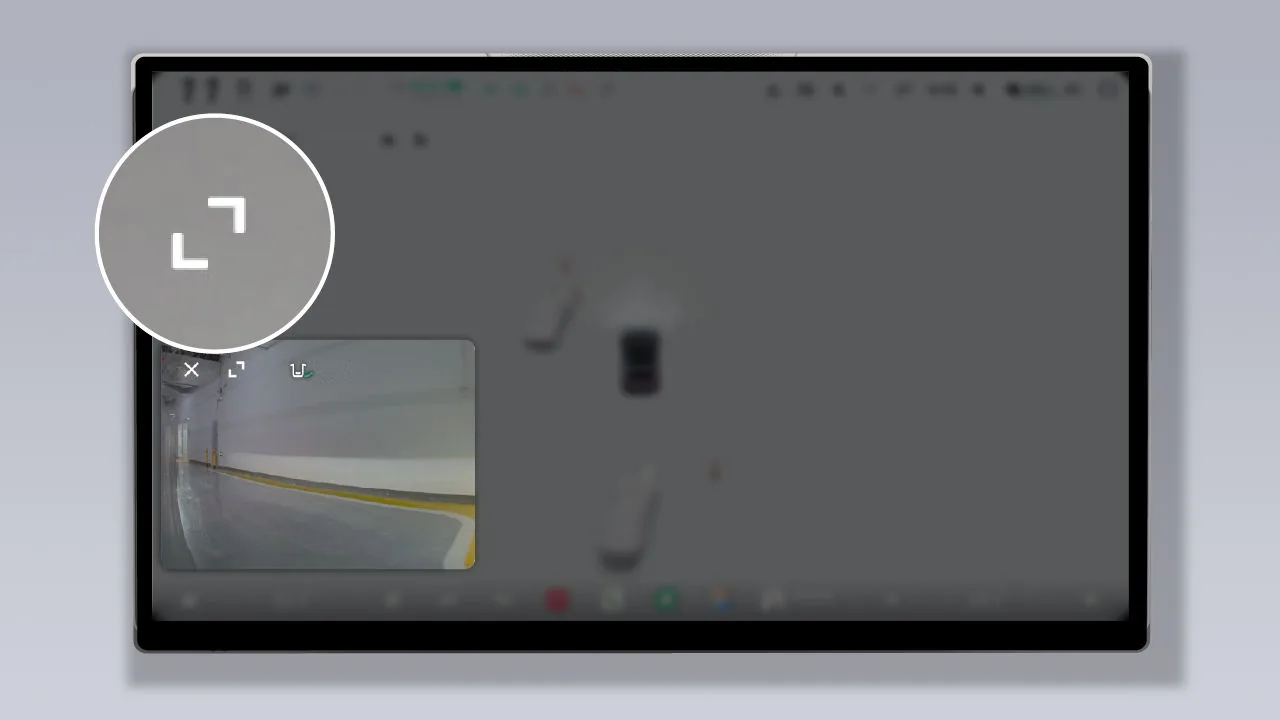
The image can be dragged to different positions. On the image screen, tap  , the image can be zoomed in/out.
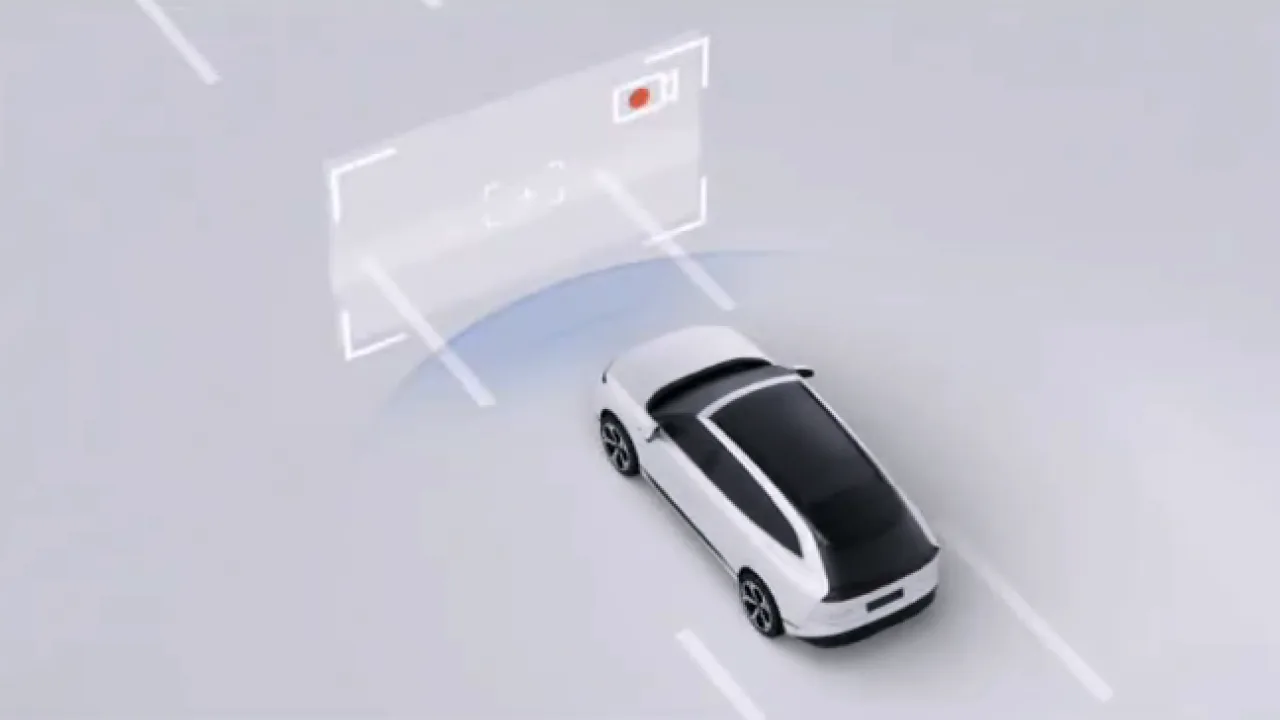
The Driving Recorder function can record video while the vehicle is driving and store the video on a USB drive. The video files can be used to review past information when needed by the user, or to assist in collecting evidence in the event of an accident.
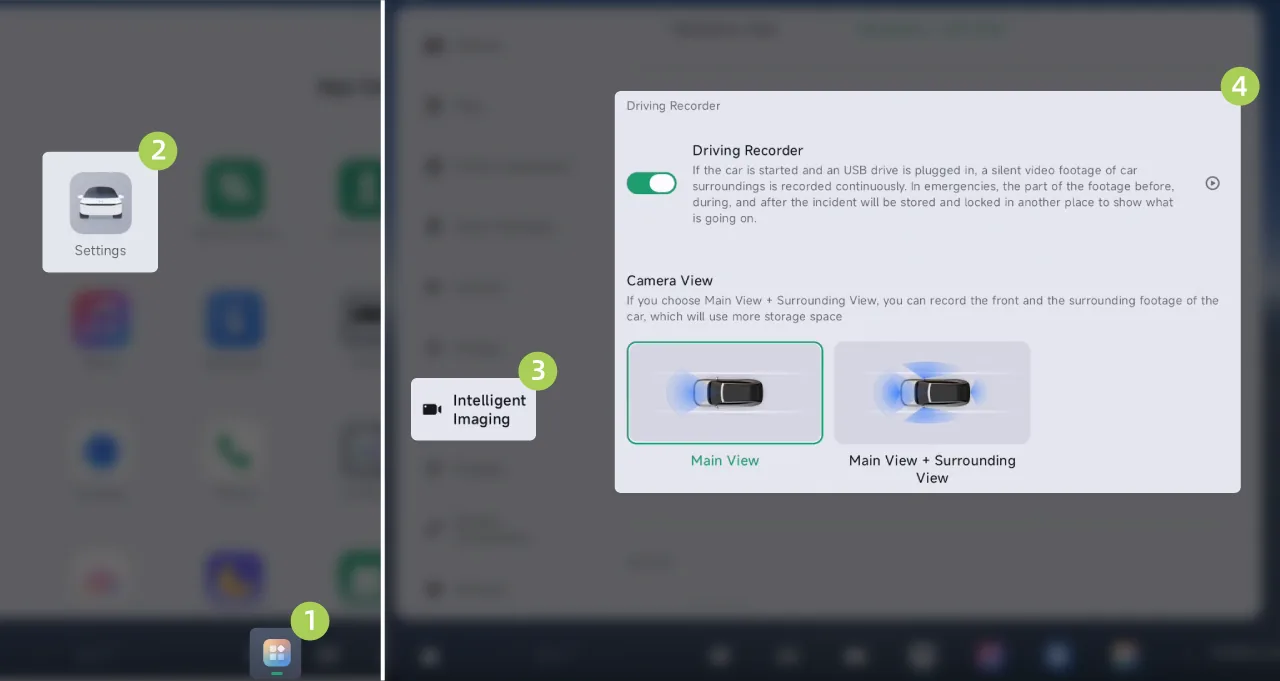
Tap on the center display in sequence. “ →Settings→Intelligent Imaging”Interface, can be opened/closed 。
Recording can be selected for some vehicle models or 。
Tips Record the surround-view image at the corresponding moment. If related functions such as 360 Camera/reversing image are being used during recording, The video for the corresponding view will be recorded.
Can simultaneously record the views in front of the vehicle and around it, but will occupy more storage space.
Automatic trigger: on the central control screen When the function is enabled and in the recording state, the vehicle will automatically perform emergency recording and save it upon detecting a collision risk event.
Manual trigger: On the center control screen When the function is enabled and in the recording state, you can tap the top status bar on the central control screen  Icon, click in the drop-down menu Emergency video recording, or tap on the bottom taskbar of the center display screen
  Icon (such as Custom Settings) emergency recording video.
Emergency recording storage location: on the center display screen “ →Driving Recorder→Emergency Recording”In , you can view and export emergency recordings.
Tap the status bar at the top of the central control screen.  Tap the icon to view the Driving Recorder status.
 | Driving Recorder enabled and in recording status |
 | Emergency recording is in progress |
 | When Driving Recorder Is Off |
 | Driving Recorder is unavailable and the USB drive needs to be checked. |
On the central control screen “ →Driving Recorder→Emergency Recording and Loop Recording”On the interface, you can view emergency recordings and loop recordings. You can also select the required Driving Recorder recordings to send to your phone or delete the unnecessary Driving Recorder recordings.
Caution For your safety, it is recommended that you view the Driving Recorder while the vehicle is parked.
On the center control screen “ →Driving Recorder→Emergency Recording and Loop Recording”Interface, tap Press the button to enter selection mode.
Select the video to be transferred.
Tap to send to phone “  ”Icon (also on the video details screen, tap Send to Phone icon) to enter the file transfer interface. During video loading and processing, tap Video sending will be canceled. After video loading and processing are completed, a QR code pop-up window will appear.
After the XPENG App pop-up window appears, tap “Receive” to transfer the file to the phone system Album.
Tips After the scan code succeeds and the transfer process is enabled, the QR code pop-up disappears, and the system automatically enters the background transfer process. During file transfer, you can still view videos, but operations such as deleting or sending to phone are not available.
During file transfer, the XPENG App must remain on the transfer screen to avoid interrupting the connection.
During file transfer, the mobile device network is temporarily unavailable and will be restored after the transfer is completed and the connection is disconnected.
The video data of the Driving Recorder will be stored in the vehicle's external storage device (USB drive). If a USB drive is not installed, the Driving Recorder function will not operate properly.
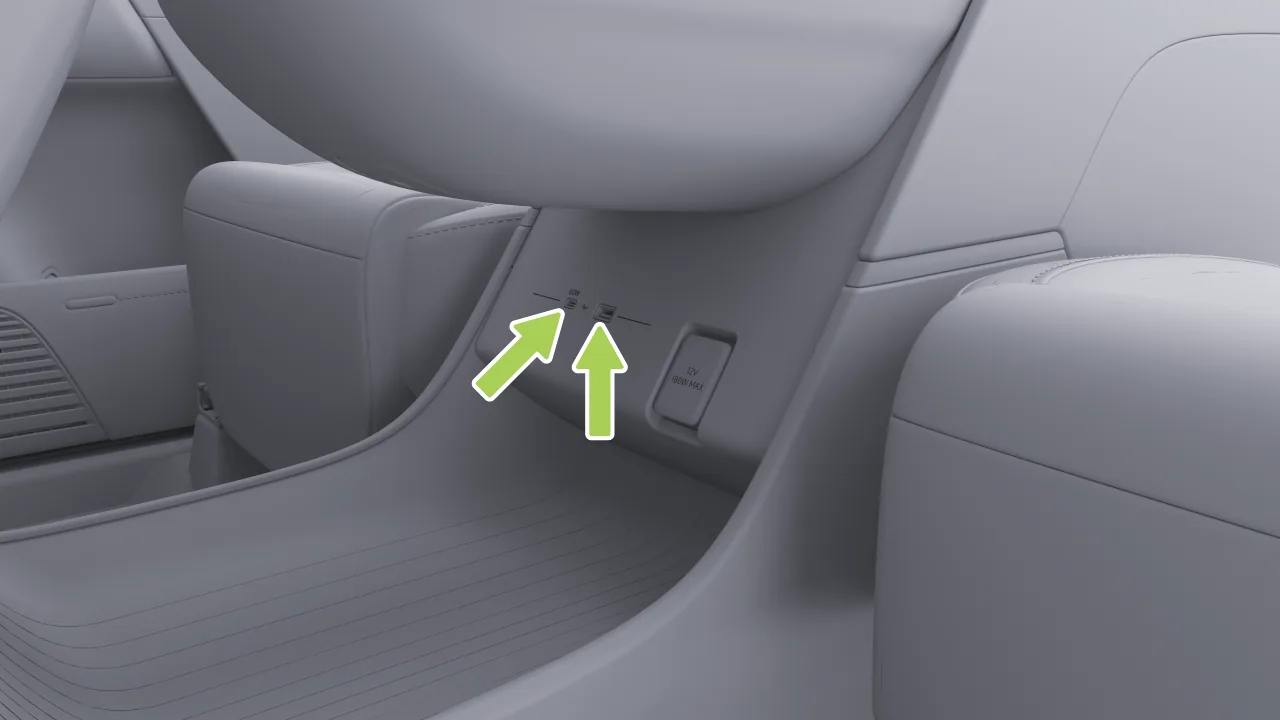
The front USB Type-A port and USB Type-C port of the center armrest box have data transmission capability. After inserting a USB flash drive, the Driving Recorder function can be used.
Driving recording recognizes only one USB drive at a time. Each time the vehicle is powered on, priority is given to the USB drive used before Power Off. If the USB drive used before Power Off is not recognized within 3 seconds after power-on, the first recognized USB drive in the reading sequence will be used as the active USB drive.
Each Driving Recorder video segment is saved by default at approximately 1 minute. During recording, operations such as locking the vehicle and powering off, ejecting the USB drive, clearing videos, or formatting will cause the recording to be interrupted. The Driving Recorder will save the recorded video and then start recording a new video segment. The video may be less than 1 minute.
During the Driving Recorder process, please avoid emergency Power Off as much as possible. Emergency Power Off will cause the video being recorded to be unable to be saved.
Driving Recorder videos are stored on an independent USB flash drive. Do not remove the USB flash drive directly. If you need to remove it, first on the central control screen “ →Driving Recorder→Storage Management”Interface, tap Otherwise, the video being recorded may be lost, and it may also cause damage to the USB flash drive, as well as corruption or loss of video data. Please avoid using adapters, docking stations, etc. as much as possible, as they can easily cause loose connections.
When Driving Recorder is enabled, videos will be recorded in a loop, and the earliest videos will be overwritten after the storage is full. To prevent important videos from being overwritten, export them in time to other devices such as a mobile phone or computer when necessary.
To better meet technical standards, please select a USB flash drive with 32 GB or more, USB 2.0 or above, and a write speed above 10 MB/s.
Only USB flash drives with partition formats FAT16, FAT32, or NTFS are supported. For USB flash drives not in the above formats, it is recommended to proactively format the USB flash drive once. Formatting will delete all files in the USB flash drive. Please save important data before formatting.
A USB flash drive has a fixed number of write/erase cycles and a fixed service life, and is a consumable item. If the USB flash drive has been used for more than half a year and video reading is found to be very slow or videos are frequently lost, please replace it with a brand-new USB flash drive.
While the vehicle is in motion, for your driving safety, please view video content with caution.
The video for the Driving Recorder function uses the H.265 codec format.

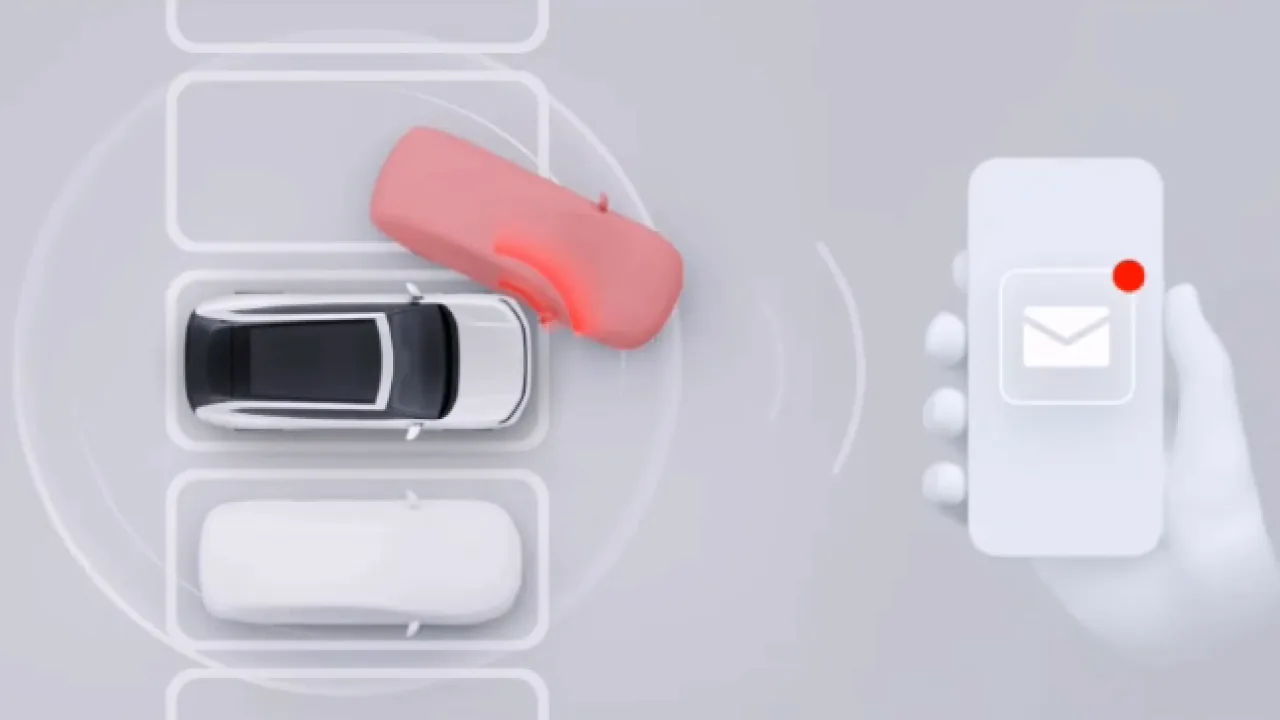
After being enabled, this function will continuously monitor the environment around the vehicle after lock and Power Off. When it detects a person continuously approaching or abnormal vibration, it will issue an alarm (the central control screen lights up and the vehicle flashes its lights) and record videos before and after the risk, effectively recording potential safety hazards and malicious damage. For vibration events, it will also promptly notify the user through mobile App push notifications and desensitized high-risk sentry recordings for timely reminders.
You can perform the following operations for Sentry Mode:
Enable/disable and set Sentry Mode through the central control screen.
View Sentry footage through the center display.
Enable/disable Sentry Mode via the mobile app.
View high-risk Sentry recordings through the mobile app.
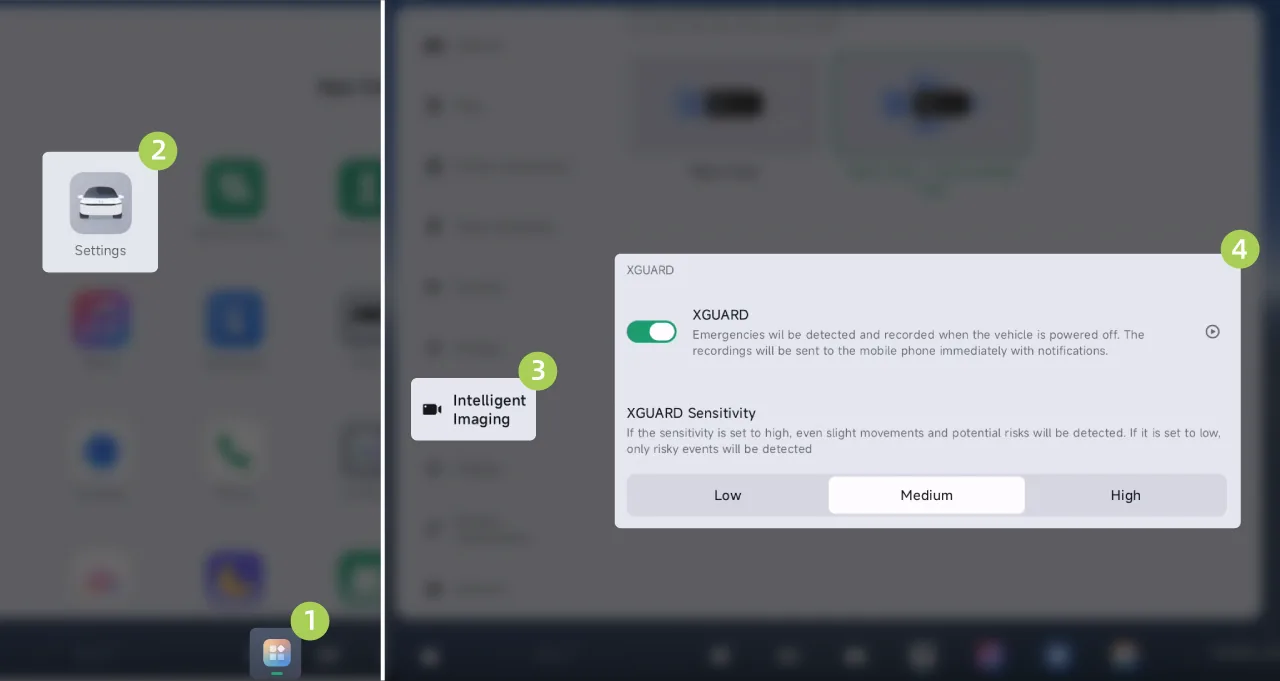
On the center control screen “ →Settings→Intelligent Imaging”Interface, can be opened/closed , set the Sentry Mode sensitivity.
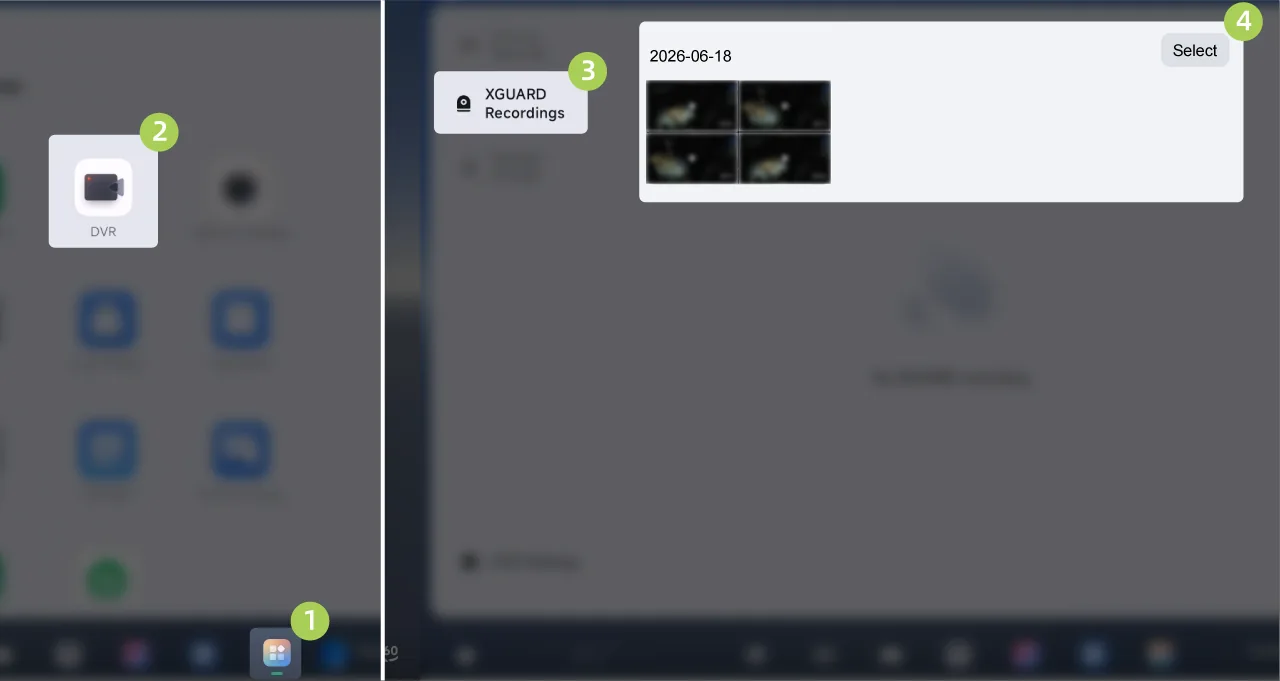
On the center control screen “ →Driving Recorder→Sentry Recording”On the interface, you can view the original XGUARD recordings. You can also select the desired XGUARD recordings to send to your phone or delete the XGUARD recordings that are not needed.
Tips When low-risk events take up more than 30GB or 90% of total system space, historical low-risk events are cycled to ensure timely recording of new events and high-risk events are permanently saved.
If too much space may cause recording to fail, please go to the Storage screenof the central control screen to clean up.
Caution For your safety, it is recommended that you watch Sentry recordings while the vehicle is parked.
Export Sentry Recordings to Phone
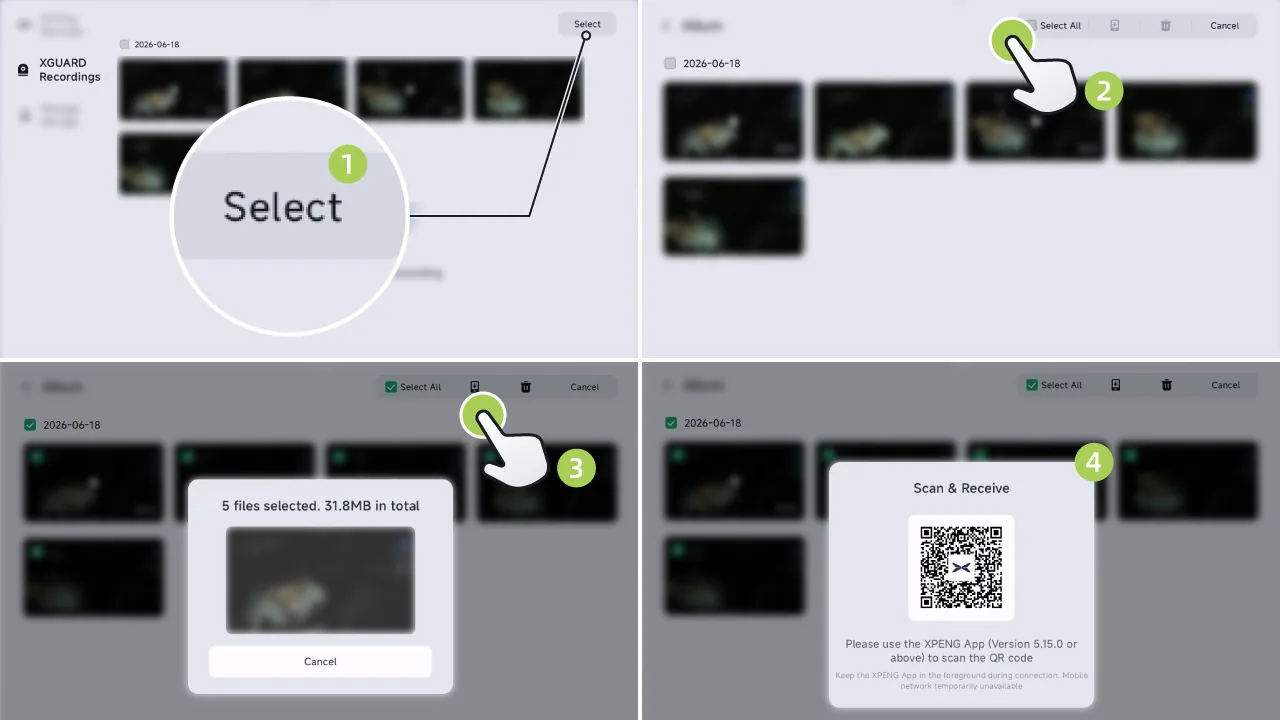
On the center control screen “ →Driving Recorder→Sentry Recording”Interface, tap Press the button to enter selection mode.
Select the video to be transferred.
Tap to send to phone “ ”Icon (You can also tap Send to Phone on the video details screen icon) to enter the file transfer interface. During video loading and processing, tap Video sending will be canceled. After video loading and processing are completed, a QR code pop-up window will appear.
Use the XPENG App to scan the QR code.
After the XPENG App pop-up window appears, tap "Receive" to transfer the file to the phone system Album.
Tips After the scan is successful and the transfer process is enabled, the QR code pop-up disappears, and the system automatically enters the background transfer process. During file transfer, you can still view videos, but operations such as deletion or sending to the phone are not available.
During file transfer, the XPENG App must remain on the transfer screen to avoid interrupting the connection.
During file transfer, the mobile device network is temporarily unavailable and will be restored after the transfer is completed and the connection is disconnected.
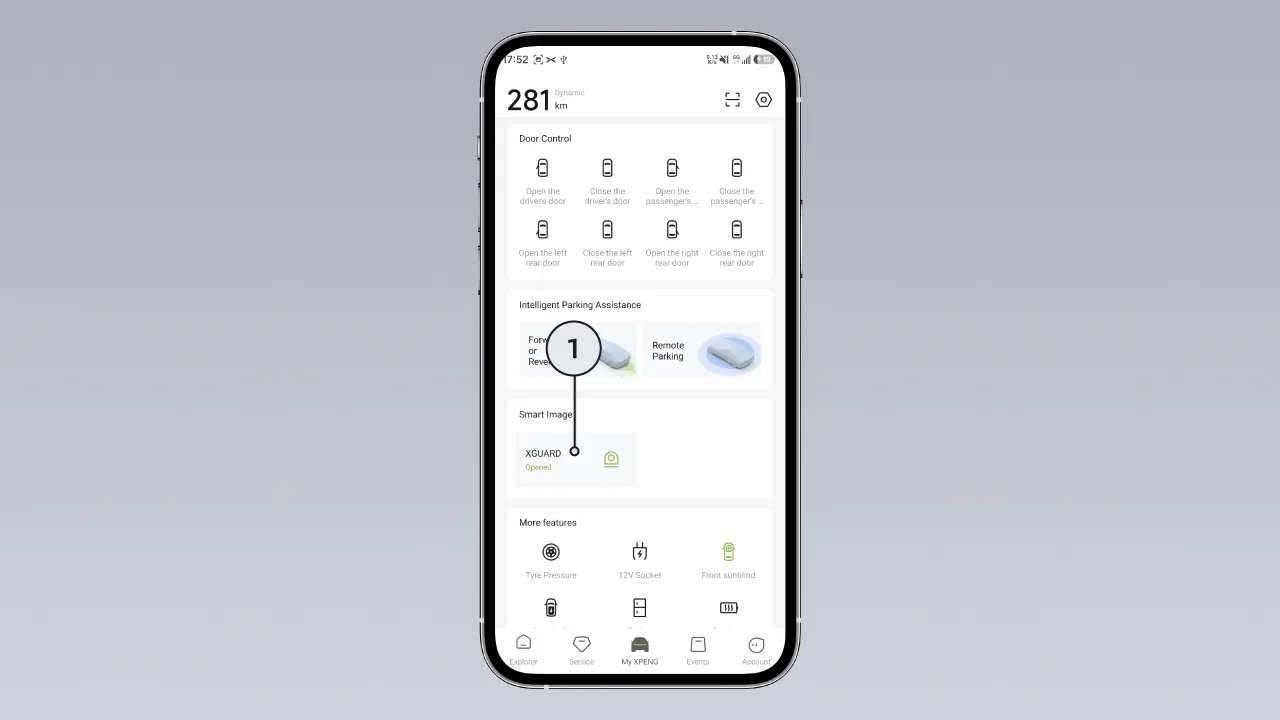
In the mobile app Interface, where you can turn XGUARD on/off, remotely view images around the vehicle (available only to the vehicle owner), and view de-identified high-risk sentinel recordings.
Turn Sentry Mode on/off.
Remotely view images around the vehicle: You can view desensitized real-time images around the vehicle.
Caution There may be a delay in the picture when the camera switches.
The remote view requires vehicle traffic and cannot be used after the traffic is used.
View XGUARD recordings: You can view desensitized high-risk XGUARD recordings.
When the notification permission for the mobile app is enabled, the mobile app will push XGUARD recordings through notifications.
If the vehicle network is poor, the upload may fail or the notification may be delayed (but it will still be saved locally).
Caution When Sentinel mode is used, the system accesses the camera permissions to detect the vehicle's surroundings. Please use Sentinel mode in compliance with local laws and regulations and the camera usage requirements of the location where you are located, and assume all corresponding responsibilities.
When Sentinel mode is switched on, the vehicle security alarm may also be activated when the vehicle is subjected to an intrusion such as pry doors, prying the boot.
Sentinel mode is only active during single-exit when switched on, and functions are automatically switched off when the vehicle is powered on.
Sentinel mode consumes a certain amount of vehicle power, switch on if necessary.
Battery power is continuously consumed during Sentinel mode operation and automatically exits Sentinel mode when the vehicle range is below 50 km.
The video of the mobile App will clear automatically after 7 days, please check it in time, the high-risk recordings of the central control screen can be saved permanently.
The cabin imaging OMS captures the in-vehicle environment through the in-vehicle camera and displays it on the central control screen. You can take photos or record videos to capture wonderful moments inside the vehicle, and you can also view the cabin imaging in real time on the central control screen.
You can perform the following operations on the in-cabin image:
Turn the in-vehicle camera on/off via the center display.
View the cabin image on the center display.
View or transfer the in-cabin image Album through the central control screen.
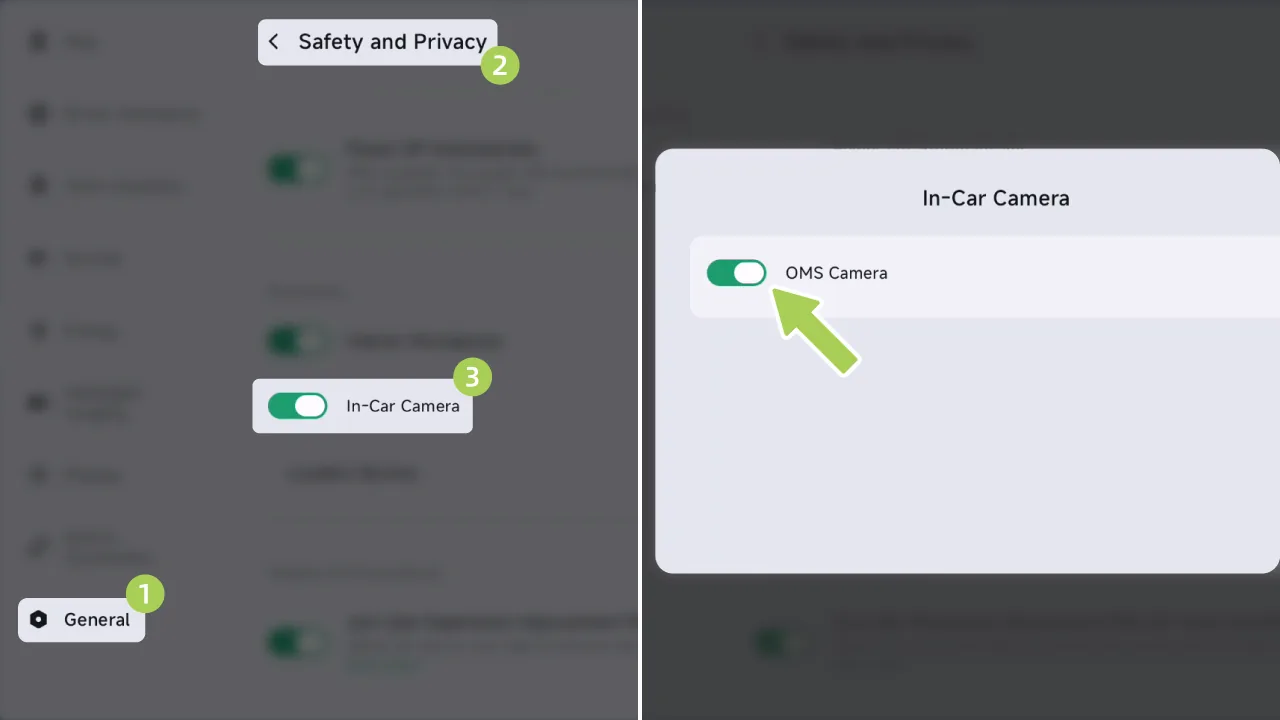
On the central control screen “ →Settings→General→Safety and Privacy”Interface, can be opened/closed , all in-vehicle cameras will be disabled after it is turned off. You can also tap the arrow icon on the right to turn it on/off in the pop-up window Function. After it is turned off, the corresponding in-vehicle camera will be disabled.
Tips The in-vehicle camera is disabled by default. When the in-vehicle camera is enabled for the first time, an authorization request prompt is displayed.
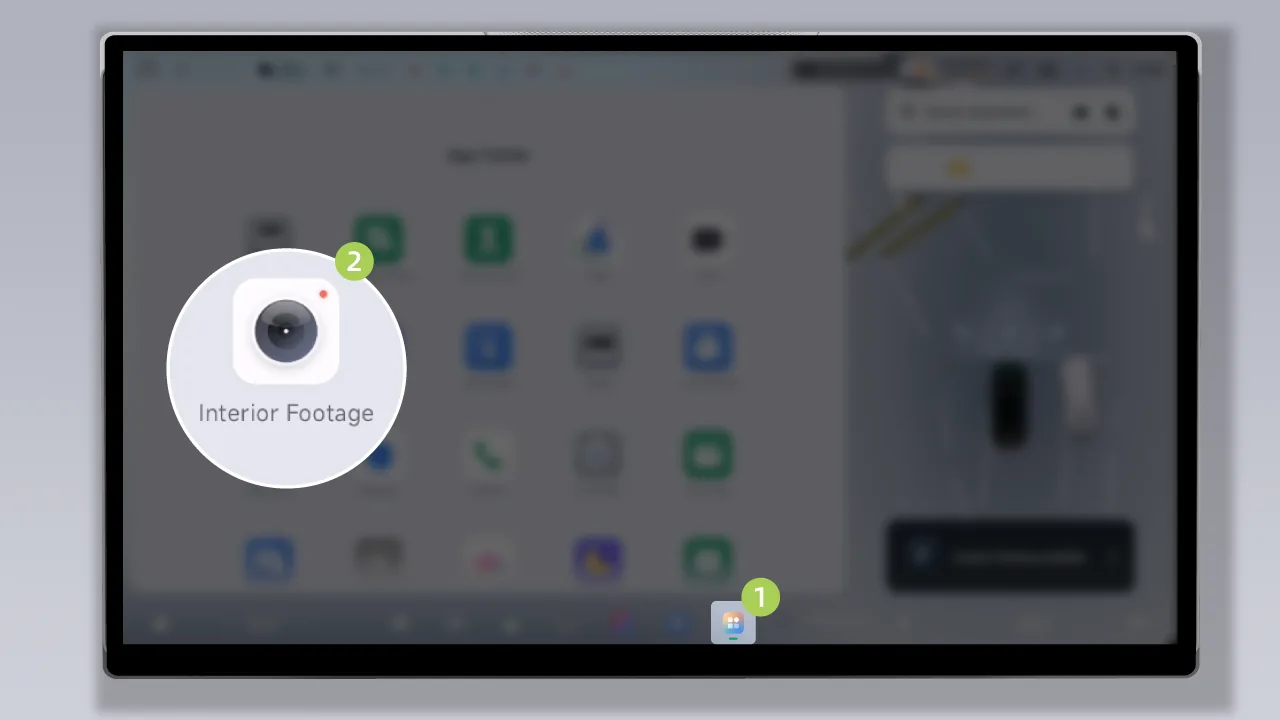
On the central control screen “ →In-Cabin Image”On the interface, you can view the in-cabin image.
While driving, do not continuously look at the in-cabin image on the center control screen, otherwise you may fail to see pedestrians, objects, etc. on the road ahead of the vehicle. You can wake up XPENG and say your command, for example: take an in-cabin photo, record an in-cabin video. Will be enabled Apply and execute photo capture or video recording.
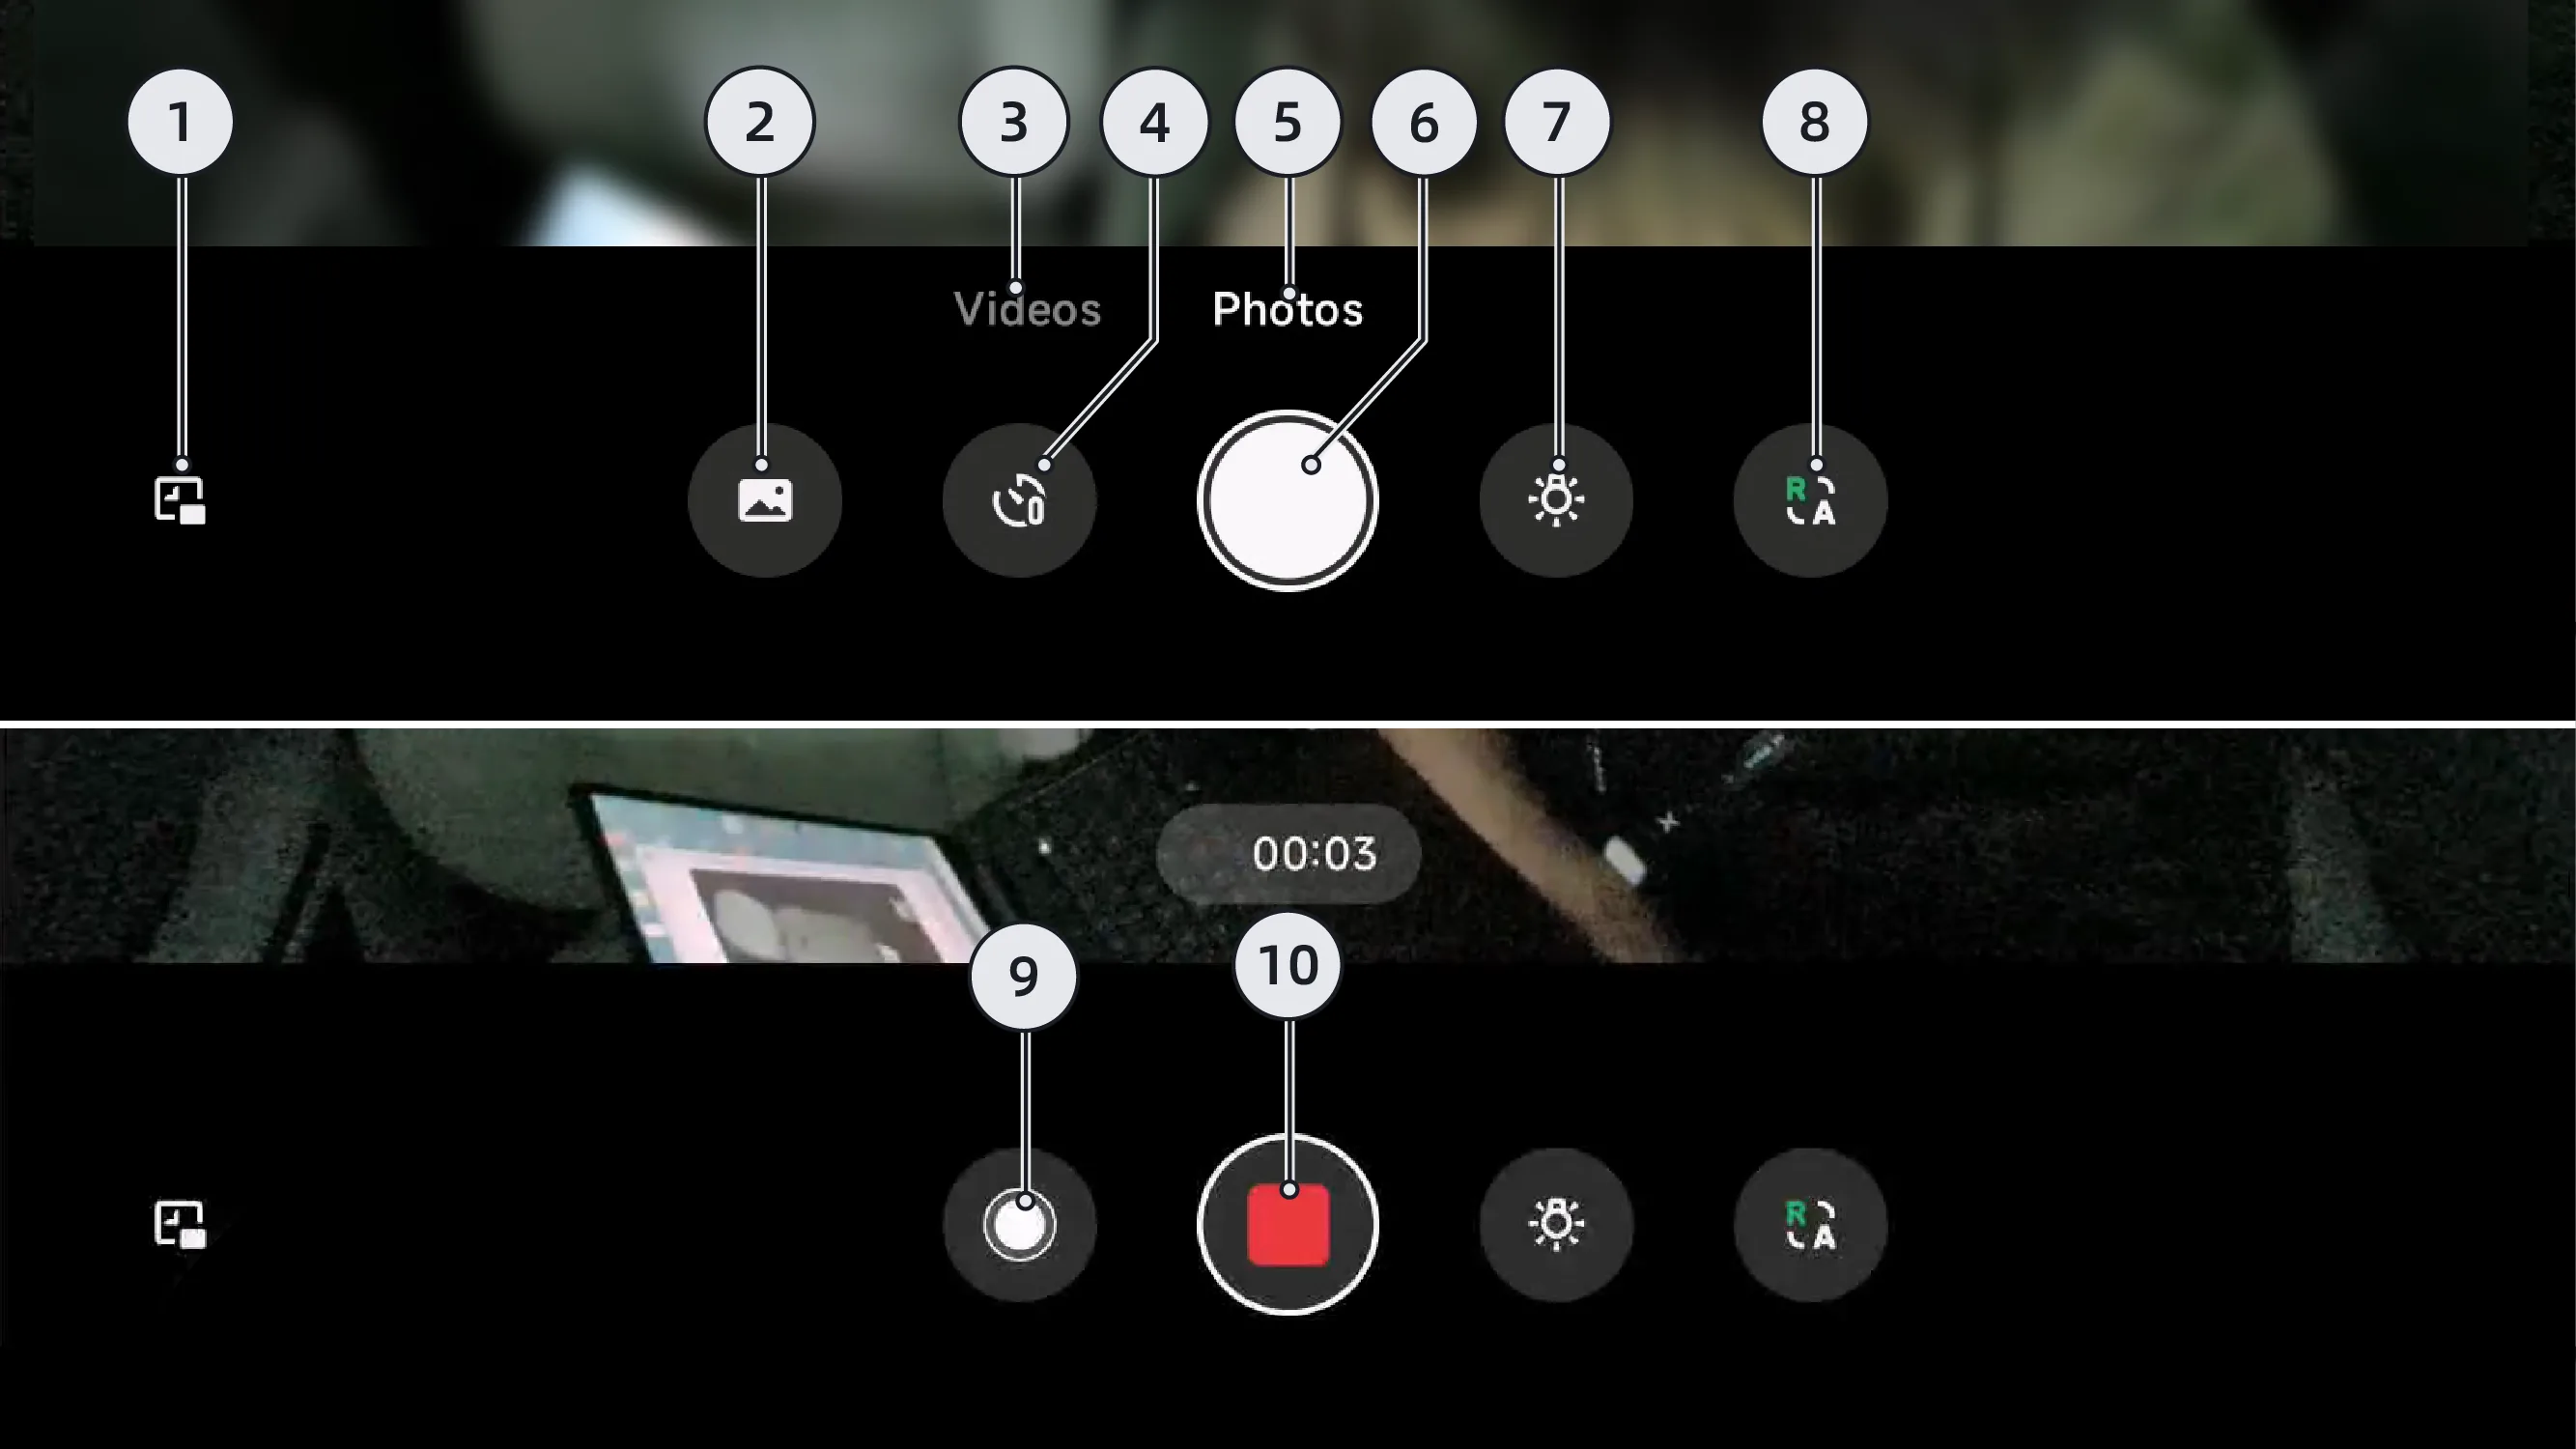
The screen is reduced to floating window mode.
Open Album.
Video mode.
Timed photo capture (displayed only in photo mode. After timed photo capture is enabled, tap the Capture Now button to take a photo after a 3-second countdown).
Photo mode.
Take a photo/video immediately.
reading light switch (after turning on, all vehicle reading lights illuminate).
Infrared night vision effect switch.
Take a photo immediately (while recording, tap Take a photo immediately).
Stop recording (displayed during recording).
Tips When clicking "Take Photo/Record Video Now", shooting may fail if the system storage space is insufficient. Please promptly go to the central control screen "Settings → General → Storage Space" interface to clear space.
The maximum duration of a single recording is 10 minutes. Recording stops automatically when it reaches 10 minutes.
When entering the cabin imaging application, the default mode is Photo mode.
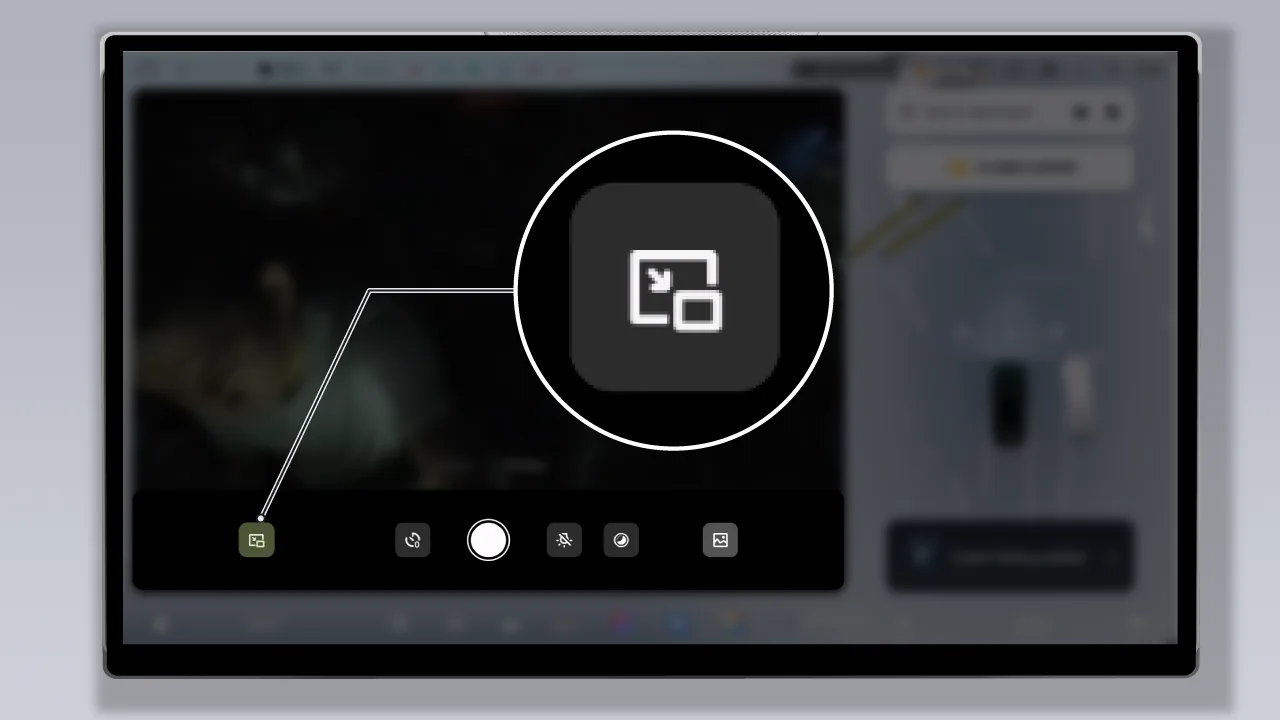
At Interface, tap  The screen can be reduced to a floating window state. You can drag the floating window to different positions on the screen. In this state, only the cabin image can be viewed, and the photo or video recording functions cannot be used.
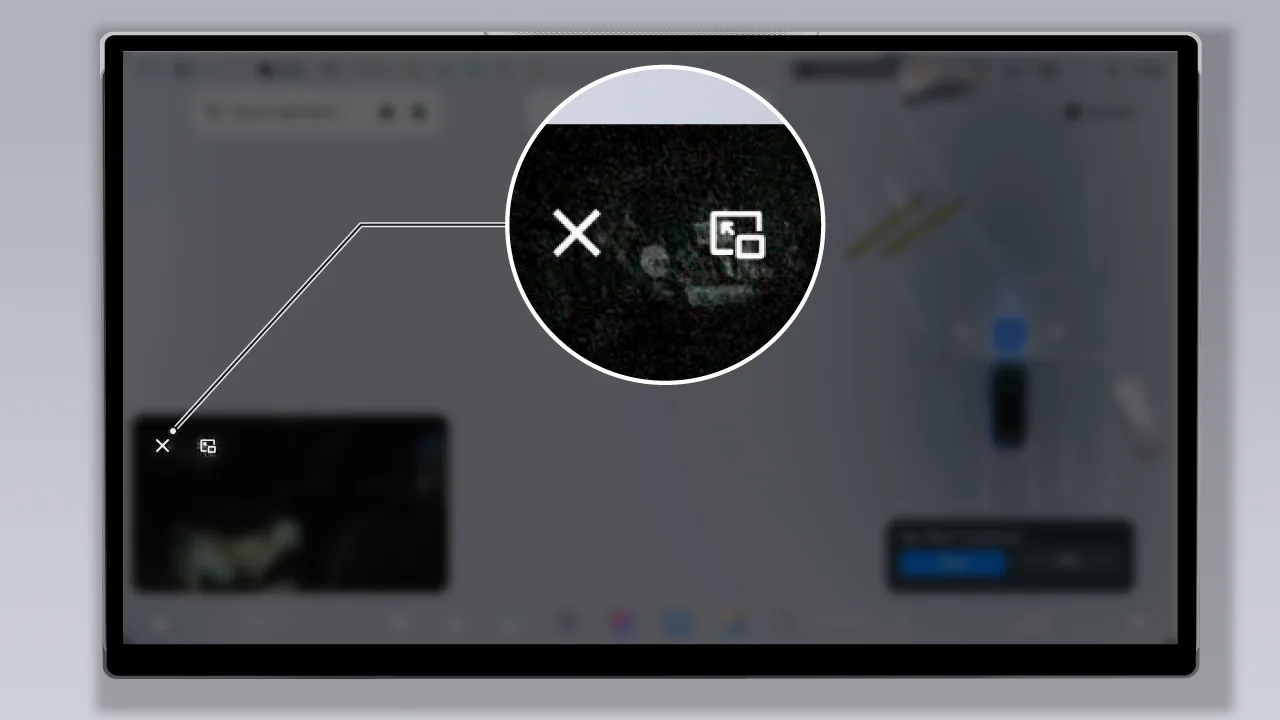
In floating window mode, tap  , Back Application interface. Tap , turn off the in-cabin image.
Tips Switching to floating window mode during recording may cause the recording to be interrupted.
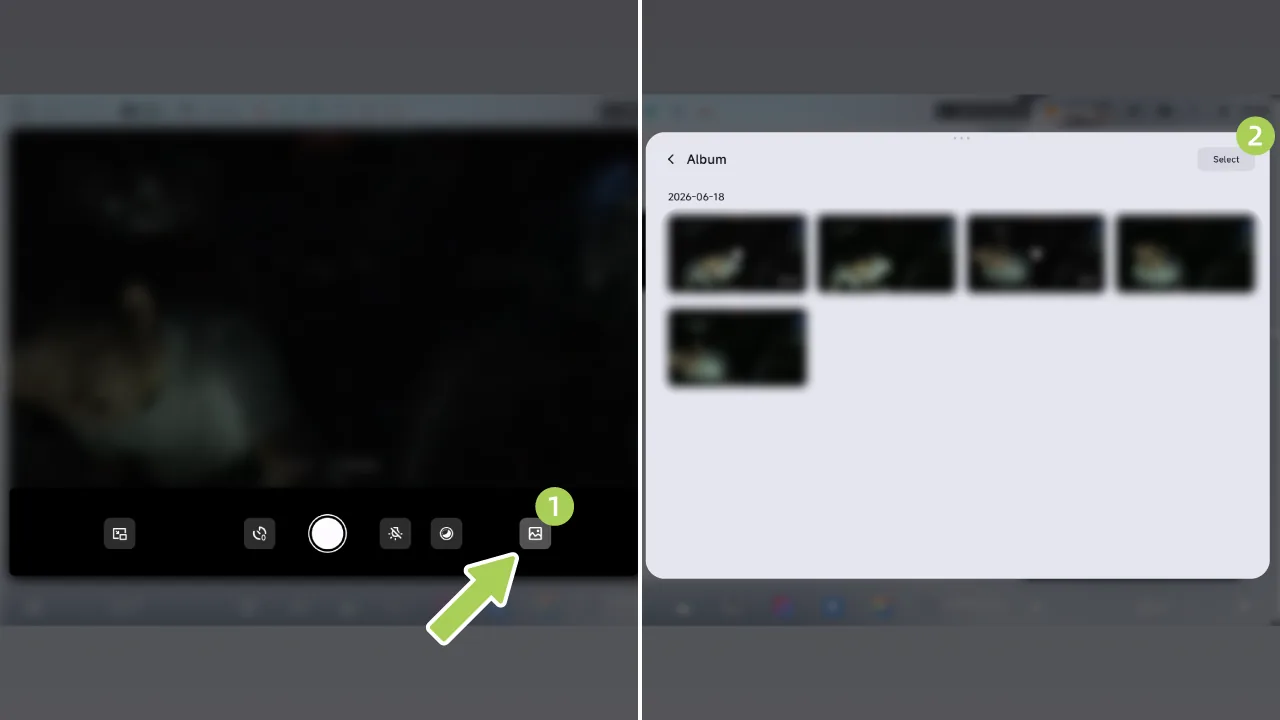
On the center control screen “ →In-Cabin Image”On the interface, you can view the recorded videos or pictures. You can also select the desired videos or pictures to send to the mobile phone or delete the videos or pictures that are not needed.
Caution For your safety, it is recommended that you view images and videos while the vehicle is parked.
Export Cabin Footage to Phone
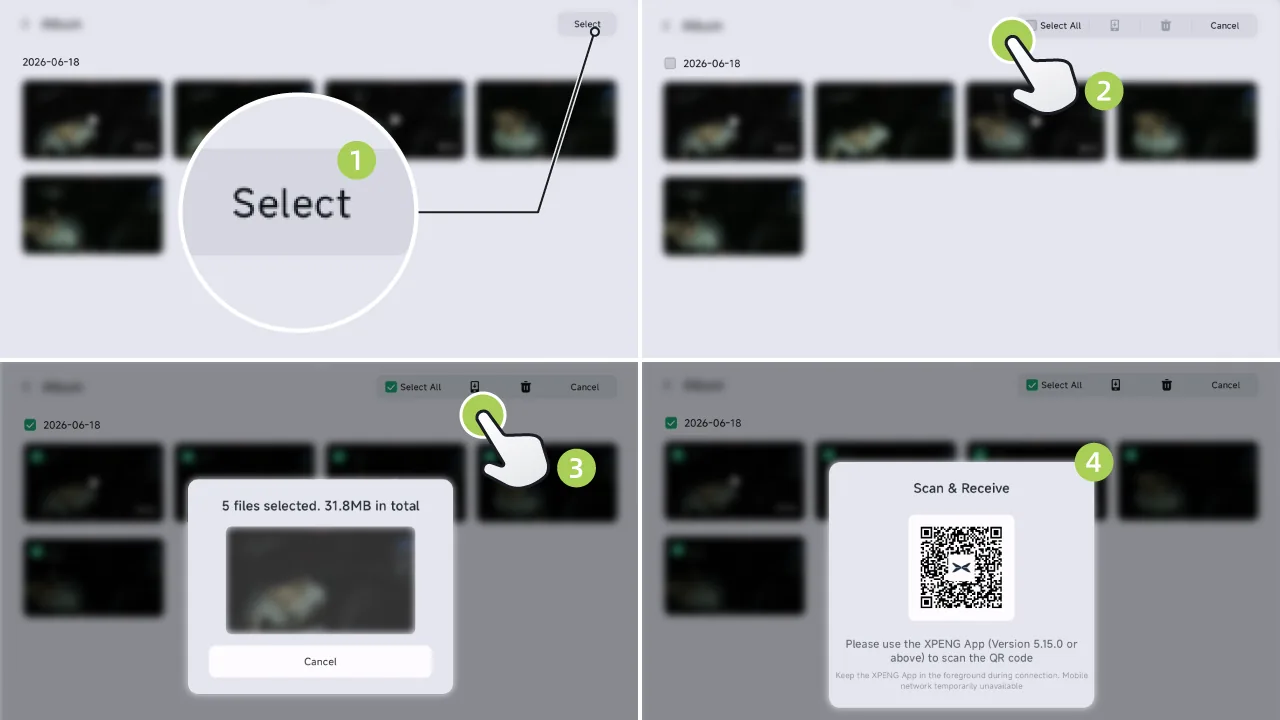
On the center control screen “ →In-Cabin Image→Album”Interface, tap Press the button to enter selection mode.
Select the video or image to be transferred.
Tap to send to phone “  ”Icon (you can also tap Send to Phone on the video details screen
  icon) to enter the file transfer interface. During video loading and processing, tap Sending the video will be canceled. After the video loading process is completed, a QR code pop-up window will appear.
After the XPENG App pop-up window appears, tap "Accept" to transfer the file to the phone system Album.
Tips After the scan code succeeds and the transfer process is enabled, the QR code pop-up window disappears, and the system automatically enters the background transfer process. During file transfer, you can still view videos, but operations such as deletion or sending to the mobile phone are not available.
During file transfer, the XPENG App must remain on the transfer screen to avoid interrupting the connection.
During file transfer, the mobile device network is temporarily unavailable and will be restored after the transfer is completed and the connection is disconnected.
Caution During OMS recording, avoid emergency Power Off as much as possible. Emergency Power Off will cause the video being recorded to be unable to be saved.
When the OMS camera temperature is too high, the OMS function will be unavailable.
Keep the in-vehicle camera clean. If there is any dirt, clean it promptly.
If the cabin image cannot be displayed properly, promptly contact a XPENG service center for inspection and repair.
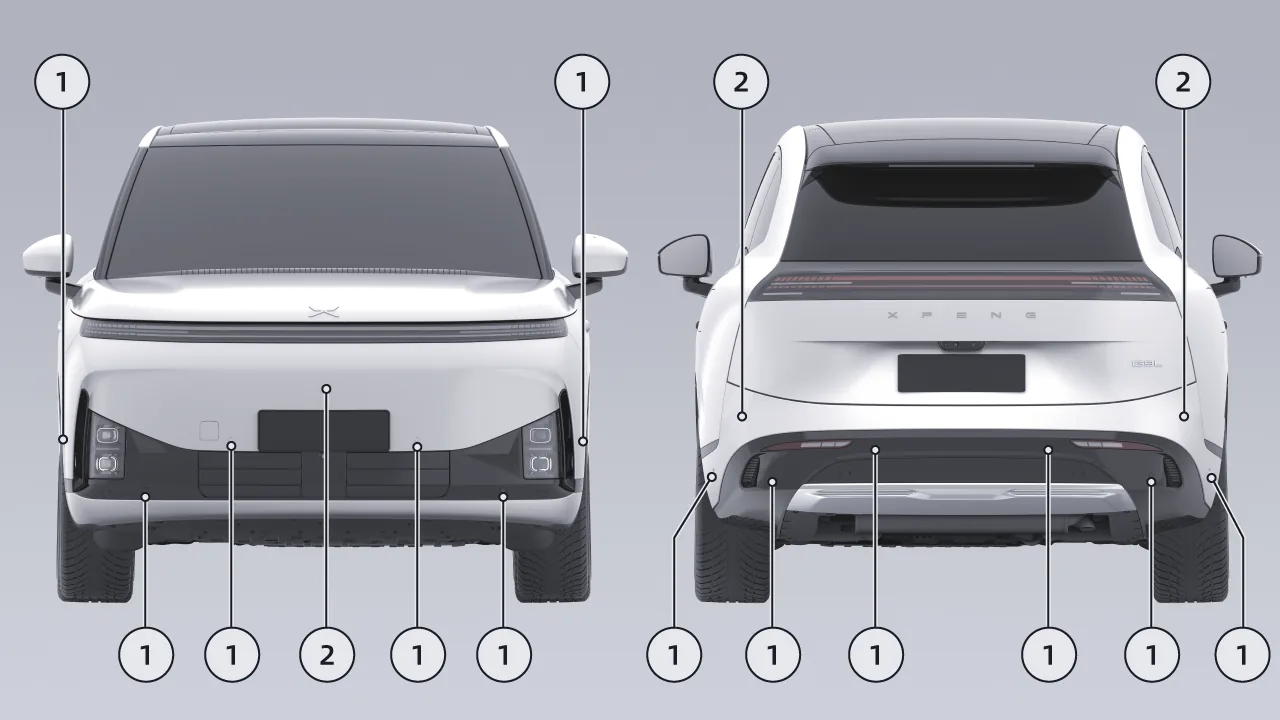
| 1. Ultrasonic Radar | 2. Millimeter-Wave Radar |
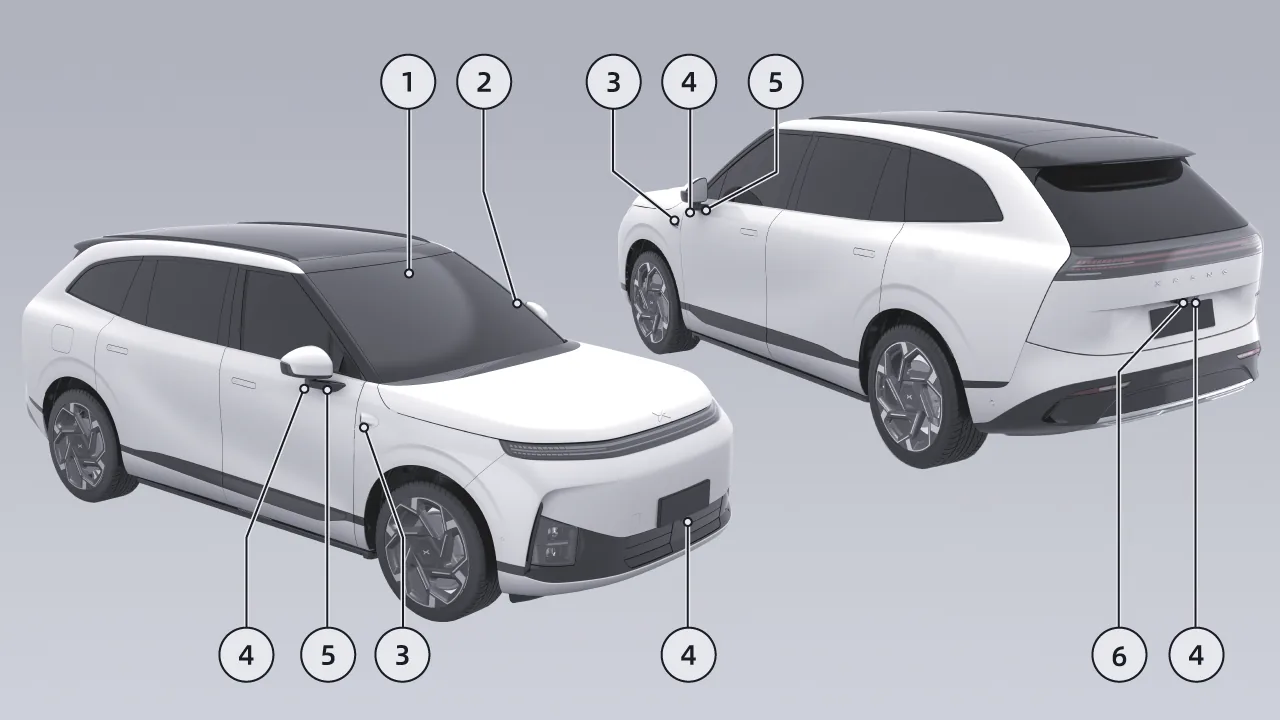
| 1. Binocular Camera | 4. Surround View Camera |
| 2. DMS Camera | 5. Front Side Camera |
| 3. Side Rear Camera | 6. Rearview Camera |
Warning If the radar and camera functions are limited, the assisted driving functions will be unable to be enabled or function normally.
Tips Before each use of the assisted driving function, ensure that the surfaces of the radar and camera are clean and unobstructed.
Warning The following conditions can cause the radar/camera to fail to recognize the target, delay in recognition, or incorrect identification:
The radar or camera is obscured or dirty, such as by snow, frost, rain, Foreign objects such as water, dirt, etc. are attached.
Faulty radar, camera or associated component.
Severe weather, such as rain, snow, fog, etc.
Road bumps or other causes cause the vehicle to rock.
There is interference from the same frequency of acoustic Boeing sources around the vehicle.
Objects in the vehicle's vicinity that can cause the sonic to reflect incorrectly.
The target detected by the radar is attached to substances that absorb sound waves, such as snowflakes, foams, cotton objects, etc.
The detected object is too small.
In rare exceptional cases, false alarms may occur on some metal barriers, green belts, cement walls, etc.
When the ambient brightness changes, such as tunnel entry or exit.
Large shadows cast by buildings, landscapes or large vehicles.
The vehicle has crashed and the radar or camera mounting position has been changed.
High light, such as oncoming headlights or direct sunlight.
Dark surroundings such as night, dawn, dusk, Tunnels, etc.
Warning The following target radar/cameras are not recognized:
Special vehicles, such as vehicles with a covered rear, damaged vehicles, or vehicles of irregular shape.
When you encounter animals, traffic lights, walls and other unknown obstacles in your route.
Some metal barriers, green belts, cement walls, etc.
Road test facilities, cone drums, crash buckets, tripods, Small construction plates, etc.
Static obstacles, such as traffic cones, buckets, traffic columns, warning triangle or other roadblock).
Static objects, such as slow or stationary sweeper, rolling accident truck, large stones, Tripods, separation belts, pedestrians crossing the road, etc.
When ACC detects that the driving speed of the vehicle ahead is lower than the set cruise speed value, the vehicle will automatically decelerate to ensure an appropriate distance from the vehicle ahead.
If the vehicle ahead accelerates and the driving speed becomes higher than the cruise speed setting, or if you change lanes and there is no other slower vehicle ahead, Adaptive Cruise Control will control the vehicle to automatically return to the cruise speed.
ACC also has the Adaptive Curve Cruise (ATC) function. ATC obtains the curvature of the road ahead through the camera and map. When ACC is enabled and the vehicle follows the lane lines or a preceding vehicle through a curve, ATC improves comfort and stability when cornering by adjusting the vehicle speed.
Tips When ACC actively decelerates to maintain distance from the vehicle ahead, the brake lights will illuminate. When ACC actively accelerates, the accelerator pedal will not move.
Warning ACC is only a driver assistance function and cannot handle all traffic, weather, and road conditions. As the driver of the vehicle, you are responsible for driving safety. Please keep both hands on the steering wheel at all times and observe the road conditions. If danger occurs, take over promptly. Do not rely on this function to control the vehicle, otherwise injury or even death may result.
 | ACC unavailable. |
 | When the ACC activation conditions are met, ACC can be activated. |
 | ACC is activated. |
 | The maximum speed limit value of ACC/LCC, and any function has been activated. |
 | The maximum speed limit value of ACC/LCC, and neither is activated. |
 | A system fault exists. |
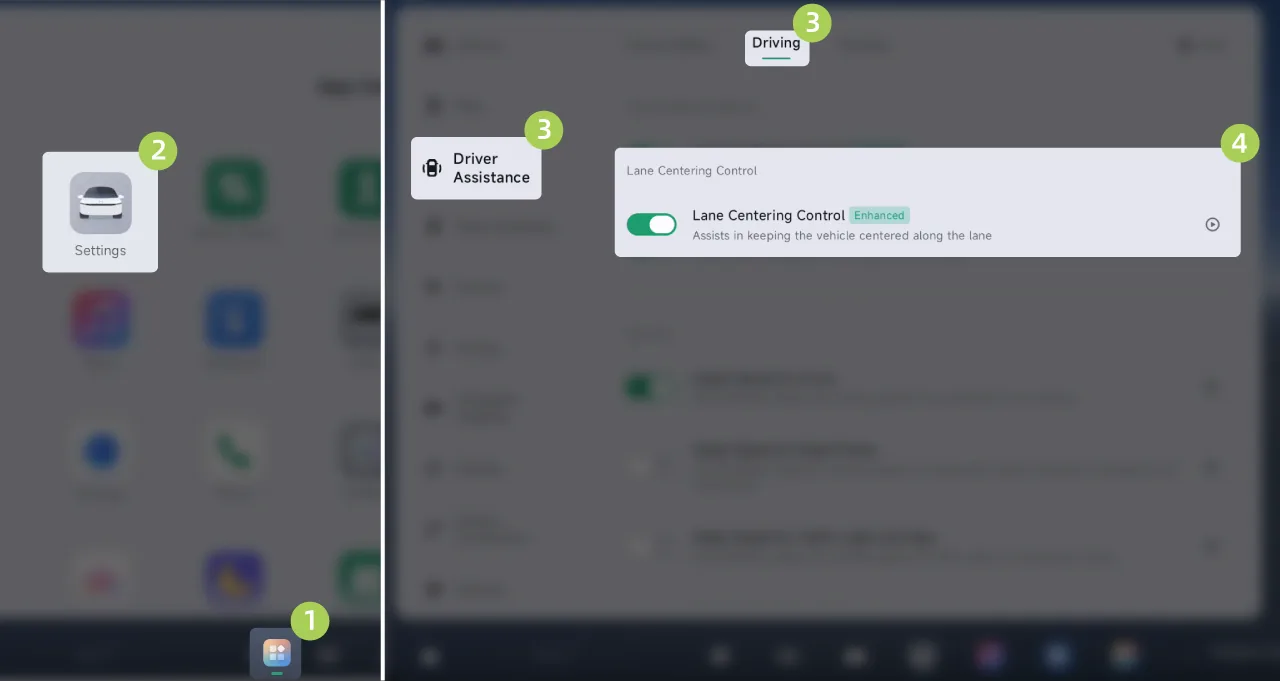
On the central control screen “ →Settings→driving assistance→Driving Scenarios”On the interface, tap to turn off the LCC function, and the ACC function will be turned on.
When ACC can be activated, the HUD and the central control screen display.  Indicator lamp.
ACC can be activated in the following ways:
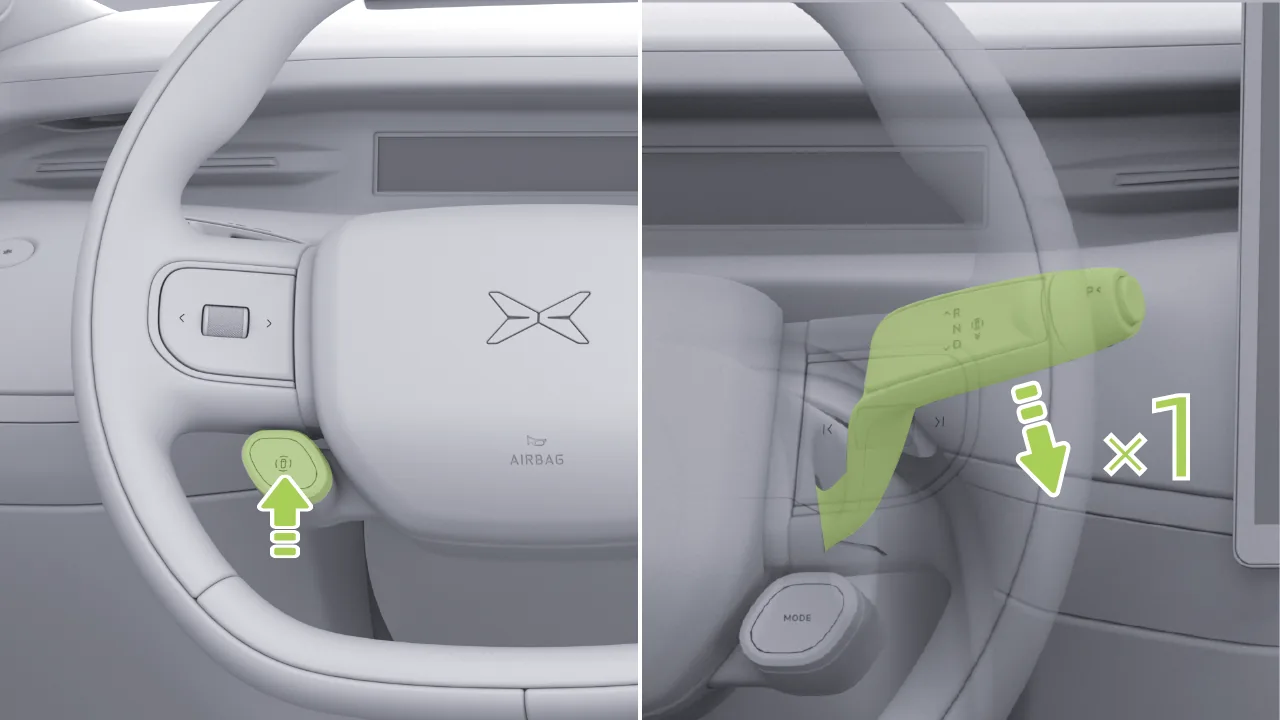
Press the left intelligent driving control button to activate ACC.
Push the shift lever downward fully once with a short movement, or push it downward fully and hold for 1 second, to activate ACC.
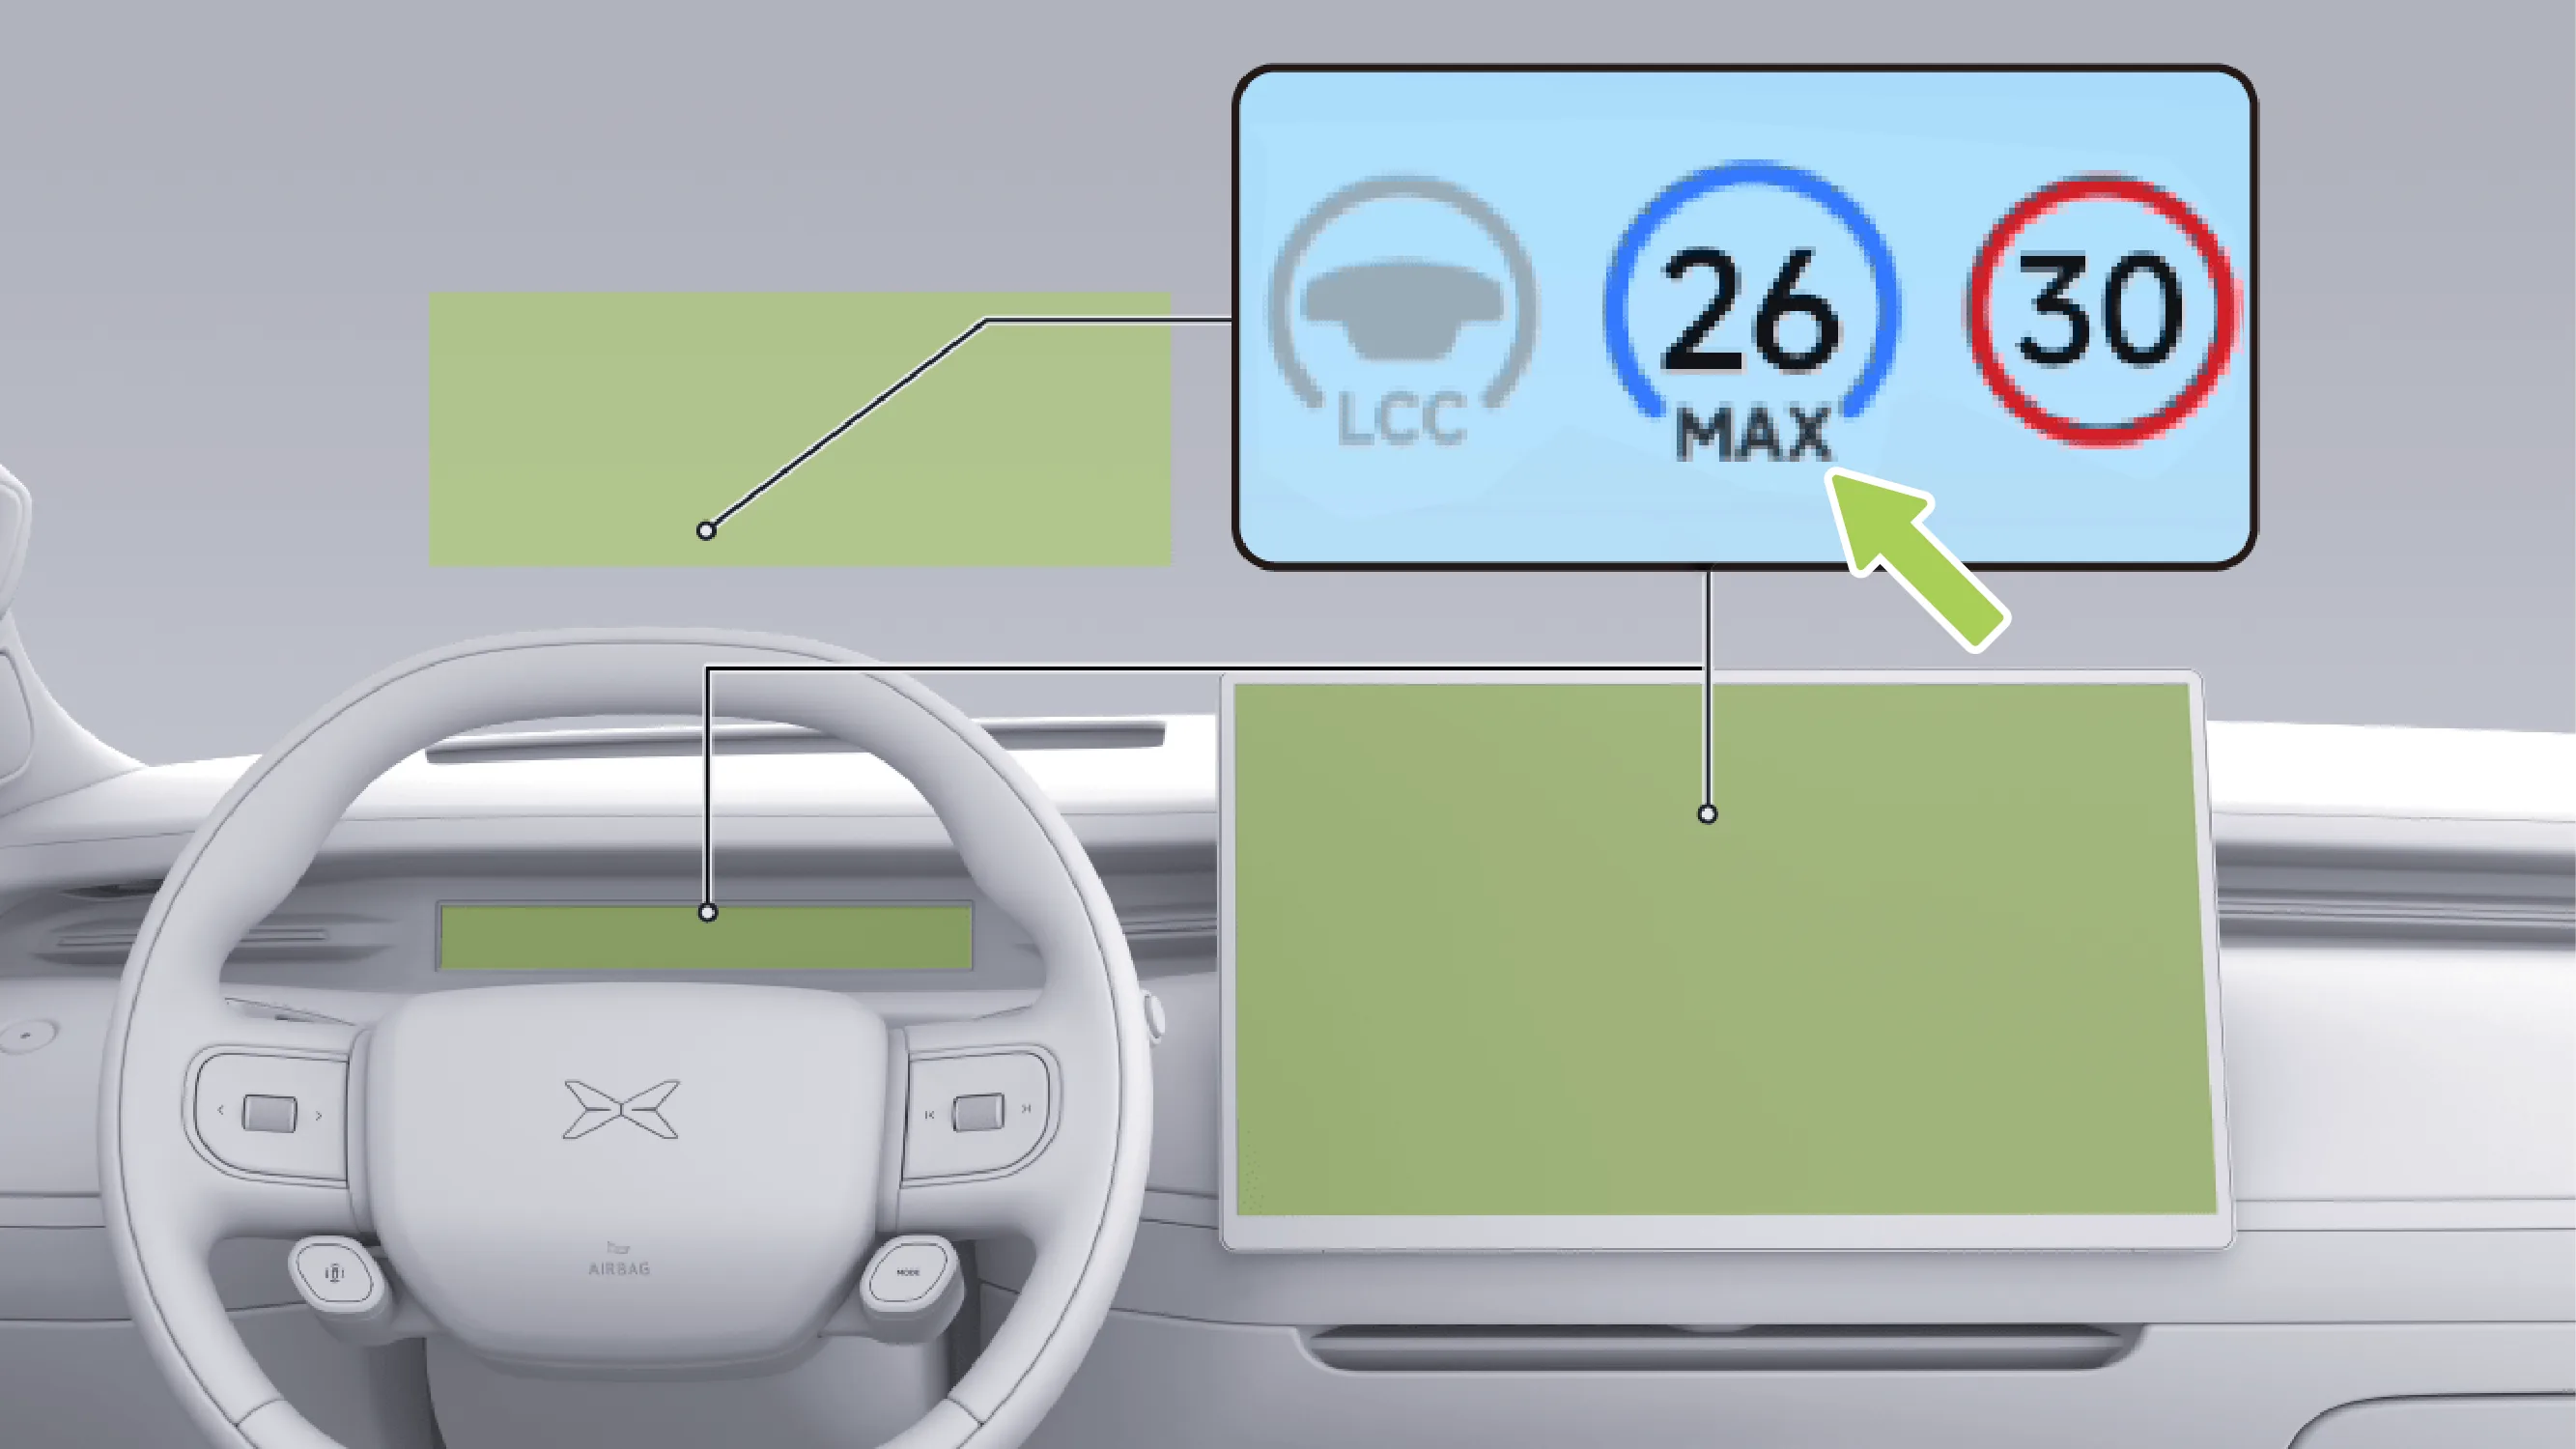
After ACC is activated, in the HUD, instrument cluster screen, and central control screen մեջ  The indicator illuminates, accompanied by a voice prompt.
ACC can be activated when the following conditions are met simultaneously:
The gear position is in drive (D Gear).
The driver fastens the seat belt.
No fatigued driving.
tire pressure normal.
The brake pedal is not depressed.
The doors, front hood, and trunk are not open.
The body stability control has been enabled.
ESP not activated, Anti-lock Braking not applied.
The ACC-related components are functioning properly, and the field of view is clear.
Tips When there is a vehicle within 2 m ahead, the ACC function can be activated within the 0-130 km/h range. When there is no vehicle ahead, the ACC function can be activated within the 15-130 km/h range.
When the ACC function is activated, if the vehicle speed is below 30 km/h, the set ACC cruising speed value is 30 km/h; if the vehicle speed is 30–130 km/h, the current vehicle speed is the set ACC cruising speed value.
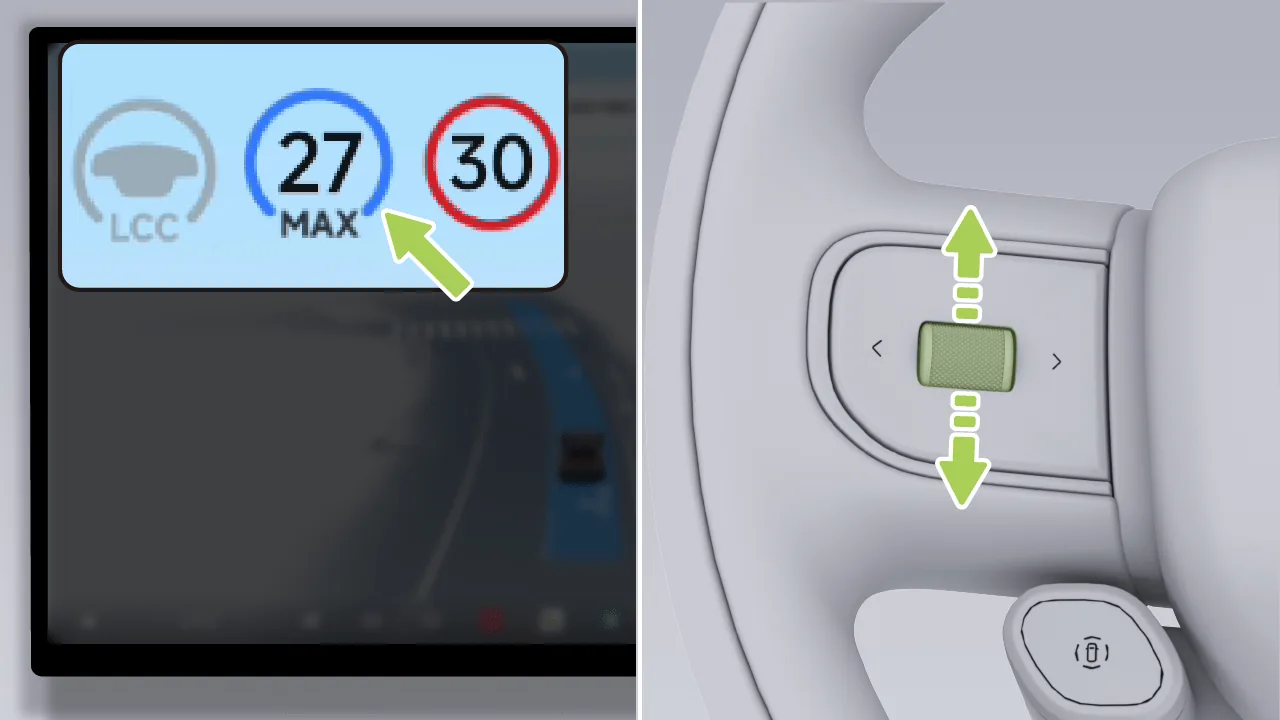
Slowly scroll the wheel; the maximum cruise speed changes by 1 km/h.
Quickly scroll the wheel, and the maximum cruise speed changes by 5 km/h.
You can also press the accelerator pedal to increase the vehicle speed, then push the gear selector downward and hold it to set the current vehicle speed as the new cruise speed. If you do not push and hold the gear selector downward, releasing the accelerator pedal will cause the vehicle to decelerate to the previously set speed and continue cruising.
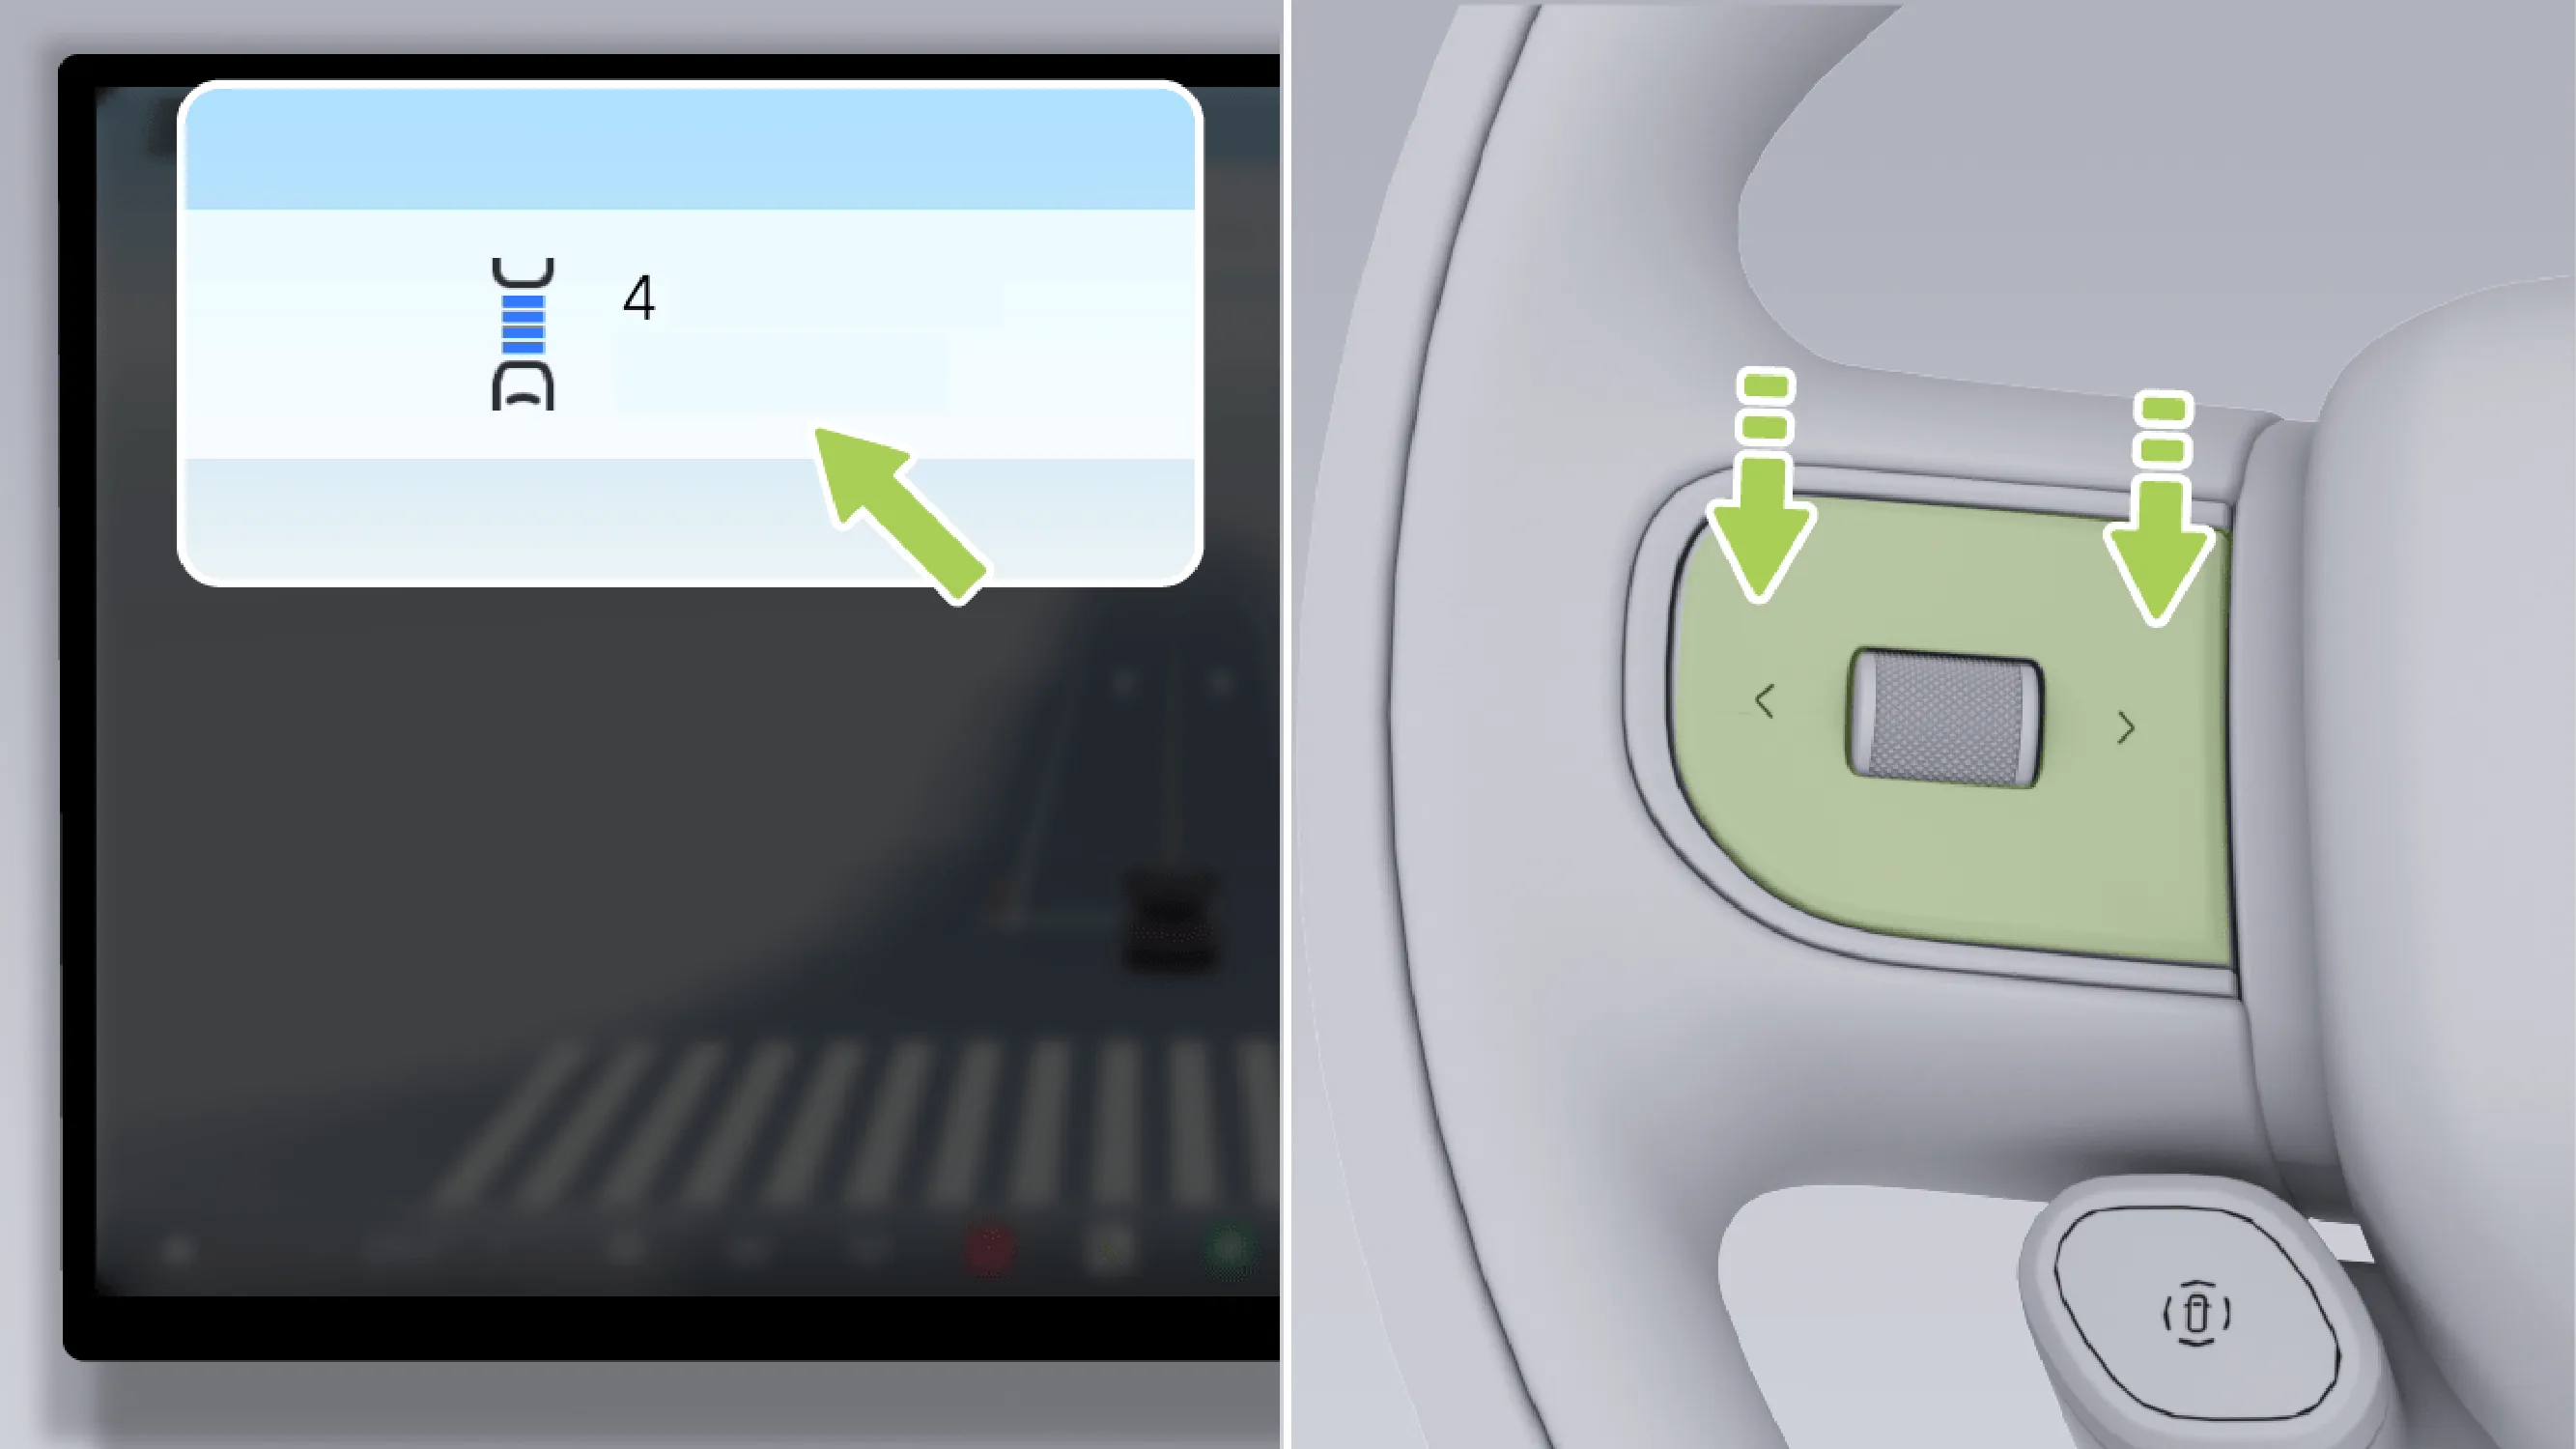
When ACC is activated, you can use the left/right buttons on the left side of the steering wheel to set the following distance, with 5 levels available.
Tips When setting the following distance, the central control screen will display the distance level.
Warning If the set following distance interval is too low, there may not be enough time to react in the event of an unexpected situation.
You are always responsible for maintaining a safe distance and speed, and for braking in time when necessary.
Tips The following distance interval is not a fixed distance; the actual distance to the vehicle ahead will vary with vehicle speed.
When driving on slippery roads, please select a larger following distance interval.
After the ACC function is activated, you can exit the ACC function in any of the following ways:
Press the brake pedal.
Push the shift lever upward.
Warning If any of the following situations occurs (including but not limited to), ACC will automatically disengage. After ACC automatically disengages, you must take over the vehicle to ensure driving safety.
Any door, the front hood, or the trunk is opened.
The driver unfastens the seat belt.
Brake system performance decreases or malfunctions.
Enable the electronic parking brake.
The wheels lose traction.
The vehicle speed exceeds the set speed, and the duration exceeds the designed time.
Shift the gear to Reverse (R) or Park (P).
Body stability control is activated, turned off, or malfunctioning.
The front windshield intelligent driving camera is obscured by dust, rain, ice, snow, or other contaminants.
A fault has occurred in another related system.
Warning If the vehicle issues a takeover request via SR interface, voice announcement, etc., take over immediately.
In the event of a hazard, or in the event of a situation requiring a takeover, take over immediately and do not wait for the vehicle to issue a takeover request.
Please read all sections in this manual related to ACC; you should understand these limitations before using the function.
ACC is designed for driving comfort and convenience and is not a collision warning or avoidance system. The driver is responsible for remaining alert at all times, driving safely, and maintaining control of the vehicle. Never rely on the system to sufficiently reduce vehicle speed to avoid a collision. Be sure to observe the road conditions ahead and be prepared to take corrective action at any time, otherwise serious injury or even death may result.
You are responsible for determining and always maintaining a safe following distance. Never rely entirely on ACC to maintain an accurate or appropriate following distance.
Warning ACC is a driving aid and cannot handle all traffic, weather and road conditions, do not use or switch ACC on in the following scenarios:
Road with varying conditions such as twists and turns (s-bends, continuous u-bends, etc.).
Roads that are in poor condition, such as icy or slippery roads.
In bad weather conditions, such as heavy rain, heavy snow, heavy fog, etc. Urban roads.
Warning ACC does not respond fully in the following special conditions, difficult road conditions, poor weather or light conditions, be sure to be concerned with the environment and conditions. Be alert, always place your hand on the steering wheel and take over the vehicle at any time, including but not limited to:
Suddenly another vehicle moves quickly or at a close range to the front of the vehicle.
When adjacent lane vehicles have only part of the body cut into front of the vehicle (especially large vehicles such as buses, trucks, etc.).
The vehicle ahead slows down suddenly.
Make a U-turn or drive in through the vehicle.
When driving in tunnels or at night, when trucks, buses, or vehicles with oversized loads are in the side lane.
When approaching or cornering through a road, there are multiple vehicles in parallel.
For stationary vehicles or objects, such as obstacles to the road surface, especially if the vehicle ahead leaves your driving lane causing the vehicle or object ahead to be stationary.
On an uphill section.
Increase ground speed when descending a hill, when the vehicle exceeds a set speed or road speed limit.
Warning ACC is unable to fully recognize and respond to the following environments and targets, it is important to keep an eye on the environment and road conditions and take over the vehicle in a timely manner to ensure safe driving in the following scenarios. This includes, but is not limited to:
The following targets are encountered in front of the drive, including but not limited to:
People, animals. Traffic lights.
Walls, roadblocks.
Two-wheelers (bicycles, motorcycles, electric cars, etc.), three-wheelers.
Other non-vehicle objects.
Target in sensor blind area.
Vehicle or object on the other side of the ramp.
In the event of a vehicle traveling in opposite directions.
When the vehicle in front is fitted with an object that protrudes beyond its body.
In the event of construction, accidents, etc.
The above warnings, cautions, and limitations do not describe all situations that affect the normal operation of ACC.
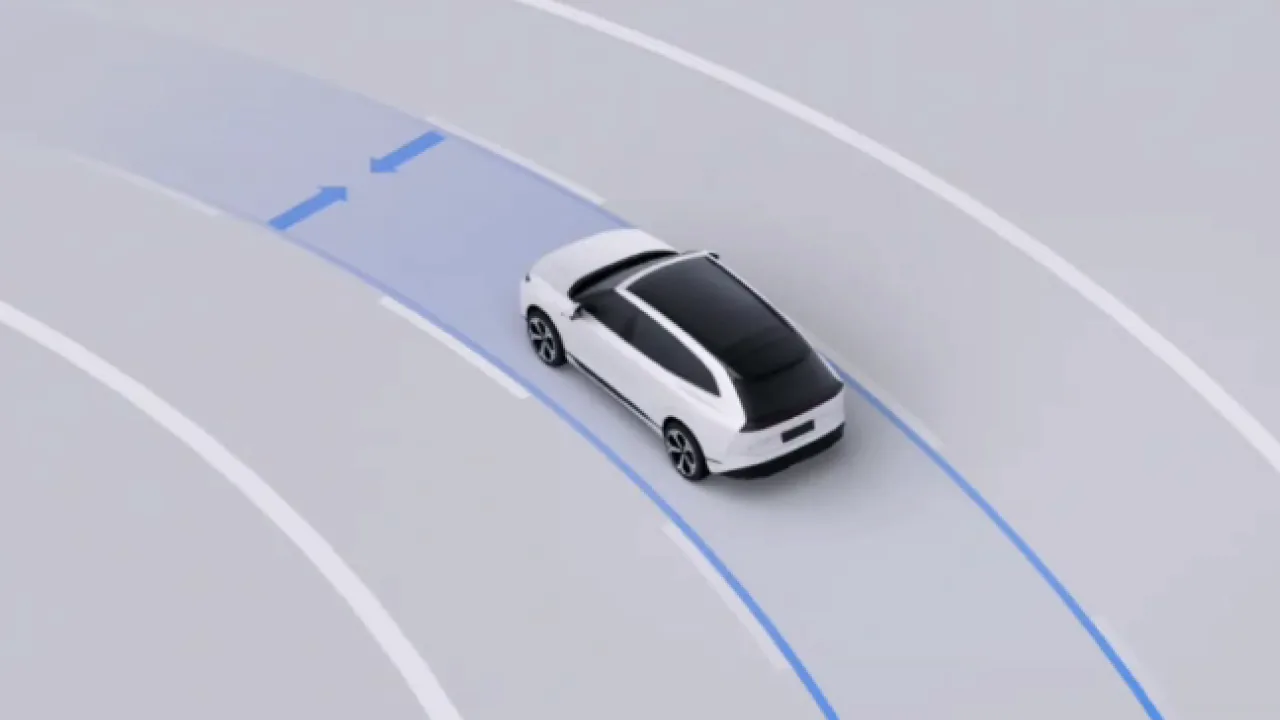
LCC is a comfort-oriented assisted driving function that can assist the driver in controlling the steering wheel and keep the vehicle centered in the current lane to the greatest extent possible.
When LCC is activated, LCC assists the driver in controlling the steering wheel and keeps the vehicle centered in the current lane to the greatest extent possible on straight roads and roads with standard curvature where the lane lines on both sides are clearly visible.
Tips When LCC is activated, ALC can be used to assist with lane changes.
Warning LCC is only a driver assistance function and cannot respond to all traffic, weather, and road conditions. You, as the driver of the vehicle, are responsible for driving safety. Please keep both hands on the steering wheel at all times and observe road conditions. If danger arises, take over promptly. Do not rely on this function to control the vehicle, otherwise injury or death may result.
 | LCC is unavailable. |
 | When the LCC activation conditions are met, LCC can be activated. |
 | LCC has been activated. |
 | LCC exit will be delayed. |
| | The maximum speed limit value of LCC, and any function has been activated. |
| | The maximum speed limit value of LCC, and none are activated. |
 | A system fault exists. |
On the central control screen “ →Settings→driving assistance→Driving Scenarios”On the interface, you can enable/disable the LCC function.
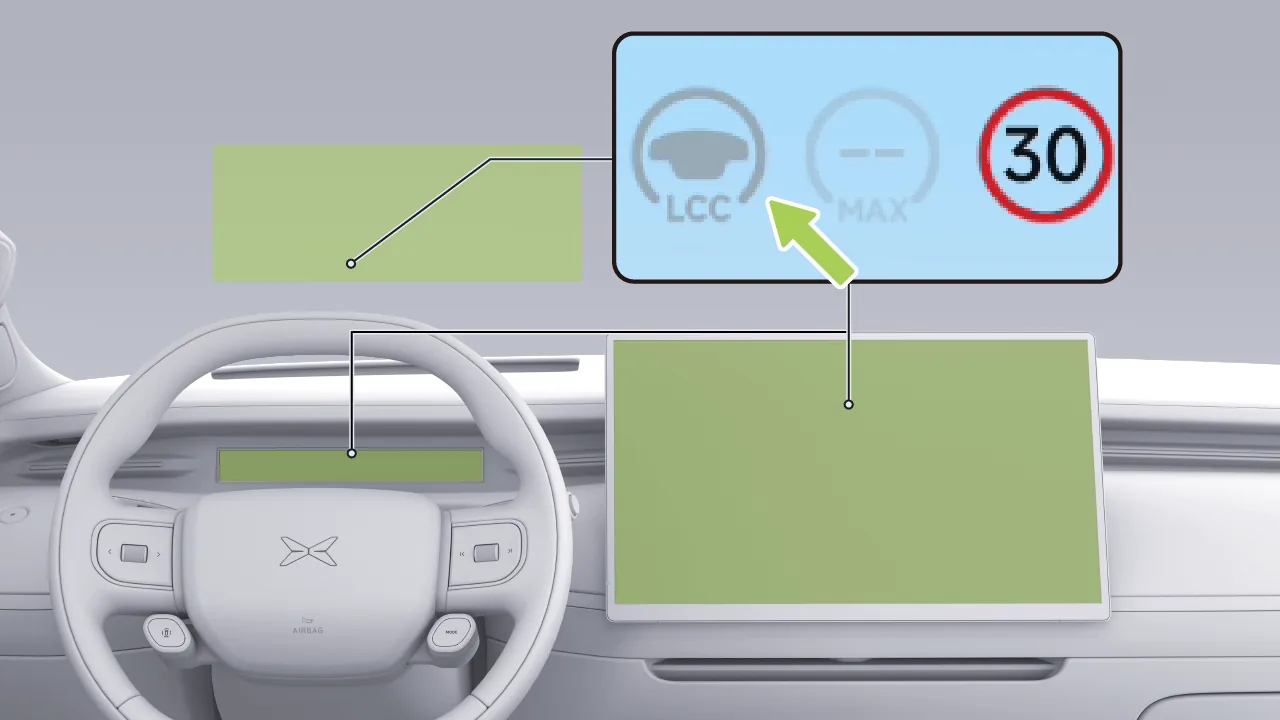
When LCC can be activated, in the HUD, instrument cluster screen, and central control screen  The indicator illuminates.
LCC can be activated in the following ways:
Press the left intelligent driving control button to activate LCC.
Push the gear selector all the way down once to activate LCC.
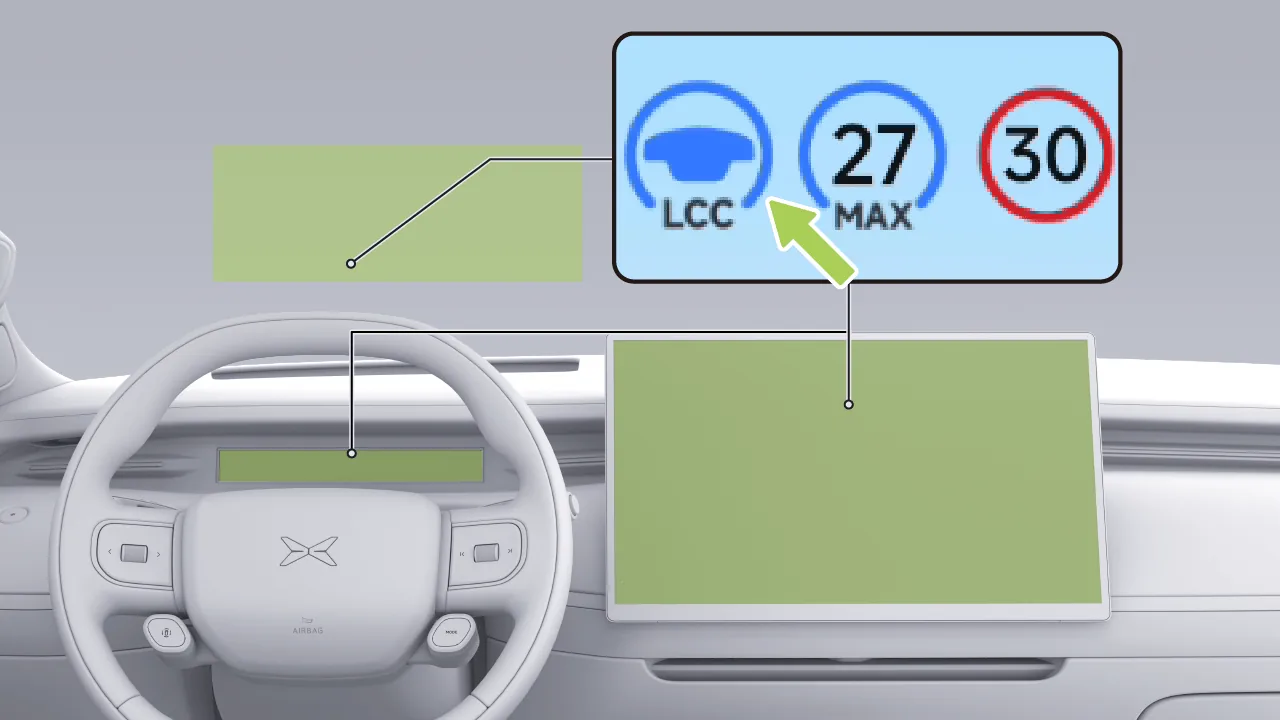
After LCC is activated, in the HUD, instrument cluster screen, and central control screen,  The indicator light illuminates, accompanied by a voice prompt.
Tips LCC is activated if the following conditions are met:
The LCC related components are functional and have a clear view.
Clear lane lines.
Wipers not in HI.
The brake pedal is not pressed.
Fasten the seat belt correctly.
Hold the steering wheel firmly with both hands.
All doors are closed.
Tire pressures are normal.
ABS, AEB etc. are not active.
Drive without fatigue.
Either of the above conditions is not met, LCC cannot be activated.
When LCC is activated, the maximum cruising speed can be set in the following ways.
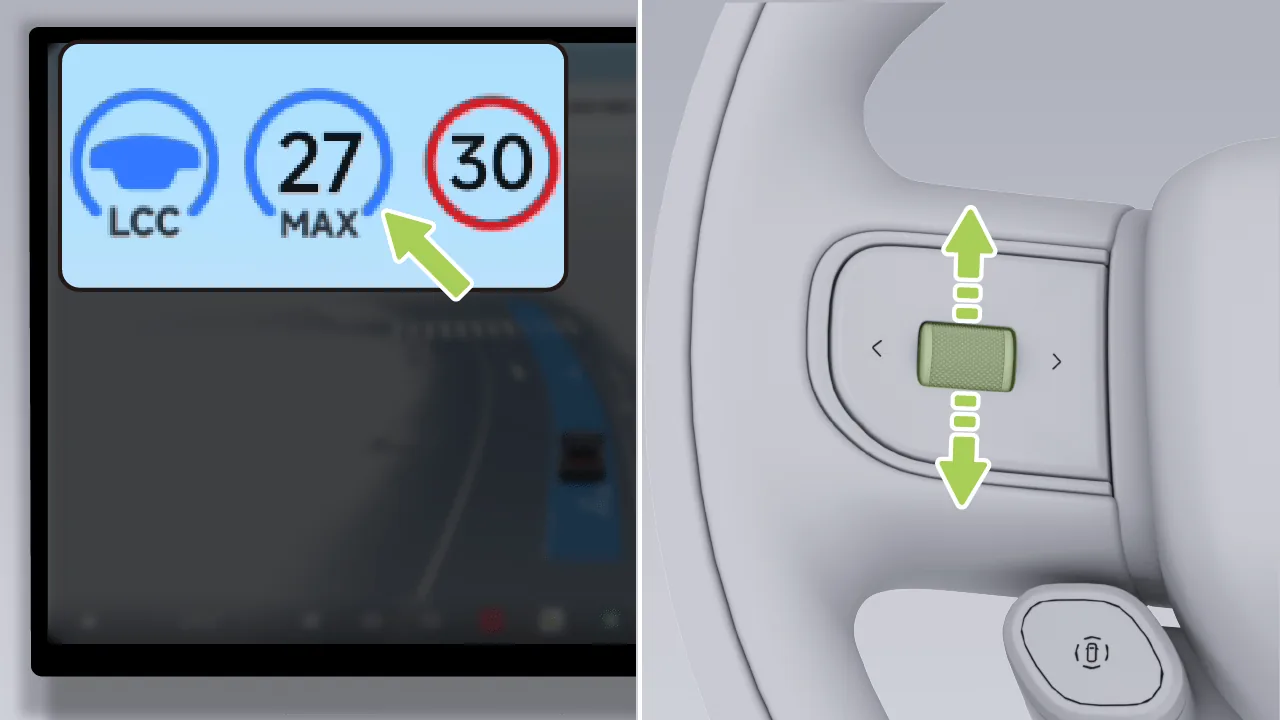
Use the left scroll wheel on the steering wheel. When the scroll wheel is scrolled slowly, the maximum cruise speed changes by 1 km/h; when the scroll wheel is scrolled quickly, the maximum cruise speed changes by 5 km/h.
Speed Assistance System SAS sets the maximum cruise speed.
Press the accelerator pedal. After the vehicle speed increases, push the shift lever downward and hold it to set the current vehicle speed as the new cruise speed. If the shift lever is not pushed and held, releasing the accelerator pedal will cause the vehicle to decelerate to the previously set speed and continue cruising.
When LCC is activated, the left/right buttons on the left side of the steering wheel can be used to set the following distance, with 5 levels available.
Tips When setting the following distance, the central control screen will display the distance level.
During the function use process, the system will detect in real time the driver's state of holding the steering wheel. If the driver removes hands from the steering wheel for a certain period of time, the system will issue A prompt is displayed and accompanied by an audible alert. At this time, the driver should grasp the steering wheel again to cancel the alarm.
If the driver still does not hold the steering wheel, the system will progressively intensify the hands-off reminder through visual, audible, and haptic reminder methods. When the continuous hands-off duration reaches the specified time, the system will issue Reminder: at this time, the driver should immediately respond to the vehicle takeover request and promptly control the vehicle's driving direction. During the current driving cycle, if a request for manual vehicle takeover is triggered due to prolonged hands-off operation, the assisted driving function will be disabled for the remainder of the journey. To reactivate it, the driver needs to shift back to the P gear to remove the disablement.
Warning The hands-off detection alert is an aid only function and does not replace the driver's judgment on the time to take over, the driver should stay focused on driving and respond to the system's alert message.
The driver as the driver of the vehicle has the responsibility to drive safely, in the course of driving should comply with the provisions of traffic regulations, consciously keep the driving all the way with both hands on the steering wheel, do not use any means to deceive the hands-off detection system.
Warning If the vehicle issues a takeover request via SR interface, voice announcement, etc., take over immediately.
In the event of a hazard, or in the event of a situation requiring a takeover, take over immediately and do not wait for the vehicle to issue a takeover request.
When LCC is activated, control can be taken over in the following ways:
Press the accelerator pedal: temporarily take over vehicle speed.
Press the brake pedal: exit LCC.
Push the gear selector lever upward: exit LCC.
Press the left intelligent driving control button: exit LCC.
If the vehicle's current status does not meet the LCC activation conditions, LCC will exit directly. Please be prepared to take over:
The lane markings are unclear.
Turn the steering wheel.
Please read all content related to LCC in this manual. You should understand these limitations before using the function.
LCC is designed for driving comfort and convenience and cannot respond to sudden dangerous situations. The driver is responsible for remaining alert at all times, driving safely, and maintaining control of the vehicle. Never rely on the system to respond to sudden emergency situations. Always observe the road conditions ahead and be prepared to take corrective action at any time, otherwise serious injury or death may result.
Warning The LCC cannot handle all traffic, road conditions and weather, do not use or turn on the LCC in the following scenarios:
Road with varying conditions, such as twists and turns.
At the junction or divergence of the road.
Roads that have been constructed or modified.
When lane line disappears or disconnects.
When the lane line is blurred, disappeared, or covered.
A road with a sharp change in lane direction ahead, such as road divergence, lane merging, sudden lane width increase or decrease.
Roads that are in poor condition, such as bumps, ice or slippery roads.
Urban roads.
At a traffic intersection.
When the vehicle ahead steers or a vehicle is moving in front of the vehicle.
A section where pedestrians or cyclists may be present.
In bad weather, such as rain, snow, fog.
When the vehicle is in poor condition, for example: Abnormal four wheel alignment, abnormal tire pressures, etc.
Warning Special road conditions or complex road sections:
On a sloping road, or on a downhill section.
High speed turns or sharp turns.
The intersection has a road/road/zebra line/arrow scene.
No lane line or excessive wear or blockage, overwriting, or disappearance of lane lines.
Temporary adjustment or rapid change due to road construction (e.g., lane forking, crossing or merging).
Special lane change scenarios such as lane diversions, diverting, diverting zones, lane widening, etc.
There are text or traffic signs on the surface of the road or dense text, traffic signs, asphalt oil, brake marks in the driveway, Tyre marks, ruts, etc.
Driveway is too wide or narrow.
The boundary of the road separated by ice cones, water horses, cement mounds, etc.
Complicated road conditions:
On congested roads.
Pedestrians or cyclists' roads may appear.
When other vehicles are moving in front of the vehicle.
Suddenly a vehicle quickly changes lanes close to the front of the vehicle.
When the vehicle ahead leaves the lane.
The vehicle in front is blocking the camera's view or blocking the lane line.
Large vehicles such as trucks, buses, etc. are on the side or in front.
Poor weather or lighting conditions:
Objects or landscape features are projected onto the driveway to form large shadows.
When bright light, such as oncoming headlamp light or direct sunlight, prevents the camera from seeing its sights.
Windshield glass blocks the camera's field of view (mist, dirt, stickers, etc.). -
When there is a large lateral air flow or high wind on one side of the vehicle.
Radar or camera restricted:
Radar restricted.
Camera restricted.
Radar or camera blocked (dust, cover, etc.) or poor weather conditions (e.g. heavy rain, heavy snow, heavy fog).
Warning Reliance on the system.
Used when lane lines are not clear or light conditions are poor.
Used in environments where pedestrians, cyclists or animals are heavy.
Remove both hands from the steering wheel.
Line of sight off the road.
When there are guardrails, barriers or curb stones on one side of the road.
The LCC will occasionally be able to assist the vehicle when secondary steering is not required or when you do not intend to steer, due to lack of clarity and irregularity in the lane line or other lines or objects on the surface of the lane that resemble a lane line, and you should take over the vehicle in time.
The above warnings, cautions, and limitations do not exhaustively describe all situations that affect the normal operation of LCC.
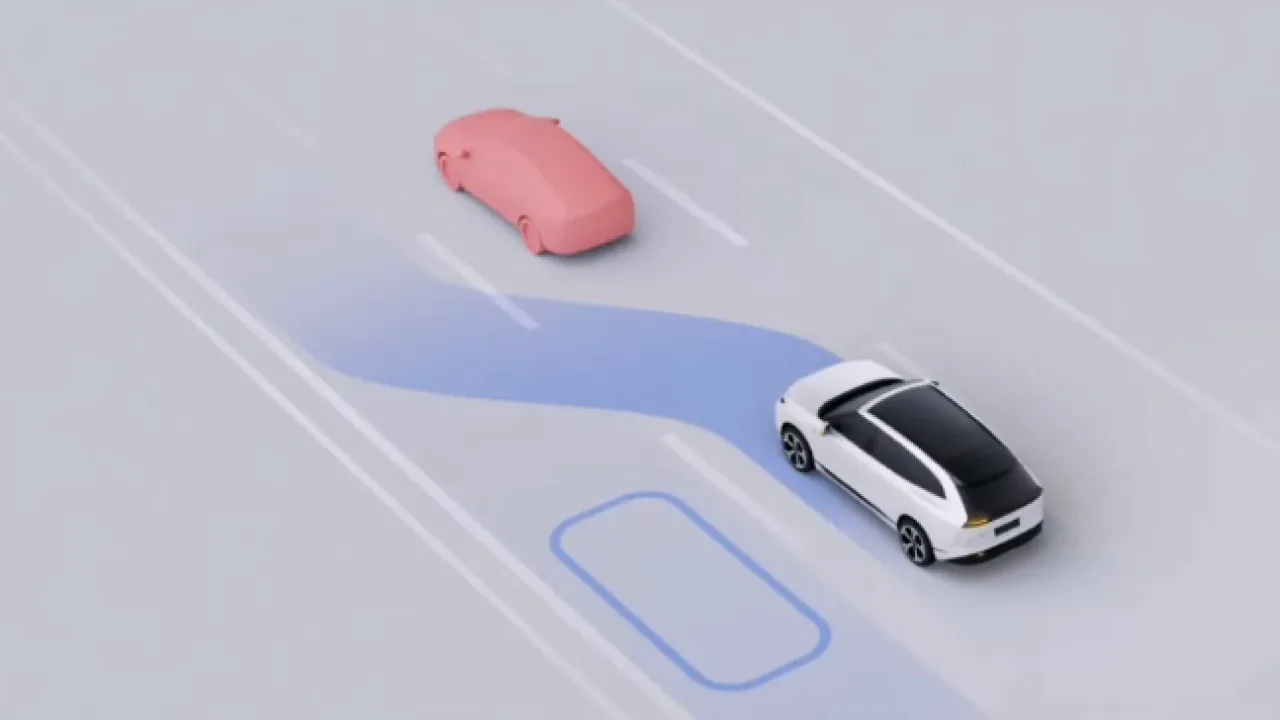
When LCC is activated, turn on the turn signal, and ALC can assist the driver in changing lanes.
Warning ALC is only an assisted driving function and cannot respond to all traffic, weather, and road conditions. You, as the driver of the vehicle, are responsible for driving safety. Please hold the steering wheel firmly at all times and observe the road conditions. If danger arises, take over promptly. Do not rely on this function to control the vehicle, otherwise injury or even death may result.
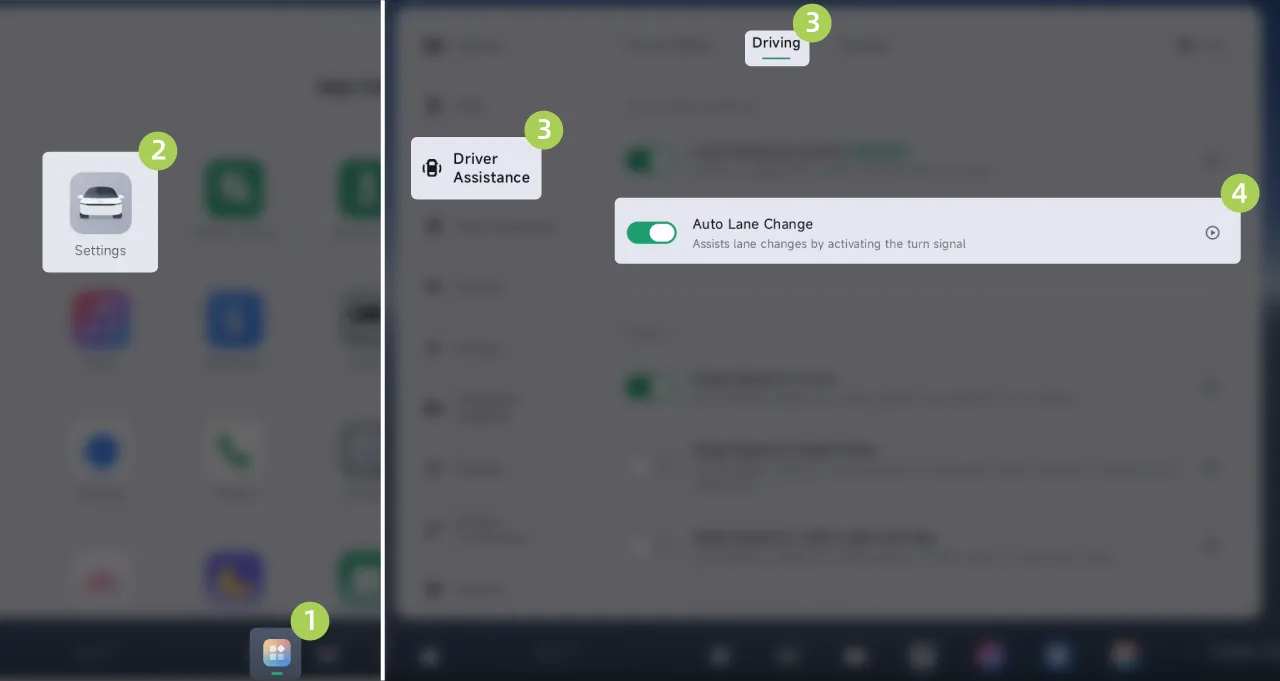
On the center display “ →Settings→driving assistance→Driving Scenarios”On the interface, you can turn the assisted lane change on/off.
Check the lane change environment and confirm that the lane change is safe.
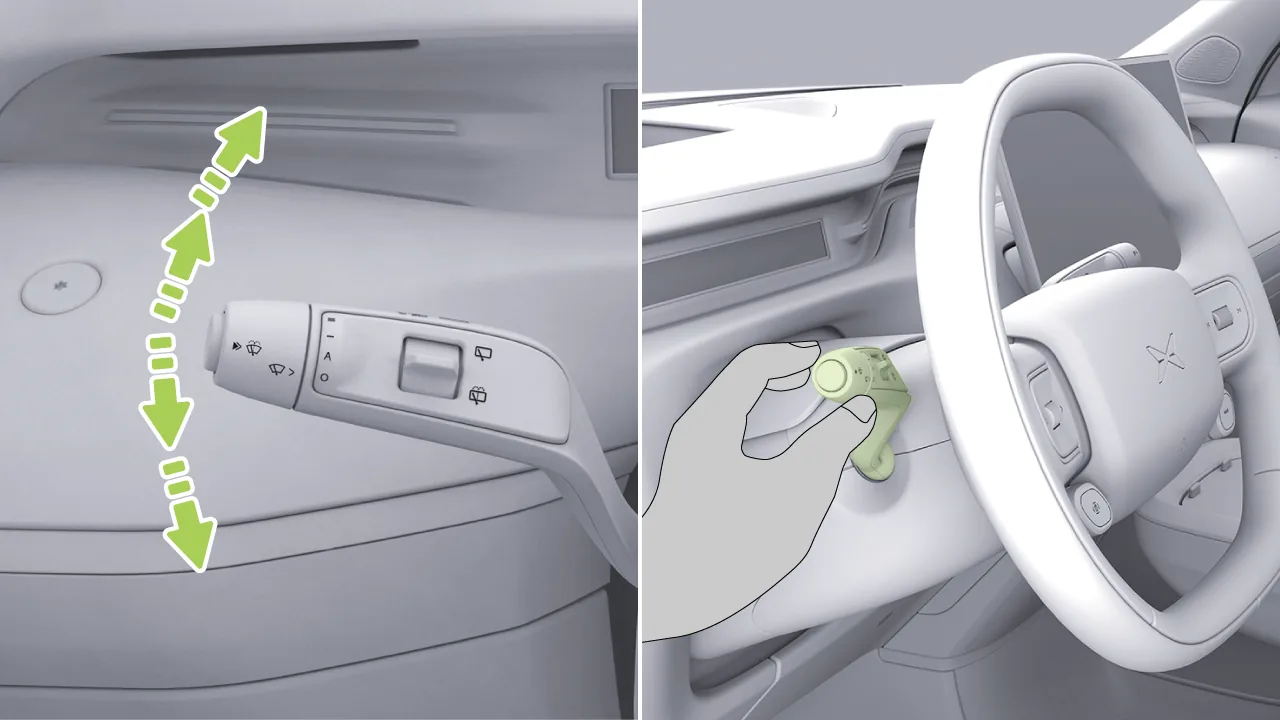
Turn on the lane change light/turn signal on the corresponding side.
If the ALC lane change conditions are met, ALC will assist the driver in changing lanes. If the lane change conditions are not met, a prompt will be displayed through the SR interface.
Tips The ALC can only change lanes one at a time, to change lanes again, switch on the opposite side of the traffic light/turn signal again.
ALC cannot change lanes across lines.
Once the ALC is initiated, it will look for the right time for the scene to change lanes, and when it is canceled, The SR screen displays the as a reminder.
The traffic/turn signals will switch off automatically when the lane change is completed or canceled using the ALC.
Warning If the vehicle issues a takeover request via SR interface, voice announcement, etc., take over immediately.
In the event of a hazard, or in the event of a situation requiring a takeover, take over immediately and do not wait for the vehicle to issue a takeover request.
After ALC is activated, you can cancel the lane change and exit LCC by performing the following operations:
Turn the steering wheel.
Depress the brake pedal.
ALC is an assisted driving function and cannot achieve autonomous driving. When ALC is activated, the driver still needs to observe the safety of the lane change environment at all times so as to take over the vehicle in time when there is a potential danger.
ALC is designed for driving comfort and convenience and cannot respond to sudden dangerous situations. The driver is responsible for remaining alert at all times, driving safely, and maintaining control of the vehicle. Never rely on the system to respond to sudden emergencies. Be sure to observe the road conditions ahead and be prepared to take corrective action at any time, otherwise serious injury or death may result.
ALC may unexpectedly deactivate at any time for unknown reasons. Be sure to observe road safety conditions and be prepared to take appropriate measures. The driver is always responsible for lane change safety.
Warning Read all of the information about ALC in this manual and you should be aware of these limitations before using the feature.
The ALC cannot handle all traffic, weather and road conditions and must not operate in bad weather (e.g. rain, snow, fog weather) and where pedestrians or cyclists may be present.
Do not use the ALC when a vehicle is in front of or adjacent to the side of the vehicle, as it may collide with other vehicles.
During the use of the ALC, if other vehicles change lane at the same time and the same lane as the vehicle is about to change lane, the function cannot avoid the risk of collision at this time, the driver should always observe the changing lane environment safe and timely intervention in vehicle control. The driver is solely responsible for safely changing lanes to avoid collisions.
Do not use the ALC when the vehicle is in poor condition, for example: Abnormal four wheel alignment, abnormal tire pressures, etc.
Do not use the ALC on ramps, commutes, or diverts on highways or other roads.
Use ALC with caution on cornering, the system may not support lane change assist.
Do not use the ALC on urban roads or in difficult conditions.
Do not use the ALC on tight curves, bumps, ice, or slippery surfaces, where the system is unable to stabilize on lane change assist.
The ALC occasionally recognizes a condition that allows lane change as not allowing lane change, which requires you to change lanes manually.
ALC may not be able to accurately detect traffic changes on high traffic sections, use ALC with caution.
Do not use ALC on lanes marked as solid or other road sections with restricted traffic changes.
When using the ALC, the driver must take over immediately if another vehicle approaches the vehicle quickly, and the ALC cannot avoid a possible collision.
Do not use the ALC when there are other vehicles in the side rear blind area of this vehicle or in the lane of a traffic change.
There are sharp turns on the road, or the road is in poor condition, such as rough, slippery or icy roads.
On a sloping road.
Pedestrians or cyclists' roads may appear.
Dark (poor lighting) or poor visibility (due to heavy rain, snow, heavy fog, etc.).
When bright light, such as oncoming headlamp light or direct sunlight, prevents the camera from seeing its sights.
Windshield glass blocks the camera's field of view (mist, dirt, stickers, etc.).
Excessive wear or blockage of lane lines, overwriting, overlap of old and new markings, temporary adjustment or rapid change due to road construction (e.g. driveways are split, crossed or merged).
Objects or landscape features are projected onto the driveway to form large shadows.
Warning cones, warning signs or other objects are placed on the surface of the road.
Radar restricted.
Radar or camera blocked (dust, cover, etc.) or poor weather conditions (e.g. heavy rain, heavy snow, heavy fog).
Performance can be compromised when there is large lateral air flow or strong wind on one side of the vehicle, which is not suitable for ALC use.
The above warnings, cautions, and limitations do not exhaustively describe all situations that affect the normal operation of ALC.
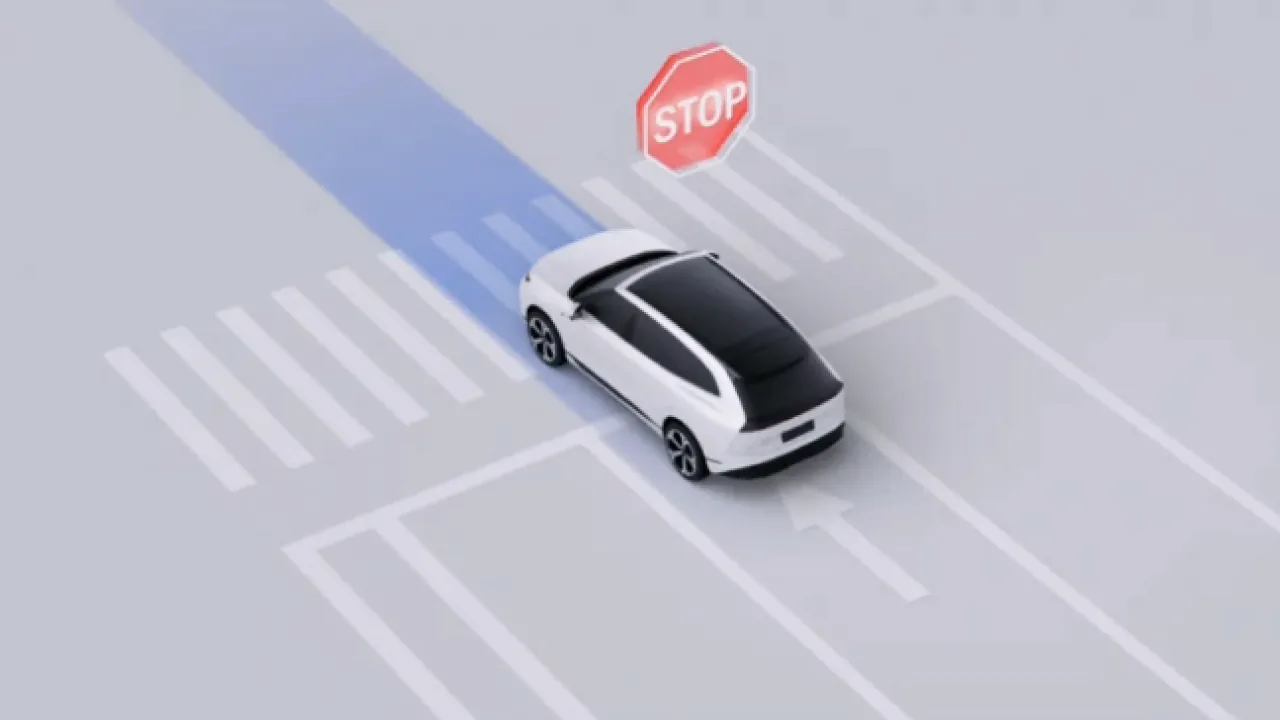
LCC is activated. The function can identify traffic lights and assist the driver in passing through intersections.
For straight-through lanes and composite lanes containing straight-through arrows, the function will recognize traffic lights in the straight-through direction and perform control for stopping at a red light and starting at a green light.
Tips In a compound arrow lane, the traffic light direction identified by the system may not be the same as the actual driving intention. Please pay attention to the navigation information and take over when necessary.
For lanes that do not include a straight-ahead arrow, the function will recognize the traffic signal for the corresponding direction and perform stopping at a red light and prompting the driver to take over at a green light.
Tips The current system does not yet have the capability to turn left or right. Please drive manually when a left or right turn is required.
Warning The stop-and-go at straight-through traffic lights is only an assisted driving function and cannot respond to all traffic, weather, and road conditions. As the driver of the vehicle, you are responsible for driving safety. Please hold the steering wheel firmly at all times and observe the road conditions. If danger arises, take over promptly. Do not rely on this function to control the vehicle, otherwise injury or even death may result.
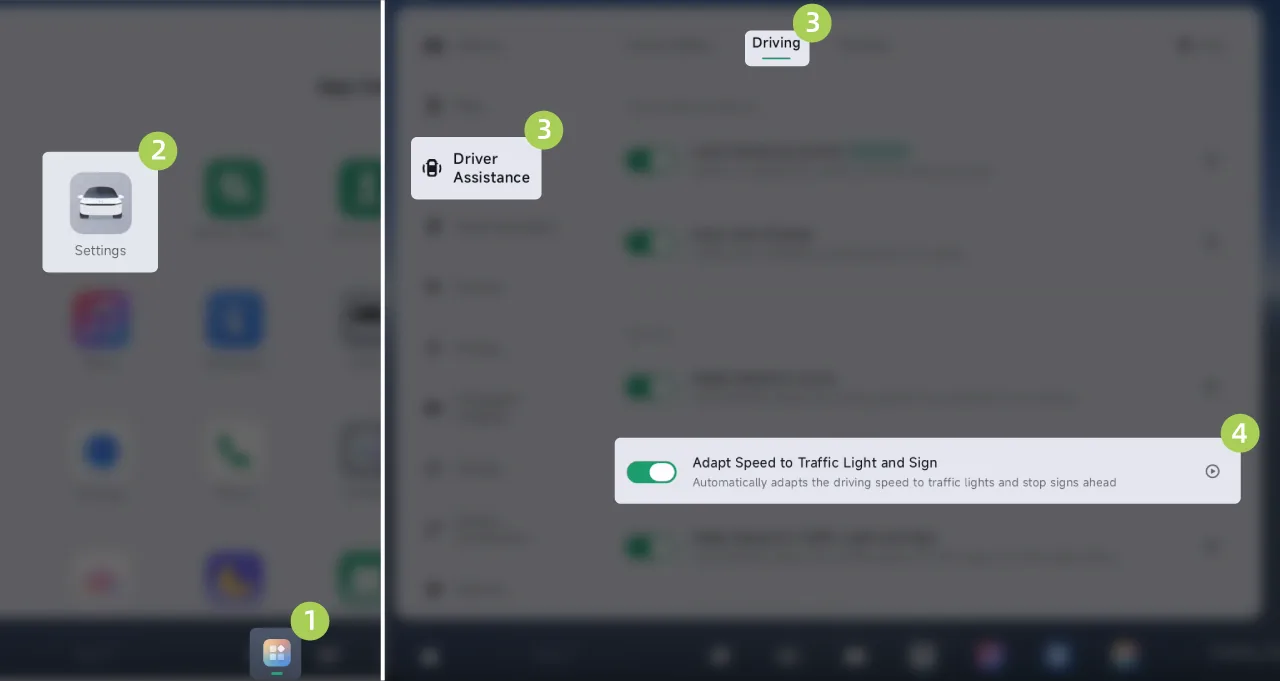
On the center control screen “ →Settings→driving assistance→Driving Scenarios”On this screen, you can turn the straight-through traffic light stop/start function on or off.
Warning If the vehicle issues a takeover request via SR interface, voice announcement, etc., take over immediately.
In the event of a hazard, or in the event of a situation requiring a takeover, take over immediately and do not wait for the vehicle to issue a takeover request.
The takeover operation of LCC also applies to stopping and starting at straight-through traffic lights.
When LCC is activated, control can be taken over in the following ways:
Press the accelerator pedal: temporarily take over vehicle speed.
Press the brake pedal: exit LCC.
Push the gear selector lever upward: exit LCC.
Press the left intelligent driving control button: exit LCC.
If the vehicle's current status does not meet the LCC activation conditions, LCC will exit directly. Please be ready to take over:
The lane markings are unclear.
Turn the steering wheel.
Warning Driving stop from traffic light is an auxiliary driving function, does not enable automatic driving, when the function is on, the driver still need to observe the vehicle's lane at all times. Stop line and traffic signal status to take over the vehicle if the brake is not slowing down in time.
When the standard motor vehicle traffic signal in the current lane is red, if a clear stop line appears ahead, the assisted driver will stop and wait according to the traffic light; otherwise, the speed will be reduced or the waiting will be stopped according to the driving road.
The system may not accurately recognize the traffic light status in the following situations, use caution using the straight-ahead traffic light start-stop feature, including but not limited to:
Multiple sets of lane-level traffic lights in the same direction blocked by other vehicles or trees, etc.
The two near junctions are close, the elevated level is close to the traffic light under the bridge, and the main Louis is tied to the traffic light of the secondary road or the ramp or cross-lane.
Temporary traffic lights.
Traffic lights for long junctions and large junctions.
Profiled traffic lights, such as heart lights.
Composite arrow beacon.
Bus, non-motor vehicle, tram and other special traffic lights, main service road, Traffic lights, etc.
A traffic light that is off-set and high above the camera's viewing range.
A traffic light in high light, such as oncoming headlamps or direct sunlight.
Lights at night when there is a lot of light.
The traffic lights that are malfunctioning, such as: Red flashing, lights not on, yellow lights not on, etc.
Changing traffic lights may result in late deceleration or excessive braking force.
Warning Do not use the straight traffic light to start and stop in the following scenarios:
Dark (poor lighting) or poor visibility (due to heavy rain, snow, heavy fog, etc.).
When bright light, such as oncoming headlamp light or direct sunlight, prevents the camera from seeing its sights.
The vehicle ahead is blocking the camera's view. Windshield glass blocks the camera's field of view (mist, dirt, stickers, etc.).
Objects or landscape features are projected onto the driveway to form large shadows.
Radar or camera restricted.
Radar or camera blocked (dust, cover, etc.) or poor weather conditions (e.g. heavy rain, heavy snow, heavy fog).
When there is a large lateral air flow or high wind on one side of the vehicle.
The above warnings, cautions, and limitations do not exhaustively describe all conditions that affect the normal operation of the straight-through traffic light stop-and-go function.
When the LCC assisted driving function is activated, you can actively control the vehicle by pressing the accelerator pedal and turning the steering wheel. At this time, the vehicle is in co-driving mode, and the central control screen displays relevant prompt information. After you complete operations such as lane changing, detouring, and turning, when you actively release the accelerator pedal or lightly hold the steering wheel, the system will automatically return to the LCC assisted driving state.
Warning In Co-Driving Mode, the driver controls the vehicle. Please observe road conditions at all times, and do not rely on this function to respond to sudden emergencies, otherwise it may result in personal injury or death.
If the driver takes actions such as depressing the brake pedal, the LCC function will also exit. Please read the LCC section carefully.
If a hazard is detected, or a situation requiring takeover occurs, take over immediately. Do not wait for the vehicle to issue a takeover request.
When the vehicle issues a takeover request through the SR interface, voice announcements, or other means, immediately take over the vehicle.
When encountering complex scenarios such as curves, intersections, and narrow roads, or when changing lanes or detouring, if a stationary obstacle/slow-moving vehicle is detected, please proactively control the vehicle's direction and brake promptly when necessary.
During parking and low-speed driving, the ultrasonic radar can detect the distance between the vehicle and surrounding obstacles, and provide alerts through the SR interface and alert sounds.
Caution When a red bar is displayed, it indicates that the distance between the obstacle and the vehicle is already very close, and extra attention is required.
As the distance between the vehicle and the obstacle decreases, the frequency of the warning tone will gradually increase.
Tips When the vehicle is in D Gear, the radar will issue a warning only when the vehicle speed is less than 12 km/h; when the vehicle is in R gear, there is no speed limit for radar warning.
Even if the obstacle is relatively soft (such as tall, thin weeds) and will not damage the vehicle, the radar warning will still issue an alert.
Warning In the following scenarios, the radar warning may not function properly:
Radar limited.
The vehicle is approaching an obstacle at a relatively high speed.
The above warnings, cautions, and limitations do not describe all situations that affect the normal operation of radar warning.
APA can assist the driver with parking in and parking out. See Function OverviewFor perpendicular parking spaces, parallel parking spaces, angled parking spaces, and dead-end parking spaces with lane markings or without lane markings, the following activation methods are supported:
Central Control Screen
Remote Key*
Phone Key
Warning APA is only an assisted driving function and cannot handle all traffic, weather, and road conditions. As the driver of the vehicle, you are responsible for driving safety. Please hold the steering wheel firmly at all times and observe the road conditions. If danger arises, take over promptly. Do not rely on this function to control the vehicle, otherwise injury or even death may result.
 | APA Can Be Activated |
 | APA Activated |
 | APA Unavailable |
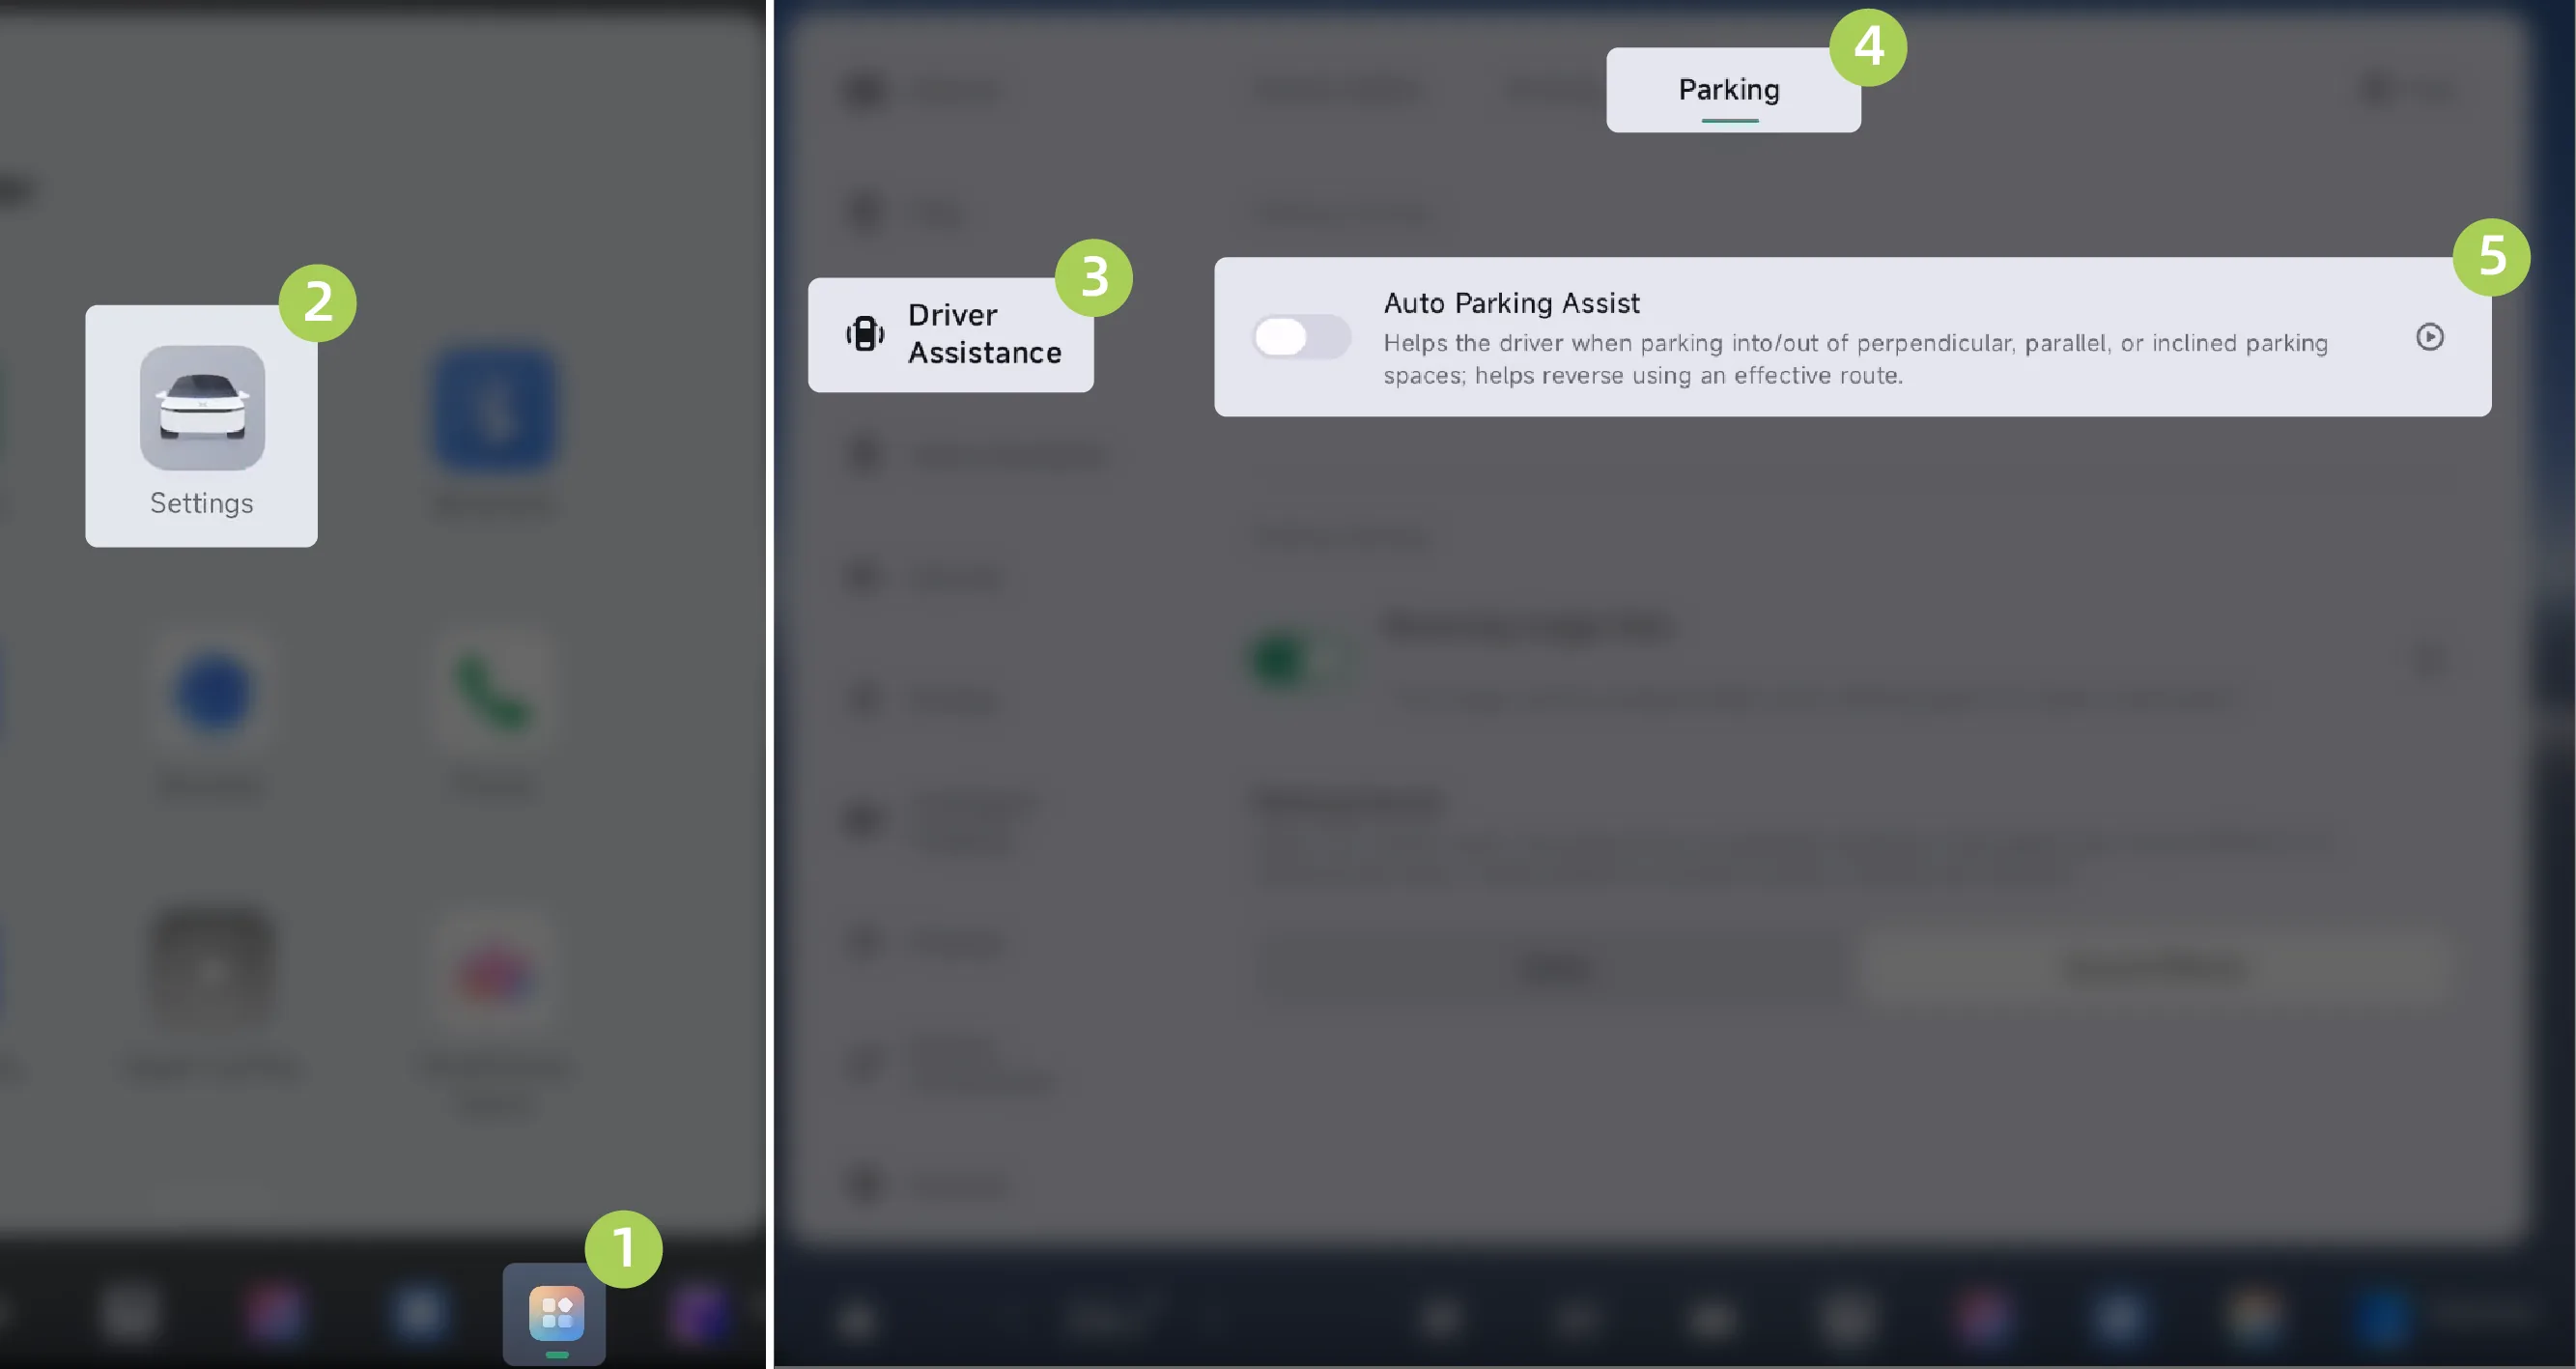
On the center control screen “ →Settings→driving assistance→Parking Scenario”On the interface, you can turn assisted parking on/off.
Parking mode can be entered using any of the following methods:
Automatic switching. When the vehicle enters a parking environment such as an underground garage, it automatically enters parking mode.
When the steering wheel shortcut button has been set to When, press the steering wheel shortcut button.
Tap the central control screen 。
Speak directly 。
When the SR interface displays the parking space icon, stop the vehicle and shift to R gear.
Drive to search for the target parking space.
Tips While searching for a parking space, please keep the lateral distance between the vehicle and the parking space within the range of 1 to 2 meters.
During the parking space search process, the vehicle speed does not exceed 24 km/h.
When the target parking space is highlighted, depress the brake pedal and tap the target parking space on the central control screen to select it.
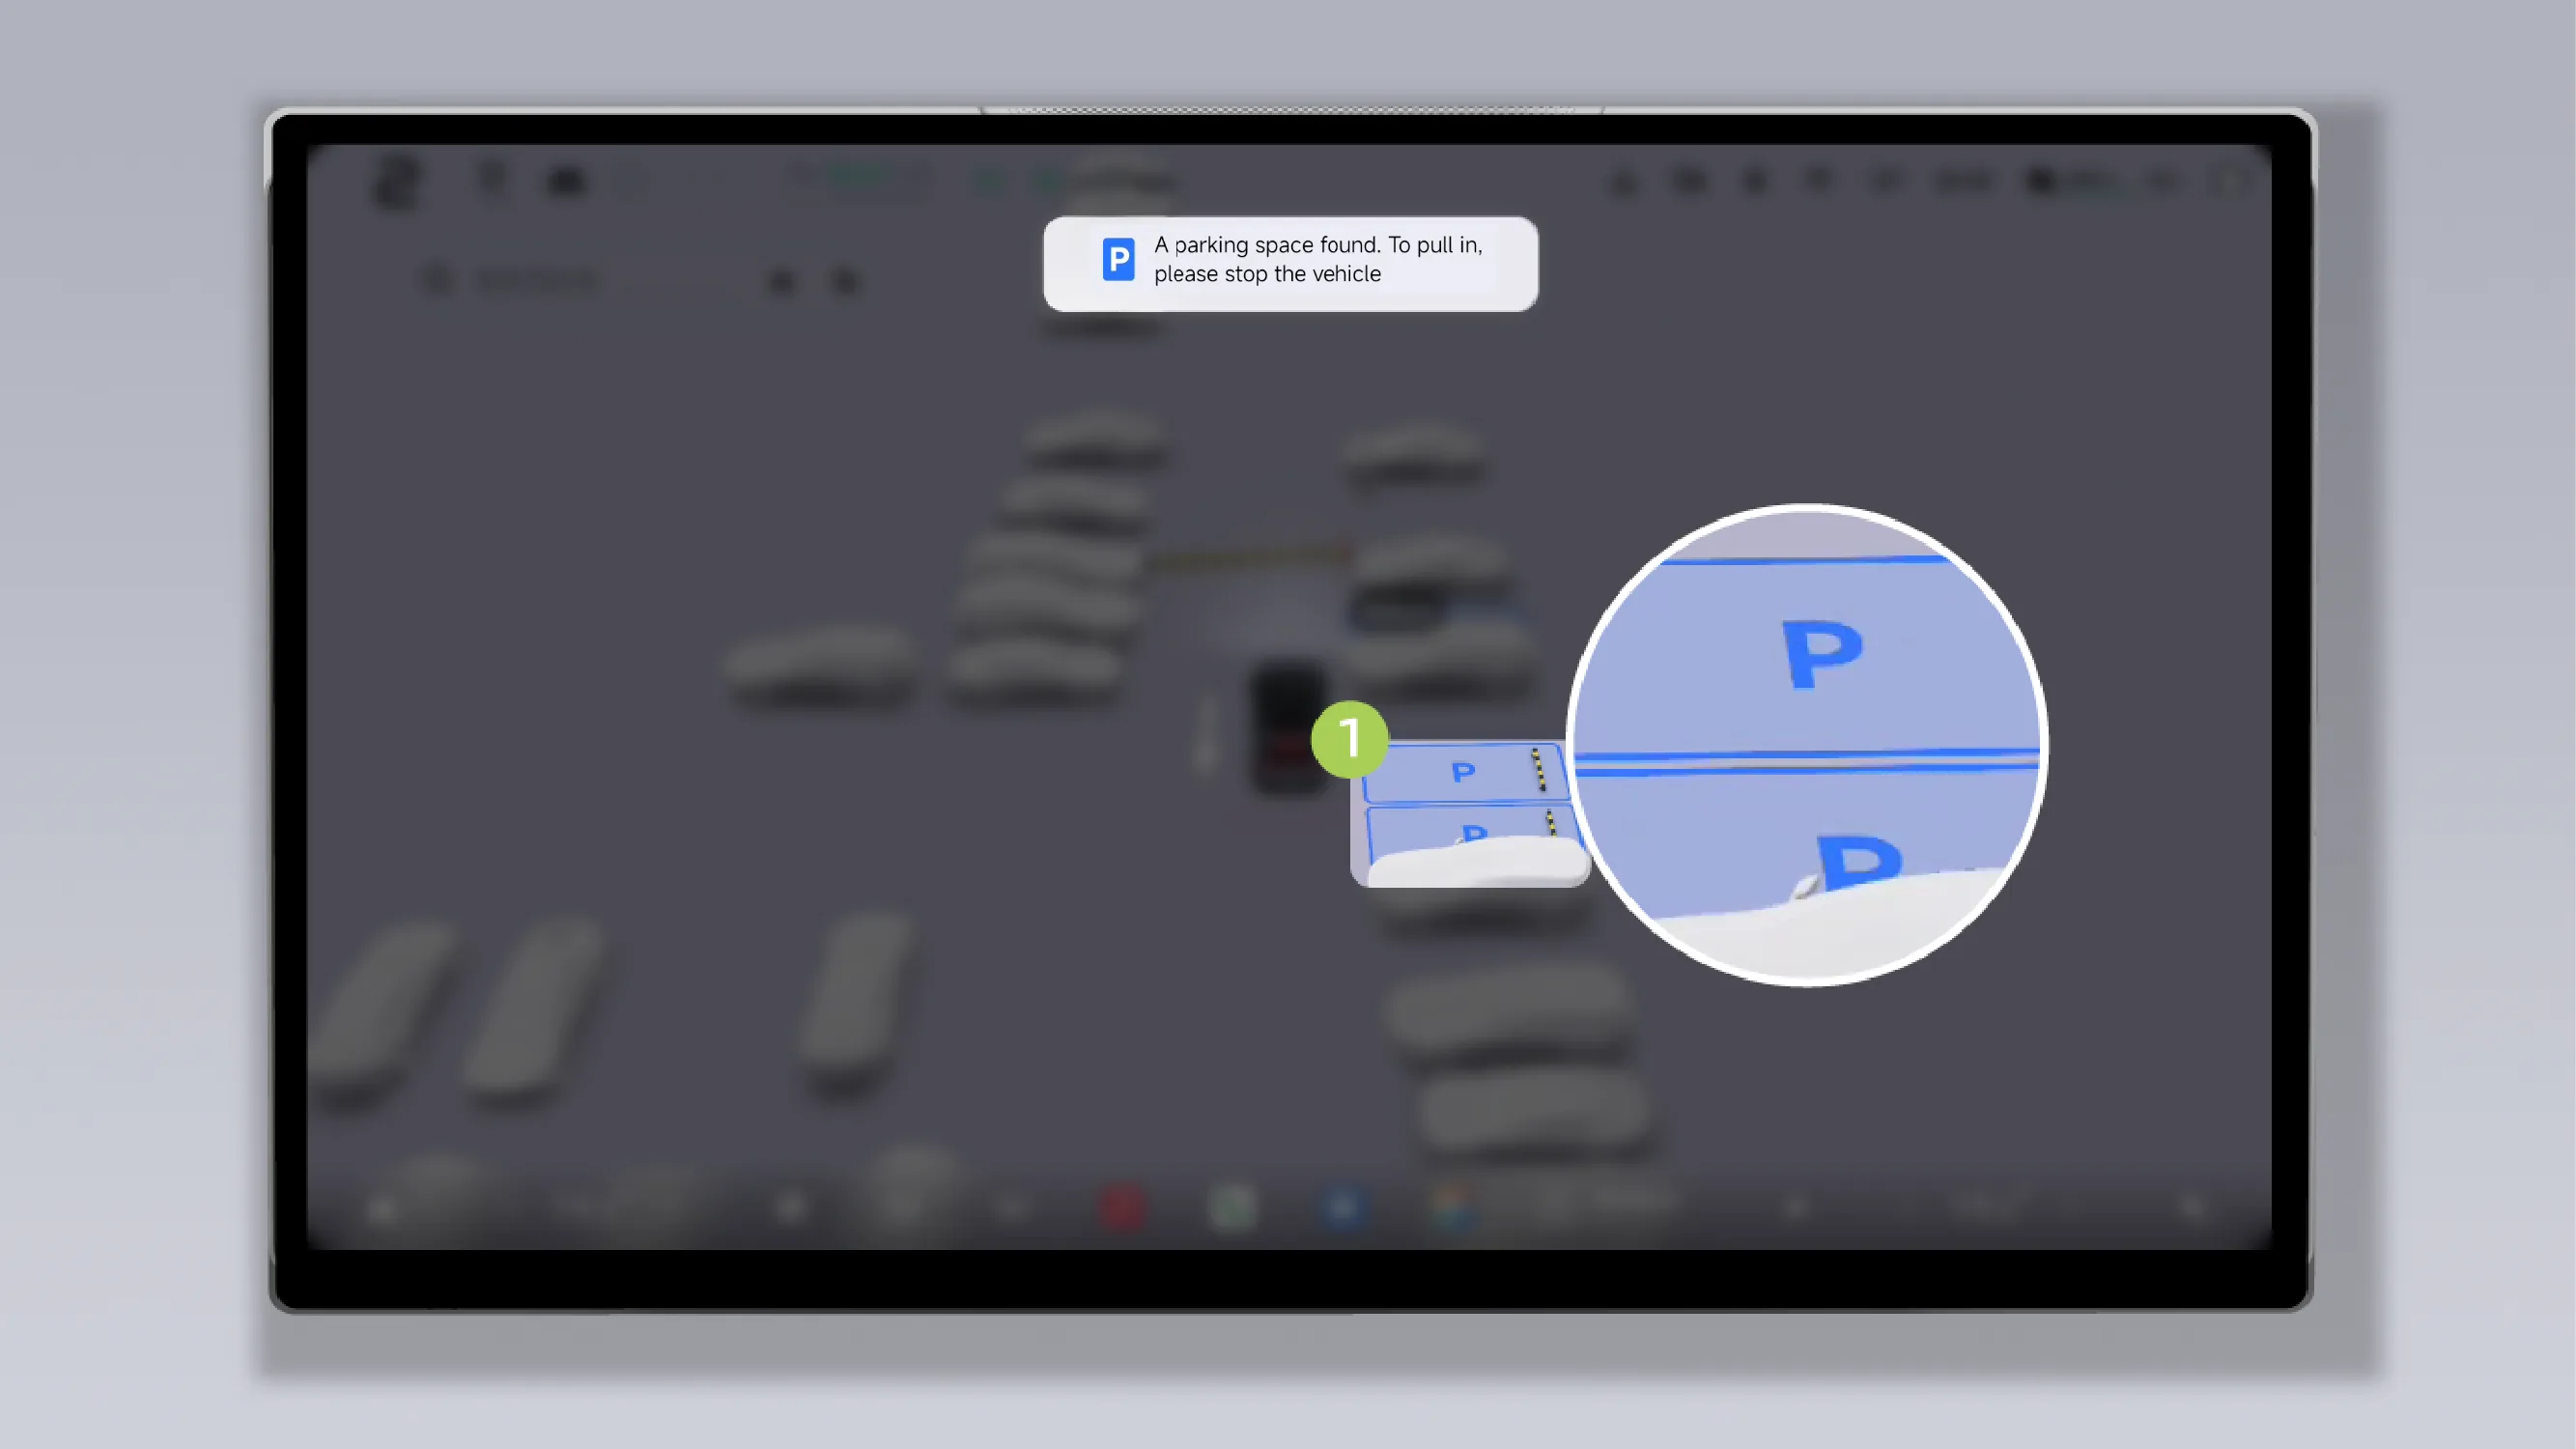
At this time, you can park into the parking space by the following methods:
Tap the central control screen's , then release the brake pedal.
Tap the upper right corner of the parking card You can select the parking-in orientation. After confirming the parking-in orientation, tap again. , then release the brake pedal.
Remote key*: Shift to P gear, get out of the vehicle and close the door properly, press and hold the parking button on the remote key, and after the Side Mirrors fold and the hazard warning lights turn on, double-press the parking button on the remote key.
Phone Key: shift into P gear, get out of the vehicle and close the door properly, open the Smart Parking module in the mobile app, tap , wait until the vehicle Side Mirrors fold and the hazard warning lights turn on, then tap 。
Tips After parking in the parking space using the remote key*/phone key, the vehicle automatically shifts to P gear, locks, and powers off.
When parking into a space using the remote key*/phone key, the smart key/phone needs to remain near the vehicle, otherwise the function will exit.
When using the phone key to park into a parking space, within five minutes after pausing remote parking, opening the door/trunk to retrieve items is allowed. After retrieving the items, close the door and tap Continue to complete remote parking.
Remote Parking Entry: Tap on the center display screen When the pop-up window appears, after selecting the start method, the occupants in the vehicle may exit the vehicle carrying the mobile phone and remote key. The vehicle turns on the hazard warning flashers and then begins automatic parking.
If selected Passengers inside the vehicle can then exit carrying their mobile phone and remote key. After exiting, close all doors and keep a certain distance away. The vehicle turns on the hazard warning lights and then begins automatic parking.
If selected Passengers inside the vehicle may then exit carrying the mobile phone and remote key. After exiting, close all doors and trigger it by any of the following methods:
Cover the side rear camera at the fender for 3 seconds. The vehicle turns on the hazard warning lights, and then begins automatic parking.
Tips This method depends on ambient brightness. If environmental conditions do not support it, the vehicle system will broadcast it. Please use the App to activate the function.
Tap the App notification or press the “Parking” button* on the remote key once to activate the function. The vehicle turns on the hazard warning lights and then starts automatic parking.
Tips Before using Remote Parking, please first confirm that notification permissions for the mobile app are enabled.
After parking starts, please keep observing the surroundings of the vehicle, keep the mobile phone Bluetooth turned on, and wait until the vehicle is Power Off and locked before leaving.
Warning If the vehicle issues a takeover request through the central control screen, voice announcement, or other means, take over immediately.
If a hazard is detected, or a situation requiring takeover occurs, take over immediately. Do not wait for the vehicle to issue a takeover request.
Before parking into a space using the remote key*/mobile App, be sure to confirm that no one is inside the vehicle.
When using remote parking, before getting out and closing the door, check whether any children or other important items have been left in the rear seats.
When APA is activated, it can be paused in the following ways:
Center control screen parking: You can press the brake pedal at any time to pause APA.
Remote key parking*: Briefly press any button on the smart key.
Phone Key Parking: Tap on the mobile app page's Button.
After confirming safety, APA can be resumed by performing the following operations:
Center display parking: Tap on the center display 。
Remote key parking*: Double-press the parking button on the remote key.
Phone Key Parking: Tap in the mobile app 。
If any of the following situations occurs, APA will exit:
Manually turn the steering wheel.
Press the brake pedal to shift.
If APA is paused for more than 30 seconds without resuming, or when using mobile phone remote parking, if it is paused for more than 5 minutes without resuming.
The APA has been paused 3 times due to a door being opened, the accelerator pedal being pressed, or the brake pedal being pressed.
Remote parking entry: Parking can be canceled by tapping the vehicle lock button in the mobile App, any button on the remote key, or pulling the door handle.
Warning Do not use APA in the following scenarios:
The road is a ramp.
One or more ultrasonic sensors, the Surround Camera is dirty or obstructed (e.g. sludge, snow or water hanging).
Poor weather conditions (e.g. heavy rain, heavy snow, heavy fog, etc.).
The road surface is uneven, icy or slippery.
Kerb material is not a stone or the curb cannot be detected.
There are poor surfaces (e.g., cliffs, high platforms, sidewalks facing the street, etc.).
Fitted with anti-slip chains or spare wheels.
The loaded object protrudes from the vehicle.
Either side of the left or right exterior mirrors is damaged or in an incorrect position.
Parking spaces on narrow streets, or narrow parking spaces.
Modifications to the vehicle or vehicle repairs carried out at a non-Xpeng Automobile Service Center affect the normal functioning of the vehicle.
Warning In the following scenarios, APA may be unable to take safety measures; take over the vehicle immediately:
When the SR interface issues a takeover request to you.
When APA exits unexpectedly.
During parking, the system encounters vehicles, pedestrians, and objects and does not complete automatic avoidance or braking in time.
Warning APA may have the following situations, please note the takeover:
Obstruction above and above exterior mirror height.
Dangling, small, and small-width obstructions.
A target in a camera or radar blind spot.
Pedestrians or animals.
The above warnings, cautions, and limitations do not describe all situations that affect the normal operation of APA.
After enabling the APA assisted parking function, in scenarios without parking space lines, you can also select Method: park the vehicle in the designated position:
Tap on the center display screen. A white parking space box will appear in the right-side view.
Tips You can also wake up XPENG and state your command, for example: enable custom parking, exit custom parking.
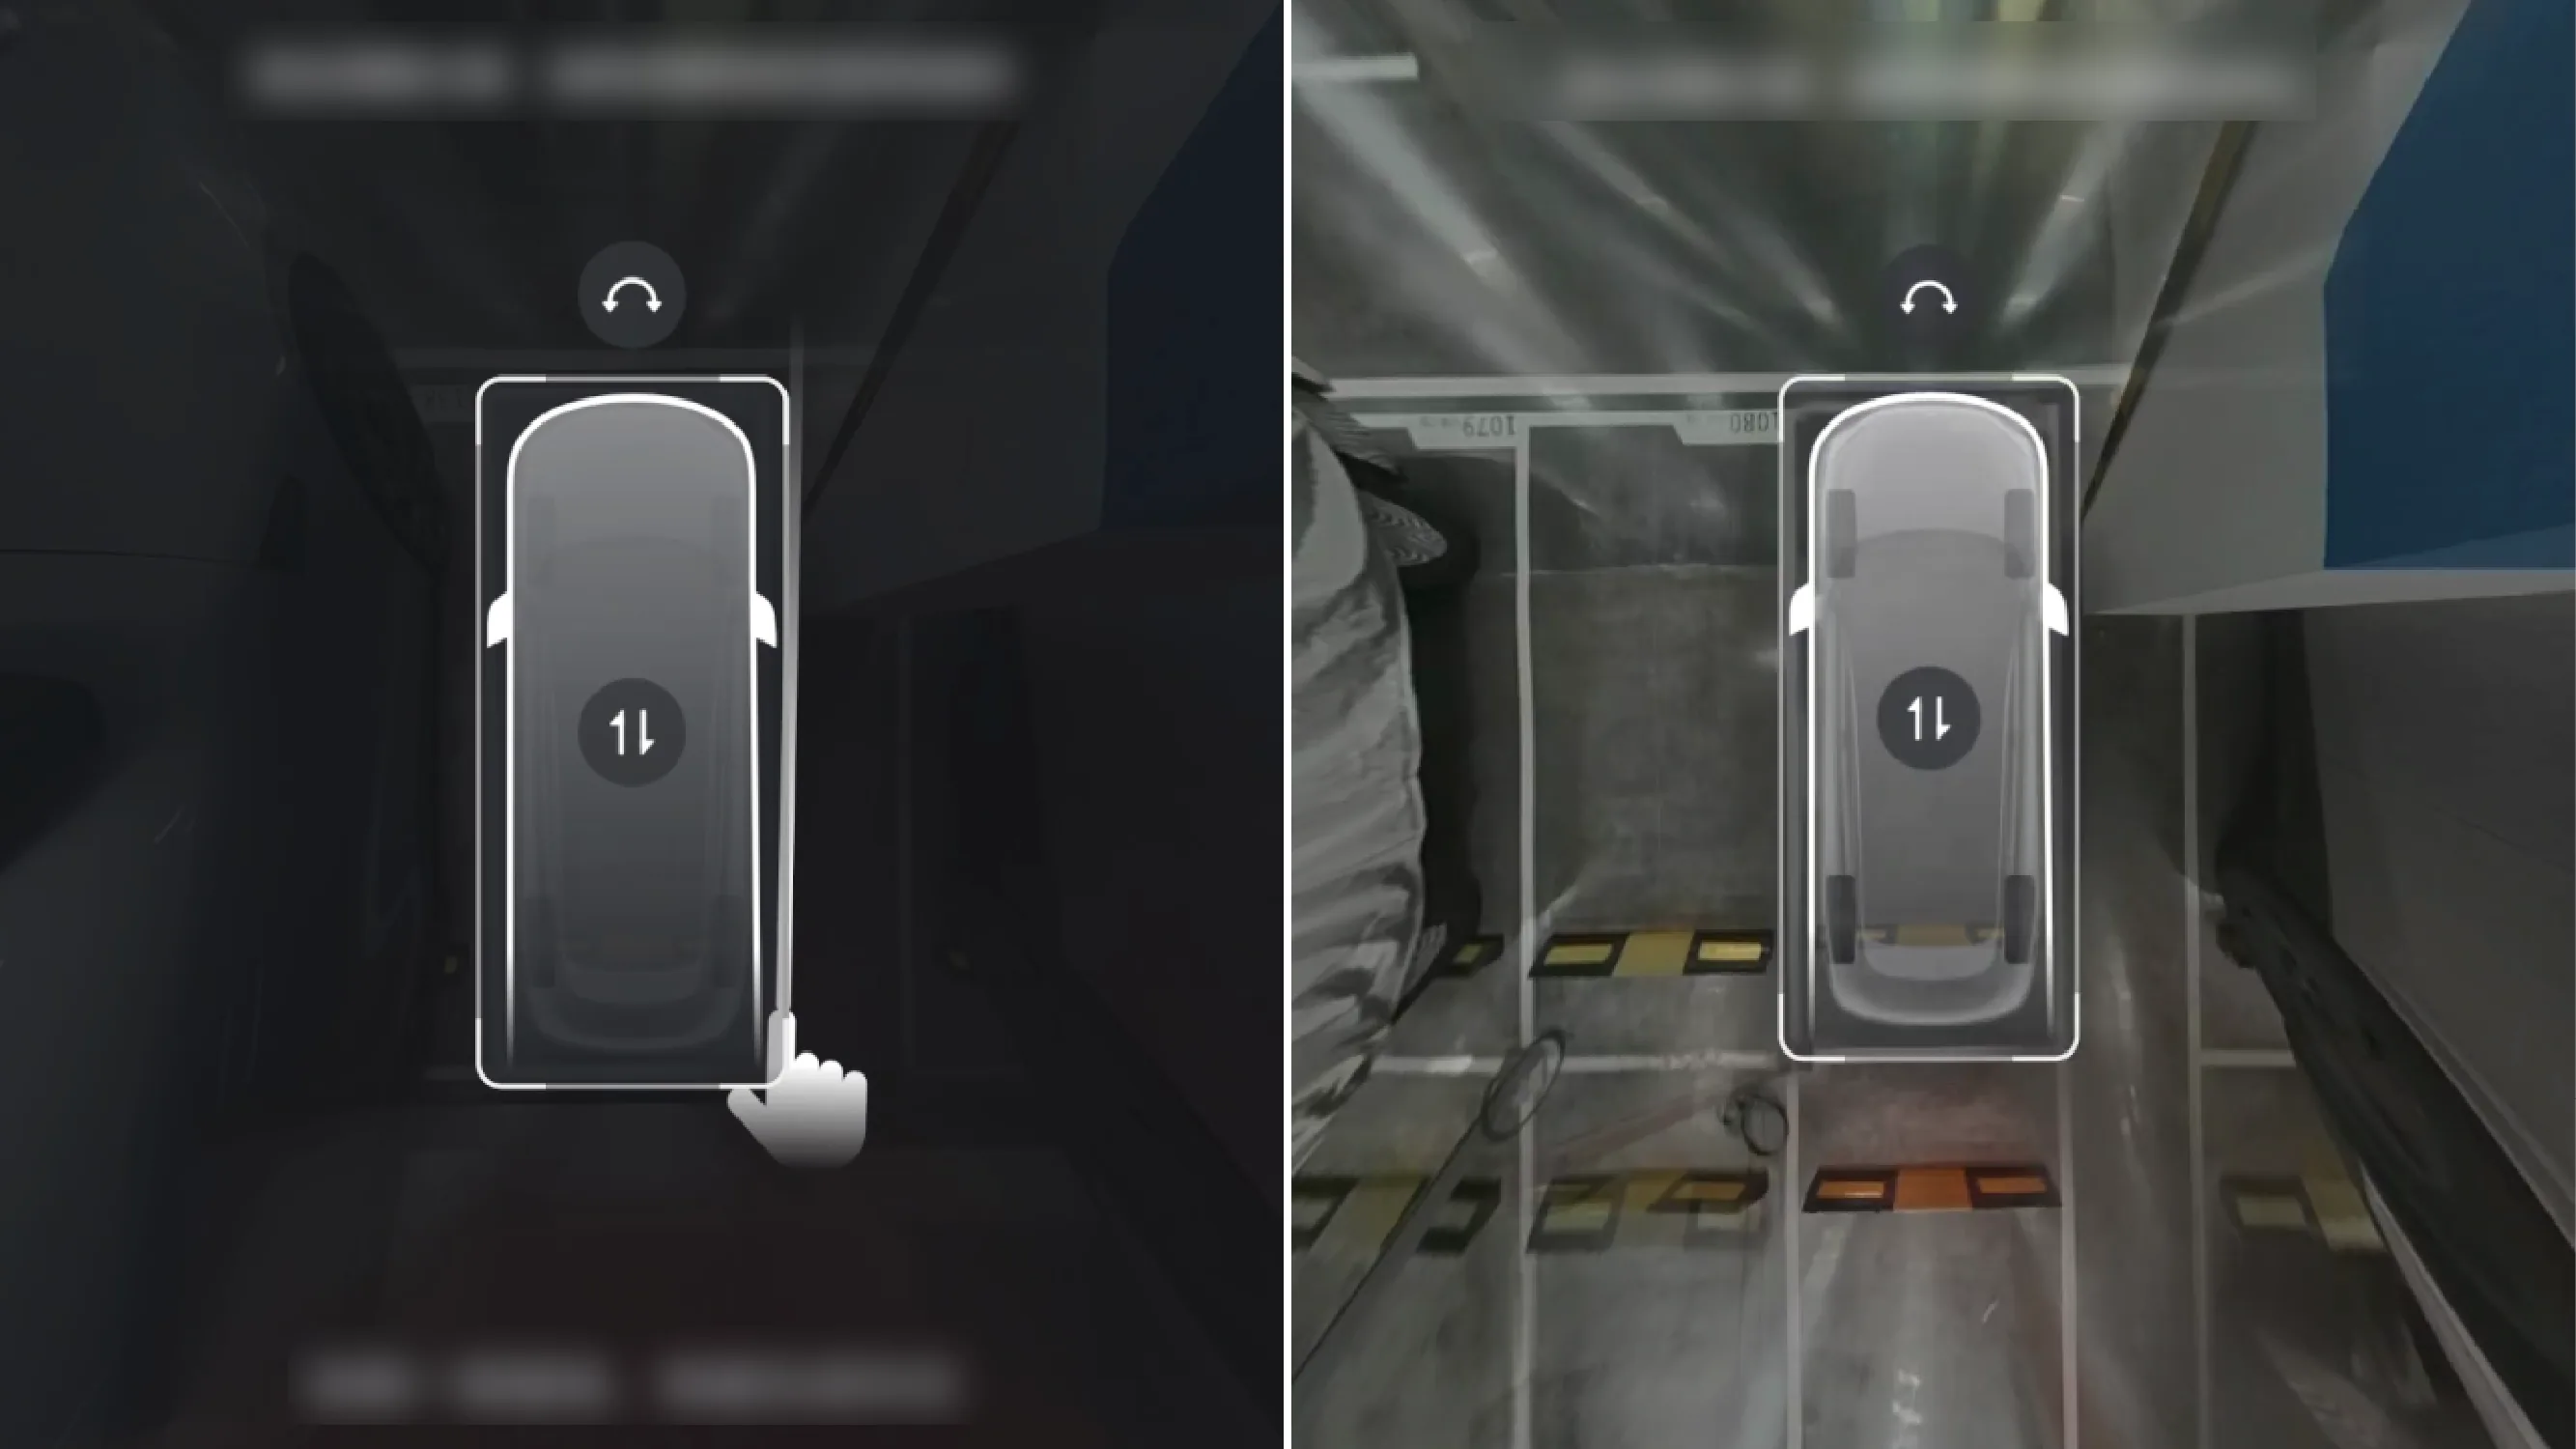
You can quickly generate a parking space box by dragging the white parking space box to adjust its position, dragging the rotation icon at the top of the parking space box to adjust its angle, or drawing a straight line.
You can also tap to enable the AI calibration function (when the customized parking space box is close to boundary objects such as curbs and walls, the parking space box will automatically adjust to an appropriate position with reference to these boundary objects), and the system will assist the driver in fine-tuning the position of the parking space box.
Caution When placing a custom parking space, observe the surrounding parking environment and place the parking space in a safe and suitable location. Avoid placing in situations that are too narrow, have other objects, are not flat on the ground, are adjacent to steps, or are otherwise restricted to the system.
After the adjustment is completed, when the white parking space frame turns blue, it indicates that this parking space is available for parking. If the parking space frame does not turn blue, readjust the parking space to an appropriate position.
After confirming the target parking space, tap while depressing the brake pedal. 。
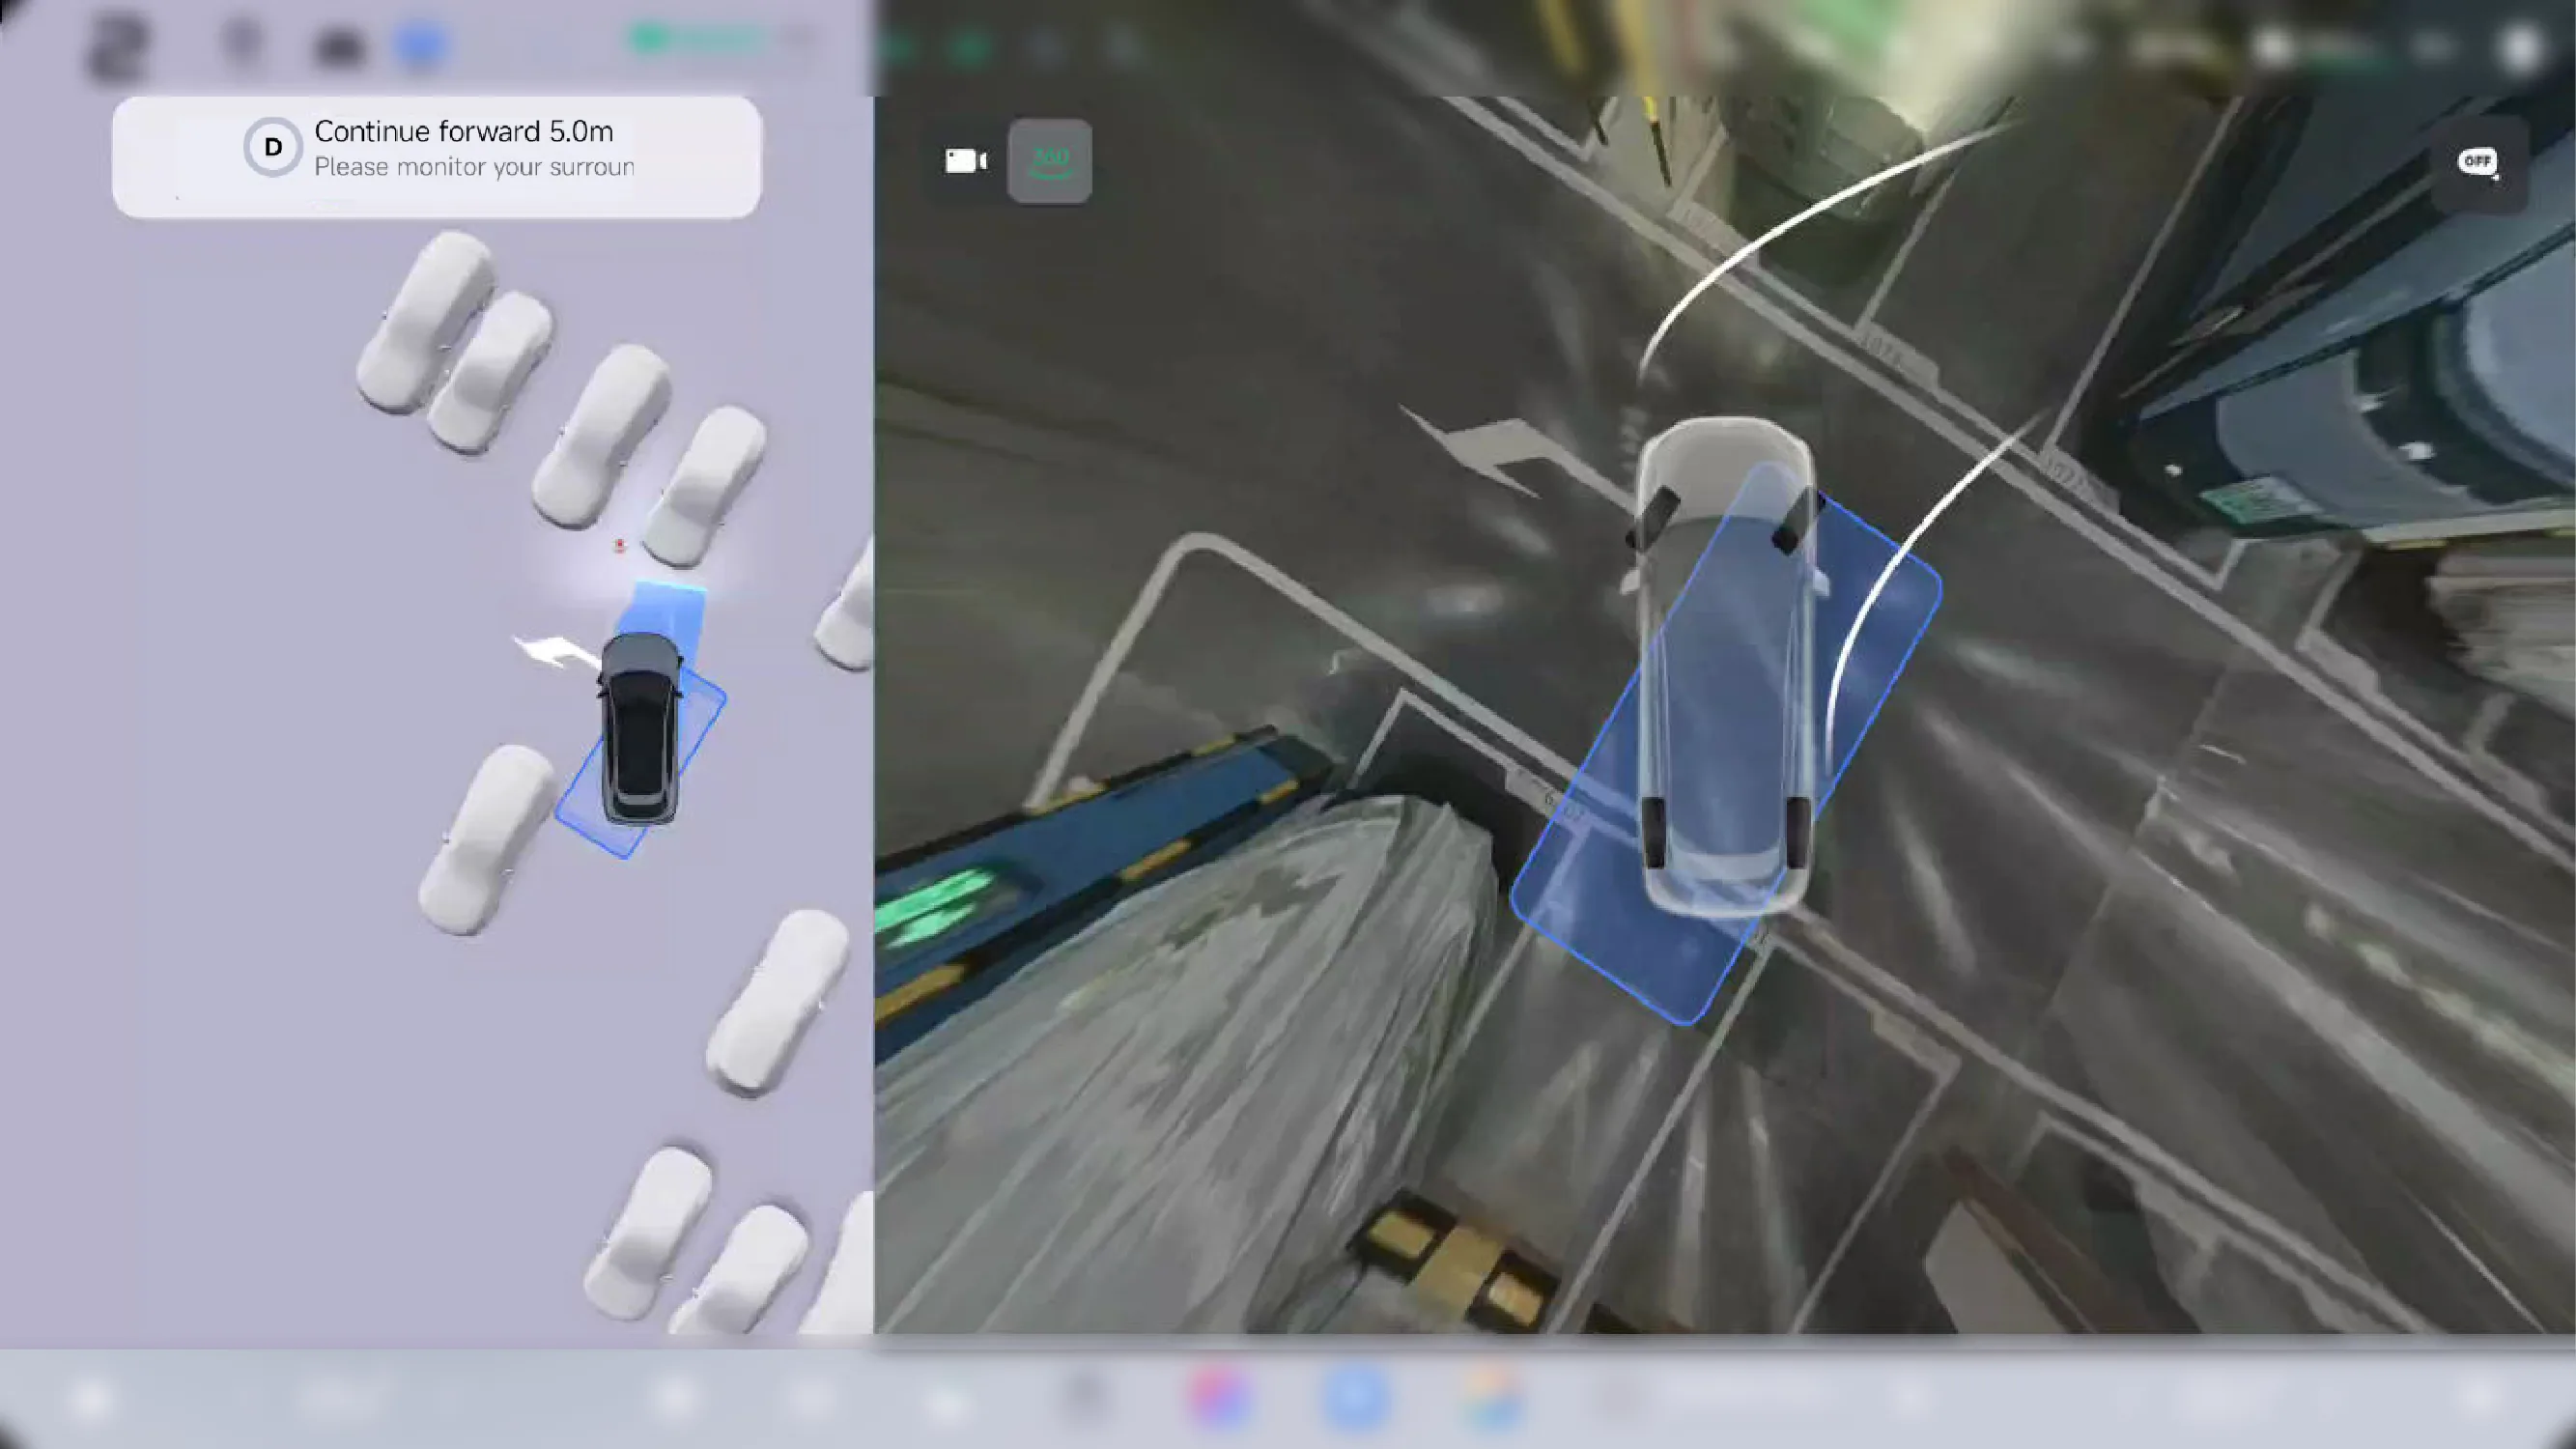
Release the brake pedal and steering wheel according to the prompts on the central control screen, and APA will control the vehicle to begin parking.
Tips During parking, the driver can switch to the front/rear view or 360°panoramic view by tapping the icon in the upper left corner of the right view. The driver should always pay attention to the surrounding hazards and vehicle conditions, timely intervention or take over of the vehicle if necessary, to ensure safe parking.
After parking is completed, the vehicle automatically shifts to P gear, and a prompt is displayed. 。
Warning Custom parking is only a driving assistance function and cannot respond to all traffic, weather, and road conditions. You, as the driver of the vehicle, are responsible for driving safety. Please hold the steering wheel firmly throughout the entire process and observe the road conditions. If danger occurs, take over in time. Do not rely on this function to control the vehicle, otherwise injury or even death may result.
Warnings, cautions, alerts, takeover, etc. for APA also apply to Custom Parking.
Using Assisted Parking (APA) See Function OverviewOr after manually parking into a parking space, you can use the parking exit assist function to control the vehicle to automatically drive out of the garage in any of the left, front, or right directions, enabling convenient boarding.
You can also set the vehicle use time in the departure scheduling function according to your commuting habits; after the scheduled time is reached, the assisted driving system will be awakened in advance to ensure that you can immediately activate the parking exit assist function when using the vehicle, without waiting.
Exit parking assist supports the following activation methods:
Center Control Screen
Mobile App
Warning Smart removal is only a driving aid and cannot handle all traffic, weather and road conditions, and you are responsible for driving safety as the driver of your vehicle. Do not rely on this function to control the vehicle, as injury or death may result.
Warning precautions, warnings and takeovers for Intelligent Parking (APA) are also applicable for Smart Removal.
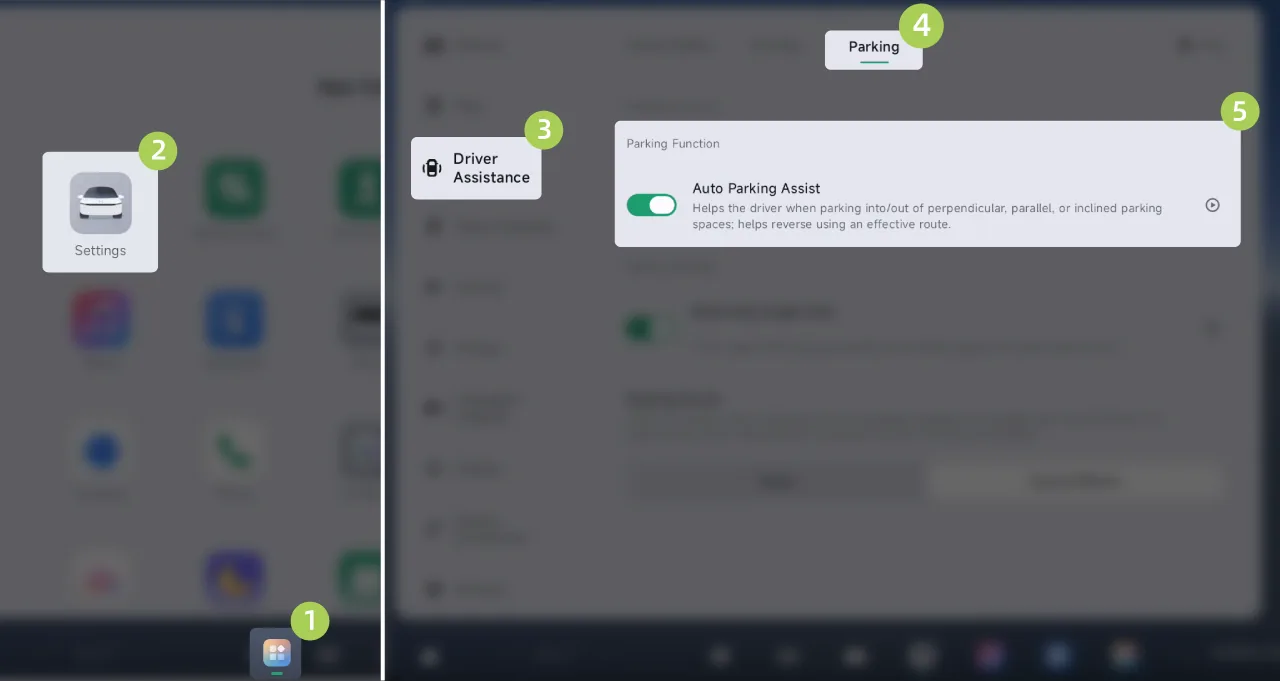
On the central control screen “ →Settings→driving assistance→Parking Scenario”On the interface, you can turn assisted parking on/off.
When you are in the vehicle and have fastened your seat belt, tap on the center control screen. Button.
Select any exit direction: left, forward, or right, then tap Button, the vehicle will automatically exit the parking space.
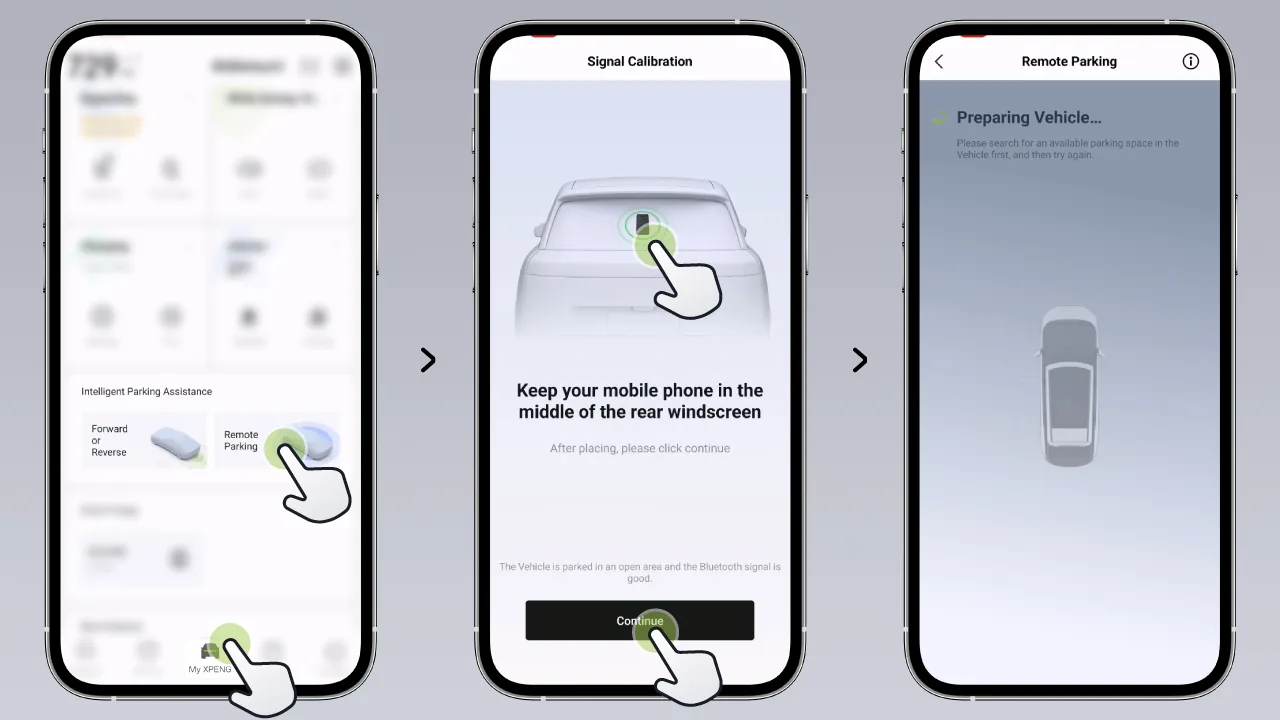
When the phone Bluetooth and the vehicle Bluetooth are not connected, open in the XPENG App page, you can prepare the vehicle in advance, and after connecting to the vehicle Bluetooth, you can use the parking exit assist.
After entering the vehicle-side bluetooth connection range, the driving assistance system will push a parking exit ready notification to the mobile phone.
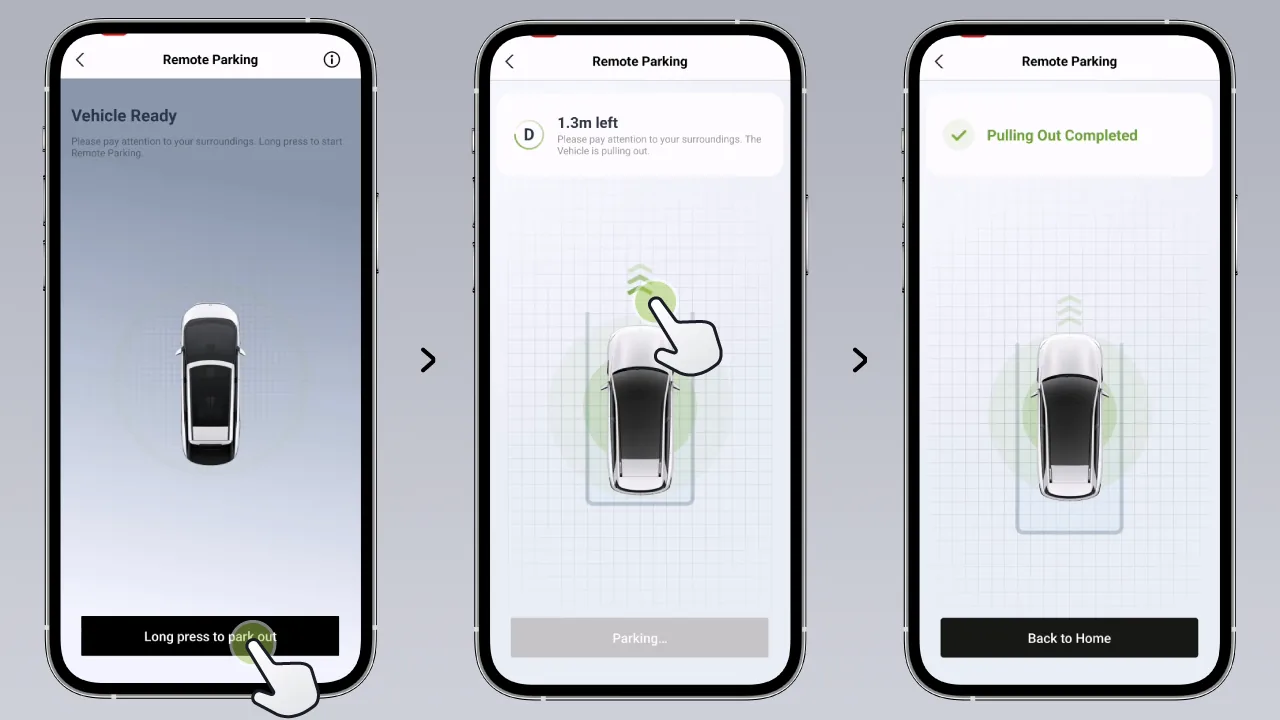
Tap the XPENG Vehicle App notification, or open in the XPENG Vehicle App the On the page, select any exit direction to the left, forward, or right, and the vehicle will automatically exit the parking space.
Tips When the system is unable to support the removal direction you selected, a pop-up prompt will appear asking you to re-select the parking direction.
During the Smart Remove Start phase, you can view the progress of the Smart Drive system preparation or the reason for the failure, and if it fails, please follow the phone prompts to retake the action.
You can pause/resume/exit the parking assist function in the XPENG App notification or on the parking assist screen in the XPENG App.
Tips Smart removal via the mobile app is not supported when there are people in the host vehicle.
Warning If a hazard is detected, or a situation requiring takeover occurs, immediately suspend the function. Do not wait for the obstacle avoidance function to be triggered.
If any of the following situations occurs, the parking exit assist will exit:
During a single use, the number of pauses of the parking exit assist function reaches 3 times.
Open the door.
Exit the mobile app parking assist interface.
Warning Do not use Smart Inventory for the following scenarios:
One or more ultrasonic sensors, the Surround Camera is dirty or obstructed (e.g. sludge, snow or water hanging).
Poor weather conditions (e.g. heavy rain, heavy snow, heavy fog, etc.).
The road surface is uneven, icy or slippery.
The road is a ramp.
Warning In the following scenarios, smart removal may not be safe and the vehicle should be taken over immediately:
The system prompts to take over the vehicle.
Vehicles, pedestrians and objects are encountered during parking and active avoidance or braking is not completed in time.
Quit unexpectedly.
Warning Line of sight away from vehicle.
Relies entirely on smart removal for potting.
The above warnings, cautions, and limitations do not describe all situations that may affect the normal operation of the parking exit assist.
You can use the remote key*/phone key to control the vehicle to move forward or backward, making it convenient for the vehicle to enter or exit narrow parking spaces where people cannot get in or out smoothly.
Tips Remote Vehicle Summons has obstacle avoidance. If an obstacle is encountered, it will actively pause.
Warning Remote Vehicle Summons is only an assisted driving function and cannot respond to all traffic, weather, and road conditions. As the driver of the vehicle, you are responsible for driving safety. Do not rely on this function to control the vehicle, otherwise injury or even death may result.
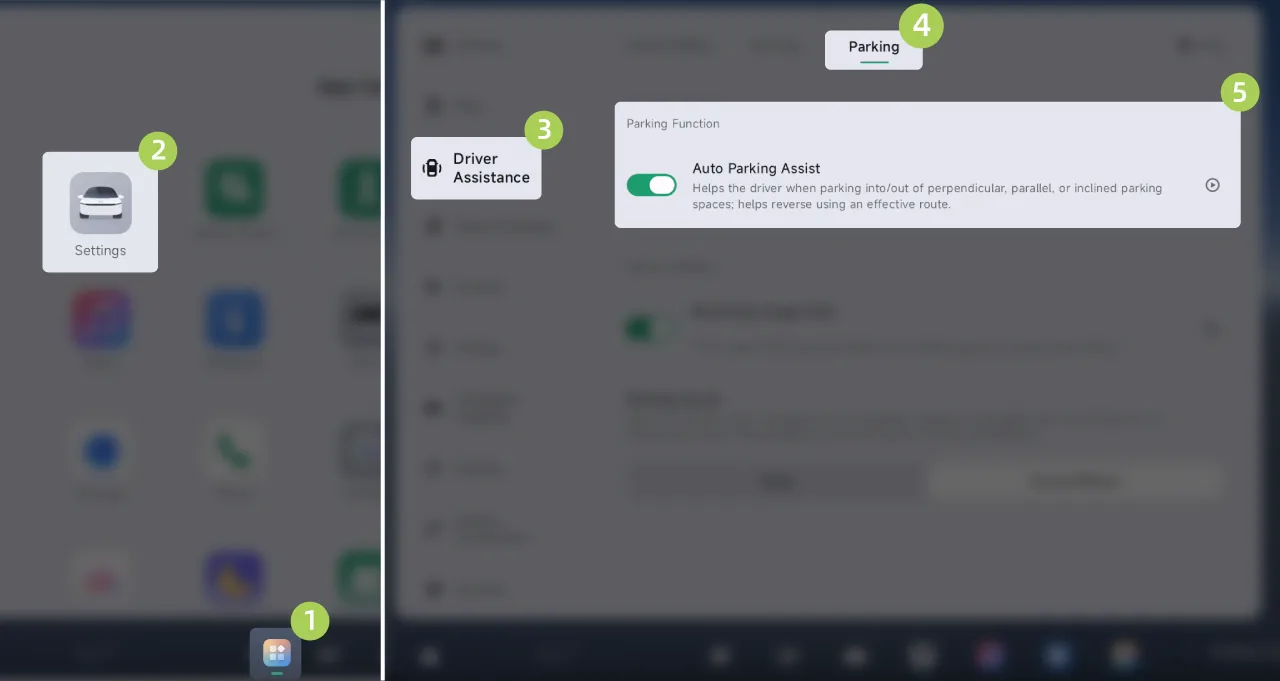
On the center control screen “ →Settings→driving assistance→Parking Scenario”On the interface, you can turn Assisted Parking on/off.
Press and hold the parking button on the remote key. The Side Mirrors fold, and the hazard warning lights turn on.
Press and hold the lock button on the remote key to control the vehicle to move forward; press and hold the unlock button to control the vehicle to move backward.
After entering or driving out of the parking space, double-press any button to exit the function.
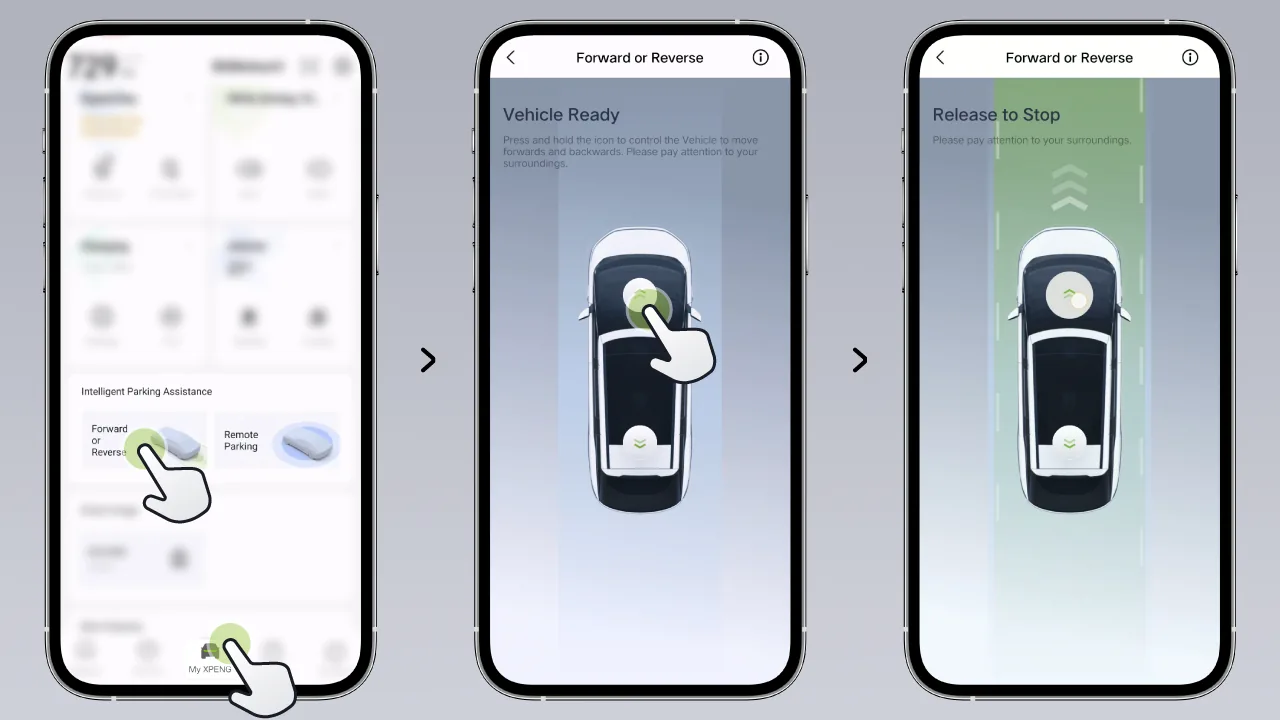
Open the mobile app and tap , the vehicle Side Mirrors fold, and the hazard warning lights turn on.
Tips Usage condition: The XPENG App must be upgraded to version V5.14 or above.
Tips When the current network condition is good, the 360 Camera will automatically start in the mobile App. However, due to network latency, the actual situation may differ from the image displayed in the mobile App. Please observe the surrounding parking environment.
When white is displayed, the distance is relatively far.
When red is displayed, the distance is very close.
The distance between the vehicle and the nearest obstacle is also displayed numerically at the front and rear of the vehicle.
Press and hold the switch to control the vehicle to move forward or backward. Release the switch and the vehicle will stop moving.
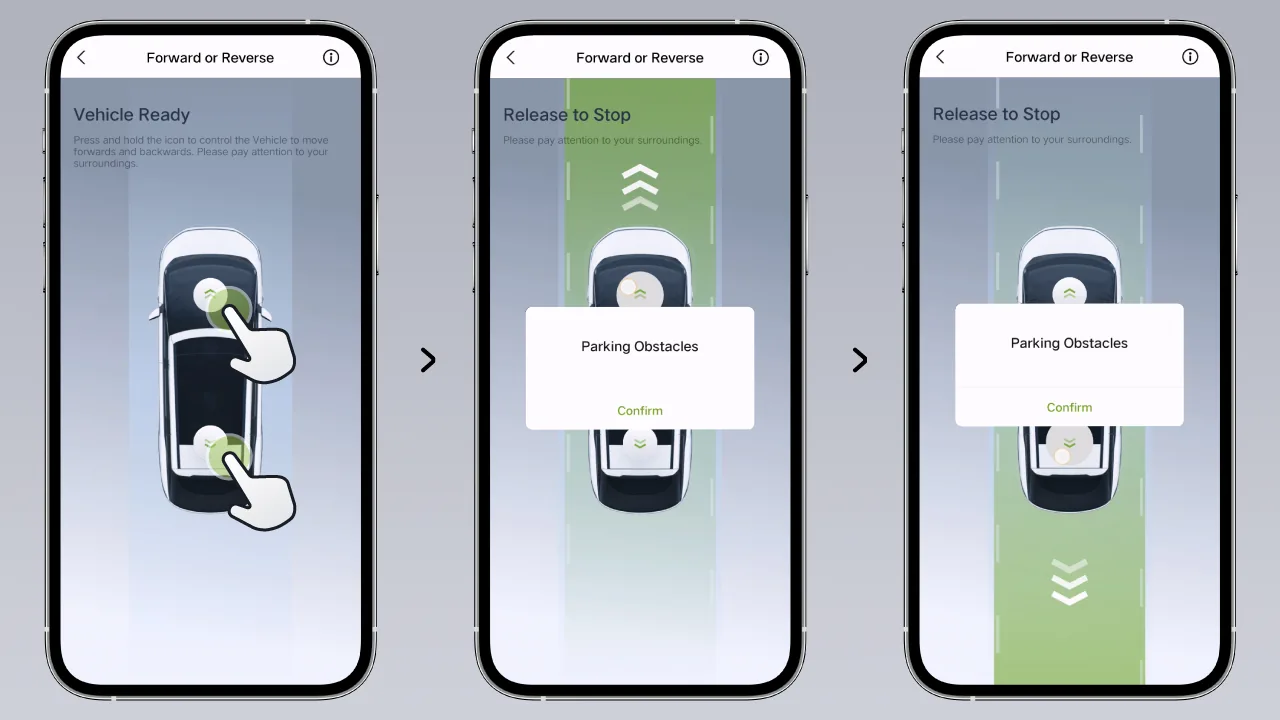
While the vehicle is moving forward or reversing, you can follow the prompts in the mobile App, read and understand the safety statement, and then tap "Confirm" to disable the vehicle's detection of side obstacles, so that it can pass through narrow environments.
Caution After Side Collision Detection is turned off, continuing to use Remote Vehicle Summons will pose a risk of vehicle collision. Always pay attention to the environment around the vehicle. You can release the "Forward/Reverse" button at any time to stop the vehicle and avoid a collision.
After entering or driving out of the parking space, tap Back to exit the function.
Warning In the event of a hazard or a situation requiring a takeover, the function should be suspended immediately and never wait for the avoidance to trigger.
In the following situations, Remote Vehicle Summons will exit:
The phone key is too far from the vehicle.
The bluetooth connection between the mobile phone and the vehicle is disconnected.
Obstacle avoidance is triggered 3 times during a single use.
No control of the vehicle moving forward or backward for more than 30 seconds.
Warning Do not use a straight call in the following scenarios:
One or more ultrasonic sensors, the Surround Camera is dirty or obstructed (e.g. sludge, snow or water hanging).
Poor weather conditions (e.g. heavy rain, heavy snow, heavy fog, etc.).
The road surface is uneven, icy or slippery.
The road is a ramp.
Warning In the following scenarios, Remote Vehicle Summons may be unable to take safety measures, and you should immediately take over the vehicle:
The system prompts you to take over the vehicle.
During parking, a vehicle, pedestrian, or object is encountered, and active avoidance or braking is not completed in time.
Remote Vehicle Summons exited unexpectedly.
Warning When using Remote Vehicle Summons, do not engage in the following behaviors:
Take your eyes off the vehicle.
Rely entirely on Remote Vehicle Summons for parking.
The above warnings, cautions, and limitations do not describe all conditions that affect the normal operation of Remote Vehicle Summons.
Reversing Assist is a function that assists the driver in reversing along the original path. When entering difficult road conditions such as dead ends or narrow roads, Reversing Assist can be used to get out of trouble.
Caution Reversing Assist has obstacle avoidance functionality. If an obstacle is encountered, it will actively pause.
Warning Reversing Assist is only a driving assistance function and cannot handle all traffic, weather, and road conditions. As the driver of the vehicle, you are responsible for driving safety. Do not rely on this function to control the vehicle, otherwise an accident may occur.
On the central control screen “ →Settings→driving assistance→Parking Scenario”On the interface, you can turn the parking assist on/off.
Drive forward at a speed below 30 km/h, and the system will automatically and silently memorize the latest valid route.
Stop the vehicle and shift into R gear.
Tap the center display screen Button.
Tap the upper right corner of the parking card , Select 。
The system displays the distance of the valid route. Press and hold the brake pedal and fasten the seat belt, then tap the central control screen. Button.
Release the brake, and the system will autonomously reverse at low speed along the valid path.
Caution A drive path in D below 30km/h is likely to be recorded as a valid path up to 100m.
Prior to activating follow-through, reversing, turning the steering wheel too far or driving on a hill will clear a valid route.
Warning Do not use follow-through reversing in the following scenarios:
The road is a ramp.
One or more ultrasonic sensors, the Surround Camera is dirty or obstructed (e.g. sludge, snow or water hanging).
Poor weather conditions (e.g. heavy rain, heavy snow, heavy fog, etc.).
The road surface is uneven, icy or slippery.
There are poor surfaces (e.g., cliffs, high platforms, sidewalks facing the street, etc.).
Warning Following situations where a trailing reversing maneuver may not be safe, take over the vehicle immediately:
The system prompts to take over the vehicle.
When reversing unexpectedly exits.
Vehicles, pedestrians and objects are encountered during reversing and automatic avoidance or braking is not completed in time.
Warning Take care of the takeover as you may experience the following when using trailing trails:
Obstruction above and above exterior mirror height.
Dangling, small, and small-width obstructions.
A target in a camera or radar blind spot.
Suddenly approaching a pedestrian or animal.
Warning When using Reversing Assist, do not rely entirely on Reversing Assist when reversing.
The above warnings, cautions, and limitations do not describe all situations that may affect the normal operation of Reversing Assist.
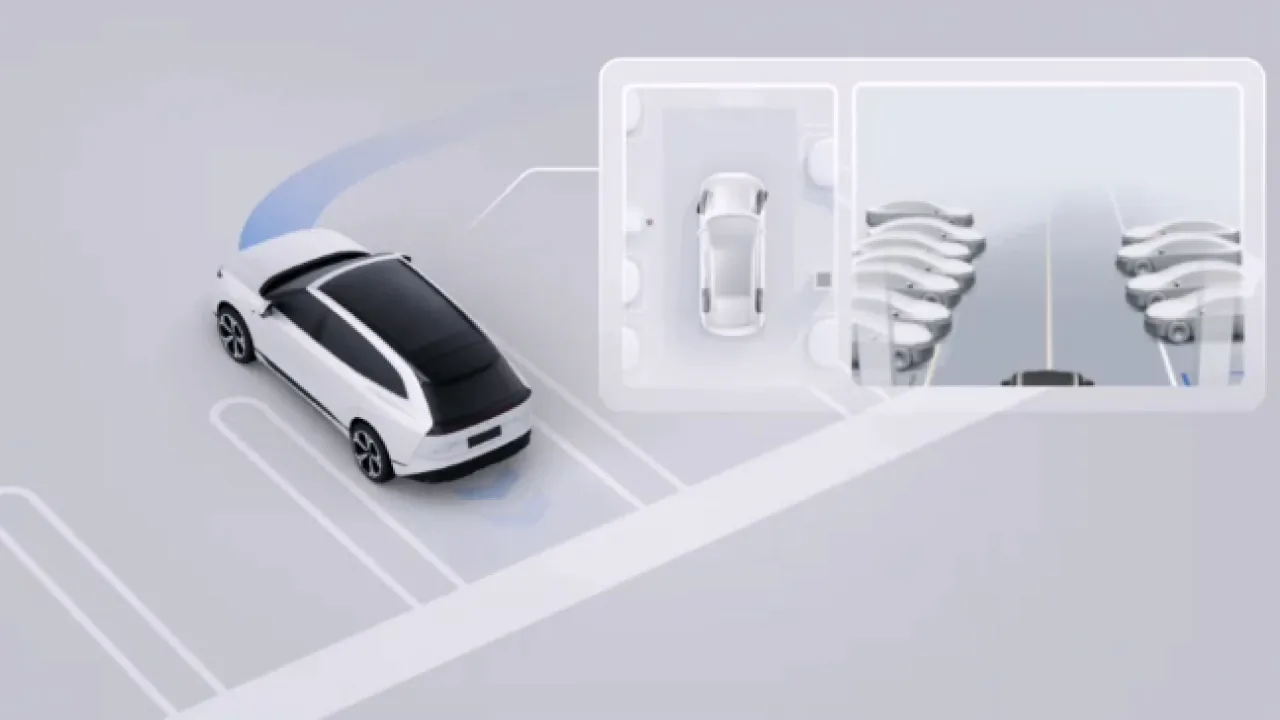
After the function is enabled, when the gear is shifted from R gear to D Gear, the 360 Camera switches to the front view. When the gear is shifted to P gear or the vehicle speed exceeds 10 km/h, the 360 Camera exits automatically.
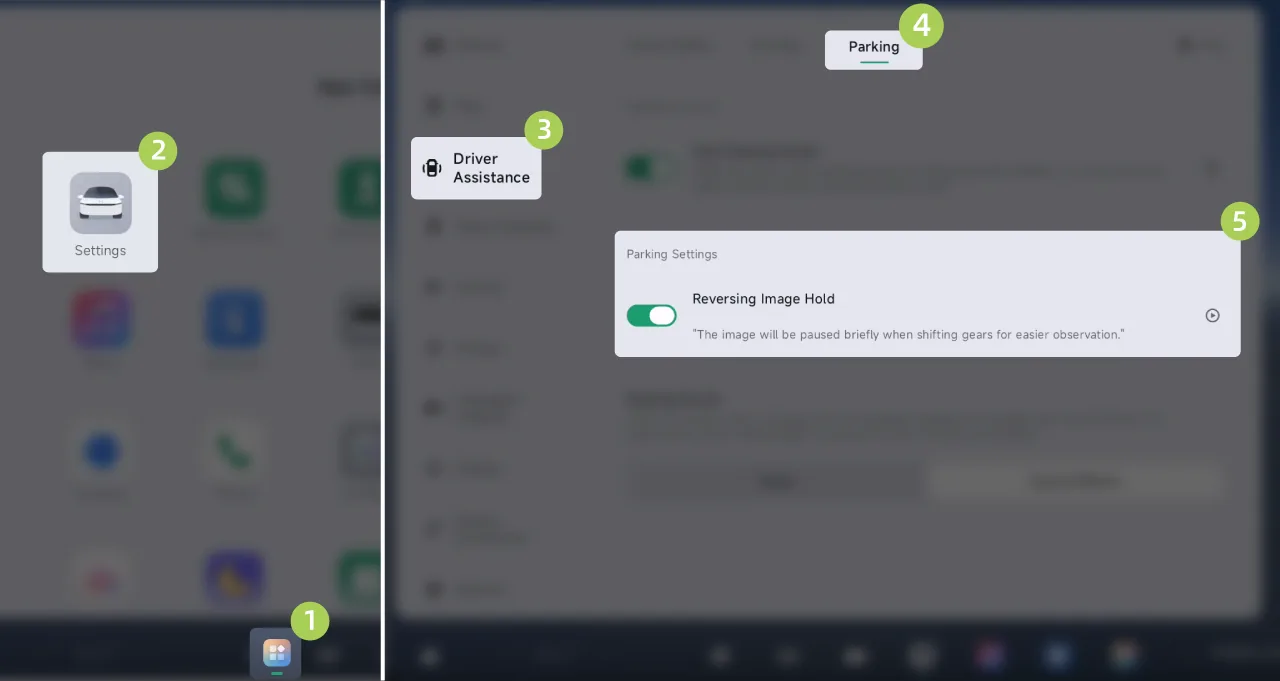
On the central control screen “ →Settings→driving assistance→Parking Scenario”Interface, can be opened/closed 。
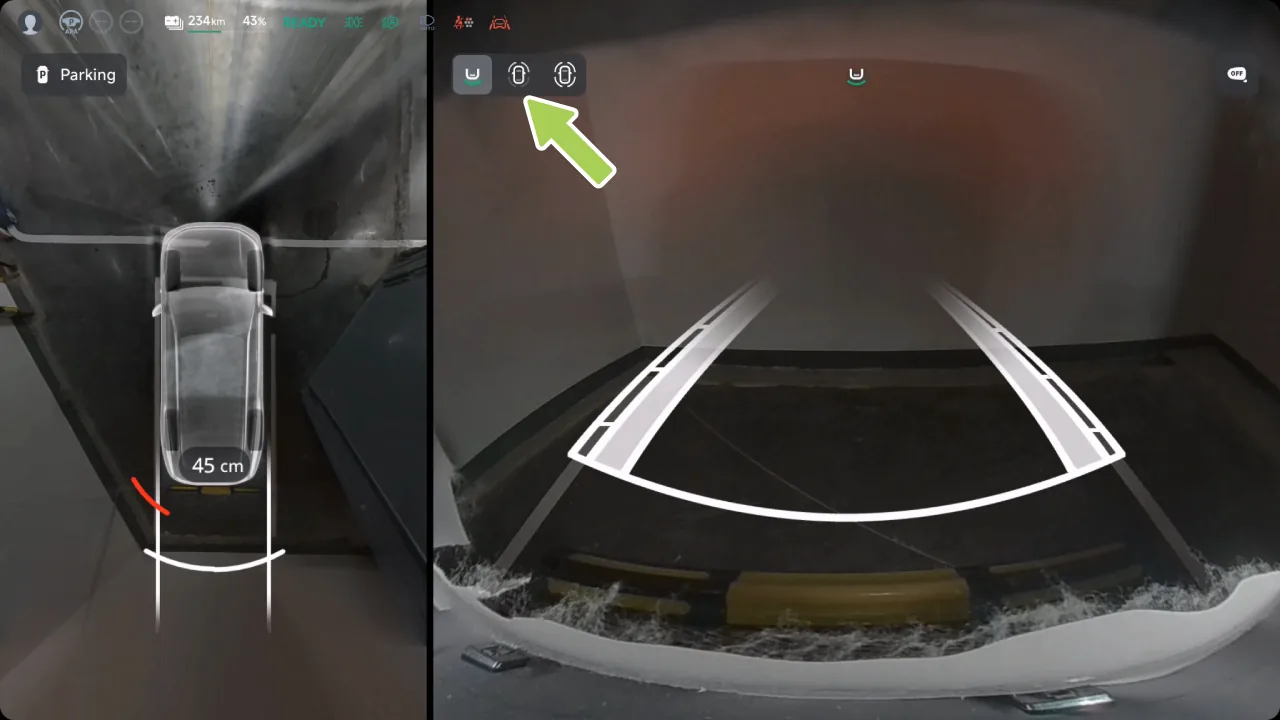
When reversing, you can tap the wheel hub view switching icon on the central control screen to switch among the rear view, front wheel hub view, and front and rear wheel hub view.
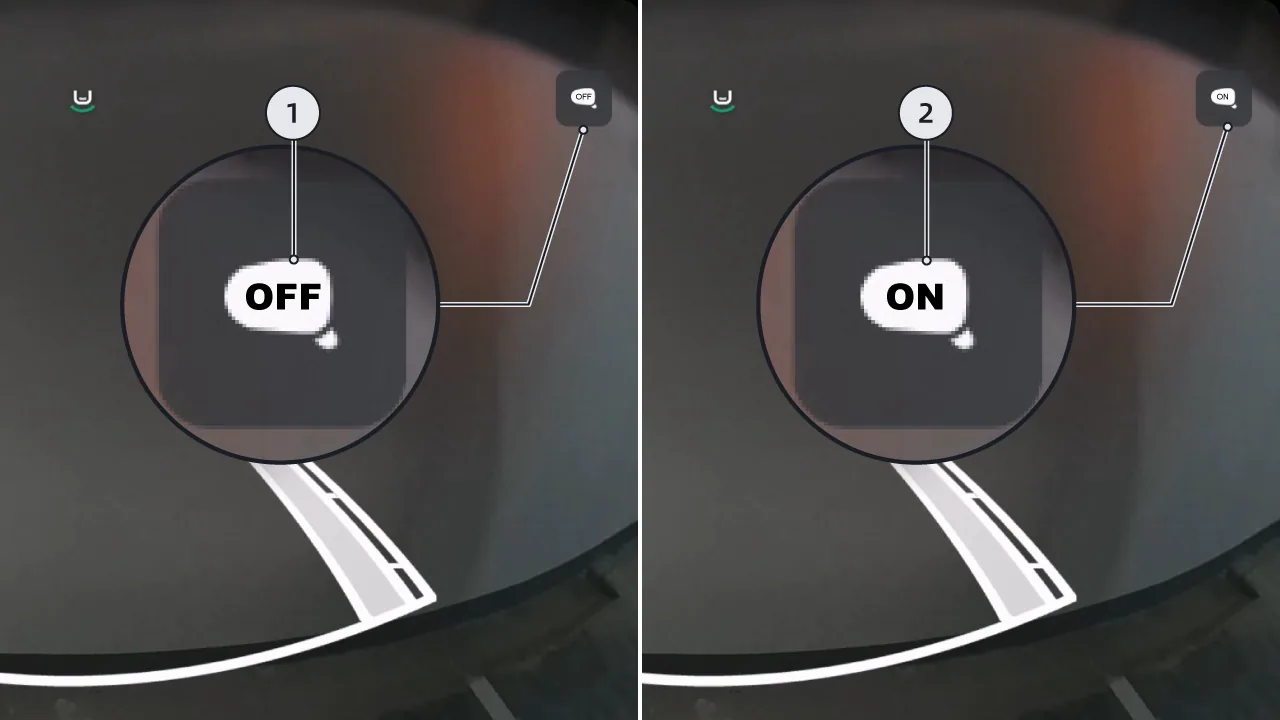
: Indicates that the Side Mirrors are in the unfolded state.
: Indicates that the Side Mirrors are in the folded state.
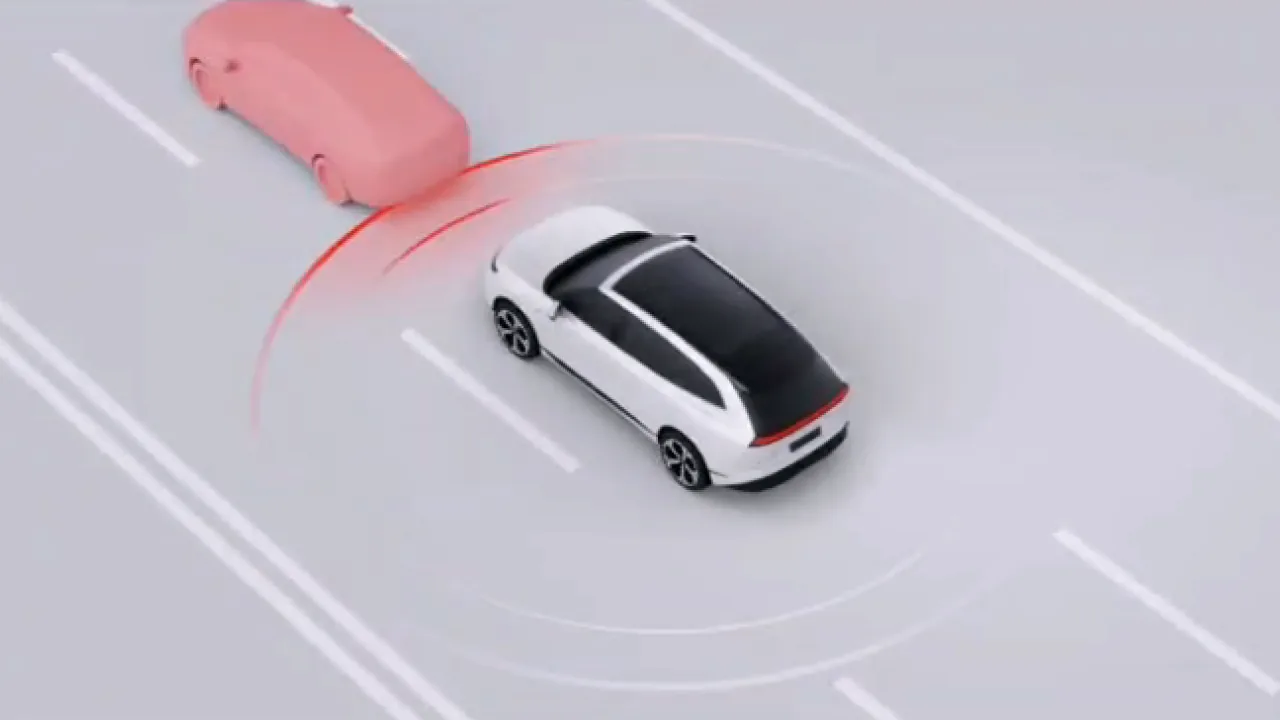
The Forward Collision Warning function includes Forward Collision Warning (FCW) and Automatic Emergency Braking (AEB), which can reduce the risk of vehicle collision or reduce the vehicle speed at collision, thereby improving driving safety.
Warning Forward Collision Warning does not operate when the vehicle is in reverse gear.
When the function detects a collision risk, it will provide an alert through the SR interface and a prompt sound.
If the risk further increases and the driver still does not brake or the braking force is too small, the vehicle will actively brake to mitigate collision injury.
Warning For pedestrians and two-wheeled vehicles, FCW operates when the vehicle speed is approximately 0–150 km/h.
For vehicles, FCW operates when the vehicle speed is approximately 0–150 km/h.
When the vehicle issues a warning, the driver must take action immediately and must not wait for AEB to intervene.
Warning Forward Collision Warning is an assistance function and cannot operate in all driving situations, traffic, weather, and road conditions. It cannot replace attentive driving and accurate judgment, and the driver bears full responsibility for driving safety. Be sure to observe road conditions while driving, and do not rely on Forward Collision Warning to warn of or avoid possible collisions. Many factors can reduce or affect performance, resulting in unnecessary, inaccurate, or ineffective warnings, brake interventions, or missed warnings. Relying on Forward Collision Warning to warn of and avoid potential collisions may cause serious personal injury or even death.
Autonomous Emergency Braking is not designed to prevent collisions. At most, it can only attempt to reduce driving speed to minimize the impact of a frontal collision. Relying on Autonomous Emergency Braking to avoid a collision may result in serious personal injury or death.
Warning For pedestrians and two-wheeled vehicles, AEB operates when the vehicle speed is approximately 0–150 km/h.
For moving, stationary, or slow-moving vehicles, AEB operates when the vehicle speed is approximately 0–150 km/h.
If AEB brings the vehicle to a stop, the vehicle will remain stationary for a short time. The driver should promptly take over braking control.
While AEB is applying the brakes, pressing the accelerator pedal may interrupt braking.
When the driver or passengers are not wearing seat belts, the AEB function will be disabled.
 | Forward Collision Warning Off |
 | Forward Collision Warning malfunction |
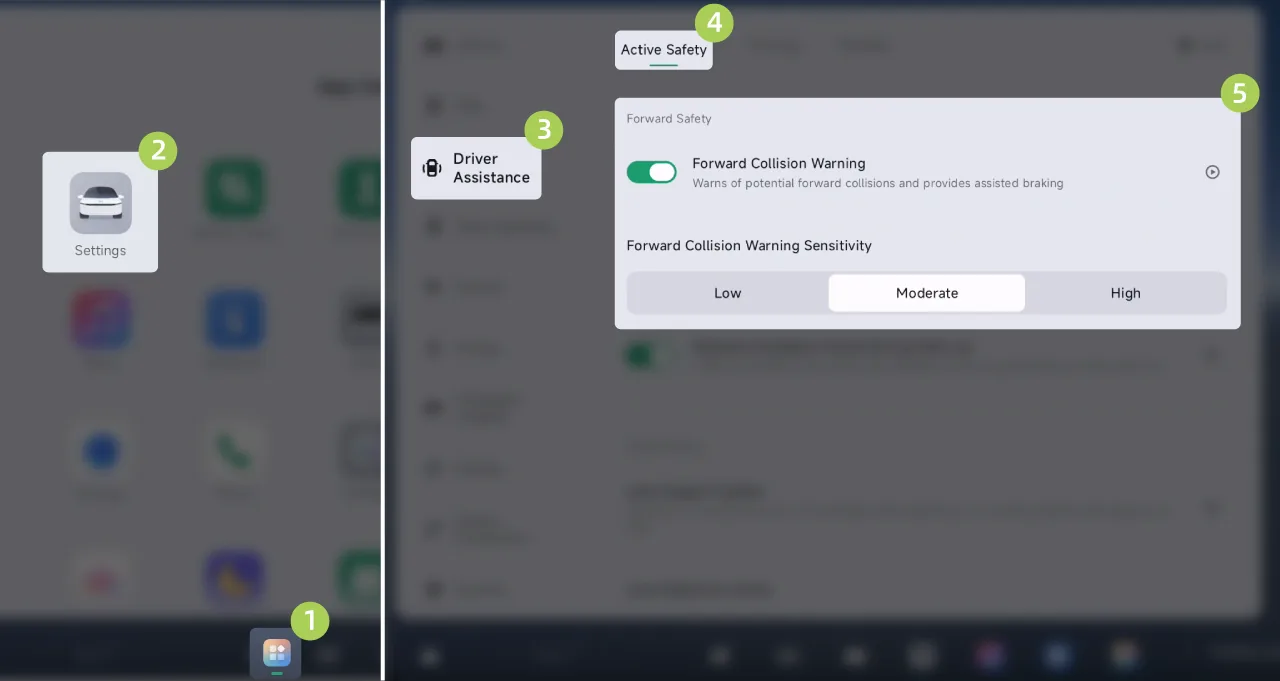
On the center control screen “ →Settings→driving assistance→Active Safety”Interface, where Forward Collision Warning can be turned on/off. After the function is turned on, the Forward Collision Warning sensitivity can be set.
Tips Forward Collision Warning is automatically enabled each time you drive. For your safety, it is recommended to keep it enabled at all times.
Before using Forward Collision Warning, the driver should refer to this chapter to understand the relevant functional usage guidelines and limitations.
Warning In the following scenarios, the Forward Collision Warning function may be limited or may not operate. Do not rely entirely on this function:
Radar or camera limited.
In darkness or when visibility is poor. For example, in conditions such as poor lighting, heavy rain, heavy snow, or dense fog.
Strong light obstructs the camera's field of view. For example, oncoming headlight beams or direct sunlight.
The windshield blocks the camera's field of view (due to mist, dust, or sticker obstruction, etc.).
There is a vehicle traveling in the wrong direction ahead.
When the vehicle is driving on a road with a large curve or on a road with poor road conditions.
The target suddenly appears. For example, another vehicle suddenly moves quickly or at close range into the area in front of this vehicle.
The target overlap ratio (the degree of overlap between the width of the front end of this vehicle and the width of the rear end of the vehicle ahead) is insufficient.
The driver brakes, deeply depresses the accelerator pedal, or quickly or sharply turns the steering wheel.
There is a stationary vehicle at the entrance or exit of the curve.
While driving on a curve, a nearby vehicle suddenly decelerates.
A vehicle is overtaking and passing ahead on a curve.
When changing lanes, pass stationary roadside objects or overtaken vehicles.
Change lanes after the vehicle ahead brakes.
The vehicle passes over speed bumps, floor drains, or beside iron gates in the garage.
When the vehicle passes under an overpass, pedestrian overpass, or road sign.
When the vehicle passes over elevated bridge joints or in scenarios where there are metal guardrails by the roadside.
Traffic signals ahead, water jets from sprinkler trucks, splashing water, iron posts on the road surface, overhead steel pipes, floating plastic bags, rolling cans on the road surface, underground parking garages, highway toll stations, manhole covers, etc.
The above warnings, cautions, and limitations do not describe all situations that affect the normal operation of FCW&AEB.
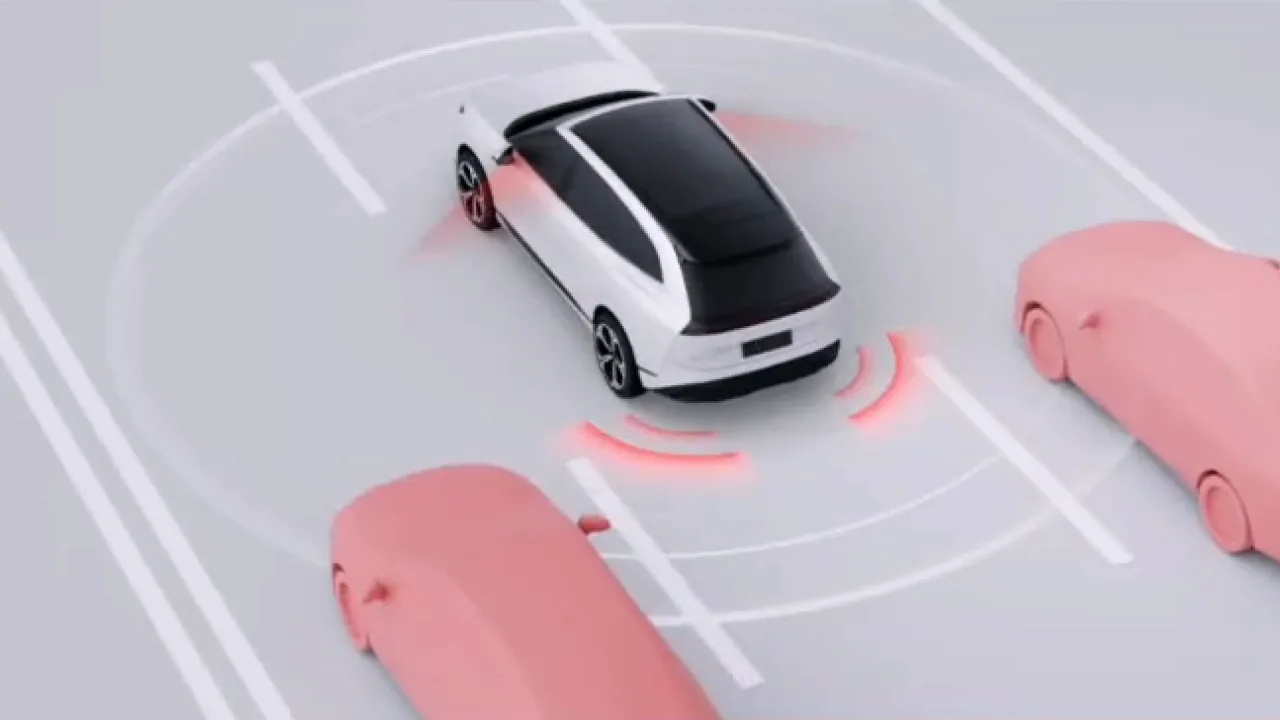
Blind Spot Detection includes blind spot monitoring warning and lane change warning, and can monitor the lanes on both sides of the vehicle and provide a warning when there is a risk during lane changing.
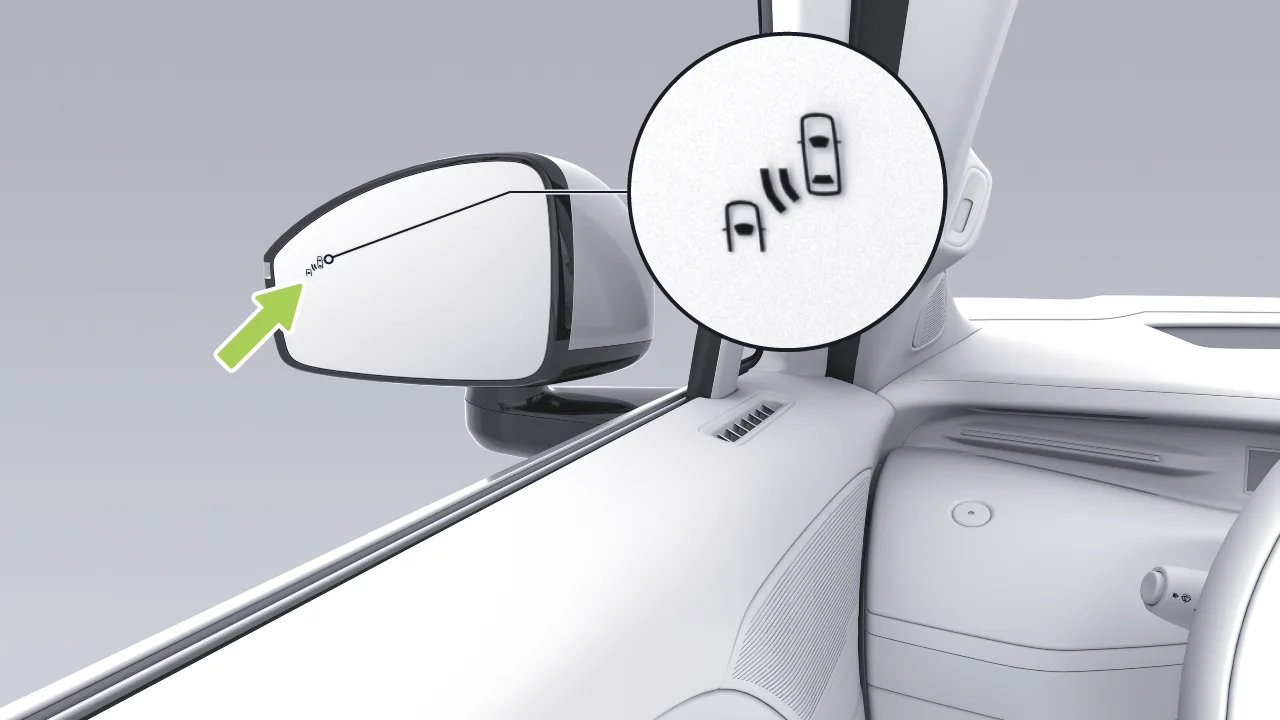
When the vehicle is in D gear and the vehicle speed is greater than 10 km/h, if there is a vehicle in the vehicle blind spot, or a rapidly approaching vehicle behind the blind spot, the warning light on the corresponding side mirror remains steadily on. At this time, if the turn signal or lane change signal on the corresponding side is turned on, the warning light on the side mirror changes to flashing as a reminder.
Warning Blind Spot Detection is only a driving assistance function and cannot handle all traffic, weather, and road conditions. It cannot replace the driver's attentive driving and accurate judgment, nor can it replace the use of the interior rearview mirror and exterior rearview mirrors. As the driver of the vehicle, you are responsible for driving safety, and changing lanes in a safe manner is always the driver's responsibility. Do not rely on this function to control the vehicle, otherwise injury or even death may result.
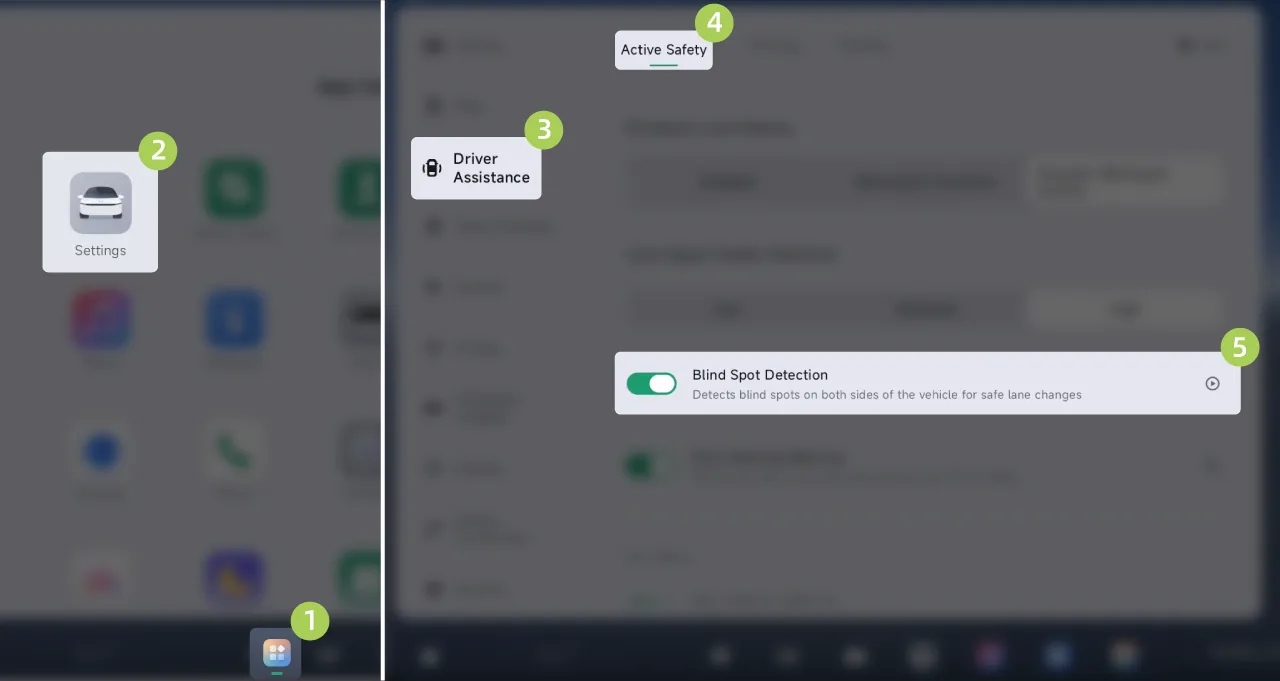
On the central control screen “ →Settings→driving assistance→Active Safety” On the interface, you can turn Blind Spot Detection on/off.
Warning BSD&LCA May Not Function Properly in the Following Scenarios:
Radar limited.
Sharp curve.
While reversing.
There is a relatively large moving metal object in the blind spot.
The above warnings, cautions, and limitations do not describe all situations that affect the normal operation of BSD&LCA.
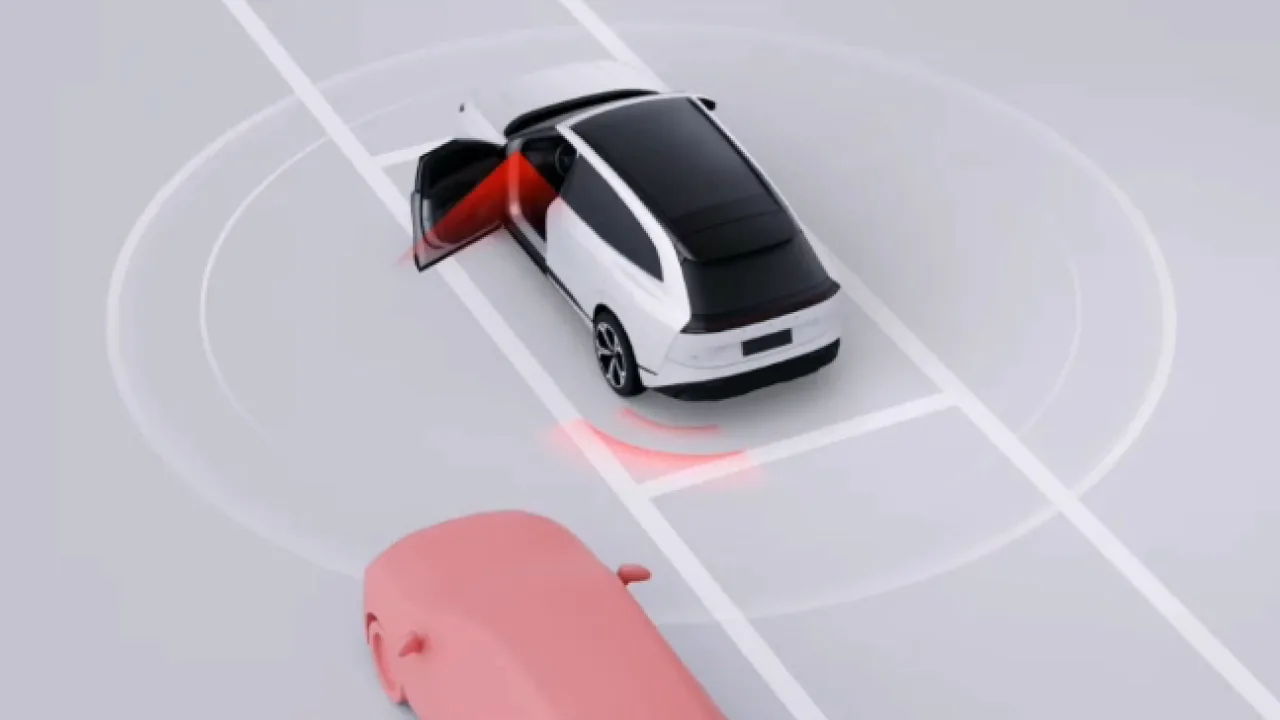
When there is a collision risk when opening the door, DOW can alert the driver and passengers.
When the vehicle speed is 0–5 km/h and a vehicle, pedestrian, or two-wheeled vehicle is approaching at a certain speed within the detection range, DOW triggers a level-1 warning, that is, a reminder is given by the warning light on the corresponding side Side Mirror remaining steadily on.
If the driver or passengers still open the door on the corresponding side, a level-2 alarm will be triggered, accompanied by reminders on the SR interface, warning sound, flashing door ambient light, and flashing turn signal.
Warning DOW is only a driving assistance function intended to remind drivers and passengers to pay attention to the safety of the door-opening environment when opening the door. It cannot respond to all traffic, weather, and road conditions, and cannot replace the driver's and passengers' visual observation, or the function of the interior and exterior rearview mirrors. As the driver of the vehicle, you are responsible for driving safety. Do not rely on this function to control the vehicle, otherwise injury or even death may result.
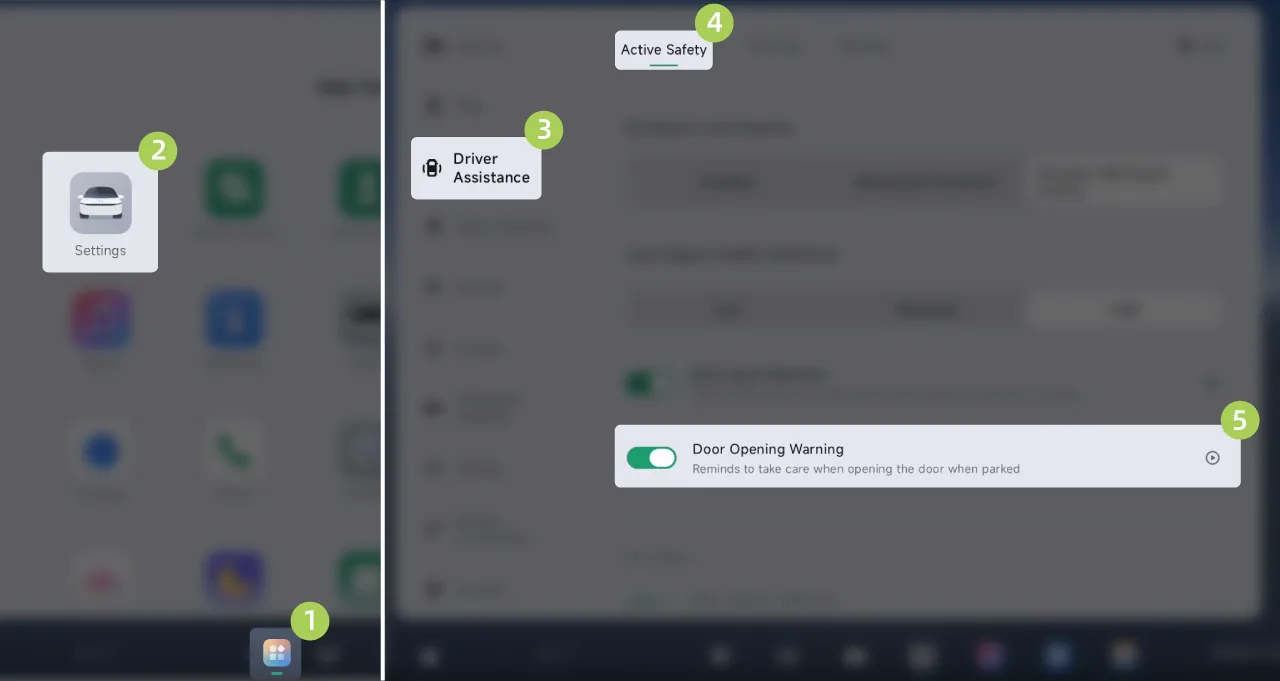
On the central control screen “ →Settings→driving assistance→Active Safety” On the interface, you can turn Door Opening Warning on/off.
Warning In the following scenarios, DOW may not function properly:
Radar limited.
Smaller targets or stationary targets.
The target speed is too fast, or there is a steering maneuver. For example: the target vehicle changes lanes to directly behind this vehicle, or another vehicle suddenly changes lanes into the monitoring area from directly behind this vehicle.
Other vehicles and cyclists appearing directly behind this vehicle.
This vehicle remains stopped at locations such as turns or beside walls.
The above warnings, cautions, and limitations do not describe all situations that affect the normal operation of DOW.
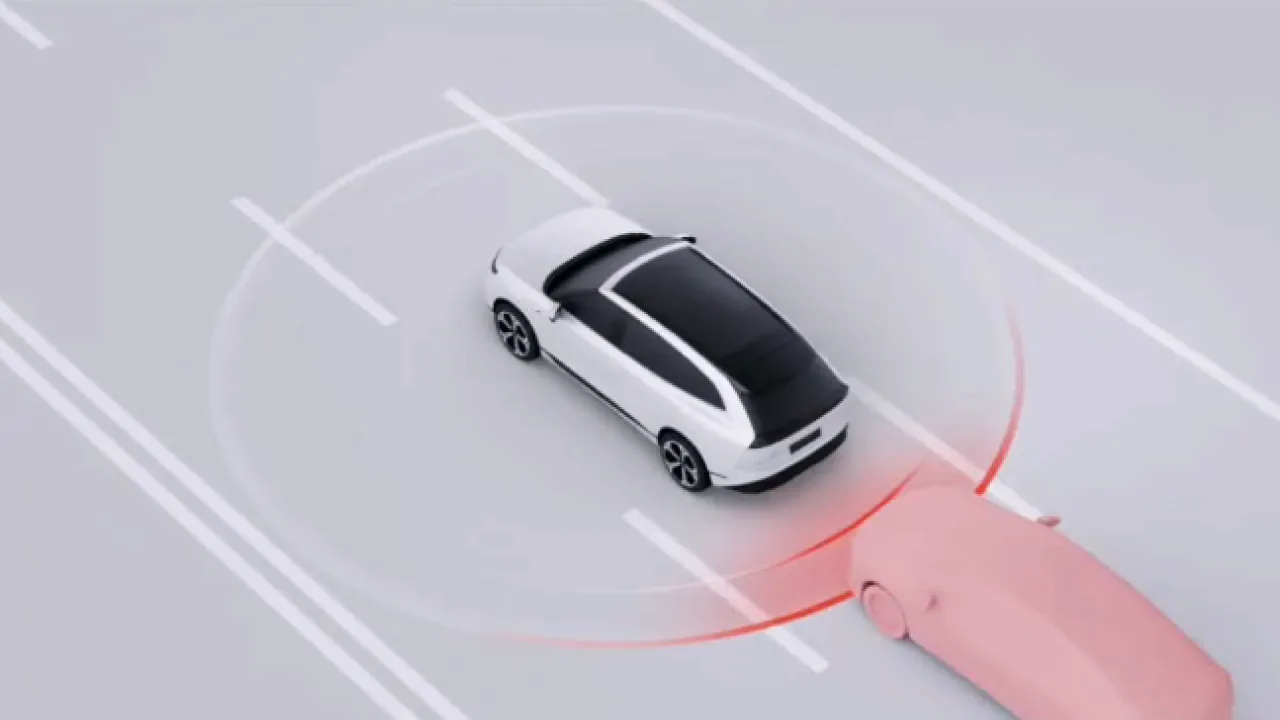
When the vehicle is moving forward at a speed of 15-160 km/h, if RCW detects that a rear vehicle may collide with your vehicle from behind, it will alert the driver through audible and visual signals, and activate the hazard warning lights to remind the driver of the rear vehicle to pay attention to braking, so as to ensure driving safety.
Warning RCW is only a driving assistance function and cannot respond to all traffic, weather, and road conditions. It cannot replace the driver's attentive driving and accurate judgment, nor can it replace the use of the Rearview Mirror and Side Mirrors. As the driver of the vehicle, you are responsible for driving safety. Do not rely on this function to control the vehicle, otherwise injury or even death may result.
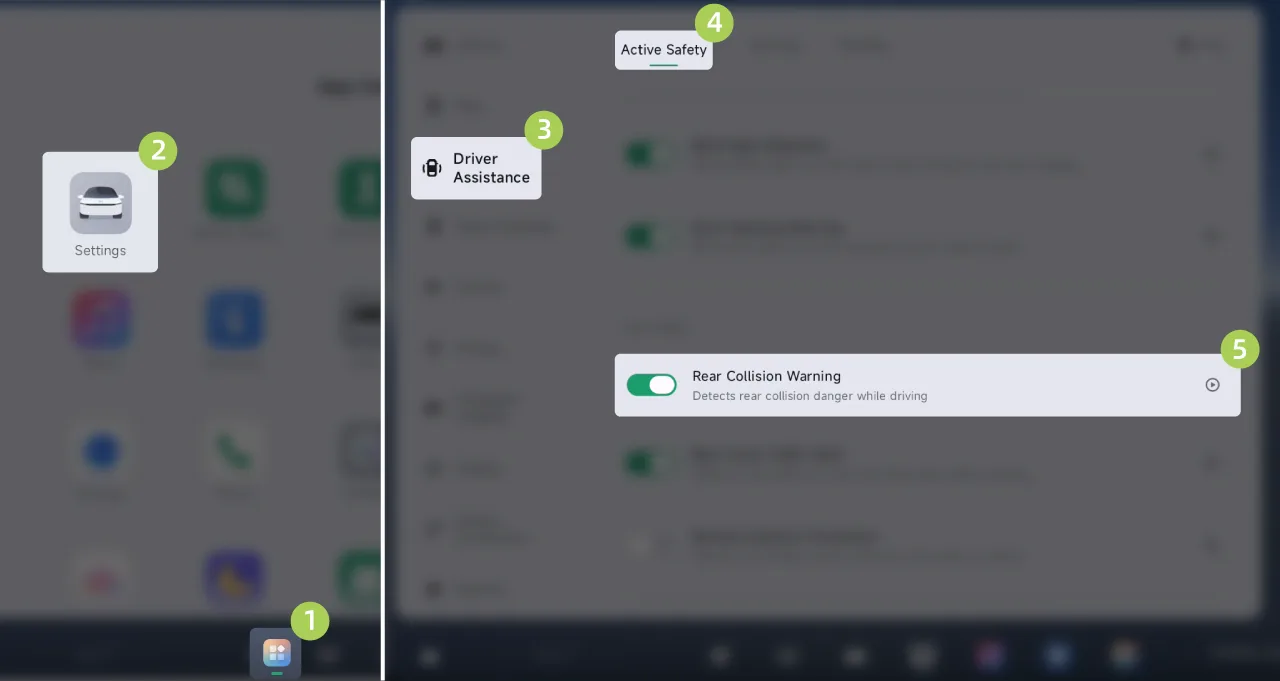
On the center control screen “ →Settings→driving assistance→Active Safety”Interface, you can turn Rear Collision Warning on/off.
Warning RCW may not function properly in the following scenarios:
Radar limited.
The detected object is moving too fast.
There is a relatively large moving metallic object in the blind spot.
Sharp curve.
The above warnings, cautions, and limitations do not describe all conditions that affect the normal operation of RCW.
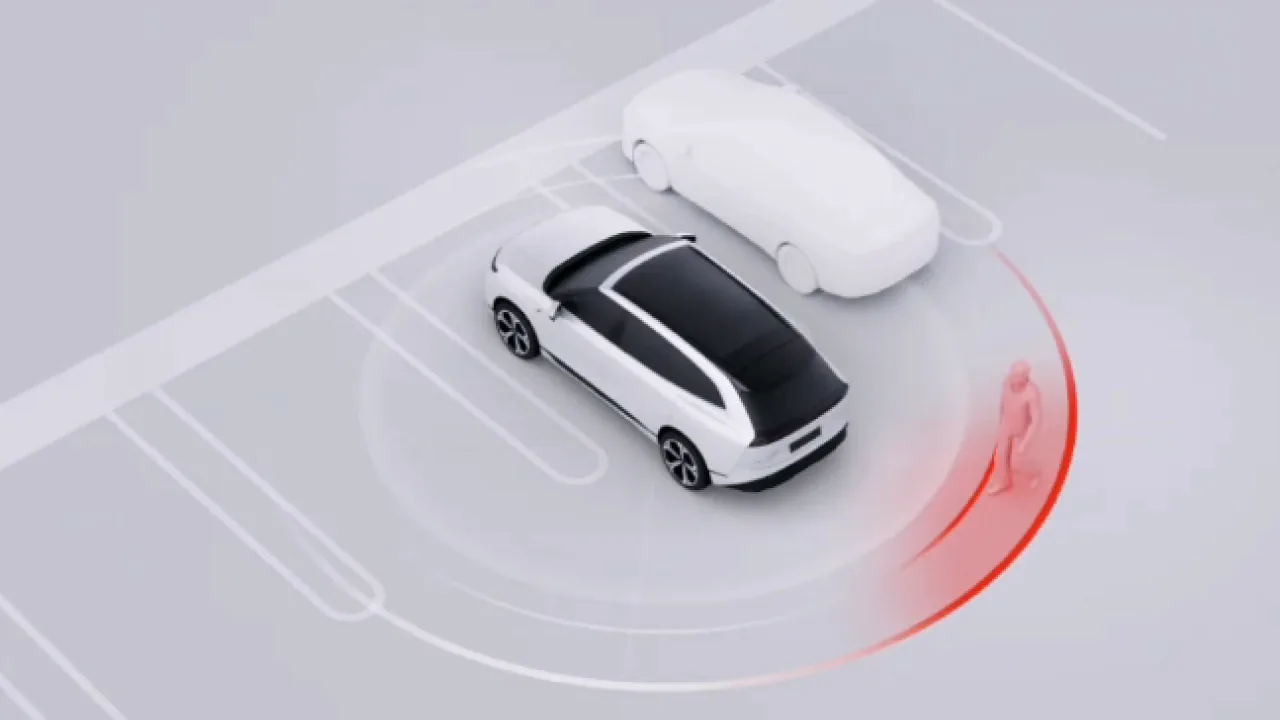
The Reverse Collision Prevention function can identify the risk of a collision behind the vehicle while reversing, issue an alarm, and assist braking.
When the vehicle is in reverse gear (R) and the vehicle speed is between 0 and 18 km/h, if a pedestrian approaching at a certain speed is detected within the detection range and there is a collision risk, RAEB provides an alert through the SR interface and prompt sound.
If the risk further increases and the driver still does not brake or the braking force is too small, RAEB will assist braking to reduce or avoid injuries caused by vehicle collisions.
Warning The RAEB function is a driving aid and may not function in all situations, nor is it a substitute for the driver's attention, who is required to reverse safely. Do not use the system when sight is obstructed and traffic conditions are difficult to observe, such as on a busy road or crossing multiple lanes, as the system may not accurately identify cyclists and pedestrians. So you must always be aware of your surroundings.
Caution Once the RAEB brake is parked, the brakes will be maintained for a period of time and the driver should take over the vehicle as soon as possible.
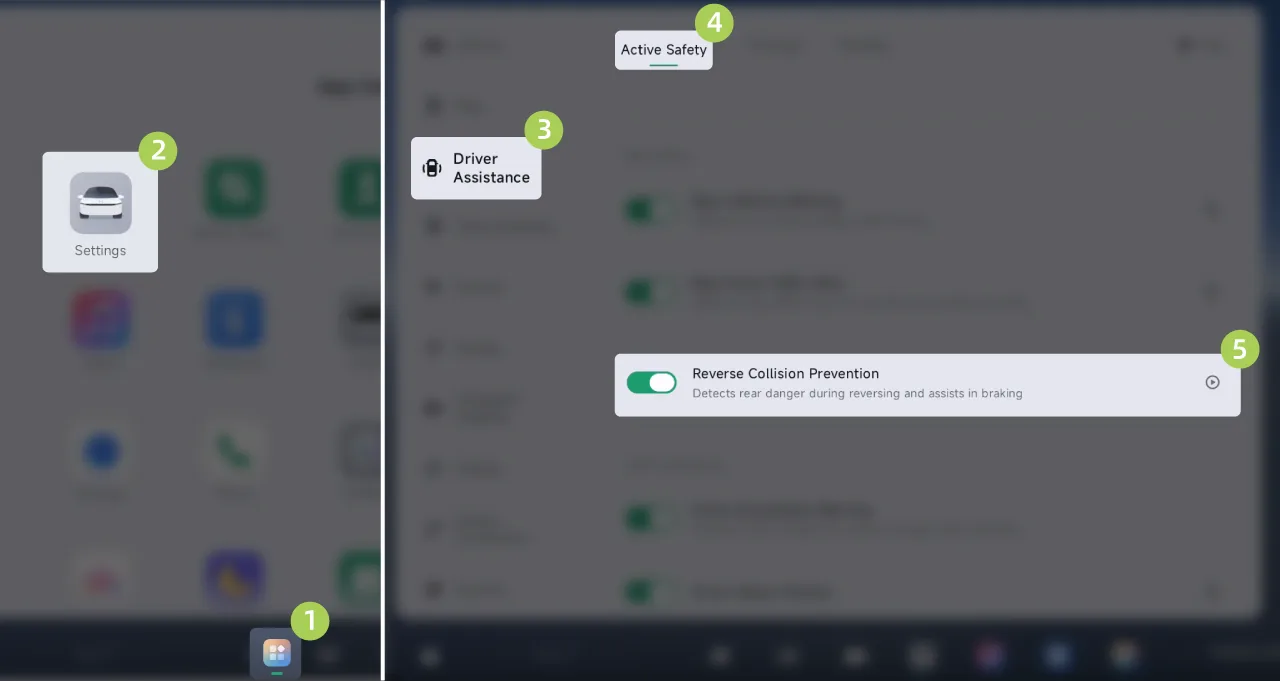
On the center control screen “ →Settings→driving assistance→Active Safety”On the interface, you can enable/disable Reverse Collision Prevention.
Warning RAEB may not function properly in all cases and may cause unnecessary, untimely or ineffective warnings for a variety of reasons. Or omit warnings, such as:
Radar restricted.
Large moving metal objects in blind spot area.
The object to be detected moves too fast.
The above warnings, cautions, and limitations do not describe all situations that affect the normal operation of RAEB.
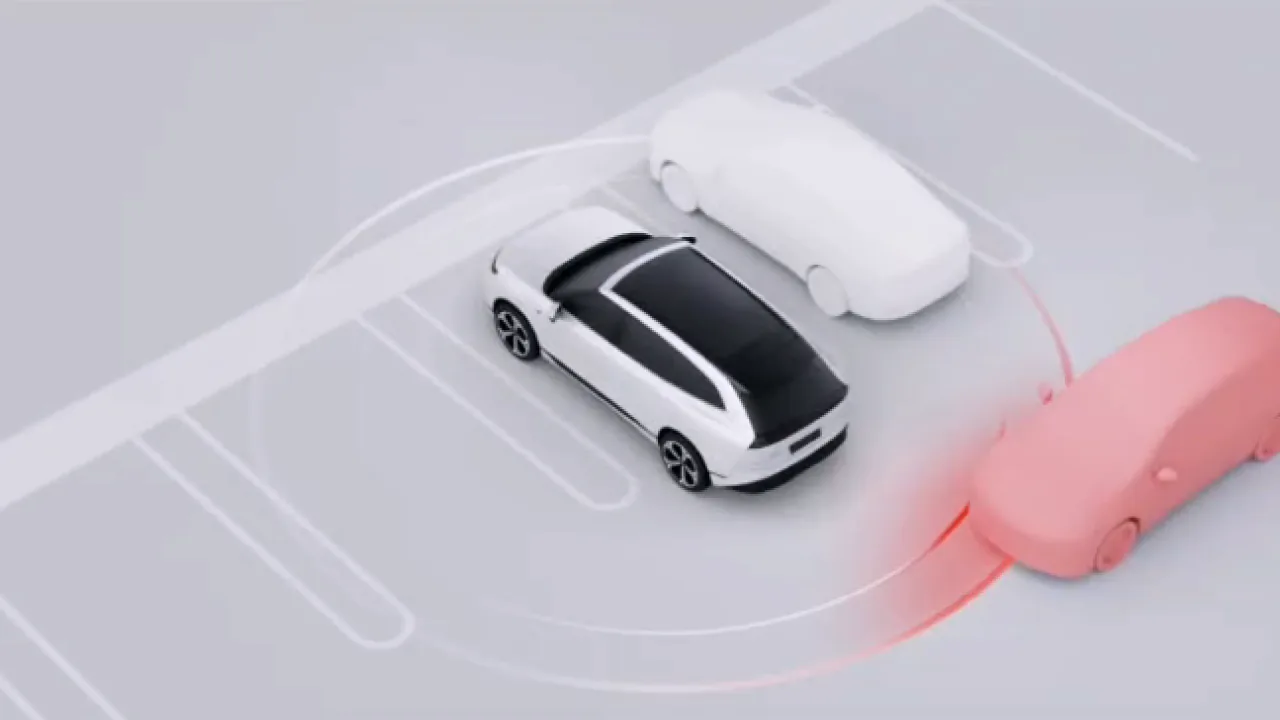
When the rear view is limited while reversing, RCTA can alert the driver to approaching vehicles in the blind spots on both sides behind the vehicle.
When the vehicle is in R gear or N gear, and the reverse speed is 2 to 15 km/h, if a vehicle, pedestrian, or two-wheeled vehicle is approaching at a certain speed within the detection range and there is a collision risk, RCTA is activated and provides an alert through the SR interface and a prompt sound.
Warning RCTA is only a driving assistance function and cannot handle all traffic, weather, and road conditions. It cannot replace the driver's attentive driving and accurate judgment, nor can it replace the use of the Rearview Mirror and Side Mirrors. Never drive recklessly because the system has improved comfort. Reversing the vehicle safely is always the driver's responsibility. Do not rely on this function to control the vehicle, otherwise injury or even death may result.
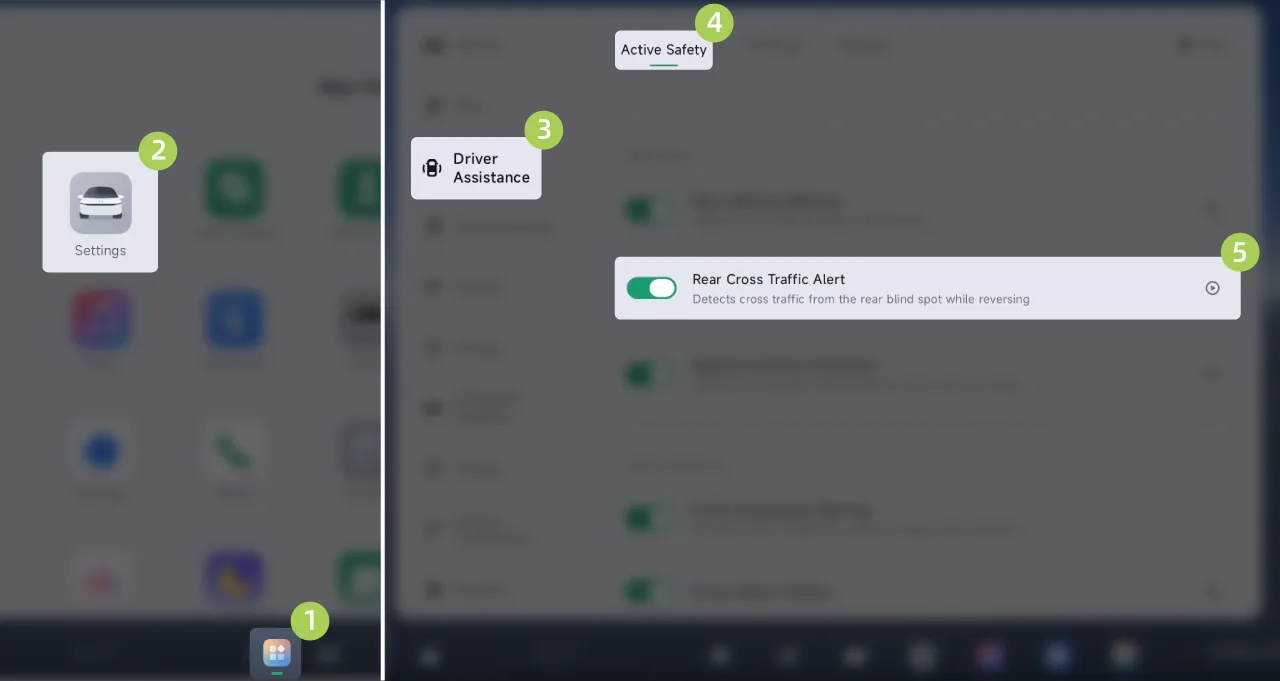
On the central control screen “ →Settings→driving assistance→Active Safety”Interface, where Rear Cross Traffic Alert can be turned on/off.
Warning Do not use RCTA in the following scenarios:
Restricted field of view.
Traffic conditions are complex, such as on roads with heavy traffic flow or when crossing multiple driving lanes.
Warning RCTA may not function properly in the following scenarios:
Radar limited.
The detected object is moving too fast.
There is a relatively large moving metal object in the blind spot.
Warning RCTA may encounter the following situations:
Pedestrians and two-wheeled vehicles were not accurately identified.
The above warnings, cautions, and limitations do not describe all situations that affect the normal operation of RCTA.
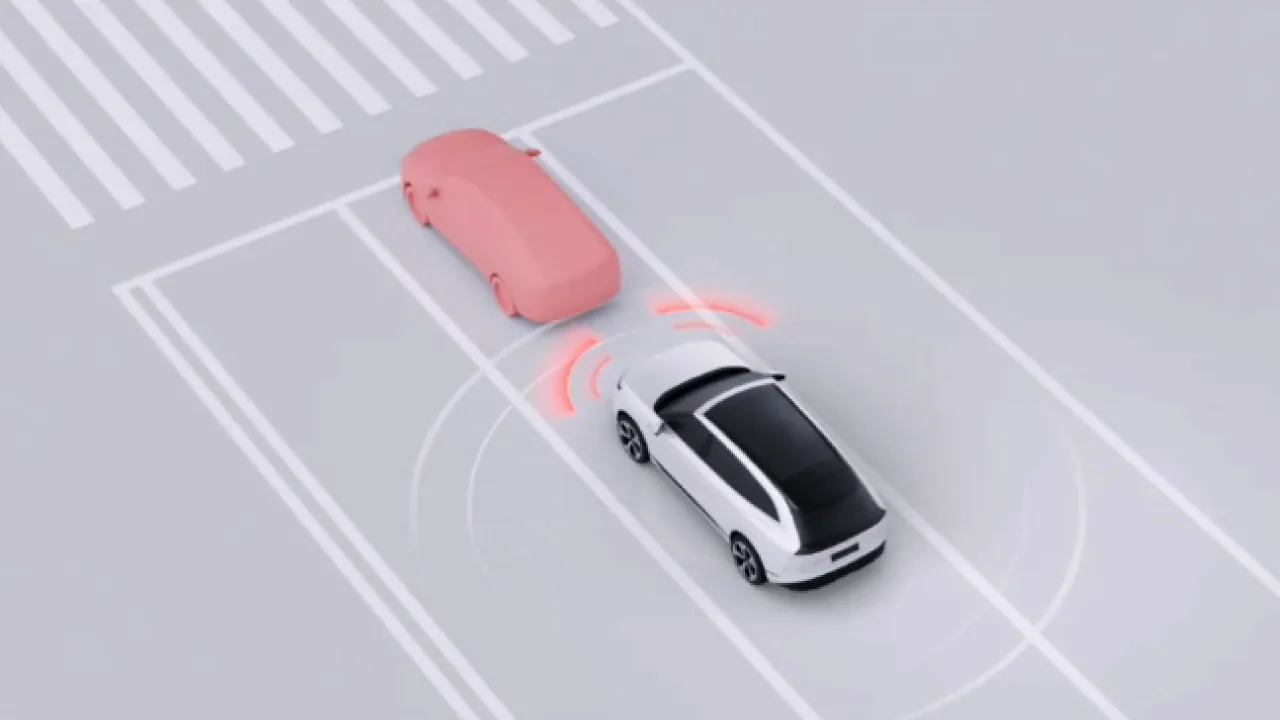
During vehicle startup, if an obstacle is detected in the direction of travel and the driver depresses the accelerator pedal too quickly, Startup Safety Assist will limit the vehicle's Power Response to avoid a collision with the obstacle caused by excessive acceleration.
Warning Startup Safety Assist is only a driving assistance function and cannot replace direct visual observation. Do not rely excessively on the Startup Safety Assist function. After the function is activated, it only limits vehicle acceleration to a certain extent. You still need to actively control the vehicle to brake to a stop, otherwise a collision may still occur. You are responsible for remaining vigilant, paying attention to the vehicle starting environment, and always being aware of other road users, otherwise serious injury or even death may result.
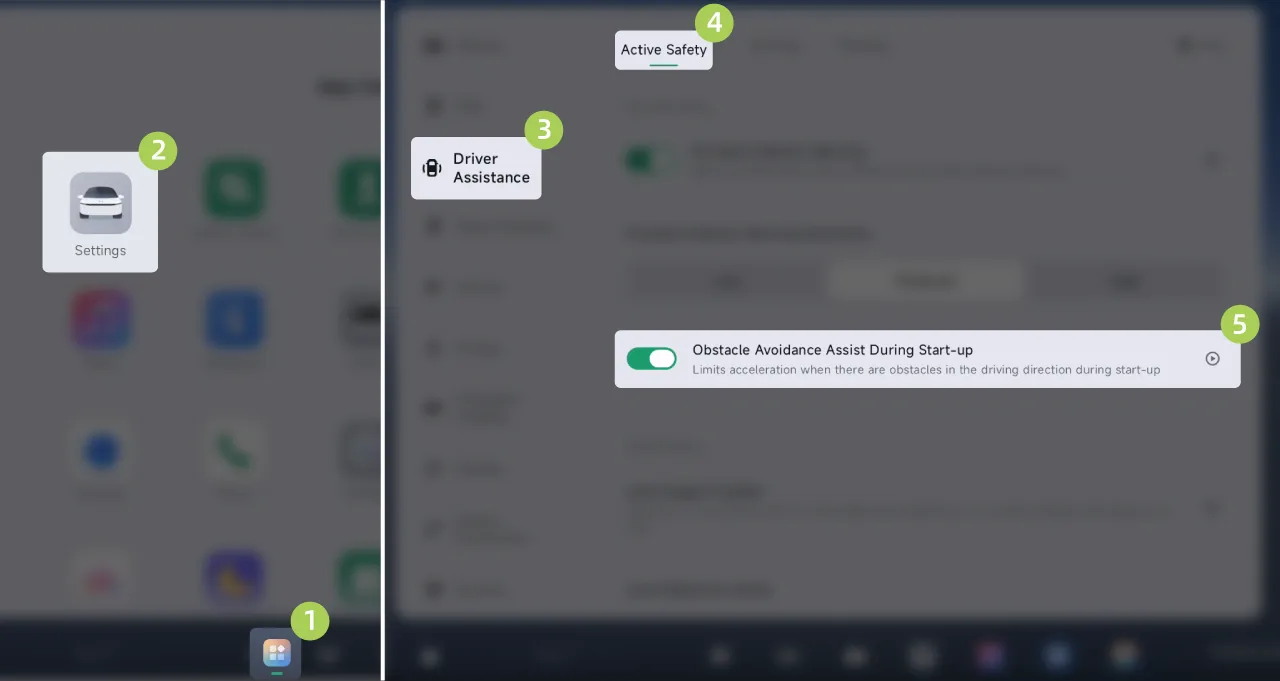
On the center control screen “ →Settings→driving assistance→Active Safety” On the interface, Startup Safety Assist can be turned on/off.
Warning The Startup Safety Assist function may not always work under all circumstances. Various reasons may cause unnecessary, inaccurate, or ineffective warnings, or missed warnings, for example:
Radar limited.
There is a relatively large moving metallic object in the blind spot.
The detected object is moving too fast.
The above warnings, cautions, and limitations do not describe all situations that affect the normal operation of Startup Safety Assist.
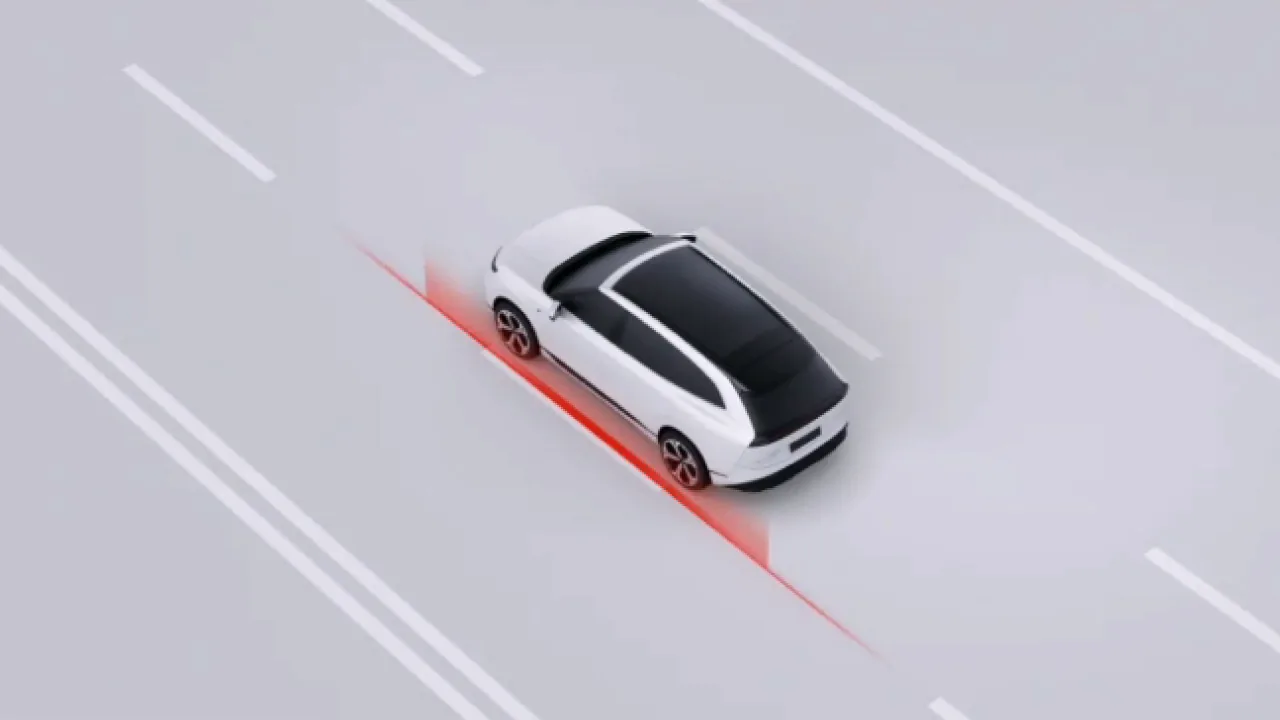
LSS includes Lane Departure Warning (LDW), Lane Keeping Assist (LKA), and emergency lane departure assist (ELK), and can warn of and correct unintentional lane departure or possible lateral collisions during emergency avoidance.
Warning LSS is only an assisted driving function and cannot respond to all traffic, weather, and road conditions. It cannot replace the driver's attentive driving and accurate judgment. As the driver of the vehicle, you are responsible for driving safety. Do not rely on this function to control the vehicle, otherwise injury or even death may result.
If Warning mode is selected, only LDW is enabled; if Correction mode is selected, LDW, LKA, and ELK are all enabled:
LDW: When the vehicle speed is 60–150 km/h and the vehicle departs from the lane without the turn signal in the same direction being activated, the function provides alerts through the SR interface, prompt tones, and steering wheel vibration until the driver corrects the vehicle position.
Warning LDW only has a warning function and cannot correct the vehicle back into the lane. Please correct the vehicle position promptly when LDW issues an alarm.
LKA: When the vehicle speed is 60–150 km/h and the vehicle departs from the lane without the turn signal in the same direction being activated, LKA provides a reminder through the SR interface and an alert tone, and intervenes in steering wheel control to correct the vehicle back into the lane.
ELK: When the vehicle speed is 60–150 km/h and a collision with a curb, an oncoming vehicle, or an overtaking vehicle is imminent, ELK provides alerts through the SR interface and warning sounds, and intervenes in steering wheel control to perform emergency avoidance.
Caution When the turn signal is on or the driver has an obvious steering intention (such as quickly turning the steering wheel, braking, deeply depressing the accelerator pedal to accelerate, turning on the hazard warning lights, etc.), the Lane Departure Assist function will not issue a warning or intervene in lane departure.
The windshield wipers and hazard warning lights will both inhibit the activation of this function.
On the center control screen “ →Settings→driving assistance→Active Safety”On the interface, you can set the mode and sensitivity of the Lane Departure Assist function.
Warning In the following scenarios, LSS may not function properly:
Special road conditions or complex road sections:
Lane markings are excessively worn, old and new markings overlap, or they are temporarily adjusted due to road construction or change rapidly (for example, lane splits, crossings, or merges).
Poor weather conditions or lighting environment:
When there is a strong crosswind or a large lateral airflow on one side of the vehicle.
Darkness (poor lighting conditions) or poor visibility (caused by heavy rain, heavy snow, dense fog, etc.).
When intense light (such as oncoming headlamp light or direct sunlight) obstructs the camera's field of view.
Objects or landscape features cast large-area shadows onto the lane.
Due to lighting conditions, lane markings may be unrecognizable or recognized incorrectly, for example, strong light causing reflection from lane markings, adverse weather, nighttime resulting in poor visibility, or insufficient light.
Camera Limited:
Camera limited.
When the camera is obstructed (by dust, coverings, etc.).
When there is a vehicle ahead that may obstruct the camera's field of view.
Issues a warning or applies braking when there is no collision risk.
The above warnings, cautions, and limitations do not describe all situations that affect the normal operation of LSS.
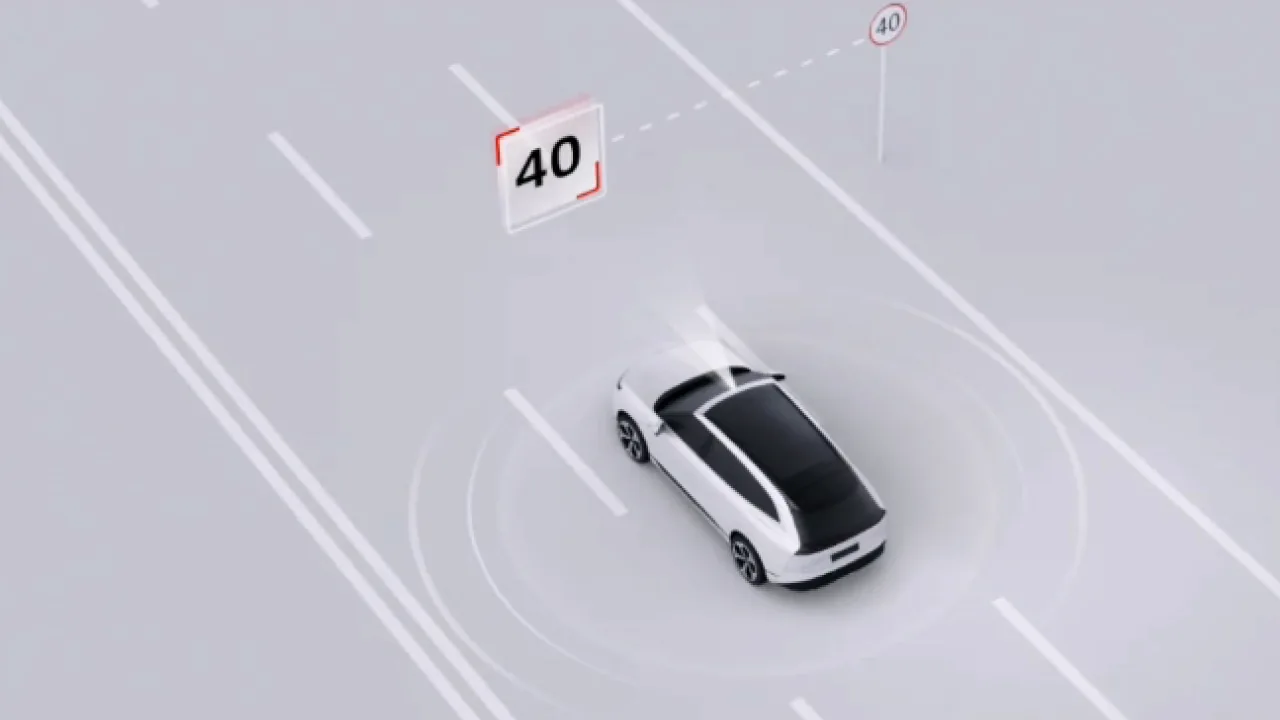
TSR can recognize speed limit signs on the road and obtain speed limit information in combination with navigation, display it on the SR interface, and also provide a reminder when the vehicle is speeding.
TSR can recognize speed limits from speed limit signs and speed cameras, and provide reminders through different icons:
 | Speed limit from speed limit sign |
 | Electronic Eye Speed Limit |
 | Exceeding the speed limit sign speed |
 | No Speed Limit Sign Speed Limit |
| | Map not in cruise state |
Tips TSR can recognize the following signs: speed limit signs, variable speed limit signs, speed limit cancellation signs, zone speed limit signs, multi-lane speed limit signs, multiple speed limit signs, and expressway exit ramp speed limit signs.
Tips When the vehicle remains in P gear for more than 5 min or there is continuously no GPS signal, the indicator that the map has not entered cruise status will be displayed. This is a normal prompt and not a vehicle malfunction.
When TSR detects a road speed limit:
Manual driving, LCC assisted driving: when the road speed limit is ≥ 60 km/h and the vehicle is overspeeding by approximately 20%, the speed limit icon on the instrument cluster screen and the central control screen flashes 3 times as a reminder.
Warning TSR is only a driver assistance function and cannot respond to all traffic, weather, and road conditions. As the driver of the vehicle, you are responsible for driving safety. Do not rely on this function to control the vehicle, otherwise injury or even death may result.
Warning TSR May Not Function Properly in the Following Scenarios:
Radar or camera limited.
When road or speed limit signs have been changed recently.
When traffic signs are in poor condition.
The above warnings, cautions, and limitations do not describe all situations that affect the normal operation of TSR.
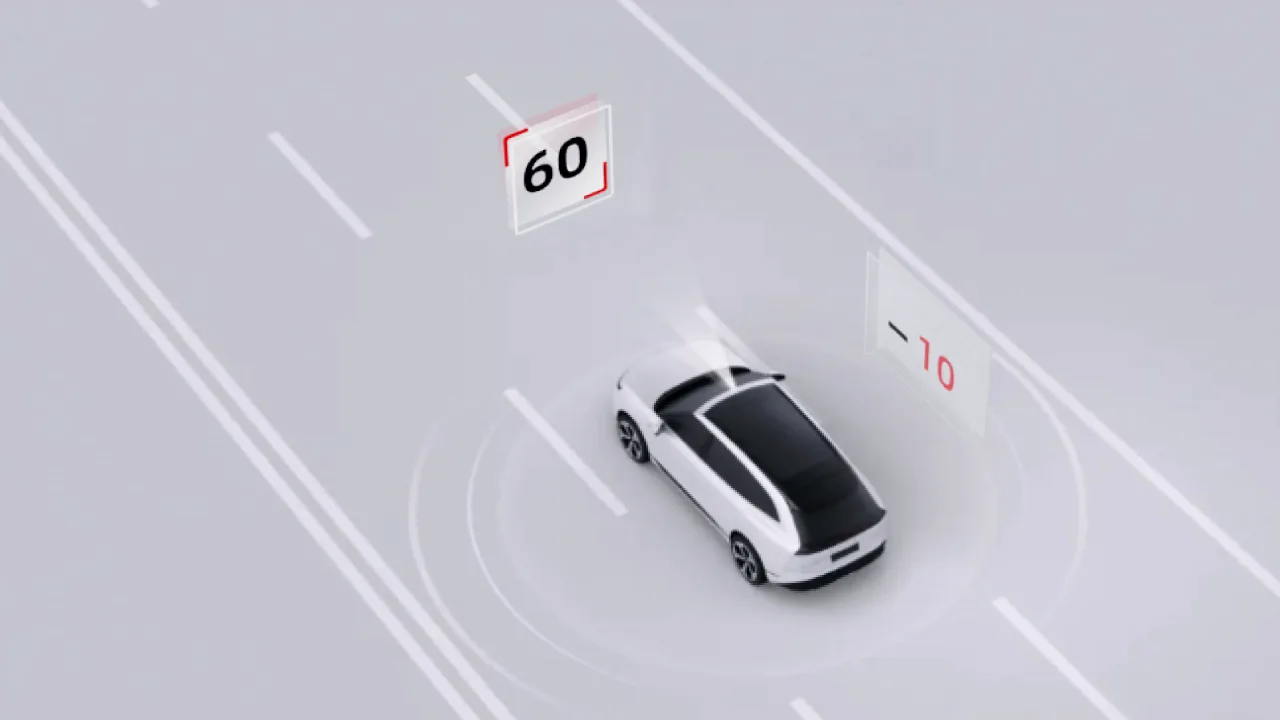
SAS can simultaneously set the maximum cruise speed according to the road speed limit recognized by TSR.
Warning SAS is only an assisted driving function and cannot respond to all traffic, weather, and road conditions. You, as the driver of the vehicle, are responsible for driving safety. Do not rely on this function to control the vehicle, otherwise injury or even death may result.
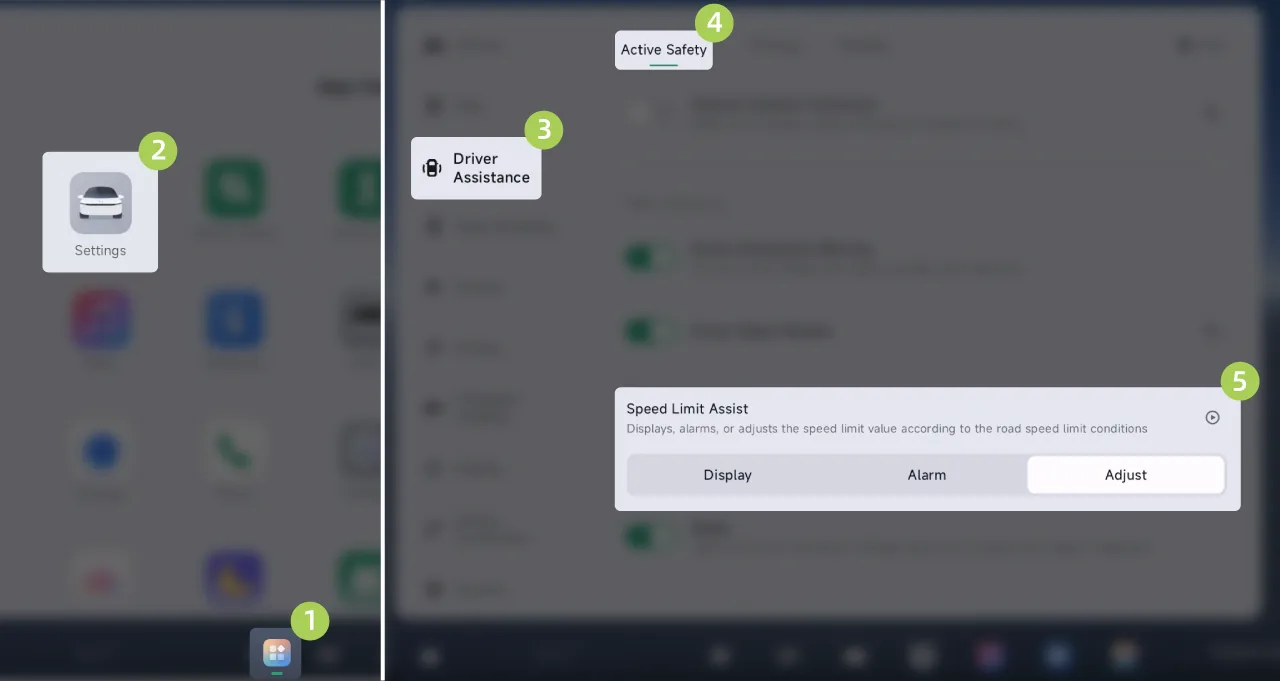
On the center control screen “ →Settings→driving assistance→Active Safety”On the interface, you can set the SAS assistance mode.
Manual: When TSR detects new speed limit information, a reminder will be displayed through the SR interface. At this time, push the shift lever downward and hold it to set the cruise speed to the speed limit of the current road.
Automatic: When TSR detects new speed limit information, SAS automatically sets the cruise speed to the speed limit of the current road.
Warning SAS may not be able to fully perform its function or may provide inaccurate information under the following circumstances:
Camera limited.
The road or speed limit has recently changed, for example due to construction or traffic control.
Poor traffic sign condition: damaged, faded, blurred, or not placed or installed as required.
Caution To maintain performance, regular updates are required. Data based on maps is provided free of charge by the manufacturer to vehicle owners every year. Vehicle owners need to connect to the network for automatic updates. The update service continues until 7 years after the vehicle manufacturing date.
The above warnings, cautions, and limitations do not describe all conditions that affect the normal operation of SAS.
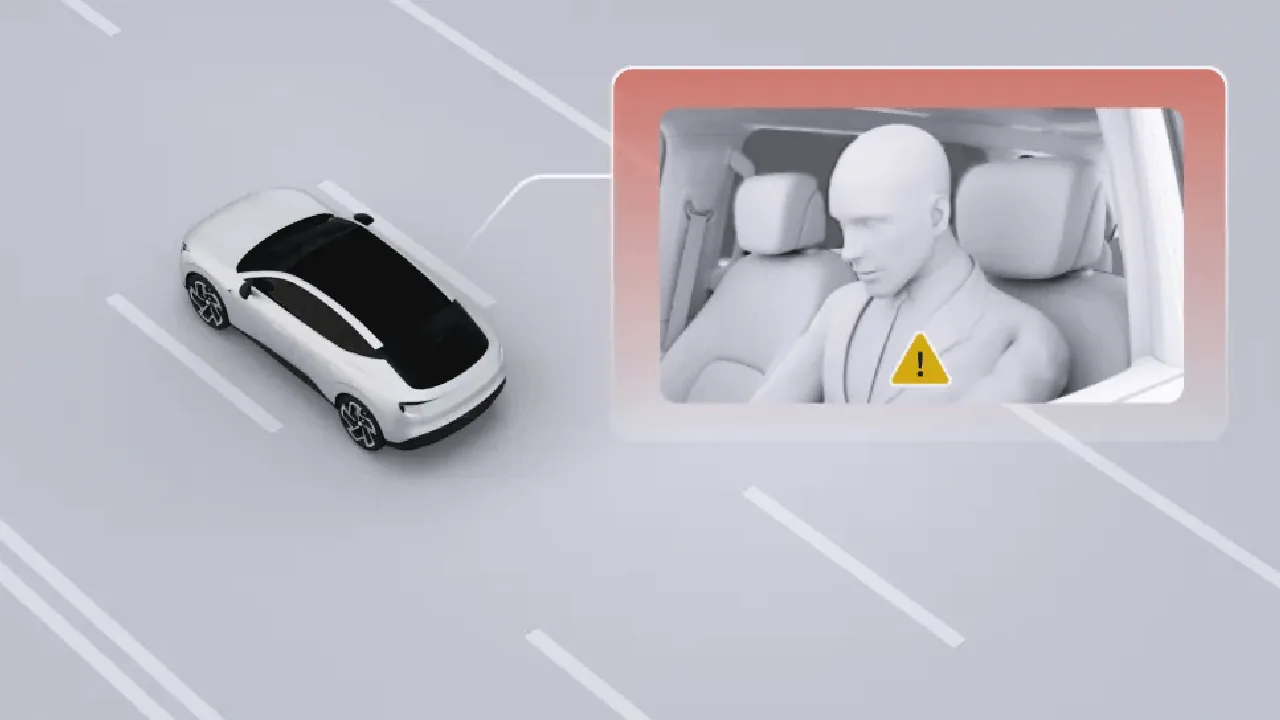
When the vehicle reaches a certain speed, the system will monitor the driver's status in real time through the in-vehicle camera, including fatigue, distraction, and making phone calls.
When the driver is drowsy or distracted, the system provides reminders through the SR interface and sound. When the driver remains drowsy or distracted for a long time, the system provides reminders through steering wheel vibration. In manual driving scenarios, the system also works in conjunction with the lane departure assist function and the Forward Collision Warning function to alert the user earlier to collision risks.
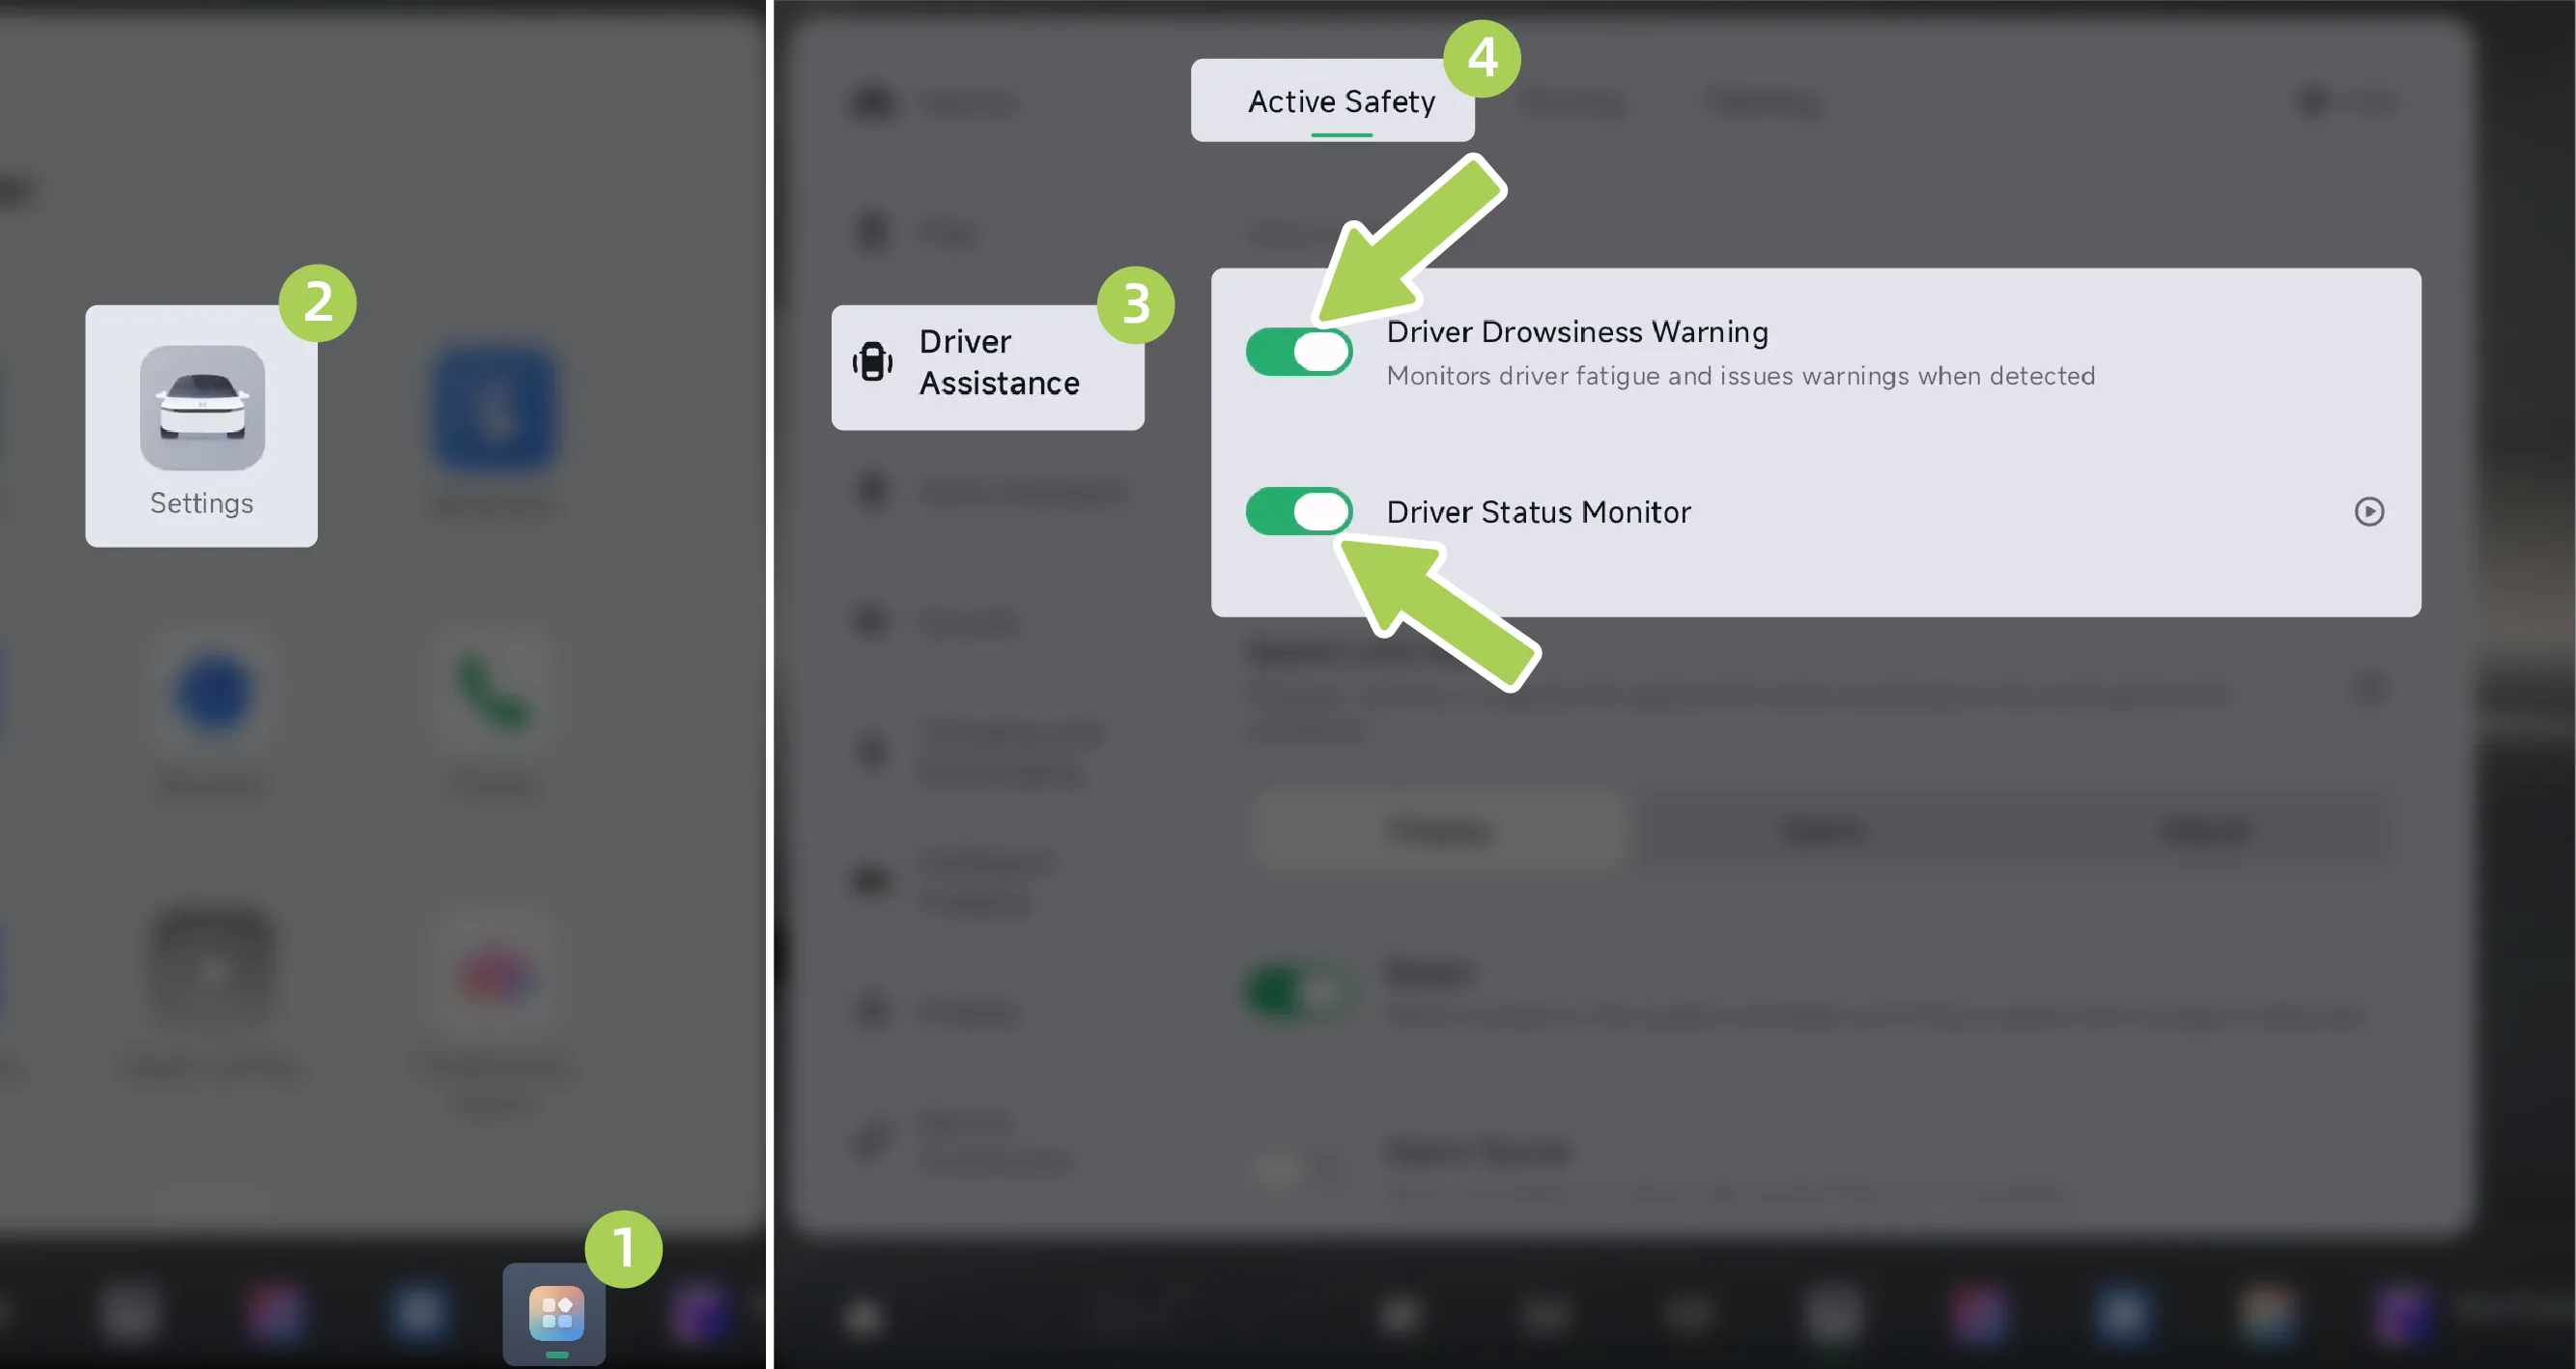
On the center control screen “ →Settings→driving assistance→Active Safety”On the interface, you can set DSM to on or off.
Tips The DDW switch can only be switched off during each drive, after the alarm has been triggered.
Driver Drowsiness Warning (DDW)
DDW is used to monitor the driver's fatigue state. When the driver becomes fatigued, the system will issue an alarm to remind the driver to stay focused or take other actions to relieve fatigue and avoid fatigued driving.
Caution When DSM/DDW is in operation, the interior camera does not store or transmit personal privacy data such as audio and video.
Warning When the DSM/DDW is switched off, the driver will not be able to be monitored for fatigue or distraction and warned that driving safety is compromised, please switch off carefully.
DSM/DDW is an auxiliary function and must not rely on fatigue distraction reminders to deal with all scenarios, the driver must always maintain a view of the vehicle's control and road environment.
Keep your eyes on the road and never drive tired. When the system prompts "Keep an eye on the road", ask the driver to adjust their driving behavior promptly or to find a service or safe place to stop and rest as soon as possible.
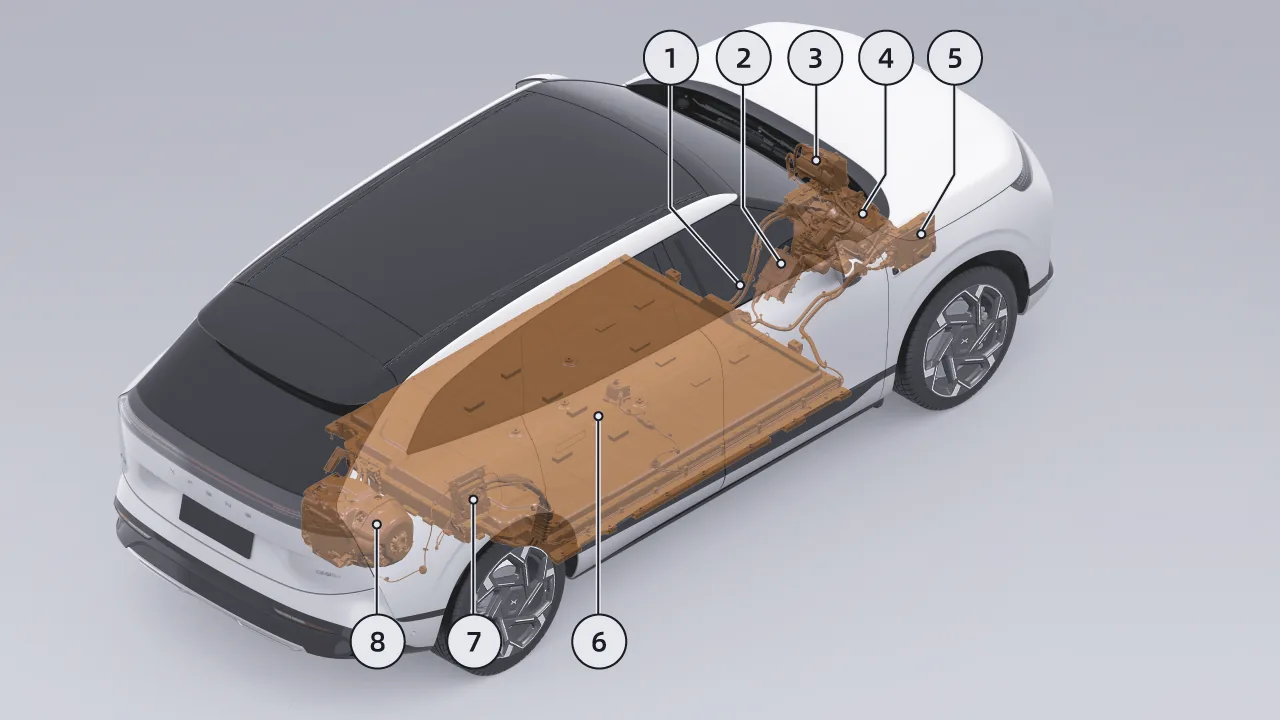
| 1. High-Voltage Wiring Harness | 5. Charger/DC Converter |
| 2. Coolant Heater | 6. Power Battery |
| 3. Air Conditioner Compressor | 7.Charging Port |
| 4. Front Electric Drive System* | 8. Rear Electric Drive System |
Warning Do not touch or remove the High-Voltage Wiring Harness or the high-voltage components connected to the High-Voltage Wiring Harness, otherwise there is a risk of electric shock.
The charging port is located on the right rear side of the vehicle. When the vehicle is unlocked and the gear position is in P, press the marked area on the left side of the charging port cover to open the charging port cover.
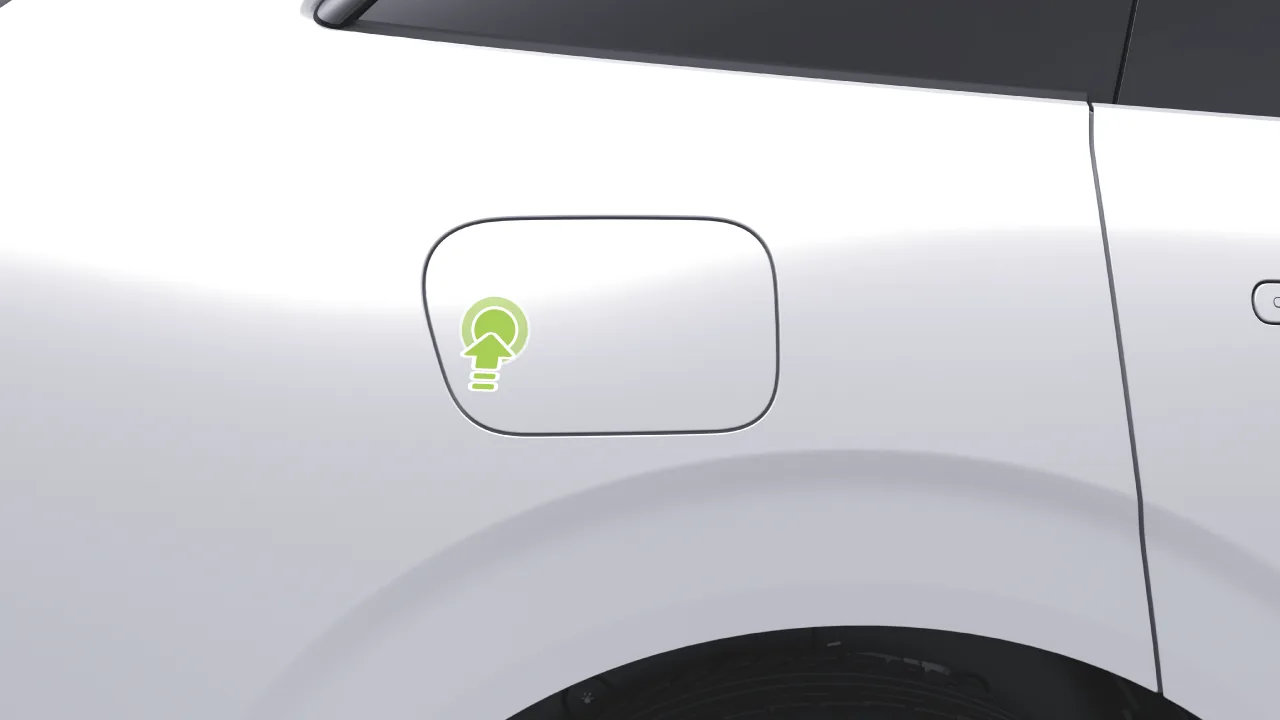
Press the switch to close the charging port cover.
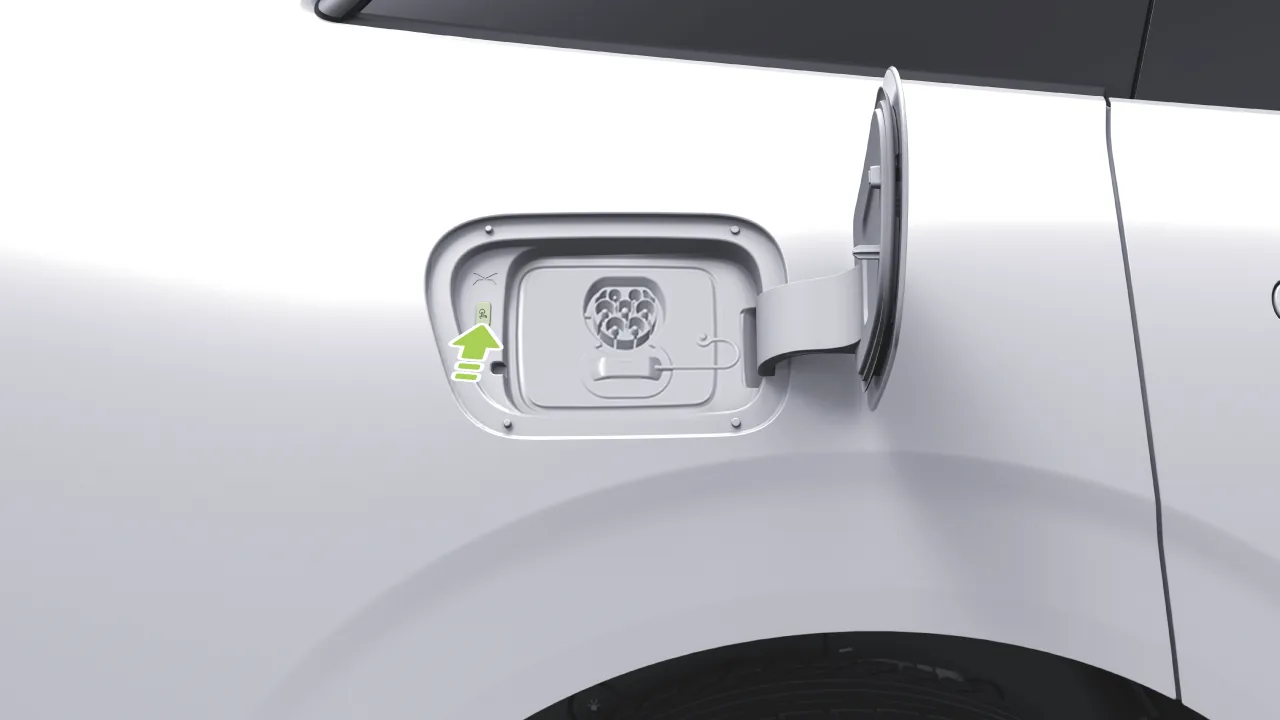 Caution
 Before closing the charging port cover, make sure there are no obstructions at the charging port to prevent damage to the cover.
When the vehicle is in P gear, you can open/close the charging port cover by either of the following methods:
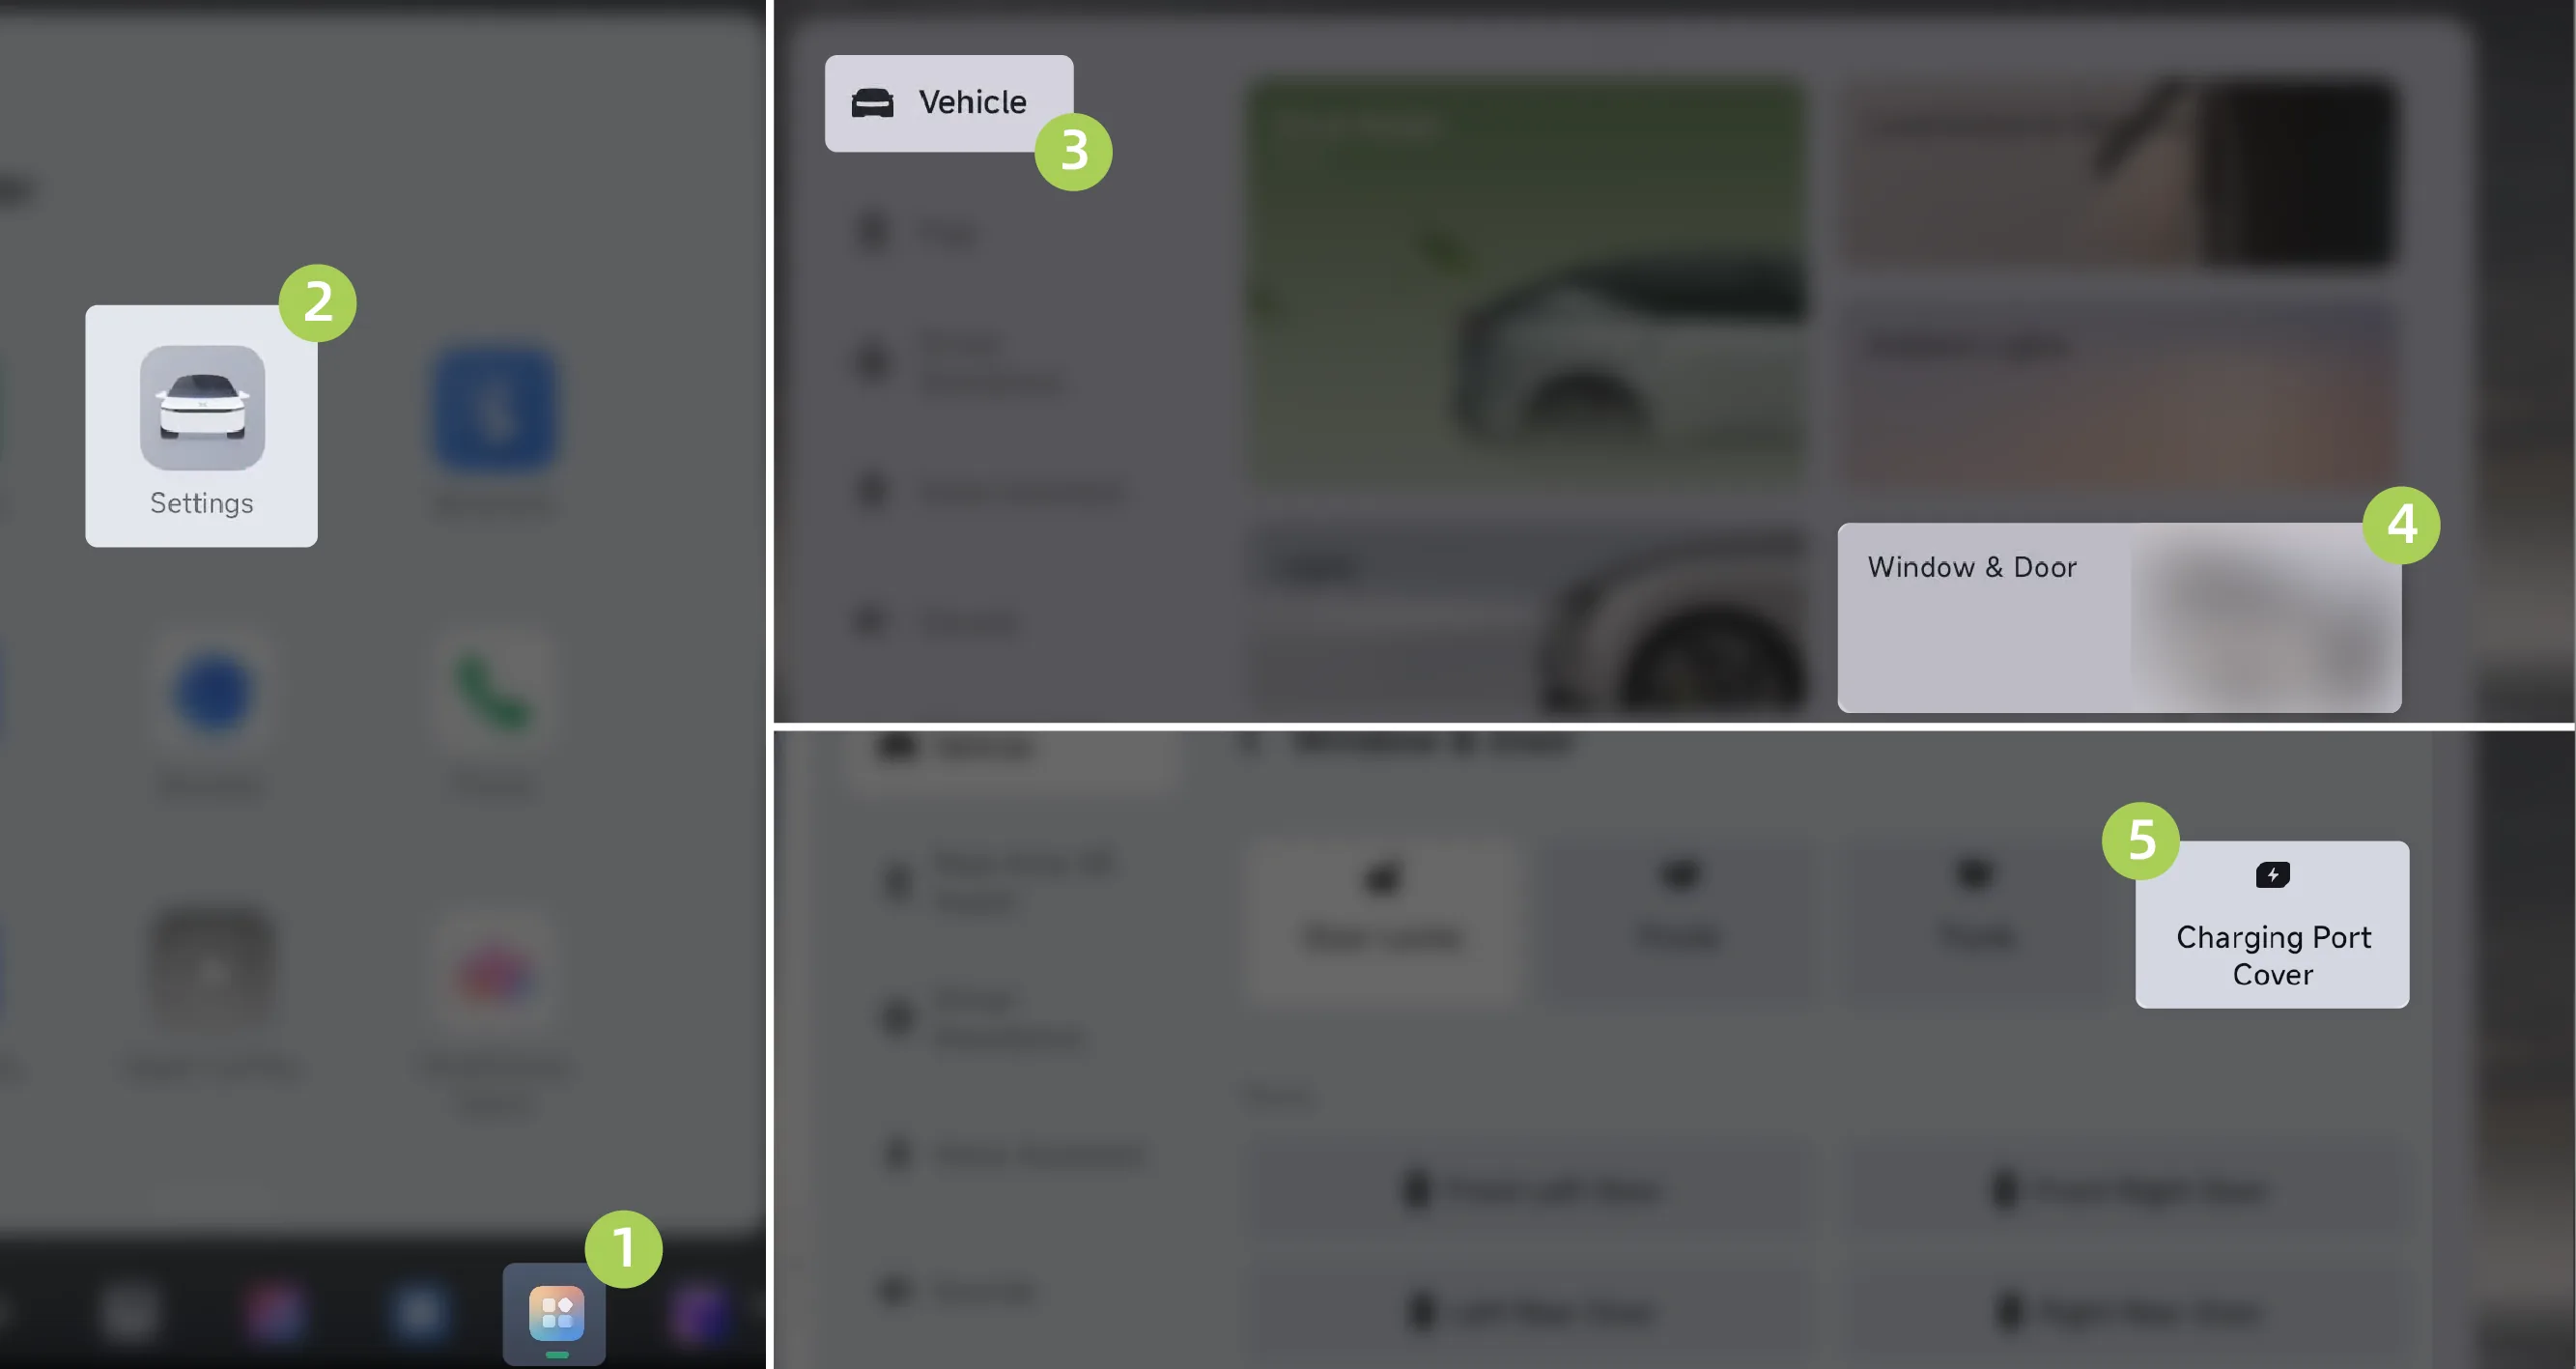
On the center control screen “ →Settings→Vehicle→Window&Door”Interface, tap Charging Port CoverThe card can open/close the charging port cover.
Tap on the center display. “ ”Enter the Control Center screen and tap Charging Port CoverThe card can open/close the charge port cover. (To learn about the custom control center, please refer to the custom control center section).
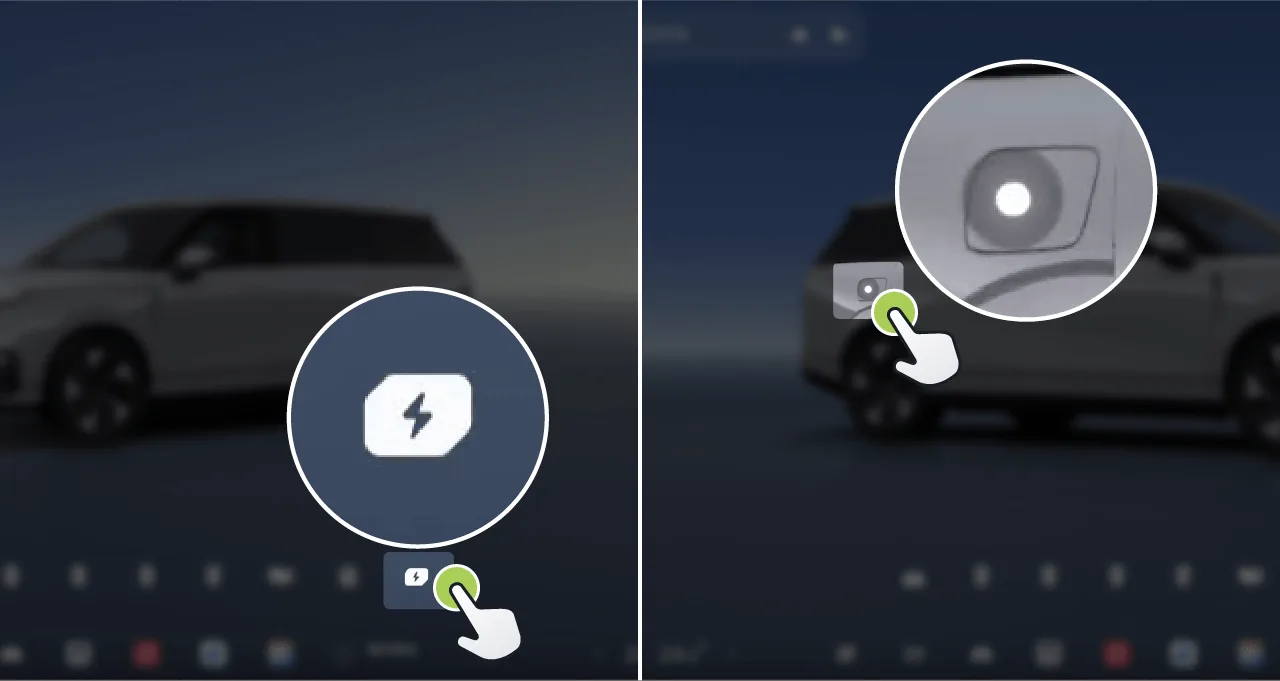
Tap the charging port icon below the 3D vehicle model on the center display home screen, or tap the hotspot icon on the charging port area of the 3D vehicle model to open/close the charging port lid.
Tips The hotspot icons on the 3D vehicle model are hidden by default. You need to tap the 3D vehicle model to display them.
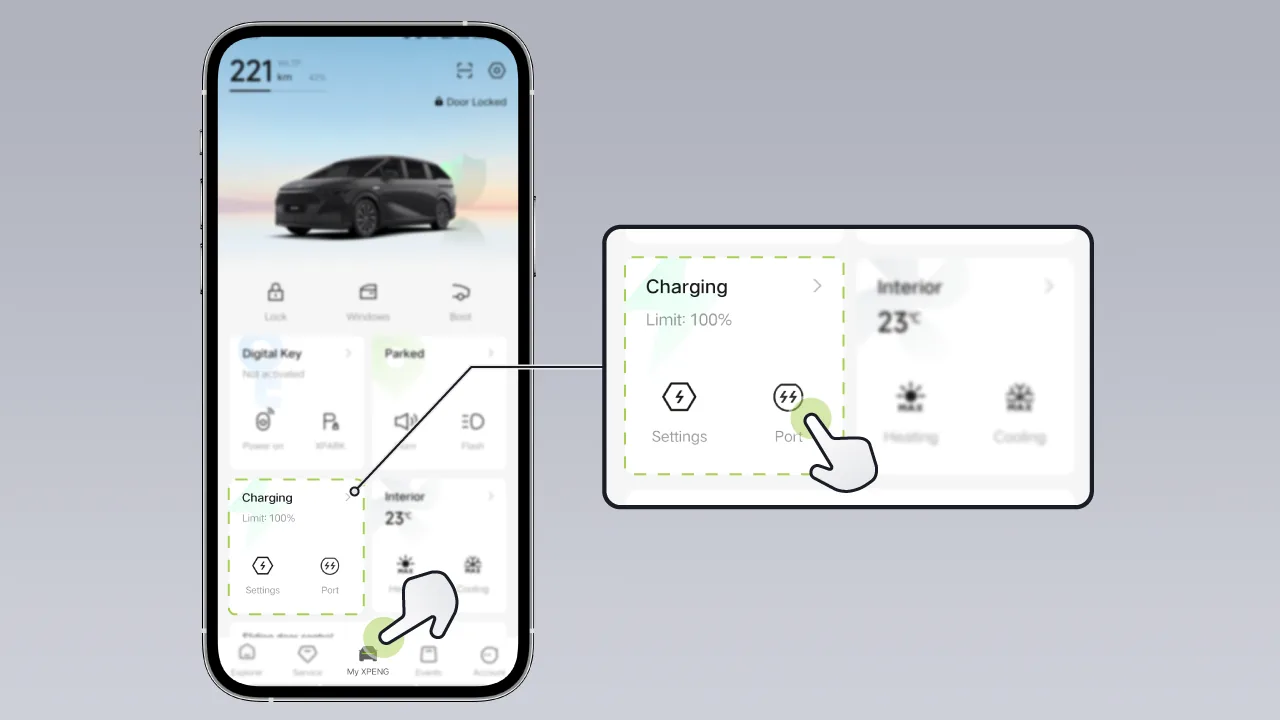
In the mobile app On the interface, you can open/close the charging port cover. Before opening, please ensure that the vehicle gear is in P gear.
If any of the following conditions is met, the charging port cover closes automatically:
After unplugging the charging connector, lock the vehicle.
Charging connector not inserted, after a period of no operation.
When the gear is shifted into a non-P gear.
Caution With Auto Close enabled, if the Charging Port dust cap is not installed, rain, snow, or other foreign objects may enter. Please secure the Charging Port sealing cap.
After charging is completed, push the charging port cover, and the charging port cover will close automatically.
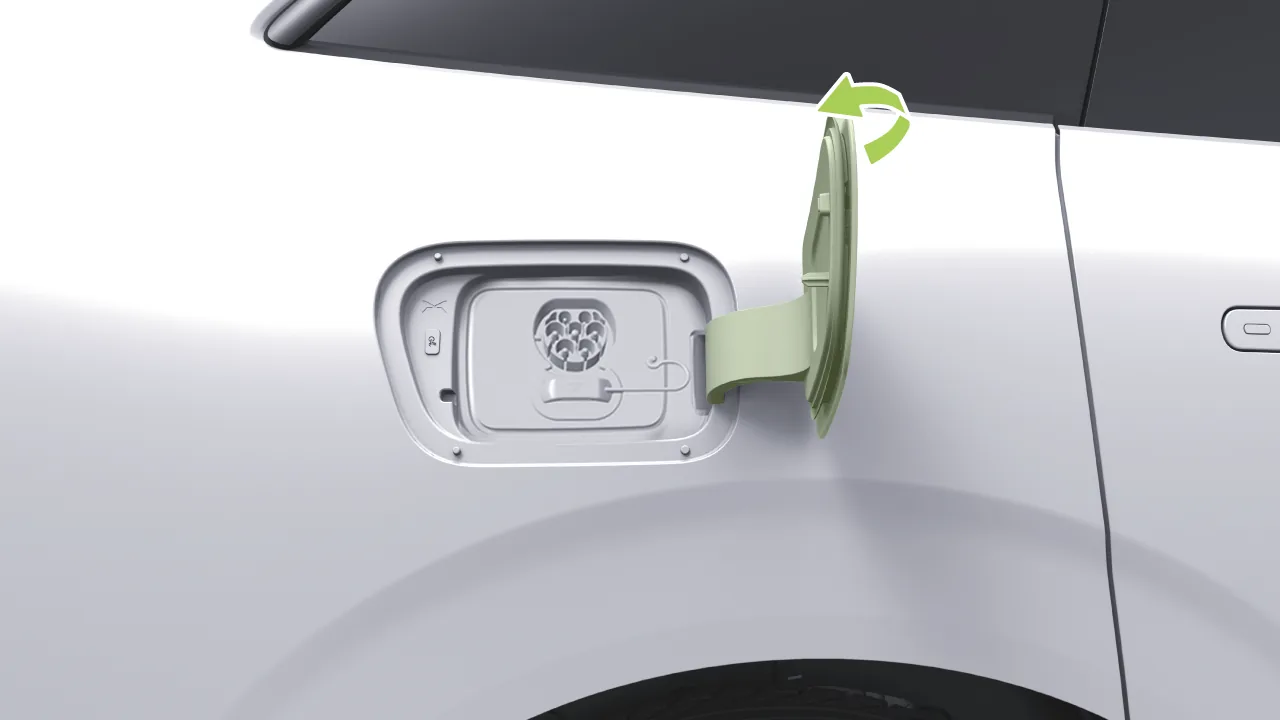 Caution
 When pushing the Charge Port Cover, do not apply excessive force or push it quickly to avoid damage to the cover.
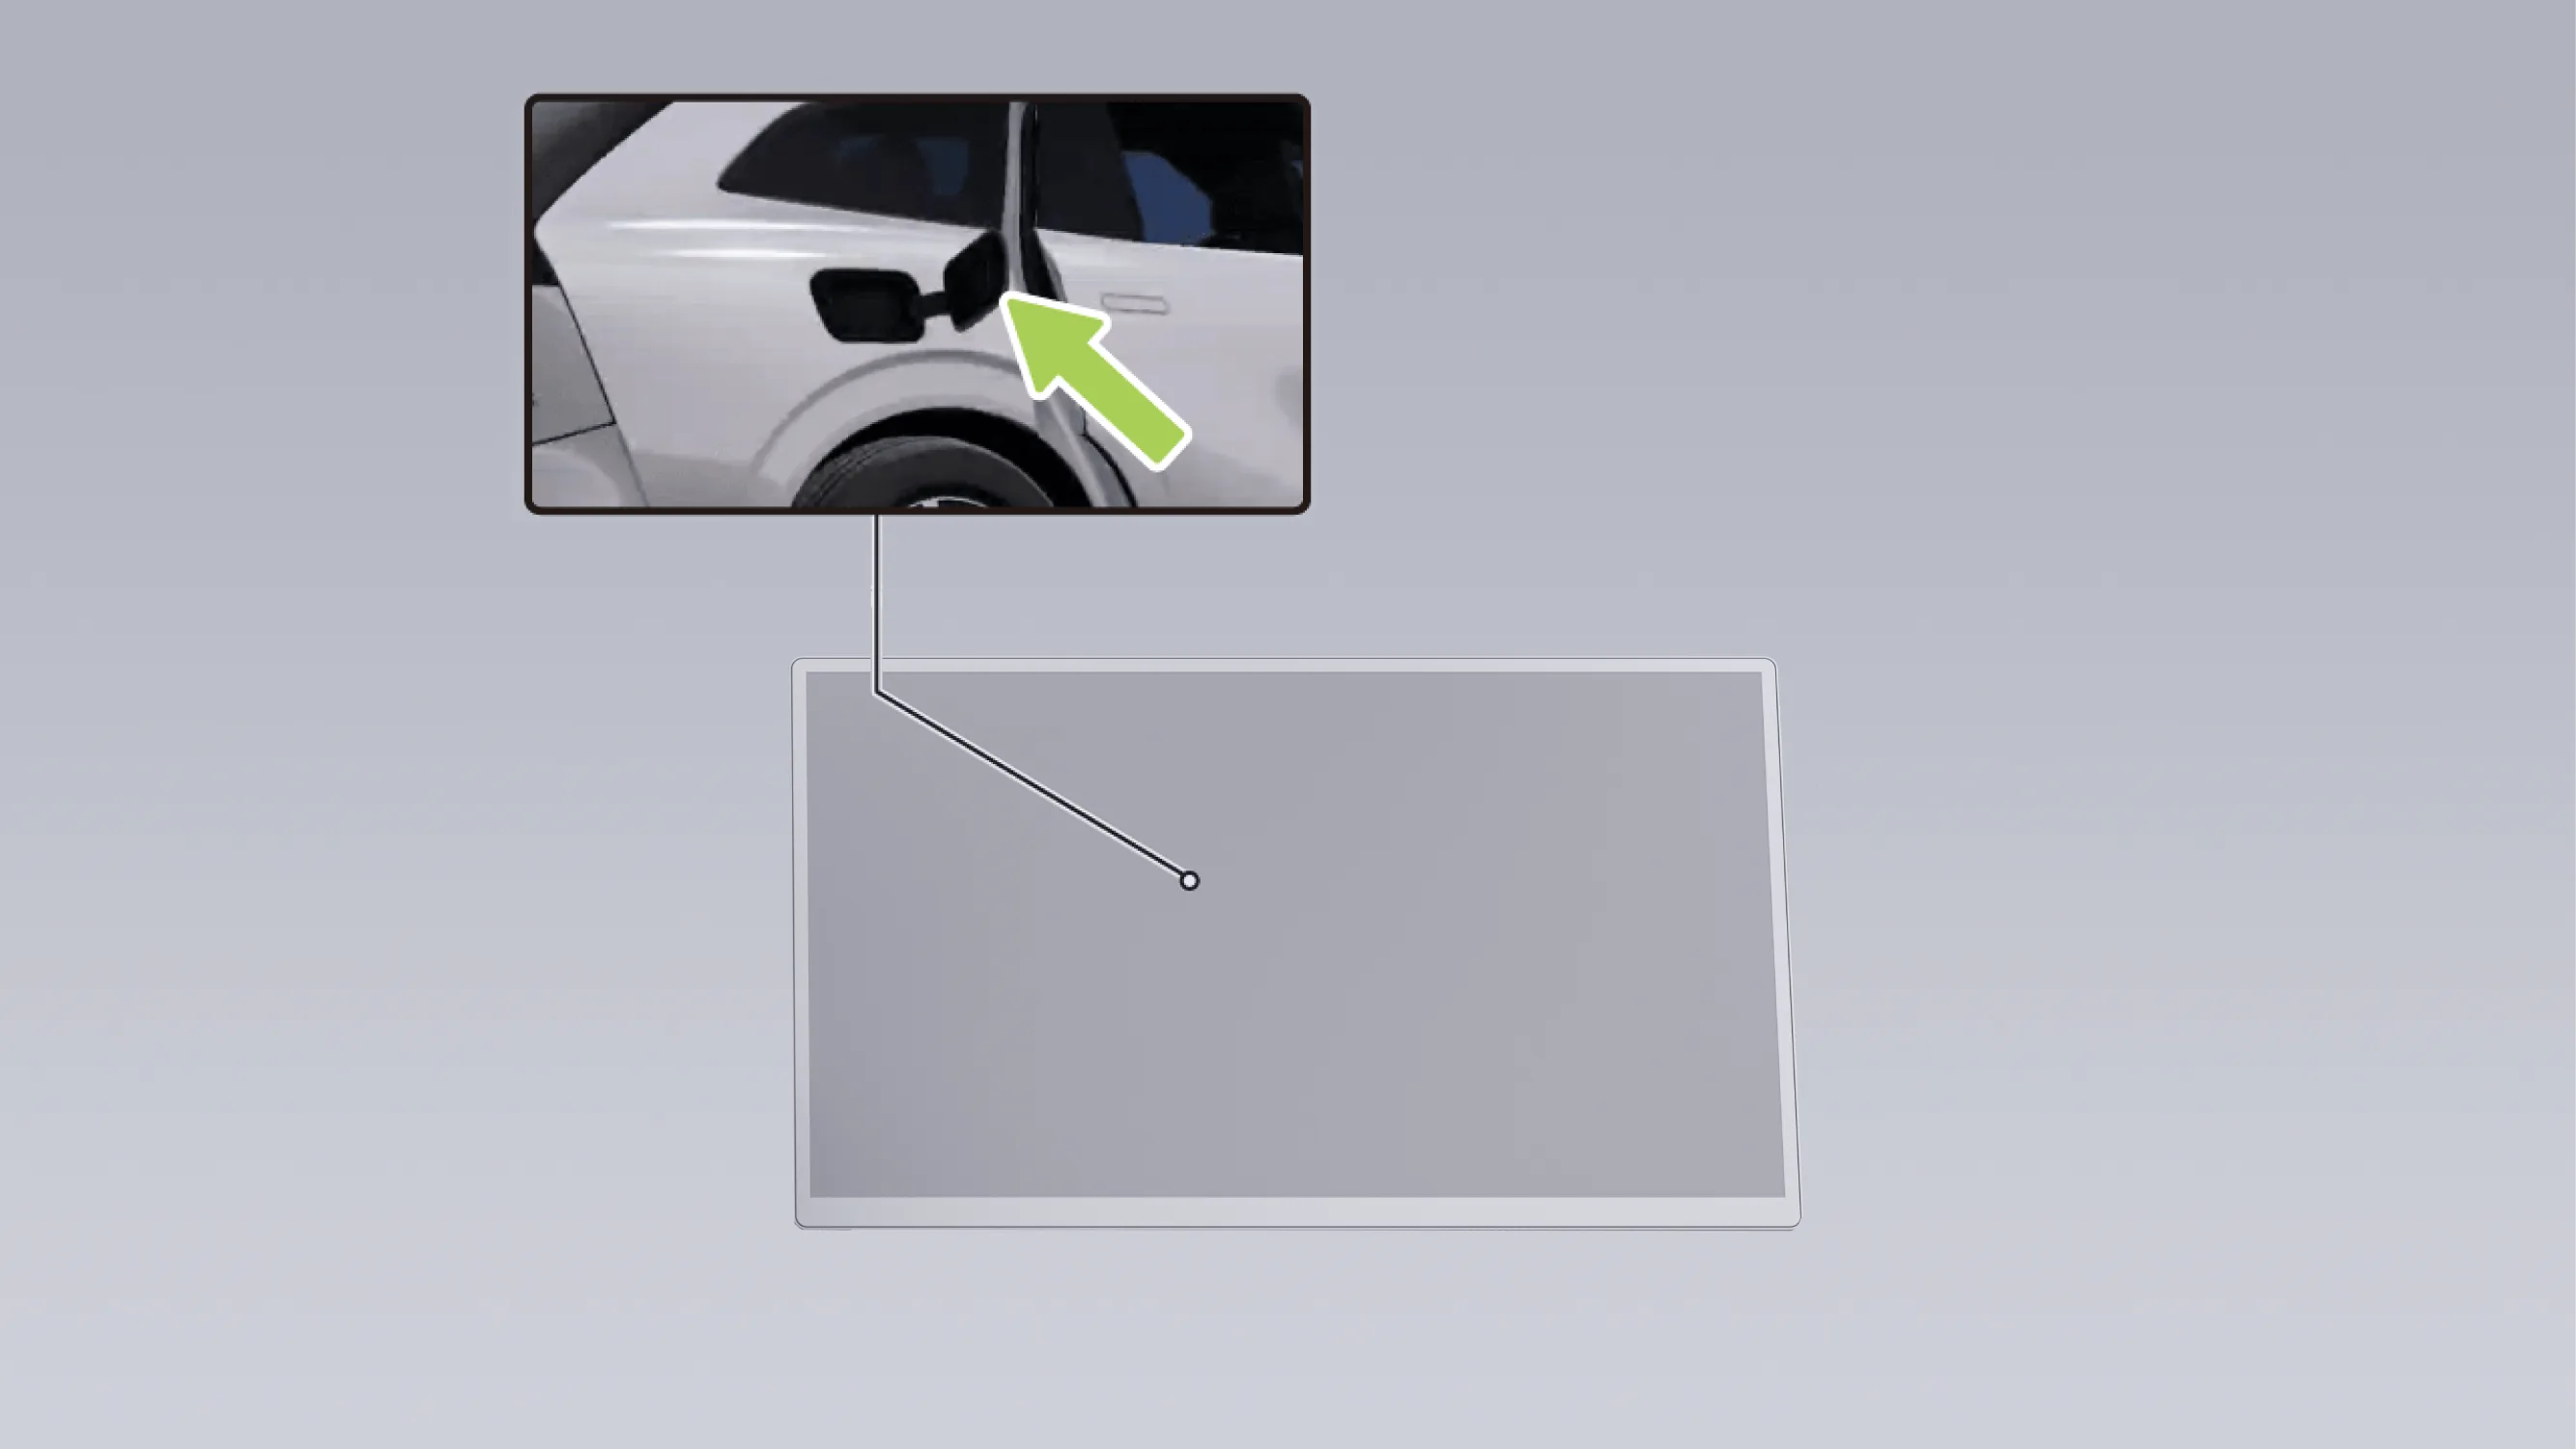
Open the charging port cover. The SR interface on the central control screen will display the charging port cover open status;
If the charging port cover is not closed while driving, text and sound prompts will be provided simultaneously.
Caution When washing the vehicle, avoid using a high-pressure water gun to spray the charging port lid switch area, otherwise the charging port lid may open.
Tips After charging is completed, place the sealing cap back onto the charging port to prevent foreign objects from falling in.
In cold weather, the charging port cover may freeze, causing the charging port cover to be unable to open. In this case, deicing treatment should be carried out first.
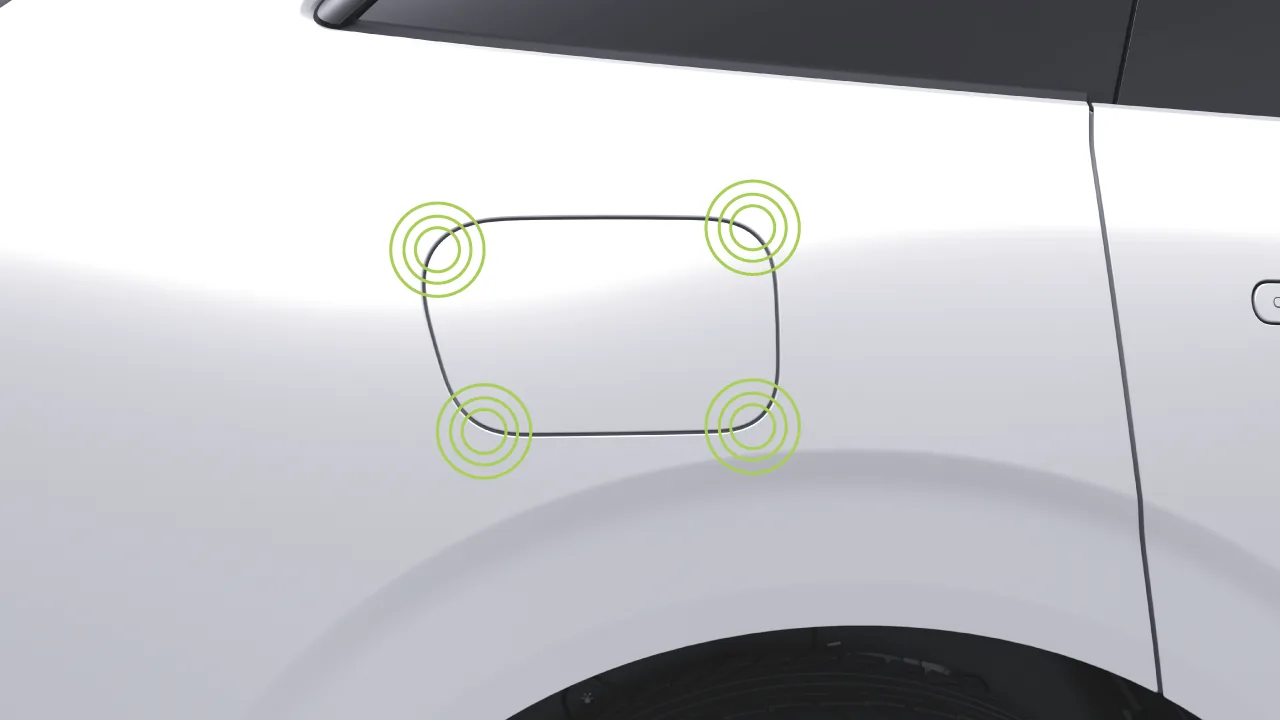
Gently tap the four corners of the charging port cover using a suitable tool.
Place a hot towel wrung out of water flat on the charging port cover panel to soften the ice.
If the charging port cover cannot be opened using the above methods, please contact a XPENG service center for assistance.
Warning Do not use highly corrosive liquids and pour the charging flap to avoid damage to the paint.
Do not force the charging flap to damage the cap.
The vehicle supports AC slow charging. You can charge the vehicle using an AC charging station or a portable charging gun.
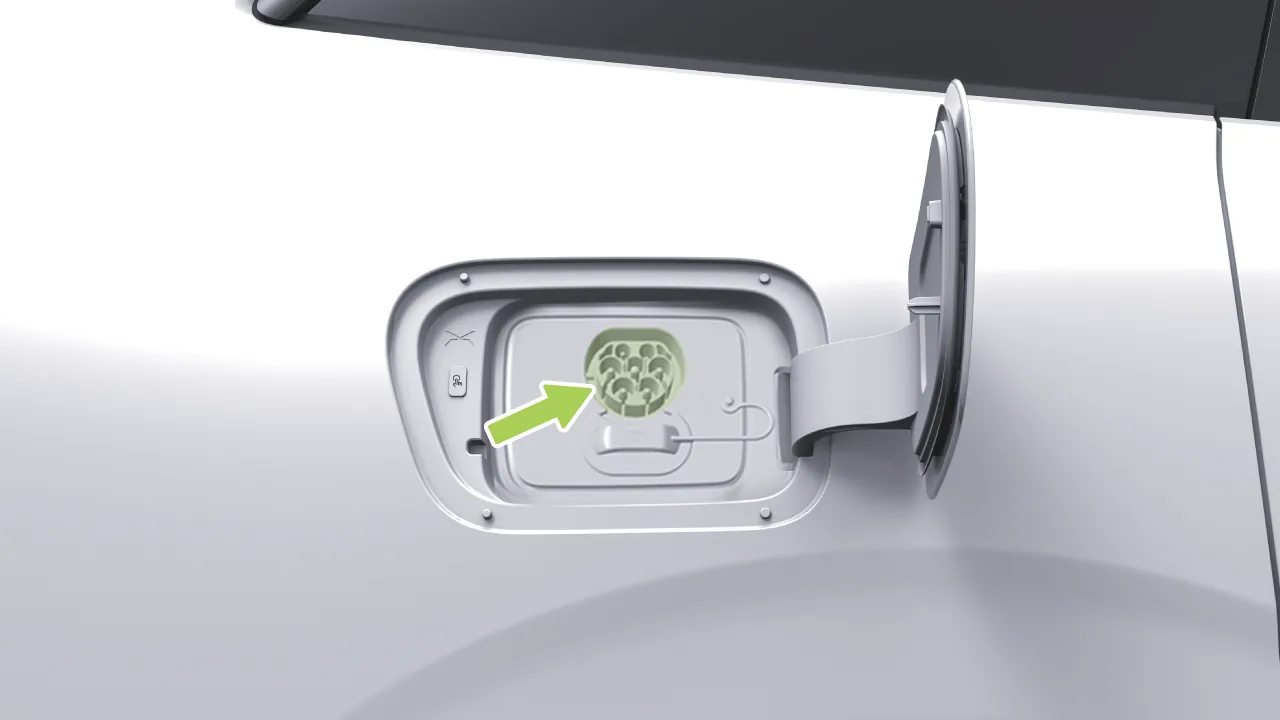
Open the charging port cover.
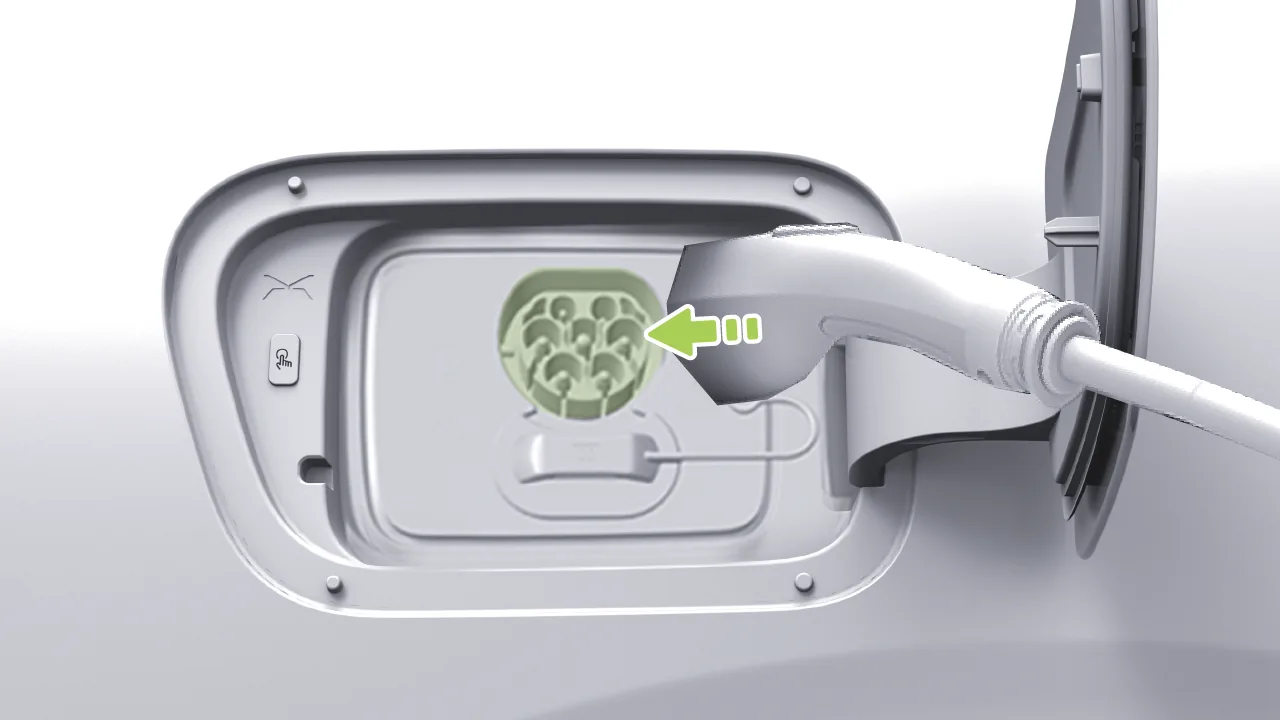
Insert the charging connector vertically into the AC charging port. When you hear a “click,” it indicates that the charging connector is fully inserted in place.
After operating according to the instructions of the AC charging station (swiping the card or scanning the code), the vehicle starts charging.
If you need to temporarily stop charging, first tap the “End Charging” button on the central control screen, and then unplug the charging gun.
Close the charging port sealing cap properly, and close the charging port cover.
Warning Read the Charging/Discharge Precautions section carefully before performing quick charge operation.
Charging or stopping must be done in strict accordance with the operating procedures of the charging pile. Do not plug or unplug the charge gun during charging.
If a fault occurs during charging, the charging screen will pop up a fault indication, do not try charging again, contact the XPENG Automobile Service Centre immediately.
In the event that the slow-charge gun fails to pull out, the gun can be unlocked using either the center screen emergency unlock switch or the boot emergency unlock pull ring.
If the charging connector still cannot be unplugged after the vehicle has been unlocked multiple times, the charging connector can be unplugged as follows:
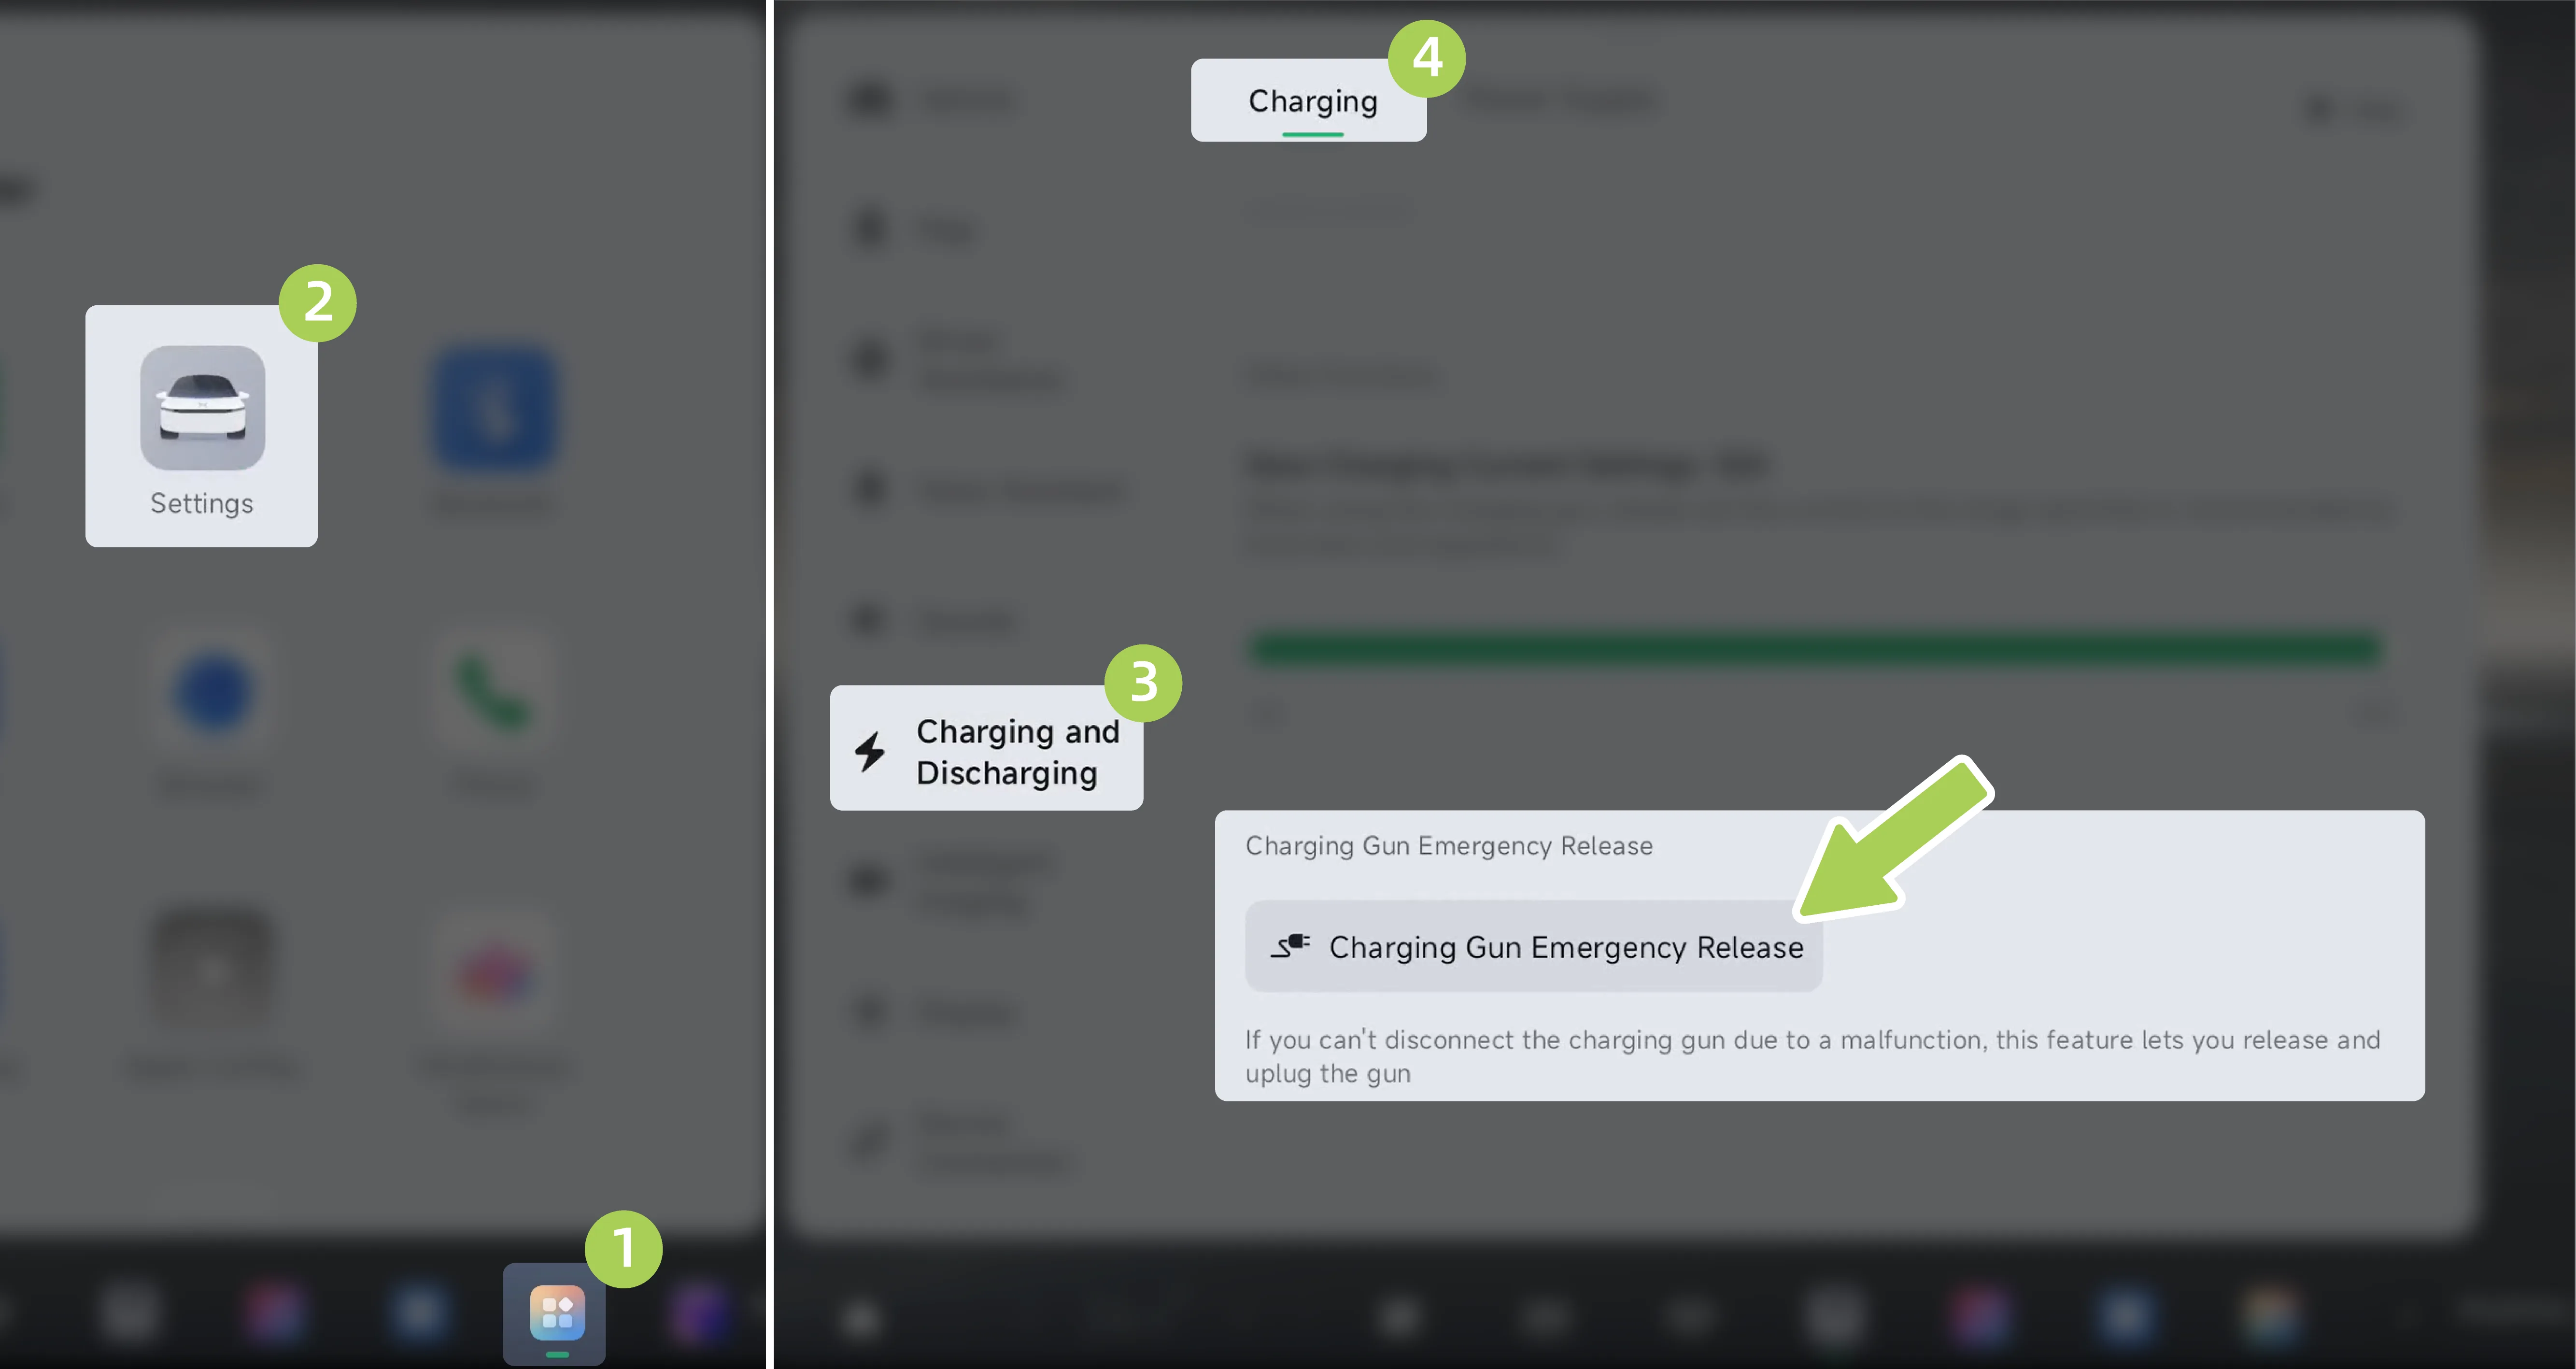
On the central control screen “ →Settings→Charging and Discharging→Charging”Interface, tap You can manually unlock the charging connector before unplugging it. If charging is in progress, unlocking the charging connector will end charging early. Please confirm before proceeding.
If the charging connector still cannot be unplugged after multiple attempts using the emergency unlock button on the central control screen, fully insert the charging connector into place, then unplug the charging connector using the following method:
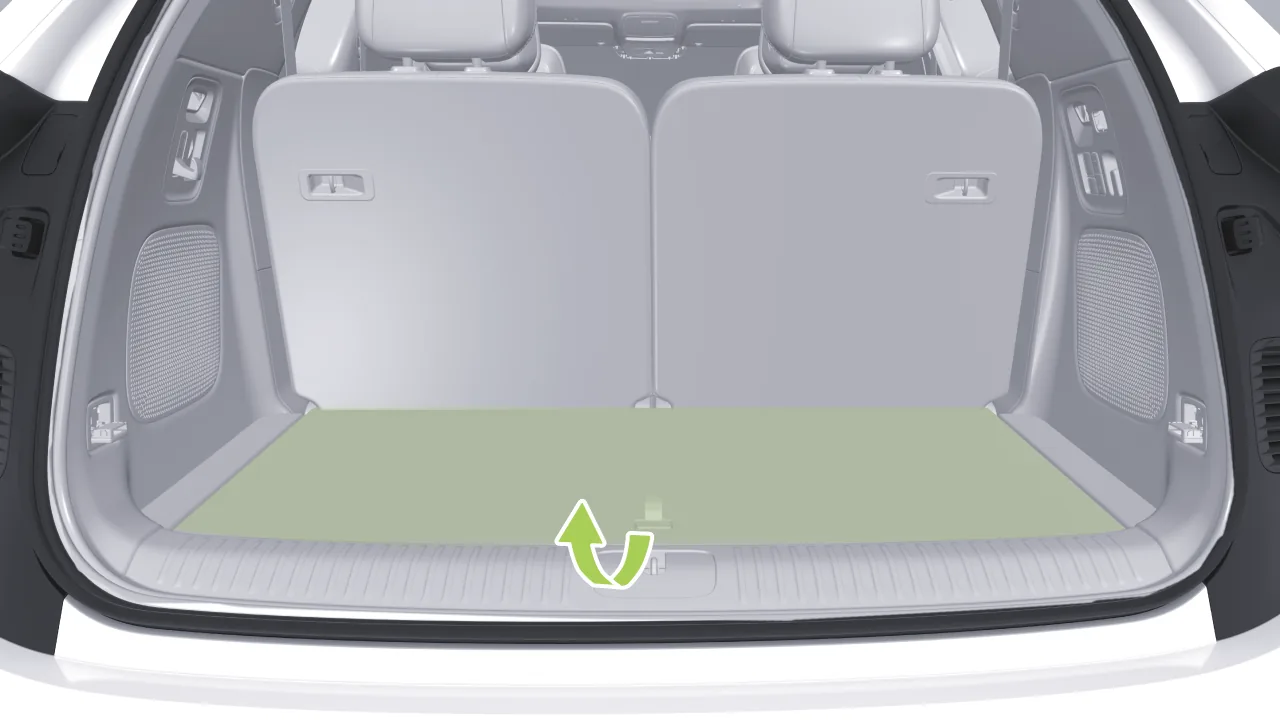
Open the trunk and lift the rear carpet.
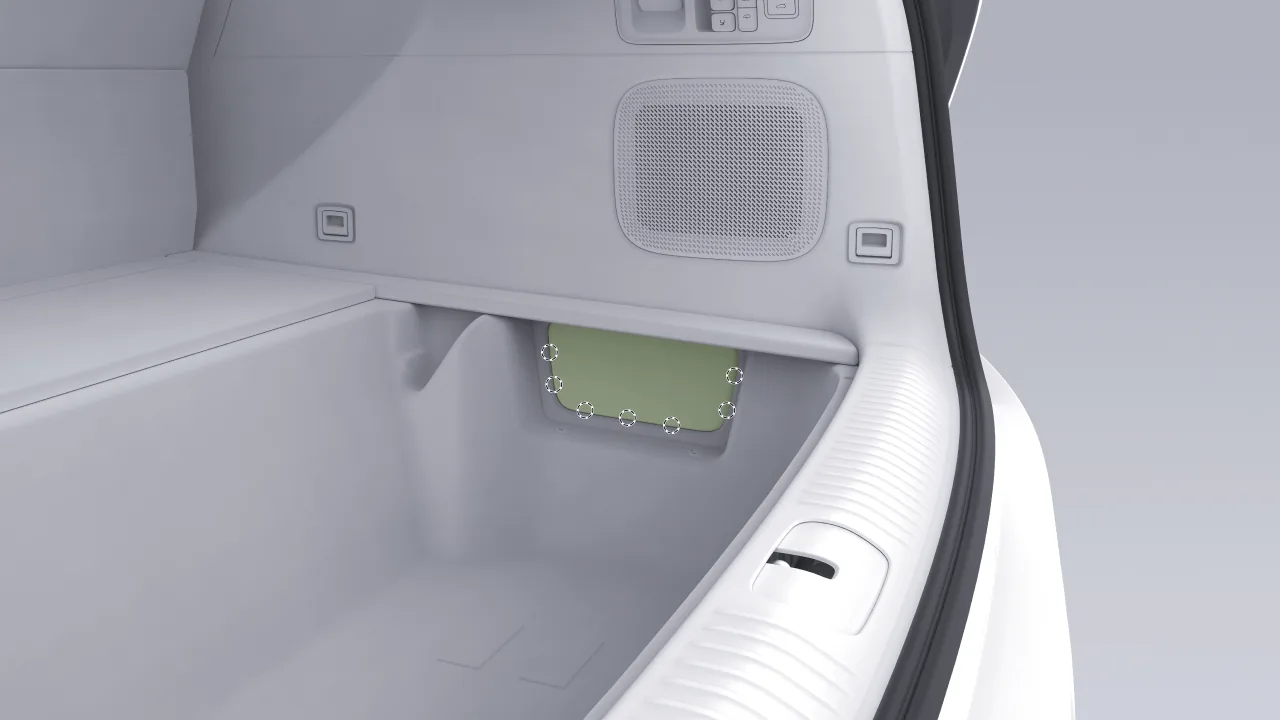
Use appropriate tools to remove the trunk service cover.
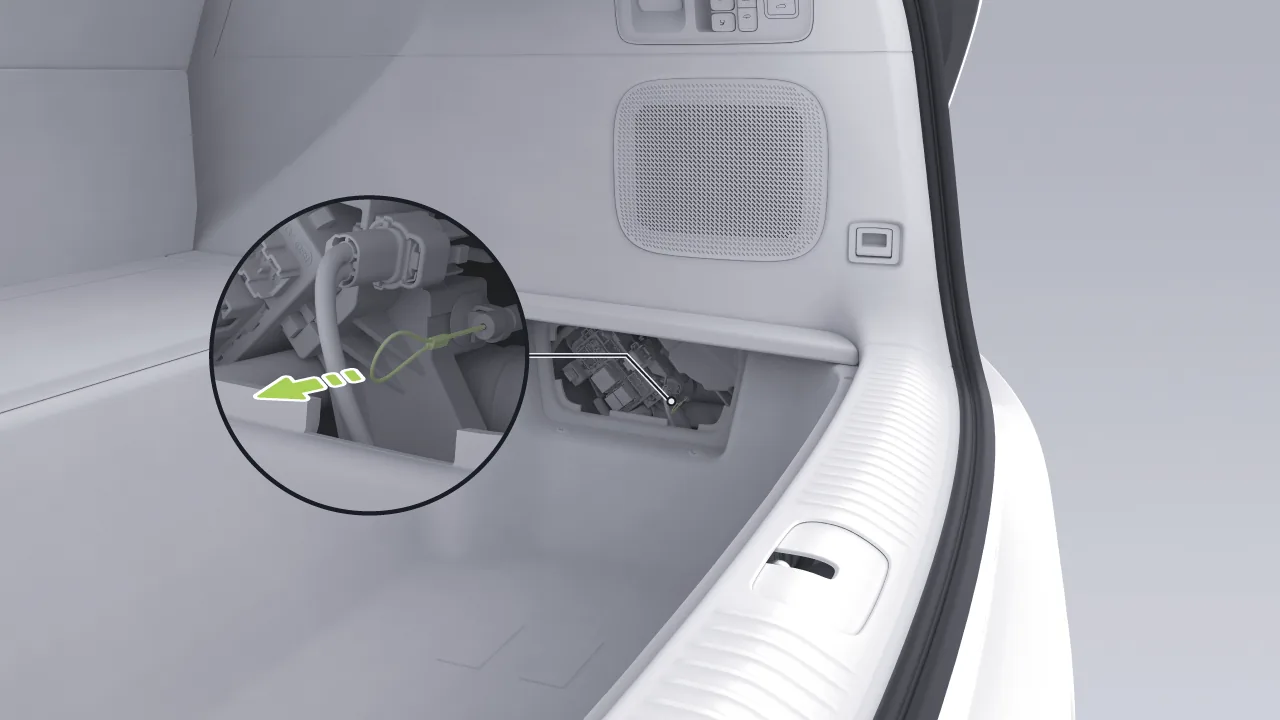
Locate the emergency unlocking pull ring for the AC charging port, pull the ring, and remove the charging connector after unlocking.
Caution After the vehicle has finished charging and the CID exits the 'charging/heating up' status display. Only use the emergency unlock pull ring to unlock the charge gun.
The emergency unlocking of the ring by the charging port is suitable for use in emergency situations and frequent use may damage the emergency unlocking ring or the charging device.
If you cannot unlock the charge gun using the emergency unlock ring of the charging port, please contact the XPENG Service Center in a timely manner.
The vehicle supports DC fast charging. You can charge the vehicle using a national standard DC charging station or an XPENG ultra-fast charging station.
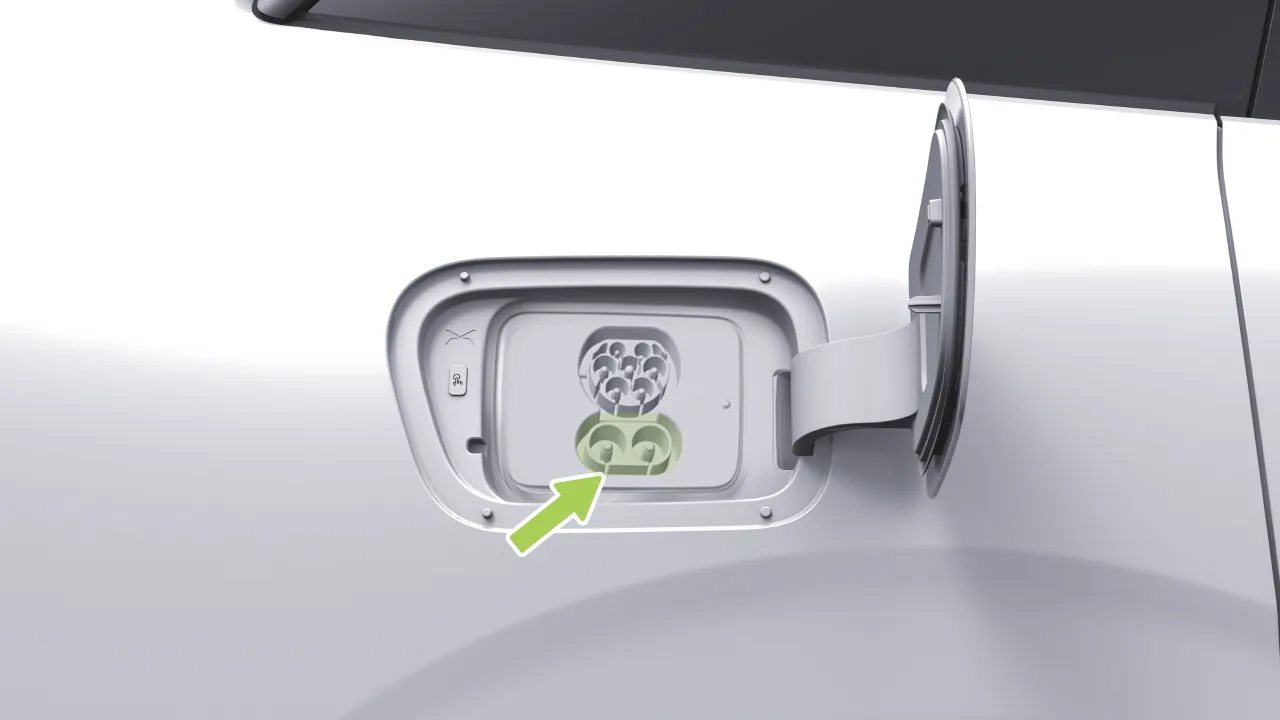
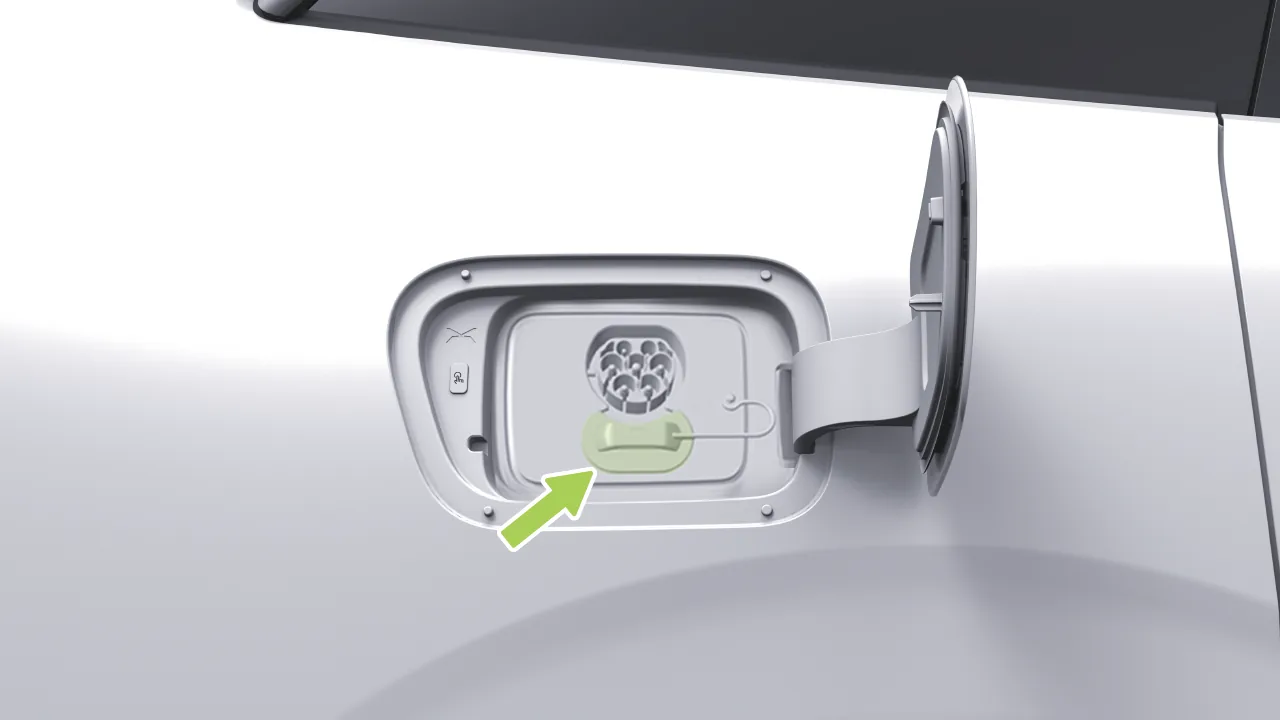
Open the charging port cover, and remove the sealing cap of the DC fast charging port.
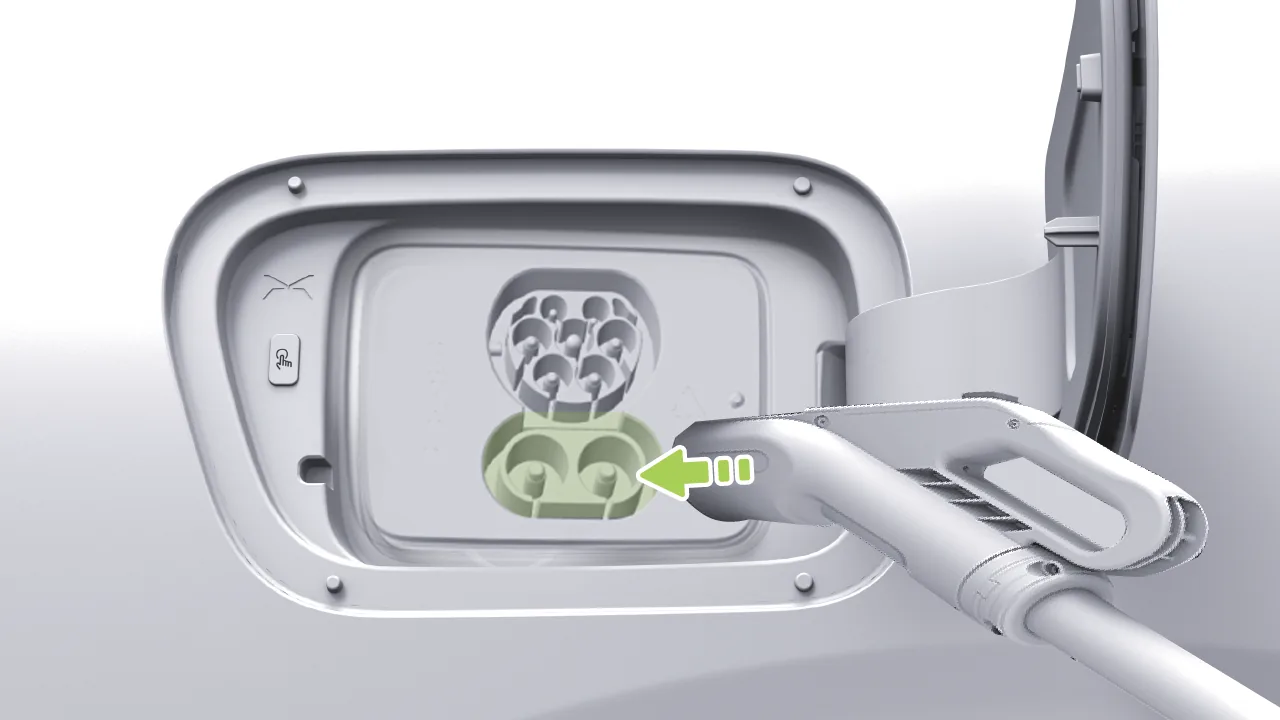
Insert the charging connector vertically into the fast charging port. A “click” sound indicates that the charging connector is fully inserted.
After operating according to the instructions of the DC fast charging station (swiping a card or scanning a code), the vehicle starts charging.
If you need to temporarily stop charging, first tap the “End Charging” button on the central control screen, and then unplug the charging gun.
Close the charging port sealing cap properly, and close the charging port cover.
Warning Read the Charging/Discharge Precautions section carefully before performing quick charge operation.
Charging or stopping must be done in strict accordance with the operating procedures of the charging pile. Do not plug or unplug the charge gun during charging.
If a fault occurs during charging, the charging screen will pop up a fault indication, do not try charging again, contact the XPENG Automobile Service Centre immediately.
The vehicle is equipped with a charging limit setting function. You can set the power battery charging limit through the central control screen and the mobile App. When the set charging limit is reached, the vehicle will automatically stop charging.
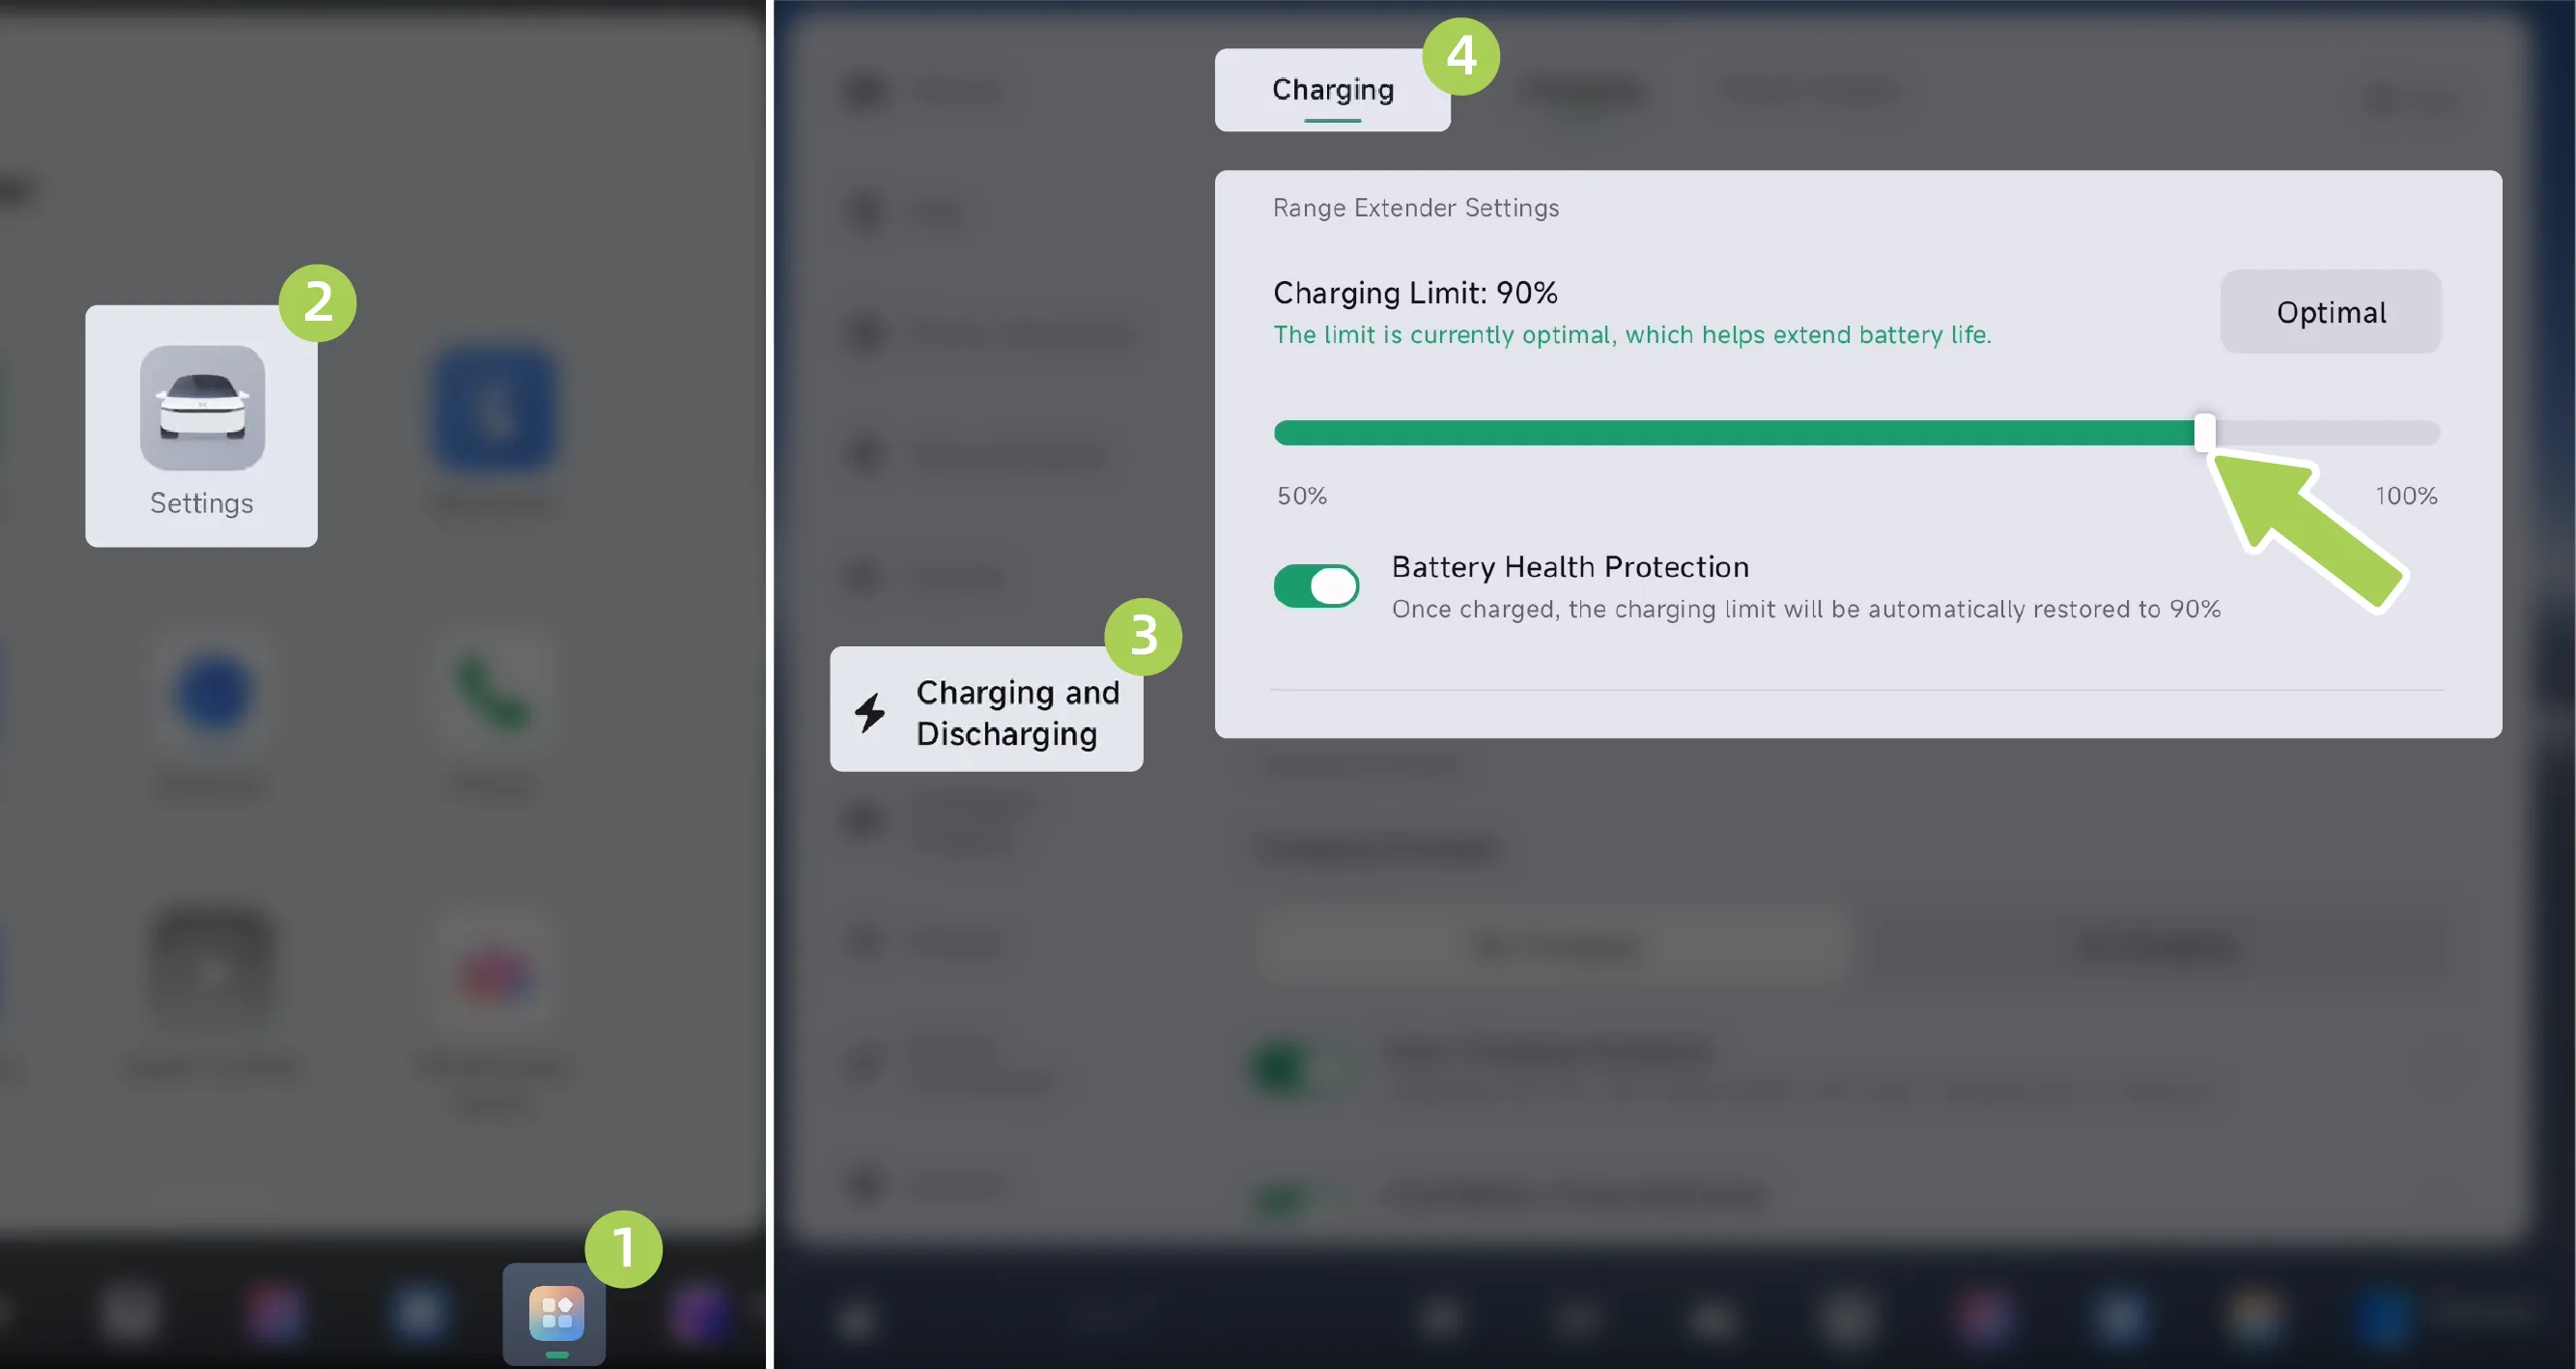
On the center control screen “ →Settings→Charging and Discharging→Charging”On the interface, you can set the charging limit.
Tips To ensure charging speed and extend battery life, it is recommended to select the charging limit during charging 。
If battery health protection is enabled, after the vehicle is powered on again, the charging limit will return to the default value, which is 90%.
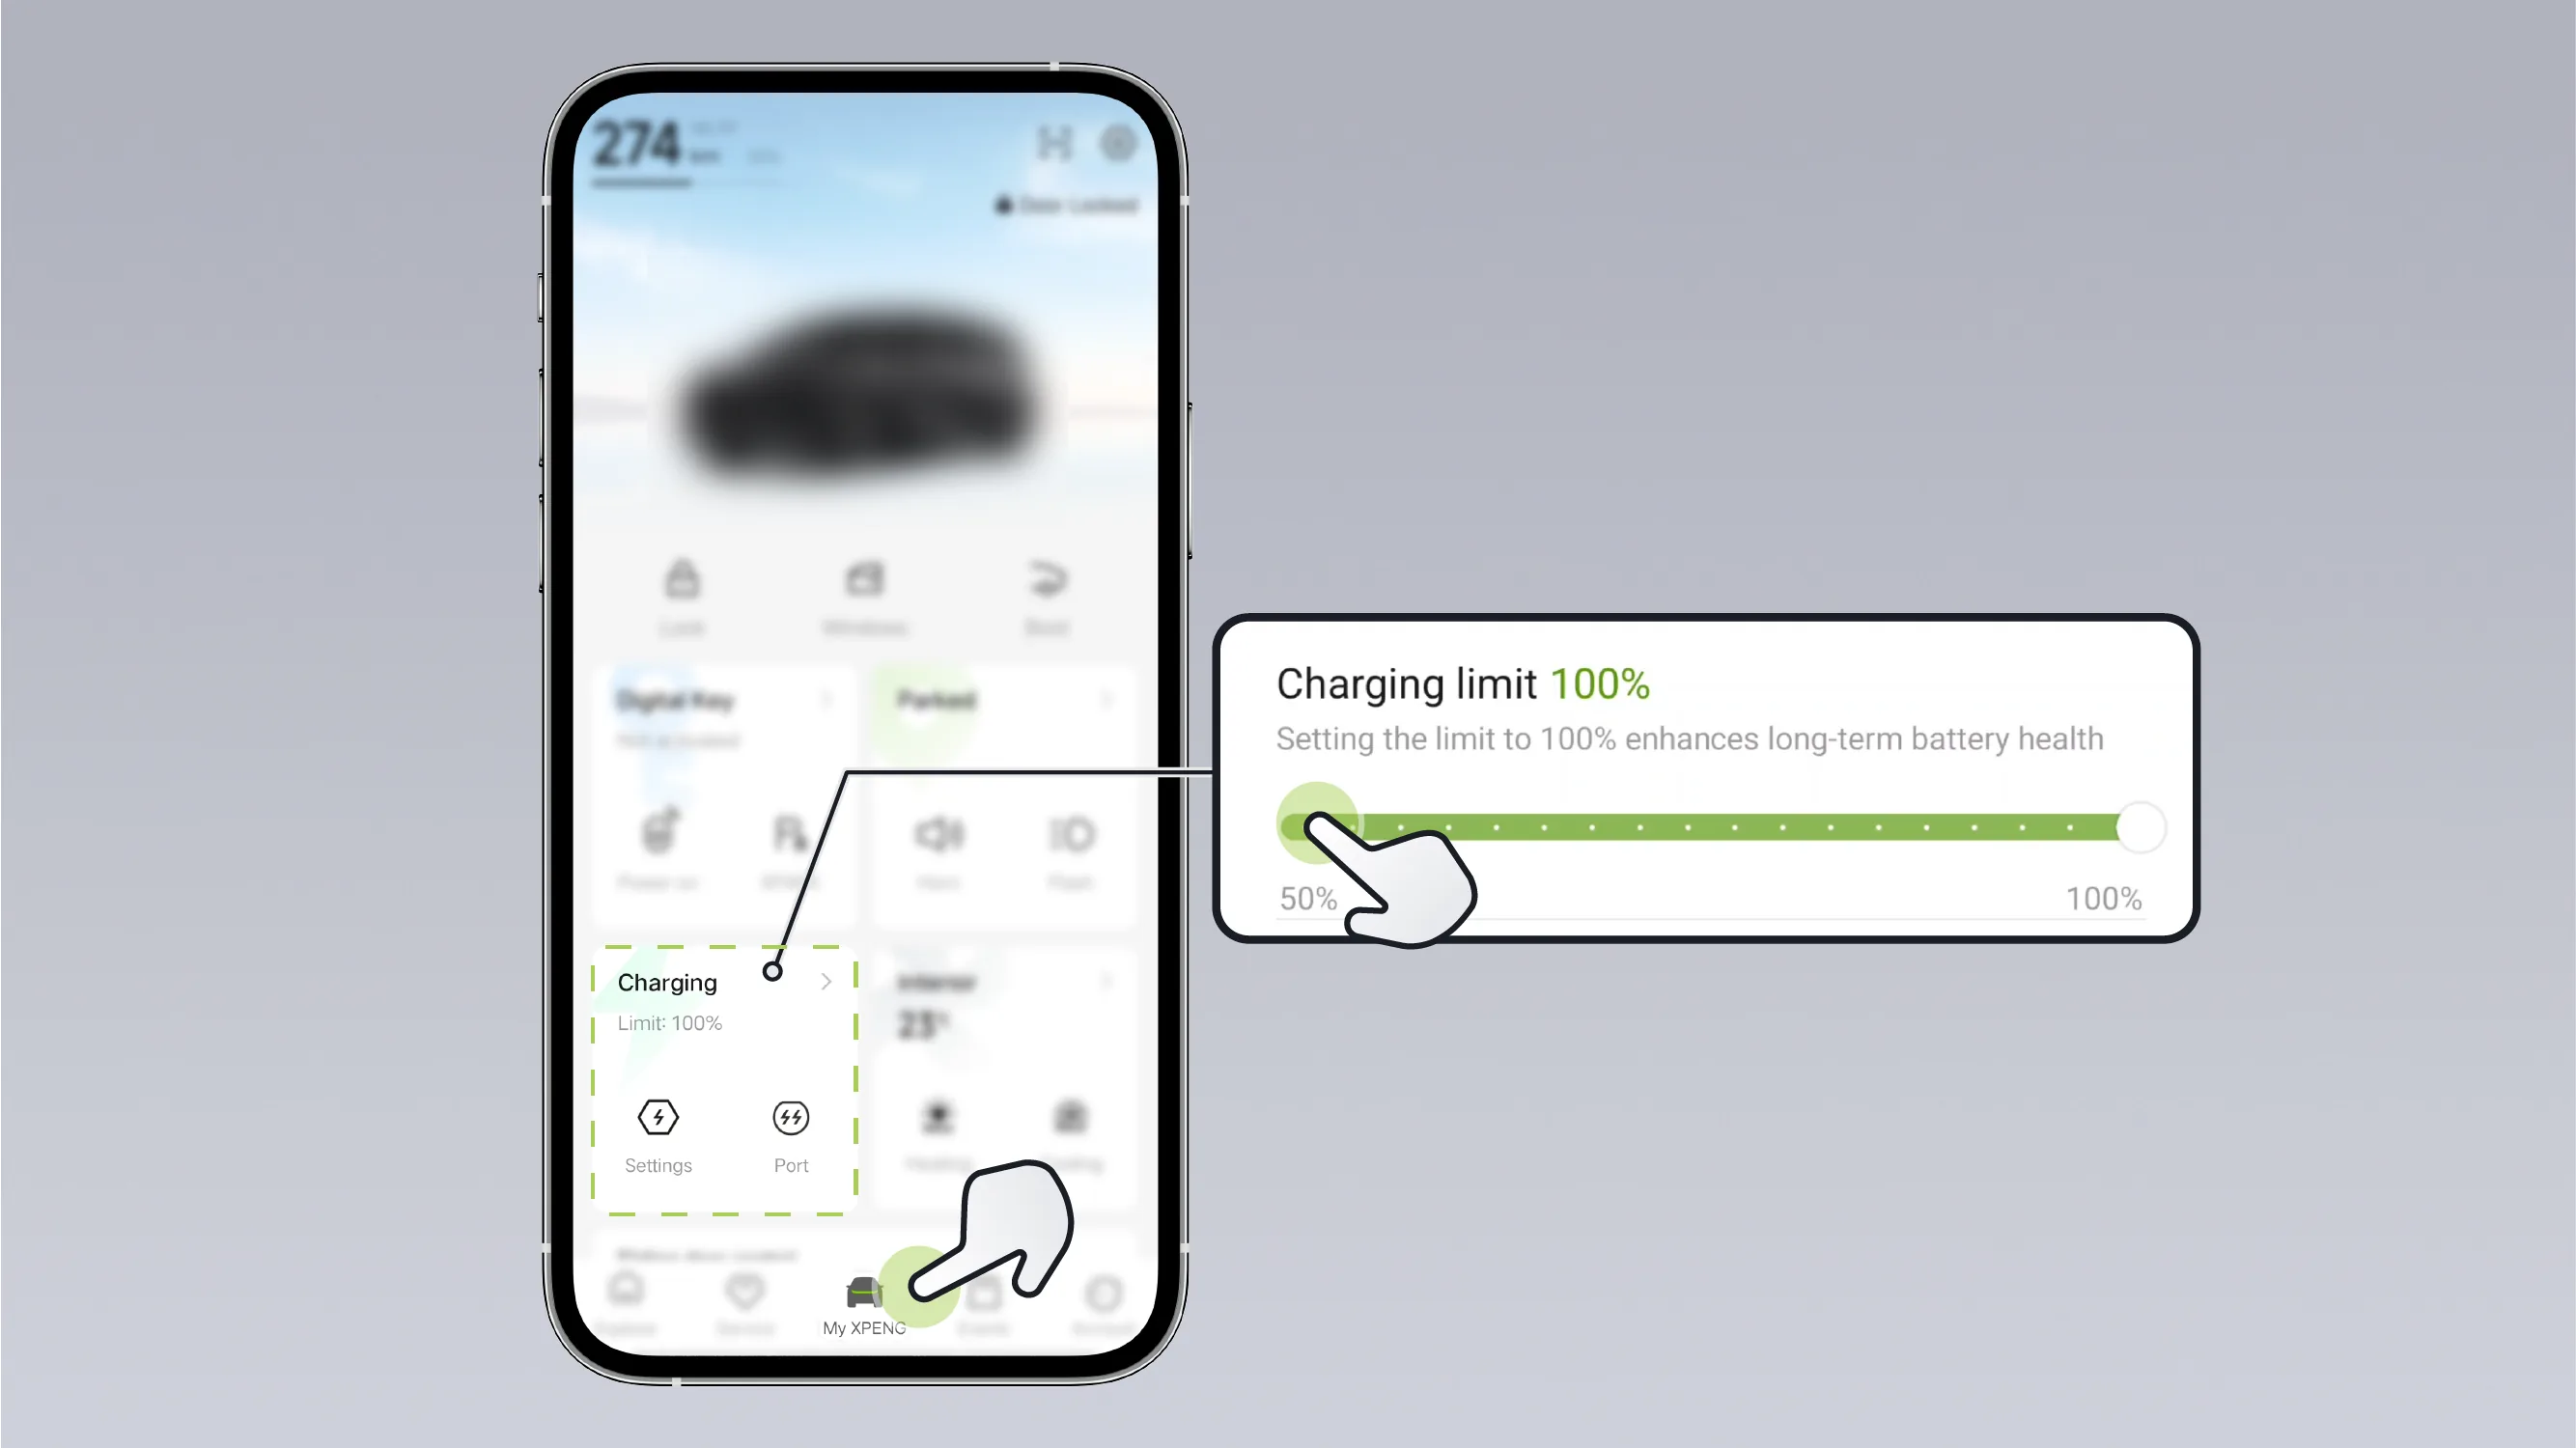
In the mobile app On the interface, slide the progress bar to set the charging limit.
The system allows you to set the charging start time and charging end time in advance through the center control screen and mobile App. When the set charging start time is reached, the vehicle starts charging automatically; when the set end time is reached or the set charging limit is reached, the vehicle stops charging automatically.
Tips You can set nighttime charging through the scheduled charging function and use off-peak nighttime electricity rates for charging to save charging costs.
Tips The schedule charging function cannot be set while the external discharge function is in use.
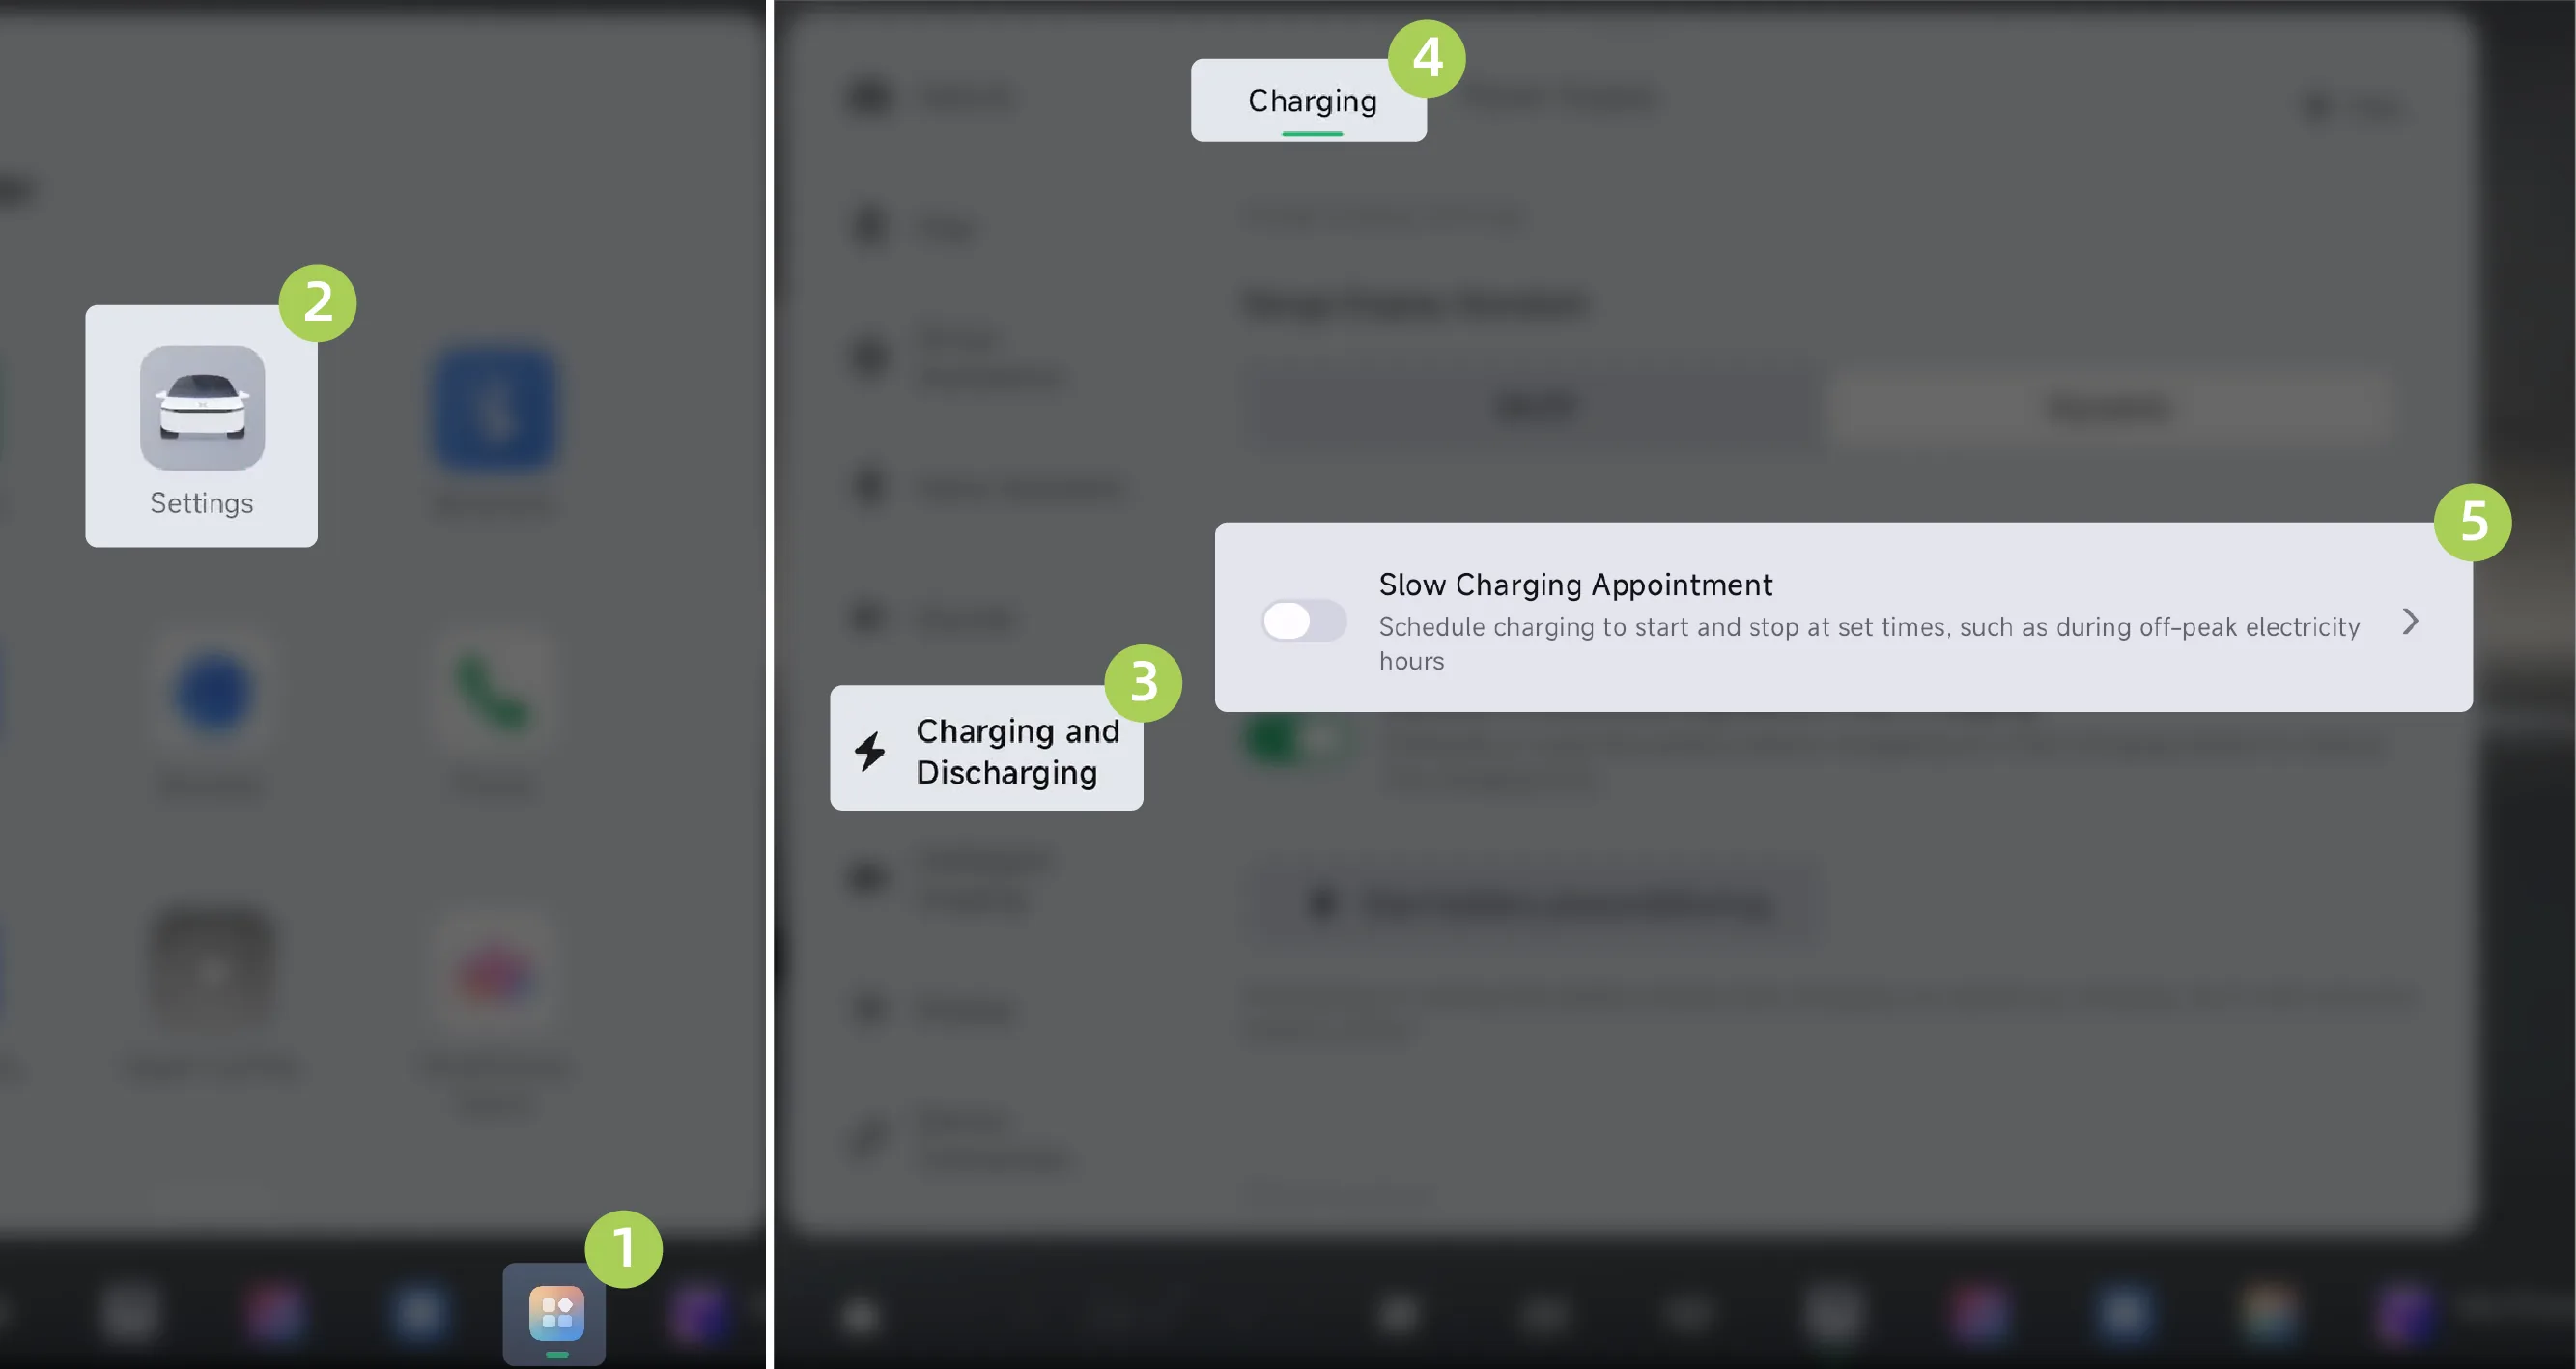
On the central control screen “ →Settings→Charging and Discharging→Charging”On the interface, you can enable scheduled slow charging and set the charging time.
Caution When using scheduled charging with AC charging, plug in the charging connector and then lock the vehicle to prevent the charging connector from being unplugged by others.
During charging, scheduled charging cannot be enabled. If you need to enable it, you must first stop charging.
To use the scheduled charging function, insert the charging gun before the scheduled charging time; otherwise, scheduled charging may fail.
XPENG home charging station also supports the charging station scheduled charging function. Enabling both the home charging station scheduled charging function and the vehicle-side scheduled charging function at the same time may cause scheduled charging to fail. It is recommended to enable only one scheduled charging function at the same time.
In the mobile app On this screen, you can enable the scheduled reservation function and set the charging time.
Set the charging start time and charging end time in advance via the central control screen.
Open the charging port cover.
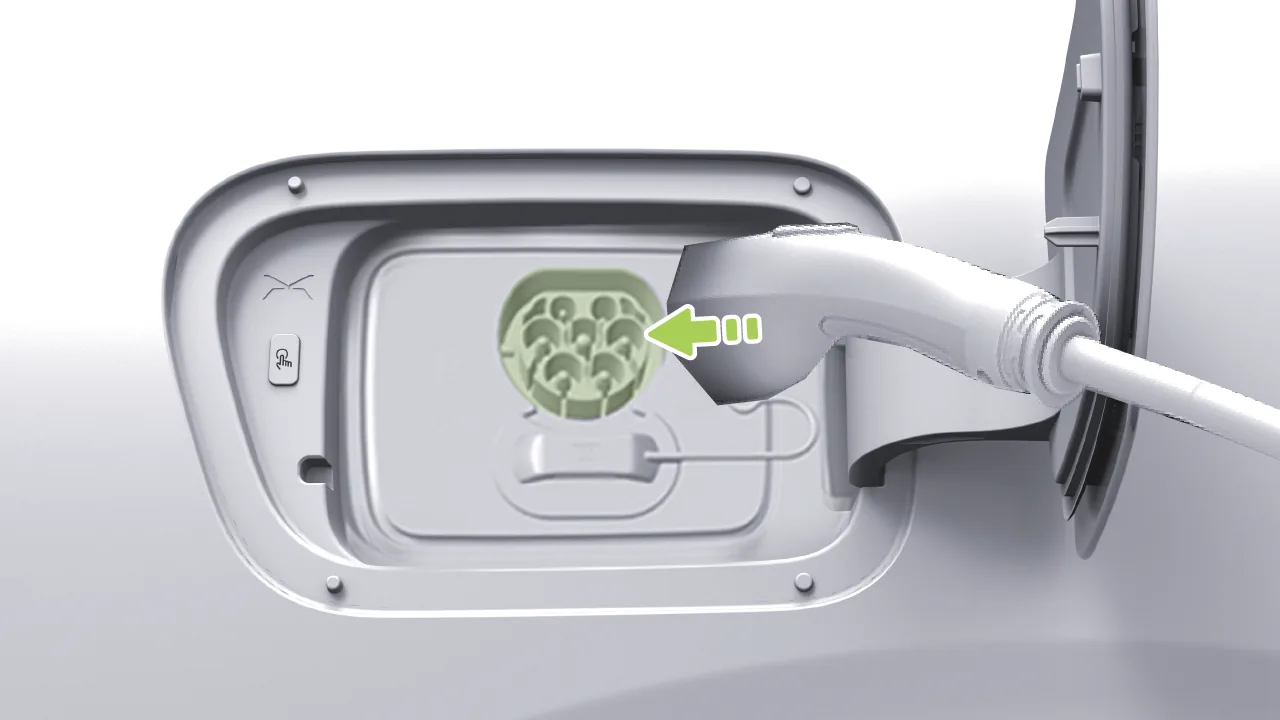
Insert the charging connector vertically into the AC charging port. A “click” sound indicates that the charging connector is fully inserted.
The XPENG home charger defaults to Plug and Charge, or scan the QR code on the charger and follow the prompts to bind and start the charger.
When the set charging start time is reached, the vehicle automatically starts charging; when the set end time is reached or the set charging limit is reached, the vehicle automatically stops charging. If charging needs to start in advance, tap the "Charge Now" button on the center display, and the vehicle starts charging.
To temporarily stop charging, first tap the “End Charging” button on the central control screen, and then unplug the charging gun. After unplugging the charging gun to end charging, close the charging port cover.
Warning Read the Charging/Discharge Precautions section carefully before performing quick charge operation.
Charging or stopping must be done in strict accordance with the operating procedures of the charging pile. Do not plug or unplug the charge gun during charging.
If a fault occurs during charging, the charging screen will pop up a fault indication, do not try charging again, contact the XPENG Automobile Service Centre immediately.
In the event that the slow-charge gun fails to pull out, the gun can be unlocked using either the center screen emergency unlock switch or the boot emergency unlock pull ring.
Battery performance is closely related to temperature. An appropriate battery temperature can improve the battery's output efficiency and service life. In cold weather, after the vehicle is powered on, the battery will consume its own power to increase the battery temperature, which will reduce the vehicle's driving range.
The low-temperature preheating function can increase the battery temperature by using the power from the AC charging pile when the vehicle is connected to the AC charging gun, thereby extending the vehicle's driving range in cold environments. The low-temperature preheating function automatically stops operating when the power battery reaches a suitable temperature or when the set battery preheating completion time is reached.
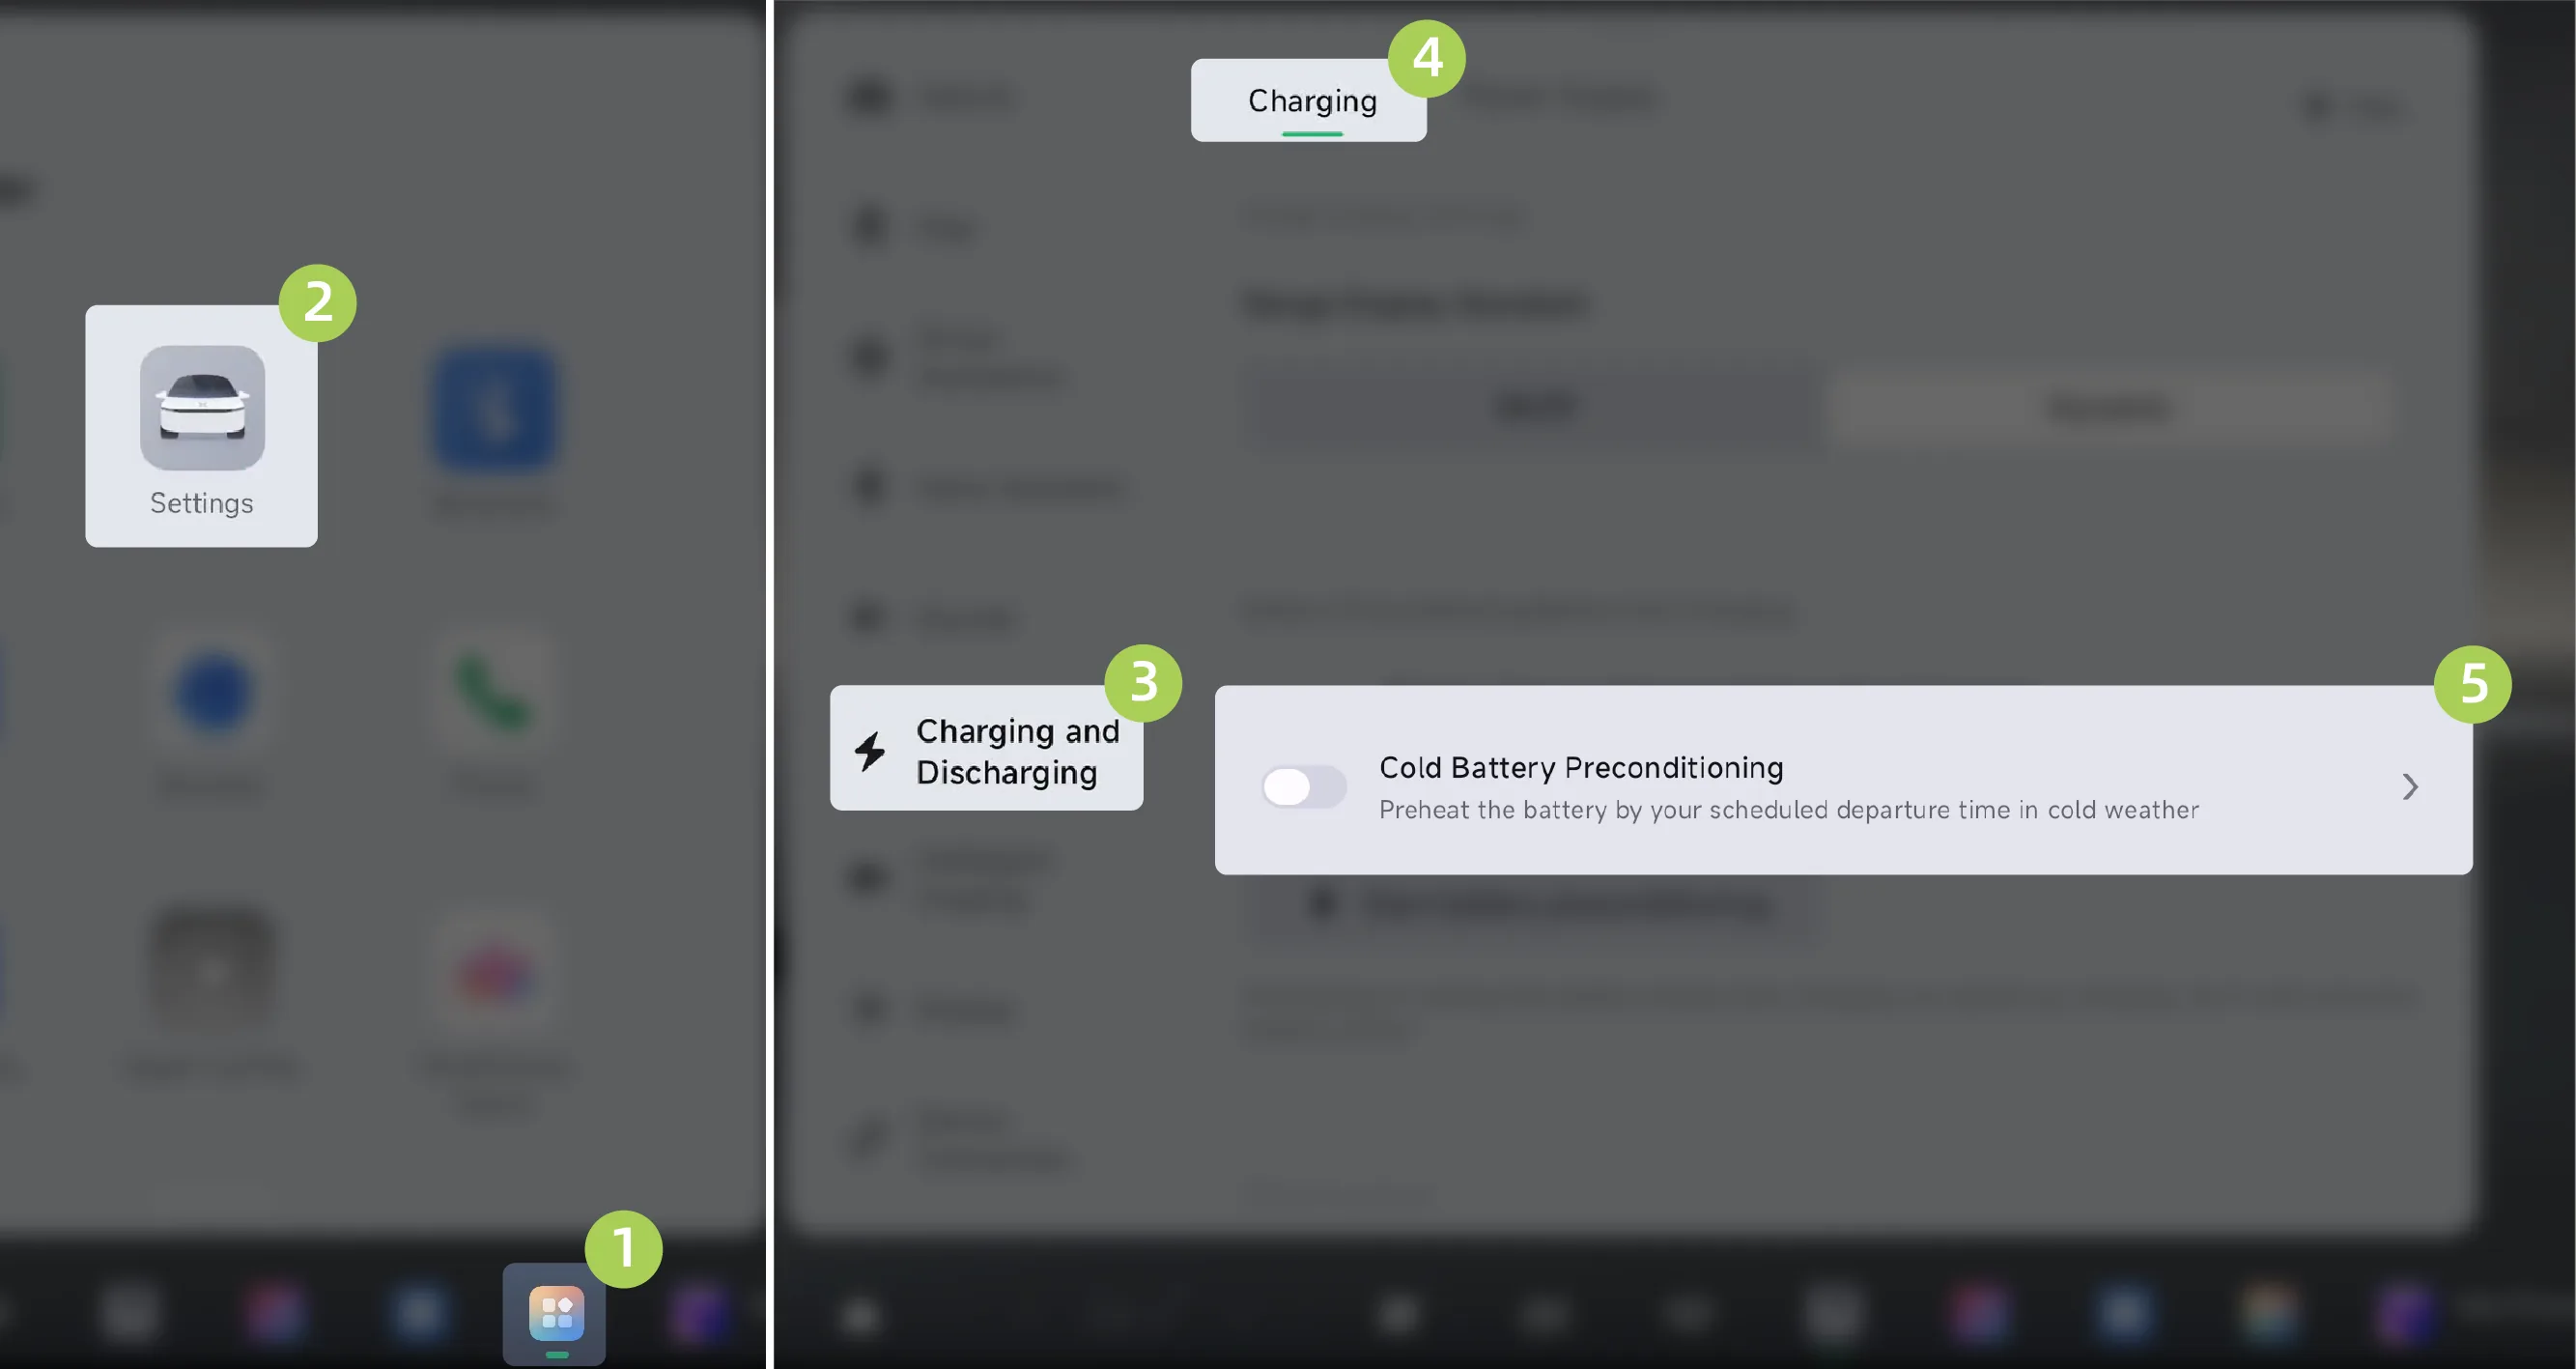
On the center control screen “ →Settings→Charging and Discharging→Charging”On this screen, you can turn low-temperature battery preheating on/off and set the preheating completion time.
Tips Preheating of the low temperature battery will slightly increase the charge pile consumption and use it as needed. Use the vehicle as soon as possible after the warm-up is complete, prolonged parking will reduce the heating effect.
Caution When using low-temperature battery preheating, plug in the gun and then lock the vehicle to prevent others from unplugging the charging gun.
If activation fails, check whether all conditions for enabling the function are met. In case of any abnormal situation, contact an XPENG service center.
You can set the battery preheating function in the mobile app in the following ways:
In the mobile app Interface, tap , low-temperature battery preheating can be enabled.
In the mobile app On this screen, you can turn slow charging battery preheating on/off and set the preheating completion time.
The charging speed of the power battery is closely related to the battery temperature. If the power battery temperature is too high or too low, the charging speed of the power battery will be affected. Before charging the vehicle, keeping the battery temperature within the applicable range in advance can effectively shorten the charging time.
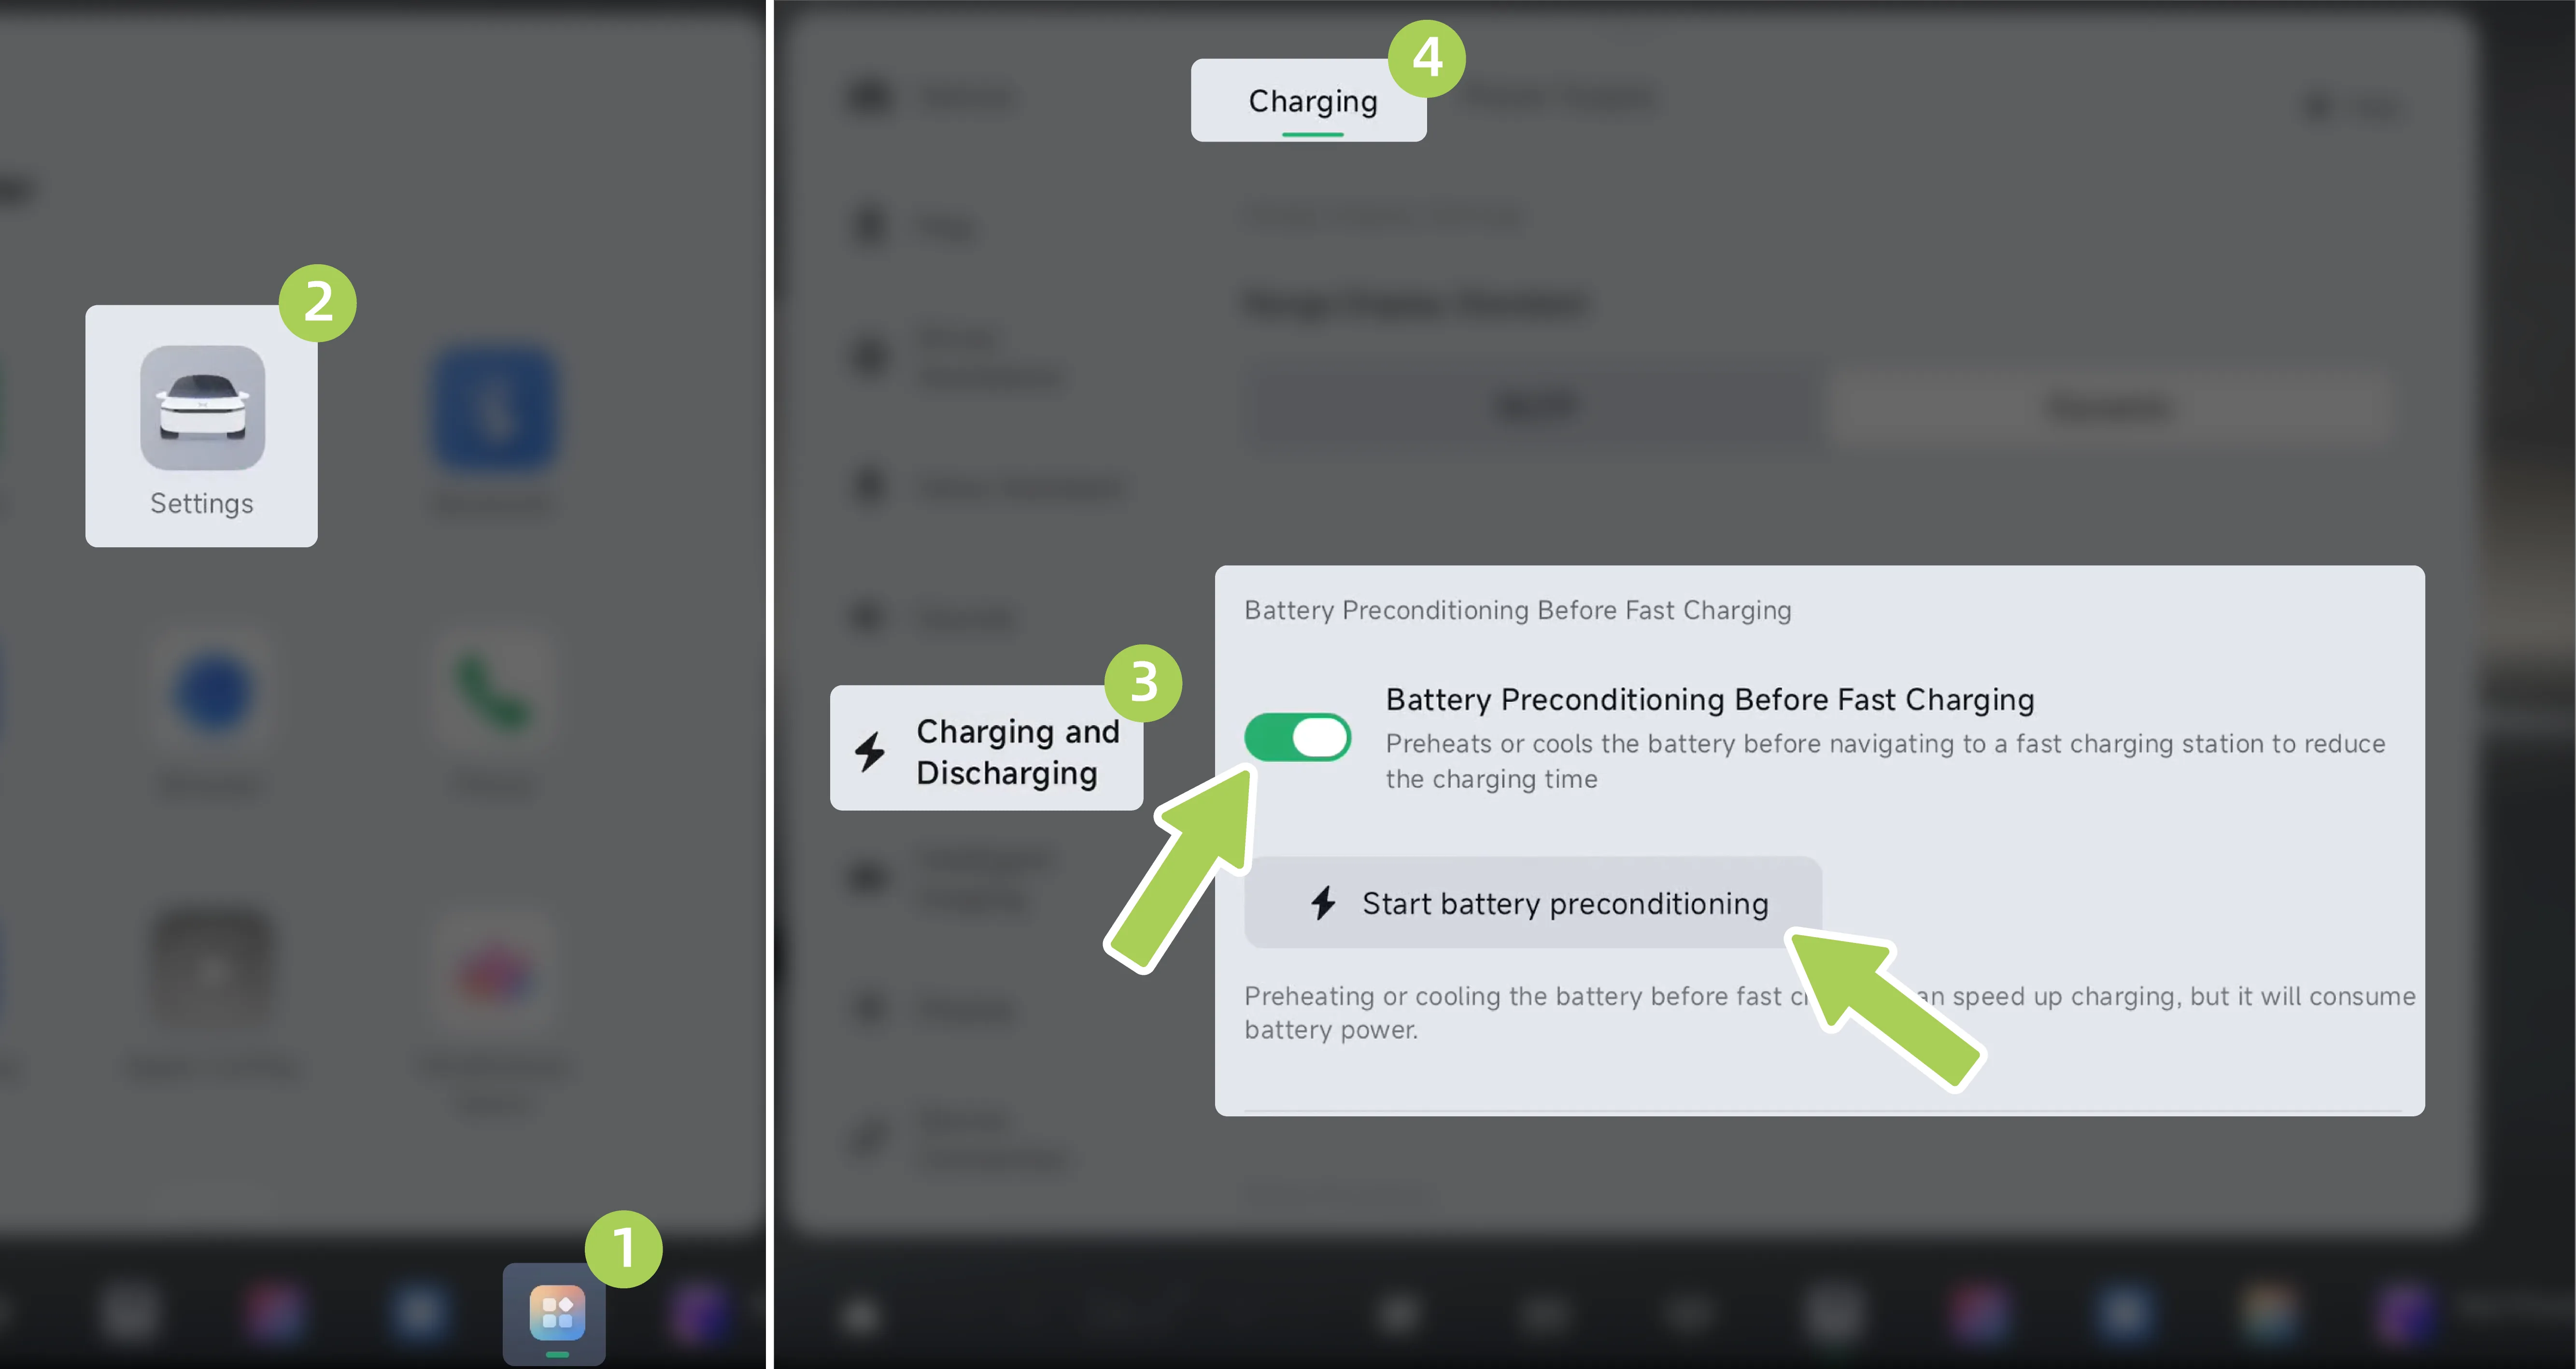
On the central control screen “ →Settings→Charging and Discharging→Charging”Interface, can be enabled or tap Function.
Battery Preconditioning: After this function is enabled, when the vehicle navigation destination is a fast charging station, the vehicle will control the power battery temperature within the optimal charging range to shorten the charging time.
Start Battery Preconditioning: After manual tapping, the system will immediately adjust the power battery temperature.
Tips Use the battery keep-warm function before fast charging to reduce charging time but also to consume some power battery power if needed.
Recommended charging operating ambient temperature: 0 to 45°C. When operating at temperatures below 0 °C, it is recommended to use the warm-up function before charging, otherwise it will cause slow charging.
The vehicle is equipped with an AC discharge function. After inserting the discharge device into the AC charging port, it can supply power to household electrical appliances such as lighting and low-power ovens. Maximum power: 6 kW.
When using the external discharge function, pay attention to the vehicle's remaining battery level to avoid a situation where the remaining driving range is too low to return.
Open the charging port cover.
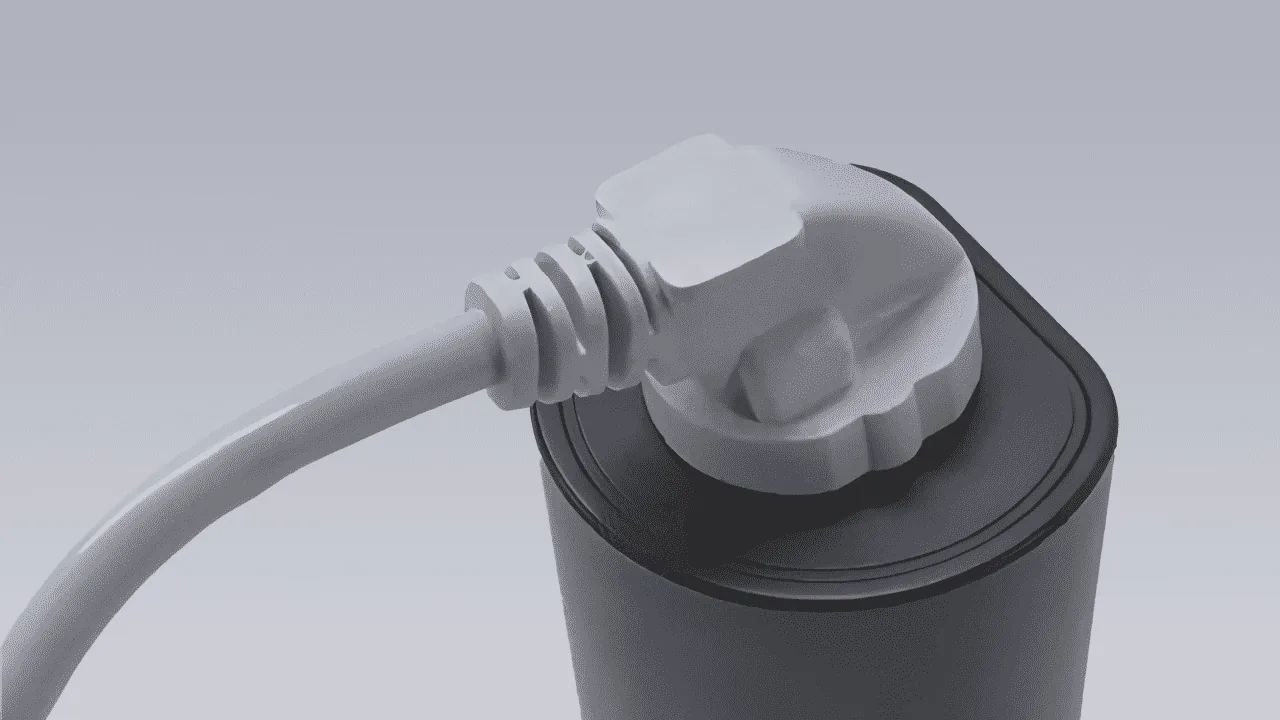
Connect the power strip socket to the discharge device.
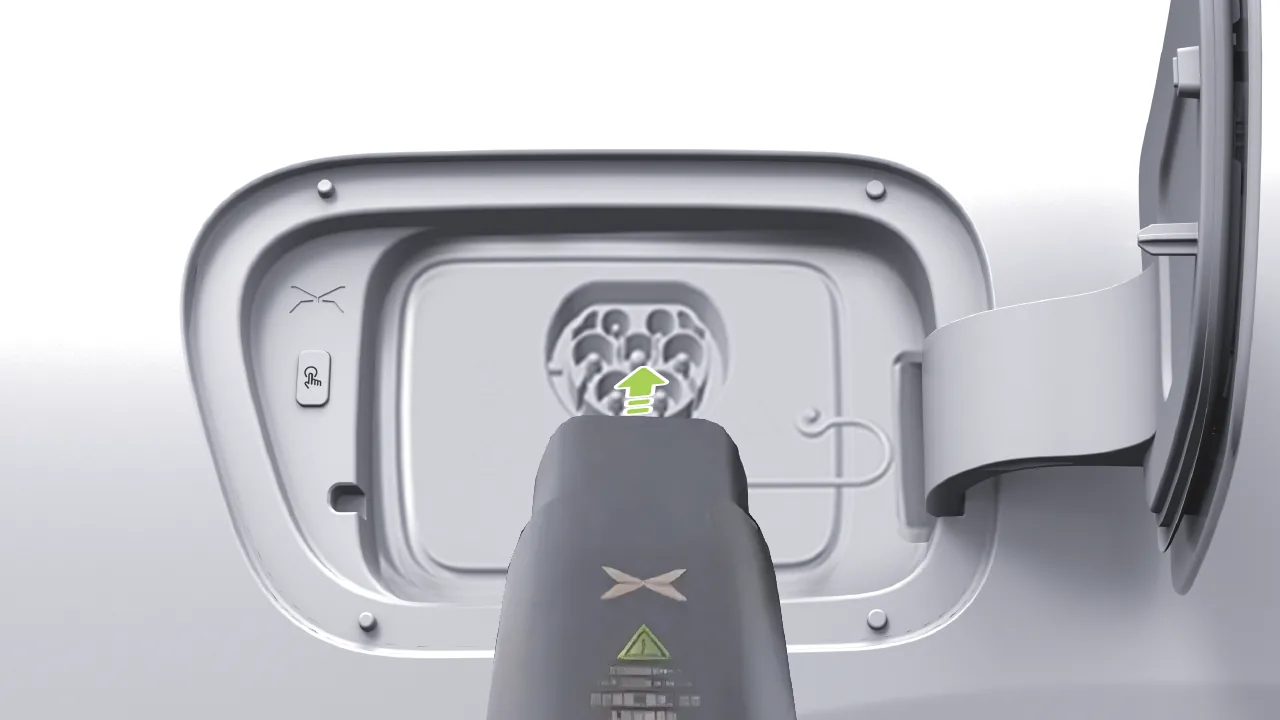
Connect the discharge device to the AC slow charging port and confirm that it is securely inserted. The vehicle starts discharging automatically.
Tips The power battery is less than 20% charged and cannot use the external discharge function. The vehicle automatically ends the power supply when the power level drops to 20% during the discharge process.
External discharge equipment (discharge socket, etc.) is not standard and must be purchased.
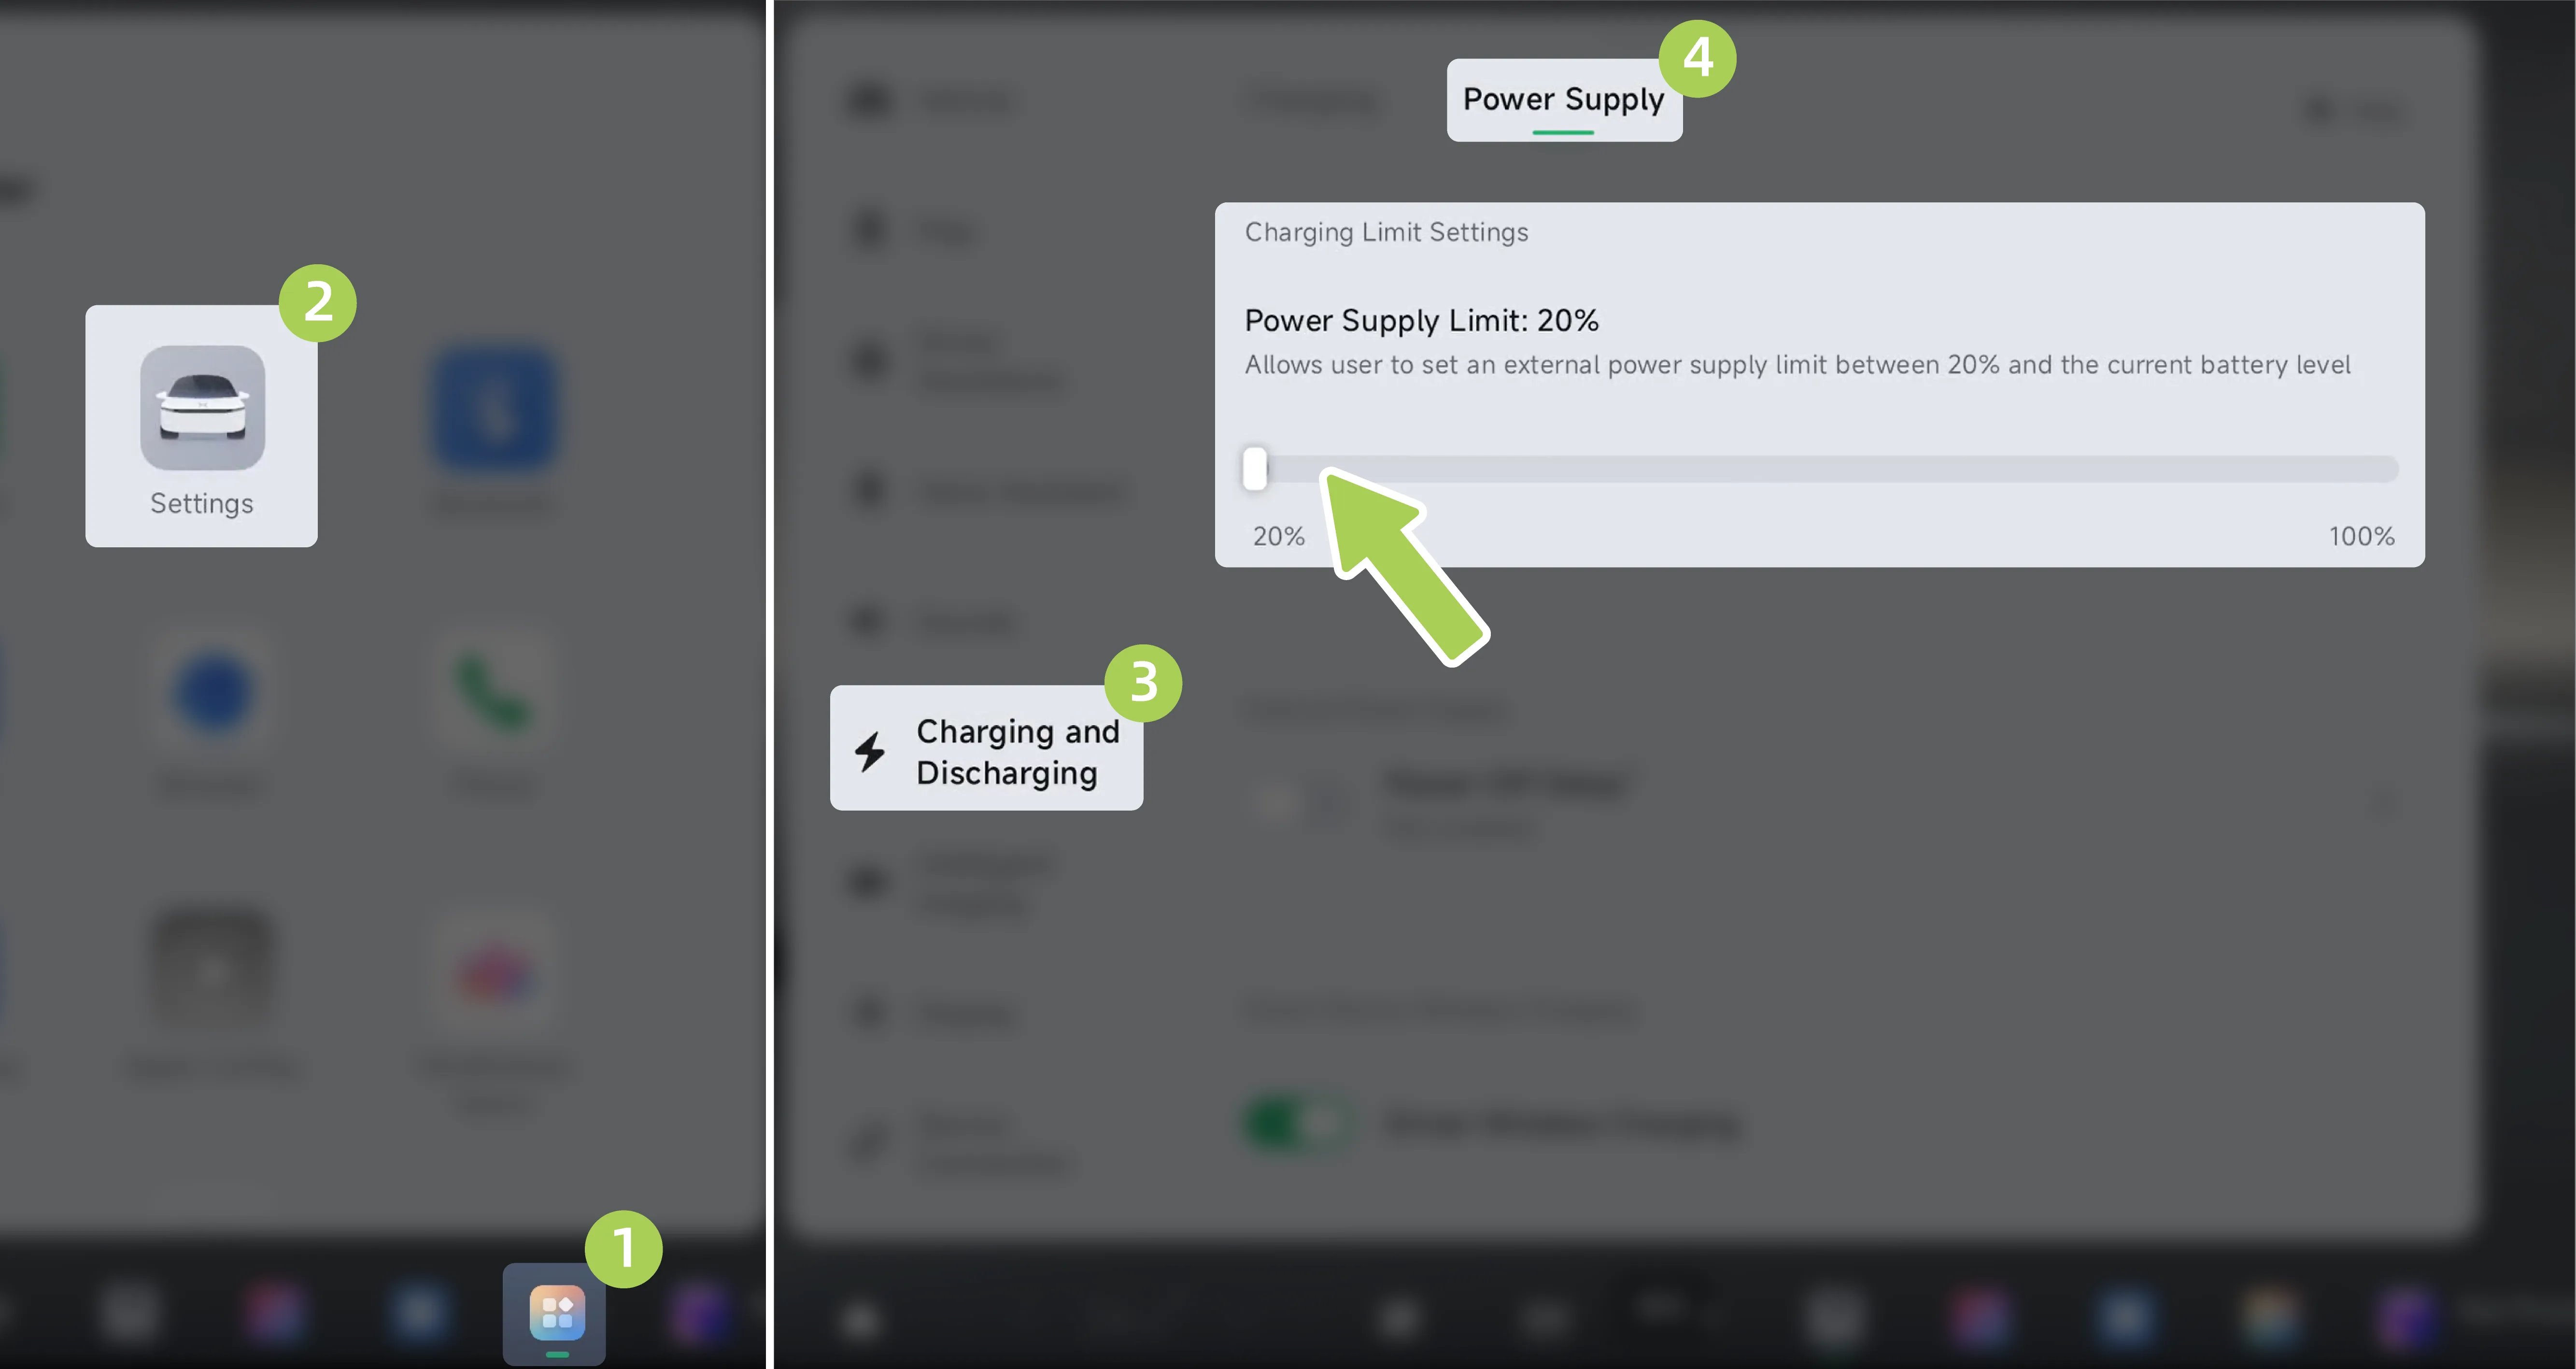
According to trip requirements, on the central control screen “ →Settings→Charging and Discharging→Power Supply”Interface, set the power supply limit value.
Tips When the traction battery’s state of charge falls below the preset power-supply limit, the vehicle will automatically stop external power output.
If discharge needs to be ended, first tap the central control screen Press the button, then unplug the discharge device, close the charging port sealing cap, and then close the charging port cover.
Warning When the discharge job is to be completed, Please click the button on the central control screen first. Then unplug the discharge device, otherwise damage to the vehicle may occur.
Before using the discharge device, read the Charging/Discharge Precautions section carefully.
When the vehicle is in P gear and the charging gun is inserted, the center display will automatically show the charging SR interface. You can view the vehicle charging status through the SR interface on the center display.
Charging preparation: After the charging connector is connected, the vehicle is ready for charging and is waiting for the charging station to respond.
Charging Heating In Progress: In low-temperature environments, the system will automatically heat the power battery to an appropriate temperature before charging.
Charging: The vehicle is charging the power battery through external charging equipment.
Charging Complete: Charging has ended. You can unplug the charging connector.
Charging Fault: A charging fault is present in the vehicle. Do not attempt to charge again. Contact XPENG Service Center immediately.
Scheduled Charging: A scheduled charging time has been set. Charging will start automatically when the set time is reached.
Smart Scheduled Charging: Based on the set departure time, off-peak electricity price period, and the vehicle's current battery level, automatically plan the most reasonable charging solution.
When the vehicle is in P gear and an external power supply device is connected, the central control screen will automatically display the discharge SR interface. You can view the vehicle discharge status through the central control screen SR interface.
Power Supply Preparation in Progress: After the external power supply equipment is connected, the vehicle is ready for external power supply and waits for a response from the external power supply equipment.
Power supply in progress: The vehicle is discharging power to the outside through the discharge equipment.
Power supply has stopped: Discharging has ended. You can unplug the discharge device.
Power Supply Fault: The vehicle has a discharge fault. Do not attempt to charge again. Please contact a XPENG service center immediately.
To avoid personal injury or vehicle damage, be sure to observe the following precautions before charging the vehicle:
Before charging, check the charging cable. Do not use a charging cable with damaged insulation or outer sheath.
Before charging, ensure that there is no water or foreign matter in the charging port of the vehicle charging port, the power supply equipment, and the charging connection device, and that the metal terminals are free of rust or corrosion.
Charge in a relatively safe environment, avoid rain exposure and water immersion, and keep away from fire sources.
Do not disassemble the charging gun, charging socket, or charging equipment, otherwise it may cause charging failure or even fire.
Please select a dry and well-ventilated charging environment. Do not use charging equipment in an environment where gasoline, paint, flammable items, or explosive items are used or stored.
It is strictly prohibited to use the charging cable in damp and humid areas.
Do not allow children to perform charging operations.
Do not touch the charging port.
In rainy conditions, if there is no rain shelter, do not perform charging operations.
If there is a sudden change in weather during charging (strong winds, rain or snow, thunderstorms), promptly check whether the charging gun is secure and in a dry state; during thunder and lightning, do not touch the charging cable or the vehicle body.
If the area near the charging port becomes wet during charging, first disconnect the power supply under safe conditions, then disconnect the power supply side plug (do not touch the metal contacts of the charging plug with your hands or other parts of your body to avoid causing a safety accident), and then unplug the charging gun. If necessary, use insulated gloves, and contact the XPENG Motors Service Center as soon as possible for confirmation.
If you notice an unusual odor coming from the vehicle during charging, stop charging immediately.
Do not squeeze the charging cable during charging.
After charging is completed, do not disconnect the charging connection device with wet hands or while standing in accumulated water on the ground.
Before driving the vehicle, ensure that the charging connection device has been disconnected from the vehicle charging port.
When removing the charging connector from the charging station, hold the charging connector firmly with both hands to prevent the twisted charging cable from rebounding and striking a person, causing injury.
During charging, the charging cable must be straightened and must not be twisted.
If the charging equipment is corroded or damaged, such as deformation or misalignment of the metal terminals of the charging gun, or deformation or cracking of the plastic body of the plug, charging is prohibited.
In the event of an emergency during charging, press the emergency stop button on the charging equipment to stop charging.
When inserting/removing the charging connector, unlock the vehicle and insert/remove the charging connector vertically. Oblique insertion and shaking are prohibited.
After charging is completed, please make sure to close the charging port cover in time to prevent rain, snow, or other foreign matter from entering.
The vehicle may affect medical or implantable electronic devices during charging and discharging. Consult the electronic device manufacturer before charging.
Due to deviations in different charging pile manufacturers’ understanding of national charging standards, as well as differences in the quality of charging pile product maintenance, charging may fail when using certain individual charging piles. If this occurs, please try reconnecting the charging connector or switching to another charging pile for charging.
To avoid personal injury or vehicle damage, be sure to observe the following precautions before performing discharge operations on the vehicle:
Do not connect a power supply (for example, a household power outlet) to the V2L discharge gun, so as to avoid damaging the vehicle.
It is strictly prohibited to modify the V2L discharge gun for use as a household power supply station, so as to avoid damaging the vehicle.
Live operation is strictly prohibited; pay attention to safety inspection during operation.
Do not operate with wet hands.
Do not use the external discharge function if the externally connected electrical appliance or discharge equipment is damaged.
Minors are strictly prohibited from touching or using the discharge equipment. Do not allow minors to approach it during use.
Do not touch the appliance plug pins or the discharge device socket holes.
Under normal use conditions, use a high-pressure air gun and a brush every week to clean the charging port. If conditions do not permit, a dust-free cloth or cotton swab may be used to clean the charging port and charging gun.
Warning Never touch the charger barrel and socket with sharp objects such as screwdrivers or tweezers to avoid damaging the socket and socket.
When a foreign object enters deep into the charging base, it must be cleaned by a professional.
The vehicle has three range display standards: WLTP, Dynamic, and NEDC*. Under the same remaining vehicle battery level, if different range display standards are selected, the remaining range displayed by the vehicle will vary slightly.
On the center control screen “ →Settings→Charging and Discharging→Charging”On the interface, select the range display standard.
The lithium iron phosphate battery needs to have its battery status calibrated by being fully charged. When the status bar on the central control screen indicates When this occurs, fully charge the battery to 100% as soon as possible to perform battery calibration. To maintain the accuracy of the displayed pure electric range, it is recommended to perform calibration by fully charging at least once every two weeks.
Tips To ensure charging safety, some brands of DC charging piles will automatically end charging when the power battery is charged to about 95%. When calibration of the power battery is required, it is recommended to use official directly operated charging piles or AC charging piles.
Owner account: the account that is first bound during vehicle handover to activate the vehicle.
Authorized account: Share the vehicle usage rights with others. The account used by the person being shared with is called an authorized account.
Guest Mode: Only some functions, such as the Air Conditioner and navigation, can be used.
After logging in to the account, tap on the center control screen. “ ”, tap in the App Center Go to the Personal Center screen to view the account login type.
When creating a Bluetooth key in the mobile app, you can enable Unlock the account to synchronize login on the central displayFunction. After it is enabled, the account is automatically logged in when the vehicle is unlocked.
You can also tap the profile icon in the upper-right corner of the center display, then log in to the XPENG App account on your phone and scan the code to log in.
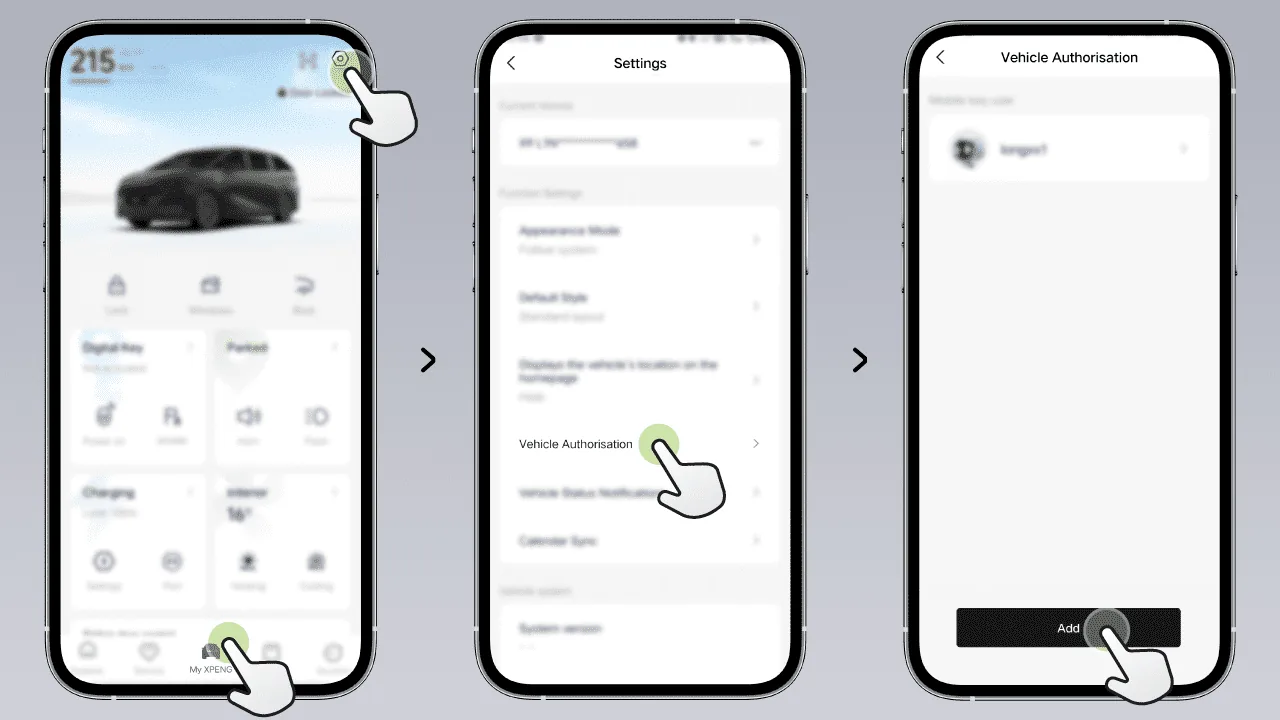
After the vehicle owner logs in to the XPENG App, tap in sequence 。
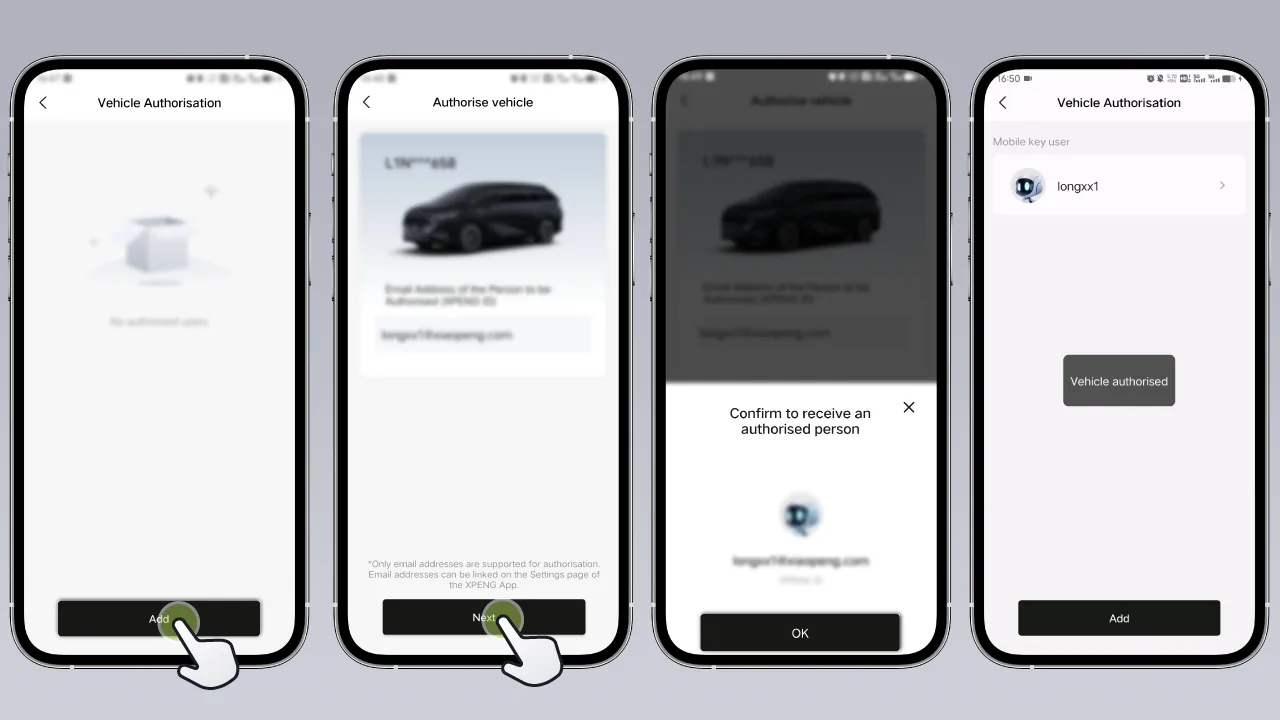
Select the authorization type as Enter the authorized person's email address and, after setting the validity period as needed, you can share the vehicle usage rights with relatives and friends for use.
After an authorized user logs in to the XPENG App, they can create a Bluetooth key or use the remote Vehicle Control function. Authorization for use by up to 5 family members or friends is supported.
After the vehicle owner logs in to the XPENG App, tap in sequence 。
Find the item to be set users.
Can be turned on or off Permissions.
After enabling charging settings permissions, the authorized person can then manage charging management in the and Set the function.
The vehicle owner uses the XPENG App to enter View or manage authorized users on the interface.
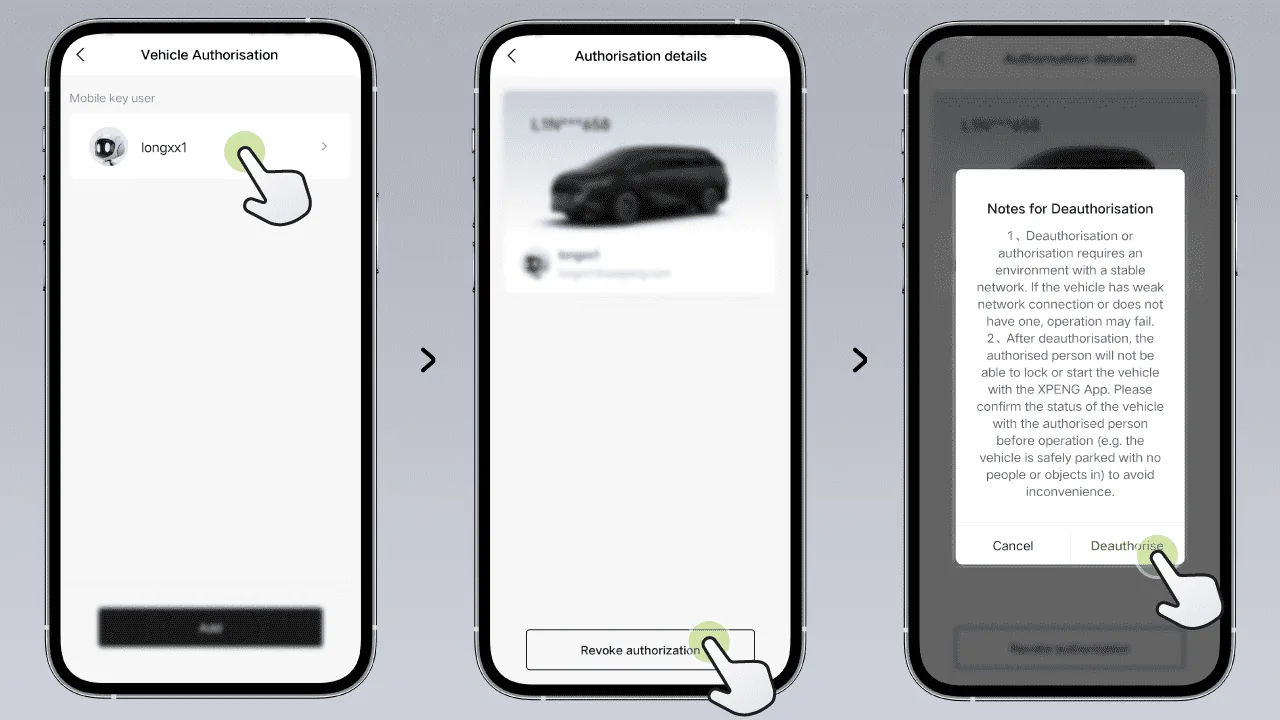
Find the user whose authorization needs to be revoked.
Tap Afterward, read and agree , tap 。
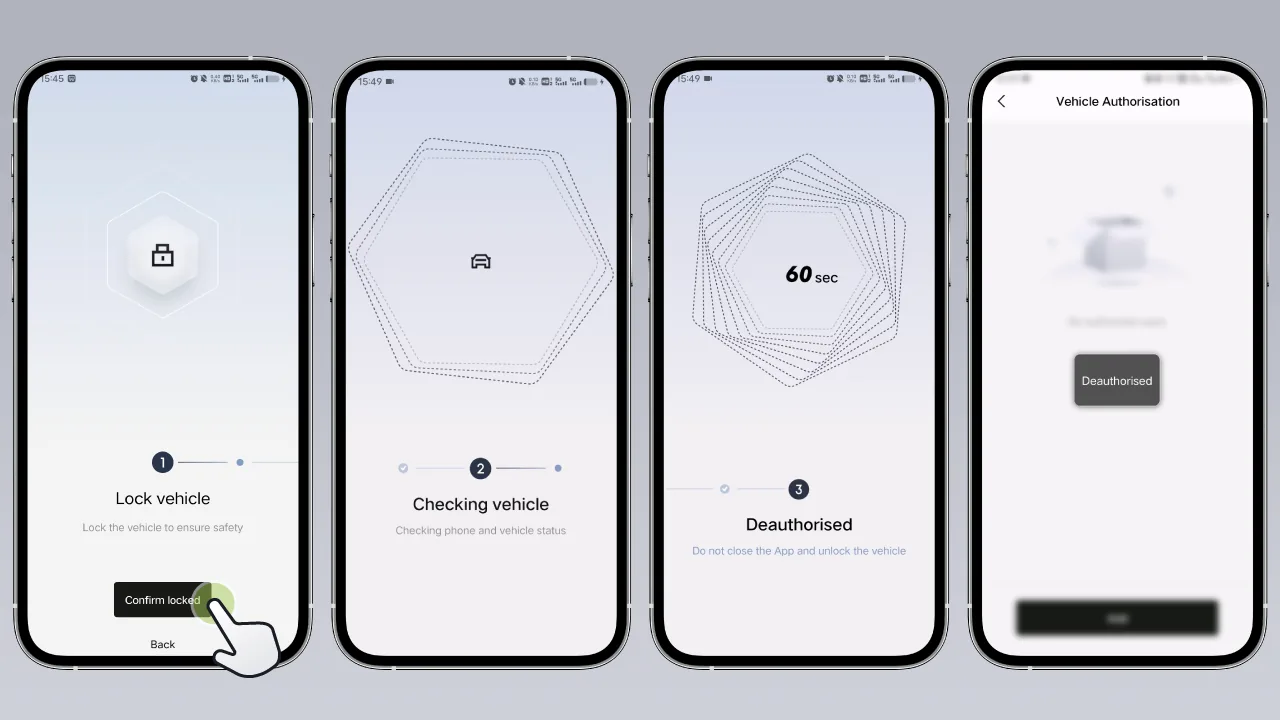
To ensure the safety of the vehicle and occupants, tap After confirming that there are no abnormalities with the mobile phone and the vehicle status, the authorization for this user can be revoked.
Tips To grant or revoke authorization, the vehicle must have a good network signal. If the vehicle has no network connection or a weak signal, the operation may fail.
After authorization is revoked, the authorized user will no longer be able to lock the vehicle or start the vehicle using the XPENG App. Before performing the operation, confirm the vehicle status with the authorized user (for example, that the vehicle is safely parked and no people or belongings are left in the vehicle) to avoid inconvenience to either party.
After switching to Guest Mode, personal sensitive information will be hidden, and functions such as assisted driving, browser, and App Store downloads will be disabled. Only basic vehicle functions such as the Air Conditioner and navigation can be used.
When the vehicle gear is in P, you can, in the pop-up window, read the prompt information and then click , and Guest Mode will be activated. The following will appear on the central control screen Prompt.
Tap the center display in sequence. , enter the pop-up window interface.
Tap on the central control screen. “ ”, tap in the App Center Enter the pop-up window.
Log in to the owner account on the central control screen. When the vehicle gear is in P, you can enable/disable automatic entry into Guest Mode in the following ways:
On the center control screen Interface, turn automatic entry into Guest Mode on/off.
Tap on the center display. “ ”, tap in the App Center Interface, turn automatic entry into Guest Mode on/off.
Caution Guest mode can only be set in non-driving conditions.
After the automatic entry into Visitor Mode function is enabled, when the vehicle is unlocked with the physical key, the central control screen will display Notice that the user has now entered Guest Mode.
You can exit Guest Mode in either of the following ways: use the XPENG App to scan the QR code, then log in to your account.
Tap the center display screen , tap , enter the QR code scanning screen.
Tap on the center display. “ ”, tap in the App Center , enter the scan code screen.
After you successfully pair your phone Bluetooth key or wallet key with the vehicle Bluetooth, unlock the vehicle, automatically log in to the associated user account, and automatically exit Guest Mode.
After logging in to your account, when adjusting the seat position and the side mirror position, you can save the set positions to driving habits. When logging in again, you can quickly switch to the saved positions. One account can store up to 6 driving habits.
You can quickly select any of the following methods for the driving habit to be used this time, and add, delete, or rename the saved primary driver driving habits on the account settings screen.
Tap the center display screen Enter the driving habit switching screen.
Tap on the center control screen. “ ”, tap in the App Center Enter the Personal Center screen.
After logging in to your account, tap the following on the center display in sequence. “ →Seats→Seat Position→DS”, enter the Driving Habits screen.
On the center control screen “ →Settings→General→Safety and Privacy”Interface, can be opened/closed When turning off the in-vehicle microphone, a confirmation pop-up will appear. After the in-vehicle microphone is turned off, functions such as bluetooth phone and voice will be unavailable.
Tips After the in-vehicle microphone is turned off, the top bar of the central control screen will display Icon, tap the icon to turn on the in-vehicle microphone in the pop-up window.
On the center control screen “ →Settings→Voice Assistant”On the interface, you can enable or disable the Voice Assistant service. After the function is enabled, you can control some vehicle functions by voice.
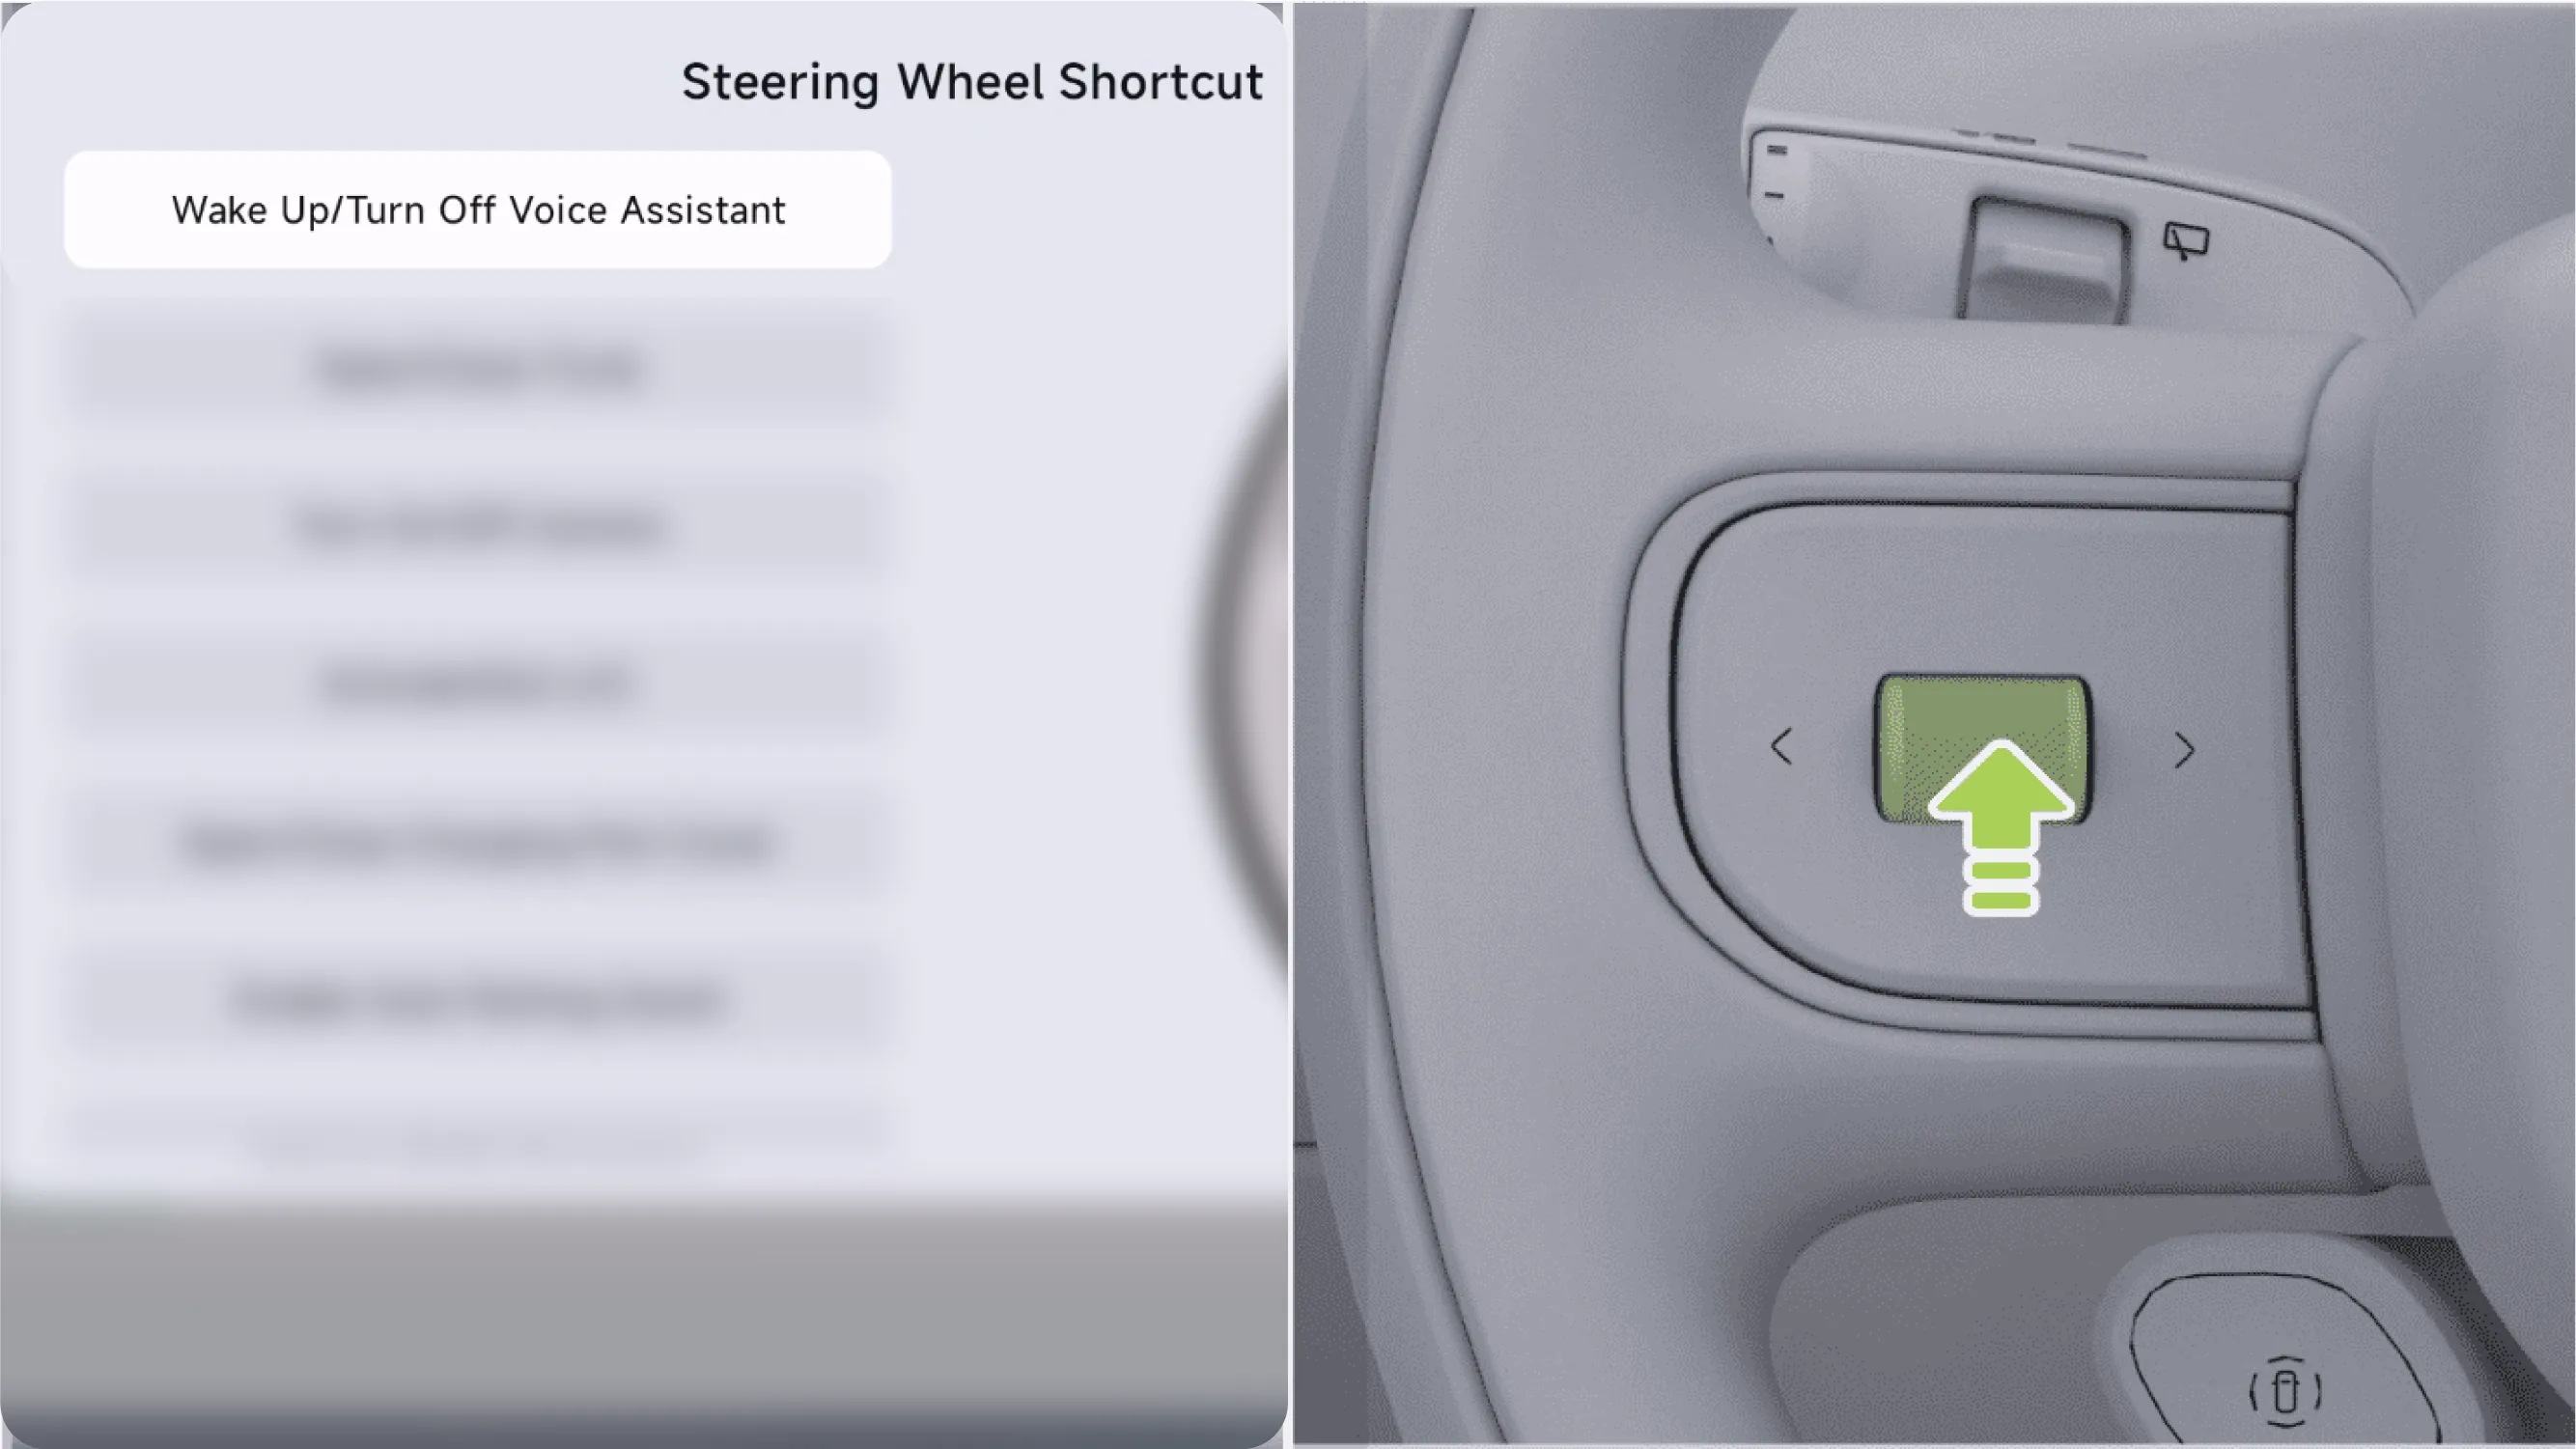
Press and hold the left scroll wheel on the steering wheel to set the steering wheel shortcut key function to Afterward, you can use the steering wheel shortcut button to wake up/turn off voice.
Enabled The function is available and the vehicle voice function component is free of faults.
Enabled Function.
Press the left scroll wheel on the steering wheel briefly to wake up XPENG Voice Assistant; after waking up XPENG, press the left scroll wheel on the steering wheel briefly to turn off voice.
Press the voice button on the left side of the steering wheel to activate the voice service. Press the voice button again to turn off the voice service.
On the central control screen “ →Settings→Voice Assistant”interface, you can enable or disable the "Hey XPENG" wake word. After the function is enabled, some vehicle functions can be controlled by voice.
“XPENG+” Smart Wake-Up: Can be activated through “XPENG+ Common Vehicle Control Commands”directly use the voice service. For example: “XPENG, turn on the Air Conditioner”.
Command wake-up: You can directly enter explicit voice commands such as Vehicle Control/music/phone. For example: “Turn on the Air Conditioner”.
Standard Wake-up: can be through “Hey XPENG”Wake up the voice service. After waking it up, you can enter voice commands. For example: “Hey XPENG, turn on the Air Conditioner”.
On the center display screen “ →Settings→Voice Assistant”On the interface, you can configure the XPENG intelligent voice service.
Voice Assistant language selection: the default language is "English". You can download and install other voice language packs, such as German, French, Thai, etc.
Inspiration Collection: You can view example voice interaction commands (English).
Single-turn conversation: After selection, XPENG can execute only one command in each conversation and exits the voice service immediately after execution is completed.
Continuous conversation: After selection, when XPENG completes the previous task, it can remain in a listening state for a period of time. At this time, you can directly issue a new command without repeatedly waking up XPENG.
Activate Zones: You can turn off the corresponding zone as needed. After it is turned off, the system will no longer receive voice commands from that zone.
To make XPENG increasingly smarter and more intelligent, we sincerely invite you to join XPENG Assistant User Experience Improvement Program。
On the center display “ →Settings→General→Safety and Privacy”Interface, can be opened/closed 。
Before enabling, you need to first read and agree to the **XPENG Assistant User Experience Improvement Program**. After the function is enabled, the system can collect voice usage information to improve your voice interaction experience.
After the exterior voice function is enabled, you can wake up "Hey XPENG" at close range outside the vehicle and have a voice conversation with XPENG. Outside the vehicle, voice function control supports commonly used vehicle control functions, intelligent assisted parking, weather inquiry, encyclopedia Q&A, vehicle use Q&A, and other functions.
Ensure on the central control screen “ →Settings→Voice Assistant”The exterior voice function is enabled.
Ensure that the vehicle is unlocked, the gear is in P, the driver leaves the main driver's seat, and the vehicle voice function components are free of faults.
You need to be within 3 m of the vehicle and say "Hey, XPENG" to successfully wake up XPENG. Then say a commonly used voice command to use the exterior voice function. When using it, please pay attention to the safety of the environment around the vehicle.
After the conversation ends, voice will automatically exit.
Tips To ensure a good interaction experience, the exterior voice function should be used as much as possible in a relatively quiet environment around the vehicle.
When using the exterior voice function, the exterior lights will display lighting effects for the wake-up state and exit state.
If the “Exterior “XPENG+” Smart Wake-up” function is enabled in the Voice Assistant settings on the central control screen, you can use the exterior voice function by directly saying Xiao P + the voice command.
If the "Exterior Voiceprint" function is enabled in the intelligent voice settings on the center display, only users with registered voiceprints can use exterior voice control.
In-vehicle voice and exterior voice cannot be awakened at the same time. After exterior voice exits, when a passenger in the vehicle awakens in-vehicle voice, the voice function will switch back to the vehicle interior. After in-vehicle voice is awakened, the exterior voice function will be unavailable.
Vehicle legally unlocked.
Vehicle power on successful, high-voltage power on successful.
The CDCU domain controller started successfully.
The exterior microphone is normal.
The exterior speaker is normal.
The exterior voice application has been initialized successfully.
The vehicle is in P gear (except in the vehicle-exterior voice parking scenario).
The vehicle is legally locked.
If the exterior voice function is not awakened and none of the four doors or the two lids is opened within 2 min of the vehicle, the vehicle will automatically lock when the time expires.
Someone is in the driver's seat.
Vehicle not in P gear state (except for external voice parking).
Enable the exterior voice function (disabled by default on first use); the exterior supports the default Standard Wake-up "Hey XPENG".
The exterior voiceprint function is disabled. If the exterior voiceprint function is enabled, only voiceprint users can wake it up.
When no one is inside the vehicle, if someone is inside the vehicle, the exterior voice is muted.
The in-vehicle voice system is not awakened (the in-vehicle and exterior systems cannot be awakened at the same time).
Keep the distance between the person and the vehicle within 3 m (the closer the distance, the better the performance).
For the first round of exterior voice interaction, the valid command duration is 15 seconds; it will automatically exit upon timeout and exit silently.
For the first round of exterior voice interaction, the invalid command duration is 15 seconds. It will automatically exit upon timeout and exit silently.
You can turn the exterior voice on or off in any of the following ways:
Wake up XPENG in the vehicle and say your command, for example: "Turn on external voice", "Turn off external voice".
Enter on the center control screen “ →Settings→Voice Assistant”Interface, turn the exterior voice function on/off.
You can also in On this screen, you can turn the exterior "XPENG+" intelligent wake-up function on or off. After it is turned on, you do not need to first say the wake-up phrase "Hey, XPENG"; you can directly say "XPENG+ commonly used vehicle control commands" to interact with XPENG by voice. For example: XPENG open the trunk.
You can adjust the exterior voice broadcast volume in the following ways:
Wake up XPENG and say your command, for example: “Increase the voice broadcast volume a little” or “Decrease the voice broadcast volume a little.”
Enter on the central control screen “ →Settings→Voice Assistant”On the interface, slide the volume slider to adjust the exterior voice announcement volume.
Tips When you wake up XPENG outside the vehicle, the external media playback volume will automatically decrease.
You can turn the exterior voiceprint on/off in the following ways. After the exterior voiceprint function is enabled, only users with a registered voiceprint can use exterior voice control.
Wake up XPENG in the vehicle and state your command, for example: “Turn on the exterior voiceprint”, “Turn off the exterior voiceprint”. The exterior voiceprint settings screen will open, where you can turn the exterior voiceprint function on/off.
Enter on the center control screen “ →Settings→Voice Assistant”Interface, turn the exterior vehicle voiceprint function on/off.
Caution Before using the vehicle's external voiceprint, you need to log in to the vehicle owner's account or authorized account. The vehicle owner or authorized person should sit in the driver's seat and complete the voiceprint registration according to the prompts on the central control screen.
Before registering your car's external voiceprint, please turn off the car door, windows, trunk, and media music, and try to conduct the voiceprint registration in a relatively quiet environment.
If you are unable to register your voiceprint, please contact XPENG Motors Service Center.
For your privacy, the phonemes are saved locally and are not uploaded to the cloud. To use the exterior voice feature on other XPENG vehicles, follow the central screen prompts to record the exterior voice pattern, which is available when the voice signature is complete.
You can enter on the central control screen “ →Settings→Voice Assistant→Exterior Sound Signature→Voiceprint Management”Interface for managing user voiceprints.
TipsThe system currently supports up to 2 voiceprints. To add more, you must first delete an existing voiceprint.| Primary Category | Secondary Category | Voice Function | Voice Command Examples |
|---|---|---|---|
| Door Control | Door | Door | Open the door, open the driver's door |
| Close the door | |||
| Trunk Control | trunk | trunk | Open the trunk |
| Close the trunk | |||
| Charging Port Lid Control | Charging Port Cover | Charging Port Cover | Open the charging port |
| Close charging port | |||
| window control | window | window | Open the window, open the driver's window |
| Close window | |||
| window open halfway | |||
| Close the window a little. | |||
| Air Conditioner Control | Air Conditioner | Air Conditioner Switch | Turn on the Air Conditioner |
| Turn off the Air Conditioner | |||
| Air Conditioner Control | Air Conditioner | A/C Temperature | Adjust to X degrees |
| Increase/Decrease by X degrees | |||
| Raise point/Lower point | |||
| Air Conditioner Control | Air Conditioner | Max Cool | Turn on Rapid Cooling |
| Turn off rapid cooling | |||
| Max Heat | Turn on rapid heating | ||
| Turn Off Rapid Heating | |||
| Air Conditioner Control | Air Conditioner | Refresh | Turn on Refresh |
| Turn off Refresh | |||
| front defogger/rear defogger | Turn on front defogger Turn on rear defogger | ||
| Turn off front defogger Turn off rear defogger | |||
| Driving Control | Driving | Rearview Mirror | Open the rearview mirror |
| Fold Mirrors | |||
| Exterior Light Control | Exterior Lights | Low beam headlamp | Turn on the low beam headlights |
| Turn off the low beam headlights | |||
| auto headlights | Turn on auto headlights | ||
| Turn off auto headlights | |||
| Exterior Voice Volume Control | Exterior voice volume | Voice Volume Adjustment | Set voice volume to maximum/minimum |
| Voice Volume Adjustment | |||
| Voice Mute | |||
| Charging Control | Charging | Stop Charging | Stop Charging |
XPENG Motors provides customized music applications. Supported audio sources include online media content such as Spotify, Amazon Music, and radio, and also support local media content such as Bluetooth Music and USB Music.
Tap the taskbar at the bottom of the center control screen “  ”On the music screen, you can switch audio sources and play from the audio source entry in the upper left corner.
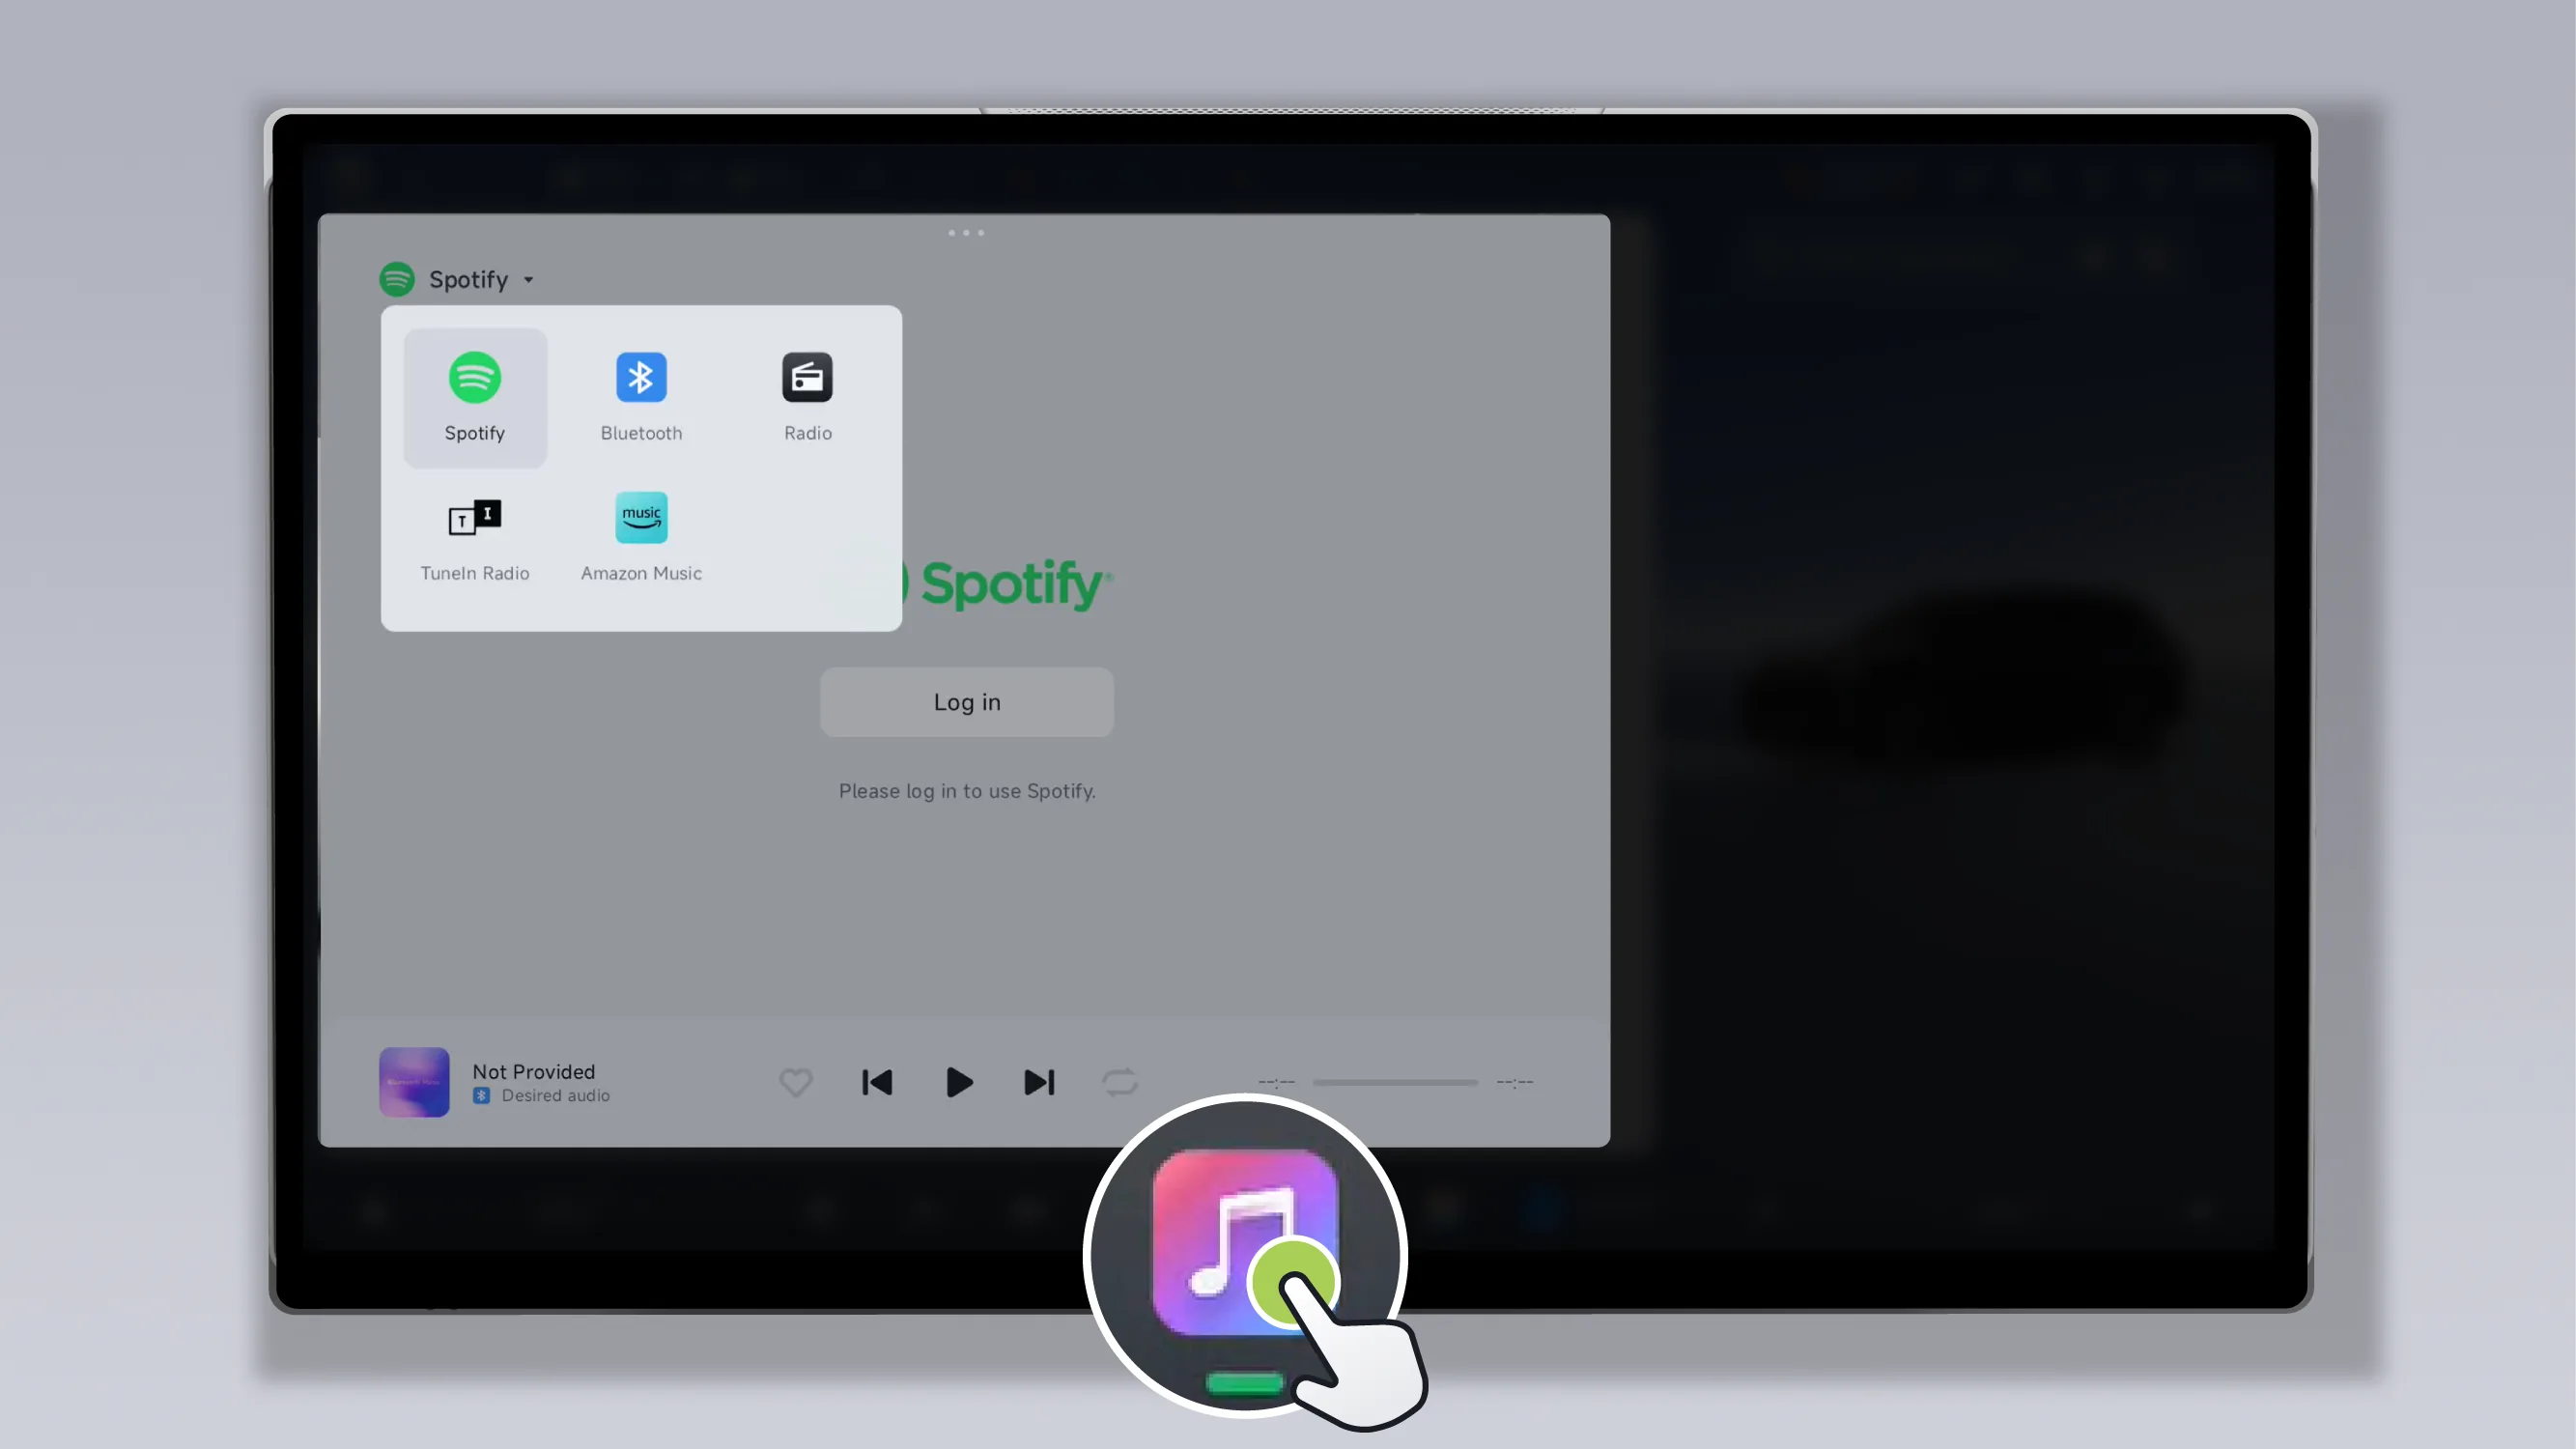
When playing multimedia, you can control it using the buttons on the right side of the steering wheel:
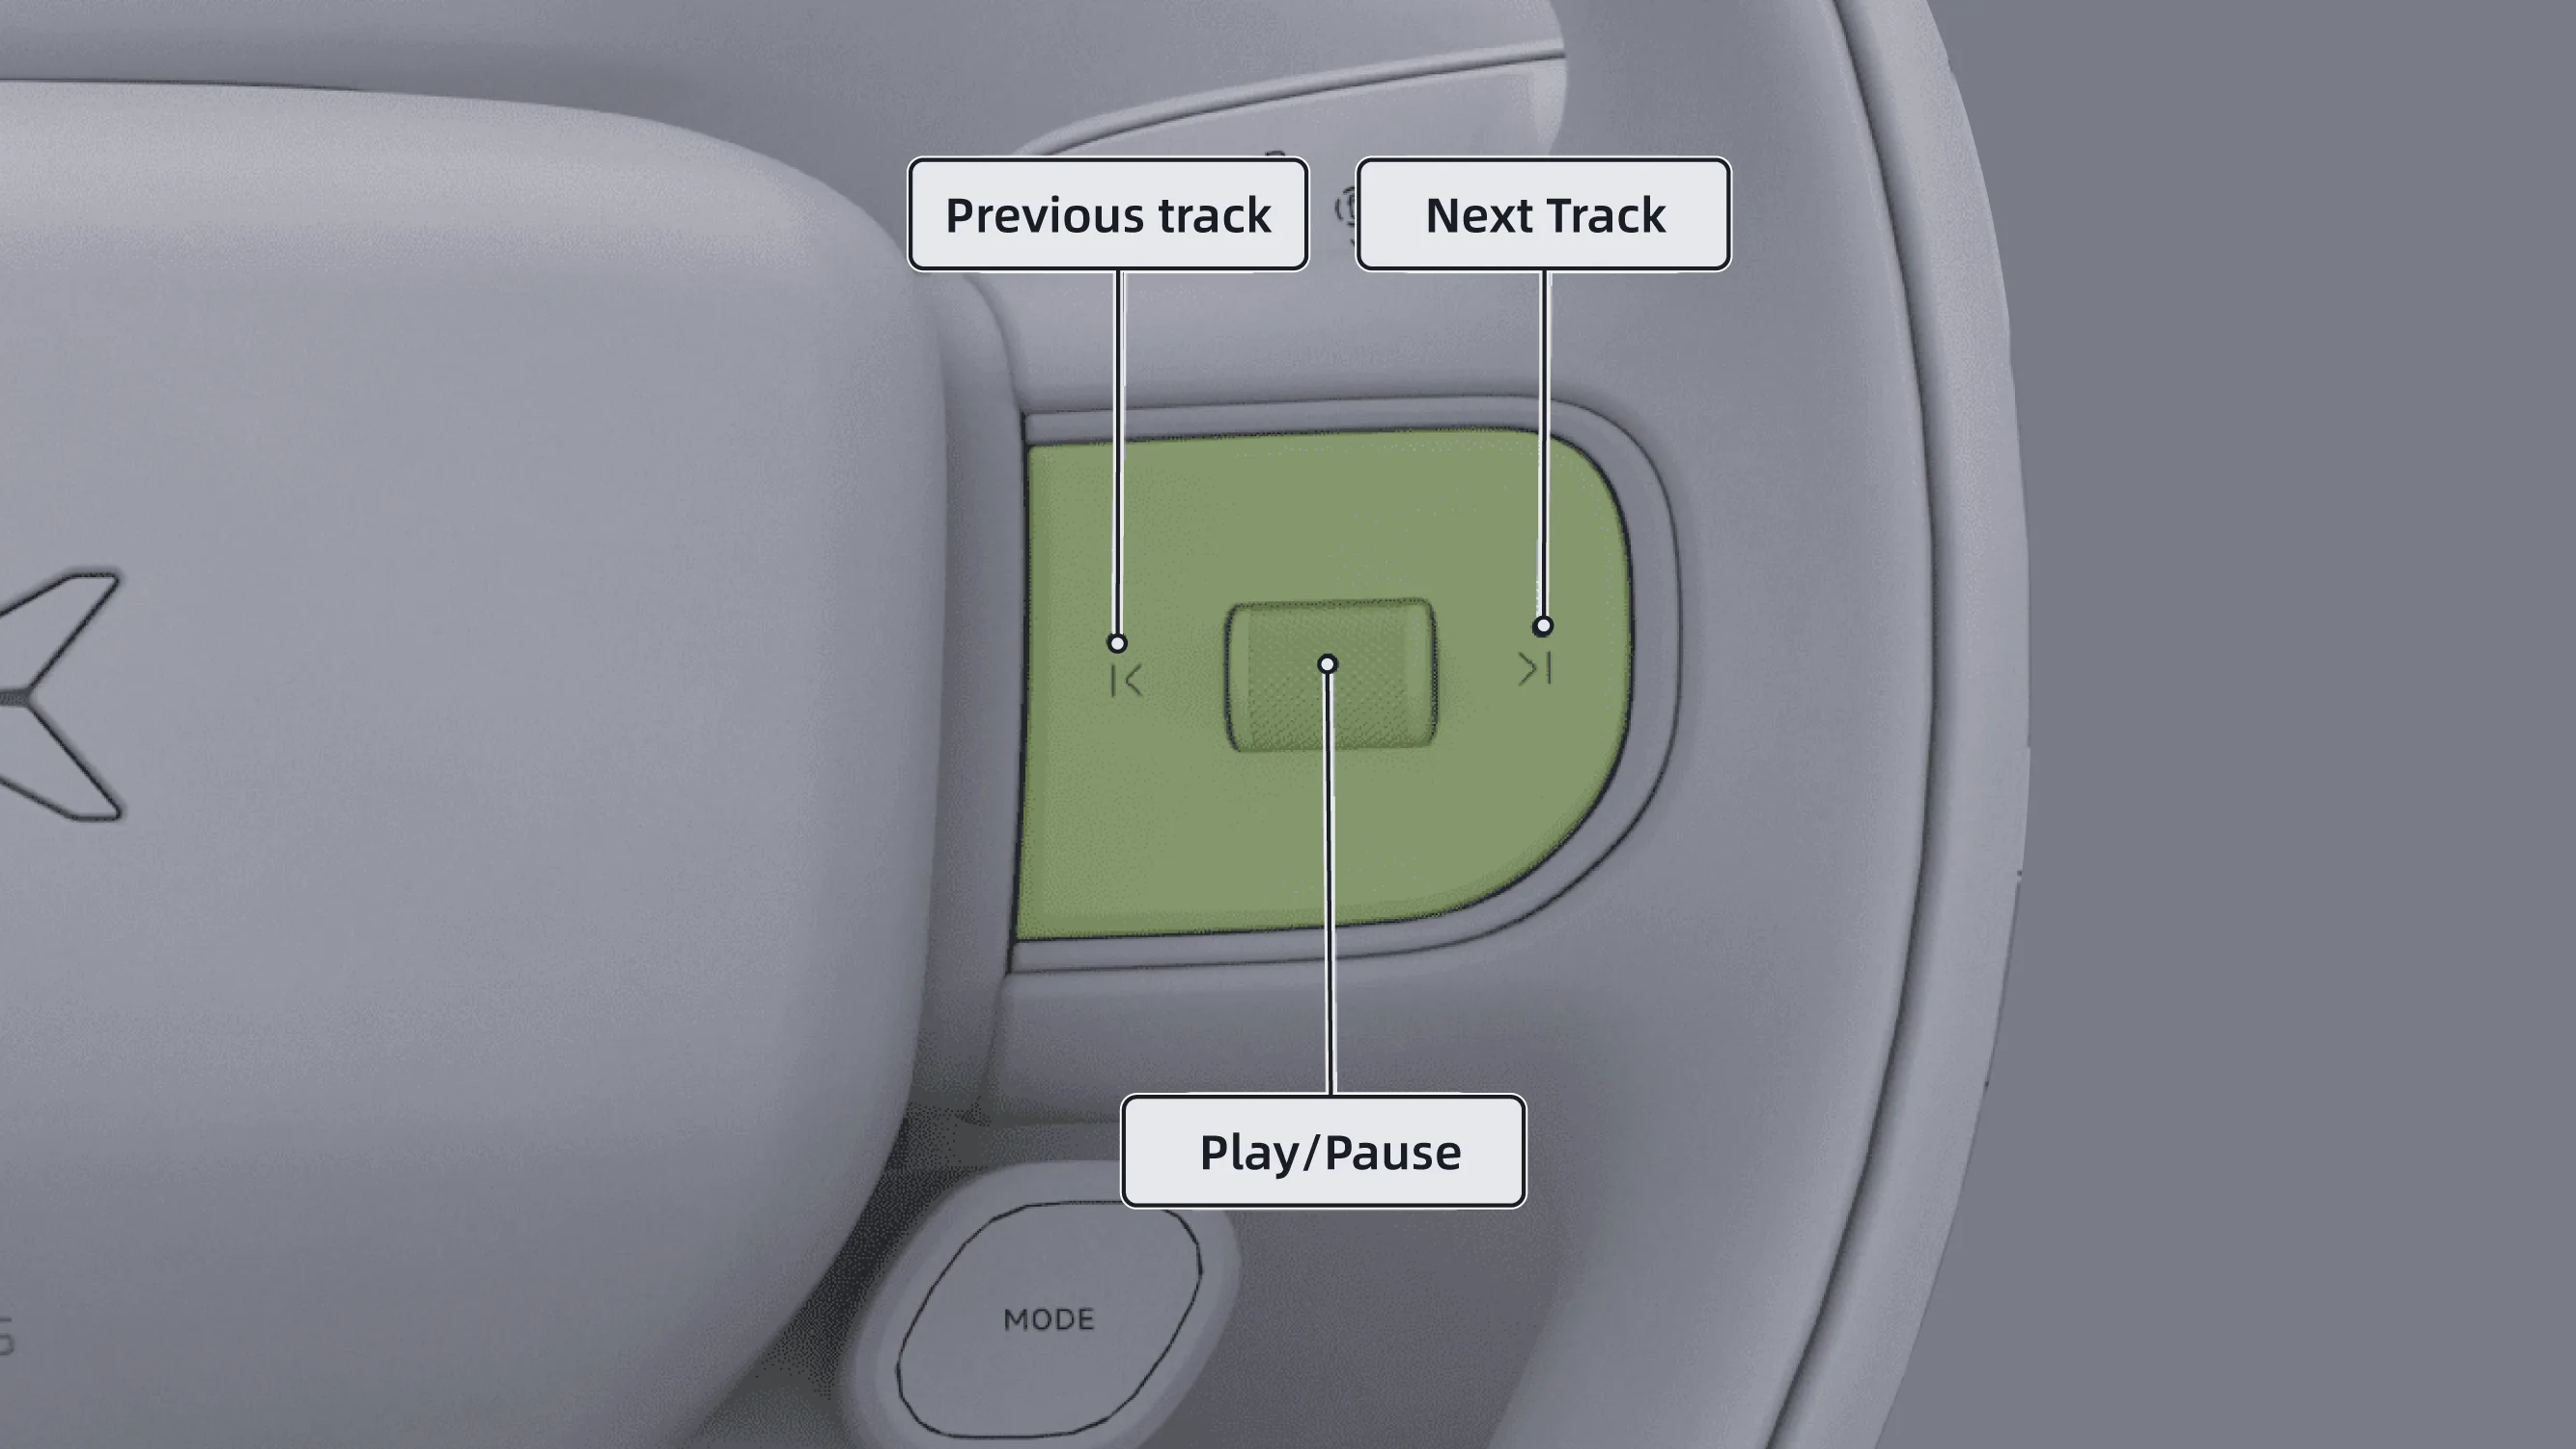
Press the left or right button to switch to the previous or next track.
Press the scroll wheel to pause media playback.
Switch audio source to , tap After connecting the phone via Bluetooth, you can listen to songs from the phone inside the vehicle.
Insert the USB drive containing music files into the front port of the center armrest box, and the status bar on the central control screen displays  The icon indicates that the USB flash drive is connected successfully.
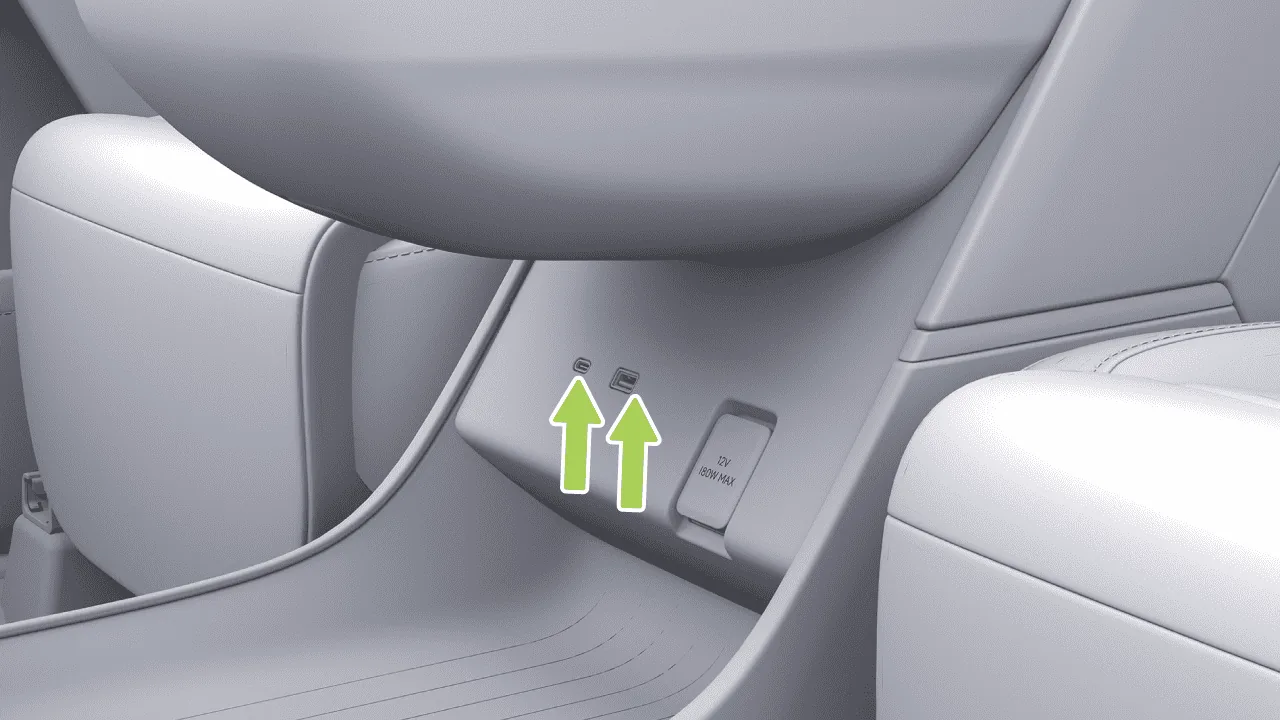 Tips
Tips Both the front USB media source port and the Type-C power port in front of the center armrest support data transfer. After a USB flash drive is inserted, the system will automatically read its contents.
Supported audio formats include: MP3, FLAC, WAV, OGG, AAC, MP4, MKV, and M4A.
Supported USB file system formats include: FAT32, FAT16, and NTFS.
On the center control screen “ →Music”Interface, switch the audio source to , and the music on the USB drive can be played.
If you need to remove the USB drive, first do so on the central control screen “ →Device Connection→Equipment→USB Device”Interface, tap After that, remove the USB drive.
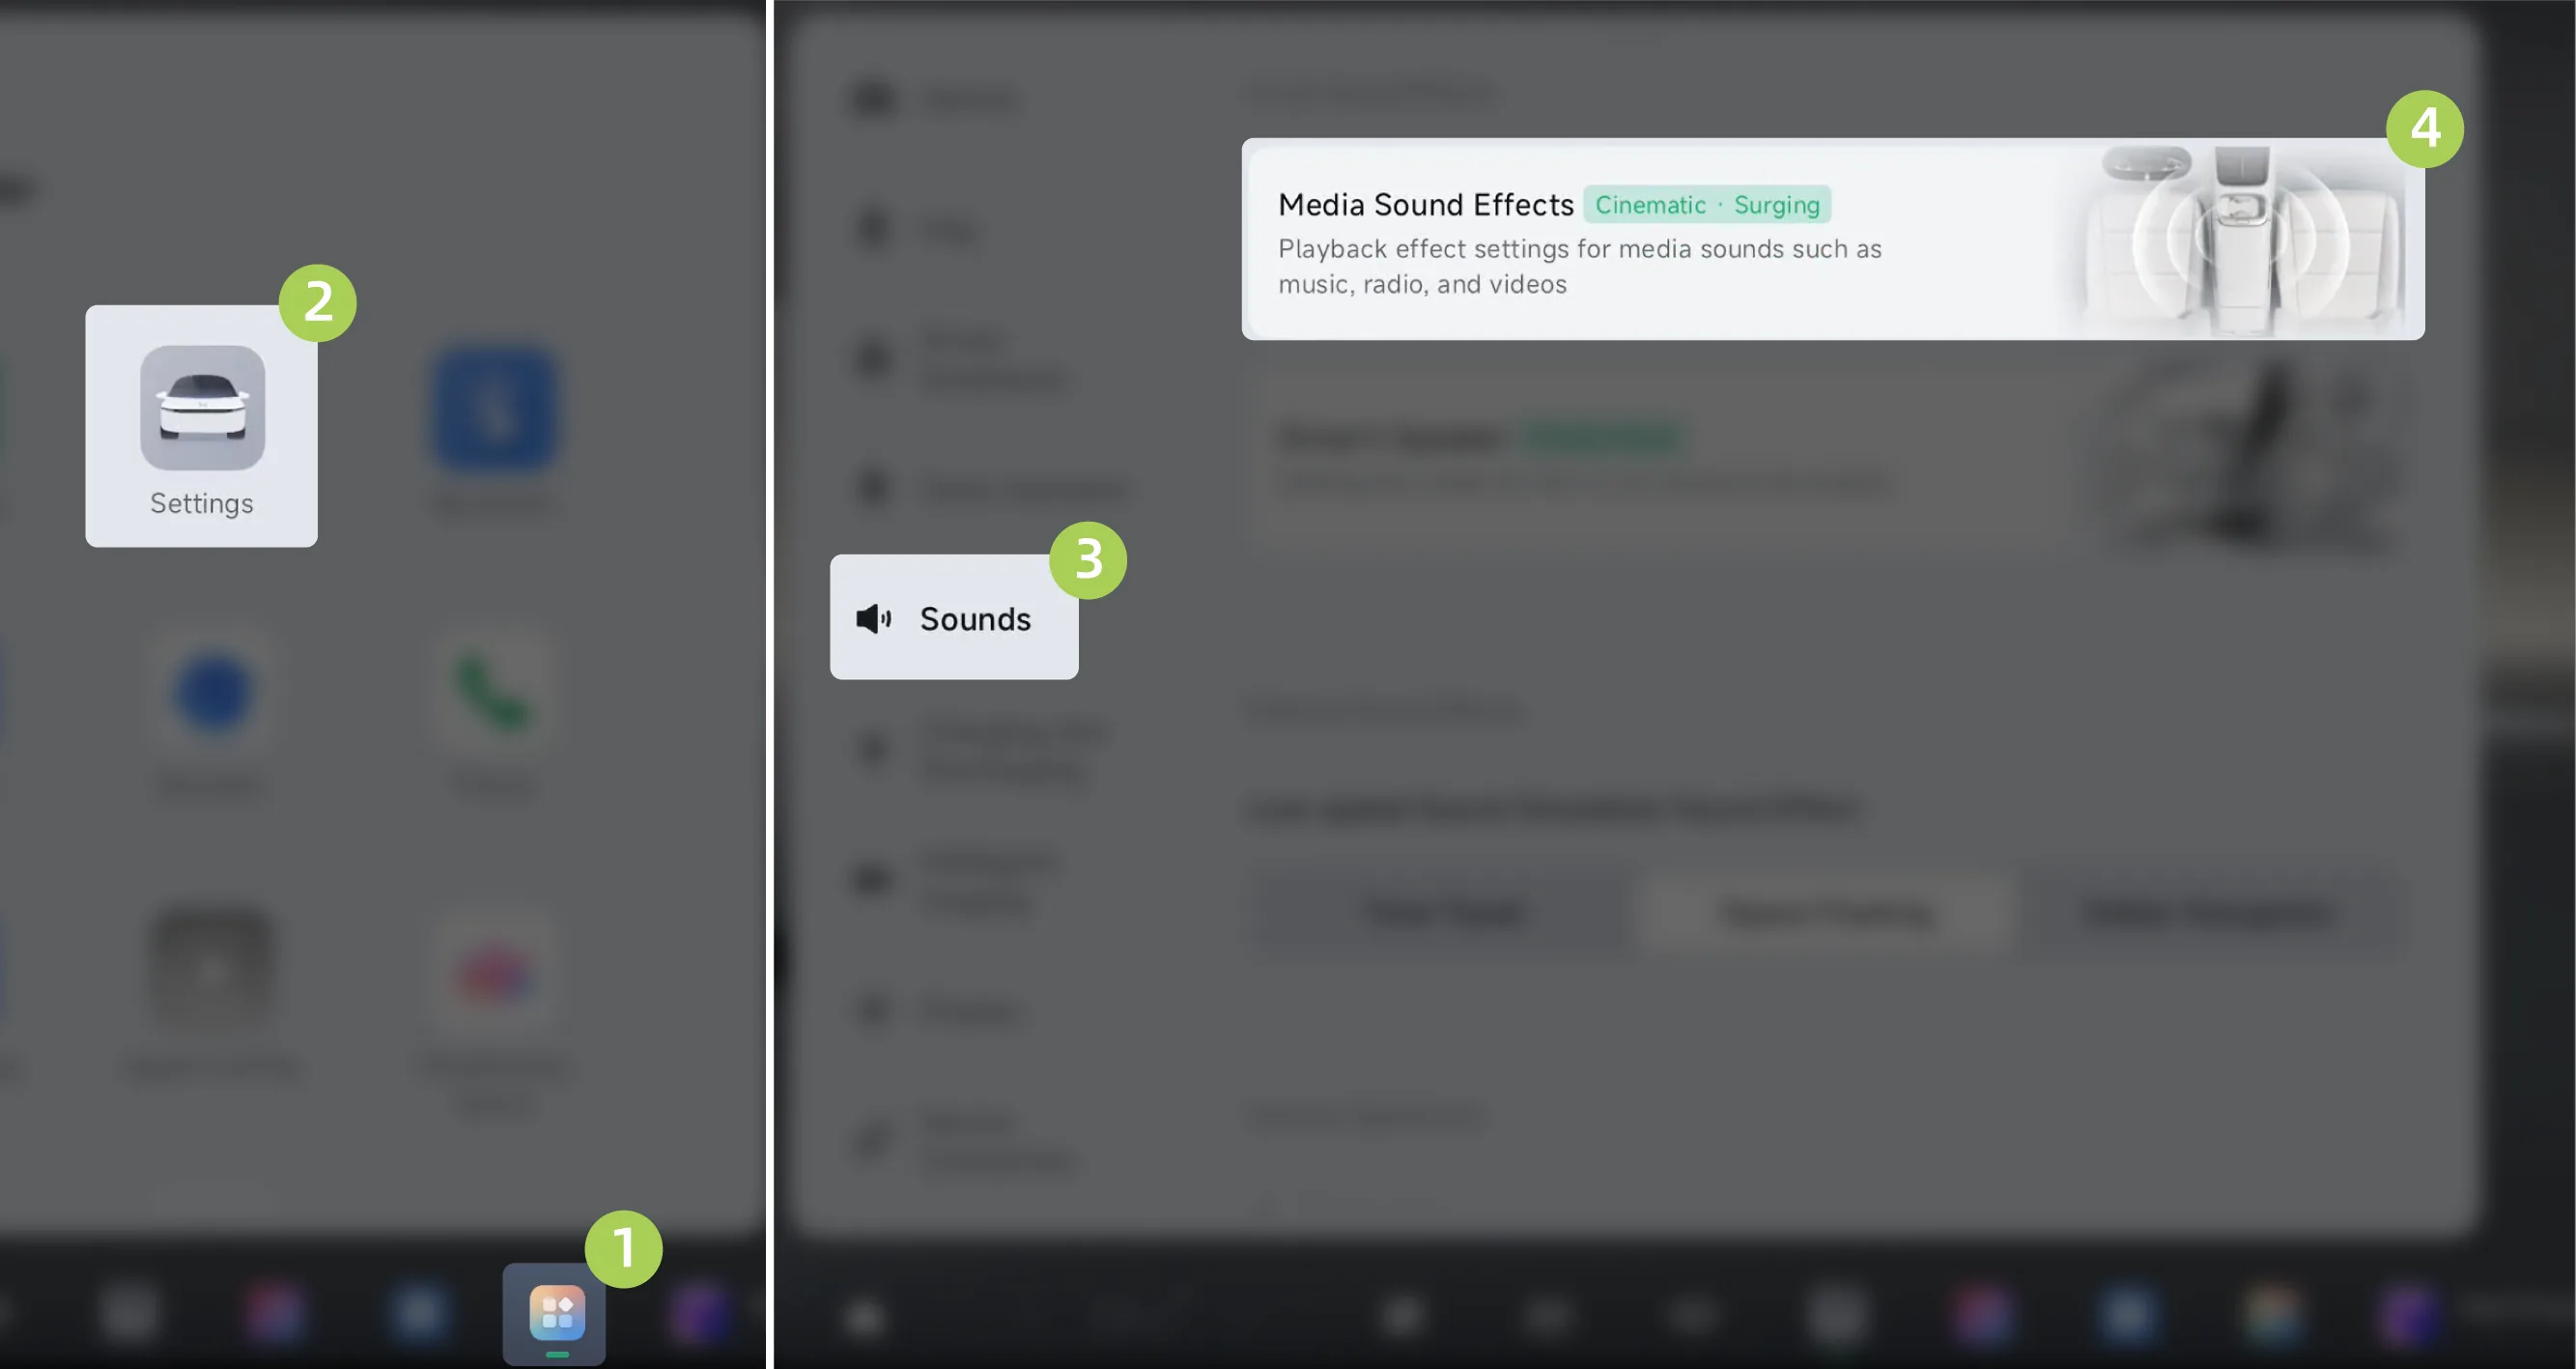
On the center control screen “ →Settings→Sound→Media Sound Effects”On this screen, you can configure playback effects for media audio such as music and videos.
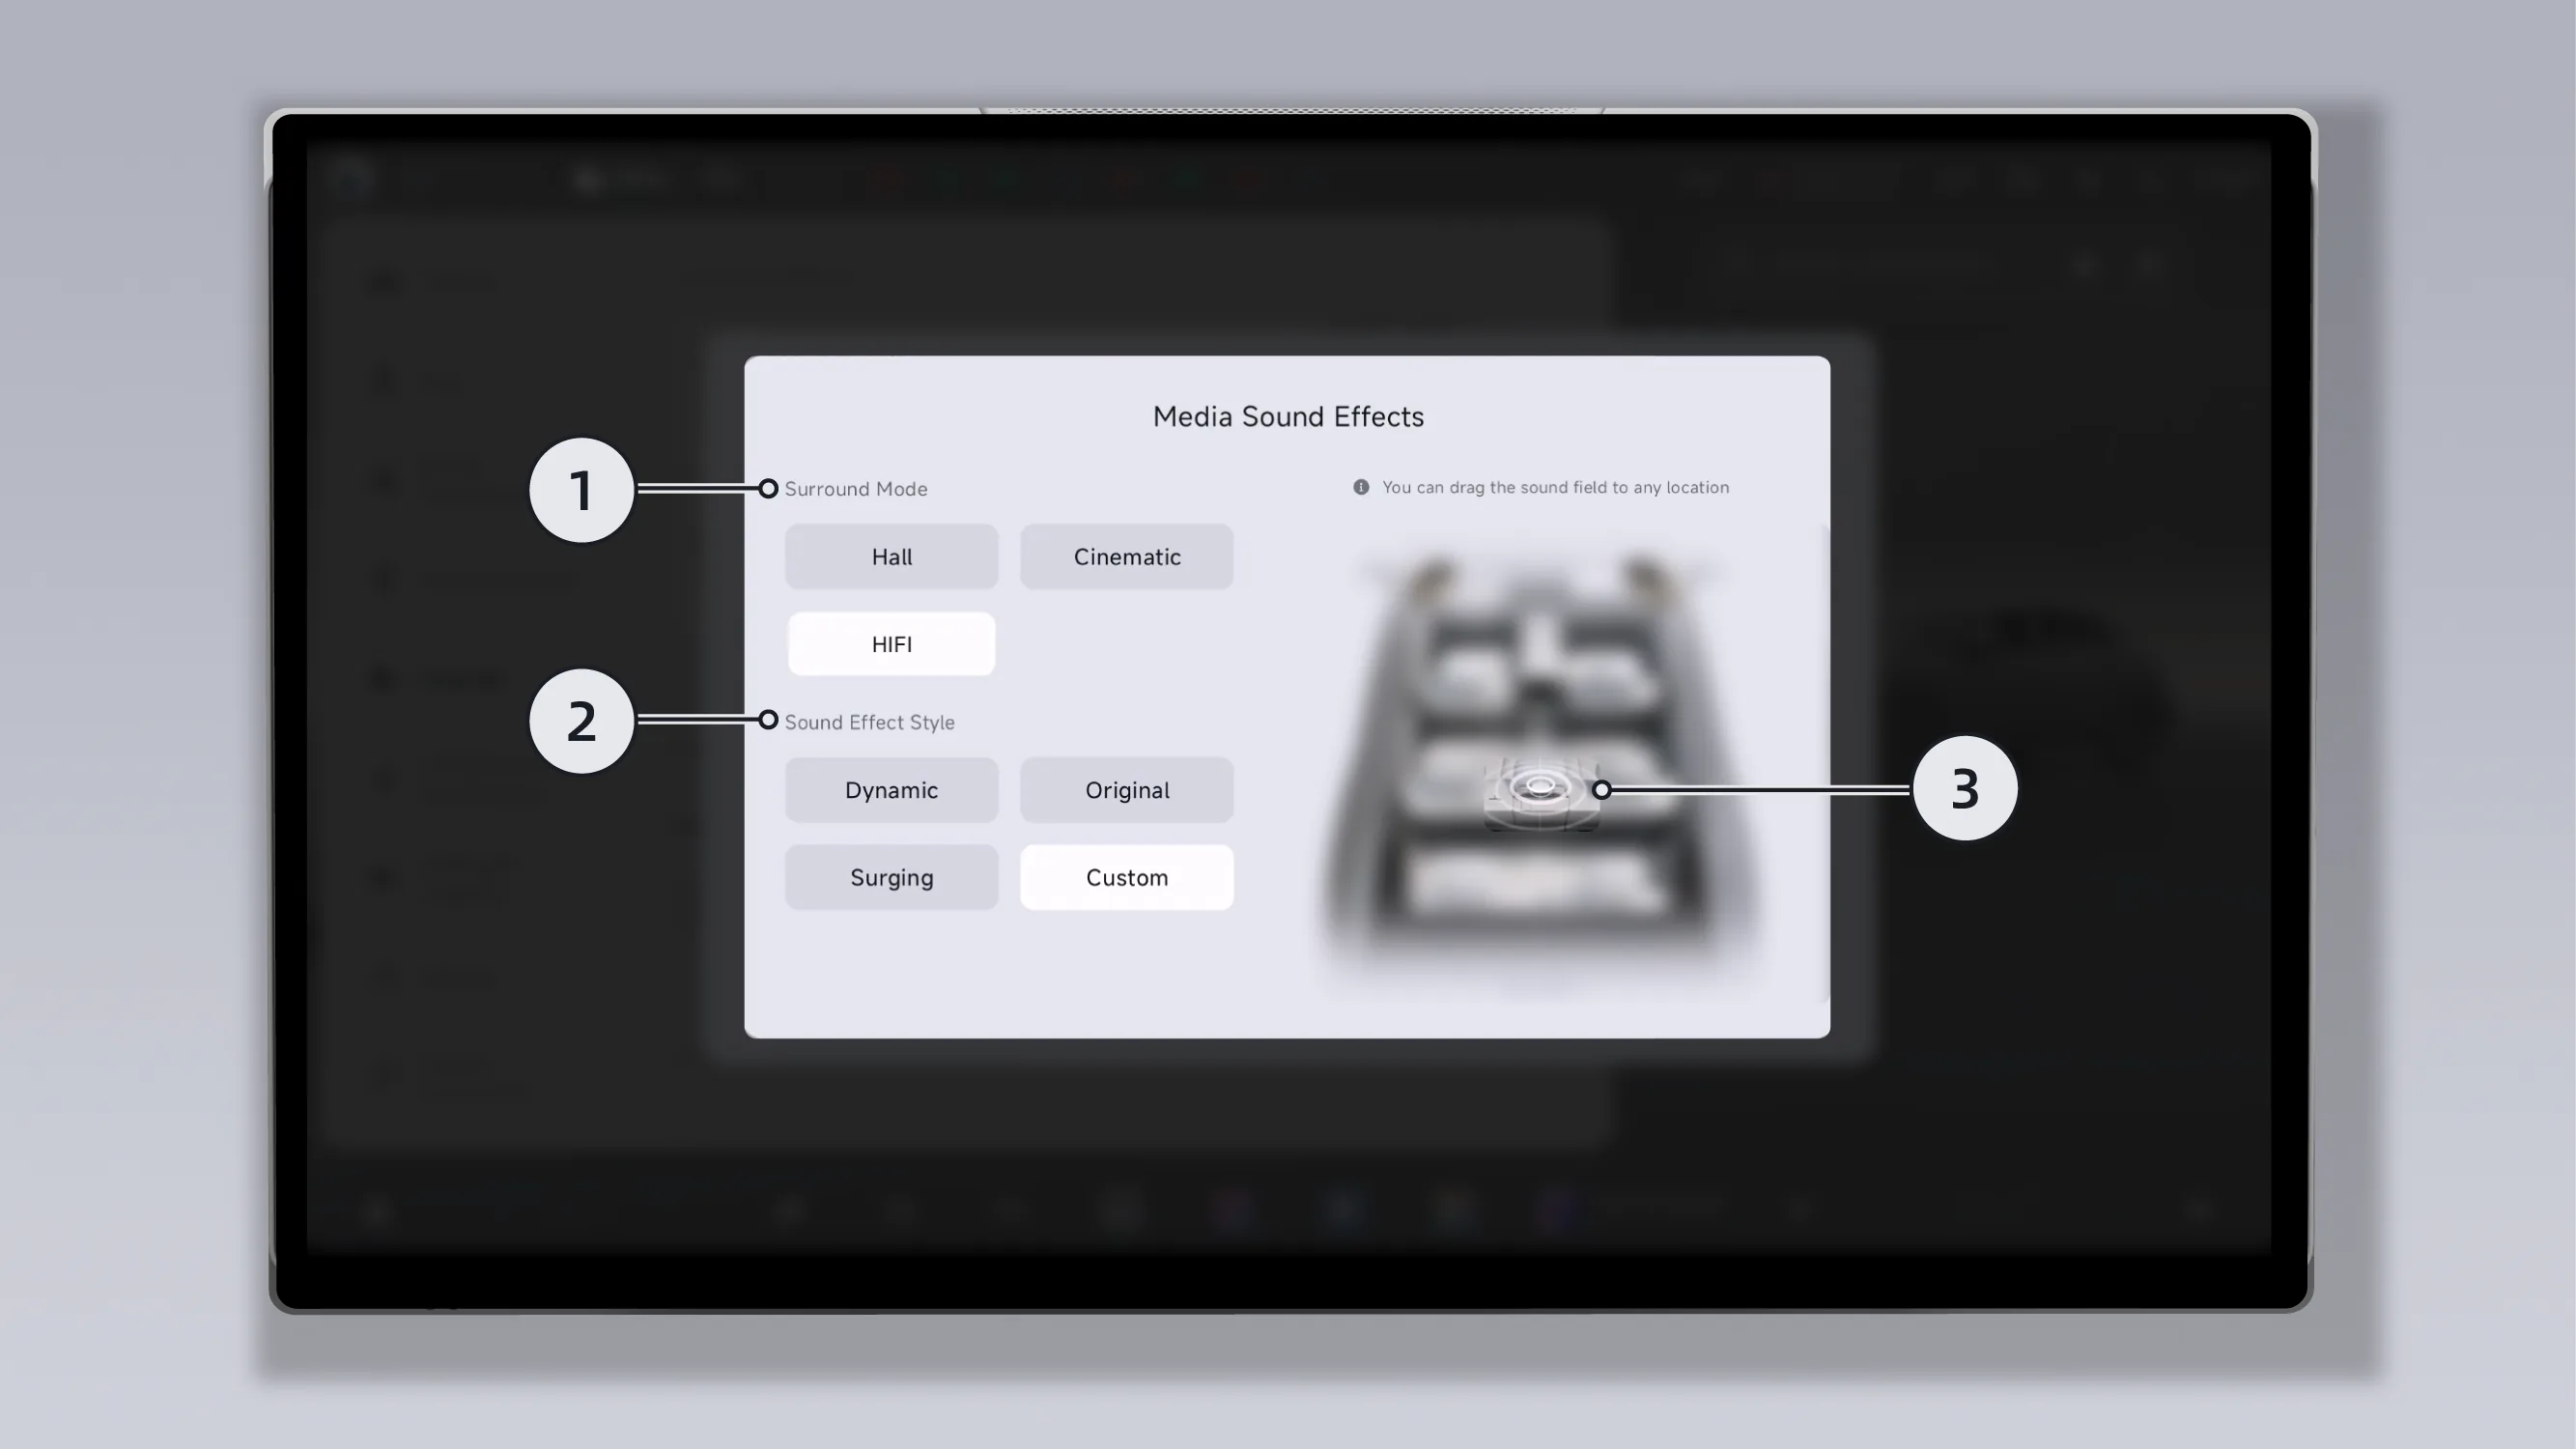
Surround mode: Multiple surround modes can be selected.
Sound effect style: Multiple sound effect modes can be selected.
Drag the sound wave to select the sound field position.
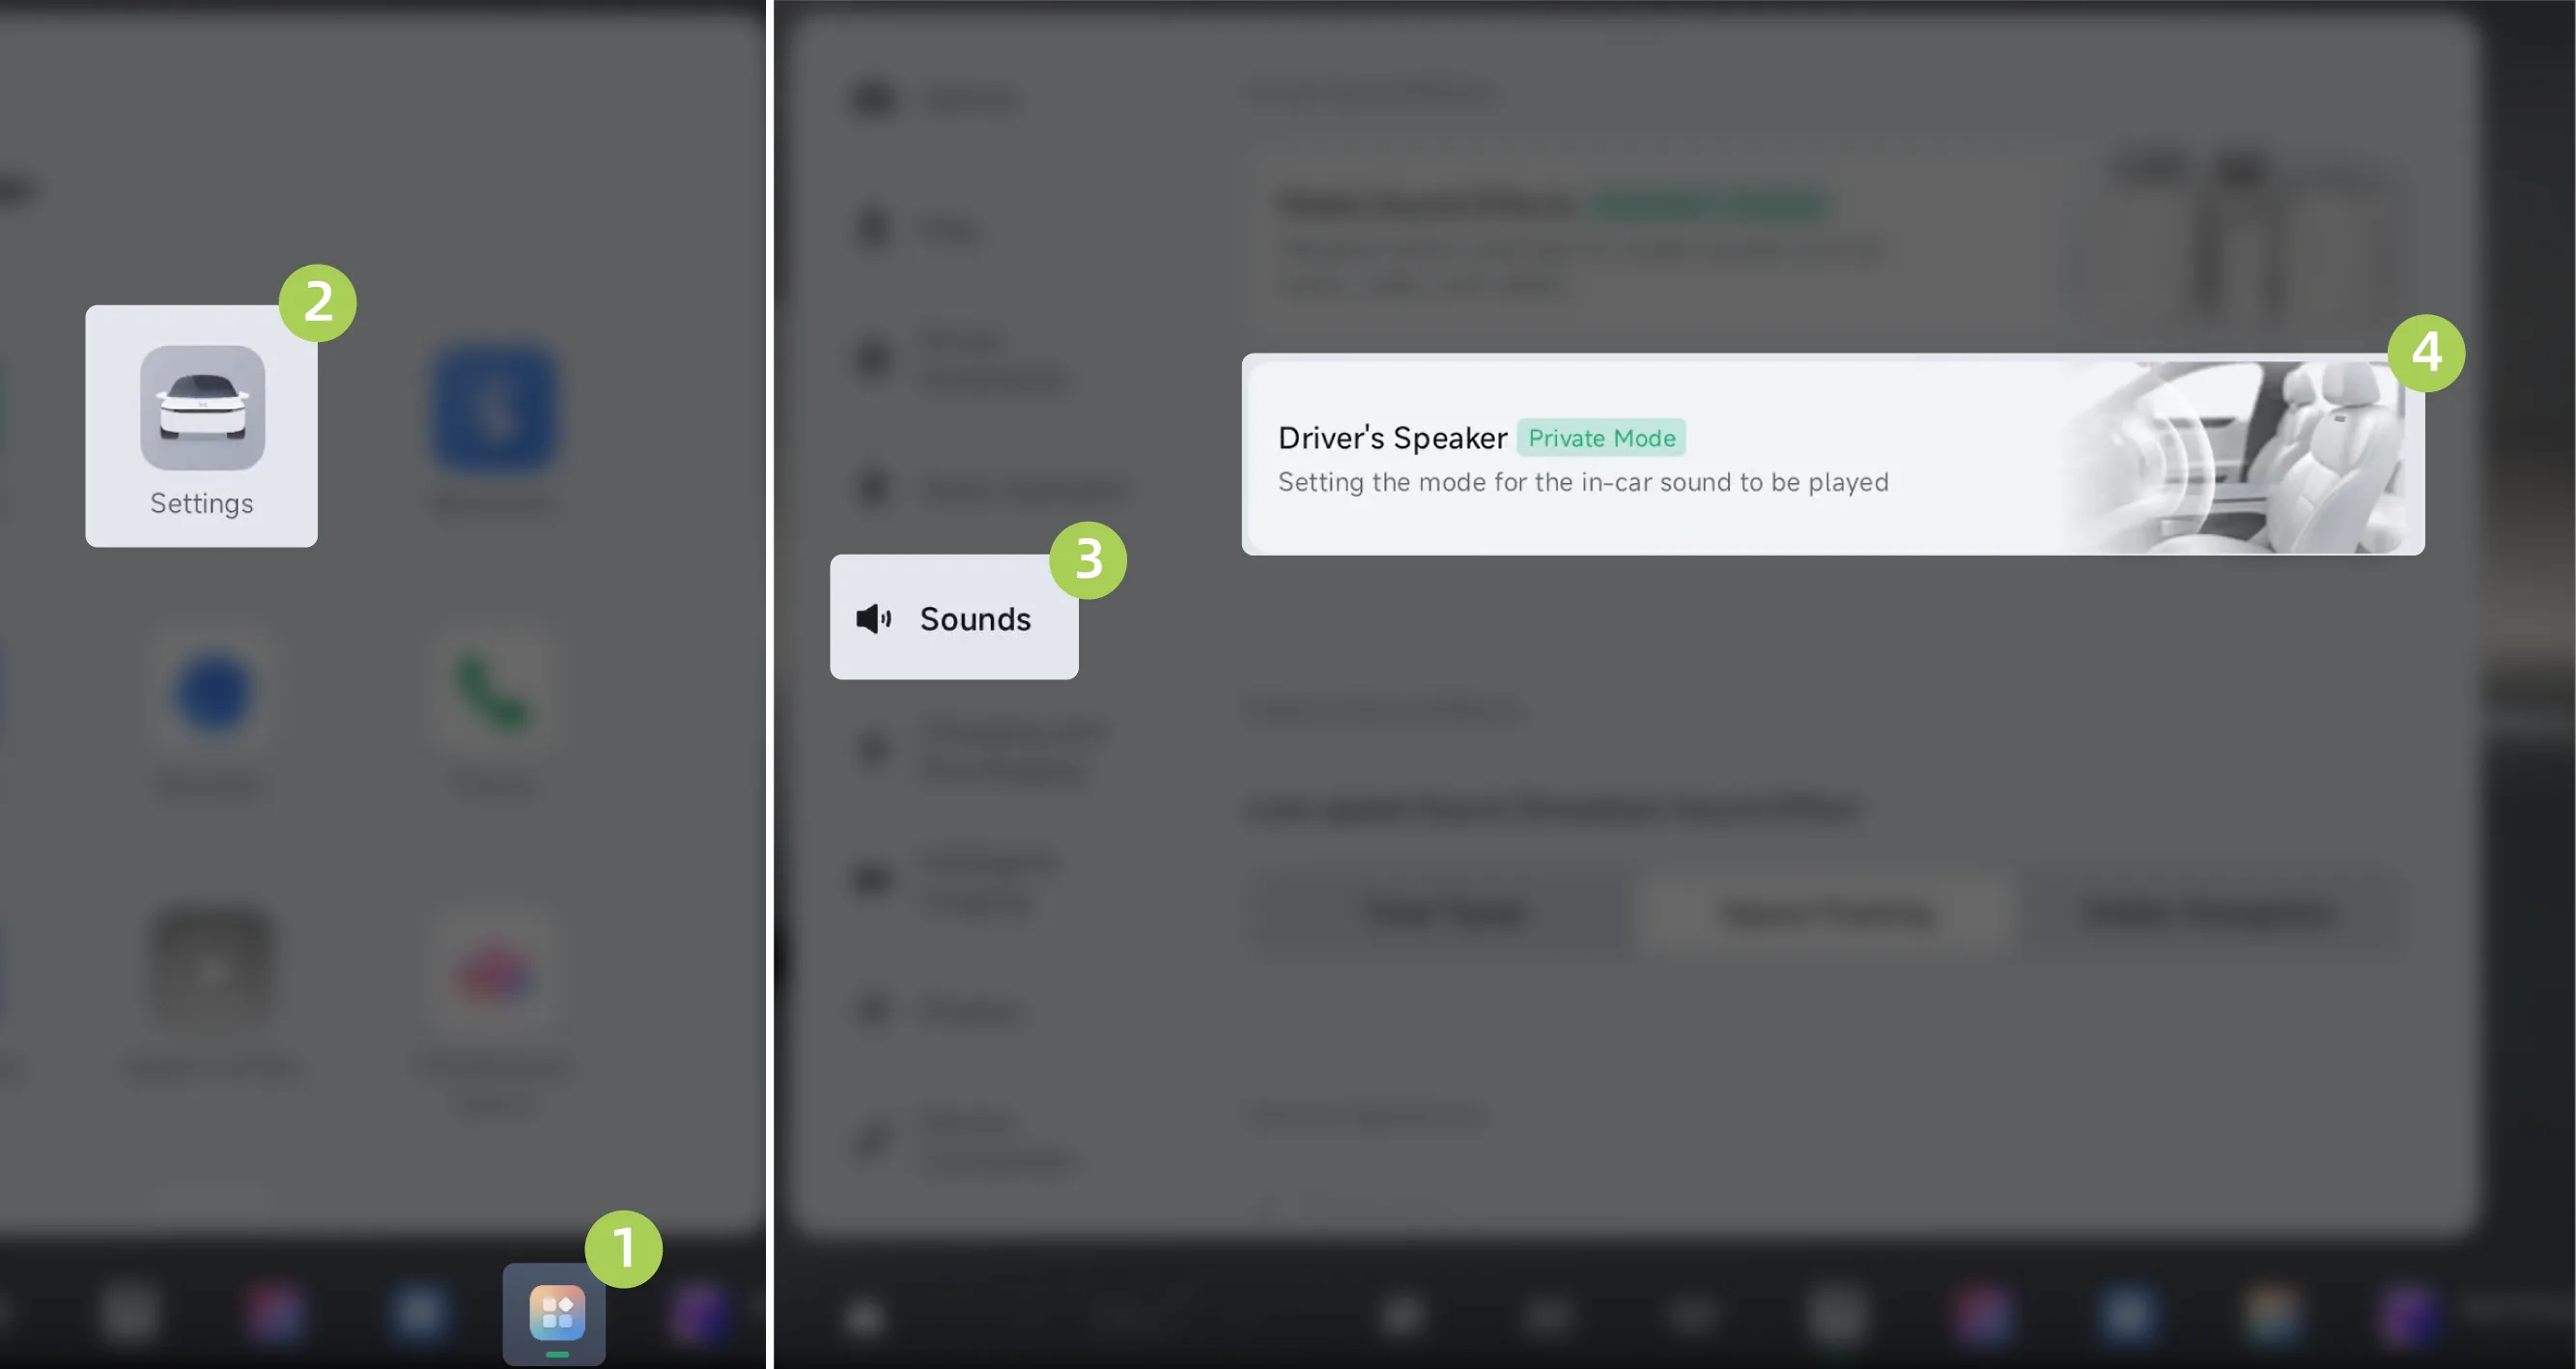
On the center control screen “ →Settings→Sound→Driver's Speaker”On this screen, you can set the driver's audio mode.
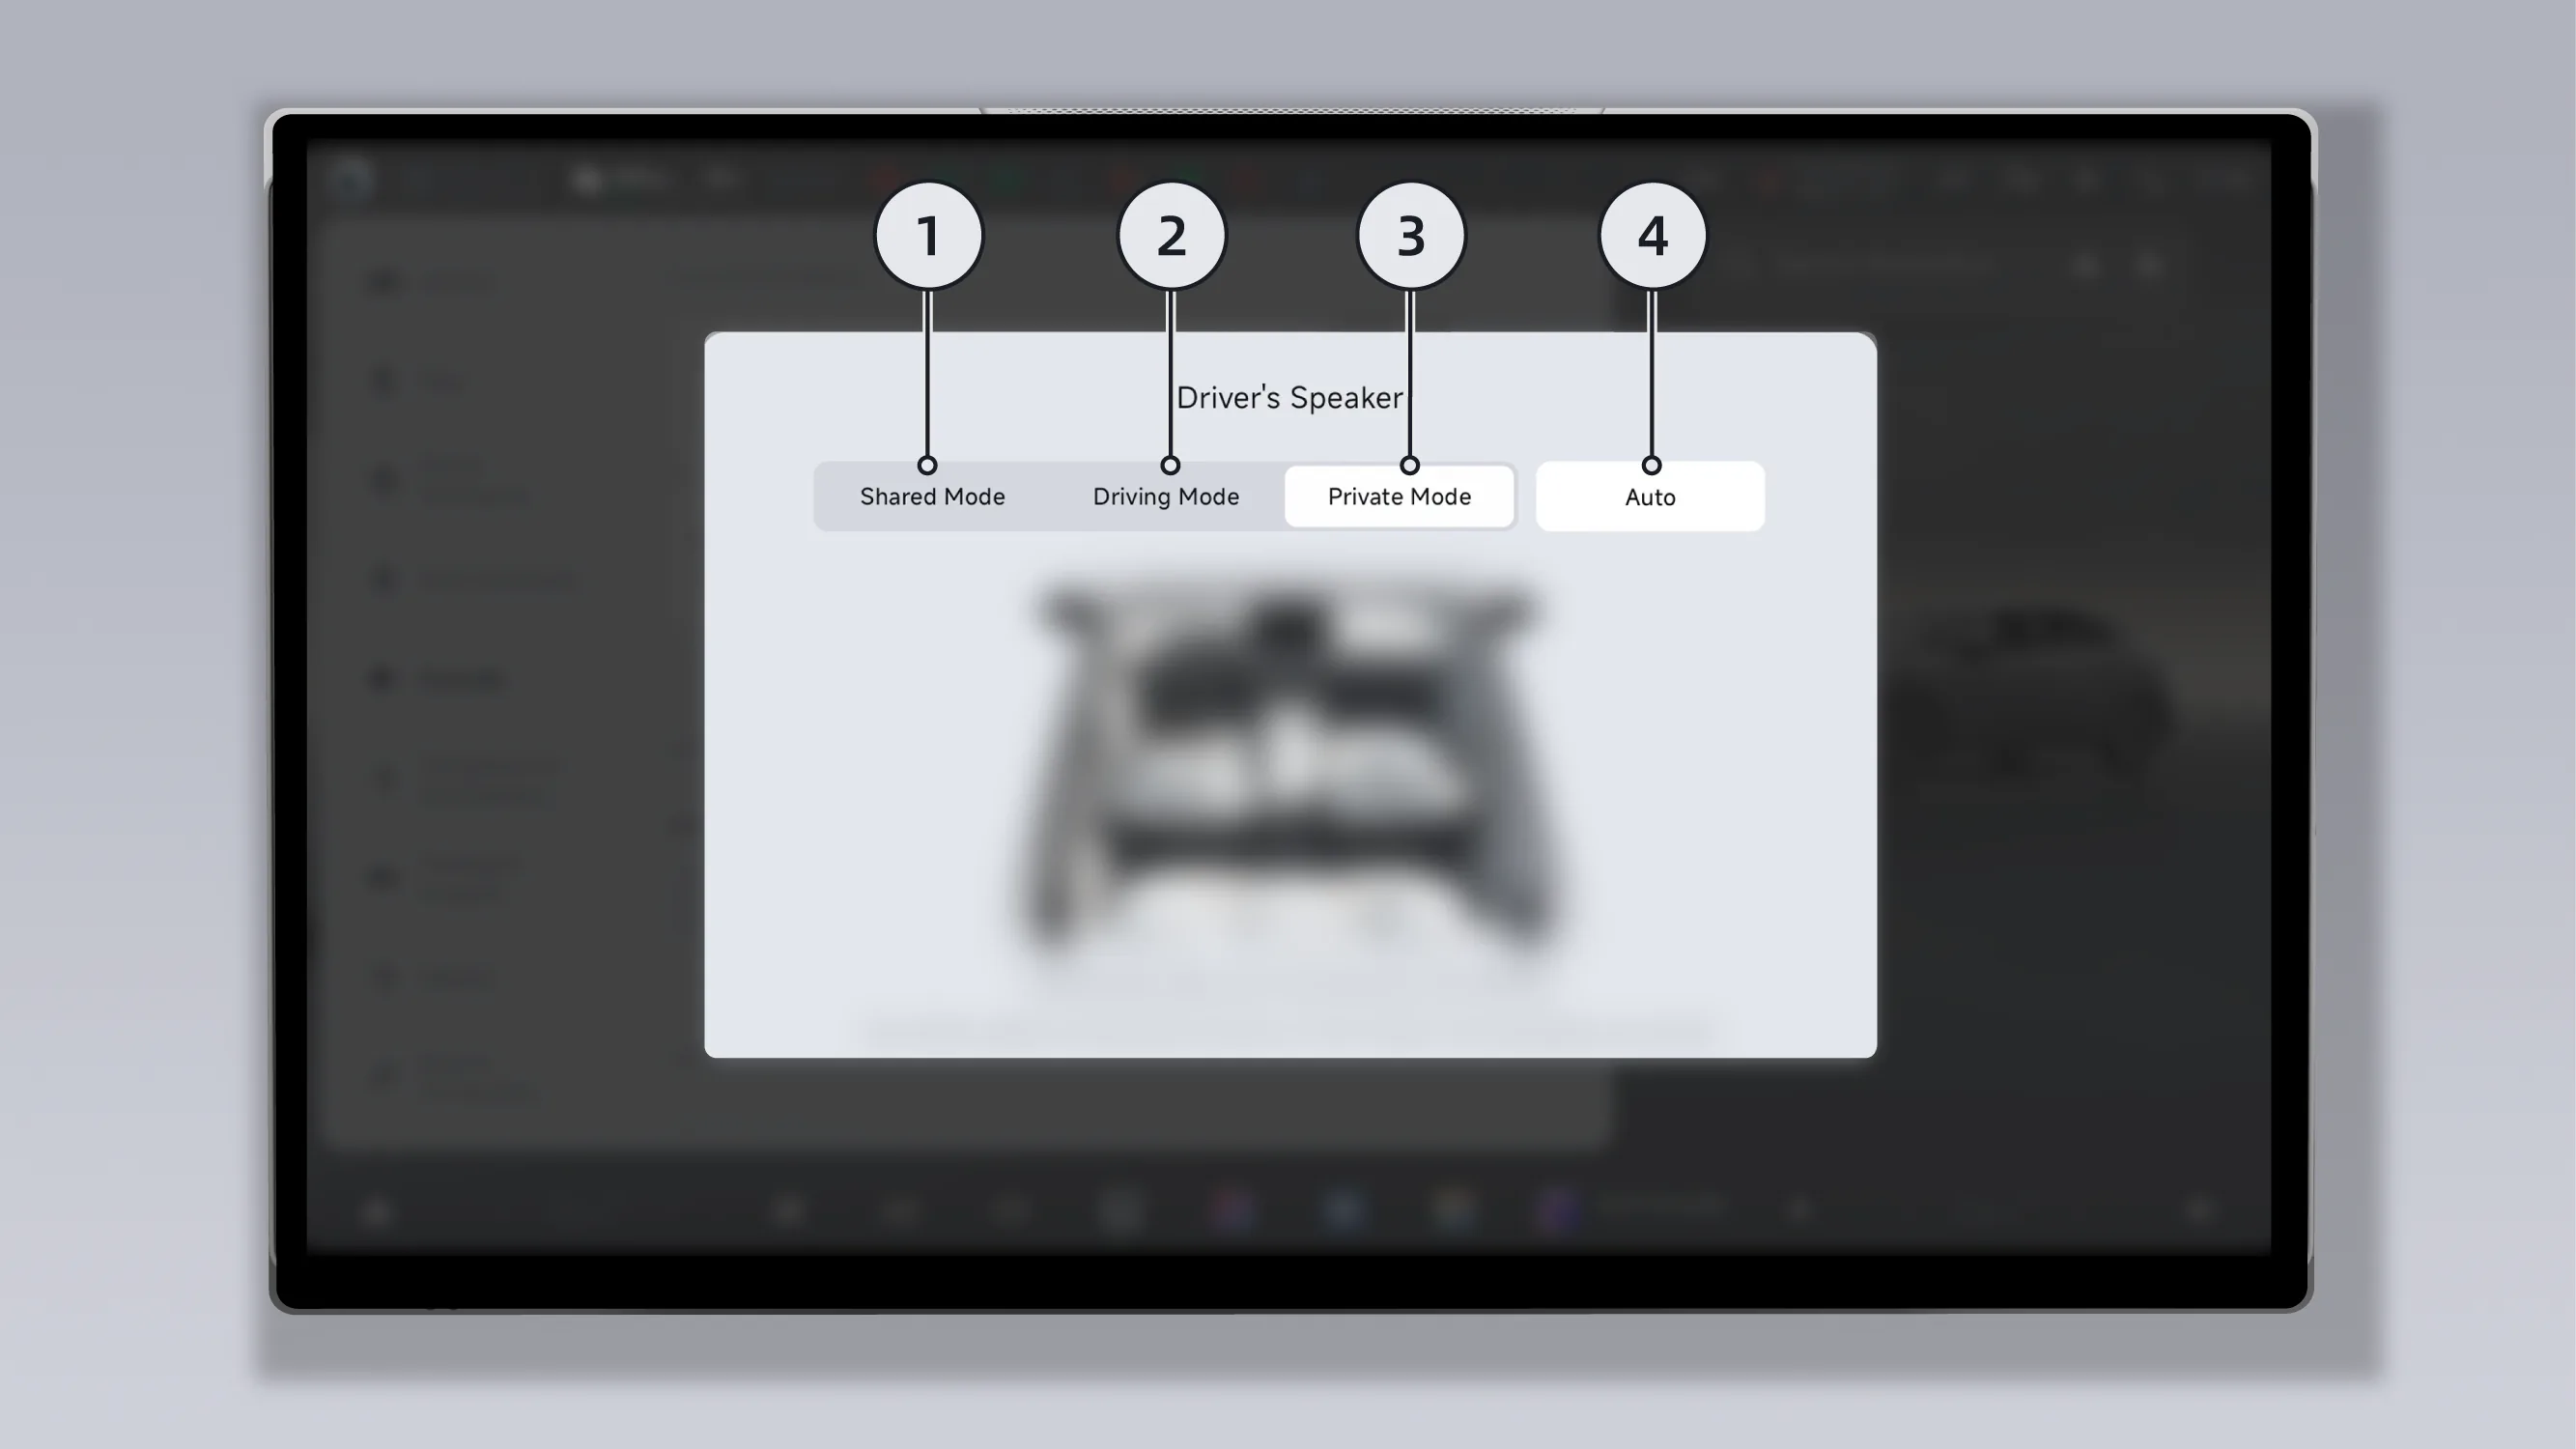
Shared: Navigation, call, and media audio are played through the vehicle audio system.
Driving: Navigation and call audio are played through the main driver's headrest speaker, and media audio is played through the vehicle speakers.
Private: Navigation, call, and media audio are played through the driver's headrest speaker.
Automatic: Automatically switches to Driving Mode when the passenger or rear seats are occupied.
On the central control screen “ →Settings→Sound”On the interface, vehicle sounds can be configured.

Adjust the media volume or mute it.
Adjust the voice volume, but the minimum voice volume is 1 and it cannot be muted.
Adjust the navigation volume or mute it.
Adjust the call volume or mute it.
Adjust the ringtone volume or mute it.
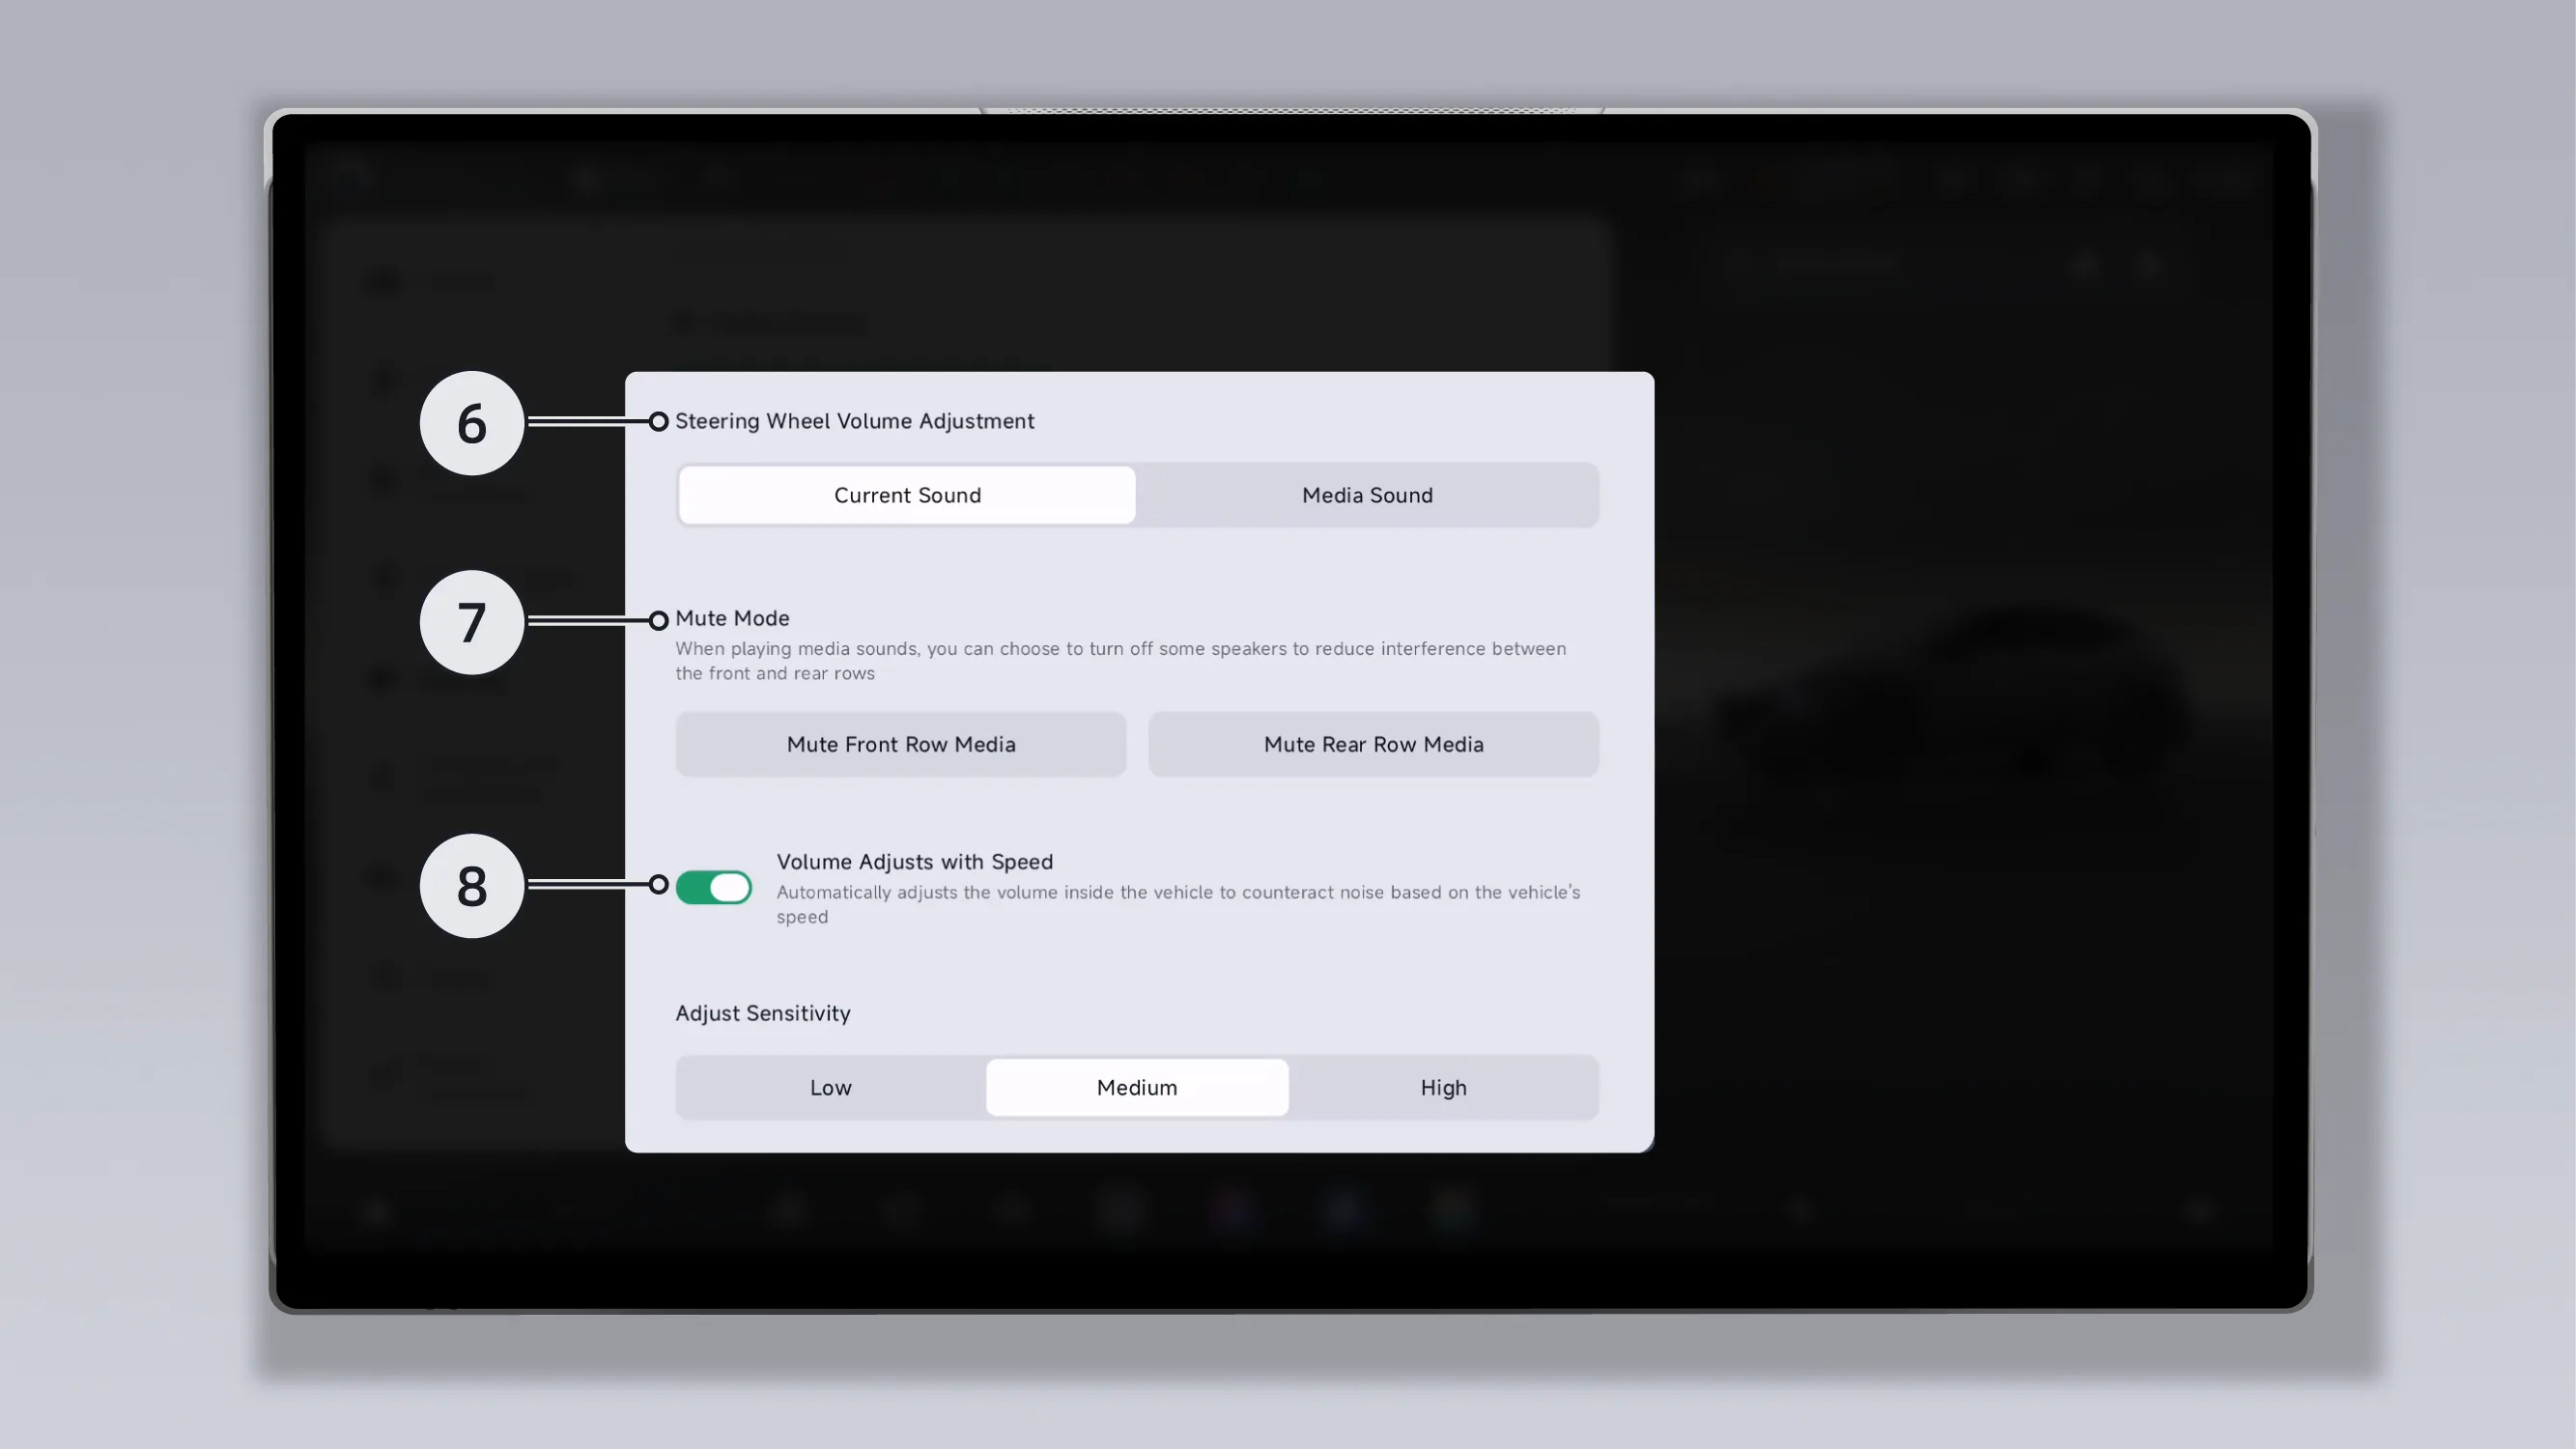
When playing media music, you can adjust the media volume using the steering wheel scroll wheel.
After waking up XPENG, you can adjust the voice volume using the steering wheel scroll wheel.
After navigation starts, when navigation is broadcasting, you can adjust the navigation volume using the steering wheel scroll wheel.
After connecting bluetooth, when using the bluetooth call function, you can adjust the call volume using the steering wheel scroll wheel.
When playing media music, you can adjust the media volume using the steering wheel scroll wheel.
During a call, you can adjust the call volume using the steering wheel scroll wheel.
Mute Mode: Tap to turn off the media sound in the front row or rear row, to reduce interference between the front and rear rows when media is playing.
Speed-sensitive volume adjustment: After tapping to enable this function, the in-vehicle volume can be automatically adjusted according to changes in vehicle speed to offset noise, and different sensitivity levels can also be selected according to driving habits.
Tap the volume icon on the bottom taskbar of the center display to adjust the volume:
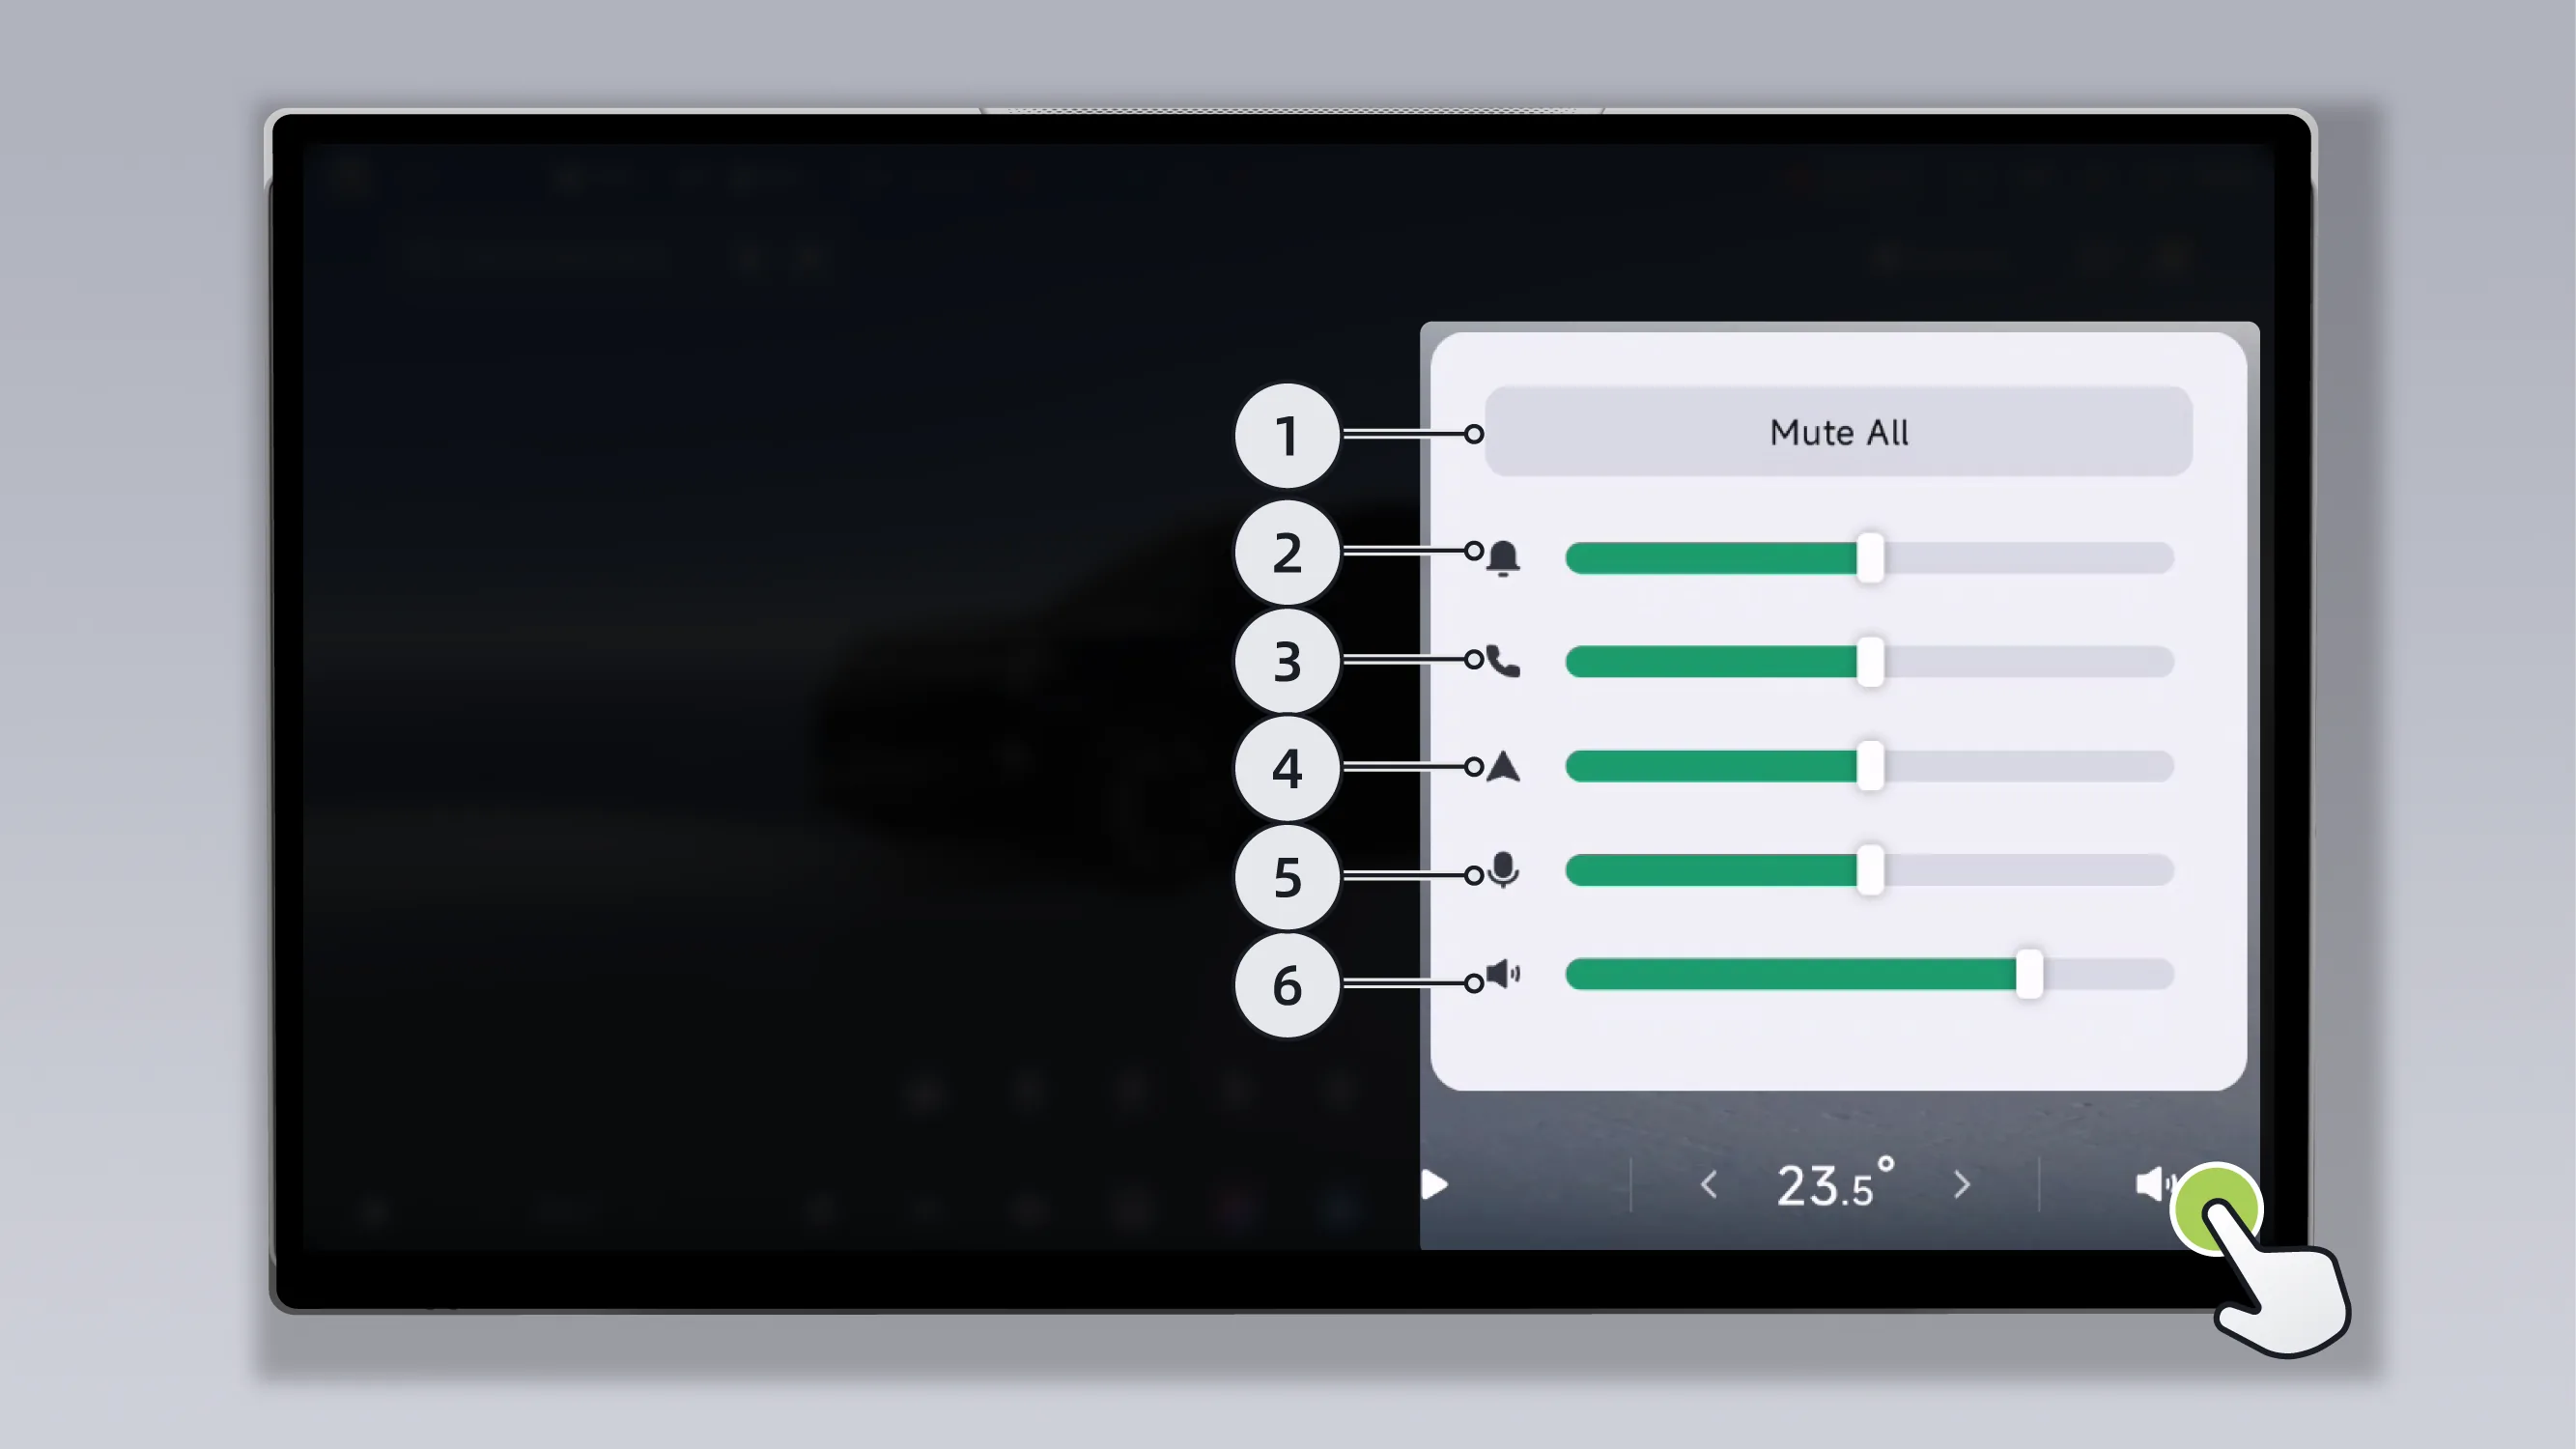
Mute all volumes (except voice volume).
Adjust the ringtone volume or mute it.
Adjust the call volume or mute it.
Adjust the navigation volume or mute it.
Adjust the voice volume, but the minimum voice volume is 1 and it cannot be muted.
Adjust the media volume or mute it.
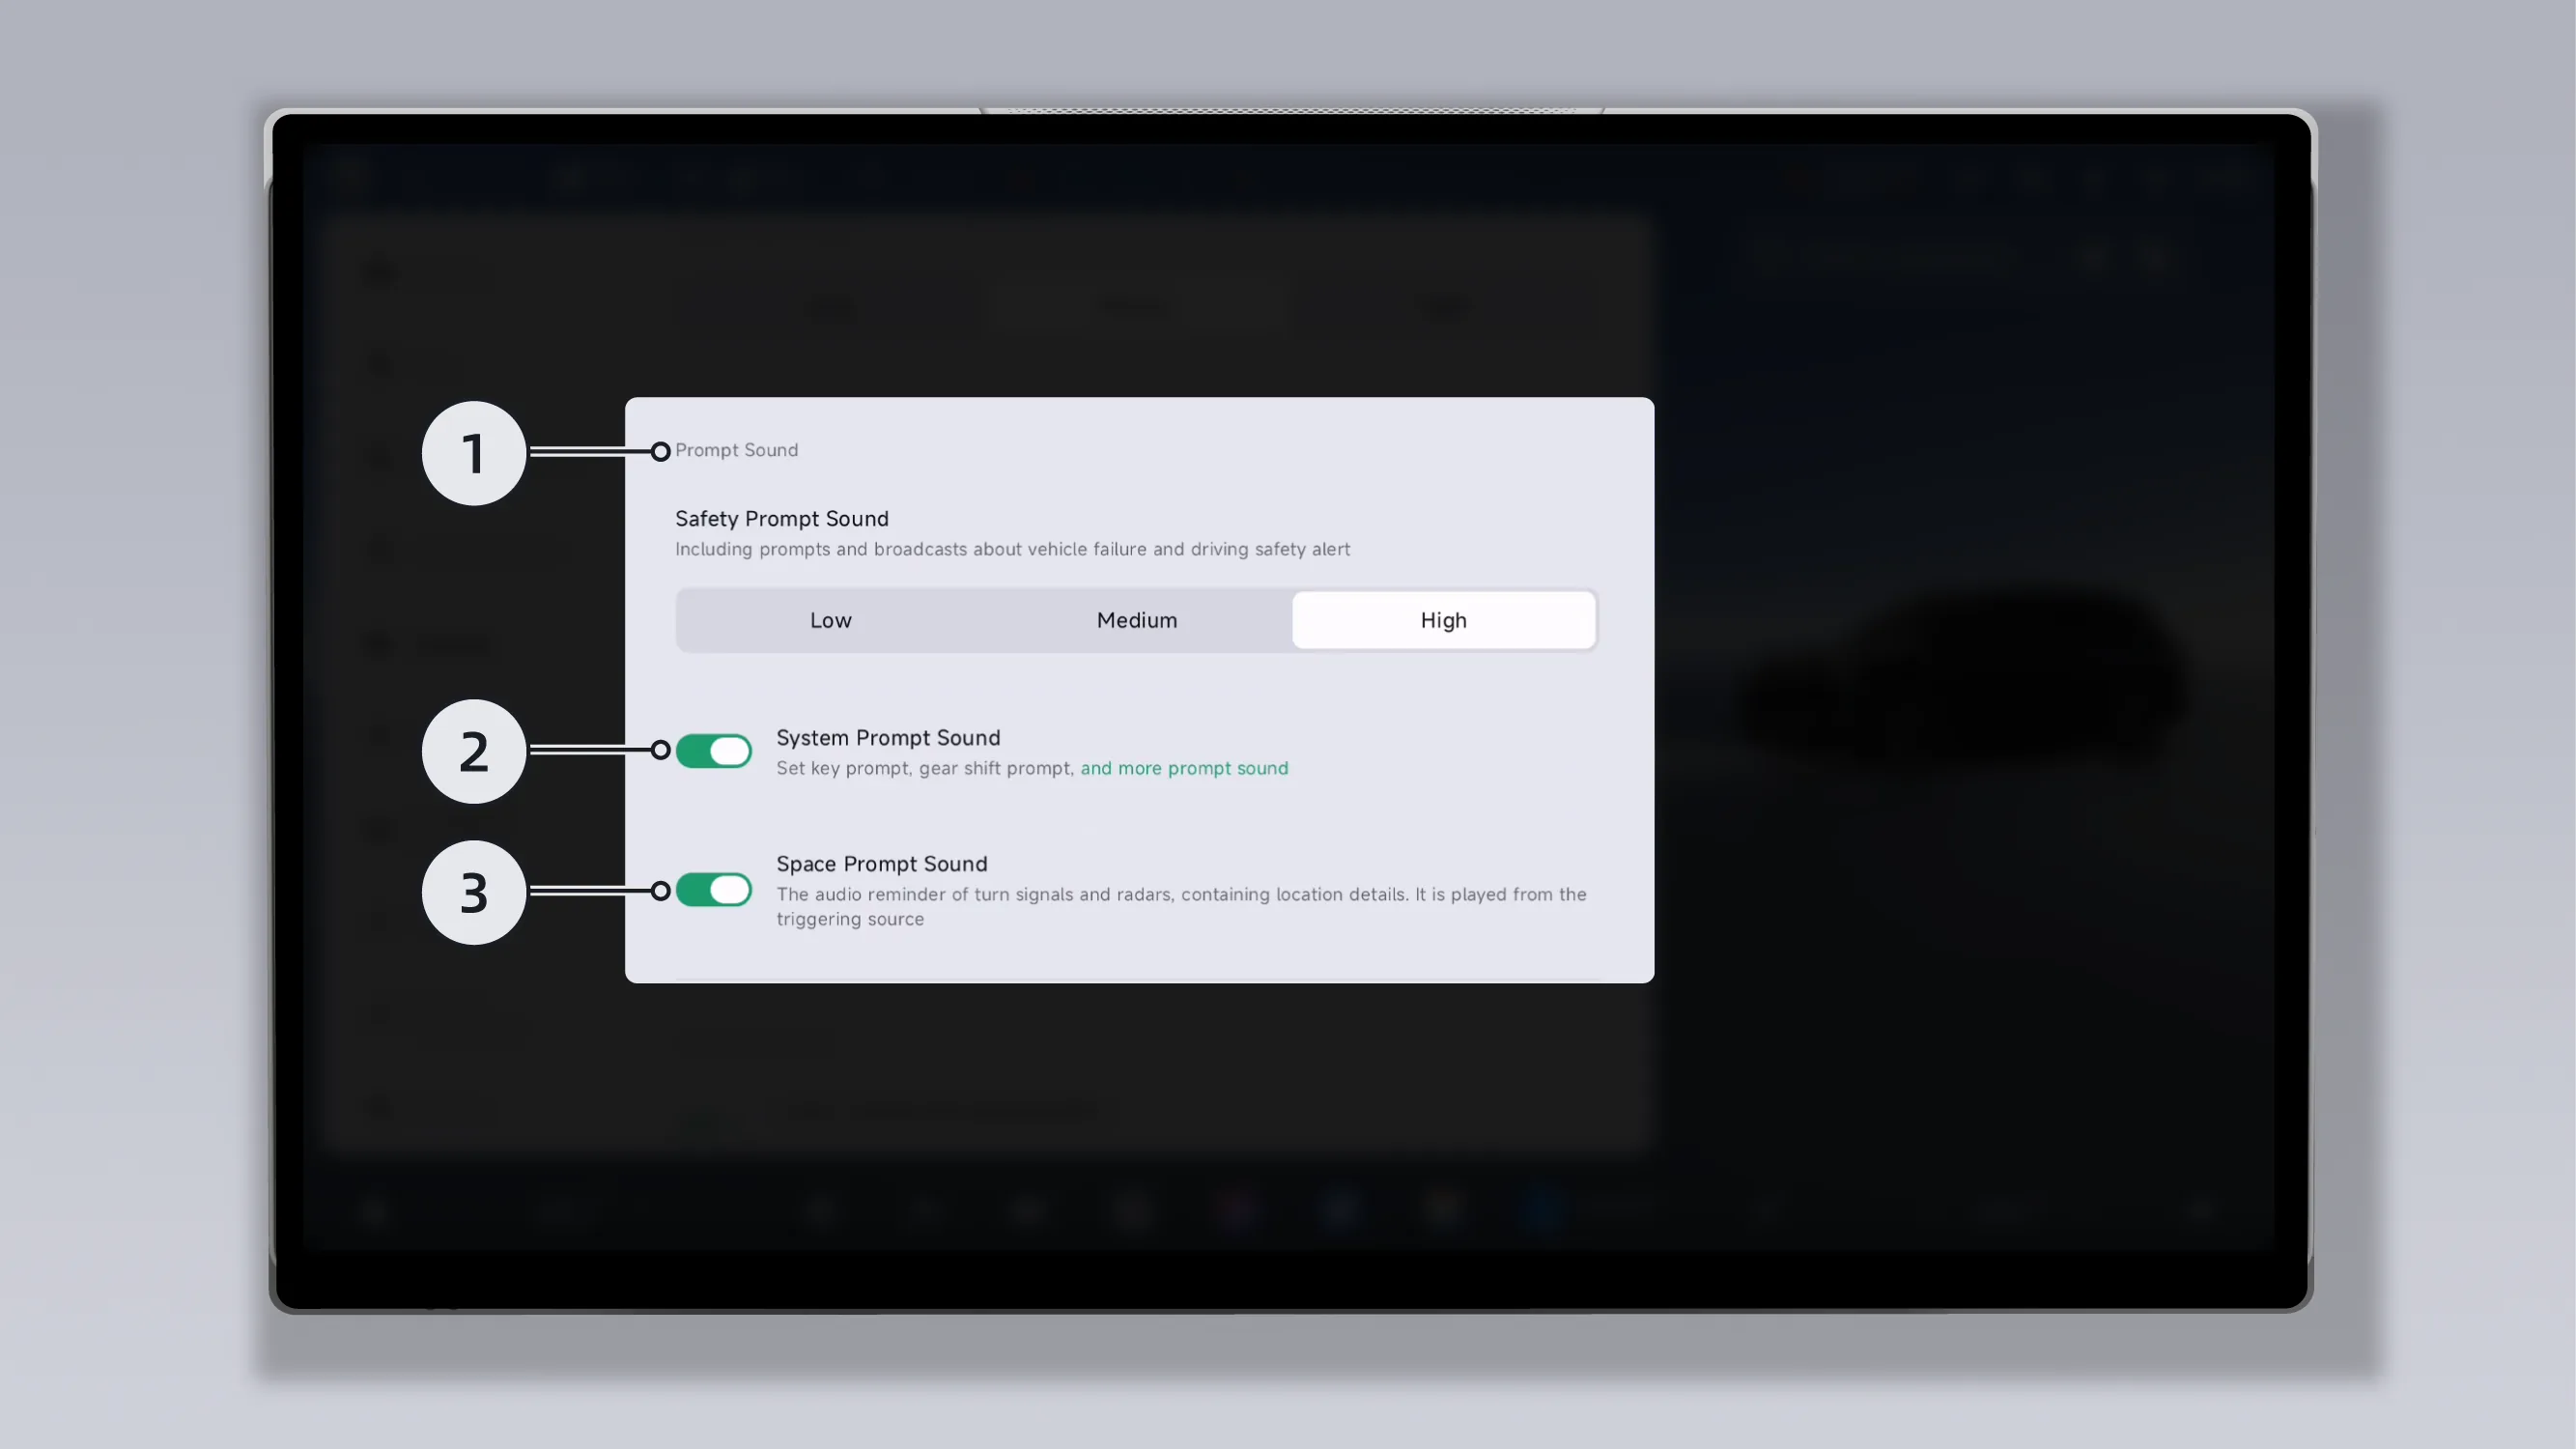
Safety alert sound: Tap to set the alert sound and broadcast volume level for vehicle faults and driving warnings.
System prompt sound: After the system prompt sound is turned on, the button prompt sound, gear shift prompt sound, external charging gun prompt sound, and driving mode sound effect can be ը Turn on or off in the middle.
Spatial prompt tone: After tapping to enable the function, prompt tones with spatial orientation, such as the turn signal and radar, will sound from the triggered position.
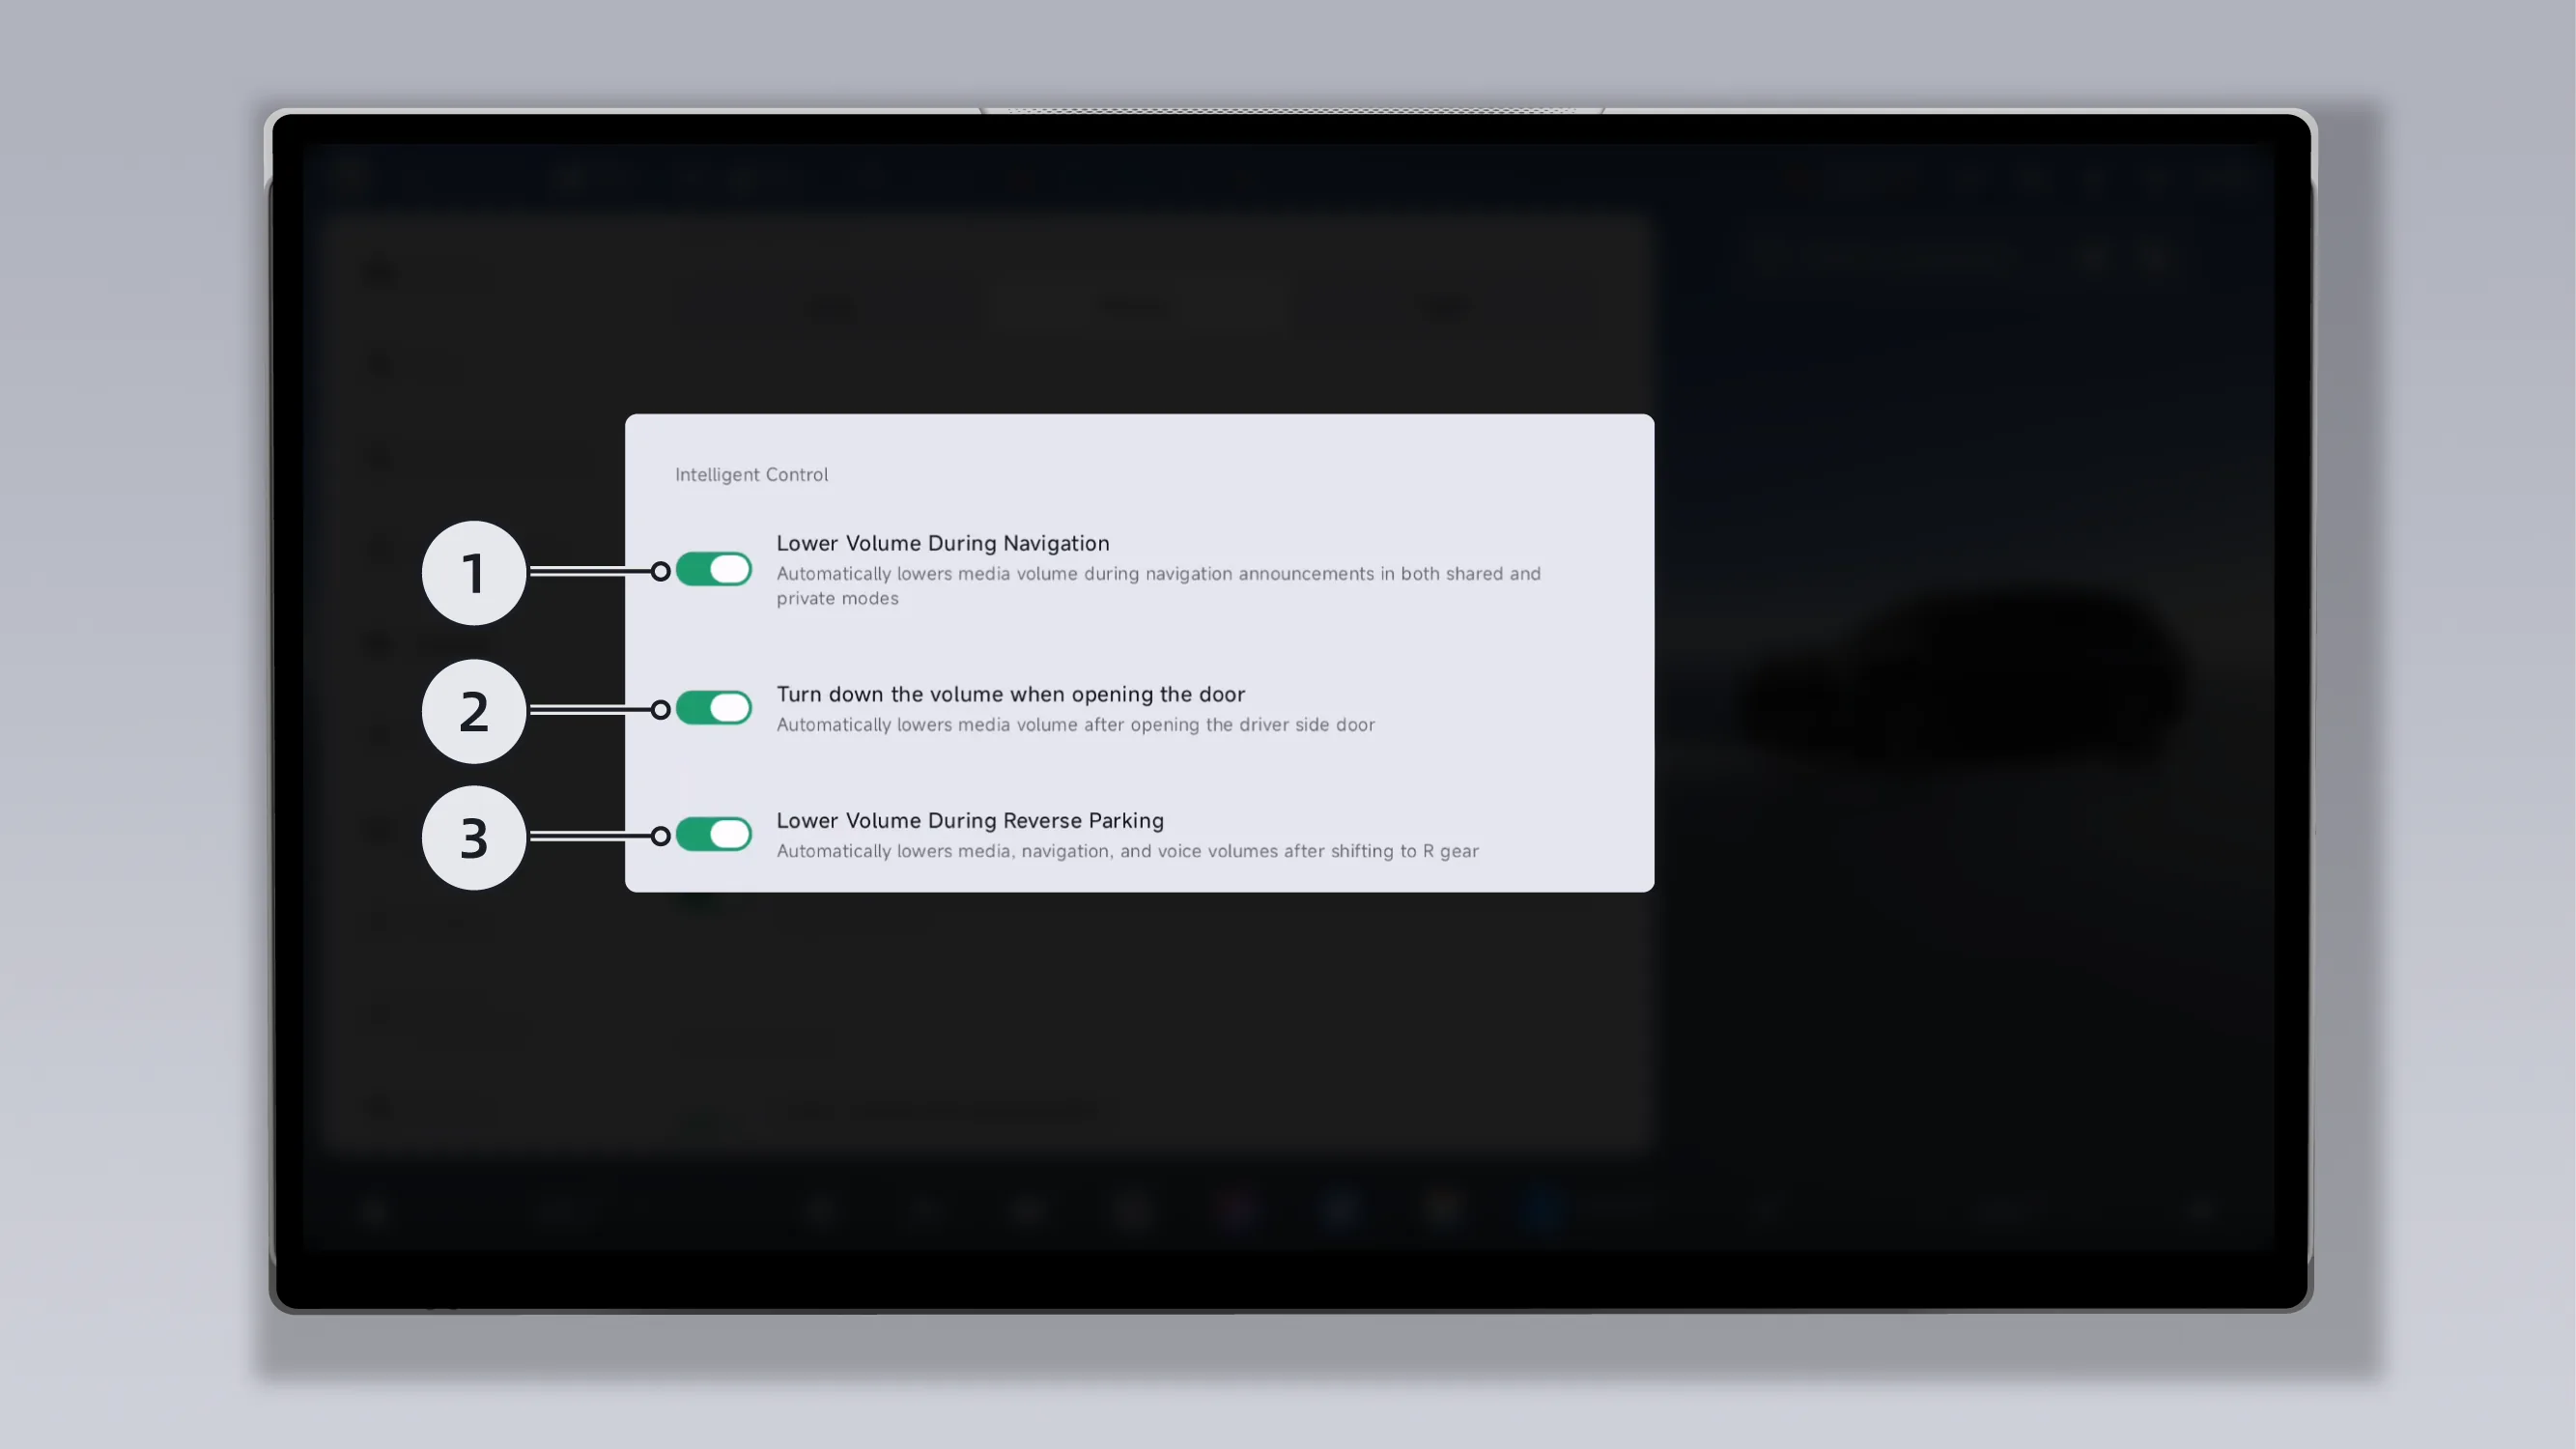
Lower volume during navigation: After tapping to enable this function, in shared mode and Private Mode, the media volume is automatically lowered during navigation playback.
Lower volume when opening the door: After tapping to enable the function, when the driver's door is opened, the media volume is automatically reduced.
Reverse volume reduction: After tapping to enable the function, when shifting into R gear, the media, navigation, and voice volumes are automatically reduced.
When the welcome sound effect function is enabled, after the driver enters the vehicle and closes the door, the system will play the welcome sound effect according to the settings.
On the center control screen “ →Settings→vehicle→Unlocking/Locking and Welcome”Interface, can be opened/closed Functions, and set the welcome sound effect.
 Tips
Tips After unlocking the vehicle, if the user is seated in the driver’s seat and repeatedly opens and closes the door, the Welcome Sound Effect will not be played.
If the Welcome Sound Effect is changed, the new setting will take effect after the vehicle is powered on again.
After the mobile phone is paired and successfully connected with the vehicle via bluetooth, you can confirm on the mobile phone to synchronize the communication data in the mobile device, such as contacts and call records, to the vehicle, making it convenient to answer and make calls and better experience the in-vehicle phone function. You can also play the music on the mobile phone through the vehicle audio system.
Bluetooth can be turned on or off in the following ways:
On the central control screen “ →Settings→Device Connection→Connect”On the interface, you can turn Bluetooth on or off.
Tap on the top status bar of the center display. “Bluetooth  Icon ”In the pop-up menu, you can turn Bluetooth on or off.
Wake up XPENG and say voice commands such as "Turn on Bluetooth" or "Turn off Bluetooth".
After enabling the Bluetooth function, on the central control screen “ →Settings→Device Connection→Connect→Open Detection”After enabling the open detection function, other Bluetooth devices can discover this vehicle's Bluetooth.
If the Bluetooth device name of this system cannot be found during Bluetooth pairing, restart Bluetooth on the mobile phone side and search again.
You can use the following steps to pair your phone with the vehicle via Bluetooth:
Turn on Bluetooth on the phone and set it to be discoverable.
Turn on Bluetooth on the center display and set it to discoverable.
On the bluetooth screen of the central control display, the searched available new devices are displayed. Select the name of the mobile device to be paired in the list of available new devices to initiate a pairing request for pairing connection, and complete the pairing according to the on-screen prompts. Tap the **[Search]** icon to search again for available new bluetooth devices.
After pairing is successful, you can view the name of the currently connected bluetooth device on the bluetooth interface.
On the bluetooth interface of the central control screen, select the required paired bluetooth device, tap Settings, select Set as commonly used device, and this device will be connected with priority when getting in the vehicle.
If bluetooth connection cannot be established, delete the paired device on the phone's Bluetooth side, and then pair again.
Tips When the infotainment system is not playing video, you can enable the "Automatically connect to the phone's media audio" feature. After Bluetooth connects successfully, the phone’s media audio and notification tones will automatically play through the infotainment system to avoid missing phone notifications.
After the phone is successfully paired and connected with the vehicle via bluetooth, on the bluetooth screen of the center display, select the paired bluetooth device to be disconnected, tap Settings, and select Disconnect.
After the phone is paired and successfully connected to the vehicle via bluetooth connection, on the bluetooth interface of the central control screen, select the bluetooth device that needs to be unpaired, tap Settings, and select Unpair.
When the phone and the vehicle are not connected via bluetooth, on the bluetooth screen of the center display, select the bluetooth device that needs to be unpaired, tap Settings, and select Delete.
Due to the large number of mobile phone brands and their differing functions, this system cannot guarantee compatibility with all mobile phones.
During use, if the bluetooth function is abnormal, disconnect bluetooth and reconnect.
You can turn the wireless network on or off in the following ways:
On the center control screen “ →Settings→Device Connection→Connect”On the interface, you can turn the wireless network on or off.
Tap the center display in sequence. , you can turn the wireless network on or off. After turning it on, tap The system will automatically scan wireless networks.
Wake up XPENG and say voice commands such as "turn on the wireless network" or "turn off the wireless network."
When connecting for the first time, after the wireless network function is enabled, the system will automatically scan for wireless networks. Select the name of the wireless network to be connected, and enter the correct password to connect.
After the wireless network connection is successful, the signal icon switches to the wireless network icon, on the central control screen “ →Settings→Device Connection→Connect”On the interface, view the name of the connected wireless network.
When it is not the first connection, entering the wireless network coverage area will attempt to automatically connect to the saved wireless network connection, and Connected will be displayed after successful verification. If you need to switch to another wireless network connection, the system will automatically scan the wireless network connection. Select the name of the wireless network connection to switch to, and enter the correct password to connect.
Tips You can connect to and use personal hotspots shared by your phone through wireless networking, and be aware of traffic consumption when using.
The signal strength of the currently connected network can be viewed from the wireless network icon in the status bar, if the signal strength is low, the vehicle may be slow to access the internet.
You can turn the in-vehicle hotspot on or off in the following ways:
On the center control screen “ →Settings→Device Connection→Connect”On the interface, you can turn the in-vehicle hotspot on or off.
Tap on the center display in sequence. In the pop-up window, you can turn the in-vehicle hotspot on or off.
Wake up XPENG and say voice commands such as “turn on the in-vehicle hotspot” or “turn off the in-vehicle hotspot.”
In the in-vehicle hotspot pop-up window, you can modify the hotspot name and password. After modifying the hotspot name or hotspot password (the wireless hotspot password must be no fewer than 8 characters), the hotspot will automatically restart.
After modifying the hotspot name or password, the connected devices will be disconnected. To use it normally, you need to select the hotspot name and enter the correct hotspot password.
When connecting for the first time, after enabling the in-vehicle hotspot, use another mobile device to search for this vehicle's in-vehicle hotspot name, and enter the correct password to connect.
After another mobile device successfully connects to the vehicle hotspot, the signal icon switches to the hotspot connection icon, on the central control screen “ →Settings→Device Connection→Connect”On the screen, view the number of connected devices.
When not connecting for the first time, if the vehicle hotspot is enabled on this vehicle, other mobile devices entering the wireless network coverage range of the vehicle hotspot will attempt to automatically connect to the saved wireless network. After successful verification, Connected will be displayed.
The in-vehicle hotspot uses the vehicle system's data traffic. On the central control screen, tap in sequence. , view data usage in the pop-up window. Please pay attention to data usage during use.
On the center control screen “ →Settings→Device Connection→Connect”On the interface, after enabling the in-vehicle hotspot, you can select the hotspot mode as 5 GHz or 2.4 GHz.
Tips It is recommended to give priority to the 5 GHz frequency band. Enabling the 2.4 GHz frequency band can ensure compatibility with more devices, but network performance will decrease.
Whether the driver's sitting posture is correct directly affects the driver's level of fatigue and driving safety.
Please correctly adjust your driving posture from the following aspects:
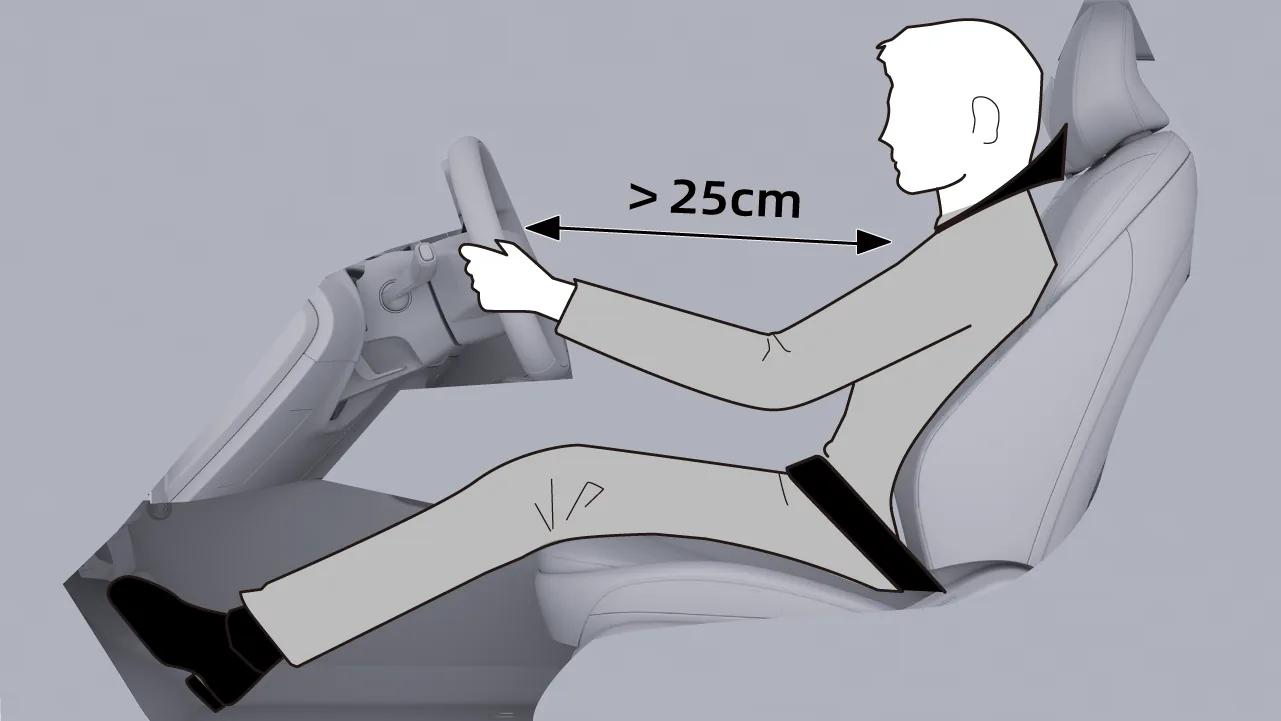
Sit upright with both feet placed on the floor.
Ensure that both feet can easily reach the pedals, your arms are slightly bent when holding the steering wheel, and your chest is at least 25 cm away from the center of the steering wheel.
Warning Do not adjust the driver's seat while driving to avoid loss of control due to sudden body inclination.
When driving the vehicle, you must not wear slippers, high heels, barefoot or telephone to make conversations that interfere with safe driving.
Wearing the seat belt correctly can greatly reduce injuries to vehicle occupants in the event of an accident and improve driving safety.
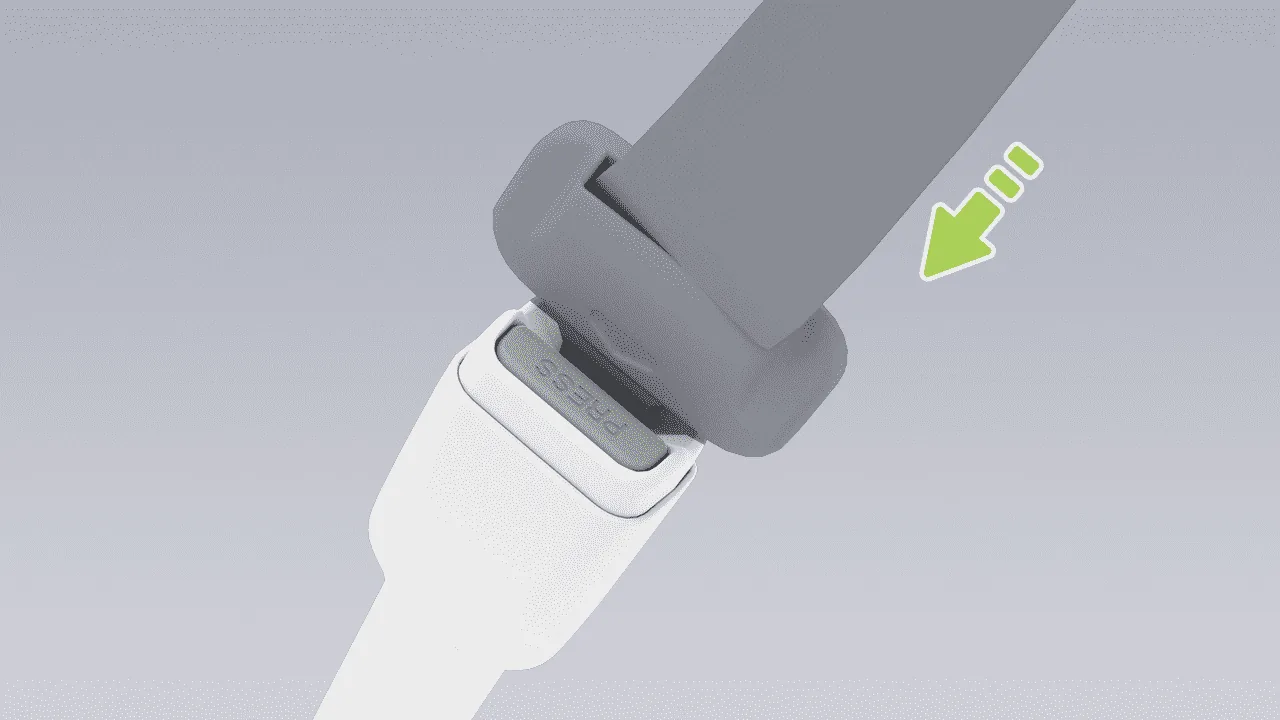
Adjust the seat to a suitable position.
Slowly pull out the seat belt so that the shoulder belt portion is positioned between the neck and shoulder, and the lap belt portion should pass over the hips (not the abdomen).
Insert the seat belt tongue into the buckle until a “click” is heard.
Pull the seat belt to check whether it is securely latched in the buckle.
Warning Do not place other objects between the seat belt and the body.
Keep the seat belt buckle clean and remove any foreign objects from the buckle, otherwise the seat belt may not lock properly and may compromise your driving safety.
When wearing a seat belt, the seat belt must be snug and untwisted, the shoulder belt must be bypassed from the middle of the occupant's shoulder, and must be snug against the occupant's upper body. The lap portion of the belt must be as far down as possible, around the hip, and if necessary, pull down slightly on the belt body. and pull in the direction of the seat belt retraction to adjust.
The seat belt can be unfastened provided safety is ensured.
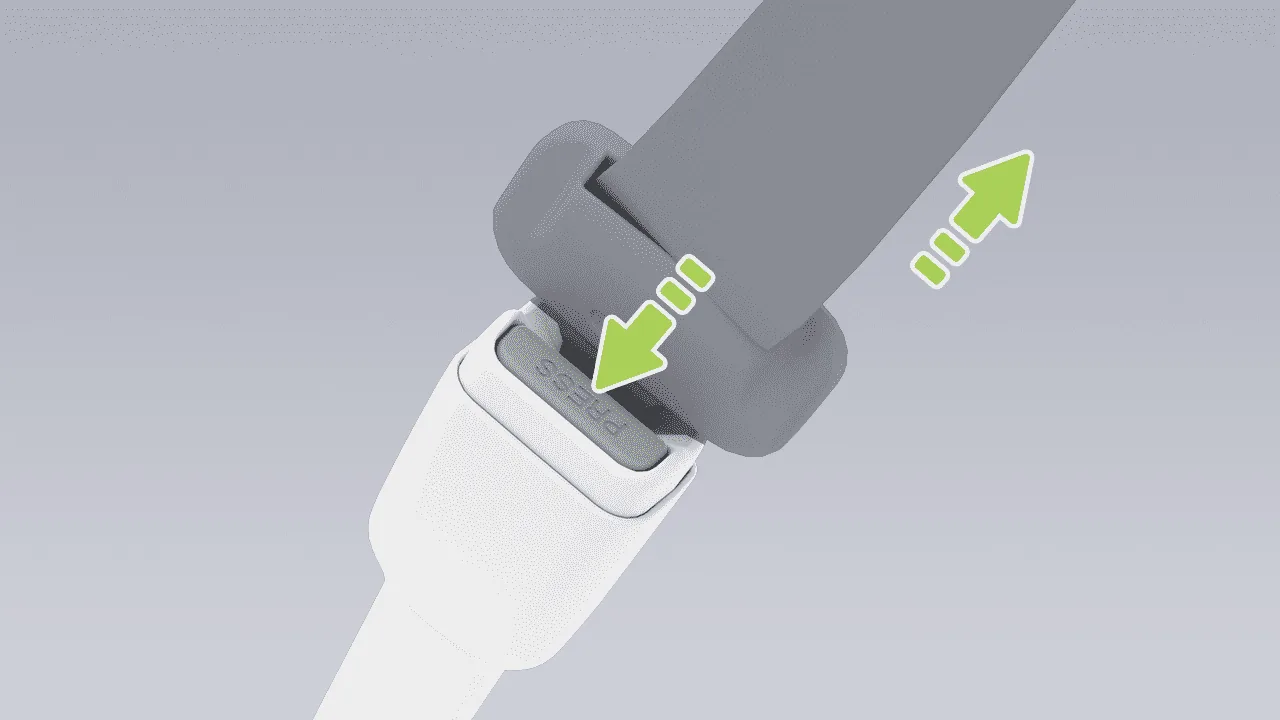
Hold the seat belt tongue and press the seat belt buckle button.
After the seat belt buckle is unlatched, place the seat belt tongue back in its original position as the seat belt automatically retracts.
Warning Do not release the seat belt tongue when the seat belt has not fully retracted, so as to prevent personal injury or vehicle damage caused by the seat belt retracting too quickly.
Seat belts are equally applicable to pregnant women. Throughout the entire pregnancy, pregnant women should wear seat belts, and the lap portion of the seat belt should be positioned as flat as possible across the front of the hips.
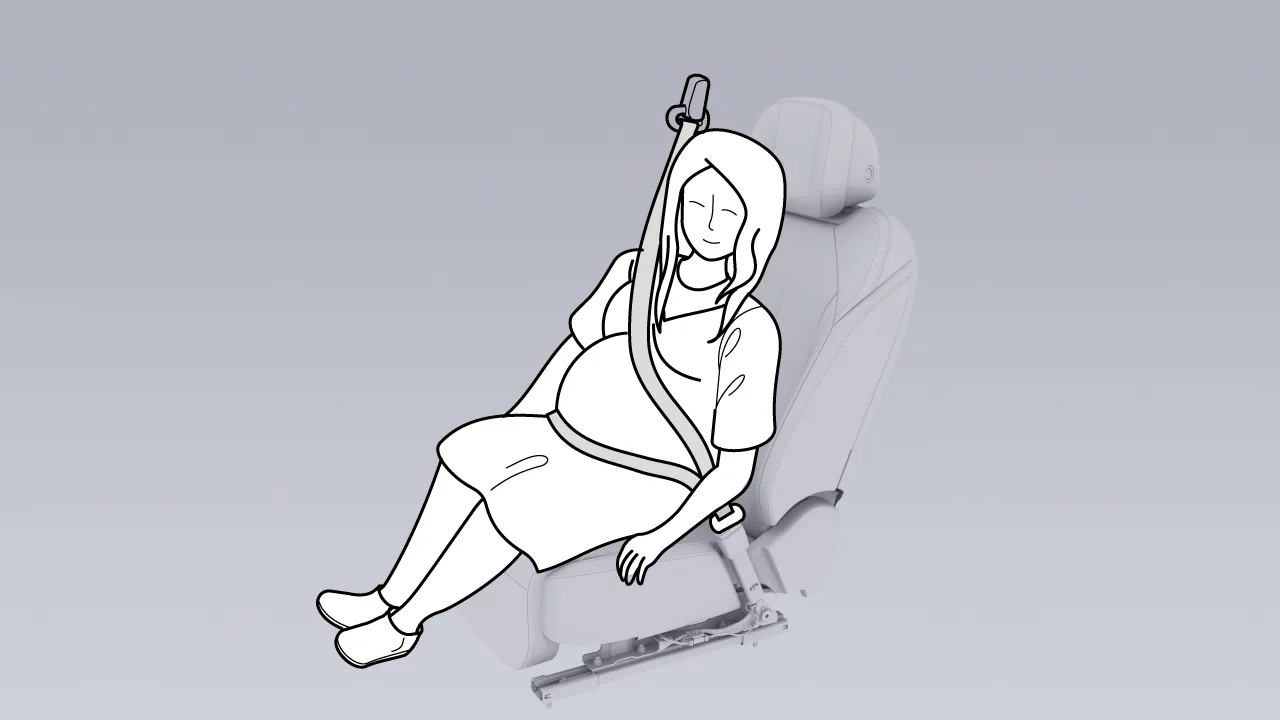
First fully extend the seat belt diagonally, then position the shoulder seat belt so that it passes between the middle of the shoulder and the center of the chest, and position the lap seat belt so that it crosses the hips below the abdomen and is properly latched. When using the seat belt, avoid contact with the protruding abdomen.
Before driving the vehicle, pregnant women should first consult a doctor to determine whether they can drive the vehicle.
Warning When traveling in the vehicle, pregnant women should sit in the rear seats whenever possible to avoid secondary injury to the abdomen from airbag deployment in the event of a collision.
Pregnant women driving the vehicle must be able to operate the pedals and steering wheel easily and maintain full control of the vehicle.
| | Front row left seat belt not fastened |
| | Front row right-side seat belt unfastened |
| | Front row left seat belt not fastened |
| | Front row right-side seat belt unfastened |
| | front row left seat belt not fastened |
| | Front row right-side seat belt not fastened |
If the driver or passenger in the front row is not wearing a seat belt, while the vehicle is stationary, the corresponding seat belt indicator on the central control screen will first flash for several seconds and then remain on continuously.
When the vehicle reaches a certain speed while driving, the corresponding seat belt indicator on the central control screen flashes, a warning window pops up on the central control screen, and an alarm sounds.
| | Rear left seat belt unfastened |
| | Rear center seat belt unfastened |
| | Rear right seat belt unfastened |
| | Second-row left seat belt unfastened |
 | Second-row right seat belt unfastened |
| | Third row left seat belt unfastened |
| | Third row right seat belt unfastened |
| | Second-row left seat belt unfastened |
| | Second-row center seat belt unfastened |
| | Second-row right-side seat belt unfastened |
| | Third row left seat belt not fastened |
| | Third row right seat belt not fastened |
If the second-row or third-row passengers have not fastened their seat belts, the corresponding seat belt indicator on the central control screen will first flash for several seconds and then remain illuminated continuously.
Tips If all vehicle occupants have fastened their seat belts and the indicator light remains on, refasten the seat belts to ensure they are properly latched.
Warning If the seat belt unfastened reminder function malfunctions, please contact a XIAOPENG service center immediately for inspection and repair.
To ensure that the seat belts operate properly, inspect the seat belts before each drive according to the following steps:
Check whether the seat belt has any abnormal conditions such as wear or cuts.
Insert the seat belt tongue into the seat belt buckle, pull the seat belt, check the fastening condition of the seat belt buckle, and ensure that the seat belt is in normal working condition.
Pull the seat belt quickly to check whether the seat belt retractor locks properly; unlock the seat belt and check whether the seat belt retracts properly.
If any seat belt fails any of the above checks, contact a XPENG service center immediately.
The front-row seat belts and second-row seat belts are both equipped with pretensioning mechanisms; in the event of a severe frontal collision or side collision, the pretensioners automatically tighten the seat belt webbing, thereby reducing occupant chest injury values and mitigating injuries.
If the pretensioners and airbags are not activated in a collision, it does not indicate that they have malfunctioned. This usually means that the severity or type of the collision did not meet their activation conditions.
Warning Do not bend, sit, or obstruct the seat belt pre-tensioning mechanism, as damage may occur and interfere with the correct function of the seat belt system.
Once activated, the seatbelt pretensioner must be replaced. After a collision, the airbags and other related components must be checked and replaced if necessary.
To ensure that the seat belt pretensioner operates correctly in certain collision situations, even if it is not triggered, contact Xpeng Automobile Service Centre immediately to inspect the vehicle safety system components.
Please strictly follow the following warning information; otherwise, personal injury or death and vehicle damage may result.
Warning All persons in the vehicle must wear seat belts correctly when driving, otherwise the risk of injury or death is increased in the event of an accident.
Do not press the seat belt on fragile or sharp objects (e.g. pens, keys, glasses, etc.), where the pressure on the seat belt may cause injury.
Each seat belt is intended for use by only one person in the vehicle, and it is prohibited to hold a child on his or her lap and share the seat belt with the child.
Avoid contaminating the seat belt with any chemicals, liquids, etc.
Do not remove or install seat belts, belt retractors, and seat belt anchors without authorization. Retrofit, disassembly, etc.
Do not add additional non-official attachments to the seat belt, including, but not limited to, additional tongue locks, webbing stops, latch extension joints, etc. The normal protection of the seat belt can be reduced or even lost.
When not in use, the seat belt should be fully retracted and not overhang. If the seat belt cannot be retracted or locked in the latch and cannot be removed, you must contact the Xpeng Automobile Service Centre immediately for service.
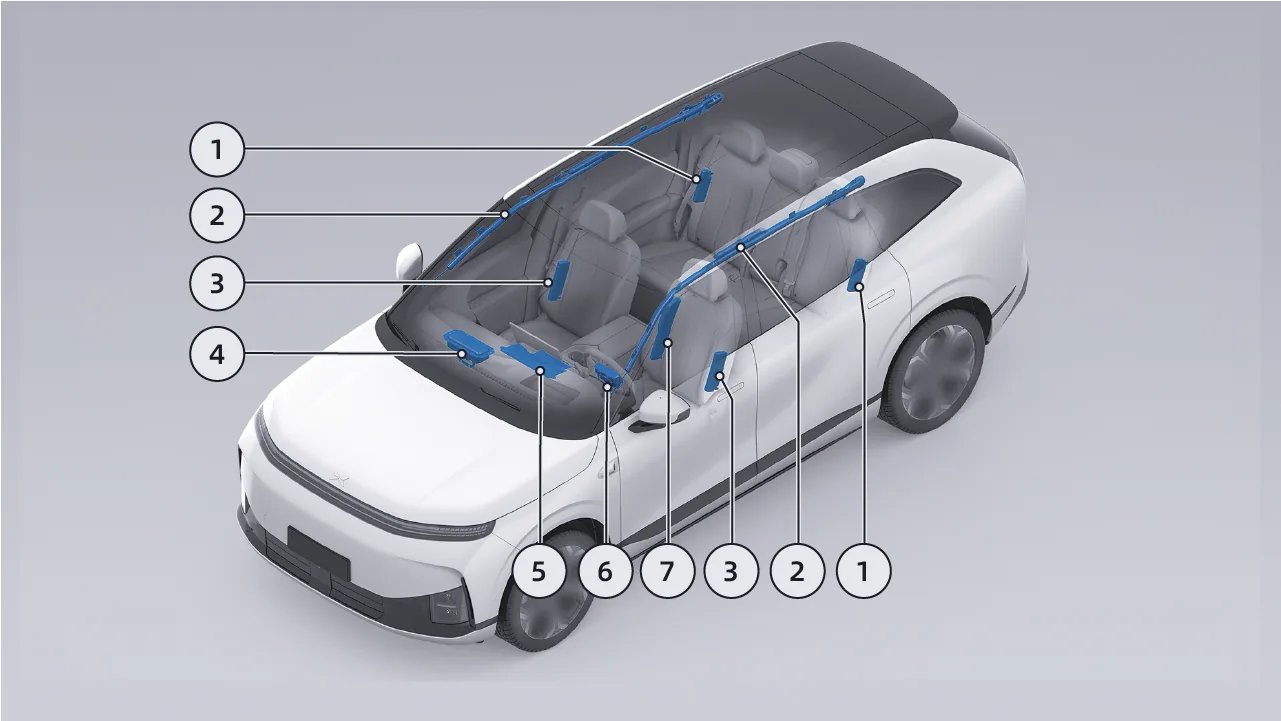
The airbag is a passive safety protection device that is used together with the seat belt to provide additional protection for vehicle occupants.
| 1. Second-Row Side Airbag | 5. Front Passenger Seat Cushion Airbag* |
| 2. Front/Rear Head Curtain Airbags | 6. Driver Airbag |
| 3. Front Row Side Airbags | 7. Driver Far-Side Airbag |
| 4. Front Passenger Airbag |
The driver airbag is installed inside the center of the steering wheel, and the middle position of the steering wheel is marked with characters.
The front passenger airbag is installed in the center of the instrument panel, and the center of the instrument panel is marked with Label.
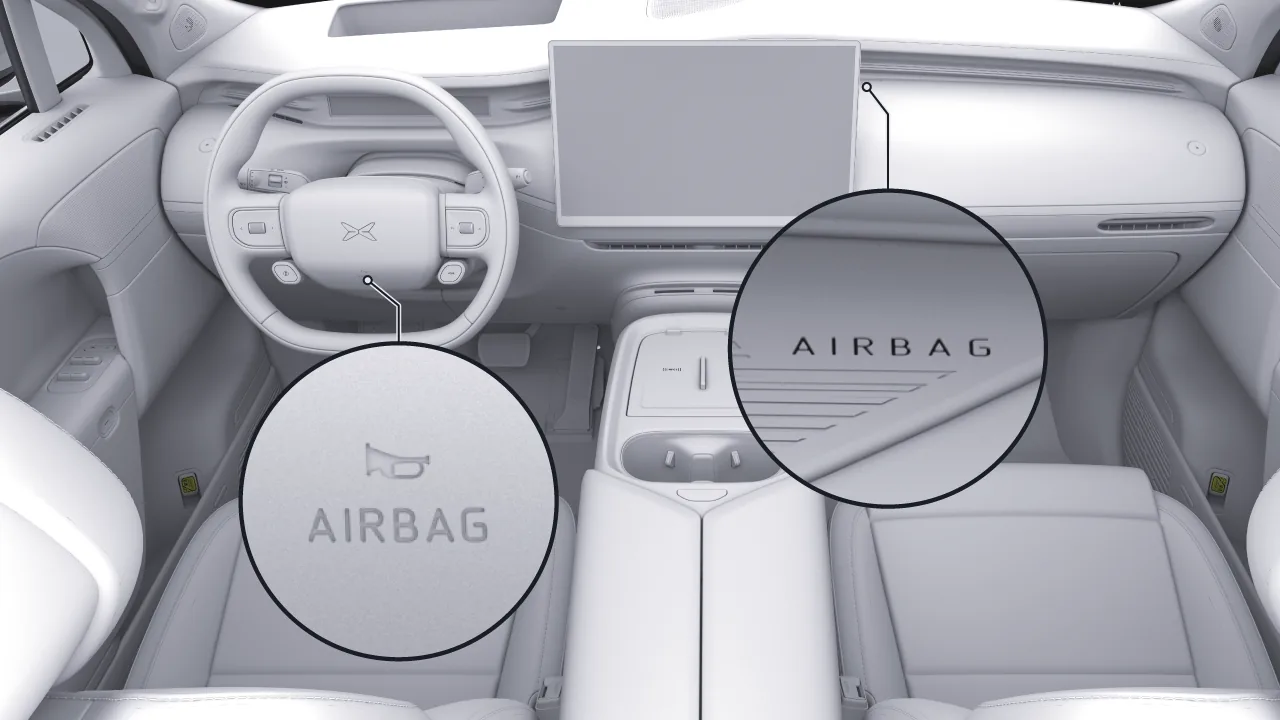
When the vehicle is subjected to a severe impact, the driver/front passenger airbags protect the heads and chests of the driver and front row passenger.
The side airbag is installed in the front seat seatback, and the outer side of the driver's seatback is marked with marking, the installation marking of the front row occupant seat side airbag is arranged symmetrically with it.
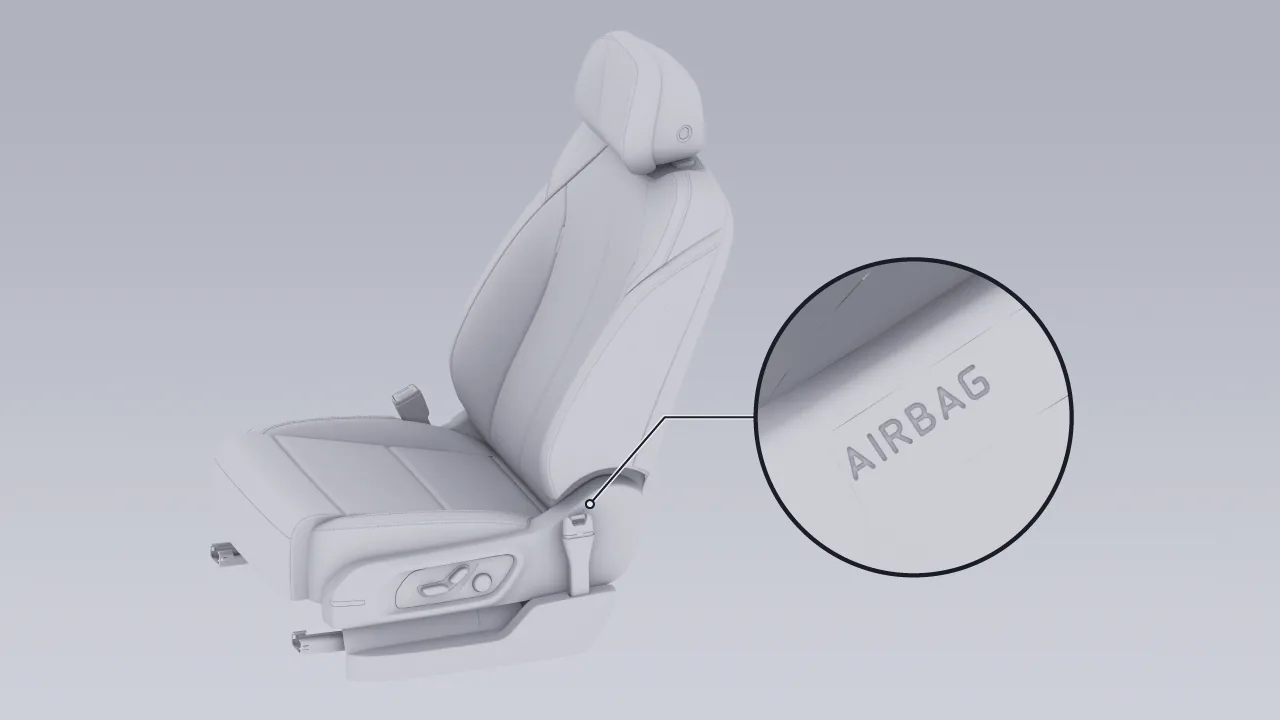
When the vehicle is subjected to a severe impact, the front row side airbags help protect the side chest and hip body areas of the driver and passenger occupant.
The side airbag is installed in the seatback of the second-row seat, and the outer side of the seatback of the second-row seat is marked with marking, the installation markings for the left/right side airbags of the second-row seats are arranged symmetrically.
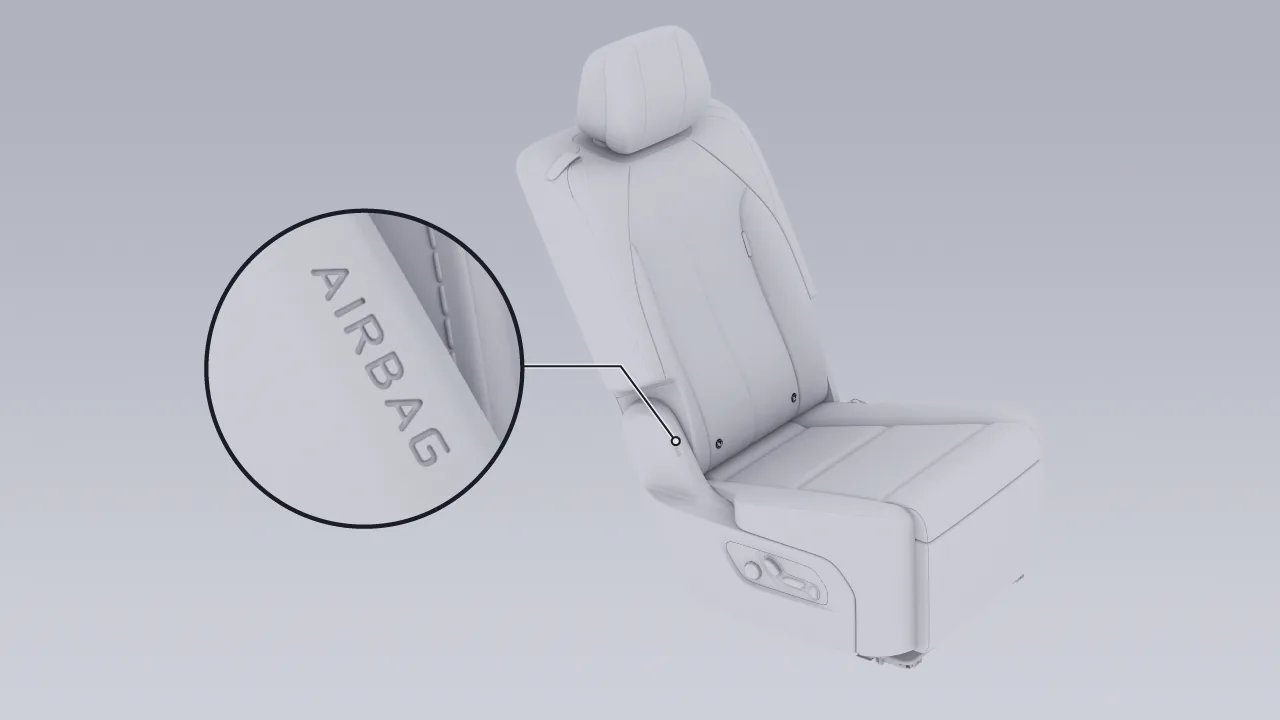
When the vehicle is subjected to a severe impact, the second-row side airbags help protect the side chest and hip body areas of second-row occupants.
The front driver far-side airbag is installed inside the driver seatback, and the inner side of the driver seatback is marked with Text.
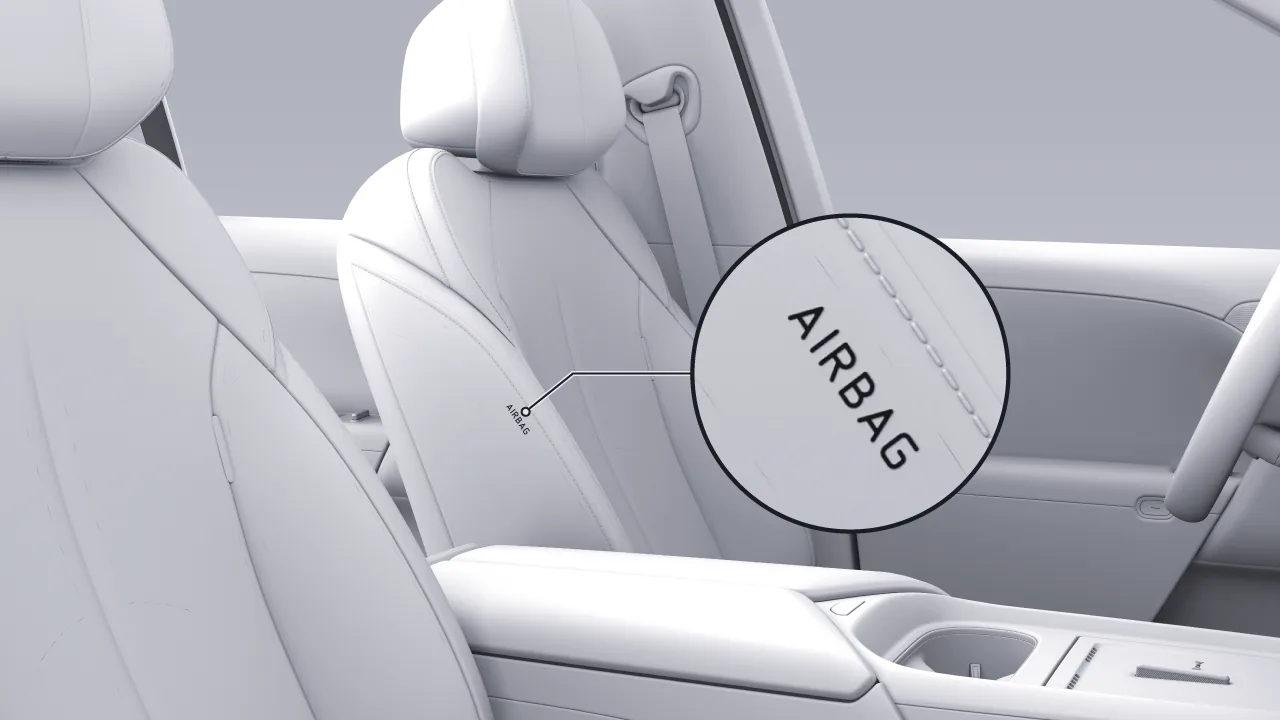
When the vehicle is subjected to a severe impact, the far-side airbag protects the shoulders and heads of the driver and passenger occupants, reducing injuries as much as possible.
The seat equipped with zero-gravity mode is equipped with a seat cushion airbag, and the airbag is installed in the seat cushion.
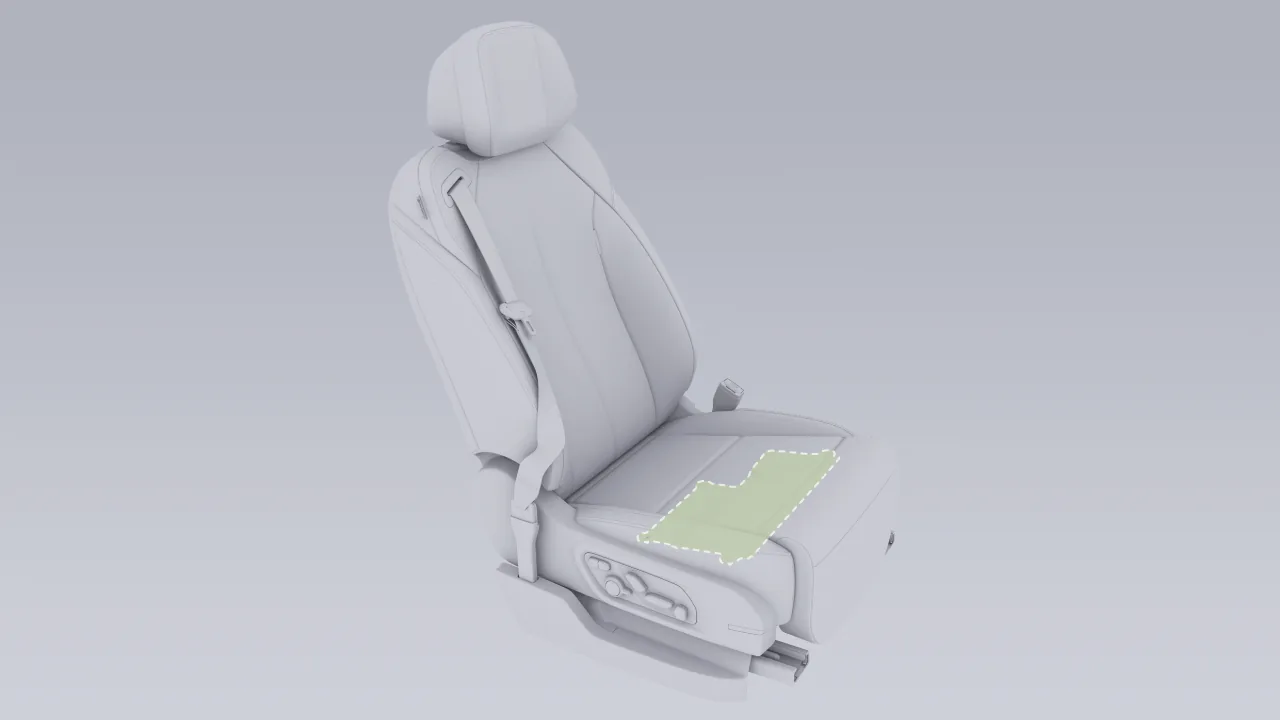
When the vehicle is subjected to a severe impact, the seat cushion airbag protects the front passenger's lumbar spine and prevents the front passenger from submarining and sliding out.
The front/rear head side curtain airbags are installed along both sides of the roof, and both the B-pillar trim panel and C-pillar trim panel inside the vehicle are marked with mark.
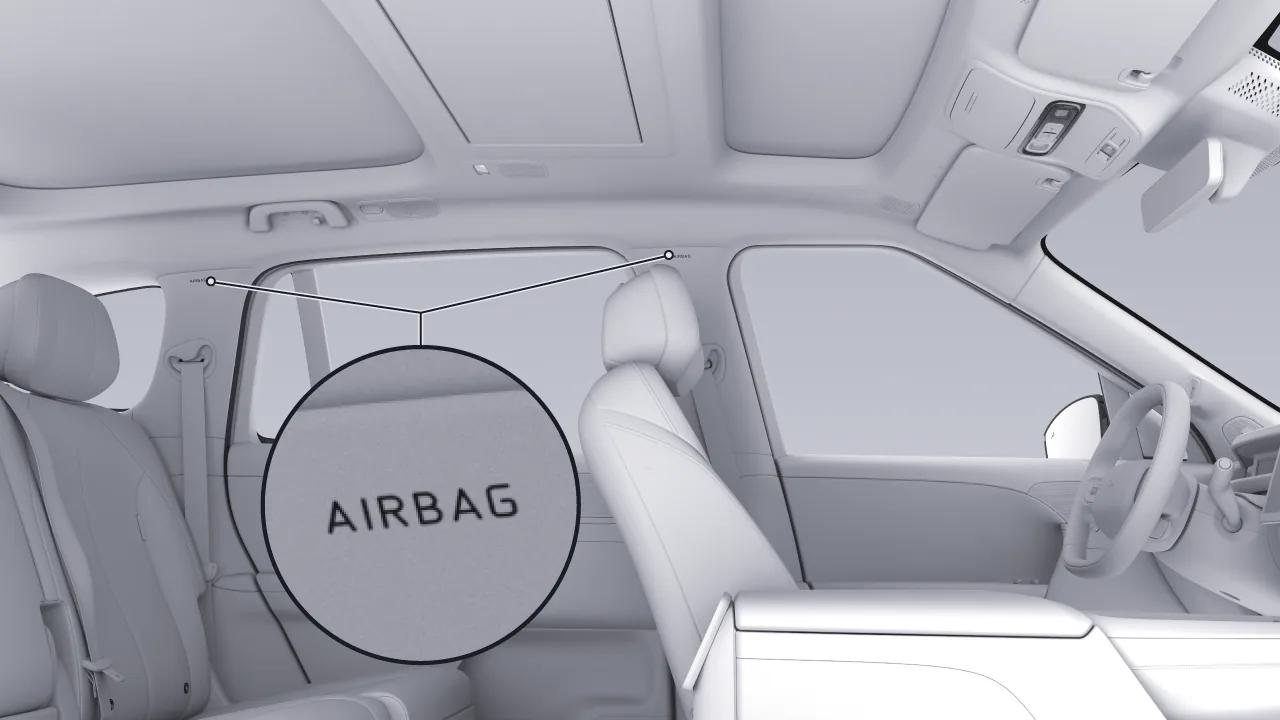
When the vehicle is subjected to a severe impact, the curtain airbag protects the heads of the driver and passengers.
After the vehicle is powered on, on the central control screen, “  ”The indicator lights up for several seconds and turns off after the system completes the self-check. If the indicator does not turn off after the system self-check, or lights up again after turning off, or remains on continuously, this indicates a fault in the airbag system. Please contact a XIAOPENG service center immediately for inspection and repair.
Whether the airbags deploy does not depend on the driving speed of the vehicle at the time of the accident, but on the collision severity detected by the collision sensors at the time of the accident. When the impact force of the collision is absorbed or dispersed into the vehicle body, the airbags may not deploy; however, depending on the impact conditions at the time of the accident, the airbags may sometimes deploy as well. Therefore, whether the airbags deploy is not determined based on the extent of vehicle damage.
The airbag may deploy in the following situations.
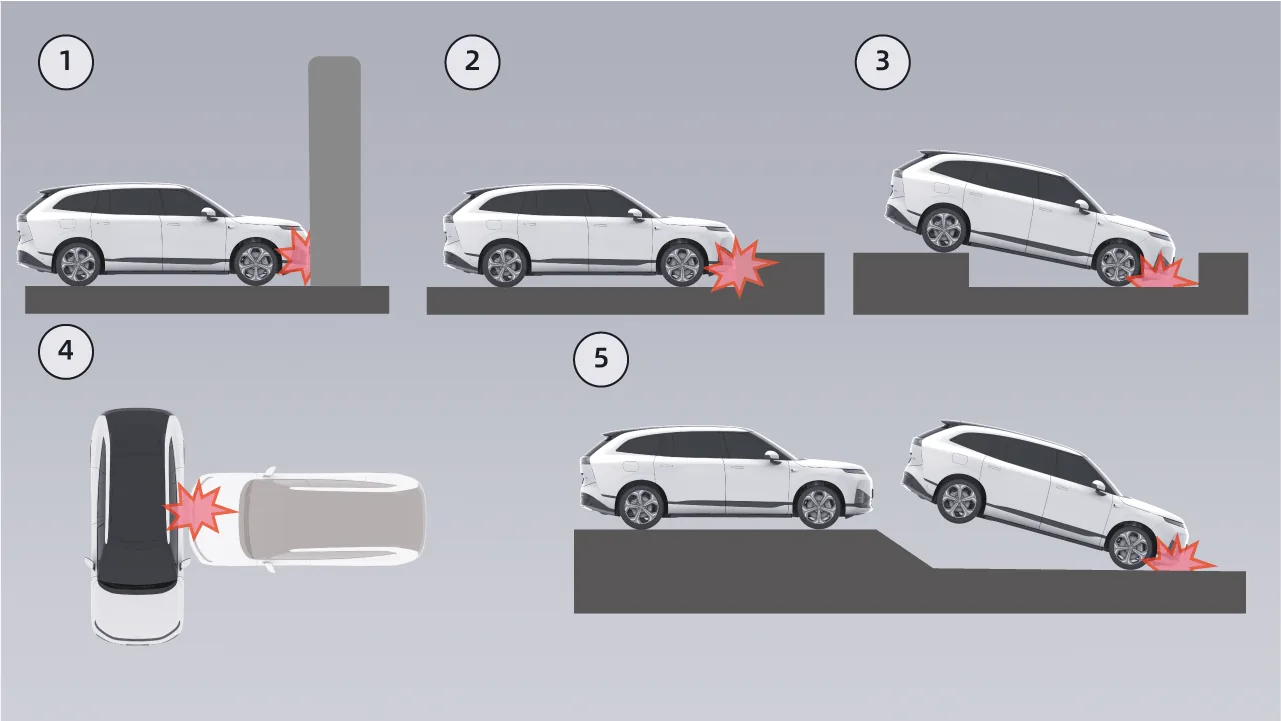
High-speed frontal collision with a wall or vehicle.
Hit a hard roadbed.
Fall into a deep ditch.
Side impact by a vehicle traveling at a relatively high speed.
Land heavily after jumping.
Caution In the instant of airbag deployment, a loud noise is associated with the release of gas and powder, which may irritate the skin and eyes. At this point, under the premise of safety, should escape outside the vehicle as soon as possible, if not, The window or door should be opened to allow fresh air to be drawn in.
When the powder gets into the eyes or adheres to the skin when the airbag is detonated, wash thoroughly with clean water as soon as possible and seek medical advice if you are seriously unwell.
When deployed, the air bag retracts in volume, providing a gradual damping effect for the occupants, ensuring an unobstructed view of the driver's forward vision.
After the vehicle collides and the airbag deploys, the vehicle will automatically carry out some safety measures to protect the personal safety of the occupants in the vehicle:
All doors are unlocked.
Turn on the hazard warning lights.
Vehicle high voltage power-off.
All doors and windows automatically lower.
Automatically call emergency rescue.
Trigger the MCB secondary collision mitigation automatic braking system.
A serious accident involving the vehicle may cause abnormal vehicle power supply or network conditions, and the above actions may not be executable. Please use the emergency interior door release handle to open the door and escape.
Tips In an emergency, you may escape by breaking the window.
The airbag may not deploy under the following circumstances. Please use the seat belt correctly to protect passengers:
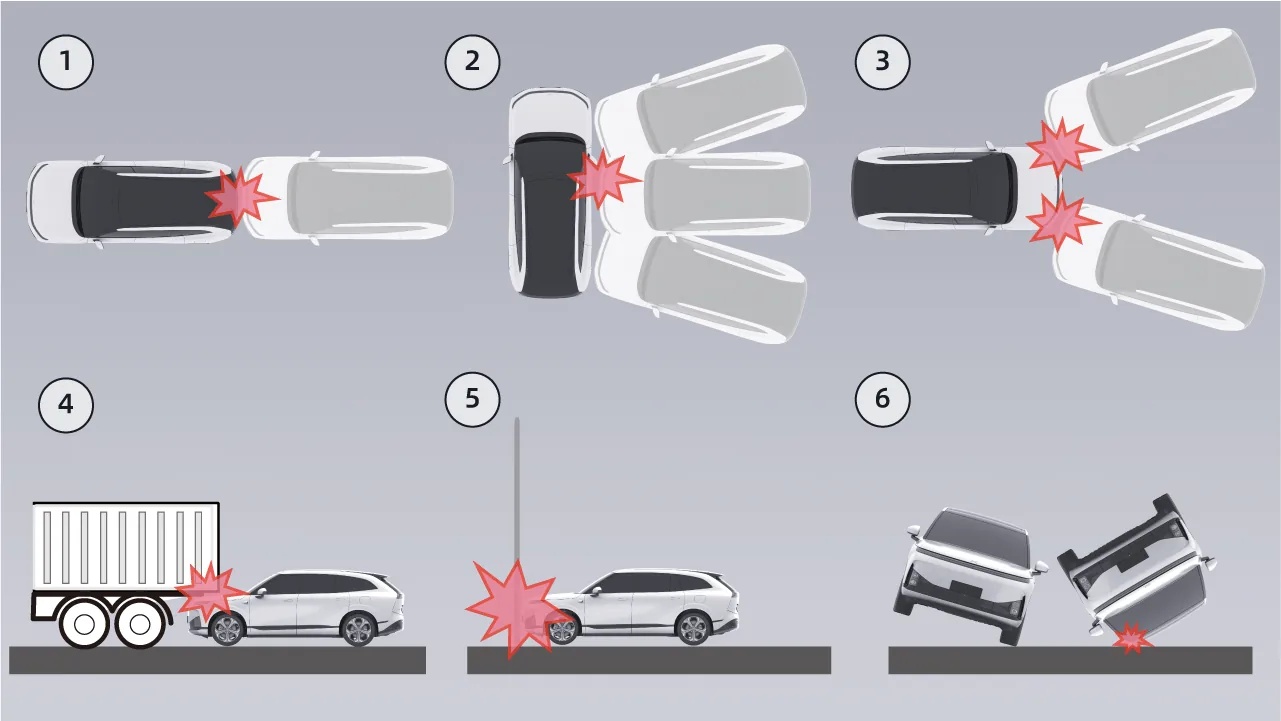
When the vehicle is rear-ended, the airbags will not deploy.
In the event of a side collision, due to the impact angle, the airbag may not deploy if the airbag sensor triggering conditions are not met.
In the event of a front-side collision, due to the impact of the collision angle, the airbag may not deploy because the triggering conditions of the airbag collision sensor are not met.
If the vehicle collides with a container truck or underrides beneath a large truck, and the airbag collision sensors do not meet the deployment triggering conditions, the airbags may not deploy.
When the vehicle collides with slender objects such as trees or poles, the airbag may not deploy if the triggering conditions of the airbag crash sensors are not met.
In the event of a vehicle rollover, the airbags may not deploy.
Warning Airbags are supplemental restraints and cannot replace the protection provided by seat belts. They provide optimal protection for occupants only when used together with seat belts. Therefore, all vehicle occupants must fasten their seat belts and maintain a proper seating position.
Maintain at least 25 cm of clearance between the driver's chest and the steering wheel to avoid injury from airbag deployment.
Airbags deploy only once. If an airbag has deployed, the airbag system components must be replaced.
Do not drive the vehicle after airbag deployment. Contact an XPENG Service Center immediately to have the vehicle’s safety system components replaced.
Do not place any objects within the deployment areas of the driver's seat air bag, passenger seat air bag, and second-row seat air bags to prevent items from obstructing air bag deployment during a frontal collision.
Front seat occupants must not hold children, pets, or objects in a way that encroaches on the airbag deployment space. This rule applies to both adults and children.
Do not attach any items (e.g. a portable navigation device) to the windshield above the passenger seat air bag.
Do not cover or affix any items (e.g. phone mounts or decorations) to the marked surface of the steering wheel or the front passenger airbag module, or modify these areas in any way.
Do not place or store items on the front and second-row passenger-side seats. If an airbag deploys during emergency braking, items may be propelled and injure vehicle occupants.
Do not use seat covers. They may restrict deployment of the front side airbags in a collision and reduce the accuracy of system detection.
Do not modify the airbag cover or install any parts near the airbag cover. Passengers must not rest their heads against the door. Otherwise, deployment of the side curtain airbag may result in injury.
Passengers must not place their feet, knees, or any other body part over or near the airbag, as this may interfere with proper airbag operation or cause fractures or other injuries when the airbag deploys.
Do not modify the vehicle headliner; doing so may interfere with the proper operation of the side curtain air bag and could cause injury to occupants when the air bag deploys.
XPENG Experience and Service Centers are equipped with special tools, diagnostic equipment, service information, and qualified technicians. Vehicle repairs and modifications must be performed by an XPENG Experience and Service Center.
Do not use airbag components removed from scrapped vehicles or any recycled airbag components. Do not place or attach any objects on or near the driver or front passenger airbag, on the sides of the front and second-row seats, along the roof side rails above the side windows, or on any airbag cover. Objects in these areas could interfere with airbag deployment. If the vehicle is involved in a severe collision and the airbags deploy, such objects may cause serious injury.
Do not attempt to modify airbag components, wiring, or software. Doing so may prevent the airbag system from operating properly and from providing the necessary protection to occupants, and may cause the system to fail or deploy unexpectedly in a crash, increasing the risk of injury.
Warning NEVER use a rearward facing child restraint on a seat protected by an ACTIVE AIRBAG in front of it, DEATH or SERIOUS INJURY to the CHILD can occur. To protect children when traveling in the vehicle, select and use an appropriate child safety seat according to the child’s age, weight, and height, and strictly follow the instructions provided by the child safety seat manufacturer.
A front airbag warning label is affixed to the front passenger sun visor, and another front airbag warning label is affixed to the front passenger side ceiling. The label on the sun visor is visible when the visor is lowered.
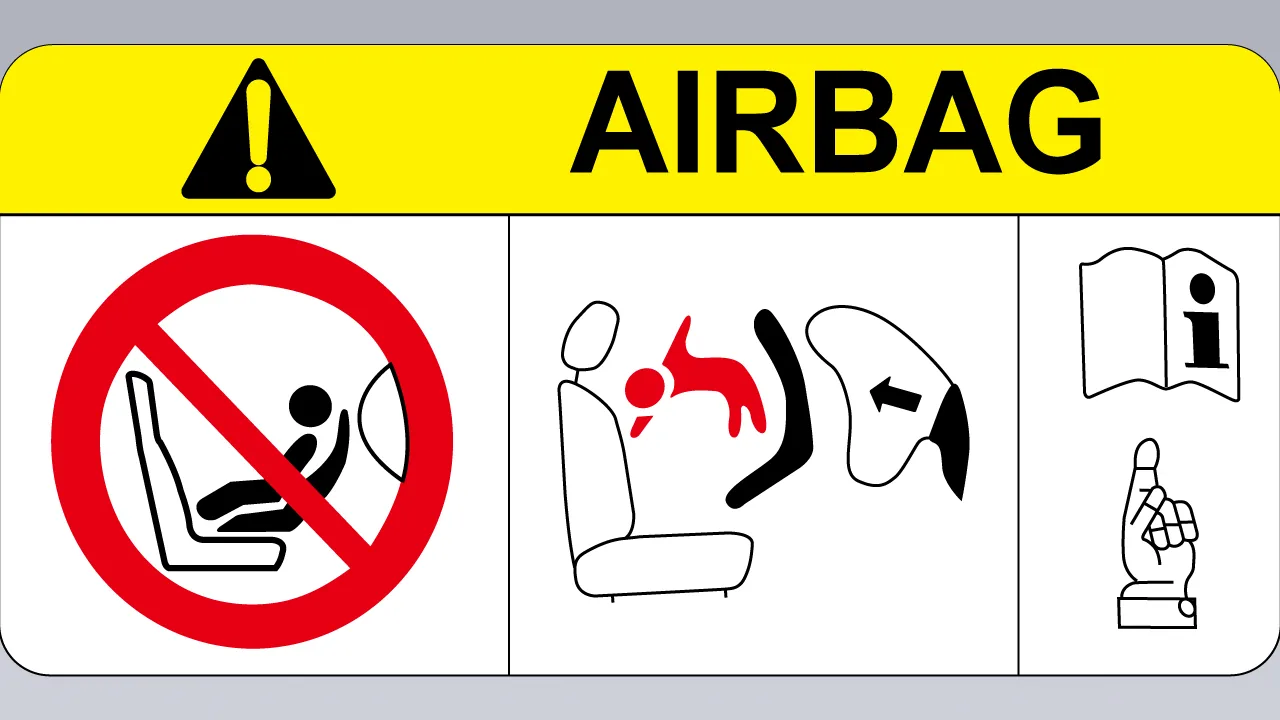 Warning Do not place any child in a Child Restraint System on the front passenger seat with an active Passenger Airbag, regardless of the seating direction.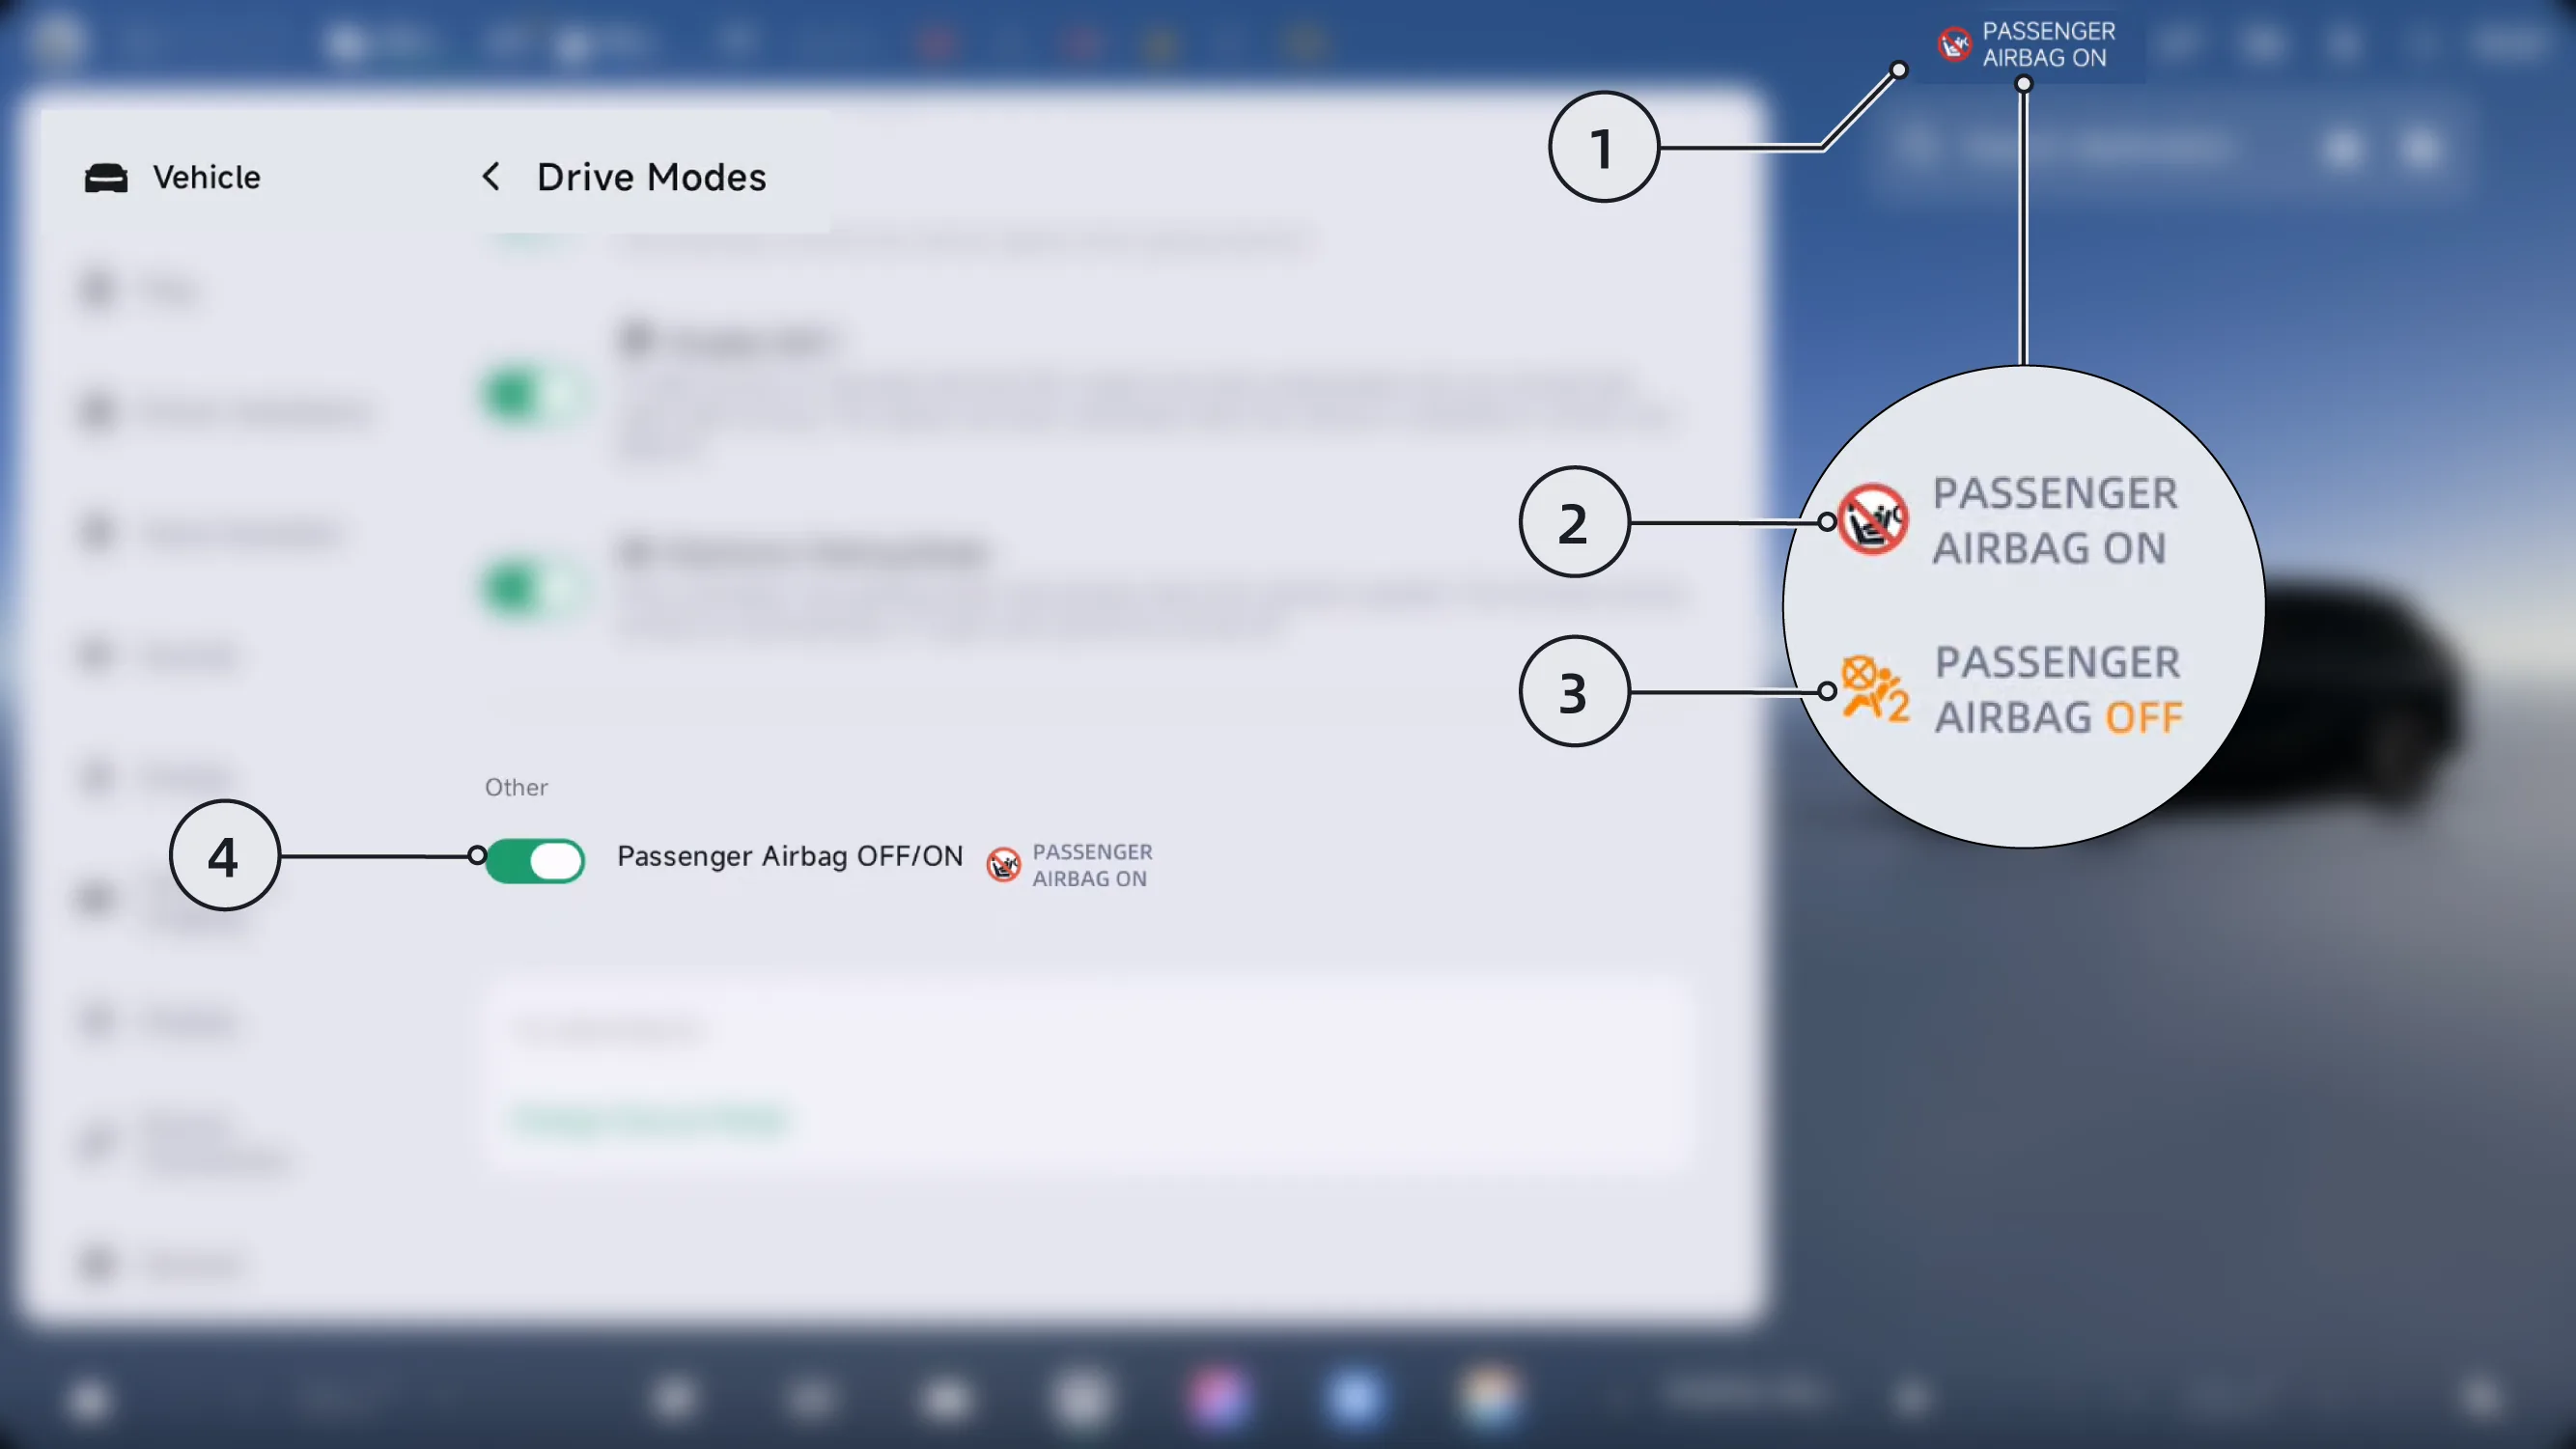
Front passenger airbag status indicator
Front passenger airbag on
Front passenger airbag off
Front passenger airbag switch
The front passenger airbag is on by default and can be turned off/on in the following two ways:
Tap the front passenger airbag status indicator on the status bar, then go to the switch setting interface.
Tap “ →Settings→Vehicle→Drive Modes”on the CID to enter the interface, then slide down and tap the front passenger airbag switch.
If a child is too large to use a child safety seat but still too small to safely use the standard seat belt alone, you may purchase and correctly use a child booster cushion that complies with applicable regulations or standards. A child booster cushion raises the child so that the shoulder belt passes across the middle of the shoulder and the lap belt is positioned low across the hips.
Warning Always select a suitable child safety seat according to the child's age, height, and weight.
Children weighing over 9 kg and capable of sitting independently should use forward-facing child safety seats. Children under two years old have underdeveloped spines and necks and should be protected from frontal collisions.
Never hold a child or infant in your lap while the vehicle is in motion. All children should always be restrained in a suitable child safety seat.
Even when a child is secured in a child safety seat, never leave them alone in the vehicle.
Never allow children to ride in a vehicle without safety protection. Always ensure children maintain a proper sitting posture while the vehicle is in motion; never allow them to stand or kneel in the seat. Doing so may cause fatal injury to the child and others in the event of an accident.
Do not use seat belt extenders on seat belts intended for use with child safety seats or booster seats.
When a larger child is in the seat, ensure the child's head is supported and adjust and secure the child seat belt appropriately. The shoulder belt must avoid the face and neck, and the overlap must avoid the abdomen.
One child seat is for one child only. Do not use seat belts to restrain multiple children in one child seat.
Never fasten two child safety seats to a single anchor point. In the event of a collision, one anchor point may not be sufficient to secure both seats.
The anchor point for a child safety device should only bear the load from a correctly installed child safety device. Child safety devices must never be used with adult seat belts, wiring harnesses, or to install other items or equipment.
Always check for damage and wear on seat belts and straps.
Never use a modified, damaged, or previously damaged child safety seat. Please check or replace the child safety seat according to the manufacturer's instructions.
To ensure your child's safety, always follow all the instructions detailed in this manual and the instructions provided by the child safety seat manufacturer.
| Seating position | ||||||
| Seating position number | 1 | 3 ① | 4 ② | 5 ② | 6 ② | |
| with front passenger airbag activated | with front passenger airbag deactivated | |||||
| Seating position suitable for universal belted(yes/no) | No | Yes Forward facing only | Yes | Yes | Yes | Yes |
| I-Size seating position(yes/no) | No | No | No | Yes | No | Yes |
| Seating position suitable for lateral fixture(L1/L2) | No | No | No | L2 | No | L1 |
| Largest suitable rearward facing fixture(R1/R2X/R2/R3) | No | No | No | R1/R2/R3 | No | R1/R2/R3 |
| Largest suitable forward facing fixture(F1/F2X/F2/F3) | No | No | No | F2X/F2/F3 | No | F2X/F2/F3 |
| Largest suitable booster fixture(B2/B3) | No | B2* | B2* | B2/B3 | B2* | B2/B3 |
| ||||||
| Seat number | Position in the vehicle | Seat number | Position in the vehicle |
|---|---|---|---|
| 1 | Front left | 4 | 2 nd row left |
| / | / | 5 | 2 nd row centre |
| 3 | Front right | 6 | 2 nd row right |
| Seating position | |||||||
| Seating position number | 1 | 3 ① | 4 ② | 6 ② | 7 ② | 9 ② | |
| with front passenger airbag activated | with front passenger airbag deactivated | ||||||
| Seating position suitable for universal belted(yes/no) | No | Yes Forward facing only | Yes | Yes | Yes | Yes | Yes |
| i-Size seating position(yes/no) | No | No | No | Yes | Yes | Yes | Yes |
| Seating position suitable for lateral fixture(L1/L2) | No | No | No | No | No | No | No |
| Largest suitable rearward facing fixture(R1/R2X/R2/R3) | No | No | No | R1//R2/R3 | R1/R2/R3 | R1/R2/R3 | R1/R2/R3 |
| Largest suitable forward facing fixture(F1/F2X/F2/F3) | No | No | No | F2X/F2/F3 | F2X/F2/F3 | F2X/F2/F3 | F2X/F2/F3 |
| Largest suitable booster fixture(B2/B3) | No | B2* | B2* | B2/B3 | B2/B3 | B2/B3 | B2/B3 |
| |||||||
| Seat number | Position in the vehicle | Seat number | Position in the vehicle | Seat number | Position in the vehicle |
|---|---|---|---|---|---|
| 1 | Front left | 4 | 2 nd row left | 7 | 3 nd row left |
| / | / | / | / | / | / |
| 3 | Front right | 6 | 2 nd row right | 9 | 3nd row right |
| Seating position | ||||||||
| Seating position number | 1 | 3 ① | 4 ② | 5 ② | 6 ② | 7 ② | 9 ② | |
| with front passenger airbag activated | with front passenger airbag deactivated | |||||||
| Seating position suitable for universal belted(yes/no) | No | Yes Forward facing only | Yes | Yes | Yes | Yes | Yes | Yes |
| i-Size seating position(yes/no) | No | No | No | Yes | No | Yes | Yes | Yes |
| Seating position suitable for lateral fixture(L1/L2) | No | No | No | L2 | No | L1 | No | No |
| Largest suitable rearward facing fixture(R1/R2X/R2/R3) | No | No | No | R1//R2/R3 | No | R1/R2/R3 | R1/R2/R3 | R1/R2/R3 |
| Largest suitable forward facing fixture(F1/F2X/F2/F3) | No | No | No | F2X/F2/F3 | No | F2X/F2/F3 | F2X/F2/F3 | F2X/F2/F3 |
| Largest suitable booster fixture(B2/B3) | No | B2* | B2* | B2/B3 | B2* | B2/B3 | B2/B3 | B2/B3 |
| ||||||||
| Seat number | Position in the vehicle | Seat number | Position in the vehicle | Seat number | Position in the vehicle |
|---|---|---|---|---|---|
| 1 | Front left | 4 | 2 nd row left | 7 | 3 nd row left |
| / | / | 5 | 2 nd row centre | / | / |
| 3 | Front right | 6 | 2 nd row right | 9 | 3nd row right |
ECE-R129 classification is based on a child height.
| Child stature | Model | Manufacturer | Type of Fixation |
| 40 cm-83 cm | Pebble 360 | Maxi-Cosi | Only belt |
| 76 cm-105 cm | Pearl 360&FamilyFix 360 base | Maxi-Cosi | ISOFIX with Support Leg |
| 100 cm-135 cm | Kidfix Pro* | Britax Römer | ISOFIX and seat belt with Secure Guard and XP-pad |
| 135 cm-150 cm | Universal booster cushion R129 | Osann | Only belt |
* For the best protection, it is recommended to use this child restraint system with the includedbackrest. And be sure to use ISOFIX and attach the seat belt through Secure Guard and XP-pad.
Choose an appropriate child restraint system. Children shall use appropriate child restraint systems until they becomelarge enough to wear the vehicle's seat belt.
If the child cannot use a child restraint system due to large body size, place the child in the second row seat and use the seat belt of the vehicle.
Ensure that the CRS is the correct type for the seating position.
This vehicle provides multiple anchorage methods for child restraint systems. Before installing a child restraint system, please carefully read the child restraint system instruction manual and, according to the instructions, select the required method to secure the child restraint system.
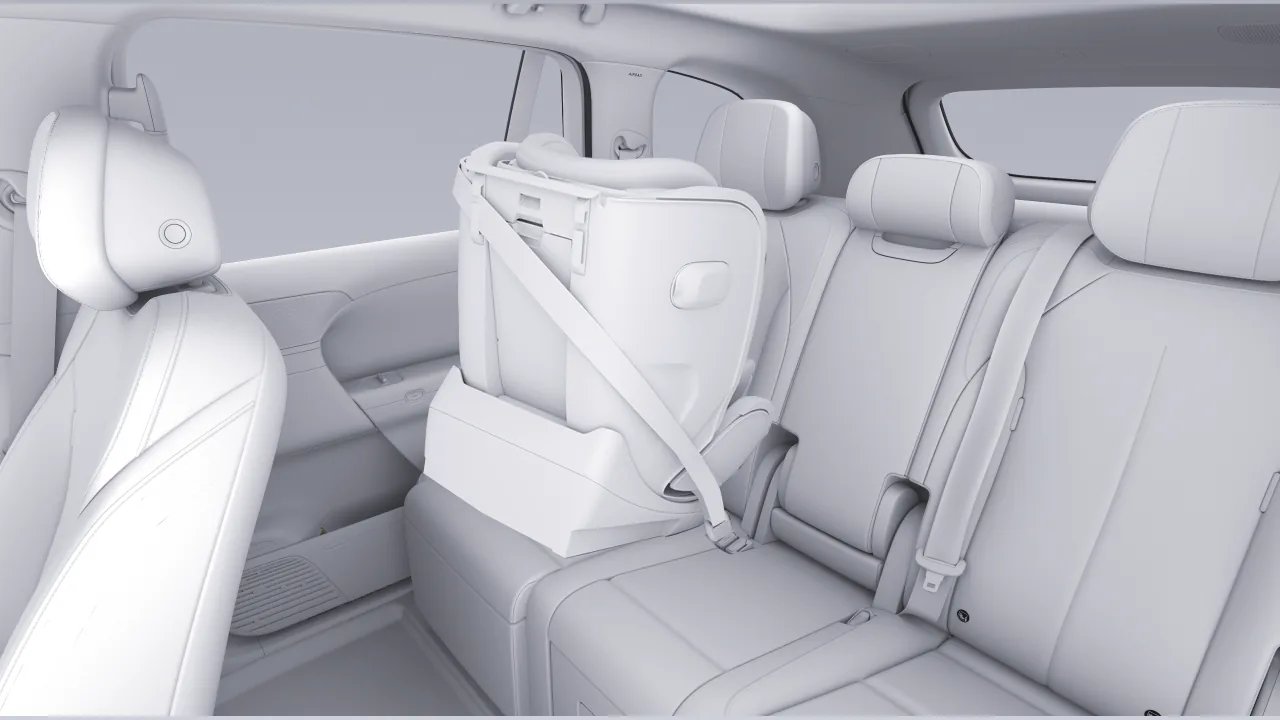
Place the child safety seat on the rear seat.
Pull out the seat belt. With the seat belt not twisted, pass the lap belt through the guide slots below the armrests on both sides of the child seat. At the same time, pass the shoulder belt through the seat guide, route it around the back of the seat, and insert the shoulder belt and lap belt together into the buckle tongue on the other side.
Shake the child restraint system to ensure that it is securely installed.
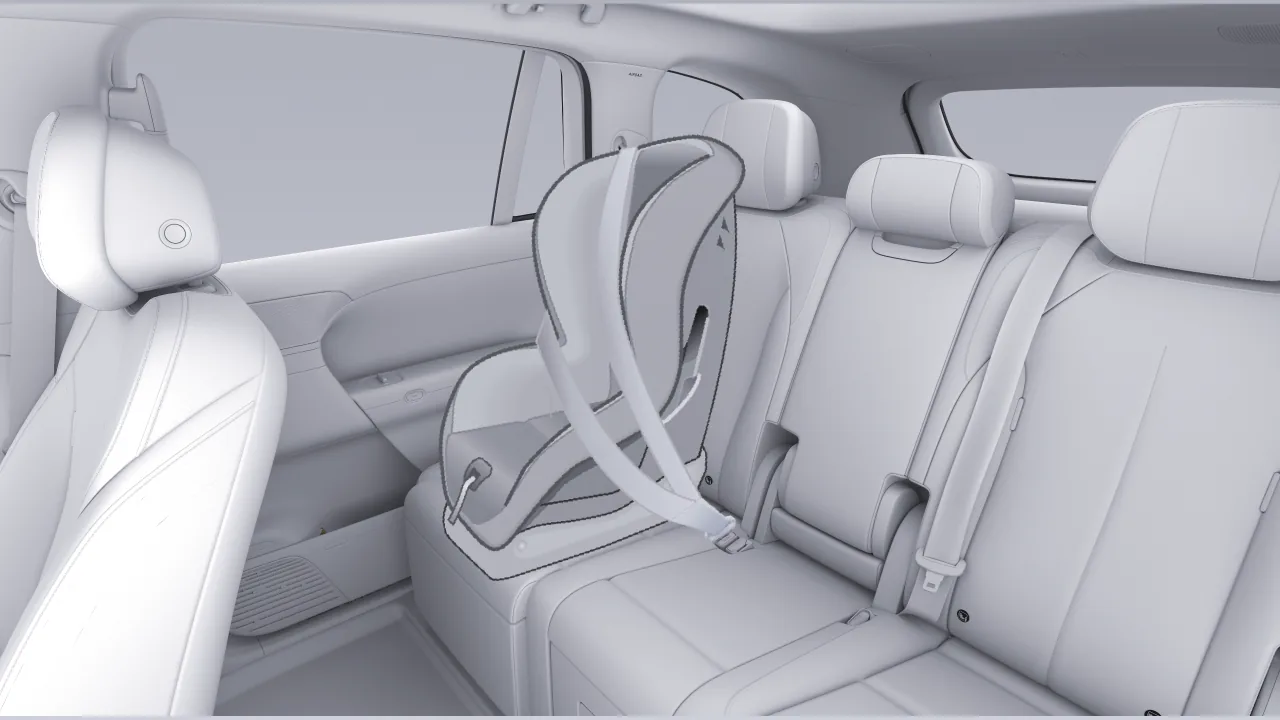
If the head restraint interferes with the installation of the child restraint system, raise it to the highest position.
After adjusting the rear seat seatback angle, place the child safety seat on the seat. The seatback of the child safety seat must fit as closely as possible against the seat seatback.
Then pull the seat belt out completely. With the seat belt not twisted, route and buckle the seat belt according to the child restraint manufacturer's instructions.
Allow the seat belt to retract, firmly push the child restraint into the seat, and tighten the slack belt at the same time. If the child restraint is equipped with an upper tether, attach the tether to the seat back.
Shake the child restraint system to ensure it is securely installed.
The i-Size anchorage points are located between the rear seat seatback and the seat cushion, and an i-Size marking is printed above each anchorage point.
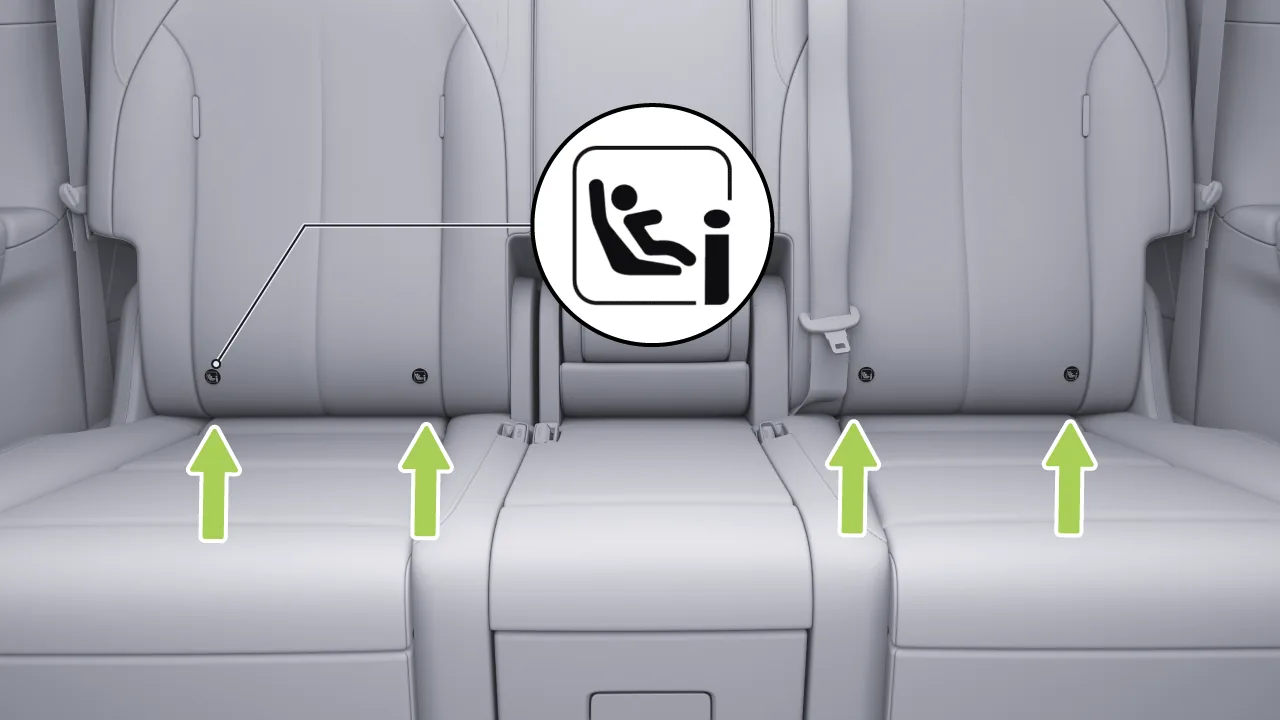
The upper anchorage point is located at the rear of the rear seat seatback.
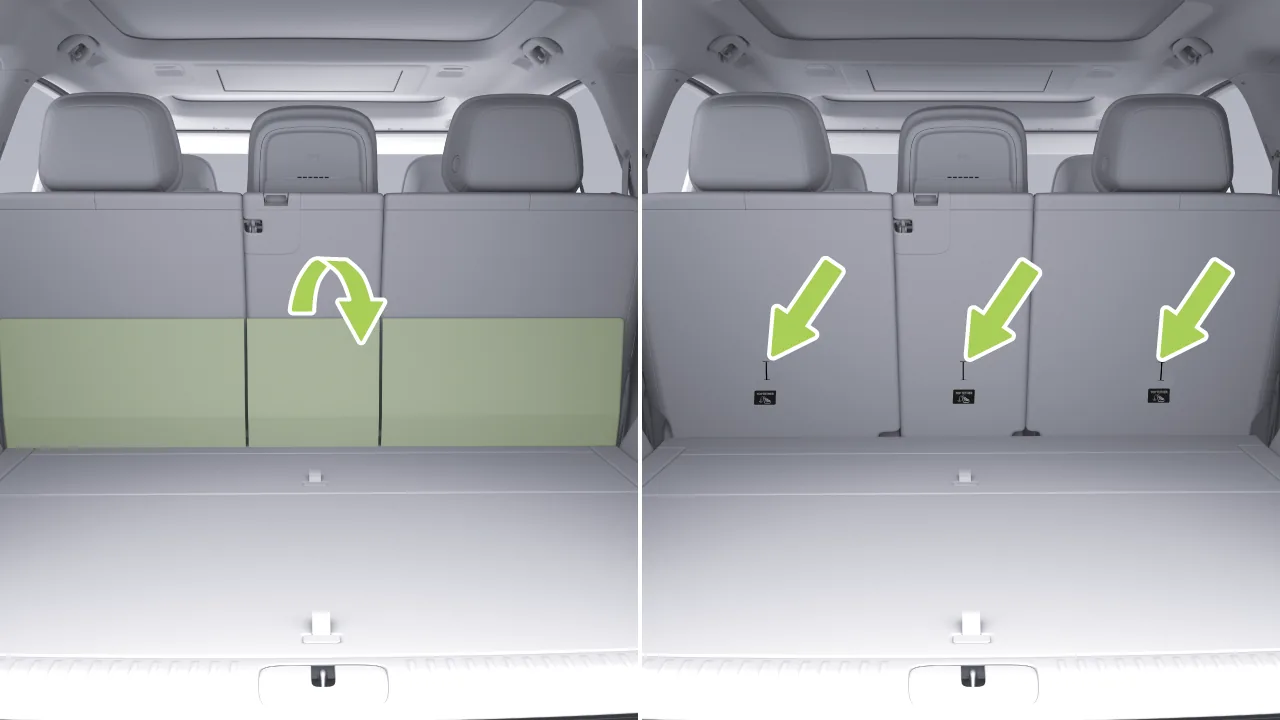
If the head restraint interferes with the installation of the child restraint system, raise it to the highest position.
After adjusting the angle of the rear seat seatback, place the child restraint system on the rear seat. The seatback of the child restraint system must fit against the seat seatback as closely as possible.
According to the child safety seat manufacturer's instructions for use, insert the lower fixing bracket of the child safety seat into the i-Size anchorage points, and ensure that the lower fixing bracket is securely fastened.
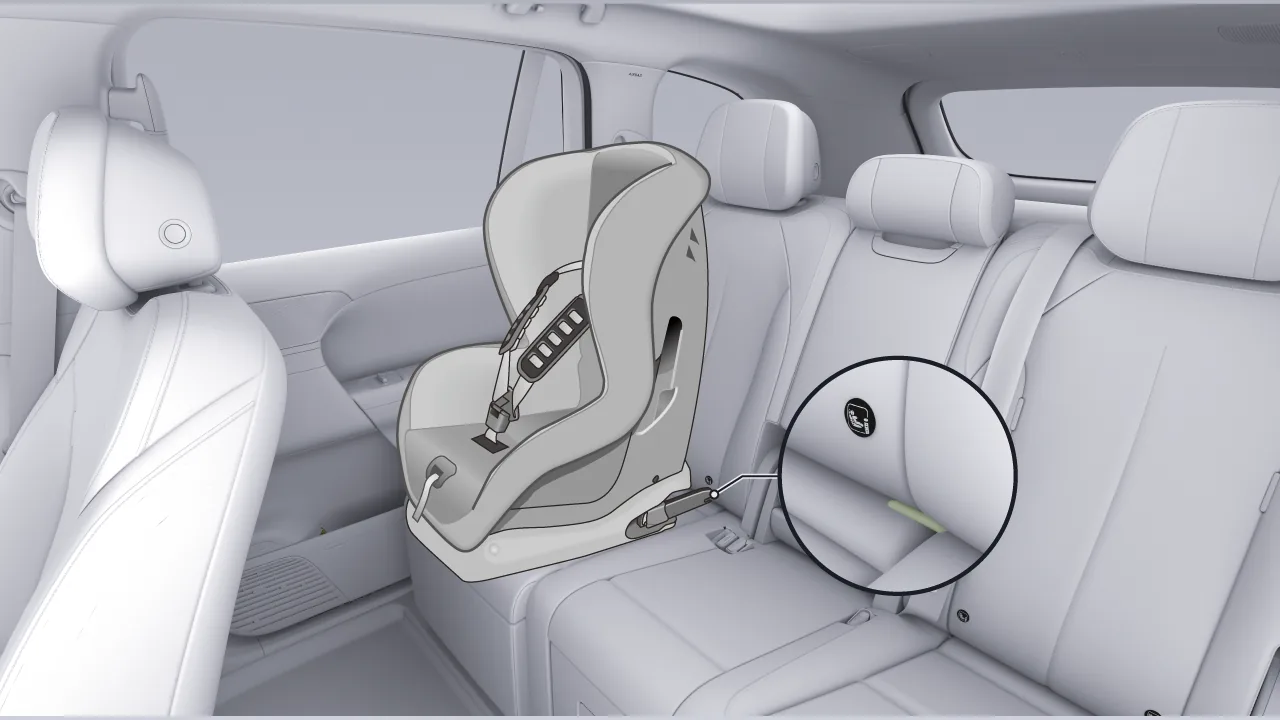
Pass the top tether strap of the child restraint through the head restraint and pull it to the rear of the seatback, attach the tether hook to the anchorage point, and tighten the tether strap.
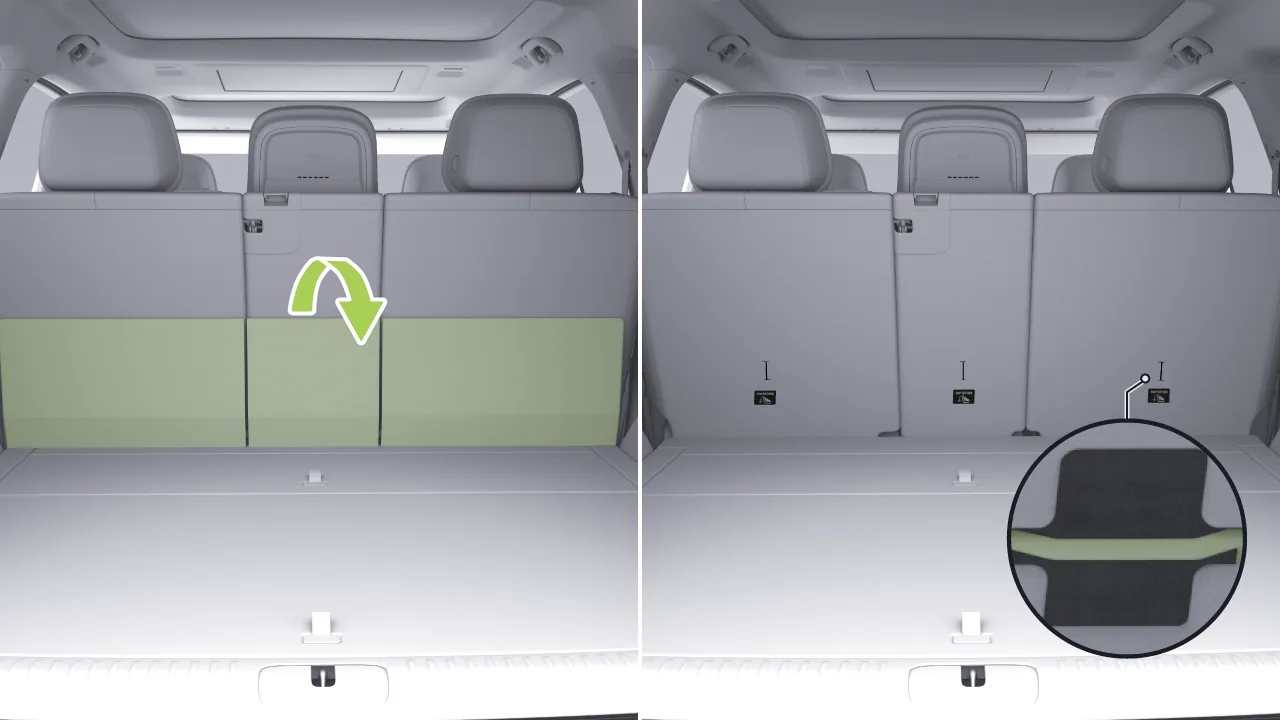
Shake the child restraint system to ensure that it is securely installed.
After installing the child safety seat, be sure to ensure that the child safety seat is not loose:
Secure the child restraint system along the seat belt path, and try sliding the child restraint system from side to side and from front to back.
If the child restraint can move more than 2.5 cm, it indicates that it is too loose. Tighten the seat belt or reconnect the i-Size rigid child restraint.
If it cannot be fastened securely, try another seating position or use a different child restraint system.
Warning The child safety seat must be fitted correctly and always in accordance with the manufacturer's installation instructions to avoid the child safety seat not being protective in the event of an accident.
Do not secure more than one child seat in a single seat belt or single anchor position. The increased load on multiple seats can damage the seat belt or anchor, causing serious injury or death.
This vehicle provides multiple fastening methods for child safety seats. Before installing a child safety seat, please carefully read the child safety seat instruction manual and, according to the instructions, select the required method to fasten the child safety seat.
Tips When installing any type of child restraint system, adjust the position of the second row seat.
When installed on the second row seat, move the second row seat to the rearmost position and enable the second row seat child lock.
When installed on the third row seat, adjust the second row seat to the foremost position.
Installed simultaneously on the second row seat and the third row seat, adjust the second row seat to a suitable position, and simultaneously enable the child lock of the second row seat.
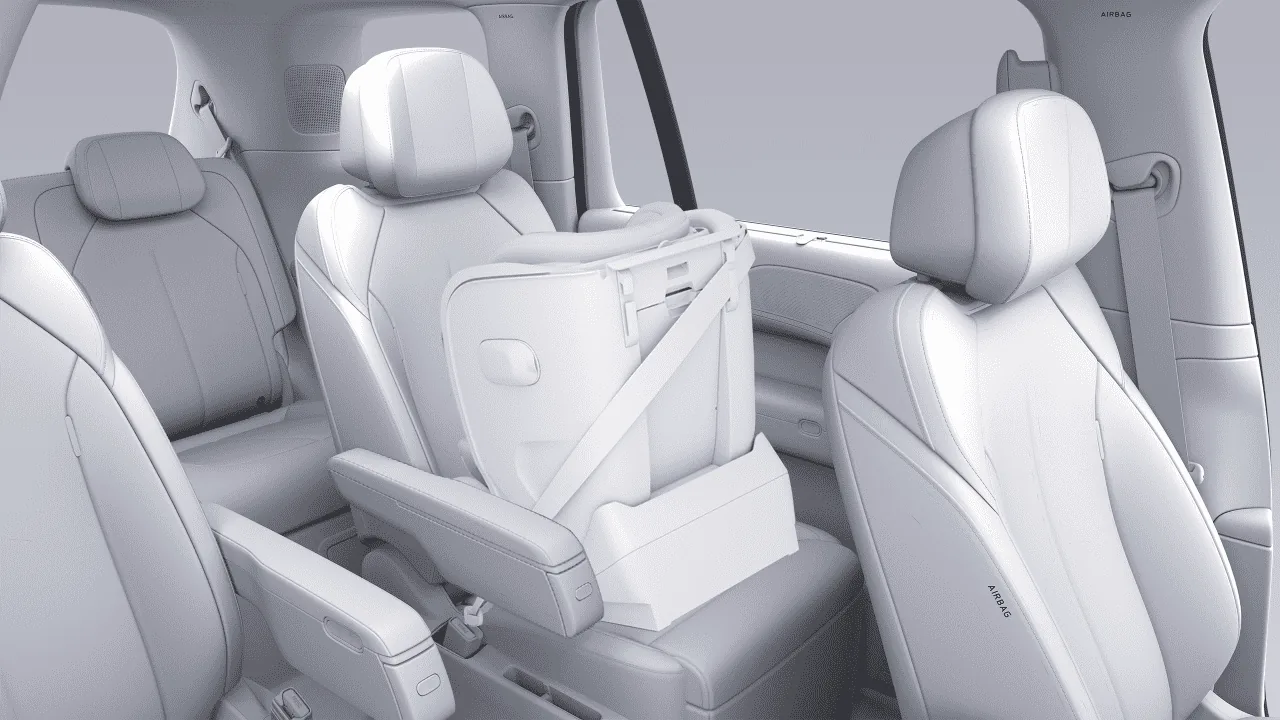
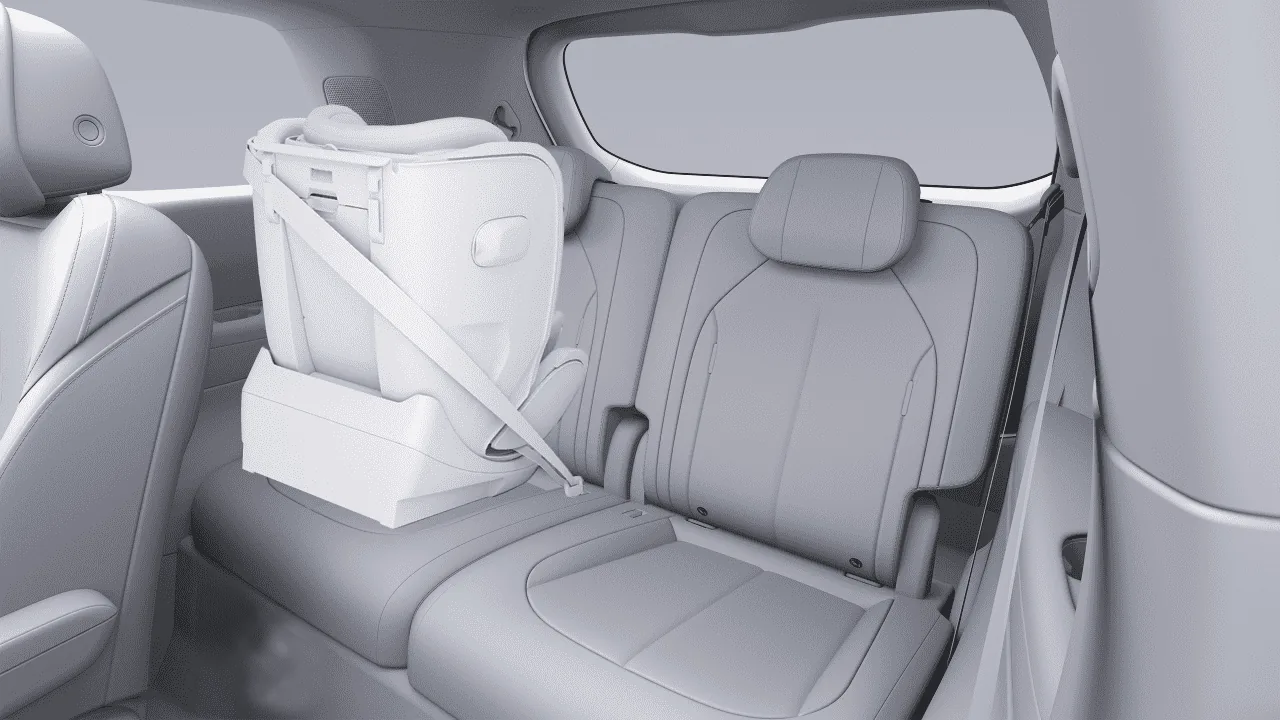
After adjusting the backrest angle of the second row/third row seat to the reclined position, place the child restraint on the seat.
Pull out the seat belt. Ensure that the seat belt is not twisted, and pass the lap belt through the guide slots below the armrests on both sides of the child seat. At the same time, pass the shoulder belt through the seat guide, route it around the back of the seat, and insert the shoulder belt and lap belt together into the latch plate on the other side.
Shake the child safety seat to ensure that it is securely installed.
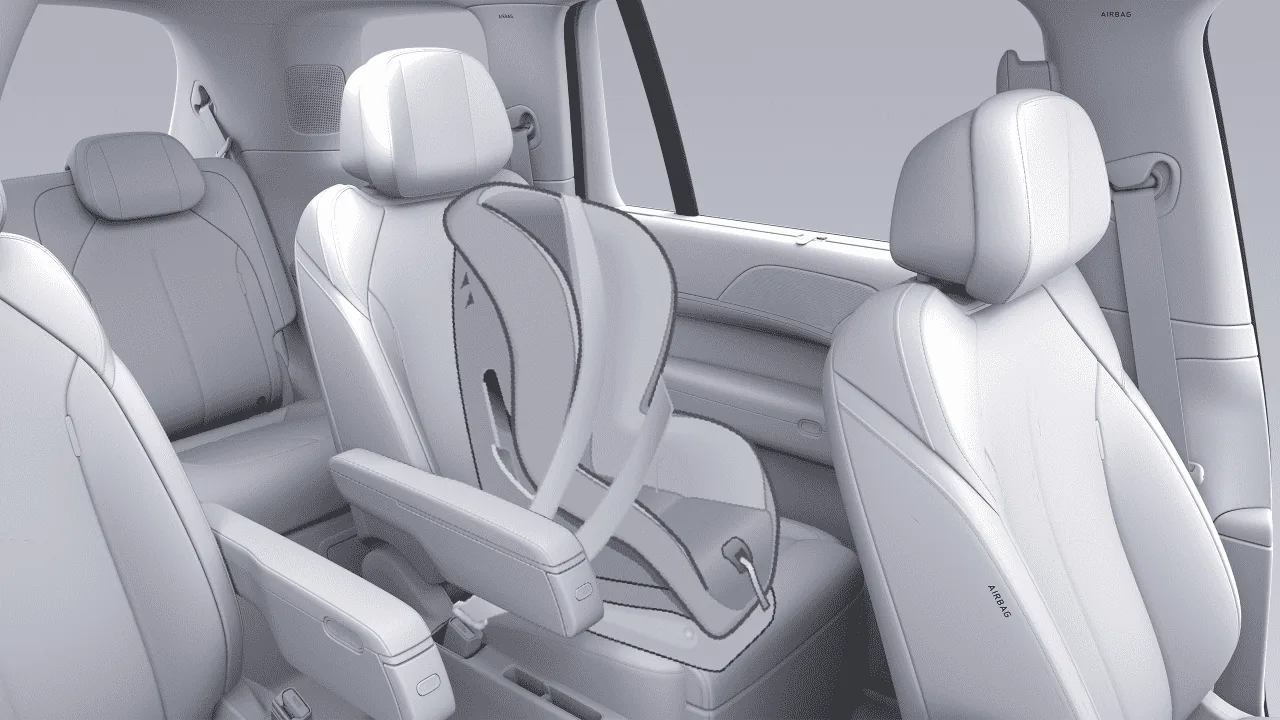
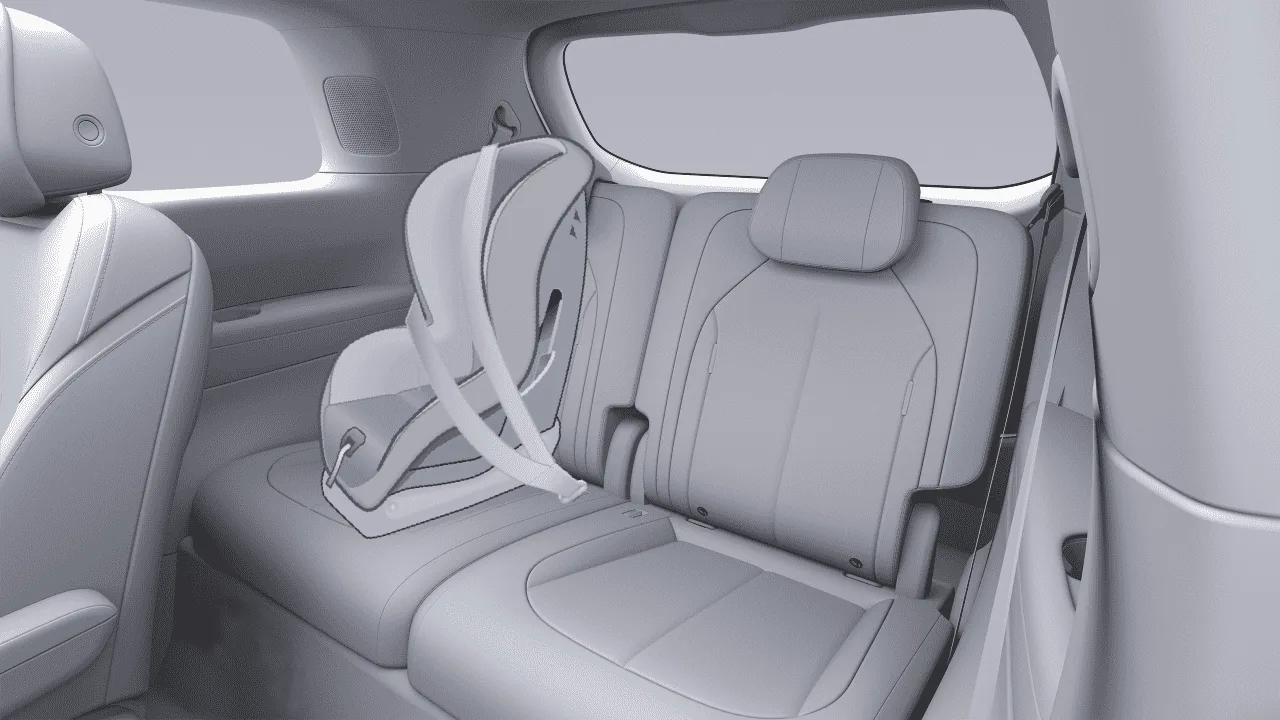
If the head restraint interferes with the installation of the child restraint system, raise it to the highest position.
After adjusting the angle of the second-row/third-row seat seatback, place the child safety seat on the seat. The seatback of the child safety seat must fit as closely as possible against the seat seatback.
Then pull the seat belt out completely. With the seat belt not twisted, route and fasten the seat belt according to the child restraint manufacturer's instructions.
Allow the seat belt to retract, firmly push the child safety seat into the seat while tightening the slack belt. If the child seat is equipped with an upper tether, attach the tether to the seat back.
Shake the child safety seat to ensure it is securely installed.
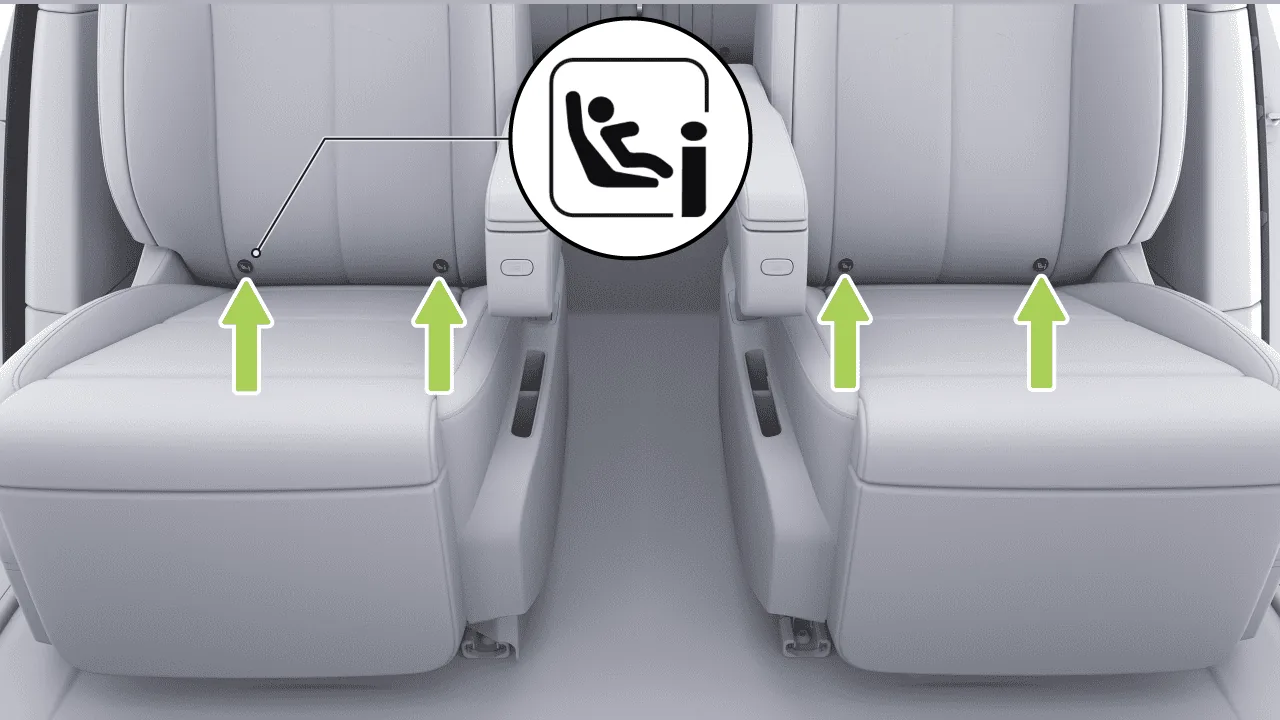
The i-Size anchorages are located between the second-row seatbacks and seat cushions, and an i-Size label is printed above each anchorage.
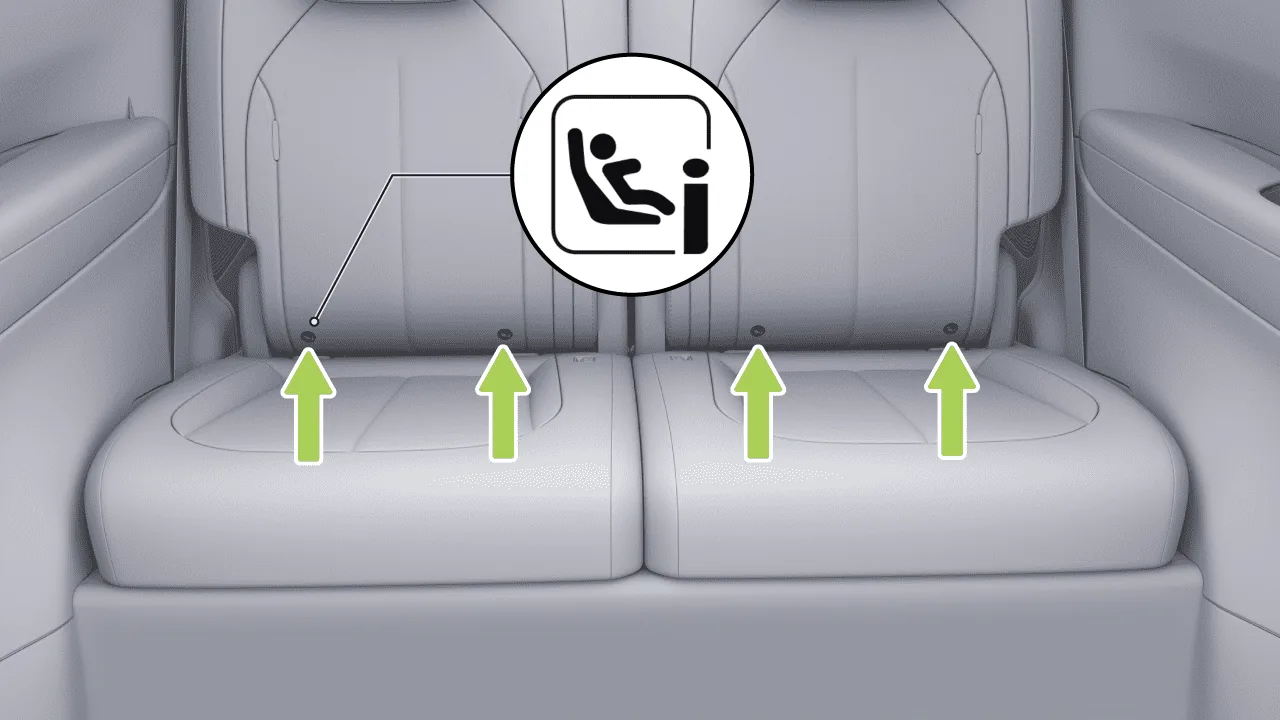
The i-Size anchorage points are located between the seatback and seat cushion of the third-row seats, and an i-Size marking is printed above each anchorage point.
6-seat model
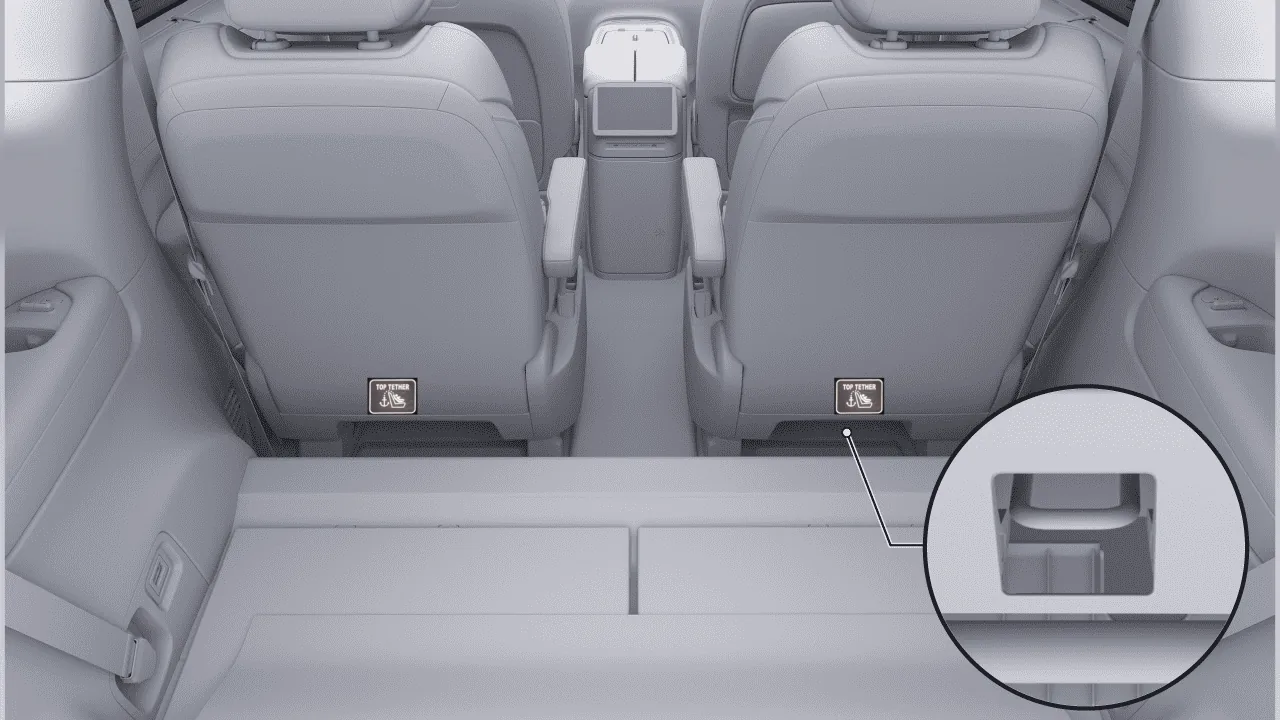
The upper anchorage point is located below the rear of the second-row seatback. Before using the upper anchorage point, use a suitable tool to pry open the upper anchorage point trim cover.
7-seat model
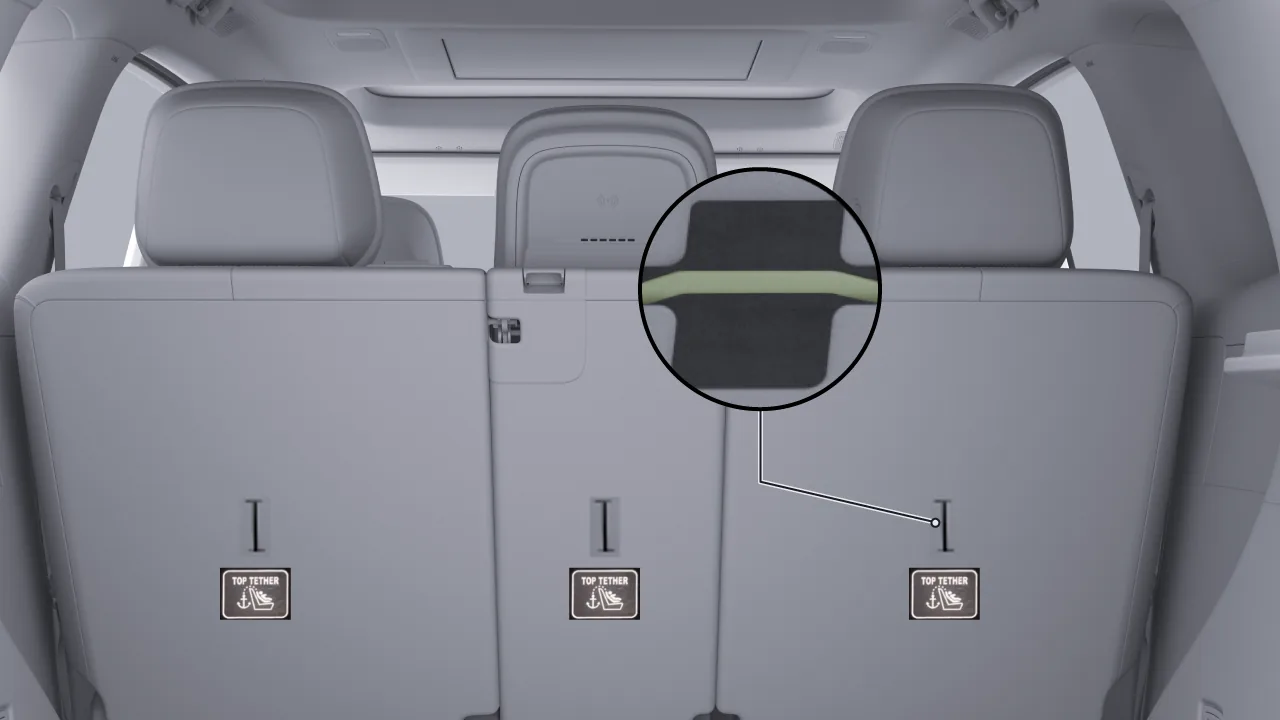
The upper anchorage point is located at the rear of the second-row seatback.
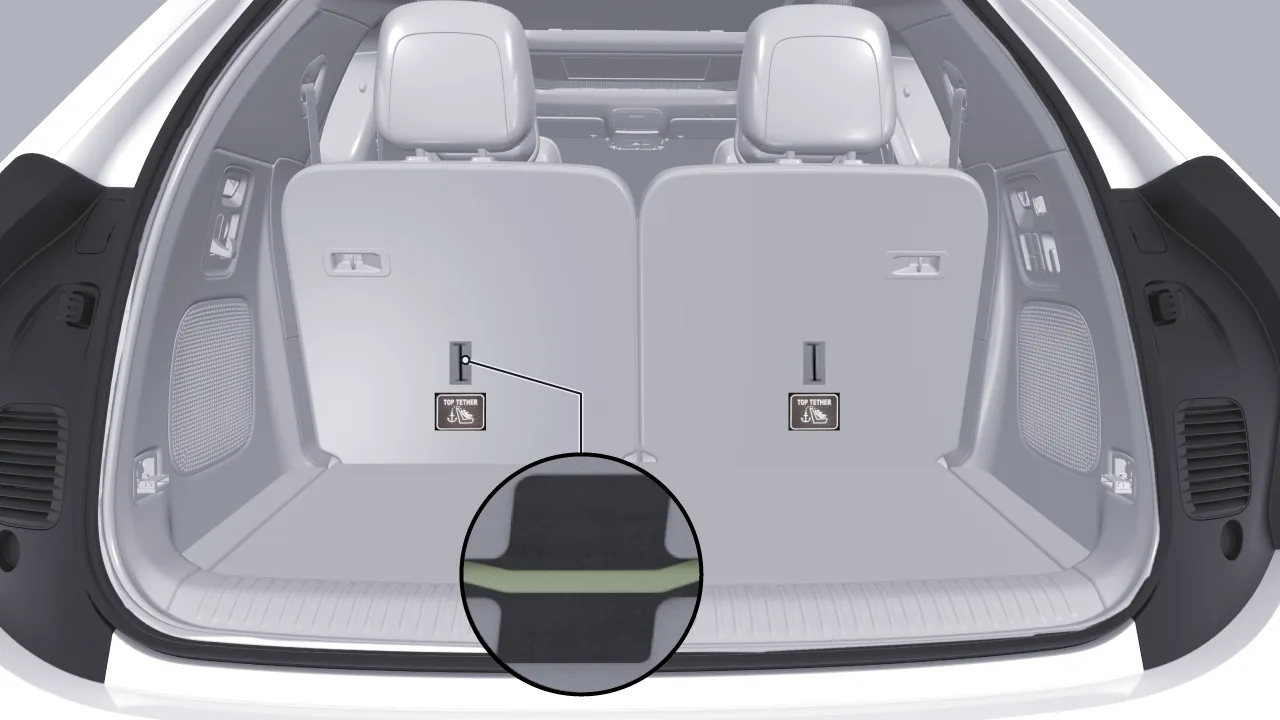
The upper anchorage point is located at the rear of the third-row seatback.
If the head restraint interferes with the installation of the child restraint system, raise it to the highest position.
After adjusting the seatback angle of the second-row/third-row seat, place the child restraint on the second-row seat/third-row seat, and the seatback of the child restraint must fit against the seatback as closely as possible.
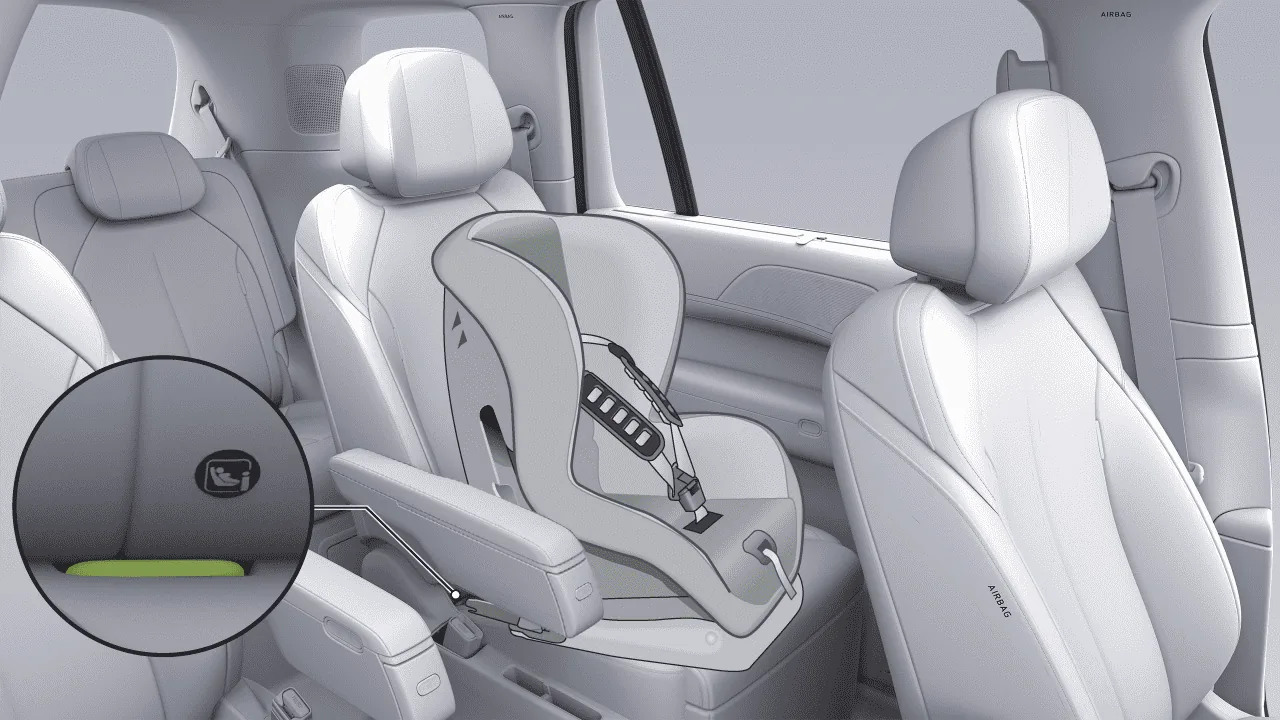
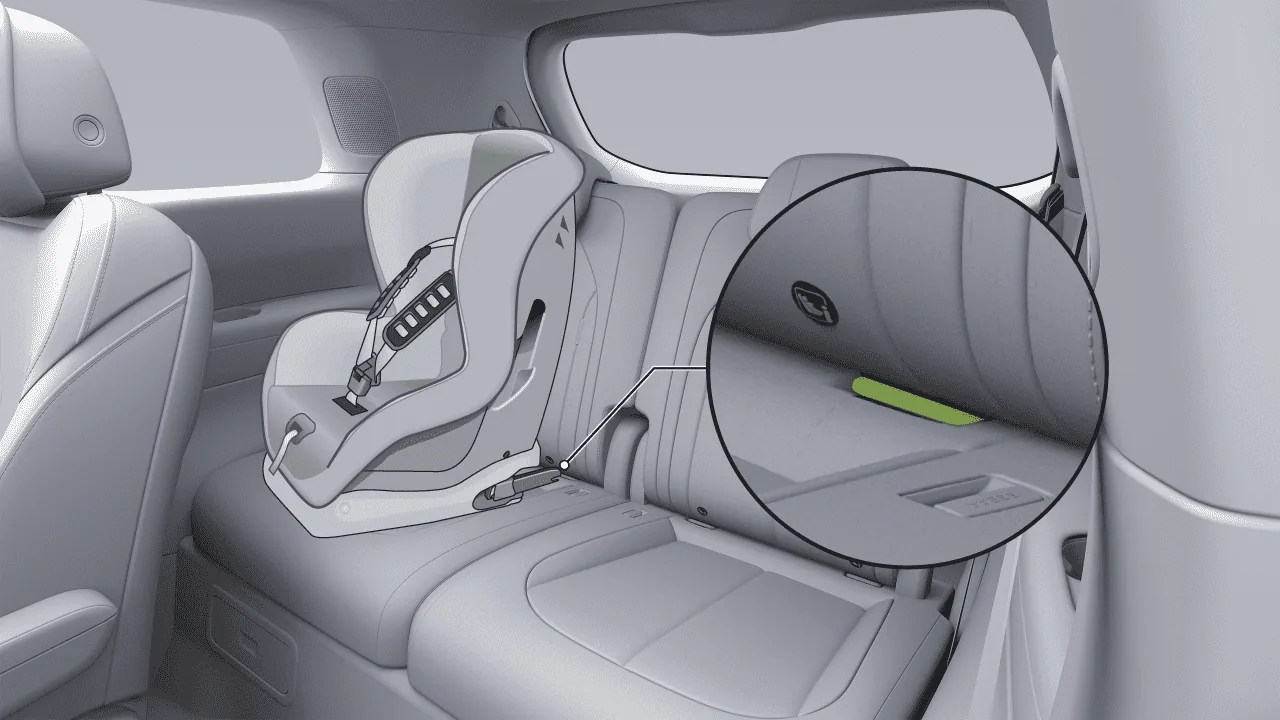
According to the child safety seat manufacturer's instructions for use, insert the lower retaining brackets of the child safety seat into the i-Size anchorage points, and ensure that the lower retaining brackets are securely fastened.
Second-row seat: With the top tether strap of the child restraint in an untwisted state, pass it between the two headrest posts below the headrest, pull it to the rear of the seat back, connect the tether hook to the anchorage point, and tighten the tether strap so that there is no slack.
Third-row seat: Pass the top tether strap of the child restraint system through the head restraint and route it to the rear of the seat back, connect the tether hook to the anchorage point, and tighten the tether strap.
Shake the child safety seat to ensure it is securely installed.
After installing the child safety seat, be sure to ensure that the child safety seat is not loose:
Secure the child restraint system along the seat belt path, and try sliding the child restraint system from side to side and from front to back.
If the child restraint can move more than 2.5 cm, it indicates that it is too loose. Fasten the seat belt or reconnect the i-Size fixed child restraint.
If it cannot be fastened securely, try another seating position or use a different child restraint system.
Warning The child safety seat must be fitted correctly and always in accordance with the manufacturer's installation instructions to avoid the child safety seat not being protective in the event of an accident.
Do not secure more than one child seat in a single seat belt or single anchor position. The increased load on multiple seats can damage the seat belt or anchor, causing serious injury or death.
After installing or removing a child restraint system, you can set the seat belt unfastened reminder function for the child seat position:
On the central control screen “ →Settings→vehicle→Seats and Steering Wheel→Rear Seat Belt Reminder”On the interface, select the seat position for which you want to enable or disable the seat belt unfastened reminder.
Caution You may turn off the seat belt unfastened warning for a child seat position only after a child safety seat has been installed at that position.
After the second-row/third-row seat belt unfastened warning is turned off, the system will not issue an audible warning if a second-row/third-row passenger is not wearing a seat belt. After removing the child safety seat, immediately turn the second-row/third-row seat belt unfastened warning back on.
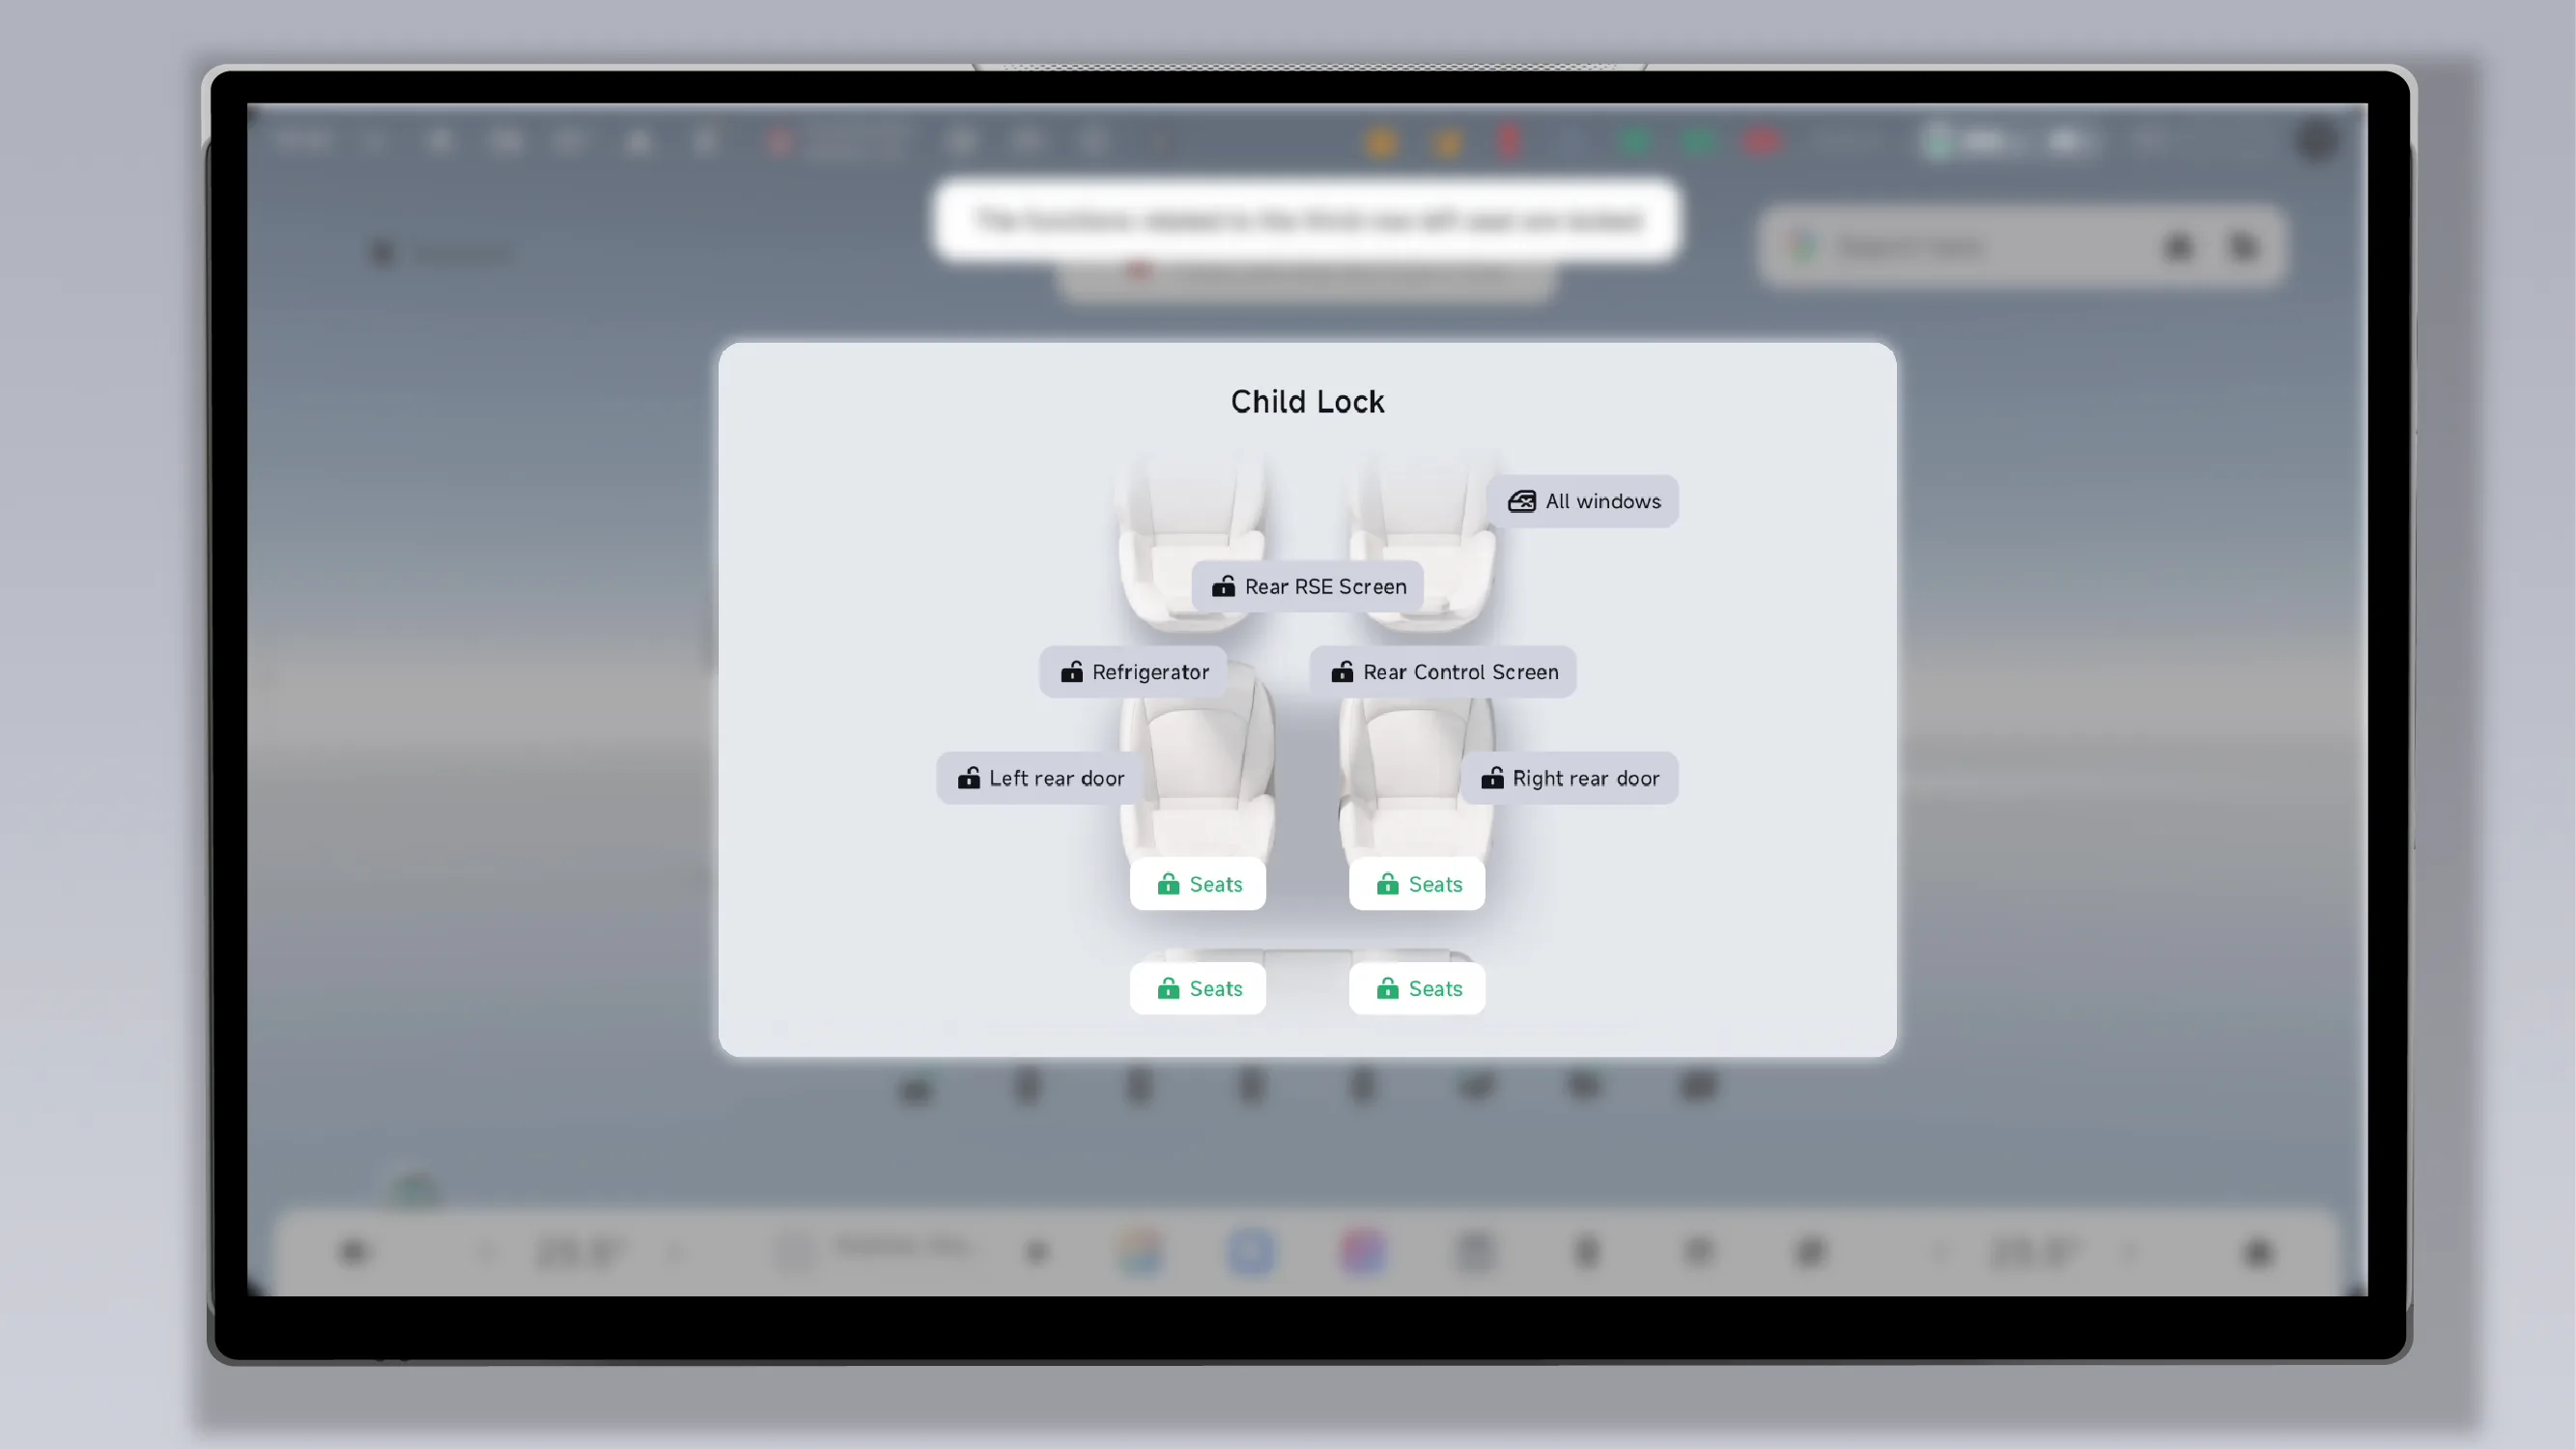
Tap on the center display screen. “ →Settings→Vehicle→Window&Door→Child Lock”Enter the Child lock pop-up interface to enable/disable the window child lock, door child lock, refrigerator child lock, rear screen child lock, and rear seat child lock.
Tap on the center display. “ →Child Lock”Enter the Child Lock pop-up interface to enable/disable the child lock for the window, door, refrigerator, rear screen, and rear seat.
Tips It is recommended to enable the child lock when children are seated in the rear seats.
When there are children in the vehicle, to ensure safety, the child lock for the windows, the child lock for the rear seats, and the child lock for the rear screen should be enabled to prevent children from operating the windows and seats and avoid pinching injuries.
Warning When the child lock function of the door is enabled, the corresponding door cannot be opened from the inside. Do not leave children alone in the vehicle.
To ensure the normal use of the vehicle and a good driving and riding experience, ensure the vehicle is efficient and reliable, and reduce possible repair costs, it is very necessary to carry out routine maintenance and regular servicing on the vehicle.
For the vehicle routine maintenance items that are explicitly specified in the *user manual* as being able to be completed by the user, the user may complete the vehicle routine maintenance according to the relevant instructions in the *user manual*.
Considering the complexity of the vehicle's systems and the strict after-sales service requirements for new energy vehicles under national laws and regulations, XPENG Vehicle strongly recommends that users complete the vehicle's regular maintenance at an XPENG Vehicle Service Center.
If the user has any questions about how to maintain the vehicle, they may contact XPENG directly.
Routine maintenance is a very important measure to ensure driving safety and reduce vehicle malfunctions. Before driving, users should pay attention to the following items. If any abnormality is found, please contact XPENG promptly.
Driving range is related to the depth of discharge. To avoid excessively deep discharge affecting the performance of the power battery, it is recommended that you charge the vehicle promptly when you notice the low battery warning light alarm on the vehicle's instrument cluster.
The vehicle's actual driving range will decrease as the vehicle ages.
Use of the Air Conditioner will reduce the vehicle driving range.
Under extreme temperatures and low battery level, due to the characteristics of the power battery, weak acceleration and insufficient power may occur.
Perform regular maintenance on the vehicle.
Maintain normal tire pressure.
Use the vehicle as little as possible in hot or severely cold climates.
After using the vehicle in winter, do not leave it parked for too long; charge it as soon as possible.
Remove unnecessary items to reduce the vehicle load.
If necessary, turn off high-power electrical devices such as the Air Conditioner, or adjust the heating or cooling temperature, to reduce the energy consumed by high-power electrical appliances and increase the driving range.
At high vehicle speeds, close the window to reduce air resistance and decrease power consumption.
Maintain the vehicle at a constant speed, and reduce sudden acceleration and sudden braking.
When accelerating, press the accelerator pedal as lightly as possible.
Regular maintenance is very important for ensuring the vehicle remains in good condition, reducing operating costs, and extending the service life of the vehicle. Users are strongly advised to regularly visit a XPENG Motors Service Center for a comprehensive inspection and maintenance of the vehicle in accordance with the requirements of the *Maintenance Manual*.
Drive in high-dust environments.
Drive in extremely cold (below 0°C) or high-temperature (above 40°C) environments.
Drive in humid environments or frequently drive through water.
Drive on roads with multiple salts or corrosive materials.
Frequent braking or driving in mountainous areas.
Used for commercial operations, or frequently for special purposes such as high-load use.
Engage in racing or competitive activities.
Vehicle operating conditions are changed due to additional installation or modification.
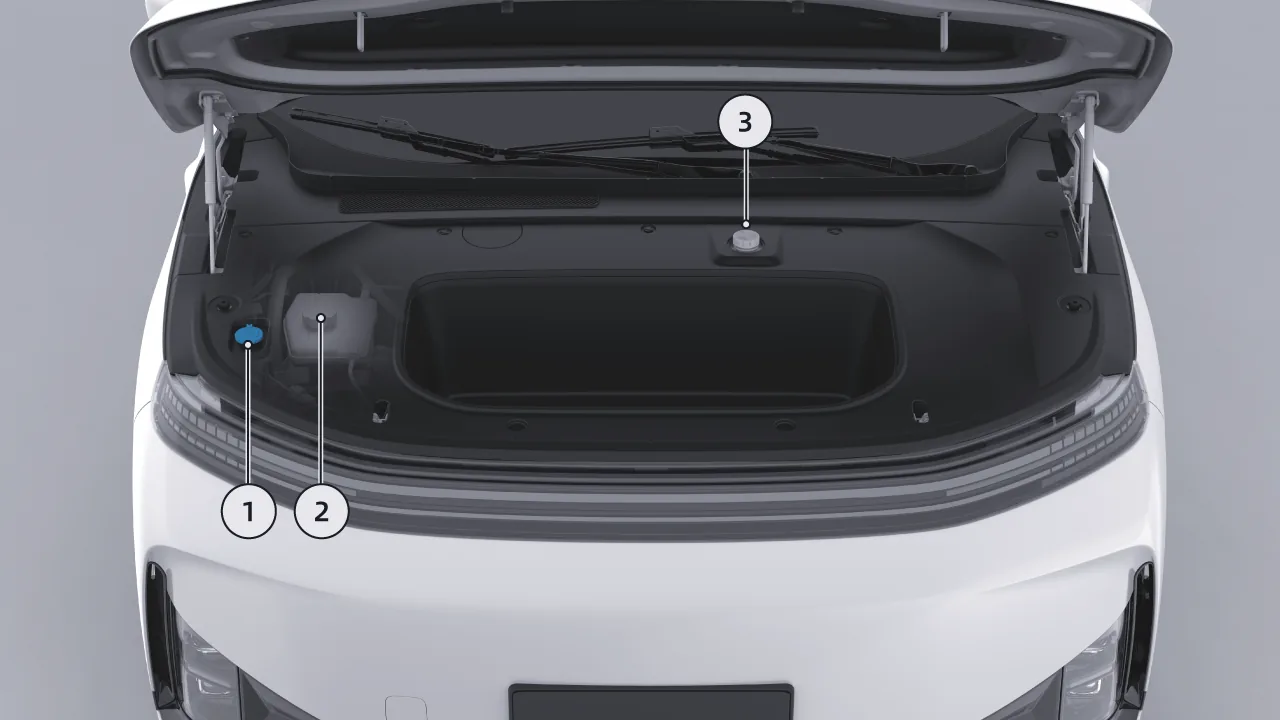
Windshield Washer Fluid Filler Opening
Coolant Filler Opening
Brake Fluid Filler Opening
Please check the coolant level within the specified maintenance interval.
Open the Frunk.
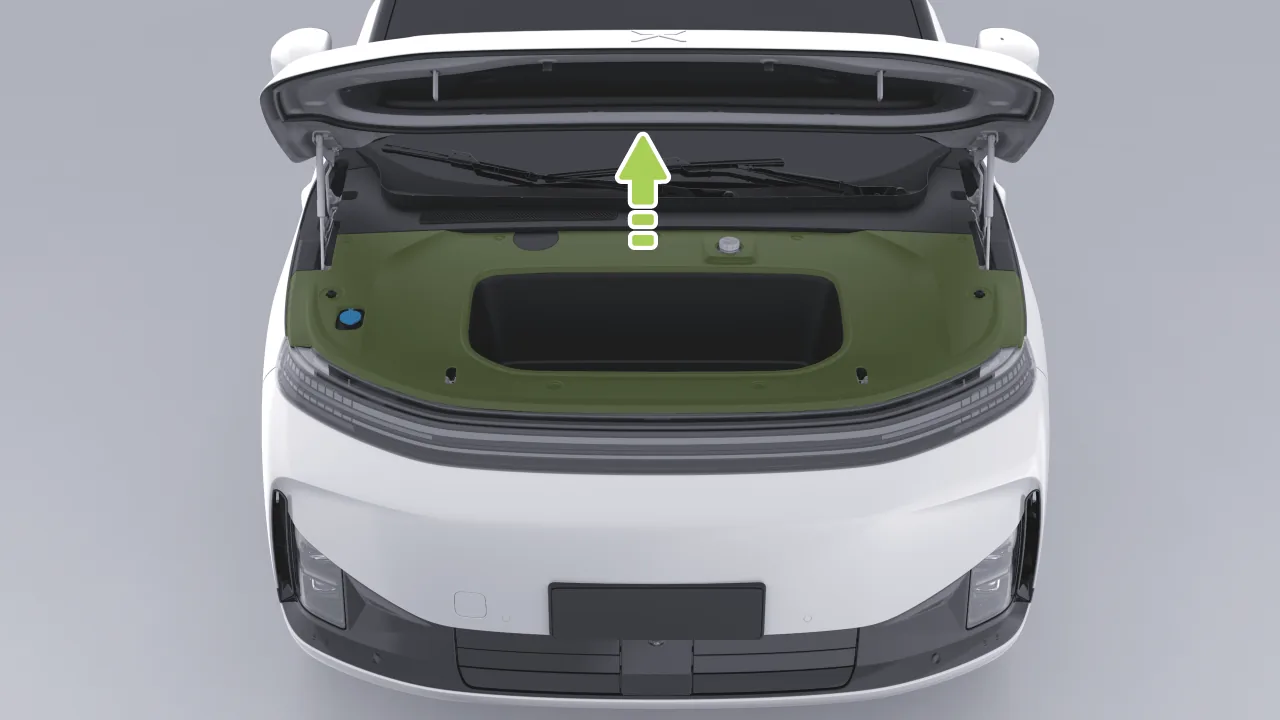
Use an appropriate tool to remove the front compartment trim panel, and the coolant reservoir will be visible.
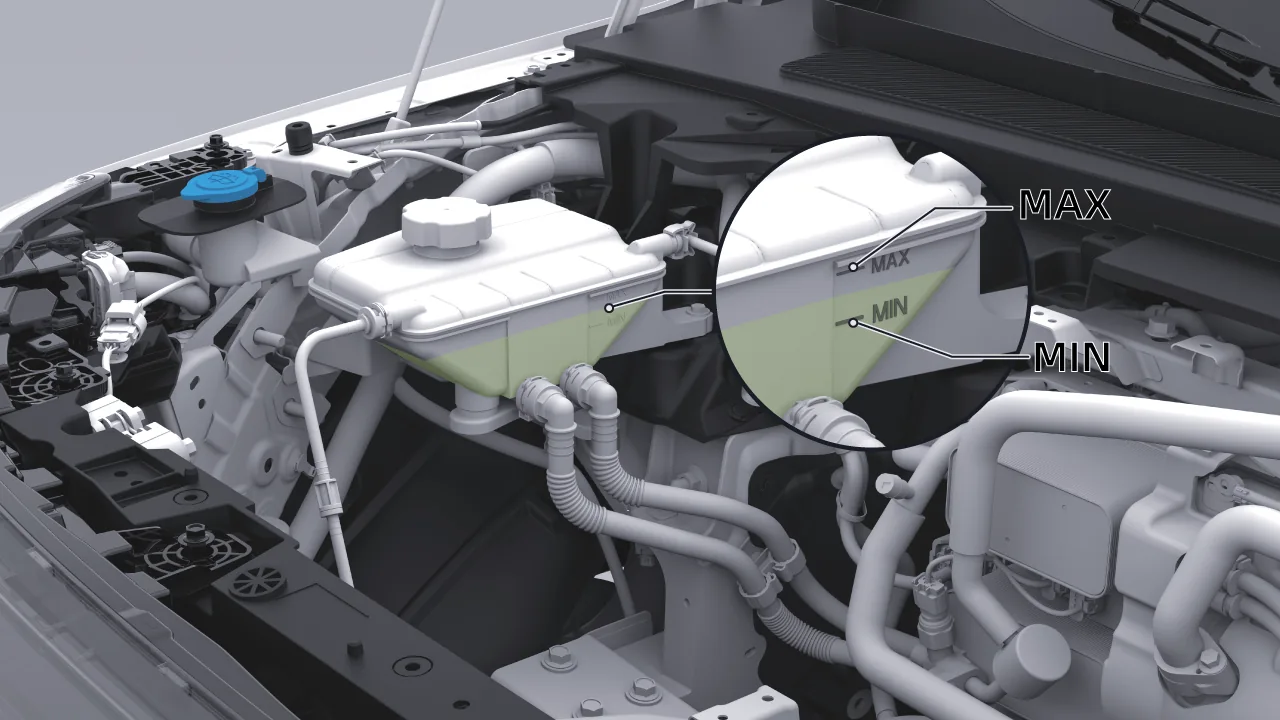
Check the coolant level. The coolant level should be between the MIN mark and the MAX mark.
MAX: Upper Limit Marking
MIN: Lower limit mark
The coolant level should be between the MIN mark and the MAX mark. If it is below the MIN mark, promptly add coolant approved by XPENG Motors.
Caution To maximize the performance and service life of the traction battery, drive motor, and air conditioner system, the cooling system uses a specific type of coolant (with different freezing points selected according to the local minimum ambient temperature).
Warning When adding coolant, it is recommended to go to Xpeng Automobile Service Center and have it handled by a professional to avoid personal injury from accidental contact with high voltage components.
Do not remove the cap of the coolant expansion jug, as the boiling fluid can splash out under steam and boiling fluid pressure in the hot cooling system and could cause personal burns.
When the brake fluid is below the specified level, the central control screen displays  The warning light indicates reduced braking performance. To prevent a traffic accident, pull over immediately when it is safe to do so and contact a XPENG service center.
Open the Frunk.
Use an appropriate tool to remove the front compartment trim panel.
Locate the brake fluid reservoir and check the brake fluid level. The brake fluid level should be between the MIN mark and the MAX mark.
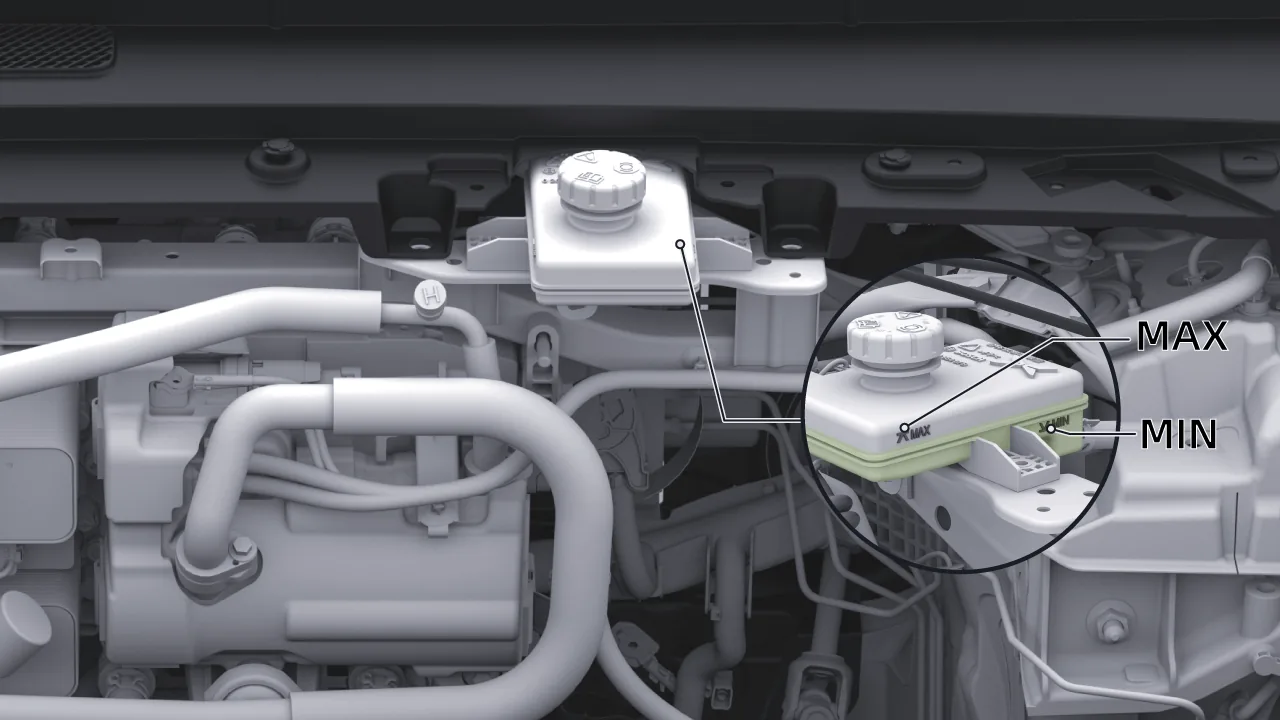
MAX: Upper limit mark
MIN: Lower limit mark
The brake fluid level should be between the MIN mark and the MAX mark. If it is below the MIN mark, promptly add brake fluid approved by XPENG Motors.
Warning Add brake fluid until the fluid level is close to MAX (but do not exceed the MAX line). After adding brake fluid, make sure the cap is properly installed.
Brake fluid is a toxic substance. Relevant environmental protection regulations must be observed when discharging or disposing of waste brake fluid.
When adding brake fluid, it is recommended to go to a XPENG service center and have the operation performed by professionals to avoid accidental contact with high-voltage components, which may cause personal injury.
Caution If paintwork is inadvertently spilled when adding brake fluid, remove the paintwork as soon as possible, otherwise damage to the vehicle paintwork may occur.
Warning Use only new brake fluid stored in an air-tight, sealed container. Never use brake fluid from a used or previously opened container. Brake fluid absorbs moisture, which reduces braking performance.
Brake fluid is highly toxic. Keep containers tightly sealed and out of the reach of children. If accidental ingestion or exposure occurs, seek medical attention immediately.
If brake fluid comes into contact with skin or gets into the eyes, rinse immediately with plenty of clean water.
Brake fluid can damage painted surfaces. Immediately absorb any spilled fluid with an absorbent cloth, then wash the area with a mixture of automotive cleaner and water.
During normal vehicle use, the brake system automatically compensates for brake pad wear, so the brake fluid level may drop slightly. This is a normal condition. However, if the fluid level drops significantly in a short period of time, falls below the "MIN" mark, or you need to add brake fluid frequently, this indicates a leak in the brake system. Contact an XPENG service center as soon as possible to have the brake system inspected.
Brake fluid is hygroscopic and will continuously absorb moisture from the air during use. If the water content in the brake fluid becomes too high, it can corrode the brake system and significantly lower the fluid’s boiling point. This may cause vapor lock during emergency braking and reduce braking effectiveness.
Never store brake fluid in food containers, beverage bottles, cups, or any container other than its original brake fluid container. Otherwise, it may be mistaken for a drink and cause poisoning!
The windshield washer fluid filler opening is located in the front compartment. When the vehicle is low on washer fluid, refill the windshield washer fluid promptly.
Open the Frunk.
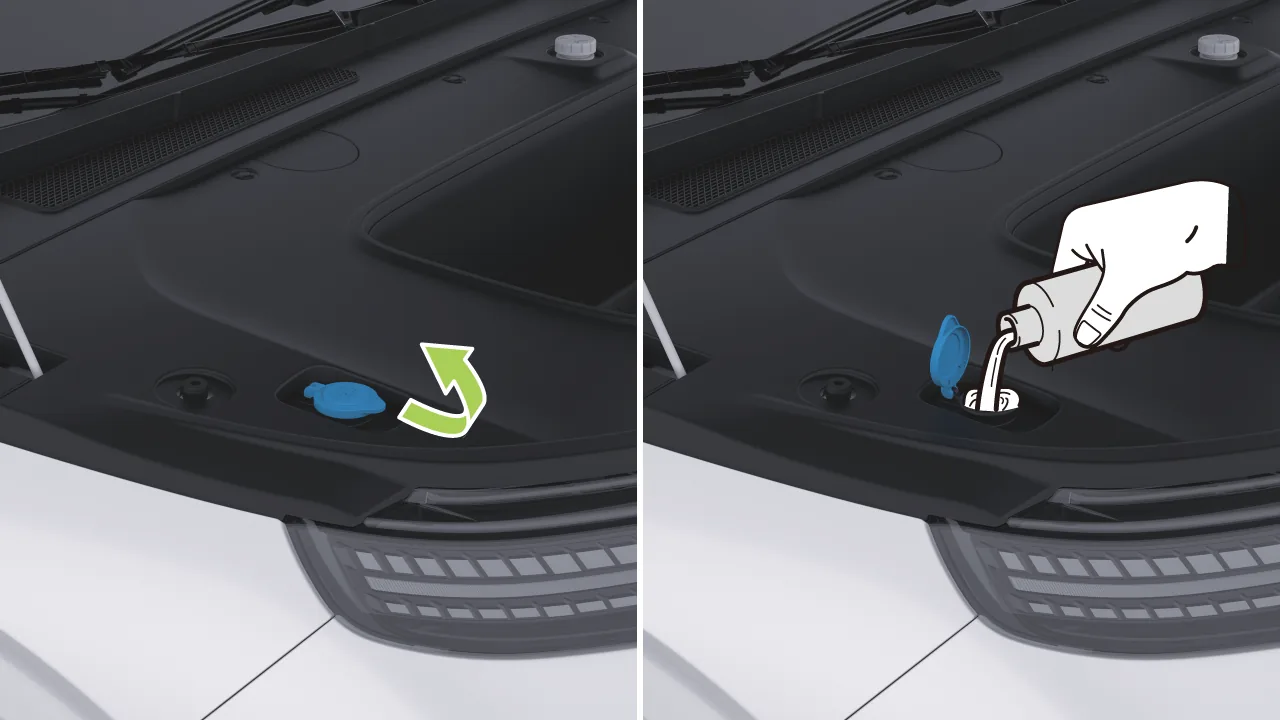
Open the windshield washer fluid filler cap and add fluid to the appropriate level as needed.
Tips When filling the windscreen washer fluid, align with the spout and fill slowly; if the washer fluid spilled, wipe it clean.
After filling, close the washer fluid filler cap and ensure it is installed in place.
Caution Do not use strong acid or strong alkali cleaning agents: only cleaning agents with a pH value in the range of 7 to 9 are acceptable.
Prohibit strong organic solvents: Certain solvents used as cleaning agents in industrial production, such as benzene, dichloromethane, and trichloroethylene, are explicitly prohibited or restricted for use in the production process of optical lenses. These solvents may dissolve or damage the lens substrate and surface coatings.
Do not use abrasives: The cleaning solution should not contain any fine abrasive particles, so as to avoid scratching the lens surface during wiping.
Do not use strong oxidizing agents or corrosive ions: Although some cleaning solutions may use weak oxidizing agents such as hydrogen peroxide, the use of strongly oxidizing chemicals should be avoided. At the same time, high concentrations of chloride ions, etc. may also cause corrosion to metal parts and certain coatings.
Avoid a temperature difference exceeding 80°C: The critical thermal shock temperature difference of borosilicate glass (a common lens material) is approximately 80°C. If a lens at -40°C directly contacts hot water above 60°C, the temperature difference exceeds 100°C, which may cause microcracks inside the lens due to uneven thermal expansion and contraction, or even cause the entire lens to break.
Caution Regularly check for clogged washer jets.
When the temperature is below freezing point, use a cleaning solution containing antifreeze to avoid freezing of the washer pump, washer fluid tank and washer line.
Do not use the washer when the washer fluid tank is empty. Damage to the washer will occur.
Do not use formulated washer fluid, this fluid may cause the windscreen to create streaks, stains.
Warning Do not allow windshield washer fluid to splash onto the body panels. If it is accidentally splashed, immediately wipe up the spill and rinse the affected area with clean water.
Use glass cleaning fluid that complies with national standards (see the wording on the bottle packaging), and according to the local temperature conditions, select cleaning fluid with a freezing point lower than the local minimum temperature. Cleaning fluid that does not meet the standards may cause damage to the glass cleaning fluid pipeline.
When the local ambient temperature is above 10°, do not use windshield washer fluid with a freezing point below 0°; otherwise, it may cause the rear lamps to crack.
The TPMS can monitor tire conditions in real time while the vehicle is in motion, and issue an alarm when tire pressure or the TPMS system is abnormal, ensuring driving safety.
When the tire pressure is too low or the tire pressure is too high, the central control screen will illuminate.  Indicator light, and the corresponding text reminder pops up: “Tire Pressure Too Low”, “Tire Pressure Too High”etc., stop the vehicle at the roadside in a safe place as soon as possible, and at a safe location inspect the tires and inflate or deflate the tires to the normal tire pressure value.
When the TPMS malfunctions, the central control screen will illuminate. Indicator light, and the corresponding text reminder pops up: “Tire pressure monitoring system fault, please contact service”, “Tire pressure sensor fault, please contact service”, stop the vehicle at the roadside in a safe place as soon as possible, and contact a XIAOPENG Motors Service Center as soon as possible.
After each tire replacement, the tire pressure needs to be calibrated. First lock the vehicle, power it off, and keep the vehicle stationary for more than 17 minutes, then drive forward for 10 minutes at a speed above 40 km/h to calibrate the tire pressure. During tire pressure calibration, avoid reversing.
You can use the central control screen “ →My Vehicle”On the interface, check the current vehicle tire pressure value. If the tire pressure value is lower than the specified value on the tire pressure label on the driver-side B-pillar, inflate the tire promptly.
Caution It is normal for the tire pressure to increase after the vehicle has been driven for a period of time.
If the tires require frequent inflation, go to Xpeng Automobile Service Center for service as soon as possible.
If the tire frequently leaks or cannot be repaired properly due to cuts and other damage, replace the tire.
If the tire leaks during driving, do not continue driving, even a short distance may cause irreparable damage to the tire.
Make sure the tire valve cap is installed, dust and moisture will enter the valve core and may cause air leakage, if the valve cap is missing, install a new valve cap as soon as possible.
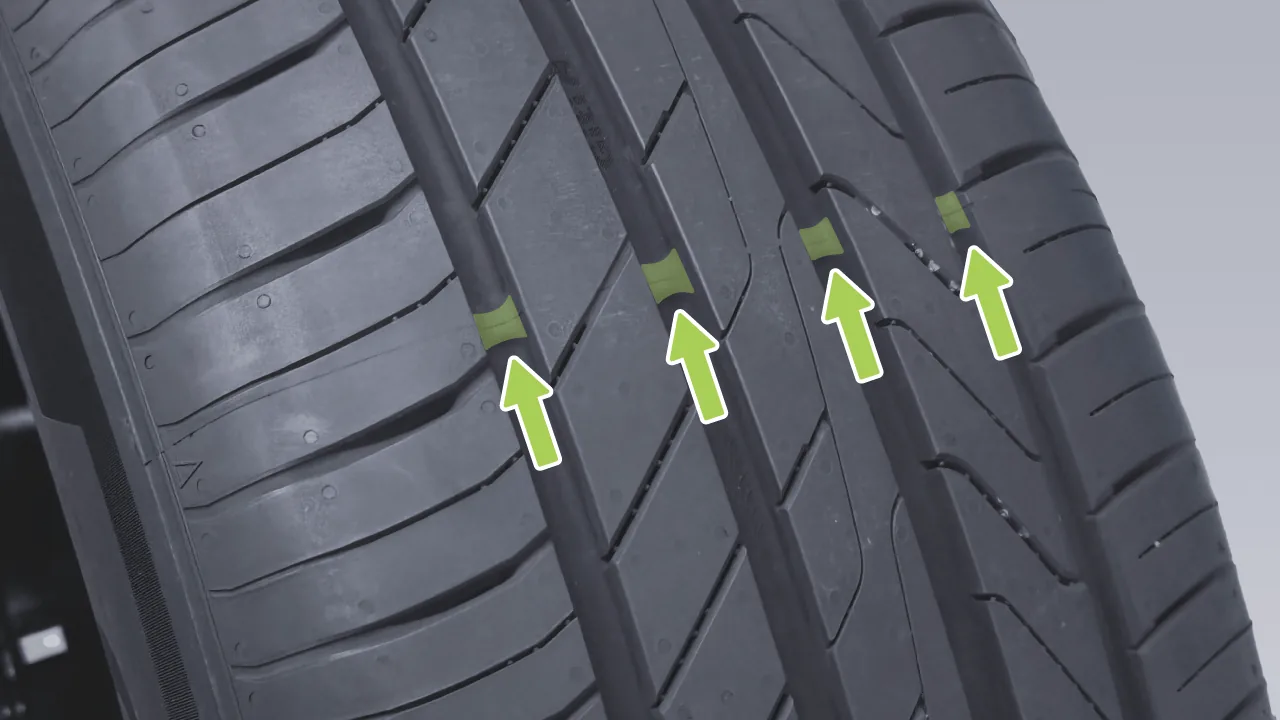
There are 1.6 mm-high wear indicators in the tire tread, distributed around the tire circumference. If the tire is worn down to be level with the wear indicators, the tire must be replaced immediately.
If tires with exposed wear indicators continue to be used, it may lead to extended braking distance, steering failure, tire rupture, and other conditions, which can easily cause accidents.
Avoid rapid acceleration.
Avoid sharp turns and hard braking.
When driving over potholes, curbs, or similar sections of road, pass through slowly.
A four-wheel alignment inspection is required when uneven tread wear is found.
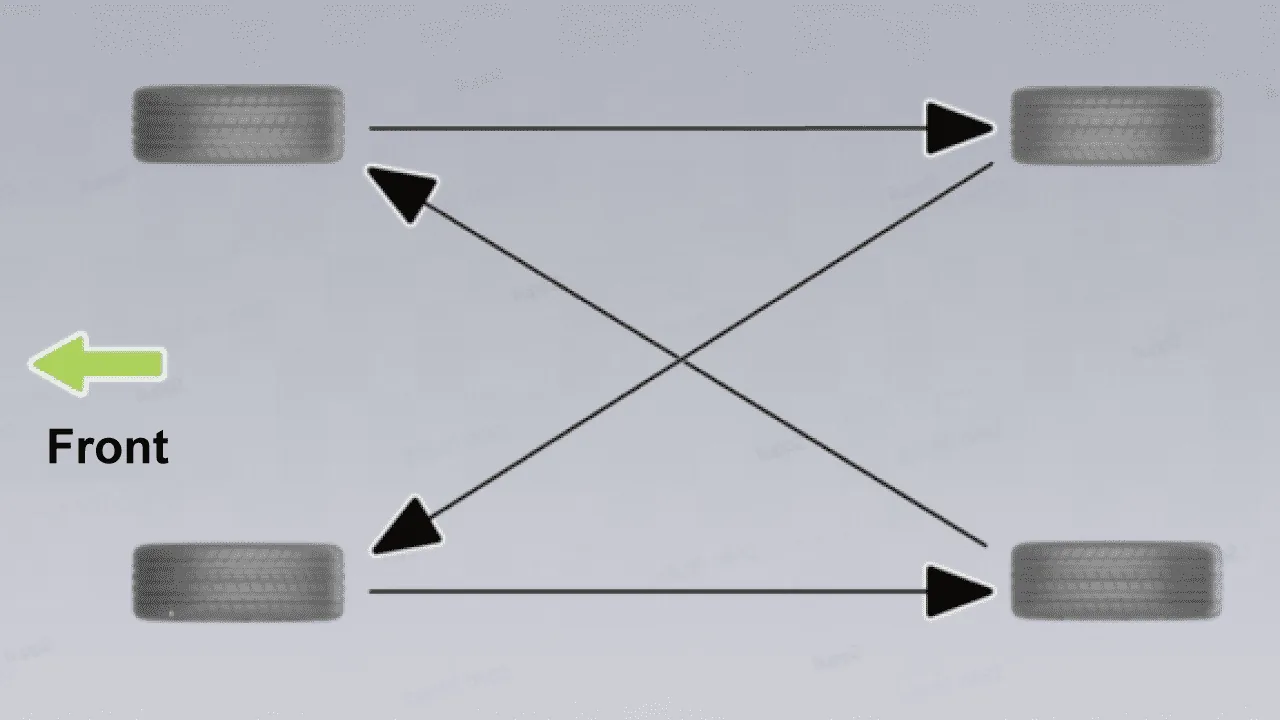
During vehicle operation, the loads borne by the tires differ, and the wear conditions are also different. Tire rotation can effectively reduce uneven tire wear, make tire wear more uniform, and extend tire service life.
Tips After tire rotation, the tire pressure sensor needs to be calibrated. To avoid abnormal TPMS operation, please go to a XPENG service center for tire rotation.
Due to the effects of ultraviolet rays, extreme temperatures, high loads, and environmental conditions, tires will age over time. Tires will also experience normal wear during normal acceleration, braking, and turning. XPENG Service Center will check tire wear during vehicle maintenance and recommend tire replacement when necessary.
When any of the following abnormal tire conditions occur (including but not limited to), immediately go to a XPENG service center to replace the tire:
The tire tread is worn down to the tread wear indicator.
Foreign objects scratch or puncture the tire surface.
There are bulges or cuts on the tire sidewall.
The tire is severely aged, and cracks appear on the tire surface.
The tire surface peels off, exposing the cord ply.
Caution Failure to observe the following precautions may result in an accident, injury, or death:
Never install tires or wheels that do not match the original vehicle specifications. Mismatched tires can degrade speedometer and odometer accuracy, which in turn can impair control of the braking system and automated driving functions. Tires of different specifications can affect suspension height control and may lead to improper vehicle stance and pulling to one side. Because rear‑wheel steering angles vary with non‑standard tires, there is also a risk of interference at the rear wheels.
Please do not use tires that have been used on other vehicles.
Do not mix tires with significantly different tread wear.
Do not use tires with unknown usage history.
Do not mix tires of different manufacturers, models, or tread patterns.
Do not mix tires of different constructions (e.g. radial, bias-belted, or bias-ply tires).
Wheel balancing must be performed again after any tire replacement or repair.
When driving the vehicle in severe conditions such as snow-covered or icy roads in winter, using snow chains can increase tire friction and reduce skidding. When using snow chains, the following operations must be observed:
Snow chains may only be installed on the rear wheels.
When driving the vehicle in deep snow, it is necessary to install tire snow chains on the tires. This vehicle is not equipped with snow chains and they may be purchased separately as needed. If snow chains are installed, equivalent products whose size and type conform to the tire specifications on the vehicle must be selected.
Snow chains may be installed only on the vehicle’s original 21-inch tires; snow chains are not applicable to any other tires. The requirements for wheel rim, tire, and snow chain thickness when installing snow chains are as follows:
| Rim Specifications | Tire Specifications | Snow Chain Thickness |
| 21-inch Wheel Rim | 265/45 R21 | ≤ 10 mm |
Install snow chains on the tires to ensure balanced driving in all weather conditions. Keep in mind that after installing snow chains, vehicle power may be insufficient. Drive carefully even if road conditions are good. When driving, do not exceed the specified speed limit for the tire snow chains, and do not exceed 50 km/h, whichever is lower.
Snow chains must be installed in pairs. The use of self-tensioning snow chains is strictly prohibited.
Do not use snow chains on dry roads. After driving onto a snow-free road surface, remove the snow chains.
After fitting the tire snow chains as tightly as possible to the tires, drive 0.5–1.0 km, then tighten the chains again.
If the vehicle is equipped with wheel covers, remove them before installing snow chains.
If you hear friction or impact noise between the snow chains and the vehicle while driving, stop the vehicle and fasten the chains again. If this does not work, remove the snow chains to prevent damage to the vehicle.
Summer tires are suitable for extremely dry and wet road surfaces, but are not suitable for winter road conditions. When driving in low temperatures or on icy and snowy road surfaces, it is recommended to use winter tires.
These tires are designed to provide adequate traction in all seasons throughout the year, but may not provide traction comparable to winter tires on icy or snowy roads. The sidewall of all-season tires is marked with (All-season) and / or (Mud and Snow) marking.
Winter tires can improve traction on icy and snowy roads. When installing winter tires, be sure to install a complete set of four tires at the same time. All four wheels must use winter tires of the same specification, brand, construction, and tread pattern. You may contact a XPENG service center for advice on winter tires.
When driving a vehicle equipped with winter tires, increased road noise, reduced tread life, and decreased traction on dry roads may occur.
It is recommended to check during each maintenance service or before a long trip whether the friction lining has worn to the warning tab position.
If abnormal brake noise occurs during braking, it is recommended to inspect the friction pads. If they are worn to the warning position, replace them. The friction pads must be replaced with original parts.
To maintain good performance of the power battery, pay attention to the following items during daily use:
When the power battery level drops to 0%, you must immediately connect the charging gun for charging.
In winter when the temperature is low, it is recommended to keep the remaining pure electric driving range not lower than 100 km.
During vehicle parking, avoid enabling Sentry Mode or the trunk 12V delayed power-off function for an extended period to reduce vehicle power consumption.
Models equipped with lithium iron phosphate batteries:After taking delivery of the vehicle, charge the battery to 100% as soon as possible. During subsequent use, it is recommended that you set the charging limit to “One-Tap Optimal” when charging, and fully charge to 100% at least once every 2 weeks or every 1,000 kilometers.
Under normal conditions, the vehicle driving range of the power battery will be affected by factors such as driving habits, road conditions, ambient temperature, or the use of electrical equipment.
Ambient temperature affects the performance of the power battery. The vehicle must be used within an ambient temperature range of -30°C to 55°C to maintain good power battery performance and extend the service life of the power battery.
During long-term parking of the vehicle, the power battery will also slowly self-discharge. A low power battery charge level will shorten the service life and performance of the power battery and affect the driving range of the vehicle.
Therefore, before the vehicle is parked for a long period, check the remaining power battery charge and keep the charge between 30% and 60%. If the charge is insufficient, charge it to meet the parking requirement before leaving the vehicle parked.
If the vehicle is parked for a long time, it is recommended to disconnect the negative terminal of the low-voltage battery. Power on and inspect it once every 3 months. If the battery charge is too low, it must be charged in time; otherwise, the performance of the power battery will be reduced due to low charge.
The power battery is an important component of the vehicle. During use, please pay attention to the following matters and limitations:
Do not leave the vehicle parked for an extended period, to avoid complete discharge of the power battery, which may cause damage to the power battery.
Do not park the vehicle in environments with high temperatures or severe cold, otherwise the power battery may be damaged.
Keep the vehicle dry and avoid parking it for extended periods in damp environments, such as waterlogged parking lots.
Use caution when driving through roads with deep standing water to avoid short circuit, electric leakage, or damage to the power battery due to excessive contact with water.
If you notice scraping of the chassis, or an unusual odor from the power battery, stop using the vehicle immediately and contact a XPENG service center.
Use caution when driving over special road surfaces such as muddy roads, potholes, curbs, relatively high and wide speed bumps, and sidewalk ramps, to avoid scratching or damaging the power battery due to chassis impact.
It is recommended to park in a cool, dry, and well-ventilated place, away from heat sources (such as heating pipes) and low-lying areas, and far from flammable and explosive materials and corrosive substances.
The replacement frequency of the low-voltage battery usually depends on the specific usage conditions of the vehicle. Good vehicle use habits can effectively extend the service life of the battery. During daily use, avoid the following situations:
If the vehicle remains stationary in storage for a long time, the low-voltage battery may become fully discharged.
Avoid frequently driving with the battery fully depleted, as this will cause the low-voltage battery capacity to decrease.
Using a non-brand low-voltage battery provides no after-sales support and has a low safety factor.
The vehicle's pure electric driving range is less than 30 km, and the vehicle was not charged in time.
The vehicle is equipped with a smart supplemental charging function. When the low-voltage battery level is low, the power battery will automatically charge the low-voltage battery. However, when the power battery level is low (when the remaining driving range is less than 30 km), charging of the low-voltage battery will stop to avoid damage caused by excessive discharge of the power battery.
Tips When the vehicle has a range of less than 30km, the vehicle should be charged immediately. Failure to do so may result in the vehicle being unable to unlock or start due to a low voltage battery being discharged.
Regularly cleaning the vehicle can protect the vehicle from damage caused by the external environment. The car wash interval depends on the frequency of vehicle use and the parking environment (for example: garage, under trees, or prolonged sun exposure).
Please note the following when washing the vehicle:
Wash the vehicle in a shaded area. Wait until the vehicle has cooled down sufficiently before washing it to avoid damage to the paint caused by direct sunlight.
Before washing the vehicle, first remove contaminants from the paint surface, such as bird droppings, tree resin, insects, tar spots, road salt, industrial dust, etc.
When cleaning the vehicle in winter, pay attention to drying the seams around the door handles to prevent the risk of these areas freezing.
Caution When washing the vehicle, please use a dedicated cleaning agent. Before use, please check the shelf life. After use, be sure to store it out of the reach of children.
The active grille is located below the front bumper. When washing the vehicle in a low-temperature environment, or when parking outdoors on snowy days, the active grille louvers may be unable to operate properly due to icing, and the center display will prompt an active grille fault. This is a normal phenomenon and does not affect normal vehicle use. After driving normally for a period of time (about one hour) or using a hot air gun to defrost, the fault will disappear automatically. If the fault still exists after the louvers are defrosted, please contact a XPENG service center for inspection and repair.
Warning Do not wash the vehicle while it is charging.
Do not wash the vehicle while it is powered on.
Keep the charging opening closed during the car wash to avoid damage to the vehicle.
Do not flush the interior of the front compartment with water.
Do not wash the vehicle with a hard or rough cloth, to avoid damage to the paint.
Do not wash the vehicle without the parking brake applied.
Do not spray hoses directly toward windows, door seals or through hub bores into the brakes.
Do not use chemical tire cleaner as this may damage the finished surface of the wheel.
Do not use℃hot water with a water temperature greater than 60 and do not use hot water with a cleaning concentrate.
Do not use acid and alkaline cleaners, acid fluids can damage the surface of the vehicle and affect its appearance.
When manually cleaning the exterior of the vehicle body, follow the steps below:
Preparation Before Cleaning
Enable Car Wash Mode.
Close all doors, the trunk, and the front hood, retract the flush door handles, and check whether the charging port is fully closed.
Close all doors, windows, and automatic wipers. For how to turn off automatic wipers, please refer to the wiper chapter.
Thorough Rinsing
Rinse the vehicle body from top to bottom with plenty of water, including areas where dust, mud, or road salt easily accumulates (for example, wheel arches and panel joints).
Use a sponge or soft cloth to wipe the vehicle body.
Add a high-quality neutral car cleaner to cold or warm water, and carefully wash the vehicle from top to bottom starting from the roof with a clean, soft sponge, cloth, or soft brush.
If there is dirt that is difficult to remove, a cleaning agent may be used to soften it. If the sponge or wiping cloth is heavily soiled, it is recommended to replace it with another sponge or wiping cloth for cleaning.
Rinse with clean water
After cleaning the vehicle, thoroughly rinse it with clean water to prevent cleaning agent residue from remaining on the surface.
Dry with a soft cloth
Caution Do not continuously spray water onto the lower part of the windshield glass. If water enters the Air Conditioner system air inlet at the lower part of the windshield glass, the Air Conditioner system may not operate properly.
When using an automatic car wash to clean the vehicle, be sure to follow the instructions of the car wash operator:
Preparation Before Cleaning
Enable Car Wash Mode.
To fold the mirrors inward, tap the fold Side Mirrors button on the car wash mode screen.
Close all doors, the trunk, and the front compartment lid, retract the flush door handles, and check whether the charging port cover is fully closed.
Close all doors, windows, and automatic wipers. For how to turn off the automatic wipers, see the wiper operation section.
If using a conveyor car wash, ensure that the vehicle remains in N gear. For how to shift the vehicle to N gear, please refer to the gear shifting operation section.
Start cleaning from the front of the vehicle.
After cleaning, unfold the rearview mirrors.
When using a high-pressure washer to clean the vehicle, be sure to follow the equipment operating instructions.
Before washing the vehicle, check and confirm that all doors, the trunk, the front compartment lid, the charging port cover, and the windows are closed.
Keep the nozzle at least 30 cm away from the vehicle body surface. Pay particular attention to the area around the window; if it is too close, water may enter the vehicle interior.
Do not directly or indirectly use high-pressure water to wash the inside of the front compartment.
Avoid cleaning the sensor with a high-pressure washer or steam cleaner to prevent damage to the sensor.
Warning When washing the vehicle, do not flush the water gun at the connector on the underside of the vehicle.
Do not use a high-pressure water gun to impact the charging flap switch area, as this may cause the cap to open.
After rinsing with a water gun, use a soft brush to clean the wheel rim, fully backward rinse with the water gun and use an air gun to blow dry the moisture on the brake friction pads and wheel rim.
Tips To drive the vehicle immediately after washing the vehicle, depress the brake pedal several times to remove any moisture from the brake discs. Water vapor may affect braking efficiency.
Regular waxing can protect the paint surface and help maintain the appearance of a new vehicle. Over time, the wax will gradually wear off; reapply wax if necessary.
Tips Waxing cannot restore the gloss of the vehicle paint.
It is recommended to park the vehicle in a covered parking area. Long-term outdoor storage is not recommended, to prevent resin, grease, and similar substances from adhering to the paint surface. Such stains are likely to leave marks and are difficult to clean. If long-term outdoor storage is necessary, it is recommended to use a thickened cotton-flannel car cover.
Regularly inspect and clean the edges of the wiper blades, and check the rubber for cracks, splits, and roughness. If damaged, contact a XPENG service center for replacement.
Caution In winter or under cold conditions, always check whether the wiper blades are frozen to the windshield before using the wipers. If so, perform de-icing first; otherwise, damage to the wiper blades and wiper motor will result.
The surface of the wiper blade is coated with a layer of graphite, which enables smooth wiping and prevents wiping noise. Cleaning agents containing solvents, hard sponges, and sharp objects can all damage the graphite layer. Damage to the graphite layer will increase wiper wiping noise and the wiper blade should be replaced promptly.
Contaminants on the wiper blades may reduce wiper blade effectiveness. Contaminants include ice, spray wax from car washing, cleaning fluid containing bacteria or water repellent, bird droppings, leaves, and other organic substances. Clean the wiper blades as follows:
Shift the vehicle gear position to P gear and keep the wipers off. On the central control screen “ →Settings→vehicle→Maintenance”On the interface, the front/rear Wiper Maintenance Mode can be enabled/disabled.
Slightly lift the wiper arm away from the windshield, just enough to access the wiper blade, then use a clean cloth and neutral detergent to wipe the wiper blade.
After cleaning, lower the wiper arm carefully to prevent it from dropping suddenly and striking the windshield, and turn off Wiper Maintenance Mode for the front wiper.
Tips If the wiper blades still do not work after cleaning, the wiper blades may need to be replaced.
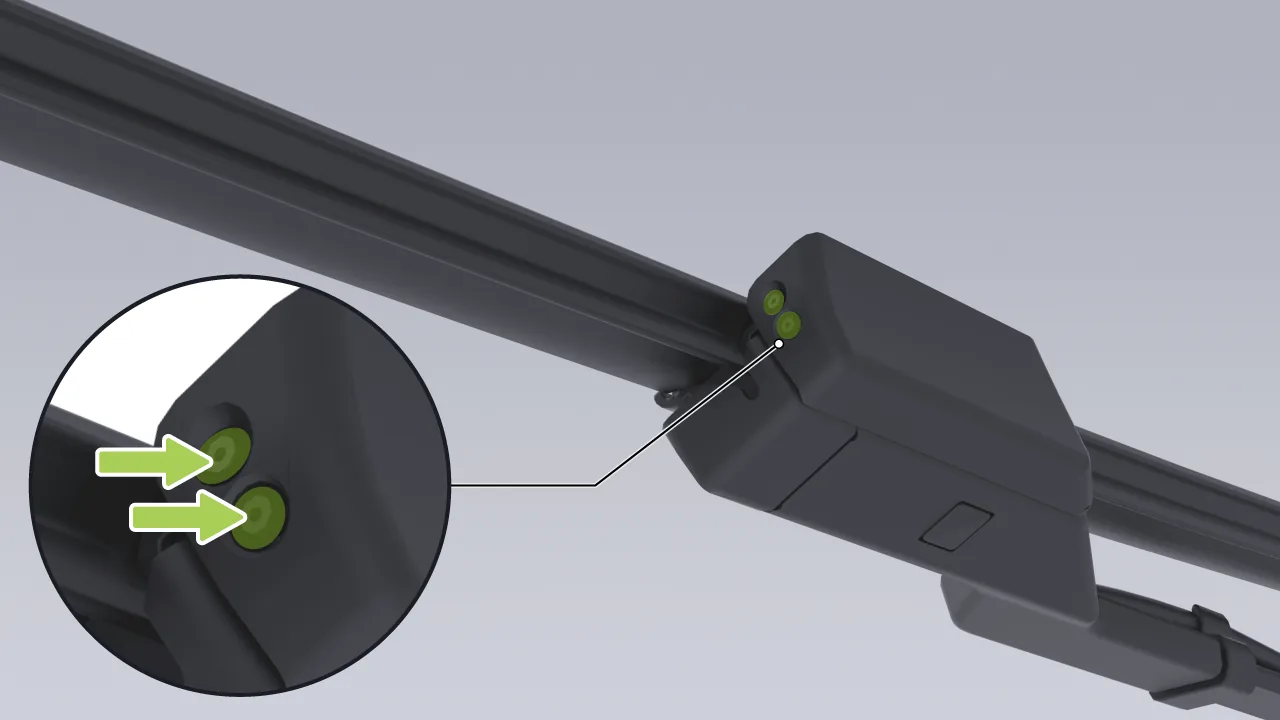
If the wiper nozzle is blocked, use a tool to clear the obstruction from the nozzle.
Contaminants on the windshield may affect the hydrophilicity of the glass. Please clean them promptly. Contaminants include dust and oil film, bird droppings, leaves, and other impurities and foreign matter.
Clean the window glass and rearview mirrors with an alcohol-based glass cleaner, then dry the glass surfaces with a clean, lint-free soft cloth.
Use a small brush to remove snow from the window and rearview mirrors. Use de-icing spray to remove ice buildup. An ice scraper may also be used, but special care is required to avoid damaging components, and the ice must be scraped in the same direction during use.
Caution Do not use hot water to remove ice and ice from the windshield and rear view mirrors, as this may cause the glass to burst.
Do not use cleaning products that contain ammonia or chlorine, such as household window cleaners, which can accelerate the aging of the wiper strips.
Do not use water-resistant materials (e.g. waxing, crystallizing, etc.) to clean the window glass, which will increase the water resistance of the glass surface and affect the cleanliness of the window glass.
If rubber, grease and silicone residues are present on the glass, they must be removed with special window cleaner or silicone cleaner.
Clean with clean water and a soft cloth at normal temperature. For dirt that is difficult to remove, use a mild cleaner such as plastic cleaner for cleaning, and then rinse off the cleaner with water.
Caution Do not use dry cloths, dry sponges, or other dry items to clean the lights, so as to avoid scratching the lights.
Do not wax or polish the surface of the lights to avoid damaging the lights.
Never use a cleaning agent directly to clean the lamps at high temperature; first rinse with clean water to cool them down before cleaning.
Do not use cleaning agents containing alcohol or organic cleaners (such as adhesive remover, glass cleaner, paint cleaner, foam cleaner, thinner, de-icer, etc.) to clean the lights, so as to avoid damaging the lights.
Regularly inspect and clean the interior, keep its appearance neat and like new, and prevent premature wear.
Caution It is recommended to use automotive products that do not contain plasticizers. If the plasticizer content in automotive products is too high, it will react with interior trim made of PU material, causing phenomena such as bubbling of the interior trim.
Using solvents (including alcohol), bleach, citrus cleaners, naphtha, silicone-based products, or additives will damage the interior.
Do not use wet wipes, wet cloths, cleaning agents, etc. to wipe the door trim panel, and protect it during vehicle use (such as on rainy days or during car washing) to avoid water entering the door trim panel as much as possible; otherwise, it may cause internal electrical component malfunctions, etc.
Warning Do not directly use a large amount of water to wash the interior of the Cabin and the rear luggage compartment, so as to avoid damaging electrical parts and affecting the normal use of the vehicle.
Clean the surface of plastic parts with a clean soft cloth and clean water. If necessary, a dedicated plastic cleaner may be selected for wiping and cleaning.
Warning Polishing the upper surface of the instrument panel is strictly prohibited. A polished surface is prone to reflection and may interfere with the driver's field of vision.
Use a vacuum cleaner to remove dust.
Clean the leather with a clean soft cloth and clean water.
Wipe the water stains dry with a dry soft cloth.
If the above cleaning is insufficient to remove stains, a special stain remover may be used for cleaning. After wiping with the stain remover, dry it as soon as possible with a soft dry cloth.
Caution Do not leave a soft cloth soaked with detergent on any part of the interior trim for an extended period, as this may cause fading or damage to the interior fabric.
Use a vacuum cleaner with a soft brush attachment to remove dust and loose dirt.
For stubborn stains, you can first try using water or soda water to remove them. Before cleaning, please use an appropriate method to remove the stains:
For liquid stains: gently blot the remaining stain with a paper towel so that the stain penetrates into and is absorbed by the paper towel as much as possible, then use an interior cleaner to clean it.
For solid dry stains: remove them manually as much as possible first, then use a vacuum cleaner to remove them.
Caution To extend the service life of the vehicle carpet and facilitate cleaning, please use genuine floor mats approved by XPENG Vehicle. Clean the floor mats regularly, and ensure that the floor mats are properly installed. If the floor mats are excessively worn, replace them promptly.
To avoid interfering with the pedals, ensure that the driver's floor mat is properly secured, and never stack floor mats on top of it. The floor mat should always be placed on the surface of the vehicle carpet.
Pull the seat belt out slowly and keep it extended.
Use a sponge dipped in neutral soapy water to wipe dirt from the seat belt surface.
After wiping, place the seat belt in a cool shaded place to dry, then retract the seat belt.
Caution If any damage to the airbags or seat belts is found, contact a XPENG service center immediately.
Do not allow any water, cleaning agent, or fabric to enter the seat belt assembly.
Do not use any type of detergent or chemical cleaner to clean the seat belt, so as to avoid damage to the seat belt webbing and affecting its function.
Before cleaning the screen, tap on the central control screen. “ →Settings→Display→Clean Screen”, enter screen cleaning mode.
Use a special cleaning lint-free soft cloth to clean the central control screen and rear control screen*.
After screen cleaning is completed, press and hold the central control screen Button, after the countdown ends, exit screen cleaning mode.
Caution Do not use cleaning agents such as glass cleaners, damp rags or dry, static-coated rags such as a recently cleaned ultra-fine microcloth.
Do not use acid-alkali, deoxygenation, sodium hypochlorite (84 disinfectant) and other corrosive liquids to clean the central control screen.
If the vehicle malfunctions, after ensuring safety, drive the vehicle to a safe area, then depress the brake pedal and stop the vehicle steadily on a safe road surface.
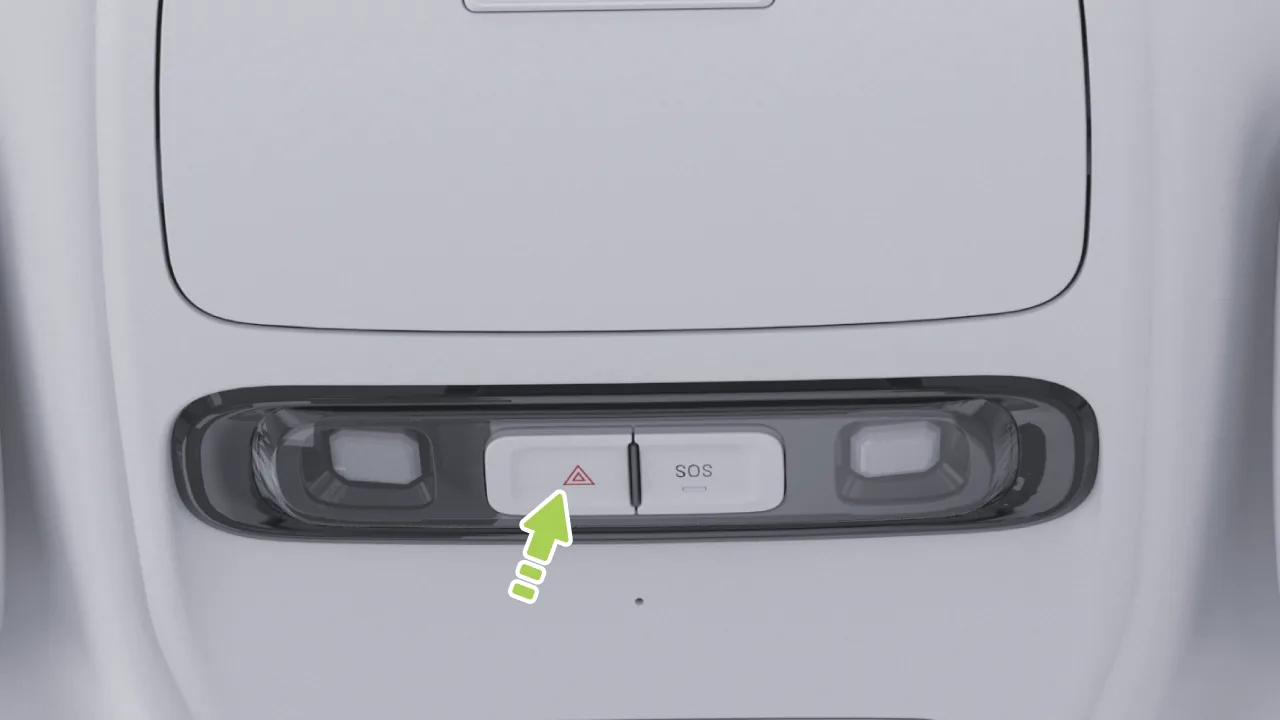
Shift the gear to P and turn on the hazard warning lights to alert the surroundings.
Open the trunk, take out and put on the safety vest.
Open the trunk, take out the warning triangle, unfold it, and place it behind the vehicle to alert following vehicles to slow down and avoid it.
After placing the warning sign, please leave the vehicle as soon as possible after ensuring that the surrounding environment is safe, keep a certain safe distance, and contact the XPENG Motors Service Center.
Tips When wearing a reflective vest, wear the side with reflective material on the outside.
If the reflective vest is damaged or heavily soiled, please replace it with a new reflective vest in a timely manner.
After using the reflective vest and warning triangle, please return the reflective vest and warning triangle to their original place.
Warning When handling a vehicle accident, regardless of the lighting conditions, be sure to wear a reflective vest as required to attract the attention of pedestrians or drivers of other vehicles.
Do not set up the warning triangle without wearing a reflective vest.
This vehicle is equipped with the following onboard tools. After use, they should be cleaned promptly and returned to their original positions.
Vehicle tool kit: air pump, tire repair sealant, towing hook, wheel center cap removal tool*/nut cap removal clip*.
Reflective vest.
Warning triangle (located inside the tailgate trim panel).
Open the trunk, and after lifting the cover panel at the bottom of the trunk, you can see the vehicle tools.
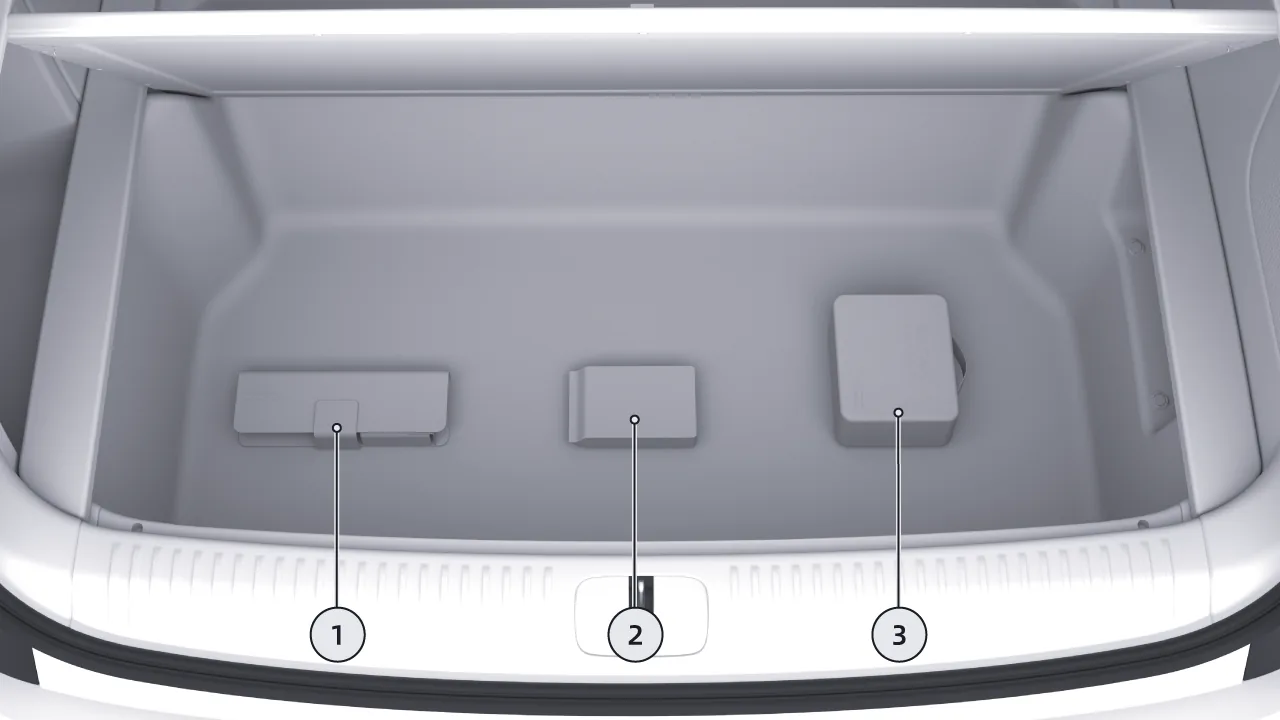
Vehicle tool kit: towing hook, wheel center cap removal tool.
Reflective vest.
Tire inflation and puncture repair tool.
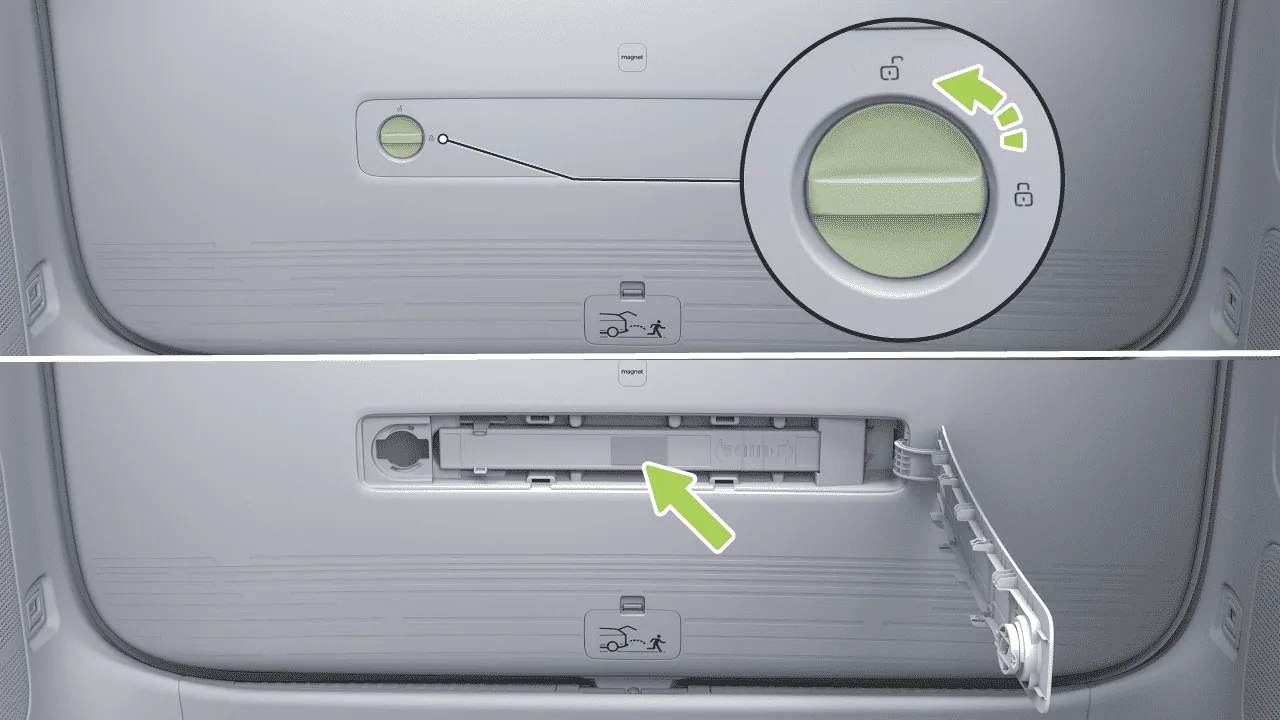
Open the trunk. The warning triangle is placed inside the tailgate trim panel.
Turn the knob counterclockwise to open the warning triangle trim cover.
Remove the warning triangle case.
Remove the warning triangle from the box.
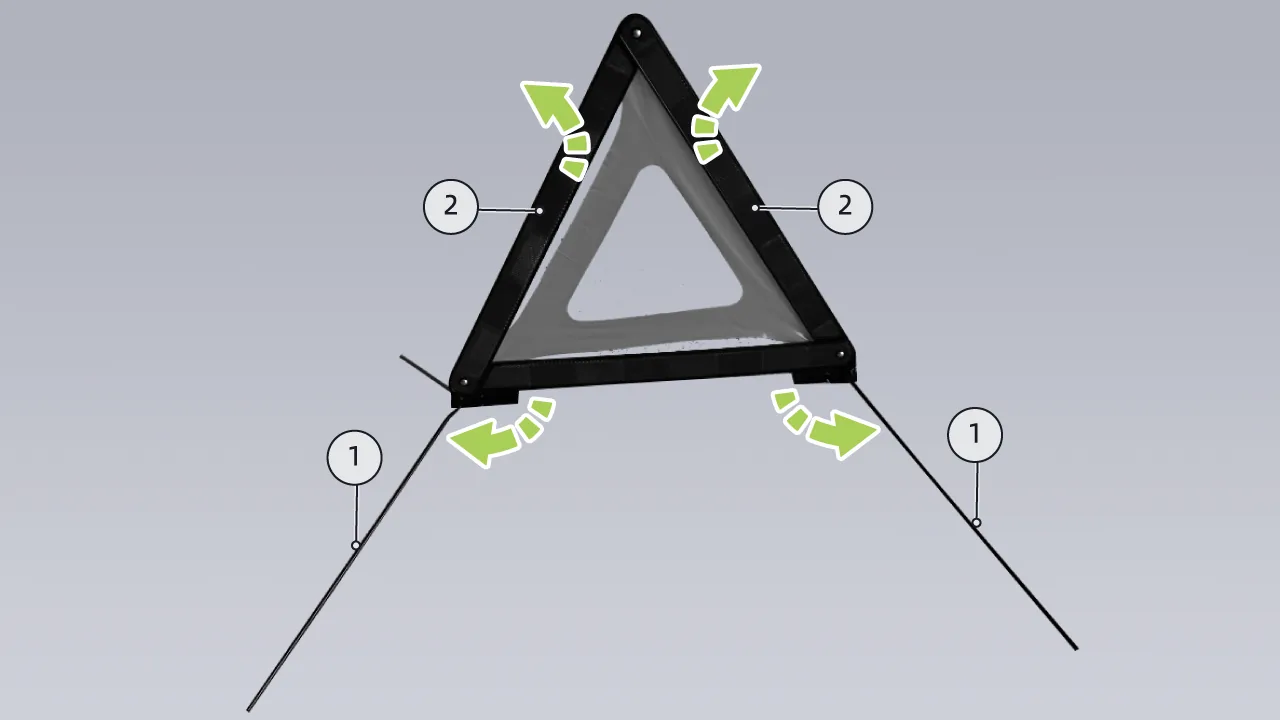
Unfold the 4 brackets ① below the warning triangle.
Unfold the folded edges ② on both sides of the warning triangle, and fasten the snap button on the upper part of the warning triangle.
Place the bracket on the ground with the side with reflective material facing rearward.
Depending on the road type and ambient visibility, the placement distance of the warning triangle behind the vehicle is as shown in the table below:
| Road | Placement Distance | |
| Daytime | Nighttime | |
| Highway | ≥ 150m | ≥ 150m |
| General Road | ≥ 50m | ≥ 80m |
Before removing the tire, take the wheel center cap removal tool out of the vehicle tool kit in the trunk.
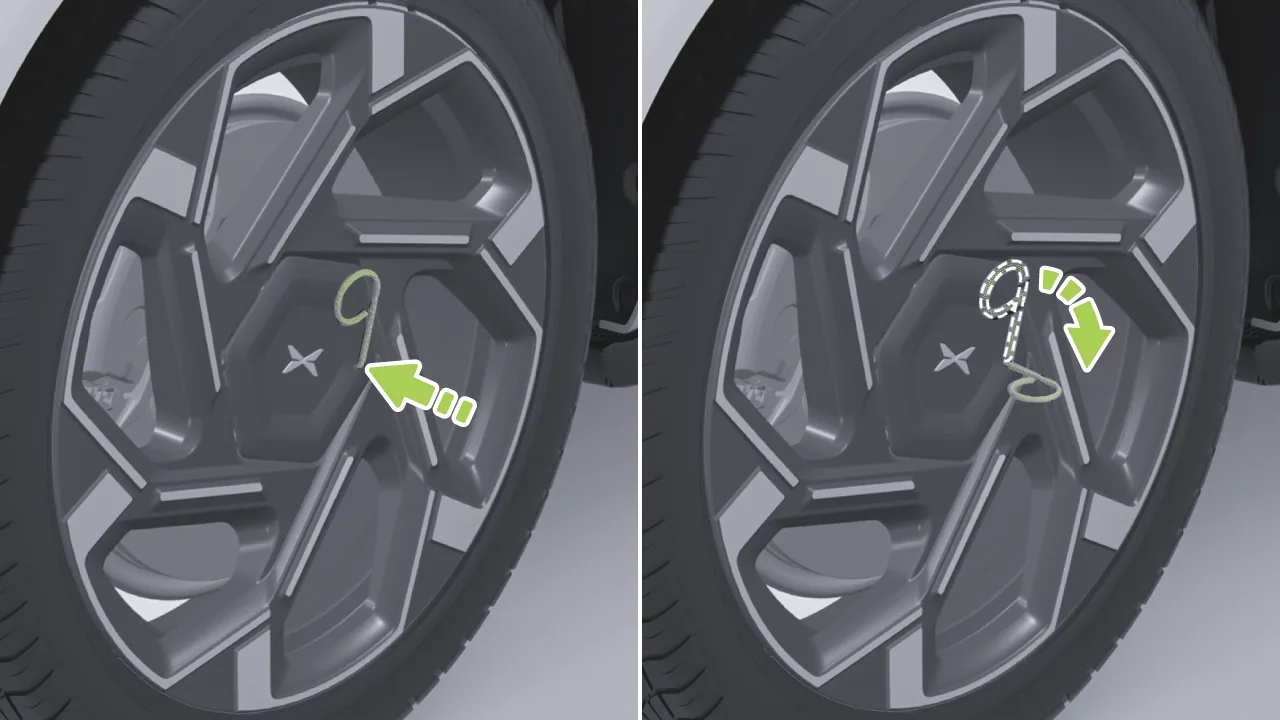
Insert it into the removal hole at the edge of the wheel center cap. When inserting it into the hole, operate carefully to avoid scratching the wheel center cap.
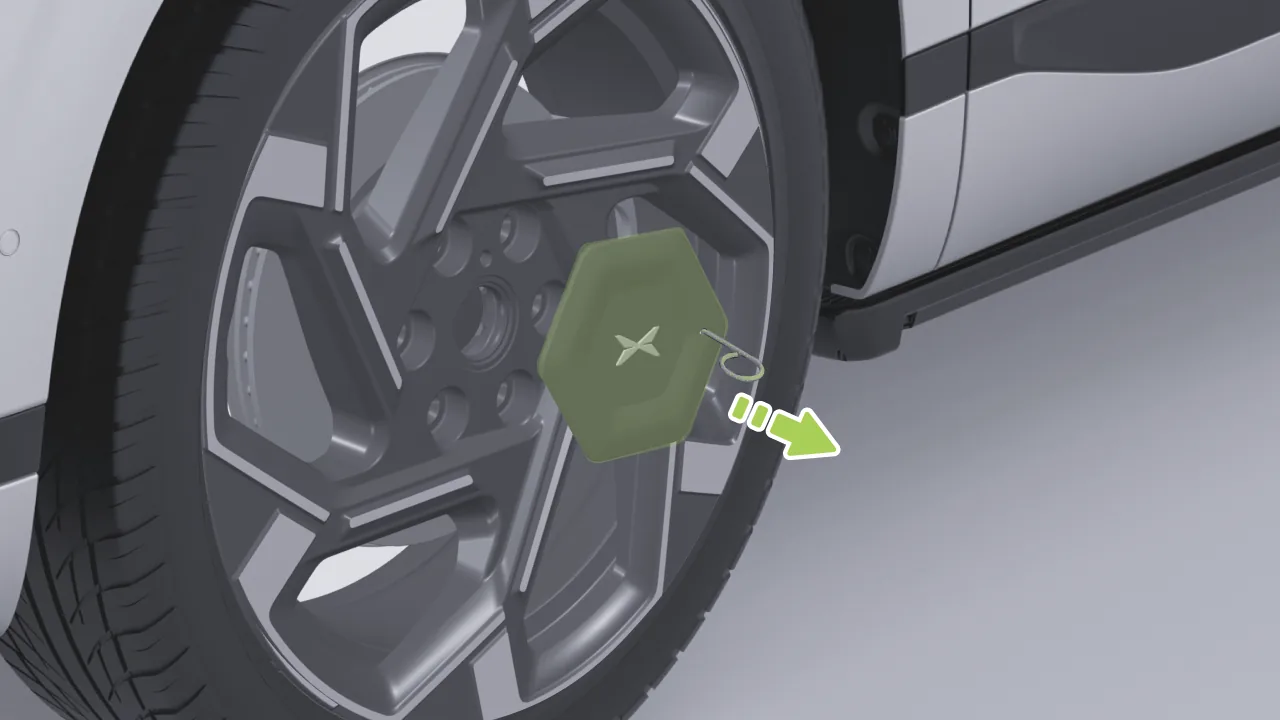
Pull outward firmly to remove the wheel center cap.
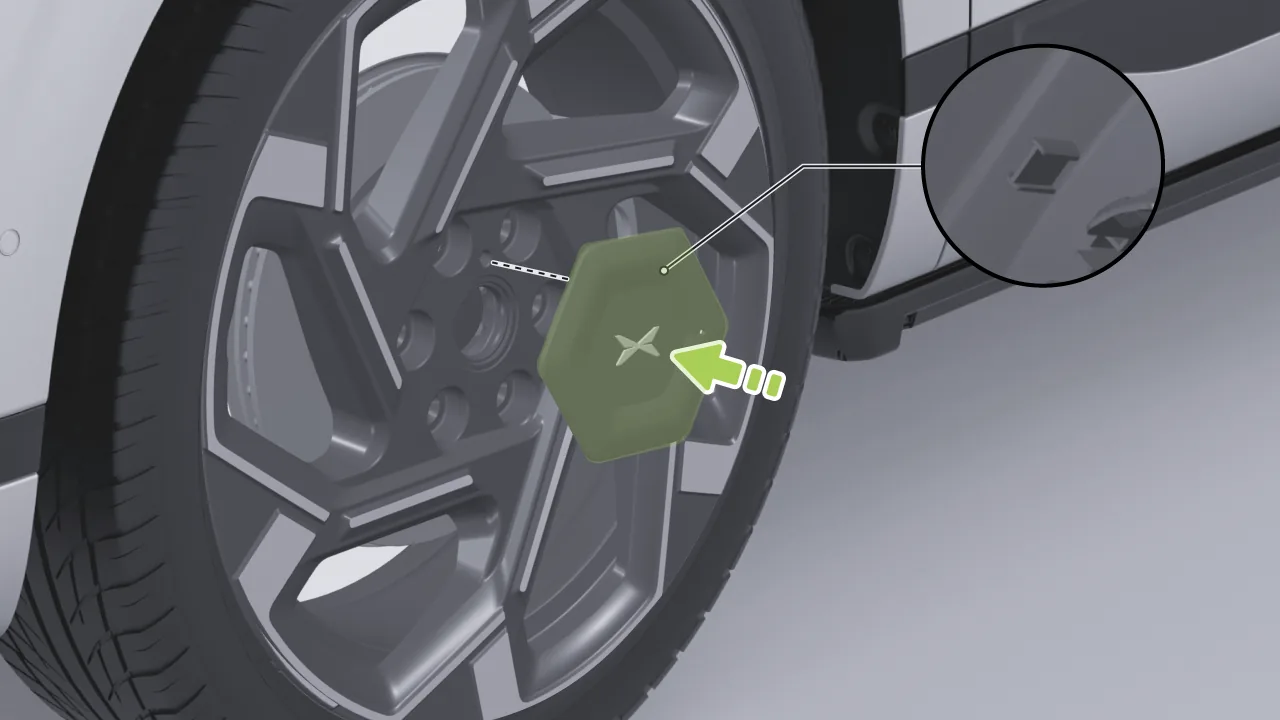
Before installation, align the positioning cylinder of the wheel center cap with the positioning hole of the wheel hub.
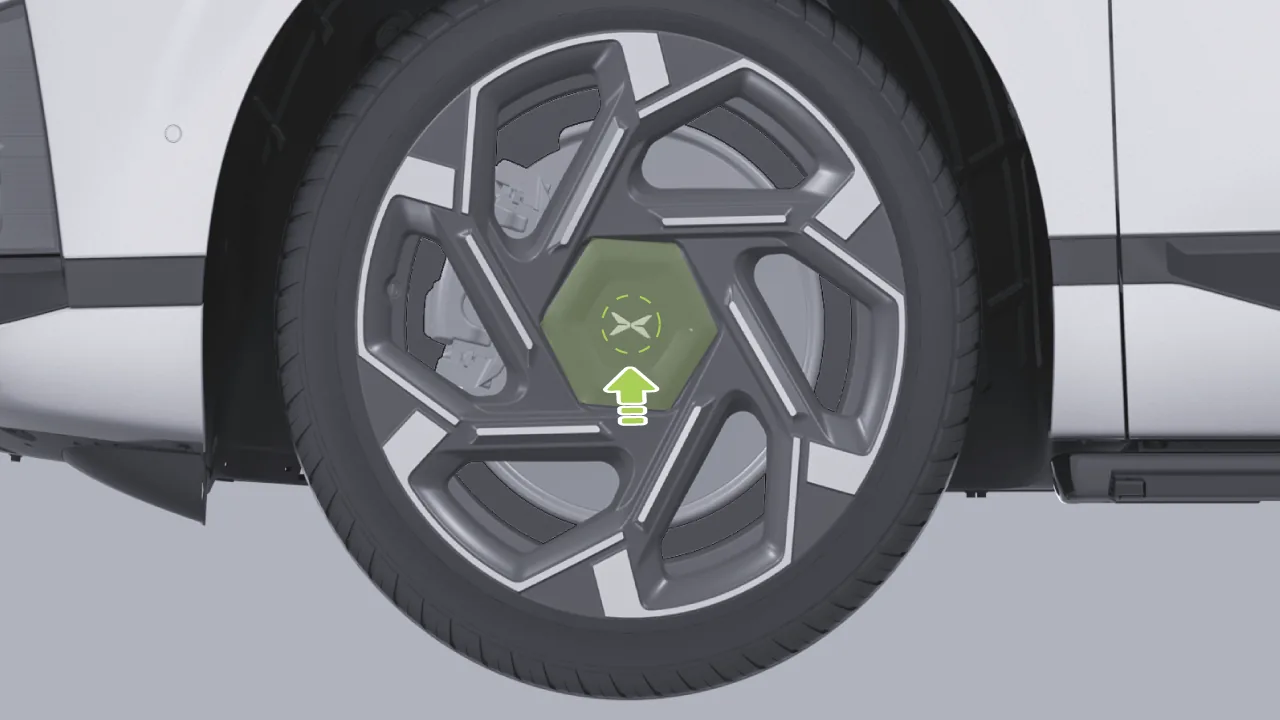
Press the wheel center cap to engage it. When pressing, ensure the clips are securely fastened in place to prevent the wheel center cap from coming loose while the vehicle is in motion.
Before removing the tire, take the lug nut cap removal clip out of the vehicle tool kit in the trunk.
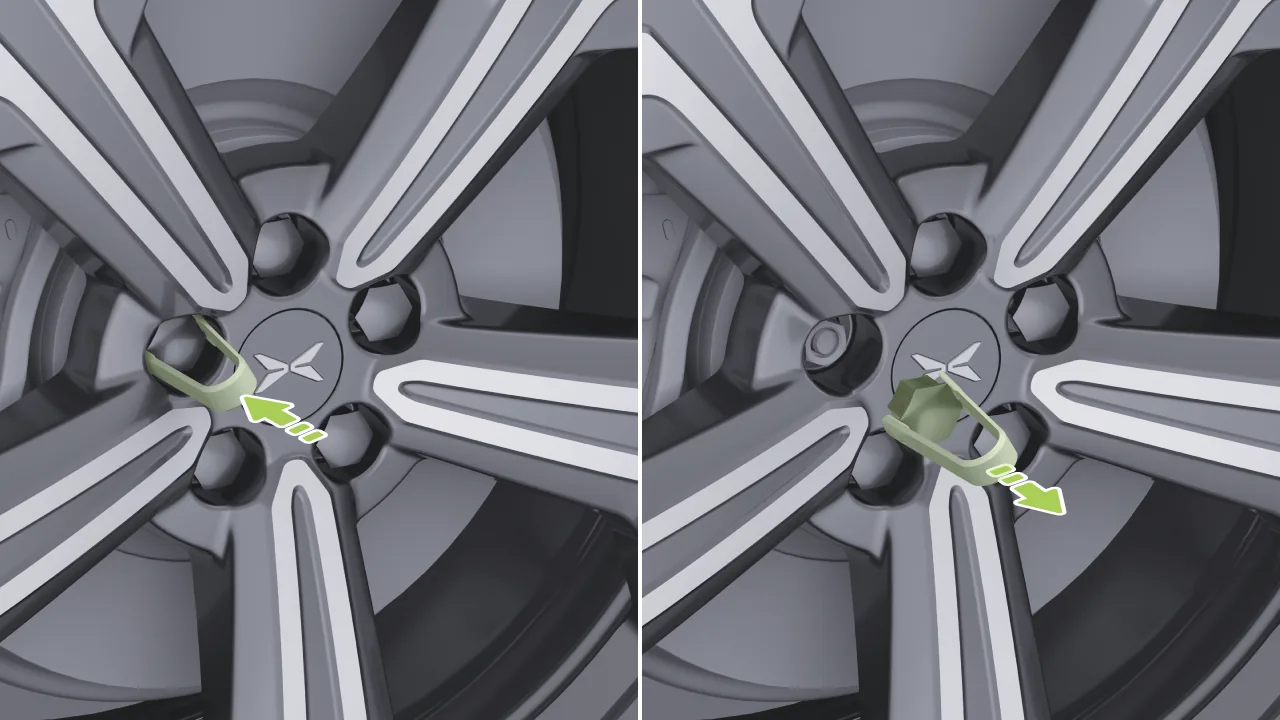
Use the wheel nut cap removal clip to remove the wheel nut caps one by one.
Properly place the removed nut cap, clean the nut cap removal clip, and return it to its original position.
Do not touch the High-Voltage Wiring Harness or any high-voltage components on the vehicle.
Do not touch leaked liquid.
Do not attempt to inspect the vehicle yourself.
If the vehicle needs to be towed, please contact a XPENG service center.
If the vehicle has been submerged in water, do not power it on again, as a short circuit may occur inside the power battery. To ensure personal safety and avoid secondary damage to the vehicle, immediately contact a XPENG service center to inspect the power battery system, and have professionals assess the damage condition of the power battery.
If the vehicle emits smoke, move away from the vehicle immediately and promptly contact the XPENG Service Center.
If the vehicle catches fire, move away from the vehicle immediately and call the police in time. When reporting the incident, you must inform them that this vehicle is a new energy pure electric vehicle.
If the central control screen displays a power battery system fault, safely pull over and stop the vehicle, stay away from the vehicle, and contact a XPENG service center for assistance.
If any occupant in the vehicle is injured, contact emergency medical services according to the severity of the injury.
If the vehicle is involved in an underbody scrape, collision, or other accident, the internal structure of the power battery may be damaged, posing a serious safety hazard. Immediately contact a XPENG service center to inspect the power battery system, and have the damage assessed by qualified personnel.
The vehicle is not equipped with a spare tire and is supplied with an emergency tire inflation and repair kit.
The tire inflation and repair emergency kit includes one inflator pump and one can of tire repair sealant (sufficient to repair one tire). When injected into the tire, the tire repair sealant will penetrate small punctures in the tire up to 6 mm in size, providing a temporary repair.
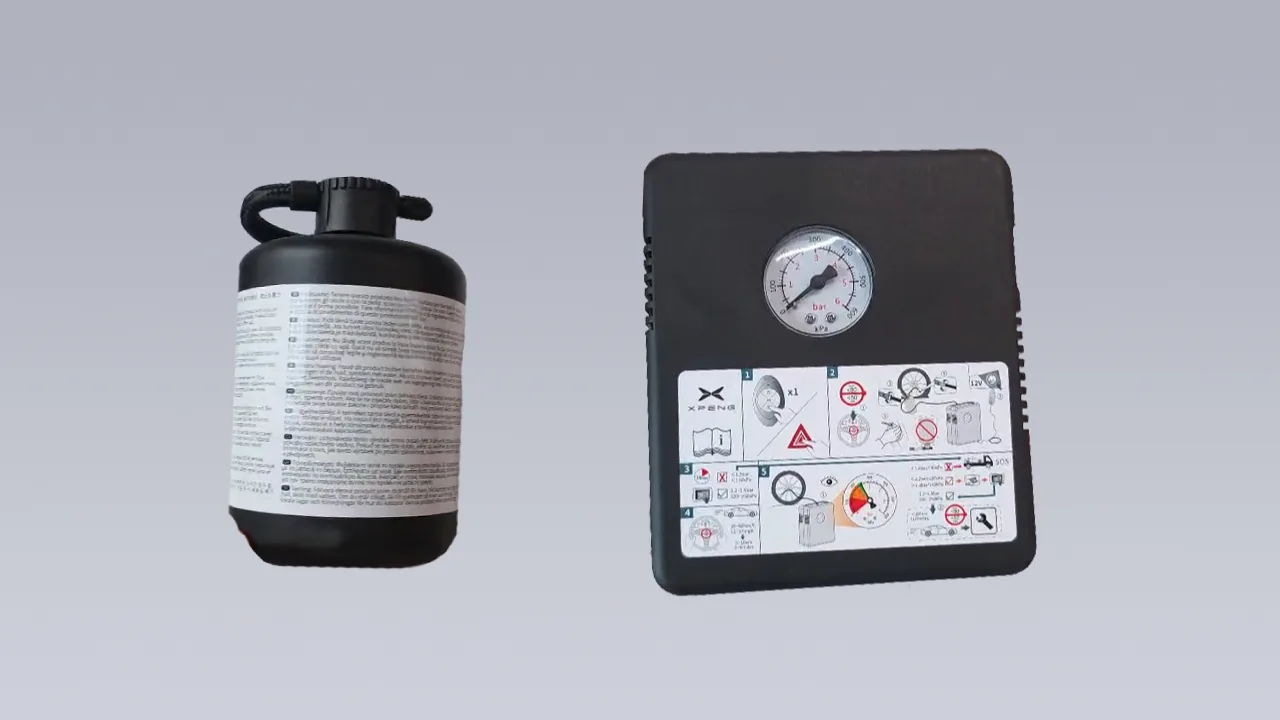 Warning
 For punctures larger than 6 mm, severe tread damage, sidewall damage, tire tearing, or if the tire has come off the wheel rim, please contact a XPENG service center.
The tire inflation and repair emergency kit is for single-use temporary tire repair only; the damaged tire must be repaired or replaced as soon as possible.
If a tire has been temporarily repaired using tire sealant, the driving speed must not exceed 80 km/h.
Read and follow all warnings and instructions on the tire inflation and repair emergency kit.
If a vehicle tire is found to be flat, it is strictly prohibited to continue driving; otherwise, serious injury may occur.
The tire sealant provided in the tire inflation and repair emergency kit is specially intended for XPENG Vehicle and will not damage the tire pressure sensor. Therefore, only tire sealant of the same type and capacity may be used as a replacement. Tire sealant can be purchased from an XPENG Vehicle Service Center.
The tire repair sealant packaging is printed with the product shelf life. If the shelf life has expired, the tire repair sealant may lose its intended effectiveness. Be sure to purchase new tire repair sealant.
Warning Do not use tire repair glue purchased from other sources as this may cause tire pressure sensor failure.
Always read and follow the safety and operating instructions for tire repair glue.
Protect children from contact with the tire hydration.
If your eyes come into contact with the tire repair glue, rinse immediately with clean water and seek medical attention.
If you accidentally eat the tire supplement, seek medical advice immediately.
If you accidentally inhale the tire repair glue, breathe fresh air immediately to avoid breathing and seek medical attention immediately.
Temporarily repair small tire punctures (less than 6 mm) by following the steps below:
Remove the tire inflation and puncture repair emergency kit from the trunk.
Remove the air pump and tire repair sealant from the tire inflation and emergency puncture repair kit.
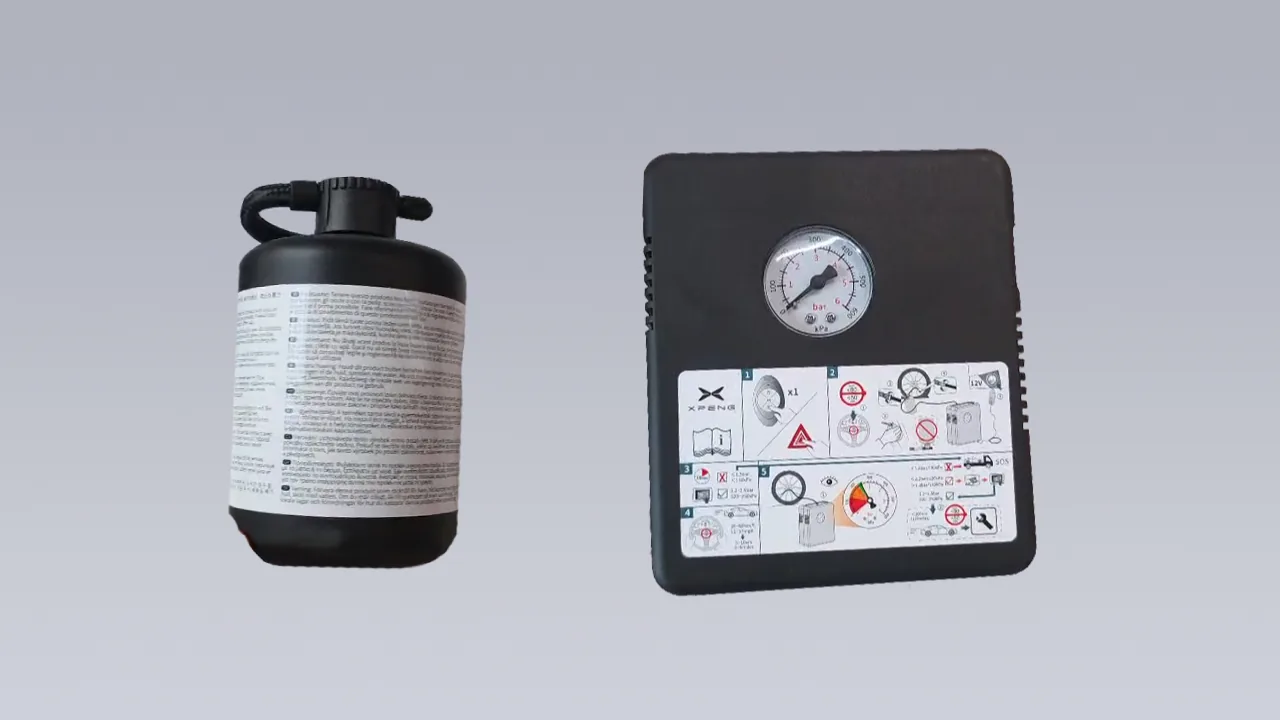
Remove the tire sealant and shake it evenly.
Screw one end of the tire repair sealant hose onto the tire valve and tighten it. Do not invert the tire repair sealant can.
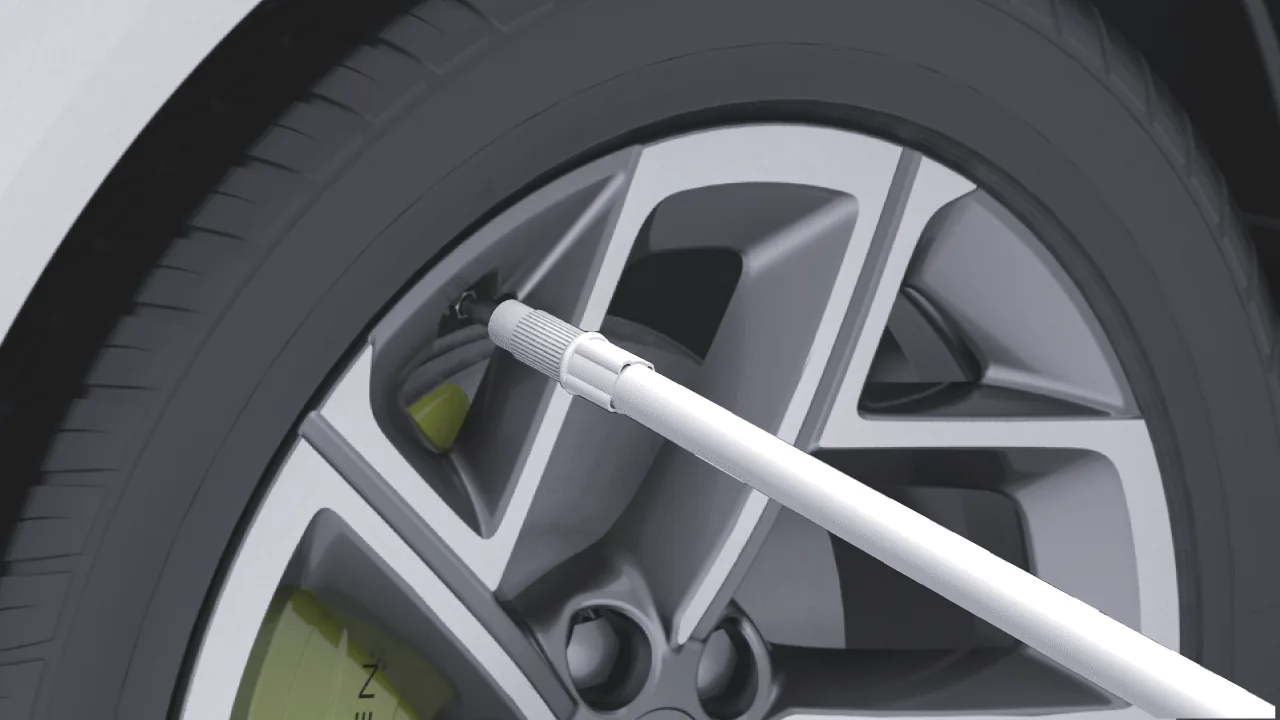
Connect the other connecting hose of the tire repair sealant to the air pump and tighten it, then connect the air pump power cord to the 12V power supply in the vehicle storage box.
Press the switch to turn it on, and the air pump starts inflating the tire.
During the tire sealant injection process, the pressure gauge indicates a pressure of approximately 300–600 kPa.
Observe the pressure gauge and stop when the tire pressure reaches the standard pressure.
For the standard tire pressure value for the tire specifications, refer to the tire pressure label.
Check the tire pressure. If the tire cannot reach the set pressure within 20 minutes, the tire repair is considered unsuccessful.
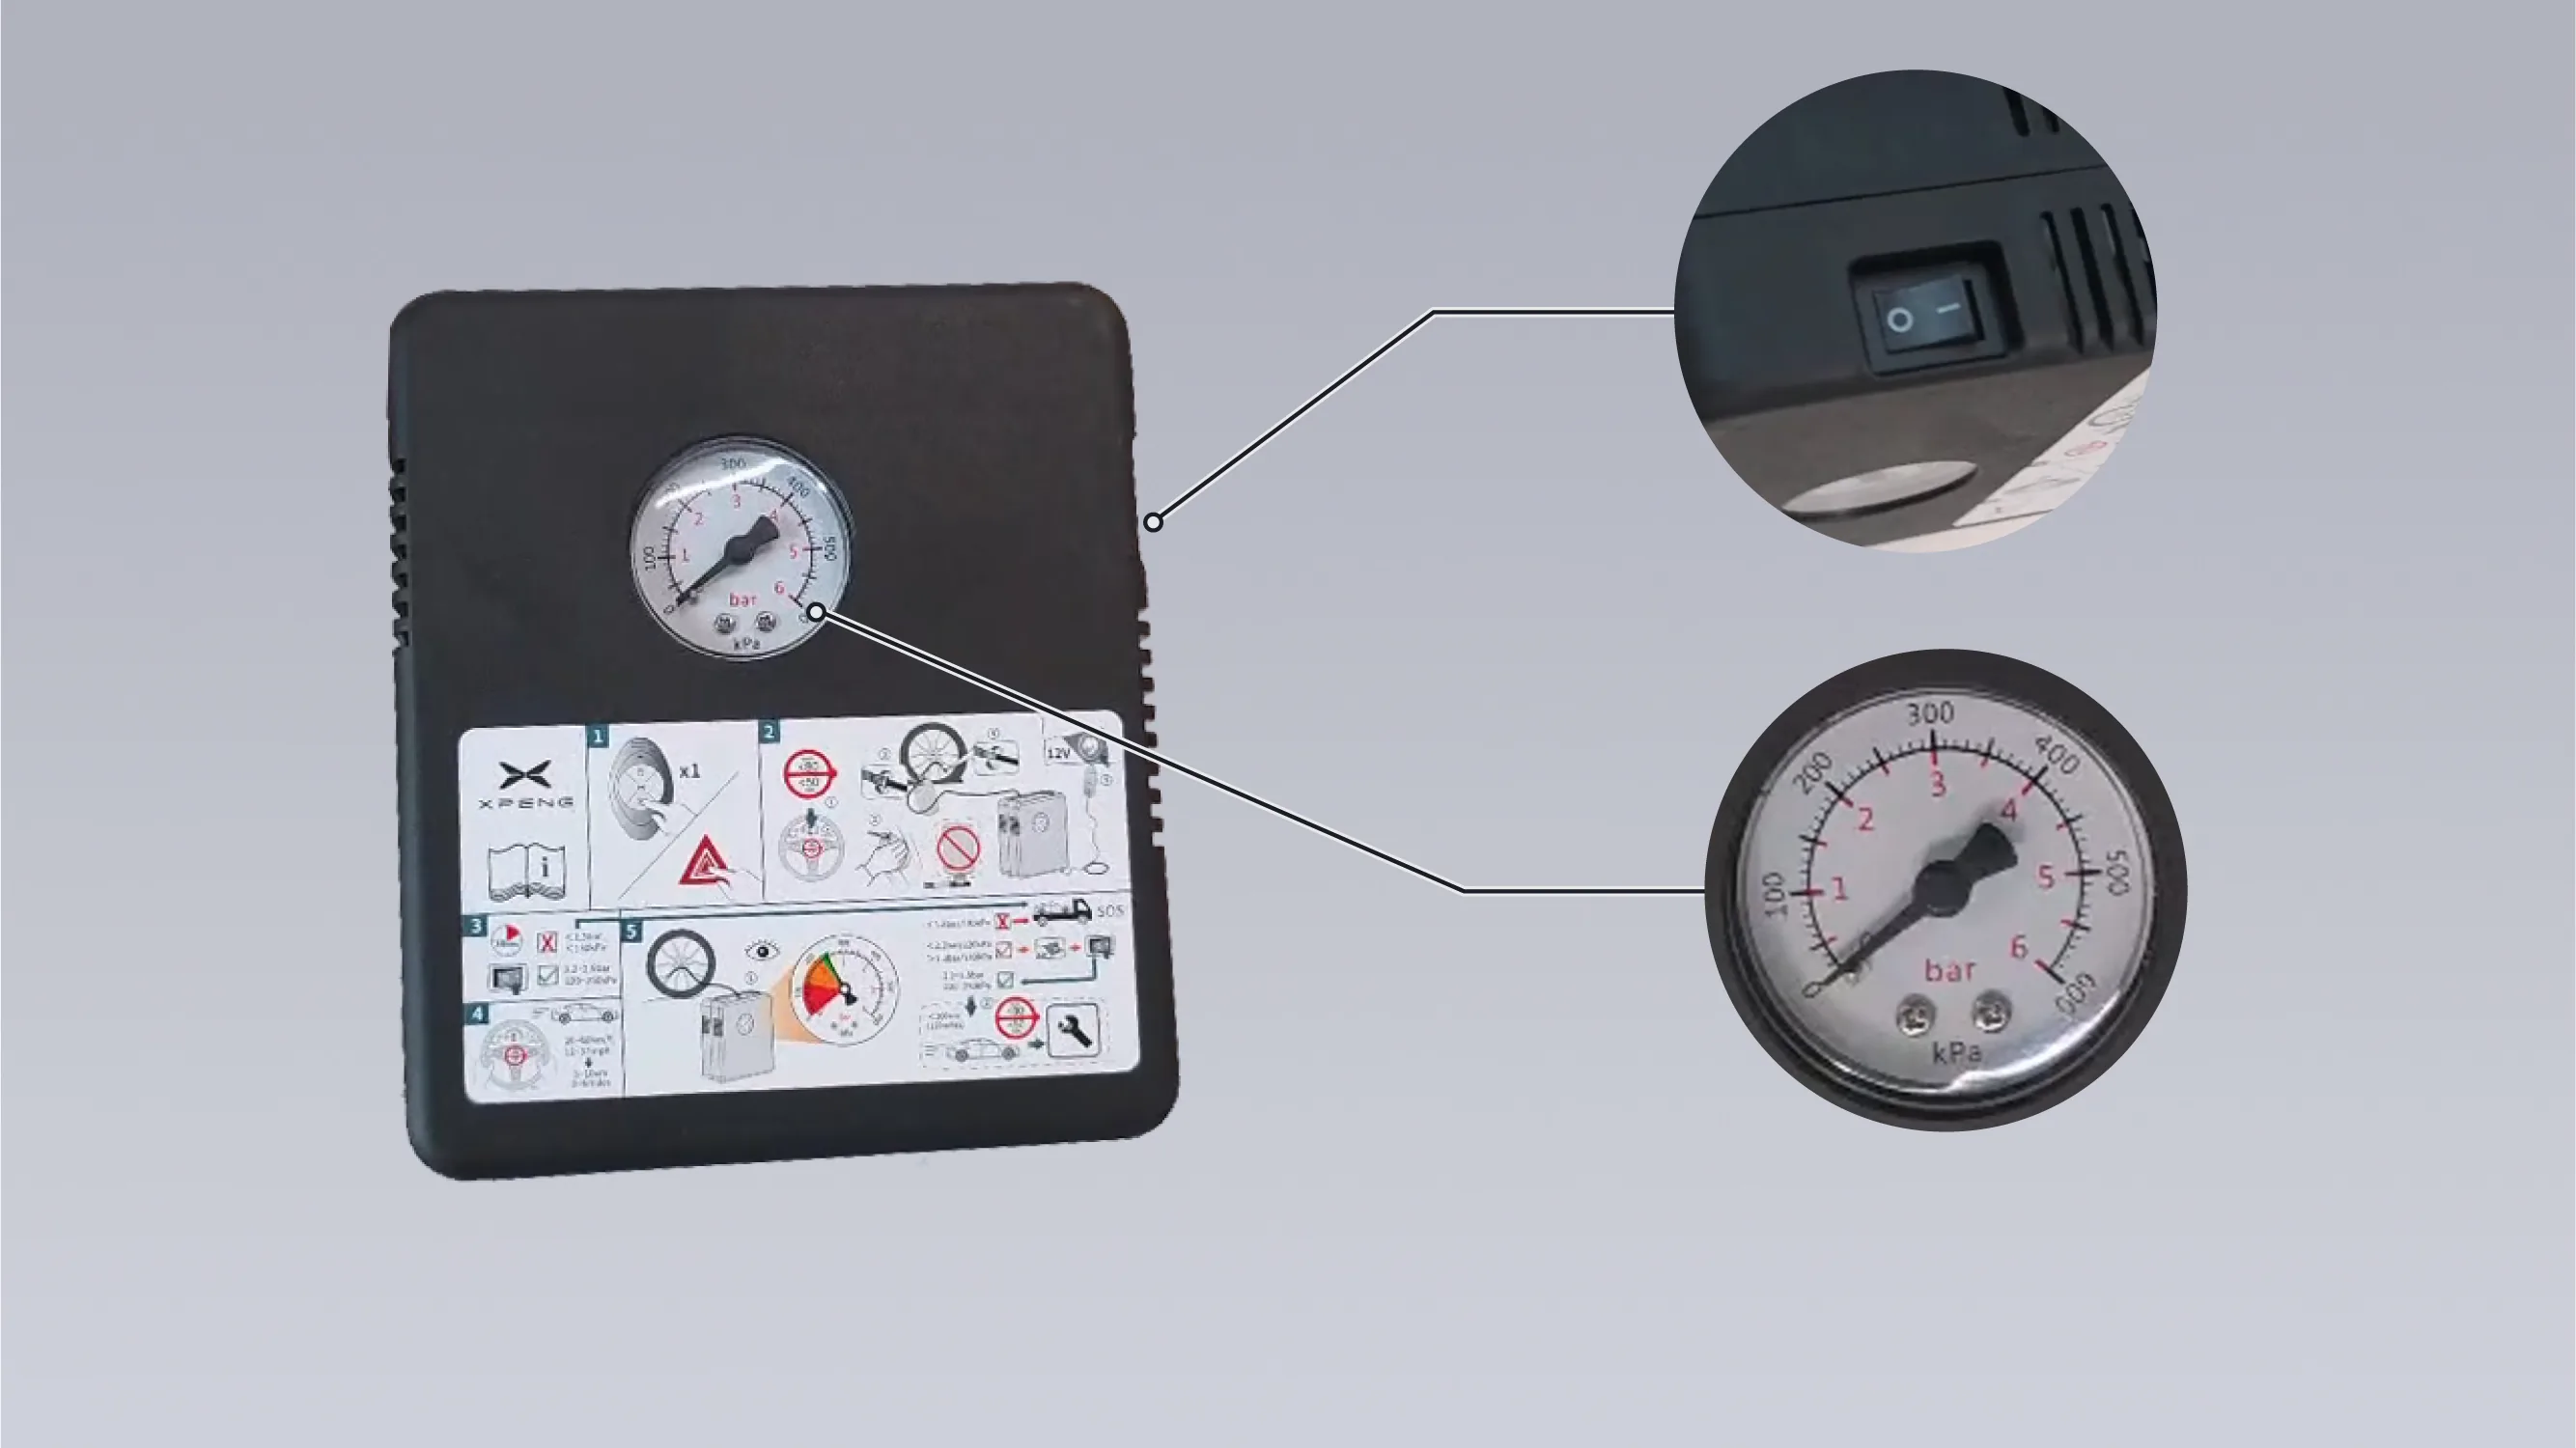
Turn off the air pump and disconnect the connecting hose from the tire valve. Wipe off any excess tire repair sealant from the tire valve and wheel rim. Then disconnect the connecting hose from the air pump, store the tire inflation and repair emergency tool properly, and place it back in the trunk.
Drive the vehicle immediately for 5 km or 10 min so that the tire repair sealant is distributed around the entire tire, and keep the driving speed at 20–60 km/h.
Stop the vehicle and check the tire pressure.
Caution If the tire pressure is lower than 130 kPa, it indicates that the tire damage cannot be repaired using tire sealant. Safely park the vehicle at the roadside and contact a XPENG service center.
Inflate to the standard tire pressure.
Store the air pump properly and put it back in the trunk.
Drive the vehicle to a XPENG Service Center for tire repair at a driving speed of 20–80 km/h.
Caution Repair or replace the tire as soon as possible.
After using the tire repair sealant, promptly purchase new tire repair sealant.
Do not exceed a vehicle speed of 80 km/h.
Remove the tire inflation and repair emergency kit from the trunk.
Remove the air pump from the tire inflation and repair emergency kit.
Take out the connecting hose and the power cord from both sides of the air pump respectively.
Install the air pump connecting hose onto the tire valve and tighten it.
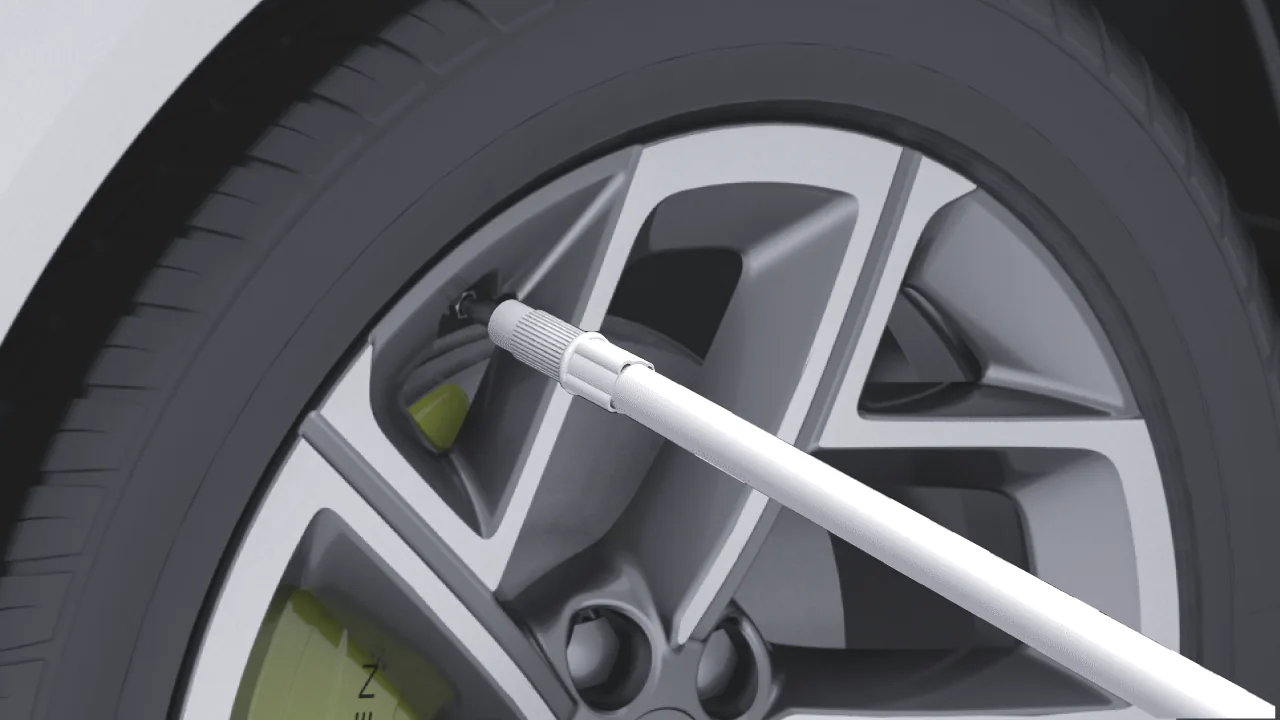
Connect the inflator power cord to the vehicle's 12V power supply.
Press the switch to turn it on, and the air pump starts inflating the tire.
Observe the pressure gauge and stop when the tire pressure reaches the specified pressure.
For the standard tire pressure value for the tire specification, refer to the tire pressure label.
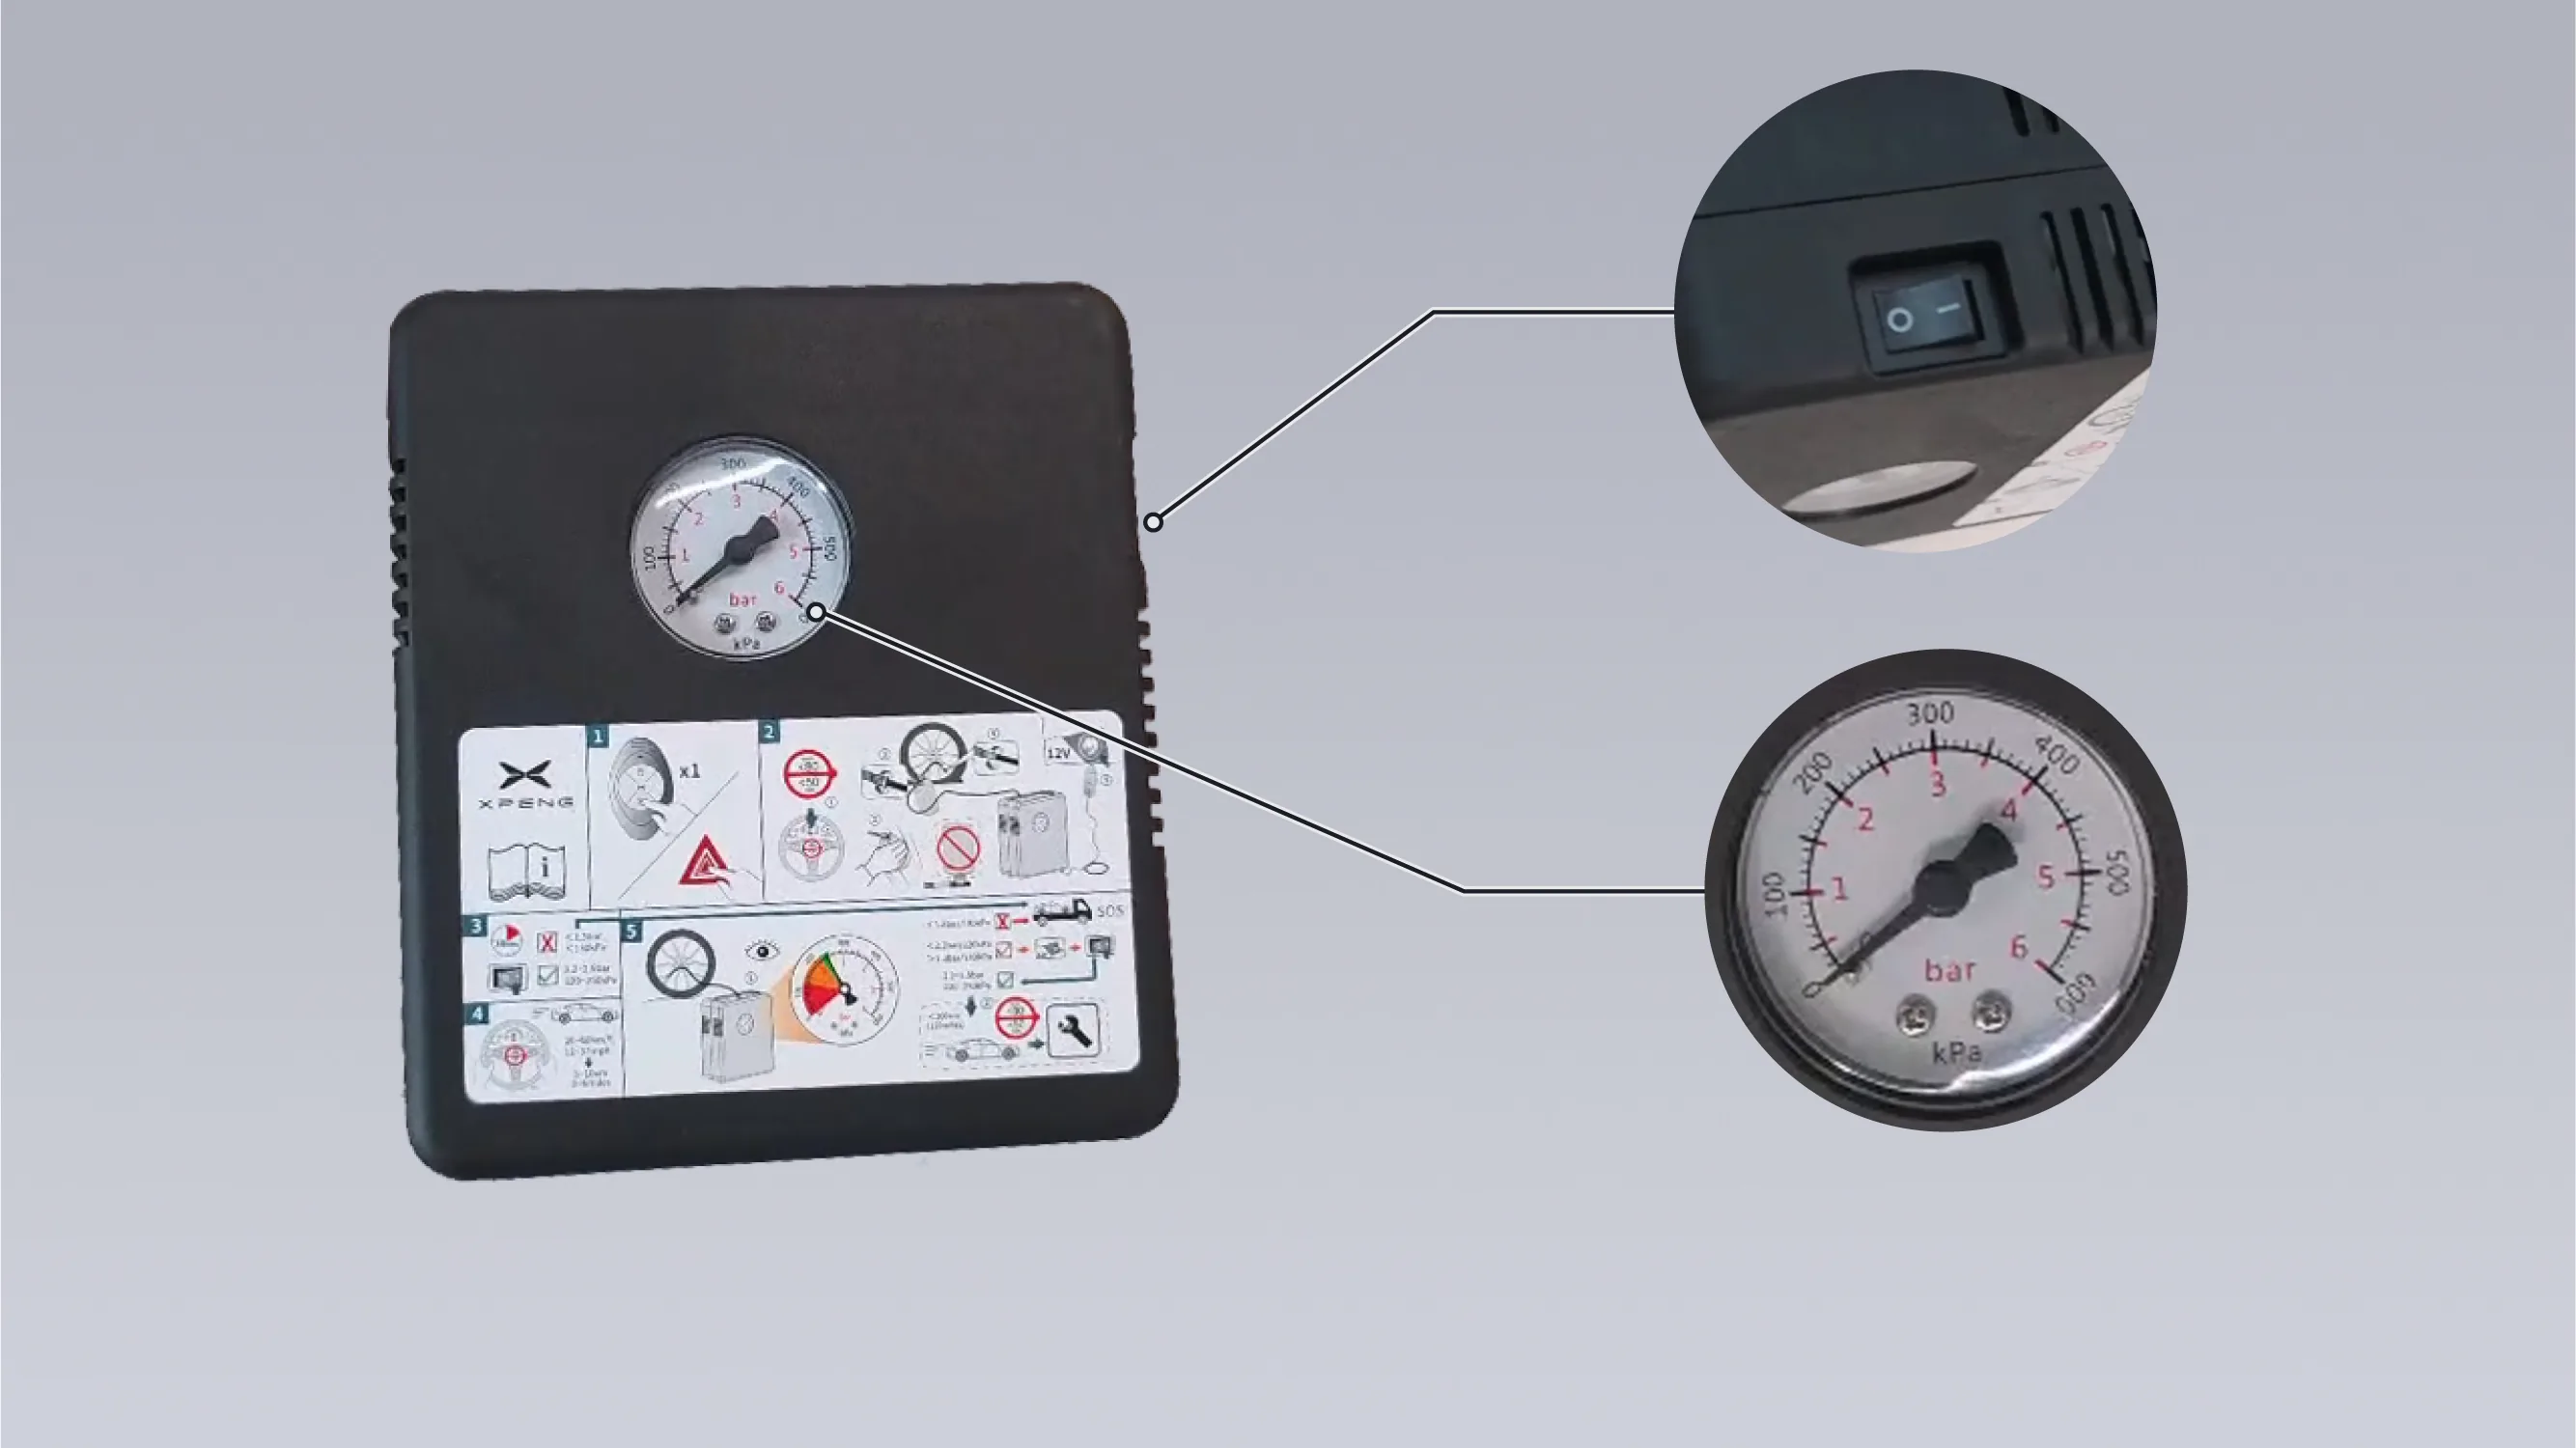
Turn off the air pump.
Caution Inflate to the standard tire pressure value, otherwise the tire pressure is too high or too low and can cause faster tire wear.
If the tire pressure is too high, the tire pressure value can be reduced by deflating air.
Procedure: Remove the pneumatic hose and press and hold the metal bar in the center of the valve to deflate while connecting the pneumatic hose reads the gauge until the tire pressure decreases to the standard tire pressure.
If the tire pressure monitoring system indicator does not extinguish after adjusting the tire pressure, drive at 40km/h for a short period of time and watch for the indicator to recover.
It is normal to have a slight increase in tire pressure as the temperature of the tire increases after the vehicle has been driven for some time.
If the indicator light is still on, contact the XPENG Automobile Service Center.
A jack and tool assembly are provided with the vehicle.
Open the trunk to see the jack and tool assembly.
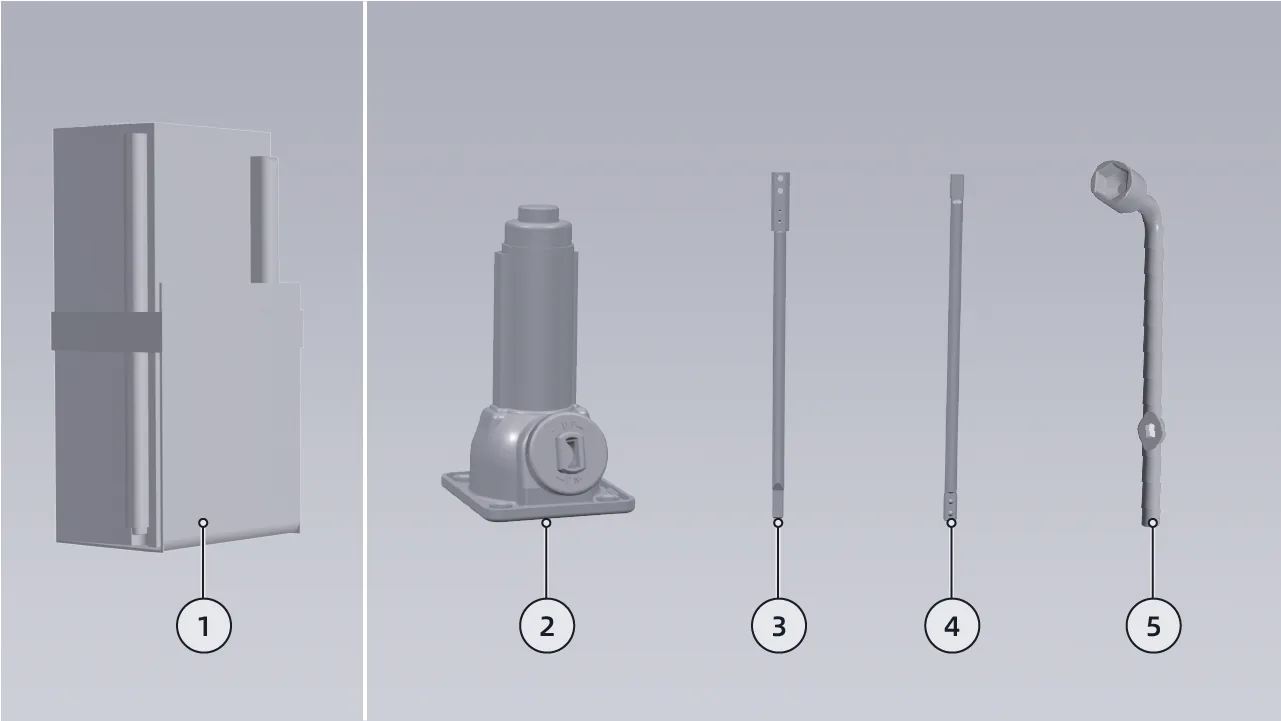
Jack and Tool Assembly
Jack
Rear Section Handle
Hook Handle
Wheel Nut Wrench
Warning Only use the jack supplied as original equipment with the vehicle.
Read and follow all warnings and instructions on the jack.
If a tire loses air while driving, do not brake hard. Gradually reduce speed, hold the steering wheel firmly, and slowly move the vehicle to a safe location at the roadside.
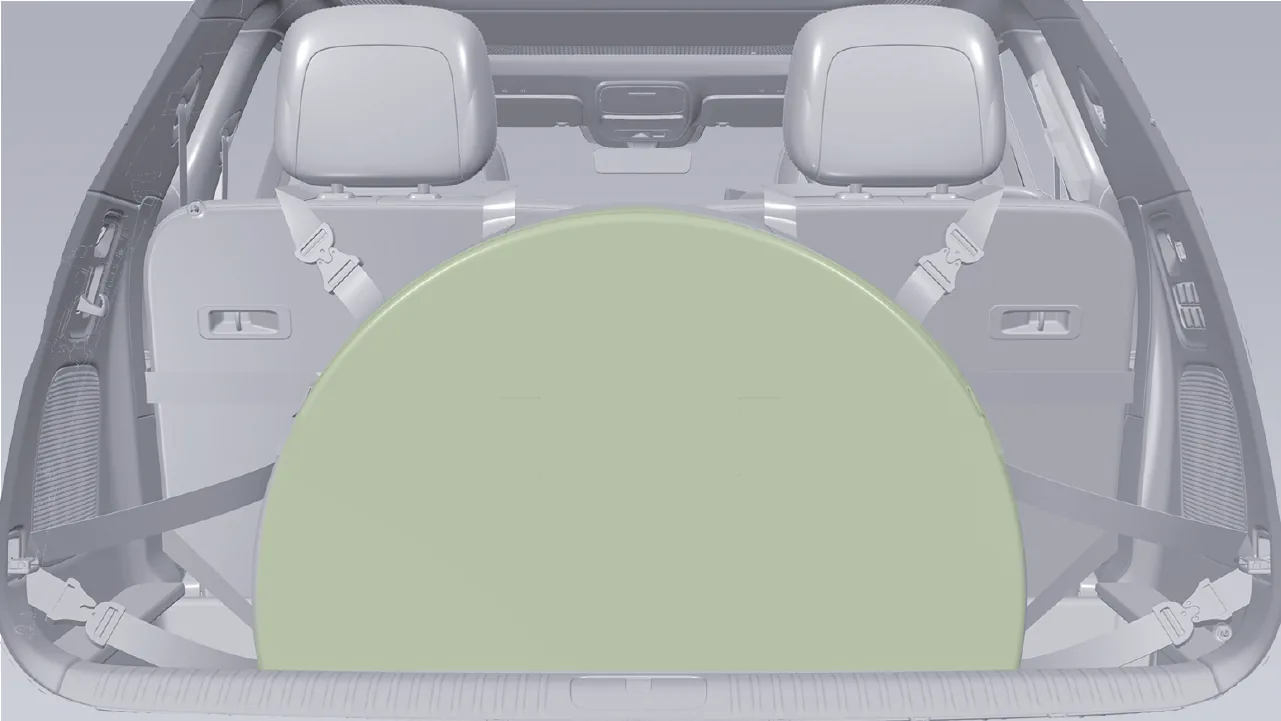
The vehicle is equipped with a full-size spare tire. Open the trunk to see the spare tire bag and the spare tire assembly.
Warning The jack supplied with this vehicle is intended only for replacing a flat tire in an emergency. When using the jack to support the vehicle, do not perform any other operation on the vehicle, because the vehicle may slip off the jack. Failure to follow this instruction may result in personal injury or death.
To prevent the vehicle from moving when changing a wheel, shift the vehicle to Park (P), apply the parking brake, and use suitable wheel chocks to secure the wheel diagonally opposite the wheel being changed. For example, when changing the left front wheel, place suitable wheel chocks at the right rear wheel.
Use only the jack supplied with the vehicle as original equipment.
Use only the specified jacking points. If other locations are used, vehicle components may be damaged.
Never position yourself under a vehicle supported by a jack.
Do not place any objects between the vehicle jack and the vehicle.
Do not place any objects between the vehicle jack and the ground under any circumstances.
Do not attempt to change a wheel on the side close to passing vehicles. When operating the jack or changing a wheel, move the vehicle far enough away from the road so as not to obstruct traffic and to avoid the danger of being struck.
Use the jack on firm, level ground whenever possible.
It is recommended to chock the vehicle wheels, and no one may remain inside the vehicle while lifting the vehicle.
Park on a level road surface, shift to park (P), apply the parking brake, and turn on the hazard warning lights.
Set suspension height to “ Maximum”. For detailed steps, refer to “Suspension Height”Section.
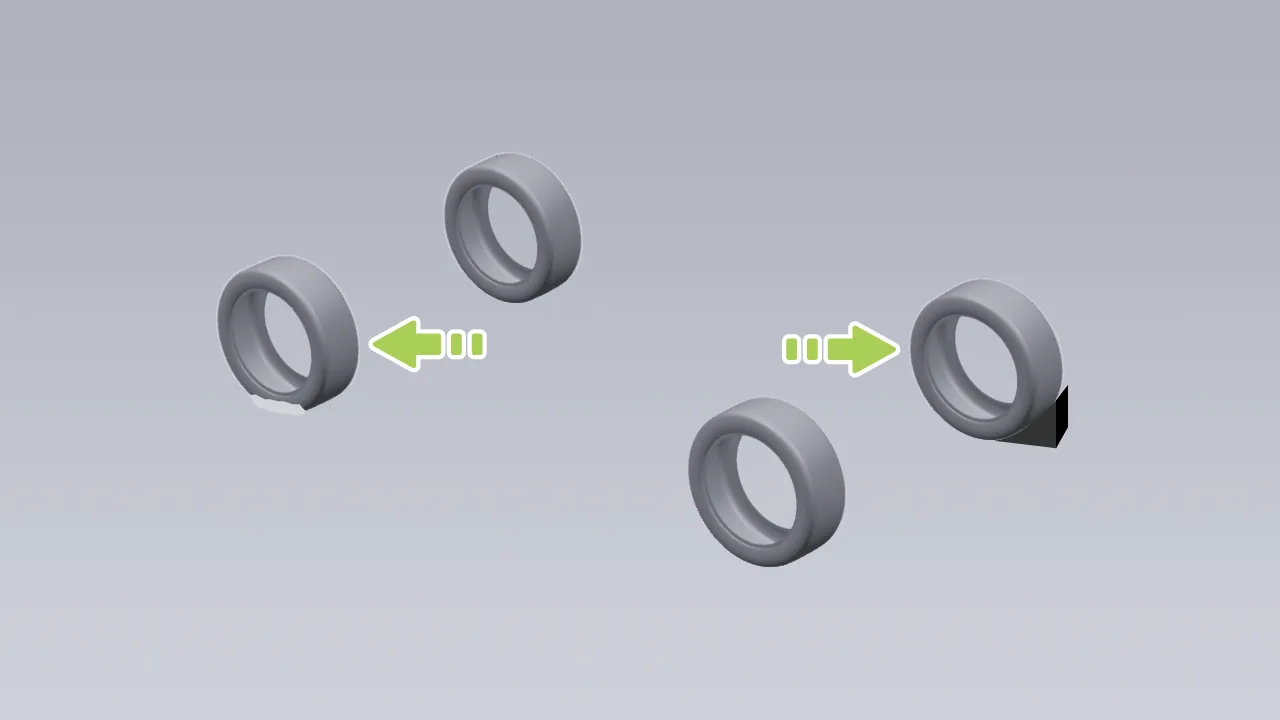
Block the wheel diagonally opposite the leaking tire. For example, if the left front tire is leaking, block the right rear wheel.
Open the trunk, take out and set up the warning triangle, and place the warning triangle at a safe distance behind the vehicle. For detailed steps, refer to “Vehicle Tools”Chapter.
Remove the jack tool kit assembly.
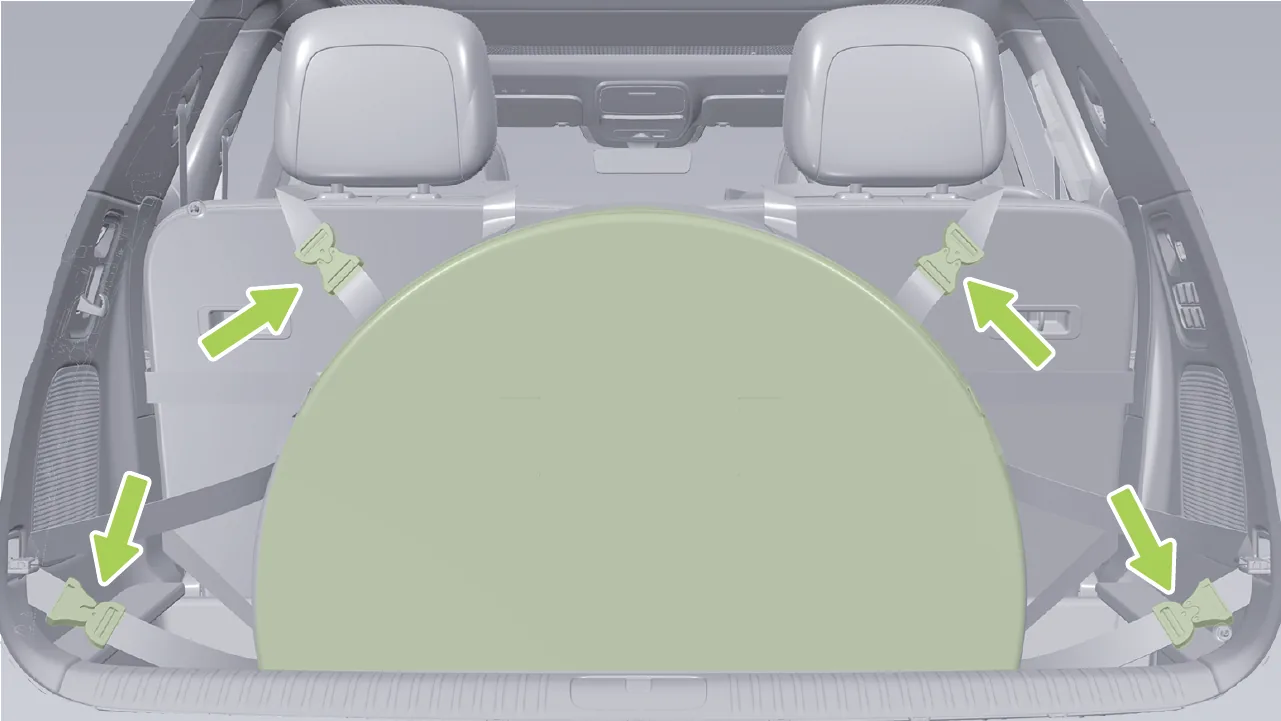
Release the 4 buckles of the spare tire bag straps, open the zipper, and remove the spare tire.
Remove the wheel center cap or wheel nut cap. For detailed steps, refer to “Vehicle Tools”Section.
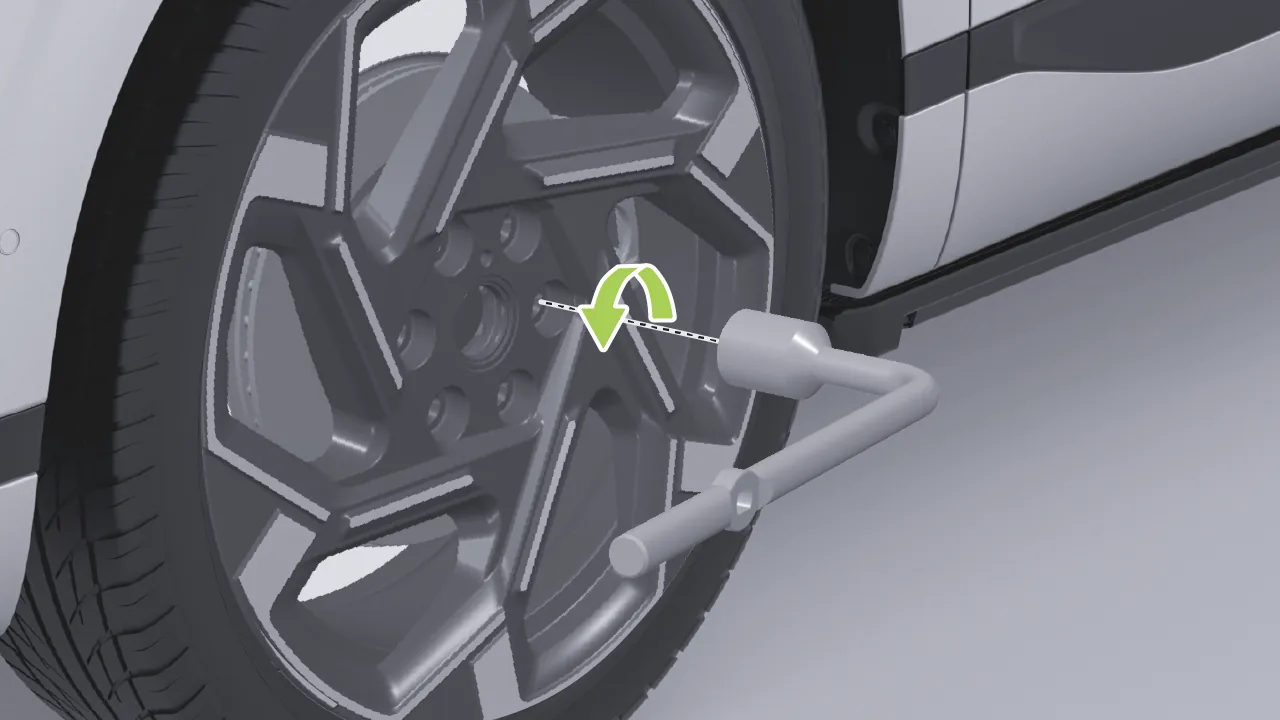
Remove the wheel nut wrench from the jack tool kit, and loosen each wheel nut by half a turn counterclockwise, but do not remove them.
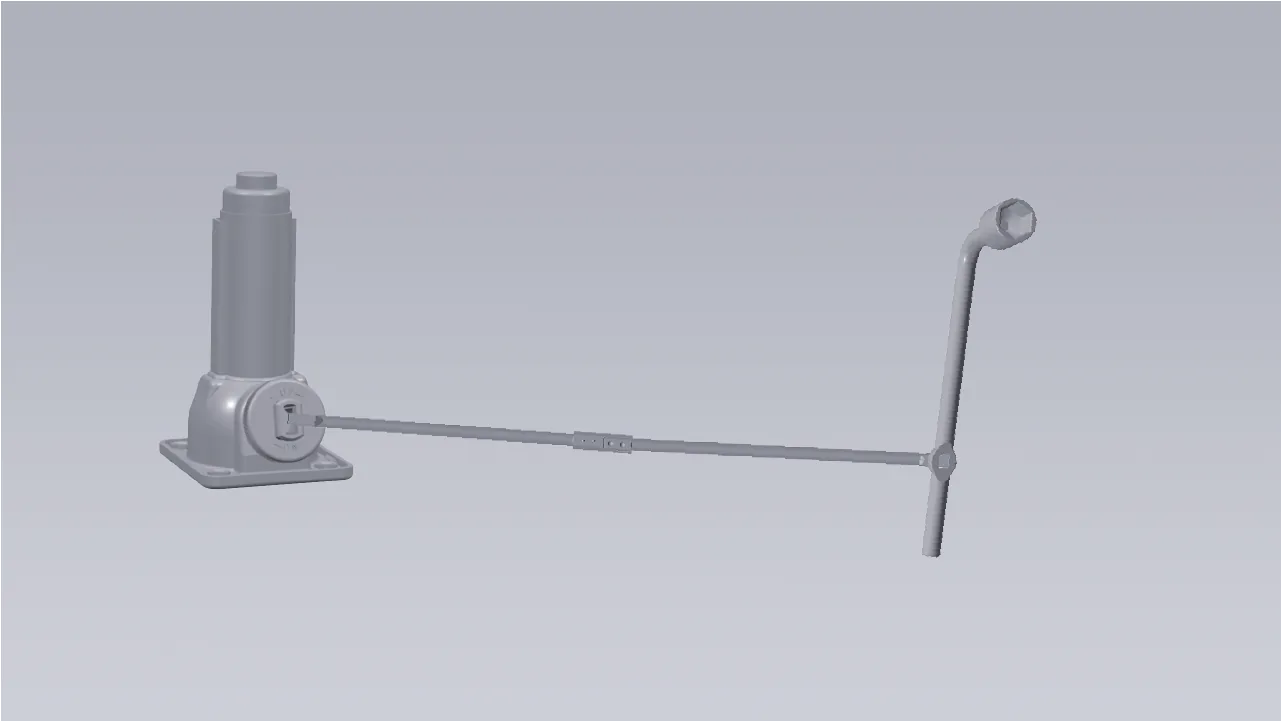
Remove the jack and handle from the jack tool kit and assemble them as shown.
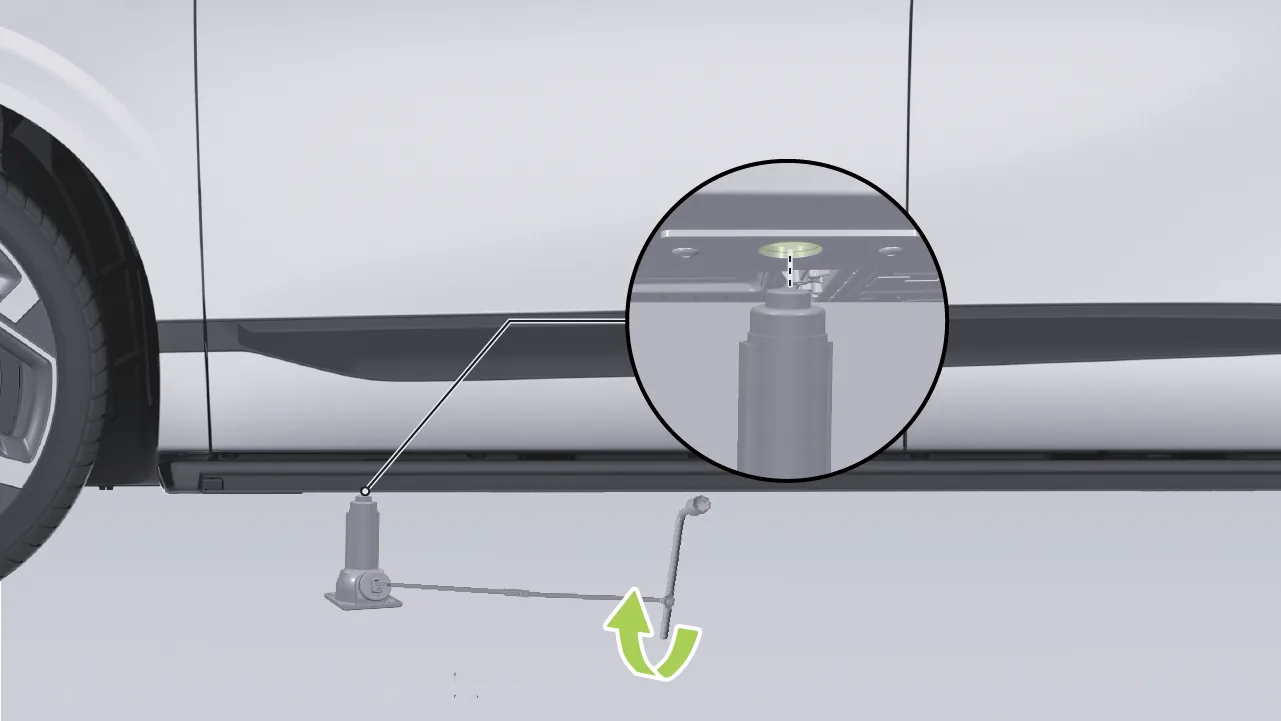
Place the jack under the vehicle lifting point (align the jack head with the round hole of the lifting point). Tighten in advance by hand-turning the round handle, and after assembling the handle and wheel wrench, turn the wrench clockwise to raise the vehicle until the leaking tire is completely off the ground.
Use the wheel nut wrench to remove the wheel nuts, and remove the wheel.
Remove corrosion, dirt, or foreign matter from the wheel mounting surface and from the hub or brake disc surface that contacts the wheel.
Replace the flat tire with the spare tire, ensuring that the valve stem faces outward.
Reinstall the wheel nuts onto the wheel hub. Do not fully tighten the wheel nuts before lowering the wheel.
Turn the wrench handle counterclockwise to lower the jack and lower the vehicle completely.
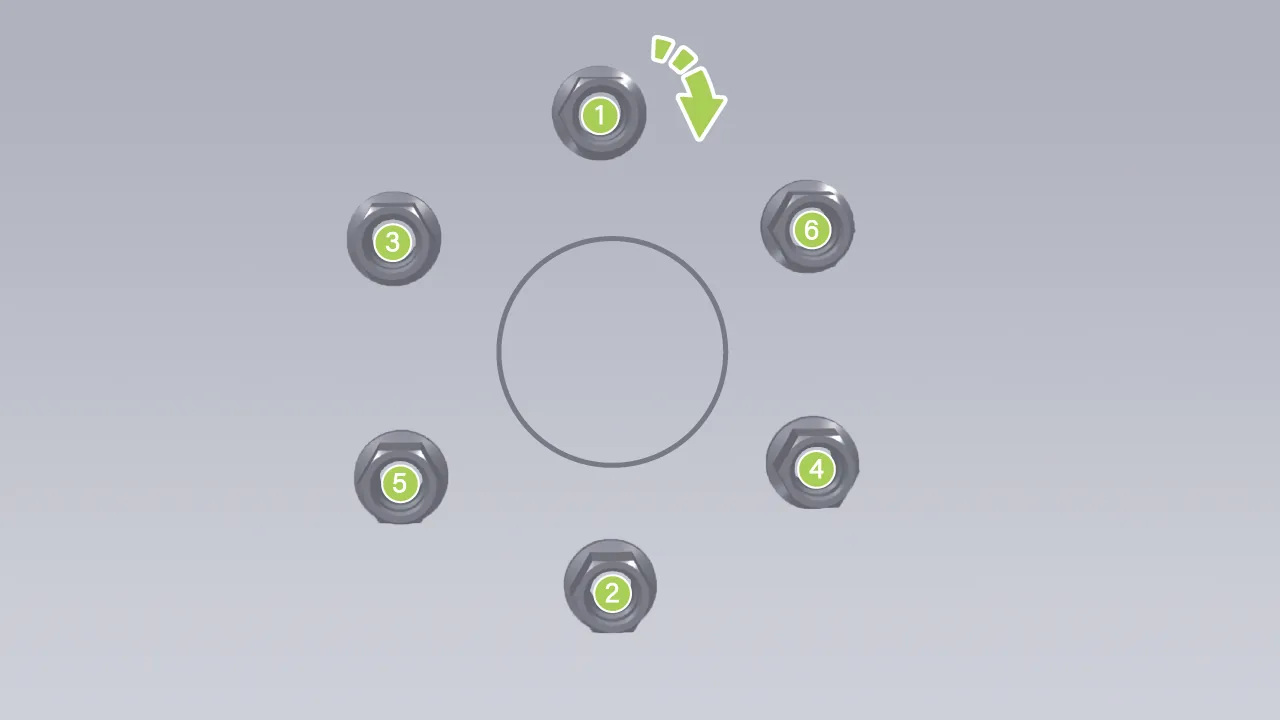
Remove the jack, and fully tighten the wheel nuts in the order shown.
Install the wheel center cap or wheel nut cap.
Return the jack, handle, and wheel nut wrench to the jack tool kit, and place it back in the trunk.
Stow the warning triangle and other vehicle tools, and place them back in the trunk.
Store the flat tire in the spare tire bag, pull up the zipper, and fasten the strap buckle to secure the spare tire bag assembly.
Caution After replacing the full-size spare tire, the tire pressure sensor needs to be re-matched. This can be done by the following methods:
After each tire replacement, the tire pressure needs to be calibrated. First lock the vehicle, power it off, and keep the vehicle stationary for more than 17 minutes. Then drive forward for 10 minutes at a speed above 40 km/h to calibrate the tire pressure. During tire pressure calibration, please avoid reversing.
If matching fails, the instrument cluster or central display will report a tire pressure system fault. Please go to the nearest XPENG Service Center or store for tire pressure matching or repair.
Caution Please repair the tire puncture or replace the tire as soon as possible.
Do not exceed a vehicle speed of 80 km/h. Please go to the nearest XPENG Service Center or store to calibrate the wheel nut torque (220 N·m).
| Name | Torque N·m |
| Wheel Nut | 220 |
Warning When installing the wheel, remove any corrosion, dirt, or foreign matter from the wheel mounting surface and from the surfaces of the hub, brake drum, or brake disc that contact the wheel. Ensure that all fasteners used to secure the rotor to the hub are tightened so that they do not affect the wheel mounting surface. Failure to install the wheel in accordance with the above steps may cause the wheel nuts to loosen and the wheel to detach while driving, resulting in loss of vehicle control, personal injury, or death.
Your name.
License plate number and vehicle color.
Vehicle Identification Number (VIN).
Description of the problem and its exact location.
The phone number through which you can be contacted.
Caution Please do not arrange rescue or repair measures on your own through a third party. To ensure that you can obtain the service benefits provided by XPENG Vehicle roadside assistance, please contact the XPENG Vehicle Service Center for help.
If towing service is required, please ensure that all your personal belongings are removed from your vehicle before the tow truck arrives.
SOS is the vehicle intelligent emergency call system. It can automatically or manually make an emergency call when the vehicle is involved in an accident or encounters an emergency, providing information such as vehicle location and passenger injuries so that rescue personnel can arrive at the scene in time and rescue trapped persons.
The SOS switch and indicator are located on the front reading light panel. In an emergency, you can manually call emergency rescue services by pressing the SOS switch twice consecutively within 3 seconds.
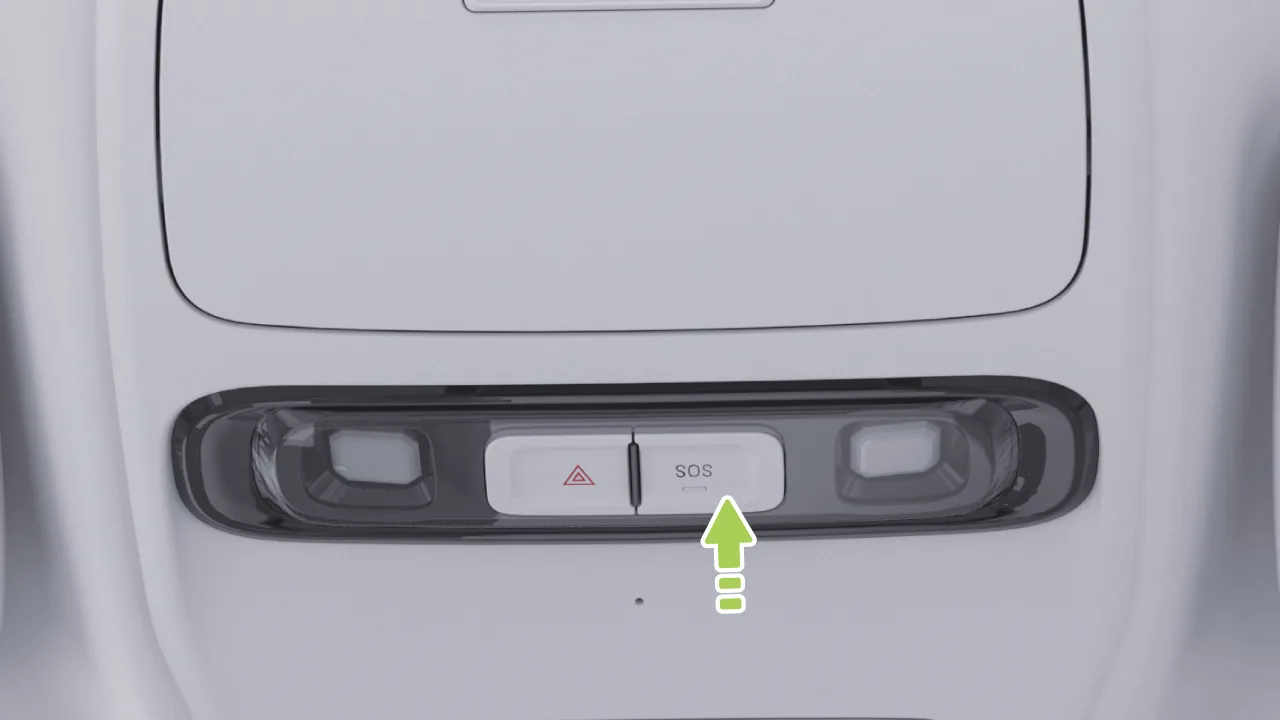
Lit green: indicates that the rescue call is waiting to be answered or is connected.
Illuminates red: indicates that the system has malfunctioned. In this case, you should contact a XIAOPENG Motors Service Center for assistance.
Warning Do not press the SOS switch in non-emergency situations.
When the vehicle is involved in a collision and airbag deployment is triggered, the system automatically calls for rescue.
Tips When the automatic emergency call function is triggered and the rescue call is connected, only the rescue party can end the call.
In the event of battery failure, calling for rescue can continue to support calls for a period of time.
Caution Not all accidents will trigger the automatic emergency call function. If you are able to make a manual emergency call, do not wait for the system to trigger an automatic emergency call; make a manual emergency call for rescue immediately to avoid delaying response time.
When the vehicle malfunctions and cannot be moved, a flatbed tow truck can be used to transport the vehicle. The specific operation is as follows:
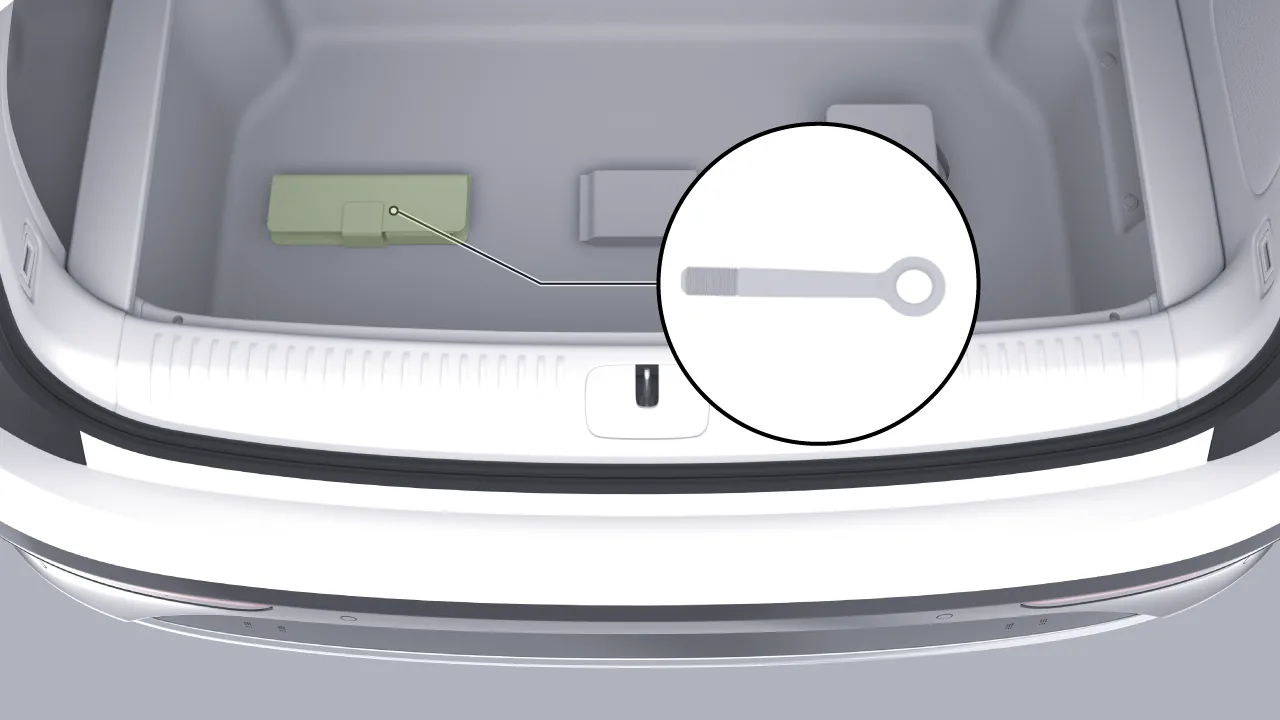
Remove the tow hook from the vehicle tool kit in the trunk.
Press the lower left corner of the tow hook cover. After the cover pops up, open it.
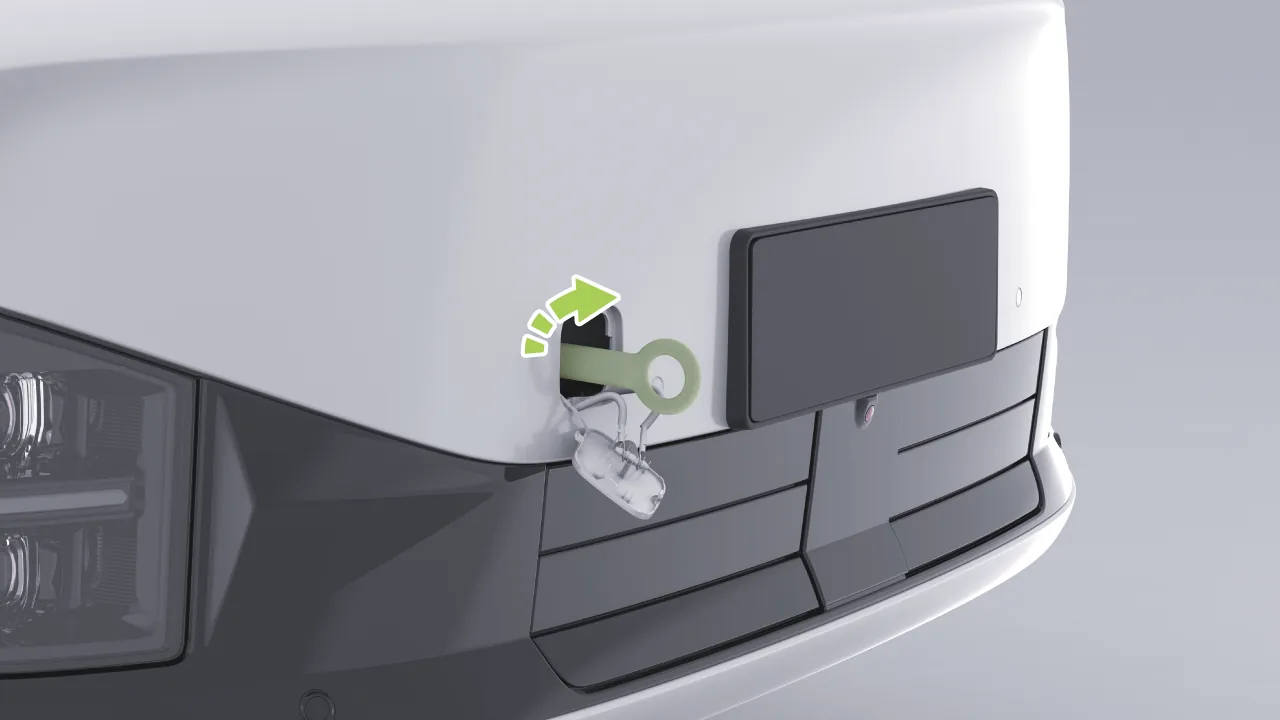
Insert the towing hook, then turn it clockwise until it is securely fastened.
Attach the tow rope to the tow hook.
Confirm that the charging connector is not inserted and that the vehicle is in P gear or N gear, then depress the brake pedal, on the central control screen “ →Settings→vehicle→Maintenance→Rescue Mode”interface, select “Enable Rescue Mode”. After Rescue Mode is enabled, the vehicle will shift into N gear and release the parking brake, and it cannot be shifted to D or R gear. Please pay attention to safety!
Tow the vehicle onto the flatbed truck.
Ensure the vehicle is fully stopped, on the central control screen “ →Settings→vehicle→Maintenance→Rescue Mode”Interface, select "Turn Off Rescue Mode". Ensure the vehicle is stationary, press the P gear switch on the gear selector, and shift to P gear.
Use straps to secure the wheels.
Caution The strap may only be secured to the tread surface. It is prohibited to bind it in a lateral or crisscross manner, so as to avoid entangling other parts and causing vehicle malfunction.
After use, restore the tow hook cover to its original state, promptly clean the tow hook, and return it to its original position.
Caution The towing hook must be securely screwed into the threaded hole; otherwise, the towing hook may slip out of the threaded hole during towing.
The rope may only be fastened to the towing ring and must not be fastened to any other part of the vehicle, otherwise the vehicle will be damaged.
Use extreme caution when towing the vehicle with a tow hook. Start the vehicle and drive slowly and smoothly. Excessive pulling force will cause impact loads and may result in personal injury or vehicle damage.
If Rescue Mode cannot be used, or if the center display cannot be used, use wheel dollies to support the vehicle and move it onto a flatbed truck. Before using wheel dollies, be sure to refer to the manufacturer's instructions and its recommended load capacity.
Before towing the vehicle, be sure to contact a XPENG service center.
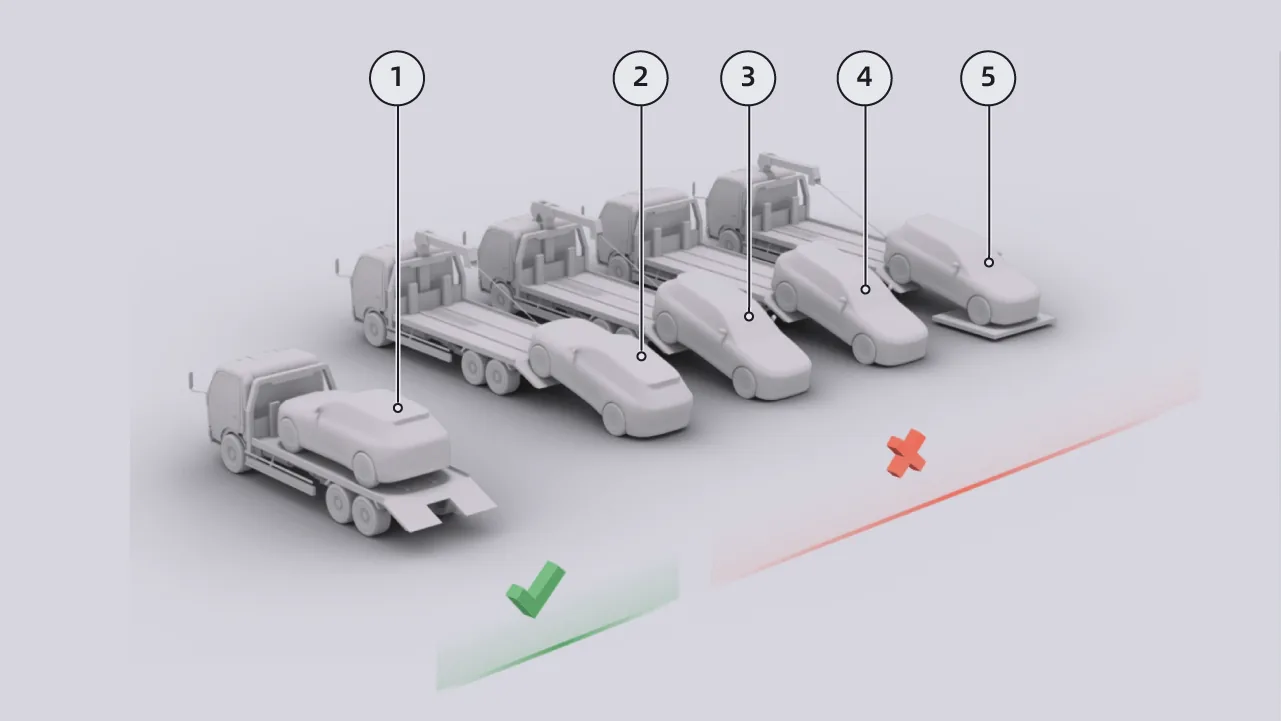
Before towing the vehicle when necessary, be sure to contact a XPENG service center. The towing method shown in ①, with all four wheels off the ground, must be used. The towing methods shown in ②③④⑤ are prohibited.
Caution Only tow the vehicle away from the scene after ensuring that the vehicle has no safety risks. If the vehicle power battery has deformation, liquid leakage, smoke, or other such conditions, the safety risks shall be addressed first.
If a flatbed truck cannot be used normally to tow the vehicle, a rigid connection may be used to urgently tow the vehicle to a safe area and wait for rescue.
When using rigid towing, avoid towing over long distances, and the towing speed must not exceed 5 km/h.
When the vehicle is winched onto a flatbed recovery vehicle, use tie-down straps and wheel chocks to secure the tires to prevent an accident.
Warning When towing the vehicle, no one is allowed to stand in front of or behind the vehicle; otherwise, an accident may occur.
When towing the vehicle, do not allow any person to ride in the vehicle; otherwise, an accident may occur.
Never allow the wheels to touch the ground when transporting the vehicle. Otherwise, it may cause severe vehicle damage and overheating. In very rare cases, extreme overheating may cause surrounding components to catch fire.
The vehicle has the function of cutting off high voltage and discharging high voltage. When the vehicle is involved in a collision accident, if the trigger conditions are met, the vehicle will automatically cut off the high-voltage electricity and, at the same time, remind the occupants in multiple forms such as sound and text to leave the vehicle as soon as possible, so as to avoid disasters posing a threat to the occupants.
Warning The operation of cutting the high voltage circuit requires a professional person, do not operate it yourself.
Always wear the appropriate personal protective equipment before operating, and use insulated tools when working at high pressures.
After entering the vehicle, you can use the following methods to perform an emergency Power Off:
Move the right front seat to the foremost position and appropriately adjust the seatback angle forward.
On the central control screen “ →Settings→vehicle→Maintenance”Interface, tap , after reading the pop-up prompt, tap The high-voltage power supply can be turned off, and the vehicle will power down directly.
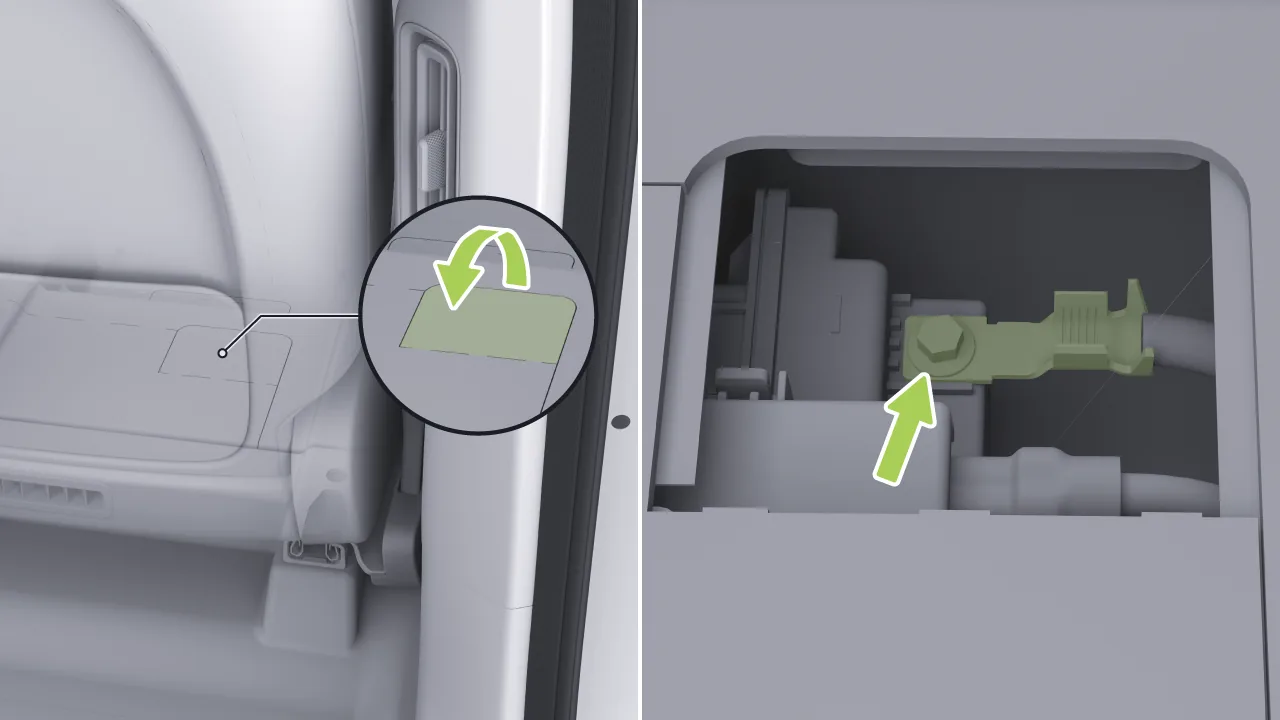
Lift the battery service access cover under the right front seat to see the battery negative cable.
Remove the negative cable bolt, disconnect the battery negative cable, and after disconnection wrap it with electrical insulating tape to prevent conduction caused by accidental contact.
If the above operation cannot disconnect the high-voltage electricity, try the following alternative methods:
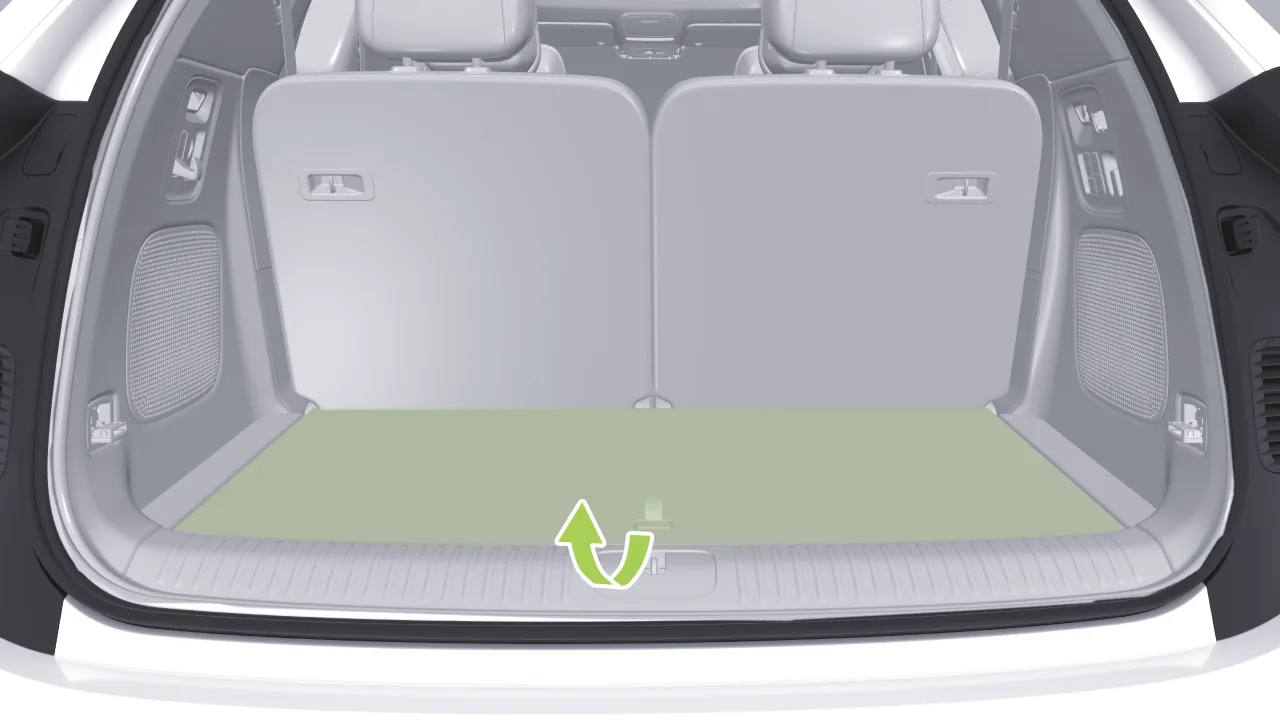
Open the trunk and lift the rear carpet.
Remove the trunk service cover panel using an appropriate tool.
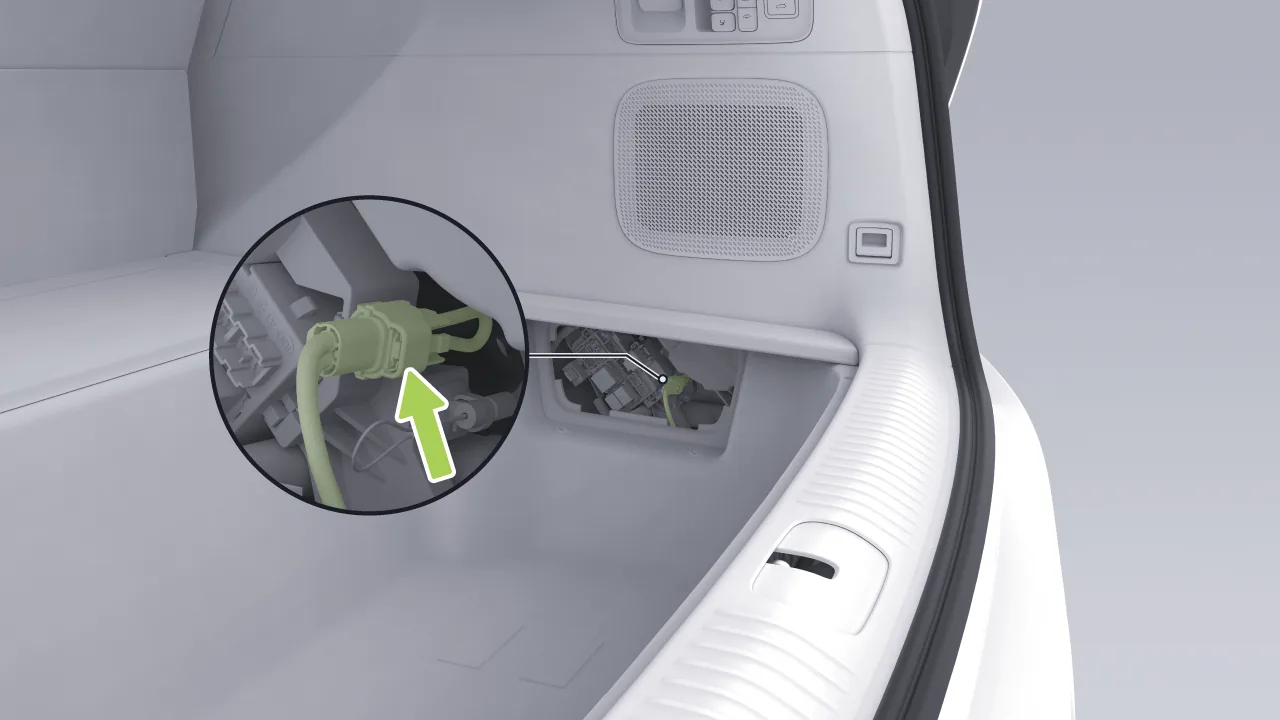
Locate the low-voltage service disconnect switch.
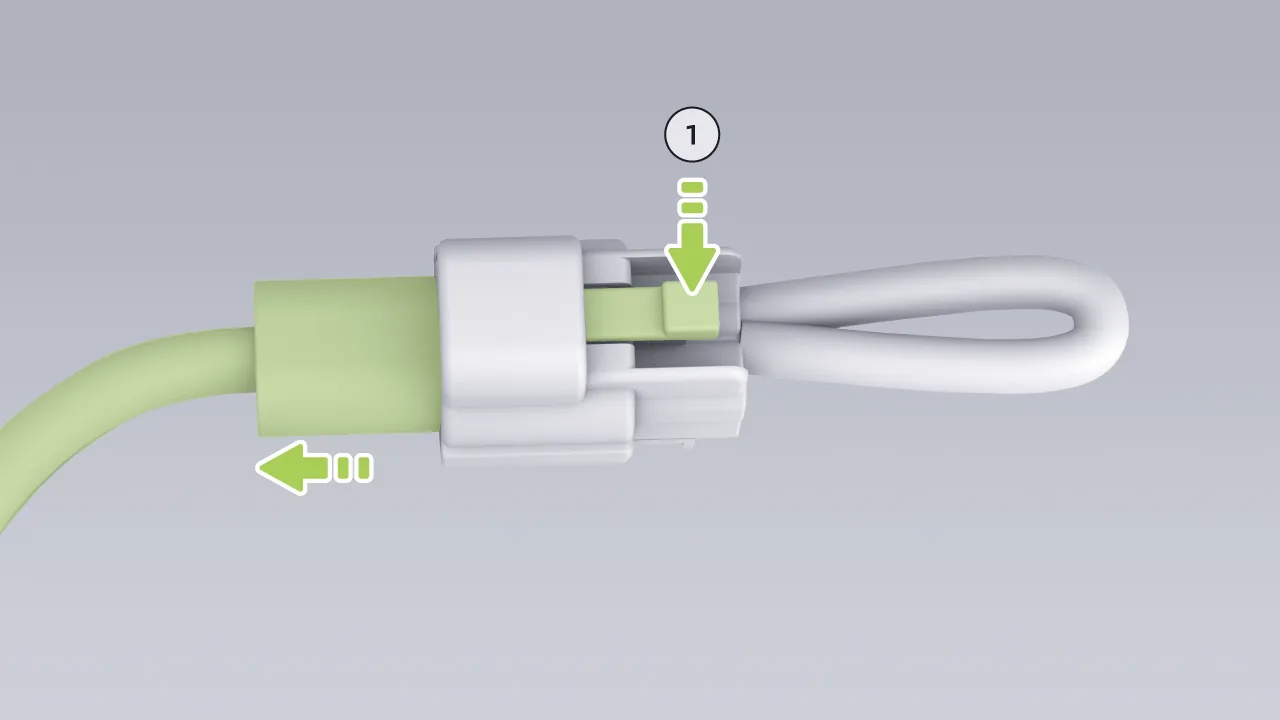
Press the unlock tab ①, then remove the low-voltage service disconnect switch in the direction of the arrow.
The vehicle cannot be started.
The headlights are dimmer than normal.
The horn does not sound or the sound is weak.
TipsWhen the low-voltage battery state of charge is low, the high-voltage battery will automatically charge it. However, if the high-voltage battery charge is low, charging to the low-voltage battery will stop to prevent over-discharge and potential damage to the high-voltage battery. After the vehicle is locked, the anti-theft system continues to draw power from the low-voltage battery. If the vehicle is not recharged promptly, the low-voltage battery may become depleted, and the vehicle may not unlock or start.Warning Do not expose the auxiliary battery to open flames or sources of static electricity. Sparks may ignite flammable gases emitted by the battery and cause an explosion. Before handling or servicing the auxiliary battery, always read and follow all relevant battery safety warnings and instructions.
Ensure the external auxiliary power supply’s output voltage matches the vehicle’s auxiliary battery rated voltage; otherwise, battery damage or explosion may occur.
The positive and negative terminal posts are located in the trunk. Open the trunk, lift the rear carpet, and remove the service cover to see them.
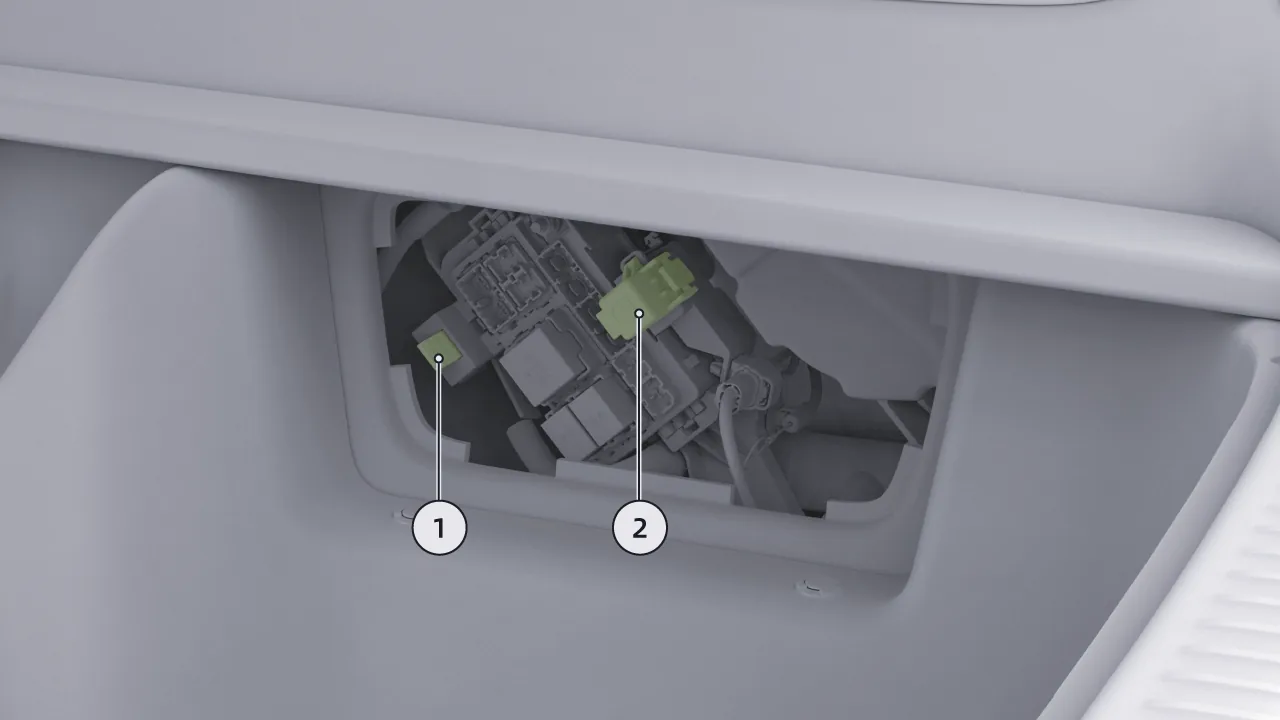
Negative terminal post
Positive terminal post
The vehicle battery has a power lock function. When the battery level is too low to unlock and start the vehicle, the battery can be awakened in the following ways:
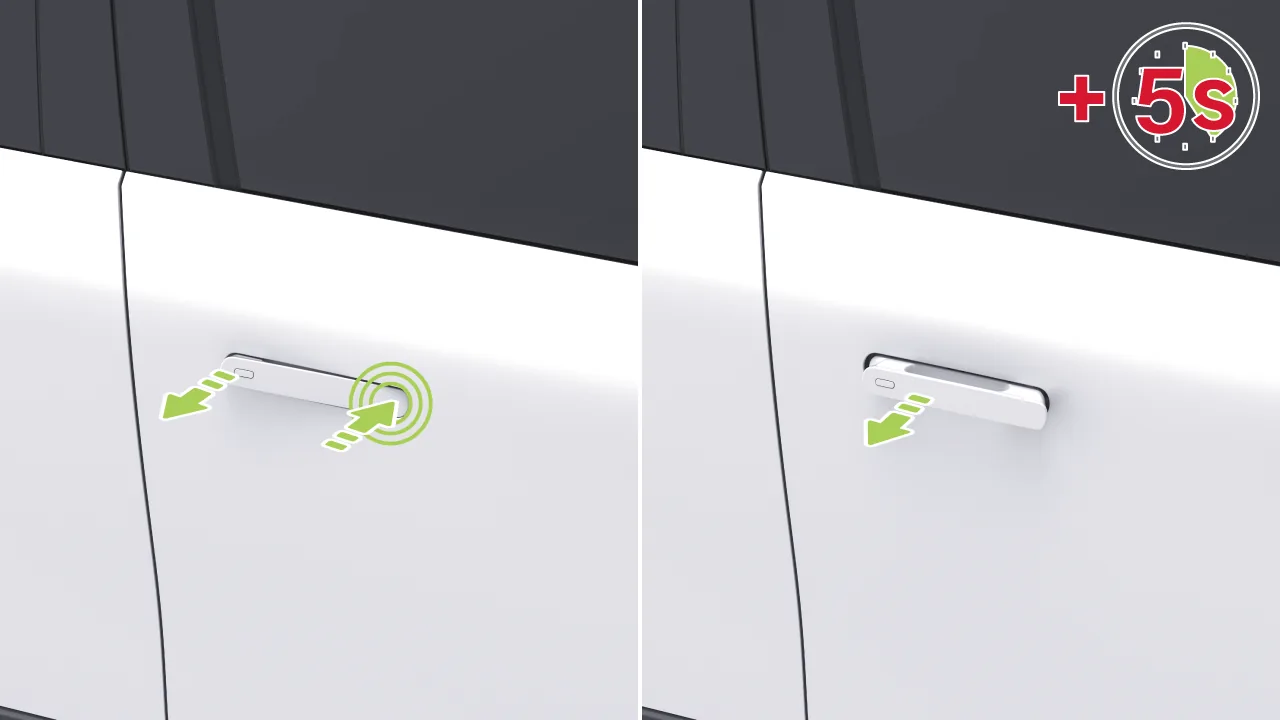
Lightly press the front end of the right front door handle so that its rear end naturally tilts upward, and use the other hand to hold the raised handle firmly;
Then release the pressure on the front end of the door handle and adjust the exterior handle to a suitable angle;
Pull the right front door handle and hold it for more than 5 seconds to wake up the battery;
Immediately use the remote key*, mobile phone Bluetooth key, or NFC card key to unlock the vehicle and open any door to power on the vehicle; otherwise, the battery will enter lock mode again.
When the right front door handle is pulled and held for more than 5 seconds, and the battery still cannot be awakened and the vehicle cannot be started, the left front door can be unlocked through the following jump-start operation:
With the vehicle parked, press the left side area of the tow hook cover to open the tow hook cover.
Detach the two jumper cables from the towing cover.
Caution Always connect positive (+) to positive (+) and negative (-) to negative (-).
Ensure that the booster cable clamps do not contact any other metal.
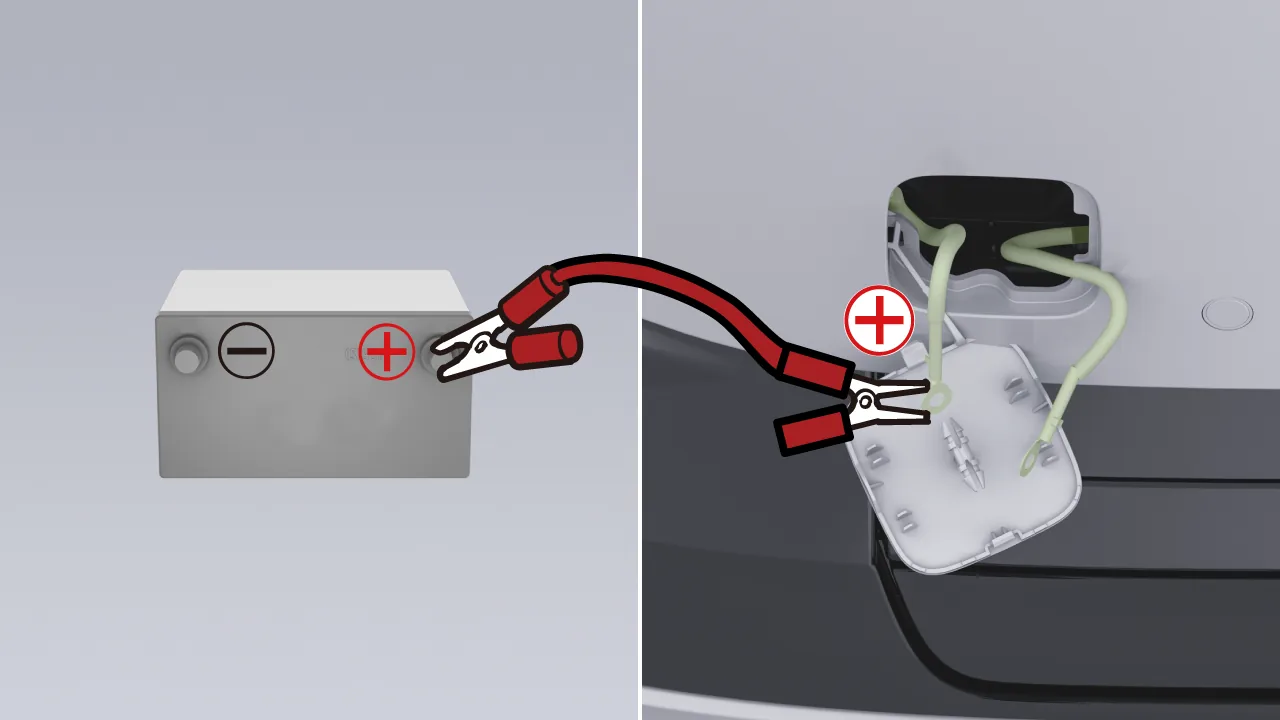
Use a 12 V power source (such as a portable emergency power supply), place it in a position convenient for jump-starting, connect one end of the red cable to the vehicle's red positive jump-start terminal (+), and connect the other end to the positive terminal (+) of the auxiliary power source.
Connect one end of the black cable to the black negative jumper terminal (-) of this vehicle, and the other end to the negative terminal (-) of the auxiliary power source.
Caution This jump-starting procedure is intended solely for unlocking the front left door. Never use it to charge the 12V battery or to power any other electrical equipment in the vehicle.
Use the remote key*, mobile phone Bluetooth key, or NFC card key to unlock the vehicle.
When the vehicle is unlocked, the left front exterior door handle automatically extends. Pull the exterior door handle to open the door.
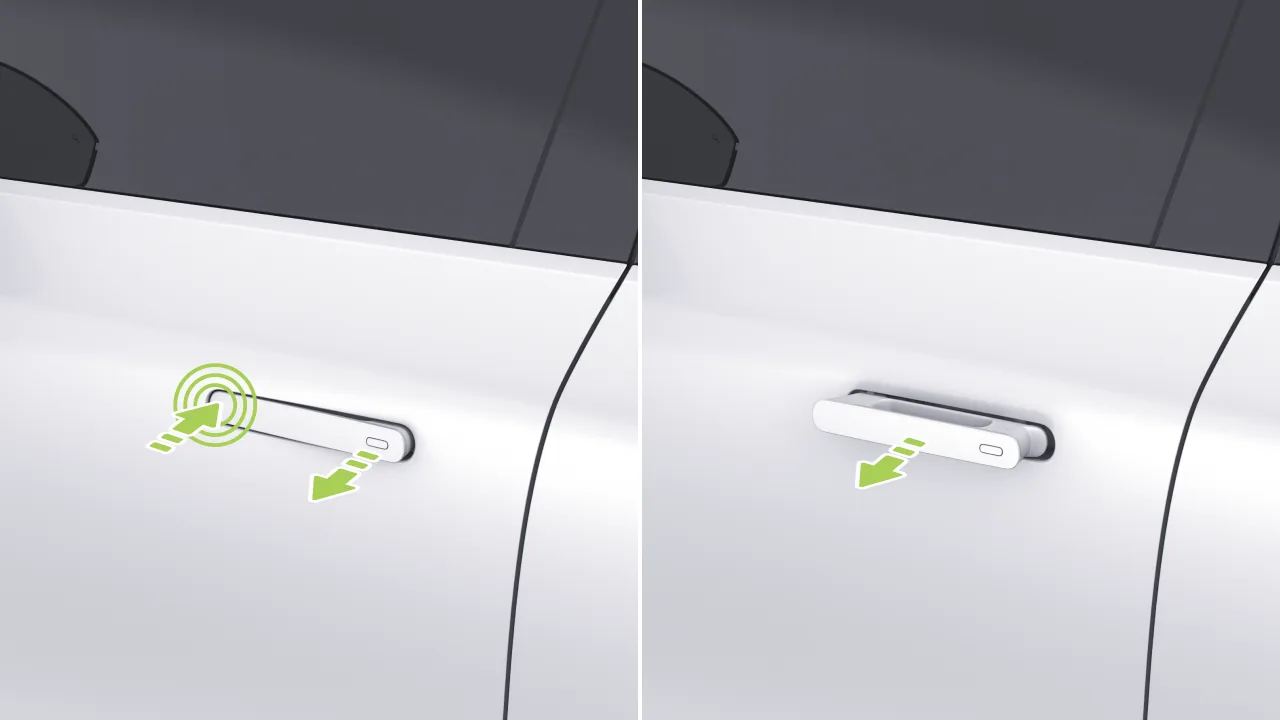
If the outer handle of the left front door does not pop out, lightly press the front end of the door handle so that its rear end naturally tilts upward, hold the tilted handle steadily with the other hand, then release the pressure on the front end of the door handle, adjust the outer handle to an appropriate angle, and then pull the outer door handle to open the left front door.
Disconnect in sequence Disconnect it, stow the cable properly, and reinstall the tow hook cover.
Warning Never jump-start the vehicle using both the front emergency jump-start terminal and the trunk jump-start terminal at the same time.
Open the trunk, lift the rear carpet, and use a suitable tool to remove the trunk service cover.
Tips If the vehicle battery is discharged and the trunk cannot be opened using the exterior switch, use the emergency release switch on a rear door to open it. Enter the cabin through the rear door and perform an emergency trunk release from inside the vehicle.
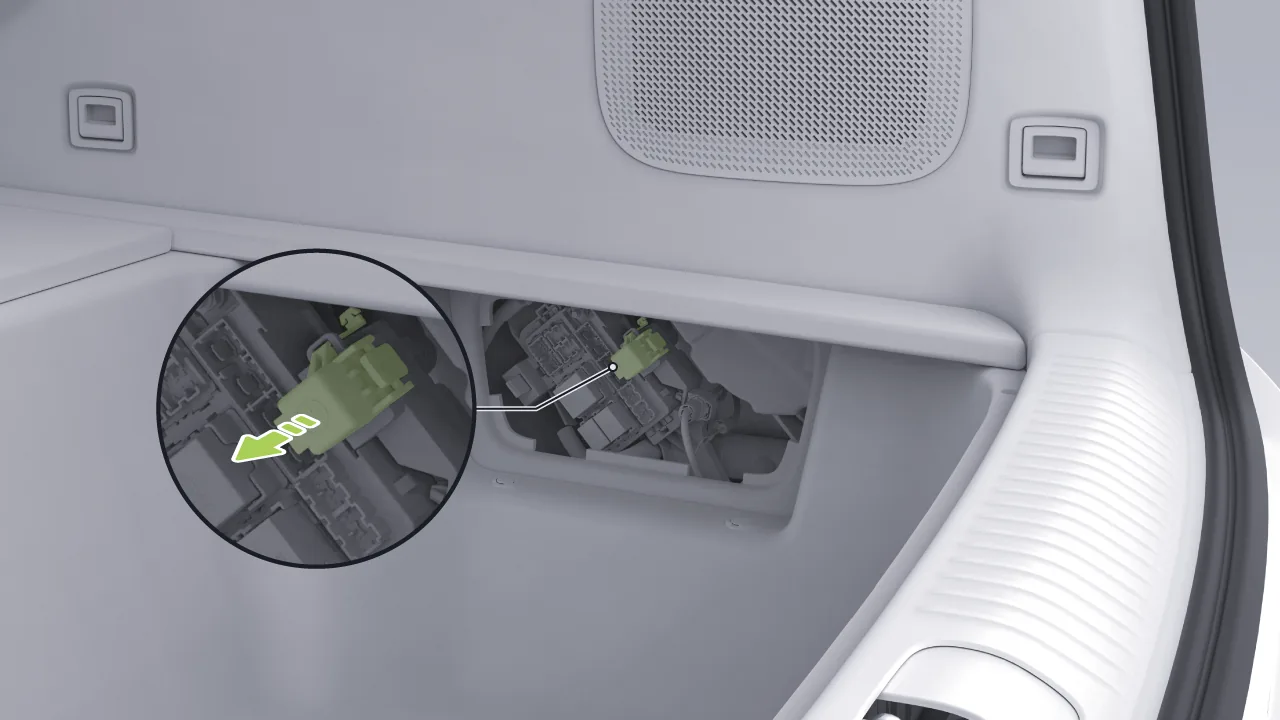
Locate the positive terminal and remove the protective cap from the positive terminal.
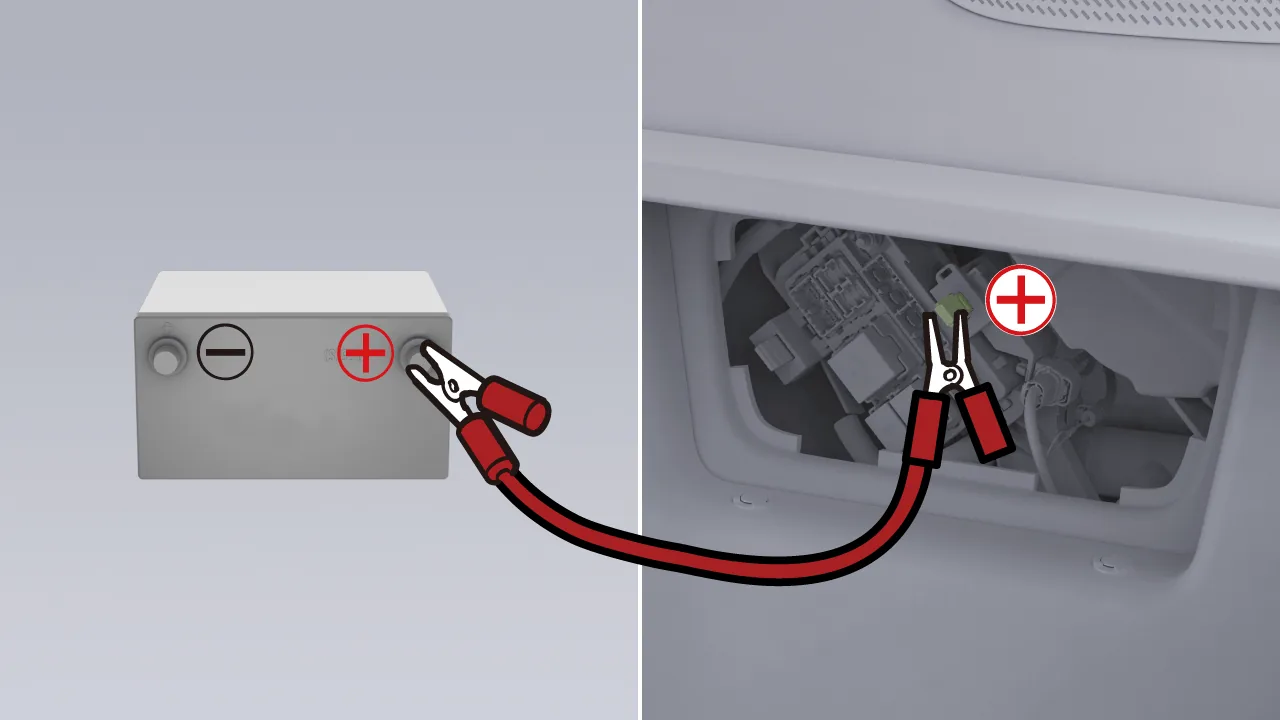
Connect one end of the red cable to the positive terminal (+) of this vehicle's fuse box, and the other end to the positive terminal (+) of the auxiliary power source.
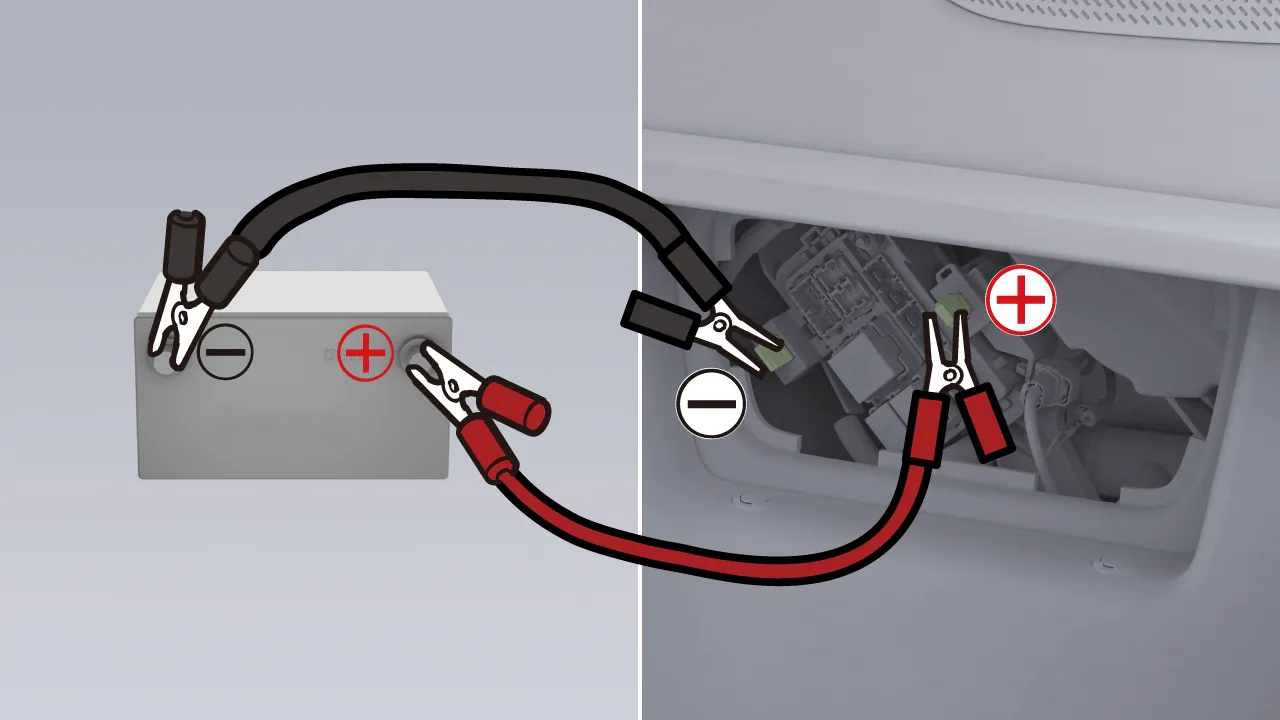
Locate the negative terminal post, connect one end of the black cable to the negative terminal post (-) of this vehicle's fuse box, and connect the other end to the negative terminal (-) of the auxiliary power source.
After connecting the auxiliary power supply, if the central control screen is lit, it is necessary on the central control screen “ →Settings→vehicle→Maintenance”Interface, tap
After Power Off, ensure that the remote key* or NFC card key is inside the vehicle, or that the mobile phone Bluetooth key is connected to the vehicle, then depress the brake pedal and shift into gear to complete startup.
Caution Emergency auxiliary power, can not maintain long-term high power output, generally to complete the auxiliary power cycle in 30 s, otherwise to re-energize the action.
After the vehicle is successfully started, disconnect in sequence. Stow the cable properly, and install the trunk service cover panel.
Warning When connecting cables, do not allow the positive and negative cables to come into contact. Doing so may cause a fault in the vehicle's electrical circuit and damage the vehicle.
Improper use of jumper cables may cause the battery to explode, resulting in personal injury.
Do not touch high-voltage components during operation. Risk of high-voltage electric shock.
The vehicle’s positive terminal post is marked with a (+) symbol. When connecting cables, ensure the auxiliary power supply’s positive (+) terminal is connected to the vehicle’s positive (+) terminal post, and the auxiliary power supply’s negative (–) terminal is connected to the vehicle’s negative (–) terminal post. Reversed polarity may damage the rear domain controller.
Tips If the 12V battery is frequently undercharged, please contact an XPENG Service Center or Customer Service.
If the battery needs to be replaced, please visit an XPENG Service Center for replacement.
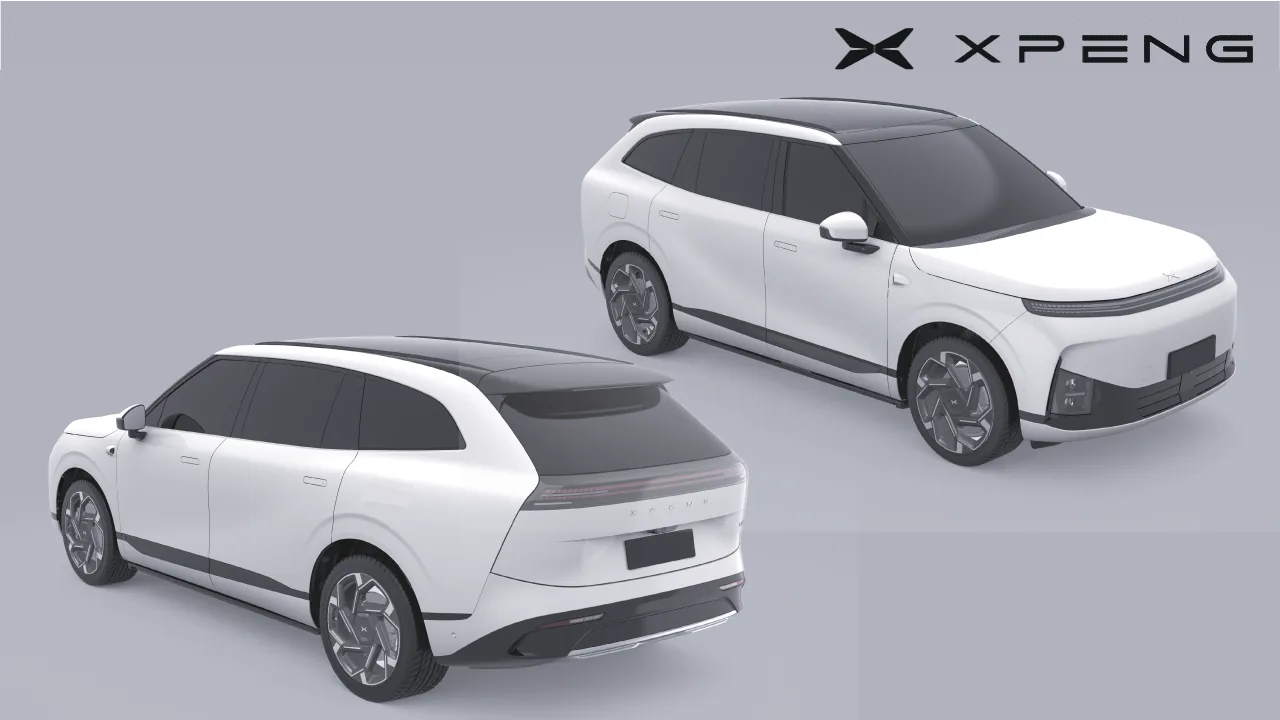
| Vehicle Model | G9L | |||
| Dimensions | Length (mm) | 5120 | ||
| Width (mm) | 1999 | |||
| Height (mm) | 1788 | |||
| Rated Passenger Capacity (persons) | 5/6/7 | |||
| Maximum Design Gross Mass (kg) | 3220/3195/3295/3260/3360/3300/3400 | |||
This vehicle's power system is driven by a power battery. In the event of a serious collision accident, high-voltage electricity leakage, battery pack damage, chemical liquid leakage, and other conditions may occur. Therefore, emergency rescue personnel should wear appropriate protective equipment when carrying out rescue operations on the vehicle to ensure personal safety.
Warning When emergency rescue personnel operate on high-voltage components, a supervision mechanism shall be implemented: one person supervises and one person operates. It is prohibited for two or more persons to work simultaneously. While the operator is working, other personnel are prohibited from touching the operator.
Emergency rescue personnel are prohibited from wearing metal accessories during rescue operations.
| Device Name | Legend | Description | Purpose |
| Insulating Protective Clothing |  | Insulation rating ≥1000V | Used to prevent high-voltage electric shock and withstand the heat generated by electric arcs. |
| Insulating Gloves |  | Insulation rating ≥1000V | Used to prevent high-voltage electric shock |
| Insulating Shoes |  | Insulation rating ≥1000V | Used to prevent high-voltage electric shock |
| Insulated Tools |  | Insulation rating ≥1000V | High-Voltage-Related Operations |
| Insulating Tape |  | Insulation rating ≥1000V | Wrap all exposed or damaged wires. |
| Insulated Rescue Hook |  | Insulation rating ≥1000V | Pull the electrocuted person away during rescue |
| Fire Blanket |  | A1 | Fire Extinguishing |
| Helmet |  | Class T4 Electrically Insulated Near-Electricity Alarm Safety Helmet | High Voltage Warning, Protect Your Head |
| Protective Face Shield |  | PVC Transparent Lens | Splash Protection |
| Goggles |  | PVC Transparent Lens | Splash Protection |
| Acid- and Alkali-Resistant Gloves |  | Must comply with the requirements of the *Solvent-Resistant Protective Gloves* standard | Use in the Event of Electrolyte Leakage |
| Fire Extinguisher |  | Select appropriate firefighting equipment (water or a fire extinguisher) to extinguish the fire according to the type of fire. | Fire Extinguishing |
Warning If the vehicle catches fire, do not directly touch any part of the vehicle. Operations shall be carried out by professional rescue personnel wearing the correct safety protective equipment.
When the vehicle fire is small and under control, appropriate extinguishing agents should be used: dry sand, chemical dry powder, carbon dioxide.
When the vehicle catches fire or the power battery is subjected to severe damage such as crushing or bending, and the fire develops rapidly or becomes uncontrollable, rescue personnel must be notified to use a continuous, large amount of firefighting water to extinguish the fire for 30 minutes (water may be sprayed through broken windows). At the same time, to prevent the fire from spreading, any surrounding combustible items should be kept away from the burning vehicle.
After the fire has been extinguished, continuous monitoring is required to prevent re-ignition.
When handling a water-immersed vehicle, professional rescue personnel must wear appropriate personal protective equipment, first pull the vehicle out of the water, and then normally disconnect the high-voltage power.
Caution It is recommended that the vehicle not remain in deep water for a long time when driving through water; otherwise, it may easily cause damage to the vehicle's high-voltage components.
After the vehicle is recovered, it must remain stationary for at least 30 minutes. During this period, the battery pack temperature must be monitored in real time to ensure that the battery is not undergoing thermal runaway before towing the vehicle away.
Warning The extent of damage to a water-submerged vehicle may not be obvious. When handling a water-submerged vehicle, rescue personnel must wear appropriate rescue protective equipment, otherwise electric shock may occur, resulting in serious personal injury or death.
Warning If a vehicle collision accident causes liquid leakage from the power battery, it must be handled by professional rescue personnel, and the corresponding personal protective equipment must be worn. Do not directly touch the liquid.
If the power battery leaks (with obvious liquid flowing out), handle it in the following way:
If a small amount of electrolyte leaks, keep away from fire sources, use an absorbent pad to absorb it and place it in a sealed container, or dispose of it by incineration.
In the event of a large leak, collect it in a unified manner and handle it as hazardous chemicals; calcium gluconate solution may be added to treat toxic gases.
Warning Before safe storage of the power battery, the power battery temperature must be monitored throughout the entire process. If abnormal temperature rise occurs, physical cooling is required to prevent fire and explosion.
If the human body accidentally comes into contact with leaked liquid, immediately rinse with a large amount of water for 10–15 minutes. If there is no improvement or discomfort symptoms occur, seek medical attention immediately.
In the event of emergency accidents such as vehicle wading, collision, or fire, move away from the vehicle immediately and do not attempt to rescue the vehicle yourself.
Passengers should attempt emergency evacuation as follows:
Try to open the door in the normal way.
If the door cannot be opened by the normal method, you may try to open the door using the emergency method. See Emergency Door Opening After Power-Off。
If the door still cannot be opened, you may try calling rescue services and wait for rescue personnel.
Warning When cutting the vehicle body, be sure to use suitable tools such as hydraulic cutters and wear appropriate personal protective equipment. Failure to follow these instructions will result in serious personal injury or death.
Regardless of which high-voltage power cut-off procedure is used, always assume that all high-voltage components are energized! Cutting, crushing, or touching high-voltage components can cause serious personal injury or death.
If it is necessary to cut the vehicle body or use hydraulic cutting equipment to rescue occupants, first disconnect the high-voltage power and wait at least 3 minutes.
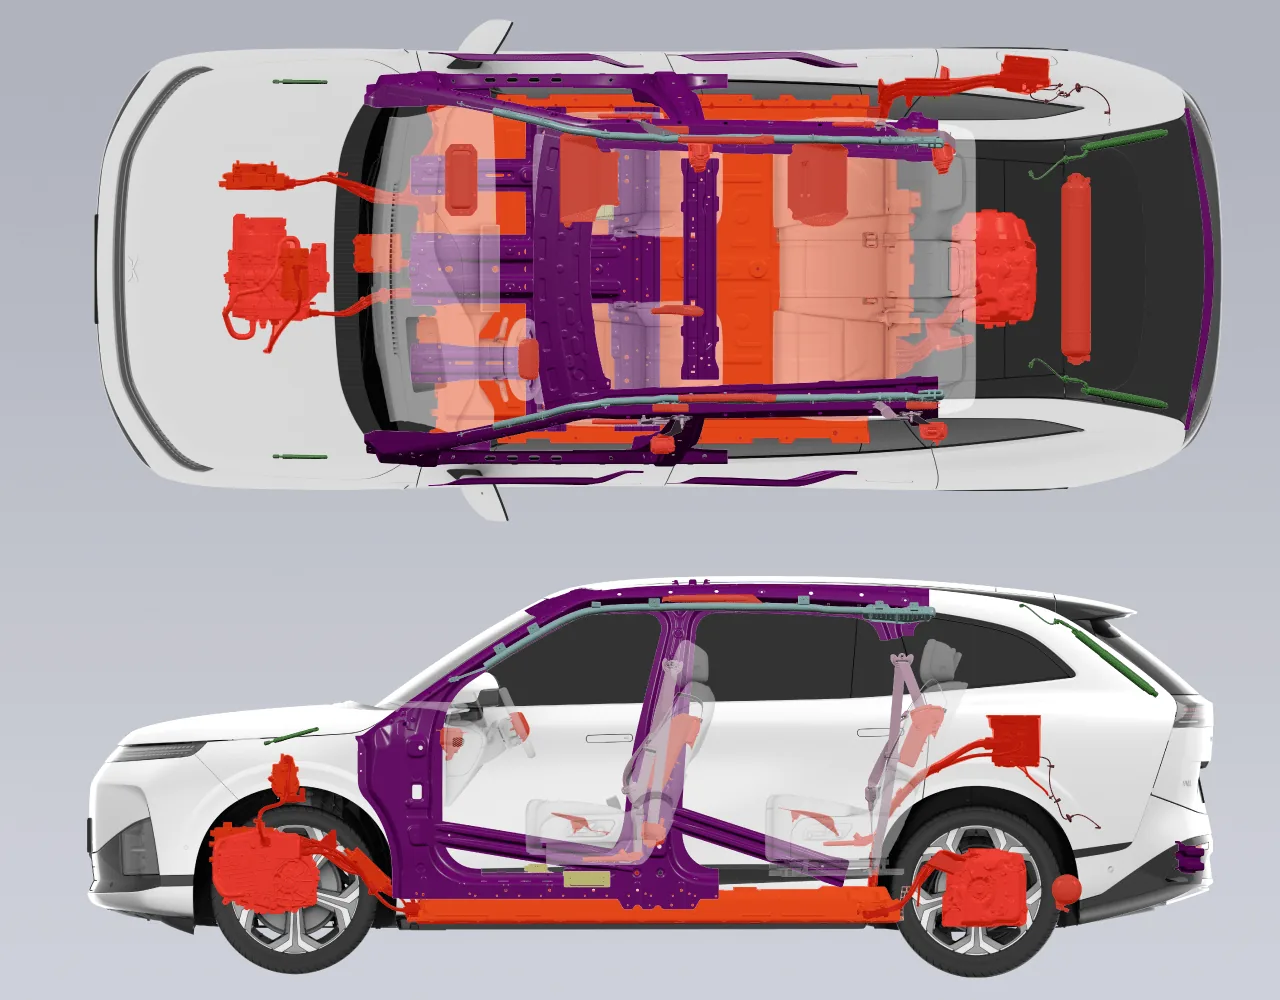
During emergency rescue, if it is necessary to cut, spread, or pierce vehicle body parts, take care to avoid high-temperature and high-voltage areas such as the power battery, drive motor, high-voltage cables, high-voltage electrical equipment, and airbag-related components. As shown in the figure, all red-marked areas are prohibited cutting areas.
Under normal circumstances, avoid cutting components related to the airbag, but it may be done in the following situations:
When the driver/passenger airbags, front row/second-row side airbags, driver far-side airbag, front/rear right seat cushion airbags*, and front and rear head side curtain airbags have deployed.
After disconnecting the negative cable of the 12V battery and cutting off the high voltage power for more than 3 minutes.
In addition, the purple areas are high-strength steel plate areas, and these steel plates need to be cut using special tools.
The vehicle identification number is stamped under the passenger seat.
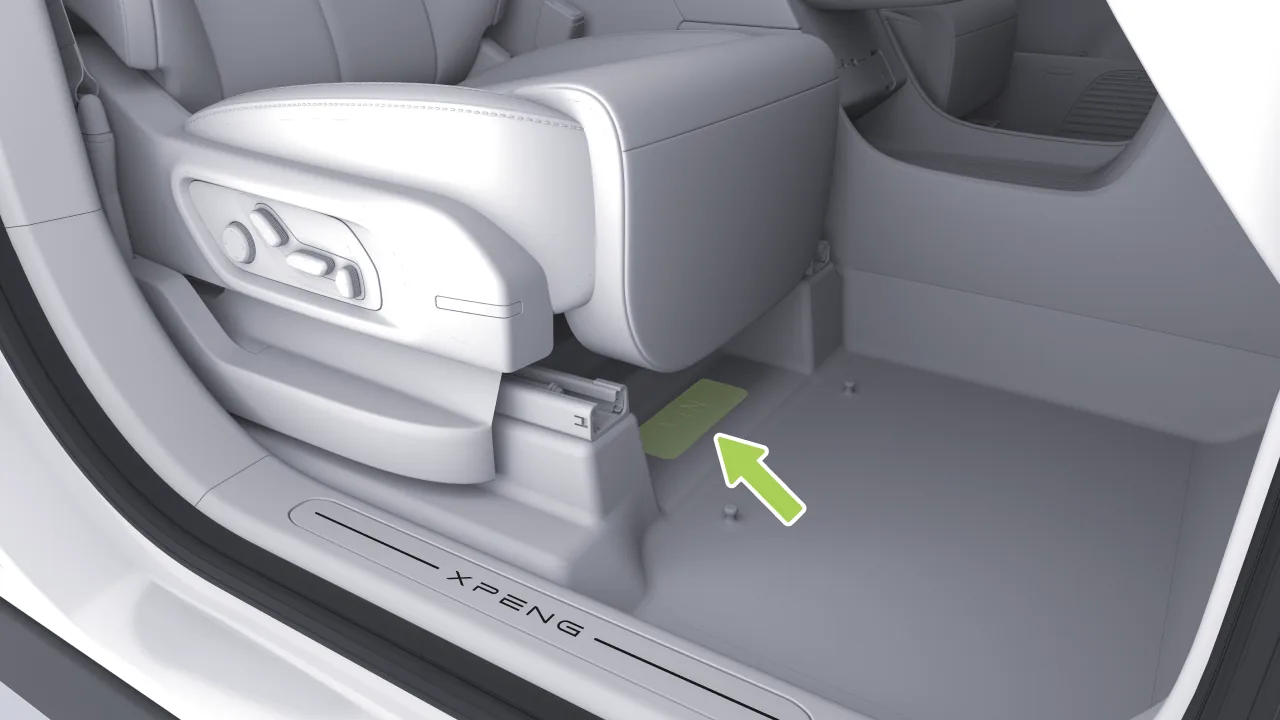
The vehicle identification number is located at the following positions on the vehicle:
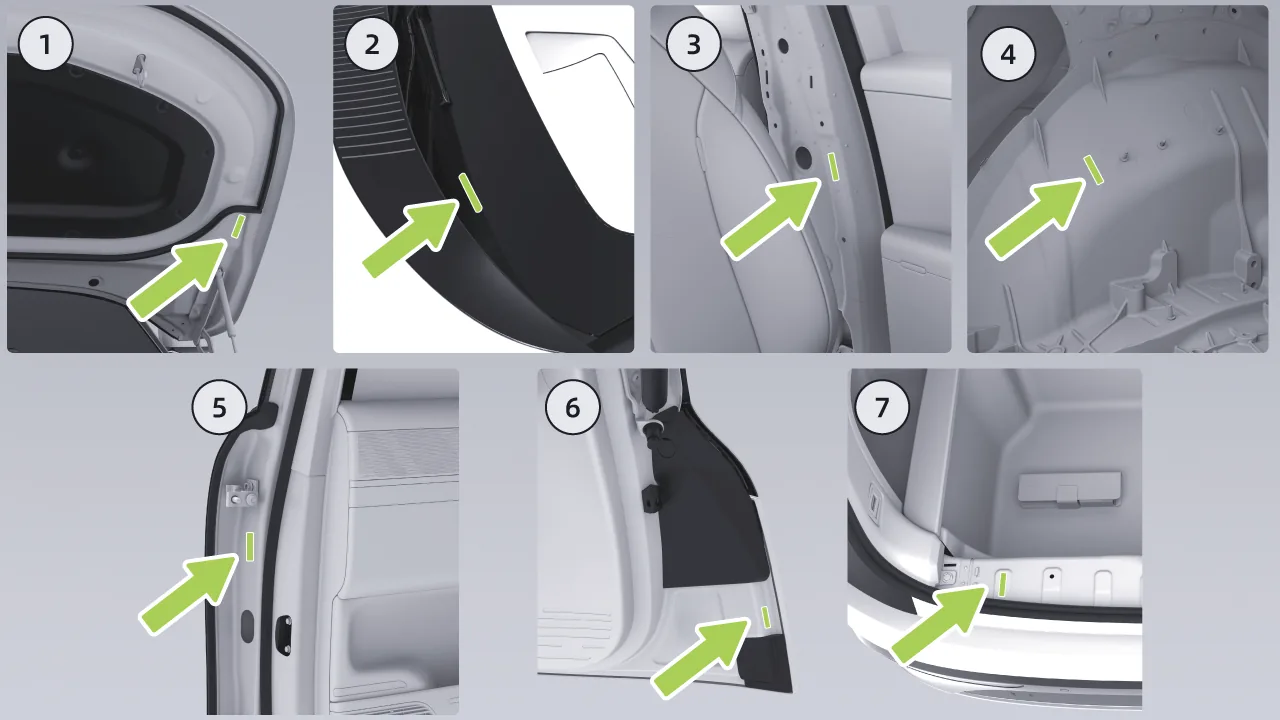
Affixed to the inner side of the front hood.
Affixed to the lower left side of the front windshield.
Affixed to the left B-pillar.
Affixed to the left rear wheel housing.
Affixed to the inner panel of the right rear door.
Affixed to the left side of the tailgate.
Affixed to the upper crossmember of the rear panel.
Type 1
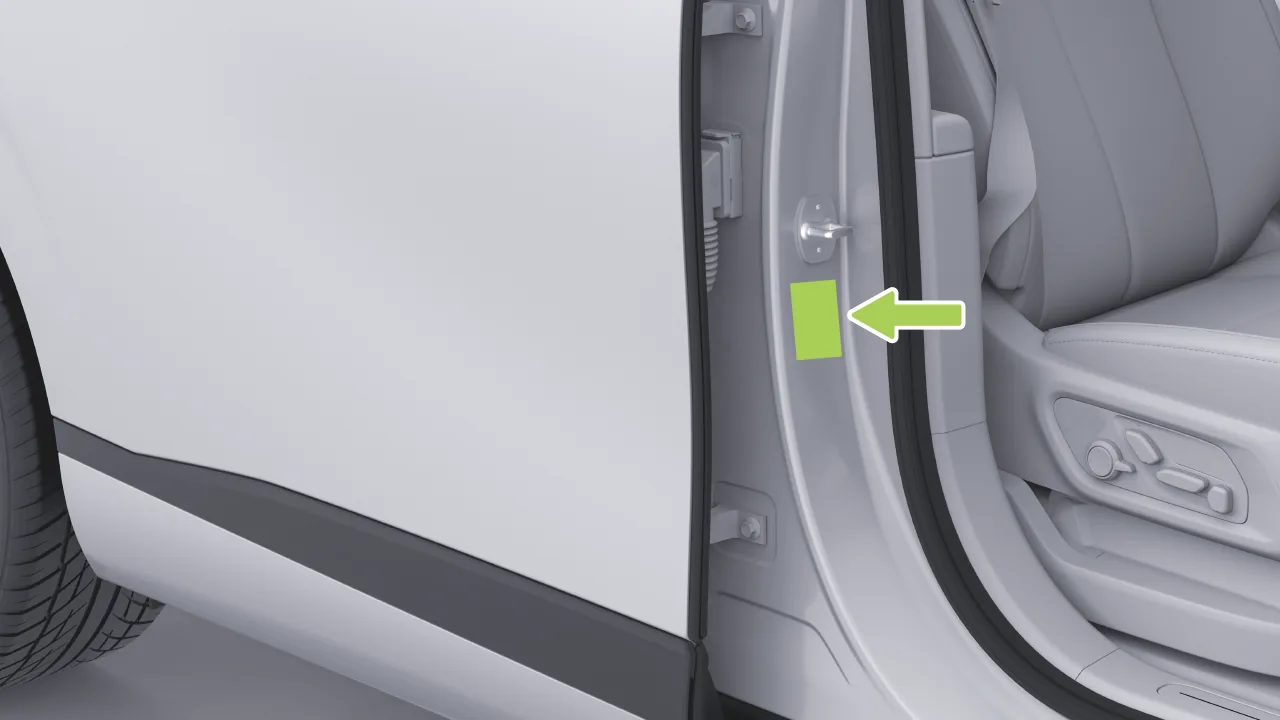
Located on the right B-pillar and visible after opening the right-side door.
Type 2
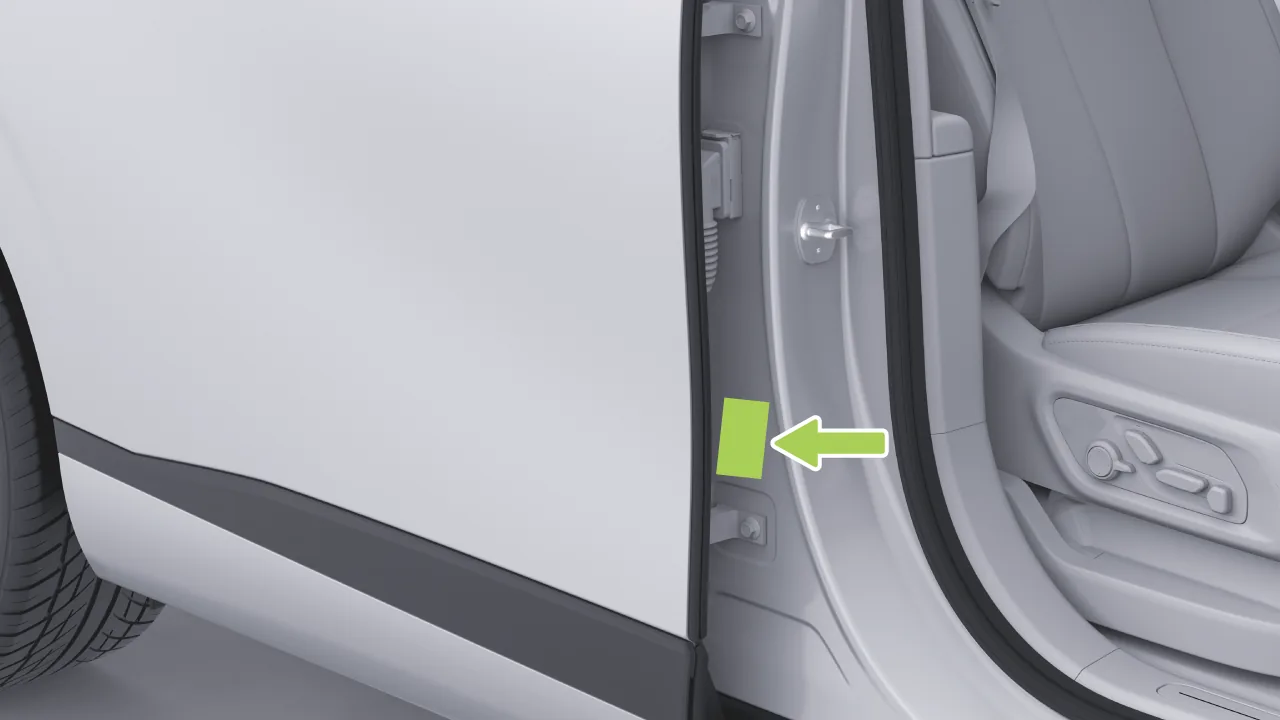
Located on the right B-pillar and visible after opening the right-side door.
Type 3
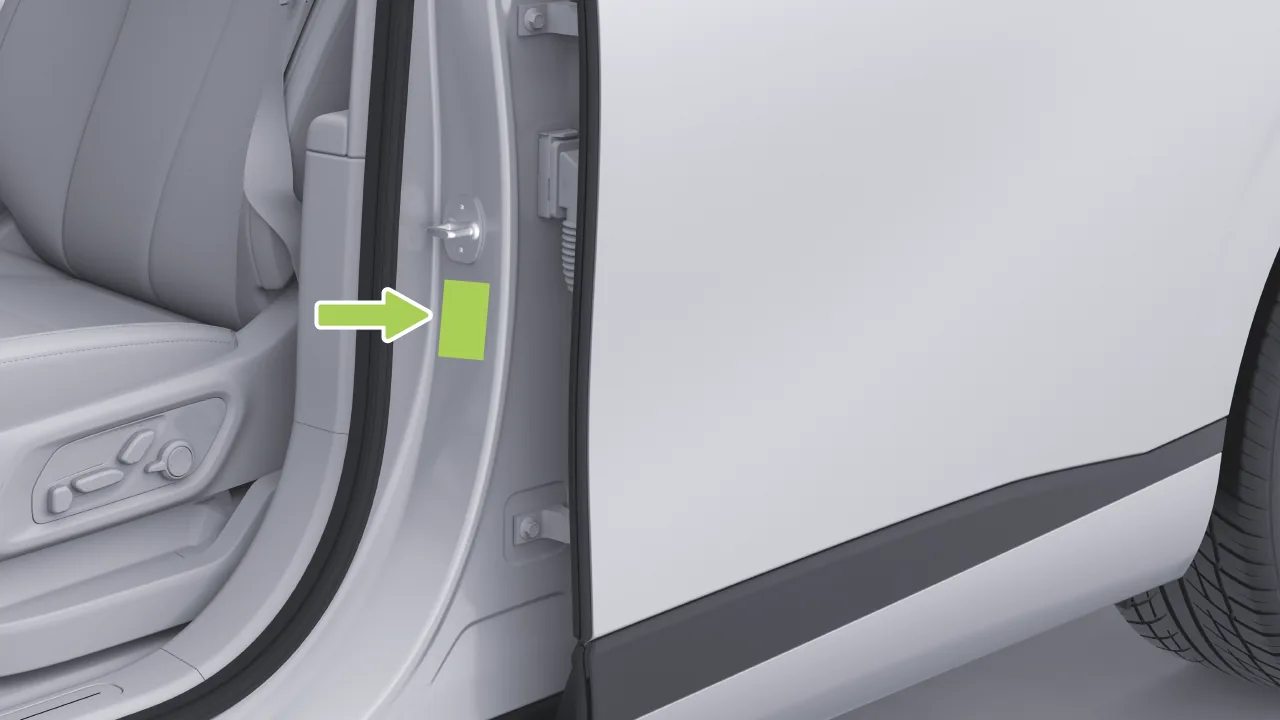
Located on the left B-pillar; visible after opening the left-side door.
The *model and number of the front drive motor are shown in the following locations:
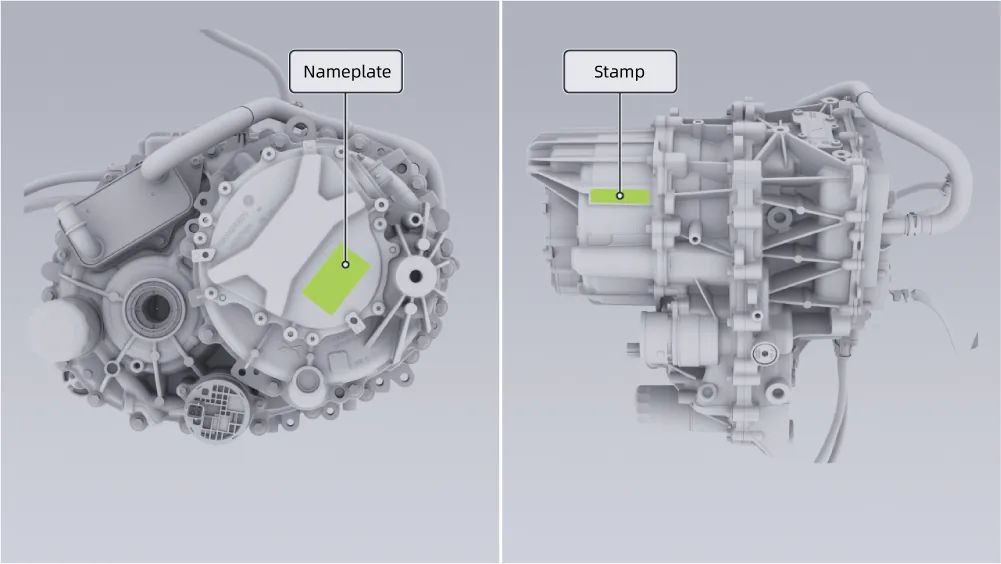
The drive motor model and serial number are shown on the drive motor housing and on the drive motor nameplate label.
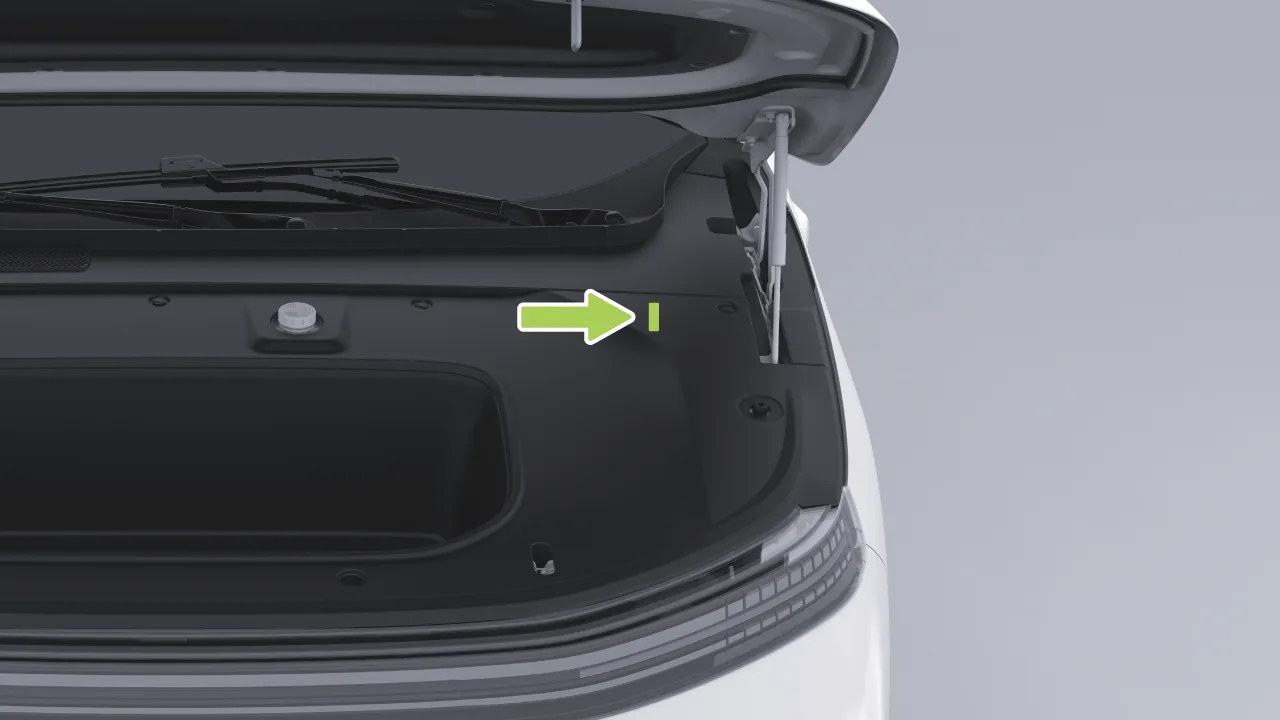
The drive motor model and serial number label is affixed to the front compartment trim panel.
The rear drive motor model and serial number are shown in the following locations:
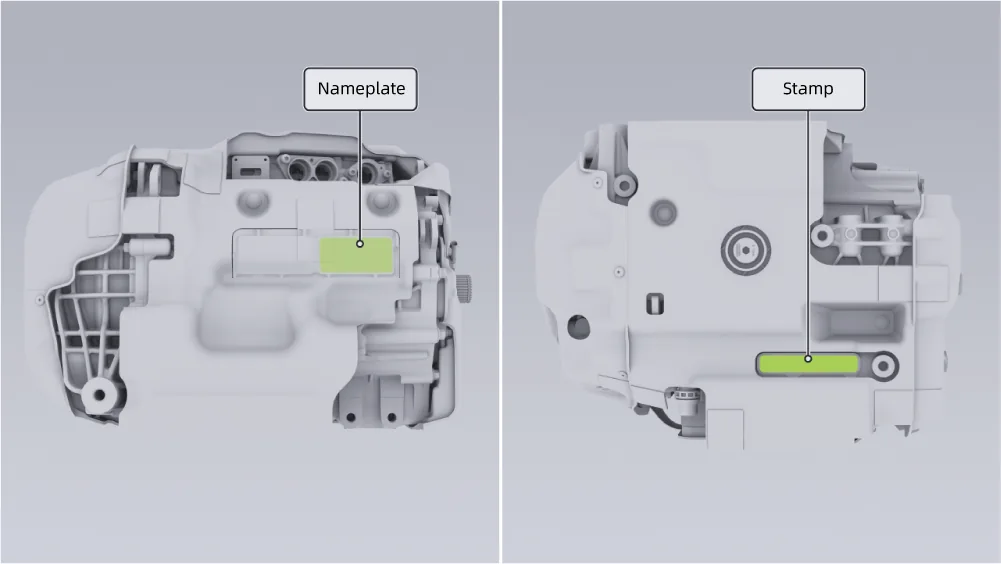
The drive motor model and serial number are shown on the drive motor housing and on the drive motor nameplate label.
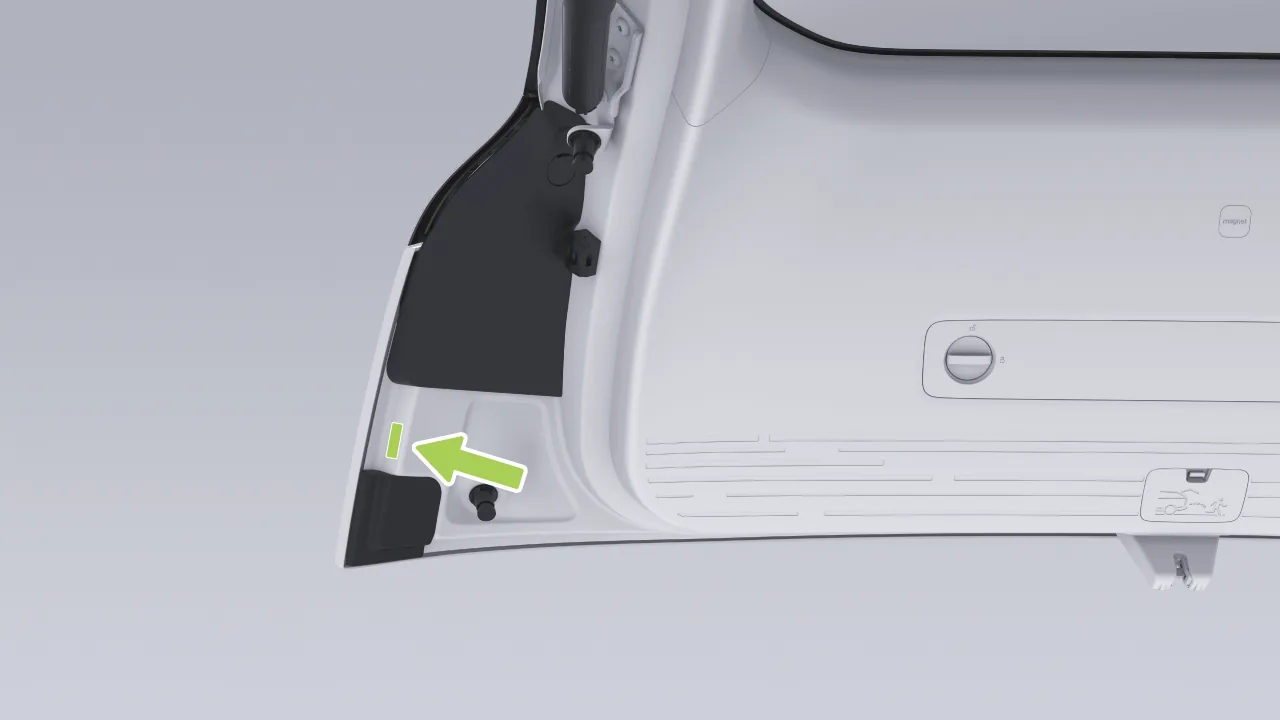
The drive motor model and serial number label is affixed to the right side of the tailgate.
The OBD port for reading the electronic VIN is located at the lower left side of the instrument panel. The electronic VIN and data such as vehicle status information can be read using the original diagnostic tool or diagnostic equipment officially approved by the manufacturer.
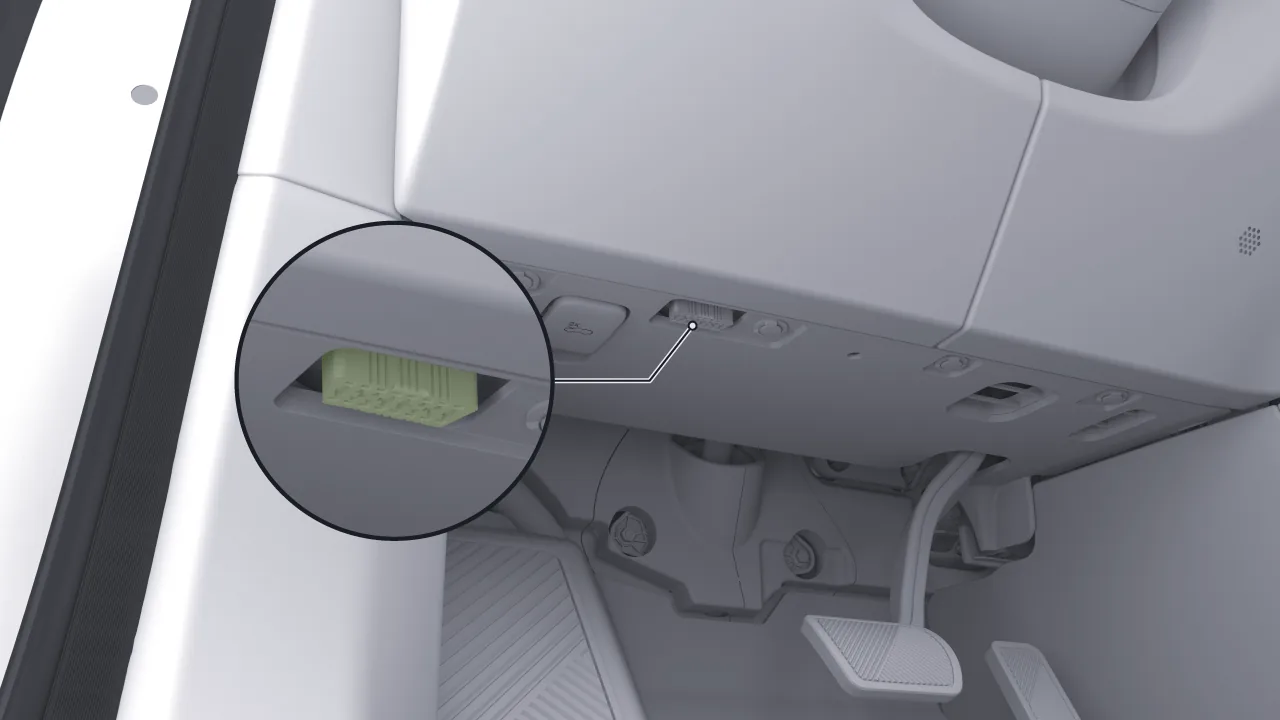
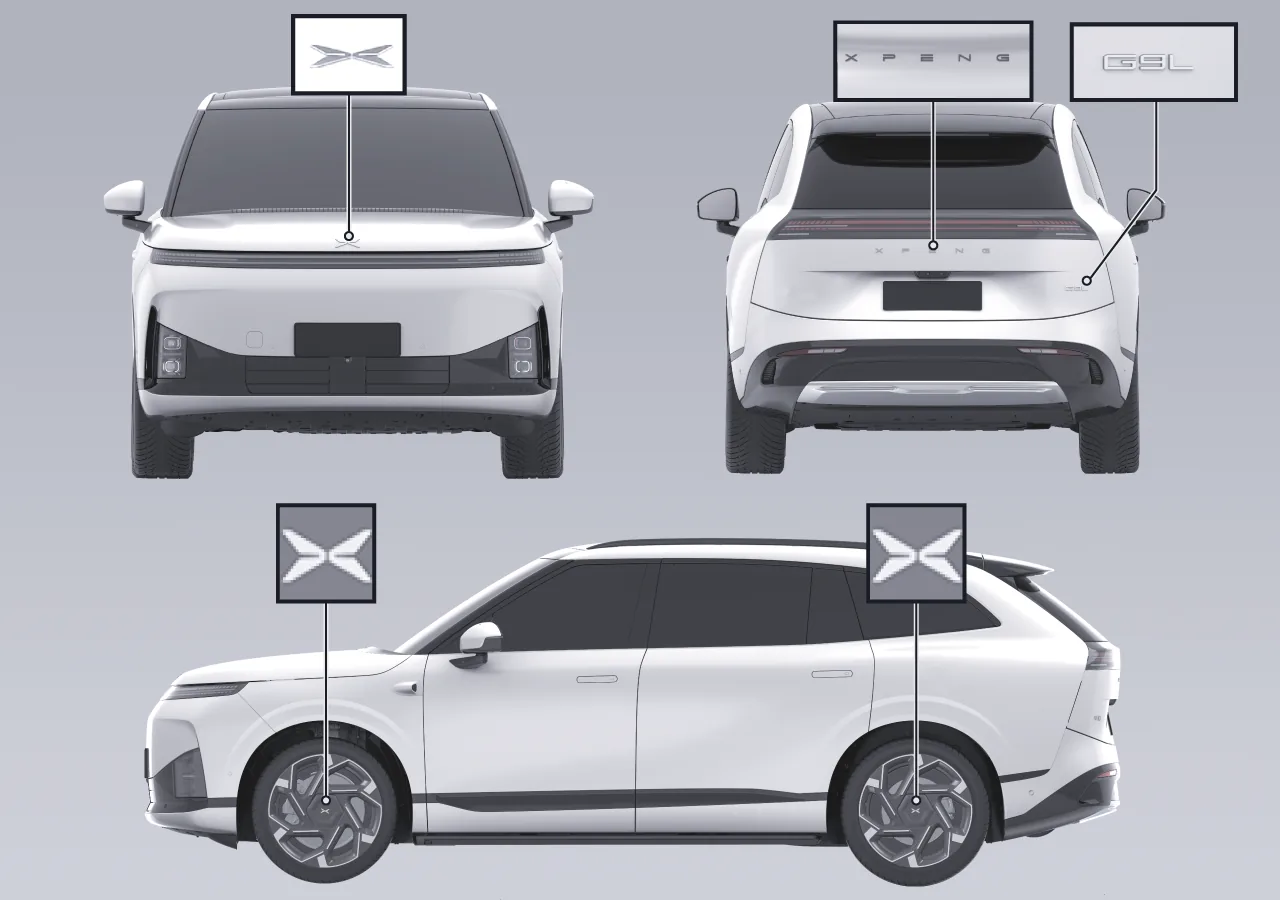
| Warning Sign Names | Warning Symbol Diagram | Warning Symbol Description |
| High-Voltage Warning Sign |  | Do not touch high-voltage components. Danger! |
| High-Voltage Component Warning Sign 1 |  | High-voltage components, danger, do not touch high-voltage components without wearing protective equipment, beware of electric shock! |
| High-Voltage Component Warning Sign 2 |  | High-voltage components, danger, do not touch the high-voltage components without wearing protective equipment, beware of electric shock! |
| Power Battery Warning Label | 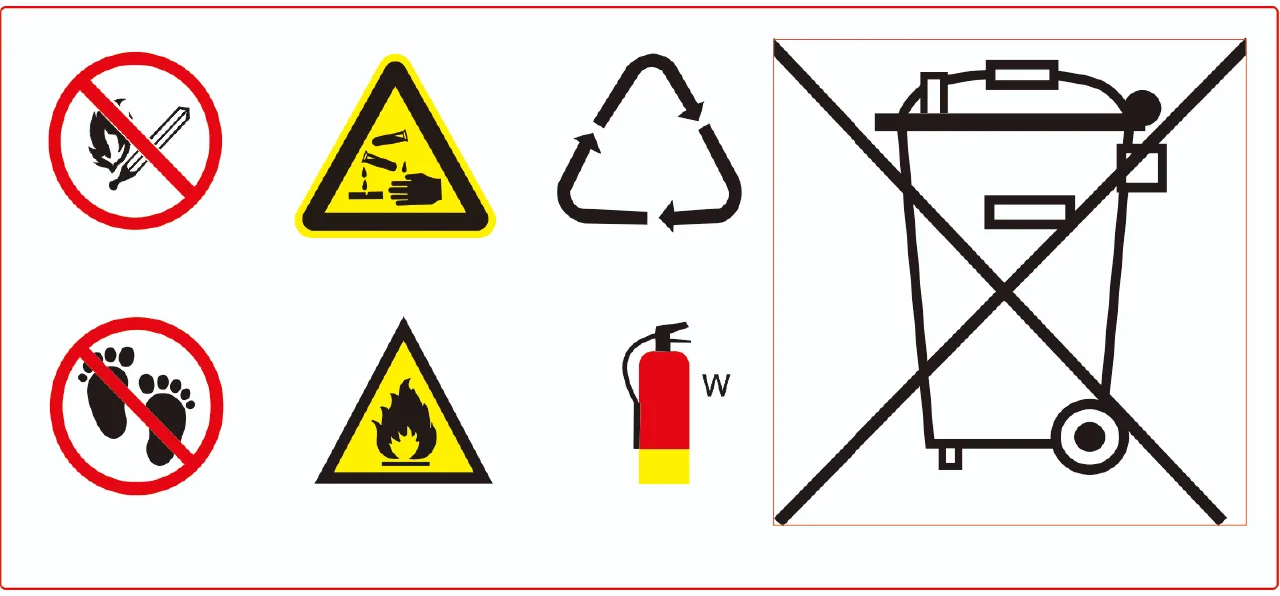 | Do not touch the power battery without wearing protective equipment. Beware of electric shock! |
| High-Voltage Wiring Harness Marking | 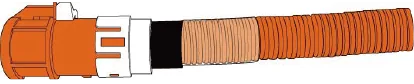 | The vehicle's high-voltage components are all connected by orange High-Voltage Wiring Harnesses. Do not touch the high-voltage components or the orange High-Voltage Wiring Harnesses without wearing protective equipment! |
The microwave window is located on the windshield.
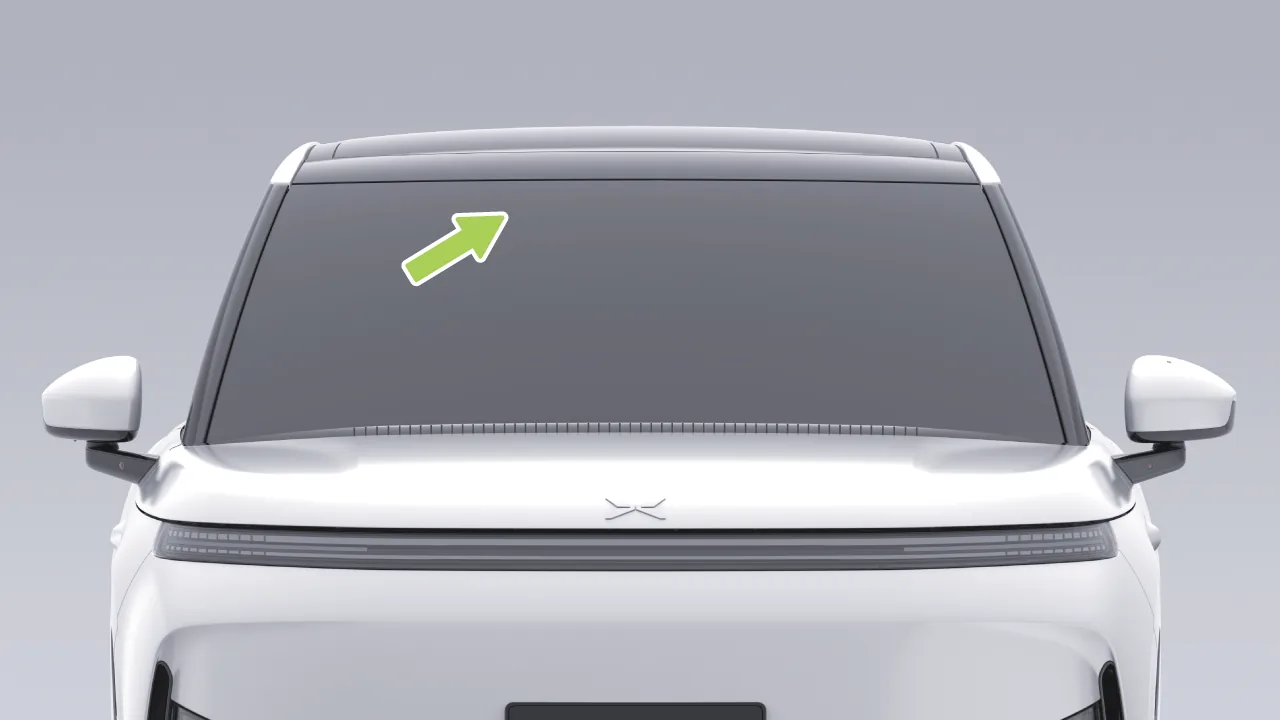 Warning
 Do not block the microwave window location.
When affixing the markings required by traffic regulations, a position around the microwave window should be selected.
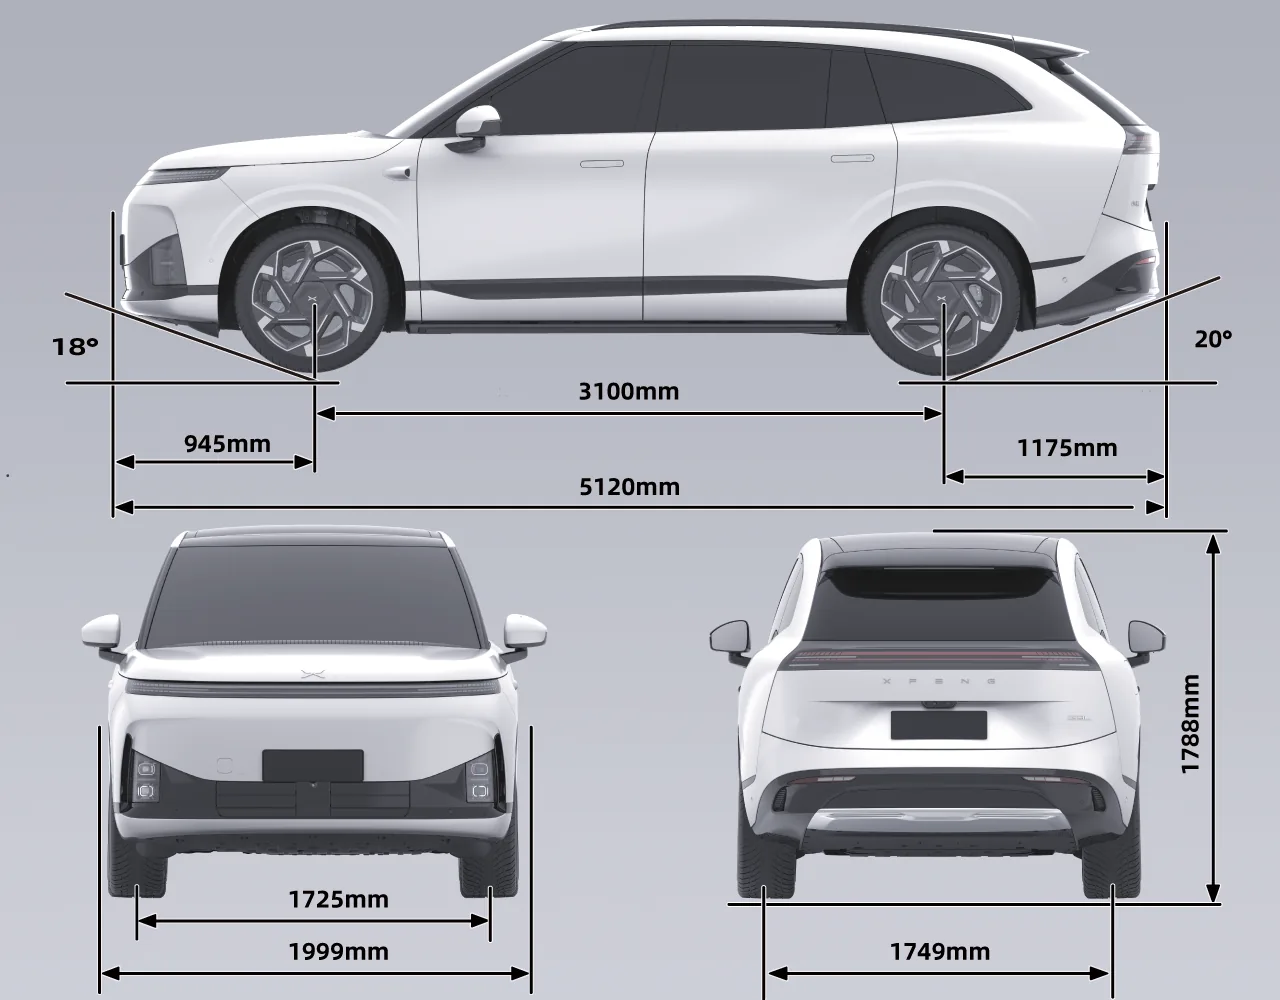
| Dimensions | Length (mm) | 5120 | |||
| Width (mm) | 1999 | ||||
| Height (mm) | 1788 | ||||
| Track Width | Front Track (mm) | 1725 | |||
| Rear Track (mm) | 1749 | ||||
| Wheelbase (mm) | 3100 | ||||
| Front Suspension (mm) | 945 | ||||
| Rear Suspension (mm) | 1175 | ||||
| Number of Occupants (persons) | 5/6/7 | ||||
| Approach Angle (Fully Loaded) (°) | 18 | ||||
| Departure Angle (Fully Loaded) (°) | 20 | ||||
Tips The Side Mirrors (one on each side) are not included in the overall width dimensions, and the allowable tolerance range for the vehicle dimension parameters is ±1%.
| Item Name | Standard Range 2WD 5 Seats | Long Range 2WD 5 Seats | Long Range 4WD 5 Seats | |
| Vehicle Curb Weight (kg) | 2645/2670 | 2620/2645 | 2720/2745 | |
| Preparation | Front Axle (kg) | 1238/1231 | 1228/1220 | 1330/1323 |
| Rear Axle (kg) | 1407/1439 | 1392/1425 | 1390/1422 | |
| Maximum Gross Mass (kg) | 3220 | 3195 | 3295 | |
| Maximum | Front Axle (kg) | 1390 | 1365 | 1470 |
| Rear Axle (kg) | 1830 | 1830 | 1825 | |
| Item Name | 2WD 6 Seats | 4WD 6 Seats | 2WD 7 Seats | 4WD 7 Seats | |
| Vehicle Curb Weight (kg) | 2660/2685 | 2760/2785 | 2700/2725 | 2800/2825 | |
| Preparation | Front Axle (kg) | 1233/1225 | 1337/1329 | 1245/1238 | 1345/1337 |
| Rear Axle (kg) | 1427/1460 | 1423/1456 | 1455/1487 | 1455/1488 | |
| Maximum Gross Mass (kg) | 3260 | 3360 | 3300 | 3400 | |
| Maximum | Front axle (kg) | 1375 | 1480 | 1385 | 1485 |
| Rear Axle (kg) | 1885 | 1880 | 1915 | 1915 | |
Tips Vehicle curb weight tolerance: ±3%. The maximum gross vehicle weight and the respective front and rear axle loads must not exceed the above‑specified limits.
| Project Name | Unit | Standard Range | Long Range | |
| Cell Battery | Type | / | LFP | NCM |
| Rated Voltage | V | 3.22 | 3.77 | |
| Rated Capacity | Ah | 140 | 165.8 | |
| Power Battery | Rated Voltage | V | 656.88 | 663.52 |
| Rated Capacity | Ah | 140 | 165.8 | |
| Rated Energy | kWh | 91.9 | 110 | |
| Quality | kg | 650 | 620 | |
Rated parameters: calculated based on 1/3C discharge.
| Project Name | Front Electric Drive System* | Rear Electric Drive System | |
| Drive Type | Non-Full-time Four-wheel Drive | Rear-Wheel Drive | |
| Drive Motor | Type | AC Asynchronous | Permanent Magnet Synchronous |
| Rated Power (kW) | 50 | 110 | |
| Rated Torque (N·m) | 50 | 170 | |
| Rated Speed (rpm) | 9550 | 6200 | |
| Maximum Power (kW) | 160 | 270 | |
| Maximum Torque (N·m) | 230 | 465 | |
| Maximum Speed (rpm) | 20000 | 18000 | |
| Reducer | Model | 1ETP22A | 1ETC46A |
| Gear Number | 1 | ||
| Minimum Turning Radius (m) | 11 | ||
| Maximum Vehicle Speed (km/h) | 200 | ||
| Maximum Gradeability (%) | 30 | ||
| Model | Air Pressure | |
| Unladen / Half load | Fully loaded | |
| Front wheel 265/45 R21 | 270 kPa | 310 kPa |
| Rear wheel 265/45 R21 | 270 kPa | 310 kPa |
| Wheel Dynamic Balancing (After Attaching the Balance Weights) | Inner Side of Front Wheel | ≤8 g | |
| Outer Side of Front Wheel | ≤8 g | ||
| Inner Side of Rear Wheel | ≤8 g | ||
| Outer Side of Rear Wheel | ≤8 g | ||
| Model | Foot-operated, X-type dual-circuit hydraulic braking. |
| Power Assist Type | Electric Power Assist |
| Brake pedal free travel or idle travel (mm) | 2 |
| Front Wheel Brake Friction Pad Wear Limit (excluding friction pad backing plate) (mm) | 3 |
| Rear Brake Friction Lining Wear Limit (excluding friction lining backing plate) (mm) | 2 |
| Front Brake Disc Wear Limit (mm) | 30 |
| Rear Brake Disc Wear Limit (mm) | 22 |
| Front Suspension Type | Double Wishbone Independent Suspension |
| Rear Suspension Type | Rear H-arm multi-link independent suspension |
| Air Suspension Reservoir Rated Working Pressure (bar) | 20 |
| Item | Positioning Parameters | ||
|---|---|---|---|
| Wheel Alignment | Front Wheel | Single-Side Front Wheel Toe-In | 0.05°±0.05° |
| Left and Right Toe Difference | ±0.05° | ||
| Single-Side Front Wheel Camber Angle | -0.6°±0.5° | ||
| Left-right camber difference | ±0.75° | ||
| Kingpin Inclination Angle | 7.4°±1° | ||
| Caster Angle | 6.56°±1.0° | ||
| Maximum Steering Angle (Inner) | 38.3°±3° | ||
| Maximum Steering Angle (Outer) | 31.6°±3° | ||
| Wheel Alignment | Rear wheel | Single-Side Rear Toe-In Forward Position | 0.15°±0.05° |
| Left and Right Toe Difference | ±0.05° | ||
| Rear Camber Angle | -1.64°±0.5° | ||
| Left-right camber difference | ±0.5° | ||
| Project Name | Model | Fill Quantity |
| Front electric drive lubricating oil* (L) | FUCHS 4101 | 1.4 |
| Rear Electric Drive Lubricating Oil (L) | FUCHS 4101 | 1.22 |
| Coolant (L) | OEVC-35 | 17.8±1.5 |
| Air Conditioner Refrigerant (g) | R134a | 820±10 (5 seats) |
| 1050±10 (6 seats/7 seats) | ||
| R1234yf | 720±10 (5 seats) | |
| 1070±10 (6-seat/7-seat) | ||
| Brake Fluid (L) | DOT4 | 0.98±0.05 |
| Windshield washer fluid (L) | / | 4 |
At the initial position, the seat adjustment parameters are as follows:
| Seat Type | Item | Parameters |
| Driver Seat | Forward/Backward Adjustment | Total travel 260 mm, design position 200 mm forward, 60 mm backward |
| seatback adjustment | Total travel 99°, design position 23° forward, 76° backward | |
| Up/Down Adjustment | Total travel 65.7 mm, design position upward 34.4 mm, downward 31.3 mm | |
| Passenger Seat (Non-Zero-Gravity) | Forward/Backward Adjustment | Total travel 260 mm, design position 200 mm forward, 60 mm rearward |
| seatback adjustment | Total travel 99°, design position 23° forward, 76° backward | |
| Up/Down Adjustment | Total travel 65.7 mm, design position upward 34.4 mm, downward 31.3 mm | |
| Passenger Seat (Zero Gravity) | Forward/Backward Adjustment | Total travel 260 mm, design position 200 mm forward, 60 mm backward |
| seatback adjustment | Total travel 99°, design position 23° forward, 76° rearward | |
| Up/Down Adjustment | Total travel 62 mm, design position upward 35 mm, downward 27 mm | |
| Second-Row Seats | seatback adjustment | Total travel 118°, design position 100° forward, 18° backward |
At the initial position, the seat adjustment parameters are as follows:
| Seat Type | Item | Parameters |
| Driver Seat | Forward/Backward Adjustment | Total travel 260 mm, design position 200 mm forward, 60 mm rearward |
| seatback adjustment | Total travel 99°, design position 23° forward, 76° backward | |
| Up/Down Adjustment | Total travel 65.7 mm, design position upward 34.4 mm, downward 31.3 mm | |
| Passenger Seat (Non-Zero-Gravity) | Forward/Backward Adjustment | Total travel 260 mm, design position 200 mm forward, 60 mm rearward |
| seatback adjustment | Total travel 99°, design position 23° forward, 76° backward | |
| Up/Down Adjustment | Total travel 65.7 mm, design position upward 34.4 mm, downward 31.3 mm | |
| Passenger Seat (Zero Gravity) | Forward/Backward Adjustment | Total travel 260 mm, design position 200 mm forward, 60 mm backward |
| seatback adjustment | Total travel 99°, design position 23° forward, 76° backward | |
| Up/Down Adjustment | Total travel 62 mm, design position upward 35 mm, downward 27 mm | |
| Second-Row Seats | Forward/Backward Adjustment | Total travel 220 mm, design position 140 mm forward, 80 mm rearward |
| seatback adjustment | Total travel 68.5°, design position 23° forward, 45.5° backward | |
| Third-Row Seats | seatback adjustment | Total travel 113.2°, design position 101.2° forward, 12° backward |
At the initial position, the seat adjustment parameters are as follows:
| Seat Type | Item | Parameters |
| Driver Seat | Forward/Backward Adjustment | Total travel 260 mm, design position 200 mm forward, 60 mm backward |
| seatback adjustment | Total travel 99°, design position 23° forward, 76° backward | |
| Up/Down Adjustment | Total travel 65.7 mm, design position upward 34.4 mm, downward 31.3 mm | |
| Passenger Seat (Non-Zero-Gravity) | Forward/Backward Adjustment | Total travel 260 mm, design position 200 mm forward, 60 mm rearward |
| seatback adjustment | Total travel 99°, design position 23° forward, 76° backward | |
| Up/Down Adjustment | Total travel 65.7 mm, design position upward 34.4 mm, downward 31.3 mm | |
| Passenger Seat (Zero Gravity) | Forward/Backward Adjustment | Total travel 260 mm, design position 200 mm forward, 60 mm rearward |
| seatback adjustment | Total travel 99°, design position 23° forward, 76° backward | |
| Up/Down Adjustment | Total travel 62 mm, design position upward 35 mm, downward 27 mm | |
| Second-Row Seats | Forward/Backward Adjustment | Total travel 410 mm, design position 330 mm forward, 80 mm rearward |
| seatback adjustment | Total travel 116.7°, design position 99° forward, 17.7° backward | |
| Three-Row Seats | seatback adjustment | Total travel 113.2°, design position 101.2° forward, 12° backward |
Only genuine original parts or approved parts from XPENG Vehicle may be used. XPENG Vehicle has subjected the parts to rigorous testing to ensure their suitability, safety, and reliability. These parts can only be purchased from XPENG Vehicle service centers, installed by XPENG Vehicle professionals, and the vehicle may be modified according to the recommendations of XPENG Vehicle experts.
Do not use parts not approved by XPENG Motors to modify the vehicle, otherwise it may affect the operability, safety, and durability of the vehicle, and may also violate local government regulations.
When modifying the vehicle body (such as installing body color-change film, transparent paint protection film, anti-collision strips, etc.), avoid areas such as the ultrasonic radar, millimeter-wave radar, surround view camera, high-perception camera, etc.; otherwise, the normal use of functions such as assisted driving will be affected.
The millimeter-wave radar is located inside the front and rear bumpers. Do not privately paint the front and rear bumpers or install body kits, etc.; otherwise, the normal use of functions related to assisted driving may be affected.
Do not replace, modify, or additionally install the radar or camera without authorization. Otherwise, the normal use of functions such as driver assistance will be affected, and radio interference may also be caused. XPENG Vehicle shall not bear any responsibility for any direct or indirect losses resulting therefrom. If the radar or camera malfunctions, please go to an XPENG Vehicle Service Center for repair.
Do not modify systems such as the vehicle Suspension and braking, as this may adversely affect vehicle handling and safety.
Do not modify the vehicle fuse box, otherwise it may adversely affect the vehicle electrical system.
Modifications to electrical components and software, as well as wiring, can affect functions and the normal operation of associated components, especially safety-related systems, thereby affecting vehicle operation and increasing the risk of accidents or injuries.
Therefore, do not modify the wiring, electronic components, or their software.
In addition, vehicle damage and performance issues caused by replacement, installation, or modification using parts that are not original or approved by XPENG Vehicle are not covered by the warranty, and XPENG Vehicle shall not bear any responsibility for any direct or indirect losses resulting therefrom.
This vehicle is equipped with an Event Data Recorder (EDR) system.
The EDR can automatically record vehicle operating data and vehicle safety system status information for a period of time before and after a vehicle event occurs, for example:
Vehicle speed.
Brake pedal status.
Vehicle VIN.
Longitudinal acceleration.
Driver seat belt status.
Accelerator pedal position, as a percentage of the fully open position.
Power-on cycle during the event.
Read the power-on cycle.
Event data recording complete status.
The time interval between this event and the previous event.
Record the ECU hardware number of the EDR data.
Record the ECU serial number of the EDR data.
Record the ECU software number of the EDR data.
Lateral acceleration.
Yaw rate.
Steering angle.
Time when the event occurred.
Gear.
Brake pedal position.
Parking system status.
Airbag deployment time.
Seat belt pretensioner deployment time.
front row passenger seat belt status.
Occupant protection system alarm status.
Tire Pressure Monitoring System alarm status.
Brake system warning status.
Cruise system status.
Anti-lock Braking System status.
Autonomous Emergency Braking system status.
Electronic Stability Control system status.
Traction Control System status.
Pre-event synchronization countdown time.
By collecting and analyzing the vehicle status data recorded by the EDR, it may help to understand the relevant circumstances before and after the event.
Data recorded by the EDR must be extracted by connecting specialized diagnostic equipment to the vehicle interface. If necessary, please contact a XPENG service center to obtain this equipment.
Data Usage Statement
XPENG Vehicle may use the data recorded by the EDR for fault diagnosis, product development, and quality improvement. Except in the following circumstances, XPENG Vehicle will not disclose the data recorded by the EDR to third parties:
With the owner's consent.
Comply with the requirements of administrative and judicial authorities.
In accordance with laws and regulations.
When the power battery needs to be replaced or scrapped, be sure to contact a XPENG service center for recycling and disposal. Discarding the power battery at will will cause environmental pollution or lead to safety accidents, and the vehicle owner shall bear the corresponding responsibility.
Based on the fulfillment of safety management obligations for new energy vehicles, XPENG will collect and process vehicle data, including but not limited to vehicle status, vehicle speed, mileage, gear position, accelerator pedal, brake pedal, vehicle location, motor, battery, alarm data, etc., and take corresponding handling measures according to safety management requirements.
In certain functions or service scenarios of the in-vehicle system, based on the need to perform the service contract or after obtaining the user's consent, XPENG Motors or third parties cooperating with it will collect and process relevant data, including but not limited to: the intelligent voice assistant needs to process voice data; map navigation needs to process location data; assisted driving needs to process exterior vehicle data; membership services need account information; App remote vehicle management needs to synchronize vehicle data, etc.
(When downloading or using third-party applications or services through the in-vehicle system, the third party may collect and process relevant data, in which case the third party's service agreement or privacy policy shall apply.)
XPENG strictly complies with the requirements of laws and regulations and adopts reasonable security protection measures to ensure data security. Except as provided by laws and regulations and in circumstances agreed with users, XPENG will not disclose user data to any third party.
If you need to learn in detail how XPENG Vehicle collects, processes, and protects user data, or how users exercise related rights, you can view the *Connected Vehicle Privacy Notice* on the in-vehicle central display.
Product Name: Front_Millimeter_Wave_Radar
Model: FRD03S-002-C2
Specification: 12V  0.3A
0.3A
Brand: DESAY SV
Manufacture’s Name:Huizhou Desay SV Automotive Co., Ltd.
Address:No.6, Huitai North Road, Huinan Technology Park, Huizhou City, Guangdong Province 516025, P.R. China
 | EU |  | Serbia |
 | Morocco |  | Singapore |
 | Oman |  | United Arab Emirates |
 | Chile |  | Paraguay |
 | Korea |  | South Africa |
 | Mexico |  | Israel |
 | Brazil |  | Thailand |
Product Name: Short Range Radar
Model: STA79-2Pro-D
Brand: WHST
Manufacture’s Name: Whst Co., Ltd.
 | Paraguay |
Product Name: Door opening obstacle avoidance rader
Model: STA79-6-F
Brand: WHST
Manufacture’s Name: Whst Co., Ltd.
 | Paraguay |
| Terminology | Description | Terms | Description |
| AR-HUD | HUD | SAS | Speed Assistance |
| SR | Environmental Simulation Display | DMS | Driver Status Monitoring |
| AVM | 360° Panoramic Image | EPB | Electronic Parking Brake |
| VIN | Vehicle Identification Number | ESC | Electronic Stability Program |
| LCC | Lane Centering Control | ABS | Anti-lock Braking System |
| ALC | Assisted Lane Change | dTCS | Distributed Traction Control System |
| EBA | Brake Assist System | EBD | Electronic Brakeforce Distribution |
| APA | Assisted Parking | HHC | Hill Start Assist |
| FCW | Forward Collision Warning | HDC | Hill Descent Control |
| AEB | Autonomous Emergency Braking | MCB | Secondary Collision Mitigation Automatic Braking System |
| BSD | Blind Spot Monitoring Warning | HBC | Hydraulic Assist Failure Compensation |
| LCA | Lane Change Warning | IHB/ADB | intelligent high beam |
| DOW | Door Opening Warning | AFS | Adaptive Low Beam Headlights |
| RCW | Rear Collision Warning | AVAS | Low-Speed Simulated Sound |
| RAEB | Reverse Collision Prevention | TPMS | Tire Pressure Monitoring System |
| RCTA | Rear Cross Traffic Alert | EDR | Event Data Recording System |
| LSS | Lane Departure Assist | OTA | Remote Software Upgrade |
| LDW | Lane Departure Warning | OBD | Diagnostic Port |
| LKA | Lane Keeping Assist | OMS | In-Cabin Image |
| ELK | Lane Emergency Keeping Assist | V2L | External Discharge to Load |
| TSR | Traffic Sign Recognition | ACC | Adaptive Cruise Assist |
| APA | Parking Assist | CPD | Child Presence Monitoring |
| Terminology | Description | Terminology | Description |
| mm | mm | L | L |
| m | m | V | volt |
| km | km | A | ampere |
| km/h | km/h | kW | kW |
| ℃ | degrees Celsius | kW·h | kWh |
| ° | ° | s | s |
| ′ | min | min | minute |
| % | Percentage | rpm | r/min |
| g | g | N·m | N·m |
| kg | kg | kPa | kPa |
| mL | mL | bar | bar |